contentscontent.cricut.com/c/downloads/ce2anniversarymanual_english.pdf · contents welcome to the...
TRANSCRIPT
ii
Contents
Welcome to the Cricut expression® 2: 5th Anniversary Edition! ........................................ 1Diagrams ......................................................................................................................... 2Button and Icon Legend ................................................................................................... 3Safety Information........................................................................................................... 4FCC statement ................................................................................................................ 5Getting Started ................................................................................................................ 6
Installing the Cutting Blade Assembly ........................................................................... 6Positioning Your Cricut Expression 2 Machine............................................................... 7Power ............................................................................................................................ 7Screen Calibration ......................................................................................................... 7First Project ................................................................................................................... 8What Your Cricut Expression 2 Machine Can Cut .......................................................... 9
Basic Operations .............................................................................................................. 10Buttons and Machine Controls ...................................................................................... 10Home Screen ................................................................................................................. 10Mat Preview .................................................................................................................. 11Mat Navigation Keys ...................................................................................................... 11Navigation Buttons ........................................................................................................ 12
Image Screen ................................................................................................................... 13Compatible Cartridges ................................................................................................... 13Selecting Cartridges ....................................................................................................... 13Selecting Images ............................................................................................................ 13Keypad Mode ................................................................................................................ 14Gallery Mode ................................................................................................................. 14Image Queue ................................................................................................................ 14Delete Image in Queue .................................................................................................. 14Copying Image in Queue ............................................................................................... 14Edit Image in Queue ...................................................................................................... 15Zoom Image in Queue ................................................................................................... 15Image Editor .................................................................................................................. 15Layered and Composite Images ..................................................................................... 16Flip Horizontal, Flip Vertical, and Portrait/Landscape ................................................... 16
Settings Screen ................................................................................................................ 17Art Quantity ................................................................................................................... 17Project Quantity ............................................................................................................ 18Fit to Page ...................................................................................................................... 18Auto Fill ......................................................................................................................... 18Mat Size ........................................................................................................................ 18Paper Size ..................................................................................................................... 19Start Position ................................................................................................................. 19Center Point ................................................................................................................... 20Fit to Length .................................................................................................................. 20Load Last ........................................................................................................................ 20Apply All ........................................................................................................................ 21Paper Saver .................................................................................................................... 21
CoNtENtS
iii
tools .............................................................................................................................. 22Materials ....................................................................................................................... 22Machine Settings ........................................................................................................... 23Screen Calibration ......................................................................................................... 24About ............................................................................................................................. 24
Cut Settings Screen .......................................................................................................... 25Material Selection ......................................................................................................... 25tool Selection ................................................................................................................ 25Cutting Heavyweight or Lightweight Materials ............................................................. 26Adjusting Blade Depth ................................................................................................... 26Adjusting Cut Speed ...................................................................................................... 27Adjusting Cut Pressure .................................................................................................. 27Multi-Cut ....................................................................................................................... 28Load/Unload Mat ......................................................................................................... 28
Basic Care ........................................................................................................................ 29Blade Life ....................................................................................................................... 29Replacing the Cutting Blade ........................................................................................... 29Caring for the Cutting Mat ............................................................................................. 30Cleaning Your Cricut Expression 2 Machine .................................................................. 30Additional Basic Care tips ............................................................................................. 30
Optional Adapter Installation .......................................................................................... 31Troubleshooting .............................................................................................................. 32Cricut expression® 2: 5th Anniversary Edition Statement of Limited Warranty ................. 34
CoNtENtS
1
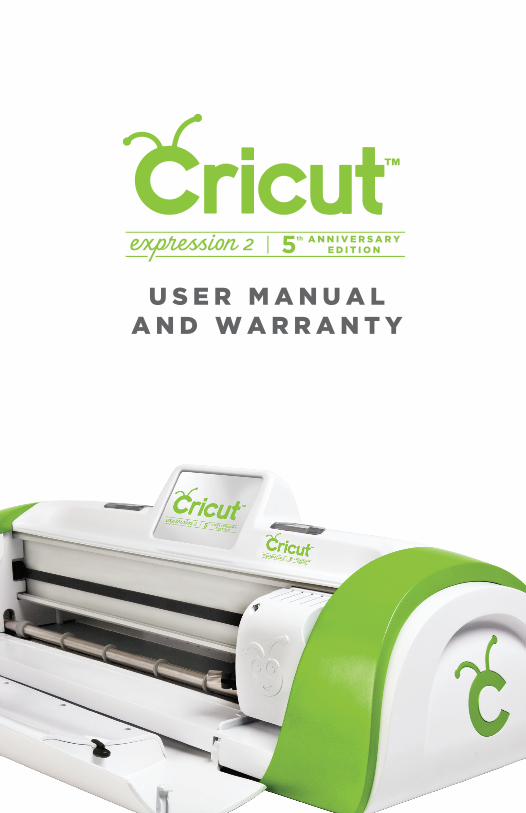
WELCOmE TO ThE CrICuT ExprESSIOn® 2: 5th AnnIvErSAry EdITIOn!
to celebrate the 5th Anniversary of Cricut®, we’re introducing something very special — the Cricut Expression® 2: 5th Anniversary Edition machine. It’s an all-new version of the Cricut Expression® Personal Electronic Cutter. on the outside, we’ve given it an all-new look, including an full-color LCD touch screen that’s bigger and faster. on the inside, we’ve kept all of the great features of the Cricut Expression machine, and added many great new features.
Your Cricut Expression 2 machine will do everything Cricut Expression machine will do and has:
• a mat preview which allows you to see shapes you’re cutting and where they fit on the mat before you cut.
• all new materials settings, allowing you to choose a default setting for materials you like to cut like cardstock or chipboard, or customize a material setting to be just how you want it.
• a cutting-area light to let you see where you’re cutting on the mat.
• independent image sizing allowing you to size each image on a mat on its own. Make one image 3" and another image 5 ½" — all on the same mat.
• multiple mat cutting so you can cut as many images as you want, even if the images won’t all fit on one mat. Your Cricut Expression 2 projects can contain up to six mats.
WELCoME
CRICUt®, CRICUt EXPRESSIoN®, CRICUt DESIGNStUDIo®, CRICUt IMAGINE™, CRICUt CAKE®, CRICUt tooLS™, GYPSY®, CRICUt CIRCLE™, CUttLEBUG®, CUttLEKIDS™, YUDU®, YoURStoRY®, and KNIFtY KNIttER® are registered or applied for trademarks of Provo Craft & Novelty, Inc. South Jordan, Ut 84095.
2
dIAGrAmS
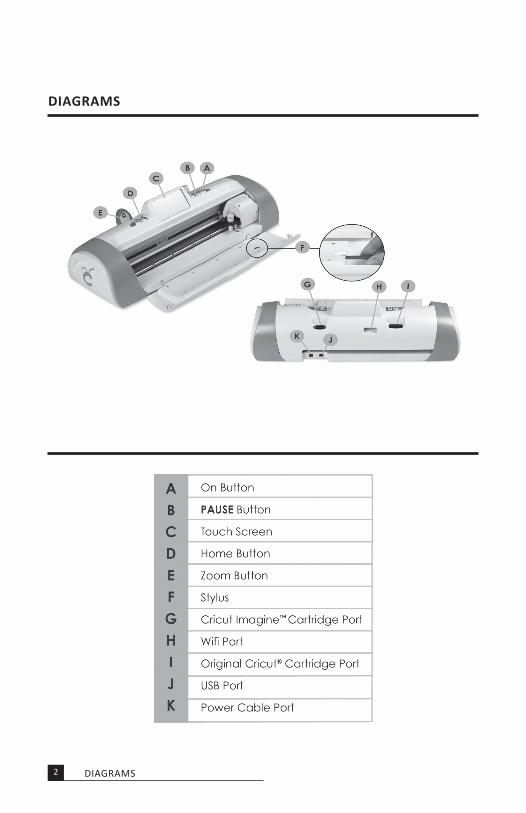
DIAGRAMS
3
BuTTOn And ICOn LEGEnd
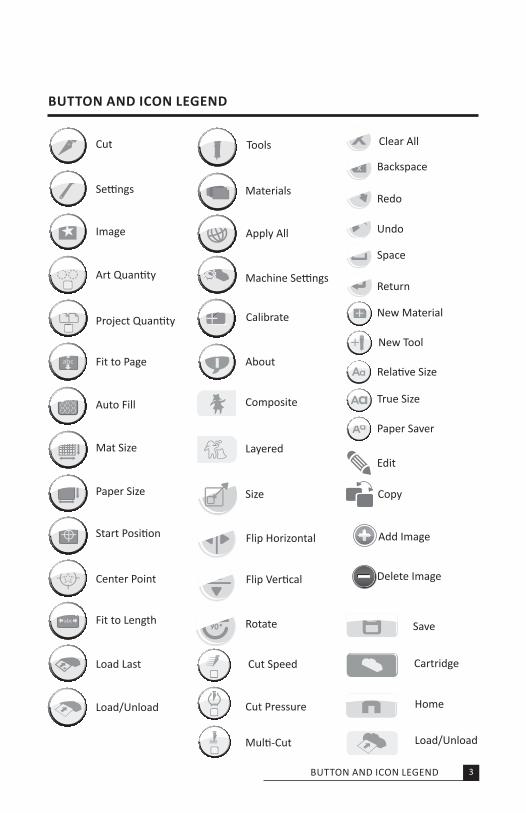
BUttoN AND ICoN LEGEND
Cut
Settings
Image
8Art Quantity
8Project Quantity
Fit to Page
Auto Fill
Mat Size
Paper Size
Start Position
Center Point
Fit to Length
Load Last
Apply All
tools
Materials
Machine Settings
Calibrate
About
Composite
Layered
Size
Flip Horizontal
Flip Vertical
Rotate
4 Cut Speed
4 Cut Pressure
4Multi-Cut
Clear All
Redo
Undo
Space
Return
New Material
New tool
Relative Size
true Size
Edit
Copy
Add Image
Delete Image
Save
Home
Backspace
Cartridge
Paper Saver
Load/Unload
Load/Unload
4
SAfETy InfOrmATIOn
Disconnect electrical power before servicing or cleaning.
WArnInG! Do not place your fingers or other objects in the Cricut Expression 2 machine while it is connected to electrical power, powered on, or during cutting operations. Rapid movements of the cutting carriage during operation may cause bodily injury and/or damage to the Cricut Expression 2 machine.
Always follow basic safety precautions when using this product to reduce risk of injury from fire or electric shock. Read and understand all instructions in the documentation that comes with the Cricut Expression 2 machine.
observe all warnings and instructions marked on the product.
Do not install or use this product near water or when you are wet.
Install the product securely on a stable surface.
Install the product in a protected location where no one can step on or trip over the power cord and the power cord cannot be damaged.
If the product does not operate normally, see troubleshooting.
there are no user-serviceable parts inside. Refer servicing to qualified service personnel.
the power cord cannot be repaired. If it is defective, it should be discarded or returned to the supplier.
ozone-depleting chemicals, such as chlorofluorocarbons (CFCs), have been eliminated from the Provo Craft manufacturing processes.
this product contains lead in the solder that might require special handling at end-of-life.
SAFEtY INFoRMAtIoN
5
fCC STATEmEnT
the U.S. Federal Communications Commission (in 47 cfr 15.105) has specified that the following notices be brought to the attention of users of this product.
this device complies with part 15 of the FCC rules. operation is subject to the following two conditions: (1) this device may not cause harmful interference, and (2) this device must accept any interference received, including interference that may cause undesired operation.
shielded Cables
Use of a shielded data cable is required to comply with the Class B limits of Part 15 of the FCC Rules.
pursuant to part 15.21 of the fCC rules, any changes or modifications to this equipment not expressly approved by provo Craft may cause harmful interference and void the fCC authorization to operate this equipment.
note: this equipment has been tested and found to comply with the limits for a Class B digital device, pursuant to Part 15 of the FCC Rules. these limits are designed to provide reasonable protection against harmful interference in a residential installation. this equipment generates, uses, and can radiate radio frequency energy and, if not installed and used in accordance with the instructions, may cause harmful interference to radio communications. However, there is no guarantee that interference will not occur in a particular installation. If this equipment does cause harmful interference to radio or television reception, which can be determined by turning the equipment off and on, the user is encouraged to try to correct the interference by one or more of the following measures:
• Reorient or relocate the receiving antenna.
• Increase the separation between the equipment and receiver.
• Connect the equipment into an outlet on a circuit different from that to which the receiver is connected.
• Consult the dealer or an experienced radio/tV technician for help.
FCC StAtEMENt
6
GETTInG STArTEd
Installing the Cutting Blade Assembly
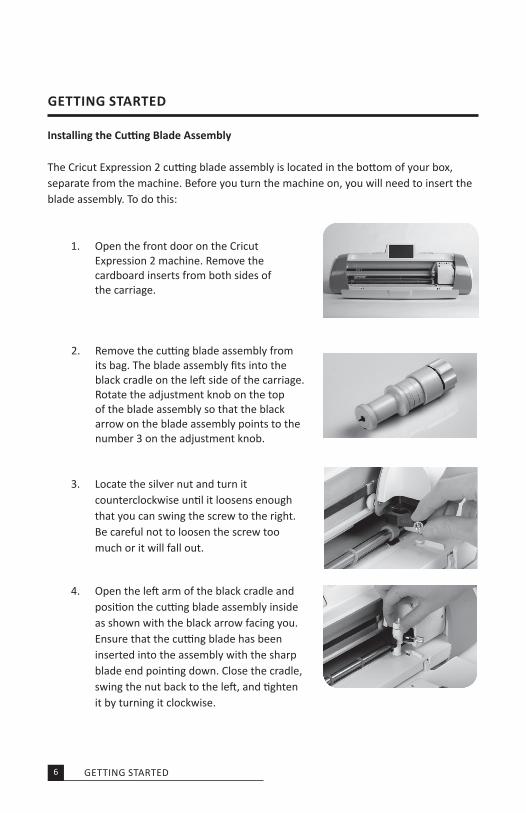
the Cricut Expression 2 cutting blade assembly is located in the bottom of your box, separate from the machine. Before you turn the machine on, you will need to insert the blade assembly. to do this:
1. open the front door on the Cricut Expression 2 machine. Remove the cardboard inserts from both sides of the carriage.
2. Remove the cutting blade assembly from its bag. the blade assembly fits into the black cradle on the left side of the carriage. Rotate the adjustment knob on the top of the blade assembly so that the black arrow on the blade assembly points to the number 3 on the adjustment knob.
3. Locate the silver nut and turn it counterclockwise until it loosens enough that you can swing the screw to the right. Be careful not to loosen the screw too much or it will fall out.
4. open the left arm of the black cradle and position the cutting blade assembly inside as shown with the black arrow facing you. Ensure that the cutting blade has been inserted into the assembly with the sharp blade end pointing down. Close the cradle, swing the nut back to the left, and tighten it by turning it clockwise.
GEttING StARtED
7
positioning your Cricut Expression 2 machine
Place your Cricut Expression 2 machine at least 12" (30.48 cm) from the edge of your table to prevent it from tipping and causing possible injury. Allow 24" (60.96 cm) in the back of the Cricut Expression 2 machine for mat movement.
When positioning your Cricut Expression 2 machine, choose a location that:
• cannot be accessed by children. the Cricut Expression 2 machine is not a toy and contains components, including a sharp blade, that could be hazardous to children.
• is a hard, stable, and flat surface within 6 feet (1.83 meters) of a grounded electrical outlet, and that has a minimum clearance of 24" (60.96 cm) behind the Cricut Expression 2 machine for paper movement.
• is indoors or in a dry location where the Cricut® cartridges are not directly exposed to the effects of the weather.
• is away from direct exposure to sunlight or extreme temperatures such as in parked cars, storage sheds, sunrooms, etc.
WArnInG! Your Cricut Expression 2 machine should never be left or stored outside, in locations without heat or air conditioning, or in environments where the machine or cartridges can come in contact with water. It is recommended that your Cricut Expression 2 machine be maintained in an area with temperatures between 60 and 90 °F (15.5 and 32.2 °C).
power
Plug the power cord into a grounded electrical outlet. turn the machine on by pressing the power button located to the right of the screen.
Screen Calibration
Prior to your first use of your Cricut Expression 2 machine, it will run a screen calibration. Instructions on the screen will walk you through each step of the calibration. You will only have to complete the calibration process successfully once. If, for some reason, you wish to recalibrate the machine, please see page 24.
GEttING StARtED
8
After you complete the screen calibration, agree to the end user license agreement, and review the warranty information, you will be ready to begin your first project!
first project
GEttING StARtED
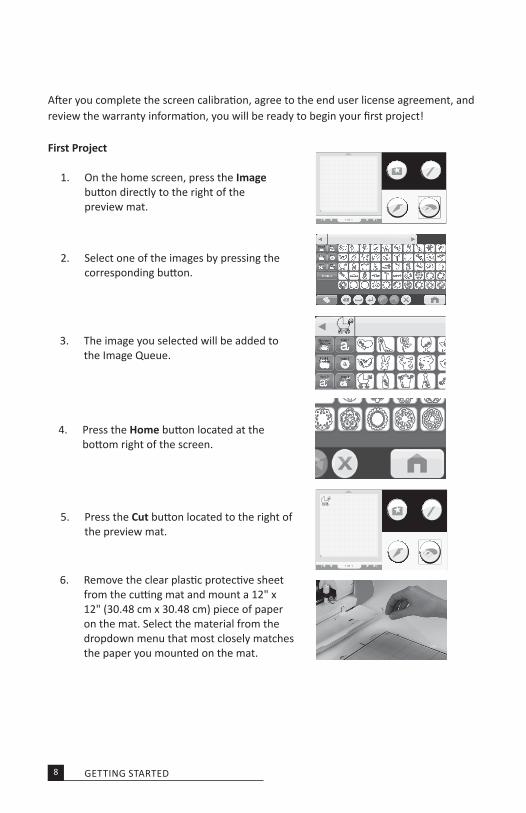
1. on the home screen, press the Image button directly to the right of the preview mat.
1 of 1
2. Select one of the images by pressing the corresponding button.
3. the image you selected will be added to the Image Queue.
4. Press the home button located at the bottom right of the screen.
5. Press the Cut button located to the right of the preview mat.
1 of 1
6. Remove the clear plastic protective sheet from the cutting mat and mount a 12" x 12" (30.48 cm x 30.48 cm) piece of paper on the mat. Select the material from the dropdown menu that most closely matches the paper you mounted on the mat.
9
What your Cricut Expression 2 machine Can Cut
the Cricut Expression 2 machine can cut a wide range of materials, from vellum and cardstock to poster board and vinyl. the Cricut Expression 2 machine can even cut thin chipboard with the use of the Multi-Cut function. More details about Multi-Cut can be found on page 28.
TIp: the repeated cutting of heavy materials may reduce the life of your Cricut Expression 2 machine’s cutting blade and mat. Replacement mats and blades can be purchased anywhere that Cricut products are sold.
GEttING StARtED
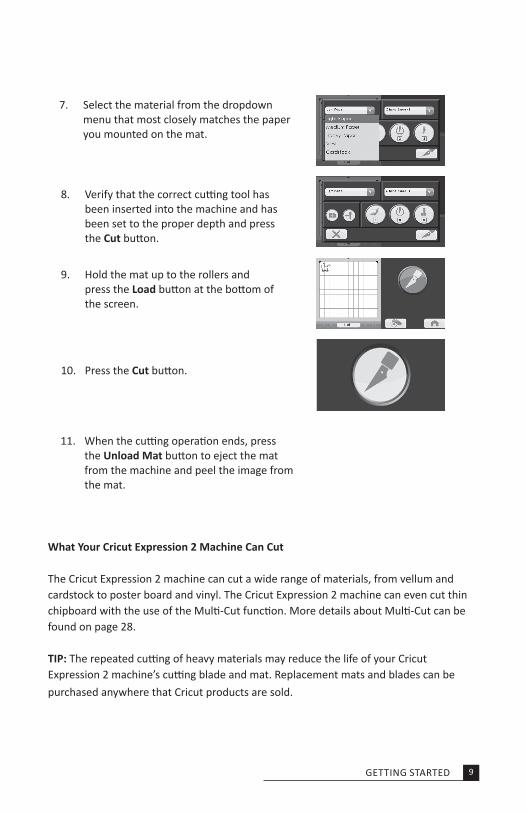
7. Select the material from the dropdown menu that most closely matches the paper you mounted on the mat.
8. Verify that the correct cutting tool has been inserted into the machine and has been set to the proper depth and press the Cut button.
9. Hold the mat up to the rollers and press the Load button at the bottom of the screen.
11. When the cutting operation ends, press the unload mat button to eject the mat from the machine and peel the image from the mat.
10. Press the Cut button.

10
BASIC OpErATIOnS
Buttons and machine Controls
power — turns the machine on and off.
pause — stops the machine while in the middle of a cut. Pressing the Pause button again will start the cutting operation where it was paused.
home — opens the Home screen.
Zoom — pressing and holding this button while selecting an image on the screen will zoom the image so that it takes up the entire screen. Releasing the button and tapping it a second time will return the image back to normal.
Cartridge slots — the two cartridge slots provide you the ability to use all of your original Cricut cartridges as well as Cricut Imagine™ cartridges. All original cartridges fit in the left slot, while Imagine cartridges fit in the right slot. Please note that Cricut Imagine Colors & Patterns cartridges contain only color printing information and no image information that can be cut, and thus will not work with the Cricut Expression 2 machine.
uSB — this port allow you to connect the Cricut Expression 2 machine to a Gypsy® Handheld Design Studio for Cricut® or other design device and cut directly from that device.
home Screen
the home Screen is your starting point for every Cricut Expression 2 project. on this screen you will be able to see a preview of the current project as well as have access to image selection and the ability to makes changes to cut and other settings.
BASIC oPERAtIoNS
1 of 1
11
mat preview
the mat preview area provides an overall view of your current project. Each image that has been added to the project will appear on the mat. Pressing an image will allow you to make changes to the image directly. Pressing the edit icon will allow you to make changes to the image itself. For more details on editing an image, see page 15. Pressing the Delete icon will remove the image from the project. Pressing the Copy icon will duplicate the image, placing a second copy of it to the immediate right of the image.
If your project contains more than one mat, you can navigate among them using the navigation keys below the mat preview area.
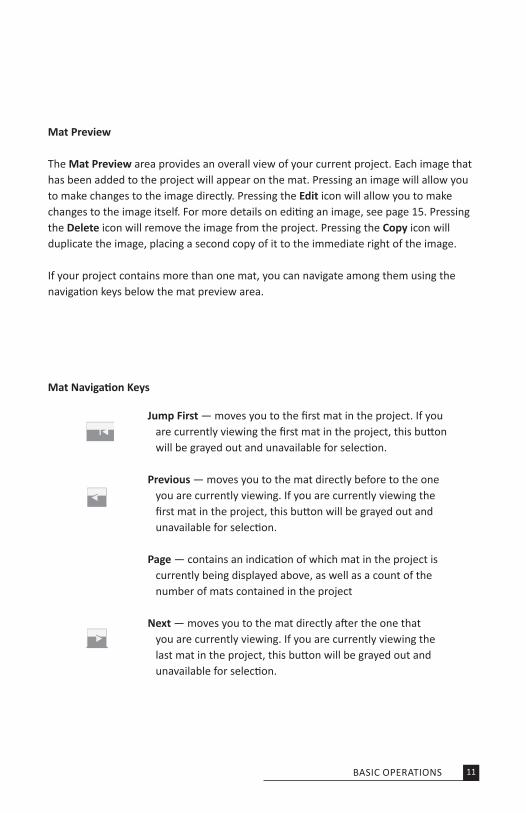
mat navigation Keys
Jump First — moves you to the first mat in the project. If you are currently viewing the first mat in the project, this button will be grayed out and unavailable for selection.
previous — moves you to the mat directly before to the one you are currently viewing. If you are currently viewing the first mat in the project, this button will be grayed out and unavailable for selection.
page — contains an indication of which mat in the project is currently being displayed above, as well as a count of the number of mats contained in the project
next — moves you to the mat directly after the one that you are currently viewing. If you are currently viewing the last mat in the project, this button will be grayed out and unavailable for selection.
BASIC oPERAtIoNS
12
navigation Buttons
to the right of the Mat Preview area, there are three navigation buttons which provide access to the other functions of the Cricut Expression 2 machine.
BASIC oPERAtIoNS
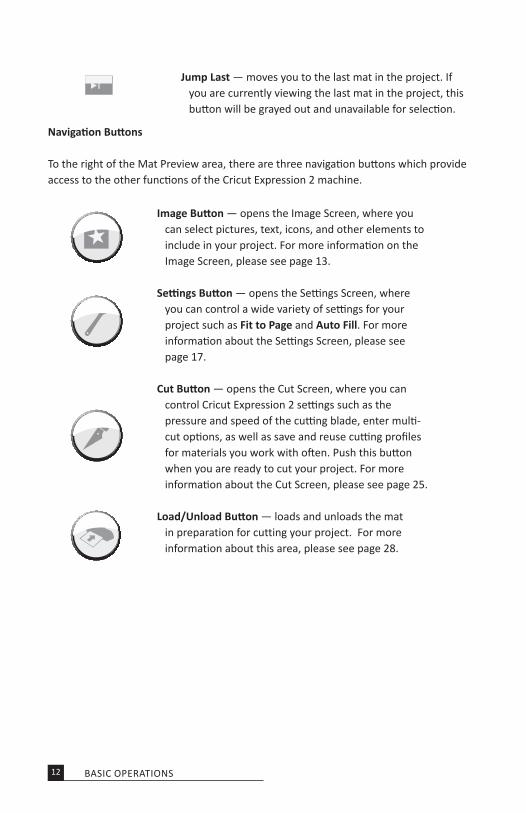
Jump Last — moves you to the last mat in the project. If you are currently viewing the last mat in the project, this button will be grayed out and unavailable for selection.
Image Button — opens the Image Screen, where you can select pictures, text, icons, and other elements to include in your project. For more information on the Image Screen, please see page 13.
Settings Button — opens the Settings Screen, where you can control a wide variety of settings for your project such as fit to page and Auto Fill. For more information about the Settings Screen, please see page 17.
Cut Button — opens the Cut Screen, where you can control Cricut Expression 2 settings such as the pressure and speed of the cutting blade, enter multi-cut options, as well as save and reuse cutting profiles for materials you work with often. Push this button when you are ready to cut your project. For more information about the Cut Screen, please see page 25.
Load/unload Button — loads and unloads the mat in preparation for cutting your project. For more information about this area, please see page 28.
13
ImAGE SCrEEn
the Image Screen is the central location for selecting and editing images you want to include in your project.
Compatible Cartridges
Your Cricut Expression 2 machine comes with preloaded internal cartridges. You can also use any original Cricut cartridges and Cricut Imagine Art cartridges for Cricut Expression 2 projects. Cricut Imagine Colors & Patterns cartridges, however, contain only printing information and thus cannot be used with the Cricut Expression 2 machine.
Selecting Cartridges
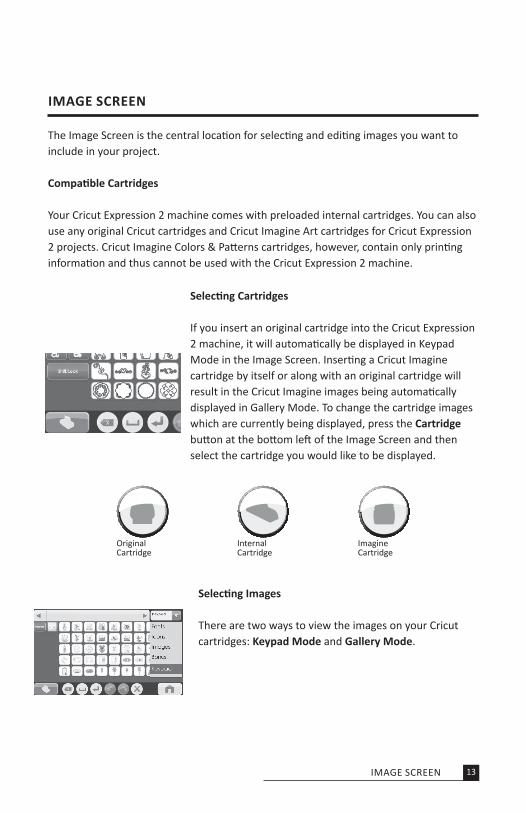
If you insert an original cartridge into the Cricut Expression 2 machine, it will automatically be displayed in Keypad Mode in the Image Screen. Inserting a Cricut Imagine cartridge by itself or along with an original cartridge will result in the Cricut Imagine images being automatically displayed in Gallery Mode. to change the cartridge images which are currently being displayed, press the Cartridge button at the bottom left of the Image Screen and then select the cartridge you would like to be displayed.
original Cartridge
Internal Cartridge
Imagine Cartridge
IMAGE SCREEN
Selecting Images
there are two ways to view the images on your Cricut cartridges: Keypad mode and Gallery mode.
14
Keypad mode
Keypad mode features a grid of image keys familiar to Expression owners. to select an image to be included in your project while in Keypad Mode, simply press its button and it will be added to the Image Queue located at the top of the Image Screen.
You can use either Keypad or Gallery Mode for all original cartridges as well as the internal Cricut Expression 2 cartridges.
Gallery mode
Gallery mode features a strip of images from your Cricut Imagine cartridge which you can browse by touching an image and dragging it to the left or right. to select an image to be included in your project while in Gallery View, simply touch the image, press the green plus icon, and it will be added to the Image Queue. You can use either Gallery or Keypad View when viewing and working with images from Cricut Imagine cartridges.
Image Queue
the Image Queue contains the images which make up your current project. they are displayed in the order they will be cut on the paper when you begin the cutting process. You can navigate through the Image Queue either by touching and dragging the images left and right or by using the arrow buttons to the left and right of the Image Queue window.
delete Image in Queue
to delete an image which is currently in the queue, press the image and then press the Delete icon on the large version of the image.
Copying Image in Queue
to duplicate an image which is currently in the queue, press the image and then press the Copy icon on the large version of the image. this will add a second copy of the image directly to the right of the first copy in the queue.
IMAGE SCREEN
15
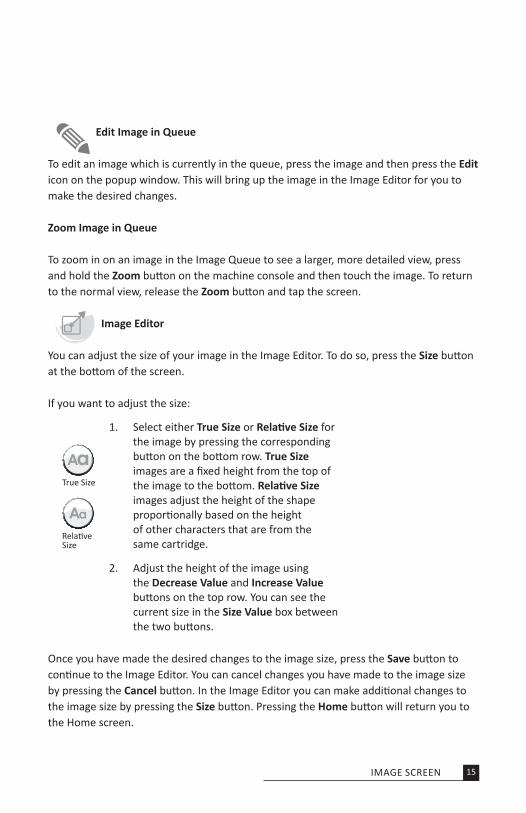
Edit Image in Queue
to edit an image which is currently in the queue, press the image and then press the edit icon on the popup window. this will bring up the image in the Image Editor for you to make the desired changes.
Zoom Image in Queue
to zoom in on an image in the Image Queue to see a larger, more detailed view, press and hold the Zoom button on the machine console and then touch the image. to return to the normal view, release the Zoom button and tap the screen.
Image Editor
You can adjust the size of your image in the Image Editor. to do so, press the size button at the bottom of the screen.
If you want to adjust the size:
once you have made the desired changes to the image size, press the save button to continue to the Image Editor. You can cancel changes you have made to the image size by pressing the Cancel button. In the Image Editor you can make additional changes to the image size by pressing the size button. Pressing the home button will return you to the Home screen.
1. Select either true size or relative Size for the image by pressing the corresponding button on the bottom row. true size images are a fixed height from the top of the image to the bottom. relative Size images adjust the height of the shape proportionally based on the height of other characters that are from the same cartridge.
2. Adjust the height of the image using the decrease value and Increase value buttons on the top row. You can see the current size in the Size value box between the two buttons.
true Size
Relative Size
IMAGE SCREEN
16
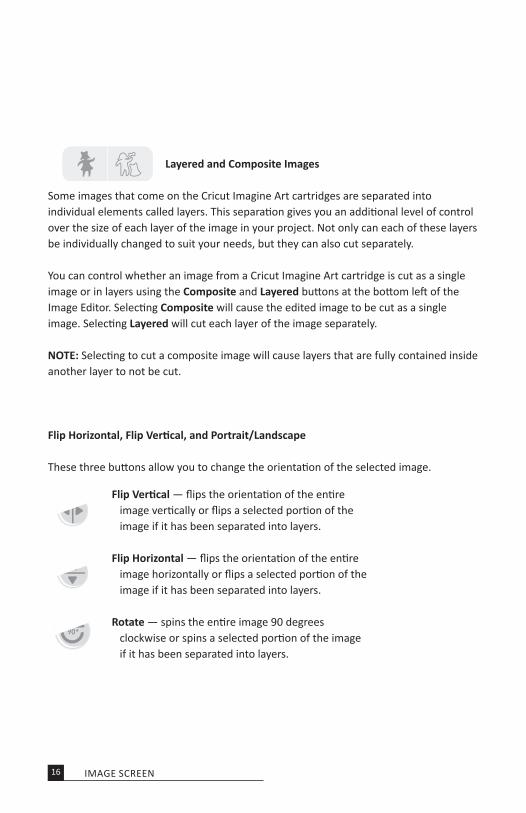
Layered and Composite Images
Some images that come on the Cricut Imagine Art cartridges are separated into individual elements called layers. this separation gives you an additional level of control over the size of each layer of the image in your project. Not only can each of these layers be individually changed to suit your needs, but they can also cut separately.
You can control whether an image from a Cricut Imagine Art cartridge is cut as a single image or in layers using the Composite and Layered buttons at the bottom left of the Image Editor. Selecting Composite will cause the edited image to be cut as a single image. Selecting Layered will cut each layer of the image separately.
note: Selecting to cut a composite image will cause layers that are fully contained inside another layer to not be cut.
flip horizontal, flip vertical, and portrait/Landscape
these three buttons allow you to change the orientation of the selected image.
IMAGE SCREEN
flip vertical — flips the orientation of the entire image vertically or flips a selected portion of the image if it has been separated into layers.
flip horizontal — flips the orientation of the entire image horizontally or flips a selected portion of the image if it has been separated into layers.
rotate — spins the entire image 90 degrees clockwise or spins a selected portion of the image if it has been separated into layers.
17
SETTInGS SCrEEn
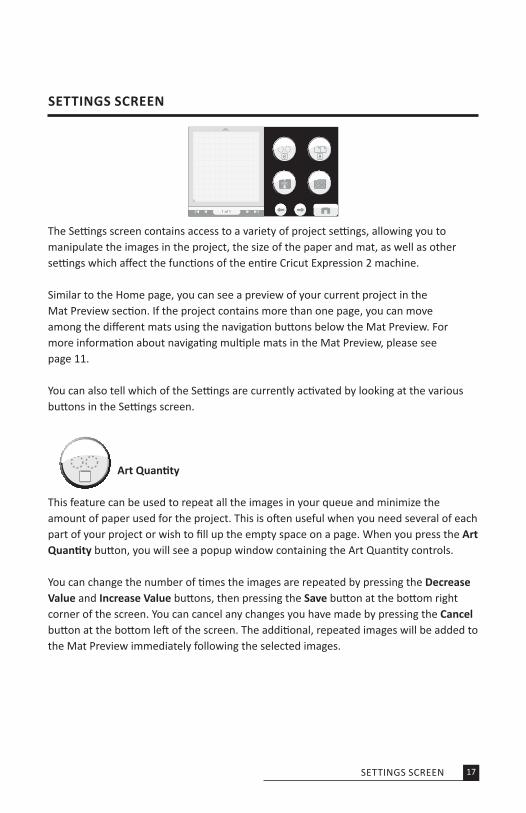
the Settings screen contains access to a variety of project settings, allowing you to manipulate the images in the project, the size of the paper and mat, as well as other settings which affect the functions of the entire Cricut Expression 2 machine.
Similar to the Home page, you can see a preview of your current project in the Mat Preview section. If the project contains more than one page, you can move among the different mats using the navigation buttons below the Mat Preview. For more information about navigating multiple mats in the Mat Preview, please see page 11.
You can also tell which of the Settings are currently activated by looking at the various buttons in the Settings screen.
Art Quantity
this feature can be used to repeat all the images in your queue and minimize the amount of paper used for the project. this is often useful when you need several of each part of your project or wish to fill up the empty space on a page. When you press the Art Quantity button, you will see a popup window containing the Art Quantity controls.
You can change the number of times the images are repeated by pressing the Decrease value and Increase value buttons, then pressing the save button at the bottom right corner of the screen. You can cancel any changes you have made by pressing the Cancel button at the bottom left of the screen. the additional, repeated images will be added to the Mat Preview immediately following the selected images.
8
8 8
1 of 1
SEttINGS SCREEN
18
project Quantity
this feature can be used to repeat the entire project. this is often useful when you need to cut your project several times. When you press the project Quantity button, you will see a popup window containing the Project Quantity controls.
You can change the number of times the project is repeated by pressing the Decrease value and Increase value buttons, then pressing the save button at the bottom left corner of the screen. You can cancel any changes you have made by pressing the Cancel button at the bottom right of the screen. When you cut a project repeatedly using this feature, you will be prompted after each project before continuing with the next. the maximum number of times a project can be cut is nine.
fit to page
the fit to page button changes the size of the images in the project to fit the entire page. the Mat Preview provides a visual indication of the size of each image in the project. to return the images to their normal sizes, press the fit to page button again.
Auto Fill
the function of the Auto Fill button is similar to the Art Quantity feature. However, instead of choosing a specific number of times to repeat all the project art, using Auto Fill repeats the project until the page is full. the additional, repeated images are reflected in the Mat Preview. to go back to the original, non-repeated images, press the Auto Fill button again.
mat Size
the mat Size button displays the current mat size being used in your project. If you want to change the mat size, press the mat Size button and select the desired mat size. the two possible sizes are 12" x 12" (30.48 cm x 30.48 cm) and 12" x 24" (30.48 cm x 60.96 cm). the third button allows you to use the longer 12" x 24" mat in landscape
SEttINGS SCREEN
8
19
orientation rather than portrait. to save your selection, press the save button at the bottom right corner of the screen. You can cancel any changes you have made by pressing the Cancel button at the bottom left of the screen.
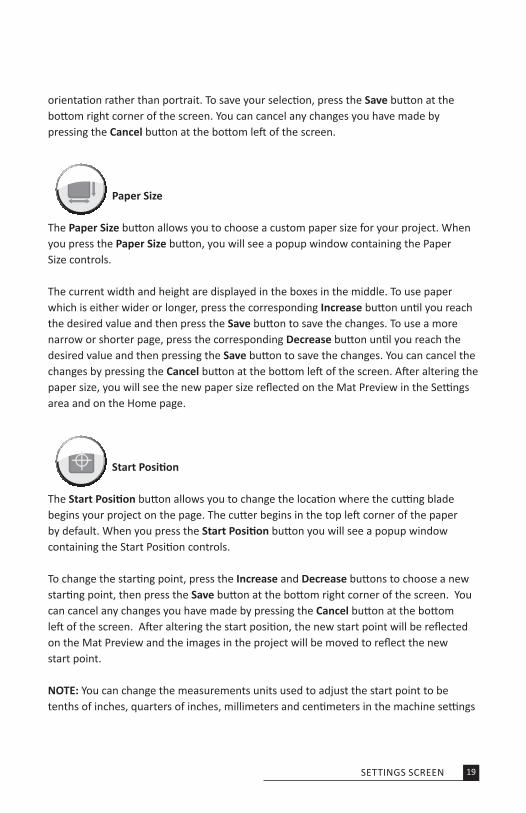
paper Size
the paper Size button allows you to choose a custom paper size for your project. When you press the paper Size button, you will see a popup window containing the Paper Size controls.
the current width and height are displayed in the boxes in the middle. to use paper which is either wider or longer, press the corresponding Increase button until you reach the desired value and then press the save button to save the changes. to use a more narrow or shorter page, press the corresponding Decrease button until you reach the desired value and then pressing the save button to save the changes. You can cancel the changes by pressing the Cancel button at the bottom left of the screen. After altering the paper size, you will see the new paper size reflected on the Mat Preview in the Settings area and on the Home page.
Start position
the Start position button allows you to change the location where the cutting blade begins your project on the page. the cutter begins in the top left corner of the paper by default. When you press the Start position button you will see a popup window containing the Start Position controls.
to change the starting point, press the Increase and Decrease buttons to choose a new starting point, then press the save button at the bottom right corner of the screen. You can cancel any changes you have made by pressing the Cancel button at the bottom left of the screen. After altering the start position, the new start point will be reflected on the Mat Preview and the images in the project will be moved to reflect the new start point.
note: You can change the measurements units used to adjust the start point to be tenths of inches, quarters of inches, millimeters and centimeters in the machine settings
SEttINGS SCREEN
20
section. this can help you more accurately adjust the starting point for the cutting blade. For more information about changing the start position in machine settings, please see page 23 .
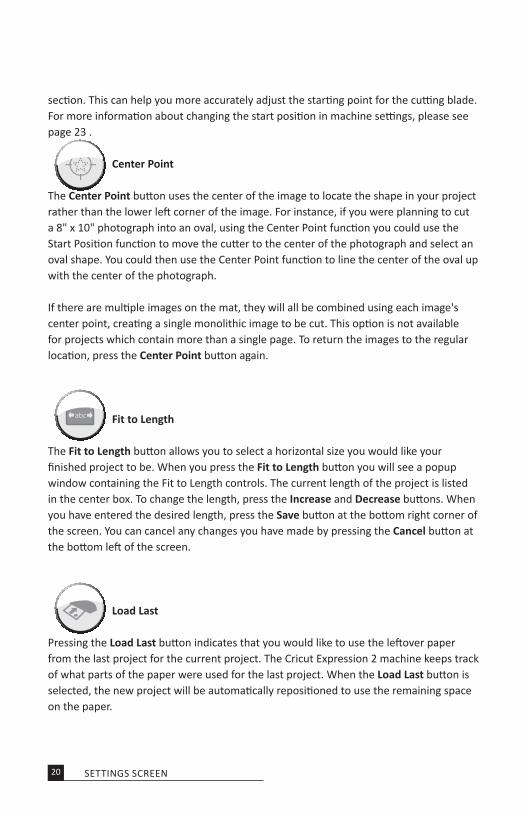
Center point
the Center point button uses the center of the image to locate the shape in your project rather than the lower left corner of the image. For instance, if you were planning to cut a 8" x 10" photograph into an oval, using the Center Point function you could use the Start Position function to move the cutter to the center of the photograph and select an oval shape. You could then use the Center Point function to line the center of the oval up with the center of the photograph.
If there are multiple images on the mat, they will all be combined using each image's center point, creating a single monolithic image to be cut. this option is not available for projects which contain more than a single page. to return the images to the regular location, press the Center point button again.
fit to Length
the fit to Length button allows you to select a horizontal size you would like your finished project to be. When you press the fit to Length button you will see a popup window containing the Fit to Length controls. the current length of the project is listed in the center box. to change the length, press the Increase and Decrease buttons. When you have entered the desired length, press the save button at the bottom right corner of the screen. You can cancel any changes you have made by pressing the Cancel button at the bottom left of the screen.
Load Last
Pressing the Load Last button indicates that you would like to use the leftover paper from the last project for the current project. the Cricut Expression 2 machine keeps track of what parts of the paper were used for the last project. When the Load Last button is selected, the new project will be automatically repositioned to use the remaining space on the paper.
SEttINGS SCREEN
21
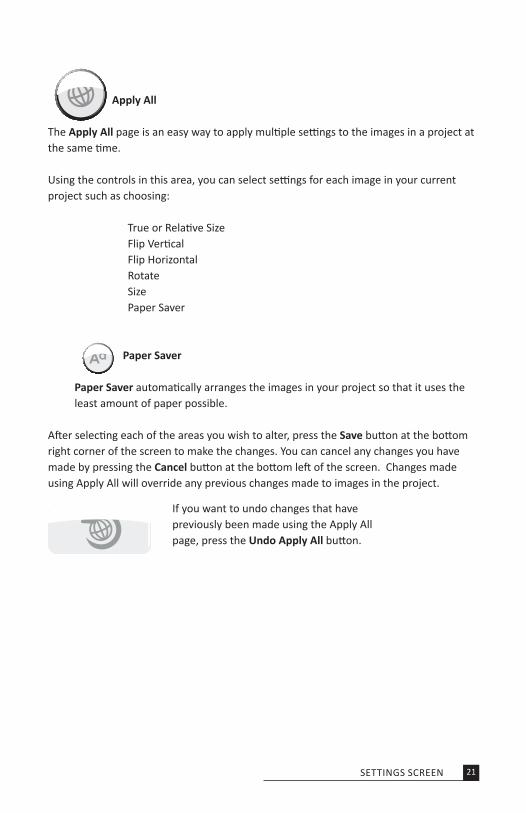
Apply All
the Apply All page is an easy way to apply multiple settings to the images in a project at the same time.
Using the controls in this area, you can select settings for each image in your current project such as choosing:
true or Relative SizeFlip VerticalFlip HorizontalRotateSizePaper Saver
paper Saver
paper Saver automatically arranges the images in your project so that it uses the least amount of paper possible.
After selecting each of the areas you wish to alter, press the save button at the bottom right corner of the screen to make the changes. You can cancel any changes you have made by pressing the Cancel button at the bottom left of the screen. Changes made using Apply All will override any previous changes made to images in the project.
SEttINGS SCREEN
If you want to undo changes that have previously been made using the Apply All page, press the undo Apply All button.
22
tools
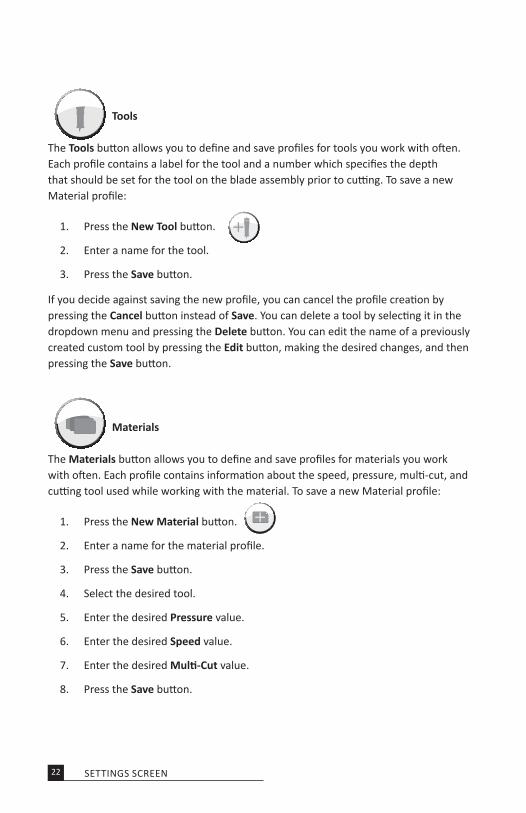
the tools button allows you to define and save profiles for tools you work with often. Each profile contains a label for the tool and a number which specifies the depth that should be set for the tool on the blade assembly prior to cutting. to save a new Material profile:
1. Press the new Tool button.
2. Enter a name for the tool.
3. Press the save button.
If you decide against saving the new profile, you can cancel the profile creation by pressing the Cancel button instead of save. You can delete a tool by selecting it in the dropdown menu and pressing the Delete button. You can edit the name of a previously created custom tool by pressing the edit button, making the desired changes, and then pressing the save button.
materials
the materials button allows you to define and save profiles for materials you work with often. Each profile contains information about the speed, pressure, multi-cut, and cutting tool used while working with the material. to save a new Material profile:
1. Press the new material button.
2. Enter a name for the material profile.
3. Press the save button.
4. Select the desired tool.
5. Enter the desired pressure value.
6. Enter the desired speed value.
7. Enter the desired multi-Cut value.
8. Press the save button.
SEttINGS SCREEN
23
If you decide against saving the new profile, you can cancel the profile creation by pressing the Cancel button instead of save. You can delete a profile by selecting it in the dropdown menu and pressing the Delete button.
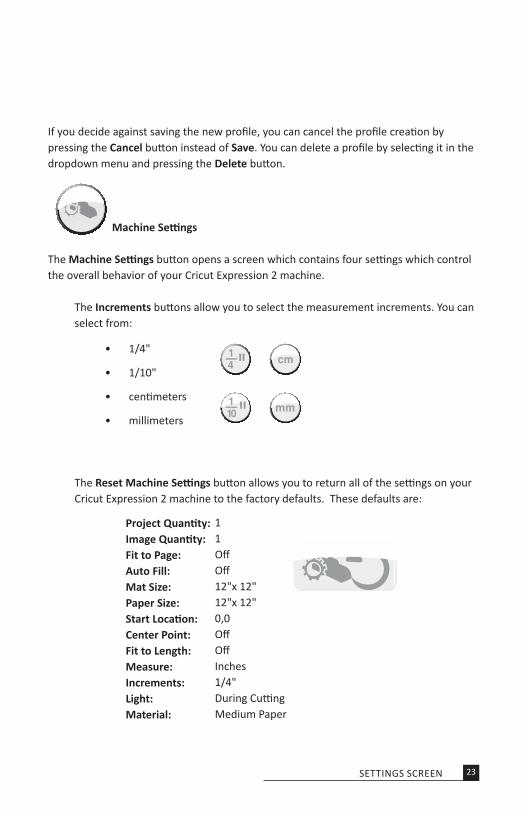
machine Settings
the machine Settings button opens a screen which contains four settings which control the overall behavior of your Cricut Expression 2 machine.
the Increments buttons allow you to select the measurement increments. You can select from:
the reset machine Settings button allows you to return all of the settings on your Cricut Expression 2 machine to the factory defaults. these defaults are:
• 1/4"
• 1/10"
• centimeters
• millimeters
SEttINGS SCREEN
project Quantity: Image Quantity: fit to page: Auto Fill: mat Size: paper Size: Start Location: Center point: fit to Length: measure: Increments: Light: material:
11offoff12"x 12"12"x 12"0,0offoffInches1/4"During CuttingMedium Paper
24
the Cutting Light dropdown allows you to choose from the following options:
• Always on
• Always off
• During Cutting
the Language Selection dropdown allows you to select whether the labels, instructions, and other information displayed in the Cricut Expression 2 machine in a language other than English. Additional languages will be available at a later date.
After making any change to the Machine Settings, pressing the save button will put the changes into effect. You can cancel any changes you have made by pressing the Cancel button at the bottom left of the screen.
Screen Calibration
the Screen Calibration button allows you to recalibrate the touchscreen. After pressing the Screen Calibration button, press each of the five crosshairs on the screen as they appear and the screen will be recalibrated.
About
the About section allows you to review important information such as the end-user license agreement, warranty information, and the software version of the Cricut Expression 2 machine.
SEttINGS SCREEN
25
CuT SETTInGS SCrEEn
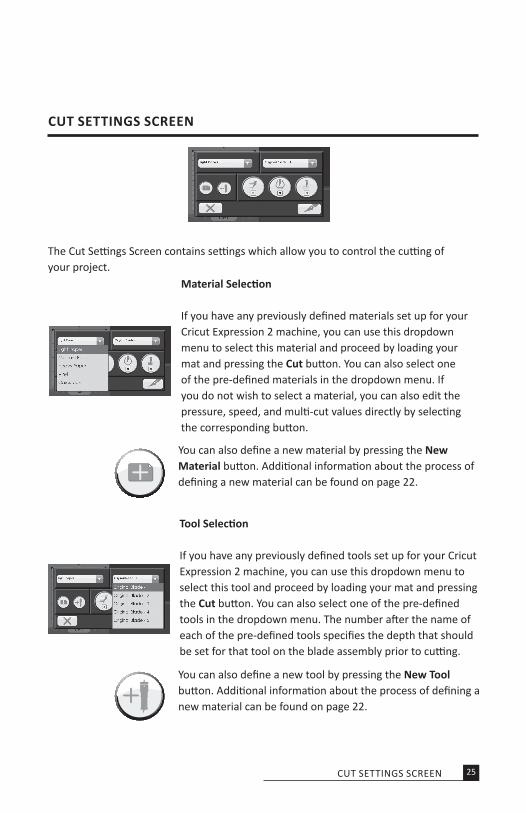
the Cut Settings Screen contains settings which allow you to control the cutting of your project.
You can also define a new material by pressing the new material button. Additional information about the process of defining a new material can be found on page 22.
material Selection
If you have any previously defined materials set up for your Cricut Expression 2 machine, you can use this dropdown menu to select this material and proceed by loading your mat and pressing the Cut button. You can also select one of the pre-defined materials in the dropdown menu. If you do not wish to select a material, you can also edit the pressure, speed, and multi-cut values directly by selecting the corresponding button.
Tool Selection
If you have any previously defined tools set up for your Cricut Expression 2 machine, you can use this dropdown menu to select this tool and proceed by loading your mat and pressing the Cut button. You can also select one of the pre-defined tools in the dropdown menu. the number after the name of each of the pre-defined tools specifies the depth that should be set for that tool on the blade assembly prior to cutting.
You can also define a new tool by pressing the new Tool button. Additional information about the process of defining a new material can be found on page 22.
CUt SEttINGS SCREEN
26
Cutting heavyweight or Lightweight materials
Your Cricut Expression 2 machine can cut a variety of materials. For an optimal cut on lightweight materials such as vellum or heavyweight materials such as thin cardstock, you may need to adjust the blade depth, speed of the cut, or cut pressure. When you find settings that work well for you, be sure to save them so that you can use them again in the future. For details on how to define a new material, please see the Material Settings section on page 22.
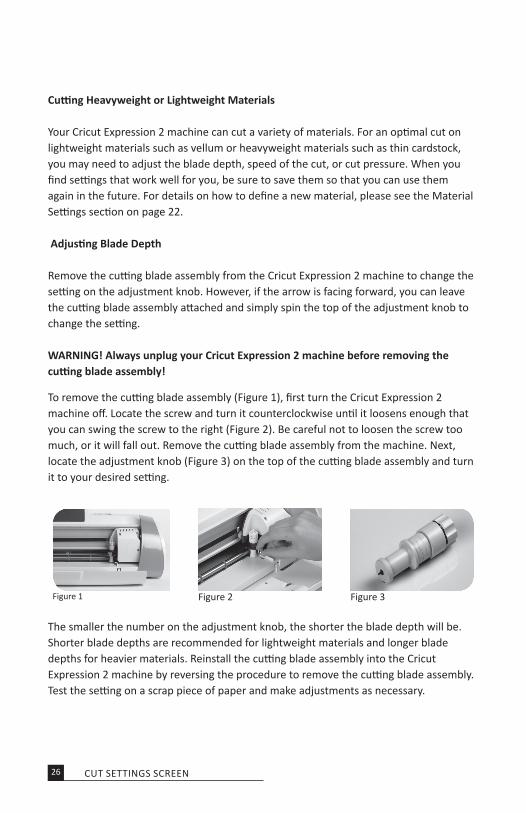
Adjusting Blade depth
Remove the cutting blade assembly from the Cricut Expression 2 machine to change the setting on the adjustment knob. However, if the arrow is facing forward, you can leave the cutting blade assembly attached and simply spin the top of the adjustment knob to change the setting.
WArnInG! Always unplug your Cricut Expression 2 machine before removing the cutting blade assembly!
the smaller the number on the adjustment knob, the shorter the blade depth will be. Shorter blade depths are recommended for lightweight materials and longer blade depths for heavier materials. Reinstall the cutting blade assembly into the Cricut Expression 2 machine by reversing the procedure to remove the cutting blade assembly. test the setting on a scrap piece of paper and make adjustments as necessary.
CUt SEttINGS SCREEN
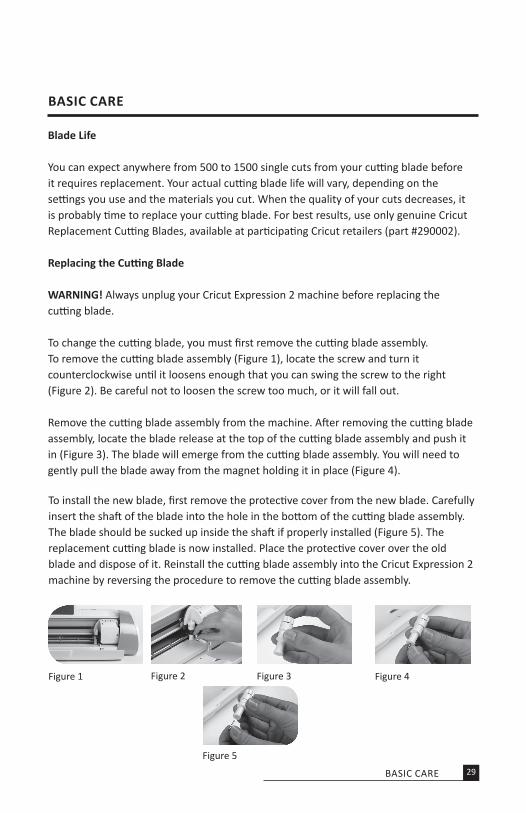
Figure 3Figure 2
to remove the cutting blade assembly (Figure 1), first turn the Cricut Expression 2 machine off. Locate the screw and turn it counterclockwise until it loosens enough that you can swing the screw to the right (Figure 2). Be careful not to loosen the screw too much, or it will fall out. Remove the cutting blade assembly from the machine. Next, locate the adjustment knob (Figure 3) on the top of the cutting blade assembly and turn it to your desired setting.
Figure 1
27
TIp: Cutting on cardstock and other heavy materials will reduce the life of your blade, but it will produce the best cuts.
TIp: If the Cricut Expression 2 machine produces poor cutting results, always insert a new blade first before trying other options.
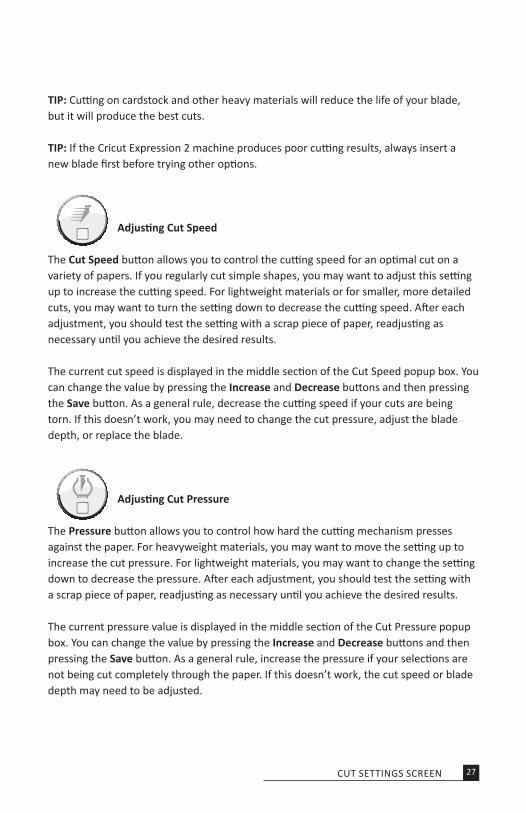
Adjusting Cut Speed
the Cut speed button allows you to control the cutting speed for an optimal cut on a variety of papers. If you regularly cut simple shapes, you may want to adjust this setting up to increase the cutting speed. For lightweight materials or for smaller, more detailed cuts, you may want to turn the setting down to decrease the cutting speed. After each adjustment, you should test the setting with a scrap piece of paper, readjusting as necessary until you achieve the desired results.
the current cut speed is displayed in the middle section of the Cut Speed popup box. You can change the value by pressing the Increase and Decrease buttons and then pressing the save button. As a general rule, decrease the cutting speed if your cuts are being torn. If this doesn’t work, you may need to change the cut pressure, adjust the blade depth, or replace the blade.
Adjusting Cut pressure
the pressure button allows you to control how hard the cutting mechanism presses against the paper. For heavyweight materials, you may want to move the setting up to increase the cut pressure. For lightweight materials, you may want to change the setting down to decrease the pressure. After each adjustment, you should test the setting with a scrap piece of paper, readjusting as necessary until you achieve the desired results.
the current pressure value is displayed in the middle section of the Cut Pressure popup box. You can change the value by pressing the Increase and Decrease buttons and then pressing the save button. As a general rule, increase the pressure if your selections are not being cut completely through the paper. If this doesn’t work, the cut speed or blade depth may need to be adjusted.
4
4
CUt SEttINGS SCREEN
28
multi-Cut
the multi-Cut button allows you to cut a project up to nine times on top of the original cut lines. this allows the machine to cut thicker materials such as thin chipboard. It is recommended that you set your blade depth to 6 when using Multi-Cut, since the effectiveness of passing the blade over the same cut is limited by blade depth.
the current Multi-Cut value is displayed in the middle section of the Multi-Cut popup box. You can change the value by pressing the Increase and Decrease buttons and then pressing the save button.
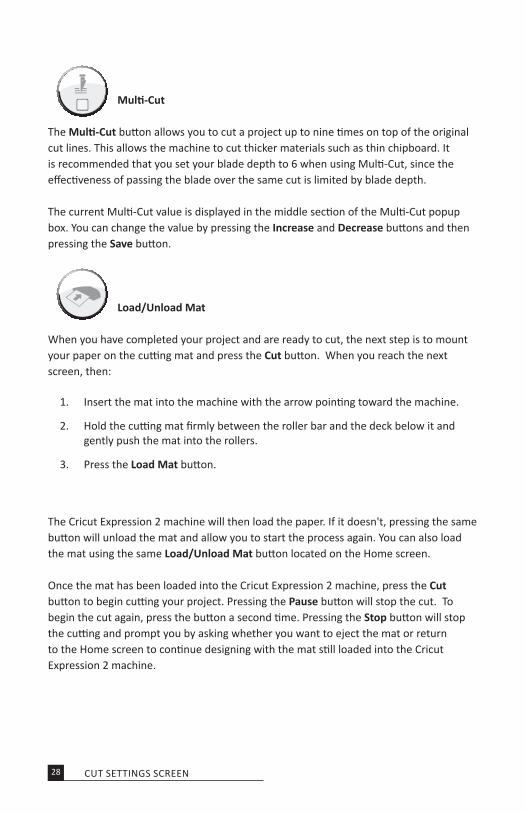
Load/unload mat
When you have completed your project and are ready to cut, the next step is to mount your paper on the cutting mat and press the Cut button. When you reach the next screen, then:
1. Insert the mat into the machine with the arrow pointing toward the machine.
2. Hold the cutting mat firmly between the roller bar and the deck below it and gently push the mat into the rollers.
3. Press the Load mat button.
the Cricut Expression 2 machine will then load the paper. If it doesn't, pressing the same button will unload the mat and allow you to start the process again. You can also load the mat using the same Load/unload mat button located on the Home screen.
once the mat has been loaded into the Cricut Expression 2 machine, press the Cut button to begin cutting your project. Pressing the pause button will stop the cut. to begin the cut again, press the button a second time. Pressing the stop button will stop the cutting and prompt you by asking whether you want to eject the mat or return to the Home screen to continue designing with the mat still loaded into the Cricut Expression 2 machine.
CUt SEttINGS SCREEN
4
29
BASIC CArE
Blade Life
You can expect anywhere from 500 to 1500 single cuts from your cutting blade before it requires replacement. Your actual cutting blade life will vary, depending on the settings you use and the materials you cut. When the quality of your cuts decreases, it is probably time to replace your cutting blade. For best results, use only genuine Cricut Replacement Cutting Blades, available at participating Cricut retailers (part #290002).
replacing the Cutting Blade
WArnInG! Always unplug your Cricut Expression 2 machine before replacing the cutting blade.
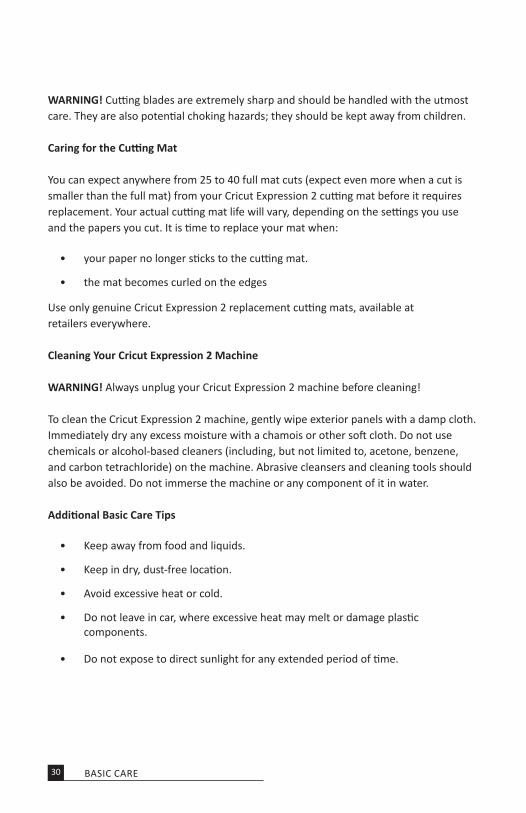
to change the cutting blade, you must first remove the cutting blade assembly. to remove the cutting blade assembly (Figure 1), locate the screw and turn it counterclockwise until it loosens enough that you can swing the screw to the right (Figure 2). Be careful not to loosen the screw too much, or it will fall out.
Remove the cutting blade assembly from the machine. After removing the cutting blade assembly, locate the blade release at the top of the cutting blade assembly and push it in (Figure 3). the blade will emerge from the cutting blade assembly. You will need to gently pull the blade away from the magnet holding it in place (Figure 4).
to install the new blade, first remove the protective cover from the new blade. Carefully insert the shaft of the blade into the hole in the bottom of the cutting blade assembly. the blade should be sucked up inside the shaft if properly installed (Figure 5). the replacement cutting blade is now installed. Place the protective cover over the old blade and dispose of it. Reinstall the cutting blade assembly into the Cricut Expression 2 machine by reversing the procedure to remove the cutting blade assembly.
Figure 1 Figure 2 Figure 3 Figure 4
Figure 5
BASIC CARE
30
WArnInG! Cutting blades are extremely sharp and should be handled with the utmost care. they are also potential choking hazards; they should be kept away from children.
Caring for the Cutting mat
You can expect anywhere from 25 to 40 full mat cuts (expect even more when a cut is smaller than the full mat) from your Cricut Expression 2 cutting mat before it requires replacement. Your actual cutting mat life will vary, depending on the settings you use and the papers you cut. It is time to replace your mat when:
• your paper no longer sticks to the cutting mat.
• the mat becomes curled on the edges
Use only genuine Cricut Expression 2 replacement cutting mats, available at retailers everywhere.
Cleaning your Cricut Expression 2 machine
WArnInG! Always unplug your Cricut Expression 2 machine before cleaning!
to clean the Cricut Expression 2 machine, gently wipe exterior panels with a damp cloth. Immediately dry any excess moisture with a chamois or other soft cloth. Do not use chemicals or alcohol-based cleaners (including, but not limited to, acetone, benzene, and carbon tetrachloride) on the machine. Abrasive cleansers and cleaning tools should also be avoided. Do not immerse the machine or any component of it in water.
Additional Basic Care Tips
• Keep away from food and liquids.
• Keep in dry, dust-free location.
• Avoid excessive heat or cold.
• Do not leave in car, where excessive heat may melt or damage plastic components.
• Do not expose to direct sunlight for any extended period of time.
BASIC CARE
31
OpTIOnAL AdApTEr InSTALLATIOn
Your Cricut Expressions 2 machine has an adapter slot in the back to enable future functionality such as Wi-fi. Please see documentation included with future adapters for installation instructions.
oPtIoNAL ADAPtER INStALLAtIoN
32
TrOuBLEShOOTInG
problem: the cutting mat didn’t load when I pressed the Load button.Solution: Press the unload mat button and then reload the mat before pressing the Cut button again.
problem: the blade is not cutting all the way through the paper.Solution 1: Adjust the Multi-Cut setting on the cut screen to allow for multiple cuts along the same cutting lines.Solution 2: Increase the cut pressure in the Project Preview screen.Solution 3: the blade depth may need to be adjusted, particularly if you are trying to cut through thicker materials.Solution 4: the cutting blade may have become dull and needs to be replaced.
problem: the paper lifts off the mat as the Cricut Expression 2 machine is cutting.Solution 1: Make sure you press the paper firmly onto the cutting mat when setting up the cut.Solution 2: Rinse the mat with water while gently rubbing off the paper lint on the mat. Let the mat thoroughly dry before attempting to re-use the mat.Solution 3: try using a new mat. Each mat will last anywhere from 25 to 40 full page cuts, depending on the size of cuts and the kind of material you are cutting.
problem: the cutting mat is too sticky. It’s ripping my paper when I try to remove it.Solution: Use a craft knife or the Cricut tools™ (sold separately) to successfully lift the material from the cutting mat. the Cricut tools are custom designed for lifting, pulling, or cleaning up cut characters.
problem: My machine doesn't turn on and doesn't appear to be getting any power.Solution 1: Check the power adapter to make sure that the green power indicator is lit up. If it is not lit, check to make sure the power plug is completely inserted into the power adapter.Solution 2: try to plug the power cord into another outlet.
problem: My Cricut Expression 2 machine doesn't communicate to an attached USB device.
tRoUBLESHootING

33
Solution 1: Check the USB cable to make sure that it is properly connected. Solution 2: Make sure that the connected device is powered on. Solution 3: Make sure that the Cricut Expression 2 machine and the attached device have the latest firmware installed.
tRoUBLESHootING
34
CrICuT ExprESSIOn® 2: 5th AnnIvErSAry EdITIOn STATEmEnT Of LImITEd WArrAnTy
part 1—General Terms
this Statement of Limited Warranty includes Part 1—General terms, Part 2— Country-Specific terms, and Part 3—Warranty Information. the terms of Part 2 replace or modify those of Part 1. the warranties provided by PRoVo CRAFt AND NoVELtY, INC. (“PRoVo CRAFt”) or its authorized repair center in this Statement of Limited Warranty apply only to Machines you purchase for your use and not for resale. the term “Machine” means a Cricut Expression® 2: 5th Anniversary Edition, its features, elements, or accessories, including any font or image cartridges sold therewith, or any combination of them. the term “Machine” does not include any expendable or consumer replaceable parts, including but not limited to cutting blades and cutting mats. Nothing in this Statement of Limited Warranty affects any statutory rights of con¬sumers that cannot be waived or limited by contract.
What this Warranty Covers
PRoVo CRAFt® warrants that each Machine 1) is free from defects in materials and work¬manship and 2) will perform substantially as described in the accompanying User Manual. the warranty period for the Machine starts on the original Date of Purchase and is specified in Part 3—Warranty Information. the date on your invoice or sales receipt is the Date of Purchase unless PRoVo CRAFt or your reseller informs you otherwise. A part that replaces a removed part will assume the warranty service status of the removed part. Unless PRoVo CRAFt specifies otherwise, these warranties apply only in the country or region in which you purchased the Machine.
tHESE WARRANtIES ARE YoUR EXCLUSIVE WARRANtIES AND REPLACE ALL otHER WAR¬RANtIES oR CoNDItIoNS, EXPRESS oR IMPLIED, INCLUDING, BUt Not LIMItED to, tHE IMPLIED WARRANtIES oR CoNDItIoNS oF MERCHANtABILItY AND FItNESS FoR A PARtICULAR PURPoSE. SoME StAtES oR JURISDICtIoNS Do Not ALLoW tHE EXCLUSIoN oF EXPRESS oR IMPLIED WARRANtIES, So tHE ABoVE EXCLUSIoN MAY Not APPLY to YoU. IN tHAt EVENt, SUCH WARRANtIES ARE LIMItED IN DURAtIoN to tHE WARRANtY PERIoD. No WARRANtIES APPLY AFtER tHAt PERIoD. SoME StAtES oR JURISDICtIoNS Do Not ALLoW LIMItAtIoNS oN HoW LoNG AN IMPLIED WARRANtY LAStS, So tHE ABoVE LIMItAtIoN MAY Not APPLY to YoU.
WARRANtY
35
What this Warranty Does not Cover
this warranty does not cover the following:
1. Blade housing and cutting blades, whether supplied with the Machine or sold separately from the Machine;
2. Cutting mats, whether supplied with the Machine or sold separately from the Machine;
3. Failure resulting from misuse (including but not limited to use beyond the Machine’s capacity or capability), use in a business or for commercial purposes, accident, modification, unsuitable physical or operating environment, or improper maintenance by you; and
4. Failure caused by a product or use of third-party software for which PRoVo CRAFt is not responsible.
the warranty is voided by removal or alteration of identification labels on the Machine or its parts or disassembly of any component of the Machine. PRoVo CRAFt does not warrant uninterrupted or error-free operation of a Machine.
Any technical or other support provided for a Machine under warranty, such as assistance with “how-to” questions and those regarding Machine set-up and installation, is provided WItHoUt WARRANtIES oF ANY KIND.
WARRANtY