white knight chronicl · white knight chronicles has a traditional sort of japanese-rpg plot, but...
TRANSCRIPT

White Knight Chronicles Guide
by Thomas Hindmarch
White Knight Chronicles harkens back to a day when more traditional RPGs were the norm. Rife with fully-explorable towns and cities, epic dungeons, and myriad battles, White Knight Chronicles offers a lot to the RPG gamer looking for a lengthy, difficult experience. Our complete guide offers novices and experts alike a ton of content, including tips and tricks on the finer points of battle, how to build your party, and even the best gear and equipment out there to find. But the meat of our guide is in our full walkthrough, which holds your hand from beginning to end.
Inside this White Knight Chronicles guide...
» Combat, Statuses, Elements, Equipment & Items
» Character Building Tips & Recommendations
» Game Walkthrough
» Trophy Guide
© 2010, IGN Entertainment, Inc. May not be sold, distributed, transmitted, displayed, published or broadcast, in whole or part, without IGN's express permission. You
may not alter or remove any trademark, copyright or other notice from copies of the content. All rights reserved.
Page 1 of 38© 2010 IGN Entertainment, Inc.
White Knight Chronicles Guide Contents
Introduction
Basics
Controls, Combat & Healing
Action Chips & Combos
Statuses, Elements, Aggro
Equipment & Items
Character Building
Weapon Skills
Party Roles & Recommendations
Walkthrough
Trophies
»
»
»
»
»
Page 2 of 38© 2010 IGN Entertainment, Inc.

White Knight Chronicles Basics
White Knight Chronicles, in single-player mode, is kind of like the platonic ideal of the Japanese-RPG and a halfway decent MMORPG got together and had some kind of creepy freak baby.
Some mechanics from either style of game apply here, so you should be on comfortable ground. The abiding characteristic of the game, though, is that its difficulty comes entirely from its learning curve. If you learn the system and how to exploit it early on, the rest of the singleplayer game will be a breeze. If you don't, White Knight Chronicles will be both sort of boring and punishingly unfair.
As such, the following tries to give you a rough grounding in how to play White Knight Chronicles, with tips, tricks, and advice. Many of the basic elements of gameplay are gradually taught to you over the course of the first couple of hours of the game, so if you're confused on some point or another, rest assured that the game itself will tell you what to do. This is more about fine-tuning your playstyle.
Controls
White Knight Chronicles has a traditional sort of Japanese-RPG plot, but the gameplay takes after several recent games. If you played Final Fantasy XII or Level-5's Rogue Galaxy, you've got a good idea what to expect here.
In the field, you can directly control one character at a time. Your other two characters will behave according to their set tactical parameters. In practice, the best tactics are "Heal First," where a character will only attack if all allies are above 50% health or so, and "Stay Safe," where a character focuses on defense. Other options tend to burn AC and MP too quickly to be worth using.
You can switch and actively control any other party member by pressing the Select button and choosing Change Character. This is something that many first-time players overlook, but it's central to White Knight Chronicles's gameplay.
For example, you can set up one character to keep a monster's attention squarely on them, then switch to your spellcaster, circle around behind the enemy, and start casting spells to exploit the monster's weaknesses. The AI that controls your other party members never really rises above "adequate," but with forethought you can control all of your characters at once.
Combat
On the other hand, if you're an MMORPG fan, there are a few things about White Knight Chronicles's combat that may seem counterintuitive.
For one thing, simple melee combat effectively has no range limit in White Knight Chronicles. You can't "kite" monsters here; at best, they'll chase you for a while before managing to land a melee attack. Positioning still matters, but that's mostly because most enemies know at least one kind of area-of-effect strike; if you control who they attack with it, you can usually position that character so the rest of your party's out of the line of fire.
When you're in a dungeon, whether it's an abandoned mine or an open field, White Knight Chronicles's commonly-encountered enemies take one of two forms. Normal enemies are the first; these are the rank-and-file antagonists that you'll take on three and four at a time.
Minibosses are the ones that prove a bit problematic. After the game's prologue, you'll face multiple minibosses on every dungeon and map you go through, and they represent a much greater challenge than the monsters around them.
First off, minibosses are big. Melee
Combat & Healing Action Chips & Combos Statuses, Elements, Aggro Equipment & Items
Page 3 of 38© 2010 IGN Entertainment, Inc.

attacks can only hit them in the legs or tail. More importantly, just about every miniboss uses attacks like Trample and Swipe, which hit and knock down enemies around them. This allows them to completely shut down any spellcasters within their reach, and forces you to keep them tanked.
As is detailed below, "tanking" in White Knight Chronicles mostly refers to the use of the skills Provoke and Threaten, which force an afflicted enemy to focus their attacks on the user for the next minute or so. During that period of time, nothing another character does will draw attention from the monster. This is the time to take control of your spellcasters or healers, run them away from the miniboss, and cast a few spells while it's distracted.
As you go through the game, the most difficult minibosses don't tend to be the ones with high damage output or specific skills. Those are easy enough to mitigate or avoid, after all. Most of White Knight Chronicles involves ensuring a monster doesn't run over and eat your healer.
For most of the game, you also have access to the arks, which allow Leonard and Caesar to transform into Knights. These massive armored creatures have a huge stat advantage over most of the monsters they'll face, and bringing out a Knight is usually a win button against anything short of a full-fledged boss.
You can't transform into a Knight very often, though, as doing so requires you to expend at least seven Action Chips (see below). They're a decidedly limited resource, and when to use one is one of the major tactical challenges of the game. As a general rule of thumb, keep either Leonard or Caesar in your party at all times, and if a miniboss fight starts going against you, use a Knight transformation to pull out the win.
Action Chips
Action Chips, or AC, are tracked via the white gauge in the lower left-hand corner of the screen. Many skills in the game, including Knight transformations and the various skills you can use in combos, cost one or more AC.
Unlike a character's HP or MP, Action Chips do not regenerate on their own, or when you touch a logic stone. Instead, there are only a few ways to restore spent AC.
Attacking an Opponent
Any melee attacks that don't cost AC to use will gradually restore AC with every hit. It's a slow but reliable process, but it's kind of like watching the coffeemaker; if you sit there and watch it happen, it looks a lot slower than it is.
A Note About Damage and Healing
You have HP and MP in White Knight Chronicles, just like in almost every other RPG on the face of the planet. Run out of MP, and you can no longer use most of the skills and spells you know; run out of HP, and you die. A dead character must be brought back by the Raise spell or a similar method. One notable difference between most Japanese-RPGs and White Knight Chronicles, though, is regeneration. As long as your entire party is outside of combat, you regain lost HP and MP at a fairly modest clip. They even continue to regenerate while you're looking at the map or screwing around in the status screen, and touching a logic stone replenishes them all at once. As a result, you can afford to have a much less conservative approach to combat in White Knight Chronicles than you would in many Japanese-RPGs. You're not saving your resources for some theoretical future encounter. Your offensive casters should be using their spells at every opportunity, and healers should be constantly replenishing lost health. Think of White Knight Chronicles's dungeons in the same way you would an MMORPG's dungeon crawl, and you're close to the kind of rhythm you need.
Combat & Healing Action Chips & Combos Statuses, Elements, Aggro Equipment & Items
Page 4 of 38© 2010 IGN Entertainment, Inc.

Getting Hit by an Opponent
Ordinary hits may regenerate an AC or two for you. Getting absolutely pummeled, on the other hand, will restore AC very quickly, so your tank will usually have a near-constant supply of two to four AC to work with. This allows them to always have a Provoke or Threaten lined up when it's most needed.
Defeating an Opponent
If a character strikes the killing blow against a hostile creature with a skill that doesn't cost AC, they usually get an AC back. Defeating an miniboss is worth up to three AC.
Leveling Up
A character that reaches a new experience level automatically restores all HP, MP, and AC. If there's a tough boss fight coming up, one sneaky trick is to fight random monsters until a character is almost ready to level, then dump a full AC meter into the boss right as the fight starts. Turn around and kill any small fry in the area, and presto: you now have a second full AC meter.
Certain Specific Skills
There are a couple of skills in the game, like a spear user's Anima, that restore lost AC. These usually have a high cost, but you can spam them outside of combat to rapidly refill the meter.
Items
You can use charge drinks to restore lost AC. The ordinary version is worth 1; a charge drink II is worth 3; and a rare charge drink III is worth 5.
Combos
Starting very early in the game, characters can buy ranks in a five-tier skill (i.e. Sword Master, Swordsman) that allows them to string moves together in a combo. This is the true value of most of the skills in a weapon's tree.
In theory, to successfully complete a combo, you need to press a button in a set rhythm. In practice, there's no penalty for simply mashing the X button all the way through the combo sequence, except maybe for carpal tunnel syndrome. Once you realize that, combos become a lot more user-friendly.
As a general rule, it's a good idea to have one or two low-AC combos on your bar to expediently dispose of annoying random monsters. A three- to five-AC combo is usually more than enough to dispatch anything short of a miniboss.
A successful seven-hit combo, on the other hand, can deal more damage at once than just about anything else in the game, short of a Knight unloading a high-MP move on somebody. Keep one of those around as well to inflict maximum damage on bosses and minibosses.
Keep track of what moves are used in your combination, however. In certain areas, such as tunnels with a low ceiling, you won't be able to use a combo that has an aerial component, such as the various launcher -> aerial transitions.
Page 5 of 38© 2010 IGN Entertainment, Inc.

Finally, one quirk of the combo system is that once a character starts one, they cannot be knocked down until the combo is complete. An attack that would ordinarily send the character flying, such as Trample, will still inflict its usual damage, but the character will ignore the impact in favor of completing the combo. With proper timing, you can anticipate certain enemy skills and use a combo to interrupt them.
Status Ailments
There are several potential status ailments in White Knight Chronicles, such as poison, paralysis, sleep, and KO. Their effects are largely self-explanatory, with the exception of KO; a KOed character cannot take any actions at all until he or she snaps out of it.
Like many Japanese-RPGs, these are frequently employed by enemies against you; unlike many Japanese-RPGs, they have a surprisingly low hit rate. You won't find enemies that can consistently inflict a badstat on you until near the end of the singleplayer campaign. Usually, they'll try it and it won't work.
While there are items that can remove status ailments, the best way of dealing with this is to teach your party's designated healer the various spells in Divine Magic that remove status ailments, then install those spells on his or her action bar.
Aggro
White Knight Chronicles uses a simple metric of determining aggro. A given enemy will turn and focus its attacks on whoever is doing the most damage to it. That will usually be a Knight, an elemental spellcaster, or failing that, a guy with a really big sword or axe. In the event that more healing is going on than direct damage, for whatever reason, a monster can be relied upon to go after the healer instead.
As such, once you've got a certain amount of skill points under your belt, it's time to figure out how to tank in White Knight Chronicles.
A sword or spear user gains access early on to a skill called either Provoke (sword) or Threaten (spear), which works like a taunt does in an MMORPG. After the enemy hit with Provoke/Threaten finishes its current activity, it immediately turns around and starts attacking the user, and will do so until either the taunt wears off, which usually takes about a minute, or the user gets killed.
Against rank-and-file enemies, aggro isn't really a going concern. Bosses and sub-bosses usually have a wide variety of ways to ruin a spellcaster's day, however, as any enemy skill that knocks a character down will also interrupt a spell. If a spell is interrupted, the caster effectively loses his or her turn and has to start over.
Thus, if you're fighting anything that has multiple target zones, it's a good idea to send in a tank and Provoke/Threaten it, steering it away from your spellcasting backfield and allowing them to do their jobs with a minimum of stress. Try to face the boss away from your party, while you're at it; this means that anything it can do that has a certain area of effect will probably only hit your tank.
Elemental Damage
White Knight Chronicles uses an odd elemental hierarchy. Put simply, fire beats ice, ice beats fire, earth beats wind, and wind beats earth. An enemy's elemental affiliation is usually obvious by either looking at it or reading its name; for example, an ice dragon is vulnerable to fire. With the exception of divine magic, all of the weapons in the game have an unlockable elemental attack somewhere on their list, so you should always have the ability to exploit an enemy's weak spots. That said, a spell must be on a character's action bars in order for him or her to use it in a fight. As a general rule, keep at least one spell of each elemental type on hand in order to speed through combat.
Combat & Healing Action Chips & Combos Statuses, Elements, Aggro Equipment & Items
Page 6 of 38© 2010 IGN Entertainment, Inc.

Attack Speed
In White Knight Chronicles's terms, attack speed refers to the time between each possible action, or the span of time it takes for your attack gauge to fill back up between hits. Spells like Haste can accelerate this, while debuffs like Slow can, well, slow it down. Your base attack speed is determined exclusively by your current equipment, with each item you're wearing adding a slight amount of recharge time. A bare-handed, naked character has the fastest possible attack speed, while a guy wearing full heavy plate and using an axe or longsword has the slowest. It's a good idea to be aware of this mechanic and to take it into account when gearing your characters. While the differences are only a matter of about a second and a half, this is a game where seconds tend to count.
Equipment
There are three kinds of armor in White Knight Chronicles: heavy, medium, and light. These aren't specifically referred to as such in-game.
Heavy armor is usually some kind of plate, and features a large amount of DEF compared to the others. A character in full heavy armor suffers a slight attack speed penalty, but compensates for this with a huge amount of resistance against physical attack.
Medium armor doesn't have quite as much DEF, but also doesn't come with quite as much of an attack speed penalty.
Finally, light armor has low DEF, but comes with a bunch of RES, raising the wearer's passive magic resistance.
A character with a shield equipped can only use a sword, shortsword, or spear, but gets a sizable boost to DEF. Using a shield also incurs a slight additional attack speed penalty.
In most occasions, your designated tanks should be the only ones wearing any heavy armor at all. These characters exist to draw fire, and physical damage is the most frequently-encountered damage type in the game. As such, it's okay to penalize their attack speed with a full suit of heavy armor and a shield.
Your healer should probably be as lightly-armored as possible, in order to get a faster attack speed. Every other party member can wear a mixture of light armor, to boost their RES, and medium armor, for higher DEF against AoE physical attacks.
When you're in an armorer's shop, you can further improve your weapons and armor with enhancements. This uses items you've found or looted in conjunction with a bit of cash to add numerical bonuses to a weapon or piece of armor.
Throughout the singleplayer game, while you'll find more than enough materials for enhancement, you're usually no more than a couple of hours away from your next upgrade. It's not a bad idea to splurge on
Items
Consumable items are sold by general stores, which can be found in most of the larger settlements throughout the game. Each character can carry twenty items at a time into the field, and anything they have equipped counts towards that total. As such, a character will usually have six or seven slots filled already, depending on whether or not they use a shield.
Combat & Healing Action Chips & Combos Statuses, Elements, Aggro Equipment & Items
Page 7 of 38© 2010 IGN Entertainment, Inc.

the occasional +1 bonus if you have the reagents lying around, but you shouldn't feel as though it's necessary to succeed.
Exploration
As you play the singleplayer game in White Knight Chronicles, it's important to realize that there are a few hundred hours of play waiting for you after the end credits roll. A number of sidequests, such as the Adventurers' Guild missions and the Boot Camp, have no bearing whatsoever on the main quest and as such aren't discussed in this document.
Further, as you progress, you may notice that many of the game's maps are far, far larger than they need to be for the sake of the main story. You can explore them as much as you want, and many of the maps have hidden treasures sitting around at dead ends and in side passages. Mostly, these treasures will be raw materials for enhancement or item fusion, reagents for your GeoTown, or free weapons and armor. Exploration is rewarding in White Knight Chronicles, and you should feel free to stray as far off of the beaten path as you like.
Your next story destination is almost always clearly labeled with a star on the in-game map. (In the event that it isn't, your destination is usually either hidden or on another dungeon level.) You'll almost never be lost, and the walkthrough is written with that in mind. You don't really need any step-by-step directions for most of the game.
White Knight Chronicles Character Building
Every character in White Knight Chronicles begins the game with the same basic stats. As your characters level up and spend their skill points, you'll unlock options in the skill trees that allow you to improve a character's combat ability and basic statistics.
How you build a character determines their role in the party, and their effectiveness in combat. With solid character builds and a good idea of how to proceed in combat, White Knight Chronicles's singleplayer game is extremely easy. Without that, you're in for a long haul.
Weapon Skills
There are eight weapon skills to choose from in White Knight Chronicles. As you buy abilities in each list, you gradually unlock more moves, stat gains, spells, and passive effects.
A good rule of thumb here is to focus on specialization. A character that's splitting his or her skill points up between two separate trees tends to be a bit watered-down, and there are some really great talents that you can't buy unless you've filled out most of the rest of the tree. The sooner you max out a tree, the sooner you can start cherry-picking stat gains from the others.
Your Pactmakers like Leonard also must carry their Knight's equipment and Incorruptus Souls. By the end of the game, Leonard's inventory is likely to be nearly full, between his gear, his Knight's sword and shield, and any consumables he has. It's a good idea to carry several mana potions, charge drinks, and heal potions with you as you enter a dungeon. It's particularly important for a pactmaker to have a stack (five) of the highest-value heal potions you can conveniently access. This is important because without those potions, a Knight has no method of healing itself. There are a couple of bosses that a Knight has to take on alone, so without a heal or two, you may be in real trouble. Make sure you have those potions on you before a boss fight, just in case, and keep a stack or two in item storage. You can access stored items from any logic stone.
Weapon Skills Party Roles & Recommendations
Page 8 of 38© 2010 IGN Entertainment, Inc.

Sword
Any character in the game can be turned into the classic sword-and-shield-wielding knight. Sword specialization is an offensively-oriented tanking build, with bonuses to STR, DEX, and AGI lending your combos a bit of extra punch. You can also use Magic Eater to steal MP from an opponent, giving yourself extra longevity, and you have several handy buffs and debuffs. The downside is that a sword specialist's passive survivability is lower than it ought to be. You hit hard—for a tank—but your HP and VIT will be lower than a spear user's.
Spear
Take what was just said about sword users and flip it. A spear-wielding tank is nothing but raw survivability, with plenty of defensive stats, the ability to regenerate AC with Anima, and powerful damage-reducing abilities like Support Field. You get almost no offensive punch, though, which forces a spear-wielding tank to either dip into other trees or rely heavily on other party members. In the singleplayer game, this isn't a bad thing at all, but it can present problems in multiplayer.
Axe
An axe build is focused on pure offense to the exclusion of just about anything else. Everything about the tree involves hitting somebody, hitting them harder, hitting them twice, hitting them so hard that their Attack and Defense go down, or hitting them with earth elemental attacks for some reason, because skills that all follow a single unifying theme are for nerds. You get a lot of bonus HP for your points, but you're a glass hammer; if you rip aggro, you'll wind up in a world of hurt. In the singleplayer campaign, a character with an axe is one of the most powerful damage dealers you can get in your party, and it's well worth the points for several fights in the latter half of the game.
Longsword
A longsword specialist is the slightly less suicidal version of an axe specialist. Like an axe-wielder, a longsword focuses on pure damage at the expense of anything remotely resembling a defensive stat, but with Serenity to regen AC and Serpent Fang to leech health, a longsword fighter is almost entirely self-sufficient. A longsword build is one of the best solo specs in the game, and it does a fair bit of damage in a group environment to boot.
Bow
The bow is a strange weapon in White Knight Chronicles. It's the only weapon spec with a full contingent of both status ailments and elemental attacks, which makes a dedicated archer sort of a low-rent mage. It's also the only weapon that inflicts physical damage at range, which can make it surprisingly versatile. A good archer can shoot a boss or miniboss right in the head whenever he feels like it, which can knock the boss off-balance or unconscious more or less at will. The other advantage to equipping a bow is that the character using it, when controlled by the AI, will stay away from the fight. If an AI character is using a melee weapon, they tend to hover in melee range, which can get them pummeled by AoE attacks like Trample. The bow, as such, finds a certain degree of utility in the singleplayer game as AI stupidity insurance.
Page 9 of 38© 2010 IGN Entertainment, Inc.

Staff
The staff is another odd-man-out weapon specialization, because its tree is designed from the ground up to complement spellcasting. If you go with a staff from the start of the game, you wind up with a number of weak combos and a few buffs that don't actually do anything for you. You need a firm background in divine or elemental magic before a staff's value becomes apparent. It also has a bunch of caster-friendly stat bumps like MP and INT Up. If you want a strong dedicated spellcaster, they need a staff; it's that simple. In the singleplayer game, the drawback of a staff is that it's a melee weapon. An AI character with a staff, even if he's set to "Stay Safe," tends to linger just inside a monster's melee range. If you equip a staff on a character, it's a good idea to take direct control and keep them out of the line of fire.
Divine Magic
This tree covers healing, removing status ailments, buffs, and debuffs. As such, it's arguably the most important tree in the game, and you should have at least one character focused on it from the beginning. Devote at least one full bar to anti-status spells, let the AI drive the character with "Heal First," and never worry about healing or status again. Your reward for maxing out the divine magic tree is the ability to restore MP for free with Knowledge of Holy Magic. It's well worth the points spent to reach it.
Elemental Magic
While most of the weapon skill trees feature an elemental attack or two, elemental magic focuses on big, slow-casting direct nukes. You can also use the various elemental Shield spells to raise a target's resistance to elemental attack, which can come in very handy near the end of the game. It's worth mentioning here that as you rank up and find better equipment, the higher-rank elemental spells actually become less useful. Dragonfire, for example, costs 28 MP and 1 AC, and can hit for something like 220 damage. A simple Flame Lance only costs 8 MP and does 120 damage; if you're exploiting an enemy's elemental vulnerability, this can go up to 150. There's almost no reason to use the higher-ranked nukes, as they're just not as efficient as your theoretically weaker spells. Moreso than any other tree, it's important to max out an elemental magician's skills as soon as possible. The final skill in the elemental magic tree, Spirit Lore, cuts the MP cost of all elemental spells by around 25%, rounding down. This turns an elemental mage into a remarkably efficient engine of destruction, especially when paired with readily accessible buffs like Spell Boost. You can throw around six-MP Flame/Arctic Lances at will, which lets you blast through fights very quickly.
Page 10 of 38© 2010 IGN Entertainment, Inc.

Party Roles
Tank
A "tank" in White Knight Chronicles is a sword or spear specialist, wearing heavy armor and carrying a shield. At the beginning of a miniboss or boss fight, hit an enemy with Provoke, then pop a move like Guardian Stance to reduce incoming damage. You can also dish out some impressive damage with long combos, using skills like Pentaslam or Air Raid.
Melee Damage
If you're in a group or in singleplayer, an axe is the only choice here. Once you've finished off the tree, start putting points into longsword to double-dip on the stat gains. A seven-hit combo from an axe specialist is kind of like hitting someone with a passenger train.
Paladin
While they aren't easy to come by, shortswords (i.e. a sai) combine decent ATK with a fair bit of MAG. You can also use them with a shield, allowing the character to dabble in melee combat without taking prohibitive amounts of damage. A "paladin," then, puts points in the sword and divine magic trees, becoming a sort of defensive specialist.
Ranged Damage
You can go one of two ways with this. One is to heavily specialize in elemental magic, equip a staff, and wear light armor. Once you've maxed out the elemental magic tree, this allows you to fire off extremely efficient and powerful direct nukes in rapid succession, but it also means you're an aggro magnet. When you learn it, you can use the staff skill Nature Meld to temporarily drop threat, which helps to some degree. The other option is to equip a bow, wear medium and light armor, and put points in the sword tree to scoop up all the DEX and AGI bumps. You can do respectable damage this way, and can combo bosses and minibosses in the face for cheap stuns. The numbers won't be quite as big as they are for an elemental spellcaster, but you can make up for that with intelligent use of combos and status ailments.
Healer
Wear light armor, put every point you can scrape together into divine magic, and then go into the staff tree. There's not much more to say than that. You could also use a bow to keep the character out of the line of fire, without penalizing the character's healing too much. Just keep in mind that you can't use staff skills without having a staff equipped.
Weapon Skills Party Roles & Recommendations
Page 11 of 38© 2010 IGN Entertainment, Inc.

Mage
Like the aforementioned healer build, purchase everything in the elemental magic tree, grab Spirit Lore, then start learning staff skills.
Recommendations
Your avatar is the only character in the singleplayer game that has access to all eight skill trees, so you can do anything you want with it. All of the story characters, conversely, have two inaccessible trees; they cannot learn those skills or equip those weapons at all.
This limits the story characters' flexibility to some extent. Leonard, for example, cannot use staves or spears, which means he won't be as good of a spellcaster or tank as somebody who isn't so limited. You can certainly make him into a spellcaster or tank, but without the extra stats from his forbidden skill trees, he won't be as good at it as, say, Yulie.
For your first time through the singleplayer game, you'll want two tanks, two healers, and two damage dealers. This allows you to swap to a different character if one is low on AC or MP in the field.
Yulie and Kara work well as tanks, mages, or healers; Caesar and Leonard are good with axes, bows, or longswords; and Eldore can be made into a designated spellcaster. You can make your avatar into whatever sort of character you need the most, but I'd caution you to keep one eye on the post-game. An archer or healer will have a very hard time soloing Guild quests.
White Knight Chronicles Walkthrough
Author Note
This walkthrough covers the singleplayer campaign of White Knight Chronicles. During the game, I did not run any missions for the Guild and I didn't grind the Boot Camp at all. I finished the game with my characters at level 31. Your mileage may vary.
Balastor Plain
Parma
Balastor Plain Revisited
Beneath Balandor
Balandor
Greydall Plains
»
»
»
»
»
»
= Balastor Plain / Parma Balastor Plain / Beneath Balandor Balandor / Greydall Plains »
Page 12 of 38© 2010 IGN Entertainment, Inc.

Nordia Tunnels
Lagnish Desert
Albana
Sand Maze
Flandar Trail
The Free City of Greede
Greede's Underbelly
Bunker Lode Caverns
Balandor
Balastor Plain
Waterfall Cave
Frass Chasm East
Baccea
Frass Chasm West
Greaverback
Van Haven Waste
Sinca Village
Dogma Rift
Dogma Rift: Ruins
Dogma Ruins: Teleport Maze
»
»
»
»
»
»
»
»
»
»
»
»
»
»
»
»
»
»
»
»
Page 13 of 38© 2010 IGN Entertainment, Inc.

Balastor Plain
After a series of cutscenes and a short trip through the streets of Balandor, you're left to your own devices on Balastor Plain. Like most of the maps in White Knight Chronicles, Balastor Plain is huge, but you only care about a small part of it right now. Explore as much as you want, or as much as you can stand while Leonard's worried about his job.
The enemies near Balandor have a very short aggro radius and can be evaded without much work as long as you stay on the road. The closer you get to Parma, the more aggressive the monsters get, until you're fighting a running battle against giant vespids and Polkans. They shouldn't pose a serious threat to you, even at level 1.
Parma
Move south to meet Yulie and trigger a cutscene or two. When that's all said and done, your mission is to search the town for Raus the cattle driver.
Raus is back by the village entrance in the stable yard, but Parma has a couple of treasures hidden throughout it. On the top floor of the Chief's House, on the southwest part of town, you can find a chest containing a pair of brass earrings, which are great for a low-level tank. There's also a bag of gold dust in a chest near the town's east exit, which can be sold for 500g.
= Balastor Plain / Parma Balastor Plain / Beneath Balandor Balandor / Greydall Plains »
Page 14 of 38© 2010 IGN Entertainment, Inc.

Balastor Plain Revisited
With Yulie along for the ride, your goal is to escort Raus back to Balandor. The toughest part of the trip is right outside Parma, where the Polkans and giant vespids will come after you in droves. The further you go, the easier it gets. If a monster gets close enough to Raus, it will attack him and his wagon, but he can really take care of himself.
Now isn't a bad time to grind a little bit and get a feel for the game's combat system. You may want to get Leonard up to level 5 or so, and to teach him a few of the early divine spells. Fortify, Inspire, Cure, and Heal will make the next part of the game a bit easier.
About two-thirds of the way back to Balandor, you'll encounter a giant Troll. While you'll fight more vicious Trolls later in the game, this one is essentially a training dummy and can be treated as such. You receive two chromium pearls lv. 1 for defeating the Troll.
Before you reenter Balandor, take a moment and put all of your heal potions and similar consumables into Leonard's inventory.
Beneath Balandor
Getting back to the city means you get to watch several cutscenes right in a row. When all's said and done, Leonard and Cisna are on their own in the dungeons beneath the castle.
There are a number of heal potions in treasure chests along the way, and the Magi soldiers you encounter in this dungeon set a tradition of mediocrity that will persist throughout the game. (Seriously, Magi are punching bags.) Even so, Leonard tends to be outnumbered two or three to one at times, so you'll need to preemptively heal a lot. It also helps if you cast Inspire and Fortify on yourself right before a fight starts.
When you reach the end of the dungeon, save at the logic stone, as you've got a couple of boss fights coming
= Balastor Plain / Parma Balastor Plain / Beneath Balandor Balandor / Greydall Plains »
Page 15 of 38© 2010 IGN Entertainment, Inc.

up.
First off, it's Leonard vs. the Phantom. The Phantom has a number of scary-sounding attacks like Skybender or Riftblade which usually do between 9 and 15 damage to Leonard.
The one real risk here is if he uncorks White Pulse while you're low on health; this inflicts 14-16 damage and knocks you sprawling, which usually gives him enough time to land a followup attack before Leonard's back on his feet. Fortunately, it takes him a few seconds between readying White Pulse and firing it, which gives you the chance to proactively heal.
As long as you don't allow your health to get to a point where a sudden 30-point damage spike could kill you, you've got this one in the bag.
For winning, you receive the White Knight ark and Whitesteel, allowing Leonard to go Voltron whenever necessary. You now get to test out its moves in a drag-out match against the Pyredaemos, the beast that's been wrecking up Balandor.
There's not much to this fight, and unless you're reasonably lucky with critical hits and blocks, you should finish off the Pyredaemos just before the White Knight runs out of MP. Keep beating it in the head with Thrust and Slash for a chance to knock it off-balance, and save the high-powered Crossfire move for an emergency. It doesn't do that much more damage than plain old Slash at this point in time.
Balandor
You now have a quest, and a new party member. Make sure to spend Eldore's accumulated skill points before you enter the field.
Before you leave Balandor, spend some of the cash you've been accumulating. Specifically, the jeweler on the east side of town sells a number of inexpensive rings that give small stat boosts (DEF 1, MAG 1, etc.). They aren't much, but you don't have any accessories at all at the moment, and it'll be a long time before you find anything better. You can also pick up a suit of chainmail at the armory for your tank.
Greydall Plains
This enormous map is where White Knight Chronicles starts to get interesting. It's a long haul to the next stop on your journey.
= Balastor Plain / Parma Balastor Plain / Beneath Balandor Balandor / Greydall Plains »
Page 16 of 38© 2010 IGN Entertainment, Inc.

(That said, there's a set of chainmail and a pair of chainmail trousers inside treasure chests that are just south of your destination on the Greydall Plain, which you'll practically trip over, so if you're feeling thifty you can just grab that as you go. You can also find a knight's cloak at C6, which adds 3 DEF, making it one of the best tanking accessories in the singleplayer game.)
Most of the local monsters are the same stuff you were fighting on the Balastor Plain, but Greydall Plains is when you first start fighting minibosses. The Trolls here are a lot tougher than the one you fought before, and until you have a few more levels under your belt, you'll probably want to use the White Knight on them.
Treants are a bit weaker and don't automatically attack you, but you may want to pick a fight with them anyway; fire spells tear them up, and they're worth a lot of experience and money compared to the other local monsters.
On your way towards your destination, check the dead end at G4 and the peninsula at F4 for a free pair of chainmail trousers and a chainmail shirt, respectively. Waste not, want not.
Right outside the Nordia Tunnels entrance, you'll run into a special guest star.
Ahwahnee
If you have an elemental caster that knows Water Shield, now isn't a bad time to use it. Ahwahnee can belly-flop to deal 20-30 damage to anyone in melee range, blast the entire party with Icicle Drop for 12-16 ice damage, or hit a single target with Glacial Tooth for around 30 ice damage. As you might expect, fire spells do full damage to Ahwahnee, while other elemental spells aren't really worth using. This is the first boss you encounter that's worth using Provoke or Threaten on, as any caster who starts flamebroiling Ahwahnee will almost certainly pull aggro.
Nordia Tunnels
You can and probably should backtrack to Balandor from the World Map before heading into the Nordia Tunnels. Dismantle your old gear, enhance your new stuff, and upgrade your tank to Copper armor if possible.
You cannot use aerial combos inside some parts of the Nordia Tunnels, as the ceiling's too low, and you'll fight a number of enemies like waterspider sprogs that favor frequent use of poison. Heading east will lead you to a locked gate, forcing you to head back west in search of a key.
As you start moving into the southwestern part of the tunnels, you'll begin encountering basilisks and fire elementals; the latter go down to one shot of a spell like Arctic Lance. Stop along the way at B3 to loot a bone bow, then keep forging south to find the Nordia tunnel key inside a treasure chest at B4.
« Nordia Tunnels / Lagnish Desert Albana Sand Maze / Flandar Trail Greede »
Page 17 of 38© 2010 IGN Entertainment, Inc.
Backtrack, fighting the respawned sprogs as you go, and unlock the gate. There's a cutscene behind it, naturally, and after that, you're suddenly fighting Magi again. Specifically, you're up against swordsmen, spearmen, axemasters, and their boss, Dragias.
Dragias
Dragias spends the first phase of the fight running around using Run Through and melee attacks, hitting for between 20 and 25 damage apiece and spreading the pain around a bit. Once he's taken about 200 points of damage, though, he'll spice things up a bit by transforming into the Black Knight. As the Black Knight, Dragias is remarkably resistant to elemental and physical attack, so the only real thing to do is sic the White Knight on him. Take control of another character and pepper the Black Knight with spells and missile fire while the White Knight tanks him. He really can't handle much of that before kicking over.
Defeating Dragias earns you a Sainted Pride, your first Incorruptus Soul.
Lagnish Desert
The desert is full of wild boars, fire elementals, scorpions (which, oddly, paralyze more than they poison), and killer vespids. In other words, it's nothing you can't handle on your way to Albana. This is that stretch of every Japanese-RPG where the enemies all hit hard but have low defense, so you should be giving as good as you're getting.
The minibosses are a bit tricky, though. Fire giants can be burst down by an elemental caster's Arctic Lance, but the Megalo Tigris can be extremely dangerous. It usually attacks by casting Lightning Bolt, dealing about 50 points of damage to a single target, but if it jumps backwards, it's warming up to use Behemoth Run. This hits every character in a straight line from its point of origin for 50 damage or more, so cast Provoke and run away from the rest of your group.
Page 18 of 38© 2010 IGN Entertainment, Inc.
Albana
The local armory has upgrades for just about every slot for all of your characters, so cash in now. Next, stop by the local pub to gather some information.
When you take control of Leonard, talk to every available customer in the bar at least once to start a cutscene. The ensuing barroom brawl spills outside, and pits your active party members against four Rogues: the Champion, Warrior, Hunter, and Spellcaster.
None of them are particularly dangerous or durable alone, but they can pile on a lot of damage in the first seconds of the fight. Burn a combo or two and take a couple of them out as fast as you can.
Don't use up too many AC or too much MP, though, as you're not done yet.
Alphamiden Gigas
Gigas takes light damage from magical attack, but has surprisingly low defense. She also hits like a truck, which means you'll want a dedicated healer going into this fight. Despite what your characters say, you can win this without the White Knight. Keep pummeling it with strong combos and you should take it out before it can inflict too much damage.
Your reward for winning this fight is a new party member, Kara, who'll be sitting in the guest slot. She contributes to fights with a weak melee attack and Fireball spells, but she has enough HP that she's probably not in any real danger.
Head towards the village's south gate for a cutscene,
« Nordia Tunnels / Lagnish Desert Albana Sand Maze / Flandar Trail Greede »
Page 19 of 38© 2010 IGN Entertainment, Inc.

then double back to the large building in the village's northwest corner and talk to the Don's men.
Fortunately, the ensuing fetch quest takes about fifteen minutes to complete. The oasis you're supposed to visit is right around the corner in the Lagnish Desert. Deliver the letter, receive one in return, and go south from the oasis to a dead end, where you'll find a claymore in a treasure chest.
Return to Albana and to the don's house to receive a pass for the south gate. As a bonus, the Don will perform weapon fusions on your behalf from this point forward. Finally, if you've happened across any of the binding shops in the game, such as the one in Balandor, you can now make use of them if you like. If you turn around and reenter the Don's lair, there are two chests on either side of the main stairwell, containing a guardian pearl and a chromium pearl, each lvl. 2.
Take a quick moment to make sure you've bought everything you need, then head south out of Albana to reach the Sand Maze.
Sand Maze
Despite its name, the Sand Maze is relatively straightforward. Head towards the Ruins, but fight carefully. You'll be dealing with fire giants, wild boars, scorpions, and a new enemy, called Golems; these fire off earth-based spells and are best fought with wind magic.
When you reach the ruins, you'll be forced into a series of boss fights with no time to rest in between. Make sure you have a healer in your party before you enter, and if you're having trouble with the fight, grind on the monsters in the Sand Maze until you're close to leveling up.
Gigas x3
Leonard will start this fight as the White Knight. Even with that in mind, three Gigases can put out enough damage that you'll want somebody to be healing the Knight; otherwise, things can get very rough, very fast. Focus fire on the Gigases and take them out one at a time, to minimize the amount of damage you're taking.
Each Gigas drops a chromium pearl lvl. 2 upon its defeat.
Grand Gigas
The Grand Gigas puts out more damage faster than any enemy so far. Behemoth Run hits every party member in a line for about 75 damage, or 40 if it hits the White Knight, and its spells (, such as Flame Lance.) can inflict 40+ damage to the Knight. Once it's taken a few hundred points of damage, a cutscene plays, and Edward gets to revisit the
« Nordia Tunnels / Lagnish Desert Albana Sand Maze / Flandar Trail Greede »
Page 20 of 38© 2010 IGN Entertainment, Inc.
Phantom's lair. You receive the argent shield. The fight then starts over, with the White Knight alone against the Grand Gigas. The Grand Gigas can now Leech health from you, but does so in such small increments that it's practically meaningless. Just burn it down; once you've hit this stage of the fight, it's all over but the bombastic battle theme.
After the battle, you've earned some more chromium pearls, and Kara has officially joined your party. Take a few minutes to buy her equipment at the Albana armory and spend her skill points. She's functionally identical to Yulie.
Flandar Trail
You'll be up against jackals and poison vespids to start with, as the enemies take another jump in difficulty. You won't be able to skip any fights or ; if you're having trouble, farm these monsters for a bit, then double back and stock up on items and equipment at Albana. The local minibosses are ice giants, which are mostly the same as the fire giants from the desert.
At the first fork along the path to the west, turn left to find an old log cabin. Past it at the dead end, there's a Katzbalger sword in a chest.
You'll also encounter an Earth Dragon early on, which does pretty much what you'd expect. You can easily slip by it without effort, or you can sic the White Knight on it; trying to fight it on foot may turn out badly for you. Use wind spells to your benefit; it's guarding a chest containing a mace.
Continue along the trail towards the checkpoint, claiming fencer's guards from a chest by the logic stone, and head up the hill to take your first look at Greede. Past that, further
Ancient Dragon
Between Meteor Ray and Flame Breath, any time the Ancient Dragon starts "drawing in energy" is going to end in some kind of massive trauma for somebody. Fortunately, if you drop a few combos on it or summon the White Knight, it won't be long before a cutscene interrupts your fight. At that point, Leonard will step in and (re-)summon the White Knight to finish the job. Between you and your new ally the Black Knight, the rest of the fight should be easy. Just use Crossfire a few times and it's over.
Fight your way down the corridor beyond, through a few wild boars and poison vespids, to the gondola to Greede.
Page 21 of 38© 2010 IGN Entertainment, Inc.

The Free City of Greede
Talk to one of the Station Agents at the desk in the center of the room to get a train pass, then take the elevator to the east up to 2F. The local shops in Greede sell much-needed armor and weapon upgrades, as well as a bunch of new accessories, including a line of glasses.
Once you're equipped, it's time to go information-gathering again. Go behind the armory and down the stairs, into the shopping arcade on 3F. Inside the pub to the far east, talk to Heti Sharko for some Baccean honey.
With that in hand, go back to the train station and travel to Downtown. You need to get into the Black Cherry, but Jones the guard won't unlock the door unless you have a black market pass.
Fortunately, there's a guy named Shu in Downtown Greede's tavern who'll trade you his pass for the Baccean honey. There's also a treasure chest containing a gold nugget (1000g) down the stairs just southwest of the tavern entrance.
Talk to Jones with your new pass in hand to gain access to the Black Cherry. Head down the hall into the auction house proper, and you'll get your next dangerous adventure hook.
Leonard will mention visiting the merchant quarter to get some more information. The guy you want to talk to is the retired adventurer Pierre, inside the house on the north side of 3F. He'll give you lizard bait.
Return to the world map via the central station and go back to the Flandar Trail. If you went exploring in this area after the Ancient Dragon fight, there was a path just south of the Greede exit that was blocked with a crystalline formation. It's now open. Inside, you'll find a bunch of ice lizards, poison vespids, and ice giants, guarding chests that contain a chromium pearl, a copper crosier, and spiked armor.
Your goal is in grid sector D5, where you'll find a hole in the ground. Drop down it to find a few monsters and a chest containing a bardiche, as well as a new part of the map. Venture forward into the large clearing and use the lizard bait on the spiky nest in the corner of the room.
« Nordia Tunnels / Lagnish Desert Albana Sand Maze / Flandar Trail Greede »
Page 22 of 38© 2010 IGN Entertainment, Inc.

After all that build-up, though, the fire lizard isn't actually that big of a deal. It comes accompanied by two of the ice lizards you've been pummelling so far, and can use Sonic Voice to lower accuracy in a small area. Defeat all three lizards to get a firestone.
The passageway at the back of the fire lizard's room leads to one of the dead ends on the south end of the Flandar Trail, which makes it easy to backtrack to the world map. From there, you can now go straight to Downtown Greede.
The Free City of Greede
Head back to the black market, where Kara will instantly become the greatest Japanese-RPG character of all time. You'll receive the Goddess of Lepanne.
Return to the Central Station and go north. Talk to one of the mansion guards to get your audience with the Count, and for Caesar to fast-talk his way into your party.
Your next mission is to find Amir, who's drinking at the tavern in downtown Greede. Thankfully, he's happy to help you out, but you'll need to get through a lengthy dungeon first.
You've probably seen the Underbelly's entrance before now, but it was locked. Just walk around the door guard; it turns out the Underbelly isn't as off-limits as he thinks it is.
Greede's Underbelly
Amir occupies your guest party slot for this dungeon crawl. He has a lot of health, can cast Heal, and generally stays out of the way. The only problem is that he occasionally goes crazy and runs off after distant monsters, but Amir's usually tough enough to take it.
In the southern room of the entry area, open the chest to find a chromium pearl lv. 4, and never pass up the opportunity to search a crate; there's a lot of ore down here, as you might expect from the main shipping corridor in a mining town.
In the opening stretch, you'll fight a lot of the spiders you found back in the mines, as well as the occasional wind elemental. The spiders usually cast Web, which will lower a character's speed for a surprisingly long period of time.
When you reach your first lever, open the left gate first. You'll find a chromium pearl lv. 3 in a treasure chest
« Greede's Underbelly Bunker Lode Balandor / Waterfall Cave / Frass Chasm E »
Page 23 of 38© 2010 IGN Entertainment, Inc.
along the path, as well as a pair of release levers. Throw them both to unlock the gate to the reservoir area, then return to the original lever and unlock the right gate.
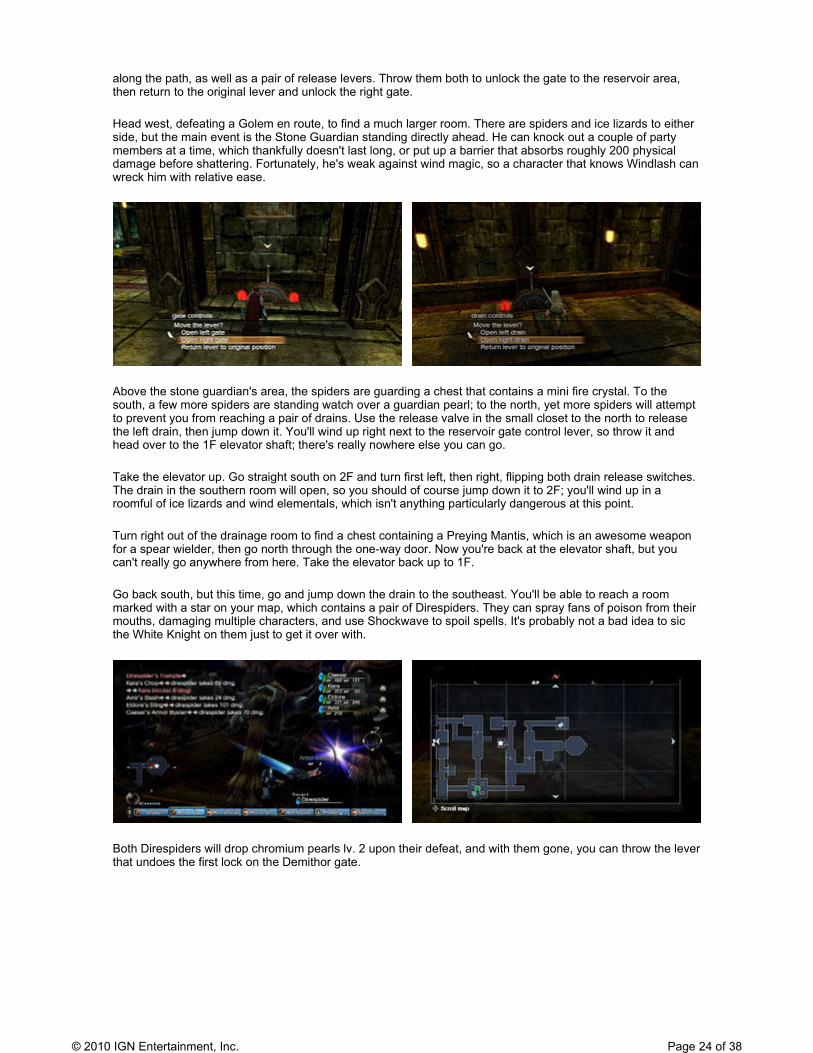
Head west, defeating a Golem en route, to find a much larger room. There are spiders and ice lizards to either side, but the main event is the Stone Guardian standing directly ahead. He can knock out a couple of party members at a time, which thankfully doesn't last long, or put up a barrier that absorbs roughly 200 physical damage before shattering. Fortunately, he's weak against wind magic, so a character that knows Windlash can wreck him with relative ease.
Above the stone guardian's area, the spiders are guarding a chest that contains a mini fire crystal. To the south, a few more spiders are standing watch over a guardian pearl; to the north, yet more spiders will attempt to prevent you from reaching a pair of drains. Use the release valve in the small closet to the north to release the left drain, then jump down it. You'll wind up right next to the reservoir gate control lever, so throw it and head over to the 1F elevator shaft; there's really nowhere else you can go.
Take the elevator up. Go straight south on 2F and turn first left, then right, flipping both drain release switches. The drain in the southern room will open, so you should of course jump down it to 2F; you'll wind up in a roomful of ice lizards and wind elementals, which isn't anything particularly dangerous at this point.
Turn right out of the drainage room to find a chest containing a Preying Mantis, which is an awesome weapon for a spear wielder, then go north through the one-way door. Now you're back at the elevator shaft, but you can't really go anywhere from here. Take the elevator back up to 1F.
Go back south, but this time, go and jump down the drain to the southeast. You'll be able to reach a room marked with a star on your map, which contains a pair of Direspiders. They can spray fans of poison from their mouths, damaging multiple characters, and use Shockwave to spoil spells. It's probably not a bad idea to sic the White Knight on them just to get it over with.
Both Direspiders will drop chromium pearls lv. 2 upon their defeat, and with them gone, you can throw the lever that undoes the first lock on the Demithor gate.
Page 24 of 38© 2010 IGN Entertainment, Inc.
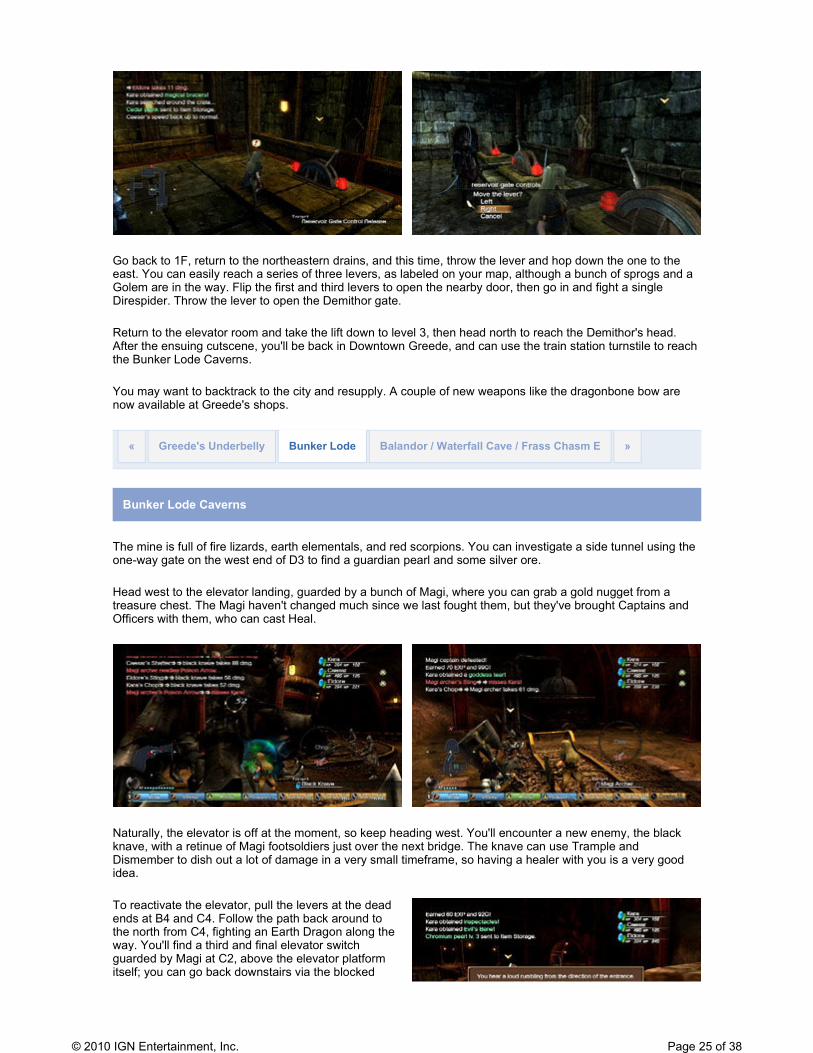
Go back to 1F, return to the northeastern drains, and this time, throw the lever and hop down the one to the east. You can easily reach a series of three levers, as labeled on your map, although a bunch of sprogs and a Golem are in the way. Flip the first and third levers to open the nearby door, then go in and fight a single Direspider. Throw the lever to open the Demithor gate.
Return to the elevator room and take the lift down to level 3, then head north to reach the Demithor's head. After the ensuing cutscene, you'll be back in Downtown Greede, and can use the train station turnstile to reach the Bunker Lode Caverns.
You may want to backtrack to the city and resupply. A couple of new weapons like the dragonbone bow are now available at Greede's shops.
Bunker Lode Caverns
The mine is full of fire lizards, earth elementals, and red scorpions. You can investigate a side tunnel using the one-way gate on the west end of D3 to find a guardian pearl and some silver ore.
Head west to the elevator landing, guarded by a bunch of Magi, where you can grab a gold nugget from a treasure chest. The Magi haven't changed much since we last fought them, but they've brought Captains and Officers with them, who can cast Heal.
Naturally, the elevator is off at the moment, so keep heading west. You'll encounter a new enemy, the black knave, with a retinue of Magi footsoldiers just over the next bridge. The knave can use Trample and Dismember to dish out a lot of damage in a very small timeframe, so having a healer with you is a very good idea.
To reactivate the elevator, pull the levers at the dead ends at B4 and C4. Follow the path back around to the north from C4, fighting an Earth Dragon along the way. You'll find a third and final elevator switch guarded by Magi at C2, above the elevator platform itself; you can go back downstairs via the blocked
« Greede's Underbelly Bunker Lode Balandor / Waterfall Cave / Frass Chasm E »
Page 25 of 38© 2010 IGN Entertainment, Inc.

staircase. There's a chromium pearl lv. 3 in a chest nearby.
Take the elevator down to B1. You can grab a greatsword from a chest at the end of the side tunnel in B3, but otherwise, just head straight west, fighting through more Magi and a black knave. Be sure to grab the Heroic Barrier Incorruptus Soul from a chest along the side of the tunnel at B3, just south of the logic stone.
Before you enter the next area, make absolutely sure that Caesar is carrying at least one stack of heal potions. IIs would be good; IIIs would be better.
Belcitane
Belcitane comes with a retinue of Magi Swordsmen, who'll close in on and pummel your healer if given half a chance. Fortunately, Belcitane himself is an ordinary enemy with a couple of painful spells like This'll Sting, and can be neutralized relatively easily if you just stay on top of him. Most of his attacks have wind-up time, allowing you to prevent them entirely by knocking him down.
Betatria Gigas, Betapente Gigas
This looks a lot worse than it is. The Gigases can put a single target to sleep with Evil Eye, or cast AoE nukes like Blizzard and Comet, but they have surprisingly low HP and DEF. You can chew them up with remarkable ease by landing seven-hit combos.
Dragon Matriarch
The Matriarch has a number of extremely powerful direct-damage nukes like Earth Crusher and Fire Breath, which make Earth and Fire Shield both very good ideas for this fight. Most of her melee attacks also knock the target sprawling, so her tank will spend most of the fight on his back. Use whatever abilities you have that lower her damage output, like Slow, Mollify, Arm Breaker, and Shield Breaker. Even when she's fully debuffed, the Matriarch hits like a truck, so keep one eye on your healer's MP.
Defeating her is worth a chromium pearl lv. 3 and a guardian pearl lv. 3.
Sargatanas
Caesar receives the Dragon Knight ark and Larvaint right before this fight starts, and you get to test-drive it against Belcitane's Gigas. If Sargatanas gathers power, his ATK goes up right before he delivers a Punishing Blow/Knuckle
Page 26 of 38© 2010 IGN Entertainment, Inc.
Sammy/Hellfire Bullet/Burst Knuckle. Fortunately, even with that, he's not exactly a melee superstar, and will usually smack you for around 60 damage a hit. The real problem is that while Sargatanas doesn't do a lot of damage at a time, he has enough health that he can win by sheer dogged persistence. Unless you have heal potions, Sargatanas will eventually do enough damage to kill the Dragon Knight, and you won't be able to do anything about it. Keep attacking Sargatanas in the Evil Eye, and pop a heal potion whenever the Dragon Knight gets down to 100-200 HP. If you're prepared, this fight isn't a big deal at all.
You receive a Dragonlord's Pride for victory.
Balandor
The local armory's gotten new goods in, including the powerful plate and chrome armor sets. After the boss fights you just went through, you'll probably also want to replenish your store of consumables.
Talk to Simon, who's standing right in front of you, for a tip as to where to find Medius. Many of the people along the road have further information about where to find Medius's house; you're looking for the only house with a blue roof, which is in F10.
Head into the yard by the kids for a cutscene.
Balastor Plain
The local enemies have leveled up since your last trip through Balastor Plain; their drops and attack patterns haven't changed, but their stats have. This includes the cash they drop, so it may be worth farming the Polkans for a while if you're low on cash.
Head east from Balandor to the star on your map.
Waterfall Cave
Grab a heavy machete from the chest to the right as you enter, then turn left and head for the star.
Black Knight
It's transformed Leonard and Caesar vs. the Black Knight. This is basically rock-‘em sock-‘em robots, and the Black Knight will briefly halt the fight after it takes roughly 1000 damage. When the fight resumes, the Black Knight can heal itself for about 800 with Dinivas Boon. Like Sargatanas, it may be able to win this fight through sheer persistence rather than via any tactical or numerical advantage, so be sure to bring heal
« Greede's Underbelly Bunker Lode Balandor / Waterfall Cave / Frass Chasm E »
Page 27 of 38© 2010 IGN Entertainment, Inc.
potions.
After the fight, head out to the East Gate of Ballandor to continue the story. Head to Greede via the world map, then use the turnstile.
Frass Chasm East
For right now, Frass Chasm is a straight line to the south. You're up against a procession of umbral flowers, spider sprogs, upgraded scorpions, and troll kings; the latter are melee-focused minibosses that can do a lot of physical damage. Most of the ordinary monsters around here can paralyze or poison your characters, so take appropriate precautions.
Don't miss the chromium pearl by the side of the trail early on, and be sure to defeat the troll king at M3 for a free scale shield.
Grab the lump of gold (a 5000g monetary item) from near the second logic stone, and take note of the giant dandelion; later, you'll be able to use this to access the other half of this very large map. For now, though, all you can do is head south.
There's a boss fight against a single Direspider shortly thereafter, which has acquired a hard-hitting move called Thread Needle but is otherwise unremarkable compared to past Direspiders.
Grab the light shell armor in a chest at K6, just as the path turns west, and follow that path all the way to its end. You'll fight a couple of dire waterspiders, which have vicious Sleep Web and Shockwave (short-ranged knockdown to all PCs) spells, in exchange for access to a chest that contains a guardian pearl lv. 3.
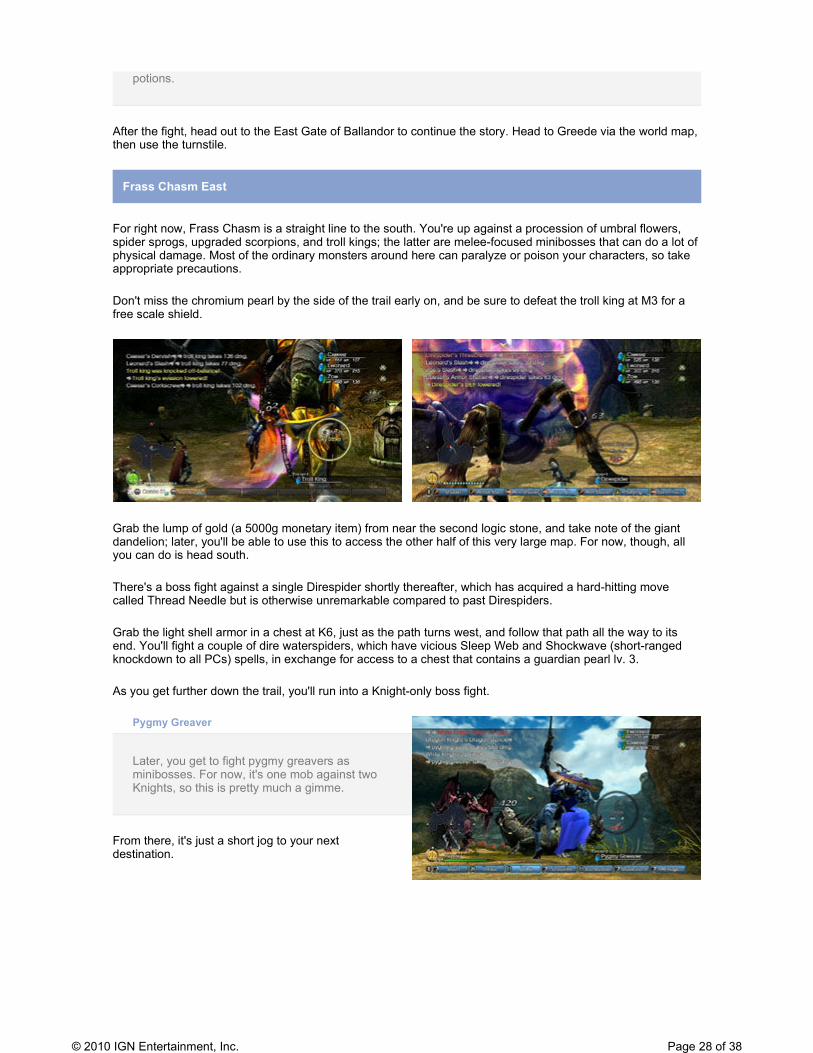
As you get further down the trail, you'll run into a Knight-only boss fight.
Pygmy Greaver
Later, you get to fight pygmy greavers as minibosses. For now, it's one mob against two Knights, so this is pretty much a gimme.
From there, it's just a short jog to your next destination.
Page 28 of 38© 2010 IGN Entertainment, Inc.

Baccea
Once you've cleared up some unfortunate misunderstandings, stimulate Baccea's economy by upgrading your light and medium armor at the armory. Once you've restocked your goods, head west.
Frass Chasm West
You've reached the other half of the map, and must go all the way northwest to progress. To use the giant dandelions effectively, watch the seeds that are blowing from them, and only use them to travel across the gorge when they're heading in the direction you need. It may take a while for the wind to shift, but it will do so eventually.
The pygmy greaver you fought earlier is now a frequently-encountered miniboss. It's not a bad idea to alternate between Leonard and Caesar's Knights; the greavers do enough damage that they're painful to fight on foot.
To get the heater shield in the chest at C5, you need to go up to C4 and take a south-blowing dandelion. Likewise, when you drop onto D3, drop down to C3 to find a chest with a sai in it. This shortsword comes with a healthy amount of MAG, which makes it a good
weapon for a character using the "paladin" hybrid build suggested above.
As you approach the end, grab the ento tachi at F4, then summon a Knight to help deal with the pair of pygmy greavers in the large clearing at E4. They're the last real obstacle between you and the end of this dungeon.
Lamia Comitis, Black Knight
Both bosses are capable of dishing out roughly 70-90 damage to either Knight whenever they feel like it, so again, this is a very good time to have a bunch of heal potions in Leonard and Caesar's inventories. Otherwise, the bosses may win this one by virtue of sheer damage output. Focus fire on the Lamia first. After she's taken enough damage, a cutscene takes the Knight out of play, which simplifies the fight considerably. Even then, the Lamia attacks often enough and viciously
« Baccea / Frass Chasm W / Greaverback Van Haven Waste Dogma Rift Dogma Ruins
Page 29 of 38© 2010 IGN Entertainment, Inc.

enough that she may be able to destroy a Knight before she goes down.
After the fight, Leonard's White Knight is now equipped with the sword Talion, and Kara has left the group permanently. You can still access her inventory, however, so don't worry about losing any gear.
Greaverback
Osmund the Windwalker is occupying the guest slot for now. He knows Windlash, fittingly enough, but his melee attack is embarrassingly weak.
Head south from your current position; there's nothing towards the west but more monsters. Just go after that star and...
Greaver
The Greaver's antennae each have around 180 HP, which isn't much at your current level. Dispatch as many of them as possible, as quickly as possible, to avoid taking too much damage from their Poison Spray and Sleep Touch. The antennae can each leech up to about 55 HP from a character at a time, so try to dispatch them with three- and four-hit combos. Even with that, though, your healer may be sucking fumes by the time all the little antennae are down. Now is a good time to pull out a Knight and lower the boom on the central antenna. Unfortunately, before you have too much time to damage the Greaver Antenna itself, it can and will respawn all of the smaller antennae. At this point, your best bet may be to disengage your footsoldiers and let the Knight you summoned duke it out with the Greaver. Use items to replenish your MP and HP, then dispatch the antennae all over again and hope the Greaver gives out before you do.
After the fight, you're back in Baccea. Visit the village chief's hut to find Setti, who'll join the party as a guest. He's an archer, and will heal himself if he gets too low. Mostly, he's a footnote.
Van Haven Waste
The Waste is home to a number of Jackals and Scorpions, which are powered-up versions of the mobs you've
« Baccea / Frass Chasm W / Greaverback Van Haven Waste Dogma Rift Dogma Ruins
Page 30 of 38© 2010 IGN Entertainment, Inc.

fought before. You should also watch out for the extra-strength Cerberus (Rend, Behemoth Dash), a huge melee mob that fights kind of like a giant version of the Jackal.
The small thing on the map of the island where you start that looks like an inverted W is an entrance to an underground catacomb, which has a straightforward layout. Unfortunately, the waterspider sprogs that infest the cavern have a bad habit of putting your characters to Sleep with a far greater hit rate than previously existed, so you may wish to put Awaken into your cast bars for once.
Unfortunately, complications exist, such as the locked stone door at F3. You have to circumvent it by going back aboveground at H3 and circling around. The door at G3—a trend is developing here—is unlocked, and leads into a large cavern where an ice dragon is guarding a chest containing papitaur boots.
Go back above ground at H3 and circle around the island, fighting a Wind Dragon along the way, to go back down into the caverns at H4.
Unfortunately, there's another locked door at the caverns F4, forcing you to ascend at F6 instead, by the logic stone. You can barbecue the Ice Elementals that haunt this stretch of the underground with a quick Bonfire spell.
Once aboveground again, don't get too close to the Pyredaemos in the clearing; you can't drop down to fight it from here, but it can open fire on you with Fireshell to the tune of 70-100 damage to every member of your party. The rest of the island is liberally infested with Wind Dragons, so don't be afraid to avoid fights, or to rest for a while before moving on. Head back below ground at H4.
The first intersection you encounter in this cavern leads to an isolated island at F7-G7, where a large number of Jackals and Basilisks are backing up a Cerberus, and the lot are trying to keep you from reaching a chest containing a sai.
The great stone door at E5 is actually, inexplicably, unlocked. Dispatch the Ice Giant and basilisks beyond it to find a chest containing a grandsword.
Page 31 of 38© 2010 IGN Entertainment, Inc.
This stretch of unlocked doors continues to the west, until finally, at E4, you can access the large green area that you couldn't get to earlier. Save at the logic stone, then release the locks on both locked doors and head west. The southern path will lead you in a circle back the way you came, so turn north and follow the path.
Ascend again at E2, then head over to D3 and descend, fighting a souped-up Cerberus (Grenade for AoE fire damage) and a bunch of Jackals and Basilisks. After D3, you can go west to find a dead end, or south to continue; along the way, a left-hand turn leads to a chest you passed before but couldn't reach, containing a guardian pearl lv. 4. Keep going south and save at the logic stone at C4.
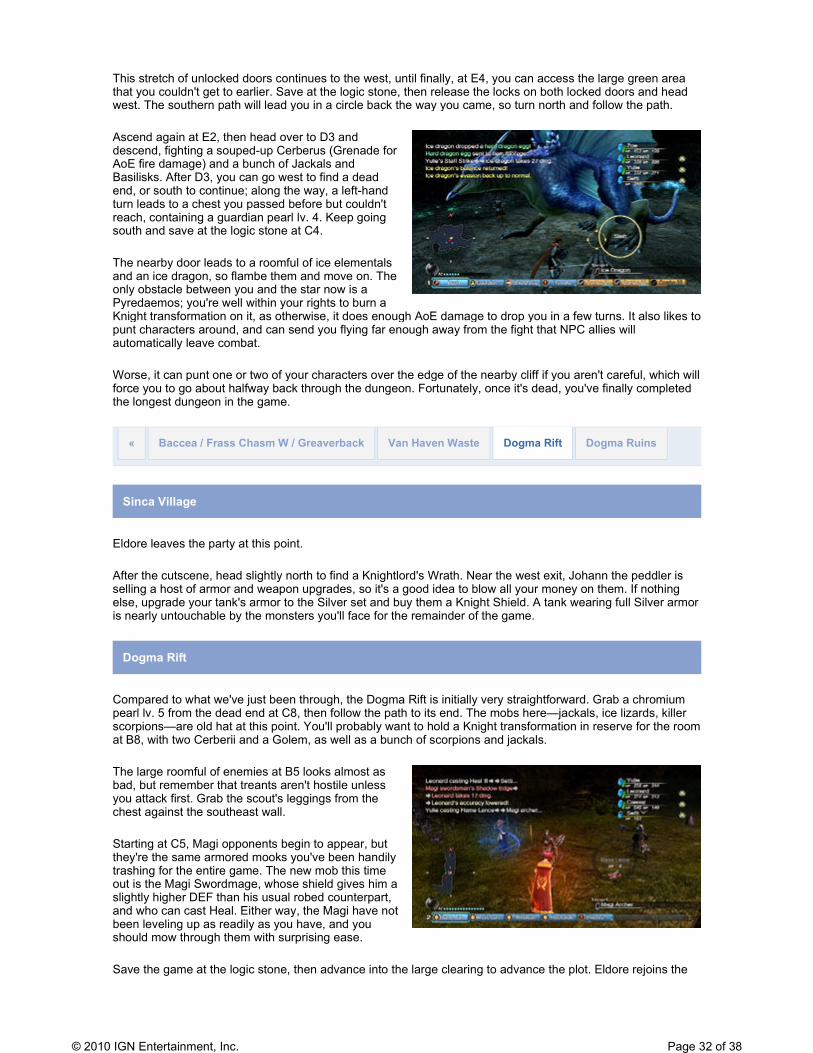
The nearby door leads to a roomful of ice elementals and an ice dragon, so flambe them and move on. The only obstacle between you and the star now is a Pyredaemos; you're well within your rights to burn a Knight transformation on it, as otherwise, it does enough AoE damage to drop you in a few turns. It also likes to punt characters around, and can send you flying far enough away from the fight that NPC allies will automatically leave combat.
Worse, it can punt one or two of your characters over the edge of the nearby cliff if you aren't careful, which will force you to go about halfway back through the dungeon. Fortunately, once it's dead, you've finally completed the longest dungeon in the game.
Sinca Village
Eldore leaves the party at this point.
After the cutscene, head slightly north to find a Knightlord's Wrath. Near the west exit, Johann the peddler is selling a host of armor and weapon upgrades, so it's a good idea to blow all your money on them. If nothing else, upgrade your tank's armor to the Silver set and buy them a Knight Shield. A tank wearing full Silver armor is nearly untouchable by the monsters you'll face for the remainder of the game.
Dogma Rift
Compared to what we've just been through, the Dogma Rift is initially very straightforward. Grab a chromium pearl lv. 5 from the dead end at C8, then follow the path to its end. The mobs here—jackals, ice lizards, killer scorpions—are old hat at this point. You'll probably want to hold a Knight transformation in reserve for the room at B8, with two Cerberii and a Golem, as well as a bunch of scorpions and jackals.
The large roomful of enemies at B5 looks almost as bad, but remember that treants aren't hostile unless you attack first. Grab the scout's leggings from the chest against the southeast wall.
Starting at C5, Magi opponents begin to appear, but they're the same armored mooks you've been handily trashing for the entire game. The new mob this time out is the Magi Swordmage, whose shield gives him a slightly higher DEF than his usual robed counterpart, and who can cast Heal. Either way, the Magi have not been leveling up as readily as you have, and you should mow through them with surprising ease.
Save the game at the logic stone, then advance into the large clearing to advance the plot. Eldore rejoins the
« Baccea / Frass Chasm W / Greaverback Van Haven Waste Dogma Rift Dogma Ruins
Page 32 of 38© 2010 IGN Entertainment, Inc.
party.
Pyredaemos Rex
Like the Pyredaemoses you saw in the Van Haven Waste, fighting the Pyredaemos Rex on foot is a good way to guarantee getting thrown around like a rag doll. Between Trample and Forward Quake, it's nearly impossible to get near enough to the boss to fight it. You can either take a long time and beat the Pyredaemos down bit by bit, or you can summon a Knight and get the battle over with quickly. The Knight's by far the better option.
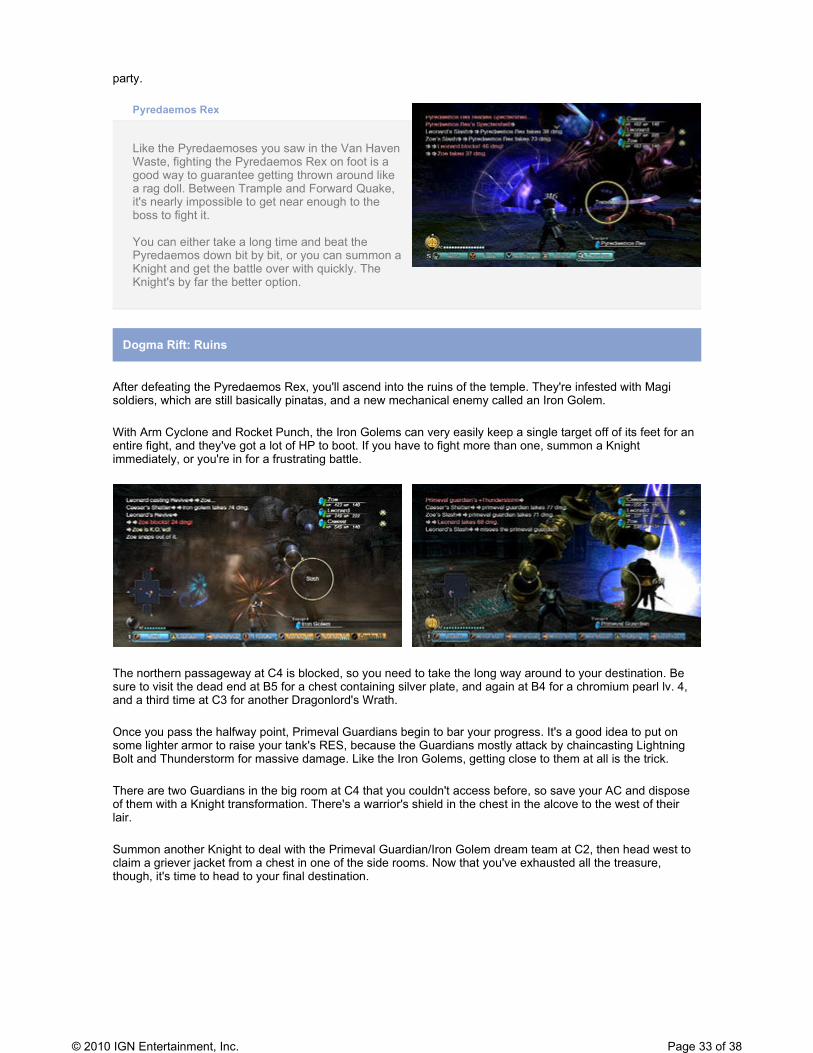
Dogma Rift: Ruins
After defeating the Pyredaemos Rex, you'll ascend into the ruins of the temple. They're infested with Magi soldiers, which are still basically pinatas, and a new mechanical enemy called an Iron Golem.
With Arm Cyclone and Rocket Punch, the Iron Golems can very easily keep a single target off of its feet for an entire fight, and they've got a lot of HP to boot. If you have to fight more than one, summon a Knight immediately, or you're in for a frustrating battle.
The northern passageway at C4 is blocked, so you need to take the long way around to your destination. Be sure to visit the dead end at B5 for a chest containing silver plate, and again at B4 for a chromium pearl lv. 4, and a third time at C3 for another Dragonlord's Wrath.
Once you pass the halfway point, Primeval Guardians begin to bar your progress. It's a good idea to put on some lighter armor to raise your tank's RES, because the Guardians mostly attack by chaincasting Lightning Bolt and Thunderstorm for massive damage. Like the Iron Golems, getting close to them at all is the trick.
There are two Guardians in the big room at C4 that you couldn't access before, so save your AC and dispose of them with a Knight transformation. There's a warrior's shield in the chest in the alcove to the west of their lair.
Summon another Knight to deal with the Primeval Guardian/Iron Golem dream team at C2, then head west to claim a griever jacket from a chest in one of the side rooms. Now that you've exhausted all the treasure, though, it's time to head to your final destination.
Page 33 of 38© 2010 IGN Entertainment, Inc.

Dogma Ruins: Teleport Maze
Head north to enter a new area. This one's just got two accessible warp platforms, and another room you can't reach at the moment; further, the right warp platform is "jammed." Take the left warp to reach another new area, full of the Magi and their robot buddies.
Defeat the Black Knave at B2 in the teleport area to unlock the platform at B1, which will take you to a new area entirely. Here, a bunch of Magi and their Black Knave buddy are in the central area, and when you defeat the Knave, use the north telepad to reach yet another new area.
Head south and defeat the Iron Golem hiding on the west side of the room to activate the southern teleporter. There's nothing down the eastern passageway but a bunch of Magi and a guardian pearl lv. 5.
Teleport to yet another new area to find a Primeval Guardian and a bunch of Magi footsoldiers. Wipe the floor with them to activate the teleporters out, then head south and drop down from the ledge. You're back at the beginning of the maze, but now the eastern teleport pad works.
Teleport to a new area and take on all comers to activate the northeastern teleport pad.
At this point, backtrack and save your game. Stock up on heal and mana potions for your entire active party, and keep a few charge drinks on hand if you have the room. It is a very good idea to bring a mage or archer with you. This is the final battle, and it's the toughest series of fights in the game.
The Sun King
The general theme of the Sun King is "AoE fire damage." Provoke him, then turn him away from the rest of your party. He has surprisingly little health, and should go down quickly. Just the same, you have to fight two more bosses after
« Baccea / Frass Chasm W / Greaverback Van Haven Waste Dogma Rift Dogma Ruins
Page 34 of 38© 2010 IGN Entertainment, Inc.

this, so don't use up too much AC or MP on him.
The Black Knight
Compared to previous battles, the Black Knight is playing keepaway, almost as if he doesn't really want to fight you at all. Most of his moves have a certain readily identifiable theme; Sonic Blade knocks you down from across the room, Skewer knocks you down at melee range, Clemency knocks everyone down in a straight line, and Ebon Gale knocks everyone down who's standing nearby. All of these moves do respectable damage on top of that. It will get rather annoying, rather quicky. The problem is that the Black Knight may not ever come close to defeating you, but he'll use up a lot of your MP before he goes. This is a fight that's here to set you up for the next one. The faster and more efficiently you can get through this battle, the better off you'll be. This is a fight where a ranged damage build really shines, as a melee character will almost never get anywhere near the target. You can do some damage by timing short combos appropriately, allowing a melee character to ignore the Black Knight's knockdowns, but you're better off letting a mage or archer carry the mail.
The Black Usurper
This is the most vicious sequence of fights in the game. The Black Knight is very good at running you out of available resources, and you'll need everything you can scrape together to survive the fight with the Usurper. The Usurper hits extremely hard, to the tune of 90-120 damage to whatever it hits. If you don't tank him with a Knight, it'll be extraordinarily difficult to heal through his sheer damage output, and even a Knight can't handle the punishment without needing a few heals. If his wounds start glowing, he's warming up to hit the entire party with Final Blast, which does around 120 damage. Switch to your healer and start queuing up a proactive AoE +Heal spell to compensate.
Page 35 of 38© 2010 IGN Entertainment, Inc.

When you deplete the Usurper's first health bar, the Black Knight reemerges from its body for a final showdown. At this point, he has a lot more health and several new moves, most of which can be summarized as "a big single-target nuke." At this point, unless you've been powerleveling and you vastly outgear the fight, you will probably want to summon a Knight and let it tank the Usurper. Nothing else can handle that much damage. The Usurper will infrequently use a move called Crackdown to inflict 140-210 damage to every character involved in the fight, and that's probably the real game-changer. If you don't have enough MP left to heal through Crackdown, you're probably going to lose this fight. Take a step back, use up any items you have, and do damage to the Usurper whenever you have the opportunity.
When it's destroyed, you've won the first installment of White Knight Chronicles. Time to start anticipating the sequel!
White Knight Chronicles Trophies
White Knight Chronicles Trophies...
» Amanda's Ruby (Secret)
A gem awarded to the one who has synthesized 200 items. It appears to have been created by Madam Amanda. It 's a l i t t le moist...
SILVER
» Bronze Horns (Secret)
Slay 100 monsters. A trophy in the shape of a monster's horn.
BRONZE
» Bronze Medal (Secret)
Raise Guild Rank to 4. A small prize from the Guild.
BRONZE
» Bronze Star (Secret)
Learn one entire set of ski l ls. Its bronze l ight shines from the soul of the wearer.
BRONZE
Page 36 of 38© 2010 IGN Entertainment, Inc.

» Conquistador's Testament (Secret)
A testament to the one who has cleared 50 quests with S Rank. A medal awarded from the Adventurer's Guild.
GOLD
» Equipment Dabbler (Secret)
Collect 50 different types of weapons / armor. A bronze ornament in the shape of a sword.
BRONZE
» Gamarone's Diamond (Secret)
A treasure awarded to the one who has synthesized 450 items. I t appears to have been created, in secret, by Gamarone. It 's a l i t t le sticky...
GOLD
» Gold Embroidered Purse (Secret)
A new purse for the one who has amassed 10,000,000 gilda. The inside is f i l led with our happiness.
GOLD
» Gold Horn (Secret)
A testament to the one who has defeated 10,000 monsters. An ornament in the form of a dragon's horns.
GOLD
» Gold Medal (Secret)
A medal awarded to GR12 adventurers. It shows deep affection from the Guild Leader.
GOLD
» Gold Star (Secret)
A medal awarded to the one who has mastered all eight skil ls. The golden radiance reflects al l of i ts bearer's techniques.
GOLD
» Item Collector (Secret)
Collect 300 different i tems. A si lver ornament in the shape of a bag.
SILVER
» Item Dabbler (Secret)
Collect 100 different i tems. A bronze ornament in the shape of a bag.
BRONZE
» Item Mania (Secret)
A testament to the one who has collected 600 items. An ornament in the form of a golden sack.
GOLD
Page 37 of 38© 2010 IGN Entertainment, Inc.
» Mercenary's Badge (Secret)
Complete f ive quests with an S Rank. A badge presented by your cl ients.
BRONZE
» Platinum Crown (Secret)
A crown worn by the one who has mastered all . It is said that the crown was once owned by an ancient king.
PLATINUM
» Professional's Badge (Secret)
Complete 20 quests with an S Rank. A badge presented by your cl ients.
SILVER
» Red Embroidered Purse (Secret)
A new purse for the one who has amassed 100,000 gilda. The inside is f i l led with our hopes.
BRONZE
» Silver Embroidered Purse (Secret)
A new purse for the one who has amassed 1,000,000 gilda. The inside is f i l led with our dreams and hopes.
SILVER
» Silver Horns (Secret)
Slay 3000 monsters. A trophy in the shape of a devil 's horn.
SILVER
» Silver Medal (Secret)
A medal awarded to GR8 adventurers. It shows admiration from the Guild Leader.
SILVER
» Toadstone (Secret)
Bind 50 different i tems. A stone fashioned by the Don's underl ings. It 's rather moist...
BRONZE
» Weapon Collector (Secret)
A testament to the one who has collected 500 pieces of equipment. An ornament in the form of a golden sword.
GOLD
» Weapon Mania (Secret)
A testament to the one who has collected 200 pieces of equipment. An ornament in the form of a si lver sword.
SILVER
Page 38 of 38© 2010 IGN Entertainment, Inc.