windows message processing and multithreaded programming · module 22: windows message processing...
TRANSCRIPT

Module 22: Windows Message Processing and Multithreaded Programming
Program examples compiled using Visual C++ 6.0 (MFC 6.0) compiler on Windows XP Pro machine with Service Pack 2. Topics and sub topics for this Tutorial are listed below. For Win32 process, thread and synchronization story can be found starting from Module R. Windows Message Processing and Multithreaded Programming Windows Message Processing How a Single-Threaded Program Processes Messages Yielding Control Timers The MYMFC27A Program On-Idle Processing Multithreaded Programming Writing the Worker Thread Function and Starting the Thread How the Main Thread Talks to a Worker Thread How the Worker Thread Talks to the Main Thread The MYMFC27B Program Using Events for Thread SynchronizationThe MYMFC27C Program Thread BlockingCritical SectionsMutexes and SemaphoresUser Interface Threads Windows Message Processing and Multithreaded Programming With its multitasking and multithreading API, Win32 revolutionized programming for Microsoft Windows. If you've seen magazine articles and advanced programming books on these subjects, you might have been intimidated by the complexity of using multiple threads. You could stick with single-threaded programming for a long time and still write useful Win32 applications. If you learn the fundamentals of threads, however, you'll be able to write more efficient and capable programs. You'll also be on your way to a better understanding of the Win32 programming model. Windows Message Processing To understand threads, you must first understand how 32-bit Windows processes messages. The best starting point is a single-threaded program that shows the importance of the message translation and dispatch process. You'll improve that program by adding a second thread, which you'll control with a global variable and a simple message. Then you'll experiment with events and critical sections. For heavy-duty multithreading elements such as mutexes and semaphores, however, you'll need to refer to another book, such as Jeffrey Richter's Advanced Windows, 3d Ed. (Microsoft Press, 1997). How a Single-Threaded Program Processes Messages All the programs so far in this book have been single-threaded, which means that your code has only one path of execution. With ClassWizard's help, you've written handler functions for various Windows messages and you've written OnDraw() code that is called in response to the WM_PAINT message. It might seem as though Windows magically calls your handler when the message floats in, but it doesn't work that way. Deep inside the MFC code (which is linked to your program) are instructions that look something like this:
MSG message; while (::GetMessage(&message, NULL, 0, 0)) { ::TranslateMessage(&message);

::DispatchMessage(&message); }
Windows determines which messages belong to your program and the GetMessage() function returns when a message needs to be processed. If no messages are posted, your program is suspended and other programs can run. When a message eventually arrives, your program "wakes up." The TranslateMessage() function translates WM_KEYDOWN messages into WM_CHAR messages containing ASCII characters, and the DispatchMessage() function passes control (via the window class) to the MFC message pump, which calls your function via the message map. When your handler is finished, it returns to the MFC code, which eventually causes DispatchMessage() to return. Yielding Control What would happen if one of your handler functions was a pig and chewed up 10 seconds of CPU time? Back in the 16-bit days, that would have hung up the whole computer for the duration. Only cursor tracking and a few other interrupt-based tasks would have run. With Win32, multitasking got a whole lot better. Other applications can run because of preemptive multitasking; Windows simply interrupts your pig function when it needs to. However, even in Win32, your program would be locked out for 10 seconds. It couldn't process any messages because DispatchMessage() doesn't return until the pig returns. There is a way around this problem, however, which works with both Win16 and Win32. You simply train your pig function to be polite and yield control once in a while by inserting the following instructions inside the pig's main loop:
MSG message; if (::PeekMessage(&message, NULL, 0, 0, PM_REMOVE)) { ::TranslateMessage(&message); ::DispatchMessage(&message); }
The PeekMessage() function works like GetMessage(), except that it returns immediately even if no message has arrived for your program. In that case, the pig keeps on chewing. If there is a message, however, the pig pauses, the handler is called, and the pig starts up again after the handler exits. Timers A Windows timer is a useful programming element that sometimes makes multithreaded programming unnecessary. If you need to read a communication buffer, for example, you can set up a timer to retrieve the accumulated characters every 100 milliseconds. You can also use a timer to control animation because the timer is independent of CPU clock speed. Timers are easy to use. You simply call the CWnd member function SetTimer() with an interval parameter, and then you provide, with the help of ClassWizard, a message handler function for the resulting WM_TIMER messages. Once you start the timer with a specified interval in milliseconds, WM_TIMER messages will be sent continuously to your window until you call CWnd::KillTimer or until the timer's window is destroyed. If you want to, you can use multiple timers, each identified by an integer. Because Windows isn't a real-time operating system, the interval between timer events becomes imprecise if you specify an interval much less than 100 milliseconds. Like any other Windows messages, timer messages can be blocked by other handler functions in your program. Fortunately, timer messages don't stack up. Windows won't put a timer message in the queue if a message for that timer is already present. The MYMFC27A Program We're going to write a single-threaded program that contains a CPU-intensive computation loop. We want to let the program process messages after the user starts the computation; otherwise, the user couldn't cancel the job. Also, we'd like to display the percent-complete status by using a progress indicator control, as shown in Figure 1. The MYMFC27A program allows message processing by yielding control in the compute loop. A timer handler updates the progress control based on compute parameters. The WM_TIMER messages could not be processed if the compute process didn't yield control.

Figure 1: The Compute dialog box. Here are the steps for building the MYMFC27A application: Run AppWizard to generate \mfcproject\mymfc27A. Accept all the default settings but two: select Single Document and deselect Printing And Print Preview. The options and the default class names are shown here.
Figure 2: MYMFC27A SDI project summary. Use the dialog editor to create the dialog resource IDD_COMPUTE. Use the resource shown here as a guide.

Figure 3: Modifying dialog properties, adding progress bar control and modifying its properties. Keep the default control ID for the Cancel button, but use IDC_START for the Start button. For the progress indicator, accept the default ID IDC_PROGRESS1. Use ClassWizard to create the CComputeDlg class. ClassWizard connects the new class to the IDD_COMPUTE resource you just created.

Figure 4: Adding a new class, CComputeDlg for the dialog. After the class is generated, add a WM_TIMER message handler function.
Figure 5: Adding a WM_TIMER message handler function. Also add BN_CLICKED message handlers for IDC_START and IDCANCEL. Accept the default names OnStart() and OnCancel().

Figure 6: Adding BN_CLICKED message handlers for IDC_START and IDCANCEL. Add three data members to the CComputeDlg class. Edit the file ComputeDlg.h. Add the following private data members (added manually):
int m_nTimer; int m_nCount; enum { nMaxCount = 10000 };
Listing 1. The m_nCount data member of class CComputeDlg is incremented during the compute process. It serves as a percent complete measurement when divided by the "constant" nMaxCount. Add initialization code to the CComputeDlg constructor in the ComputeDlg.cpp file. Add the following line to the constructor to ensure that the Cancel button will work if the compute process has not been started:
m_nCount = 0;

Listing 2. Be sure to add the line outside the //{{AFX_DATA_INIT comments generated by ClassWizard. Code the OnStart() function in ComputeDlg.cpp. This code is executed when the user clicks the Start button. Add the following code:
void CComputeDlg::OnStart() { MSG message; m_nTimer = SetTimer(1, 100, NULL); // 1/10 second ASSERT(m_nTimer != 0); GetDlgItem(IDC_START)->EnableWindow(FALSE); volatile int nTemp; for (m_nCount = 0; m_nCount < nMaxCount; m_nCount++) { for (nTemp = 0; nTemp < 10000; nTemp++) { // uses up CPU cycles } if (::PeekMessage(&message, NULL, 0, 0, PM_REMOVE)) { ::TranslateMessage(&message); ::DispatchMessage(&message); } } CDialog::OnOK(); }
Listing 3. The main for loop is controlled by the value of m_nCount. At the end of each pass through the outer loop, PeekMessage() allows other messages, including WM_TIMER, to be processed. The EnableWindow(FALSE) call

disables the Start button during the computation. If we didn't take this precaution, the OnStart() function could be reentered. Code the OnTimer() function in ComputeDlg.cpp. When the timer fires, the progress indicator's position is set according to the value of m_nCount. Add the following code:
void CComputeDlg::OnTimer(UINT nIDEvent) { CProgressCtrl* pBar = (CProgressCtrl*) GetDlgItem(IDC_PROGRESS1); pBar->SetPos(m_nCount * 100 / nMaxCount); }
Listing 4. Update the OnCancel() function in ComputeDlg.cpp. When the user clicks the Cancel button during computation, we don't destroy the dialog; instead, we set m_nCount to its maximum value, which causes OnStart() to exit the dialog. If the computation hasn't started, it's okay to exit directly. Add the following code:
void CControlDlg::OnCancel() { TRACE("entering CComputeDlg::OnCancel\n"); if (m_nCount == 0) { // prior to Start button CDialog::OnCancel(); } else { // computation in progress m_nCount = nMaxCount; // Force exit from OnStart } }
Listing 5. Edit the CMymfc27AView class in mymfc27AView.cpp. First edit the virtual OnDraw() function to display a message, as shown here:
void CMymfc27AView::OnDraw(CDC* pDC) { pDC->TextOut(30, 30, "Press the left mouse button here."); }

Listing 6.
Then use ClassWizard to add the OnLButtonDown() function to handle WM_LBUTTONDOWN messages.
Figure 7: Adding the OnLButtonDown() function to handle WM_LBUTTONDOWN messages. Then, add the following code:
void CMymfc27AView::OnLButtonDown(UINT nFlags, CPoint point) { CComputeDlg dlg; dlg.DoModal(); }
Listing 7. This code displays the modal dialog whenever the user presses the left mouse button while the mouse cursor is in the view window. While you're in mymfc27AView.cpp, add the following #include statement:
#include "ComputeDlg.h"
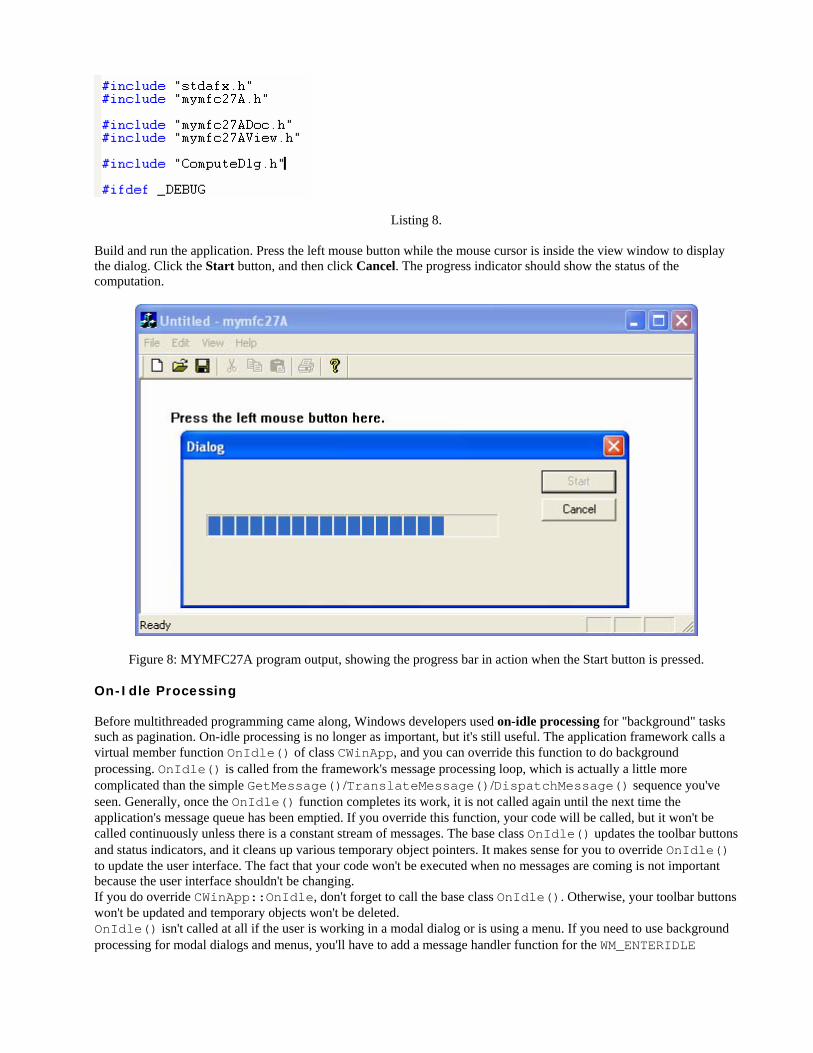
Listing 8. Build and run the application. Press the left mouse button while the mouse cursor is inside the view window to display the dialog. Click the Start button, and then click Cancel. The progress indicator should show the status of the computation.
Figure 8: MYMFC27A program output, showing the progress bar in action when the Start button is pressed. On-Idle Processing Before multithreaded programming came along, Windows developers used on-idle processing for "background" tasks such as pagination. On-idle processing is no longer as important, but it's still useful. The application framework calls a virtual member function OnIdle() of class CWinApp, and you can override this function to do background processing. OnIdle() is called from the framework's message processing loop, which is actually a little more complicated than the simple GetMessage()/TranslateMessage()/DispatchMessage() sequence you've seen. Generally, once the OnIdle() function completes its work, it is not called again until the next time the application's message queue has been emptied. If you override this function, your code will be called, but it won't be called continuously unless there is a constant stream of messages. The base class OnIdle() updates the toolbar buttons and status indicators, and it cleans up various temporary object pointers. It makes sense for you to override OnIdle() to update the user interface. The fact that your code won't be executed when no messages are coming is not important because the user interface shouldn't be changing. If you do override CWinApp::OnIdle, don't forget to call the base class OnIdle(). Otherwise, your toolbar buttons won't be updated and temporary objects won't be deleted. OnIdle() isn't called at all if the user is working in a modal dialog or is using a menu. If you need to use background processing for modal dialogs and menus, you'll have to add a message handler function for the WM_ENTERIDLE

message, but you must add it to the frame class rather than to the view class. That's because pop-up dialogs are always "owned" by the application's main frame window, not by the view window. Multithreaded Programming A process is a running program that owns its own memory, file handles, and other system resources. An individual process can contain separate execution paths, called threads. Don't look for separate code for separate threads, however, because a single function can be called from many threads. For the most part, all of a process's code and data space is available to all of the threads in the process. Two threads, for example, can access the same global variables. Threads are managed by the operating system, and each thread has its own stack. Windows offers two kinds of threads, worker threads and user interface threads. The Microsoft Foundation Class (MFC) Library supports both. A user interface thread has windows, and therefore it has its own message loop. A worker thread doesn't have windows, so it doesn't need to process messages. Worker threads are easier to program and are generally more useful. The remaining examples in this module illustrate worker threads. At the end of the module, however, an application for a user interface thread is described. Don't forget that even a single-threaded application has one thread, the main thread. In the MFC hierarchy, CWinApp is derived from CWinThread. The InitInstance() and m_pMainWnd are members of declared in CWinThread, but of course they're inherited by CWinApp. The important thing to remember here is that an application is a thread. Writing the Worker Thread Function and Starting the Thread If you haven't guessed already, using a worker thread for a long computation is more efficient than using a message handler that contains a PeekMessage() call. Before you start a worker thread, however, you must write a global function for your thread's main program. This global function should return a UINT, and it should take a single 32-bit value (declared LPVOID) as a parameter. You can use the parameter to pass anything at all to your thread when you start it. The thread does its computation, and when the global function returns, the thread terminates. The thread would also be terminated if the process terminated, but it's preferable to ensure that the worker thread terminates first, which will guarantee that you'll have no memory leaks. To start the thread (with function name ComputeThreadProc()), your program makes the following call:
CWinThread* pThread = AfxBeginThread(ComputeThreadProc, GetSafeHwnd(), THREAD_PRIORITY_NORMAL);
The compute thread code looks like this:
UINT ComputeThreadProc(LPVOID pParam) { // Do thread processing return 0; }
The AfxBeginThread() function returns immediately; the return value is a pointer to the newly created thread object. You can use that pointer to suspend and resume the thread (CWinThread::SuspendThread and ResumeThread()), but the thread object has no member function to terminate the thread. The second parameter is the 32-bit value that gets passed to the global function, and the third parameter is the thread's priority code. Once the worker thread starts, both threads run independently. Windows divides the time between the two threads (and among the threads that belong to other processes) according to their priority. If the main thread is waiting for a message, the compute thread can still run. How the Main Thread Talks to a Worker Thread The main thread (your application program) can communicate with the subsidiary worker thread in many different ways. One option that will not work, however, is a Windows message; the worker thread doesn't have a message loop. The simplest means of communication is a global variable because all the threads in the process have access to all the globals. Suppose the worker thread increments and tests a global integer as it computes and then exits when the value reaches 100. The main thread could force the worker thread to terminate by setting the global variable to 100 or higher. The code below looks as though it should work, and when you test it, it probably will:
UINT ComputeThreadProc(LPVOID pParam)

{ g_nCount = 0; while (g_nCount++ < 100) { // Do some computation here } return 0; }
There's a problem, however, that you could detect only by looking at the generated assembly code. The value of g_nCount gets loaded into a register, the register is incremented, and then the register value is stored back in g_nCount. Suppose g_nCount is 40 and Windows interrupts the worker thread just after the worker thread loads 40 into the register. Now the main thread gets control and sets g_nCount to 100. When the worker thread resumes, it increments the register value and stores 41 back into g_nCount, obliterating the previous value of 100. The thread loop doesn't terminate! If you turn on the compiler's optimization switch, you'll have an additional problem. The compiler uses a register for g_nCount, and the register stays loaded for the duration of the loop. If the main thread changes the value of g_nCount in memory, it will have no effect on the worker thread's compute loop. You can ensure that the counter isn't stored in a register, however, by declaring g_nCount as volatile. But suppose you rewrite the thread procedure as shown here:
UINT ComputeThreadProc(LPVOID pParam) { g_nCount = 0; while (g_nCount < 100) { // Do some computation here ::InterlockedIncrement((long*) &g_nCount); } return 0; }
The InterlockedIncrement() function blocks other threads from accessing the variable while it is being incremented. The main thread can safely stop the worker thread. Now you've seen some of the pitfalls of using global variables for communication. Using global variables is sometimes appropriate, as the next example illustrates, but there are alternative methods that are more flexible, as you'll see later in this module. How the Worker Thread Talks to the Main Thread It makes sense for the worker thread to check a global variable in a loop, but what if the main thread did that? Remember the pig function? You definitely don't want your main thread to enter a loop because that would waste CPU cycles and stop your program's message processing. A Windows message is the preferred way for a worker thread to communicate with the main thread because the main thread always has a message loop. This implies, however, that the main thread has a window (visible or invisible) and that the worker thread has a handle to that window. How does the worker thread get the handle? That's what the 32-bit thread function parameter is for. You pass the handle in the AfxBeginThread() module call. Why not pass the C++ window pointer instead? Doing so would be dangerous because you can't depend on the continued existence of the object and you're not allowed to share objects of MFC classes among threads. This rule does not apply to objects derived directly from CObject or to simple classes such as CRect and CString. Do you send the message or post it? Better to post it, because sending it could cause reentry of the main thread's MFC message pump code, and that would create problems in modal dialogs. What kind of message do you post? Any user-defined message will do. The MYMFC27B Program The MYMFC27B program looks exactly like the MYMFC27A program when you run it. When you look at the code, however, you'll see some differences. The computation is done in a worker thread instead of in the main thread. The count value is stored in a global variable g_nCount, which is set to the maximum value in the dialog window's Cancel button handler. When the thread exits, it posts a message to the dialog, which causes DoModal() to exit. The document, view, frame, and application classes are the same except for their names and the dialog resource is the same. The modal dialog class is still named CComputeDlg, but the code inside is quite different. The constructor,

timer handler, and data exchange functions are pretty much the same. The following code fragment shows the global variable definition and the global thread function as given in the \mymfc27B\ComputeDlg.cpp file. Note that the function exits (and the thread terminates) when g_nCount is greater than a constant maximum value. Before it exits, however, the function posts a user-defined message to the dialog window. Follow the similar steps in MYMFC27A and then do the modification as follows. Add the following code at the top of the class implementation file, ComputeDlg.cpp after the preprocessor directives.
int g_nCount = 0; UINT ComputeThreadProc(LPVOID pParam) { volatile int nTemp; // volatile else compiler optimizes too much for (g_nCount = 0; g_nCount < CComputeDlg::nMaxCount; ::InterlockedIncrement((long*) &g_nCount)) { for (nTemp = 0; nTemp < 10000; nTemp++) { // uses up CPU cycles } } // WM_THREADFINISHED is user-defined message ::PostMessage((HWND) pParam, WM_THREADFINISHED, 0, 0); g_nCount = 0; return 0; // ends the thread }
Listing 9. Delete the m_nCount member variable and change the enum to public in ComputeDlg.h.
Listing 10.

The OnStart() handler below is mapped to the dialog's Start button. Its job is to start the timer and the worker thread. You can change the worker thread's priority by changing the third parameter of AfxBeginThread(), for example, the computation runs a little more slowly if you set the priority to THREAD_PRIORITY_LOWEST. Change the OnStart() as shown below.
void CComputeDlg::OnStart() { m_nTimer = SetTimer(1, 100, NULL); // 1/10 second ASSERT(m_nTimer != 0); GetDlgItem(IDC_START)->EnableWindow(FALSE); AfxBeginThread(ComputeThreadProc, GetSafeHwnd(), THREAD_PRIORITY_NORMAL); }
The OnCancel() handler below is mapped to the dialog's Cancel button. It sets the g_nCount variable to the maximum value, causing the thread to terminate. Change OnCancel() as shown below.
void CComputeDlg::OnCancel() { if (g_nCount == 0) { // prior to Start button CDialog::OnCancel(); } else { // computation in progress g_nCount = nMaxCount; // Force thread to exit } }
The OnThreadFinished() handler below is mapped to the dialog's WM_THREADFINISHED user-defined message. It causes the dialog's DoModal() function to exit. Add the following #define directive in the ComputeDlg.h at the top of the class definition.
#define WM_THREADFINISHED WM_USER + 5 UINT ComputeThreadProc(LPVOID pParam);
Listing 11. Then add the declaration inside the class.
LRESULT OnThreadFinished(WPARAM wParam, LPARAM lParam);
Listing 12.

Finally add the implementation code at the end of the ComputeDlg.cpp file.
LRESULT CComputeDlg::OnThreadFinished(WPARAM wParam, LPARAM lParam) { CDialog::OnOK(); return 0; }
Listing 13. Build and run the program.
Figure 9: MYMFC27B program output. Using Events for Thread Synchronization The global variable is a crude but effective means of inter thread communication. Now let's try something more sophisticated. We want to think in terms of thread synchronization instead of simple communication. Our threads must carefully synchronize their interactions with one another. An event is one type of kernel object (processes and threads are also kernel objects) that Windows provides for thread synchronization. An event is identified by a unique 32-bit handle within a process. It can be identified by name, or its handle can be duplicated for sharing among processes. An event can be either in the signaled (or true) state or in the un-signaled (or false) state. Events come in two types: manual reset and auto reset. We'll be looking at auto reset events here because they're ideal for the synchronization of two processes. Let's go back to our worker thread example. We want the main (user interface) thread to "signal" the worker thread to make it start or stop, so we'll need a "start" event and a "kill" event. MFC provides a handy CEvent class that's derived from CSyncObject. By default, the constructor creates a Win32 auto reset event object in the un-signaled state. If you

declare your events as global objects, any thread can easily access them. When the main thread wants to start or terminate the worker thread, it sets the appropriate event to the signaled state by calling CEvent::SetEvent. Now the worker thread must monitor the two events and respond when one of them is signaled. MFC provides the CSingleLock class for this purpose, but it's easier to use the Win32 WaitForSingleObject() function. This function suspends the thread until the specified object becomes signaled. When the thread is suspended, it's not using any CPU cycles, which is good. The first WaitForSingleObject() parameter is the event handle. You can use a CEvent object for this parameter; the object inherits from CSyncObject an operator HANDLE that returns the event handle it has stored as a public data member. The second parameter is the time-out interval. If you set this parameter to INFINITE, the function waits forever until the event becomes signaled. If you set the time-out to 0, WaitForSingleObject() returns immediately, with a return value of WAIT_OBJECT_0 if the event was signaled. The MYMFC27C Program The MYMFC27C program uses two events to synchronize the worker thread with the main thread. Most of the MYMFC27C code is the same as MYMFC27B, but the CComputeDlg class is quite different. Follow the similar steps in MYMFC27B and then do the modification as follows. The StdAfx.h file contains the following line for the CEvent class:
#include <afxmt.h>
There are two global event objects, as shown below. Note that the constructors create the Windows events prior to the execution of the main program.
volatile int g_nCount; CEvent g_eventStart; // creates auto reset events CEvent g_eventKill;
Listing 14.
It's best to look at the worker thread global function first. The function increments g_nCount just as it did in MYMFC27B. The worker thread is started by the OnInitDialog() function instead of by the Start button handler. The first WaitForSingleObject() call waits for the start event, which is signaled by the Start button handler. The INFINITE parameter means that the thread waits as long as necessary. The second WaitForSingleObject() call is different; it has a 0 time-out value. It's located in the main compute loop and simply makes a quick test to see whether the kill event was signaled by the Cancel button handler. If the event was signaled, the thread terminates.
UINT ComputeThreadProc(LPVOID pParam) { volatile int nTemp; ::WaitForSingleObject(g_eventStart, INFINITE); TRACE("starting computation\n"); for (g_nCount = 0; g_nCount < CComputeDlg::nMaxCount; g_nCount++) { for (nTemp = 0; nTemp < 10000; nTemp++) { // Simulate computation }

if (::WaitForSingleObject(g_eventKill, 0) == WAIT_OBJECT_0) { break; } } // Tell owner window we're finished ::PostMessage((HWND) pParam, WM_THREADFINISHED, 0, 0); g_nCount = 0; return 0; // ends the thread }
Listing 15. Here is the OnInitDialog() function that's called when the dialog is initialized. Note that it starts the worker thread, which doesn't do anything until the start event is signaled. Add the message map and the OnInitDialog() code as shown below.

Figure 10: Adding a message handler.
BOOL CComputeDlg::OnInitDialog() { CDialog::OnInitDialog(); AfxBeginThread(ComputeThreadProc, GetSafeHwnd()); return TRUE; // Return TRUE unless you set the focus to a control // EXCEPTION: OCX Property Pages should return FALSE }
Listing 16.
The following Start button handler sets the start event to the signaled state, thereby starting the worker thread's compute loop. Change the OnStart() to the following code.
void CComputeDlg::OnStart() { m_nTimer = SetTimer(1, 100, NULL); // 1/10 second ASSERT(m_nTimer != 0); GetDlgItem(IDC_START)->EnableWindow(FALSE); g_eventStart.SetEvent(); }

Listing 17. The following Cancel button handler sets the kill event to the signaled state, causing the worker thread's compute loop to terminate. Change OnCancel() as shown below.
void CComputeDlg::OnCancel() { if (g_nCount == 0) { // prior to Start button // Must start it before we can kill it g_eventStart.SetEvent(); } g_eventKill.SetEvent(); }
Listing 18. Build and run the program.
Figure 11: MYMFC27C program output.
Note the awkward use of the start event when the user cancels without starting the compute process. It might be neater to define a new cancel event and then replace the first WaitForSingleObject() call with a WaitForMultipleObjects() call in the ComputeThreadProc() function. If WaitForMultipleObjects() detected a cancel event, it could cause an immediate thread termination. Thread Blocking The first WaitForSingleObject() call in the ComputeThreadProc() function above is an example of thread blocking. The thread simply stops executing until an event becomes signaled. A thread could be blocked in many other ways. You could call the Win32 Sleep() function, for example, to put your thread to "sleep" for 500 milliseconds. Many functions block threads, particularly those functions that access hardware devices or Internet hosts. Back in the Win16 days, those functions took over the CPU until they were finished. In Win32, they allow other processes and threads to run. You should avoid putting blocking calls in your main user interface thread. Remember that if your main thread is blocked, it can't process its messages, and that makes the program appear sluggish. If you have a task that requires heavy file I/O, put the code in a worker thread and synchronize it with your main thread. Be careful of calls in your worker thread that could block indefinitely. Check the online documentation to determine whether you have the option of setting a time-out value for a particular I/O operation. If a call does block forever, the thread will be terminated when the main process exits, but then you'll have some memory leaks. You could call the Win32 TerminateThread() function from your main thread, but you'd still have the memory-leak problem. Critical Sections Remember the problems with access to the g_nCount global variable? If you want to share global data among threads and you need more flexibility than simple instructions like InterlockedIncrement() can provide, critical sections might be the synchronization tools for you. Events are good for signaling, but critical sections (sections of code that require exclusive access to shared data) are good for controlling access to data. MFC provides the CCriticalSection class that wraps the Windows critical section handle. The constructor calls the Win32 InitializeCriticalSection() function, the Lock() and Unlock() member functions call EnterCriticalSection() and LeaveCriticalSection(), and the destructor calls DeleteCriticalSection(). Here's how you use the class to protect global data:
CCriticalSection g_cs; // global variables accessible from all threads int g_nCount; void func() { g_cs.Lock(); g_nCount++; g_cs.Unlock(); }
Suppose your program tracks time values as hours, minutes, and seconds, each stored in a separate integer, and suppose two threads are sharing time values. Thread A is changing a time value but is interrupted by thread B after it has updated hours but before it has updated minutes and seconds. Thread B will have an invalid time value. If you write a C++ class for your time format, it's easy to control data access by making the data members private and providing public member functions. The CHMS class, shown in Listing 19, does exactly that. Notice that the class has a data member of type CCriticalSection. Thus, a critical section object is associated with each CHMS object. Notice that the other member functions call the Lock() and Unlock() member functions. If thread A is executing in the middle of SetTime(), thread B will be blocked by the Lock() call in GetTotalSecs() until thread A calls Unlock(). The IncrementSecs() function calls SetTime(), resulting in nested locks on the critical section. That's okay because Windows keeps track of the nesting level. The CHMS class works well if you use it to construct global objects. If you share pointers to objects on the heap, you have another set of problems. Each thread must determine whether another thread has deleted the object, and that means you must synchronize access to the pointers. HMS.H #include "StdAfx.h"

class CHMS { private: int m_nHr, m_nMn, m_nSc; CCriticalSection m_cs; public: CHMS() : m_nHr(0), m_nMn(0), m_nSc(0) {} ~CHMS() {} void SetTime(int nSecs) { m_cs.Lock(); m_nSc = nSecs % 60; m_nMn = (nSecs / 60) % 60; m_nHr = nSecs / 3600; m_cs.Unlock(); } int GetTotalSecs() { int nTotalSecs; m_cs.Lock(); nTotalSecs = m_nHr * 3600 + m_nMn * 60 + m_nSc; m_cs.Unlock(); return nTotalSecs; } void IncrementSecs() { m_cs.Lock(); SetTime(GetTotalSecs() + 1); m_cs.Unlock(); } };
Listing 19: The CHMS class listing. No sample program is provided that uses the CHMS class. If you write a multithreaded program, you can share global objects of the class. You don't need any other calls to the thread-related functions. Mutexes and Semaphores As I mentioned, I'm leaving these synchronization objects to Jeffrey Richter's Advanced Windows. You might need a mutex or a semaphore if you're controlling access to data across different processes because a critical section is accessible only within a single process. Mutexes and semaphores (along with events) are shareable by name. User Interface Threads The MFC library provides good support for UI threads. You derive a class from CWinThread, and you use an overloaded version of AfxBeginThread() to start the thread. Your derived CWinThread class has its own InitInstance() function, and most important, it has its own message loop. You can construct windows and map messages as required. Why might you want a user interface thread? If you want multiple top-level windows, you can create and manage them from your main thread. Suppose you allow the user to run multiple instances of your application, but you want all instances to share memory. You can configure a single process to run multiple UI threads such that users think they are running separate processes. That's exactly what Windows Explorer does. Check it out with SPY++. Starting the second and subsequent threads is a little tricky because the user actually launches a new process for each copy of Windows Explorer. When the second process starts, it signals the first process to start a new thread, and then it exits. The second process can locate the first process either by calling the Win32 FindWindow() function or by declaring a shared data section. Shared data sections are explained in detail in Jeffrey Richter's book.

Further reading and digging:
1. Win32 process, thread and synchronization story can be found starting from Module R. 2. MSDN MFC 6.0 class library online documentation - used throughout this Tutorial. 3. MSDN MFC 7.0 class library online documentation - used in .Net framework and also backward compatible
with 6.0 class library 4. MSDN Library 5. Windows data type. 6. Win32 programming Tutorial. 7. The best of C/C++, MFC, Windows and other related books. 8. Unicode and Multibyte character set: Story and program examples.