workaround for fax failure in · fax failure in "windows 8.1" • after you install or...
TRANSCRIPT

2
Web location for this
presentation:
http://aztcs.orgClick on
“Meeting Notes”
3
SUMMARYAfter you install or upgrade to the free
"Windows 8.1", you will be unable to
send and receive faxes with
"Microsoft Windows Fax and Scan"
because the FXST30.dll file that
comes with "Windows 8.1" is
inoperative. You can repair the
problem by replacing it with the
FXST30.dll file from "Windows 7".
4
TOPICSo VIRTUAL FAX MACHINE INSIDE
ALL "WINDOWS 7" and
"WINDOWS 8" COMPUTERS
o FAX FAILURE IN "WINDOWS
8.1"
o CONCISE DESCRIPTION OF
THE FIX
o STEP-BY-STEP HOW-TO FOR
PERFORMING THE FIX.
5
VIRTUAL FAX
MACHINE INSIDE ALL
"WINDOWS 7" AND
"WINDOWS 8"
COMPUTERS

6
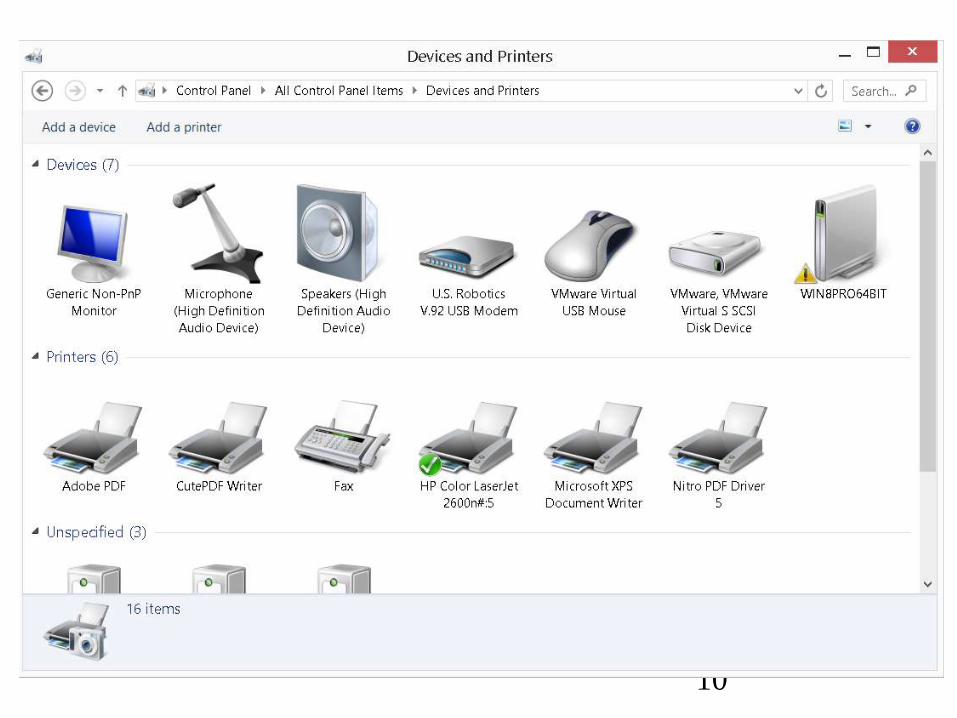
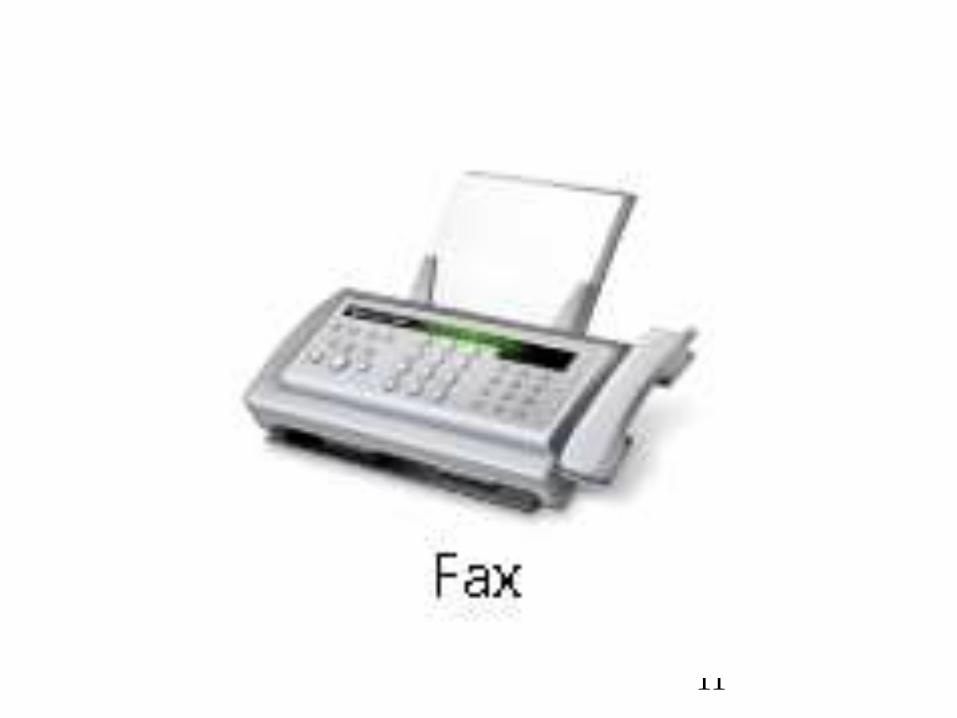
VIRTUAL FAX MACHINE INSIDE
MOST WINDOWS.. COMPUTERS• See
http://aztcs.org/meeting_notes/winha
rdsig/add-ons/fax/fax-Windows.pdf
This how-to document shows you
how to fax documents from within
most versions of "Windows..",
including how to use a calling card to
dramatically reduce long distance
charges.
7
FAX FAILURE IN
"WINDOWS 8.1"

8
FAX FAILURE IN "WINDOWS 8.1"
• After you install or upgrade to the
"Windows 8.1“ (or the free “Windows
8.1 Preview” or the free “Windows
8.1 Enterprise Preview” or the free
“Windows 8.1 Enterprise Evaluation”)
you will discover that "Windows Fax
and Scan" will fail to complete all
attempts at sending and receiving
faxes with an analog data/fax
modem.

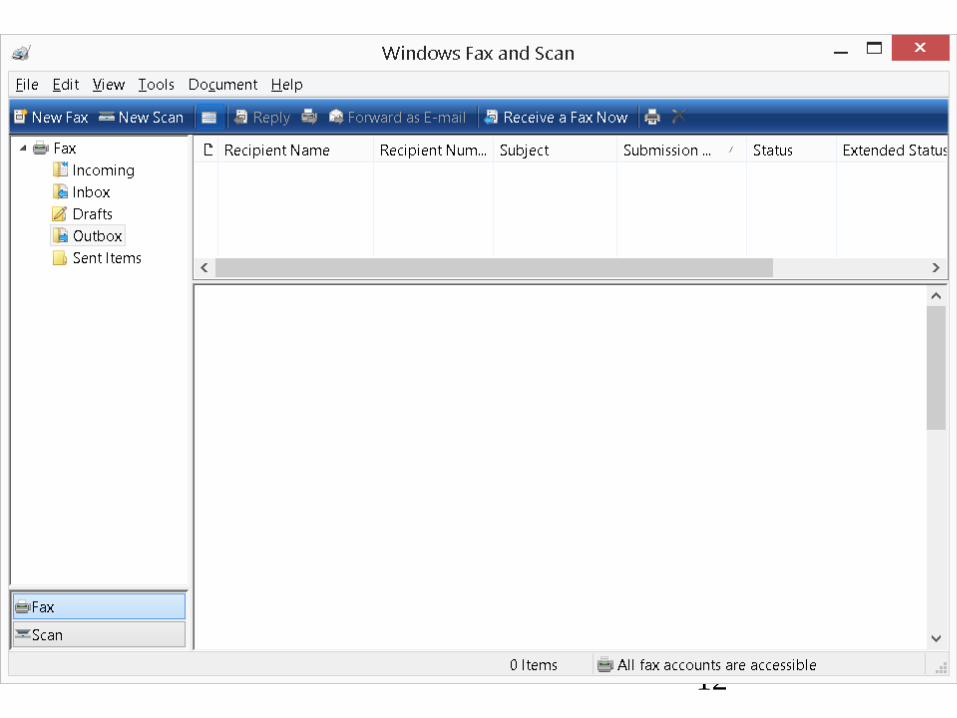
9
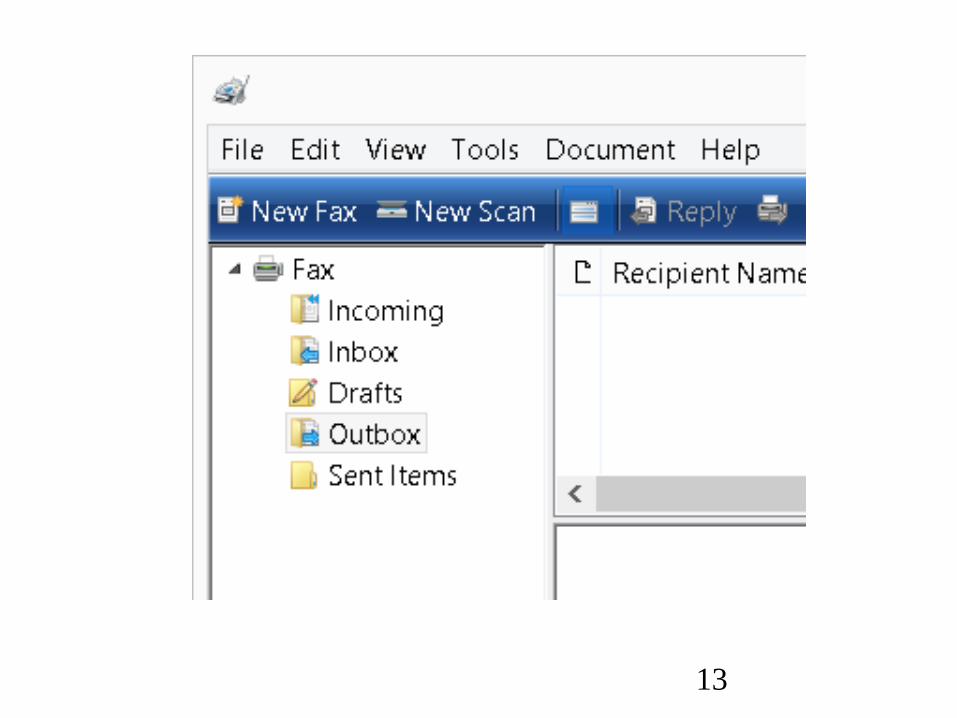
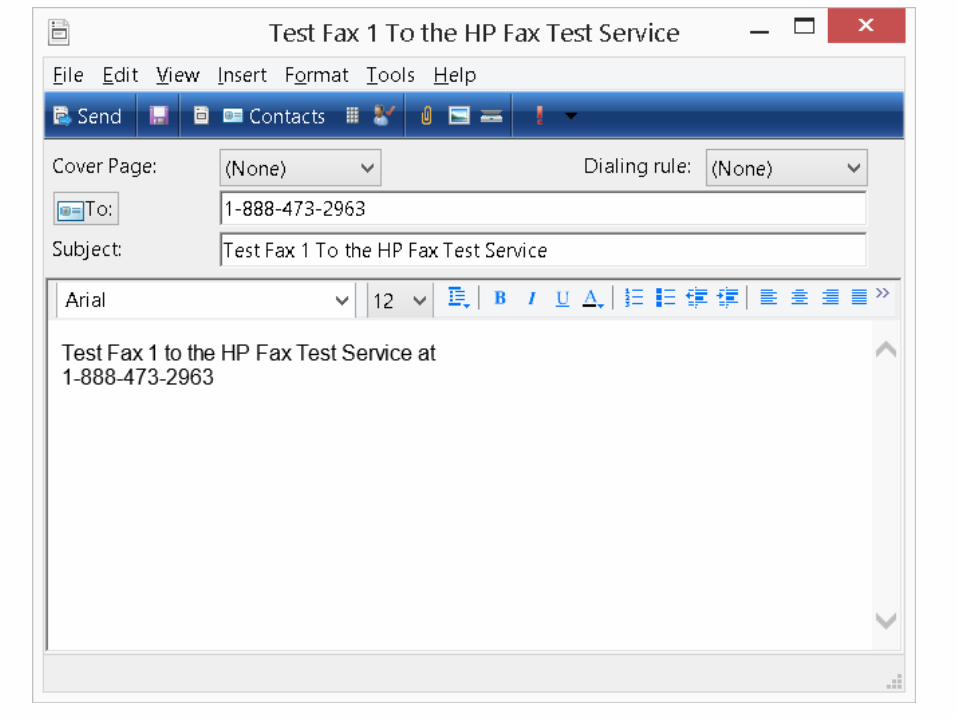
FAX FAILURE IN "WINDOWS 8.1” (continued)
• All attempts to send and receive
faxes will fail prior to the
transmission or reception of the
first page:
10
11
12
13
14
15

16
17
CONCISE
DESCRIPTION OF
THE FIX FOR
"WINDOWS FAX.." IN
"WINDOWS 8.1"

18
CONCISE DESCRIPTION OF THE FIX
(continued)
• "Windows 8.1" has a defective
FXST30.dll file at
C:\Windows\System32\
To repair the problem:
Take ownership of the file.
Remove or rename the file.
Replace it with the same named
file from "Windows 7".
Reboot the computer.

19
CONCISE DESCRIPTION OF THE FIX
(continued)
• Reference source for this fix:
http://social.technet.micro
soft.com/Forums/window
s/en-US/57611007-4d60-
4fe6-b81d-
4b2c809e3a2a/81-broke-
my-windows-fax
20
STEP-BY-STEP "HOW
TO" FOR FIXING THE
FAX FEATURE IN
"WINDOWS 8.1"
21
STEP-BY-STEP..FIX FOR FAX IN
"WINDOWS 8.1" (continued)
• Step 1: Use a Web browser
to go to
http://hevanet.com/hb/FXST30.dll
to download an operational
FXST30.dll
file and store it in a safe
place.

22
STEP-BY-STEP..FIX FOR FAX IN
"WINDOWS 8.1" (continued)
• Step 2:
Start up your "Windows 8.1"
computer and log in with an
"Administrator" account.
23
STEP-BY-STEP..FIX FOR FAX IN
"WINDOWS 8.1" (continued)
• Step 3: Start "File Explorer"
(“File Explorer” is the new
name for "Windows
Explorer" in "Windows 8"
and "Windows 8.1")

24
25
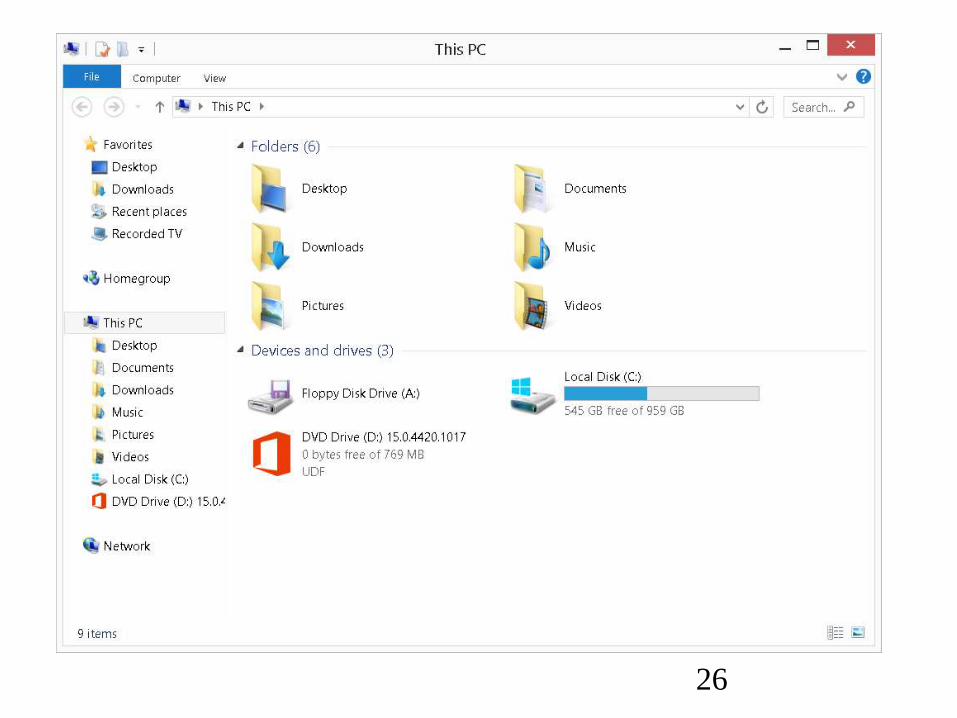
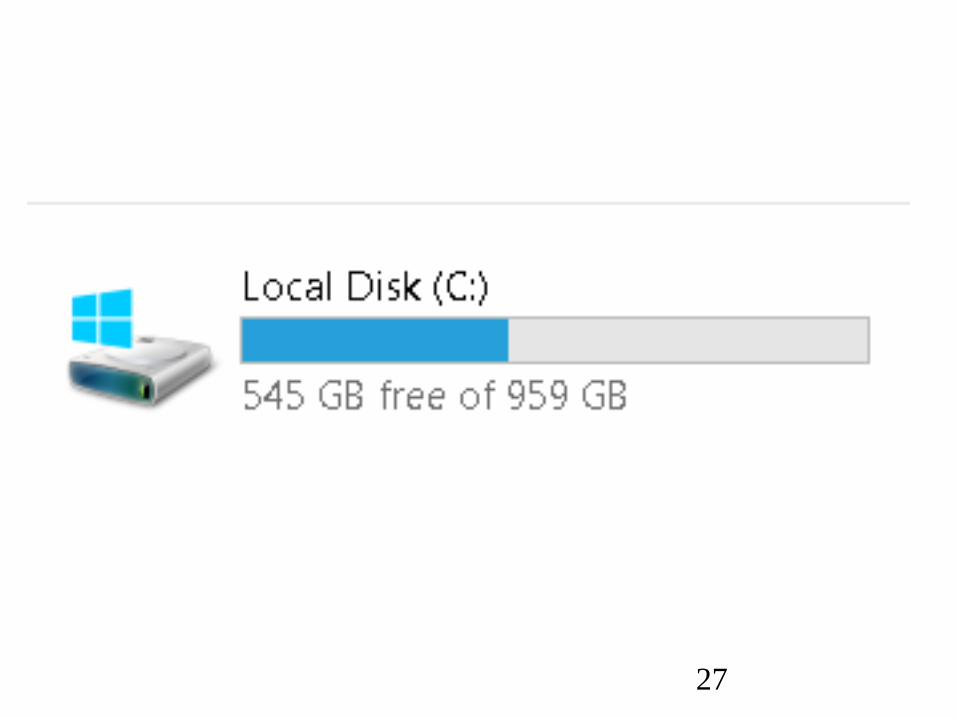
STEP-BY-STEP..FIX FOR FAX IN
"WINDOWS 8.1" (continued)
• Step 4: Double-click on the
C: drive:
26
27
28
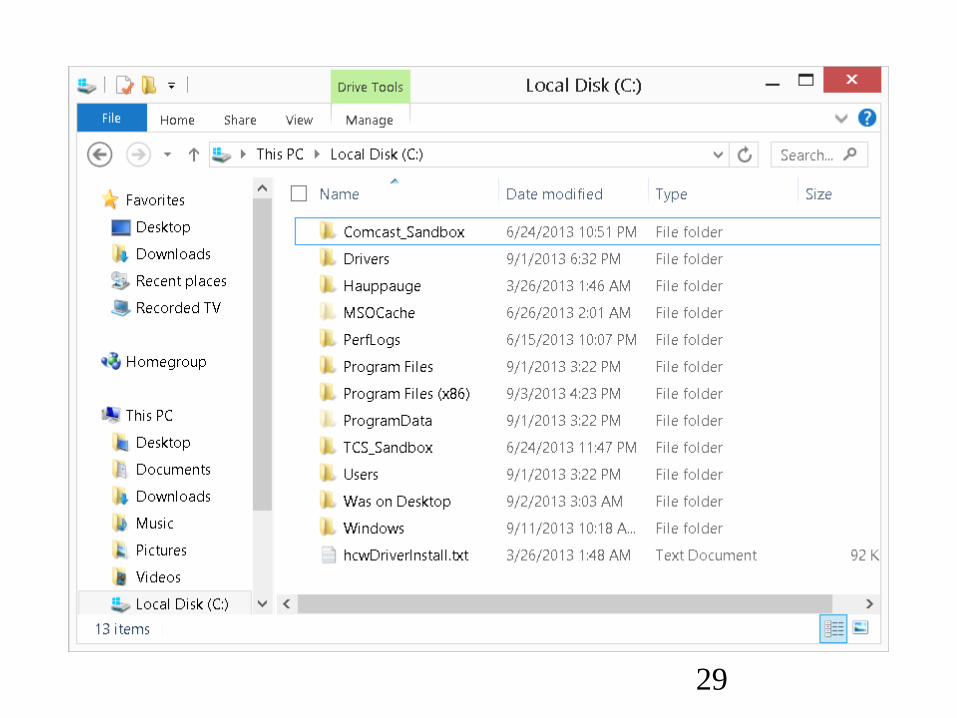
STEP-BY-STEP..FIX FOR FAX IN
"WINDOWS 8.1" (continued)
• Step 5: "File Explorer" will
now display the contents of
the C: drive:
29
30
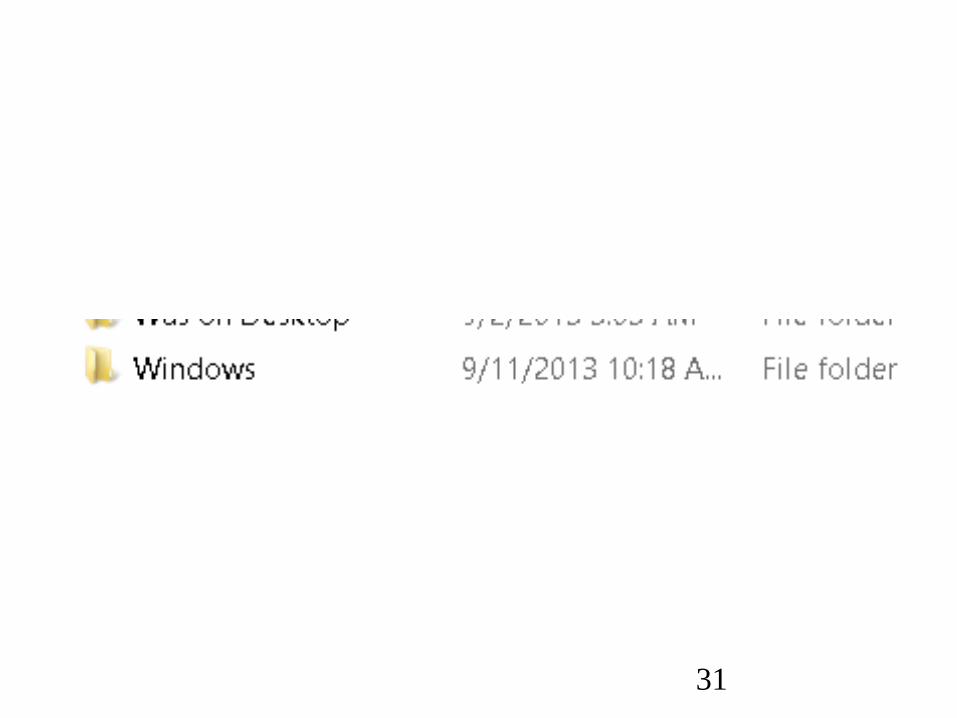
STEP-BY-STEP..FIX FOR FAX IN
"WINDOWS 8.1" (continued)
• Step 6: Double-click on the
"Windows" folder:
31

32
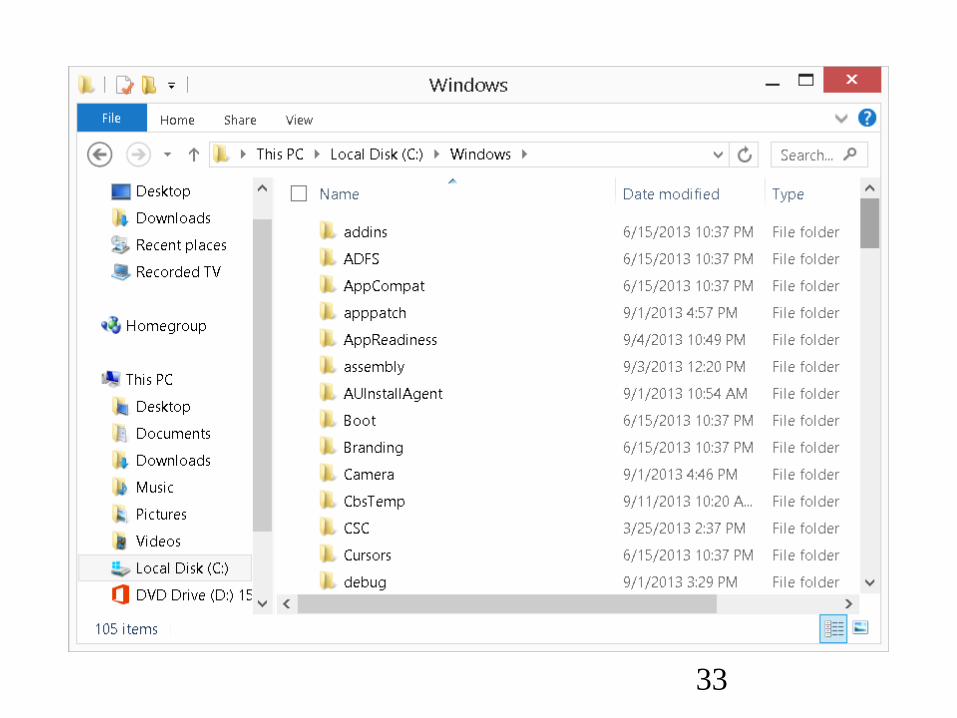
STEP-BY-STEP..FIX FOR FAX IN
"WINDOWS 8.1" (continued)
• Step 7: The contents of the
"Windows" folder will be
displayed:
33

34
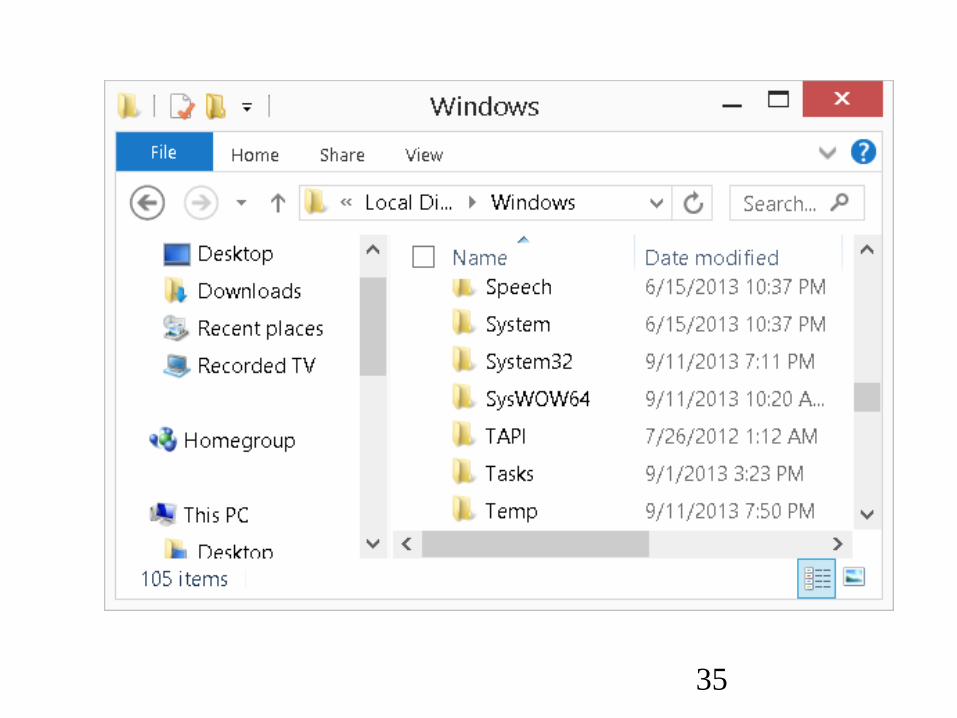
STEP-BY-STEP..FIX FOR FAX IN
"WINDOWS 8.1" (continued)
• Step 8: Scroll or page down
vertically to the "System32"
folder and double-click on it:
35
36
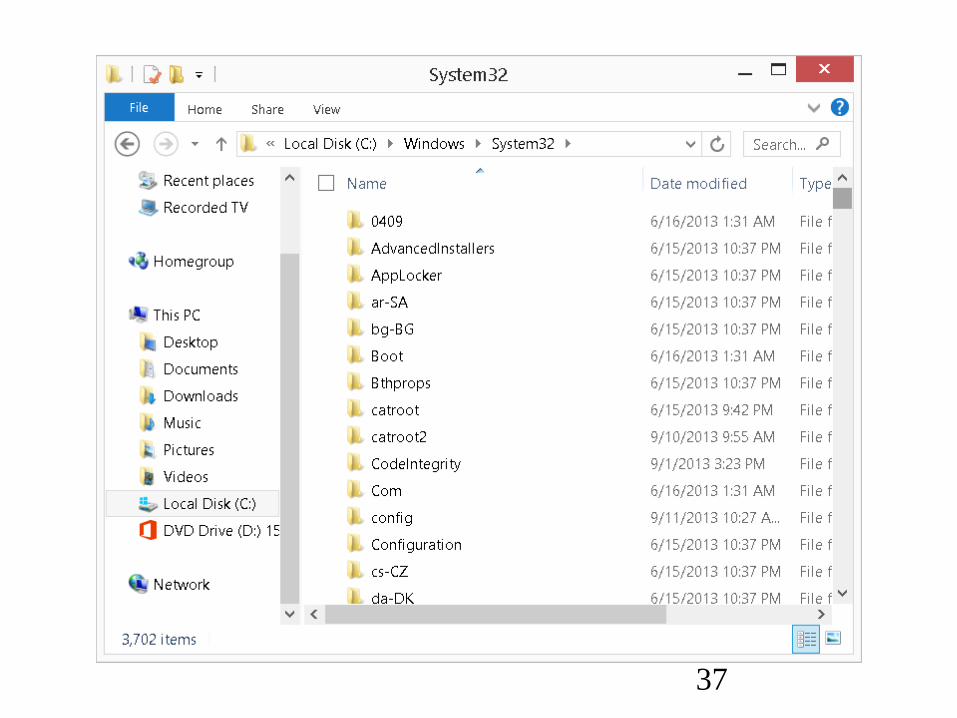
STEP-BY-STEP..FIX FOR FAX IN
"WINDOWS 8.1" (continued)
• Step 10: The contents of the
"System32" folder will be
displayed:
37
38
STEP-BY-STEP..FIX FOR FAX IN
"WINDOWS 8.1" (continued)
• Step 11: Scroll or page
downward and locate the
FXST30.dll file

39

40
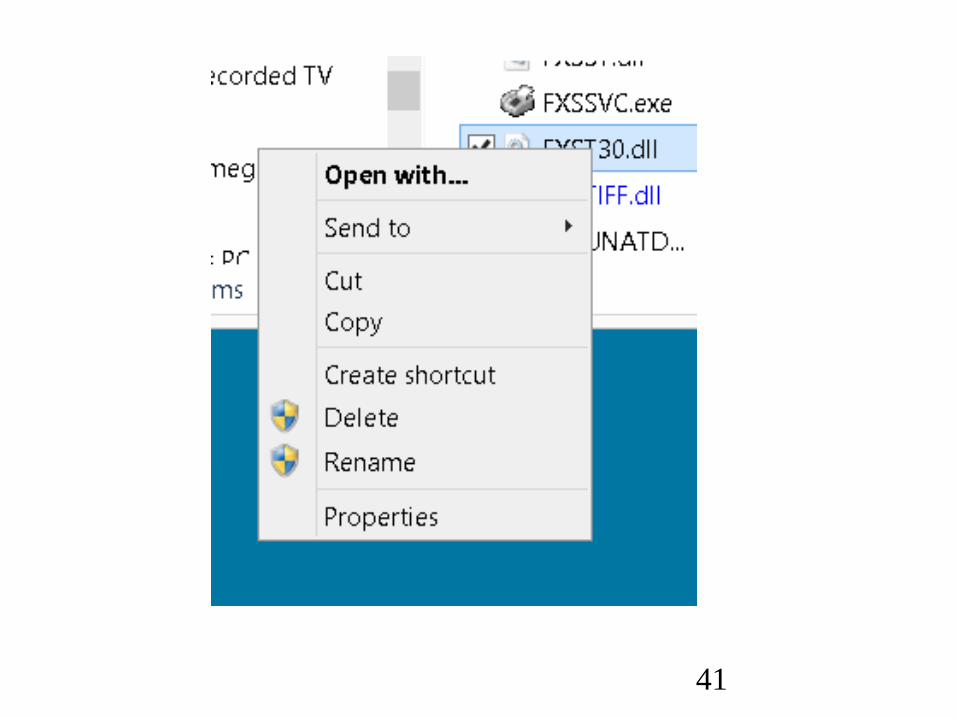
STEP-BY-STEP..FIX FOR FAX IN
"WINDOWS 8.1" (continued)
• Step 12: Use the RIGHT
mouse button to click on the
FXST30.dll file. Then a pop-
up context menu will be
displayed:
41
42
STEP-BY-STEP..FIX FOR FAX IN
"WINDOWS 8.1" (continued)
• Step 13: Use the left mouse
button to click on
"Properties" in the pop-up
context menu:

43
44
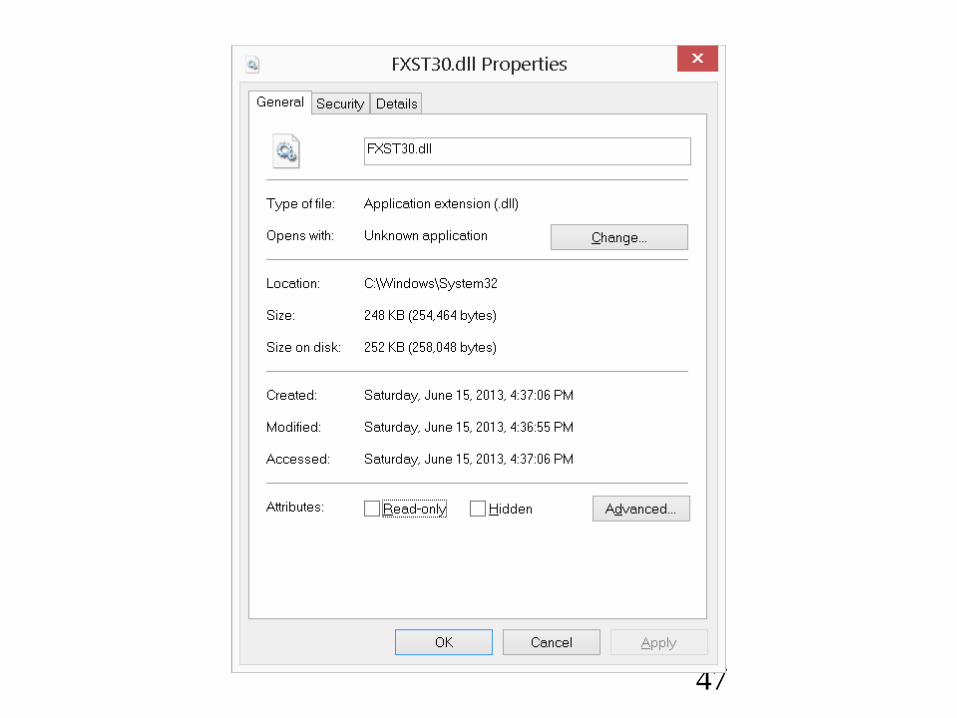
STEP-BY-STEP..FIX FOR FAX IN
"WINDOWS 8.1" (continued)
• Step 14: A "FXST30.dll
Properties" dialog box will be
displayed:

45
46
STEP-BY-STEP..FIX FOR FAX IN
"WINDOWS 8.1" (continued)
• Step 15: Click on the
"Security" tab:
47
48
STEP-BY-STEP..FIX FOR FAX IN
"WINDOWS 8.1" (continued)
• Step 16: The "Security" tab
will be displayed:

49
50
STEP-BY-STEP..FIX FOR FAX IN
"WINDOWS 8.1" (continued)
• Step 17: Click on the
"Advanced" button:

51

52
STEP-BY-STEP..FIX FOR FAX IN
"WINDOWS 8.1" (continued)
• Step 18: An "Advanced
Security Settings For
FXST.dll" box will be
displayed:

53
54
STEP-BY-STEP..FIX FOR FAX IN
"WINDOWS 8.1" (continued)
• Step 19: Click on "Change":

55

56
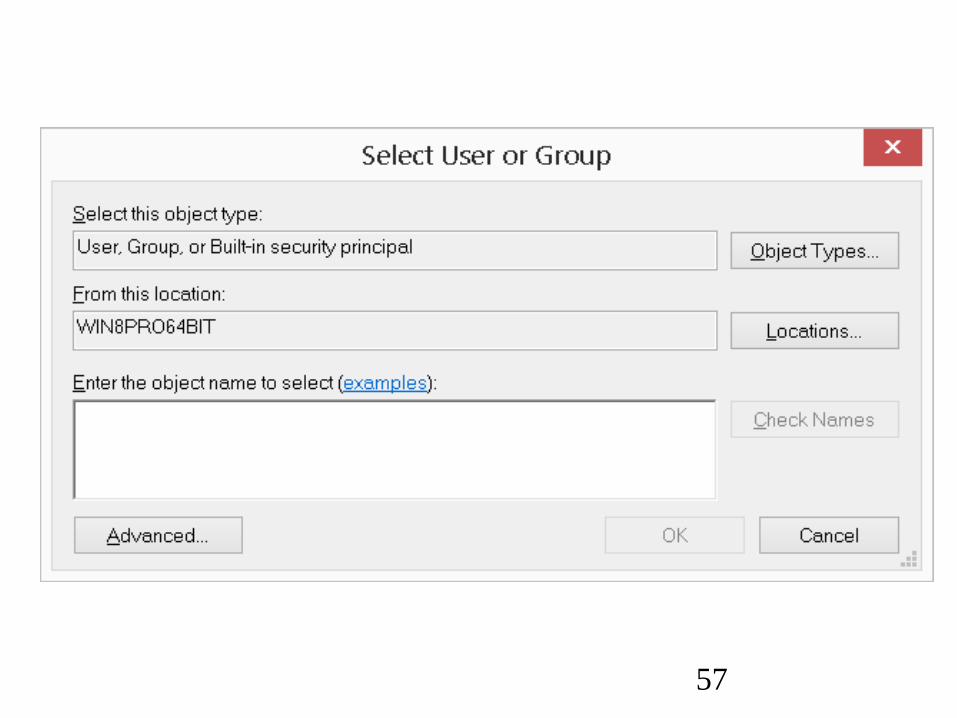
STEP-BY-STEP..FIX FOR FAX IN
"WINDOWS 8.1" (continued)
• Step 20: A "Select User or
Group" box will be displayed:
57

58
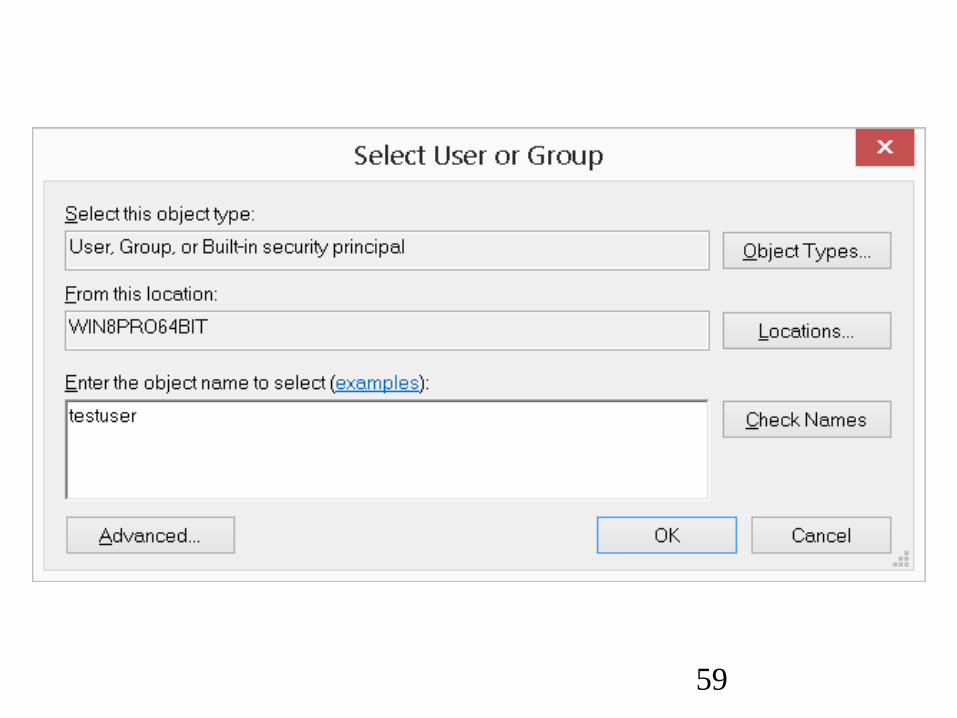
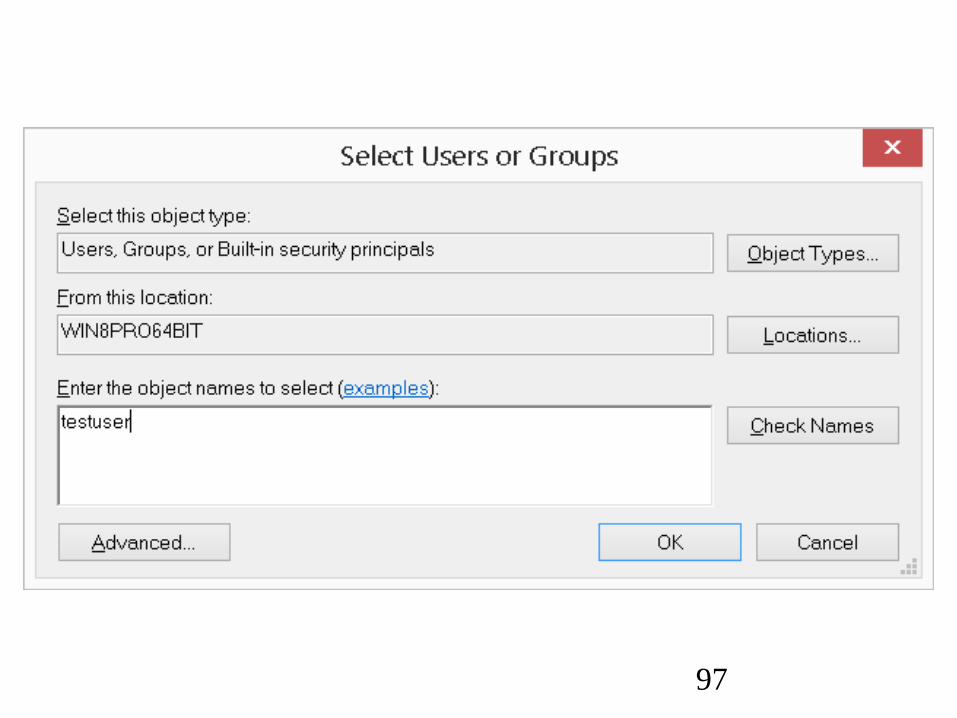
STEP-BY-STEP..FIX FOR FAX IN
"WINDOWS 8.1" (continued)
• Step 21: Type in the name of
your user account. In this
example, we typed in
testuser
59
60
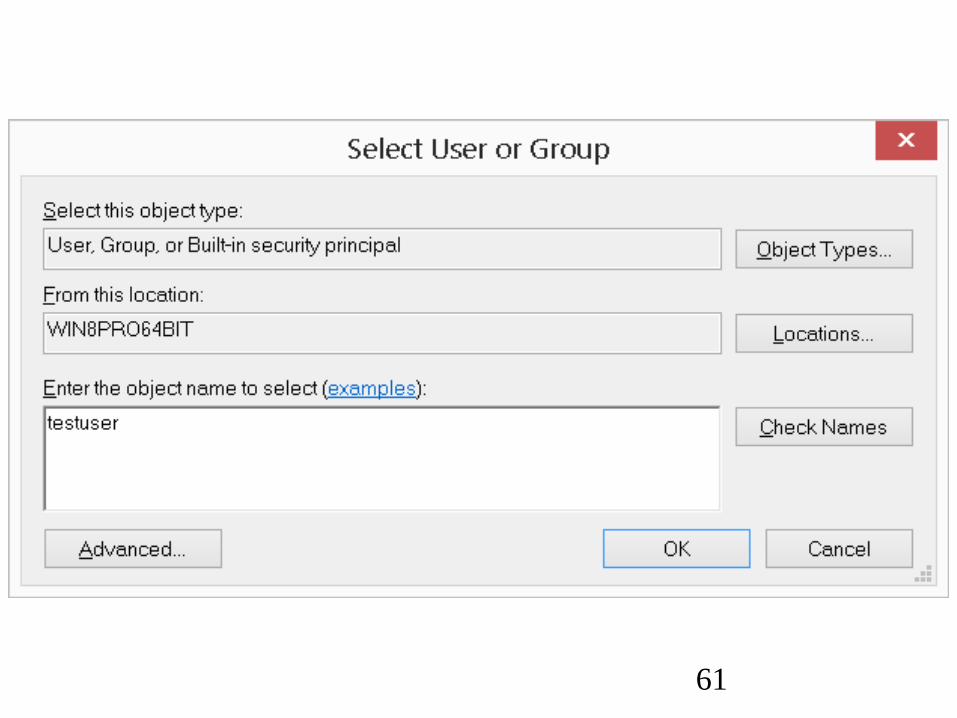
STEP-BY-STEP..FIX FOR FAX IN
"WINDOWS 8.1" (continued)
• Step 22: Click on the "Check
Names" button:
61

62
63
STEP-BY-STEP..FIX FOR FAX IN
"WINDOWS 8.1" (continued)
• Step 23: The name of your
computer will be prepended
to the left of the username
that you typed in two steps
ago:

64
65
STEP-BY-STEP..FIX FOR FAX IN
"WINDOWS 8.1" (continued)
• Step 24: Click on the "OK"
button:

66
67
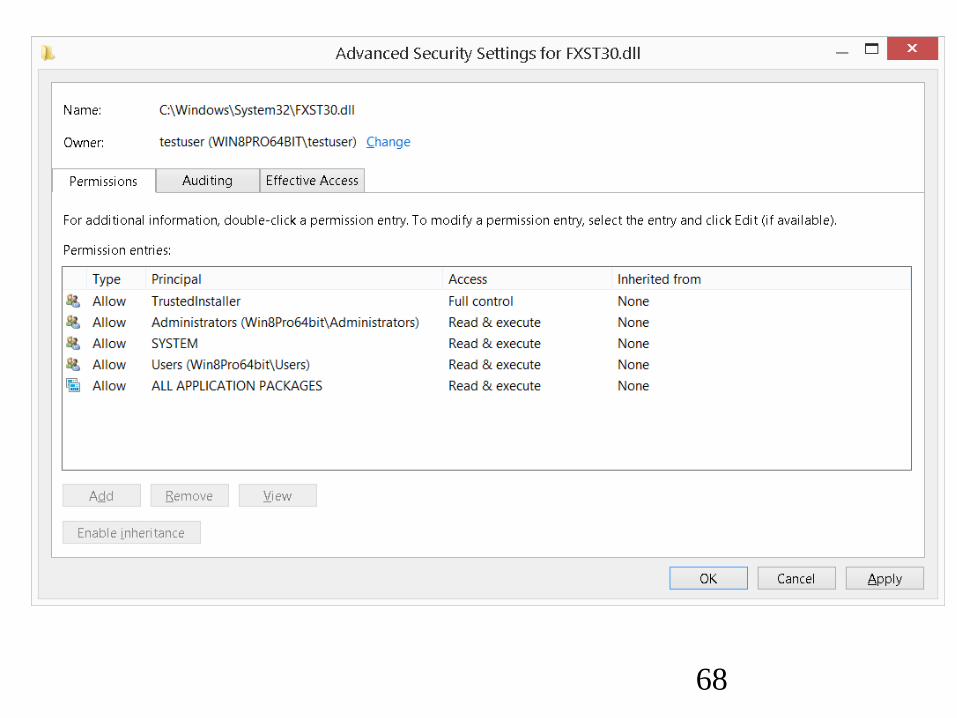
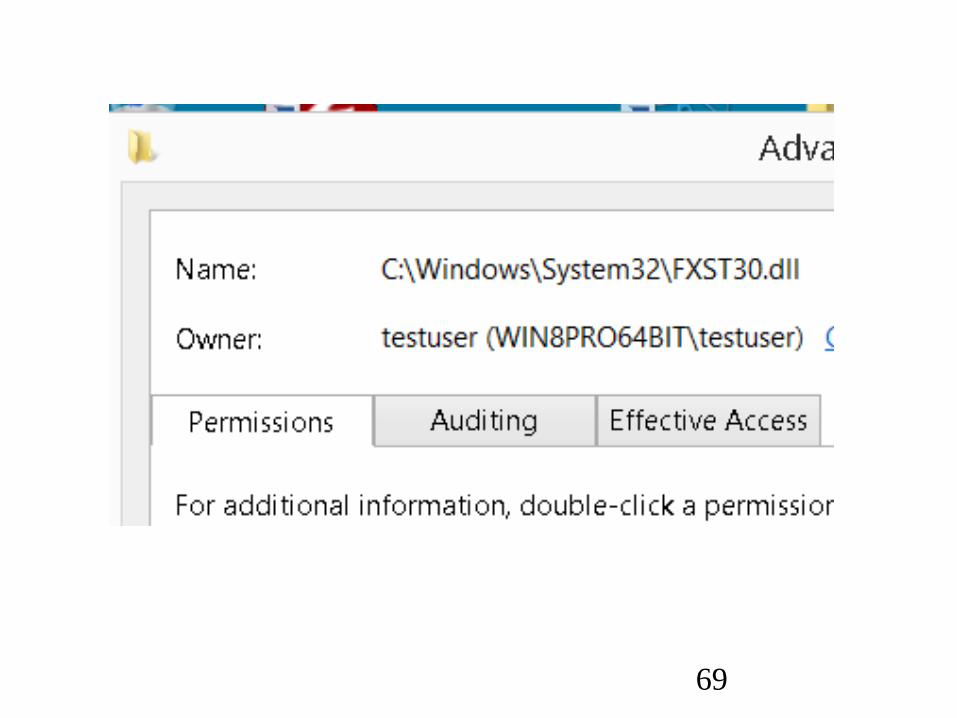
STEP-BY-STEP..FIX FOR FAX IN
"WINDOWS 8.1" (continued)
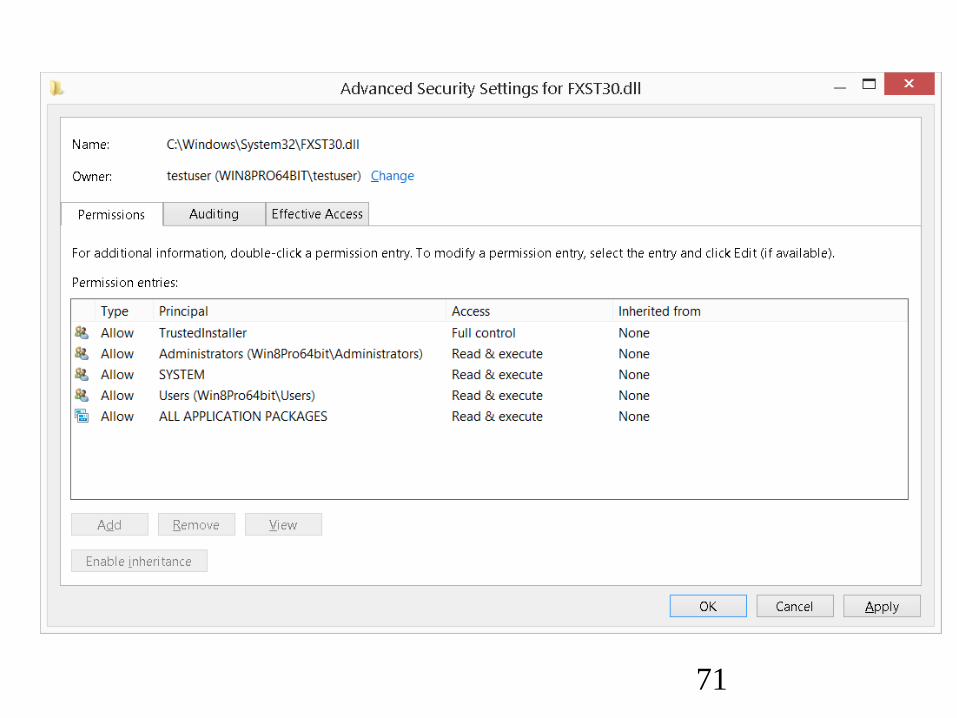
• Step 25: You are now listed
as the "Owner" of the
defective FXST30.dll file:
68
69
70
STEP-BY-STEP..FIX FOR FAX IN
"WINDOWS 8.1" (continued)
• Step 26: Click on the "Apply"
button:
71
72
STEP-BY-STEP..FIX FOR FAX IN
"WINDOWS 8.1" (continued)
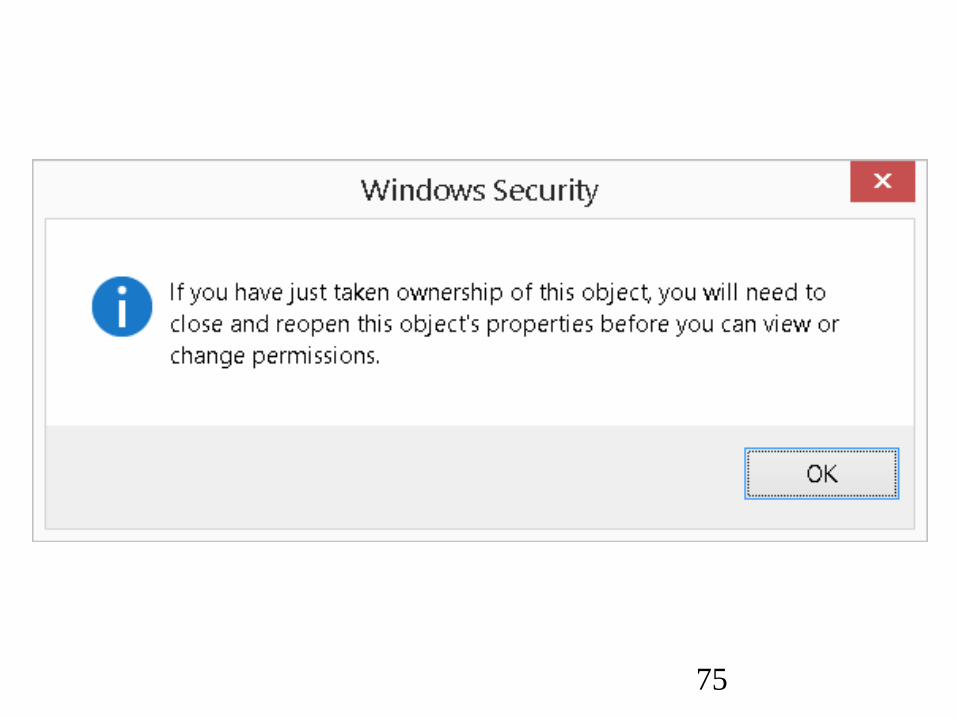
• Step 27: The following notice
will pop up:

73

74
STEP-BY-STEP..FIX FOR FAX IN
"WINDOWS 8.1" (continued)
• Step 28: Click on its "OK"
button:
75

76
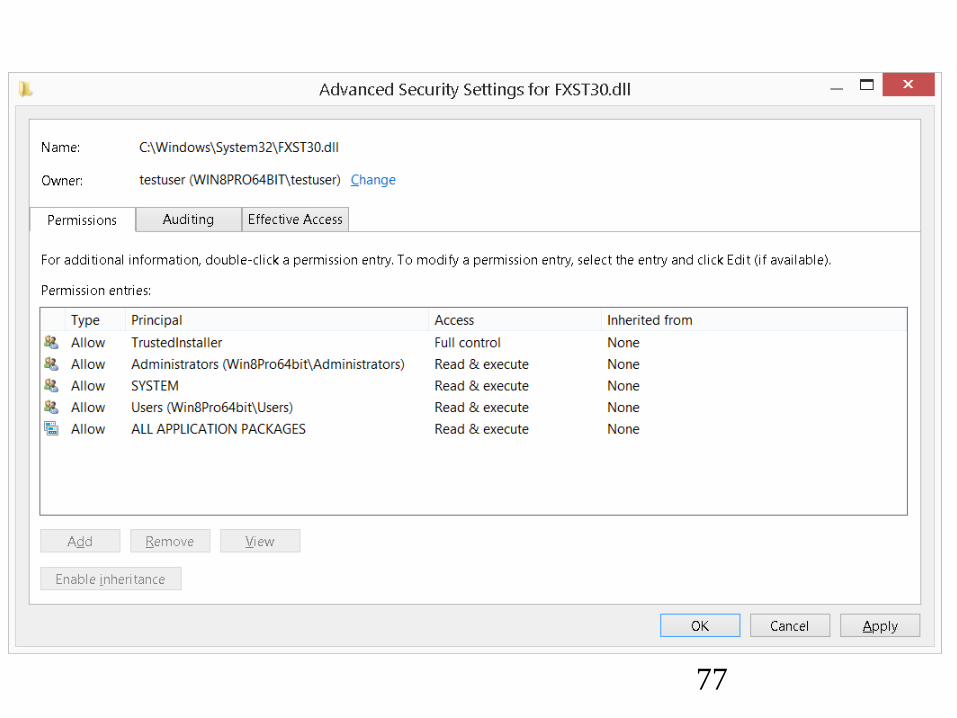
STEP-BY-STEP..FIX FOR FAX IN
"WINDOWS 8.1" (continued)
• Step 29: Close the
"Advanced Security and
Settings for FXST30.dll" box
by clicking on the "X" button
in its upper-right corner:
77
78
STEP-BY-STEP..FIX FOR FAX IN
"WINDOWS 8.1" (continued)
• Step 30: Close the
FXST30.dll box by clicking
on the "X" button in its
upper-right corner:
79
80
STEP-BY-STEP..FIX FOR FAX IN
"WINDOWS 8.1" (continued)
• Step 31: Locate the
FXST30.dll file and use the
RIGHT mouse button to click
on it:

81

82
STEP-BY-STEP..FIX FOR FAX IN
"WINDOWS 8.1" (continued)
• Step 32: Use the left mouse
button to click on
"Properties" in the pop-up
context menu:

83

84
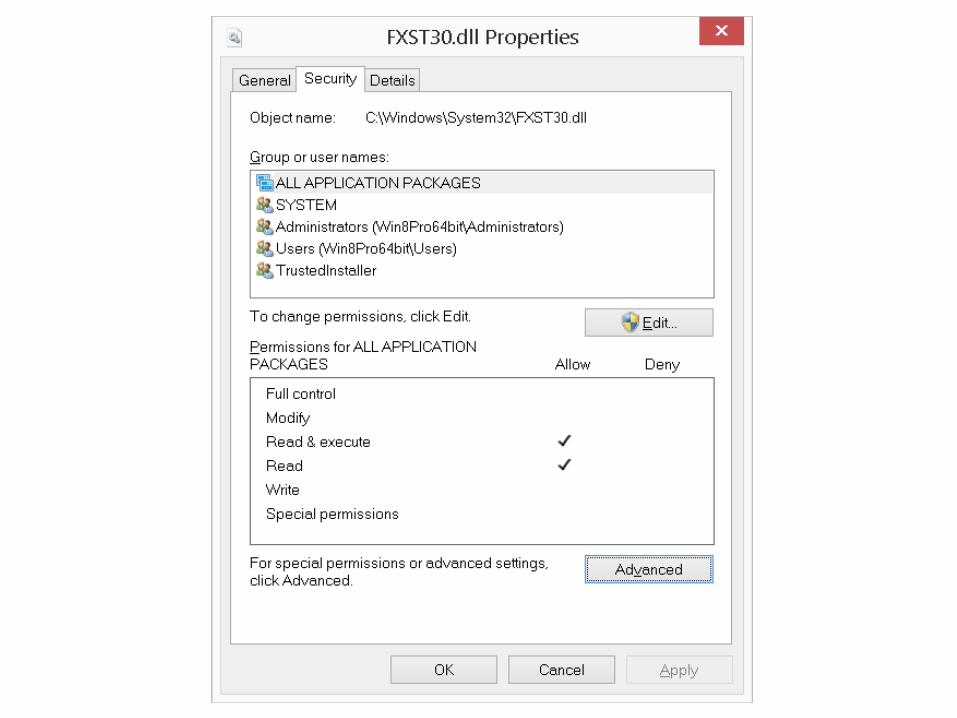
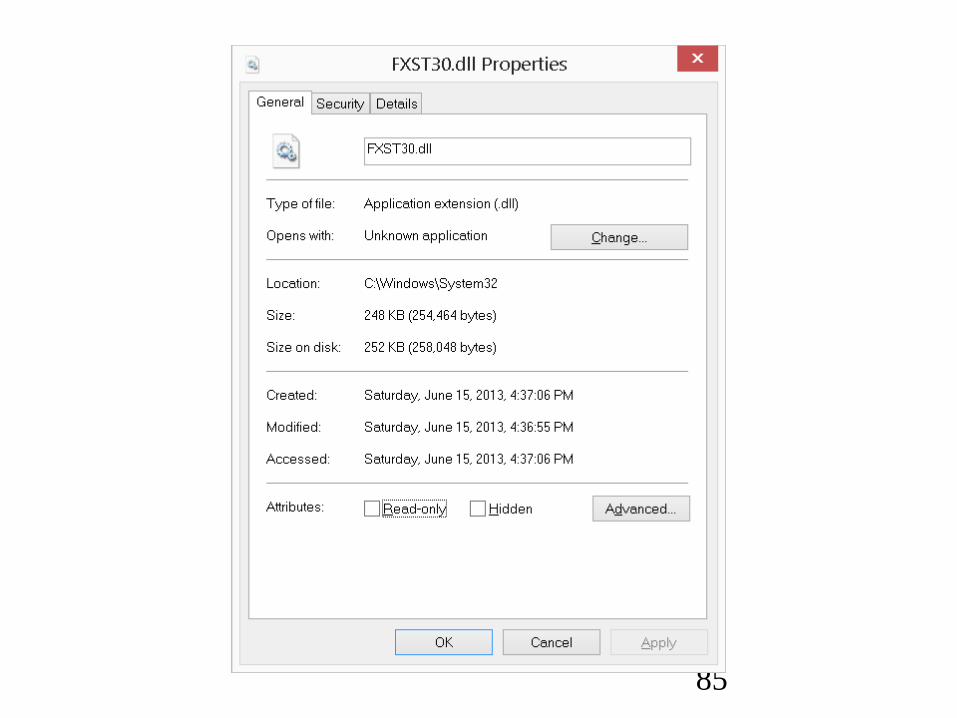
STEP-BY-STEP..FIX FOR FAX IN
"WINDOWS 8.1" (continued)
• Step 33: A "FXST30.dll
Properties" dialog box will be
displayed:
85

86
STEP-BY-STEP..FIX FOR FAX IN
"WINDOWS 8.1" (continued)
• Step 34: Click on the
"Security" tab:

87
88
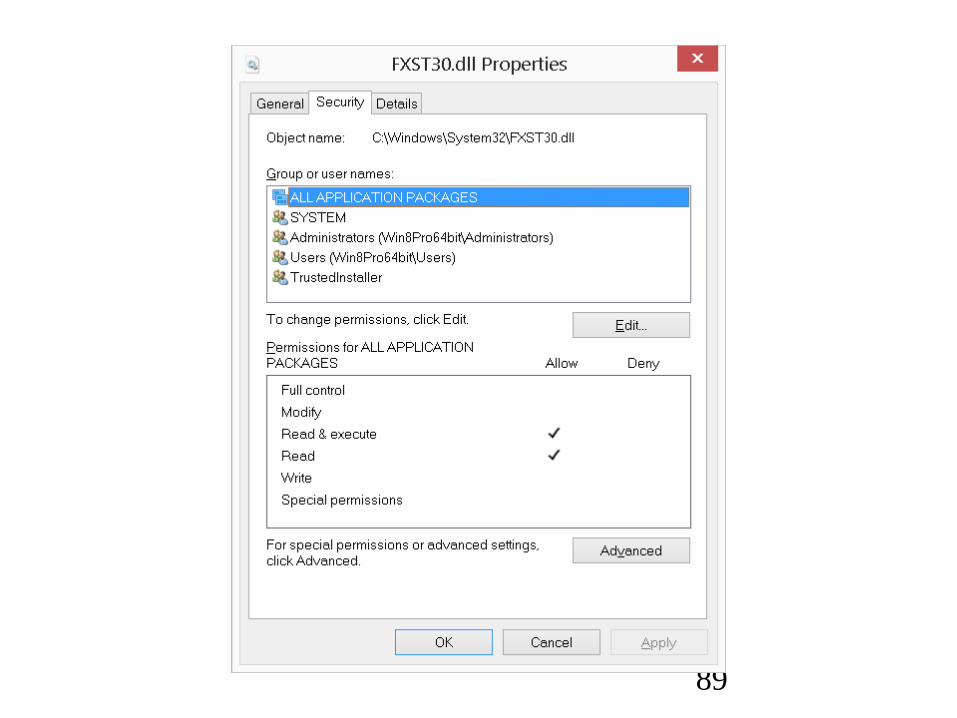
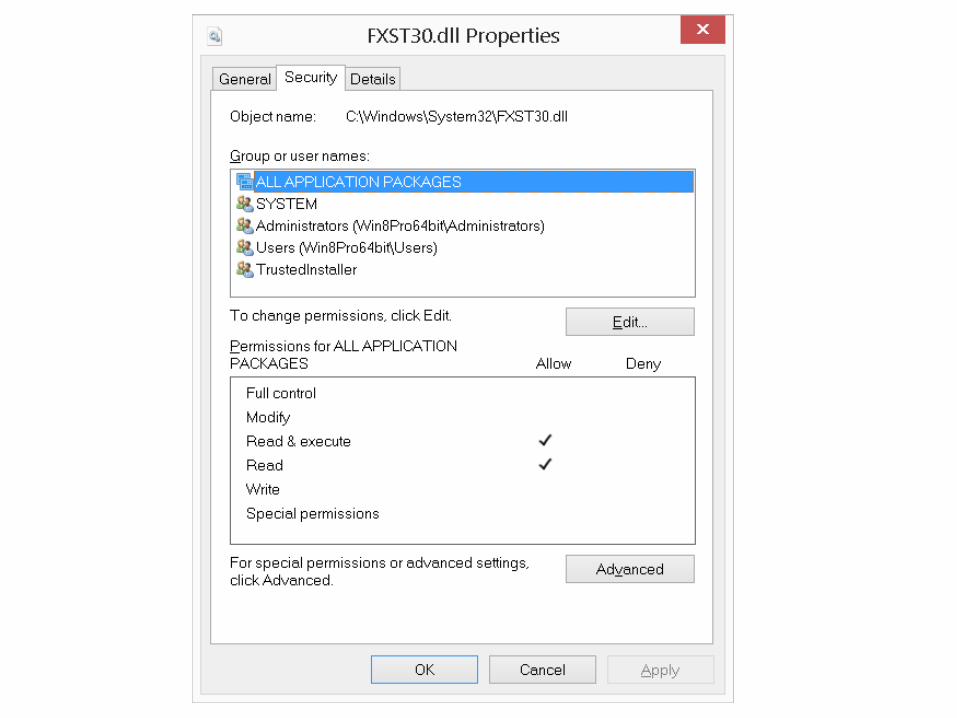
STEP-BY-STEP..FIX FOR FAX IN
"WINDOWS 8.1" (continued)
• Step 35: The "Security" tab
will be displayed:
89

90
STEP-BY-STEP..FIX FOR FAX IN
"WINDOWS 8.1" (continued)
• Step 36: Click on the "Edit"
button:
91
92
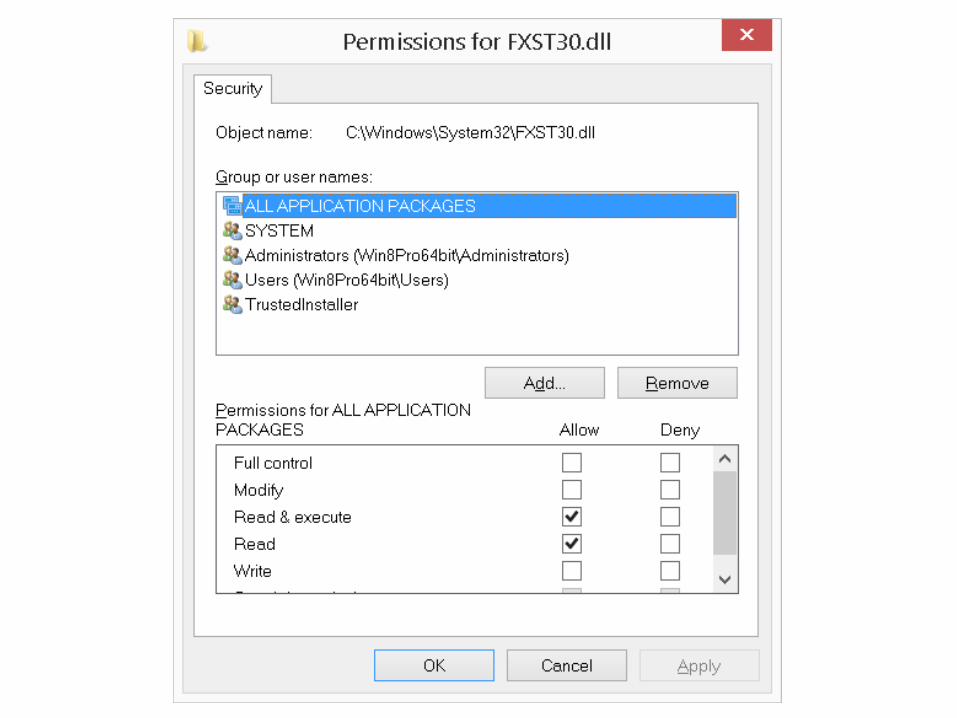
STEP-BY-STEP..FIX FOR FAX IN
"WINDOWS 8.1" (continued)
• Step 37: Click on the "Add"
button:
93
94
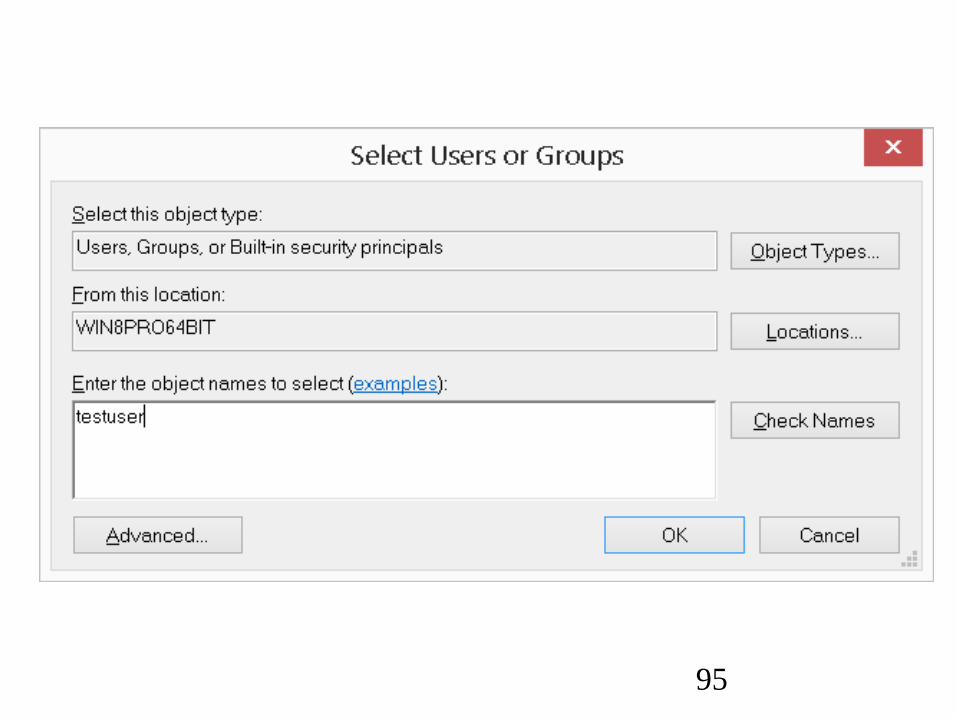
STEP-BY-STEP..FIX FOR FAX IN
"WINDOWS 8.1" (continued)
• Step 38: type in your
username for your user
profile in “Windows 8.1”. In
this example, we typed in
testuser:
95

96
STEP-BY-STEP..FIX FOR FAX IN
"WINDOWS 8.1" (continued)
• Step 39: Click on the "Check
Names" button:
97
98
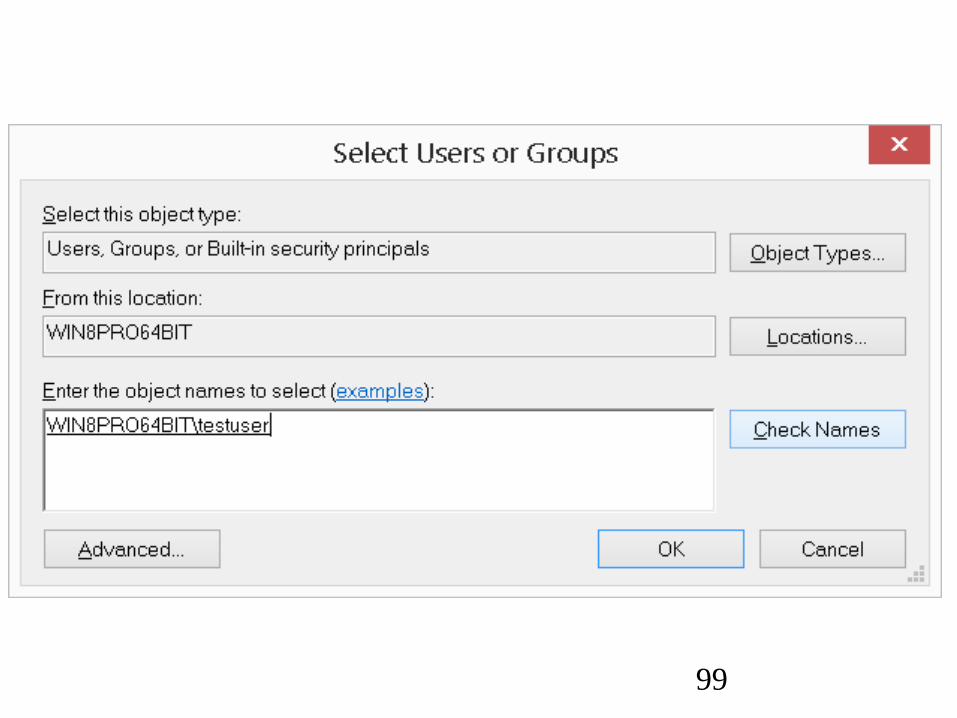
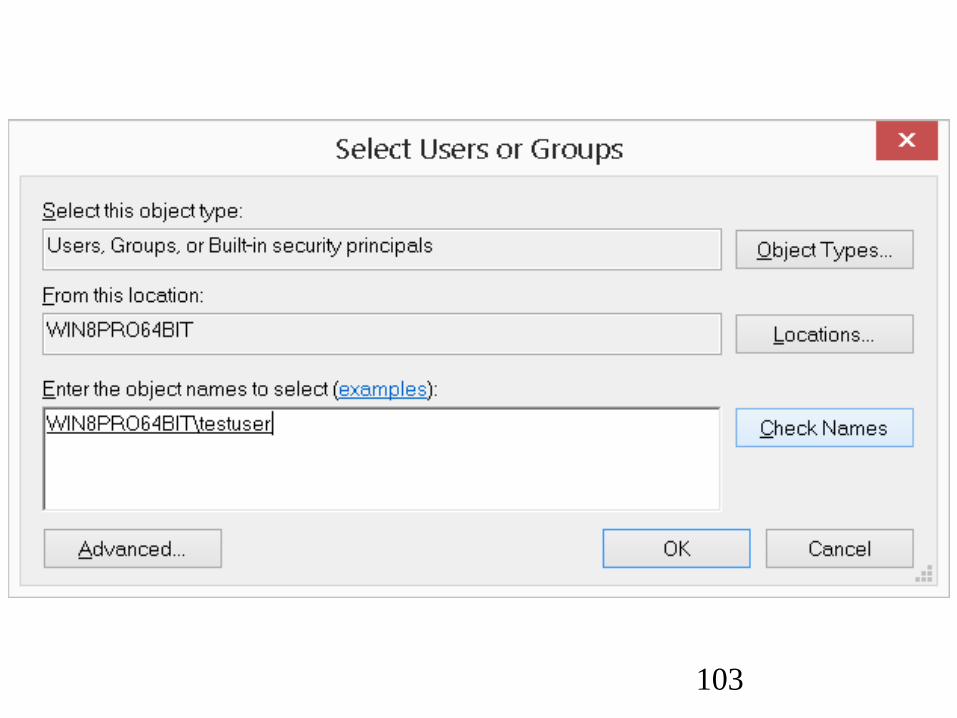
STEP-BY-STEP..FIX FOR FAX IN
"WINDOWS 8.1" (continued)
• Step 40: The name of the
computer will be prepended
to the left of the user name
that you typed in:
99

100
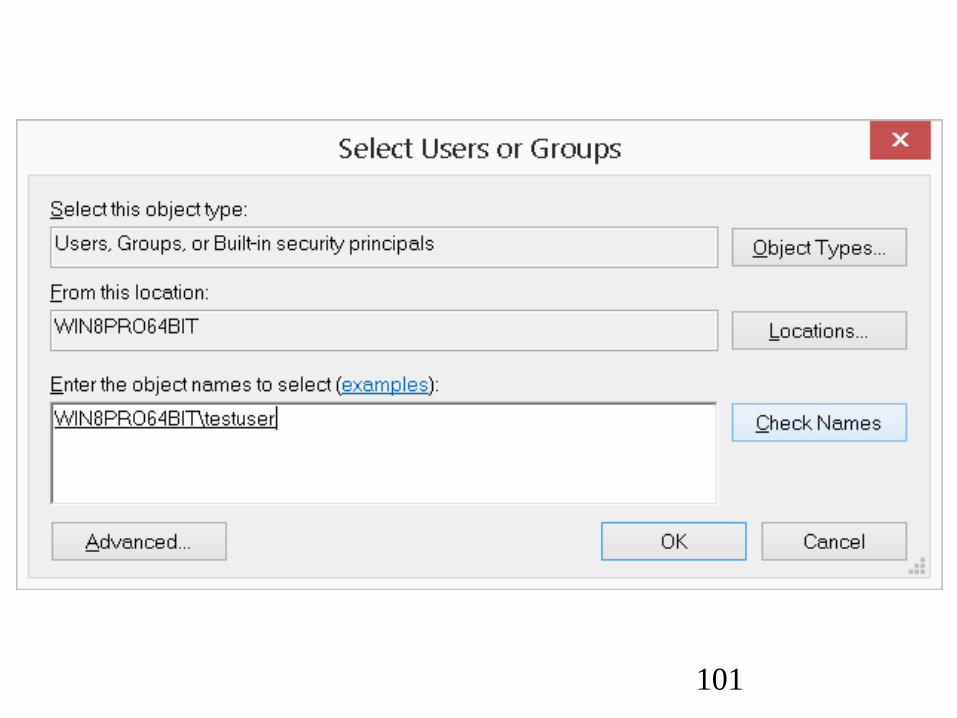
STEP-BY-STEP..FIX FOR FAX IN
"WINDOWS 8.1" (continued)
• Step 41: The name of the
computer will be prepended
to the left of the user name
that you typed in:
101
102
STEP-BY-STEP..FIX FOR FAX IN
"WINDOWS 8.1" (continued)
• Step 42: Click on the "OK"
button:
103
104
STEP-BY-STEP..FIX FOR FAX IN
"WINDOWS 8.1" (continued)
• Step 43: Click on your
username to make sure that
it is highlighted:

105
106
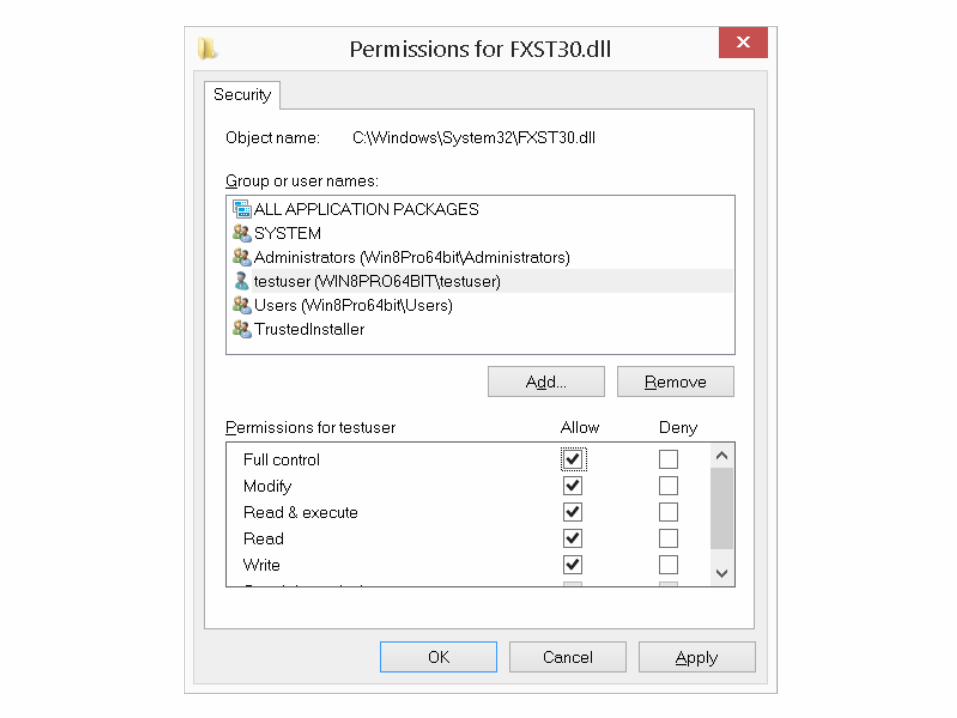
STEP-BY-STEP..FIX FOR FAX IN
"WINDOWS 8.1" (continued)
• Step 44: Put a checkmark in
the "Allow" column of "Full
Control":
107
108
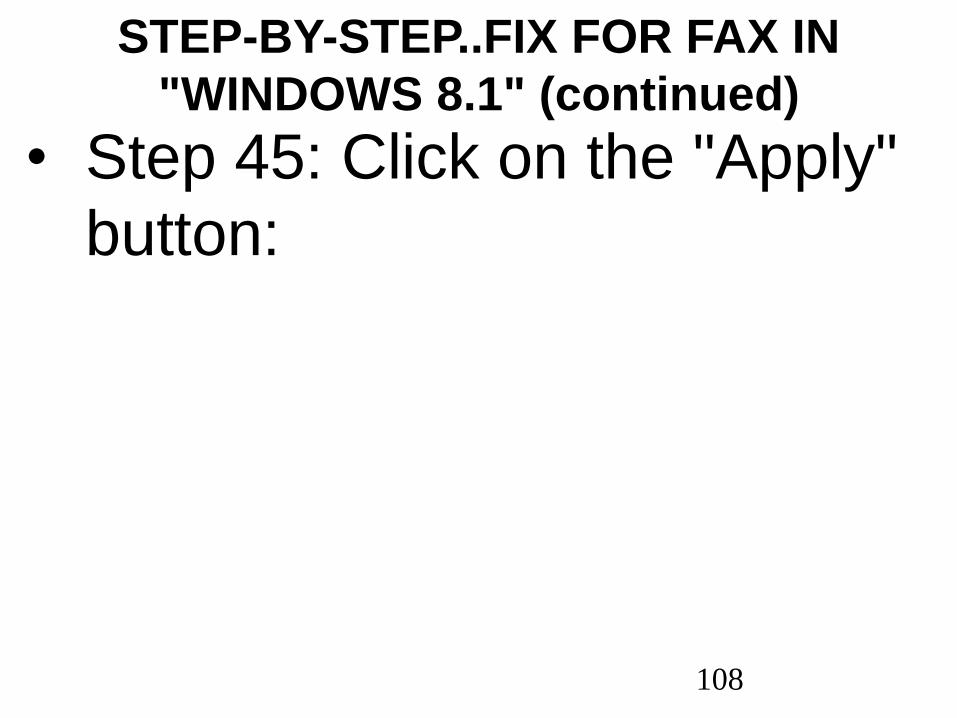
STEP-BY-STEP..FIX FOR FAX IN
"WINDOWS 8.1" (continued)
• Step 45: Click on the "Apply"
button:
109

110
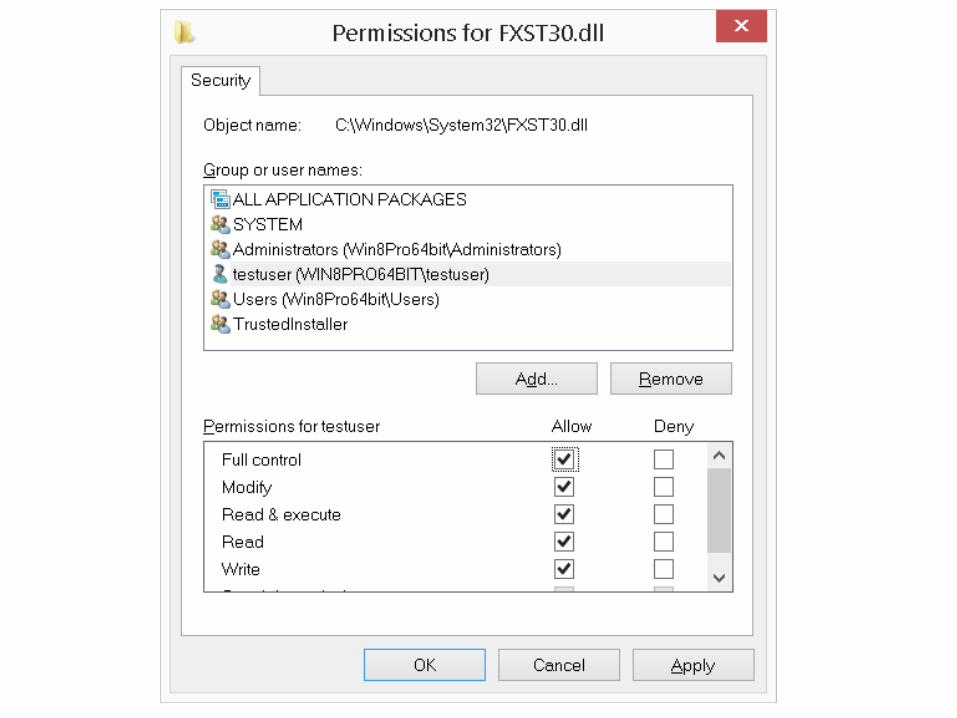
STEP-BY-STEP..FIX FOR FAX IN
"WINDOWS 8.1" (continued)
• Step 46: Click on the "Yes"
button of the "Windows
Security" warning:
111

112
STEP-BY-STEP..FIX FOR FAX IN
"WINDOWS 8.1" (continued)
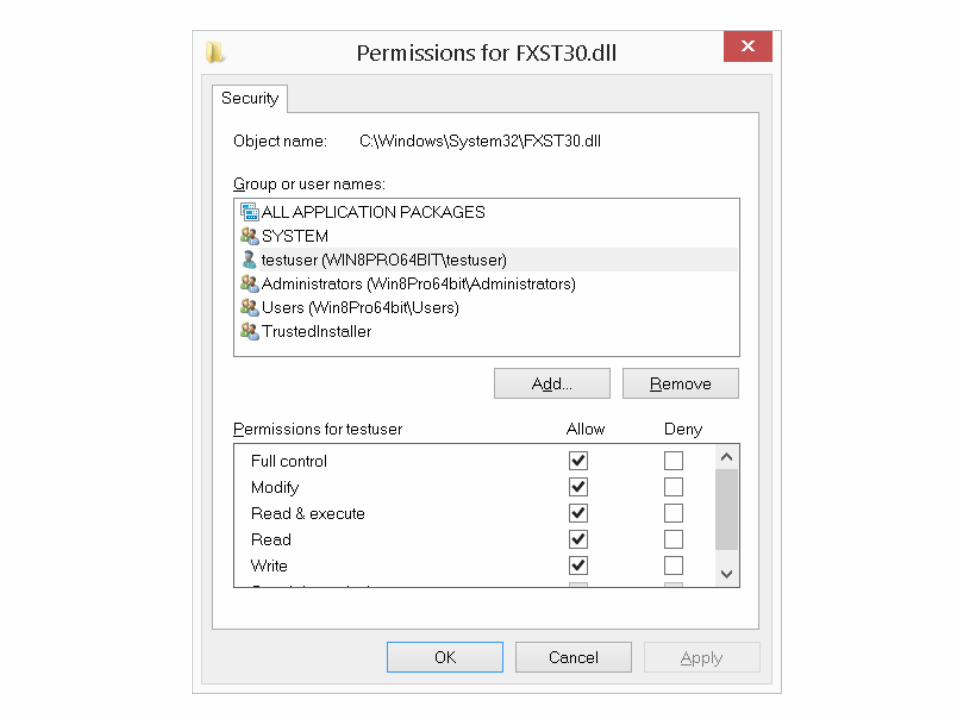
• Step 47: Close the
"Permissions for FXST30.dll"
box by clicking on the on "X"
button:
113
114
STEP-BY-STEP..FIX FOR FAX IN
"WINDOWS 8.1" (continued)
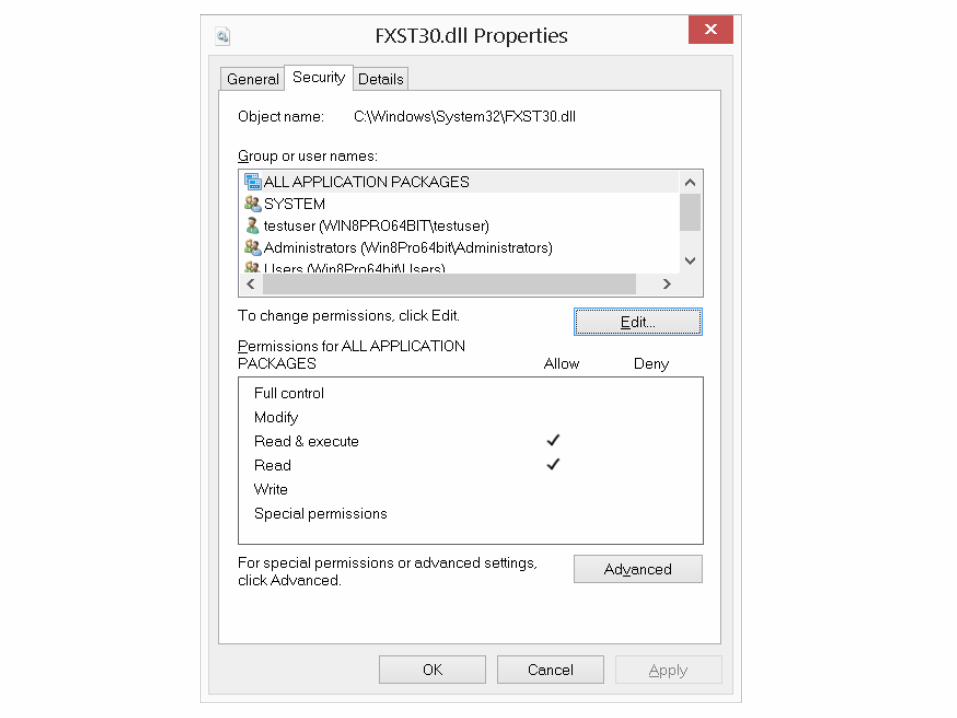
• Step 48: Close the
"FXST30.dll Properties" box
by clicking on the on "X"
button:
115
116
STEP-BY-STEP..FIX FOR FAX IN
"WINDOWS 8.1" (continued)
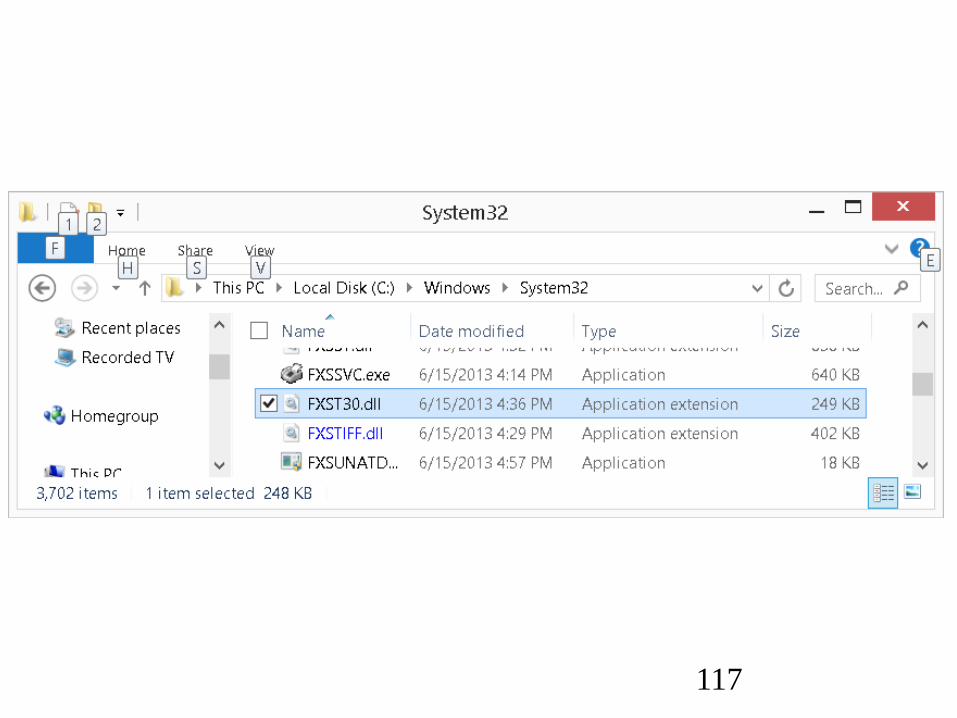
• Step 49: Use the RIGHT
mouse button to click on the
FXST30.dll file:
117
118
STEP-BY-STEP..FIX FOR FAX IN
"WINDOWS 8.1" (continued)
• Step 50: A pop-up context
menu will be displayed:

119
120
STEP-BY-STEP..FIX FOR FAX IN
"WINDOWS 8.1" (continued)
• Step 51: Click on "Delete" in
the pop-up context menu:

121

122
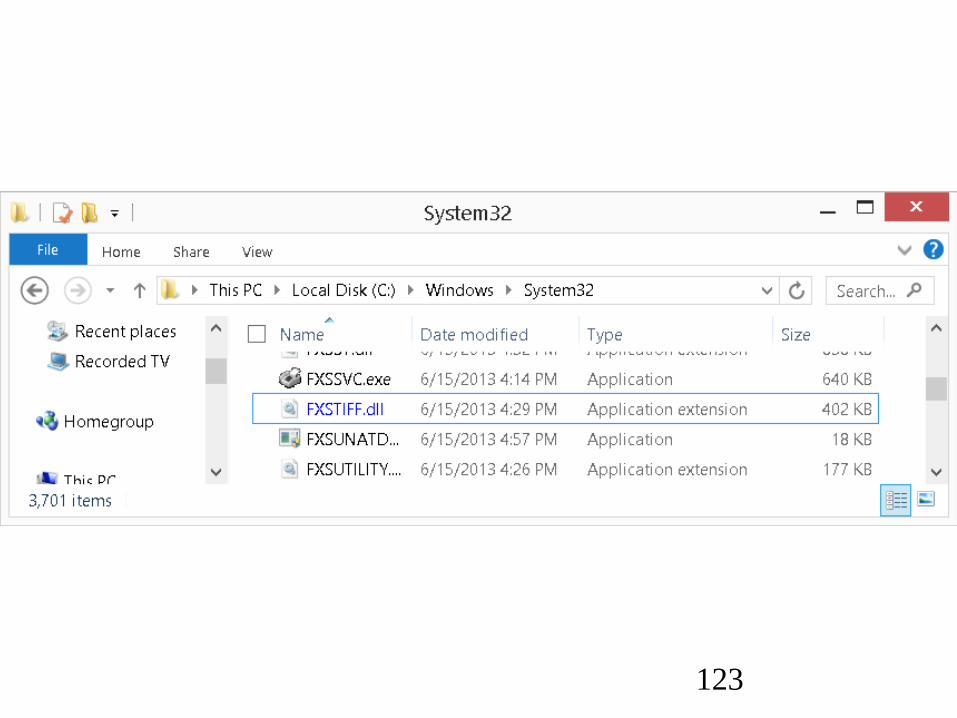
STEP-BY-STEP..FIX FOR FAX IN
"WINDOWS 8.1" (continued)
• Step 52: The FXST30.dll file
will disappear.
123
124
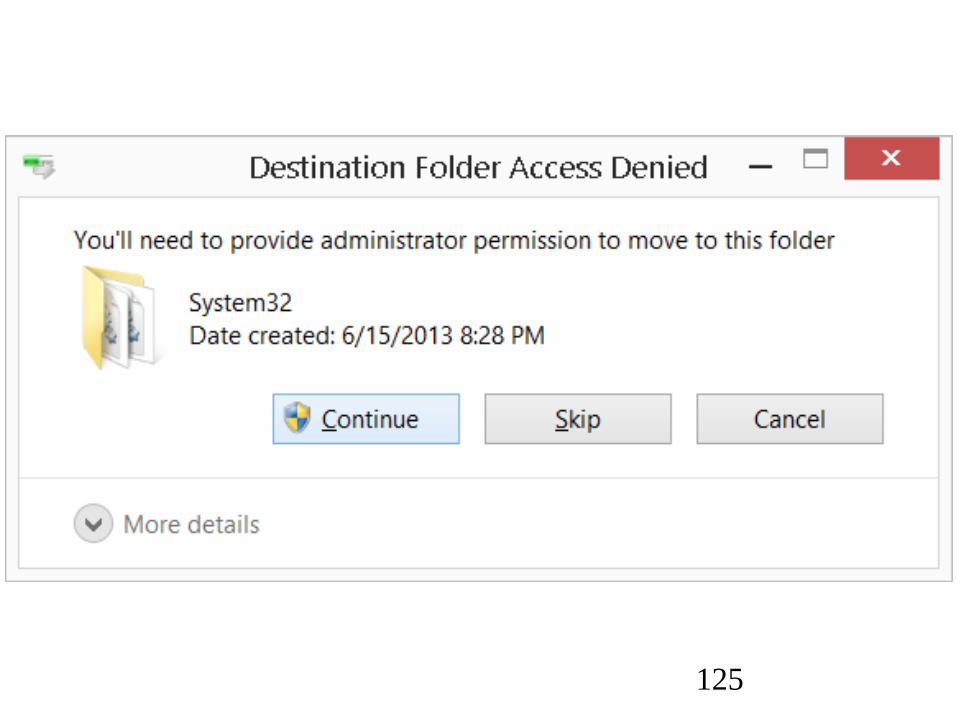
STEP-BY-STEP..FIX FOR FAX IN
"WINDOWS 8.1" (continued)
• Step 53: Copy the good
FXST30.dll file that you
downloaded in "Step 1" into
the same location:
125
126
STEP-BY-STEP..FIX FOR FAX IN
"WINDOWS 8.1" (continued)
• Step 54: Reboot the
computer.
127
STEP-BY-STEP..FIX FOR FAX IN
"WINDOWS 8.1" (continued)
• "Microsoft Windows Fax and
Scan" will now allow you to
successfully transmit and
receive faxes to any analog
fax machine that is
connected to the “Public
Switched Telephone
Network” (PSTN).