working with music software - university of texas libraries · working with music software ......
TRANSCRIPT
Working with Music Software
Brief introduction. List key learning outcomes: • Use Garage Band to transform a MIDI file into an audio track • Import TIFF files into Finale and edit scores
Using Garage Band To begin the project we are going to take the following MIDI file of “The Yellow Rose of Texas” and change the instrumentation of a song. So let’s say you’re making a western themed movie and you really want to use this song but the original song is too modern, using Garage Band you can transform the MIDI to sound like however you may want it to sound. MIDI File: http://www.midiworld.com/search/?q=yellow+rose
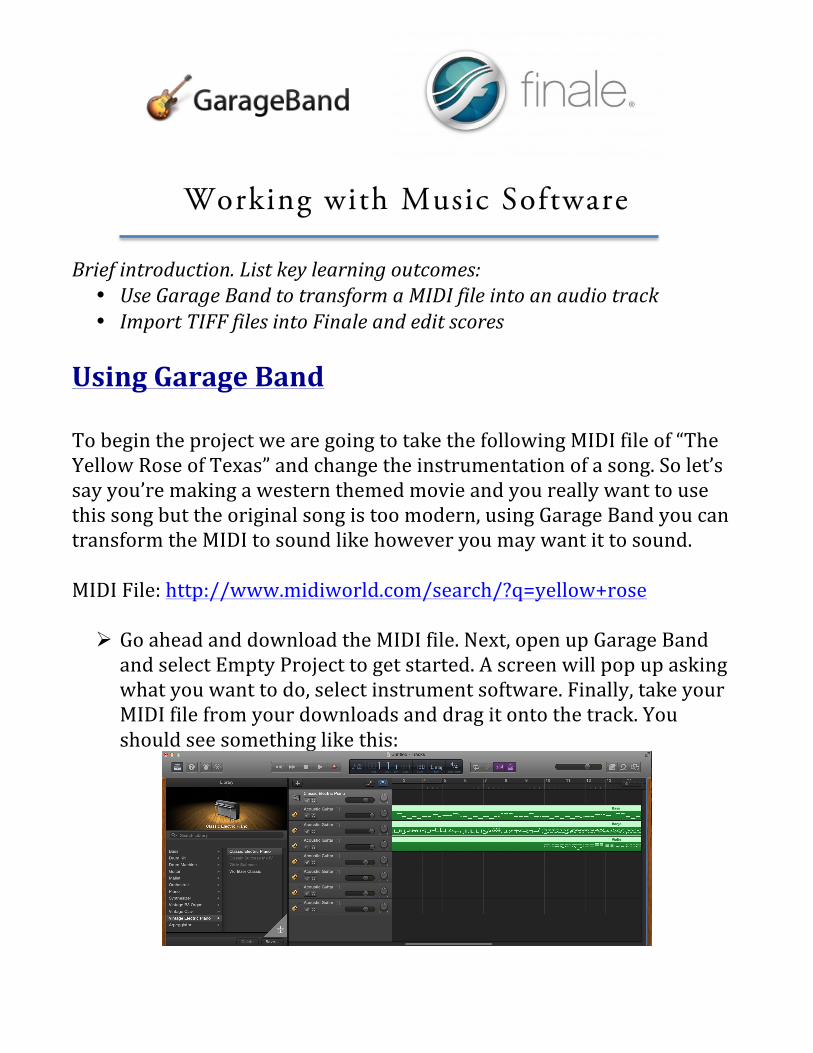
Ø Go ahead and download the MIDI file. Next, open up Garage Band and select Empty Project to get started. A screen will pop up asking what you want to do, select instrument software. Finally, take your MIDI file from your downloads and drag it onto the track. You should see something like this:
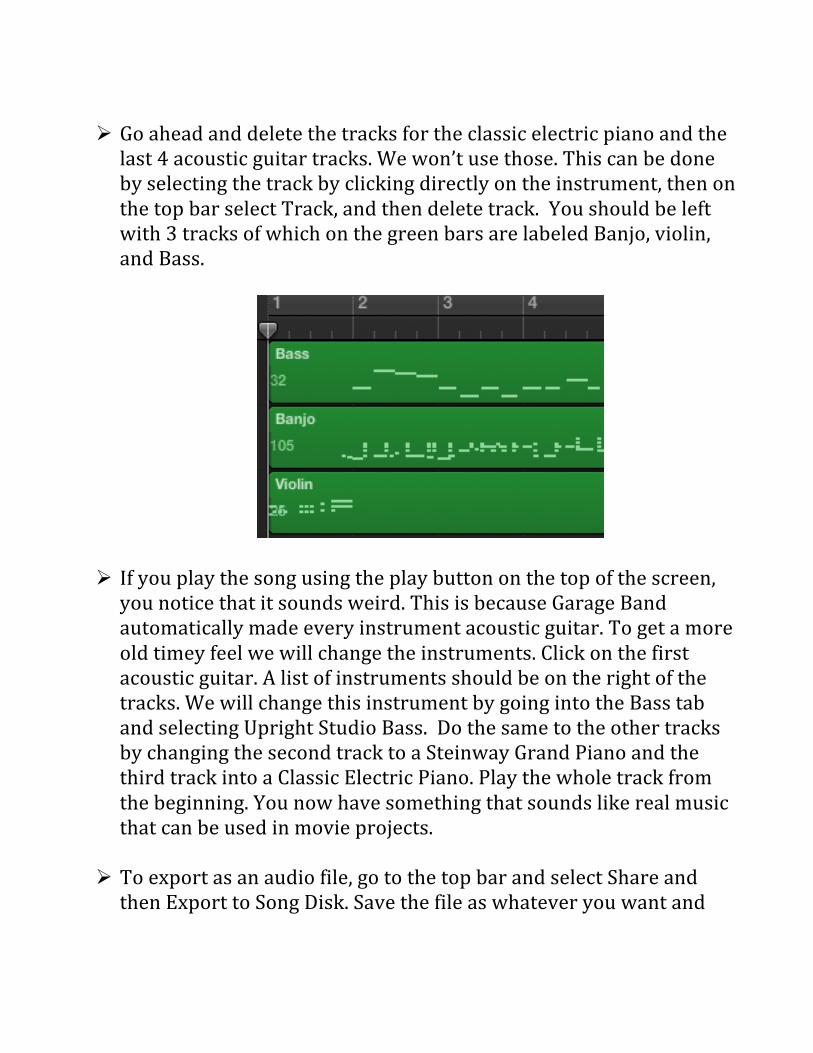
Ø Go ahead and delete the tracks for the classic electric piano and the last 4 acoustic guitar tracks. We won’t use those. This can be done by selecting the track by clicking directly on the instrument, then on the top bar select Track, and then delete track. You should be left with 3 tracks of which on the green bars are labeled Banjo, violin, and Bass.
Ø If you play the song using the play button on the top of the screen, you notice that it sounds weird. This is because Garage Band automatically made every instrument acoustic guitar. To get a more old timey feel we will change the instruments. Click on the first acoustic guitar. A list of instruments should be on the right of the tracks. We will change this instrument by going into the Bass tab and selecting Upright Studio Bass. Do the same to the other tracks by changing the second track to a Steinway Grand Piano and the third track into a Classic Electric Piano. Play the whole track from the beginning. You now have something that sounds like real music that can be used in movie projects.
Ø To export as an audio file, go to the top bar and select Share and then Export to Song Disk. Save the file as whatever you want and
then choose to save as MP3. Give it a few seconds and your audio file should be saved and ready to use!
Using Finale Finale is a great software for your music needs because it enables you to scan music, edit it, and then export it into anything you want—including MIDI files.
Ø So first we are going to take the following pdf of a piece of music that I have already converted into a TIFF file. To convert this a pdf file into a TIFF file you can use Adobe Photoshop. You can also upload sheet music by scanning it and using the SmartScore Lite Scanner option, but for now we will use a TIFF file.
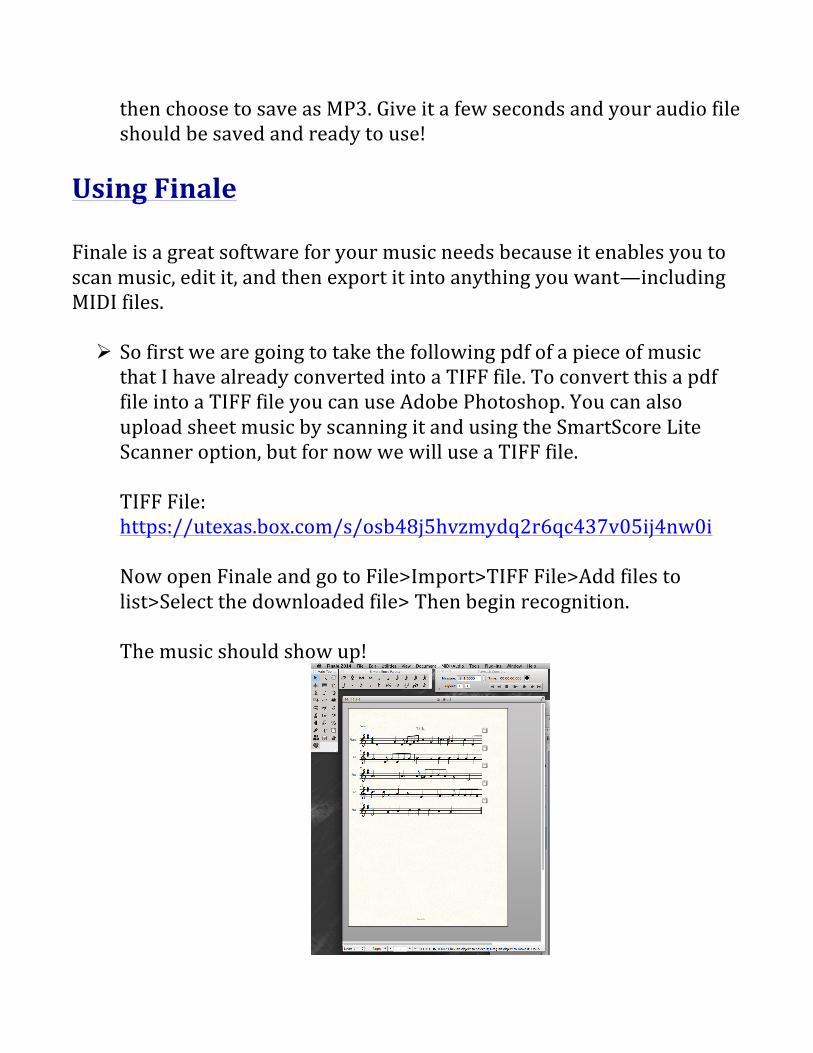
TIFF File: https://utexas.box.com/s/osb48j5hvzmydq2r6qc437v05ij4nw0i Now open Finale and go to File>Import>TIFF File>Add files to list>Select the downloaded file> Then begin recognition. The music should show up!
Ø Play the music using the playback control tab. You should recognize this song. It’s The Eyes of Texas! You should also notice that it doesn’t sound exactly quite like it, and it doesn’t match the TIFF exactly. That’s okay because that’s what editing is for.
Ø Here is where you would need some musical knowledge but since we are just learning about software I’ll list explicitly what needs to be edited.
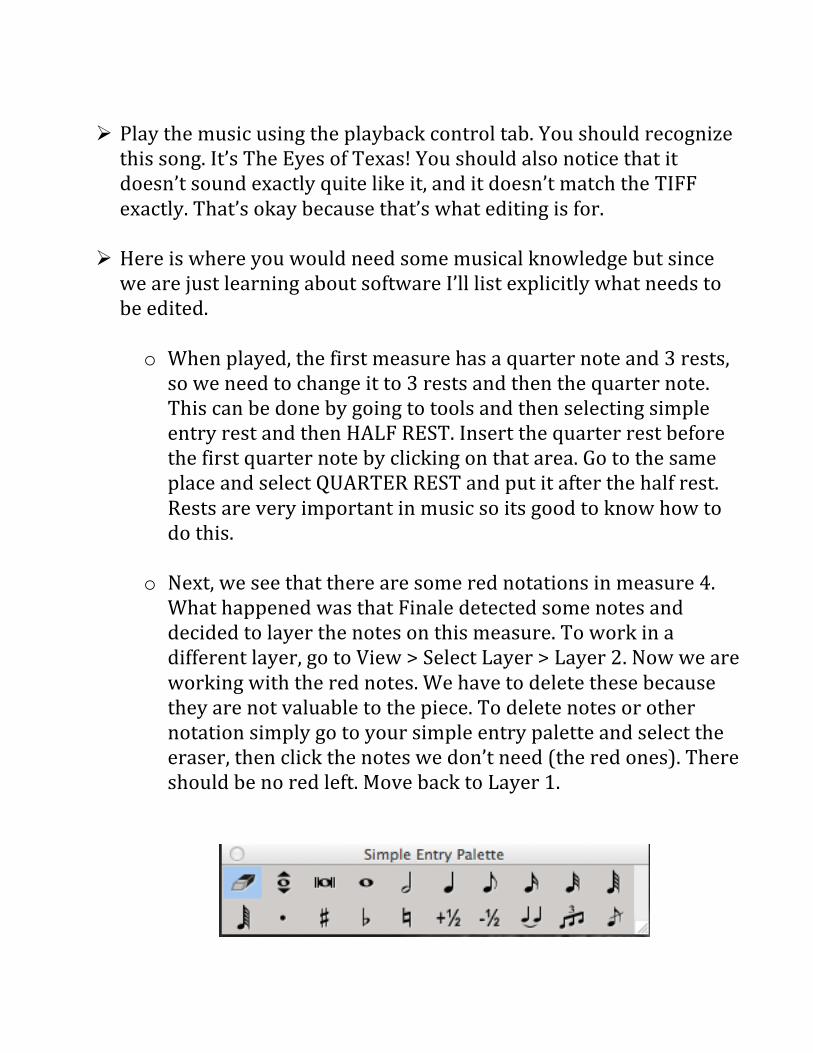
o When played, the first measure has a quarter note and 3 rests, so we need to change it to 3 rests and then the quarter note. This can be done by going to tools and then selecting simple entry rest and then HALF REST. Insert the quarter rest before the first quarter note by clicking on that area. Go to the same place and select QUARTER REST and put it after the half rest. Rests are very important in music so its good to know how to do this.
o Next, we see that there are some red notations in measure 4. What happened was that Finale detected some notes and decided to layer the notes on this measure. To work in a different layer, go to View > Select Layer > Layer 2. Now we are working with the red notes. We have to delete these because they are not valuable to the piece. To delete notes or other notation simply go to your simple entry palette and select the eraser, then click the notes we don’t need (the red ones). There should be no red left. Move back to Layer 1.
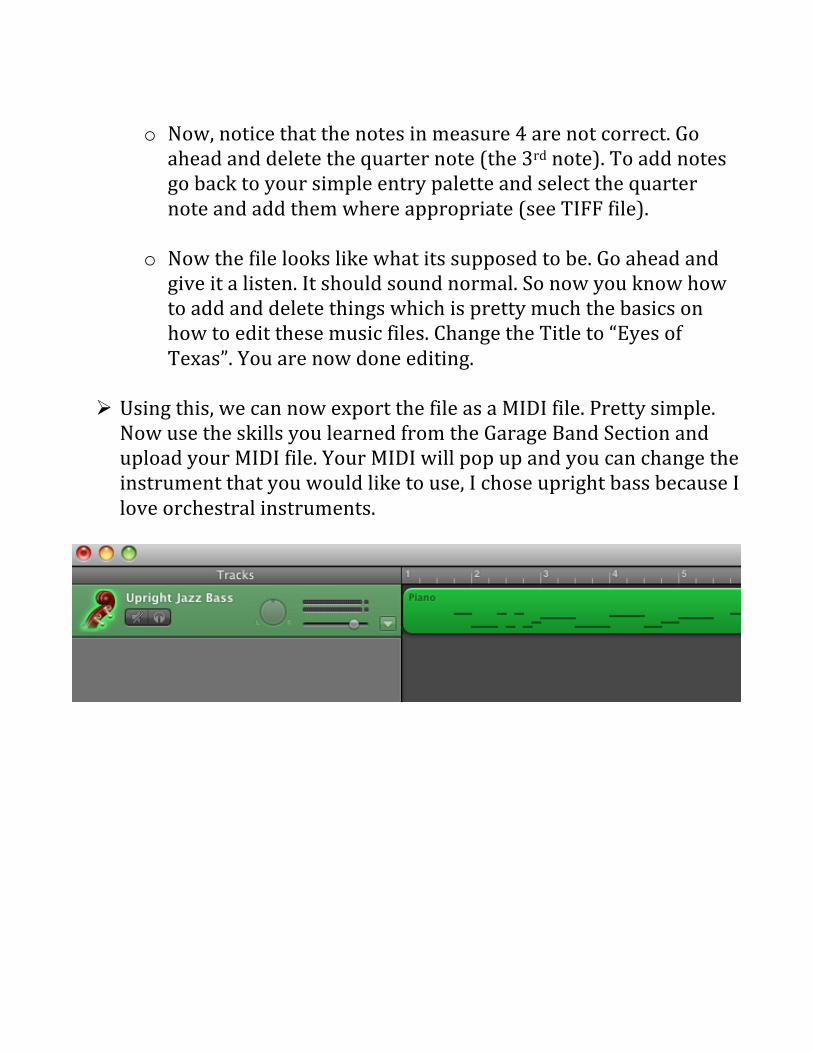
o Now, notice that the notes in measure 4 are not correct. Go ahead and delete the quarter note (the 3rd note). To add notes go back to your simple entry palette and select the quarter note and add them where appropriate (see TIFF file).
o Now the file looks like what its supposed to be. Go ahead and give it a listen. It should sound normal. So now you know how to add and delete things which is pretty much the basics on how to edit these music files. Change the Title to “Eyes of Texas”. You are now done editing.
Ø Using this, we can now export the file as a MIDI file. Pretty simple. Now use the skills you learned from the Garage Band Section and upload your MIDI file. Your MIDI will pop up and you can change the instrument that you would like to use, I chose upright bass because I love orchestral instruments.
Further Information To get more information on how to use Garage Band or Finale you can head over to these website to see how to use different parts of the software. Garage Band -‐ Lynda Finale-‐ Lynda
Produced by: Jocelyn Mendoza ULN Internship Program
PCL Media Lab Spring, 2015