written by david l. drotar illustrated by mel mann
TRANSCRIPT

Written by David L. Drotar
Illustrated by Mel Mann

Magic PaperYou Will Need:
Sheet of paper
Instructions:
Do you know a fast way to stick a piece of paper to your hand without using any glue or tape? Would you
believe that air will do the job? Well, it will! Just follow the steps below.
1. Hold your arm straight at your side. Turn your hand so that the palm faces forward.
2. Press a flat sheet of paper to your palm, using your other hand. Now start running as fast as you can
and take away the helping hand. The paper will stay in place as you run.
This Is What Happens:
Even though you can’t see air, it is a substance, just like anything else, and it exerts a force against
objects. When you ran with the paper, you created a force pushing against the air. The air pushed back
against the paper and held it in place against your hand.

Lighter Than AirYou Will Need:
String
Wooden dowel
Tape
2 paper lunch bags
Candle
Matches
THE HELP OF ONE OF YOUR PARENTS
Instructions:
What is lighter than air? Do this experiment to find the answer.
1. Tie a piece of string to the center of a wooden dowel and attach the free end of the string to a support,
such as the center of a doorway. Tape equal lengths of string to the bottom of 2 paper lunch bags and tie
these upside down to the ends of the dowel. Adjust the paper bags so that they balance perfectly on the
dowel.
2. Hold one of the bags in its balanced position and ask your parent to light a candle and hold it under that
bag for several seconds. When the candle is taken away, let go of the bag. The bag will rise.
This Is What Happens:
The candle flame heats the air inside the bag. This hot air is surrounded outside by cooler air. The cooler
air is heavier than the hot air and lifts the bag of hot air upwards. What is lighter than air? Air, of course!

Come Glide with MeYou Will Need:
Sheet of typing paper
Instructions:
1. Hold an 8.5 by 11-inch sheet of typing paper high above your head. Use both hands to grasp the paper.
Let go. The paper will scoot in various directions and probably turn over.
2. Now make two folds in the long side of the paper, first, 1 inch inward, then, 1 inch again.
3. Hold the paper over your head as you did before, but make sure that the folded edge is at the front,
and on the underside, of the sheet. Gently push the paper as you release your grip. The paper will not turn
over and will glide for some distance before falling to the ground.
This Is What Happens:
As the plain sheet of paper falls, the force of the rushing air over it causes differences in air pressure
over different parts of the paper. The front end tilts up, and the paper may move in a topsy-turvy fashion.
However, by folding the edge, you increase the weight that is at the front, and this weight balances the
upward force of air, causing the paper to glide smoothly without flipping over. Airplane wings are shaped
like this also—they are a little bit heavier in front than they are in the rear—which helps make the ride a
smooth one.

All Kangaroos, Please Step AsideYou Will Need:
Cardboard Pencil
Scissors Book
Instructions:
1. Draw a V-shaped pattern like the one shown in the illustration on a piece of smooth, stiff cardboard.
Cut it out, making sure the corners are rounded.
2. Hold a book in your left hand, with the binding pointing upward at an angle. Place the cardboard shape
on the book so that one arm hangs off the side.
3. Hold a pencil along the side of the book. Quickly move the pencil forward and strike the cardboard so
that it spins and flies off the book. In a few seconds, the cardboard will be back at your feet!
This Is What Happens:
You have just made a boomerang. Because of its shape, the boomerang returns to the thrower, continuing
to spin in the same path without turning over. Boomerangs, used by native Australians and usually carved
from wood, can be used as weapons or for hunting or just for the fun of it.

Sister TwistersYon Will Need:
2 sheets of paper
Pencil
Ruler
Scissors
Instructions:
1. With a pencil and ruler, draw two rectangles that measure 12 by 6 inches on ordinary note paper and
cut them out.
2. Now, make a cut lengthwise on each piece of paper as if you were cutting them in half, but do not cut all
the way through. Make each cut only 6 inches long.
3. On both pieces of paper, fold one of these flaps one way, and the other in the opposite direction.
4. On one piece, make continuous 1-inch
folds along the uncut side. On the other piece,
fold the uncut side into a triangle, then fold it
again into another triangle.
5. Stand on a chair or bench. Drop your two
creations to the ground. They will twirl and spin
gracefully like two ballerina sisters.
This Is What Happens:
You are using the same principle to operate
your spinners that helicopters use to fly. The
folded end of the paper is a little heavier than
the rest of the piece, and this weight keeps the
end always pointing down. The rotating paper
wings fall against a greater amount of air than
if they did not rotate. This decreases the speed
at which the device drops, keeping it aloft for a
longer period of time.
Tight SqueezeYou Will Need:
Cork
Glass soda bottle
Petroleum jelly
Water
Instructions;
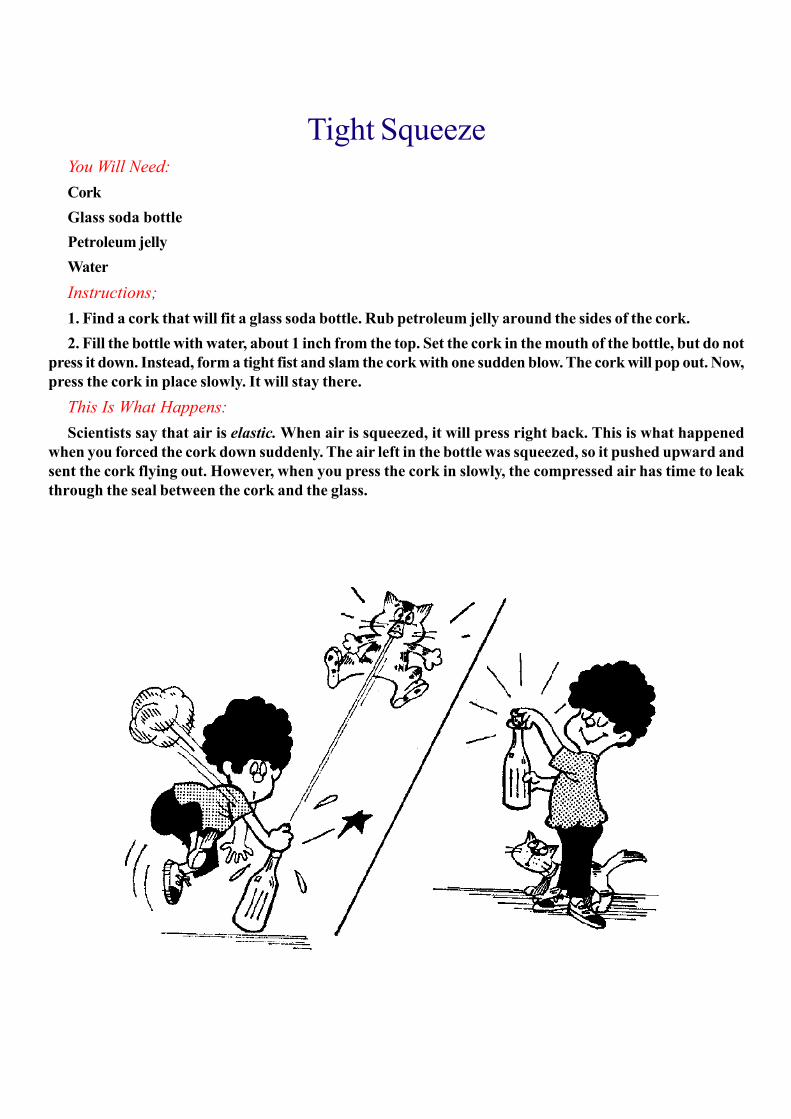
1. Find a cork that will fit a glass soda bottle. Rub petroleum jelly around the sides of the cork.
2. Fill the bottle with water, about 1 inch from the top. Set the cork in the mouth of the bottle, but do not
press it down. Instead, form a tight fist and slam the cork with one sudden blow. The cork will pop out. Now,
press the cork in place slowly. It will stay there.
This Is What Happens:
Scientists say that air is elastic. When air is squeezed, it will press right back. This is what happened
when you forced the cork down suddenly. The air left in the bottle was squeezed, so it pushed upward and
sent the cork flying out. However, when you press the cork in slowly, the compressed air has time to leak
through the seal between the cork and the glass.

Heavy AirYou Will Need:
Basketball Air pump
Scientific scale (one that shows grams or fractions of ounces)
Instructions:
1. Pump up a basketball very hard. You can use a bicycle pump if you have the proper needle for inflating
sports equipment.
2. Now weigh the basketball on the scientific scale. Your science classroom probably has this type of
scale. Ask your teacher to show you how to use it.
3. Let all of the air out of the basketball and weigh it again. This time it weighs less. Can you explain
why?
This Is What Happens:
Did you know that air has weight? Even though air does not weigh very much compared to the objects
that we normally place on scales, you saw the slight difference between an empty basketball and one that
was pumped up. This difference in weight was due to the amount of air inside the ball.
There is a layer of air over the entire earth, and it, too, has weight, and exerts pressure on us.

Paper RaceYon Will Need:
2 sheets of paper Chair
Instructions:
This experiment takes only a few seconds to perform, but you may want to repeat it a few times and think
about the scientific principle before reading the explanation at the bottom of the page.
1. Use two sheets of paper that are exactly alike. Crumple one piece of paper into a ball. Do not do
anything to the other piece.
2. Stand on a chair and hold one piece of paper in each hand. Extend your arms as high as possible. Drop
the crumpled piece and the flat piece at the same time. Which paper falls faster? You know that they both
weigh the same. Can you explain the difference in speed?
This Is What Happens:
Even though both pieces of paper weigh the same, they are shaped differently. The crumpled piece is
more compact and is, therefore, able to push through the air better. The flat paper has more surface area
and the air pushes against this and slows the paper down. Engineers who build airplanes and rockets know
this scientific principle very well. They design their vehicles with a streamlined shape so that they can slice
through the air instead of pushing against it.

Bring on the RingsYou Will Need:
Oatmeal box, Scissors, Balloon, Rubber band
Ammonium chloride (available in a drugstore) Aluminum foil, Tweezers, Candle
THE HELP OF ONE OF YOUR PARENTS
Instructions:
1. Cut a hole about the size of a half-dollar in the bottom of an empty oatmeal box. (The other end is
completely open.) Slice open a large balloon so that you have a flat rubber piece. Stretch the rubber over the
open end of the box and secure it with a rubber band.
2. Place quarter teaspoon of ammonium chloride into a small cup-shaped piece of aluminum foil. Hold the
foil with tweezers, while one of your parents gently heats it over a candle flame. (Ammonium chloride is a
harmless chemical when it is burned.)
3. Thick white smoke will begin to form. When this happens, direct the smoke into the oatmeal box
through the hole you have cut.
4. Now you are ready for some stunts. Tap the center of the rubber on your oatmeal box. A beautiful
smoke ring will whiz out of the hole. Try to make one smoke ring pass through the center of another one, or
try to knock down a light paper figure by shooting a smoke ring toward it!
This Is What Happens:
You have just produced vortex rings, which is simply whirling air. The smoke that you added serves to
make the rings visible to your eyes. Did you notice that the smoke rings keep their shape for a long time?
This happens because the only force that breaks them apart is the movement of air outside the rings.

Gyral SpiralYon Will Need:
Aluminum pie plate
Pencil
Glue
Empty spool
Small block of wood
Radiator or hot-air vent
Instructions:
1. Cut out a spiral shape from the flat base of an aluminum pie plate. Use the blunt point of a pencil to
make a dent in the exact center, but do not poke it all the way through the aluminum.
2. Glue an empty spool to a scrap piece of wood. Insert the pencil, eraser side down, into the spool. The
fit should be firm so the pencil stands upright without wobbling. If the pencil does wobble, wrap paper strips
around it for padding.
3. Align the dent in the aluminum spiral with the pencil point and allow the spiral to hang freely. Twist or
bend the metal as needed so that the edges separate from each other.
4. Finally, place your device over a safe heat source, such as a radiator or hot-air vent. The shimmering
spiral will spin merrily.
This Is What Happens:
You’ve just proven that hot air rises. The currents of hot air rise and push against the metal, and this
continuous action causes the spiral to rotate around its pivot—the pencil point.
Loose ChangeYou Will Need:
Wine glass
Dime
Half-dollar
Instructions:
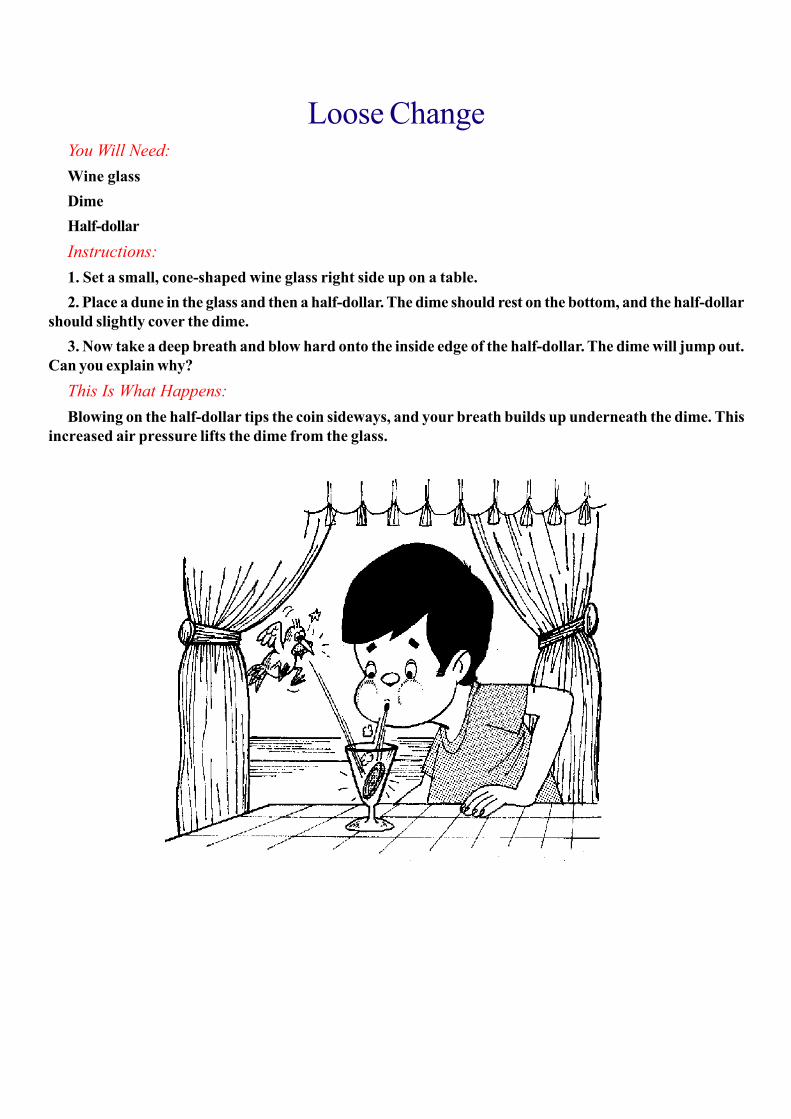
1. Set a small, cone-shaped wine glass right side up on a table.
2. Place a dune in the glass and then a half-dollar. The dime should rest on the bottom, and the half-dollar
should slightly cover the dime.
3. Now take a deep breath and blow hard onto the inside edge of the half-dollar. The dime will jump out.
Can you explain why?
This Is What Happens:
Blowing on the half-dollar tips the coin sideways, and your breath builds up underneath the dime. This
increased air pressure lifts the dime from the glass.

George Washington Was HereYon Will Need:
A cold winter day Door to your house Dollar bill
Instructions:
You have probably heard a good deal about conserving energy. Here is a simple test you can perform to
see if you and your family are energy savers!
1. On a cold winter day, stand inside your house and face an outside door. Place a dollar bill on the floor
in front of the door.
2. Push the dollar bill under the door. Does it slide away easily, or do you have trouble pushing it through?
This Is What Happens:
The dollar bill helps you measure the air space between the bottom of the door and the floor. If you could
slide the bill underneath the door easily, this means that there is not a tight seal and warm air from your
house is escaping through this space. It is very expensive to heat the air in your house, and now this hot air
is leaving! Hold your hand in front of the door for a few seconds. Do you feel cold air? Not only are you
losing warm air, but the leak is also letting cold air in!

Dry DunkYou Will Need:
Matches
Newspaper
Tall drinking glass
Pail
Water
THE HELP OP ONE OF YOUR PARENTS
Instructions:
Can you dunk some matches in water and still be able to use them?
1. Wrap a few matches in a small scrap of newspaper. Crumple the newspaper and poke it to the bottom
of a tall drinking glass. The paper should remain in the bottom when the glass is turned upside down.
2. Fill a pail, or other deep container, with water. Hold the glass upside down and push it straight down to
the bottom of the pail. Make sure you don’t tip the glass sideways.
3. Now, remove the glass, take out the newspaper, and unwrap the matches. The newspaper and the
matches are dry! Prove it by asking one of your parents to strike the matches.
This Is What Happens:
When you pushed the glass into the water, the glass was not really empty. It was full of air. This volume
of air prevented water from entering the glass, and the paper and matches remained dry.

Vapor LockYou Will Need:
Clear nail polish
Wooden matches
Styrofoam egg carton
THE HELP OF ONE OF YOUR PARENTS
Instructions:
If you’ve ever been on a rainy camping trip and found yourself with soggy matches, here’s a good way to
waterproof them.
1. Buy some clear nail polish. With the applicator brush that comes in the bottle, paint the striking tips of
some wooden matches. Make sure to cover the area thoroughly.
2. Poke the other ends of the matches into a Styrofoam egg carton so that the painted tips are sticking up.
Do not touch the painted ends.
3. Let the matches dry completely, then give them a second coat. Let them dry overnight this time.
4. The next day, take a match from the egg carton and dip it in some water. Now, ask one of your parents
to strike the tip against the match box. The match will light!
This Is What Happens:
The nail polish coats the chemicals on the match tip and seals them. Since the nail polish is a hard
substance, it creates a barrier to moisture. However, when the match is struck, the polish is scratched away,
allowing the chemicals to ignite as they normally do.

Water ScrubberYou Will Need:
Half-gallon plastic jug
Scissors
Nail
Hammer
Pebbles, gravel, and sand (coarse and fine)
Glass jar Muddy water
THE HELP OF ONE OF YOUR PARENTS
Instructions:
1. Cut off the bottom of a half-gallon plastic jug. Then, unscrew the cap and ask one of your parents to
punch a few small holes in it with the tip of a nail and a hammer. Screw the cap back on and turn the jug
upside down.
2. Fill the jug with equal layers of pebbles, gravel, coarse sand, and fine sand. The pebbles go in first, the
gravel next, then the coarse sand, and, finally, the fine sand on top. Don’t fill the jug completely; leave a
couple of inches free.
3. Hold the jug over a clear glass jar. If possible, prop up the jug so that it rests securely over the jar.
4. Now, pour some muddy water onto the sand. In a few minutes, clean water will trickle into the jar.
This Is What Happens:
You have just performed filtration. Filtration is the removal of material that is suspended in a liquid. The
muddy water contained many impurities, and these were trapped—filtered—by the layers in your jug. The
water itself, however, was free to pass through the layers and into the jar. Of course, you shouldn’t drink
this water because it is not really clean enough for drinking.

Stormy Seas AheadYou Will Need:
Tall olive jar
Water
Blue food coloring
Cooking oil
Instructions:
1. Save one of the tall jars that olives come in. Fill it halfway with water, then add a drop of blue food
coloring.
2. Fill the rest of the jar, right up to the top, with cooking oil, being sure not to leave any air space at the
top. Screw the cap on tightly.
3. Hold the jar sideways and gently rock it back and forth. The blue water inside the jar churns like
rolling ocean waves. Now shake the jar vigorously and you’ll have a stormy sea!
This Is What Happens:
Water and oil do not mix together. Each remains separate, and since water is heavier, it stays on the
bottom of the jar. When you rock the jar, the colored water moves against the surface of the oil. When you
shake the jar vigorously, foamy bubbles form that look like the stormy sea, but the water and oil are still not
mixed. Let the jar sit for a few minutes and you will see two separate layers again.

Mystery BubblesYou Will Need:
Glass jar with lid
Water
1 tablespoon salt
Instructions:
1. Fill a clear glass jar—such as a mayonnaise jar—with tap water. Set the jar in front of a bright window
and watch the water at the top. Air bubbles will rise to the surface.
2. After the bubbling has stopped and the water becomes clear, add a tablespoon of salt to the jar. Screw
the lid on the jar and turn the jar over once. Then return it to the upright position. Study the water again.
More bubbles will rise. Where did they come from?
This Is What Happens:
Water contains air, even though you can’t see it. This air is usually dissolved in the water. You saw some
of the excess air rising as bubbles in the first part of the experiment. When you added the salt, more air was
driven from the water because the salt dissolves more easily in the water than the air, and it replaces the air.
Fish hi lakes and streams are able to take air directly from water by passing water through their gills.

The All-American Taste TestYou Will Need:
Saucepan Tap water Glass
THE HELP OF ONE OF YOUR PARENTS
Instructions:
1. Fill a saucepan with tap water. Ask one of your parents to boil the water gently for a few minutes. Then
leave the pan undisturbed with its cover on until the water is cool.
2. Now pour some of the water into a glass and drink it. Does it taste flat and dull? Drink some water
fresh from the faucet and compare the taste.
This Is What Happens:
Tap water contains ah* in addition to many minerals, and they all help to give water a pleasant, lively
quality. But by boiling the water, you have removed most of the air, and this changes the flavor.

Marble JarsYon Will Need:
Newspapers
Coffee can
Water
Enamel paint in several colors
Baby food jars
Instructions:
This is a good project to do outdoors on a picnic table.
1. Spread some newspapers on the table on which you are working.
2. Fill a coffee can about 3/» full with water, and then dribble different-colored enamel paints into the can.
You do not have to measure the paints exactly.
3. Hold a baby food jar by the rim and dip it into the water. Remove the jar and set it upside down to dry.
You will see beautiful swirls of color that look like marble designs.
This Is What Happens:
Enamel paints are made with oil and this causes them to float on top of the water. When you dip the jar
into the water, the paint sticks to the glass and runs together to form interesting patterns. You might use
your new jar to store rubber bands, seeds, paper clips, coins, or crayons.
That’s SwellYou Will Need:
Prunes
Raisins
Small, clear glass
Water
Instructions:
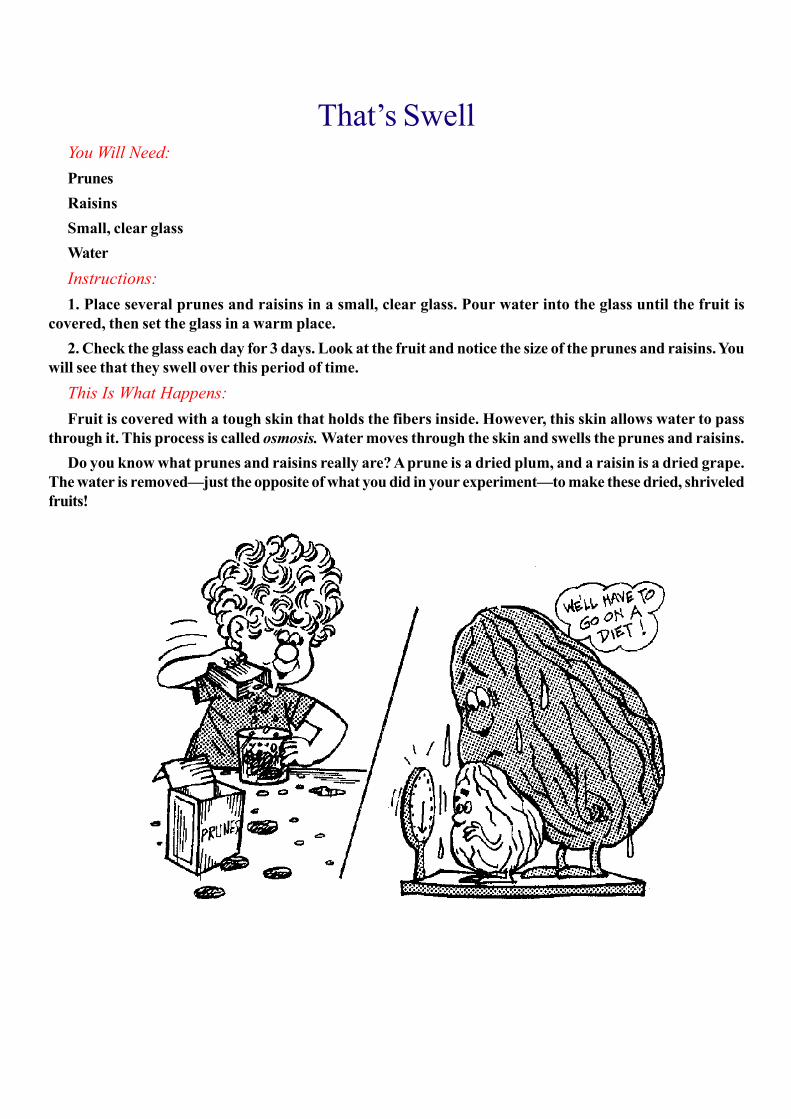
1. Place several prunes and raisins in a small, clear glass. Pour water into the glass until the fruit is
covered, then set the glass in a warm place.
2. Check the glass each day for 3 days. Look at the fruit and notice the size of the prunes and raisins. You
will see that they swell over this period of time.
This Is What Happens:
Fruit is covered with a tough skin that holds the fibers inside. However, this skin allows water to pass
through it. This process is called osmosis. Water moves through the skin and swells the prunes and raisins.
Do you know what prunes and raisins really are? A prune is a dried plum, and a raisin is a dried grape.
The water is removed—just the opposite of what you did in your experiment—to make these dried, shriveled
fruits!

Little Red ScooterYou Will Need:
Light-colored bowl Water Paprika Dishwashing liquid
Instructions:
1. Fill a light-colored bowl with water and shake some paprika evenly over the top of the water.
2. Put a drop of dishwashing liquid on your finger, and then dip your finger into the center of the bowl. The
red paprika quickly scoots to the sides of the bowl.
This Is What Happens:
Dishwashing liquid is a detergent, and one of the important qualities of detergent is that it mixes easily
with water. As you dipped your finger into the bowl, a small amount of dishwashing liquid from your finger
readily attached itself to the water. Then it quickly spread over the entire surface and pushed all the grains
of paprika to the sides.
Giant Bubble MachineYou Will Need:
Large bowl
Water
4 to 5 tablespoons dishwashing
liquid Scissors Paper cup
Instructions:
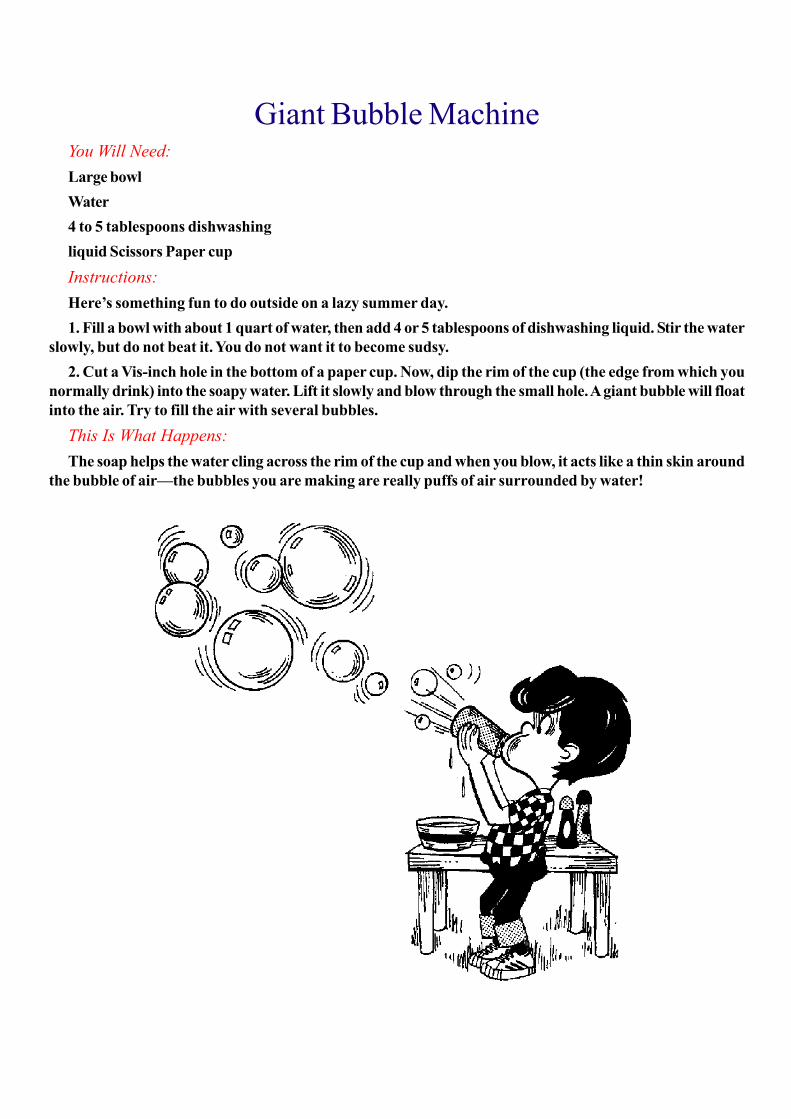
Here’s something fun to do outside on a lazy summer day.
1. Fill a bowl with about 1 quart of water, then add 4 or 5 tablespoons of dishwashing liquid. Stir the water
slowly, but do not beat it. You do not want it to become sudsy.
2. Cut a Vis-inch hole in the bottom of a paper cup. Now, dip the rim of the cup (the edge from which you
normally drink) into the soapy water. Lift it slowly and blow through the small hole. A giant bubble will float
into the air. Try to fill the air with several bubbles.
This Is What Happens:
The soap helps the water cling across the rim of the cup and when you blow, it acts like a thin skin around
the bubble of air—the bubbles you are making are really puffs of air surrounded by water!

Parade of the DropsYou Will Need:
Stove or hot plate
Small glass
Frying pan
Water
THE HELP OF ONE OF YOUR PARENTS
Instructions:
1. Ask one of your parents to turn a stove burner or hot plate on high heat and to set a frying pan on the
burner.
2. Fill a small glass, such as a juice glass, with water and set this down nearby.
3. After the pan has had time to heat for a few minutes, and with your parent at your side during this step,
dip your fingers into the glass of water to moisten them. Shake the excess water from your fingers over the
frying pan so that drops of water fall into the pan. You will see perfectly formed spheres of water bounce and
parade around the pan.
4. Remind your parent to turn off the heat when you are finished.
This Is What Happens:
As soon as a drop of water hits the hot surface of the frying pan, a little layer of steam forms underneath
the drop. This steam acts as a cushion and raises the drop above the metal surface. The drop of water is
held together as a sphere by the surface tension of the water, but eventually the drop disappears, as all of its
water is changed into steam by the heat.

Let’s Stick TogetherYou Will Need:
Large can, such as a coffee or juice can Hammer Nail Water
THE HELP OF ONE OF YOUR PARENTS
Instructions:
1. Ask one of your parents to punch 5 holes into a large can, using a hammer and nail. The holes should
be placed on the side of the can, near the bottom, and spaced V£ inch apart.
2. Cover the holes with your hand as you fill the can to the top with water. Then set the can near the edge
of the sink and remove your hand. You will see 5 streams of water spurt out.
3. Squeeze the streams together with your thumb and index finger. They will combine to form a single
flow of water.
This Is What Happens:
Each of the 5 streams of water has a film around it. This film, composed of water molecules itself, encases
the water, but is quite elastic and allows movement. When you pinch the streams into 1 stream, a new film is
formed, which is strong enough to hold all the water together without breaking apart.

See-Through SheetsYou Will Need:
Water faucet Spatula Spoon Small glass
Instructions:
1. Turn on the kitchen faucet and adjust the water to produce a smooth, continuous stream. Insert the flat
portion of a spatula into the water’s path. Hold the spatula horizontally and direct the water stream forward
and downward until you produce a sheet of water.
2. You can make the water assume various shapes by slightly changing the angle and position of the
spatula, or instead of the spatula, use a spoon to make different shapes from the water. If you hold the
spoon rounded side up, you can produce a circular sheet of water!
3. Hold a small juice glass under the faucet. If you let the water strike the side of the glass at an angle,
you can make a cone-shaped figure.
4. Search for other common household objects that might change the water’s shape in unusual patterns.
With a little practice, you can make many interesting shapes.
This Is What Happens:
As you’ve seen, one of the many interesting qualities of water is its surface tension. When you inserted
the objects into the stream of water, you spread the water over a wide area, but the water did not disperse.
Instead, it held together in thin, clear sheets—surface tension!
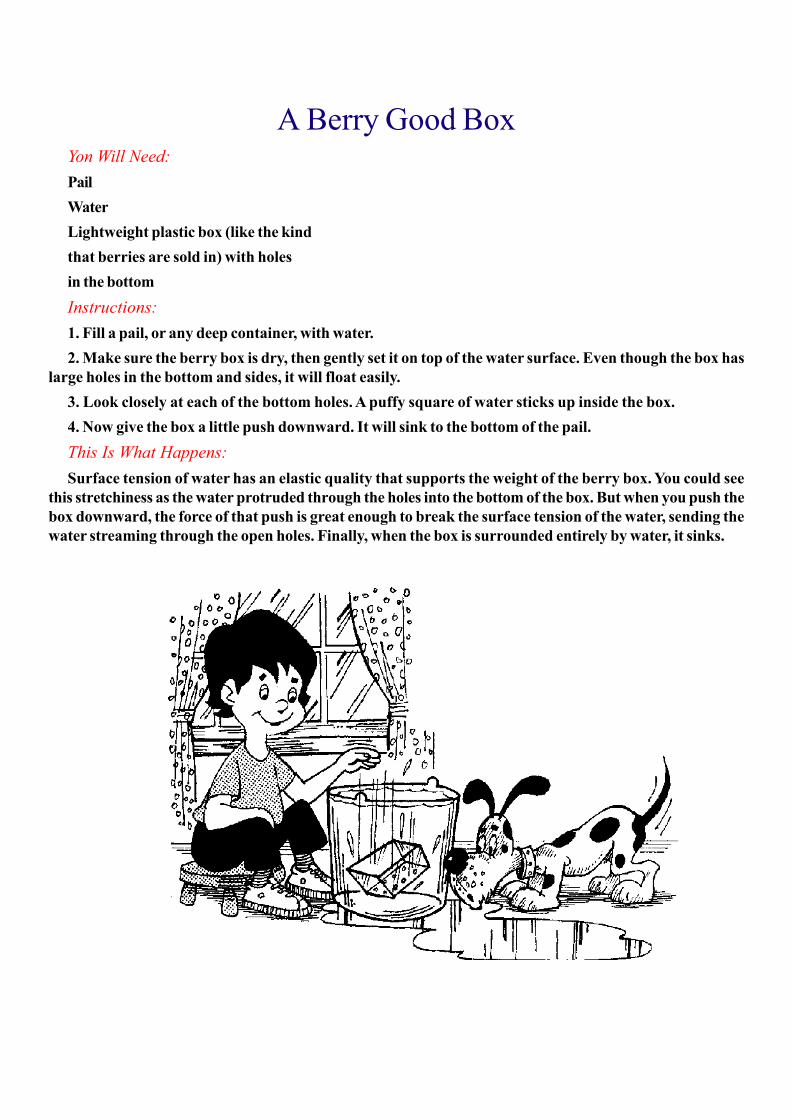
A Berry Good BoxYon Will Need:
Pail
Water
Lightweight plastic box (like the kind
that berries are sold in) with holes
in the bottom
Instructions:
1. Fill a pail, or any deep container, with water.
2. Make sure the berry box is dry, then gently set it on top of the water surface. Even though the box has
large holes in the bottom and sides, it will float easily.
3. Look closely at each of the bottom holes. A puffy square of water sticks up inside the box.
4. Now give the box a little push downward. It will sink to the bottom of the pail.
This Is What Happens:
Surface tension of water has an elastic quality that supports the weight of the berry box. You could see
this stretchiness as the water protruded through the holes into the bottom of the box. But when you push the
box downward, the force of that push is great enough to break the surface tension of the water, sending the
water streaming through the open holes. Finally, when the box is surrounded entirely by water, it sinks.

All Corks to Center StageYou Will Need:
Narrow drinking glass Water
Cork
Watering can (like the kind used for house plants)
Instructions:
1. Fill a narrow drinking glass with water to about one-third of an inch from the lip of the glass. Set a cork
on the water surface and note that it drifts to the side. No matter how carefully you try to center it, the cork
will always move to the edge of the glass.
2. Now remove the cork. Using the watering can, or any other small pitcher with a spout, pour additional
water slowly into the glass. Continue pouring until the water level is above the rim of the glass. Carefully
place the cork on the surface once more. This time it will float in the center.
This Is What Happens:
In Step 1, where the water is one-third of an inch from the lip, the water clings to the walls of the glass.
Because the water level is slightly higher at the walls than in the middle of the glass, the cork floats to this
higher point. However, in Step 2, where the water is above the rim, the shape of the water is just the
opposite-higher in the center. So, again, the cork floats to the highest point, but this time it’s the center. Do
you know why you were able to “pile up” the water above the normal level in Step 2? If your answer was
“surface tension” you’re right! The attraction of water molecules to each other allowed you to add water to
the glass slightly above the normal level.

The 25-Cent Hole StretcherYou Will Heed:
Dime
Paper
Pencil
Scissors
Quarter
Instructions:
1. Lay a dime on top of a piece of paper and trace around it with a pencil. With a pair of scissors, cut out
the hole.
2. Now, try to push a quarter through the hole in the paper. Can you do it without ripping the paper?
3. The secret to this experiment is a simple trick. Fold the paper in half with the crease running through
the middle of the hole. Then place the quarter between the two halves. Grasp the quarter through the hole
with your thumb and index finger, and pull gently. The coin slips through easily.
This Is What Happens:
The hole in the paper is not really getting bigger. When you fold the paper, you are flattening the hole and
moving the sides apart so that the opening gets thinner, but not longer. This allows the coin, which is not
very thick, to pass through.

Follow MeYou Will Need:
String Water
Cream pitcher, with a handle and spout
Drinking glass
Instructions:
1. Cut a piece of string about 1 foot long and soak it in water for a few minutes.
2. Tie one end of the string to the handle of the cream pitcher, then fill the pitcher with water.
3. Run the piece of string across the spout to the inside wall of the drinking glass. Press the string to the
glass with your finger and pull the pitcher away until the string is tight. The pitcher should be several inches
from the glass and slightly higher.
4. Now tilt the pitcher until water pours out. The water will roll down the string and go into the glass.
This Is What Happens:
The stream of water coming from the pitcher has a strong surface film around it. This film holds the water
to the string, preventing it from dropping straight below. The string guides the path of the water and leads it
into the glass. People who work in laboratories use this principle when they pour a solution from one container
to another and must not spill a single drop. They will place a glass rod across the spout of their pouring
container and let the solution run along the rod into the other container.
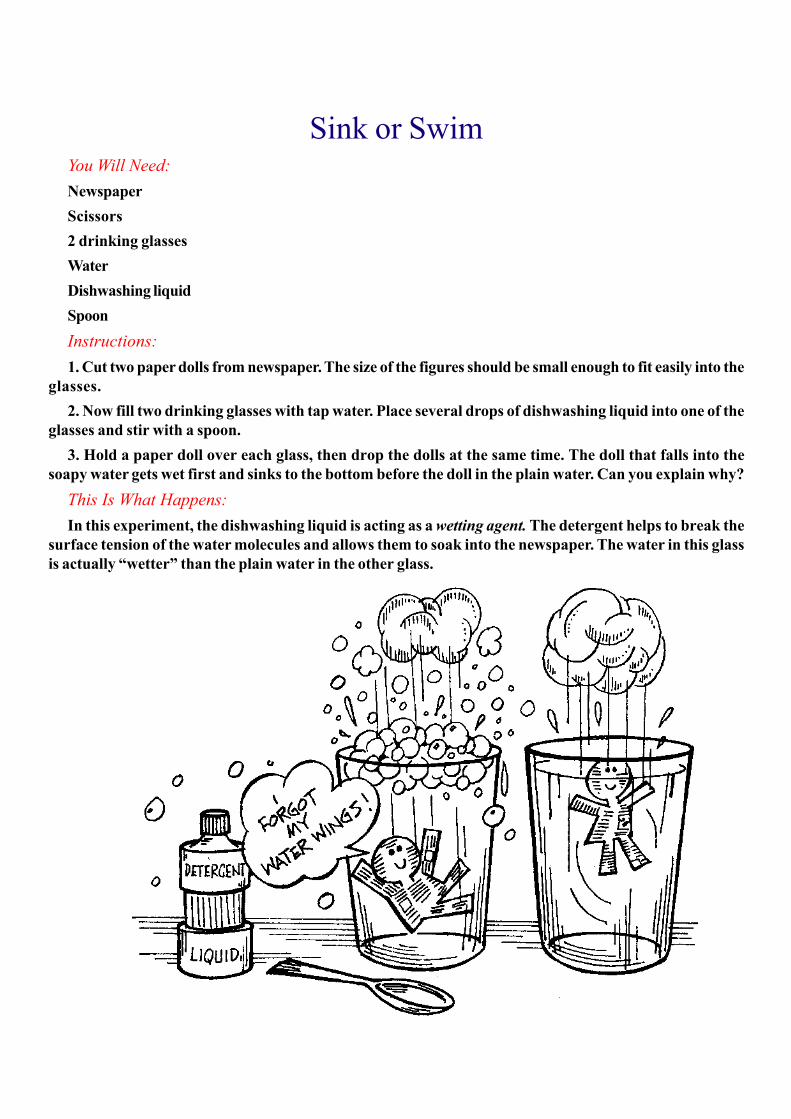
Sink or SwimYou Will Need:
Newspaper
Scissors
2 drinking glasses
Water
Dishwashing liquid
Spoon
Instructions:
1. Cut two paper dolls from newspaper. The size of the figures should be small enough to fit easily into the
glasses.
2. Now fill two drinking glasses with tap water. Place several drops of dishwashing liquid into one of the
glasses and stir with a spoon.
3. Hold a paper doll over each glass, then drop the dolls at the same time. The doll that falls into the
soapy water gets wet first and sinks to the bottom before the doll in the plain water. Can you explain why?
This Is What Happens:
In this experiment, the dishwashing liquid is acting as a wetting agent. The detergent helps to break the
surface tension of the water molecules and allows them to soak into the newspaper. The water in this glass
is actually “wetter” than the plain water in the other glass.

Heavy DropsYon Will Need:
Small glass, such as
a juice glass Vegetable oil Ice cube
Instructions:
1. Fill a small glass with vegetable oil.
2. Place an ice cube in the glass, and you will see that the ice floats near the top. Observe your experiment
for several minutes. As the ice melts, water droplets sink to the bottom. Do you know why this happens?
This Is What Happens:
In “Stormy Seas Ahead” (page 21), you saw that water and oil don’t mix, and that since water is heavier,
it will remain underneath the oil. So, since ice and water are made from the same matter, why did the ice
float on top of the oil in this experiment? Well, even though ice and water are made of the same matter, each
behaves in a different way. As water freezes, it expands and takes up more room. This makes it less dense
and it floats in the oil. But once the ice has melted, the water is heavier than the oil and it falls to the bottom.

Roll Over!You Will Needs
Bowl Water Ice cube
Instructions:
1. Fill a bowl with warm tap water and set the bowl on a firm surface, such as a counter top.
2. Gently place an ice cube in the water and let it come to rest. Do not touch the experiment now; just
watch it closely. The ice cube will turn over. Soon it will turn over again. This action will be repeated many
times. Do you know why?
This Is What Happens:
As the ice cube floats in the warm water, the bottom side melts quickly. This makes the top half heavier,
so the top falls and the cube flips over. Now the warm water melts the new bottom, and the process repeats
while the cube gets smaller and smaller.

Happy Birthday to YouYou Will Need:
Glass soda bottle
Water
Small candle (like the kind put on birthday cakes)
2 or 3 straight pins
Matches
THE HELP OF ONE OF YOUR PARENTS
Instructions:
1. Fill the soda bottle to the top with water.
2. Poke two straight pins into the bottom of a birthday candle and suspend the candle in the water. It
should float upright. If the candle is tilted, you may need to add another pin to weight the base down a little
more.
3. Now, ask one of your parents to light the candle. As you watch it burn down, stop and think: Will the
flame die out when the wick burns down to the water level? Watch and see.
This Is What Happens:
At the start of the experiment, the candle floats at the surface of the water. As the top burns away, the
weight of the candle is decreased bit by bit. With less weight, the entire candle rises slightly, keeping the
wick above the water level at all times. So, even though the candle grows shorter, the flame is never smothered
by the water, and the candle keeps burning until its wick finally burns out.

The Amazing Upside-Down “U”You Will Needs
2 jars Water
Box, 1 foot high
Flexible (rubber or plastic) tubing
Instructions:
1. Fill one jar completely with water and set it on top of the box. Place the empty jar on the ground
beneath the full jar.
2. Cut a piece of rubber or plastic tubing long enough to reach between the two jars. Hold both ends of the
tubing together under the faucet until the tubing fills entirely with water.
3. With your fingers, pinch both ends of the tubing closed. Place one end in the jar of water, pushing it
beneath the water level. Release your hold, but make sure the tube rests on the bottom of the jar.
4. Place the other end of the tubing into the empty jar and release it. The water will flow from the full jar
to the empty jar until all the water is completely transferred.
This Is What Happens:
You have just created a device called a siphon. Notice that the shape of your siphon is really an upside-
down ‘U’, with one long side. As the water falls down this long side, a vacuum is formed at the bend in the
‘U’. Air pressure against the water in the top jar pushes water into the short side of the tube where it climbs
up until it reaches the bend, and then falls. The process occurs continuously until the flow of water is
interrupted, such as when the jar runs dry, or when air gets into the tube, disturbing the vacuum.

Kitchen OrbitYou Will Need:
Round balloon String, 1 foot long Faucet
Instructions:
1. Inflate a round balloon and tie the opening with the piece of string.
2. Turn on the faucet full force to produce a rushing stream of water.
3. Hold the end of the string and allow the balloon to hang freely. Slowly move your hand toward the
faucet so that the balloon comes close to the water. As the ballon is drawn toward the water stream, pull your
hand away slowly. The balloon win remain against the water jet and begin rotating.
This Is What Happens:
The force of the water stream rushing into the sink creates an area of low pressure around it. Because
the balloon is very light, it is pushed into this area by the surrounding air of higher pressure. The push of air
on the rounded surface causes the balloon to spin.

Stick UpYou Will Need:
2 teacups Round balloon
Instructions:
1. Place two teacups—ask your parents which ones you can use—on a table, about 5 inches apart.
2. Place the deflated balloon between the two cups and blow air into it until the sides of the balloon are
touching the sides of the teacups. Then knot the opening of the balloon, without raising it from the table.
3. Slowly raise the balloon. You will lift the two cups.
Thin Is What Happens:
The air that you blew into the balloon pushed the rubber against the walls of the cups. The force of the air
held the balloon snugly and prevented the cups from slipping away when you lifted the balloon.

A Hole in OneYou Will Need:
Coffee can
Nail
Hammer
Round balloon
Soap
THE HELP OF ONE OF YOUR PARENTS
Instructions:
1. Ask one of your parents to make a small hole near the bottom of a coffee can by tapping the tip of a nail
into the metal can with a hammer.
2. Inflate a round balloon until it is slightly larger than the can opening, then tie the balloon shut.
3. Wet your hands and lather them with a piece of soap. Rub your soapy hands all over the surface of the
balloon.
4. Place the coffee can on its side on a table with the hole facing up. Hold the balloon next to the can
opening and start to suck air from the tiny hole. The balloon will slip into the can. Now blow air into the hole,
and you’ll make the balloon leave.
This Is What Happens:
By sucking air from the can, you decrease the air pressure inside. The air pressure outside the can is
now greater, and this pushes against the balloon, forcing it into the can. Blowing into the can does just the
opposite: The pressure builds up inside and forces the balloon out.
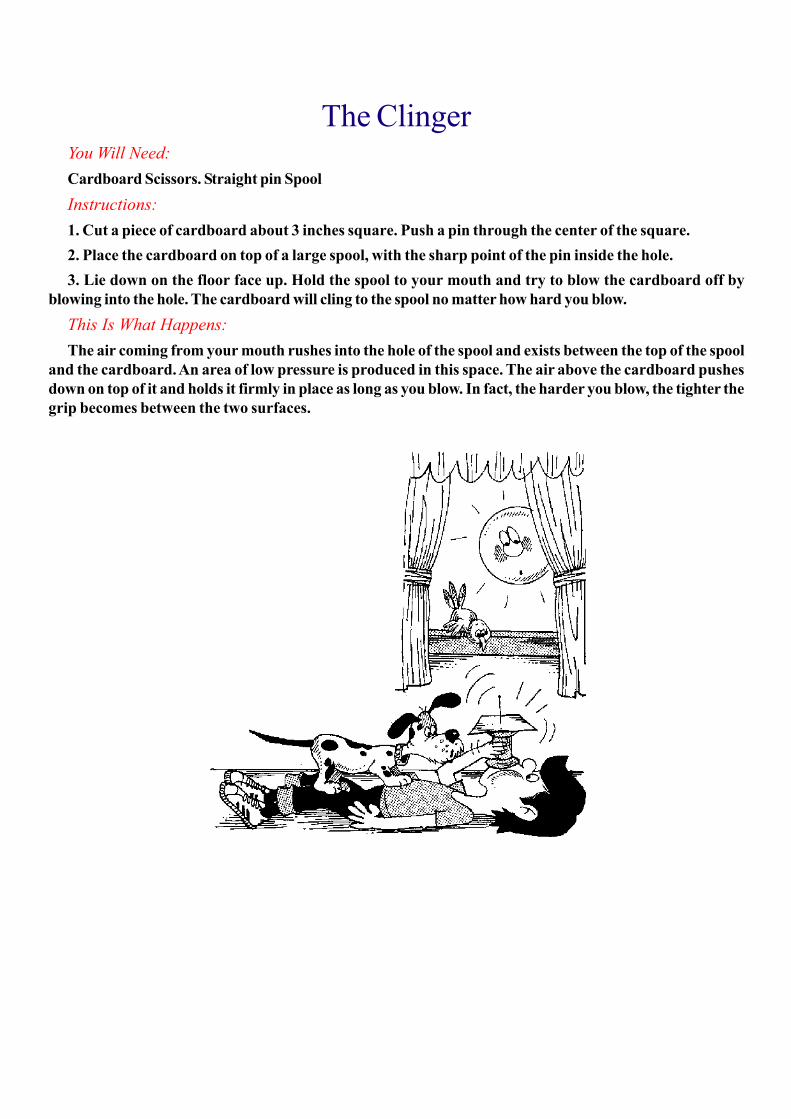
The ClingerYou Will Need:
Cardboard Scissors. Straight pin Spool
Instructions:
1. Cut a piece of cardboard about 3 inches square. Push a pin through the center of the square.
2. Place the cardboard on top of a large spool, with the sharp point of the pin inside the hole.
3. Lie down on the floor face up. Hold the spool to your mouth and try to blow the cardboard off by
blowing into the hole. The cardboard will cling to the spool no matter how hard you blow.
This Is What Happens:
The air coming from your mouth rushes into the hole of the spool and exists between the top of the spool
and the cardboard. An area of low pressure is produced in this space. The air above the cardboard pushes
down on top of it and holds it firmly in place as long as you blow. In fact, the harder you blow, the tighter the
grip becomes between the two surfaces.

Ping-Pong BathYou Will Need:
Bath spray hose Funnel
Bathtub faucet Ping-Pong ball
THE HELP OF ONE OF YOUR PARENTS
Instructions:
1. Ask one of your parents to remove the spray head from a bath spray hose, then insert the narrow end
of the kitchen funnel into the hose opening.
2. Connect the other end of the hose to the bathtub faucet. Hold the funnel so that it points downward into
the tub, and turn on the water.
3. Push a Ping-Pong ball into the funnel as far as you can. Take your hand away. The Ping-Pong ball will
not be pushed out, but rather will stay securely in the funnel. If you turn the water on faster, the ball will only
cling more firmly.
This Is What Happens:
The stream of water rushing from the hose into the funnel produces an area of low pressure between the
funnel and the Ping-Pong ball. The air pressure outside the funnel pushes upward on the ball and supports it
against the downward thrust of the water. This experiment is a good example of Bernoulli’s principle: The
pressure in a flowing stream of liquid or gas is less than at its sides.

Automatic Banana PeelerYou Will Need:
Knife
Banana
1-quart bottle, with a neck about the same width as the banana
Newspaper Matches
THE HELP OF ONE OF YOUR PARENTS
Instructions:
1. Ask one of your parents to use the knife to slice a l.5-inch cross-section from a ripe banana (skin and
all).
2. Fold a 6-inch-long, 1-inch-wide strip of newspaper until it is V* inch wide. Ask one of your parents to
light this paper with a match and drop it gently into the bottle.
3. When you see the flame start to die out, press the banana firmly on the lip of the bottle. (It should not
slip down into the neck, but should hang over the edge a little bit.) The banana pulp will slip into the bottle,
while the skin will remain outside, against the lip.
This Is What Happens:
The heat produced inside the bottle causes the air to expand, forcing some of it to leave. Then as you
block the opening (with the banana), the cooling air occupies less space and has a reduced pressure. The
greater air pressure on the outside of the bottle pushes the soft banana pulp into the jar. The skin, however,
is prevented from entering by the edge of the glass lip.

Stop When I Say EnoughYou Will Need:
Glass soda bottle
Water
Drinking glass
Instructions:
1. Fill a glass soda bottle to the rim with water. Hold a clear drinking glass upside down and place it over
the mouth of the bottle.
2. Holding both the glass and the bottle together, turn them upside down at the same time. Some water
may escape into the glass.
3. Raise the bottle 2 inches from the bottom of the glass and keep it in this position. You will see the water
come from the bottle and go into the glass, but the water will stop as soon as it reaches the level of the
bottle’s mouth.
4. Repeat Step 3, raising the bottle 2 inches more. The water will never rise beyond the bottle. Can you
explain why?
This Is What Happens:
When you raise the bottle, air blows into it, pushing the water out of it. When the water level in the glass
reaches the bottle mouth, the air outside the bottle presses on the water in the glass and prevents any more
water from leaving the bottle.

The Big BangYou Will Needs
Round balloon
Scissors
Newspaper
Matches
Glass jar with a narrow mouth
THE HELP OP ONE OF YOUR PARENTS
Instructions:
1. Cut off the top half of a round balloon and discard it. You will be left with a solid piece of rubber.
2. Fold a piece of newspaper to approximately 3 by 5 inches. Ask one of your parents to light the newspaper
with a match and place the burning paper into the glass jar.
3. Quickly place the piece of rubber over the jar’s opening. Use both hands to securely hold the rubber
against the glass sides, grasping opposite edges of the balloon and gently tugging with a slight outward and
downward motion. You will see the balloon stretch upward at first. Then the rubber will turn inward until it
bursts with a loud bang.
This Is What Happens:
The burning paper heats the air inside the jar, which causes the air to expand. This is why the balloon first
bulges out. After the flame dies, however, the air cools and its pressure is less than the air outside the jar.
The outside pressure pushes the rubber down and breaks it.
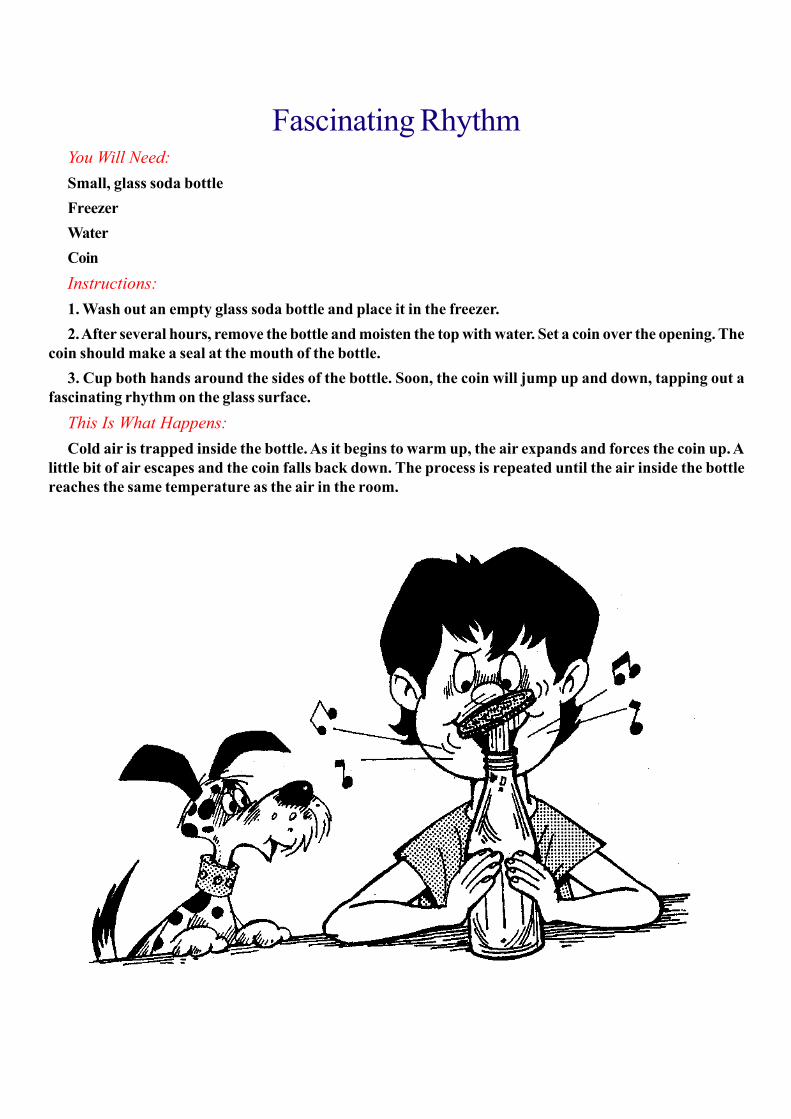
Fascinating RhythmYou Will Need:
Small, glass soda bottle
Freezer
Water
Coin
Instructions:
1. Wash out an empty glass soda bottle and place it in the freezer.
2. After several hours, remove the bottle and moisten the top with water. Set a coin over the opening. The
coin should make a seal at the mouth of the bottle.
3. Cup both hands around the sides of the bottle. Soon, the coin will jump up and down, tapping out a
fascinating rhythm on the glass surface.
This Is What Happens:
Cold air is trapped inside the bottle. As it begins to warm up, the air expands and forces the coin up. A
little bit of air escapes and the coin falls back down. The process is repeated until the air inside the bottle
reaches the same temperature as the air in the room.

Trapped!Yon Will Need:
Drinking glass
Water
Thin cardboard or index card
Instructions:
Do this experiment outdoors or over the sink.
1. Fill the drinking glass with water up to the rim.
2. Set a piece of thin cardboard, or an index card, on top of the glass. If you see some air bubbles trapped
inside the glass, spill the water out and start over again.
3. Holding your hand on the cardboard, turn the glass upside down. Remove your hand from the cardboard
and you will see that the water remains inside the glass. Can you explain why the water does not fallout?
This Is What Happens:
A tight seal is formed between the cardboard and the run of the glass. The force of air pressure pushes
upward to keep the cardboard in place. The water does not spill out because the force of gravity pulling the
water downward is not great enough to break the seal.

Stuck Like GlueYou Will Need:
Newspaper
Matches
Water
Dinner plate
THE HELP OF ONE OF YOUR PARENTS
Instructions:
1. Fold a newspaper page several times until it measures approximately 4 by 5 inches. Soak this piece in
water, until it is completely wet, then place it on a dinner plate.
2. Fold a smaller piece of dry newspaper, about 4 by 4 inches, into a narrow half-inch-wide strip. Ask one
of your parents to strike a match and light this strip, then drop it into the wide-mouth jar.
3. Ask your parent to quickly turn the jar upside down on top of the plate with the wet newspaper. Press
firmly on the jar and continue holding this position until the flame has died out and the jar has cooled.
4. Now have someone grip the dinner plate and hold it against the table-top. Try to lift the jar. You can’t—
the jar remains fastened to the plate.
This Is What Happens:
The burning strip of paper heats the air inside the jar. This hot air expands and some of it is forced from
the jar. As the air remaining in the jar cools, it contracts and its pressure is reduced. The outside air pressing
on top of the jar and underneath the plate is stronger than the inside air and holds the two objects together
firmly.

Soaring in SpaceYou Will Need:
Scissors
Plastic lid from a cottage cheese container
Push-pull squirt cap from a bottle of dishwashing liquid
Glue
Round balloon
Instructions:
1. Cut a hole 0.75 inch in diameter in the center of the plastic lid from the cottage cheese container.
2. Center the push-pull squirt cap over the hole and glue it to the lid, with the lid’s writing face up. Use
enough glue so that no air spaces are left between the plastic surface of the cap and the plastic of the lid. Let
the glue dry completely.
3. Blow up a round balloon and slip the opening over the opening on the closed squirt cap.
4. Place the device on a smooth surface, such as a table top, and lift the squirt-cap opening so that the air
escapes from the balloon. Your space car will glide effortlessly over Martian territory!
This Is What Happens:
The air you blow into the balloon is under pressure. When you attach the balloon to the squirt cap’s
opening, you create a seal that prevents the air from leaking out. As the nozzle is lifted, the only path the air
can take is through the inner hole in the cap to the underside of the device. Here, a cushion of air spreads
along the flat surface of the cottage cheese lid, the entire device is supported by the air cushion, and it
appears to be floating on top of the table.

Puffin’ FunnelYou Will Need:
Funnel
Glass bowl
Water
Instructions:
1. Set a funnel, small side up, on a counter top, then set a large glass bowl next to it. Notice how high the
tip of the funnel extends. Fill the glass bowl with water to a level just below this point.
2. Hold the funnel between your thumb and middle finger, keeping your index finger over the small
opening. Push the funnel into the water until it touches the bottom of the bowl. Raise your index finger
slightly. You will feel a puff of air blown at your finger.
This Is What Happens:
When you are holding the funnel with your finger over the tip, a quantity of air is inside the device. As you
press the funnel to the bottom of the bowl, this air remains trapped inside the funnel—your finger blocks it
from the top and the water blocks it from below. When you remove your finger, the pressure of the water
pushes against the air inside the funnel and forces it out through the small hole. If you used a glass funnel,
you could see the water level rise inside the funnel as the puff of air hit your finger!

Daring DiverYon Will Need:
1-quart clear glass soda bottle
Water
Eyedropper
Cork
Instructions:
1. Fill the 1-quart soda bottle with water almost to the top.
2. Squeeze the rubber bulb of an eye-dropper to draw up some tap water into the tube. Set the eyedropper
into the soda bottle. It should float upright near the top. If the eyedropper sinks too low or bobs above the
water surface, adjust the amount of water inside the glass, tube until it floats properly.
3. Next, fill the soda bottle the rest of the way to the top. Place a cork over the opening and press down.
The eyedropper will dive to a lower depth. By releasing the pressure on the cork, the diver will raise itself
back up. Repeat the pressing and releasing process over and over again, and you will see the eyedropper
dive and return, dive and return.,..
This Is What Happens:
A small pocket of air remains inside the eyedropper. When you apply pressure by pushing down on the
cork, this volume of air is reduced. More water flows into the dropper, it becomes a little heavier, and sinks
lower. When you release the pressure, the compressed air expands to its original volume. Water leaves the
dropper, and the dropper becomes lighter, and rises to the surface.

Hurray for SprayYou Will Need:
Paper straw Scissors Drinking glass Water
Instructions:
1. Slit a paper straw across, about Vs from one end, making sure you do not slit it all the way through.
Bend the straw back like a hinge and insert the short end into a drinking glass.
2. Fill the glass with water until the level almost reaches the hinged part of the straw. Now blow hard
through the long section of the straw. Water will spray from the glass.
This Is What Happens:
When you blow through the straw, the swiftly moving jet of air reduces the pressure above the hinged
opening. The air pressure over the water is now greater, and this pushes water up the short section. When
this water hits the stream of air, it is carried away as drops of water. This is the same principle used hi many
squeeze-type spray bottles. Instead of blowing through a straw, however, you force air through the mechanism
with a hand pump.

Super SipperYou Will Need:
Drinking glass
Water
2 straws
Instructions:
1. Fill a clean drinking glass with tap water. Place two straws in your mouth and lower your mouth to the
glass. Allow one straw to enter the water, but let the other one hang outside the glass.
2. Try to sip some of the water. You will find that the water will not rise up the straw.
3. Now place the tip or side of your tongue tightly over the end of the dry straw (the one that is outside the
glass) and try to sip some water again. This time the water is easily sipped up into your mouth.
This Is What Happens:
Normally, you sip a liquid through a single straw, creating a tight seal between your mouth and the straw.
The action of sipping lowers the air pressure inside your mouth to a point slightly lower than the air pressure
on the surface of the liquid. It is now this greater pressure that pushes the liquid up the straw. In the
experiment, the extra straw was open to the outside air. This did not allow a decrease of pressure because
more air was entering your mouth when you sipped. But by placing your tongue over the outside straw, you
created the necessary airtight seal for lowering the air pressure inside your mouth. Therefore, you could
successfully sip!
Fan ClubYou Will Need:
2 thermometers, 1, or both, with an exposed bulb
Cloth Thread
Water
Electric fan
Instructions;
1. Make sure the two thermometers give identical readings. Wrap a piece of lightweight cloth once
around one of the exposed thermometer bulbs, and tie it in place with thread.
2. Wet the cloth with water, then hold both thermometers, side by side, in front of a blowing fan. After a
few seconds have passed, read the temperatures. The thermometer wrapped with a wet doth has a lower
reading than the unwrapped thermometer,
This Is What Happens:
The fan helped to blow moisture from the wet cloth into the air. This evaporation of moisture into the air
requires heat. The necessary heat was taken from the thermometer bulb, which caused the liquid inside to
become cooler and the temperature to drop. No such forces were acting on the other thermometer, so it did
not lose heat.

Shape Up or Ship OutYon Will Need:
Several bottles and jars in various shapes
Measuring cup
Pie plate
Water
Instructions:
1. In selecting the bottles and jars of different shapes, be sure to include some with narrow and some with
wide openings.
2. Using a measuring cup, pour exactly 1 cup of water into each of your jars, plus 1 cup each into the pie
plate and glass. If 1 cup is too much or not enough for the containers you have chosen, you can increase or
decrease the 1-cup amount, but make sure all the containers hold the same amount of water at the start of
the experiment.
3. Set the containers in a warm, dry place overnight or longer. Then measure the amount of water in each
vessel. You will find that they all have varying amounts of water. Can you explain these differences?
This Is What Happens:
Each of the containers lost water due to evaporation—liquid changing to vapor and escaping into the air.
The pie plate probably lost the most water because it had the greatest surface area of water (spread out
flat) exposed to the air. In other words, there was more water in contact with the air, so there was more
water available to escape at the surface. Other containers that were skinny and had small openings lost the
least amount of water. Can you imagine how much water evaporates from a large body of water, such as a
lake, in a single day?

Things That Go Drip in the NightYou Will Need:
Coffee can
Hammer
Nail
String
Thumbtack
Water
Blue food coloring
A very cold day—below 32° F.
THE HELP OF ONE OF YOUR PARENTS
Instructions:
1. Ask one of your parents to punch 3 holes, equally spaced, around the top edge of the coffee can. A
hammer and small nail work well for this.
2. Tie a piece of string through each of these openings, then tie the ends to one long piece of string.
3. Next, punch a tiny hole in the bottom of the can with the thumbtack.
4. On a cold night, fill the can with water and add a few drops of blue food coloring. Then, using the long
piece of string, hang the can outdoors. You will find a shimmering blue icicle suspended from the can in the
morning.
This Is What Happens:
The hole in the bottom of the can allows water to drip through slowly, one drop at a time. First, some
water freezes to the cold can. Then more drops flow out and freeze to this new surface. The icicle grows from
top to bottom, each new drop increasing its length, and the next day—behold a beautiful blue icicle shimmering
in the morning light!
Operation Ice LiftYou Will Need:
Glass Water Ice cube String Salt
Instructions:
1. Fill a glass with water and place an ice cube on the surface.
2. Tie a loop, about 1 inch in diameter, hi a piece of string several inches long. Set the loop on top of the
ice cube.
3. Sprinkle some salt over the top of the cube where the loop sits. Wait a few minutes. Gently pull the
string up. The ice cube is lifted above the water.
This Is What Happens:
The salt caused the ice cube to melt around the string. Then the water re-froze, freezing the string to the
ice cube and allowing you to pull it up with the ice cube attached. Salt is used on many roads and sidewalks
in the wintertime on ice and snow because it lowers the melting point of water.

BrickworkYou Will Need:
l-quart milk or juice carton
Water
2 outdoor benches
Thin, uncoated wire
Brick
A very cold day—32 °F. or colder
Instructions:
1. Fill the 1-quart carton with water and place it in the freezer until it is frozen solid.
2. Take the carton out of the freezer and run a little warm water over it so that you can slide the ice from
the container.
3. Go outdoors and rest the chunk of ice between two supports, such as picnic benches, placed side by
side.
4. Tie a piece of wire around the ice and tie a brick to the wire’s other end so that it dangles from the wire.
As the time passes, you will see the wire slice through the solid piece of ice. However, the ice will not be cut
in half. The brick will fall to the ground as the ice remains on the benches.
This Is What Happens:
The weight of the brick pulls on the wire, exerting great pressure on the ice. This causes a small strip of
ice to melt where the wire sits. But after the wire passes through the melted area, the water refreezes, and
the ice remains in one solid piece.
Frosty, the Snow CanYou Will Need:
Plastic bag
Ice
Hammer
1-pound coffee can
Salt
Half teaspoon water
Paper
THE HELP OF ONE OF YOUR PARENTS
Instructions:
1. Fill a strong plastic bag with ice. Set the bag on a hard surface, such as a concrete garage floor, and ask
one of your parents to hit the ice with a hammer until the ice breaks up into tiny pieces.
2. Fill the coffee can about 2/3 full with the crushed ice. Fill the can the rest of the way with salt, and stir
completely.
3. Place the1/2 teaspoon of water on a piece of ordinary note paper and set the can on top of this.
4. Frost will form on the sides of the can. Lift the can up. You will find that the paper has frozen to the
bottom of the can.
This Is What Happens:
By adding salt to the crushed ice, you have lowered the temperature of the ice slightly below the freezing
point. As air comes in contact with the cool surface, water molecules condense. This is known as dew. The
dew quickly freezes, becoming frost. The wet paper underneath the can also freezes and sticks to the metal.
Towel DryYou Will Need:
Towel
Water
Clothesline and clothespins
A very cold day—below 32 °F.
Instructions:
1. Wet a towel with water until it is completely soaked. Squeeze out the excess water by twisting the towel
over a sink.
2. Hang the towel outside by clipping it to a clothesline with clothespins. It should hang straight down. Go
back inside where it is nice and warm.
3. After about an hour, go outside again and examine the towel. You will find that it is frozen stiff.
4. Examine the towel the next day. Most of the ice will be gone and the towel will be dry. Where did the
ice go?
This Is What Happens:
The ice in the towel has a temperature of about 32° F. because it has just froze. Ice at this temperature
will evaporate into the air almost as quickly as water at the same temperature. The ice does not have to
melt into water first. It can turn into water vapor without becoming a liquid. This process of going directly
from a solid to a gas is called sublimation. And if there is a strong breeze outside, this will speed sublimation
because the wind helps to carry away the moisture.

Rain, Rain, Go AwayYou Will Need:
Saucepan
Water
Frying pan
Ice Cubes
THE HELP OF ONE OF YOUR PARENTS
Instructions:
1. Fill a saucepan about 1/4 full with water, and ask one of your parents to boil it over high heat.
2. Fill a frying pan with ice cubes, then give it to your parent to hold several inches above the steam
escaping from the saucepan. Remind your parent to hold the frying pan by its handle so his or her hands do
not come in contact with the steam—steam is extremely hot and can burn! In a few minutes, you will see
raindrops fall from the bottom of the frying pan into the boiling water.
This Is What Happens:
You have just produced rain the same way that nature makes it. The boiling water caused water vapor
(steam) to rise from the saucepan. As the steam hit the cold surface of the frying pan, it collected as moisture
on the underside. Soon, the moisture became too heavy and fell as drops of water. In nature, a similar cycle
takes place. Oceans, lakes, and streams lose water through evaporation. The water vapor rises into the
sky. Here, it is colder, so the water collects into clouds. When the clouds become too heavy with water,
drops of rain fall to the earth.

Human ThermometerYou Will Need:
Yourself
4 or 5 friends
Driveway or sidewalk
Chalk
Instructions:
Did you ever wonder what makes the liquid in a thermometer rise? In this experiment, by making a
human thermometer, you will discover the answer!
1. Gather 4 or 5 friends together on a driveway or sidewalk. Stand as close as possible in a straight line.
With a piece of chalk, mark the beginning and end of the line.
2. Now try to remain as close as possible while everyone keeps turning around without hitting each other.
Look down at the chalk marks. Has the human line grown outside the lines?
This Is What Happens:
Every substance is made up of molecules. When molecules are heated, they move about rapidly and
separate slightly, taking up more space. This happened with you and your friends in line. Moving about
caused you to take up more space. And it also happens with the substance inside a thermometer. As the
temperature increases, the molecules of the thermometer’s liquid expand, take up more space, and climb
higher in the tube.

UFO: Unidentified Floating OilYou Will Need:
Fish tank
Water
Blue food coloring
1 cup vegetable oil
Stirrer
Instructions:
1. Fill a fish tank or other large, clear container about half full with water, and add some food coloring
until the water turns to a deep shade of blue. Then pour the oil on top.
2. Slowly stir the water. The oil will stay mostly flat near the top. Next, stir the water very rapidly. The oil
will roll over and form a fluffy appearance. Do these shapes remind you of anything?
This Is What Happens:
You have just made a model of the formations that clouds make in the sky! When the air is calm, the
clouds assume a level shape, like the oil that you first stirred. These kinds of clouds are called stratus.
When the air is moving fast, however, the clouds roll over themselves, just as the oil did. Clouds like these
are called cumulus.

Weather WiseYou Will Need:
Round balloon Glass jar, with a 2-inch-wide mouth
Rubber band
Glue
Straw
Wooden match
Tape Paper Pencil
Instructions:
1. Cut a round balloon in half and stretch the bottom piece over the jar. Secure the balloon tightly to the
jar with a strong rubber band that is doubled.
2. Glue a soda straw to the top of the rubber. Position the straw so that the end is in the exact center of
the balloon. If necessary, place a weight on top of the straw until the glue dries.
3. Ask one of your parents for a used wooden match, and place a dab of glue on the burned tip. Insert this
end into the opposite end of the straw.
4. Tape a piece of paper on a wall, then set your device on a table next to it so that the match points to the
approximate center of the paper. With a pencil, mark this position on the paper. Check your device each day
and note the spot the match points to.
This Is What Happens:
You have just made a simple home barometer. You have probably heard the weatherperson on television
talk about barometric pressure. This is really a measure of the air pressure, and your instrument works on
the same principle as the very expensive barometers professional weather people use. When the air pressure
is high, it presses on the balloon on your instrument. This pushes the rubber down and raises the pointer.
The opposite happens when the atmospheric pressure is low.
Watch the weather forecast and see if your barometer pointer is high when the television says that the
air pressure is high. A “high” usually means nice weather, while low pressure—a falling barometer—means
stormy conditions.

ThundercrackersYou Will Need:
A thunder and lightning storm
Instructions:
Can you tell how far away a storm is? Here is a simple way to find out.
1. The next time a big thunderstorm occurs, watch for the lightning. As soon as you see the flash in the
sky, start counting, “thundercracker 1, thundercracker 2, thundercracker 3,” and so on. (The time it takes
you to say “thundercracker,” followed by the number, equals about a second.) Stop counting when you hear
the clap of thunder.12. Now divide the number of seconds you have counted by 5. The result will be the distance of the storm
center. For example, suppose you had counted to “thundercracker 10” when you heard the big boom: 10
(divided by) 5 = 2, The storm is about 2 miles away.
3. You can repeat the procedure on the next bolt of lightning. If the storm is closer this time, you know
that it is traveling toward you. Better get inside!
This Is What Happens:
Light travels at a speed of 186,000 miles per second, so you see a bolt of lightning almost instantly when
it occurs. Sound, however, travels much more slowly—at a speed of only 1/5 mile per second. When you see
a bolt of lightning, you know that the sound has just started to travel. By determining how long it takes to
reach your ears, you can figure out how far away it was.

Pop-Proof BalloonYou Will Need:
Balloon
Cellophane tape
Scissors
Small straight pins
Instructions:
1. Blow up a balloon and tie the end closed.
2. Cut several small squares of plastic tape and press them to the surface of the balloon. Make sure the
edges are smoothed down.
3. Now stick a small pin through each piece of tape. The balloon will not pop.
This Is What Happens:
As you press a pin into the balloon, the adhesive compound on the tape clings around the pin. This forms
a seal where the point is inserted, and no air can escape. A balloon pops when air is allowed to escape, and
so you have a pop-proof balloon!

Instant Weight LossYou Will Need:
A bathroom scale
Instructions:
Here’s an easy way to lose several pounds instantly.
1. Stand on the bathroom scale and raise your arms high above your head. Read the dial and note how
many pounds you weigh.
2. Lower your arms rapidly to your sides. You are suddenly many pounds lighter. Oops! A few seconds
later, your normal weight returns.
This Is What Happens:
For every action, there is an equal and opposite reaction—this is one of Sir Isaac Newton’s famous laws
of physics. Bringing your arms down is an action that you created. The opposite reaction is a force that
pushes up, and this was created by the scale’s platform. The mechanical components of the scale detected
the temporary upward force, and this was recorded as a weight loss.

Please SqueezeYou Will Need:
Your hand Raw egg
Instructions:
You probably won’t believe this simple trick until you try it yourself, but the results will amaze you!
1. Make sure your hand does not have any rings or hard objects on it. Then, hold a raw egg in your hand
over the sink.
2. Now squeeze your hand closed. Don’t be afraid to squeeze as hard as you can. The egg does not
break! Can you explain why?
This Is What Happens:
When you crack open an egg the normal way, you usually hit it against something hard. The force is
concentrated on only one area, and this spot in the shell breaks. However, squeezing the egg in your hand
spreads the force over a much larger area. The egg can withstand this pressure because it is shaped like an
arch, and an arch is extremely strong. Builders know this fact and use the arch in many kinds of construction.

Tube StrengthYou Will Need:
Sheet of typing paper Rubber band Book
Instructions:
1. Roll a single sheet of typing paper into a tube and slip a rubber band around it.
2. Stand the tube on end on a flat surface. Carefully place a book on top of the tube and you will see that
the paper supports the weight of the book.
This Is What Happens:
A tube is a shape that has much more strength than a flat object. This allows you to place the book on top
of the paper without crushing it. Pillars are a type of tube shape, and they are used in some buildings to hold
up their great weight.

Anchors AwayYou Will Need:
Thin cardboard Scissors Water Dishwashing liquid
Instructions:
1. Obtain a piece of thin cardboard and cut out a shape like the one shown.
2. Fill the sink with water. When the water is calm, set the cardboard gently on top of it.
3. Place a drop of dishwashing liquid in the opening. Your cruise has begun!
This Is What Happens:
The dishwashing liquid spreads itself over the water and flows from the small opening. This action creates
a force in the opposite direction, which pushes the boat forward.
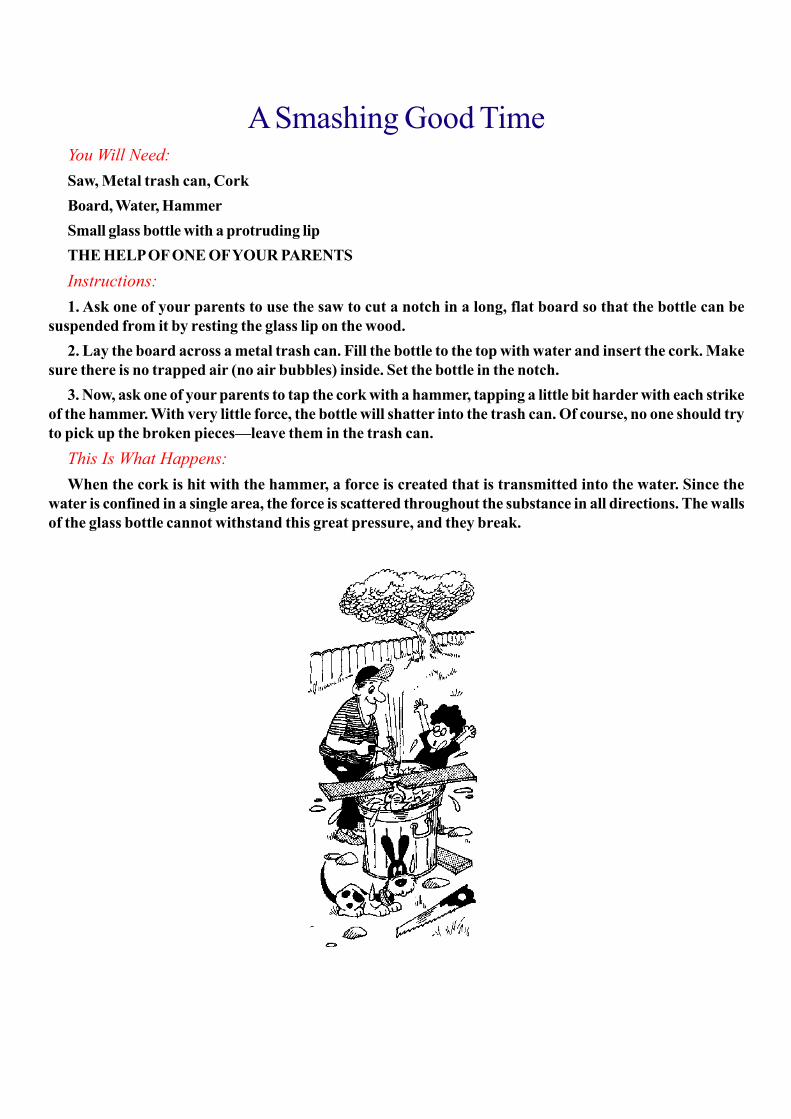
A Smashing Good TimeYou Will Need:
Saw, Metal trash can, Cork
Board, Water, Hammer
Small glass bottle with a protruding lip
THE HELP OF ONE OF YOUR PARENTS
Instructions:
1. Ask one of your parents to use the saw to cut a notch in a long, flat board so that the bottle can be
suspended from it by resting the glass lip on the wood.
2. Lay the board across a metal trash can. Fill the bottle to the top with water and insert the cork. Make
sure there is no trapped air (no air bubbles) inside. Set the bottle in the notch.
3. Now, ask one of your parents to tap the cork with a hammer, tapping a little bit harder with each strike
of the hammer. With very little force, the bottle will shatter into the trash can. Of course, no one should try
to pick up the broken pieces—leave them in the trash can.
This Is What Happens:
When the cork is hit with the hammer, a force is created that is transmitted into the water. Since the
water is confined in a single area, the force is scattered throughout the substance in all directions. The walls
of the glass bottle cannot withstand this great pressure, and they break.

Tube TestYou Will Need:
Paper tissue Cardboard tube Rubber band Salt Broomstick
Instructions:
1. Wrap a paper tissue around the opening of an empty cardboard tube, and secure it with a rubber band.
2. Pour salt into the tube, about 3 or 4 inches high.
3. Holding the cardboard tube in one hand, try to rip the tissue by pushing the broomstick into the open
end of the tube and into the salt. No matter how hard you push, the tissue won’t break.
This Is What Happens:
The layer of salt is composed of many tiny crystals that are free to move against each other. As you push
the broomstick into the salt, the crystals send the force in many directions, and the small amount of pressure
that finally reaches the tissue is not strong enough to rip it open.

A Gripping TaleYou Will Need:
1-quart, empty mayonnaise jar
Uncooked rice
Knife with blunt, wide blade, such as a cake knife
Instructions:
1. Fill the empty mayonnaise jar with uncooked rice and pack it down firmly. Add more rice until it’s even
with the top of the jar.
2. Poke the blunt knife into the rice several times to a depth of about 2 inches. Then jab the knife in
firmly, about 6 inches deep.
3. Now slowly pull the knife upward. You will lift the jar of rice.
This Is What Happens:
The rice grains, which fill the jar, have many air spaces between them. As you poke the knife into
these grains, they become tightly packed. When you finally jab the knife deeply, the rice is pushed
against the blade and holds it in place. This gripping force enables you to lift the entire jar as you raise
the knife.
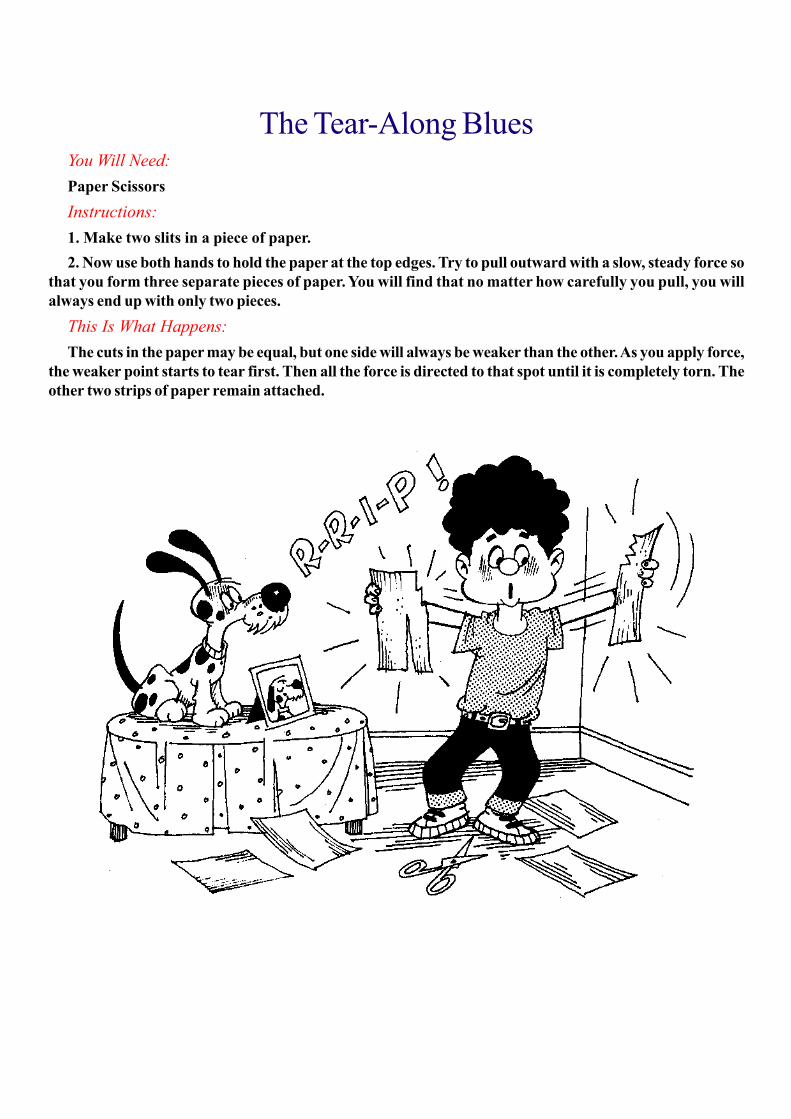
The Tear-Along BluesYou Will Need:
Paper Scissors
Instructions:
1. Make two slits in a piece of paper.
2. Now use both hands to hold the paper at the top edges. Try to pull outward with a slow, steady force so
that you form three separate pieces of paper. You will find that no matter how carefully you pull, you will
always end up with only two pieces.
This Is What Happens:
The cuts in the paper may be equal, but one side will always be weaker than the other. As you apply force,
the weaker point starts to tear first. Then all the force is directed to that spot until it is completely torn. The
other two strips of paper remain attached.

Breaking AwayYon Will Need:
Empty food can, such as a soup can
Can opener
Scissors
Water
Cardboard
Drinking glass
THE HELP OF ONE OF YOUR PARENT
Instructions:
1. Ask one of your parents to cut away the bottom of an empty food can with a can opener so that both
ends are open.
2. Cut a piece of cardboard that is a little bit larger than the bottom of the can.
3. Fill a pail with water. Hold the cardboard beneath the bottom of the can and push the can straight into
the water. When the outside water level conies near the top of the can, take away your hand from the
cardboard. The inside of the can will remain dry as the cardboard clings to the can.
4. Now pour water slowly from a drinking glass into the can. When the water level inside the can is the
same as the water level outside, the cardboard will break away.
This Is What Happens:
The empty can and cardboard act as if they were one solid unit in the water-the force of the water presses
upward on the cardboard, keeping it pressed to the bottom rim of the can. However, when you add water to
the inside of the can, you are creating an opposite force—a downward force—which balances out the water
pressure in the pail, and the cardboard drifts away.

Spin the CanYou Will Need:
Hammer
Nail
Coffee can
String
Water
THE HELP OF ONE OF YOUR PARENTS
Instructions:
1. Ask one of your parents to punch 5 holes into the side of a coffee can—1 hole above the other in a
vertical line—with a hammer and a small nail, then 3 more holes, equally spaced, around the top rim—8
holes in all.
2. Tie string through each of the 3 holes around the rim. Then tie the ends to one long piece.
3. Tie the device to a low tree branch and fill the can with water to the top. The can will spin.
This Is What Happens:
Water squirts from the 5 holes that were punched in the side of the can. The action of these water jets
creates a backward force against the can, which causes it to rotate.

Sea CruiseYou Will Need:
2 antacid tablets
Empty plastic bottle, such as a
6-inch-tall shampoo bottle Water Pan
Instructions:
1. Break apart two antacid tablets and put the pieces in the bottle.
2. Now fill the bottle about W full with water. Rest the bottle on its side in a pan of water. You will see the
bottle-boat chug along the water’s surface.
This Is What Happens:
When the antacid tablets and water combine, they form a gas that escapes through the neck of the bottle.
This backward motion of the escaping gas is matched by an equal forward thrust, which propels the boat
ahead.

Carrot Me UpYou Will Need:
String
Carrot, with leaves
2 spools, 1 large and 1 small
Instructions:
1. Tie a piece of string, about 40 inches long, to the top of a carrot.
2. Slip the free end of the string through the large spool, then tie it to the smaller spool.
3. Hold the large spool in your hand and begin making circular motions—the small spool should swing in
a circle. As you increase the speed of the motion, the carrot will rise.
This Is What Happens:
There is a force associated with the rotation of the small spool. This force pulls away from the center of
the circle and is called centrifugal force. Since the spool is attached to the carrot, the “pulling-away” force
is transmitted along the entire length of string and the carrot is pulled up.

Hang in ThereYou Will Need:
Wire clothes hanger Penny
Instructions:
1. In one hand, hold a wire clothes hanger by the hook. With your other hand, pull straight down on the
bottom wire at the middle. Bend the wire until the hanger has stretched lengthwise and an angle has formed.
2. Slip this newly-formed bottom angle over your index finger and allow the wire to hang freely. (The
hook will now be at the bottom.)
3. Carefully balance a penny on the tip of the hook. Slowly swing the hanger back and forth on your
finger. Then build up a little speed and spin the wire in a full circle. Continue spinning as fast as you like. The
penny will not fall off. When you want to stop spinning, do it gradually, coming to a slow halt. The penny still
remains perched, as if it had been glued to the spot. If you have trouble on your first try, practice a few times
and you will soon be an expert.
This Is What Happens:
While the wire is spinning, the tip of the hook exerts an inward force, which pushes the penny toward the
center of the circle. This force is called centripetal force and prevents the coin from flying outward.

Dapper DollarYou Will Need:
Dollar bill 2 paper clips
Instructions:
1. Fold a dollar bill into an ‘&’ shape. Then place a paper clip at each of the two outer edges, hooking the
short, single wire over the outer layer and inner layer.
2. Now use both hands to grasp the edges of the dollar bill. Pull quickly! The paper clips will hook
themselves together and jump away.
This Is What Happens:
You folded the dollar bill into an *S’-shaped curve. When you tried to straighten it by pulling the ends, the
paper clips were forced into the center where they met each other. At this point, the curve in the bill was
removed as the clips hooked around each other.

SupermanYou Will Need:
A friend Broom
Instructions:
Challenge your friend with this experiment—you’ll always win!
1. Ask your pal to hold both hands straight out and grasp the broom.
2. Place one of your hands in the center of the broom, with your arm bent at the elbow, grasping it with a
slight downward tug. Tell your friend that you bet he or she can’t push you over with the broom.
3. As your friend pushes the broom toward you, push straight up. You will remain standing in place.
This Is What Happens:
Even if your friend is bigger and stronger than you, you will always win because you have a hidden power.
You have much more leverage—with one bent arm acting as a lever— than your friend has with two straight
arms. A lever helps to lift weights with less effort, giving you a mechanical advantage. So the direction of
your friend’s pushing force is easily offset by a much smaller force from you.
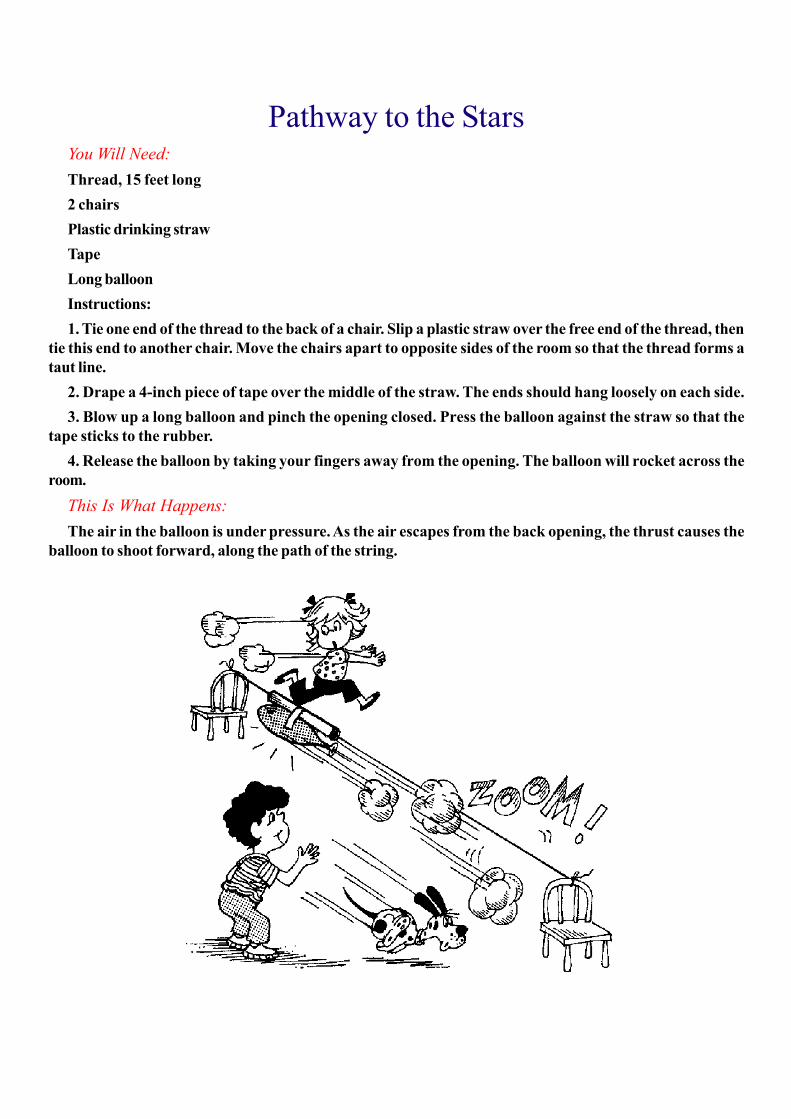
Pathway to the StarsYou Will Need:
Thread, 15 feet long
2 chairs
Plastic drinking straw
Tape
Long balloon
Instructions:
1. Tie one end of the thread to the back of a chair. Slip a plastic straw over the free end of the thread, then
tie this end to another chair. Move the chairs apart to opposite sides of the room so that the thread forms a
taut line.
2. Drape a 4-inch piece of tape over the middle of the straw. The ends should hang loosely on each side.
3. Blow up a long balloon and pinch the opening closed. Press the balloon against the straw so that the
tape sticks to the rubber.
4. Release the balloon by taking your fingers away from the opening. The balloon will rocket across the
room.
This Is What Happens:
The air in the balloon is under pressure. As the air escapes from the back opening, the thrust causes the
balloon to shoot forward, along the path of the string.

Diffusion ConfusionYon Will Need:
Small bar of soap, not the kind that floats
1-quart glass jar with lid
Glue Paper Water Pencil
Instructions:
1. The tiny bars of soap from hotels or airplanes are excellent for this experiment, but if you don’t have
any, slice a piece of regular soap into several chunks that will cover the bottom of the jar.
2. Glue a strip of paper up the side of the jar. Then drop the soap into the jar, and fill completely with
water.
3. Screw the lid onto the jar and set the experiment in a quiet place where it will not be disturbed. Check
the experiment every week for several weeks. You will see two layers in the jar. The soap dissolves to form
a heavy solution underneath the water. Mark the soap position on the paper each week. This layer slowly
creeps upward. Do you know why?
This Is What Happens:
At first, the soap dissolves in the water surrounding it. This is why you see the layer of soap solution at
the bottom. However, the molecules of a substance are always in motion, even though the substance may
appear to be sitting quietly. The soap and water molecules are in constant motion, always interacting.
Eventually, the soap solution distributes itself throughout the entire jar of water. The scientific name for this
process is diffusion.

Friction FactsYou Will Need:
Your 2 hands
Instructions:
Have you ever wondered what heat is and where it comes from? Here is an easy experiment that will
give you the answer—you don’t need any equipment except your own 2 hands!
1. Press your hands together, palms facing each other. Now rub them together quickly, letting your hands
slide back and forth over each other several times. You will notice that your hands become warm. Can you
explain why?
This Is What Happens:
The act of objects in contact, resisting motion, is known as friction. You noticed friction between your two
hands as you rubbed them together. This action-friction—created heat. The rubbing of molecules of air
against each other creates heat also—the kind of heat that warms a room.

A Change of PaceYou Will Need:
Tape String Coin Desk
Instructions:
1. Tape a piece of string to one side of a coin. Tie the free end of the string to the handle on an opened
desk drawer.
2. Keeping the string straight, pull the com back until it touches the front of the desk. Then release it,
letting it swing away. Observe its motion. You will see that the com travels over a shorter distance with each
swing it takes.
This Is What Happens:
For any action, the energy out always equals the energy in. So, when you start the coin at the desk, it
never swings higher because this would require more energy. But you would suspect that the coin should
travel the same distance each swing. Why does it swing lower? Energy is never lost; however, some energy
changes to a different form. The act of the coin rubbing against the air is called friction, and friction changes
the energy of the swinging coin into heat. The surrounding air actually becomes warmer, but this change is
so slight you don’t notice a temperature increase.

Smooth RiderYou Will Need:
2 empty, dry paint cans, the same size
Marbles
Instructions:
1. Fill the groove that runs around the top of one paint can with marbles.
2. Now turn the other can upside down and set it on top of the first. The groove on this can should rest on
top of the marbles. Rotate the upper can and notice how easily it turns.
This Is What Happens:
You have just constructed a simple model of ball bearings, which are used to reduce friction between two
surfaces that rub against each other. Your bicycle probably has ball bearings, allowing the wheels to turn
freely. The ball bearings in a wheel are made from finely polished steel.

A Hot MysteryYon Will Need:
Heavy-duty rubber band, at least 1A inch wide
Instructions:
1. Hold the rubber band between your two hands and stretch it tightly. Gently
place it against your cheek. The rubber band feels warm.
2. Now release the tension in the rubber band, and once again hold it to your face. This time it is cool.
Repeat the stretching and loosening process several times. Do you know what causes the gain and loss of
heat?
This Is What Happens:
If you could not come up with an explanation for this experiment, don’t worry. Scientists have several
theories, but no one is sure which is absolutely correct! One idea is that when the rubber is stretched, the
molecules bump into each other more frequently and this may raise the temperature.

Built-in Metal DetectorYou Will Need:
A friend
This book
Frying pan
Instructions:
Did you know that you have a built-in metal detector? Read the directions to this experiment, then try it
with your eyes closed.
1. Have someone hold this book against one of your cheeks. At the same time, have the person gently
hold the bottom of a frying pan against the other cheek.
2. Can you tell which is which? The book may feel a little cooler than your cheek, but the frying pan feels
quite cold.
This Is What Happens:
This book is made of paper, and the frying pan is made of metal. Metal is said to be a good conductor of
heat because heat travels quickly through it. When the metal was held next to your cheek, the heat from
your body was rapidly carried away and the frying pan felt cold. Paper, on the other hand, is not a good
conductor of heat, so your cheek kept most of its heat and the book felt just a little colder than your skin.

Dime TimeYou Will Need:
Candle
Aluminum pie tin
Dime
Index card
Matches
THE HELP OF ONE OF YOUR PARENTS
Instructions:
1. Set the candle on the aluminum pie tin and place the tin in the sink.
2. Rest the dime in the center of the index card.
3. Ask one of your parents to light the candle and move the card over the tip of the flame, keeping the
card in continuous motion, but the dime in the same position. When the paper begins to turn brown, ask your
parent to stop.
3. Let the dime slide off the card into the aluminum dish. The coin will be hot, so do not pick it up until it
has cooled. You will see a pattern on the card in the spot where the dime was resting.
This Is What Happens:
The change in color of the paper is due to the heat from the candle flame. A slight charring takes place.
The area where the dime is resting, however, remains unburned because the metal conducts heat away from
that space.

Sharp ShooterYou Will Need:
Rubber band Plastic straw Scissors
Instructions:
1. Tie a thin rubber band in half.
2. Cut a 5-inch section from the plastic straw and anchor the whole rubber band over the edges as shown.
3. Now slip the scissors around the rubber band at one side of the knot. Cut. The straw shoots away.
This Is What Happens:
The tension in the stretched rubber band is actually a form of stored energy. You release this energy
when you cut the rubber and it causes the straw to fly off in one direction. If you watched closely, you noticed
that the rubber band moved away in the opposite direction—for every action, there is an equal and opposite
reaction.

Tight RopeYou Will Need:
Nylon rope, or nylon clothesline, 6 to 8 feet long
Dacron, polyester, or dacron/polyester rope, 6 to 8 feet long
Water
2 big rocks
THE HELP OF ONE OF YOUR PARENTS
Instructions:
1. Wet both pieces of rope with water from a garden hose or in a sink.
2. Ask one of your parents to tie each rope to a tall, sturdy object, such as the cross bar of a swing or a
high, solid tree branch.
3. Tie a large rock to each of the free ends. Now tug on the ropes by applying downward pressure to the
rocks. What do you notice about the properties of the two different kinds of rope? The nylon line increases
hi length, while the dacron line remains the same.
This Is What Happens:
Sailors and other boaters know about the two different kinds of rope that you tested. Nylon line will
stretch a little while it is under tension, so sailors use it to tie their boats to a dock. However, the lines used
to fasten the sails to the mast must be as tight as possible so the sails don’t flap needlessly in the wind, and
a stretchy rope would not be a good idea. In this case, dacron line is used.

Pole StrollYon Will Need:
A pole
Instructions:
1. Stand straight and balance a pole vertically in the palm of your hand.
2. Try to keep the pole in balance as you move to a spot several feet away. The pole will lean forward as
you walk, but it will not fall. When you stop, the pole balances in the vertical position again. Do you know
what forces are acting on the pole?
This Is What Happens:
There is only one force acting on the balanced pole when you are standing still—gravity. It pulls downward,
so the pole must be perfectly upright in order to be balanced. As you walk to a point several feet away,
however, your forward motion creates an additional force on the pole. Now the pole must be tilted in order
to balance the two forces—downward gravity and forward motion.

The Match GameYou Will Need:
Wooden match
Large safety pin
Instructions:
1. Break the striking head off the wooden match and discard it. Open the safety pin and push its point
through the center of the match. Close the pin. Move the match around the metal several times so that it
rotates easily.
2. Now rotate the match until it is pressed against the other edge (on top) of the pin. Push firmly against
the lower tip of the match, then quickly slide your finger off the edge in a snapping motion. The match seems
to move through the solid pin to the other side.
This Is What Happens:
Of course the wooden match cannot pass through another solid material. When you pressed the tip of the
match, this caused the stick to snap against the pin and bounce around in a full circle until it came to rest on
the opposite side of the metal. This happened so fast that it appeared as if the match passed through the
metal. Practice this trick several times and show it to your friends. They’ll be amazed!

Strike 1You Will Need:
Baseball bat Hard rubber mallet
Instructions:
1. Grasp the handle of a wooden baseball bat between your thumb and index finger. Let the bat hang
down loosely.
2. With a hard rubber mallet, lightly tap the wide part of the bat near the very end. You will feel a strong
vibration through the wood.
3. Continue making a series of light taps along the length of the bat. You will find one spot that produces
no vibration.
This Is What Happens:
When you swing a baseball bat, the ball must hit the wood in one special place in order to make a good
hit. This spot is called the center of percussion, and you have just located it on your bat—the area that
produced no vibration. Any other spot along the wood produces a vibration. That is why your hands may
sting if you hit a ball too near the tip or the handle of the bat.

Strike 2Yon Will Need:
Push-pull cap from dishwashing liquid
Baseball bat
Clay
Ball bearing or small marble
Instructions:
You learned about a bat’s center of percussion in the first experiment. Here is another method to locate
that spot on your bat.
1. Pull out the center piece of the push-pull cap and attach it to the end of your bat with a piece of clay.
2. Set a ball bearing or small marble on the plastic piece. (The ball should be small enough so that it rests
securely inside the curve, but large enough to prevent it from dropping down the opening.)
3. Rest the handle of the bat on the ground and raise the wide end. Let the bat fall. Repeat the process
several times, each time changing the placement of the ball and its holder along the length of the bat. What
do you find?
This Is What Happens:
The freely falling object (the ball) falls at a constant speed. The end of the bat, however, falls faster than
the handle. When the ball/cap device is stuck near the end of the bat, the end of the bat falls away from
beneath the ball. You hear the click of the ball hitting the ground after the bat has hit. But when you place the
ball at the center of percussion, the ball and the bat both drop at the same rate. There is no click!

Arch StarchYou Will Need:
6 or more identical books
Table or desk top
Instructions:
1. Obtain 6 or more books of the same size. Stack them together into an even pile near the edge of a table
or desk top.
2. Slide the top book out as far as you can without letting it fall. It should hang over the table’s edge by
almost 1/2 its length.
3. Next, push the second book out as far as you can, allowing the top book to move along with it.
4. Move the third book, keeping the first 2 with it. Proceed in this fashion with each book hi the stack,
always keeping the same position of the upper books. With each new move that you make, you will find that
you cannot slide the book quite as far as the previous one. Soon, you will develop a “feel” for how far you
can slide a book without the ones above it falling.
5. When you have reached the bottom of the stack, stand back and look at your creation. You will be
amazed to see a leaning tower extending far beyond the edge of the table. It looks like you have completed
an impossible balancing task.
This Is What Happens:
When you slid the first (top) book out, the center of gravity remained above the second book. Otherwise,
the book would have fallen. When you slid the second book, the center of gravity for the total weight of the
first and second books was above the third book. For each move, you always maintained the center of
gravity above the table. Even though individual books may protrude beyond the edge, the combined center
of gravity for the entire stack rests securely on the table.

Speed TrapYou Will Need:
4 small plastic bowls Strong plastic tape 16 marbles
3-foot, or longer, board Several books
Instructions:
1. Tape 2 small plastic bowls together back to back, forming a wheel. Make another wheel with 2 more
identical bowls.
2. Tape 4 marbles to the center of each side of one wheel. Then tape 4 marbles to each side of the other
wheel, but place 2 marbles close to the inside rim and 2 marbles directly opposite.
3. Prop up the end of a board with several books. Hold both wheels at the high end.
4. Release the wheels at the same instant. The wheel with the weights in the center will speed ahead of its
opponent. Can you explain why?
This Is What Happens:
The wheel with the marbles placed at the rim loses speed because energy must be used to move the
weight of the marbles. The faster wheel, however, has the weight of the marbles at the exact center of
rotation and does not waste energy spinning the marbles around the outer edge.

Can-O-RamaYou Will Need:
Coffee can, 2 rubber bands, String
2 plastic coffee can lids (both must fit the coffee can)
Nuts or bolts
THE HELP OF ONE OF YOUR PARENTS
Instructions:
1. Ask one of your parents to first cut off the bottom of a coffee can so you have a metal cylinder with
neither top nor bottom, and then to punch 2 holes, spaced about 2 inches apart, in each plastic lid. The 2
holes should be positioned equally distant from the center of the circular lid.
2. Now cut open a rubber band, thread it through the holes of one of the lids, and retie the ends. Do the
same for the other lid.
3. Join the 2 rubber bands inside the coffee can, tying them together with a piece of string. Tie a weight,
such as a nut or bolt, onto the string.
4. Snap the lids onto the can. Roll the device across the floor. It will come back to you!
This Is What Happens:
As the can rolls across the floor, the outer portion of the rubber bands roll along, identical to the lids’
movement. However, the weight inside the can prevents the inner portion from turning. As a result, the
rubber bands become twisted. This twisted condition stores some of the energy from the rolling motion.
When the can stops, the stored energy is then released as the rubber bands unwind and the can rolls back
to its owner.

Over Easy, PleaseYon Will Need:
Raw egg Hard-boiled egg
Instructions:
Con you tell the difference between a raw egg and a hard-boiled egg? They look and feel the same, but
here is an easy trick.
1. Spin a raw egg on a hard surface, such as a counter or tabletop, (Don’t let it fall off the table or you’ll
have quite a mess to clean upl) The egg will slow down very soon and move in a floppy, random fashion.
2. Now spin a hard-boiled egg. The egg acts quite differently this time. It will spin easily and may stand
up on end. You will also notice that it spins for a much longer period of time.
This Is What Happens:
The hard-boiled egg is of nearly uniform density throughout its interior. The raw egg, on the other hand,
has a loose, runny composition, and the shifting contents slow down the motion of the egg.

Jack in the GlassYou Will Need:
Playing card Drinking glass Soap
Instructions:
1. Select a card from a deck of playing cards. Then obtain a drinking glass with slightly tapered sides.
The glass opening should be larger than the width of the card.
2. Rub some soap along the inside surface of the glass.
3. Now push the card vertically into the glass. The card will rise.
This Is What Happens:
When you push the card to the bottom of the glass, the edges bend in slightly. This creates a force that
pushes against the slippery walls of the glass and allows the card to slide back up.

Keep It GoingYou Will Need:
Cellophane packaging material
Instructions:
1. Save the plastic wrapper from a packaged food item, such as a bag of pretzels.
2. Try to make a rip in the cellophane by poking your fingers into it, then pulling it apart. You will find that
it is very hard to start a tear, but it is easy to keep it going after it has started.
This Is What Happens:
When you pull against opposite ends of the plastic, your force is spread over a large area. The plastic
may stretch, so starting a tear is very hard. Once a tear has begun, however, most of the stress is concentrated
at this single point, and you do not have to pull very hard to continue the tear.

Nobody’s PerfectYon Will Need:
Small, clear glass jar or bottle
Rubbing alcohol
Water
Eyedropper
Cooking Oil
Instructions!
1. Fill the jar or bottle about Va full with nibbing alcohol. Note the level to which the liquid comes.
Mentally divide the remainig volume in half and add water to this level.
2. With an eyedropper, draw up some cooking oil. Place the tip of the dropper beneath the surface of the
alcohol/water mixture and gently squeeze out the oil. The drop should float, but if it does not, then slowly
add more alcohol until the drop rises to the middle.
3. If the drop is floating near the top as predicted, add water, a little at a time, until the drop is suspended
in the center. Stand back. You will see a perfect sphere mysteriously hanging in mid-solution.
This Is What Happens:
The water/alcohol solution has a density greater than alcohol alone, but it is less dense than pure water.
You created an environment in which the density of the oil drop was approximately the same as its surrounding
medium—the water/alcohol solution. Thus the drop had no forces pulling it one way or another and remained
hanging in mid-solution. That is also why the drop kept its perfectly round shape. The forces in nature are
not usually balanced like this. For example, a raindrop is rarely round. As it falls to the ground, it flattens
out into a hamburger shape.
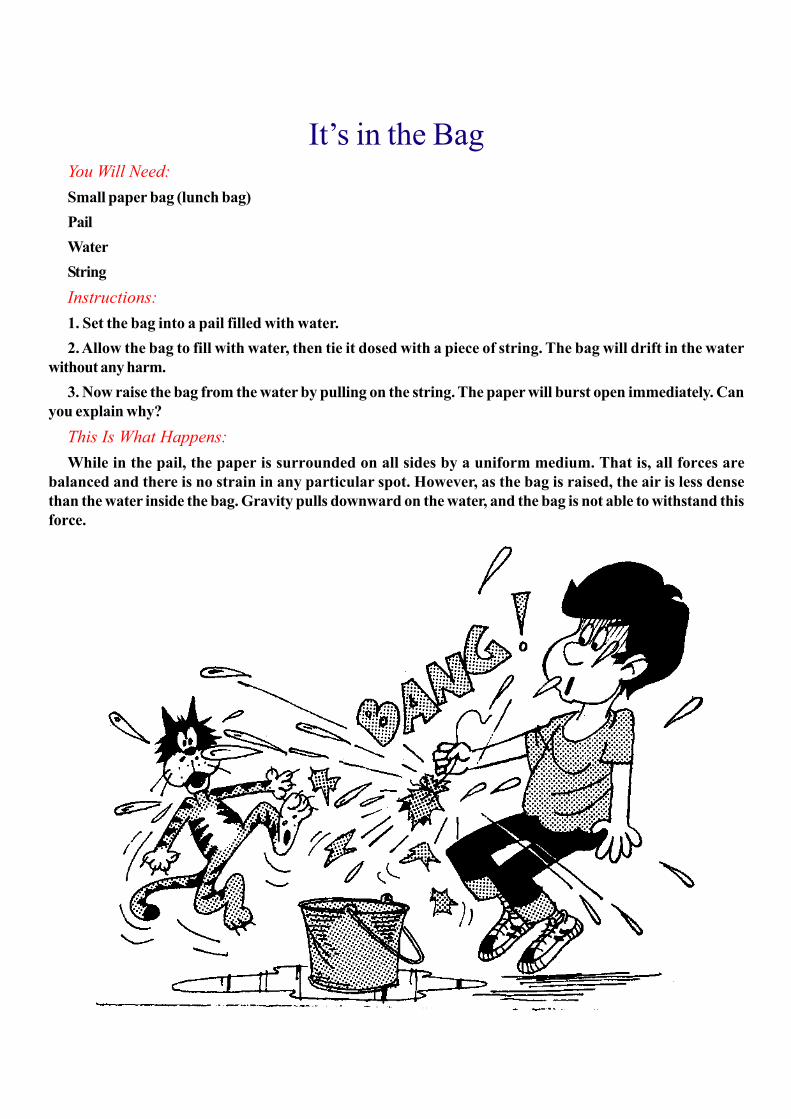
It’s in the BagYou Will Need:
Small paper bag (lunch bag)
Pail
Water
String
Instructions:
1. Set the bag into a pail filled with water.
2. Allow the bag to fill with water, then tie it dosed with a piece of string. The bag will drift in the water
without any harm.
3. Now raise the bag from the water by pulling on the string. The paper will burst open immediately. Can
you explain why?
This Is What Happens:
While in the pail, the paper is surrounded on all sides by a uniform medium. That is, all forces are
balanced and there is no strain in any particular spot. However, as the bag is raised, the air is less dense
than the water inside the bag. Gravity pulls downward on the water, and the bag is not able to withstand this
force.

Oh, Say Can You See a PulleyYou Will Need:
Wire
Empty spool String
2 boxes of the same size, such as jewelry or cuff link boxes Pennies
Instructions:
1. Insert a piece of wire through the spool and twist the ends together. Hang the spool on a hook.
2. Drape a piece of string over the spool so that it hangs several feet on each side. Tie a small cardboard
box to each end.
3. Place a few pennies in one box. Then add pennies to the opposite box until the first box is lifted. How
many corns are in each?
This It What Happens:
An equal number of pennies is needed to lift the first box. You have just constructed a simple pulley,
which is a device that changes the direction of a force. When you pull one box down, the other box rises the
same distance. Many devices use pulleys. Look at the flag in front of your school. Does someone climb the
pole each morning to put it there? Most likely the flagpole has a pulley on it. When one side of the rope is
pulled down, the flag can be raised.
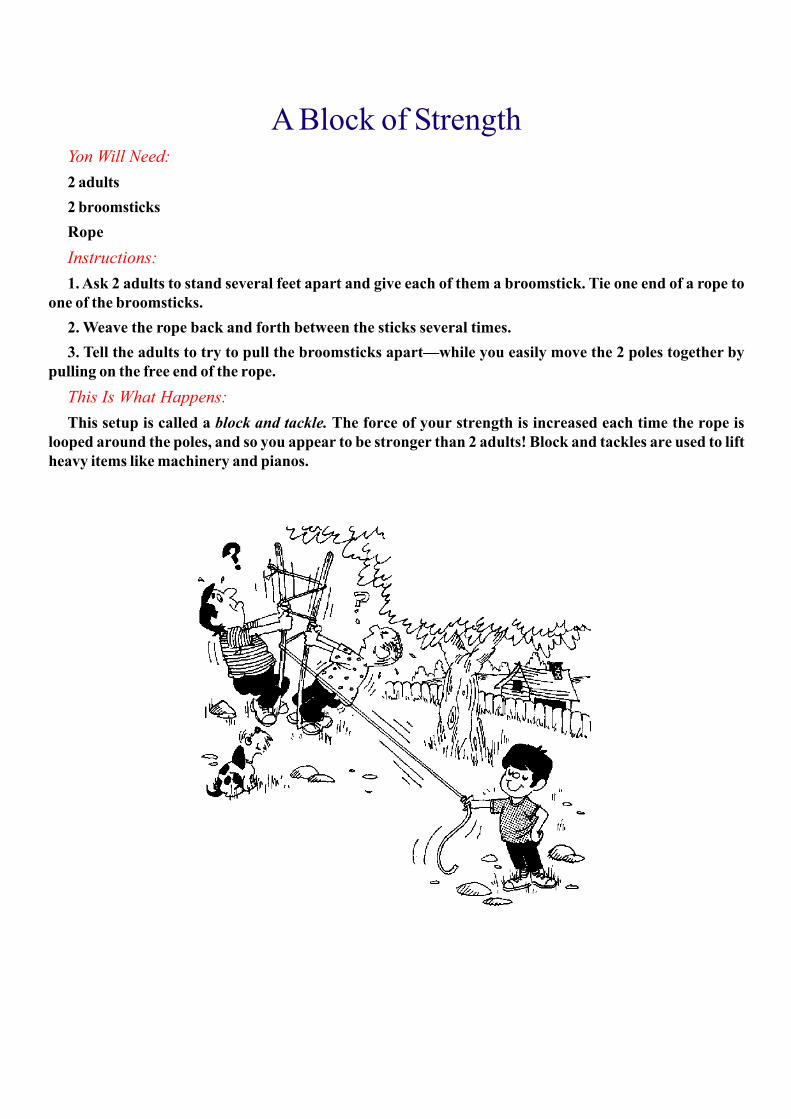
A Block of StrengthYon Will Need:
2 adults
2 broomsticks
Rope
Instructions:
1. Ask 2 adults to stand several feet apart and give each of them a broomstick. Tie one end of a rope to
one of the broomsticks.
2. Weave the rope back and forth between the sticks several times.
3. Tell the adults to try to pull the broomsticks apart—while you easily move the 2 poles together by
pulling on the free end of the rope.
This Is What Happens:
This setup is called a block and tackle. The force of your strength is increased each time the rope is
looped around the poles, and so you appear to be stronger than 2 adults! Block and tackles are used to lift
heavy items like machinery and pianos.
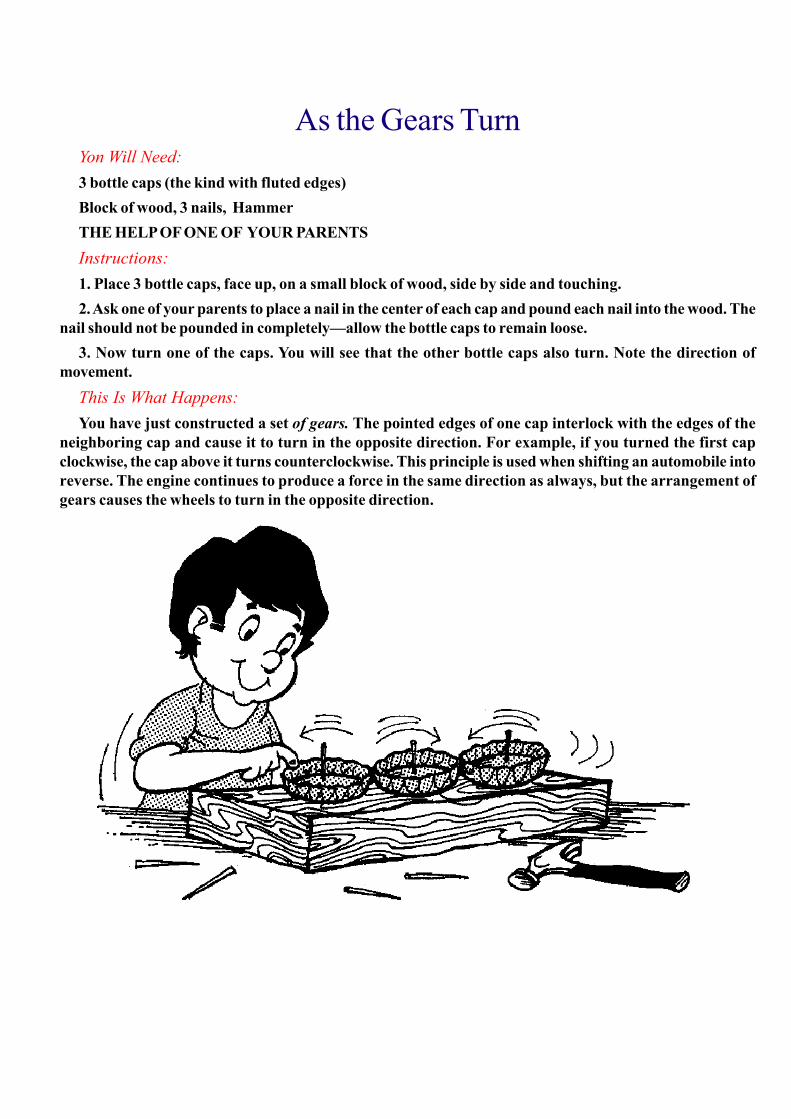
As the Gears TurnYon Will Need:
3 bottle caps (the kind with fluted edges)
Block of wood, 3 nails, Hammer
THE HELP OF ONE OF YOUR PARENTS
Instructions:
1. Place 3 bottle caps, face up, on a small block of wood, side by side and touching.
2. Ask one of your parents to place a nail in the center of each cap and pound each nail into the wood. The
nail should not be pounded in completely—allow the bottle caps to remain loose.
3. Now turn one of the caps. You will see that the other bottle caps also turn. Note the direction of
movement.
This Is What Happens:
You have just constructed a set of gears. The pointed edges of one cap interlock with the edges of the
neighboring cap and cause it to turn in the opposite direction. For example, if you turned the first cap
clockwise, the cap above it turns counterclockwise. This principle is used when shifting an automobile into
reverse. The engine continues to produce a force in the same direction as always, but the arrangement of
gears causes the wheels to turn in the opposite direction.

Turn, Turn, TurnYou Will Need:
Pencil
Paper plate with ridges along the edges
Water faucet
Instructions:
1. Push a pencil through the center of the plate, wriggling the pencil back and forth to make the hole
loose.
2. Turn on the tap water to produce a steady stream. Hold the pencil so that one edge of the plate touches
the water. The plate will spin. Turn the faucet higher and the plate will spin faster.
This Is What Happens:
You have just built a waterwheel. Waterwheels many times the size of your model are used in large rivers
and near waterfalls. The water causes the waterwheel to turn, and the turning motion generates electricity.
We call the energy that is made this way hydroelectric power.
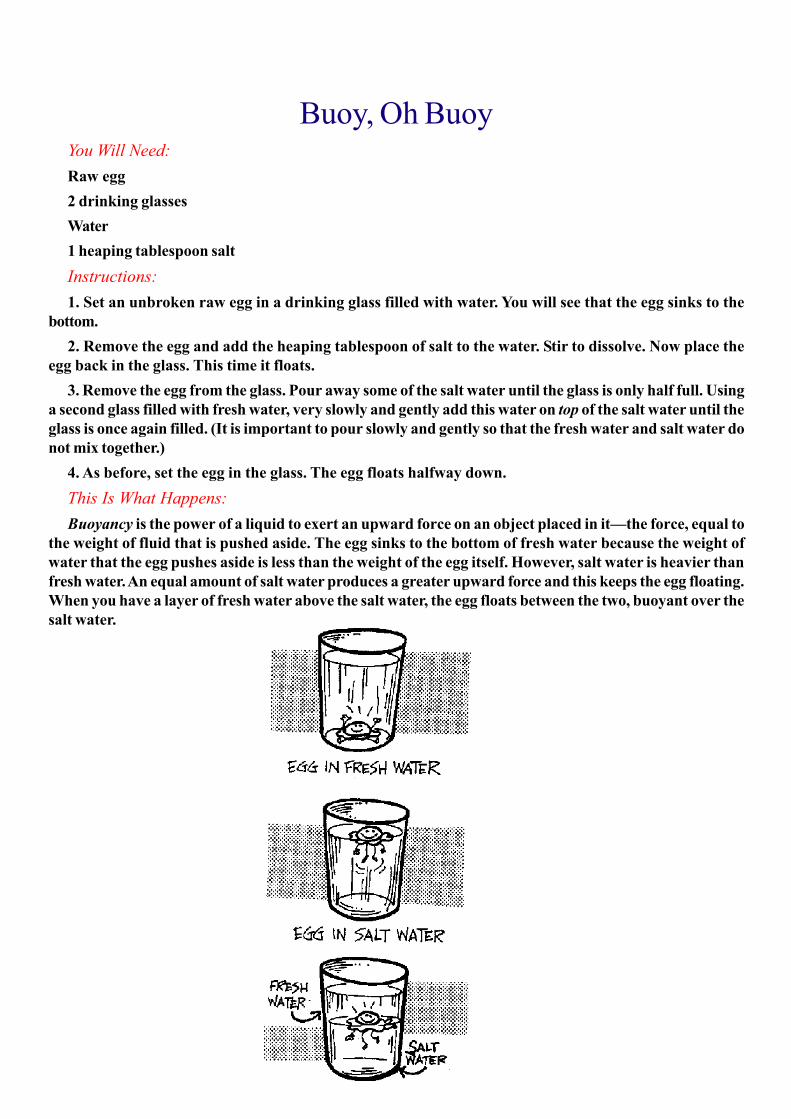
Buoy, Oh BuoyYou Will Need:
Raw egg
2 drinking glasses
Water
1 heaping tablespoon salt
Instructions:
1. Set an unbroken raw egg in a drinking glass filled with water. You will see that the egg sinks to the
bottom.
2. Remove the egg and add the heaping tablespoon of salt to the water. Stir to dissolve. Now place the
egg back in the glass. This time it floats.
3. Remove the egg from the glass. Pour away some of the salt water until the glass is only half full. Using
a second glass filled with fresh water, very slowly and gently add this water on top of the salt water until the
glass is once again filled. (It is important to pour slowly and gently so that the fresh water and salt water do
not mix together.)
4. As before, set the egg in the glass. The egg floats halfway down.
This Is What Happens:
Buoyancy is the power of a liquid to exert an upward force on an object placed in it—the force, equal to
the weight of fluid that is pushed aside. The egg sinks to the bottom of fresh water because the weight of
water that the egg pushes aside is less than the weight of the egg itself. However, salt water is heavier than
fresh water. An equal amount of salt water produces a greater upward force and this keeps the egg floating.
When you have a layer of fresh water above the salt water, the egg floats between the two, buoyant over the
salt water.

Sand PaintingYou Will Need:
Coffee can with plastic lid
Hammer
Small nail
String
Sand
Large sheet of paper
THE HELP OF ONE OF YOUR PARENTS
Instructions:
1. Ask one of your parents to punch a hole in the bottom of the coffee can with a hammer and a small nail,
then make 3 equally spaced holes around the top edge of the can.
2. Tie a piece of string, approximately 6 inches long, through each hole, and knot the ends together at the
top. Tie a long piece of string to this knot and hang the can from a low tree branch. The bottom of the can
should be an inch or two above the ground.
3. Cover the bottom of the can with the plastic lid and fill the can with clean, dry sand.
4. Spread a large sheet of paper on the ground. Remove the plastic lid and give the can a push. You will
see a unique sand pattern form in front of you.
This Is What Happens:
You have just made a pendulum. Its action is traced by the escaping sand. The two parts of the swinging
motion—vertical and horizontal—are combined into the pattern that you see on the paper.

Hot RocksYon Will Need:
Shallow pan, such as an old baking pan, Sand
Small rocks, Sunny window
Instructions:
1. Fill a shallow pan with a layer of dry sand.
2. Place some small rocks on top of the sand, stacking them several layers high.
3. Set the experiment in the direct path of the sun in a sunny window and leave it there for at least 1 hour.
When you come back, touch the surface of the rocks. They will feel hot. Hold your hand above the pan. You
will feel warmth in the air above the rocks, but as you move your hand away, the air becomes cooler.
This Is What Happens:
The rocks and sand store energy from the sun in the form of heat. This is why they feel hot to the touch
after sitting in the sun. But the rocks also give off heat to the surrounding air; the rocks are radiating heat.
The farther the distance from the source of heat—the rocks—the lesser the warmth from radiation. The
whole earth acts in the same way: It collects heat from the sun during the day, then the ground radiates the
heat and warms the air above it at night. But the higher you go from the earth’s surface, the less heat there
is. That is why a mountaintop is very cold—it is high above the ground, very far from where most heat is
radiated. The upper atmosphere surrounding the earth has very little heat at all for the same reason.

Waggling WormsYou Will Need:
Knife
Cooked spaghetti
Fish bowl
1 cup vinegar
1 cup water
Red and blue food coloring
2 tablespoons baking soda
THE HELP OF ONE OF YOUR PARENTS
Instructions:
1. The next time you have spaghetti for dinner, ask one of your parents to cut a few strands of the cooked
spaghetti into 1- to 2 Vi-inch pieces.
2. In a fish bowl or other large container, mix the cup of vinegar and the cup of water. Then add a few
drops of red and blue food coloring. Slowly add the 2 tablespoons of baking soda.
3. Now drop the pieces of cooked spaghetti into the bowl. Purple worms will waggle back and forth, but
some will rise to the top and fall to the bottom of the container several times. Can you explain why?
This Is What Happens:
The vinegar and baking soda form gas bubbles, which collect on the spaghetti. Because the gas bubbles
make the spaghetti lighter, the pieces rise and drift in the solution. The gas bubbles of those pieces that rise
to the top of the container break open at the surface, causing the pieces to fall to the bottom, where more
gas bubbles collect on the spaghetti, and the process is repeated.

Leapin’ LeoYou Will Need:
Wooden toothpick Eyedropper
Water
Instructions:
1. Use this page for the experiment, or redraw the figure on a sheet of your own paper.
2. Break a wooden toothpick exactly in the middle, but do not separate the two halves—leave them
attached to form an upside-down’ V.
3. Place the toothpick on the drawing, with the joint at the letter A, the two prongs pointing downward.
4. Use an eyedropper to transfer one drop of water to the joint. Watch the gymnast leap up and spread his
legs apart.
This Is What Happens:
When you placed the drop of water onto the toothpick, some of the water soaked into the wood. This
moisture caused the wood fibers to expand and the toothpick straightened out.

Wriggling FishYou Will Need:
Thin cellophane Scissors
Instructions:
1. Cut a fish shape 3/4 inch wide and 2 inches long from a piece of thin cellophane. (Make sure that you
use cellophane and not clear plastic. You can tell the difference by the crackling noise cellophane makes
when it is crumpled.)
2. Hold the cellophane in the palm of your hand for a couple minutes. Suddenly you will see the fish
wriggle up!
This Is What Happens:
Of course you know that the shape cannot actually come to life. The palm of your hand gives off
perspiration, and this moisture is absorbed by the cellophane, causing it to swell. The side touching your
skin absorbs more moisture than the dry side (the upper side), and this difference causes the curling action.

Snap, Crackle, JumpYou Will Need:
Puffed cereal
Plate or bowl
Wool cloth
Old phonograph record
Instructions:
1. Spread a layer of puffed cereal onto a plate, and set the plate on a table.
2. Rub a piece of wool doth, such as a wool sweater, over one entire side of an old phonograph record.
3. Now hold the record, rubbed side down, over the plate of cereal. Slowly lower the record toward the
cereal. You will see some of the cereal jump to the record and then jump off.
This Is What Happens:
Rubbing the record with wool causes its surface to pick up electrical charges. These charges are particles
called electrons. The record surface does not conduct electricity, so it simply holds the electrons in place,
even though the electrons tend to repel each other. When the “charged-up” record is held above the light,
dry cereal, the electrons attract the puffy pieces. Then some electrons stick to the cereal. Now the record
and the cereal both have electrons. These negative charges repel each other and the cereal is pushed away.
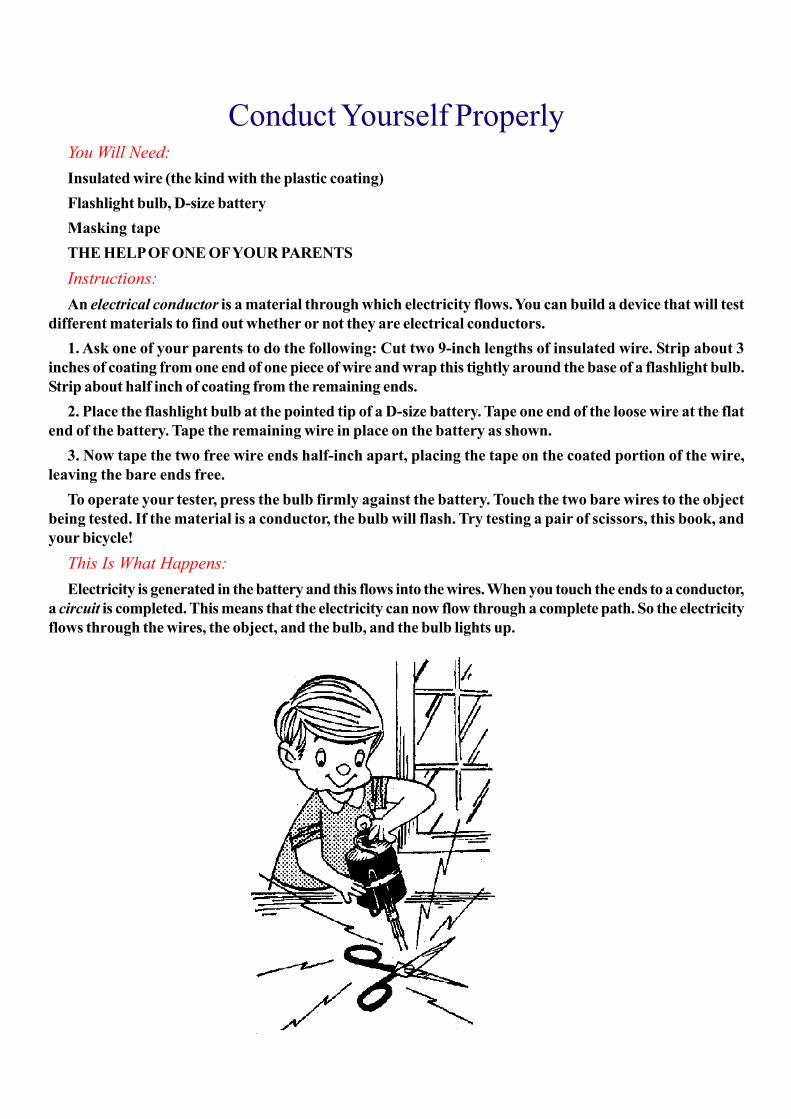
Conduct Yourself ProperlyYou Will Need:
Insulated wire (the kind with the plastic coating)
Flashlight bulb, D-size battery
Masking tape
THE HELP OF ONE OF YOUR PARENTS
Instructions:
An electrical conductor is a material through which electricity flows. You can build a device that will test
different materials to find out whether or not they are electrical conductors.
1. Ask one of your parents to do the following: Cut two 9-inch lengths of insulated wire. Strip about 3
inches of coating from one end of one piece of wire and wrap this tightly around the base of a flashlight bulb.
Strip about half inch of coating from the remaining ends.
2. Place the flashlight bulb at the pointed tip of a D-size battery. Tape one end of the loose wire at the flat
end of the battery. Tape the remaining wire in place on the battery as shown.
3. Now tape the two free wire ends half-inch apart, placing the tape on the coated portion of the wire,
leaving the bare ends free.
To operate your tester, press the bulb firmly against the battery. Touch the two bare wires to the object
being tested. If the material is a conductor, the bulb will flash. Try testing a pair of scissors, this book, and
your bicycle!
This Is What Happens:
Electricity is generated in the battery and this flows into the wires. When you touch the ends to a conductor,
a circuit is completed. This means that the electricity can now flow through a complete path. So the electricity
flows through the wires, the object, and the bulb, and the bulb lights up.
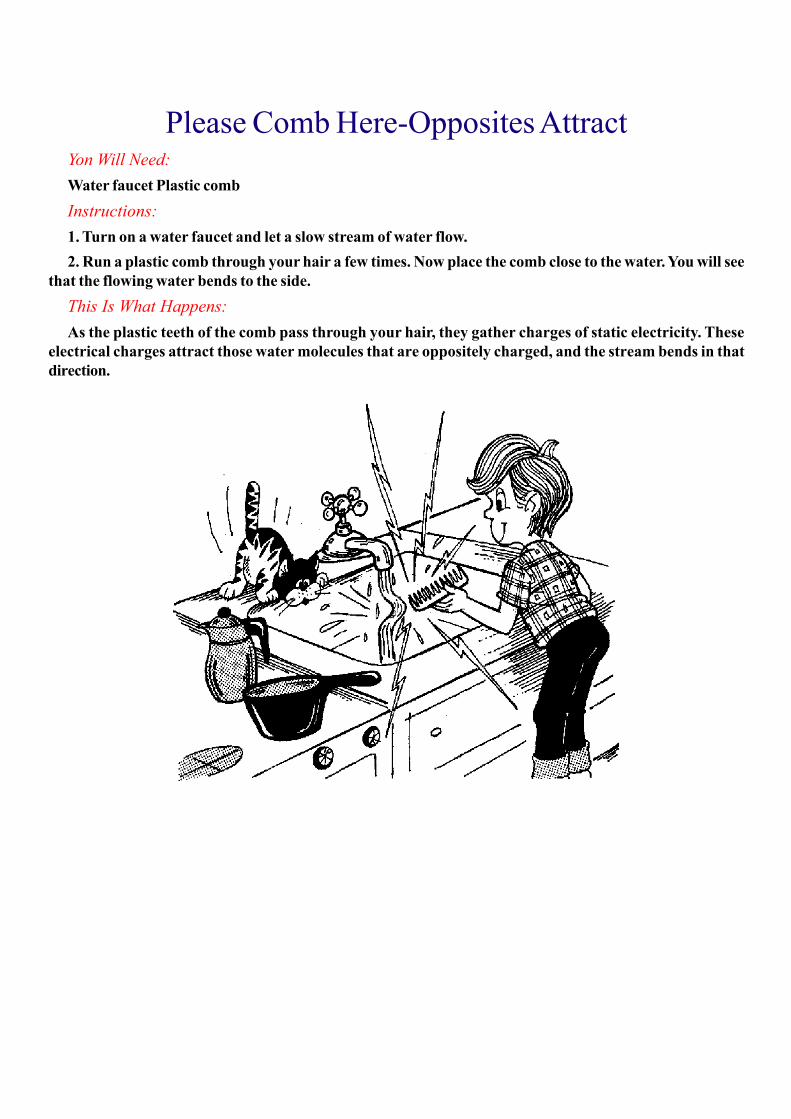
Please Comb Here-Opposites AttractYon Will Need:
Water faucet Plastic comb
Instructions:
1. Turn on a water faucet and let a slow stream of water flow.
2. Run a plastic comb through your hair a few times. Now place the comb close to the water. You will see
that the flowing water bends to the side.
This Is What Happens:
As the plastic teeth of the comb pass through your hair, they gather charges of static electricity. These
electrical charges attract those water molecules that are oppositely charged, and the stream bends in that
direction.

Lemon BatteryYou Will Need:
Copper nail Zinc nail Steel wool Lemon
Instructions:
1. Scrub a copper nail and a zinc nail with a piece of steel wool until they are clean and shiny. Rinse the
nails under the faucet.
2. Now poke the pointed ends of the nails into the center of a fresh lemon. Space the nails about 1 inch
apart and leave 1A of each nail protruding.
3. Stick out your tongue and touch it across the tops of the nails. You will feel a tingle.
This Is What Happens:
You have just made a chemical battery and the tingle on your tongue was electricity. The lemon contains
acid and water, which reacts with the metals copper and zinc to produce a slight current that passes over
your tongue.

Curses, Foiled Again!You Will Need:
Clear glass jar
Cork that fits the jar snugly
Number 18 copper wire,
several inches long Aluminum foil, Scissors, Plastic comb
Instructions:
1. Push the copper wire through the cork, leaving an inch or two protruding from the top. Bend this free
end into a curly shape to prevent the wire from slipping back into the cork. Then bend the longer bottom
piece into a triangle.
2. Cut a piece of thin aluminum foil (not the heavy-duty kind) H inch wide and 4 inches long. Fold the strip
in half lengthwise and drape it over the bottom rung of the wire triangle. Place the cork in the jar.
3. Run the plastic comb several times through your hair, then touch the comb to the tip of the curly end of
the wire sticking out of the jar. You will see the foil inside the jar move apart. Remove the comb and touch
the wire with your fingers. The foil will fall back in place.
This Is What Happens:
Running the comb through your hair picks up tiny charged particles of electrons. When you touch the
“charged” comb to the wire, the electrons travel along the length of the wire into the two flaps of aluminum
foil. Because “like” charges of electricity repel each other, the ends of the foil separate. When you touch
the wire with your finger, you reverse the flow of electrons and remove the charge, so the foil is free to fall
back into its normal position.

Down, Boy!You Will Need:
Wool sock Plastic comb Tape
Lightweight thread, about 1 foot long
Instructions:
1. Rub a wool sock rapidly back and forth over a plastic comb.
2. Tape the end of the piece of thread to the top of a table.
3. Touch the comb to the free end of the thread and raise the comb. The thread will stand on end, sticking
straight up into the air.
This Is What Happens:
When you rub the wool sock over the comb, you give the comb an electrical charge. The charge on the
comb attracts the thread because the thread carries an opposite charge. The two differently charged objects
cling together, and the thread is carried upward with the comb.
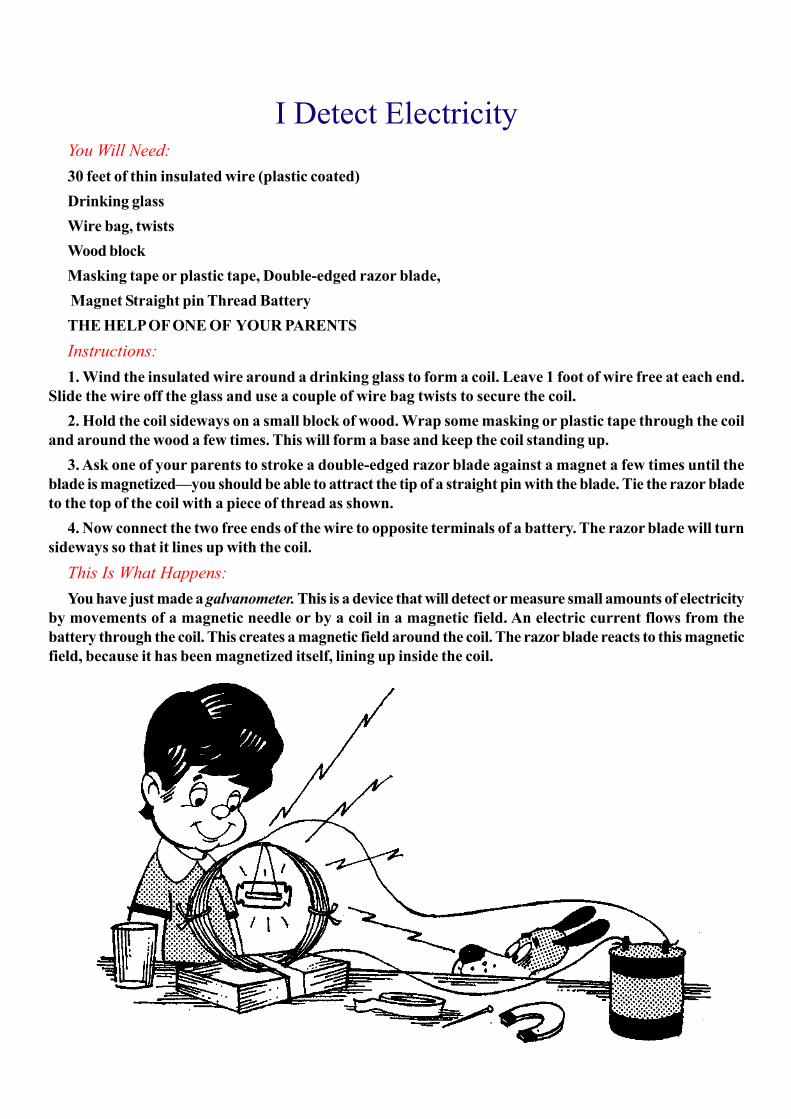
I Detect ElectricityYou Will Need:
30 feet of thin insulated wire (plastic coated)
Drinking glass
Wire bag, twists
Wood block
Masking tape or plastic tape, Double-edged razor blade,
Magnet Straight pin Thread Battery
THE HELP OF ONE OF YOUR PARENTS
Instructions:
1. Wind the insulated wire around a drinking glass to form a coil. Leave 1 foot of wire free at each end.
Slide the wire off the glass and use a couple of wire bag twists to secure the coil.
2. Hold the coil sideways on a small block of wood. Wrap some masking or plastic tape through the coil
and around the wood a few times. This will form a base and keep the coil standing up.
3. Ask one of your parents to stroke a double-edged razor blade against a magnet a few times until the
blade is magnetized—you should be able to attract the tip of a straight pin with the blade. Tie the razor blade
to the top of the coil with a piece of thread as shown.
4. Now connect the two free ends of the wire to opposite terminals of a battery. The razor blade will turn
sideways so that it lines up with the coil.
This Is What Happens:
You have just made a galvanometer. This is a device that will detect or measure small amounts of electricity
by movements of a magnetic needle or by a coil in a magnetic field. An electric current flows from the
battery through the coil. This creates a magnetic field around the coil. The razor blade reacts to this magnetic
field, because it has been magnetized itself, lining up inside the coil.

Chalk It UpYou Will Need:
Blackboard Piece of chalk Glass window An old cloth
Instructions:
You have probably seen your teacher write with chalk many times, but have you ever thought about the
chalk itself? Do you know what makes chalk stick to a surface? For the answer, try this experiment.
1. If you are at school or have a blackboard at home, draw a line on the blackboard with a piece of chalk.
Did you have any trouble? Of course not.
2. Now go to a window and rub the piece of chalk on the glass. Where is the mark? Very little chalk sticks
to the glass.
3. Rub the piece of chalk on an old cloth. You will find that some chalk marks will stick to the cloth, but
seeing letters is difficult. Try rubbing the chalk on other substances, then read the explanation below.
This Is What Happens:
When you rub a piece of chalk against something, the chalk breaks apart into separate particles at the
point of contact. Each of these tiny particles carries an electrical charge, and it is this charge that determines
what substance the particles will cling to—a blackboard surface and chalk particles will cling together
tightly; a glass surface, however, provides a poor area for the chalk particles to stick. A cloth is better than
glass, but still not as good as a blackboard.

Balloon CaveYon Will Need:
Unflavored gelatin
Dish
Balloon
Wool cloth
Instructions:
1. Pour an envelope of unflavored gelatin into a dish.
2. Blow up a balloon and tie the opening closed. Rub a piece of wool cloth, such as a wool sweater, on the
balloon.
3. Gently touch the balloon to the surface of the gelatin. Now slowly raise the balloon. Columns of gelatin
will form between the balloon and the dish. These look like the stalagmites and stalactites—deposits of
calcium carbonate resembling icicles—of a cave.
This Is What Happens:
You deposit electrical charges on the balloon when you rub it with wool. These charges attract the particles
of gelatin to the balloon’s surface, where they stick. Additional particles accumulate on top of these, so
when you pull the balloon away from the dish, the gelatin separates into columns.

The Invisible LegYou Will Need:
An old nylon stocking Plastic sandwich bag
Instructions:
1. With one hand, hold the toe of a nylon stocking (the shiny kind works best) on the edge of a table. Slip
your other hand into the plastic sandwich bag and grip the stocking, starting at the toe and pulling along the
entire length, up to the thigh. Repeat this process several times, stroking the nylon in the same direction.
2. Holding the top edge of the stocking, lift it from the table. Let go with the bagged hand. Suddenly the
stocking will appear as if there were a leg in it.
This Is What Happens:
When you stroked the nylon with the plastic bag, these two materials acquired opposite electrical charges.
Because the stocking material became all the same charge and because like charges repel each other, the
sides of the stocking pushed away from each other, taking on the shape of a real leg.
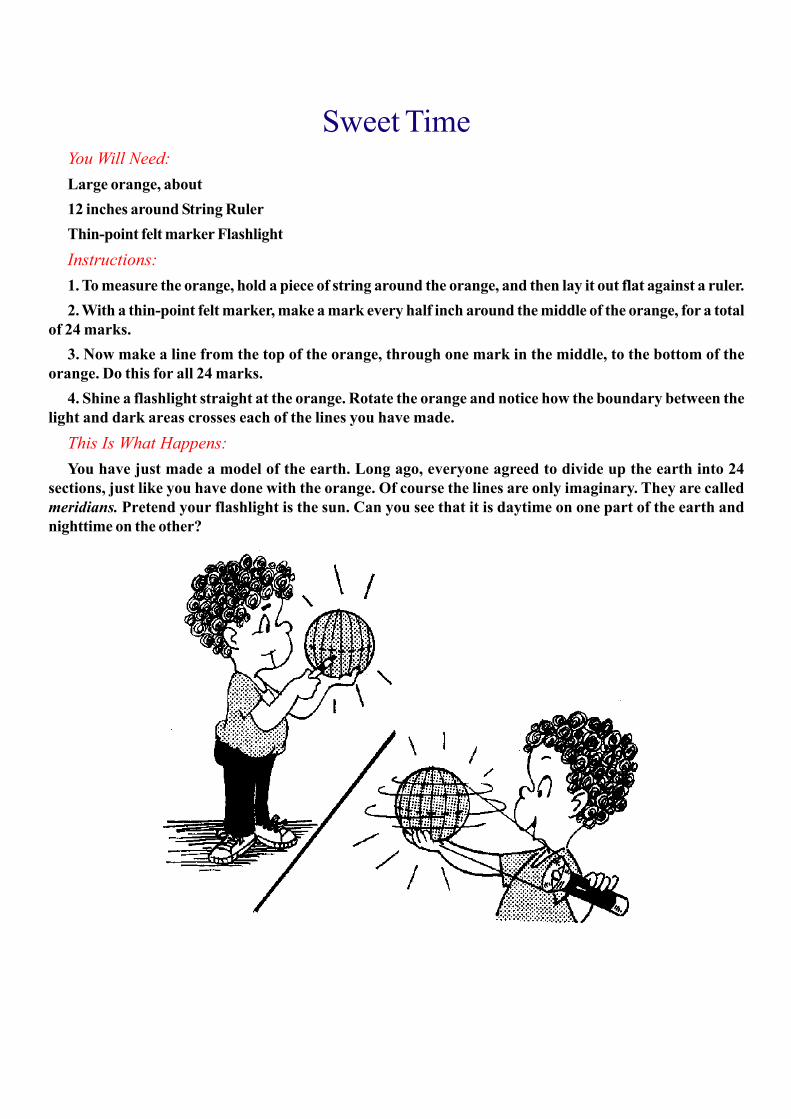
Sweet TimeYou Will Need:
Large orange, about
12 inches around String Ruler
Thin-point felt marker Flashlight
Instructions:
1. To measure the orange, hold a piece of string around the orange, and then lay it out flat against a ruler.
2. With a thin-point felt marker, make a mark every half inch around the middle of the orange, for a total
of 24 marks.
3. Now make a line from the top of the orange, through one mark in the middle, to the bottom of the
orange. Do this for all 24 marks.
4. Shine a flashlight straight at the orange. Rotate the orange and notice how the boundary between the
light and dark areas crosses each of the lines you have made.
This Is What Happens:
You have just made a model of the earth. Long ago, everyone agreed to divide up the earth into 24
sections, just like you have done with the orange. Of course the lines are only imaginary. They are called
meridians. Pretend your flashlight is the sun. Can you see that it is daytime on one part of the earth and
nighttime on the other?

Shadow ClockYon Will Need:
A sunny day
Compass
Pencil
Instructions:
1. On a sunny day, take a compass and pencil outdoors. Allow the compass needle to come to rest, then
place the pencil’s eraser at the ‘S’. Tilt the pencil at a 45 ° angle in line with the needle.
2. Imagine the compass face as the dial of a clock. ‘N’ is 12 o’clock, ‘E’ is 3 o’clock, ‘S’ is 6 o’clock, and
‘W is 9 o’clock. You can tell the approximate time by observing where the shadow falls.
This Is What Happens:
Long ago, people did not have clocks or watches. They knew how late in the day it was by the position of
the sun in the sky. Then someone discovered that he could tell time more precisely by observing where the
sun cast a shadow on a round disk. This was called a sundial. You just made a type of sundial with the
compass and pencil. The hour that you read on your compass is Standard Time. If Daylight Savings Time is
in effect where you live, add one hour to your reading.
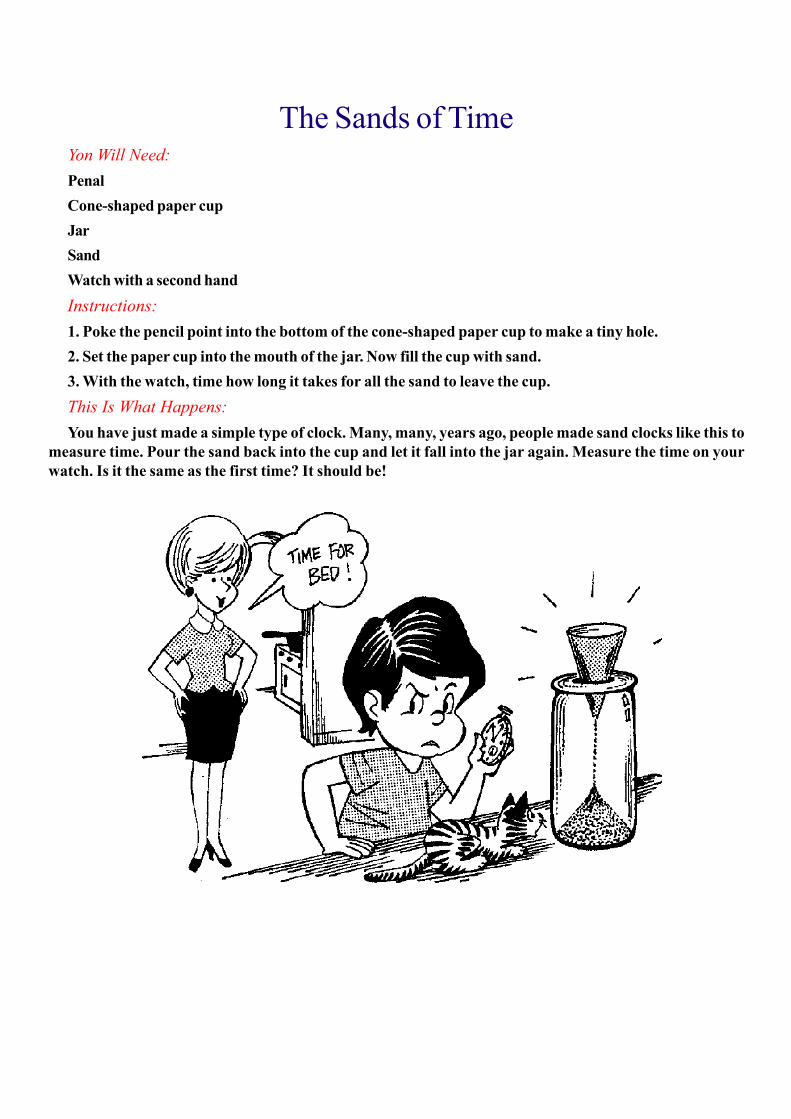
The Sands of TimeYon Will Need:
Penal
Cone-shaped paper cup
Jar
Sand
Watch with a second hand
Instructions:
1. Poke the pencil point into the bottom of the cone-shaped paper cup to make a tiny hole.
2. Set the paper cup into the mouth of the jar. Now fill the cup with sand.
3. With the watch, time how long it takes for all the sand to leave the cup.
This Is What Happens:
You have just made a simple type of clock. Many, many, years ago, people made sand clocks like this to
measure time. Pour the sand back into the cup and let it fall into the jar again. Measure the time on your
watch. Is it the same as the first time? It should be!
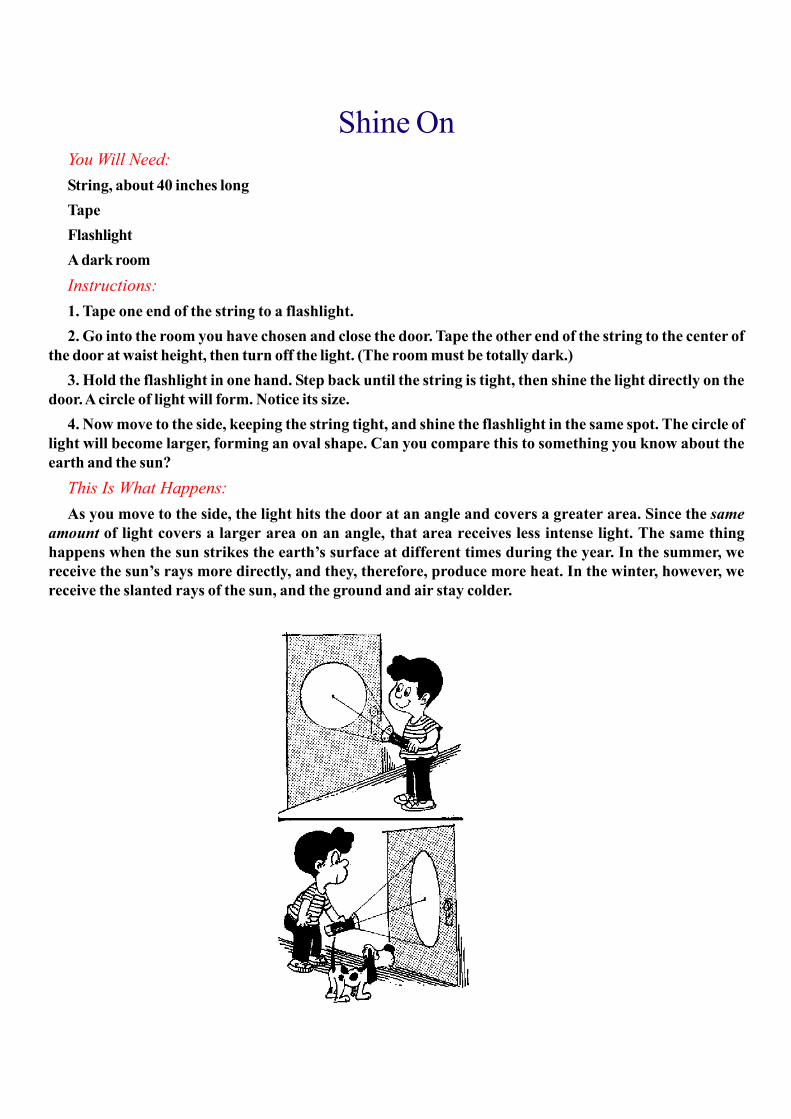
Shine OnYou Will Need:
String, about 40 inches long
Tape
Flashlight
A dark room
Instructions:
1. Tape one end of the string to a flashlight.
2. Go into the room you have chosen and close the door. Tape the other end of the string to the center of
the door at waist height, then turn off the light. (The room must be totally dark.)
3. Hold the flashlight in one hand. Step back until the string is tight, then shine the light directly on the
door. A circle of light will form. Notice its size.
4. Now move to the side, keeping the string tight, and shine the flashlight in the same spot. The circle of
light will become larger, forming an oval shape. Can you compare this to something you know about the
earth and the sun?
This Is What Happens:
As you move to the side, the light hits the door at an angle and covers a greater area. Since the same
amount of light covers a larger area on an angle, that area receives less intense light. The same thing
happens when the sun strikes the earth’s surface at different times during the year. In the summer, we
receive the sun’s rays more directly, and they, therefore, produce more heat. In the winter, however, we
receive the slanted rays of the sun, and the ground and air stay colder.
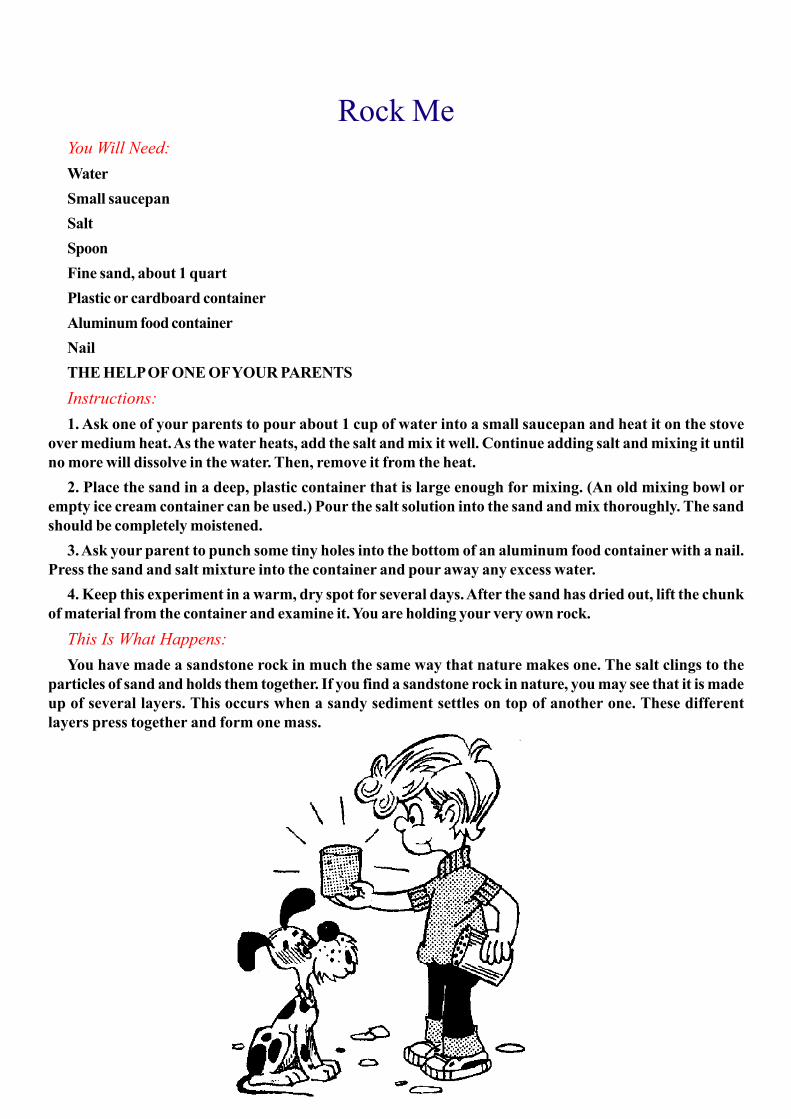
Rock MeYou Will Need:
Water
Small saucepan
Salt
Spoon
Fine sand, about 1 quart
Plastic or cardboard container
Aluminum food container
Nail
THE HELP OF ONE OF YOUR PARENTS
Instructions:
1. Ask one of your parents to pour about 1 cup of water into a small saucepan and heat it on the stove
over medium heat. As the water heats, add the salt and mix it well. Continue adding salt and mixing it until
no more will dissolve in the water. Then, remove it from the heat.
2. Place the sand in a deep, plastic container that is large enough for mixing. (An old mixing bowl or
empty ice cream container can be used.) Pour the salt solution into the sand and mix thoroughly. The sand
should be completely moistened.
3. Ask your parent to punch some tiny holes into the bottom of an aluminum food container with a nail.
Press the sand and salt mixture into the container and pour away any excess water.
4. Keep this experiment in a warm, dry spot for several days. After the sand has dried out, lift the chunk
of material from the container and examine it. You are holding your very own rock.
This Is What Happens:
You have made a sandstone rock in much the same way that nature makes one. The salt clings to the
particles of sand and holds them together. If you find a sandstone rock in nature, you may see that it is made
up of several layers. This occurs when a sandy sediment settles on top of another one. These different
layers press together and form one mass.

Star GazerYon Will Need:
Round balloon Wide-tip felt marker
Instructions:
1. Inflate a round balloon partially full with air. Pinch the neck dosed with your thumb and forefinger, but
do not tie it closed.
2. With a wide-tip felt marker, make several specks all over the surface of the rubber. Let them dry.
3. Now blow more air into the balloon, take it away from your mouth, and note the position of the specks.
Continue inflating and observing the balloon. The specks grow farther and farther apart. Do you know what
this model represents?
This Is What Happens:
The balloon is really a model of space, and each of the spots is a galaxy of stars. Our Sun and the planet
Earth are part of the Milky Way galaxy. Scientists believe that the universe is expanding in just the same
way as you saw on the balloon. The galaxies are drifting apart, leaving greater distances between them.
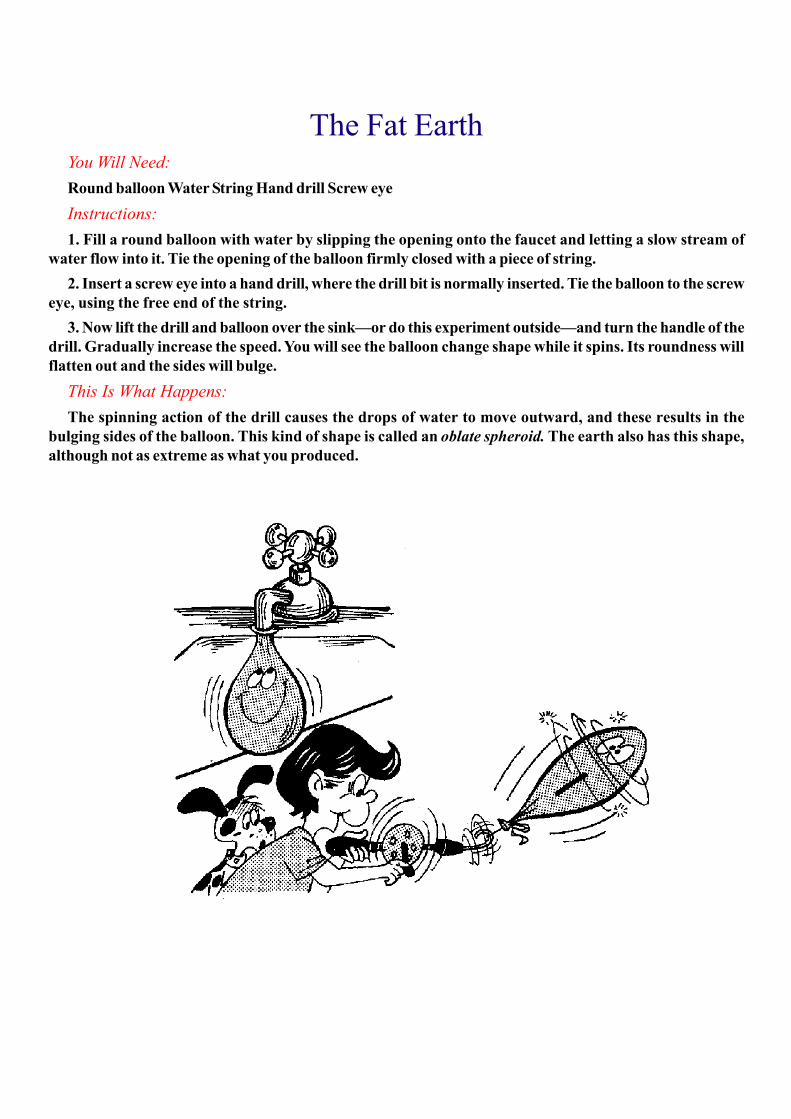
The Fat EarthYou Will Need:
Round balloon Water String Hand drill Screw eye
Instructions:
1. Fill a round balloon with water by slipping the opening onto the faucet and letting a slow stream of
water flow into it. Tie the opening of the balloon firmly closed with a piece of string.
2. Insert a screw eye into a hand drill, where the drill bit is normally inserted. Tie the balloon to the screw
eye, using the free end of the string.
3. Now lift the drill and balloon over the sink—or do this experiment outside—and turn the handle of the
drill. Gradually increase the speed. You will see the balloon change shape while it spins. Its roundness will
flatten out and the sides will bulge.
This Is What Happens:
The spinning action of the drill causes the drops of water to move outward, and these results in the
bulging sides of the balloon. This kind of shape is called an oblate spheroid. The earth also has this shape,
although not as extreme as what you produced.

Hot on the TrailYou Will Need:
Scissors, Sponge
Mayonnaise jar with lid
Glue, Tin snips
Carbon paper, Rubbing alcohol
Dry ice
Slide projector
THE HELP OF ONE OF YOUR PARENTS
Instructions:
1. Cut a piece of sponge so that it fits into the bottom of a mayonnaise jar. Glue the sponge in place.
2. Ask one of your parents to cut out a 1-inch piece of metal from the side of the jar’s lid with a pair of tin
snips. Do not handle the edges because they will be sharp.
3. Next, cut a piece of carbon paper into a circle that will fit into the metal lid. Place the paper in the lid
carbon side up.
4. Pour some rubbing alcohol into the jar and let the sponge soak up as much of this liquid as it can. Then
turn the jar upside down, let it drain completely, and screw on the lid. Ask your parent to set the device, still
upside down, on a small piece of dry ice.
5. Shine a projector light into the cutaway section of the lid. In about 10 minutes, you will see tiny trails
skirting across the black background of the carbon.
This Is What Happens:
You have just constructed a diffusion cloud chamber. This instrument makes the paths of nuclear particles
visible. Nuclear particles may come from outer space, the earth’s natural radioactivity, or from man-made
sources such as power plants. As the alcohol in the sponge, vaporizes, it slowly sinks to the lid where it is
cooled by the dry ice underneath. The motion of nuclear particles through this cool vapor creates trails of
fog, which you are able to see because of the bright light.

Double SplitYou Will Need:
Newspaper
Scissors
Tape
Pen or marker
Instructions:
1. Cut a strip of newspaper at least 2 inches wide. Using a double page of the newspaper will give you a
nice, long strip.
2. Lay the strip flat. Bring the two ends together, but before joining them give one end a half twist. Tape
the two ends together in this position. You now have a loop.
3. Try to split the loop into two by cutting along the center of the entire circle. You will end up with a single
loop that is twice the size of the original!
This Is What Happens:
You have just formed a Mobius strip. This type of figure was first discovered by a German mathematician
named Mobius. He showed that this kind of strip has only one side. You can prove this by making another
Mobius strip and drawing a continuous line around the entire loop. The line will end at the point where you
started.
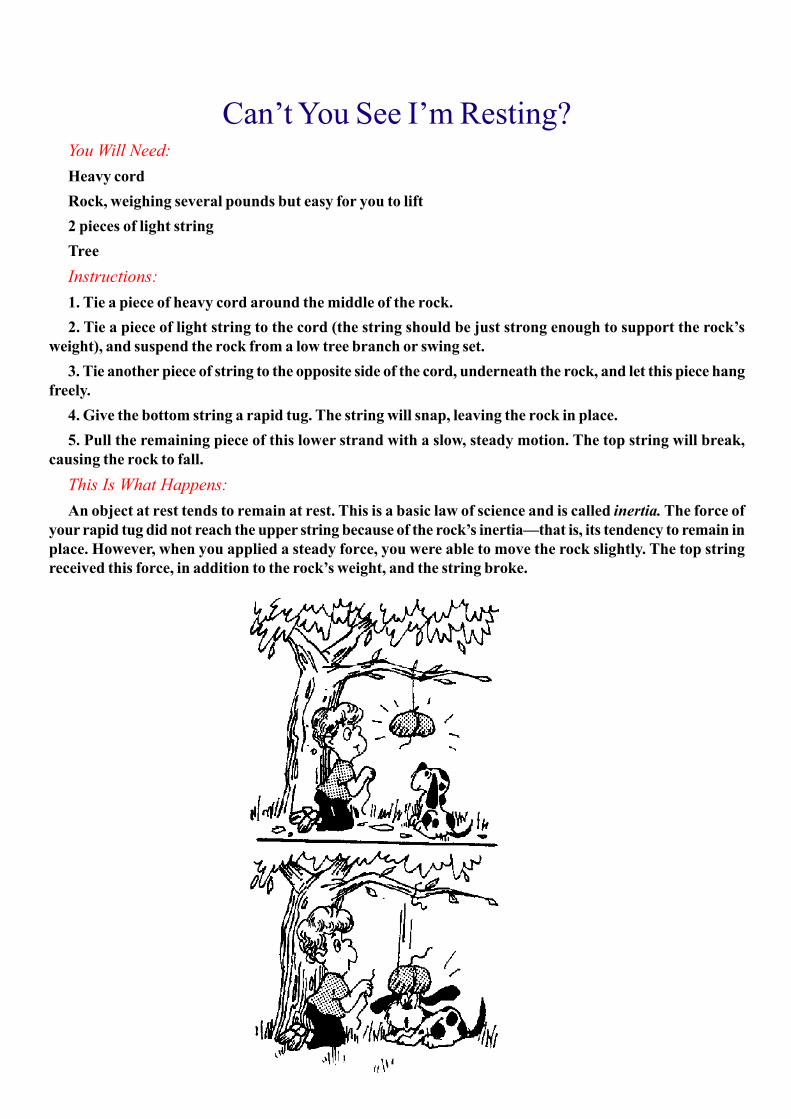
Can’t You See I’m Resting?You Will Need:
Heavy cord
Rock, weighing several pounds but easy for you to lift
2 pieces of light string
Tree
Instructions:
1. Tie a piece of heavy cord around the middle of the rock.
2. Tie a piece of light string to the cord (the string should be just strong enough to support the rock’s
weight), and suspend the rock from a low tree branch or swing set.
3. Tie another piece of string to the opposite side of the cord, underneath the rock, and let this piece hang
freely.
4. Give the bottom string a rapid tug. The string will snap, leaving the rock in place.
5. Pull the remaining piece of this lower strand with a slow, steady motion. The top string will break,
causing the rock to fall.
This Is What Happens:
An object at rest tends to remain at rest. This is a basic law of science and is called inertia. The force of
your rapid tug did not reach the upper string because of the rock’s inertia—that is, its tendency to remain in
place. However, when you applied a steady force, you were able to move the rock slightly. The top string
received this force, in addition to the rock’s weight, and the string broke.

Inside-Out CatsupYou Will Need:
Catsup bottle
Sink Warm water
Instructions:
1. Soak a clean, empty catsup bottle in a sink with warm water until the label comes off. Leaving some
water in the bottle, lay the bottle on its side on the counter.
2. Now roll the label into a roll, printing on the outside, with a diameter smaller than the bottle opening.
Push the rolled up label into the bottle. The label will open up again.
3. Gently tilt the bottle back and forth, allowing the water to slowly flow out. The label will stick to the
inside of the glass and will dry in this position.
This Is What Happens:
When you insert the roll inside the bottle, the paper absorbs water and flattens out. Then you remove the
water and the wet paper clings to the glass.
After the paper and bottle dry thoroughly, replace the cap and show your friends your very unusual
catsup bottle.
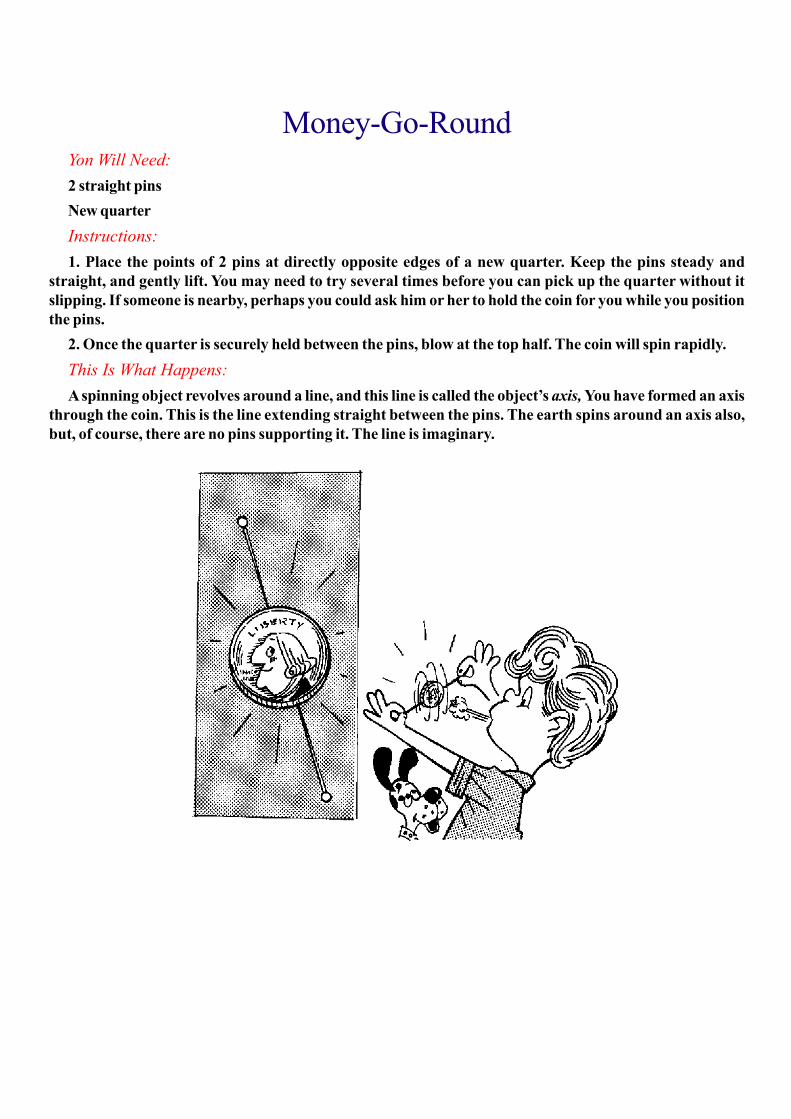
Money-Go-RoundYon Will Need:
2 straight pins
New quarter
Instructions:
1. Place the points of 2 pins at directly opposite edges of a new quarter. Keep the pins steady and
straight, and gently lift. You may need to try several times before you can pick up the quarter without it
slipping. If someone is nearby, perhaps you could ask him or her to hold the coin for you while you position
the pins.
2. Once the quarter is securely held between the pins, blow at the top half. The coin will spin rapidly.
This Is What Happens:
A spinning object revolves around a line, and this line is called the object’s axis, You have formed an axis
through the coin. This is the line extending straight between the pins. The earth spins around an axis also,
but, of course, there are no pins supporting it. The line is imaginary.

Pass It OnYou Will Need:
5 nickels Smooth surface
Instructions:
1. Place 4 nickels in a row on a smooth surface, such as a table or counter top. The coins should be
touching each other.
2. Place the fifth nickel about 2 inches away from the end of the row, keeping it in line with the others.
3. Now place your fingernail on the table behind the single coin. Lightly flick your finger forward, propelling
the single coin against the others. This nickel will join the row of other coins, and the nickel at the front of
the row will shoot forward.
This Is What Happens:
You created a force by sending the nickel ahead. When the nickel hit the others, it stopped. However, the
force was transmitted through the other coins to the one in the front of the row. With no other coins to block
it, this first nickel was free to move away.

Go Ahead, I’ll Stay Here!You Will Need:
Playing card Drinking glass Quarter
Instructions:
1. Set a playing card on top of a drinking glass, and place a quarter in the center of the card.
2. Form a tight circle with your thumb and index finger. Then quickly flick your finger outward, hitting the
edge of the card. The card will shoot away and the coin will drop into the glass.
This Is What Happens:
There is very little friction between the quarter and the playing card because of their smoothness. When
you snap the card, it is quickly set into motion. However, the inertia of the heavier object—the quarter—
causes it to remain in place. Without the card to support it, the coin falls.

A Strong AttractionYou Will Need:
Strong magnet
Shoe box with a cover
Books
Paper clip
String, about 40 inches long
Instructions:
1. Place a strong magnet inside the end of a shoe box. Put some books inside the box to weight it down,
then cover the box. Set the box on a tabletop so that the end with the magnet hangs over the edge of the
table.
2. Now tie a paper clip to one end of the string. Place the opposite end of the string on the floor directly
beneath the magnet. Set another book on this end.
3. Raise the paper clip toward the box and adjust the length of the string, pulling the string from beneath
the book, until the clip is held up without falling. Stand back. You will see the paper clip mysteriously floating
in mid-air.
This Is What Happens:
You know that magnets attract steel objects. The magnet’s field extends in all directions and passes
through the cardboard shoe box. The paper clip is attracted by this magnetic field, but is prevented from
sticking to the box because of the string.

Compass in a JarYou Will Need:
Needle
Magnet
Scissors
Index card
Jar
Thread
Pencil
Instructions:
1. Magnetize a needle by stroking it several times with a magnet.
2. Cut a small strip from an index card so that the strip will fit inside the jar. Push the needle into the card.
3. Tie one end of a piece of thread to the center of the strip, the other end, to a pencil. Suspend the strip
inside the jar by resting the pencil across the opening.
4. The needle should rest horizontally—you can balance it by sliding it back or forth in the card strip.
5. Let the device come to rest. You have made a compass, and the needle will point North and South.
This Is What Happens:
The entire earth has a magnetic field surrounding it. The needle is a miniature magnet and it is attracted
by the earth’s magnetic forces. Since the needle is free to rotate, it aligns itself in a North and South
direction.

A Short MeetingYou Will Need:
Salt Pepper
Drinking glass Spoon
Water
Instructions:
1. Sprinkle some salt and pepper into an empty drinking glass and stir them together with a spoon. Now,
can you think of a way to separate the pepper from the salt?
2. Here’s how: Pour some water into the glass. Stir thoroughly with the spoon. Where did the salt go?
This Is What Happens:
Adding water to the glass and stirring causes the salt to dissolve in the water. The pepper, however, does
not dissolve in water and remains visible.

Crystal ClearYon Will Need:
Glass
Cotton string, 6 inches long
Water
2 tablespoons salt
Spoon
Washer or nut
Metal kitchen tongs
Matches
THE HELP OF ONE OF YOUR PARENTS
Instructions:
1. Fill a drinking glass about halfway with water, and add 2 tablespoons of salt. Stir with the spoon.
2. Soak the cotton string in the salt solution for at least an hour. Then remove the string and let it dry
thoroughly.
3. Tie a small washer or nut to one end of the string. Grasp the other end with a pair of metal kitchen
tongs and hold the tongs over the sink.
4. Ask one of your parents to strike a match and hold the flame to the string. After the string has burned,
you will see the washer supported in mid-air by a column of ashes.
This Is What Happens:
Soaking the string in the solution allows salt to enter the string’s fibers. As the string dries, this salt
crystallizes and adds support to the entire length.
The fire burns the cotton fibers, but the structure of crystals remains in place and supports the small
weight tied to the end.

Trust In RustY«m Will Need:
Steel wool, non-soap filled
Glass jar
Water
1 tablespoon vinegar
1 tablespoon bleach
Instructions:
1. Place a ball of steel wool into a glass jar. Pour water into the jar until the steel wool is completely
covered.
2. Add 1 tablespoon each of vinegar and bleach. Set the experiment in a quiet place and leave it undisturbed
for half hour. When you return, you will see that the steel wool has rusted. Do you know why this action
takes place so quickly?
This Is What Happens:
Iron objects slowly rust when they are exposed to air and moisture. (The iron combines with oxygen in
the presence of water.) In the experiment, a large quantity of oxygen was released by the action of the
bleach and vinegar. This oxygen came in contact with the many wet strands of the steel wool—steel is a type
of iron—and the oxygen and iron molecules combined to form rust.

The Silver TouchYou Will Need:
Silver or silver-plated object Silver polish Cloth Rubber band
Water
Instructions:
1. Ask an adult in your family if you may borrow a silver or silver-plated object, such as a spoon. The
experiment will not harm the piece. Polish the object with an old cloth and some silver polish.
2. Wrap a rubber band tightly around the object and dip it in water. Then let the experiment sit on a dry
shelf for several days.
3. When you return, remove the rubber band. You will see dark marks where the rubber came in contact
with the silver.
This Is What Happens:
The dark areas on the object in your experiment are actually a new chemical called silver sulphide. Some
sulphur in the rubber band came in contact with silver on the surface of the object. These two chemicals
combined to form a new substance. Sulphur is added to rubber during processing so that the final product
won’t melt or crack and extreme temperatures. Now polish the spoon again to remove the dark marks—it
will look as good as new!

The Mystery of the Lost LiquidYou Will Need:
2-quart container, with clearmarkings
Water
1-quart container, with clear markings
Rubbing alcohol, Spoon
Instructions:
1. Fill the 2-quart container with exactly 1 quart of water.
2. Now fill the 1-quart container with exactly 1 quart of rubbing alcohol. Pour the alcohol into the container
of water and mix thoroughly with a spoon. Notice where the liquid level rests. The line falls short of the 2-
quart mark. Can you explain why?
This Is What Happens:
You were careful in measuring exactly 1 quart each of the water and alcohol. You would think that the
combined volume should equal 2 quarts, but another factor is at work here. As alcohol is mixed with water,
the alcohol molecules slip between the water molecules. Thus the mixture takes up less space than 2 quarts.

Chewy, Chewy, ChewyYou Will Need:
Flavored gelatin dessert
Small dish
Eyedropper
Water
Fork
Instructions:
1. Pour a box of flavored gelatin into a small dish. The powder should be at least 1 inch deep.
2. Using an eyedropper, squeeze a drop of water onto the surface and let it soak in. Then continue
squeezing single drops of water onto the same spot until 6 drops have been deposited. Allow each drop to
soak in before adding the next.
3. Now dip a fork under this area and gently lift upward. A chewy little gumdrop will come to the surface.
This Is What Happens:
Gelatin dessert is made of sugar, flavoring, and protein. As you add drops of water to this dry powder, the
mixture swells and holds the water in place, keeping the liquid suspended within the surrounding solid
material with its protein fibers.

The Cabbage Tells AllYou Will Need:
2 red cabbage leaves
Jar
Water
Eyedropper
Vinegar
1 teaspoon baking soda
1 teaspoon orange juice
Instructions:
1. Cut a leaf of red cabbage into small pieces. Place the pieces in a jar and fill the jar with water.
2. Allow the mixture to soak for several minutes, then remove the cabbage parts. You will see a slight
blue coloration in the water.
3. With an eyedropper, add a few drops of vinegar, and swirl. The solution will turn pink. You can bring
back the original blue color by adding a teaspoon of baking soda. Do you know what causes these color
changes?
This Is What Happens:
You extracted a pigment from the cabbage leaf. This substance colored the water blue and is known to
chemists as an indicator. When you add vinegar, the indicator’s color changes to pink because the solution
is now an acid. By adding baking soda, you cause the indicator to react again. This time the solution is said
to be a base. A base and an acid are opposites. Now do the experiment substituting orange juice for the
vinegar. Is the orange juice an acid or a base?

Creature FeatureYou Will Need:
Red and blue food coloring
H cup water
Bowl
1 heaping cup cornstarch
2 marbles
Instructions:
1. Add a drop of red and a drop of blue food coloring to half cup of water. Pour this into a bowl. Add the
corn-starch and mix well.
2. Pick up a handful of this goo and roll it quickly between your hands, forming a ball. The solution feels
dry. Stop the rolling action, and the substance loses its form, oozing between your fingers.
This experiment is a good stunt to show your friends—they’ll be amazed!
Press 2 marbles into your purple concoction and it will look like you’ve made a new kind of creature!
This Is What Happens:
Cornstarch does not form a true solution with water. Instead, solid particles are held up by the water,
creating a mixture called a suspension. When you roll the mixture in your hands, you keep the suspension
together by squeezing it on all sides. But as soon as you remove this support, the fluid and its particles are
able to flow freely, drifting apart. If you let some of the goo sit for several minutes in a clear glass, you will
see the cornstarch and water separate into two layers.

Hot FrostYou Will Need:
Epsom salts
Teaspoon
Half cup water
Small pan
Liquid household glue
Glass pane
Cloth
THE HELP OF ONE OF YOUR PARENTS
Instructions:
1. Mix several teaspoons of Epsom salts with half cup of water.
2. Ask one of your parents to gentry heat the solution in a small pan on the stove, adding more salts to the
water until no more will dissolve. Then mix in several drops of the glue.
3. Pour the solution while it is still warm onto a glass pane. Spread the liquid evenly over the surface of
the glass with a cloth. An array of dazzling frost will appear before your eyes.
This Is What Happens:
You have just formed crystals from magnesium sulfate—the chemical content of Epsom salts. You dissolved
this chemical in water. As the water evaporated from the glass, the atoms arranged themselves into orderly
designs—crystals. The edges of the crystals are actually huge representations of the way the individual
atoms of magnesium sulfate are lined up.

Crystal GardenYou Will Need:
Quarter cup water
Quarter cup laundry bluing
Quarter cup salt
1 tablespoon ammonia
Jar, Spoon, Charcoal briquettes, Bowl
Food coloring in various colors, Old pie tin
Instructions:
1. Place the water, bluing, salt, and ammonia in a jar, and stir thoroughly with a spoon.
2. Set a single layer of charcoal briquettes in a bowl, then pour the solution on top. The solution should
not cover the charcoal completely.
3. Put several drops of various shades of food coloring on the charcoal, leaving some areas plain.
4. Set the bowl in an old pie tin and place the entire experiment in a quiet place. The next day you will see
gorgeous crystal formations covering the charcoal and sides of the bowl.
This Is What Happens:
There are many small spaces inside the charcoal briquettes, and the solution was drawn into these areas.
As the water evaporated, the salt remained there, forming crystals. The crystals have similar spaces
themselves, and the solution continued to be sucked up and evaporated. Thus the delicate formations continued
to grow by attaching more salt to the ends of existing crystals.

Do You Like My New Coat?You Will Need:
10 pennies
Juice glass
Quarter cup vinegar
1 teaspoon salt
Nail
Instructions:
1. Place 10 pennies in the juice glass, then add the vinegar and salt. Stir.
2. Set a clean iron nail in the solution and wait a few minutes. Soon you will see the nail coated with a
bright metallic layer.
This Is What Happens:
Pennies are made of copper. The salt and vinegar react with some of the copper, causing it to go into the
solution. Some iron molecules and some copper molecules switch places and the coating that you see on the
nail is copper.
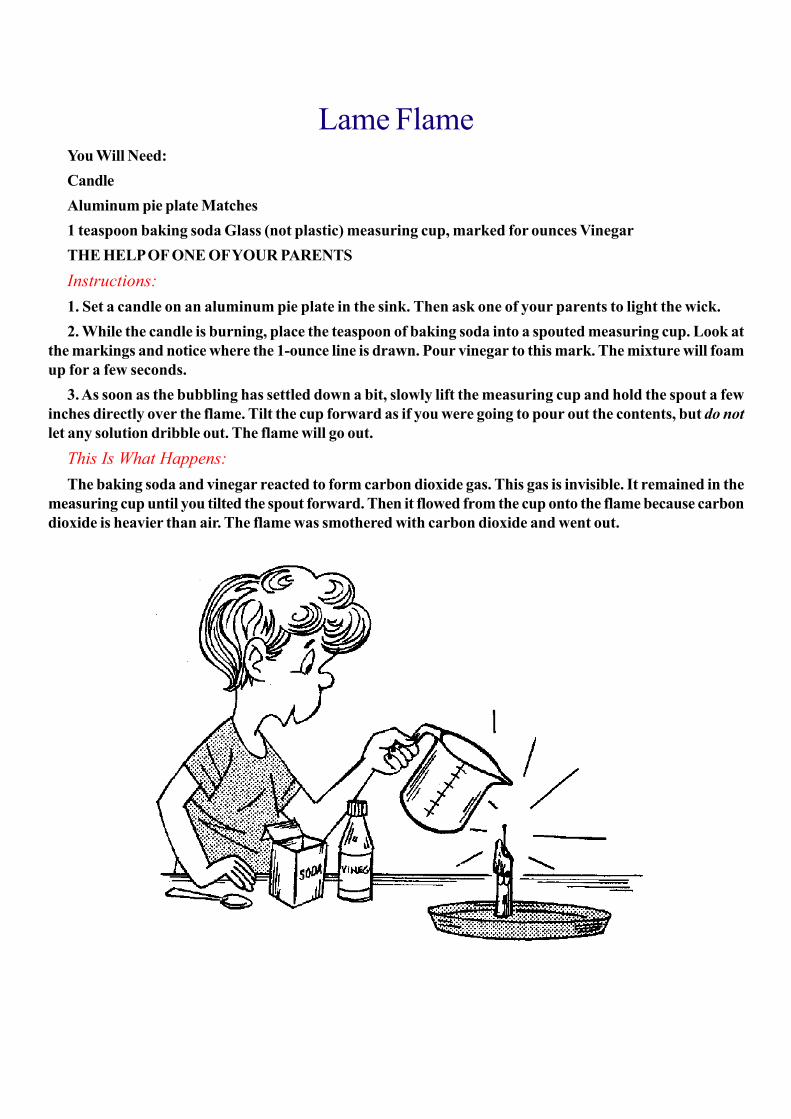
Lame FlameYou Will Need:
Candle
Aluminum pie plate Matches
1 teaspoon baking soda Glass (not plastic) measuring cup, marked for ounces Vinegar
THE HELP OF ONE OF YOUR PARENTS
Instructions:
1. Set a candle on an aluminum pie plate in the sink. Then ask one of your parents to light the wick.
2. While the candle is burning, place the teaspoon of baking soda into a spouted measuring cup. Look at
the markings and notice where the 1-ounce line is drawn. Pour vinegar to this mark. The mixture will foam
up for a few seconds.
3. As soon as the bubbling has settled down a bit, slowly lift the measuring cup and hold the spout a few
inches directly over the flame. Tilt the cup forward as if you were going to pour out the contents, but do not
let any solution dribble out. The flame will go out.
This Is What Happens:
The baking soda and vinegar reacted to form carbon dioxide gas. This gas is invisible. It remained in the
measuring cup until you tilted the spout forward. Then it flowed from the cup onto the flame because carbon
dioxide is heavier than air. The flame was smothered with carbon dioxide and went out.

Scrub-a-Dub-DubYou Will Need:
Quarter cup water
Quarter cup baking soda
Quarter cup salad oil
Enamel saucepan
Wooden spoon
Teaspoon
Large jar with lid
THE HELP OF ONE OF YOUR PARENTS
Instructions:
1. Place the water, baking soda, and salad oil into an enamel saucepan. (Do not use a metal pan.) Mix
thoroughly with a wooden spoon.
2. Ask one of your parents to place the pan on the stove and heat it over low heat, stirring constantly. The
water will boil away and the mixture will get thick. When this happens, the mixture should be boiled for a few
additional minutes, then the pan should be set aside to cool.
3. Now place a teaspoon of this mixture into a large jar. Pour in 2 cups of hot tap water, then screw on the
lid. and shake. The jar will be filled with sudsy foam. Where did it come from?
This Is What Happens:
You have just made soap, and the suds are a result of the shaking action. It is easy for us to buy soap
products in the store, but during the times of the early pioneer settlers, people made soap like you just did.
However, they used grease and wood ashes. The ashes contained strong chemical called lye. Your experiment
substituted salad oil for grease and baking soda for lye.

Soap SavvyYou Will Need:
5 tablespoons pure laundry soap or detergent
2 cups warm tap water
4 tablespoons salt
Large glass
Instructions:
1. Place the laundry soap into 1 cup of water. Stir until the soap has dissolved.
2. Next, place the salt into another cup of water and stir until the salt is dissolved as much as possible.
3. Pour the soap solution into a large glass, then pour the salt solution on top of it. Mix well. You will see
the soap harden immediately and form a solid. If you let the mixture stand still for a few minutes, the soap
will climb to the top of the solution and the bottom will remain clear.
This Is What Happens:
You have just demonstrated how a bar of soap is made. The process is called salting out the soap because
the salt contains chemicals that react with the soap molecules, causing them to harden and settle out on top
of the mass. Of course, soap manufacturers use large kettles. Usually the soap is removed before it hardens,
and perfumes and colors are added to it. The soap can be placed in molds, or allowed to harden and cut into
bars.

Stripes!You Will Need:
Glass
Water
Red or blue food coloring
Celery stalk, with leaves
Instructions:
1. Fill a glass with 1 or 2 inches of water, then add several drops of red or blue food coloring—enough to
make a deep color.
2. Break off an inch from the bottom of the celery so you have a fresh edge on the stalk.
3. Place the stalk, with the fresh edge down, into the glass of colored water. Set the experiment in a warm
place for at least an hour. When you come back, you will see that the celery’s stalk and leaves have stripes
of color running through them.
This Is What Happens:
All plants have cells that are full of water. The water reaches the cells by traveling from the roots of a
plant into the leaves through a series of tubes. The colored solution in this experiment made these pathways
visible to you. If you break or cut off another section from the bottom of the stalk, you will be able to see the
ends of these tubes—a row of small colored dots.

The Duke of CukeYou Will Need:
Cucumber
Vegetable parer
2 bowls
Water
1 tablespoon salt
Instructions:
1. Using a vegetable parer and moving it away from your fingers, peel the skin from a fresh cucumber.
2. When the skin has been removed, continue to use the parer to slice the cucumber into strips. Divide
the strips into 2 bowls, then add water to each until the strips are covered.
3. Add a tablespoon of salt to one bowl. Stir until the salt is dissolved.
4. Let the experiment sit for several hours. Then examine the cucumber strips in each bowl. The strips in
the salt water will be wilted and limp, but the strips in the plain water will remain crisp. Can you explain this
difference?
This It What Happens:
Because cucumbers are plants, water can flow either into or out of them. When there are more minerals
in the surrounding medium, such as in the bowl with salt water, these minerals cause the water to leave the
cucumbers. This gives them a soft, wilted feel. In the bowl with plain water, the cucumbers have more
minerals inside them than in the surrounding water, and more water tends to move into the cucumbers,
making them stay crisp.
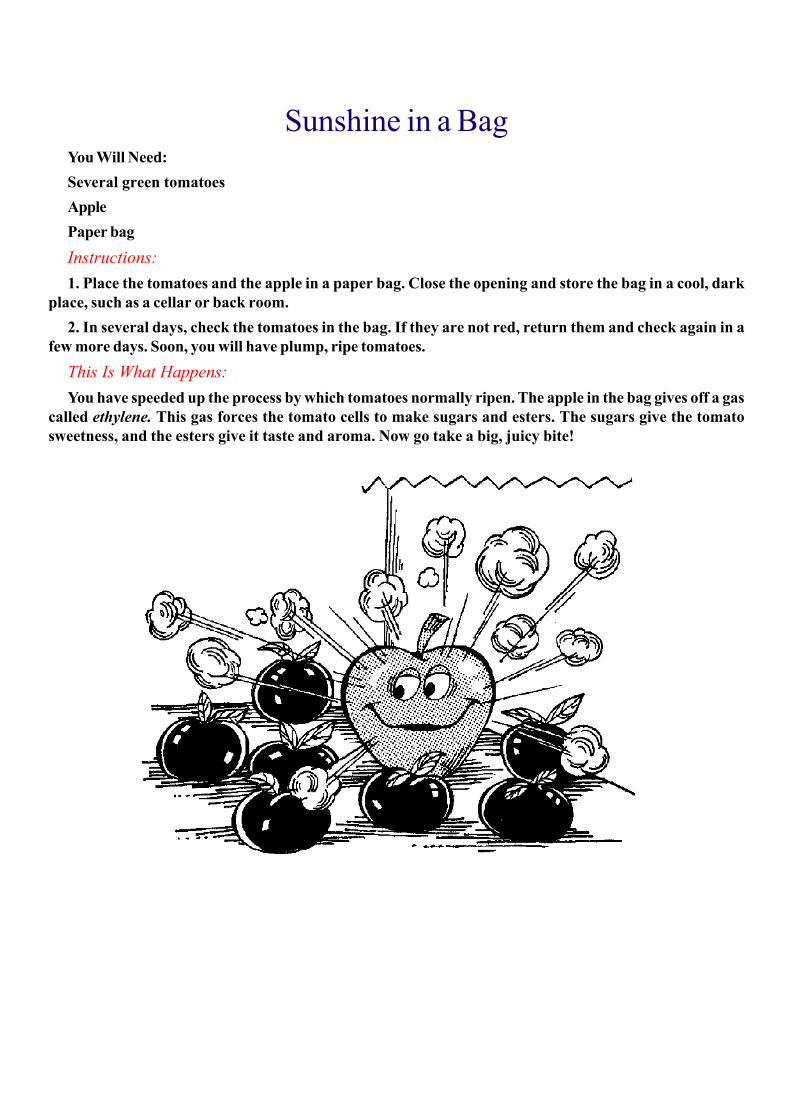
Sunshine in a BagYou Will Need:
Several green tomatoes
Apple
Paper bag
Instructions:
1. Place the tomatoes and the apple in a paper bag. Close the opening and store the bag in a cool, dark
place, such as a cellar or back room.
2. In several days, check the tomatoes in the bag. If they are not red, return them and check again in a
few more days. Soon, you will have plump, ripe tomatoes.
This Is What Happens:
You have speeded up the process by which tomatoes normally ripen. The apple in the bag gives off a gas
called ethylene. This gas forces the tomato cells to make sugars and esters. The sugars give the tomato
sweetness, and the esters give it taste and aroma. Now go take a big, juicy bite!

Pore ChoreYou Will Need:
Fresh egg
Bowl
Hot tap water
Instructions:
1. Place the fresh egg in the bowl, then fill the bowl with hot tap water.
2. Set the bowl on a table or counter top and watch closely as the experiment sits quietly for several
moments. You will see a tiny stream of bubbles rising from the egg.
This Is What Happens:
Did you know that an egg contains air? The air inside the egg expands as it is heated by the hot water,
and escapes into the water as bubbles. You might wonder how the air leaves the egg since the shell is not
broken. Well, there are tiny openings called pores in the shell—about 7,000 of them! The pores are big
enough to allow gases and moisture to pass through, but small enough to prevent harmful bacteria from
getting into the egg.

Hidden FibersYou Will Need:
Paper toweling Cellophane tape
Instructions:
1. Lay a paper towel on a flat surface such as a tabletop. Place a piece of cellophane tape, sticky side
down, on the paper and press lightly.
2. Slowly pull the tape off the paper towel and hold the tape up to the light. You will see many tiny, short
strands of material.
This Is What Happens:
You are observing paper fibers. The paper towel looks as if it is one solid sheet, but it is actually composed
of thin, individual fibers. You have used the sticky tape to strip away some of these fibers lying close to the
surface.
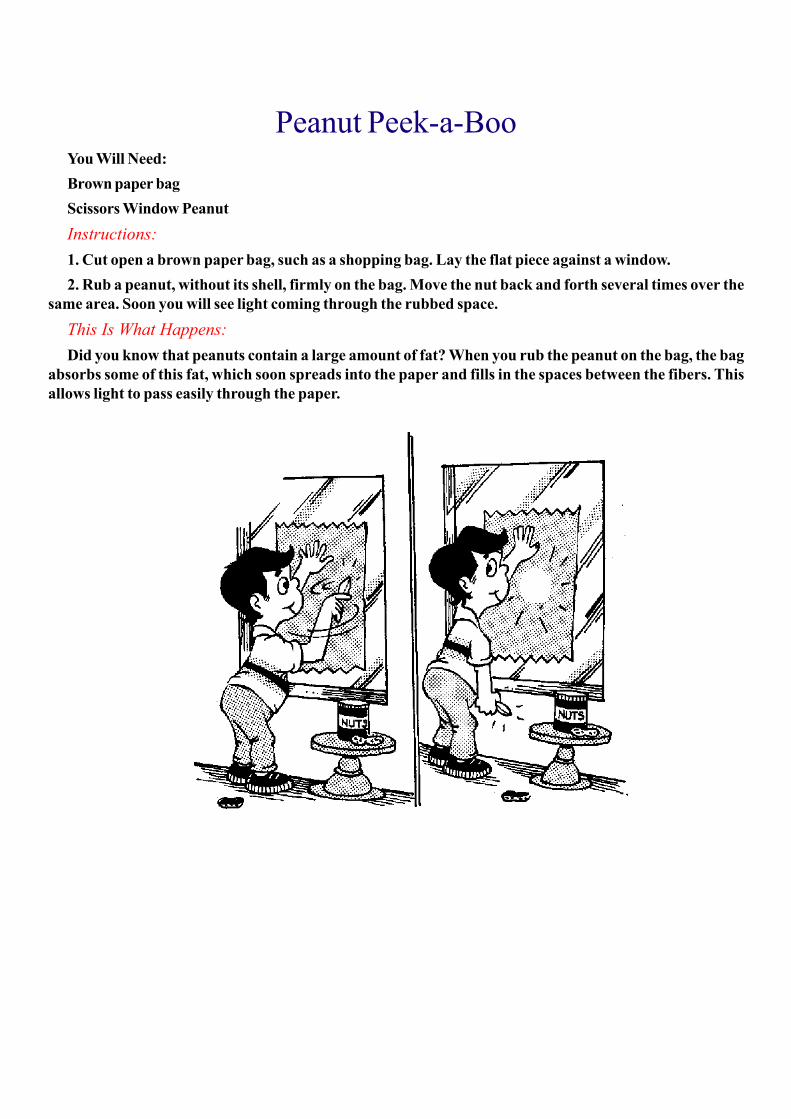
Peanut Peek-a-BooYou Will Need:
Brown paper bag
Scissors Window Peanut
Instructions:
1. Cut open a brown paper bag, such as a shopping bag. Lay the flat piece against a window.
2. Rub a peanut, without its shell, firmly on the bag. Move the nut back and forth several times over the
same area. Soon you will see light coming through the rubbed space.
This Is What Happens:
Did you know that peanuts contain a large amount of fat? When you rub the peanut on the bag, the bag
absorbs some of this fat, which soon spreads into the paper and fills in the spaces between the fibers. This
allows light to pass easily through the paper.

Butter-UpYou Will Need:
Heavy cream Bowl Egg beater
Instructions:
1. Place a carton of heavy cream on the kitchen counter. Let it sit at room temperature for at least two
days. You will notice a sour smell.
2. Then pour the cream into a small bowl and whip it with an egg beater. Continue beating for several
minutes. Soon, a solid lump will form. This is butter!
This Is What Happens:
Cream is really the fat taken from milk. When cream is whipped, the fat sticks together to form butter.
Your butter looks different from store-bought because the butter that you buy in the store has salt and
yellow coloring added to it.

Fit to Be TiedYou Will Need:
Chicken wishbone
Jar
Vinegar
Instructions:
1. The next time you have chicken for dinner, save the wishbone.
2. Set the bone in a jar and pour vinegar into the container until the entire bone is covered.
3. Let the experiment sit undisturbed for a couple of days. Then take the bone out and bend it. It will feel
rubbery, and you will be able to tie the ends in a knot.
This is What Happens:
Bones contain a substance called calcium, which makes them hard and strong. The vinegar dissolved
away most of the calcium in the wishbone. The remaining material is flexible.

Rye CleanYou will need:
A wallpapered surface 1 slice of rye bread
Instructions:
1. In your house or apartment, find a wall covered by wallpaper that is lightly soiled—perhaps an area
near a light switch, because hands frequently touch this space.
2. Rub a piece of rye bread over the dirty area. You will see that the soil is lifted, and a cleaner, fresher
surface is left behind.
This Is What Happens:
The flour that goes into making rye bread contains a substance called gluten. Gluten is formed from the
proteins in the flour and has a sticky nature. When you rub the bread over the wallpaper, the dirt sticks to
the gluten and is carried away. Wallpaper cleaner that is sold in stores also contains gluten.
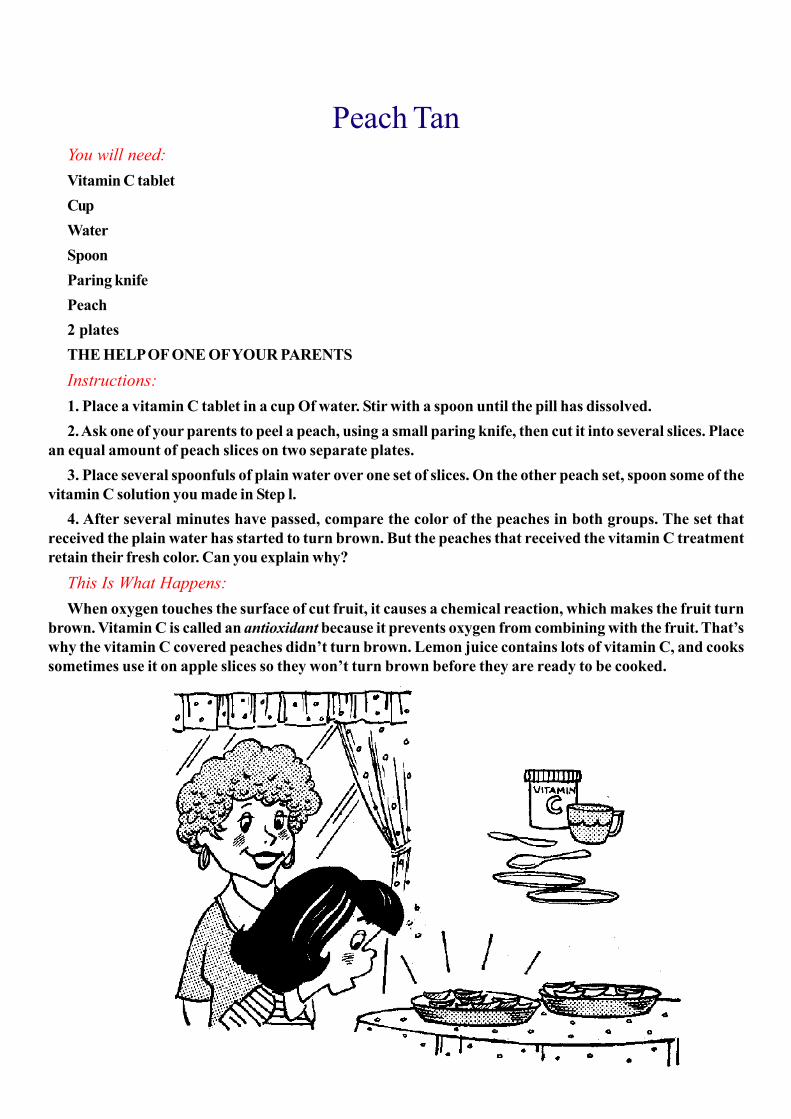
Peach TanYou will need:
Vitamin C tablet
Cup
Water
Spoon
Paring knife
Peach
2 plates
THE HELP OF ONE OF YOUR PARENTS
Instructions:
1. Place a vitamin C tablet in a cup Of water. Stir with a spoon until the pill has dissolved.
2. Ask one of your parents to peel a peach, using a small paring knife, then cut it into several slices. Place
an equal amount of peach slices on two separate plates.
3. Place several spoonfuls of plain water over one set of slices. On the other peach set, spoon some of the
vitamin C solution you made in Step l.
4. After several minutes have passed, compare the color of the peaches in both groups. The set that
received the plain water has started to turn brown. But the peaches that received the vitamin C treatment
retain their fresh color. Can you explain why?
This Is What Happens:
When oxygen touches the surface of cut fruit, it causes a chemical reaction, which makes the fruit turn
brown. Vitamin C is called an antioxidant because it prevents oxygen from combining with the fruit. That’s
why the vitamin C covered peaches didn’t turn brown. Lemon juice contains lots of vitamin C, and cooks
sometimes use it on apple slices so they won’t turn brown before they are ready to be cooked.

Apple AirYou Will Need:
Large bowl Water Carrot Apple
Instructions:
1. Fill the bowl with water.
2. Set a carrot in the bowl. The carrot sinks to the bottom.
3. Now, set an apple in the bowl The apple floats on top. Can you explain why?
This Is What Happens:
Foods like carrots and apples vary greatly in the amount of air they contain. Carrot matter is packed
very tightly and is very heavy. Thus, the carrot sinks in the bowl. The apple, however, is not packed as
tightly and has many air spaces, which allows it to float.

Pit SplitYou Will Need:
Ripe avocado pit 3 wooden toothpicks Small juice glass Water
Instructions:
1. Wash off the ripe avocado pit and peel away the dark brown coating.
2. Insert 3 wooden toothpicks, equally spaced, around the middle of the pit. Then set the pit in a small
juice glass so that the toothpicks are resting on the glass rim.
3. Fill the glass with water to a level just beneath the toothpicks. The bottom of the pit should be covered
with water.
4. Set your experiment aside for several days, but maintain the water level by adding more water when
necessary. This last step will vary in time, depending on your pit. In a few days to a few weeks, you will see
the pit split in half. A root will come from the bottom, and a sprout will grow from the crack.
This Is What Happens:
An avocado pit is just like any other seed, except that it is larger and harder. Everything needed to make
a new avocado plant is contained in the pit. After the root and sprout emerge, the two halves of the pit supply
food for the growing plant until it grows leaves and starts to make its own food from sunlight. You can plant
your new avocado in a pot with soil to make a nice house plant.

Locked DoorsYou Will Need:
House plant
2 plastic bags with twist-ties
Petroleum jelly
Instructions:
1. Place a plastic bag over 1 leaf of your house plant and use a wire twist-tie to close the bag opening
firmly around the leaf’s stem.
2. Rub petroleum jelly on both sides of another leaf. Enclose this leaf in a plastic bag as you did for the
first leaf.
3. Wait a day or two, and observe the two leaves. The bag surrounding the untreated leaf will have
moisture on its surface. The bag over the petroleum jelly leaf, however, will remain dry.
This Is What Happens:
Plants contain openings that permit air to enter and water to leave. These numerous openings are called
stomas. Rubbing petroleum jelly on the surface of one leaf prevented the escape of moisture through the
stomas, and the bag remained dry. The normal exchange of air and water occurred in the untreated leaf, and
the moisture condensed on the inside surface of the bag.

Fat PotatoYou Will Need:
Large potato
Small, sensitive scale, such as a postal or dieter’s food scale
Instructions:
1. Wash and dry the potato, then place it on the scale. Note the weight and write it down.
2. Now set the potato in a dry place and leave it there for about three weeks.
3. After three weeks, weigh the potato again. Even though the potato may look the same size to you, it
will weigh less than when you first weighed it. Has the potato gone on a diet?
This Is What Happens:
Water makes up a large part of most animal and plant matter. When the potato was exposed to the dry
air, some water evaporated and this resulted in a weight loss. Did you know that most of your own body is
made up of water?

Good to the Last DropYon Will Need:
Small tin can, such as a soup can
Dry seeds
Kitchen tongs
Candle
Cold glass
THE HELP OF ONE OF YOUR PARENTS
Instructions:
1. Wash and dry the can but don’t touch the inside rim with your hands because the metal may be sharp
where the can was opened.
2. Place enough dry seeds in the can to cover the bottom.
3. Ask one of your parents to hold the can securely with a pair of kitchen tongs and heat it over a candle
flame. After the contents have warmed, hold a cold glass over the can opening. You will see moisture condense
on the surface of the glass.
4. Ask your parent to continue heating the can until the seeds turn black.
This Is What Happens:
In the last experiment, you learned that living things contain water. Even the dry seeds in this experiment
contain some water too. As your parent heated the seeds, this water was driven off as steam, which came in
contact with the cold surface of the glass and formed water droplets. As the seeds continued to be heated all
the water was released. The black, charred material that remained was carbon.
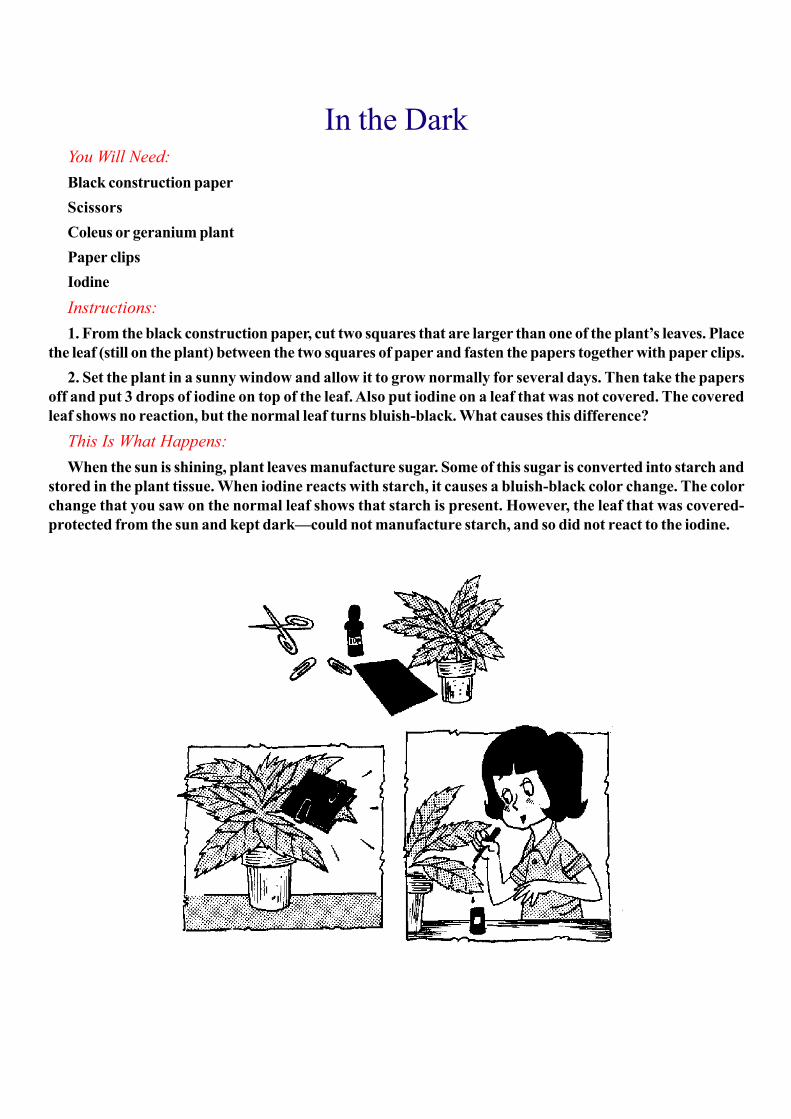
In the DarkYou Will Need:
Black construction paper
Scissors
Coleus or geranium plant
Paper clips
Iodine
Instructions:
1. From the black construction paper, cut two squares that are larger than one of the plant’s leaves. Place
the leaf (still on the plant) between the two squares of paper and fasten the papers together with paper clips.
2. Set the plant in a sunny window and allow it to grow normally for several days. Then take the papers
off and put 3 drops of iodine on top of the leaf. Also put iodine on a leaf that was not covered. The covered
leaf shows no reaction, but the normal leaf turns bluish-black. What causes this difference?
This Is What Happens:
When the sun is shining, plant leaves manufacture sugar. Some of this sugar is converted into starch and
stored in the plant tissue. When iodine reacts with starch, it causes a bluish-black color change. The color
change that you saw on the normal leaf shows that starch is present. However, the leaf that was covered-
protected from the sun and kept dark—could not manufacture starch, and so did not react to the iodine.

Bubbling BeansYou Will Need:
20 dried beans
Glass
Water
Instructions:
Here is a simple experiment you can perform in just a few minutes.
1. Drop 20 dried beans into a clear glass. Pour warm water into the glass until the seeds are covered.
2. In a few minutes, you will see small bubbles rising from the beans. The bubbles come from the same
spot on each seed. Can you explain what is going on?
This Is What Happens:
The bean seeds contain air. When they are immersed in water, this air escapes through a small hole in
each seed, which is normally used to let water in when the seed sprouts.

Corn MuscleYou Will Need:
4-inch-high flowerpot
Soil
10 corn seeds
Water
Glass plate
Instructions:
1. Fill the flowerpot with soil almost to the top. Poke 10 corn seeds into the soil, then sprinkle more soil
on top.
2. Water the seeds thoroughly and place the pot in a warm place. As the soil dries out, give it water.
3. After the seeds have sprouted in a few days, cover the pot with a piece of glass slightly larger than the
top. Allow the corn to continue growing with the glass in place. Soon you will see the glass plate lifted from
the rim of the pot.
This Is What Happens:
We usually don’t think of plants as having muscles as humans do, because plants remain still, while we
are very active. But over a period of tune, a growing plant can exert a tremendous force—have you ever
seen a cement sidewalk pushed up by the growing roots of a big tree!
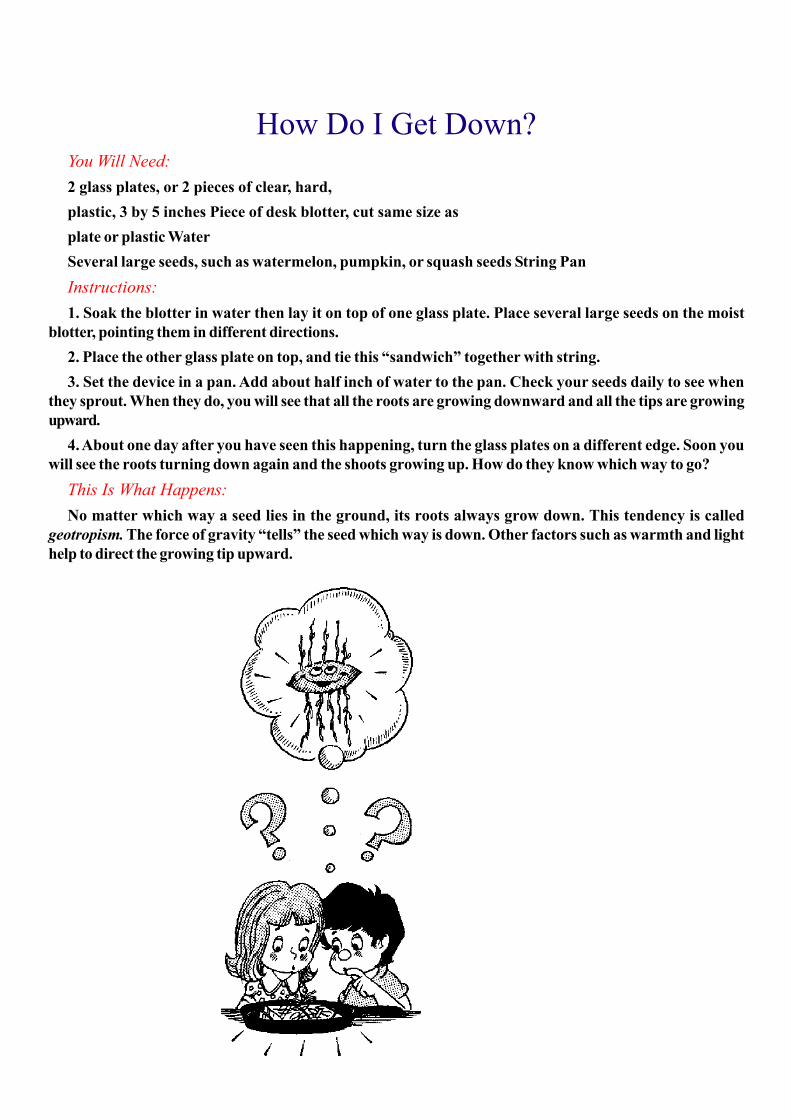
How Do I Get Down?You Will Need:
2 glass plates, or 2 pieces of clear, hard,
plastic, 3 by 5 inches Piece of desk blotter, cut same size as
plate or plastic Water
Several large seeds, such as watermelon, pumpkin, or squash seeds String Pan
Instructions:
1. Soak the blotter in water then lay it on top of one glass plate. Place several large seeds on the moist
blotter, pointing them in different directions.
2. Place the other glass plate on top, and tie this “sandwich” together with string.
3. Set the device in a pan. Add about half inch of water to the pan. Check your seeds daily to see when
they sprout. When they do, you will see that all the roots are growing downward and all the tips are growing
upward.
4. About one day after you have seen this happening, turn the glass plates on a different edge. Soon you
will see the roots turning down again and the shoots growing up. How do they know which way to go?
This Is What Happens:
No matter which way a seed lies in the ground, its roots always grow down. This tendency is called
geotropism. The force of gravity “tells” the seed which way is down. Other factors such as warmth and light
help to direct the growing tip upward.

Bustin’ LooseYou Will Need:
1-pint jar with lid Dried peas or beans Water
Pail or any other container with high sides
Instructions:
1. Fill the jar with dried peas or beans. Tap the jar so that all the seeds settle down snugly, then add more
seeds until you can’t fit any more.
2. Now, pour water into the jar, filling it completely. Screw the lid on tightly and set the whole jar in the
pail.
3. Let the jar sit overnight. Examine your experiment the next morning. The glass will be broken. Before
you blame the cat for knocking the jar over, read the explanation!
This Is What Happens:
When the peas or beans are dry, they are actually in a resting state. When they come in contact with
water, a growth process begins: The seeds absorb water and begin to expand. As a result, the pressure
inside the jar increases, causing the glass walls to crack.

Plant PotionYou Will Need:
3 tablespoons nail polish remover
Small glass
Fresh green plant leaf
White paper toweling
Instructions:
1. Place 3 tablespoons of nail polish remover hi a small glass. Tear the plant leaf into tiny pieces and add
them to the glass. Leave the experiment in a quiet place for several hours or overnight. The solution will be
green when you come back.
2. Next, cut a strip of white paper toweling, 1 inch wide and 1 inch longer than the height of your glass.
Rest one end of the strip hi the glass and drape the other end over the side. Soon a green band of color will
form at the moist end of the strip, and it will travel toward the other end.
This Is What Happens:
You have just extracted chlorophyll from your leaf. All green plants contain chlorophyll, which helps to
convert sunlight, water, and carbon dioxide into food for the plant. The paper toweling absorbed the chlorophyll/
nail polish remover solution, and was separated by the towel fibers and carried along hi one unit. Look
closely at the green band. You might see two or more separate lines of green and yellow-green color, which
indicates that several types of chlorophyll might be present hi the same plant.
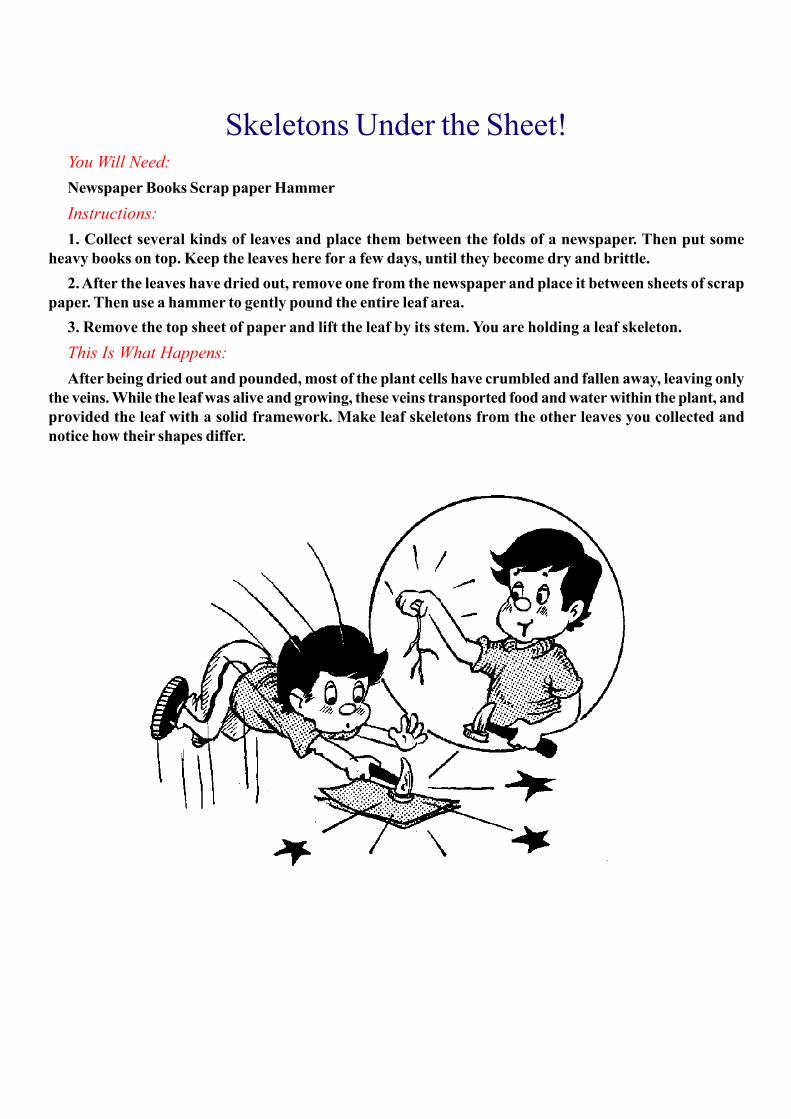
Skeletons Under the Sheet!You Will Need:
Newspaper Books Scrap paper Hammer
Instructions:
1. Collect several kinds of leaves and place them between the folds of a newspaper. Then put some
heavy books on top. Keep the leaves here for a few days, until they become dry and brittle.
2. After the leaves have dried out, remove one from the newspaper and place it between sheets of scrap
paper. Then use a hammer to gently pound the entire leaf area.
3. Remove the top sheet of paper and lift the leaf by its stem. You are holding a leaf skeleton.
This Is What Happens:
After being dried out and pounded, most of the plant cells have crumbled and fallen away, leaving only
the veins. While the leaf was alive and growing, these veins transported food and water within the plant, and
provided the leaf with a solid framework. Make leaf skeletons from the other leaves you collected and
notice how their shapes differ.

Permanent Press LeavesYou Will Need:
Brightly colored leaves
Wax paper
Newspaper
Electric iron
THE HELP OF ONE OF YOUR PARENTS
Instructions:
Do you enjoy the bright-colored leaves of fall? If you do, here is a way you can save some of your
favorites.
1. Place a leaf between 2 pieces of wax paper, then set this on top of a newspaper. Next lay a few sheets
of newspaper over the wax-paper-covered leaf.
2. Ask one of your parents to turn an electric iron on the “low” setting. With your parent watching close
by, iron the papers until the wax from the wax paper has melted. You can check this by lifting up a corner of
the newspaper. Now carefully remove the leaf and let it cool thoroughly.
This Is What Happens:
The iron has heated the wax paper and the wax has coated the leaf on both sides. This prevents the leaf
from drying out and becoming brittle. Leaves preserved in this way will last a long time—you might want to
mount yours in a scrapbook!
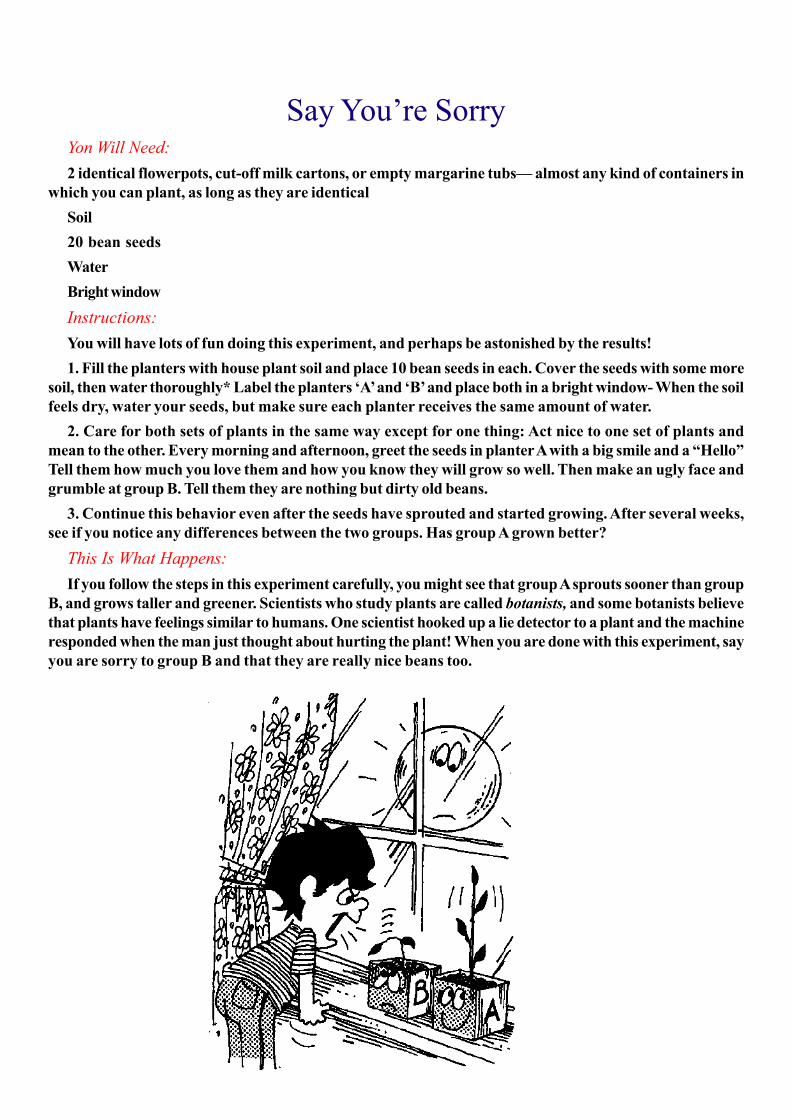
Say You’re SorryYon Will Need:
2 identical flowerpots, cut-off milk cartons, or empty margarine tubs— almost any kind of containers in
which you can plant, as long as they are identical
Soil
20 bean seeds
Water
Bright window
Instructions:
You will have lots of fun doing this experiment, and perhaps be astonished by the results!
1. Fill the planters with house plant soil and place 10 bean seeds in each. Cover the seeds with some more
soil, then water thoroughly* Label the planters ‘A’ and ‘B’ and place both in a bright window- When the soil
feels dry, water your seeds, but make sure each planter receives the same amount of water.
2. Care for both sets of plants in the same way except for one thing: Act nice to one set of plants and
mean to the other. Every morning and afternoon, greet the seeds in planter A with a big smile and a “Hello”
Tell them how much you love them and how you know they will grow so well. Then make an ugly face and
grumble at group B. Tell them they are nothing but dirty old beans.
3. Continue this behavior even after the seeds have sprouted and started growing. After several weeks,
see if you notice any differences between the two groups. Has group A grown better?
This Is What Happens:
If you follow the steps in this experiment carefully, you might see that group A sprouts sooner than group
B, and grows taller and greener. Scientists who study plants are called botanists, and some botanists believe
that plants have feelings similar to humans. One scientist hooked up a lie detector to a plant and the machine
responded when the man just thought about hurting the plant! When you are done with this experiment, say
you are sorry to group B and that they are really nice beans too.
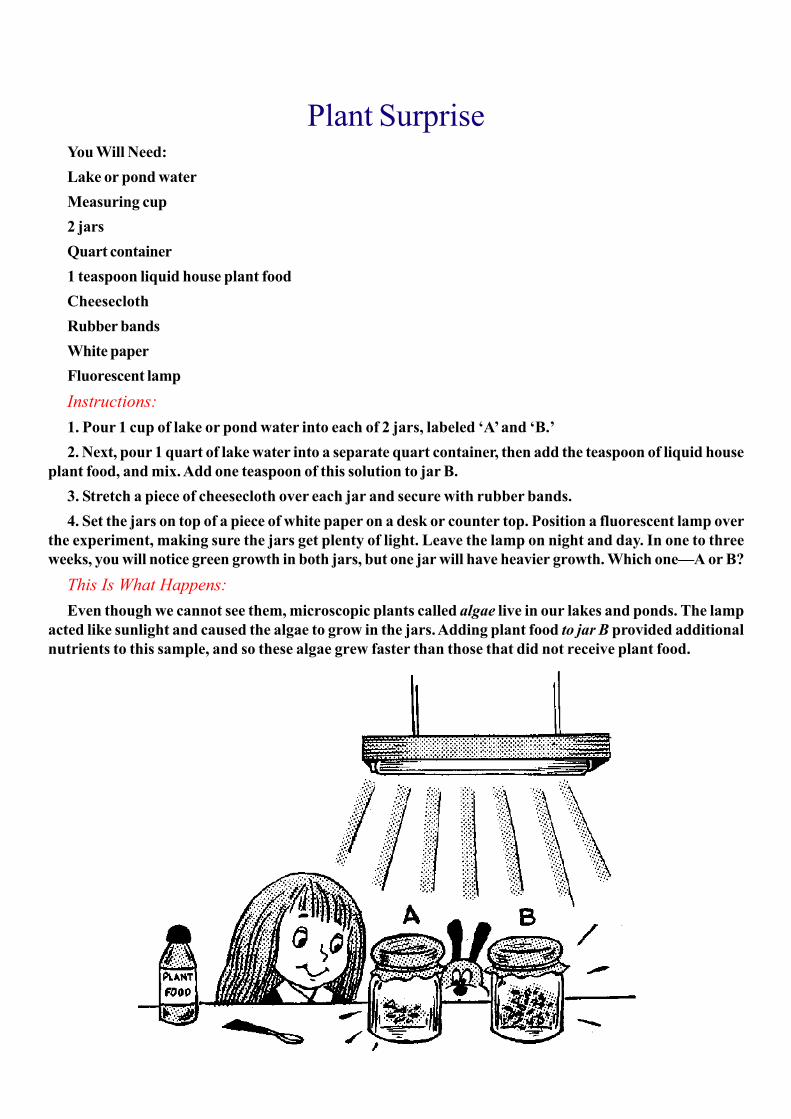
Plant SurpriseYou Will Need:
Lake or pond water
Measuring cup
2 jars
Quart container
1 teaspoon liquid house plant food
Cheesecloth
Rubber bands
White paper
Fluorescent lamp
Instructions:
1. Pour 1 cup of lake or pond water into each of 2 jars, labeled ‘A’ and ‘B.’
2. Next, pour 1 quart of lake water into a separate quart container, then add the teaspoon of liquid house
plant food, and mix. Add one teaspoon of this solution to jar B.
3. Stretch a piece of cheesecloth over each jar and secure with rubber bands.
4. Set the jars on top of a piece of white paper on a desk or counter top. Position a fluorescent lamp over
the experiment, making sure the jars get plenty of light. Leave the lamp on night and day. In one to three
weeks, you will notice green growth in both jars, but one jar will have heavier growth. Which one—A or B?
This Is What Happens:
Even though we cannot see them, microscopic plants called algae live in our lakes and ponds. The lamp
acted like sunlight and caused the algae to grow in the jars. Adding plant food to jar B provided additional
nutrients to this sample, and so these algae grew faster than those that did not receive plant food.

We See SeaweedYou Will Need:
Pail
Seaweed
Shallow pan
Water
Finger-paint paper (paper with one glossy side)
Glass pane, smaller than the shallow pan
Scissors Pencil
Paper toweling Book
Instructions:
If you live near the ocean or if you go down to the sea during the summer or on a vacation, you can make
an interesting picture from seaweed.
1. Take a pail to the beach and collect some seaweed. Look for various types of green, brown, and red
seaweed.
2. When you get home, fill a shallow pan about halfway with water, then cut the finger-paint paper to the
same size as the glass pane.
3. Set the glass pane in the pan of water and press the paper, glossy side up, onto the glass. Make sure
at least quarter inch of water covers the paper.
4. Now, arrange your seaweed on the paper. The layer of water will support the plants and allow them to
assume their natural shape. Use the tip of a pencil to position them wherever you want on the paper.
5. Spread some paper towels on a flat surface. Slowly and gently lift the glass pane from the pan. (Do not
tilt it or the seaweed will run off the edges.) Carefully slide the paper from the glass onto the paper toweling.
6. Place 2 or 3 paper towels over the seaweed and lay a heavy book on top. Let the experiment sit
overnight. The next day, when you take away the book and paper towels, you will find a beautiful picture.
This Is What Happens:
Seaweed is a collection of living plants that grow in the ocean. The seaweed contains a type of natural
glue that helps it to stick to the white paper. After you arranged the seaweed on the paper and the paper
towels absorbed the excess water, the plants remained firmly attached to the paper.

Designer EyesYou Will Need:
2 mushrooms 2 heavy glasses
Instructions:
1. Go to a forest or other shady, damp area and look for mushrooms. When you have found 2 that are the
same size, bring them home and break off
the stems.
2. Set each of the mushrooms on the eyes of the owl on this page, or draw your own owl. The bottoms of
the mushrooms should be facing downward.
3. Place a heavy glass on top of each mushroom. Leave the experiment in a quiet place overnight, then,
the next day, remove the glasses and the mushrooms. Someone is looking at you with a set of beautiful
eyes. Who?!!
This Is What Happens:
Mushrooms reproduce themselves by tiny organs called spores. When you removed the mushrooms
from the ground, brought them inside to a dry room, and placed them on the paper, the spores fell out and
stuck to the paper. The color and pattern of spore prints like these can be used to identify different types of
mushrooms.

Bold MoldYou Will Need:
Slice of bread
2 paper plates
Spray bottle
Water
Magnifying glass
Instructions:
1. Place a slice of bread on a paper plate. Homemade bread or one of the natural breads without
preservatives works best, but ordinary bread will also do the job.
2. Fill a spray bottle with water and gently mist the top of the bread until it is moist. Do not soak the entire
slice.
3. Let the bread sit in the open air for a few minutes, then set another paper plate, upside down, over the
first. This will form a raised cover for the bread. Leave the entire experiment in a warm, dark place for
several days.
4. You will soon see a light gray fuzzy material covering the bread. If you check the bread each day now,
the growth will become heavier and turn dark.
This Is What Happens:
You probably knew that the material growing on the bread is called mold—a unique kind of plant. Mold
is not green and does not make its own food in sunlight. In this experiment, the mold drew nourishment from
the bread. Even though mold can spoil food, sometimes it is helpful, and people grow it on purpose like you
did. Many cheeses and certain drugs, such as penicillin, are made from mold.
Use a magnifying glass and examine your mold carefully. Do you see small dark spheres on the ends of
stalks? These structures help to grow new mold. Tear the bread apart and look at the torn edge. There are
several white threads growing into the bread. These are similar to the roots of a plant.
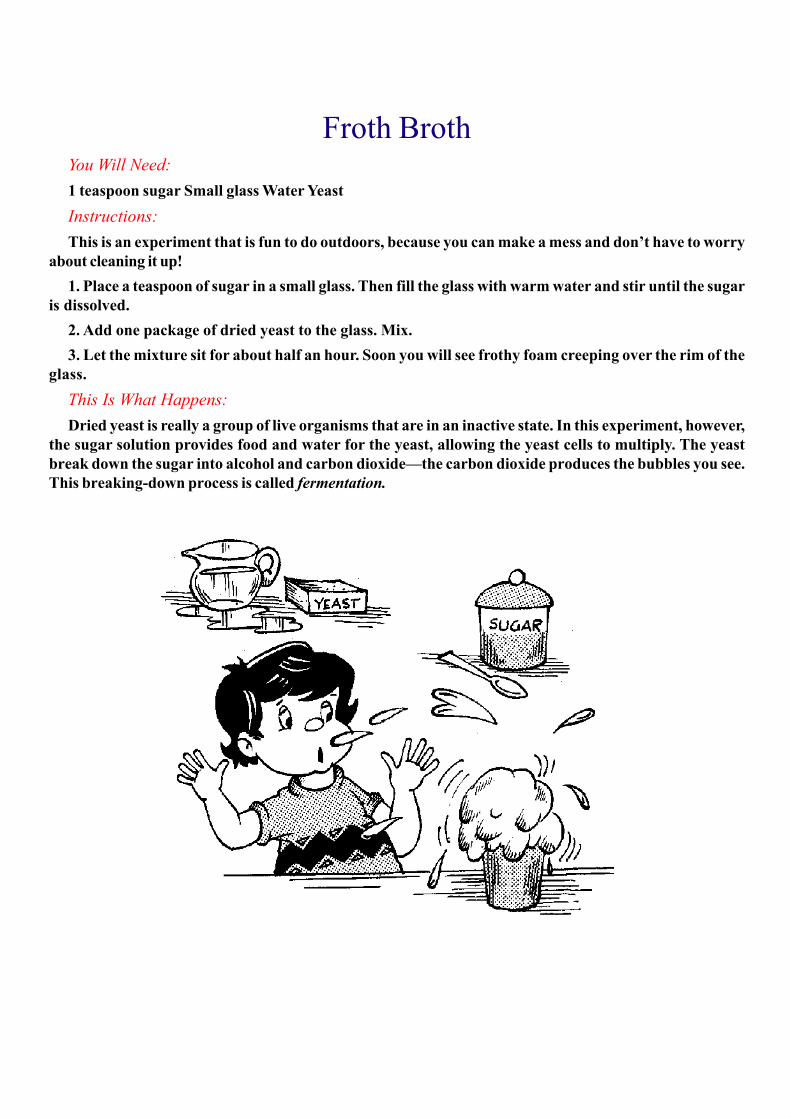
Froth BrothYou Will Need:
1 teaspoon sugar Small glass Water Yeast
Instructions:
This is an experiment that is fun to do outdoors, because you can make a mess and don’t have to worry
about cleaning it up!
1. Place a teaspoon of sugar in a small glass. Then fill the glass with warm water and stir until the sugar
is dissolved.
2. Add one package of dried yeast to the glass. Mix.
3. Let the mixture sit for about half an hour. Soon you will see frothy foam creeping over the rim of the
glass.
This Is What Happens:
Dried yeast is really a group of live organisms that are in an inactive state. In this experiment, however,
the sugar solution provides food and water for the yeast, allowing the yeast cells to multiply. The yeast
break down the sugar into alcohol and carbon dioxide—the carbon dioxide produces the bubbles you see.
This breaking-down process is called fermentation.
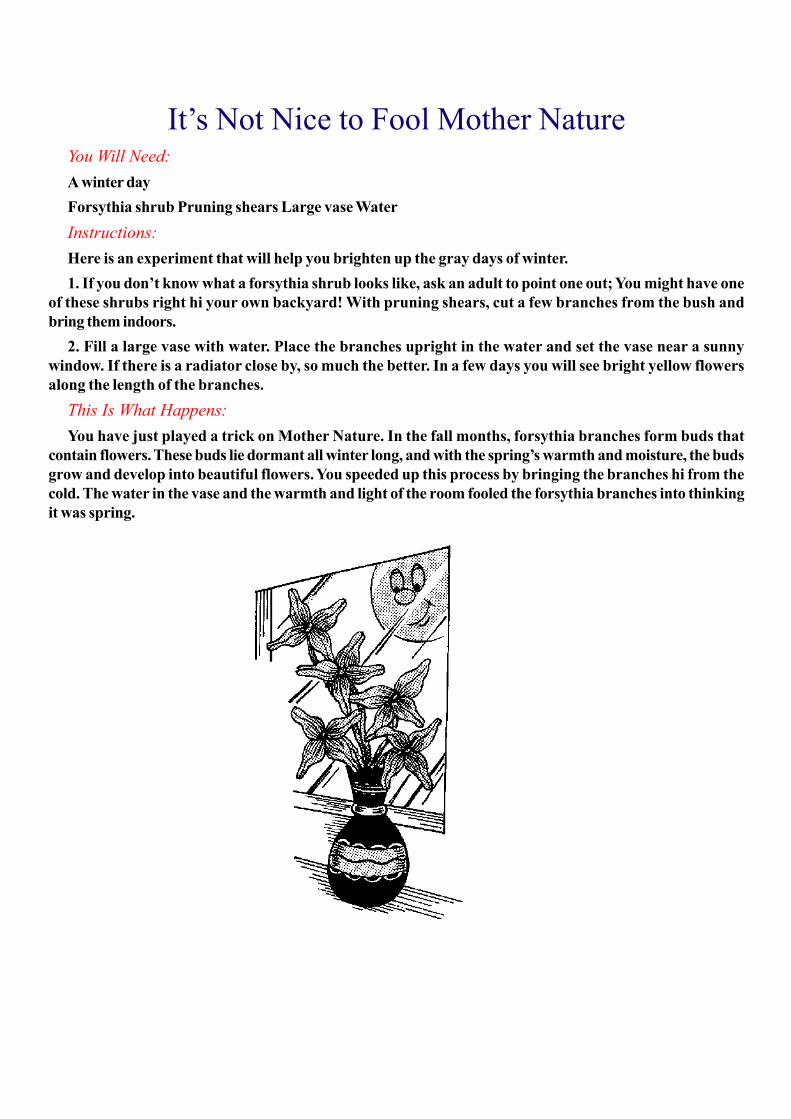
It’s Not Nice to Fool Mother NatureYou Will Need:
A winter day
Forsythia shrub Pruning shears Large vase Water
Instructions:
Here is an experiment that will help you brighten up the gray days of winter.
1. If you don’t know what a forsythia shrub looks like, ask an adult to point one out; You might have one
of these shrubs right hi your own backyard! With pruning shears, cut a few branches from the bush and
bring them indoors.
2. Fill a large vase with water. Place the branches upright in the water and set the vase near a sunny
window. If there is a radiator close by, so much the better. In a few days you will see bright yellow flowers
along the length of the branches.
This Is What Happens:
You have just played a trick on Mother Nature. In the fall months, forsythia branches form buds that
contain flowers. These buds lie dormant all winter long, and with the spring’s warmth and moisture, the buds
grow and develop into beautiful flowers. You speeded up this process by bringing the branches hi from the
cold. The water in the vase and the warmth and light of the room fooled the forsythia branches into thinking
it was spring.
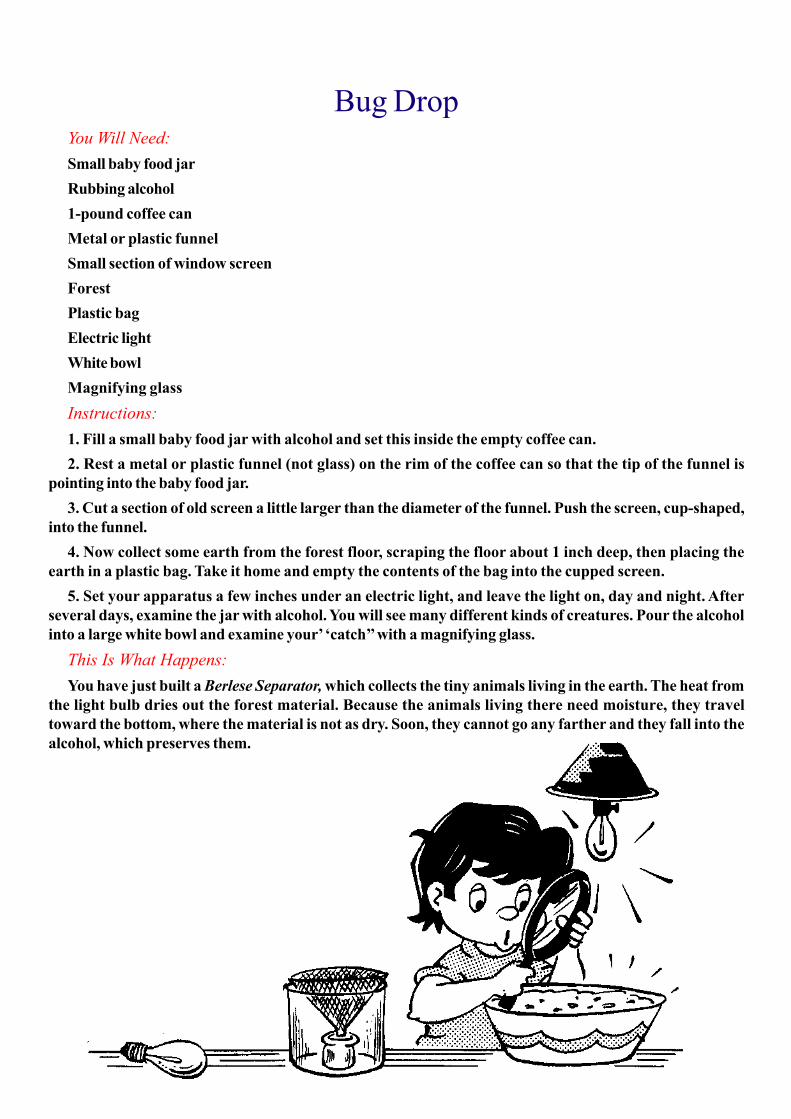
Bug DropYou Will Need:
Small baby food jar
Rubbing alcohol
1-pound coffee can
Metal or plastic funnel
Small section of window screen
Forest
Plastic bag
Electric light
White bowl
Magnifying glass
Instructions:
1. Fill a small baby food jar with alcohol and set this inside the empty coffee can.
2. Rest a metal or plastic funnel (not glass) on the rim of the coffee can so that the tip of the funnel is
pointing into the baby food jar.
3. Cut a section of old screen a little larger than the diameter of the funnel. Push the screen, cup-shaped,
into the funnel.
4. Now collect some earth from the forest floor, scraping the floor about 1 inch deep, then placing the
earth in a plastic bag. Take it home and empty the contents of the bag into the cupped screen.
5. Set your apparatus a few inches under an electric light, and leave the light on, day and night. After
several days, examine the jar with alcohol. You will see many different kinds of creatures. Pour the alcohol
into a large white bowl and examine your’ ‘catch’’ with a magnifying glass.
This Is What Happens:
You have just built a Berlese Separator, which collects the tiny animals living in the earth. The heat from
the light bulb dries out the forest material. Because the animals living there need moisture, they travel
toward the bottom, where the material is not as dry. Soon, they cannot go any farther and they fall into the
alcohol, which preserves them.

Fossils in ParisToil Will Need:
2 plastic margarine tubs
Plaster of Paris
Old spoon
Water
Petroleum jelly
Small seashells
Instructions:
1. Fill a plastic margarine tub about quarter full with plaster of Paris. While stirring with an old spoon,
slowly add water until the mixture becomes creamy.
2. Spread a thin coat of petroleum jelly onto the outside of several seashells. Press each shell into the
plaster, but do not allow the plaster to rise above the edge of the shell.
3. Let the experiment set overnight. The next day, gently pry the shells loose. You will see shell depressions
in the plaster. Spread a thin coat of petroleum jelly into these areas.
4. In another margarine container, mix up a new batch of plaster. Pour the fresh plaster into the depressions
and let it harden overnight. The next day, lift the small plaster pieces from the surface. They will be exact
models of the seashells.
This Is What Happens:
You have just performed the process by which a fossil—an impression of a plant or animal of the past
that has been preserved in the earth’s crust—is created. A dying plant or animal is covered with mud, which
hardens around its shape. As the matter decays and the cavity fills with minerals, a copy of the original plant
or animal is formed from the minerals. Your experiment took two days, but real fossils are formed over
hundreds of years. Scientists study fossils from long ago to learn what kind of plants and animals were alive
during Earth’s long history. The study of fossils is called paleontology.

Along Came a SpiderYon Will Need:
Spider web
White enamel spray paint
Dark-colored construction paper
Instructions:
The next time you see a spider web outside, try this experiment. Just make sure the web isn’t close to
your house or anything else—plants, pets, and so on—that could be damaged or harmed by spray paint.
1. With a can of white enamel spray paint, coat the spider web evenly with paint. Do not spray too much
so that drops form on the strands.
2. Before the paint has a chance to dry, press a piece of black or other dark-colored construction paper
flat against the web. The web will stick to the paper. Set the sheet of paper aside to dry.
This Is What Happens:
Look at the beautiful piece of artwork the spider has created for you. A spider has a gland near the rear
portion of its body. That produces a liquid used for web-making. When the liquid comes in contact with the
air, it turns into thread. First the spider makes the long strands that come from the center to the outer edge
of the web. These are not sticky because the spider must be able to walk somewhere on its own web without
getting caught in it. Next, the spider makes pieces of web that cross the longer strands, and some of these
do have sticky droplets, which help to trap insects!

Pass Me a Straw, PleaseYon Will Need:
Spider web White paper Safety pins
Instructions:
1. Find an old spider web with some dead insects left in the threads— you might look in a garage, on a
porch, or on some trees or bushes.
2. Pull one of the dead insects from the web and place it on a sheet of white paper.
3. With a safety pin or other small, pointed instrument, break apart the insect’s hard outer shell. You will
see that there is nothing left inside. How did the spider eat the inside of his catch without opening the shell?
This Is What Happens:
When an insect gets caught in a spider’s web, the spider spins extra thread around its victim to hold it in
place, but he does not have to do any chewing through the tough shell. The spider punctures the insect with
sharp fangs and injects a chemical. This chemical makes the insect’s insides soft and watery, and then the
spider sucks up its meal.

Moth AirportYou Will Need:
A warm summer evening Porch light or electric lamp
Instructions:
Here is something you’ve probably seen happen many times before, and perhaps wondered about it!
1. On a warm summer evening, sit outdoors near a porch light. If your house doesn’t have an outdoor
light, take an electric lamp outside, plugged into an extension, which is plugged into an outlet inside the
house.
2. Turn on the light and wait. Soon, several moths will come to the light, and circle round and round. Can
you explain this behavior?
This Is What Happens:
Moths have a nervous system that is very sensitive to light. When light strikes one side of the moth, a
nerve carries a message to the brain. The brain responds by making the wing with the light on it beat more
slowly. This means that the other wing is beating faster, and these unbalanced movements cause the moth to
turn constantly toward the light. During the daytime, the light is stronger and more even, and so the moths
remain quieter.

Ant FarmingYou Will Need:
2 glass plates
4 wood strips
Plastic tape
Cotton
Shovel
White cloth
Sponge
Sugar water
Honey
Black construction paper
THE HELP OP ONE OF YOUR PARENTS
Instructions:
This experiment will be great fun during your summer vacation] Build an ant farm, with the help of an
adult, from 2 plates of glass and wood strips. The exact measurements will depend on the materials you
have on hand, but the sheets of glass should be placed about 1 inch apart.
1. With the glass plates 1 inch apart, tape the wood strips around the glass plates, making a rectangular
glass and wood container. Do not tape the top wood strip to the glass plates yet.
2. Ask one of your parents to drill a hole in the top wood strip. This hole will be used to water the soil—
the soil must be kept moist at all times. Plug the hole with some cotton between waterings.
3. Dig up an ant hill, including the area around it. Spread the soil on a white cloth to locate the queen. She
will be much bigger than the other ants. Place the soil, queen, and other ants inside their new home.
4. Place a wet sponge, a tiny, open container of sugar water, and
a few drops of honey on top of the soil. Then tape the remaining
strip of wood—the one with the hole in it—to the top of your ant
farm.
5. If you cover the glass with black construction paper for the
first two weeks, it will encourage the ants to burrow next to the
glass, and you will be able to see their tunnels clearly. You will soon
discover many interesting facts about your ants.
This Is What Happens:
You are observing an ant colony. Ants live and work in a society—
an organized group of individuals, in which all the members follow
rules. An ant society has one queen and many worker ants, and
they all have special jobs. Study your ant farm to see the many
different jobs the ants perform!

Plain Old PlanariaYou Will Need:
Small piece of raw liver Jar
Piece of window screen, large enough to cover the jar opening
String
A stream
Instructions:
1. Place the small piece of raw liver into the jar. Cover the jar with a piece of old window screen and tie it
in place with a heavy string or cord. Also tie a long string (several feet) around the jar,
2. Suspend the jar in a stream and tie the free end of string to a bush or tree. Let the experiment sit for
several hours.
3. When you return, pull the string to retrieve your jar. Remove the screen and examine the liver. You will
find several tiny creatures on it. Save them for the next experiment.
This Is What Happens:
The organisms you collected are called planaria. They belong to a group known as flatworms and are
found in fresh-water areas. You may nave also seen them hiding under moist stones.

Double Your FunYou Will Need:
Planaria from previous experiment
Block of wood
Single-edged razor blade
Shallow bowl
Stream water
Raw liver
THE HELP OF ONE OF YOUR PARENTS
Instructions:
1. Lay one of the planaria on a small block of wood. Ask one of your parents to make a slit halfway down
its front end with the razor blade.
2. Place the worm in the shallow bowl and add some of the stream water. Let the experiment sit for about
two weeks. When you return you will see a two-headed monster! Feed it by dropping a piece of raw liver into
the water, but remove the liver after an hour so it does not decay in the bowl.
This Is What Happens:
The amazing feat you just saw is known as regeneration—the ability to grow a new body part. When you
split the planariana head in half, each half grew the missing parts to make a full head again. Thus, you saw
a worm with one body and two heads. Humans do not have the ability to regenerate lost or damaged parts,
such as arms or legs, but scientists think that one day it may be possible to perform regeneration in the
laboratory. For example, if a person’s arm was crushed in an accident, a new one could be grown and then
sewn back on!
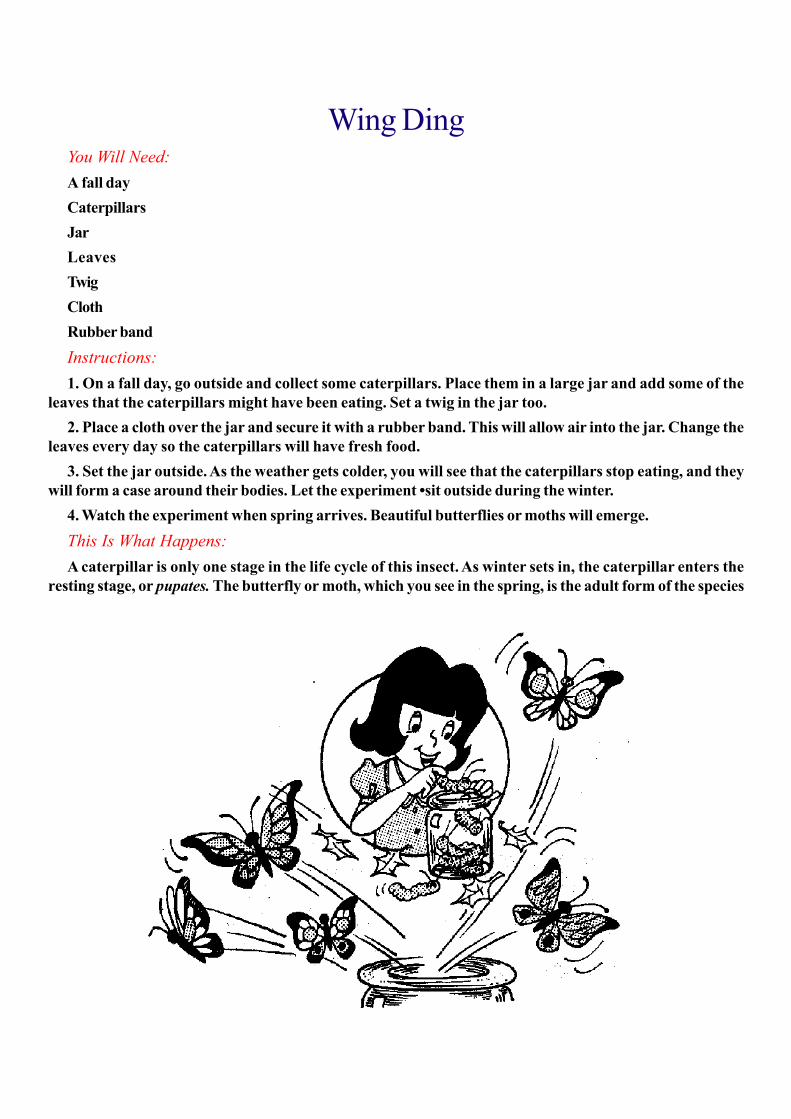
Wing DingYou Will Need:
A fall day
Caterpillars
Jar
Leaves
Twig
Cloth
Rubber band
Instructions:
1. On a fall day, go outside and collect some caterpillars. Place them in a large jar and add some of the
leaves that the caterpillars might have been eating. Set a twig in the jar too.
2. Place a cloth over the jar and secure it with a rubber band. This will allow air into the jar. Change the
leaves every day so the caterpillars will have fresh food.
3. Set the jar outside. As the weather gets colder, you will see that the caterpillars stop eating, and they
will form a case around their bodies. Let the experiment •sit outside during the winter.
4. Watch the experiment when spring arrives. Beautiful butterflies or moths will emerge.
This Is What Happens:
A caterpillar is only one stage in the life cycle of this insect. As winter sets in, the caterpillar enters the
resting stage, or pupates. The butterfly or moth, which you see in the spring, is the adult form of the species

By Crackers!You Will Need:
Unsweetened cracker
Instructions:
1. Place an unsweetened cracker in your mouth. Chew it thoroughly, but don’t swallow it.
2. Continue to chew without swallowing for several minutes; Does the cracker now taste sweet?
Tills Is What Happens:
The moisture in your mouth is called saliva. Saliva contains chemicals that start to break down the food
before it enters your stomach. The cracker has been changed by the action of these chemicals into simple
sugars that your body can use for energy, and you can taste this sugar while the cracker is in your mouth.

Banana JuiceYou Will Need:
A jar of banana baby food
Instructions:
1. Open a jar of banana baby food and spit once onto the surface.
2. Set the jar on a counter and leave the experiment undisturbed overnight. When you look at the jar’s
contents the next morning, you will see that almost all the food has turned into a liquid.
This Is What Happens:
Banana baby food is mostly starch. The saliva from your mouth contains a chemical called an enzyme.
Your enzymes broke apart the banana starch molecules into smaller pieces and made the mixture watery.
This same process happens inside your mouth whenever you eat a food with starch. Saliva combines with
the food and the enzymes begin to break apart the molecules before the food reaches your stomach.

Easy to DigestYou Will Need:
2 cherry cough drops
2 small jars, such as baby food jars, with lids
Water
Instructions:
1. Place a cough drop in each small jar, then fill each about halfway full with water.
2. Screw the lids on tightly. Gently shake 1 jar by turning it upside down and then right-side up, over and
over again. Leave the other jar alone.
3. After several minutes, notice the color of the water in the 2 jars. The jar that you shook contains water
of a deeper color than the jar that remained quiet.
This Is What Happens:
When the jar is shaken, the motion of the water helps to dissolve the cough drop more quickly. When you
eat, your stomach acts the same way. It does not sit still, but rather the muscles squeeze and churn the food
so that it breaks apart into pieces and becomes watery.

Do Not EnterYou Will Need:
2 clear glasses
Water
1 teaspoon sugar
1 teaspoon cocoa
Paper towel
Instructions:
1. Fill a glass about half full with water, then add the sugar and the cocoa. Stir until the sugar and cocoa
are completely mixed with the water.
2. Now, fold a paper towel in half lengthwise, then in half widthwise. Pull one outside section away so that
a funnel is formed. Set this runnel into an empty, clear glass.
3. Slowly pour the sugar and cocoa mixture into the funnel. The fluid that pastes through the paper will be
clear. Take a sip. Can you explain why it tastes sweet?
This Is What Happens:
The paper towel traps the particles of cocoa and prevents them from passing through the tiny openings in
the paper. The sugar and water, however, easily pass through the paper towel and produce a sweet, colorless
solution. This same process happens inside your body. Digested food passes through the walls of your small
intestine in order to reach the cells of your body, but other larger substances, such as waste particles, are
kept out.

The Nose KnowsYou Will Need:
Yourself
Asparagus
Bathroom
Instructions:
1. The next time you have asparagus for dinner, note its distinctive odor and taste, and eat a generous
helping.
2. When you go to the bathroom the next morning, do you notice the same asparagus smell? Why does
this happen when other foods that you eat do not produce their own odor in your urine?
This Is What Happens:
A substance’s odor is produced by molecules that your nose detects. The molecules that produce the
smell of asparagus enter your body when you eat the vegetable, and are absorbed through your small
intestine. However, your body does hot use these particular molecules and they are passed, unchanged, into
your kidneys. They finally leave your body in your urine.

BigfootYon Will Need:
Ruler, at least 1 foot long
Your 2 feet
Instructions:
1. Place the ruler on the floor.
2. Take off your shoes and socks, place one foot on the ruler, and measure your foot. Measure your
other foot in the same way. Are the two lengths the same?
This Is What Happens:
You probably noticed that one foot is bigger than the other. This is true for most people. Right-handed
people tend to have a slightly larger left foot, and left-handed people usually have a larger right foot. Even
though you are still growing, this difference will remain, even when you are fully grown!
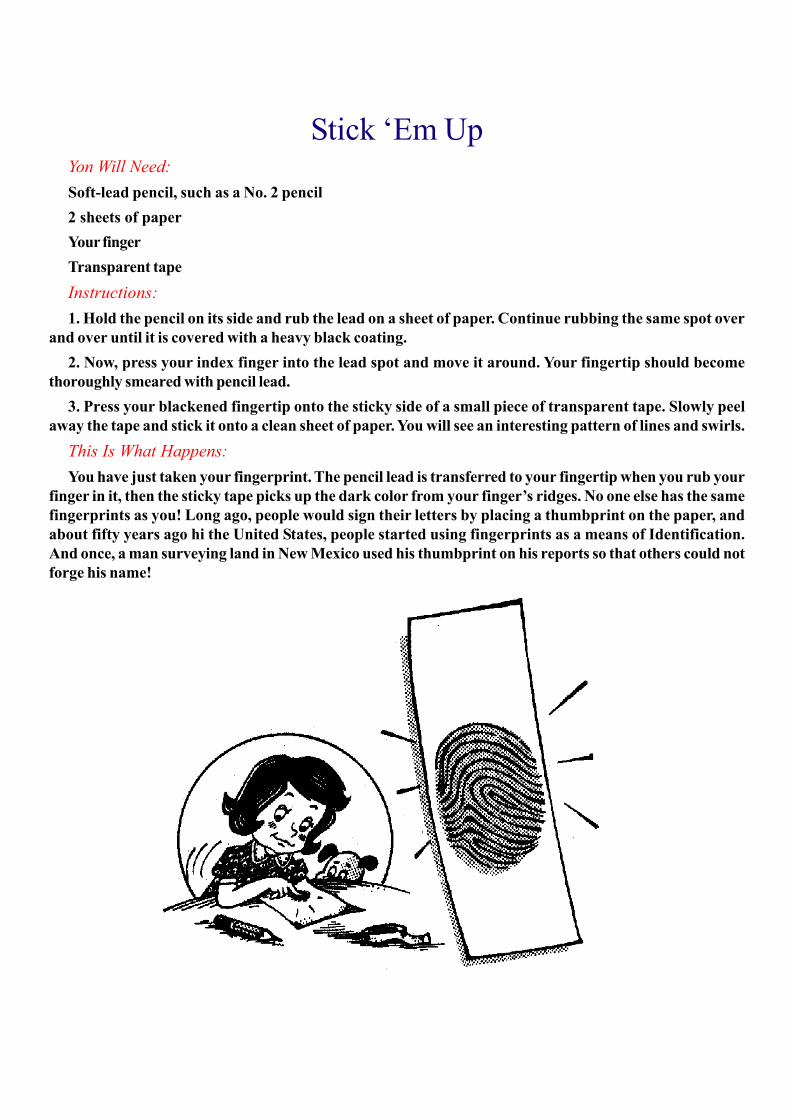
Stick ‘Em UpYon Will Need:
Soft-lead pencil, such as a No. 2 pencil
2 sheets of paper
Your finger
Transparent tape
Instructions:
1. Hold the pencil on its side and rub the lead on a sheet of paper. Continue rubbing the same spot over
and over until it is covered with a heavy black coating.
2. Now, press your index finger into the lead spot and move it around. Your fingertip should become
thoroughly smeared with pencil lead.
3. Press your blackened fingertip onto the sticky side of a small piece of transparent tape. Slowly peel
away the tape and stick it onto a clean sheet of paper. You will see an interesting pattern of lines and swirls.
This Is What Happens:
You have just taken your fingerprint. The pencil lead is transferred to your fingertip when you rub your
finger in it, then the sticky tape picks up the dark color from your finger’s ridges. No one else has the same
fingerprints as you! Long ago, people would sign their letters by placing a thumbprint on the paper, and
about fifty years ago hi the United States, people started using fingerprints as a means of Identification.
And once, a man surveying land in New Mexico used his thumbprint on his reports so that others could not
forge his name!
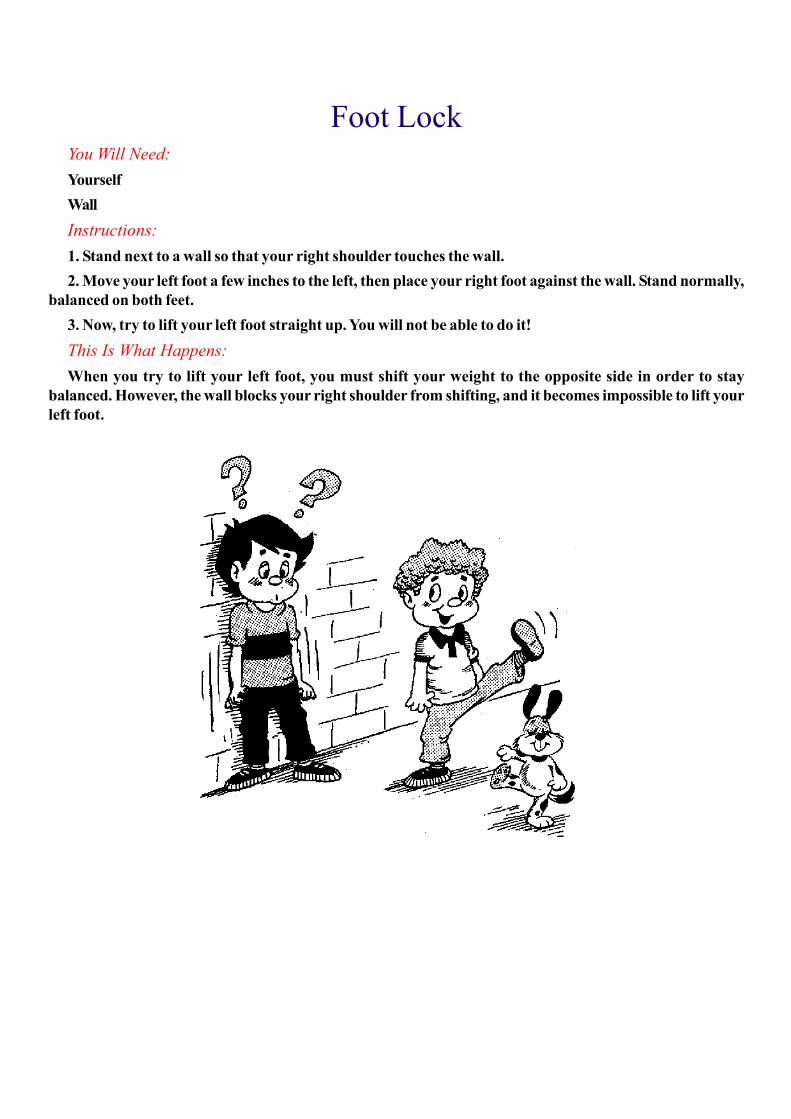
Foot LockYou Will Need:
Yourself
Wall
Instructions:
1. Stand next to a wall so that your right shoulder touches the wall.
2. Move your left foot a few inches to the left, then place your right foot against the wall. Stand normally,
balanced on both feet.
3. Now, try to lift your left foot straight up. You will not be able to do it!
This Is What Happens:
When you try to lift your left foot, you must shift your weight to the opposite side in order to stay
balanced. However, the wall blocks your right shoulder from shifting, and it becomes impossible to lift your
left foot.
Fingertip ControlYou Will Need:
A friend Chair
Instructions:
1. Ask a friend to relax in a chair. He should fold his arms and stretch his feet as far forward as possible.
Tell him to lean far back so that his head faces upward.
2. Now press a fingertip onto his forehead and challenge him to get up from the chair without unfolding
his arms or moving his feet. He will struggle, but will not be able to rise.
This Is What Happens:
Your friend must gain his balance before getting up from the chair. To do this, he must raise his head first.
However, you are pressing down on his forehead and this prevents him from taking the first action.
Flavorless GumYou Will Needs:
Peppermint chewing gum
Instructions:
When you buy gum, you probably purchase the sugarless kind because It Is better for your teeth. But
have you ever had flavorless gum?
1. Open a stick of peppermint gum and place it in your mouth. Pinch your nose dosed with your fingers
and begin chewing the gum. You will not be able to taste the pepper* mint flavor.
2. Stop holding your nose. Chew the gum again. Can you taste the flavor now?
This Is What Happens:
The sense of smell and the sense of taste are very closely related. You could not recognize the peppermint
flavor while holding your nose because its taste comes from its aroma. Have you ever noticed that when you
have a cold, food has little flavor? This is because your stuffed-up nose cannot smell the food.

Time for a Eustachian BreakYou Will Need:
Yourself
Instructions:
1. Pinch your nose closed with your fingers.
2. Now swallow. Your ears will feel blocked. Have you ever had this feeling before?
3. Take a big yawn. Your ears will return to normal.
This Is What Happens:
There is a stretchy tissue inside each of your ears that helps you to hear. This tissue is called an eardrum.
Sometimes there is a difference in air pressure outside and inside your head, such as when you climb a
mountain or go up in an elevator. To protect your eardrums from breaking under this kind of increase in
pressure, a tube—the eustachian tube—that leads from each ear to your nose and throat allows air of the
same pressure as the outside to get behind your eardrums. When yon blocked your nose and swallowed,
you actually blocked your euatachian tubes and created an unequal pressure in your head. By yawning, you
returned everything back to normal.

Steady as a RockYou Will Need:
Butter knife
Table
Hairpin
Instructions:
Do you think you can hold your arm perfectly still? Try this experiment.
1. Hold a butter knife parallel to the top of a table. Don’t brace your arm or allow your elbow to touch the
table surface.
2. Rest a hairpin on the blade of the knife. Now try to hold the knife as steady as you can while the tips
of the pin barely make contact with _ the tabletop. The hairpin will walk to the end of the knife and fall off,
no matter how hard you try to remain still.
This Is What Happens:
When you try to keep your arm in the same position, your muscles must make slight corrections to
prevent the arm from leaving that spot. The muscles produce up-and-down movements and these slight
quivers set the hairpin in motion.

ThumperYou Will Need:
Wooden match
Thumbtack, with a wide, flat surface
Instructions:
You can feel your heart beating, but did yon know that you can also see It beating? All it takes is a simple
device, which you can make hi a few minutes.
1. Press a wooden match onto the point of the thumbtack.
2. Set your device on top of your wrist and move it from place to place until you find a strong beat—your
pulse. Your device will respond by tick-tocking back and forth like a grandfather clock pendulum.
3. Count how many times the wooden match moves In one minute.
This Is What Happens:
When you measure how many times your heart beats, you are taking your pulse. Blood is pumped by
your heart throughout your entire body, carried by arteries and veins. Some veins are close to the surface
in your wrist, and this Is a good place to measure the beating action. You probably obtained a count between
90 and 120 beats. As you grow older, your heart will slow down to about 80 beats per minute.

Rainbow EyesYou Will Need:
Rubber band Red cellophane Flashlight A dark room
Instructions:
1. With a rubber band, fasten a piece of red cellophane over the lens of a flashlight.
2. Go into a dark room and aim the light at a white surface, such as a wall. Stare at the red spot for
several minutes.
3. Without moving your eyes, turn off the flashlight and continue to gaze directly at the same spot. You
will see it turn blue-green in color.
This Is What Happens:
Your eyes contain many light-sensitive nerve endings, and each responds to different colors. When you
stared at a red spot for such a long period of time, the nerve centers associated with red were over stimulated;
they became tired, and stopped working. So, the blue and green regions around this area sent messages to
the brain, and you saw the spot take on these colors.

Gaze into My EyesYon Will Need:
10 sheets of typing paper, Rubber band
This book
Mirror
Instructions:
1. Roll the 10 sheets of typing paper into a hollow tube. Slip a rubber band over the roll to hold it in place.
2. Hold the tube against some words on this page and look into the cylinder. Your face should be pressed
against the tube so that no light enters. At first, you will not be able to see much. However, your eye will
soon adjust to the dark and allow you to read the words.
3. Lift your head and’ immediately look at your eye in the mirror. Do you see any changes?
This Is What Happens:
The part of your eye into which light enters is called the pupil—the dark spot in the center of your eye.
The pupil gets bigger in the dark because it must allow more light in to help you see better. When the light
is too bright, the pupil tries to shut some of it out by becoming smaller.

This House Is SpotlessYon Will Need:
This page
Your eyes
Instructions:
1. Hold this page in front of your face at arm’s length.
2. Close your left eye and stare directly at the door of the house with your right eye. Slowly bring the
page forward while you continue to look at the door. Suddenly the spot will disappear from sight. Continue
to bring the page closer and the spot will reappear.
This Is What Happens:
You are not going crazy! Everyone has a “blind spot” in each eye and you have just located yours. The
back portion of your eye is covered with many receptors that are sensitive to light. However, the nerve that
sends messages to your brain is attached to the eye and it has no receptors. At the time you held this page
in front of your eye and could not see the spot on the house, the image was falling; directly on your blind
spot, and there were no receptors to receive the picture.

Laser VisionYen Will Need:
Paper towel tube Matchbook
Instructions:
To discover a power that you are probably not aware of, try this easy experiment. Did you know that your
eyes can pierce solid objects?
1. Hold an empty paper towel tube in front of one eye. Hold a matchbook in front of the other eye, with
the cardboard touching both the tip of your nose and the tube.
2. Look straight ahead while keeping both eyes open. Your eyes have just burned a hole through the
match-book!
This Is What Happens:
You use both your eyes to see an object. Your brain receives a message from each eye and combines
them for the total picture. Usually the messages are the same because both eyes are looking at the same
thing. In this experiment, however, each eye sees a different image: One eye sees the matchbook and the
other sees the view beyond it. The brain combines these and it seems as if you are looking right through the
matchbook.

Balancing ActYou Will Need:
Yourself
Instructions:
This experiment seems easy at first, bat you might change your mind afterwards.
1. Stand on the floor or on flat ground outdoors. Lift your right foot and grasp it with your right hand. Now,
see how long you can balance on the other leg. You probably will not have much trouble.
2. Try the same thing with your eyes closed. You will not be able to stand upright for more than a few
seconds.
This Is What Happens:
You have nerve sensors in your joints and in the soles of your feet. Your brain combines the information
they send with the information that your eyes send to keep you standing upright. So, to prevent you from
tipping over, messages are sent to the muscles to correct their position. However, without the important role
of sight, your other sensors cannot do the job, and you lose your balance.

Hot and ColdYon Will Need:
3 bowls Water
Instructions:
1. Fill 3 bowls with tap water as follows: one with cold water, one with lukewarm water, and one with hot
water—but not hot enough to burn. Place the bowls on a table or counter, with the lukewarm water between
the other two.
2. Place one hand in the cold water and one in the hot. Let your hands adjust to the temperature for
several minutes. Then take them out and plunge them both into the bowl of lukewarm water. The hand that
was resting in the cold water now feels warm and the other hand feels cold. Do you know why?
This Is What Happens:
The hand that was resting in the cold water is now placed in warmer water and some heat from the water
is transferred to the akin—the hand feels warm. The opposite happens with the other hand—it is now
warmer than the surrounding water and some heat moves into the water. As a result, the hand feels cold.

Chilly DipYou Will Need:
Pail Ice cubes
Water
Your two hands
Instructions:
This experiment makes for a refreshing break on a hot summer day.
1. Fill a pail with several trays of ice cubes, then add water almost to the rim of the pail. Allow the pail to
stand for a few minutes so the water can reach freezing temperature.
2. Dip both hands into the water and hold them motionless. Notice which hand becomes cold first. Hold
your hands hi the water for a few more seconds, then remove them. Which one stays cold the longest?
This is What Happens:
If you are right-handed, you probably noticed that your left hand was the first to. get cold and stayed cold
the longest. Blood moves through your hands to keep them warm. However, the blood flow is not equal on
both sides of your body. Your left hand receives somewhat less blood than your right and is more sensitive
to the cold. If you are left-handed, the opposite is true—your right hand receives less blood than your left.

Summer SkinYou Will Needs
A cold day
Outdoor thermometer
Instructions:
1. Dress properly and go outside on a cold day. Hold a thermometer in the air for a few minutes and
when the mercury has settled, notice what the air temperature is.
2. Next, slide the thermometer up your sleeve so that it rests against your skin. Again, wait a few
minutes.
3. Now, check the temperature. Your skin is much warmer than the air temperature. Can you explain
why?
This Is What Happens:
Your body stays the same temperature no matter what the outside temperature is. There are many
chemical reactions going on inside you that produce neat and help to keep you warm, even on cold winter
days. The source of this energy that keeps you warm is the food you eat!

Spot CheckYou Will Need:
Your hand and wrist Water
Instructions:
1. Touch one of your index fingers to the underside of the opposite wrist.
2. Moisten the finger with warm water and touch the wrist in a different spot.
3. Gently blow across both spots. You will find that the wet spot feels cold. Do you know why?
This Is What Happens:
Your breath carries some of the water from your wrist .into the air. This action takes away heat from your
body, and the spot feels cool. This, process called evaporation, happens all over your body on a warm
summer day. As your skin sweats, the moisture goes into the air, and your body is cooled.

Weight LossYon Will Need:
A hot summer day Bathroom scale Paper and pencil
Instructions:
1. On a hot summer day, weigh yourself on the bathroom scale. Write down your weight on a piece of
paper.
2. Now go outside and play—ride your bicycle, play baseball, run. If you get thirsty do not come inside
for a drink. Continue your play for at least a half hour.
3. Next, return inside and get back on the scale. What do you notice? You probably weigh less than you
did a half hour ago. Can you explain this weight loss?
This Is What Happens:
You may have recorded a difference in weight of as many as several pounds. Most of this weight loss is
water. Where did it go? To keep you cool while you were playing, your body produced sweat. When the
sweat evaporates into the air, it takes away excess heat from your body. You probably notice that you drink
many more liquids during the summer than during the winter months. You do this to replace the water that is
lost through your skin. Otherwise, you would dry up like a withered plant! Now go have a nice, tall, cool
glass of water and thank your body for keeping you cool—and letting you know it was thirsty.

Sensor MagicYou Will Need:
2 metal rods or 2 large screwdrivers
Freezer
Jar
Warm water
Instructions:
1. Place one rod, or screwdriver, in the freezer for about an hour and insert the other in a jar of warm
water.
2. Remove the 2 rods and set them in the palm of your hand. They should be placed side by side. Suddenly
you will feel a hot sensation. What is going on here?
This Is What Happens:
There are two kinds of temperature sensors on our skin. A warm sensor responds to warmth. An extreme
sensor responds to cold. In this experiment, the two messages are combined by your brain into a hot feeling.
This makes an amazing stunt to play on a friend with his eyes closed!

Spicy WristYou Will Need:
1 tablespoon dried hot peppers
Quarter cup hot tap water
Cotton swab
Instructions:
1. Mix the hot peppers in the hot tap water. Let the mixture soak for about twenty minutes.
2. Next, dip a cotton swab in the water, then shake off any excess water. Touch (he tip of the swab to your
tongue. You will feel a hot, spicy sensation. Caution: Do not drink any of the solution or allow more than a
single drop to touch your tongue. Otherwise, you will feel an unpleasant burning.
3. Now; remove a few of the pepper pieces from the cup and place them on your wrist. You will also
experience the same hot feeling in this location.
4. When you’re finished with this experiment, wash your hands and wrist thoroughly so you do not
spread any of the spice to your eyes or nose.
This Is What Happens:
There is a chemical in the hot peppers that produces the sensation of hotness. This chemical can be felt
by the skin as well as by the tongue, where you usually taste different flavors. Did you know that some
kinds of microscopic forma of life respond to chemicals over their entire body? They do not have special
taste buds as you do on your tongue.

The BlinkerYon Will Need:
A friend
Instructions:
1. Ask a friend to stand in front of you. Have him/her stare directly at your face.
2. Now, slowly count to yourself while you watch his/her eyes. Stop counting when your friend blinks. Try
the experiment several times. You will never count higher than 20!
This Is What Happens:
Our eyes must be kept moist to work properly, so they are constantly bathed with fluid. This fluid comes
from tears, and blinking helps spread an even coat of tears over the eyes. Blinking is called an involuntary
action because you do not have to think about it; our eyes blink automatically every few seconds.

Cry BabyYou Will Need:
Onion
Cutting board
Knife
THE HELP OF ONE OF YOUR PARENTS
Instructions:
1. Set a small onion on a cutting board or plate. Ask one of your parents to slice the onion in half with a
sharp knife.
2. Hold the cut onion next to your nose and take a little sniff. You will begin to cry. Do you know what
causes this reaction?
This Is What Happens:
Onions contain strong-smelling oil inside their cells. When you cut into the onion, some of this oil forms
a vapor, goes into the air, and is detected by your nose. The nerves inside your nose are very sensitive to
the vapor and are connected to your eyes, which try to wash away the substance by producing tears.
At times when you are not crying, your eyes still have small amounts of tears, which help to keep them
clean and moist. The tears flow over your eyes, then into small openings in the corners of your eyes. From
here, the fluid is routed into your nose. When you cry, however, the tiny canals cannot handle the great
amount of liquid, and tears roll down your face in big drops.

Nail Know-It-AllYou Will Need:
Your fingers and toes
Instructions:
This experiment is easy. All you have to do is look carefully at your fingernails and toenails. How much
do you know about them? Read on and amaze your family and friends with these interesting facts:
1. Fingernails and toenails are dead cells.
2. Laving cells lie under the nail’s white, arch-shaped area. They grow and pack together closely, pushing
the nail outward.
3. Your nails are made from the same kind of material as a horse’s hoof
4. The condition of your fingernails can indicate the general health of your whole body. If the nails have
deep ridges or are misshaped, an illness may be present.
Thick SkinYou Will Need:
Bathtub Water Soap Yourself
Instructions:
1. The next time you take a bath, scrub yourself clean with soap, then soak in the tub for at least fifteen
minutes, with some bubble bath, if you like!
2. After you step from the water and dry yourself off, check your fingertips and the bottoms of your feet.
Do you notice that they are wrinkled, while the rest of your skin is smooth? Do you know what causes this
difference?
This Is What Happens:
The outer layer of skin on your hands and feet is thicker than the skin on other parts of your body. So, the
skin on your hands and feet absorbs water and expands when it is soaked. After you take your hands and
feet from the tub, the excess water evaporates into the air and carries along with it moisture that was
originally in the skin. This process dries out the skin and causes it to wrinkle.

The Hand Is Quicker Than the BrainYou Will Need:
Yourself Doorway
Instructions:
1. Stand in the center of a doorway and place the insides of both hands against the frame.
2. Press outward as hard as you can and hold this position for as long as possible.
3. When you feel you no, longer have any strength left, step clear of the doorway. Let your arms hang
limp. Suddenly they will float upward!
This Is What Happens:
When you held your hands against the doorway, you told your brain to contract your arm muscles. However,
when you stepped away from the doorway and told yourself to stop pushing, the brain continued sending
push signals to the arms for a few seconds. These signals caused the muscles to raise your arms, even
though you did not consciously think about it.
End