xml and xsl in coldfusion mx - charlie arehart · utilizing xml and xslt in coldfusion mx by nate...
TRANSCRIPT
Utilizing XML and XSLT in ColdFusion MX
By Nate Weiss April 2002
Installing the sample code ...............................................................................2 Parsing existing XML .......................................................................................3
Parsing your first XML document..................................................................4 Introducing XML Document and Element structures ....................................5 Fetching XML documents with the cfhttp tag ................................................8 Looping through child elements....................................................................9 Referring to elements in the tree by name ................................................... 11 A note about dots and brackets .................................................................. 12 Querying XML with the XMLSearch() function and XPath............................ 14 A crash course in XPath ............................................................................. 15 An easy XPath example .............................................................................. 16
Generating new XML documents ................................................................... 17 Using the CFXML tag to output XML .......................................................... 18 Producing dynamic XML............................................................................. 19 Escaping special characters........................................................................ 21 Outputting XML directly ............................................................................. 22 Using functions instead of the cfxml tag to create XML ............................... 22
Transforming XML through XSLT .................................................................. 26 Overview of XSLT........................................................................................ 26 Transforming XML with the XmlTransform() tag.......................................... 28
Experimenting with the cffunction tag ........................................................... 30 Creating dynamic stylesheets......................................................................... 31 Other XML-related features in ColdFusion MX ............................................... 32
1
Macromedia ColdFusion MX brings a whole new set of features and advantages to web development—silky-smooth Flash integration, way-cool support for web services and other groovy stuff that will surely make the lives of ColdFusion developers easier and more interesting. One of the neatest new features in ColdFusion MX, and one which forms the basis for many of its other new features, is its native support for XML. This new functionality makes the task of working with XML—something that can be quite complicated or cumbersome in other languages—remarkably simple and straightforward. Suddenly a whole bunch of XML-related tasks just became ridiculously easy. ColdFusion MX supports XML in three basic areas:
• Parsing existing XML • Generating new XML • Transforming XML through XSLT
Note: This article assumes that you have at least some familiarity with XML. At its simplest, XML can be defined as syntax for marking up data with "tags," similar to the HTML and CFML tags that you know and love. These tags (called elements in XML) can have all kinds of different names, depending on what they describe (perhaps <company> and <employee>, <film> and <actor>, and so forth). If you want to learn more, I suggest reading O'Reilly's xml.com site and read at least their "Introduction to XML" section, after clicking "What Is XML?" on the home page.
Installing the sample code Before you read onward, install the sample ColdFusion pages discussed in this article: 1. Download the following ZIP file: xmlxslt.zip (220KB). 2. Unpack the ZIP file in your ColdFusion MX webroot. Typically this is located
at c:\cfusionmx\webroot\ if you chose the default ColdFusion MX installation. The unpacked ZIP file will create a folder named XmlExampleCode.
3. To run a ColdFusion page, such as ParseXML1.cfm, browse it at a URL similar to the following: http://localhost/XmlExampleCode/ParseXML1.cfm
4. You can open each file referred to in this article within your text editor. The files are located inside the XmlExampleCode folder, which was created when you unpacked the ZIP file in your ColdFusion MX webroot.
5. In ColdFusion Administrator, create a Microsoft Access data source called XmlExamples, which specifies the XmlExamples.mdb file inside the XmlExampleCode folder. The XmlExamples.mdb file is also included in the ZIP archive.
2
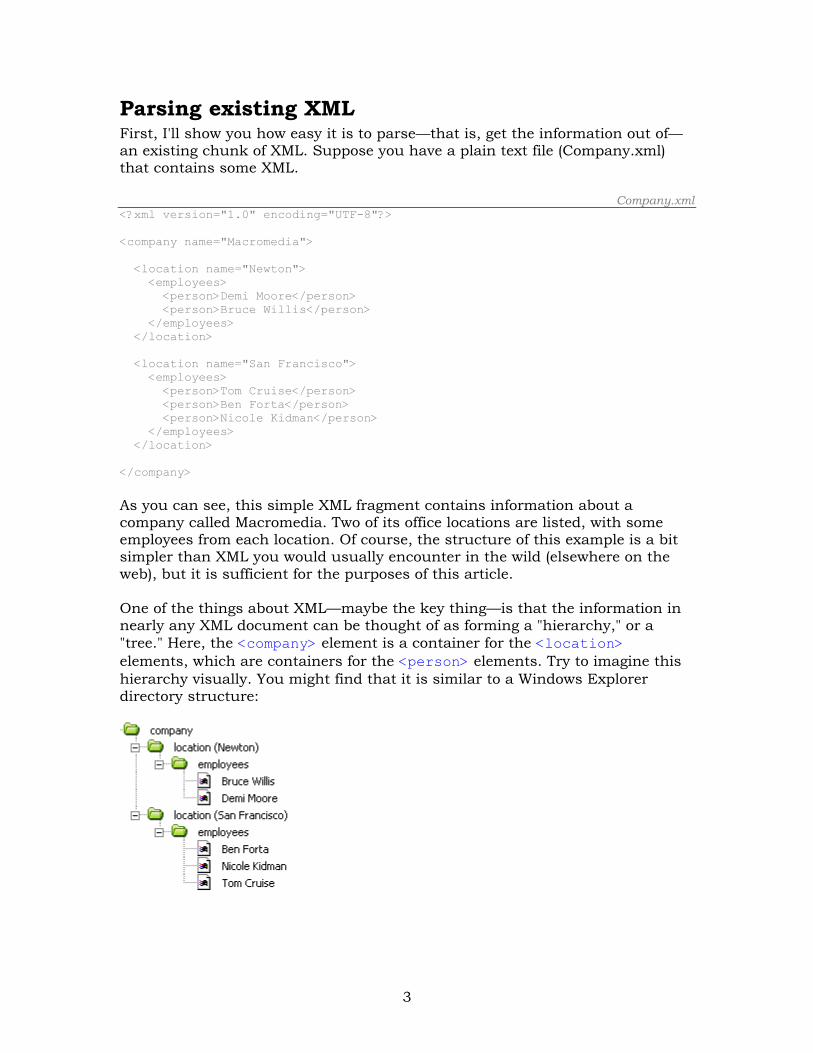
Parsing existing XML First, I'll show you how easy it is to parse—that is, get the information out of—an existing chunk of XML. Suppose you have a plain text file (Company.xml) that contains some XML.
Company.xml <?xml version="1.0" encoding="UTF-8"?> <company name="Macromedia"> <location name="Newton"> <employees> <person>Demi Moore</person> <person>Bruce Willis</person> </employees> </location> <location name="San Francisco"> <employees> <person>Tom Cruise</person> <person>Ben Forta</person> <person>Nicole Kidman</person> </employees> </location> </company> As you can see, this simple XML fragment contains information about a company called Macromedia. Two of its office locations are listed, with some employees from each location. Of course, the structure of this example is a bit simpler than XML you would usually encounter in the wild (elsewhere on the web), but it is sufficient for the purposes of this article. One of the things about XML—maybe the key thing—is that the information in nearly any XML document can be thought of as forming a "hierarchy," or a "tree." Here, the <company> element is a container for the <location> elements, which are containers for the <person> elements. Try to imagine this hierarchy visually. You might find that it is similar to a Windows Explorer directory structure:
3

Now, why am I pounding away at this concept? Hasn't this all been covered—the inherently relational tree-like structure of it all, the parent-child relationship between the various nodes in the tree, and so on—in a thousand other books, websites, and magazine articles? Sure it has. I'm just dwelling on it for the moment in the hopes that you'll think of some existing type of data within ColdFusion's CFML language that also is inherently tree-like. Cue Mr. Burns from "The Simpson's": Hmmm. Some other data type that can hold all sorts of information in a hierarchical manner..where you can refer to the various pieces of information (company, location, person and so forth) by name... yes, a tree-like structure... Aha! Of course, that familiar face: the ColdFusion structure (fondly called Struct in social circles). Conceptually, it's similar to the underlying logical structure of nearly any XML document. For this reason, when ColdFusion parses an XML document, it returns the information from the document in a form that's very, very similar to a ColdFusion structure. Just use the familiar, dot notation syntax to refer to the various pieces of information in the structure. Then use the familiar structure-related functions (such as StructKeyExists(), StructInsert() and so on) to find out the elements within the XML document, or to make changes to the XML data. Release the hounds!
Parsing your first XML document Like many things, all this talk of structures and whatnot is easier to understand when you see it in action. Take a look at how you might parse the sample Company.xml file in a ColdFusion page. For simplicity's sake, assume that you've saved the following CFML code as a file named ParseXML.cfm, in the same folder as your Company.xml file. It only takes three lines of code for ColdFusion MX to parse the XML, as follows.
ParseXML.cfm <!--- 1. We want to work with the Company.xml file, ---> <!--- which is in the same folder as this CF template ---> <CFSET MyXmlFile = ExpandPath("Company.xml")> <!--- 2. Read XML file into string variable called MyXmlCode ---> <CFFILE ACTION="READ" FILE="#MyXmlFile#" VARIABLE="MyXmlCode"> <!--- 3. Parse the XML into an XML "Object" ---> <!--- (very similar to a CFML Structure) ---> <CFSET MyXml = XmlParse(MyXmlCode)> That's it. The first two lines of code aren't even new for ColdFusion MX. The first line returns a fully qualified pathname for the Company.xml file (including the c:\, if you're using Windows). The pathname is stored as the variable MyXmlFile, which passes to the cffile tag. The cffile tag reads the contents of the XML file into a string variable named MyXmlCode. Of course, if the XML you wish to parse is on a remote web server somewhere else, you can grab it
4
just as easily by substituting the cffile with a cfhttp tag above. You'll see a couple examples of that later. Now you use a new function called XmlParse(), which accepts any properly formatted XML code as a string, returning a special structure-like item called an XML Document object. This XML Document object (named MyXml in this article) contains all of the information that was contained in the XML code (for this article, this would be the contents of the Company.xml file). So, while this code doesn't produce any output yet, ColdFusion MX has now parsed the XML and is waiting for your next move.
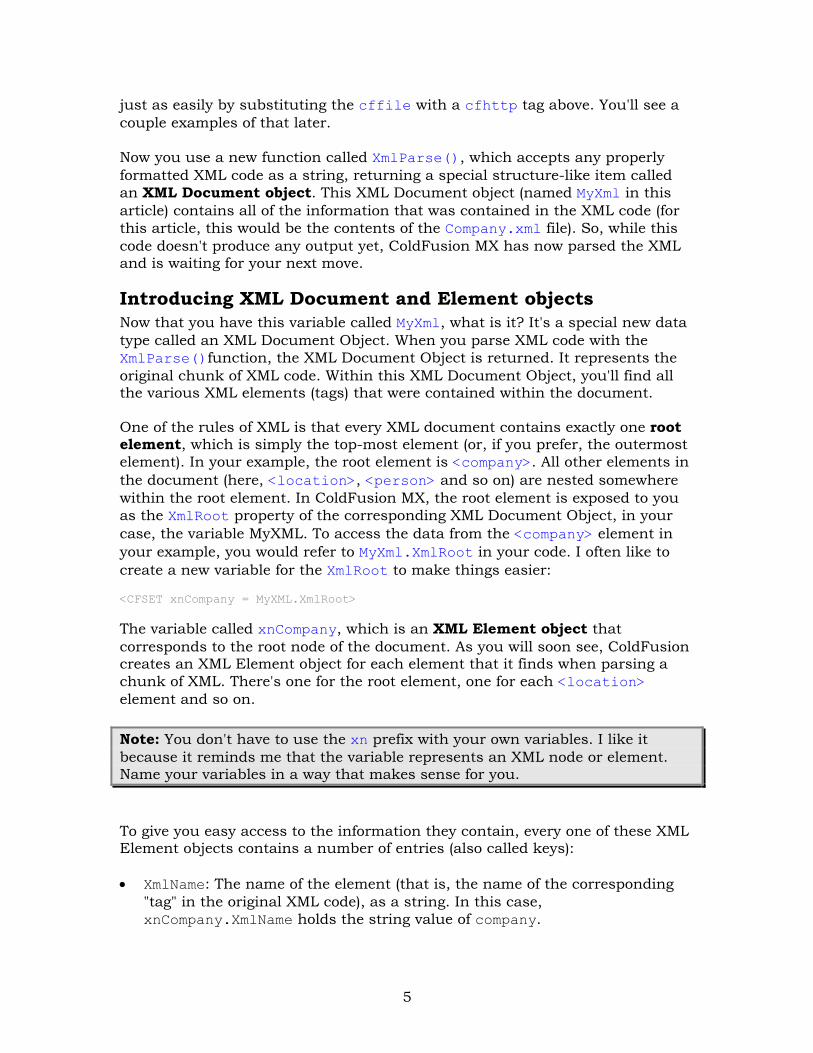
Introducing XML Document and Element objects Now that you have this variable called MyXml, what is it? It's a special new data type called an XML Document Object. When you parse XML code with the XmlParse()function, the XML Document Object is returned. It represents the original chunk of XML code. Within this XML Document Object, you'll find all the various XML elements (tags) that were contained within the document. One of the rules of XML is that every XML document contains exactly one root element, which is simply the top-most element (or, if you prefer, the outermost element). In your example, the root element is <company>. All other elements in the document (here, <location>, <person> and so on) are nested somewhere within the root element. In ColdFusion MX, the root element is exposed to you as the XmlRoot property of the corresponding XML Document Object, in your case, the variable MyXML. To access the data from the <company> element in your example, you would refer to MyXml.XmlRoot in your code. I often like to create a new variable for the XmlRoot to make things easier: <CFSET xnCompany = MyXML.XmlRoot>
The variable called xnCompany, which is an XML Element object that corresponds to the root node of the document. As you will soon see, ColdFusion creates an XML Element object for each element that it finds when parsing a chunk of XML. There's one for the root element, one for each <location> element and so on. Note: You don't have to use the xn prefix with your own variables. I like it because it reminds me that the variable represents an XML node or element. Name your variables in a way that makes sense for you. To give you easy access to the information they contain, every one of these XML Element objects contains a number of entries (also called keys): • XmlName: The name of the element (that is, the name of the corresponding
"tag" in the original XML code), as a string. In this case, xnCompany.XmlName holds the string value of company.
5

• XmlText: The plain text that appears between the corresponding opening and closing tags in the original XML code. If there isn't any text between them, then this value is an empty string. Note that in your example, only the <person> elements have plain text between them (such as Bruce Willis, Demi Moore, Ben Forta, Tom Cruise, and Nicole Kidman). In many XML documents, only the "leaf nodes" (the ones without any children) contain text.
• XmlAttributes: A structure that contains all the attributes of the corresponding element in the original XML code. This allows you to refer to the attributes by name, as properties of this structure. For instance, you can get the value of the name attribute of the root node by referring to xnCompany.XmlAttributes.name or xnCompany.XmlAttributes["name"]. This is an ordinary CFML structure, so you can use the StructKeyExists()function to see whether a particular attribute was included in the original XML code. For instance, to check whether the name attribute was included, use a test similar to the following within the cfif tags (add your own logic within the cfif tag): <CFIF>: StructKeyExists(xnCompany.XmlAttributes, "name") </CFIF>.
• XmlChildren: An array that contains all the immediate children of the element in question. Each item contained by this array will in turn be another XML Element object (which means that it has all these properties, all over again). In this simple example, the XmlChildren array for the root element contains two child items (one for each of the <location> elements). This is an ordinary CFML array, which means that the function ArrayLen(XmlChildren) returns the number of child elements within the element in question. Similarly, XmlChildren[1] always returns the first child (here, the element for the Newton location), and XmlChildren[ArrayLen(XmlChildren)] always returns the last child (the San Francisco location).
Note: It's worth noting that the XmlAttributes property of every XML Element object behaves like an ordinary CFML structure, which means that you can use the function StructKeyList() to get a list of the names of the element's attributes. Therefore, if you don't know the attributes that a particular element will contain, you can easily loop through the list of names by providing the XmlAttributes property to the cfloop tag's LIST attribute. Basically, you can use these properties to grab, output or change any of the information contained within a particular element, or to "get to" any of its children. No matter how often the contents of your XML documents change, it's always pretty easy to access the data they contain, on the fly. For instance, below (ParseXML1.cfm) is a continuation of the ColdFusion page that you started before. The first half is exactly the same as the earlier
6

ParseXML.cfm code snippet; the additional code displays a few simple facts, gleaned from the information in the XML by the browser.
ParseXML1.cfm <!--- 1. You want to work with the Company.xml file, ---> <!--- which is in the same folder as this CF template ---> <CFSET MyXmlFile = ExpandPath("Company.xml")> <!--- 2. Read XML file into string variable called MyXlCode ---> <CFFILE ACTION="READ" FILE="#MyXmlFile#" VARIABLE="MyXmlCode"> <!--- 3. Parse the XML into an XML "Object" ---> <!--- (very similar to a CFML Structure) ---> <CFSET MyXml = XmlParse(MyXmlCode)> <!--- 4. The "root element" of this XML Object ---> <!--- is the <company> element in the XML code---> <CFSET xnCompany = MyXML.XmlRoot> <!--- 5. Let's grab the <company> element's "name" attribute ---> <CFSET sCompanyName = xnCompany.XmlAttributes["name"]> <!--- 6. How many immediate children of <company> are there? ---> <CFSET nNumLocations = ArrayLen(xnCompany.XmlChildren)> <!--- 7. Now you can output some basic information ---> Some quick facts about the company: <CFOUTPUT> <p>The name of the company is: <b>#sCompanyName#</b></p> <p>The company has a total of: <b>#nNumLocations# locations</b></p> </CFOUTPUT> This is what you see when you run ParseXML1.cfm in your browser:
7
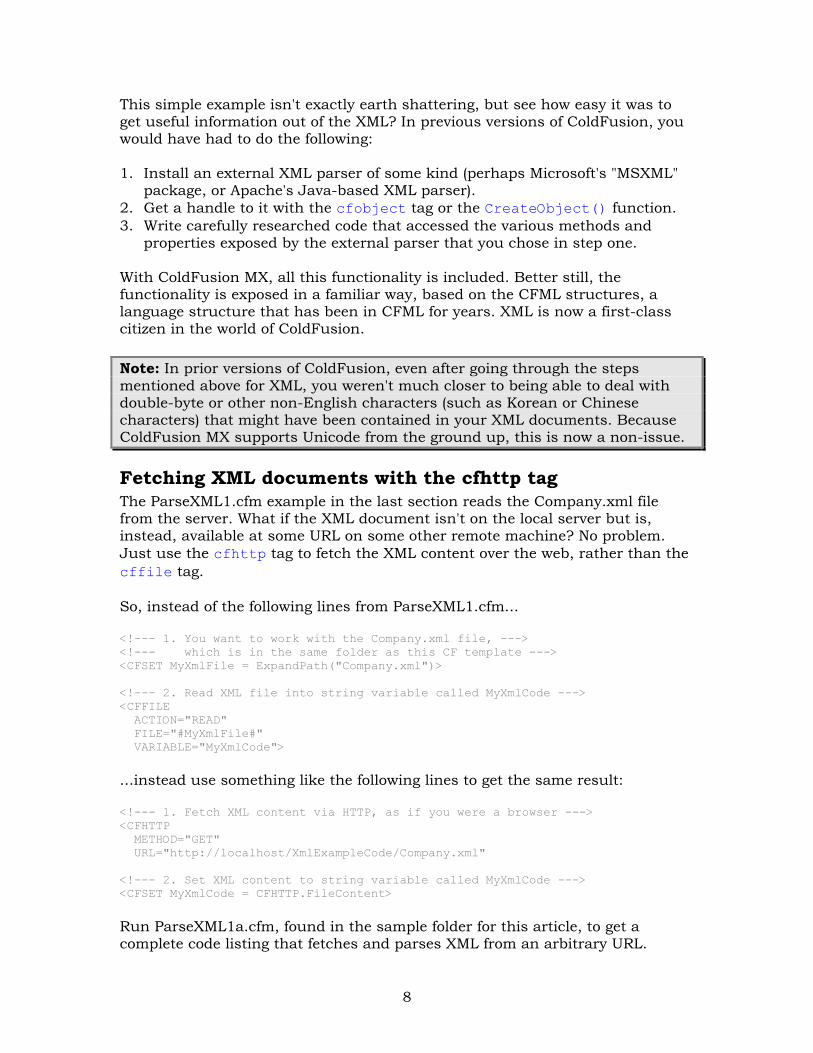
This simple example isn't exactly earth shattering, but see how easy it was to get useful information out of the XML? In previous versions of ColdFusion, you would have had to do the following: 1. Install an external XML parser of some kind (perhaps Microsoft's "MSXML"
package, or Apache's Java-based XML parser). 2. Get a handle to it with the cfobject tag or the CreateObject() function. 3. Write carefully researched code that accessed the various methods and
properties exposed by the external parser that you chose in step one. With ColdFusion MX, all this functionality is included. Better still, the functionality is exposed in a familiar way, based on the CFML structures, a language structure that has been in CFML for years. XML is now a first-class citizen in the world of ColdFusion. Note: In prior versions of ColdFusion, even after going through the steps mentioned above for XML, you weren't much closer to being able to deal with double-byte or other non-English characters (such as Korean or Chinese characters) that might have been contained in your XML documents. Because ColdFusion MX supports Unicode from the ground up, this is now a non-issue.
Fetching XML documents with the cfhttp tag The ParseXML1.cfm example in the last section reads the Company.xml file from the server. What if the XML document isn't on the local server but is, instead, available at some URL on some other remote machine? No problem. Just use the cfhttp tag to fetch the XML content over the web, rather than the cffile tag. So, instead of the following lines from ParseXML1.cfm... <!--- 1. You want to work with the Company.xml file, ---> <!--- which is in the same folder as this CF template ---> <CFSET MyXmlFile = ExpandPath("Company.xml")> <!--- 2. Read XML file into string variable called MyXmlCode ---> <CFFILE ACTION="READ" FILE="#MyXmlFile#" VARIABLE="MyXmlCode"> ...instead use something like the following lines to get the same result: <!--- 1. Fetch XML content via HTTP, as if you were a browser ---> <CFHTTP METHOD="GET" URL="http://localhost/XmlExampleCode/Company.xml" <!--- 2. Set XML content to string variable called MyXmlCode ---> <CFSET MyXmlCode = CFHTTP.FileContent> Run ParseXML1a.cfm, found in the sample folder for this article, to get a complete code listing that fetches and parses XML from an arbitrary URL.
8

Please note that you may have to adjust the URL attribute of the cfhttp tag, depending on how you installed ColdFusion MX and where you placed the sample files for this article.
Looping through child elements To iterate through the contents of an XML file (or any chunk of XML), you just "loop through" the contents of the appropriate XMLChildren array. For instance, if you want to display the name of each of the sample company locations, you'd loop over the contents of the xnCompany.XmlChildren array. You could replace the cfoutput tag section of your most recent example with the following code, which would display the name of each of the company locations (that is, the name attribute value for each of the original document <location> elements): Some quick facts about the company: <CFOUTPUT> <p>The name of the company is: <b>#sCompanyName#</b></p> <p>The company has a total of: <b>#nNumLocations# locations</b></p> <!--- Loop through each of the <location> elements ---> <CFLOOP FROM="1" TO="#nNumLocations#" INDEX="i"> <!--- Grab values from the XML document ---> <CFSET xnThisLocation = xnCompany.XmlChildren[i]> <CFSET sLocationName = xnThisLocation.XmlAttributes["name"]> <!--- Output the information about each location ---> <p>Location #i# is: <b>#sLocationName#</b></p> </CFLOOP> </CFOUTPUT>
As you can see, the key point is to realize that the xnCompany.XmlChildren array contains the child elements contained by the <company> element in your XML code. Then, simply loop through the array's contents. The cfloop tag block executes once for each child. Each time through the loop, the variable i advances by one, until all items have been processed. Inside the loop, refer to the "current" child element (which is the current <location>) by the variable xnThisLocation. Since xnThisLocation is itself an XML Element object, it contains the XmlAttributes and other special properties I discussed earlier. The following would appear in a browser at this point:
9
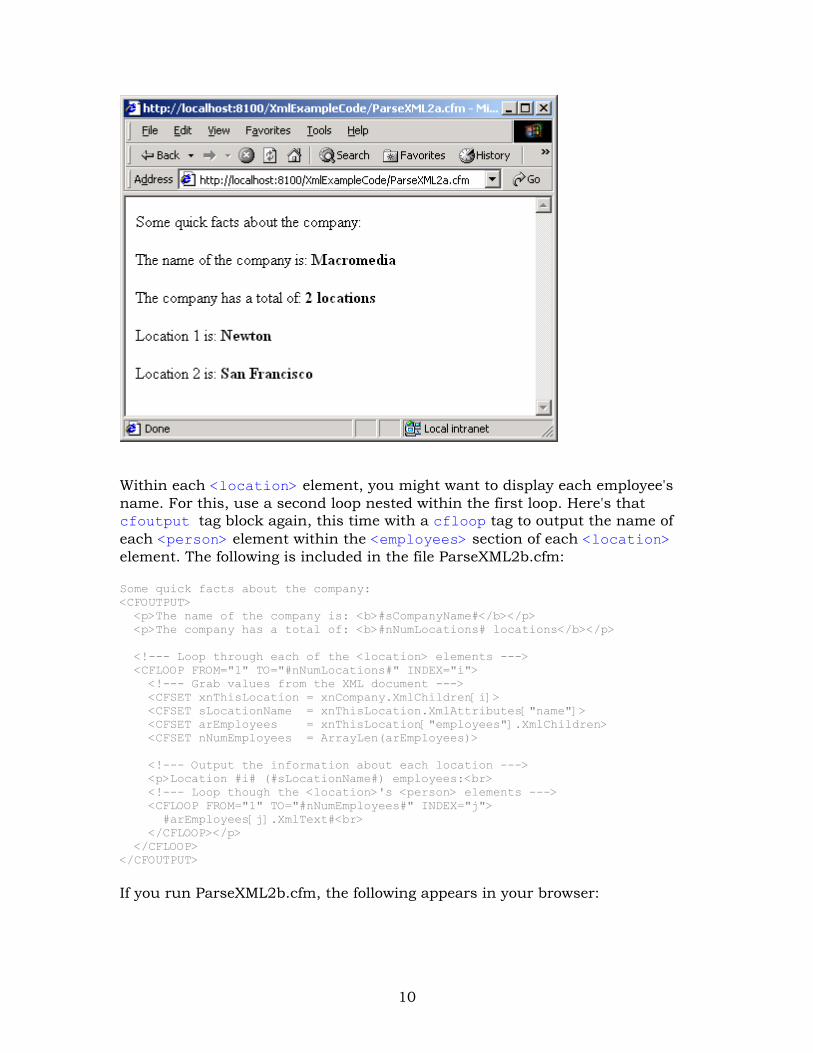
Within each <location> element, you might want to display each employee's name. For this, use a second loop nested within the first loop. Here's that cfoutput tag block again, this time with a cfloop tag to output the name of each <person> element within the <employees> section of each <location> element. The following is included in the file ParseXML2b.cfm: Some quick facts about the company: <CFOUTPUT> <p>The name of the company is: <b>#sCompanyName#</b></p> <p>The company has a total of: <b>#nNumLocations# locations</b></p> <!--- Loop through each of the <location> elements ---> <CFLOOP FROM="1" TO="#nNumLocations#" INDEX="i"> <!--- Grab values from the XML document ---> <CFSET xnThisLocation = xnCompany.XmlChildren[i]> <CFSET sLocationName = xnThisLocation.XmlAttributes["name"]> <CFSET arEmployees = xnThisLocation["employees"].XmlChildren> <CFSET nNumEmployees = ArrayLen(arEmployees)> <!--- Output the information about each location ---> <p>Location #i# (#sLocationName#) employees:<br> <!--- Loop though the <location>'s <person> elements ---> <CFLOOP FROM="1" TO="#nNumEmployees#" INDEX="j"> #arEmployees[j].XmlText#<br> </CFLOOP></p> </CFLOOP> </CFOUTPUT> If you run ParseXML2b.cfm, the following appears in your browser:
10
Referring to elements in the tree by name There's one interesting thing in that last example that I haven't talked about yet. When referring to a single child of an element, refer to it by name as a property of the XML Element object itself. That is, each XML element contains the "special" properties discussed earlier (XmlName, XmlAttributes and so on) plus a property, named after each of its child elements. So, xnThisLocation["employees"] refers to the <employees> element nested within each <location> element. Therefore, the line in the last example that sets the arEmployees variable actually gets an array of the current <employees> element's children (which are the actual employees—the location's <person> elements). Because each <person> element contains both the first and the last name, you are able to output the name with just #arEmployees[j].XmlText#. In reality, an element such as <person> would probably contain several pieces of information, like separate first and last names. Depending on how the original XML document is structured, the first and last names might be stored as nested child elements as follows: <person> <firstName>Ben</firstName> <lastName>Forta</lastName>
11
</person> In such a case, you would output the first and last names like so: #arEmployees[j]["firstName"].XmlText# and then #arEmployees[j]["lastName"].XmlText# Or, the first and last names might appear in the XML as attributes of the <person>, rather than nested elements, as follows: <person firstName="Ben" lastName="forta"/> In this case, output the first and last names as follows: #arEmployees[j].XmlAttributes["firstName"]# and then #arEmployees[j].XmlAttributes["lastName"]#
A note about dots and brackets It's worth pointing out that CFML lets you refer to the properties of a structure using either "square-bracket" notation or "dot notation," depending on your preference or what's more convenient at the time. (JavaScript gives you the same choice.) With square-bracket notation, you supply the property name (key name) as a quoted string, which means that the first and last name would look like the code sample above. With dot notation, you provide the key name as a literal identifier, as follows (note the lack of quotation marks): #arEmployees[j].firstName.XmlText# or #arEmployees[j].lastName.XmlText# For many developers, the dot notation is a bit clearer (somehow it's more obvious that the last name is a "property" of the employee). Use whichever notation you prefer. There are a few situations, however, where dot notation won't work. For instance, it's possible for the name of an XML element or attribute to contain characters that aren't legal characters for a CFML identifier. Hyphens are often used in tag names to make them more readable. For example, instead of the following XML: <person> <firstName>Ben</firstName> <lastName>Forta</lastName> </person> You might see XML formatted as follows: <person> <first-name>Ben</first-name> <last-name>Forta</last-name> </person>
12

Or, instead of the following: <person firstName="Ben" lastName="forta"/> You might encounter this version: <person first-name="Ben" last-name="forta"/> In such a case, the dot notation syntax fails because the ColdFusion server interprets the hyphen in #arEmployees[j].last-name.XmlText# and attempts to perform a subtraction (as in math). Only square-bracket notation such as #arEmployees[j]["last-name"].XmlText# will do in this scenario because it cleanly isolates the name of the attribute in an unambiguous way. Another advantage to square-bracket notation is the fact that property names can be dynamic. This can be helpful when the names of the elements or attributes in a given XML document are not known until the document is actually parsed. For instance, the following loop can be adapted to display the name and value of each attribute for any given XML element: <!--- Because XmlAttributes is a structure, StructKeyList() returns ---> <!--- a comma-separated list of this element's attribute names ---> <CFSET MyAttribList = StructKeyList(arEmployees[j].XmlAttributes)> <!--- Now you can output the name and value of each attribute ---> <CFLOOP LIST="#MyAttribList#" INDEX="ThisAttrib"> The value of the <i>#ThisAttrib#</i> attribute is: #arEmployees[j].XmlAttributes[ThisAttrib]#<br> </CFLOOP> The ParseXML2c.cfm page included in the sample files directory uses the cfloop tag to output the various attributes of each <person> found in an XML document. The example reads the Company2.xml document, which is the original Company.xml file with a few silly attributes added for fun. Note that the code is able to display the information in the XML document, even though the code doesn't know what attributes each person will have before running. Run ParseXML2c.cfm in your browser. The following appears in the browser:
13

Hopefully I'm not confusing the issue too much, but you could also use the COLLECTION attribute instead of the INDEX attribute in your cfloop tag to achieve the same effect, as follows: <!--- Output the name and value of each attribute ---> <CFLOOP COLLECTION="#arEmployees[j]#" ITEM="ThisAttrib"> The value of the #ThisAttrib# attribute is: #arEmployees[j].XmlAttributes[ThisAttrib]#<br> </CFLOOP> See your ColdFusion MX documentation for more information about the LIST, INDEX, COLLECTION and ITEM attributes of the cfloop tag, and about the StructKeyList() function. Just keep in mind that XmlAttributes structure is a normal CFML structure like any other, and you should be okay.
Querying XML with the XMLSearch() function and XPath You've seen how easy it is to parse an XML document and then "crawl" through it by navigating through the various elements in the document. This is fine when writing a ColdFusion page that is interested in most of the information in the document, and when the structure of the document is fairly simple. In other situations, you may want to be able to simply query the document, similar to how you would query a database table.
14
ColdFusion MX provides a great way to query a chunk of XML: with the XmlSearch() function. This function takes two arguments. The first is the XML object that you want to query. The second is your search criteria, as a special kind of string called an XPath expression. If you have done any work with XSLT stylesheets, you probably already know all about XPath. If you're new to XPath, think of it for now as the XML equivalent to the WHERE clause in a SQL query.
A crash course in XPath XPath uses slashes to represent the nested elements in a document's hierarchy, much like the slashes you use in web URLs to represent nested folders in your web server's document root. In this instance, you use element names instead of folder names. Usually, you start with one of these slashes, which represents the document itself. Just add elements and slashes until you have described the route or path to the elements you want. Anything that matches the XPath criteria you provide is returned for you to work with it. The following code finds all of the <person> elements that are children of <employees> elements, which in turn are children of <location> elements that are children of <company> elements, where the <company> element is at the top level of the document: XmlSearch(MyXML, "/company/location/employees/person") XPath also allows you to specify attribute values as part of the criteria, using square brackets and @ signs, where the @ sign indicates the relevant attribute's name. For instance, the following line is similar to the one shown above, except this one will only find the <person> elements for the Newton location: XmlSearch(MyXML, "/company/location[@name='Newton']/employees/person") You can use dynamic ColdFusion variables and functions to build the XPath expression on the fly. For instance, if the desired location name had been passed as a URL parameter, you might do something like the following: XmlSearch(MyXML, "/company/location[@name='#URL.LocName#']/employees/person") You can also use a double-slash as a kind of wildcard that stands in for "any parent." So, if you want all <person> elements, regardless of what their parents are or where (or how deeply) they are positioned in the document, you can use the following: X mlSearch(MyXML, "//person")
That should get you started, but there's a lot more to XPath than what I've mentioned here. For more information about XPath syntax and all of the special symbols, wildcards (even functions!) that you can use with the new ColdFusion MX XmlSearch() function, refer to the W3C's XPath specification: www.w3.org/TR/xpath
15
An easy XPath example It's easy to use XPath with ColdFusion MX. What if you wanted to get the names of all the employees listed in sample company document? All you need is a single call to the XmlSearch() function with an appropriate XPath expression. The XmlSearch() function returns a simple array of all matching XML Element objects. (If you want, you can use the ArrayLen() function on this array to find out how many matching elements were found.) Here's a simple ColdFusion page that searches your sample XML document for <person> elements and displays the names of each employee found. Note that the page allows for an optional URL parameter named LocName to be provided. If provided, only the employees for that location (that is, nested within the matching <location> element) are displayed. If the LocName is not provided, all employee names are displayed. The following code is found in ParseXML3.cfm.
ParseXML3.cfm <!--- You want to work with the Company.xml file, ---> <!--- which is in the same folder as this CF template ---> <CFSET MyXmlFile = ExpandPath("Company.xml")> <!--- Read XML file into string variable called MyXmlCode ---> <CFFILE ACTION="READ" FILE="#MyXmlFile#" VARIABLE="MyXmlCode"> <!--- Parse the XML into an XML "Object" ---> <!--- (very similar to a CFML Structure) ---> <CFSET MyXml = XmlParse(MyXmlCode)> <!--- The "root element" of this XML Object ---> <!--- is the <company> element in the XML code---> <CFSET xnCompany = MyXml.XmlRoot> <!--- Conduct an XPath search for <person> elements ---> <CFIF IsDefined("URL.LocName")> <CFSET arPeople = XmlSearch(MyXml, "/company/location[@name='#URL.LocName#']/employees/person")<CFELSE> <CFSET arPeople = XmlSearch(MyXml, "/company/location/employees/person")> </CFIF> <!--- Display the results ---> <B>Employee List</B> <ol> <CFLOOP FROM="1" TO="#ArrayLen(arPeople)#" INDEX="i"> <CFOUTPUT><li>#arPeople[i].XmlText#</li></CFOUTPUT> </CFLOOP> </ol> To see the querying effect, add ?LocName=Newton or ?LocName=San%20Francisco after the page's filename, using your web browser. It displays a partial list, like the following:
16
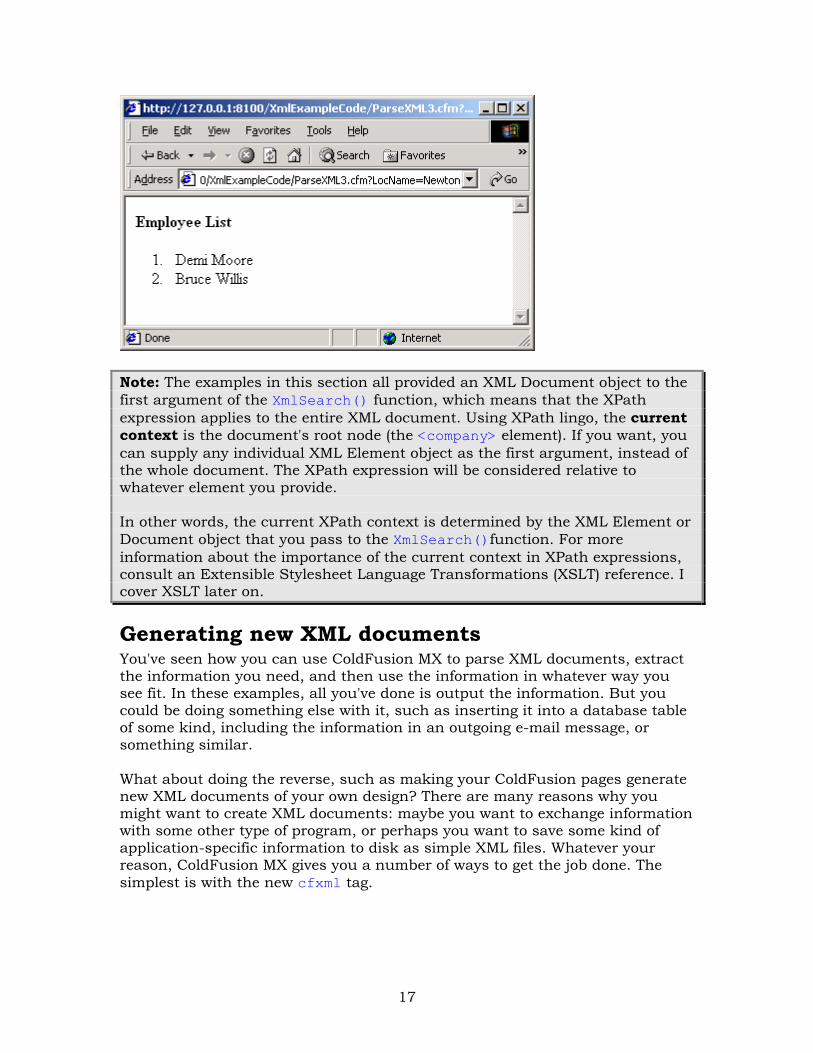
Note: The examples in this section all provided an XML Document object to the first argument of the XmlSearch() function, which means that the XPath expression applies to the entire XML document. Using XPath lingo, the current context is the document's root node (the <company> element). If you want, you can supply any individual XML Element object as the first argument, instead of the whole document. The XPath expression will be considered relative to whatever element you provide. In other words, the current XPath context is determined by the XML Element or Document object that you pass to the XmlSearch()function. For more information about the importance of the current context in XPath expressions, consult an Extensible Stylesheet Language Transformations (XSLT) reference. I cover XSLT later on.
Generating new XML documents You've seen how you can use ColdFusion MX to parse XML documents, extract the information you need, and then use the information in whatever way you see fit. In these examples, all you've done is output the information. But you could be doing something else with it, such as inserting it into a database table of some kind, including the information in an outgoing e-mail message, or something similar. What about doing the reverse, such as making your ColdFusion pages generate new XML documents of your own design? There are many reasons why you might want to create XML documents: maybe you want to exchange information with some other type of program, or perhaps you want to save some kind of application-specific information to disk as simple XML files. Whatever your reason, ColdFusion MX gives you a number of ways to get the job done. The simplest is with the new cfxml tag.
17
Using the CFXML tag to output XML If you want your ColdFusion page to generate valid, well-formed XML, a really easy way to get started is with the cfxml tag: 1. Add a pair of opening and closing cfxml tags to your page. 2. Include whatever XML you wish between them. 3. ColdFusion will parse the XML and return it to you as a XML Document
object structure (you specify the name of the structure with the VARIABLE attribute, as shown below).
The following code would return a XML Document object named MyXml, which is identical to the MyXml object that you worked with in the first part of this article. That is, the cfxml tag and the XmlParse() function both return the same thing if fed the same XML. The cfxml tag is just a way to include the XML that you want to generate inline within your ColdFusion pages: <CFXML VARIABLE="MyXml"> <company name="Macromedia"> <location name="Newton"> <employees> <person>Demi Moore</person> <person>Bruce Willis</person> </employees> </location> <location name="San Francisco"> <employees> <person>Tom Cruise</person> <person>Ben Forta</person> <person>Nicole Kidman</person> </employees> </location> </company> </CFXML> The MyXml variable is an XML Document object that can be inspected, queried and looped over using the same methods I discussed earlier. To output the XML as a string—that is, to generate the corresponding XML code—use the ToString() function. Once you have the XML code as a string, you can save it to disk, upload it somewhere using the cfftp tag, create a file with the cffile tag and send it to some automated daemon as an e-mail message, or whatever else your application might require. For instance, the following code (SaveXML.cfm) gets the XML that corresponds to the data now in the MyXml variable and saves it as a file called Output.xml on the server.
SaveXML.cfm <!--- This XML will be parsed and returned ---> <!--- as a XML Document Object named MyXML ---> <CFXML VARIABLE="MyXml"> <company name="Macromedia">
18

<location name="Newton"> <employees> <person>Demi Moore</person> <person>Bruce Willis</person> </employees> </location> <location name="San Francisco"> <employees> <person>Tom Cruise</person> <person>Ben Forta</person> <person>Nicole Kidman</person> </employees> </location> </company> </CFXML> <!--- Write the XML to a file called Output.xml ---> <!--- (in same folder as this ColdFusion template) ---> <CFFILE ACTION="WRITE" FILE="#ExpandPath('Output.xml')#" OUTPUT="#ToString(MyXML)#"> <p>XML has been written to disk.</p> If you run SaveXML.cfm in a web browser, the following message appears: "XML has been written to disk." Go to the XMLExamples folder to find the new Output.xml file. The file will be almost identical to what appears between the cfxml tags above, except that it will include an XML declaration line at the top, as follows: <?xml version="1.0" encoding="UTF-8"?> This line is mandatory for an XML document to be considered well-formed. ColdFusion MX includes it in the generated XML as a courtesy.
Producing dynamic XML You may be thinking what's the point of the cfxml tag. After all, if all you want to do is write some static, unchanging XML to disk, couldn't you just use a normal string variable? How does this make it any easier for me to create XML documents on the fly? Well, cfxml starts making more sense when you consider that any CFML expressions, functions or tags can be used between the cfxml tags. For instance, the following code elaborates a bit on the last code sample. It fetches all the data to be included in the XML document from the sample database file that's included with this article, as shown in SaveXML2.cfm
SaveXML2.cfm <!--- You can specify a CompanyID in the URL ---> <!--- If not provided, it defaults to 1 ("Macromedia") ---> <CFPARAM NAME="URL.CompanyID" TYPE="numeric" DEFAULT="1"> <!--- Get the name of the company from your database --->
19
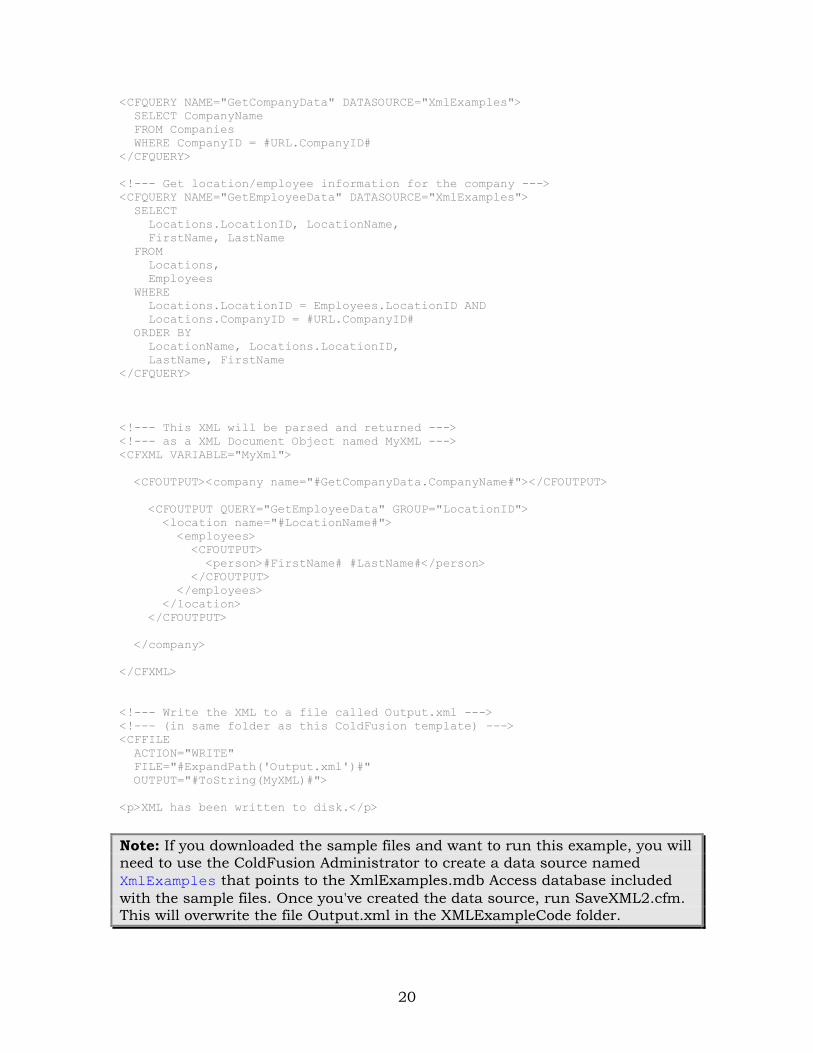
<CFQUERY NAME="GetCompanyData" DATASOURCE="XmlExamples"> SELECT CompanyName FROM Companies WHERE CompanyID = #URL.CompanyID# </CFQUERY> <!--- Get location/employee information for the company ---> <CFQUERY NAME="GetEmployeeData" DATASOURCE="XmlExamples"> SELECT Locations.LocationID, LocationName, FirstName, LastName FROM Locations, Employees WHERE Locations.LocationID = Employees.LocationID AND Locations.CompanyID = #URL.CompanyID# ORDER BY LocationName, Locations.LocationID, LastName, FirstName </CFQUERY> <!--- This XML will be parsed and returned ---> <!--- as a XML Document Object named MyXML ---> <CFXML VARIABLE="MyXml"> <CFOUTPUT><company name="#GetCompanyData.CompanyName#"></CFOUTPUT> <CFOUTPUT QUERY="GetEmployeeData" GROUP="LocationID"> <location name="#LocationName#"> <employees> <CFOUTPUT> <person>#FirstName# #LastName#</person> </CFOUTPUT> </employees> </location> </CFOUTPUT> </company> </CFXML> <!--- Write the XML to a file called Output.xml ---> <!--- (in same folder as this ColdFusion template) ---> <CFFILE ACTION="WRITE" FILE="#ExpandPath('Output.xml')#" OUTPUT="#ToString(MyXML)#"> <p>XML has been written to disk.</p> Note: If you downloaded the sample files and want to run this example, you will need to use the ColdFusion Administrator to create a data source named XmlExamples that points to the XmlExamples.mdb Access database included with the sample files. Once you've created the data source, run SaveXML2.cfm. This will overwrite the file Output.xml in the XMLExampleCode folder.
20
The code above uses the cfparam tag to declare a URL parameter called CompanyID. When you visit this page with a browser, you can specify the company ID in the URL (the URL would end with SaveXML2.cfm?CompanyID=2 or something similar). If it is not provided, it uses a default value of 1 (which means the selected company will be Macromedia in the sample database). Next it uses a few cfquery tags to get the company data from the database, using the appropriate company ID. The rest of the page is very similar to the previous example, except that it dynamically generates the location and employee names based on the results of the queries. Normally, this type of code would be used to generate a web page; because it's sitting between cfxml tags, it produces well-formed XML.
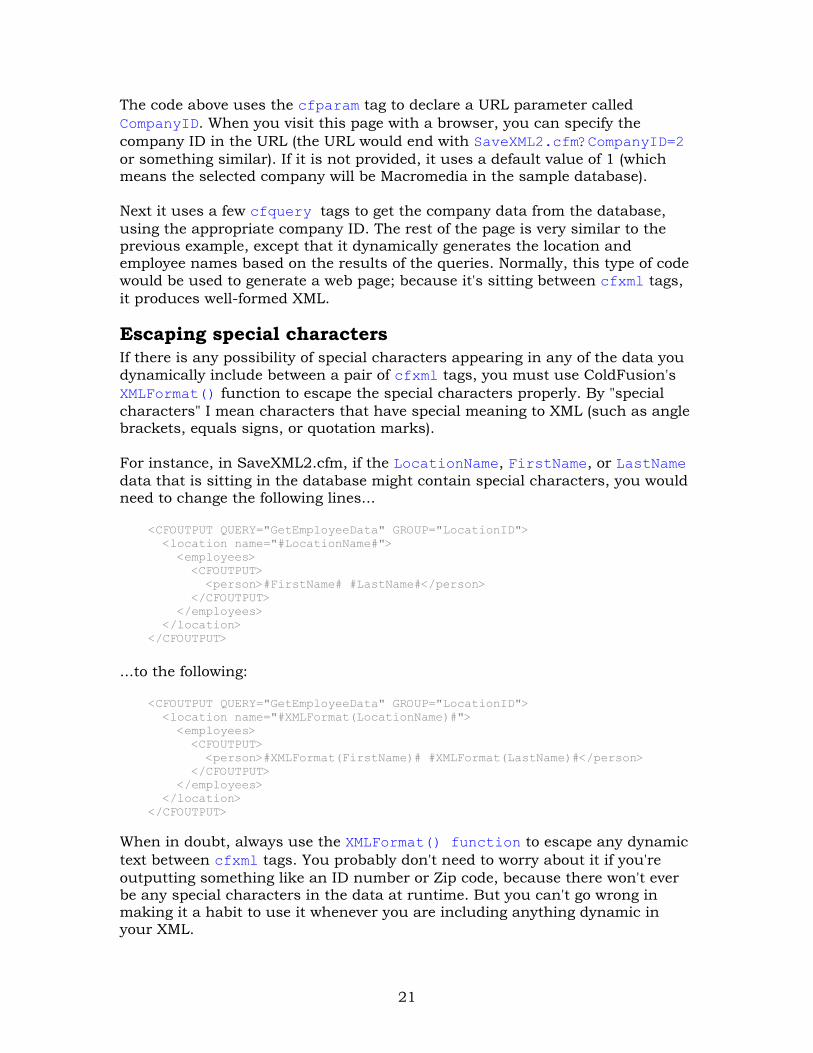
Escaping special characters If there is any possibility of special characters appearing in any of the data you dynamically include between a pair of cfxml tags, you must use ColdFusion's XMLFormat() function to escape the special characters properly. By "special characters" I mean characters that have special meaning to XML (such as angle brackets, equals signs, or quotation marks). For instance, in SaveXML2.cfm, if the LocationName, FirstName, or LastName data that is sitting in the database might contain special characters, you would need to change the following lines... <CFOUTPUT QUERY="GetEmployeeData" GROUP="LocationID"> <location name="#LocationName#"> <employees> <CFOUTPUT> <person>#FirstName# #LastName#</person> </CFOUTPUT> </employees> </location> </CFOUTPUT> ...to the following: <CFOUTPUT QUERY="GetEmployeeData" GROUP="LocationID"> <location name="#XMLFormat(LocationName)#"> <employees> <CFOUTPUT> <person>#XMLFormat(FirstName)# #XMLFormat(LastName)#</person> </CFOUTPUT> </employees> </location> </CFOUTPUT>
When in doubt, always use the XMLFormat() function to escape any dynamic text between cfxml tags. You probably don't need to worry about it if you're outputting something like an ID number or Zip code, because there won't ever be any special characters in the data at runtime. But you can't go wrong in making it a habit to use it whenever you are including anything dynamic in your XML.
21
Note: There's another way to generate XML that doesn't require you to use the XMLFormat() function. See the section, "Using functions instead of cfxml to create XML" later in this article.
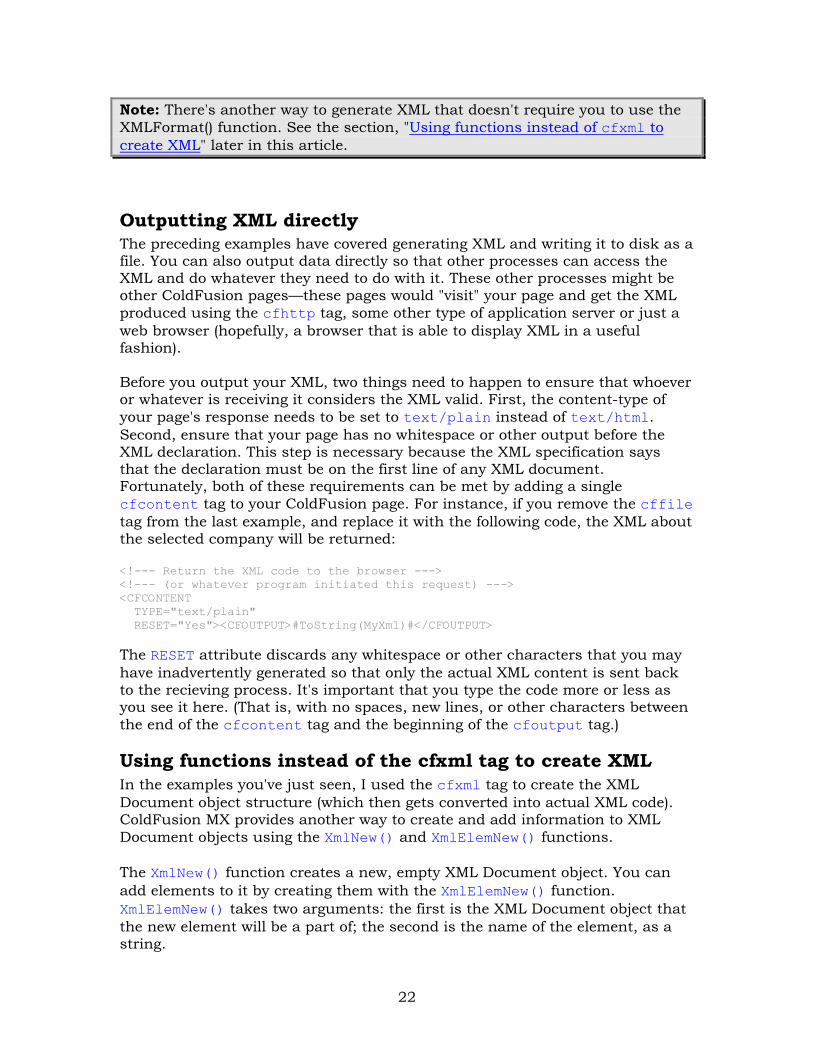
Outputting XML directly The preceding examples have covered generating XML and writing it to disk as a file. You can also output data directly so that other processes can access the XML and do whatever they need to do with it. These other processes might be other ColdFusion pages—these pages would "visit" your page and get the XML produced using the cfhttp tag, some other type of application server or just a web browser (hopefully, a browser that is able to display XML in a useful fashion). Before you output your XML, two things need to happen to ensure that whoever or whatever is receiving it considers the XML valid. First, the content-type of your page's response needs to be set to text/plain instead of text/html. Second, ensure that your page has no whitespace or other output before the XML declaration. This step is necessary because the XML specification says that the declaration must be on the first line of any XML document. Fortunately, both of these requirements can be met by adding a single cfcontent tag to your ColdFusion page. For instance, if you remove the cffile tag from the last example, and replace it with the following code, the XML about the selected company will be returned: <!--- Return the XML code to the browser ---> <!--- (or whatever program initiated this request) ---> <CFCONTENT TYPE="text/plain" RESET="Yes"><CFOUTPUT>#ToString(MyXml)#</CFOUTPUT>
The RESET attribute discards any whitespace or other characters that you may have inadvertently generated so that only the actual XML content is sent back to the recieving process. It's important that you type the code more or less as you see it here. (That is, with no spaces, new lines, or other characters between the end of the cfcontent tag and the beginning of the cfoutput tag.)
Using functions instead of the cfxml tag to create XML In the examples you've just seen, I used the cfxml tag to create the XML Document object structure (which then gets converted into actual XML code). ColdFusion MX provides another way to create and add information to XML Document objects using the XmlNew() and XmlElemNew() functions. The XmlNew() function creates a new, empty XML Document object. You can add elements to it by creating them with the XmlElemNew() function. XmlElemNew() takes two arguments: the first is the XML Document object that the new element will be a part of; the second is the name of the element, as a string.
22

The first node you need to add to any new XML document is the document's root node. To start an XML document that has a <company> element as its top-level, root node, use code similar to the following: <CFSET MyXml = XmlNew()> <CFSET MyXml.XmlRoot = XmlElemNew(MyXml, "company")> The first line creates the empty XML Document object. The second line creates a new element named <company> and establishes it as the new document's root node. Any time you want to create XML from scratch, use code similar to the example above. Note that this functionally is equivalent to the following code snippet. You can use whichever syntax you prefer to get the XML document started: <CFXML VARIABLE="MyXml"> <company> <company/> </CFXML> In either case, you can populate your new XML Document object with whatever information you want by creating new elements and attaching them to the document object. This is usually a three-step process:
1. Create a new XML Element object by calling the XmlElemNew() function. 2. Add whatever information you want (such as attributes) to the new
element. 3. Attach the new element to the overall XML document, usually by
appending it to an existing element's xmlChildren array through the ArrayAppend() function or something equivalent.
For instance, to create a new <location> element like the ones you saw earlier in this article that were placed within the <company> element that was just created, you would do something similar to the following: <!--- 1. Create new XML Element Object ---> <CFSET xnLocation = XmlElemNew(MyXml, "location")> <!--- 2. Add attributes to new element ---> <CFSET xnLocation.xmlAttributes["name"] = "Newton"> <!--- 3. Make it a child of the appropriate parent ---> <CFSET ArrayAppend(MyXml.xmlRoot.xmlChildren, xnLocation)> The first line creates a new XML Element object with the name of location. The second line adds the name attribute to the new element with a value of Newton, which means that you'll expect to see <location name="Newton"> in your final XML code. The third line drops the new element into the document at the appropriate place (in this case, as a child of the root <company> element) by appending it to the xmlChildren array of some existing element object.
23
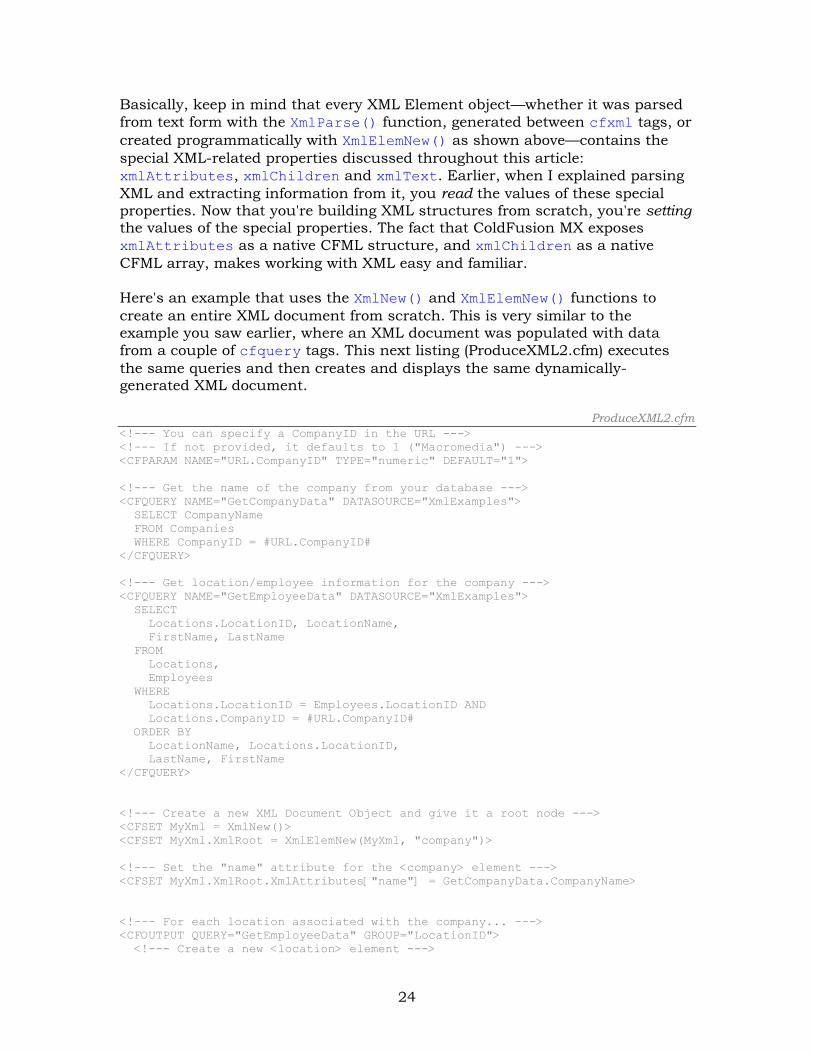
Basically, keep in mind that every XML Element object—whether it was parsed from text form with the XmlParse() function, generated between cfxml tags, or created programmatically with XmlElemNew() as shown above—contains the special XML-related properties discussed throughout this article: xmlAttributes, xmlChildren and xmlText. Earlier, when I explained parsing XML and extracting information from it, you read the values of these special properties. Now that you're building XML structures from scratch, you're setting the values of the special properties. The fact that ColdFusion MX exposes xmlAttributes as a native CFML structure, and xmlChildren as a native CFML array, makes working with XML easy and familiar. Here's an example that uses the XmlNew() and XmlElemNew() functions to create an entire XML document from scratch. This is very similar to the example you saw earlier, where an XML document was populated with data from a couple of cfquery tags. This next listing (ProduceXML2.cfm) executes the same queries and then creates and displays the same dynamically-generated XML document.
ProduceXML2.cfm <!--- You can specify a CompanyID in the URL ---> <!--- If not provided, it defaults to 1 ("Macromedia") ---> <CFPARAM NAME="URL.CompanyID" TYPE="numeric" DEFAULT="1"> <!--- Get the name of the company from your database ---> <CFQUERY NAME="GetCompanyData" DATASOURCE="XmlExamples"> SELECT CompanyName FROM Companies WHERE CompanyID = #URL.CompanyID# </CFQUERY> <!--- Get location/employee information for the company ---> <CFQUERY NAME="GetEmployeeData" DATASOURCE="XmlExamples"> SELECT Locations.LocationID, LocationName, FirstName, LastName FROM Locations, Employees WHERE Locations.LocationID = Employees.LocationID AND Locations.CompanyID = #URL.CompanyID# ORDER BY LocationName, Locations.LocationID, LastName, FirstName </CFQUERY> <!--- Create a new XML Document Object and give it a root node ---> <CFSET MyXml = XmlNew()> <CFSET MyXml.XmlRoot = XmlElemNew(MyXml, "company")> <!--- Set the "name" attribute for the <company> element ---> <CFSET MyXml.XmlRoot.XmlAttributes["name"] = GetCompanyData.CompanyName> <!--- For each location associated with the company... ---> <CFOUTPUT QUERY="GetEmployeeData" GROUP="LocationID"> <!--- Create a new <location> element --->
24
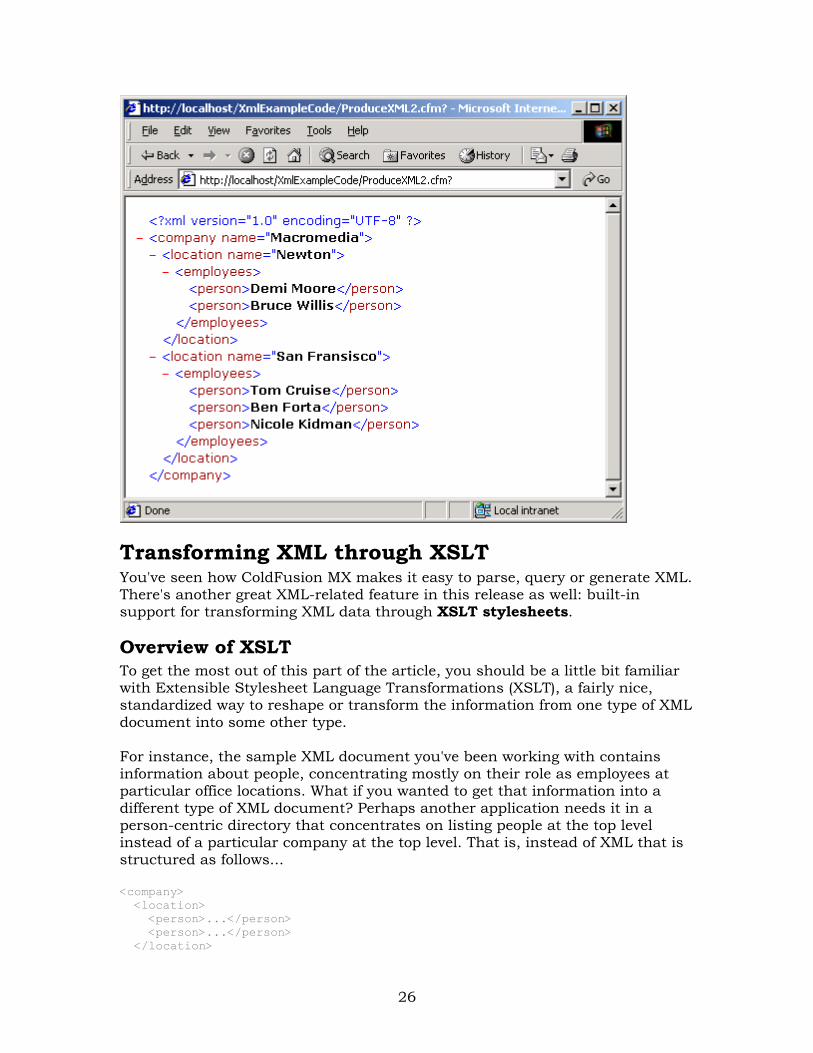
<CFSET xnLocation = XmlElemNew(MyXml, "location")> <CFSET xnLocation.XmlAttributes["name"] = LocationName> <!--- Create a new <employees> element ---> <CFSET xnEmployees = XmlElemNew(MyXml, "employees")> <!--- For each person within the current location... ---> <CFOUTPUT> <!--- Create a new <person> element ---> <CFSET xnPerson = XmlElemNew(MyXml, "person")> <CFSET xnPerson.XmlText = FirstName & " " & LastName> <!--- Attach the <person> as as child of <employees> ---> <CFSET ArrayAppend(xnEmployees.XmlChildren, xnPerson)> </CFOUTPUT> <!--- Attach the <employees> as a child of <location> ---> <CFSET xnLocation["employees"] = xnEmployees> <!--- Attach the new <location> as a child of the root node ---> <CFSET ArrayAppend(MyXml.XmlRoot.XmlChildren, xnLocation)> </CFOUTPUT> <!--- Return the XML code to the browser ---> <!--- (or whatever program initiated this request) ---> <CFCONTENT TYPE="text/plain" RESET="Yes"><CFOUTPUT>#ToString(MyXml)#</CFOUTPUT> Here's what this listing looks like when you browse it with Internet Explorer (different browsers will represent the document differently; you can always view source to see the actual XML code):
25
Transforming XML through XSLT You've seen how ColdFusion MX makes it easy to parse, query or generate XML. There's another great XML-related feature in this release as well: built-in support for transforming XML data through XSLT stylesheets.
Overview of XSLT To get the most out of this part of the article, you should be a little bit familiar with Extensible Stylesheet Language Transformations (XSLT), a fairly nice, standardized way to reshape or transform the information from one type of XML document into some other type. For instance, the sample XML document you've been working with contains information about people, concentrating mostly on their role as employees at particular office locations. What if you wanted to get that information into a different type of XML document? Perhaps another application needs it in a person-centric directory that concentrates on listing people at the top level instead of a particular company at the top level. That is, instead of XML that is structured as follows... <company> <location> <person>...</person> <person>...</person> </location>
26
</company> ...you want your XML to look more like the following: <directory> <person> <company>...</company> <location>...</location> </person> <person> <company>...</company> <location>...</location> </person> </directory> To turn the first type of XML into the second type using XSLT, the first thing you need is an XSLT stylesheet, which is a special sort of "translator" script that explains how the information in the first document should be manipulated in order to produce the second document. Think of the stylesheet as a French–English dictionary. It tells you how to translate one markup language into another, even though the two languages might use different structures. Here, the two "markup languages" are the two types of XML shown above (one starts with <company> and the other starts with <directory>). Instead of writing this translation code in some kind of traditional programming or scripting language, just write it as a special form of XML. In other words, take your original XML document and ask ColdFusion to "run it through" an XML document translator (the XSLT stylesheet). The result of this transformation is a brand new XML document that probably contains much of the same information as the original, but with a different, more desirable structure based on your needs. There isn't space here to explain everything about writing XSLT Stylesheets; whole books have been written on the topic. With that said, it's usually quite easy to write the stylesheet for a given problem. Take a look at some XSLT stylesheet code listed below (TransformCompany.xsl):
TransformCompany.xsl <?xml version="1.0" encoding="utf-8"?> <!-- Begin XSLT Stylesheet --> <xsl:stylesheet version="1.0" xmlns:xsl="http://www.w3.org/1999/XSL/Transform"> <!-- This "template" runs on the data in the root <company> element --> <xsl:template match="/company"> <!-- This will become the root element in the transformed document --> <whos-who-in-hollywood> <!-- Now, for each <person> element in original XML... --> <xsl:for-each select="location/employees/person"> <!-- ...you'll "output" a <celebrity> tag in tranformed document --> <celebrity>
27

<name first="{substring-before(., ' ')}" last="{substring-after(., ' ')}"/> <employer><xsl:value-of select="/company/@name"/></employer> <hometown><xsl:value-of select="../../@name"/></hometown> </celebrity> </xsl:for-each> <!-- Here's the end of your transformed document --> </whos-who-in-hollywood> </xsl:template> </xsl:stylesheet> Think of this stylesheet as a ColdFusion page. The XSLT language engine processes all tags that start with <xsl:>, just as ColdFusion's CFML language engine processes all tags that start with the <CF> prefix. Inside the XSLT Stylesheet, tags that do not start with <xsl:> are included in the transformed document. Also, think of the <xsl:for-each> element as analogous to the cfloop tag in CFML. Here, everything inside the "for-each" loop repeats for each <person> element found in the original document. (Note that you specify the items to loop over using the same XPath syntax discussed earlier.) Within the "for-each" loop, the curly braces are similar to the # signs in CFML (they indicate expressions that are evaluated inline). The <xsl:value-of> elements are also similar conceptually to # signs (they evaluate and include the dynamic output in the final output). Note: To learn more about the XSLT syntax used in the sample TranformCompany.xsl stylesheet shown above, check out the following helpful references: Zvon.org's XSLT Reference: http://www.zvon.org/xxl/XSLTreference/Output/ XSL Transformations (XSLT) Version 2.0 Specification from W3C: http://www.w3.org/TR/xslt20/ XSLT by Doug Tidwell (O'Reilly & Associates, 2001) http://www.oreilly.com/catalog/xslt/
Transforming XML with the XmlTransform() tag If you have some XML that you wish to transform, and you have the XSLT stylesheet that will translate the XML from its current form to a desired form, performing the actual transformation is really easy. Use the XmlTransform() function, which is new in ColdFusion MX. This function takes two arguments:
28
• xmlString is the XML that you want to transform, either as a string of XML code or as an XML Document object.
• xslString is the XSLT stylesheet code, as a string. The XmlTransform() function performs the transformation and returns the resulting XML (as a string), which you cam then save to disk, output to the calling process with the cfoutput tag or even transform further with another XSLT stylesheet. Below is a simple example (TransformXML.cfm) that performs an XSLT transformation and displays the transformed XML in the browser (or returns the transformed XML to whatever application initiated the request).
TransformXML.cfm <!--- You want to work with the Company.xml file, ---> <!--- which is in the same folder as this CF template ---> <CFSET MyXmlFile = ExpandPath("Company.xml")> <!--- Read XML file into string variable called MyXmlCode ---> <CFFILE ACTION="READ" FILE="#MyXmlFile#" VARIABLE="MyXmlCode"> <!--- You also need to work with your XSLT Stylesheet code ---> <CFSET MyStylesheet = ExpandPath("TransformCompany.xsl")> <!--- Read XSLT file into string variable called MyXsltCode ---> <CFFILE ACTION="READ" FILE="#MyStylesheet#" VARIABLE="MyXsltCode"> <!--- Perform the XSLT Stylesheet transformation ---> <CFSET TransformedXmlCode = XmlTransform(MyXmlCode, MyXsltCode)> <!--- Return transformed XML to whatever program asked for it ---> <CFCONTENT TYPE="text/plain" RESET="Yes"><CFOUTPUT>#TransformedXmlCode#</CFOUTPUT> The first two lines read the contents of the Company.xml file into a string variable called MyXmlCode. Similarly, the next two lines read the TransformCompany.xsl stylesheet into the variable named MyXsltCode. It's a cinch to run the actual transformation with XmlTransform() and send the transformed XML back to the receiving application using the cfcontent tag. If you browse the above CFML page with Internet Explorer, the transformed XML is displayed as shown below:
29

Note that the basic information is the same, except that it's been turned "inside out" (what used to be nested most deeply in the XML structure, the concept of a person, is now close to the top level of the structure). Also, some information that used to be stored in attributes is now stored in separate elements, and vice-versa. First and last names now appear as separate pieces of information, even though the original XML code concatenated the first and last names. Note: Because XML does not consider the order of attributes, the last attribute appears before the first attribute in the name tag above.
Experimenting with the cffunction tag If you take another glance at the code example in TransformXML.cfm, you'll see that most of its CFML code is dedicated to reading the XML and XSLT files from disk. It's a really simple and straightforward page even as it is, but I'd like to take a moment to point out another new ColdFusion MX ability that allows you to create your own functions with the new cffunction tag. You can read more about the cffunction tag in Ray Camden's article, "Writing User-Defined
30
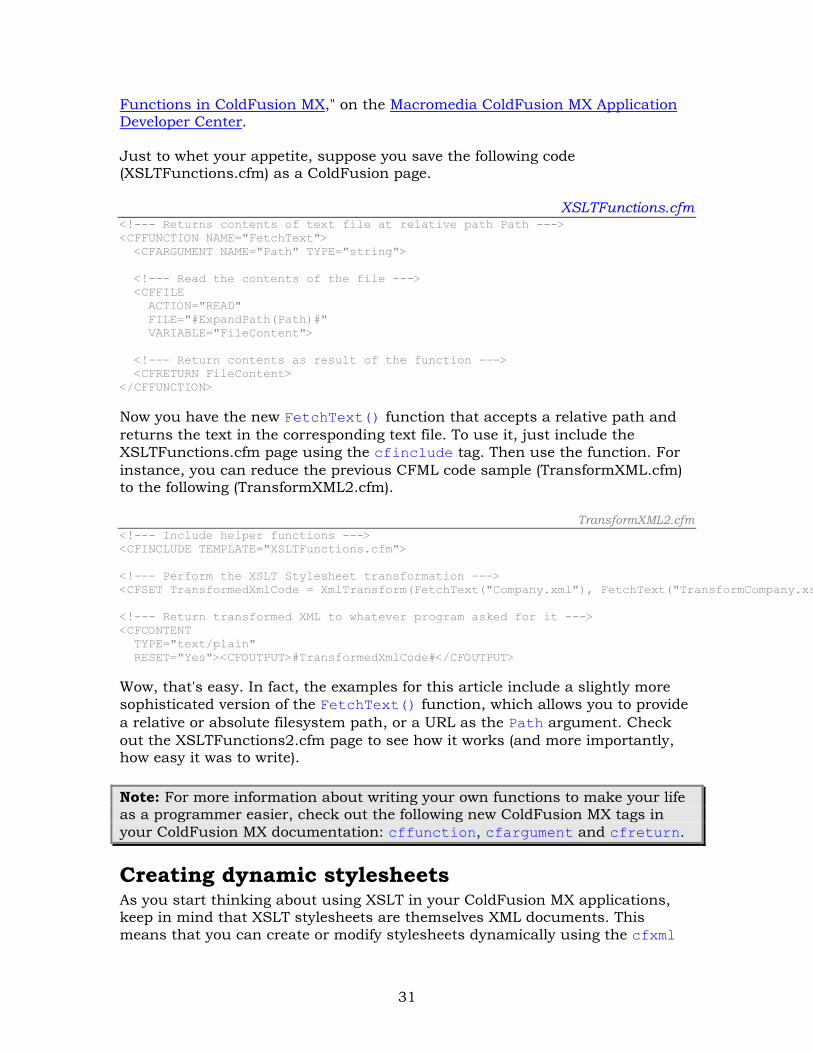
Functions in ColdFusion MX," on the Macromedia ColdFusion MX Application Developer Center. Just to whet your appetite, suppose you save the following code (XSLTFunctions.cfm) as a ColdFusion page.
XSLTFunctions.cfm <!--- Returns contents of text file at relative path Path ---> <CFFUNCTION NAME="FetchText"> <CFARGUMENT NAME="Path" TYPE="string"> <!--- Read the contents of the file ---> <CFFILE ACTION="READ" FILE="#ExpandPath(Path)#" VARIABLE="FileContent"> <!--- Return contents as result of the function ---> <CFRETURN FileContent> </CFFUNCTION>
Now you have the new FetchText() function that accepts a relative path and returns the text in the corresponding text file. To use it, just include the XSLTFunctions.cfm page using the cfinclude tag. Then use the function. For instance, you can reduce the previous CFML code sample (TransformXML.cfm) to the following (TransformXML2.cfm).
TransformXML2.cfm <!--- Include helper functions ---> <CFINCLUDE TEMPLATE="XSLTFunctions.cfm"> <!--- Perform the XSLT Stylesheet transformation ---> <CFSET TransformedXmlCode = XmlTransform(FetchText("Company.xml"), FetchText("TransformCompany.xs <!--- Return transformed XML to whatever program asked for it ---> <CFCONTENT TYPE="text/plain" RESET="Yes"><CFOUTPUT>#TransformedXmlCode#</CFOUTPUT> Wow, that's easy. In fact, the examples for this article include a slightly more sophisticated version of the FetchText() function, which allows you to provide a relative or absolute filesystem path, or a URL as the Path argument. Check out the XSLTFunctions2.cfm page to see how it works (and more importantly, how easy it was to write). Note: For more information about writing your own functions to make your life as a programmer easier, check out the following new ColdFusion MX tags in your ColdFusion MX documentation: cffunction, cfargument and cfreturn.
Creating dynamic stylesheets As you start thinking about using XSLT in your ColdFusion MX applications, keep in mind that XSLT stylesheets are themselves XML documents. This means that you can create or modify stylesheets dynamically using the cfxml
31

tags or XmlNew() techniques that were discussed in the "Generating new XML" section of this article. It therefore becomes easy to customize an XSLT stylesheet on the fly, just before running an XSLT transformation. If you've written many stylesheets in the past, you might find this to be an intriguing idea because some tricky jobs may become much easier when you realize that you are not limited to XSLT's set of functions, operators and other programmatic tools. You can always bolster them by using the full suite of ColdFusion tags and functions to create slightly different stylesheets at runtime, customizing them based on conditions you choose.
Other XML-related features in ColdFusion MX I hope this has been a helpful introduction to the ColdFusion MX features for parsing, generating and transforming XML. It's worth noting that there are a number of other features in ColdFusion MX that leverage XML internally:
• Web Services: ColdFusion MX makes it super easy to build Web services that other systems can access, or to use ("consume") existing Web services. Web services rely on XML to communicate with one another and generally provide transparent interoperability. For instance, the ColdFusion server produces WSDL and SOAP code on an as-needed basis when talking to .NET processes.
• ColdFusion Components: The new CFC architecture leverages XML in various ways. For instance, XML generated behind the scenes is what makes it possible for Dreamweaver MX to "introspect" the components on a server (so you can see each component's methods and properties right in the development environment).
• Macromedia Flash Integration: The new features in ColdFusion MX that allow you to supply data to Macromedia Flash MX documents also rely on XML.
• WDDX: Although not a new feature in ColdFusion MX (actually, it's been around since ColdFusion 4.0), the cfwddx tag is still a very handy way to instantly serialize any type of information into a fixed XML vocabulary.
About the Author
Nate Weiss has been developing web applications with ColdFusion for six or seven years. He was the lead developer at International Commerce Exchange
32
Systems, Inc. Later he was the systems architect for OneCARE.com, an online product support company. Nate has been involved with the ColdFusion developer community in many different ways over the years, through participation in Team Macromedia, as a speaker at ColdFusion developer conferences and user group meetings, and by contributing to the OpenWDDX.org project. He is currently working on portions of Ben Forta's forthcoming ColdFusion MX Web Application Construction Kit from Macromedia Press. Nate can be reached at [email protected].
33