youth thrive™: promoting youth resilience · ... and publishing support during the development of...
TRANSCRIPT

YOUTH THRIVE™:PROMOTING YOUTH RESILIENCE

YouthThrive™: Promoting Youth Resilience Center for the Study of Social Policy
ii ™ | Promoting Youth Resilience
YOUTH THRIVE™:PROMOTING YOUTH RESILIENCE
Trainer’s Guide
By Jean Carpenter-Williams, MS, CYC-P

YouthThrive™: Promoting Youth Resilience Center for the Study of Social Policy
iii ™ | Promoting Youth Resilience
Acknowledgements
This project was commissioned as part of the Center for the Study of Social Policy’s (CSSP) Youth Thrive™ initiative. The author would like to thank the staff at CSSP: Associate Director Susan Notkin, for her leadership and guidance; as well as Senior Associate Francie Zimmer-man, for their time reviewing the early drafts. Their input was invaluable to the completion of the project.
Additional acknowledgements go to staff from The University of Oklahoma OUTREACH National Resource Center for Youth Services (NRCYS) who contributed advice, evaluation, clerical, proofing, and publishing support during the development of this curriculum.
Youth Thrive™: Protective and Promotive Factors for Healthy Development Trainer’s Guide
By Jean Carpenter-Williams, MS, CYC-P
Copyright©2017, The Center for the Study of Social Policy, Washington, D.C. All rights reserved.

YouthThrive™: Promoting Youth Resilience Center for the Study of Social Policy
iv ™ | Promoting Youth Resilience
Table of Contents
Overview ........................................................................................1
Experienced based learning activities.....................................................1
A word about debriefing .........................................................................2
Additional Resources ............................................................................3
Workshop Introduction .....................................................................4
Behind Every Name ..............................................................................7
Crossword Connections ........................................................................8
Commonalities ...................................................................................11
Human Scavenger Hunt ......................................................................13
Handout: Human Scavenger Hunt ........................................................14
What Does Resilience Look Like? ..................................................15
Handout: Characteristics of Resilient Youth ..........................................19
Handout: Body Outline ........................................................................20
Teaching Skills to Help Modulate Emotions ...................................21
Mindfulness Activity Options .........................................................25
Online Mindfulness Guided Meditations ...............................................25
Observe & Describe Object .................................................................25
Balance .............................................................................................26
Yoga Activity Options ...........................................................................28
Teaching Problem Solving Skills ....................................................29
Count 20 ...........................................................................................32
Traffic Jam ..........................................................................................33
Tarp Flip .............................................................................................35
Balloon Trolley ....................................................................................36
Handout: S.A.F.E. ................................................................................38
Handout: Tips for Facilitating Activities .................................................39
Handout: Suggestions for Activity Process Questions ............................40

YouthThrive™: Promoting Youth Resilience Center for the Study of Social Policy
v ™ | Promoting Youth Resilience
Planning Activities That Build Resiliency .......................................42
Handout: Guidelines for Planning Activities to Build Skills to Support Resilience ....................................................45
Handout: Resilience Skills Planning Worksheet.....................................46
Handout: Resilience Skills Planning Worksheet (Example) .....................49
Personal Reflection and Action Planning .......................................52
Handout: Personal Reflection and Action Planning Worksheet ................54
Handout: Personal Reflection and Action Planning Worksheet (short session) ...................................................................................56

YouthThrive™: Promoting Youth Resilience Center for the Study of Social Policy
1 ™ | Promoting Youth Resilience
Overview
Supporting Youth Resilience is designed to provide participants with easy to implement activ-ities that can assist those working directly with young people. This training is intended to be used after participants have completed the Youth Thrive™: Promotive and Protective Factors to Support Healthy Adolescent Development training so participants come to the training with an understanding of the basics about the Youth Thrive promotive and protective factor frame-work and can use this training to begin to make an intentional shift from theory to practice.
The training curriculum can be used in a variety of formats. The trainer guide is laid out to use the material as a one-day, 6-7-hour training, or as several 1-2 hour in-service modules. If using the material in these shorter sections, we recommend you use the alternate Reflection Work-sheet on page 56 at the end of each session to benefit from the reflective practice activities built in to each section. We suggest you use the first few minutes of each training session to check in on the action plans that were developed in the previous sessions. Making it standard practice to review What can I integrate into my daily practice between now and the next training session? What do I want to do? (Be specific — e.g., “I will offer yoga classes two times per week for the young people in my shelter.”) before you begin the new session can build accountability for putting the information into practice. At the end of the final session, ask participants to use the reflection sheet on page # to develop a final personal action plan.
Experienced based learning activities
One goal of this training is to provide youth workers with tools and activities that can be used in their programs and professional practice to support young people in developing resilience skills. The activities included in the training are meant to be fun and enjoyable, help teach professionals to think differently about their work, and provide practice using activities with young people. This training is meant to be experiential in nature, and requires active participa-tion. While these types of learning activities are designed to be fun, they can make participants feel uncomfortable and as facilitators we must ensure that the environment is comfortable and safe in order for attendees to fully participate. For facilitators with limited experience in using experiential activities, you might first review “Guidelines for Planning Activities” on page 45 of this trainer guide.
There are some great resources for helping trainers become more comfortable with facilitating experiential activities. One great resource for helping trainers get comfortable with facilitating experiential activities is Project Adventure. They provide a variety of services, trainings, and publications. Check it out at http://workshops.pa.org.

YouthThrive™: Promoting Youth Resilience Center for the Study of Social Policy
2 ™ | Promoting Youth Resilience
Here are a few more online resources to help you prepare for this type of facilitation:
• Facilitating Powerful Learning Experiences: Experiential Learning, the Experiential Learn-ing Cycle, and “how tos” for Facilitators: Ryan Bannerman Associates https://pdfs.semanticscholar.org/de17/68d199ae9228ecebc03ec5848af52fc1702e.pdf
• How to Facilitate Experiential Activities: Association for Talent Development https://www.td.org/Publications/Newsletters/Links/2017/03/How-to-Facilitate-Experien-tial-Activities
• 7 Traps to Avoid When Facilitating Experiential Learning Activities With Young People: MTa Learning http://www.mtalearning.com/library/7-traps-avoid-facilitating-experiential-learning-ac-tivities-young-people
A word about debriefing
While the games are fun and enjoyable, they are designed to teach, practice, and generalize information to other real-life situations. This learning comes to the fore when we do a good debrief. Debriefing is more than simply asking, “how did you like it?” Focusing on the goals of the activity will help focus your questions and provide a good debrief. We have included de-brief questions with each activity and have a handout with suggestions for debriefing questions on page 54. In addition, each of the activities include a series of process questions meant to help participants explore how they might use the activity with youth.
Again, there are amazing resources out there to help you learn more about the art of the de-brief. Some links here:
• Effective Debriefing Tools and Techniques: Michelle Cummings, MS https://onlineteachingandlearning.wikispaces.com/file/view/Processing+Effective+De-briefing+Tools.pdf
• Reflection Activity Ideas for Community Service and Service Learning Projects: University of Wisconsin Extension http://www.extension.umn.edu/b-assets/extyouth/driven-to-discover-citizen-science/Re-flection-with-Youth-UWExtension.pdf

YouthThrive™: Promoting Youth Resilience Center for the Study of Social Policy
3 ™ | Promoting Youth Resilience
Additional Resources
It is important to keep in mind not everything can be contained in a one-day training. It is vital trainers and youth workers continue to explore additional information that supports con-tinued professional development. We encourage you to check out these additional resources to augment the information in the curriculum. It will help you in a variety of ways in making this training work best for you and the staff member you will train.
Building Resilience in Children and Youth Dealing with Trauma: SAMHSA http://onewithcourage.org/wp-content/uploads/2014/01/Building-Resilience-in-Children-and-Youth-Dealing-with-Trauma.pdf
Resilience and Child Traumatic Stress: The National Child Traumatic Stress Network http://nctsn.org/sites/default/files/assets/pdfs/resilience_and_child_traumatic_stress_0316.pdf
Resilience Guide for Parents and Teachers: American Psychological Association http://www.apa.org/helpcenter/resilience.aspx
Resilience in African American Children and Adolescents: A Vision for Optimal Development http://apa.org/pi/families/resources/resiliencerpt.pdf
Building resilience among black boys: Psychologists are helping black boys capitalize on their strengths, in part by giving them strategies to recognize and respond to racism. http://apa.org/monitor/2014/10/cover-resilience.aspx
Ways to Bolster Resilience in LGBTQ Youth (Lesbian, Gay, Bisexual, Transgendered, Questioning) http://melissainstitute.org/documents/Conf19-2-2015-WaystoBolsterResilience.pdf
Resilience and marginalized youth: Making a case for personal and collective meaning-mak-ing as part of resilience research in public health https://alaskaindigenous.files.wordpress.com/2012/07/resilience-and-marginalized-youth-making-a-case-for-personal-and-collective-meaning-making-as-part-of-resilience-research-in-public-health1.pdf
Child and Youth Resilience Measure http://cyrm.resilienceresearch.org

YouthThrive™: Promoting Youth Resilience Center for the Study of Social Policy
4 ™ | Promoting Youth Resilience
F Activity Name: Workshop Introduction
g Time: 45 minutes
g Learning Goals:
1. Introduce the workshop facilitators.2. Introduce participants to one another.3. Introduce the goals of the training.
g Materials: Flipchart paper or dry erase board, markers, tape
g Instructions:
“ Welcome to the Youth Thrive™: Promoting Youth Resilience Workshop.
> Briefly introduce yourself (if you have a co-trainer, have them do the same). Include information on your background in working with young people relevant to the workshop content.
“ Now that you know a little about me (us), let’s find out a little about you. I’d like you all to briefly introduce yourselves by sharing your:
1. Name
2. Do you have preferred pronouns you would like the group to use? For example: He/Him/His, She/Her/Hers, They/Their/Theirs
3. Organization
4. And one easy get-to-know-you fact (all-time favorite cartoon, book, hobby, superhero, movie, etc.)
Trainer Note: You may find some participants are unsure why we might ask the questions about preferred pronouns. We can frame this as a learning opportunity regarding the importance of paying attention to individual identity. You cannot know an individual’s preferred pronoun by looking at them, and asking the question to everyone is a very easy way to demonstrate respect of gender identity. It is a matter of respect and helps create a safe environment for everyone. Here are some additional resources to help improve practice in this area:
Preferred Gender Pronouns: For Faculty: Central Connecticut State University https://www.ccsu.edu/lgbt/files/PreferredGenderPronounsForFaculty.pdf
Gender Neutral Pronoun Usage: Massachusetts Institute of Technology http://web.mit.edu/trans/GenderNeutralPronouns.pdf
Pronouns Matter: MYPRONOUNS.ORG https://www.mypronouns.org/

YouthThrive™: Promoting Youth Resilience Center for the Study of Social Policy
5 ™ | Promoting Youth Resilience
> Share any important housekeeping information, such as:
• Restroom locations
• Designated smoking areas
• Basic structure of the workshop
• Breaks and lunch
• “Hold that Thought” list (used to keep the training on track; specifically regarding in-formation that will be covered later in the workshop or topics that may need follow-up after the workshop)
• Importance of managing electronics/technology
“ Before we dive into the material, let’s spend some time getting to know each other a lit-tle better. As we start to get to know one another, I want you to remember a few things about the Youth Thrive™ Framework. First, remember that each of the promotive and protective factors identified in the framework (Adolescent Development, Social Con-nections, Cognitive and Social-Emotional Competency, Concrete Support in Times of Need, and Supporting Youth Resilience) are interdependent on each other. Each supports the others, and it would be difficult to talk about resilience without referring to the other factors, even in the introduction section! There is significant research that shows resilience is strengthened and nurtured through social connections and relation-ships. So, what better way to start this workshop by building our own connections with each other by doing an activity!
> Depending on the makeup of the group and your comfort level, follow the detailed direc-tions for one of the following activities as a warm-up activity:
• Behind Every Name (p. 7)
• Crossword Connections (pp. 8-10)
• Commonalities (pp. 11-12)
• Human Scavenger Hunt (pp. 13-14)
> For the purpose of this training, the activities described in this section focus on getting to know other participants and building connections — an important building block of resil-ience — and may work best with groups that may not know each other well. We have includ-ed adaptations to some of the activities so you can also use them as warm-up activities for groups that are more familiar with each other and to focus more specifically on resilience as a concept. Look for the italicized instructions for a series of questions or specific adjustments that can help tailor the activity to these more specific goals.

YouthThrive™: Promoting Youth Resilience Center for the Study of Social Policy
6 ™ | Promoting Youth Resilience
> Following the activity:
“ As you might guess from this introduction section, this is going to be an active train-ing. Our goal is not to sit and lecture you about resilience. Rather, we will spend our time together learning and practicing activities that support resiliency-building skills which we can then share with young people with whom we work. These activities, while designed to be fun and enjoyable, may feel a bit risky for us. What might be some risks we might encounter in the workshop?
> Accept answers. These might include: doing something I’ve never done before, looking or feeling silly, sharing with people I don’t know well, or sharing with people I know very well.
“ Our goal is to create a safe and supportive atmosphere that encourages learning. The activities we do today may challenge us in how we currently think about our work. Furthermore, because we are talking about working with young people who have ex-perienced trauma, toxic stress, discrimination, microaggression, or have lived in other adverse situations, some of us may be reminded of our own personal histories. With this in mind, we feel it’s important to set some ground rules. What are the things you need for this to be a supportive environment for your learning?
> Accept answers and record them on the flipchart. Add any of the following that have not been mentioned:
• Listen and hear what is being said.
• Challenge old ideas and behaviors with kindness.
• Replace judgment with wonder.
• Be willing to take risks.
• Ask questions for clarification.
• Take care of your needs so you can be present, attentive, and actively engaged.
• Consider the impact of what you are sharing about personal experiences and how the infor-mation adds to the training and moves the field forward.
• We ask that you don’t repeat personal information that others share during the training. However, it can be difficult to guarantee confidentiality. Please be respectful when sharing examples from our own work and refrain from using names or obvious identifying informa-tion about youth, families, or coworkers.
“ Can we all agree to these ground rules? Now that we’ve set the stage for the rest of the workshop, let’s get started. Helping young people build resiliency is an ACTIVE inter-vention — we, and they, must DO things. So, let’s get moving!!

YouthThrive™: Promoting Youth Resilience Center for the Study of Social Policy
7 ™ | Promoting Youth Resilience
� Activity Name: Behind Every Name
� Time: 20 minutes
� Materials: Small lightweight ball, flipchart paper or dry erase board, markers, posted questions
� Instructions:
> Ask the group to stand and form a circle.
“ We are going to take turns tossing the ball to each other. Each person will get the ball one time per round. In each round, we will share a little about ourselves when we catch the ball.
• First Round: Your name and the agency you represent.
• Second Round: Are you named after someone? If so, who is it or for what reason?
• Third Round: Do you prefer to go by your given name, or is there a name we should use?
• Fourth Round: Where were you born?
• Fifth Round: What do you value about your culture and heritage?
• Sixth Round: What is something you enjoy doing to relax or to take care of yourself?
• Seventh Round: What person did you turn to for support and help when you were a teen?
> The size of the group will dicate the number of rounds used — smaller groups can do more rounds; larger groups will do fewer.
> Debrief with a short discussion using the following questions:
• What did you learn about others in the group?
• Did you discover a commonality that surprised you?
> Resilience specific questions — feel free to replace any of the above questions with one of the questions below:
• What was a recent problem you tackled successfully?
• What is a stressful situation you feel you were able to respond to in a positive way?
• What do you identify as your biggest strength in times of high stress?
• Who do you turn to in times of stress?
• Can you name a community resource you have accessed to help solve a problem?
Adapted from Great Group Games: 175 Boredom-Busting, Zero-Prep Team Builders for All Ages (p. 26), by S. Ragsdale and A. Saylor, 2007, Minneapolis, MN: Search Institute Press.

YouthThrive™: Promoting Youth Resilience Center for the Study of Social Policy
8 ™ | Promoting Youth Resilience
� Activity Name: Crossword Connections
� Time: 15-20 minutes
� Materials: Paper and pens, example of crossword puzzle
� Instructions:
> Pass out paper and pens/pencils to the group and provide the following instructions:
“ We are going to take some time to create our own personal connection crossword puzzles. I would like to start this activity by asking you to write your name across the center of your paper using letters about one inch in size. Does everybody have your name done? OK, now it is time for an aerobic moment. When I say go, I’m going to ask that you move around the room and begin building your crossword puzzle. You will be using the other members in the group to build onto your name by finding common connections — hobbies, birthplaces, places you have worked, education, etc. When you find that connection, add their name to yours by connecting common letters (see exam-ple) like in a crossword puzzle, and write the shared interest near that name in paren-theses. As new names are added to your page, you may use the letters in those names for new connections. If you cannot find a connection with someone, see if you can find other names that will allow you to add the connection later. Let’s see how many connec-tions we can find! You will have ten minutes to complete this activity. Any questions?
> Answer any questions and provide needed clarification.
“ Ready? Go!
> Allow ten minutes for the group to mingle and find their connections. Call time at the end of the ten minutes and ask the group to return to their seats. Debrief with a brief dis-cussion using the following questions:
• Was it easy to find connections with others in the group?
• How does finding these common connections affect your comfort level in a new group? (if most of the group doesn’t know each other already)
• How do these commonalities have an impact on an already-established group? (if the group knows each other already)
• Did you find out anything surprising about other group members?
• Do you take time to find commonalities with others in everyday life? Why or why not?
• Does finding these commonalities make it easier to start conversations?
• How do these commonalities influence the development of relationships?

YouthThrive™: Promoting Youth Resilience Center for the Study of Social Policy
9 ™ | Promoting Youth Resilience
> Instead of asking the group to find commonalities within the group, ask the participants to find a group member who has a resiliency skill that could be helpful to them. Provide the following directions:
“ You will be using the other members in the group to build onto your name by connecting to others who have resilience skills that would be helpful to you. To assist your search, let’s identify some skills we need to help us cope during times of stress and adversity.
Take a few minutes — only two or three — to generate a list from the group. Some things that you will want to include: has good problem solving skills, can speak up for yourself, good self-care skills, mindfulness, knows how to form strong connections to others, can teach someone to use the public transit system, has completed the Free Application for Federal Student Aid (FAFSA), or is a social media expert.
This is just a short list of the things we can look for — feel free to look for others! When you find that connection, add their name to yours by connecting common letters (see ex-ample) like in a crossword puzzle, and write the discovered skill near that name in paren-theses. Following the activity, ask the following questions:
• What was your most surprising find?
• How does the knowledge we personally have (or don’t have) impact our work with young people?
• How does the knowledge we have (or don’t have) about others (coworkers or young peo-ple) impact our work?
• How would an activity like this help young people in assessing their own resilience skills?
Adapted from Great Group Games: 175 Boredom-Busting, Zero-Prep Team Builders for All Ages (p. 33), by S. Ragsdale and A. Saylor, 2007, Minneapolis, MN: Search Institute Press.

YouthThrive™: Promoting Youth Resilience Center for the Study of Social Policy
10 ™ | Promoting Youth Resilience

YouthThrive™: Promoting Youth Resilience Center for the Study of Social Policy
11 ™ | Promoting Youth Resilience
� Activity Name: Commonalities
� Time: 15-20 minutes
� Materials: Flipchart paper, markers, masking tape
� Instructions:
“ In order to form connections and build relationships, it is helpful to find things we have in common. We’re going to do a quick activity to do just that. In a minute, I will ask you to break into smaller groups. When you get into your group, you will identify a record-er — they will be responsible for recording your group’s answers on the flipchart paper. Next, you will identify a reporter — they will share the information your group creates with the larger group. Any questions? Answer any questions. OK, let’s get into groups.
> Depending on the size of the class, break into several smaller groups of two to six. Direct the groups on where they will meet to have their brainstorming sessions. Provide each group a piece of flipchart paper and a marker. Once they are in their small groups and have assigned the recorder and reporter roles, give the following directions:
“ Your task is to come up with a list of things that are common to all of the people in your small group. The catch is, that list can only include those things you cannot see right now. Examples of things we cannot currently see might be: the ability to speak a for-eign language, the fact that you all drive the same make of car, or the fact that everyone is a vegan. Does anyone have any questions? Answer any questions. Are all the groups ready? You have seven minutes to create your list. Go!
> Monitor the groups as they work and address any questions. Give the groups a five-min-ute and a two-minute reminder. Call time and provide each group with masking tape so they can post the results of their brainstorms. Ask which group would like to volunteer to share their list. When they are done, ask the remaining groups to do the same.
After all the groups have reported, wrap up the activity by facilitating a short discussion using the following questions:
• What was necessary to be able to identify the unseen commonalities with others in the group?
• How does finding these commonalities affect your comfort level in a new group? (if most of the group doesn’t know each other already)
• How do these commonalities have an impact on an already-established group? (if this group knows each other already)

YouthThrive™: Promoting Youth Resilience Center for the Study of Social Policy
12 ™ | Promoting Youth Resilience
• Which of the commonalities found support resiliency?
• How do the groups compare — are there commonalities across the groups?
• How does awareness of these commonalities influence the development of relationships?
• If your group was racially diverse, how did you work to overcome any potential racial anxiety? How does this awareness impact the development of relationships?
Adapted from QuickSilver: Adventure Games, Initiative Problems, Trust Activities, and a Guide to Effective Leadership (p. 76), by K. Rohnke and S. Butler, 1995, Dubuque, IA: Ken-dall/Hunt Publishing Company.

YouthThrive™: Promoting Youth Resilience Center for the Study of Social Policy
13 ™ | Promoting Youth Resilience
� Activity Name: Human Scavenger Hunt
� Time: 20 minutes
� Materials: Pens and pencils, prizes for first three places (optional), Handout: “Human Scavenger Hunt”
� Instructions:
“ We are going to do an activity designed to help us get to know each other a little better. Has anyone ever been on a scavenger hunt?
> Allow participants to share what they know about scavenger hunts.
“ Today we are going to do a modified version of a scavenger hunt, using just the people in this room. In a second, I’ll give everyone a list of what they need to find for this hunt. I’m going to ask that when you get your handout, put your name at the top and then take a minute to read over it, but don’t start hunting until I tell you to go.
> Make sure everyone has a writing utensil and pass out the “Human Scavenger Hunt” handout. Ask the participants to read over the items on the list.
“ Has everyone read the handout? OK, this will need to be an aerobic moment if you want to have a chance to find all the required items. You will have eight minutes to find as many of the things on the list as you can. Once you find someone who matches a re-quirement on the list, get their signature. The person with the most signatures (or who finishes first) will win a fabulous prize! Any questions?
> Answer any questions. You may have to adjust some of the rules depending on the size of the group. If the group is small, you might allow each participant to sign their own sheet one time or allow participants to sign each other’s sheets more than once.
“ Is everyone clear? Ready? Go!
> Give the group about eight minutes to complete the scavenger hunt. Provide a five-min-ute and a two-minute reminder to the group. After time is called, ask the group to take a seat and count the signatures they have on their handouts. Review some of the items and ask volunteers to share which participants could sign their sheets. (You might ask a few participants to demonstrate the skill or share the specific piece of knowledge they signed.) Lead a brief discussion using the following questions to wrap up the activity:
• What was your most surprising find?
• How would an activity like this help young people in assessing their own resilience skills?
• How does the knowledge we personally have (or don’t have) impact our work with young people?
• How does the knowledge we have (or don’t have) about others (coworkers or young people) impact our work?

YouthThrive™: Promoting Youth Resilience Center for the Study of Social Policy
14 ™ | Promoting Youth Resilience
g Handout: Human Scavenger Hunt
You have eight minutes to complete this scavenger hunt. Get the signature of someone who:
1. Can show you two yoga poses
2. Is good at solving puzzles
3. Has been an advocate for someone
4. Has participated in a service learning project
5. Can define resilience
6. Can identify three youth-focused resources in the community
7. Regularly uses a personal self-care plan
8. Can name three strong personal connections outside of work
9. Has attended another Youth Thrive™ training
10. Has partnered with a young person to do volunteer work
11. Has asked for help from someone in the last three days
12. Has solved a problem in the past couple of weeks
13. Can teach conflict resolution skills
14. Can define what we mean by trauma responsive care

YouthThrive™: Promoting Youth Resilience Center for the Study of Social Policy
15 ™ | Promoting Youth Resilience
F Activity Name: What Does Resilience Look Like?
g Time: 45 minutes
g Learning Goals:
1. Identify the characteristics of resilient youth. 2. Identify ways in which adults can support these characteristic issues of adolescent
development that impact youth.
g Materials: Large pieces of plain paper (butcher paper or two pieces of flipchart paper taped together, big enough to draw the outline of a body),
a number of colored markers or colored pencils, masking tape, Handouts: “Characteristics of Resilient Youth,” “Body Outline”
g Instructions:
“ Now that we know each other a little better, let’s start talking about resiliency and why it is important to the Youth Thrive™ Promotive and Protective Framework. How would you define resilience?
> Accept answers from two to three people.
“ The Youth Thrive™ Framework describes resilience as “the process of managing stress and functioning well even when faced with adversity.” What does that mean for us and our work?
> Accept answers. Emphasize that becoming resilient is a process, and we must find ways to support the development of skills young people need in order to manage stress and func-tion even when things feel out of control. Take care not to spend too much time talking about the concept of resilience here — the activity will help the group do that. You may want to limit this initial discussion to no more than ten minutes.
“ We know that resilience is developed and supported in a number of ways. It’s important to keep in mind that promoting resilience in young people is not just about teaching them to manage stress or use a coping skill. There are a number of building blocks to resilience, and we must focus on supporting these building blocks in our work with young people. We should keep in mind that our job is to help young people through a tough time, of course, but also to teach and support new skills and strategies youth must have to solve problems and access resources for themselves. Having lived expe-rience with the child welfare or juvenile justice systems, in addition to having expe-rienced discrimination, racism, and microaggressions, can make young people more vulnerable to poor outcomes. We want youth to have the necessary skills in order to increase the likelihood of positive results as they transition toward adulthood.

YouthThrive™: Promoting Youth Resilience Center for the Study of Social Policy
16 ™ | Promoting Youth Resilience
So how do we recognize resilience in others? Let’s take some time and explore not only what the characteristics of resilient youth are, but how we adults can help to support these characteristics in the youth with whom we work.
> Depending on the size of the group, divide into smaller groups of about five to six. Pro-vide each group with a large piece of paper (either a large piece of butcher paper or two pieces of flipchart paper taped together) and several markers. Once participants are in their new groups, give the following directions:
“ Now that you are in your groups, I want you to draw the outline of a person on the paper. (Depending on the amount of space in the training room or training materials available, this can be a literal outline of one of the group members or a “gingerbread person” outline.) Once the outline is drawn, I want your group to brainstorm the char-acteristics of a resilient youth — what might we see or hear that would lead us to believe they might be resilient? What skills and knowledge would they have? How might they view themselves? As you brainstorm these qualities, list them on the inside of the young person on your paper. Take five minutes to come up with your internal lists.
> Monitor the groups as they work and listen to what is being discussed. Provide two-minute and one-minute warnings and call time at the end of five minutes.
“ Now I want your group to shift your focus from the resiliency characteristics a young person might have to how we, as adults, can support the development of these internal characteristics. I want you to take five minutes as a group and brainstorm what we can do — what opportunities can we provide? What kinds of experiences should young people have? What resources should they have access to that would support resiliency? This time, I want you to list these things on the outside of your outline. When the five minutes are up, I’m going to ask that each group present their work, so make sure you identify someone to act as a spokesperson for your group.
> Encourage the groups to be specific about the actual opportunities, experience, and re-sources they can provide for young people.
> Monitor the groups as they work and listen to what is being discussed. Provide two-min-ute and one-minute warnings and call time at the end of five minutes. When the groups are finished, provide them with masking tape to hang their outlines on the wall. Ask that each group’s spokesperson take a turn to report their work back to the larger group.

YouthThrive™: Promoting Youth Resilience Center for the Study of Social Policy
17 ™ | Promoting Youth Resilience
> When the last group has finished sharing their work, debrief the activity using the follow-ing questions as a guide:
• What similarities do you notice between the groups’ lists?
• Did you notice any big differences?
• What does this tell us about how we think about resilience and the important role adults play to support resiliency skills?
• Why is it important to think about resilience as something more than just the internal characteristics of the young person?
• How are we currently supporting these internal skills with the young people with whom we work?
> Provide the participants with the “Characteristics of Resilient Youth” handout.
“ In the Youth Thrive™: Protective and Promotive Factors for Healthy Development and Well-Being training, we discussed these characteristics of resilient youth. Let’s take a sec-ond to review these. How do the resilient youth we developed in our groups compare to this list? Do you see any characteristics we missed?
> Accept answers.
“ As we have seen, there are characteristics, skills, and behaviors that are common to resilient youth. Many young people enter into our services with some of these charac-teristics already established. However, it is a serious mistake to assume that all youth are naturally resilient. We know that simply having a handful of skills is insufficient to guarantee that someone will be able to recover when met with adversity.
There is a very important role that adults play in helping young people to become as re-silient as possible. This includes supporting youth during times of stress, teaching and nurturing the development of critical skills, encouraging youth to face challenges, help-ing youth advocate for themselves, and providing youth with experiences that enhance their self-concept and offer a brighter prospect of what the future may hold.
What are some of the tools and skills we, as professionals, need to have at our disposal and feel confident in using in order to support youth?
> Accept answers and record on flipchart. Discussion should include skills like: active listening, ability and confidence in teaching new skills like self-care, self-calming, seeking out support from peers or joining affinity groups, problem-solving, identifying and offer-ing opportunities for postive risk-taking, etc.

YouthThrive™: Promoting Youth Resilience Center for the Study of Social Policy
18 ™ | Promoting Youth Resilience
“ Great. We’ll be focusing on specific concrete ways we can increase how we support these skills as we move through the rest of the training.
Now, I’d like for us to apply these same ideas to a specific person. Provide participants with the “Body Outline” handout. I want you to reflect on a youth with whom you are currently working. Do you have someone in mind? Ok, now I’d like you to work through this exercise again using the identified young person. First, let’s start with the inside. Use one color to identify the internal skills they do currently have. Use a differ-ent color to designate skills or situations where they may still need support. Take three minutes to identify these internal strengths and needs.
> Call time after three minutes.
“ Ok, let’s move to the external supports. How are you supporting this particular youth? Be specific. How are you using the skills and tools that we identified; for example: “We do yoga together two times per week.” “I encouraged them to try out for the school play.” “We developed a self-care plan together.” “I’m available as a sounding board for problem solving.” Take another three minutes to add these supports to the outside of the handout.
> Call time after three minutes. Ask for two or three volunteers to share their work.
“ As you can see, it is important that we strike a balance between what young people have and need with what we, as professionals, are competent to offer. Just like becoming resilient is a process, so is honing the skills we need to have in order to support young people. Keep your “young person” in front of you throughout the training as we think about building resilience skills.
As we move through the rest of the training, we’ll begin to explore how we can help young people learn and practice those things which can help them become better pre-pared to respond to the stressful times we know they will experience. As we learn new ways we can support young people, add these external supports to your handout. These are things you can go back to implement with this young person.
Adapted from Positive Youth Development: The Vital Link, “Body of Information,” The Uni-versity of Oklahoma Outreach National Resource Center for Youth Services.

YouthThrive™: Promoting Youth Resilience Center for the Study of Social Policy
19 ™ | Promoting Youth Resilience
g Handout: Characteristics of Resilient Youth
Characteristics of Resilient Youth...
• Have close supportive connections with trusted family, friends, teachers, and other adults in the community.
• Generally view themselves in a positive light and can recognize they possess strengths and abilities.
• Are aware of their emotional responses to situations and can modulate their arousal and manage impulses.
• Possess strong communication skills; they know how to express themselves and listen to others.
• Have confidence in their ability to solve problems they encounter.
• Understand they do not have all the answers and feel confident in their ability to locate resources and ask for help and assistance.
• See themselves as resilient and not as a victim.
• Practice good self-care habits and have a number of healthy coping skills to use in a variety of situations.
• Experience themselves as a resource for others and can contribute to their family, friends, school, or community.
• Can separate themselves from their adversity and have a positive outlook for their future, despite difficult or traumatic experiences. *Keep in mind that racialized expectations of perseverance, strength, religiosity, gen-der, and cultural norms, as well as the stigma around mental health within commu-nities of color, may contribute to youth of color being less expressive in surfacing their struggles to recover.
Adapted from “This Emotional Life,” co-production of the NOVA/WGBH Science Unit and Vulcan Productions, Inc. 2009.

YouthThrive™: Promoting Youth Resilience Center for the Study of Social Policy
20 ™ | Promoting Youth Resilience
g Handout: Body Outline

YouthThrive™: Promoting Youth Resilience Center for the Study of Social Policy
21 ™ | Promoting Youth Resilience
F Activity Name: Teaching Skills to Help Modulate Emotions
g Time: 45-60 minutes
g Learning Goals:
1. Explain the importance of emotional regulation in developing resiliency.
2. Introduce and practice mindfulness activities.
3. Introduce and practice yoga activities.
g Materials: Mindfulness video clip (https://youtu.be/kk7IBwuhXWM), guided meditation link (http://mindfulnessforteens.com/guided-meditations),
yoga video clip (http://streetyoga.org/videos/), materials required for chosen mindfulness and yoga activities
g Instructions:
“ When we review the characteristics of resilient youth, we see that both awareness of emotional responses to situations and the ability to manage the resulting feelings and impulses are important characteristics. In what way is the ability to manage our emotions important for resiliency?
> Accept answers. Answers might include: It helps us feel competent and capable, in control of situations, able to face stressful situations, to know that adverse circumstances will pass, etc.
“ Bessel van der Kolk (2015) stated that modulating our emotions is important in that
“... something is happening to you that you interpret as being frightening, and you can change the sensation by moving, breathing, tapping, and touching (or not touching). You can use any of these processes.
It’s more than tolerating feelings and sensations. Actually, it is more about knowing that you, to some degree, are in charge of your own physiological system.
“ As you probably know, this is not a skill that everyone has at their disposal and it is not an easy skill to master. It can be especially challenging if you have a history of trauma that has not been fully addressed, or if you find yourself in an environment that may easily trigger these past issues. For example, many of the youth we serve will face an ongoing struggle as they attempt to navigate the widespread and institutional effects of racism. This process is ongoing. For them, resilience is embodied through the capacity of adapt-ing, managing, and functioning well. It is important that we intentionally teach and prac-tice these skills with the youth in our programs. In addition, we want to keep in mind that young people need a variety of skills at their disposal; skills they can access in a variety of situations. For example, simply telling young people to walk away from a tense situation

YouthThrive™: Promoting Youth Resilience Center for the Study of Social Policy
22 ™ | Promoting Youth Resilience
will only work in a finite number of situations. For example, when a young person is feel-ing high stress in a classroom setting or confronting police or community violence, they may not be able to take a break or walk away from that stressor. What other skills could they use in a situation? How can they manage the strong emotion without having to leave the situation? How are you currently helping young people learn and practice skills that help with modulating emotions in a variety of settings?
> Accept responses to each question and record them on the flipchart.
“ It is not uncommon in our work to rely on talking to young people about these skills — in group, during individual or informal counseling, or in formal therapy sessions. It’s important to keep in mind that for some youth, the skills necessary to manage emotions may require opportunities beyond only talking about them. We want to think about a way to move past talking to and into doing with young people. For this training, we’ll focus on doing active, physical things to help teach and reinforce these skills. Young people need to know what it feels like to regulate what is happening with their emotions, not something just to be imagined or discussed.
I’d like us to spend some time learning some easy skills that you can take to your pro-gram to help young people learn to modulate their own emotions. We are going to start with two activities that can be easily introduced in any program: Mindfulness and Yoga. Research has found that teaching physical skills such as yoga, martial arts, or relaxation techniques like mindfulness can help young people — especially those who have experi-enced a great deal of toxic stress or adversity — to learn valuable self-regulation skills that will assist them in managing their own emotions and feelings. These types of activities have been found to help young people regain a sense of control regarding their situations and support them in the belief that they are not merely helpless victims subject to fate.
For the purposes of this training, we will focus on mindfulness and yoga activities. Since these require litte equipment, cost, or special training, they are doable in a variety of settings.
Let’s start with mindfulness. It is common to hear about mindfulness today. Many prom-ising practices (e.g., SPARKS, Seeking Safety) that focus on trauma responsive care incor-porate mindfulness as a helpful coping skill to share with young people. But what do we mean by mindfulness?
> Accept answers and record them on the flipchart.
“ When we define mindfulness, we are referring to an awareness of the present moment, of one’s thoughts and actions, of letting go of the past, and of letting go of the future.

YouthThrive™: Promoting Youth Resilience Center for the Study of Social Policy
23 ™ | Promoting Youth Resilience
“ Let’s watch a short video from Kelty Mental Health Resource Centre in Vancouver, British Columbia. The video shows young people talking about the benefits they have found from learning mindfulness skills. https://youtu.be/kk7IBwuhXWM
> Lead a short discussion regarding the video using the following questions:
• What phrases or images stood out to you in the video?
• What did you hear about the benefits of using mindfulness practices?
• How do you see mindfulness fitting into your programming?
“ One thing we heard in the video is that “mindfulness is a tool to use anytime, anyplace.” Let’s put that to the test and do a quick activity to practice mindfulness.
> Pick one of the activities from the Mindfulness Activity Options (pp. 25-27) to facilitate with the group. Keep the activity time to five to ten minutes. Following the activity, ask the group to form pairs or trios and then give them five minutes to discuss the following questions. Ask them to take notes on their discussions to report back to the larger group. If you are running short on time, simply facilitate this discussion as a large group activity.
• What did you notice during the activity — about yourself, your thoughts, or the group?
• How might you see yourself using this with young people?
• How might mindfulness support young people in becoming more resilient?
“ Now that we’ve gotten a taste of mindfulness, let’s move on and try some yoga activities. Are any of you currently using yoga activities yourself or in your programs at this time? If so, what kind of benefits have you personally experienced from this practice? What kind of response have you been getting from youth? If you are not using yoga now, what might the barriers be to using these types of activities in your program? How might you over-come such barriers? Accept answers.
As with mindfulness, we don’t want you to take our word for the benefits of using yoga — let’s hear what young people say about using yoga. Street Yoga, a program started in Portland, Oregon, used yoga with young people experiencing homelessness, so let’s hear what they are saying.
> Either video link can be helpful to educate the group on the use of yoga with young people. Pick one of these to play for the group:
• https://youtu.be/NE_7KmZJwPI (This video is about five minutes. You can choose to play the entire clip or an abbreviated version.) This is a video from Street Yoga founder Mark Lilly.
• https://youtu.be/uOqYm9C01GU This video provides a good understanding of the benefits of using yoga with young people in high risk situations.

YouthThrive™: Promoting Youth Resilience Center for the Study of Social Policy
24 ™ | Promoting Youth Resilience
> After you play the video, lead a short discussion using the following questions:
• What phrases or images stood out to you in the video?
• Was there anything particularly surprising to you?
• What did you hear about the benefits of using yoga practices?
• How do you see yoga fitting into your programming?
“ OK, so just like we did with mindfulness, let’s spend time exploring how we can use yoga activities in our programs.
> Choose one of the resources in the Yoga Activity Options (p. 28), or one of your own, to conduct a ten to fifteen-minute yoga activity with the group. Following the activity, ask the group to form pairs or trios and then give them five minutes to discuss the following ques-tions. Ask them to take notes on their discussions to report back to the larger group. If you are running short on time, simply facilitate this discussion as a large group activity.
• What did you notice during the activity — about yourself, your thoughts, or about the group?
• How might you see yourself using this with young people?
• How might practicing yoga or including yoga activities in your program support young people in becoming more resilient?
• Can you identify any barriers to using yoga in your program?
“ Now that we are all centered and focused, let’s move on to the next characteristic of resil-iency we’ll be discussing: the ability to solve problems.
Trainer Note: Mindfulness and Yoga are both activities that can feel foreign to some participants, or even to some of us trainers. If this is new for you, we encourage you to spend a little time practicing the activities to get comfortable with the skills. If the listed activities don’t feel comfortable to you, explore other mindfulness or yoga options. You can also partner with a co-facilitator, or a young person in your program, who is more comfortable with the concepts.
Reference: van der Kolk, B., Buczynski, R. (n.d.). “Four Concrete Steps for Working with Trauma.” Retrieved from http://www.nicabm.com/trauma-treatment-kolk/free-report-con-firmed/?wemail=#sthash.IqMKtNz9.dpuf

YouthThrive™: Promoting Youth Resilience Center for the Study of Social Policy
25 ™ | Promoting Youth Resilience
Mindfulness Activity Options
� Activity One: Online Mindfulness Guided Meditations
� Time: 10-15 minutes
� Materials: http://mindfulnessforteens.com/guided-meditations
� Instructions:
> Pick one of the shorter mindfulness audio links found here and play for the group. We suggest starting with one of the five-minute or shorter options.
� Activity Two: Observe & Describe Object*
� Time: 10 minutes
� Materials: Speakers, music
� Instructions:
“ The ability to manage emotions requires a number of skills. An important component is the ability to have a clear picture of what is really happening to cause an increase in stress or emotions. In order to make a good decision about this, you need as much information as you can get. Two skills, observing and describing, can help us in making accurate decisions about what is happening. Observing helps you get information. De-scribing helps you organize the information you get. It helps you think clearly and leads you into Wise Mind. The wise mind brings together what you know (logic) and what you feel (emotion). Some may refer to the wise mind as their inner voice, a gut feeling, or intuition that might be guiding them to the right answer to give or correct action to take. It is important that we practice the building blocks that can lead to our ability to modulate emotions. Let’s take some time and practice observing and describing skills in a non-stressful situation.
> Ask participants to choose an item in the room to observe and describe. The item can be something they can hold (e.g., pencil, keys, eraser, water bottle) or something they can’t hold (e.g., picture on the wall, the blackboard, window, tree outside the window). Provide the following instructions:
“ Observe the object. As appropriate, what does it feel like? What does it smell, sound, taste, and look like?
Describe the object. Use words. Pretend you are describing it to someone who can’t see.
How would you describe it to someone so they could draw it?
Don’t use words that judge — avoid words like pretty, ugly, good, and bad.

YouthThrive™: Promoting Youth Resilience Center for the Study of Social Policy
26 ™ | Promoting Youth Resilience
> Allow one minute of observing and thinking about how they would describe the object. Call time and ask the members to find a partner and share their descriptions of the object to see if their partner can guess what is being described. After both partners have de-scribed their objects, bring the group back together and have a short discussion using the following questions as a guide.
• What was most difficult about describing the object?
• How well did your partner follow the guidelines to describe the object?
• How hard or easy was it to guess what your partner was describing?
• What was it like to keep from using judgment words?
• How can we generalize the skills of observing and describing to help us in modulating emotions?
• How can this be used in your work with young people?
� Activity Three: Balance
� Time: 10 minutes
� Materials: None
� Instructions:
“ The wise mind brings together what you know (logic) and what you feel (emotion). Some may refer to the wise mind as their inner voice, a gut feeling, or intuition that might be guiding them to the right answer to give or correct action to take. This activity is a metaphor for getting into Wise Mind — maintaining a balance between emotion and reasonable mind. Balancing takes practice — on your feet or in Wise Mind. The more you do it, the easier it gets.
> Ask group members to stand behind their chairs and try to balance on one foot. (If they need to, they can touch the back of their chair momentarily.) Encourage them to mindful-ly focus on standing up straight and tall, and holding their balance. While balancing, ask participants to:
• Notice what it feels like when they have obtained balance.
• Notice what it feels like when they feel themselves tipping to one side or the other and what it feels like to right themselves.
• Encourage the participants to try and not to judge themselves, even if they keep tipping. Ask them to continually try to bring themselves to a balanced position in the center.

YouthThrive™: Promoting Youth Resilience Center for the Study of Social Policy
27 ™ | Promoting Youth Resilience
> Give the group three minutes to practice balancing. When the three minutes are up, use the following questions to lead a short discussion on the experience:
• What was it like trying to maintain your balance? Was it more difficult than you expected?
• Did anyone feel frustrated when they momentarily lost balance? What was it like to try not to judge yourself?
• What did it feel like when you achieved a state of balance?
• How can we generalize this idea of balance in our day-to-day lives?
• How mindful are you to your day-to-day balance?
• What things keep in you balance?
• What things tend to throw you off balance?
• How does it feel to be in balance/out of balance?
• How does this exercise relate to achieving a state of balance between emotion and rea-son in your mind?
• How does finding this “balance” relate to increasing resilience?
*These activities are from Providing Shelter from the Storm: Trauma Informed Care (2012). Children’s Hospital Los Angeles for Runaway and Homeless Youth Training and Technical Assistance Center.
Dietz, L. (2003-2012). Core Mindfulness. Retrieved from http://www.dbtselfhelp.com/html/core_mindfulness.html
Schenck, L. (2011). What is Wise Mind? Retrieved from http://www.mindfulnessmuse.com/dialectical-behavior-therapy/what-is-wise-mind

YouthThrive™: Promoting Youth Resilience Center for the Study of Social Policy
28 ™ | Promoting Youth Resilience
Yoga Activity Options
There is a variety of web-resources you can access to learn and practice yoga activities with youth. Many of these resources can be accessed for free or at a low cost.
• ShantiGeneration – http://shantigeneration.com/partner-yoga-for-teens-online You can access an online streaming course for only $79 per year.
• Do Yoga With Me – https://www.doyogawithme.com/ Free streaming yoga videos.
• Yoga in My School – https://yogainmyschool.com/category/teen-yoga/ Resources include an online teacher training.
• Kids Health Yoga Activities – http://kidshealth.org/en/teens/yoga-break.html?WT.ac=t-ra
Other helpful links:
• Yoga for Youth – https://www.youtube.com/watch?v=nEUdh_3q9OU
• Yoga Basics for Kids and Teens – https://www.youtube.com/watch?v=23i8T7_vvL4

YouthThrive™: Promoting Youth Resilience Center for the Study of Social Policy
29 ™ | Promoting Youth Resilience
F Activity Name: Teaching Problem Solving Skills
g Time: 45 minutes
g Learning Goals:
1. Discuss the importance of intentionally teaching skills and providing safe practice time.
2. Learn activities that can be used to teach problem solving skills to young people.
3. Explore the importance of reflective questions and feedback to assist with the learning.
g Materials: Flipchart paper or dry erase board, markers, tape, Handouts: “S.A.F.E. Model,” “Tips for Facilitating Activities,”
“Suggestions for Activity Process Questions”
g Instructions:
“ The next characteristic we’ll talk about is the ability to effectively solve problems. How is effective problem solving tied to resilience?
> Accept answers.
“ What are some ways in which you are currently teaching young people to address the problems they face?
> Accept answers.
“ When talking about skill building, we often hear people say things like, “We talk about it,” or “I tell them to…” We want to make sure we are moving beyond simply telling young people how to be resilient and moving toward a more intentional way to teach skills and allow for practice time to build competence. If you’ll recall from the So-cial-Emotional and Cognitive Competency section of the Youth Thrive™: Promotive and Protective Factors of Healthy Development training, we suggested the SAFE model (pp. 80-81), developed by Joseph Durlak, to structure learning programs.
> Review the model components:
• S – Sequential: Use a curriculum or protocol that builds competencies in a coordinated, step-by-step approach.
• A – Active: Utilize hands-on learning that incorporates practice and feedback.
• F – Focused: Set aside specific and sufficient time for training.
• E – Explicit: Clearly explain target skills so young people know the expectation.

YouthThrive™: Promoting Youth Resilience Center for the Study of Social Policy
30 ™ | Promoting Youth Resilience
> Challenge the group to come up with examples of ways to teach problem solving skills to young people, including how to incorporate safe practice of the skills.
“ It can feel like a daunting task to figure out how to teach problem solving skills in a formalized way. However, we need to remember that the adolescent brain is primed to learn these skills, and unless we offer these structured opportunities, they may miss out on the development of these important skills. And, as we will see, it is possible to make teaching skills easy and fun!
One effective way to help young people practice problem solving is through games, activities, and problem solving initiatives. Initiatives are fun activities that can be used as a way for young people to learn and practice problem solving skills. These types of games and activities focus more on planning, creative thinking, and cooperation than on physical skills. They provide opportunities to demonstrate leadership, good follow-ship and have fun. This activity-based approach not only provides a unique opportunity to address a fictional problem — like navigating a mine field, crossing a chocolate river, disposing of toxic waste, or building a marshmallow tower — it allows participants to try new ways to identify and test possible solutions, be part of a team, build trusting relationships, ask for help, and manage frustration and other emotions in a safe environment.
These types of activities should be in every youth worker’s bag of tricks. They are effec-tive ways to engage with young people, teach and practice skills, and address patterns of challenging behaviors that may be getting in the way of their success. So, let’s stop talking about these teaching activities and try a few!
> Depending on group size and time, facilitate at least one of following activities:
• Count 20 (p. 32)
• Traffic Jam (p. 33-34)
• Tarp Flip (p. 35-8)
• Balloon Trolley (p. 36-37)
If you have a co-trainer and enough room, you might be able to do two separate activities simultaneously.
When the chosen activity is completed (with a specific debrief for that activity), pass out the “Tips for Facilitating Activities” handout. Review the handout with the group and lead a discussion on how participants experienced these tips being utilized in the activity. Provide any needed clarification.

YouthThrive™: Promoting Youth Resilience Center for the Study of Social Policy
31 ™ | Promoting Youth Resilience
When you finish the discussion regarding facilitating activities, lead a discussion with the group regarding the use of activities to teach and practice problem solving by using the following questions as a guide:
• What did you notice as the benefits to using initiative games for teaching problem solving?
• What did you notice as drawbacks to using these types of activities?
• Can you identify any barriers to using these things in your program?
• What other skills that support resilience did you notice coming up during the activity?
• How might you make connections from the activity to real life for young people?
• How might you see yourself using this with young people?
“ So far today we have been learning about things we can do with young people to learn and practice skills like self-modulation and problem solving. Now let’s turn our atten-tion to planning additional opportunities for the young people to learn and practice skills that will support resilience.

YouthThrive™: Promoting Youth Resilience Center for the Study of Social Policy
32 ™ | Promoting Youth Resilience
� Activity One: Count 20
� Time: 10 minutes
� Materials: None
� Group Size: 7-30
� Objective: Count to 20 as a group without talking over each other
� Instructions:
Sit or stand in a circle. Inform the group that from this point on they cannot speak unless instructed. Provide the following the instructions:
“ The idea is for the group to count to twenty, one person saying one number at a time. You cannot pre-plan and you cannot talk unless saying a number.
Anybody can start the count. Then a different person says the next number, but if two or more people happen to speak at the same time, counting must start again from the beginning. It is possible to get to twenty if everybody really concentrates, but try and be relaxed as well. Ready? Go!
� Variations:
> You can try to include members of the group (or for a big challenge, with the whole group) facing outwards and closing their eyes (difficult!) or counting back from twenty to one.
� Debrief:
• Did you think this was going to be an easy or difficult challenge?
• How did you/group approach the problem?
• Was one approach more effective than the other?
• Was it necessary to reevaluate your initial plan? How did you know you needed to reassess?
• What did you learn from the less successful attempts?
• How is this similar/different to how you typically react to stressful situations?
• What helped the group stay focused?
• How can you apply these skills to your own problems?
Farmer, D. (2007). 101 Drama Games and Activities, p.47. Lulu.com.

YouthThrive™: Promoting Youth Resilience Center for the Study of Social Policy
33 ™ | Promoting Youth Resilience
� Activity Two: Traffic Jam
� Time: 10 minutes
� Materials: Enough place markers for each participant plus one. These markers can be anything that people can reasonably
stand on (e.g. bandanas, plastic spots, carpet squares), or can be a small area marked on the ground with chalk or masking tape. The key is to make the place markers big enough for one person
to stand on easily, but small enough that two people have to balance carefully to both fit on the marker.
� Group Size: At least 6 people (divided into 2 even teams)
� Objective: Have two groups of people exchange places on a line of squares that have one more space than the number of people.
� Setup:
> Set up a line of place markers, one for each person plus one extra. Divide the group into two even teams. Have each person stand on a place marker with one free space in between the two teams. Each team will face the free space. The following diagram shows the starting placement with one team represented by numbers and the other represented by letters.
Group One Group Two Start: [1] [2] [3] [4] [Free Space] [A] [B] [C] [D]
� Directions:
> The goal is to have the two teams exchange places and end up in the same order on the opposite side of the open space. The following diagram shows the starting and ending positions with arrows indicating the direction each participant should move.
Group One Group Two Start: [1] [2] [3] [4] [Free Space] [A] [B] [C] [D]
-------------> <-------------
Group Two Group One End: [A] [B] [C] [D] [Free Space] [1] [2] [3] [4]

YouthThrive™: Promoting Youth Resilience Center for the Study of Social Policy
34 ™ | Promoting Youth Resilience
The participants may not touch anything but the markers and each other (imagine a hot lava flowing all around the markers). The only allowed moves are: a person can move to an empty space in front of them, and a person may move around a person who is facing them and into an empty space. The forbidden moves include: any move backwards and any move involving two people moving at once. If at any time a participant makes a for-bidden move, or anyone steps off the markers, all participants must return to the starting positions.
Additional challenges: Give a time limit. Blindfold or ask certain members to close their eyes. Instruct certain members to stay silent. You can provide the group with a choice of one of these challenges as an alternative to starting over (i.e., “You may start from the beginning” or “Chris must be blindfolded for the rest of the activity.”)
� Debrief:
• What worked well?
• What was challenging?
• What skills and actions helped?
• Who were the leaders of this activity? The followers?
• How was it for the people on the ends?
• Did anyone feel excluded from the process?
• How did you individually address your frustration with the process? How did the group address the frustration?
• How would you relate this back to some of your daily struggles?
� Solution:
> http://www.squarewheels.com/articles/trafficjam.html
Rohnke, K. (1983). Silver Bullets: A Guide to Initiative Problems, Adventure Games and Trust Activities, p.112. Project Adventure, Inc. http://files.eric.ed.gov/fulltext/ED356918.pdf

YouthThrive™: Promoting Youth Resilience Center for the Study of Social Policy
35 ™ | Promoting Youth Resilience
� Activity Three: Tarp Flip
� Time: 10 minutes
� Materials: Tarp (or a tarp substitute), ball (optional)
� Group Size: 5-25
� Objective: For the group to completely flip the tarp over, without stepping off at any time
� Setup:
> Lay out a tarp on the ground and have all team members stand on it. The smaller the tarp the more challenging the exercise! No Tarp? You could use a large blanket or use taped together newspaper sheets — the fragile paper makes the challenge even more interesting.
� Directions:
> While standing on top of a completely open tarp, the group must create a plan to get everyone on the opposite side of the tarp without anyone stepping off. The size of the tarp should be defined by the number of individuals in the group.
� Variations:
> Standing in a circle, group members begin by holding the edges of a tarp with both hands. A ball is placed in the middle of the tarp. The objective is to flip the tarp so that the object rests on the opposite side of the tarp, facing up. Participants cannot let go of the tarp at any time, and the object should remain on the tarp at all times.
� Debrief:
• Who took the lead? • Did everyone agree with what they needed to do? • Did anyone have any ideas but were not able to share them? • How did you address challenges or failures?• What could the tarp represent in your life?• What skills did you access to solve the problem?• If you were going to do the task again what would you do differently?
*If the group gets stuck, you might provide a few hints to get them started. The easiest way to solve the problem is to get everyone on one side of the tarp and start pulling the opposite end to the other side. The group then starts to move to that part of the tarp. Once you’re a little more than half way over, stop and pull the bottom from under the top that you folded over.
Retrieved from: http://www.teampedia.net/wiki/index.php?title=Tarp_Flip

YouthThrive™: Promoting Youth Resilience Center for the Study of Social Policy
36 ™ | Promoting Youth Resilience
� Activity Four: Balloon Trolley
� Time: 10 minutes
� Materials: Balloons (a few more than the number of participants to address any popping that might happen), boundary marker (tape, rope, cones),
obstacles (milk crates, tables, chairs, hula hoops, etc.)
� Group Size: 6-20
� Objective: To move a line of people, connected by balloons, across an obstacle field without dropping any of the balloons.
� Instructions:
> Provide everyone with a balloon and ask them to blow it up and tie it off. Once all the bal-loons are ready, instruct the group to line up and place a balloon between themselves and the person in front of them. The group must keep the balloons secure without holding on to them.
The challenge is to move the entire group across a designated area, that includes several obstacles (rolled-up mats, hula hoops, chairs, benches, milk crates etc.) without allowing any of the balloons to hit the floor. Allow the group to have three minutes for planning.
When the planning session is over, have the group line up and begin moving across the area.
> If a balloon touches the floor or ground, it will result in:
1. The entire group having to start again from the beginning;
2. The two people who drop the balloon having to change places in the line (one to the front, and one to the back);
3. The group having to design a method to pick up the balloon and re-insert it where it was without losing any other balloons;
4. All of the above. Or, make up any consequence that makes sense to you, but doesn’t leave the group feeling hopeless.
> Requiring the group to negotiate obstacles (going over a bench or a short stack of milk crates, going up a set of stairs) adds a definite challenge. You can also add time limits to increase the stress of the activity.

YouthThrive™: Promoting Youth Resilience Center for the Study of Social Policy
37 ™ | Promoting Youth Resilience
� Debrief:
• Did you think this was going to be an easy or difficult challenge?• How did you/group approach the problem? • How did you/group utilize the planning period?• How were possible solutions evaluated by you/group?• Was one approach more effective than the other?• Was it necessary to reevaluate your initial plan? How did you know you needed to reassess?• What did you learn from the less successful attempts?• What happened to the group when balloons were dropped?• How is this similar/different to how you typically react to stressful situations? • What helped the group stay focused?• What did you learn about yourself? The group?• How can you apply these skills to your own problems?
Rohnke, K. & Butler, S. (1995). Quick Silver: Adventure Games, Initiative Problems, Trust Activities, and a Guide to Effective Leadership, (p.147). Kendall/Hunt: Dubuque, IA.

YouthThrive™: Promoting Youth Resilience Center for the Study of Social Policy
38 ™ | Promoting Youth Resilience
g Handout: S.A.F.E.
• S – Sequential: Use a curriculum or protocol that builds competencies in a coordinat-ed, step-by-step approach.
• A – Active: Utilize hands-on learning that incorporates practice and feedback.
• F – Focused: Set aside specific and sufficient time for training.
• E – Explicit: Clearly explain target skills so young people know the expectation.

YouthThrive™: Promoting Youth Resilience Center for the Study of Social Policy
39 ™ | Promoting Youth Resilience
g Handout: Tips for Facilitating Activities
Select the Right ActivityThere is a plethora of activity resources — books, videos, and websites — you can access to find activities to use with a variety of groups. Is this part of a class? A retreat? Will you be working with a group or an individual? Finding the right one can feel like an overwhelming task — keeping a few simple things in mind will increase your ability to find the right activity for a particular group.
You should have a goal in mind for what you hope to accomplish during the session (What do you hope the participants will explore, learn or practice?) and select activities that will help you reach that goal. Regardless of your goal, it’s always good to have a plan A and a plan B (and sometimes a plan C). This kind of flexibility puts you in a position to meet the group where it is on any given day.
When selecting an activity to use, keep in mind the developmental needs of the participants. Does the activity fit the age or developmental stage of the individual group members? What skills will be nec-essary for all members to participate? For example, some problem solving initiatives require abstract thinking skills or a high frustration tolerance. A good match with the developmental abilities of your group will help keep young people engaged in what they can see as a meaningful activity.
Consider the role that race, discrimination, and biases based on race, gender, sexual orientation, or disability can play when considering which activities to select. Workers’ own understanding of these dynamics create and/or perpetuate power dynamics and other factors that contribute to racial anxiety and can impact intergroup contact.
You Set the ToneTo most participants, these types of activities will be unfamiliar and may seem weird — such as a choco-late river filled with sharks! You want to create an environment where participants feel safe to try some-thing new and different, make mistakes, or even look a little silly. This means you have to be willing to do this yourself, and to do so with enthusiasm! Adults and practitioners can play a critical role as a buffer to risk in an environment over which an adolescent may have little or no control. Consider ways that you can help to provide safe spaces, reduce fear, and encourage prosocial behaviors.
Safety First… And Then There Are a Few Other Rules…Keep in mind that safety does not only refer to the physical safety of those in the group, but also to emotional safety. Again, these activities, while seemingly silly, can come with a high social risk. What will others think if I participate? What if I look stupid or make a mistake? A few non-negotiable rules should be in place: Safety first, challenge by choice, and everyone gives their 100% — but remember that everyone’s 100% looks different.
Frame the ActivityOur job as facilitators is to provide an opportunity for the participants to have an experience. For the learning to be especially powerful, we need to manage our expectations of what we think the group needs to get out of the activity. When we relax and let the group do the work, we will be amazed at the lessons that are revealed. Think of yourself as a guide, not a boss.
Take Time to Reflect This is an important step to ensure that the group can identify if they have met their goal and what take away lessons they have learned. Thoughtful reflection is a combination of open-ended, feeling, judge-ment, guiding, and closed questions that go far beyond “how was that?” Framing the debrief around those characteristics that help us become more resilient (Characteristics of Resilient Youth discussed earlier in the What Does Resilience Look Like? section and in the Resilience section of the Youth Thrive training) will help young people generalize the experience of the activity to their real-life circumstances (see “Suggestions for Activity Process Questions” handout).

YouthThrive™: Promoting Youth Resilience Center for the Study of Social Policy
40 ™ | Promoting Youth Resilience
g Handout: Suggestions for Activity Process Questions
GENERAL QUESTIONS
• What did you notice/see/hear during the activity?
• Were you surprised by anything that happened?
• Who had the same reaction? Who had a different experience?
PROBLEM SOLVING
• How did you/group approach the problem?
• How did you/group utilize the planning period?
• How were possible solutions evaluated by you/group?
• Was one approach more effective than the other?
• Was it necessary to reevaluate your initial plan? How did you know you needed to reassess?
• What did you learn from the less successful attempts?
• Were all voices heard?
• What interfered with the ability to listen to others?
• How did race, ethnicity, and religion shape your/group’s experiences?
• Did you access all available resources?
• What patterns did you notice in self/group in the problem solving process?
• In what ways was your/group’s approach to the problem similar to how you approach problems in your day-to-day experience?
LEADERSHIP
• Who did you notice take leadership roles?
• What behaviors helped you know this?
• How did the group respond to these behaviors?
• How did the leadership shift?
• How did the groups respond to these shifts?
TEAMWORK
• How are you different from the other group members?
• Are these differences a help or a hindrance?
• When do differences in group members get in the way of meeting goals?

YouthThrive™: Promoting Youth Resilience Center for the Study of Social Policy
41 ™ | Promoting Youth Resilience
• How can differences be capitalized on for the success of the group?
• On a scale of 1-10, how did the group cooperate?
• What is cooperation?
• What are the rewards of cooperation?
• Give examples of when the group cooperated. Give examples of when there was competition within the group.
SUPPORT
• How did the group support each other during this activity?
• How can support be developed? Destroyed?
• Can you give examples of when you had to trust someone in the group?
• What allowed you to place your trust in that person?
• How do we build a trusting environment?
• How do we build trust with another person?
• Can support be misplaced?
• How did the group manage mistakes made by individuals?
• What are some examples of feedback you received during the activity?
• How did you respond to the feedback?
• What tensions came up for the group?
• How was conflict addressed?
• Were you aware of peer pressure? Was it positive/negative?
• Were you aware of others focusing on prejudices? If so, how did it affect the group?
CLOSURE (Open Evaluation Questions)
• What did you learn/re-learn about yourself? Others?
• Did you do anything that you feel particularly proud of?
• Was your behavior typical of how you behave in a group?
• What would you do the same next time? Different?
• How can what you learned be carried over into other life situations?
• Did this experience/your responses/your patterns remind you of anything?
*Adapted from “Challenge Course Instructor’s Manual,” Venture Therapeutics.

YouthThrive™: Promoting Youth Resilience Center for the Study of Social Policy
42 ™ | Promoting Youth Resilience
F Activity Name: Planning Activities That Build Resiliency
g Time: 60 minutes
g Learning Goals:
1. Identify and discuss components of successful learning opportunities. 2. Practice selecting and preparing activities that enhance youth resiliency.
g Materials: Flipchart paper, markers, tape, Handouts: “Characteristics of Resilient Youth,”
“Guidelines for Planning Activities to Build Skills to Support Resilience,” “Resilience Skills Planning Worksheet”
g Instructions:
“ We have been talking a lot about building resiliency skills with young people and we’ve practiced using games and techniques you can take back to use in your own program. Now, we are going to discuss the remaining characteristics of resilient youth we iden-tified earlier. Let’s return to the “Characteristics of Resilient Youth” handout. Ask the group to take out this handout. I’d like to spend some time thinking about how we in-tentionally provide development opportunities for young people to learn and practice these additional skills.
To start, I’d like us to begin thinking about what it takes to learn new information or a new skill. Think about a learning experience — a workshop or class that you were involved with, either as a participant, facilitator, or observer — that did not go well. Do you have something in mind? Who can share what they thought didn’t go well in their example?
> Accept answers and record responses.
“ Let’s explore the other side of the learning experience continuum and think about a learning experience that went very well. What did you notice happening that made this a success?
> Accept answers and record responses.
“ How might we use what we learned from the successful experiences to improve those experiences that didn’t work?
> Lead a short discussion on how these adjustments can be made and record suggestions made by the group.

YouthThrive™: Promoting Youth Resilience Center for the Study of Social Policy
43 ™ | Promoting Youth Resilience
“ When you are planning skill-building activities for youth, there are guidelines you can keep in mind to help ensure your activities are more successful with the young people with whom you work.
> Provide Handout: “Guidelines for Planning Activities to Build Skills to Support Resil-ience.” Facilitate a discussion by asking the group to provide an example for each point and record answers.
• Set developmentally meaningful goals and explain them in a positive way.
• Provide positive role modeling of what you are presenting.
• Demonstrate acceptance of individual skill level and ability to participate.
• Be positive and supportive during the process.
• Provide honest and clear feedback.
> Lead the group in processing the activity when it is over.
“ Let’s take this information about what supports more successful learning experiences and put it into practice.
In a minute, we’ll break up into small groups. (The group size will depend on the num-ber of participants. If you have a relatively small group, have them find a partner for the exercise. If the group is larger, break them into groups of three to five.) Once you are in your groups, I want to choose one of the remaining resilience characteristics to focus on. Once you’ve decided on the characteristic, your group will use the handout to plan an activity that will assist youth in learning more about or practicing a skill which supports that characteristic. For example, your group might choose Strong Communi-cation Skills. What type of skill-building activities could you offer to youth that would help them learn and practice strong communication skills?
> Accept answers. These might include: assertiveness training, conflict resolution skills, creative writing, public speaking, debate team, volunteer experiences, etc.
“ Once you identify what you might do to build that characteristic, I want you to plan a complete activity. This can be a plan for a group or an individual activity. As your group is planning, I want you to remember our earlier discussion about what makes these types of skill-building activities successful. Use the “Guidelines for Planning Activities to Build Skills to Support Resilience” handout and refer to our earlier suggestions to focus your discussion on answering the following questions listed on your handout:

YouthThrive™: Promoting Youth Resilience Center for the Study of Social Policy
44 ™ | Promoting Youth Resilience
Identify your target audience. Is it an individual or group (i.e., GSA group, residents of your group home, young people utilizing your shelter or outreach services, group of young people on your probation case load, young people attending your life skills workshops)?
• What does your target audience already know?• What new information or new skill(s) do you want them to have at the end of the
activity?• How will you motivate the young person/people to participate in the learning
experience? • What resources (money, time, staff, material, space) will you need to provide the
learning experience?• What is your plan to encourage the young person/people to continue to practice — to
transfer the learning into their daily life?
“ Any questions? Answer any remaining questions. Ok, let’s get into our groups and start planning!
Trainer note: If the group is new to the work, you might work through an example together. Using one of the examples recorded in the earlier discussion, have the whole group complete the plan-ning sheet together. If there is enough time, then break them into small groups to complete their own examples.
> Provide the Resilience Skills Planning Worksheet to each group. Allow the groups 15-20 minutes to plan their activities. Monitor the groups for progress and adjust the time-frame to fit the whole group. Give the group a time check at the halfway, five-minute, and one-minute points. When time is called, ask the groups to report their work. If time is an issue, ask for only a couple of volunteers to share the work of their groups.
Wrap up the experience by leading a short discussion using the following quesions as a guideline:
• How easy/difficult was this exercise?
• What did you find was the the biggest struggle?
• How will you be able to use this exercise in your work at your agency to build a variety of youth resiliency skills and characteristics?
• Can we think about including the young person as a resource in the initial planning rather than just a participant in the activity? How would doing so help build even more skills for the young person?
YouthThrive™: Promoting Youth Resilience Center for the Study of Social Policy
45 ™ | Promoting Youth Resilience
g Handout: Guidelines for Planning Activities to Build Skills to Support Resilience
• Set developmentally meaningful goals with the identified youth; state them in a positive way.
• Provide positive role modeling of what you are presenting.
• Demonstrate acceptance of individual skill level and ability to participate.
• Be positive and supportive during the process.
• Provide honest and clear feedback.
• Lead the group in processing the activity when it is over.

YouthThrive™: Promoting Youth Resilience Center for the Study of Social Policy
46 ™ | Promoting Youth Resilience
g Handout: Resilience Skills Planning Worksheet
Resiliency Characteristic Focus:
Activity:
Identified Target Audience:
What does your target audience already know about this skill?
What additional information or new skill(s) do you want them to have at the end of the activity?
How will you motivate the young person/people to participate in the learning experience?

YouthThrive™: Promoting Youth Resilience Center for the Study of Social Policy
47 ™ | Promoting Youth Resilience
What resources (money, time, staff, material, space) will you need to provide the learning experience?
• Cost
• Time
• Staff
• Material
• Space
• Other
Think about how you will...• Set developmentally meaningful goals and state them in a positive way.
• Provide positive role modeling of what you are presenting.
• Demonstrate acceptance of individual skill level and ability to participate.

YouthThrive™: Promoting Youth Resilience Center for the Study of Social Policy
48 ™ | Promoting Youth Resilience
• Be positive and supportive during the process.
• Provide honest and clear feedback.
• Lead the group in processing the activity when it is over. What are some questions you can use?
Assessment: How will you know that you met your objectives? What will the young people do? (Examples: Create a play, poem, song, draw a picture, demonstrate a skill or belief, take a test, write a letter, etc.)
What is your plan to encourage the young person/people to continue to practice — transfer the learning into their daily life?

YouthThrive™: Promoting Youth Resilience Center for the Study of Social Policy
49 ™ | Promoting Youth Resilience
g Handout: Resilience Skills Planning Worksheet (Example)
Resiliency Characteristic Focus: Possesses Strong Communication SkillsKnows How to Express Themselves and Listen to Others
Activity: Practicing Job Interviews
Identified Target Audience:15-17-year-olds in Job Readiness Program
What does your target audience already know about this skill? The group has watched mock interview tapes and can identify helpfulcommunication skills for job interviews. They understand the importance ofbody language (i.e., good eye contact, attentive posture) and active listening.What additional information or new skill(s) do you want them to have at the end of the activity?Participants will increase confidence in answering basic job interview skills.
How will you motivate the young person/people to participate in the learning experience?Create a safe learning and practice environment, tie this skill practice to increase success in job attainment. Allow them to first be interviewers, with staff as interviewees to increase comfort level.
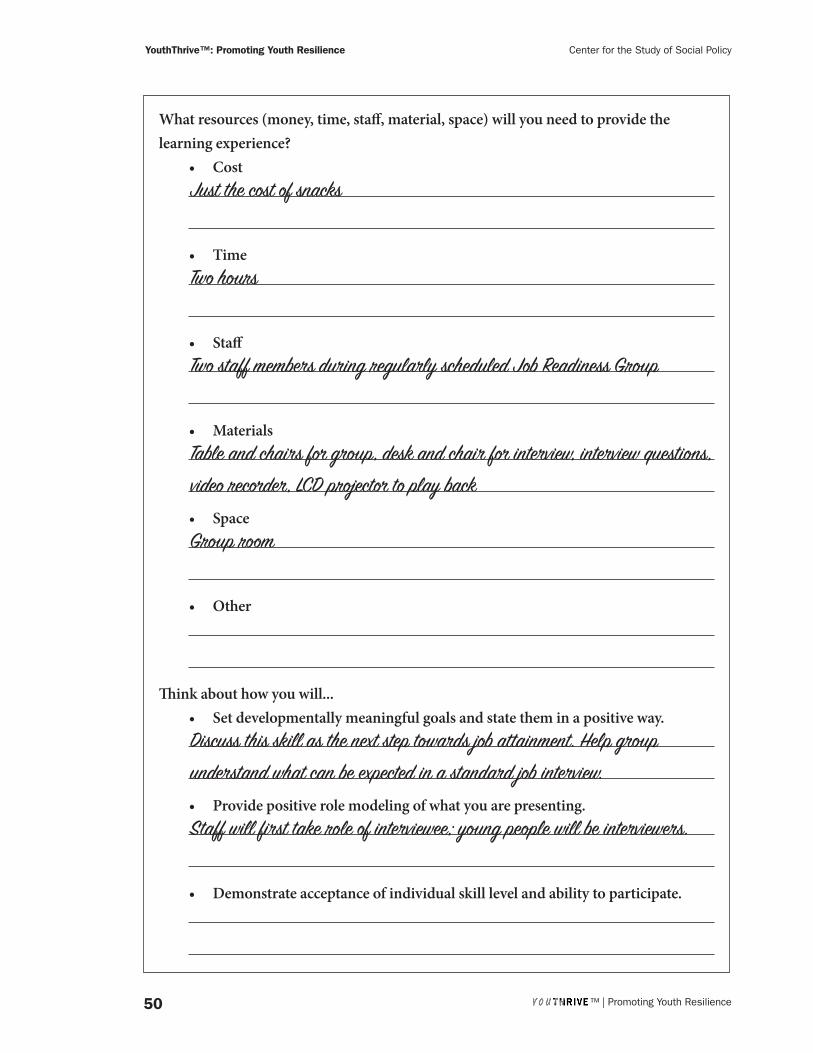
YouthThrive™: Promoting Youth Resilience Center for the Study of Social Policy
50 ™ | Promoting Youth Resilience
What resources (money, time, staff, material, space) will you need to provide the learning experience?
• Cost Just the cost of snacks
• Time Two hours
• Staff Two staff members during regularly scheduled Job Readiness Group
• Materials Table and chairs for group, desk and chair for interview, interview questions, video recorder, LCD projector to play back
• Space Group room
• Other
Think about how you will...• Set developmentally meaningful goals and state them in a positive way.
Discuss this skill as the next step towards job attainment. Help group understand what can be expected in a standard job interview.
• Provide positive role modeling of what you are presenting. Staff will first take role of interviewee; young people will be interviewers.
• Demonstrate acceptance of individual skill level and ability to participate.

YouthThrive™: Promoting Youth Resilience Center for the Study of Social Policy
51 ™ | Promoting Youth Resilience
• Be positive and supportive during the process. Refer to group norms and expectations to maintain a safe supportive group environment.
• Provide honest and clear feedback. Video tape each session. Spend a few minutes, as a group, reviewing each tape. Ask the interviewee what they did well, what they need to keep working on. Ask group members to provide the same feedback.
• Lead the group in processing the activity when it is over. What are some questions you can use?
What were the most helpful skills you noticed today? What helps interviewees in clearly answering the questions? What is one thing you learned from watching others do interviews? What do you think others learned from watching your interview? What is one thing you did well? What is one thing you need to improve on?Assessment: How will you know that you met your objectives? What will the young people do? (Examples: Create a play, poem, song, draw a picture, demonstrate a skill or belief, take a test, write a letter, etc.)They will each have at least one successful mock interview. They will eachparticipate in at least one debriefint session with the group.
What is your plan to encourage the young person/people to continue to practice — transfer the learning into their daily life?Check in with progress, celebrate when members get interviews, celebrate whenmembers get jobs, do debriefs following any interview.

YouthThrive™: Promoting Youth Resilience Center for the Study of Social Policy
52 ™ | Promoting Youth Resilience
F Activity Name: Personal Reflection and Action Planning
g Time: 40-60 minutes
g Learning Goals:
1. Review the course content and consider what is most relevant for participants.
2. Create a plan for implementing learning from the course upon return to the programs.
3. Evaluate participant experience during the training.
g Materials: Flipchart, markers, pencils/pens, Handout: “Personal Reflection and Action Planning Worksheet”
g Instructions:
“ We have spent some time looking at how we can become more intentional in providing opportunities for young people to build the necessary skills to become truly resilient. I think it is important for us to take some time and reflect on this information, our cur-rent practice with youth, and to think about how we are planning to put these concepts into practice in our day-to-day work.
> Provide the Personal Reflection and Action Planning Worksheet to participants.
“ I’d like us to take a couple of minutes to think about our personal experiences as we worked through this material. Did you have any “aha” moments? Is there something you discovered that you hadn’t thought about before? Is there an activity or approach that really made an impression on you? I want you to take three to five minutes and jot down those things that left a big impression on you.
> Allow the group three to five minutes to reflect on the information and record their thoughts. Ask for a couple of volunteers to share with the group.
“ Now let’s think about how these new ideas relate to what we already knew — or thought we knew — about resiliency and our role in helping young people develop these skills. Did you find your current knowledge or beliefs to be challenged? Were you pleased to find that some of your current approaches to this work are being supported by what you experienced as you went through the training? Take a couple of minutes and jot down your ideas about how this information fits with what you already knew.
> Provide three to five minutes for the participants to work independently to answer these questions. Ask for a couple of volunteers to share what they recorded.

YouthThrive™: Promoting Youth Resilience Center for the Study of Social Policy
53 ™ | Promoting Youth Resilience
“ Now that we have reflected back, let’s look to the future. None of this information will be helpful to anyone if we don’t actively choose to use it in our practices. Turn to the fi-nal section of your worksheet. Take five to ten minutes to develop your plan to integrate this information, or some of these activities, into your own professional practice. It’s important that you are specific about what you want to do, who can be your resource, how you will be held accountable for implementing this plan, and even about the possi-ble barriers you might face? Any questions?
> Allow five to ten minutes for participants to complete their plans. Depending on the size of the group and time, complete the activity in one of the following ways:
One:
“ Now that you have completed your plan, I’d like you to pick a responsibility part-ner in the group. It can be someone you have known or worked with for a while or someone you just met through the training. When you find a partner, I’m going to ask each of you to share your plan. After you have each shared your work, develop a way to follow up at least one time with your partner — it can be by email, Facebook, phone, or face-to-face over lunch. You’ll have 15 minutes to complete this step.
> Allow 15 minutes for participants to find responsibility partners, share their plans, and develop ways to follow up with each other.
“ OK, does everyone have a plan for what you want to incorporate, as well as a plan for follow-up?
> If time allows, you might ask for one or two people to share their plans.
Two:
“ It’s important that we make our plans clear and that we identify those who can be resources for us. Can I get a couple of people to share the plans they developed with the whole group?
> Ask for a few volunteers to share their plans with the group. Provide feedback and seek clarification if necessary.
“ Thanks for sharing your plans. I think it is important that we remember that the changes we are asking young people to consider making can be difficult. So are the changes that we, ourselves, need to make in order to provide the most impactful developmental opportunities to those with whom we work. Having a clear plan to support our professional development is a strong step toward making sure we have the skills necessary to support young people to thrive!
> Ask for any final questions or comments. Thank everyone for attending and provide evaluations and certificates.

YouthThrive™: Promoting Youth Resilience Center for the Study of Social Policy
54 ™ | Promoting Youth Resilience
g Handout: Personal Reflection and Action Planning Worksheet
What key information will I take away from this training experience? Did I have any aha moments? Is there something I discovered that I hadn’t thought about before? Is there a specific activity or approach that made an impression on me?
How did these new ideas relate to what I already knew about resilience and work with young people?
Did I find my current knowledge or beliefs to be challenged? Was I pleased to find my current approach to this work is being supported by the information we discussed?
What is my plan for integrating this information into my daily practice? What do I want to do? (Be specific — e.g., I will offer yoga classes two times per week for the young people in my shelter.)

YouthThrive™: Promoting Youth Resilience Center for the Study of Social Policy
55 ™ | Promoting Youth Resilience
Who can be my resource (coworker, supervisor, mentor)? Can I use this new informa-tion as a part of my supervision?
What possible barriers might I face?
How might I approach overcoming those barriers?
Accountability Plan: (include timeline, responsibility partner information, etc.)

YouthThrive™: Promoting Youth Resilience Center for the Study of Social Policy
56 ™ | Promoting Youth Resilience
g Handout: Personal Reflection and Action Planning Worksheet (short session)
Section Covered in Today’s Session: o What Does Resilience Look Like? o Teaching Skills to Help Modulate Emotionso Teaching Problem-Solving Skills o Planning to Teach Skills
How did today’s information relate to what I already know about this topic?
What key information will I take away from this training experience? Did I have any aha moments?
What does your target audience already know about this skill?
What will I integrate into my daily practice between now and the next training session? What do I want to do? (Be specific — i.e., “I will offer yoga classes two times per week for the young people in my shelter.”)