zeiss cinema zoom lenses · 2020-05-04 · in this manual you learn how to change the mount of a...
TRANSCRIPT
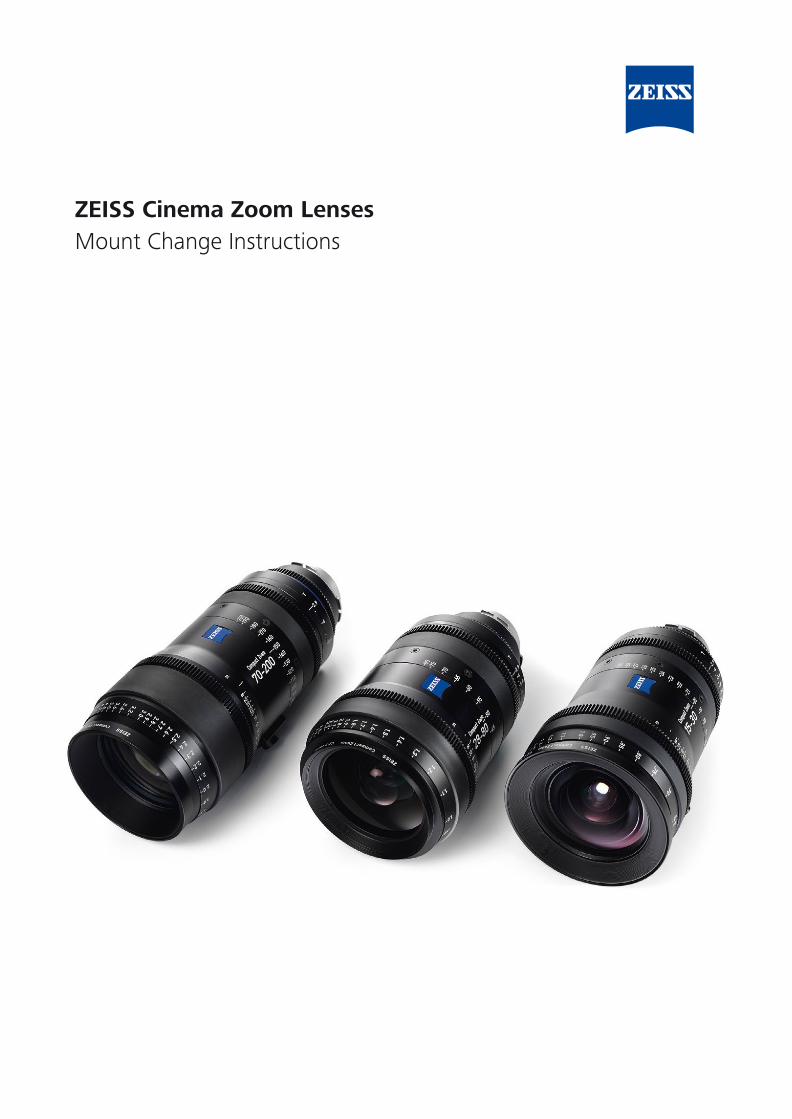
ZEISS Cinema Zoom Lenses Mount Change Instructions

Table of Contents
2
Introduction 3
Explanation of Symbols 3 Overview 4 Delivery Contents of a ZEISS CZ.2 4 Technical Data 5
Changing the Mount of a ZEISS CZ.2 6
Detaching a Mount 6 Attaching a Mount 10
Adjusting a ZEISS CZ.2 to Your Digital Camera 15
Testing the Sharpness 16 Correcting the Flange Focal Distance 19
Appendix 21
Color Code of the Shims 21 Shimming Table 21 Mount Change Accessories 23 Glossary 23

Introduction
3
In this manual you learn how to change the mount of a ZEISS Cinema Zoom CZ.2 (abbreviation: ZEISS CZ.2) and how to match it to a digital camera. In order to explain the procedure, this manual uses a ZEISS CZ.2 28 – 80 which is scaled in feet with PL mount. Proceed in the same sequences to switch from or to any other mount that is available for the ZEISS CZ.2 (Canon1 EF, Nikon2 F, Sony3 E and MFT).
Explanation of Symbols
1 Canon is a trademark or registered trademark of Canon Inc. and/or other members of the Canon Group.
2 Nikon is a registered trademark of Nikon Corporation
3 Sony and E-mount are registered trademarks of Sony Corporation
The information symbol indicates additional information, which is useful for the context.
The skip symbol indicates that under certain circumstances you can skip certain steps.
The result symbol indicates information about the obtained result of a step.
The warning symbol indicates dangerous situations and actions, which might impair the functionality of the product, damage the product or hurt the user.

4
Overview
1 front lens
9 lens barrel
2 focus ring 10 groove of the lens 3 focus index mark 11 small screw 4 lens foot 12 rear lens 5 zoom index mark 13 shims 6 zoom ring 14 mount including the black inner ring 7 aperture index mark 15 T6 screws 8 aperture ring
10 12 13 14 15
1 2 3 5 4 6 7
Delivery Contents of a ZEISS CZ.2
• 1x ZEISS CZ.2 • 1x Front cap • 1x Rear cap • 1x Focus lever • 3x Lens support riser 3/8"
11 9 8

5
Technical Data
Cinema Zoom
Cinema Zoom
Cinema Zoom
15 – 30 mm 28 – 80 mm 70 – 200 mm
Aperture range T 2.9 to T 22 T 2.9 to T 22 T 2.9 to T 22
Focal length 15 – 30 mm 28 – 80 mm 70 – 200 mm
Close focus distance1 0.55 m / 1'10" 0.83 m / 2'8" 1.51 m / 5'
Length2 198 mm / 9.92" 196 mm / 7.72" 250 mm / 9.84"
Front diameter 114 mm / 4.49" 95 mm / 3.7" 95 mm / 3.7"
Weight 2.6 kg / 5.7 lbs 2.5 kg / 5.5 lbs 2.8 kg / 6.2 lbs
Horizontal Angle of View
Full-Frame3 100 – 62° 66 – 25° 29 – 10°
APS-H4 90 – 54° 57 – 21° 24 – 9°
Super 355 79 – 46° 48 – 18° 20 – 7°
Normal 356 72 – 41° 43 – 16° 18 – 6°
APS-C7 73 – 42° 43 – 16° 18 – 6°
MFT8 59 – 33° 34 – 12° 14 – 5°
1 Close focus distance is measured from the image plane
2 Front to PL mount flange
3 Horizontal angle of view for a full-frame camera
(aspect ratio 1:1.5, dimensions 36 mm x 24 mm / 1.42" x 0.94")
4 Horizontal angle of view for an APS-H camera
(aspect ratio 1:1.81, dimensions 30.2 mm x 16.7 mm / 1.19" x 0.66")
5 Horizontal angle of view for an ANSI Super 35 Silent camera
(aspect ratio 1:1.33, dimensions 24.9 mm x 18.7 mm / 0.98" x 0.74")
6 Horizontal angle of view for a Normal 35 Academy camera
(aspect ratio 1:1.37, dimensions 22 mm x 16 mm / 0.87" x 0.63")
7 Horizontal angle of view for an APS-C camera
(aspect ratio 1:1.50, dimensions 22.3 mm x 14.9 mm / 0.88" x 0.59")
8 Horizontal angle of view for a Micro 4/3 (MFT) camera
(aspect ratio 1:1.33, dimensions 17.3 mm x 13 mm / 0.68" x 0.51")

6
Changing the Mount of a ZEISS CZ.2
In this chapter you learn how to change the mount of a ZEISS CZ.2. The procedure consist of 2 parts which are both mandatory to successfully change a mount. You learn how to detach the currently attached mount and how to attach a different mount. To make sure the ZEISS CZ.2 works properly, additionally complete the subsequent procedure: Adjusting a ZEISS CZ.2 to Your Digital Camera.
Detaching a Mount
You need
ZEISS CZ.2
ZEISS T6 torque wrench with a torque of 0.4 Nm alternatively: regular T6 torque wrench with a torque of 0.4 Nm
ZEISS Interchangeable Mount Set for ZEISS CZ.2
Requirements
Ensure that your working space is flat and leveled, in order to prevent the lens from tilting and falling over.
Ensure that the environment is clean and free from dust so that no dust particles enter the ZEISS CZ.2.
Ensure that the front lens cap sits on your ZEISS CZ.2, in order to avoid scratches.
The use of tools offered by ZEISS is highly recommended. You can purchase these tools directly from ZEISS or your trusted ZEISS dealer. See Mount Change Accessories

7
1. Place your ZEISS CZ.2 on a flat surface with the mount facing up and the serial number facing away from you.
2. Remove the rear lens cap.
3. With a T6 torque wrench remove the torx screws of the mount.
The serial number is located at the side of the lens foot. The serial number varies.
You can now see the mount.
The black inner ring is securely fastened to the mount at the ZEISS factory and does not need to be removed.
The mount is now loose.

8
4. Carefully detach the mount from your ZEISS CZ.2.
5. With a T6 torque wrench remove the torx screws of the black adapter ring.
If you are changing from a PL mount, skip Step 5 and 6, since the PL mount doesn´t have an adapter ring.
If you are changing from a PL mount, you can directly see the shims. If you are changing from any other mount than a PL mount, you can now see the black adapter ring.
The shape and height of the black adapter ring varies according to the different mounts.
The black adapter ring is now loose.

9
6. Detach the black adapter ring from your ZEISS CZ.2.
1 groove of the lens 2 shims 3 small screw in the groove of the lens
1
2
3
Now you see the shim(s) and a small screw in the groove of the lens barrel. You successfully detached the mount
When detaching the mount for the first time, do not remove the shims. Never remove the small screw in the groove of the lens.

10
Screws required in order to attach an interchangeable mount PL LPL EF EF Spacer E E Spacer
Cinema Zoom 2
M2x8 M2x8 M2x8 M2x10 M2x8 M2x10
Attaching a Mount
You need
ZEISS CZ.2
ZEISS T6 torque wrench with a torque of 0.4 Nm
ZEISS Interchangeable Mount Set for ZEISS CZ.2
The use of tools offered by ZEISS is highly recommended. You can purchase these tools directly from ZEISS
or your trusted ZEISS Dealer. See Mount Change Accessories
EF-Mount Spacer
E-Mount Spacer

11
Requirements
Ensure that your working space is flat and leveled, in order to prevent the lens from tilting and falling over.
Ensure that the environment is clean and free from dust so that no dust particles enter the ZEISS CZ.2.
Ensure that the front lens cap sits on your ZEISS CZ.2, in order to avoid scratches.
Make sure you successfully completed Part 1: Detaching a Mount

12
1. Carefully place the adapter ring, which came with your ZEISS Interchangeable Mount Set for the ZEISS CZ.2. Make sure the small screw in the groove of the ZEISS CZ.2 sinks into groove of the adapter ring.
2. With the T6 torque wrench tighten the torx screws using a torque of 0.4 N
If you are changing to a PL mount, skip Steps 1 and 2 in this chapter.
The shape and height of the black adapter ring varies according to the different mounts.

13
3. Place the mount on your ZEISS CZ.2:
3.I PL mount: Place the PL mount on the ZEISS CZ.2 in such a way that the groove of the PL mount lays on top of the small screw on the lens barrel.
3.II EF mount: Place the silver EF mount on the adapter ring in such a way that the notch aligns with the aperture index mark.


13
3.III F mount: Place the F mount on the adapter ring in such a way that the notch aligns with the aperture index mark.
3.IV MFT mount: Place the MFT mount on the adapter ring in such a way that the notch aligns with the aperture index mark.

14
3.V E mount: Place the E mount on the adapter ring in such a way that the blue dot aligns with the aperture index mark.
4. With the T6 torque wrench tighten the torx screws using a torque of 0.4 N
In this chapter you learned how to detach the mount of your ZEISS CZ.2 and attach a new mount to your ZEISS CZ.2. To make sure your ZEISS CZ.2 works properly, also complete the subsequent procedure: Adjusting a ZEISS CZ.2 to Your Digital Camera.
You now successfully changed the mount of a ZEISS CZ.2.

15
Adjusting a ZEISS CZ.2 to Your Digital Camera
In the following chapter you learn how to adjust your ZEISS CZ.2 to a digital camera. This is necessary to ensure that the ZEISS CZ.2 works properly and delivers the maximum image quality. In order to perform this adjustment, ZEISS provides shims in different colors which indicate their thickness.
You need:
Tripod
Digital camera with live view
ZEISS CZ.2 lens that needs to be adjusted
Siemens star test chart
Measuring tape or folding ruler
Flat-blade screwdriver
At least 5 m of free space
ZEISS Interchangeable Mount Set for ZEISS CZ.2 alternatively: ZEISS Shims set
Requirements:
Make sure that the front and rear lens of the ZEISS CZ.2 are clean.
Ensure that the illumination is bright and uniform.
Set your camera to standard settings (cf. work settings)
The use of tools offered by ZEISS is highly recommended. You can purchase these tools directly from ZEISS or your trusted ZEISS Dealer. See Mount Change Accessories
Smudges and fingerprints on the lens surface can gently be removed with a soft brush
and then with a dry and clean cotton cloth. The ZEISS lens cleaning kit will give superior results and is highly recommended for this purpose. For further information, please watch our tutorial on how to clean your lens. https://youtu.be/syOzecbtuwg

16
Testing the Sharpness
1. Fasten the siemens star test chart on a wall.
2. Mount the ZEISS CZ.2 on the camera.
3. Mount the camera on a tripod.
4. Position your camera at a testing distance according to the Shimming Table in the appendix.
5. Level the camera.
The testing distance is measured from the siemens star test chart to image plane on your camera.

17
6. Set the aperture of the ZEISS CZ.2 to T2.9 by rotating the aperture ring.
7. Activate the live view of your camera.
8. Select the maximum magnification of the live view.
9. Make sure that the center of the image aligns with the center of the siemens star test chart.
10. Set the focal distance of the ZEISS CZ.2 to longest focal length by rotating the zoom ring.
11. Set the focus ring according to the testing distance. See Shimming Table
12. Turn the focus ring to determine if the sharpness is located below or above the testing distance.
13. Again, set the focus ring according to the testing distance. See Shimming Table
The aperture setting must not be changed during the adjustment process.
This will give you an idea if you need to reduce or enlarge the distance of the camera to the
siemens star test chart. You will need this information in a further step.
If you achieve the maximum sharpness at the testing distance according to the shimming tables, you successfully tested your ZEISS CZ.2. No further steps are required.

18
14. Reduce or enlarge the distance between the test chart and the image plane of the camera by a maximum of 5 cm or 2" to obtain maximum image sharpness on the live view. Keep the focus ring at the testing distance. See Shimming Table • If you measured the sharpness below the testing distance you need to reduce the distance between the test chart and
the image plane of the camera. • If you measured the sharpness above the testing distance you need to enlarge the distance between the test chart and
the image plane of the camera.
15. Now remeasure the testing distance between the image plane mark on the camera body and the test chart (= the actual distance) • If the testing distance has changed, note the distance. The change indicates that the flange focal distance of the
ZEISS CZ.2 must be adjusted. Proceed with the steps in Correcting the Flange Focal Distance.
Do not take down the setup as you will need it again to recheck the sharpness later in the process.

19
Correcting the Flange Focal Distance
1. Remove the ZEISS CZ.2 from the camera.
2. Follow the steps of chapter Detaching a Mount.
3. Determine the total thickness of the shims that already lay in the lens groove.
4. Increase or decrease the total shim thickness according to the tables in the appendix. See Shimming Table
Any combination of shims is possible to achieve the required thickness and therefore the desired flange focal distance. Always use the closest possible combination of shims.
Example: Using a ZEISS CZ.2 28 – 80 with an PL mount, scaled in feet and a siemens star test chart at a test distance of 7 ft, an actual distance of 7 ft 2' is measured. Due to the shimming tables, you add a orange shim 0.102 mm to the total thickness of the shims.

20
5. Use a flat-bladed screwdriver or a pair of tweezers to remove or add shims.
6. Follow the steps of chapter Attaching a Mount to attach a new mount.
7. echeck the sharpness of the lens by following the steps of chapter Testing the Sharpness once more. Check the sharpness at the longest and the shortest focal length.
a. If the testing distance has changed, follow the steps of chapter Correcting the Flange Focal Distance once more. b. If you achieve the maximum sharpness over the whole focal range, you successfully tested your ZEISS CZ.2.
In this chapter you learned how to adjust a ZEISS CZ.2.
Handle the shims carefully as they can easily kink or tear which makes them unusable. Ensure that the colored shims lie on top of each other in the groove of the lens barrel and do not cover the screw holes. The shims might otherwise be damaged, while screwing in the screws.

21
Appendix
Color Code of the Shims
Shim color Thickness [mm]
Silver 0.013
Gold 0.019
Purple 0.025
Light Blue 0.032
Red 0.038
Blue 0.051
White 0.064
Green 0.076
Orange 0.102
Light Purple 0.127
Clear 0.152
Shimming Table
Minus sign: Enlarge the flange focal distance. Remove Shims Plus sign: Reduce the flange focal distance. Add Shims
Compact Zoom CZ.2 70 – 200 / T2.9
Meter distance scale Feet distance scale
Distance to test chart [mm] 4500 Distance to test chart [ft] 15
Object distance Change of total Object distance Change of total at best focus [mm] washer thickness [mm] at best focus [ft] washer thickness [mm] 4460 -0,09 14ft 10' -0,11
4470 -0,07 14ft 10 1/2' -0,08
4480 -0,04 14ft 11' -0,06
4490 -0,02 14ft 11 1/2' -0,03
4500 0,00 15ft 0' 0,00
4510 +0,02 15ft 1/2' +0,03
4520 +0,04 15ft 1' +0,06
4530 +0,07 15ft 1 1/2' +0,08
4540 +0,09 15ft 2' +0,11

22
Compact Zoom CZ.2 28 – 80 / T2.9
Meter distance scale Feet distance scale
Distance to test chart [mm] 2000 Distance to test chart [ft] 7
Object distance Change of total Object distance Change of total at best focus [mm] washer thickness [mm] at best focus [ft] washer thickness [mm]
1960 -0,07 7ft 10' -0,10
1970 -0,06 7ft 10 1/2' -0,07
1980 -0,04 7ft 11' -0,05
1990 -0,02 7ft 11 1/2' -0,02
2000 0,00 7ft 0' 0,00
2010 +0,02 7ft 1/2' +0,02
2020 +0,04 7ft 1' +0,05
2030 +0,06 7ft 1 1/2' +0,07
2040 +0,07 7ft 2' +0,10
Compact Zoom CZ.2 15 – 30 / T2.9
Meter distance scale Feet distance scale
Distance to test chart [mm] 1000 Distance to test chart [ft] 4
Object distance Change of total Object distance Change of total at best focus [mm] washer thickness [mm] at best focus [ft] washer thickness [mm] 960 -0,06 3ft 10' -0,04
970 -0,04 3ft 10 1/2' -0,03
980 -0,03 3ft 11' -0,02
990 -0,01 3ft 11 1/2' -0,01
1000 0,00 4ft 0' 0,00
1010 +0,01 4ft 1' +0,01
1020 +0,03 4ft 1 1/2' +0,02
1030 +0,04 4ft 2' +0,03
1040 +0,06 4ft 2 1/2' +0,04

23
Mount Change Accessories
Accessories ZEISS Identification Number
Interchangeable Mount Set EF (CZ.2 70 – 200 / T2.9) 2002-824
Interchangeable Mount Set EF (CZ.2 28 – 80 / T2.9) 2016-087
Interchangeable Mount Set EF (CZ.2 15 – 30 / T2.9) 2075-923
Interchangeable Mount Set PL (CZ.2 70 – 200 / T2.9) 2002-823
Interchangeable Mount Set PL (CZ.2 28 – 80 / T2.9) 2016-086
Interchangeable Mount Set PL (CZ.2 15 – 30 / T2.9) 2075-926
Interchangeable Mount Set F (CZ.2 70 – 200 / T2.9) 2002-825
Interchangeable Mount Set F (CZ.2 28 – 80 / T2.9) 2016-448
Interchangeable Mount Set F (CZ.2 15 – 30 / T2.9) 2075-924
Interchangeable Mount Set MFT (CZ.2 70 – 200 / T2.9) 2002-826
Interchangeable Mount Set MFT (CZ.2 28 – 80 / T2.9) 2016-449
Interchangeable Mount Set MFT (CZ.2 15 – 30 / T2.9) 2075-925
Interchangeable Mount Set E (CZ.2 70 – 200 / T2.9) 2002-827
Interchangeable Mount Set E (CZ.2 28 – 80 / T2.9) 2016-450
Interchangeable Mount Set E (CZ.2 15 – 30 / T2.9) 2075-922
Support Bracket EF, F, MFT, E (incl. screws) 1856-667
Torx torque wrench (T6, torque moment 0,4 Nm) 0520-065
Front Lens Cap Focal Lengths 18 – 85 mm & 100 mm CF 0097-227
Rear Lens Cap EF 1793-167
Rear Lens Cap PL 102160-0052-000
Rear Lens Cap F 1793-178
Rear Lens Cap MFT 1889-118
Rear Lens Cap E 1907-145
ZEISS Siemens Star Test Chart 1849-755
Set of Colored Shims CP.2 1853-634
Glossary
Flange focal distance flange-to-film distance, flange focal depth, flange back distance, flange focal length
Shim washer
Index mark aperture indicator, aperture line, aperture mark, aperture index
Flat-blade screwdriver slotted screwdriver, flathead screwdriver

EN_10_070_0003I Printed in Germany CZ-VIII/2017 Subject to change in design and scope of delivery and as a result of ongoing technical development.
Carl Zeiss AG
C
amera Lenses
73446 Oberkochen
Germ
any
Phone +49 7364 20-6175 Fax: +49 7364 20-4045
ww
w.zeiss.com
/cine