zen of iraf
TRANSCRIPT

7/27/2019 zen of iraf
http://slidepdf.com/reader/full/zen-of-iraf 1/53
The Zen of IRAF
A Spiritual User’s Guide to the "Image Reduction andAnalysis Facility" for the LINUX Novice
A. Charles Pullen
Revision 1.0 14June 2003 Page 1 of 53
A. Charles Pullen, all rights reserved.

7/27/2019 zen of iraf
http://slidepdf.com/reader/full/zen-of-iraf 2/53
Table of Contents
I. INTRODUCTION……………………………………………………………………………….…….3
II.BEGININGS……………………………………………………………………………………………4A .Background………………………………………………………………………………….4
B. Assumptions………………………………………………………………………………..4C. LINUX Review……………………………………………………………………………..4D. Installation of IRAF on the LINUX PC……………………………………………………5E. Getting to Know the Beast - Fun with dev$pix……………………………………………5
III. IMAGE CALIBRATION…………………………………………………………………………….9A. Overview………………………………………………………………………………….10B. File Names………………………………………………….……………………………..10C. Getting Headers Straight………………………………………………………………….10D. Getting to Know ccdproc…………………………………………………………………13E. Fixing Bad Pixels…………………………………………….……………………………15
F. Overscan Corrections……….……………………………………………………………..17G. Overscan Trimming……………………………………………………………………….18H. Dark Subtraction………………………………………………………………………….18I. Making a Master Bias Frame and Applying Bias………………………………………….19J. Making Master Field Frames and Applying Flat Field Correction………………………..20K. Registering Images or Performing Astrometry…………………………………………...22
IV. INSTUMENTAL PHOTOMETRY……………………………………………………………..….23A. Identifying Standard Stars…………………………………………………………………23B. Using daofind for Star Identification……………………………………………………...25C. Setting Aperture and Background Annulus Size……………………………………….…29
D. Extracting Raw Photometry with phot…………………………………………………….30
V. STANDARD SYTEM CORECTIONS………………………………………………………..……34A. Making an Image Set………………………………………………………………………34B. Making a Standard Star Observation File……………………………………………….…35C. Making Configuration Files………………………………………………………………..38D. Fitting the Transformation Plots…………………………………………………………...40E. Back Checking Your Work………………………………………………………………...41
VI. THE FINISHED PRODUCT……………………………………………………………..………43
VII. ACKNOWLEDGMENTS……………………………………………………………………..…45
VIII. RESOURCES……………………………………………………………………………………...46
XI. REFERENCES………………………………………..……………………………………………46
X. APPENDIX……………………………………………..…………………………………………...46
Revision 1.0 14June 2003 Page 2 of 53
A. Charles Pullen, all rights reserved.

7/27/2019 zen of iraf
http://slidepdf.com/reader/full/zen-of-iraf 3/53
I. INTRODUCTION
Go beyond this way or that way, to the farther shore where the world dissolves
and everything becomes clear. Beyond this shore and the farther shore, Beyond the beyond, where there is no beginning, no end, without fear, go.
- Buddha in the Dhammapada
"IRAF is the Image Reduction and Analysis Facility, a general purpose software system for thereduction and analysis of astronomical data. IRAF is written and supported by the IRAF programminggroup at the National Optical Astronomy Observatories (NOAO) in Tucson, Arizona. NOAO is operated by the Association of Universities for Research in Astronomy (AURA), Inc. under cooperativeagreement with the National Science Foundation" (from http://iraf.noao.edu/iraf/web/).
The astute reader will have already noticed that IRAF is made by a consortium, controlled by agovernment contractor, overseen by a committee. That's the bad news. The good news is that IRAF isthe most powerful, free, software for CCD image reduction and analysis that the U.S. taxpayer ever
provided the astronomical community, amateur and professional alike. That said, it has also been calledone of the most "user-antagonistic" pieces of software ever written (Hager, 2002). Part of this fact isthat it is primarily command line driven; remember MS-DOS? Another fact is that editing text filesdoes configuration of tasks, not using nifty dialogs as in Windows. But, once the user gets into themethod behind the madness, the logic behind IRAF can begin to grow on one.
IRAF is extremely well documented, with both on-board help files for every task as well as a number of web accessible tutorials, reference guides, and user manuals (see resources). That's the good news. The bad news is that the documentation has not kept up with version revisions. So, while you can get fromA to B following examples in the help files and other documentation, you probably worked too hard toget there. The most glaring example of this problem is that, originally, IRAF required that FITS format
images be converted into an IRAF native format, .imh, using the command "rfits". This step, andreferences to .imh files, fills the documentation. Yet, starting around 1995, IRAF became able to handleFITS files transparently, with no need for image conversion! This document will try to help you avoidthe painful steps to IRAF self-realization the author endured.
Originally intended for UNIX mainframes with tape drives, IRAF has been made accessible to theLINUX PC’s that are replacing even Sun workstations. This conversion again comes with a price - thedocumentation is not specific to the LINUX version, and may even conflict at times. One personalitytrait of LINUX users is (or should be) that they are willing to exchange thinking by droids in Redmond,Washington ( Microsoft) with greater computing power at the expense of complexity. The user whosees every error message, failure to execute a command, or system lock up as a worthy challenge, will
do well with LINUX and IRAF. The user who doesn't will likely be found naked, screaming, in the rain,on a dark night, in their local city park prior to being institutionalized. Or follow the legions of previous users who just gave up trying. Be of stout heart! IRAF's ability to simplify, yes simplify, your image reduction and photometry is worth the journey; as is the benefit to your personal spiritual growththough adversity. And you will grow...
Revision 1.0 14June 2003 Page 3 of 53
A. Charles Pullen, all rights reserved.

7/27/2019 zen of iraf
http://slidepdf.com/reader/full/zen-of-iraf 4/53
II. BEGINNINGS
One equal temper of heroic hearts, Made weak by time and fate, but strong in will
To strive, to seek, to find, and not to yield.
- Tennyson
A. Background
As part of Swinburne Astronomy Online, I chose to do a project in HET611 –- astrophysics, involving plotting and interpreting a Color-Magnitude Diagram (CMD) for the open cluster M67. I decided tocombine aspects of this project with another course taken concurrently, HET609 - Imaging. So, for theimaging project (this document) it was proposed to make a user's guide to IRAF. Specifically, this guidewas to be for the non-LINUX expert and would also be more current than the official offerings from NOAO. The author had dabbled with IRAF in the past, but knew that the need to make a classdeliverable would be an incentive to really "break though" past failures and disappointments. The CMD
project involved the calibration of B, R, and I images of SA104, SA107 (each at several airmasses) andM67 taken with a 2085 by 2085 pixel CCD at McDonald Observatory by PhD candidate (now Dr.)Pamela Gay. The student was expected to process the data fully, though a B-R vs R plot on theJohnson-Cousins UBVRI system.
B. Assumptions
It is assumed you have an i86 PC clone, with some flavor of LINUX installed and working. The projectwas performed using Red Hat 7.2, on a Pentium -4 clone with 256MB of RAM, and an 80 GB harddrive. If you don't have this horsepower, some of the image processing steps will just take a bit longer."NOAO PC-IRAF Revision 2.11.3 EXPORT Thu Feb 10 23:10:10 MST 2000" (from the "Welcome toIRAF" paragraph that shows every time you start IRAF) was used. As of this writing, they are up to PC-IRAF 2.12.1, but it is assumed that there are no significant differences at the level we will be working.Aa KDE Graphical User Interface (GUI) was used, but GNOME would work just as well. It is alsoassumed you have downloaded and installed SAOIMAGE - DS9 as an image viewer. ( see the resourcessection). But, you can use the integral IRAF viewer (XIMTOOL) if you wish, (see below).
C. LINUX Review
LINUX is a powerful, multitasking operating system for i86-based PCs, developed by Linus Torvalds in1991. At the command line, it is at heart UNIX, which has existed in various forms since the days of punch cards. Unlike Windows, LINUX does many operations at once, and is nearly immune to systemcrashes (e.g. the infamous Microsoft "blue screen of death"). However applications can and do crash onLINUX, as you'll see with IRAF. Various forms of LINUX can be downloaded free, and installed inconjunction with a Windows operating system such that you can choose at boot up which system youwant to use. Or you can purchase some LINUX flavors, such as Red Hat, and get access to goodmanuals and even telephone technical support. If you are not really into computers, a good technicalguide for your LINUX system is a must, because the onboard "man" (manual) pages are often too terseand too comprehensive for the non-technogeek. For RH 7.2, one such tome is the "Red Hat Linux 7.2Bible-unlimited version" (Megus 2002 - Hungry Minds , Inc.) which is comprehensive yet
Revision 1.0 14June 2003 Page 4 of 53
A. Charles Pullen, all rights reserved.

7/27/2019 zen of iraf
http://slidepdf.com/reader/full/zen-of-iraf 5/53
understandable. And, they include the three installation CD-ROMS as well, justifying the U.S.$50 price!
D. Installation of IRAF on the LINUX-PC
1.Where to get it.
Having heard horror stories about trying to install the ftp version, the author purchased "LINUX for Astronomy CD-ROM, Volumes 5 and 6" from "The Random Factory". They have compiled for LINUXa vast amount of professional astronomical software, and developed, where needed, install scripts toautomate the installation. This approach was cheap (U.S.$80) and following the instructions was painless. You can also download it for free, and follow NOAO's instructions. It is rumored that thelater versions of PC IRAF install much easier than the older versions. But, once installed, you still havea bit of configuration to do to make it work.
2. Setting up your basic parameters - login.cl
The file login.cl was placed in whatever directory you installed IRAF (probably your home directory,home/username) when you executed the 'mkiraf' command to finish installation. Using the commandline command 'find login.cl' , (type without the quotes, and hit enter to input the command) should helpyou find it. Once found, lets first make a copy of the default file, just in case something bad happens.Use 'cp login.cl login.cl.bak' to make a copy. Now let’s look at login.cl with your favorite text editor.This author prefers EMACS, so 'emacs login.cl' should bring it up. Note that any thing with a # in frontof it in the login.cl file is not enabled.
Refer to the login.cl file, in the Appendix if you don’t have one on the screen in front of you. 'set home'tells you where IRAF is. 'imdir' is where .imh pixel files are stored, but we won't be using them - justignore it. Also ignore right now 'uparm' and 'useid'. Under set terminal type, you'll see some programming language, then 'stty gterm' and later 'stty xterm'. We'll open IRAF in an Xterm windowmanually, so just leave these alone. The next parameters are some important ones. 'Editor' is whichLINUX text editor will be invoked by IRAF with the command 'edit'. To change from the default vi, just type over that with emacs, pico, or leave it at vi if you are comfortable with that editor. 'stdimage' isthe default image size you will be using in terms of pixels. For most amateur CCD, the ‘imt512’ valueis fine. But, for this project, ‘stimage’ was reset to ‘imt2048’ as the trimmed images were 2048 by 2048 pixels square. 'imtype' should tell the file extensions of your images; the author’s were 'fit'. 'imextn' isan function that will allow IRAF to open various types of FITS extensions (like fit, fts, fits) that are usedoften interchangeably. The author’ is set to 'imextn="fxf:fit,fts,fits oif:imh ', to cover all the bases.That's pretty much it at this point. Save your file and exit. You should be ready to go.
Note that if you want to try any change to login.cl without actually changing the file, you can alwaystype one of the 'set" lines from the IRAF command prompt cl>. For example, you want to try using vias a text editor type: 'set editor=vi' to change it for just that session.
Revision 1.0 14June 2003 Page 5 of 53
A. Charles Pullen, all rights reserved.

7/27/2019 zen of iraf
http://slidepdf.com/reader/full/zen-of-iraf 6/53
E. Getting to know the Beast - Fun with dev$pix
1.Opening IRAF
Now comes the big moment, seeing if it will run. First open a terminal window (also called a shell).You should see something like: [cpullen@unit7 cpullen]$ if you are using BASH as a shell language.
Now, let’s open a Xterminal window: type 'xterm'. IRAF may not open from BASH, so change toCShell with the command "csh". You now will now see [cpullen@unit7 ~]# for a prompt, and notethat the upper left corner of the window has X in it, not Konsole. Open IRAF with the command 'cl'. If all goes well, you'll see:
NOAO PC-IRAF Revision 2.11.3 EXPORT Thu Feb 10 23:10:10 MST 2000This is the EXPORT version of PC-IRAF V2.11 supporting most PC systems.
Welcome to IRAF. To list the available commands, type ? or ??. To getdetailed information about a command, type `help command'. To run acommand or load a package, type its name. Type `bye' to exit a package, or `logout' to get out of the CL. Type `news' to find outwhat is new in the version of the system you are using. The following
commands or packages are currently defined:
dataio. images. lists. obsolete. proto. system.dbms. language. noao. plot. softools. utilities.
cl>
Now, from the cl> prompt, let's open our image viewer, DS9, by typing '! ds9 &' . DS9 should open in aseparate window. Yea! You are up and running.
Note that the way to close IRAF is to type 'logout' at the prompt. Just closing the window could leave itunhappy. Also, if you get any kind of error message, reset things with the command 'flpr' which issupposed to recover any faulty processing from the error. You'll want to do flpr if you ever use 'cntl-c'
to abort an IRAF process that is running away or hung up.
2.Why DS9?
IRAF has an onboard image viewer included in the distribution, ximtool. Why not use that? The simpleanswer is that it only works if your computer is set up for 8-bit color. Most folks have not used 8-bitcolor since their first color Macintosh was purchased in 1985. 8 bit means 28 colors to represent every possible shade. That's 512 colors. Your computer is probably running 16 or 24-bit color. DS9 will runfine on either of those. Or, if you want to use ximtool, change your color scheme by typing'xconfigurator' at the shell command line, and follow the instructions (select with the space bar, movethough the menus with the tab key). If you only use the computer for IRAF, it probably won't matter
changing it to 8 bit, but if you want to see photos of your grandchildren, you'll want to get DS9 so youdon't have to keep changing back and forth, and rebooting each time you do.
3.Basic IRAF Tasks
a. Image Display
Revision 1.0 14June 2003 Page 6 of 53
A. Charles Pullen, all rights reserved.
Let’s open an onboard image: type 'display dev$pix 1'. The image of M51 should appear in DS9 frame

7/27/2019 zen of iraf
http://slidepdf.com/reader/full/zen-of-iraf 7/53
1 of 4. A little playing with DS9 is inorder here; make sure you know how totoggle the various frame modes. Youcould have just typed the command'display' and IRAF would havesequentially asked for the name of the
image, then the frame as below.
cl> displayimage to be displayed (104b2): dev$pixframe to be written into (1:4) (1): 1cl>
So, ‘display dev$pix 1’ just made thingshappen a bit quicker. This is acharacteristic of all IRAF commands: Youcan use long and detailed commands, or be prompted in small chunks.
b. Changing the parameters of a commandwith parm files.
Now is as good a time as any to get into parm (parameter) files. Every IRAFcommand has a parm file that fixes the parameters for that command. When youare typing ‘display dev$pix 1’, or waitingfor IRAF to prompt you, it is looking tosee what is in that parm file for the displaycommand. Let's look at the 'display' parmfile with the command 'lpar display'.
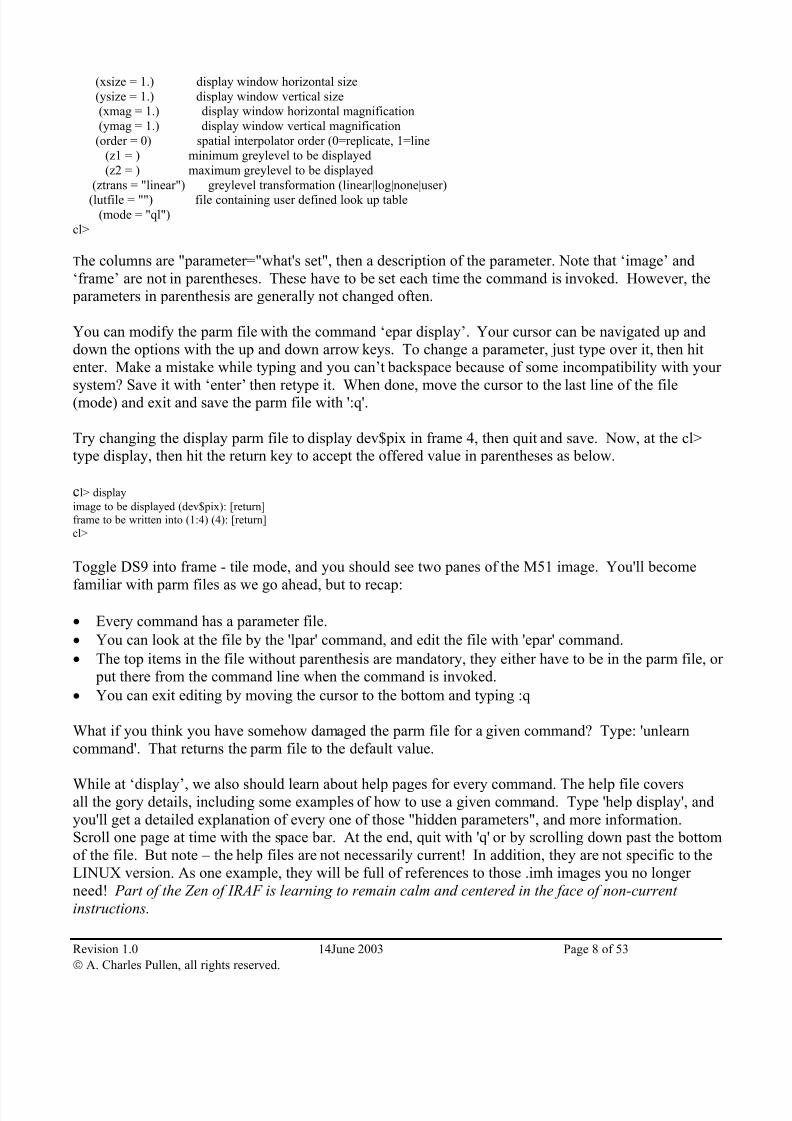
Fi ure 1 – dev$ ix ne ative viewcl> lpar displayimage = "104b2" image to be displayedframe = 1 frame to be written into
(bpmask = "BPM") bad pixel mask (bpdisplay = "none") bad pixel display (none|overlay|interpolate)(bpcolors = "red") bad pixel colors(overlay = "") overlay mask (ocolors = "green") overlay colors
(erase = yes) erase frame(border_erase = no) erase unfilled area of window(select_frame = yes) display frame being loaded
(repeat = no) repeat previous display parameters(fill = no) scale image to fit display window
(zscale = yes) display range of greylevels near median(contrast = 0.25) contrast adjustment for zscale algorithm
(zrange = yes) display full image intensity range(zmask = "") sample mask
(nsample = 1000) maximum number of sample pixels to use(xcenter = 0.5) display window horizontal center (ycenter = 0.5) display window vertical center
Revision 1.0 14June 2003 Page 7 of 53
A. Charles Pullen, all rights reserved.
7/27/2019 zen of iraf
http://slidepdf.com/reader/full/zen-of-iraf 8/53
(xsize = 1.) display window horizontal size(ysize = 1.) display window vertical size(xmag = 1.) display window horizontal magnification(ymag = 1.) display window vertical magnification
(order = 0) spatial interpolator order (0=replicate, 1=line(z1 = ) minimum greylevel to be displayed(z2 = ) maximum greylevel to be displayed
(ztrans = "linear") greylevel transformation (linear|log|none|user)
(lutfile = "") file containing user defined look up table(mode = "ql")
cl>
The columns are "parameter="what's set", then a description of the parameter. Note that ‘image’ and‘frame’ are not in parentheses. These have to be set each time the command is invoked. However, the parameters in parenthesis are generally not changed often.
You can modify the parm file with the command ‘epar display’. Your cursor can be navigated up anddown the options with the up and down arrow keys. To change a parameter, just type over it, then hitenter. Make a mistake while typing and you can’t backspace because of some incompatibility with your
system? Save it with ‘enter’ then retype it. When done, move the cursor to the last line of the file(mode) and exit and save the parm file with ':q'.
Try changing the display parm file to display dev$pix in frame 4, then quit and save. Now, at the cl>type display, then hit the return key to accept the offered value in parentheses as below.
cl> display
image to be displayed (dev$pix): [return]frame to be written into (1:4) (4): [return]cl>
Toggle DS9 into frame - tile mode, and you should see two panes of the M51 image. You'll become
familiar with parm files as we go ahead, but to recap:
• Every command has a parameter file.
• You can look at the file by the 'lpar' command, and edit the file with 'epar' command.
• The top items in the file without parenthesis are mandatory, they either have to be in the parm file, or put there from the command line when the command is invoked.
• You can exit editing by moving the cursor to the bottom and typing :q
What if you think you have somehow damaged the parm file for a given command? Type: 'unlearncommand'. That returns the parm file to the default value.
While at ‘display’, we also should learn about help pages for every command. The help file coversall the gory details, including some examples of how to use a given command. Type 'help display', andyou'll get a detailed explanation of every one of those "hidden parameters", and more information.Scroll one page at time with the space bar. At the end, quit with 'q' or by scrolling down past the bottomof the file. But note – the help files are not necessarily current! In addition, they are not specific to theLINUX version. As one example, they will be full of references to those .imh images you no longer need! Part of the Zen of IRAF is learning to remain calm and centered in the face of non-current
instructions.
Revision 1.0 14June 2003 Page 8 of 53
A. Charles Pullen, all rights reserved.
7/27/2019 zen of iraf
http://slidepdf.com/reader/full/zen-of-iraf 9/53
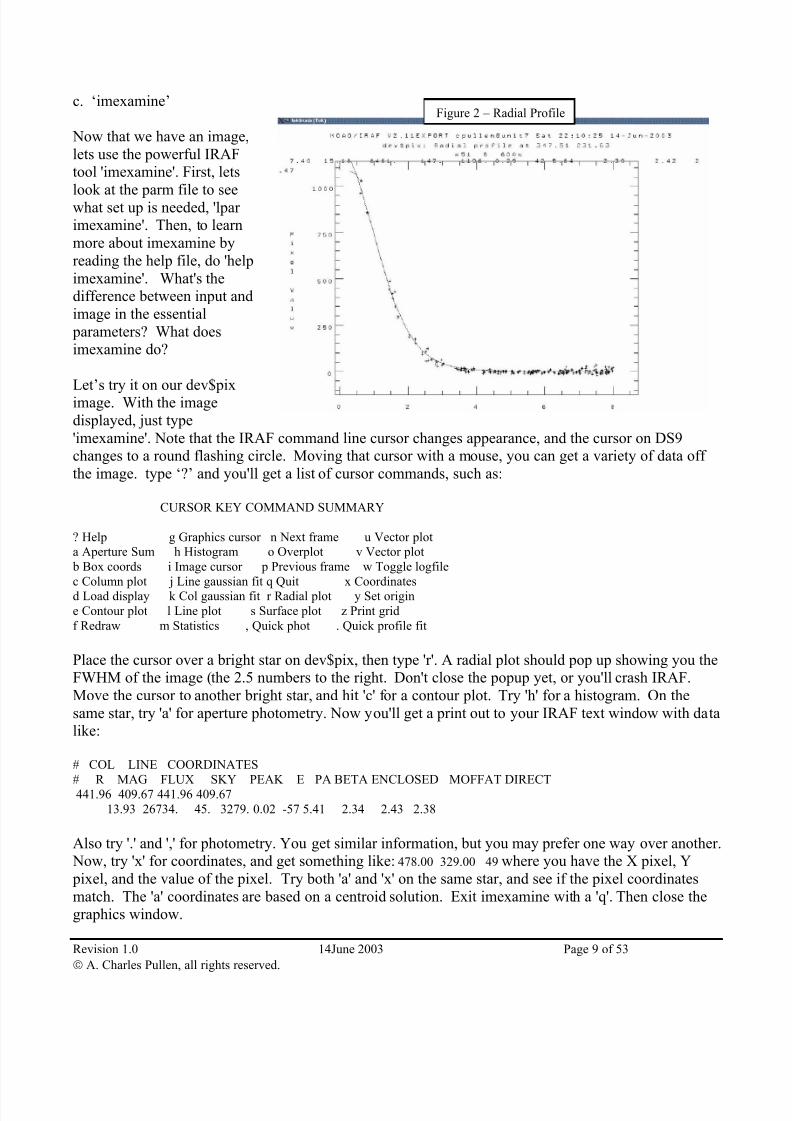
c. ‘imexamine’
Now that we have an image,lets use the powerful IRAFtool 'imexamine'. First, lets
look at the parm file to seewhat set up is needed, 'lpar imexamine'. Then, to learnmore about imexamine byreading the help file, do 'helpimexamine'. What's thedifference between input andimage in the essential parameters? What doesimexamine do?
Let’s try it on our dev$piximage. With the imagedisplayed, just type'imexamine'. Note that the IRAF command line cursor changes appearance, and the cursor on DS9changes to a round flashing circle. Moving that cursor with a mouse, you can get a variety of data off the image. type ‘?’ and you'll get a list of cursor commands, such as:
Figure 2 – Radial Profile
CURSOR KEY COMMAND SUMMARY
? Help g Graphics cursor n Next frame u Vector plota Aperture Sum h Histogram o Overplot v Vector plot b Box coords i Image cursor p Previous frame w Toggle logfilec Column plot j Line gaussian fit q Quit x Coordinatesd Load display k Col gaussian fit r Radial plot y Set origine Contour plot l Line plot s Surface plot z Print gridf Redraw m Statistics , Quick phot . Quick profile fit
Place the cursor over a bright star on dev$pix, then type 'r'. A radial plot should pop up showing you theFWHM of the image (the 2.5 numbers to the right. Don't close the popup yet, or you'll crash IRAF.Move the cursor to another bright star, and hit 'c' for a contour plot. Try 'h' for a histogram. On thesame star, try 'a' for aperture photometry. Now you'll get a print out to your IRAF text window with datalike:
# COL LINE COORDINATES
# R MAG FLUX SKY PEAK E PA BETA ENCLOSED MOFFAT DIRECT441.96 409.67 441.96 409.6713.93 26734. 45. 3279. 0.02 -57 5.41 2.34 2.43 2.38
Also try '.' and ',' for photometry. You get similar information, but you may prefer one way over another.
Revision 1.0 14June 2003 Page 9 of 53
A. Charles Pullen, all rights reserved.
Now, try 'x' for coordinates, and get something like: 478.00 329.00 49 where you have the X pixel, Y pixel, and the value of the pixel. Try both 'a' and 'x' on the same star, and see if the pixel coordinatesmatch. The 'a' coordinates are based on a centroid solution. Exit imexamine with a 'q'. Then close thegraphics window.

7/27/2019 zen of iraf
http://slidepdf.com/reader/full/zen-of-iraf 10/53
Figure 3 - Histogram Congratulations, you have gotten things workingin IRAF, opened an image, extracted informationfrom it, and learned how to access set up (parm)files and modify them. If you feel karmic distressat this point, stop for a time to re-center yourself,
perhaps helped by some time in a hot tub, or your favorite recreational beverage.
III. IMAGE CALIBRATION
I f you want to know the realm of buddhahood, you
must make your mind as clear as empty space.Leave false thinking and all grasping far
behind ,causing your mind to be unobstructed
wherever it may turn. The realm of buddhahood is
not some external world where there is a formal
"Buddha." It's the realm of the wisdom of a self-awakened sage.
Zen Master Ta-hui (1088-1163)
If you just asked yourself, "What's image calibration?" please stop (now!) and look at some of thelinks on basic CCD image theory and practice. However, if words like "bias" and "twilight flats"mean more than referring to how referees treat your favorite sports team, and a case of beer on the beach at sunset, respectively, then read on and be awed at the power of IRAF.
A. Overview
In this section we'll learn how to sequentially:
• Tell IRAF what kind of image is what
• Fix bad pixels and rows (if present) with a badpixel mask
• Read the bias strip and do an initial bias subtraction
• Trim unwanted portions of the image
• Make a median combined master bias image, and apply it to our image set
• Make median combined master flats for each filter, and apply it to our image set.
• Register images of the same field so that the stars are at the same coordinates
We'll be using mostly 'ccdproc' for this work, although (like the rest of IRAF) there are several other ways to do it. The advantage of 'ccdproc' is that you can do a full night's image calibration with avery few instructions once it is set up and you understand what you are doing.
B. File Names
IRAF can make powerful use of the "*" wild card function if you set up your image file names right.It can also use image lists as inputs into calibration commands, where by you listed the names of the
Revision 1.0 14June 2003 Page 10 of 53
A. Charles Pullen, all rights reserved.

7/27/2019 zen of iraf
http://slidepdf.com/reader/full/zen-of-iraf 11/53
file you wanted processed - once - into a text file. However, I find that image names that tell mewhat the image is, and what kind of image it is are very time saving. I use the following conventions:
Flats: flatFN.fit (example: flatR1.fit)Bias: zeroN.fit (example: zero5.fit)Fields: "field"FN.fit (example: M67B3.fit)
where:
F = filter name (BVRI) N= frame number (1,2,3...N)"field"= field name (M67, SA104, SSCyg)
Another thing to keep in mind is that when running image calibration routines though the ccdproccommand, IRAF will sort out which files are which from the image header. But it sure helps if youcan tell what an image is up front. Something like "sci0001tr5.fit" is a bit cryptic.
C. Getting Headers Straight
Because IRAF will be using image headers, they need to be right. You can get a short-listing of what
is in a given directory by using the "imheader *.fit" command. With my project, you get thefollowing partial output:
cl> imheader *.fit104b1.fit[2080,2048][ushort]: SA104 B104b2.fit[2080,2048][ushort]: SA104 B104i1.fit[2080,2048][ushort]: SA104 I
...
Deciphering, you have:
image name [Number of X pixels, number of Y pixels][image type]:Name on header
1. Subsets
It is important that the image headers tell IRAF the information that is needed. One way to do this, if it isn't done as part of the image acquisition process, is to explicitly tell IRAF what is what in animage set. You can use your file name conventions to help with this task. Use the 'ccdedit' task inthe ccdred package:
cl> ccdeditERROR: task `ccdedit' not foundcl>
What! Remember that peace is in the mind of the believer- believe you are at peace, and you will be
at peace…
IRAF loads a small set of tasks at start up. You can modify that list, it's in your login.cl file. Butremember that IRAF was written in the days of limited memory. So, we have to load the packagethat ccdproc is in. That is done as follows:
Revision 1.0 14June 2003 Page 11 of 53
A. Charles Pullen, all rights reserved.

7/27/2019 zen of iraf
http://slidepdf.com/reader/full/zen-of-iraf 12/53
Change to 'noao'
cl> noaoartdata. digiphot. mtlocal. observatory surfphot.astrometry. focas. nobsolete. onedspec. twodspec.astutil. imred. nproto. rv.
Change to 'imred'
no> imredargus. ctioslit. generic. irred. kpnoslit.
bias. dtoi. hydra. irs. specred.ccdred. echelle. iids. kpnocoude. vtel.
Change to 'ccdred'
im> ccdred badpiximage ccdmask darkcombine mkskycor ccdgroups ccdproc flatcombine mkskyflatccdhedit ccdtest mkfringecor setinstrumentccdinstrument combine mkillumcor zerocombine
ccdlist cosmicrays mkillumflatcc>
I asked for the 'noao' package, which gave me another list. I asked for the 'imred' package, andfinally the 'ccdred' package that has 'ccdedit' in it. Note that the prompt changed each time I switched packages (cl> to no> to im> to cc>). That is one way IRAF tells you where you are. To go back (or unload) a package, type 'bye':
cc> bye
argus. ctioslit. generic. irred. kpnoslit. bias. dtoi. hydra. irs. specred.ccdred. echelle. iids. kpnocoude. vtel.
Im>
See how I moved back one step? So, to get back all the way to the cl> prompt, I'd have to type 'bye'for each level. Yes, there are layers and layers of packages, each with a number of different tasks."In complexity one can find beauty".
To review, ccdhedit is in the ccdred package. To get there, you have to move as follows: openinglevel (cl>), noao (no>), imred (im>),ccdred (cc>). To move back in the package set, type 'bye’ for each level.
Now, back to subsets. We want to teach IRAF what each type of image is. We are confirming the'imtype' and are adding 'filter' to the image header. Here is how to do it with 'ccdhedit':
ccdhedit bias* imgetyp zeroccdhedit flat* imagetyp flatccdhedit dark* imagetyp dark ccdhedit flatB* subset "B"ccdhedit flat R* subset "R"ccdhedit flatI* subset "I"ccdhedit field1!* imtyp objectccdhedit field1B* subset "B"ccdhedit field1R* subset "R"
Revision 1.0 14June 2003 Page 12 of 53
A. Charles Pullen, all rights reserved.

7/27/2019 zen of iraf
http://slidepdf.com/reader/full/zen-of-iraf 13/53
ccdhedit field1I * subset "I"ccdhedit field2* imtype objectccdhedit field2*B subset "B"(repeat as for field1 to field n)
Now, if this seems like a lot of typing, it is. If you can set up your acquisition software to do it for your, so much the better. Or, if you use the same naming conventions all the time, you can make up a
simple shell script (or an IRAF script) to type all this in for you. See the example of a script in the'ccdhedit' help file.
2. Header Inspection
So, how did IRAF know what was what when I typed 'imheader'?
104b1.fit[2080,2048][ushort]: SA104 B
It got the information from the image header, either because the camera operating software put itthere, or we later added it, or a combination of both.
If you want to look at the entire header, then type 'imheader m67r.fit l+' and your output will be:
m67r[2046,2046][real]: M67 R No bad pixels, min=0., max=0. (old)Line storage mode, physdim [2046,2046], length of user area 2673 s.u.Created Sat 15:17:47 10-May-2003, Last modified Sat 15:17:44 10-May-2003Pixel file "m67r.fit" [ok]ORIGIN = 'NOAO-IRAF FITS Image Kernel July 1999' / FITS file originator EXTEND = F / File may contain extensionsIRAF-TLM= '15:17:44 (10/05/2003)' / Time of last modificationOBJECT = 'M67 R ' /DATE = '2003-05-10T15:17:47'IRAF-MAX= 5.683400E4 / DATA MAXIRAF-MIN= 3.187000E3 / DATA MIN
OBSERVAT= 'MCDONALD ' / observatoryEXPTIME = 60.00 / actual integration timeDARKTIME= 60.00 / total elapsed timeIMAGETYP= 'object ' / object, dark, bias, etc.DATE-OBS= '2001-04-24 ' / date (yyyy-mm-dd) of obs.UT = ' 3:21:57.35' / universal timeST = '10:34:46.47' / sidereal timeEPOCH = 2001.31 / epoch of ra and decHA = '+10:34:46.5 ' / hour angleZD = '21.27 ' / zenith distanceAIRMASS = 1.073 / airmassTELESCOP= 'mcd30 ' / telescope namePROGRAM = 'ICE-1.5 ' / program used to get and write dataDETECTOR= 'lf1_0004 ' / detector microcode nameSSI = '#5 Revision B ' / synchronous serial interface id
DSP = '#6 Revision F ' / digital signal processor idPREFLASH= 0 / preflash time, secondsGAIN = 1.60 / gain, electrons per aduRDNOISE = 5.87 / read noise, electronsCAMTEMP = 0 / camera temperatureDEWTEMP = 0 / dewar temperatureCCDSEC = '[2:2047,2:2047]' / orientation to full frameORIGSEC = '[1:2048,1:2048] ' / original size full frameCCDSUM = '1 1 ' / on chip summationINSTRUME= 'pfc ' / instrument
Revision 1.0 14June 2003 Page 13 of 53
A. Charles Pullen, all rights reserved.

7/27/2019 zen of iraf
http://slidepdf.com/reader/full/zen-of-iraf 14/53
INSFILTE= 'R ' / instrument filtersINSFOCUS= '-788 ' / instrument focusINSTRTEM= ' 9.59 ' / instrument current temperatureHISTORY 'KPNO-IRAF' /HISTORY '2001-04-26T09:11:56'FILTERS = 'R '
Some of the fields that were added or altered with our 'ccdhedit' exercise above have beenhighlighted. Some of these fields are not important for your data, others are critical. Exposure time(EXPTIME) is critical. IMTYPE helps IRAF distinguish between bias, flat, and actual data images(which are called "OBJECT") The filter (INSFILTE and/or FILTERS) is critical. For all-sky photometry, AIRMASS is critical. Various sections ending in 'SEC' tell IRAF what areas of theimage to use for what processing step, are critical.
These should be correct if your image acquisition software is doing it's job. If not, or if you want tomodify the header, you can do so with the 'ccdhedit' command. For example, if the real airmass for the above image was 1.53, you could change the header with 'ccdhedit m67r.fit airmass=1.53'You can do multiple changes with commas 'ccdhedit m67r.fit airmass=1.53, exptime=62, insfilter=V'
You can also add comments to the header, such as: 'ccdhedit m67r.ft comment=peace is in the mindof the believer'. Then do 'imheader imagename l+' to see that your changes took place.
So, now that we are 'headed' (sorry!) in the right direction, let's do some image processing.
D. Getting to Know 'ccdproc'
Let's start with looking at the par file for ccdproc, type 'lpar ccdproc' and you'll get:
cl> lpar ccdprocERROR: task `ccdproc' not found
lparam (ccdproc)
Gotcha! Make sure you are in the noao.imred.ccdred package. So, get back in to the ccdred package,and type 'lpar ccdproc'.
cc> .lpar ccdprocimages = "*.fit" List of CCD images to correct(output = "out*.fit") List of output CCD images
(ccdtype = "object") CCD image type to correct(max_cache = 0) Maximum image caching memory (in Mbytes)
(noproc = no) List processing steps only?\n
(fixpix = no) Fix bad CCD lines and columns?
(overscan = no) Apply overscan strip correction?
(trim = no) Trim the image?
(zerocor = no) Apply zero level correction?
(darkcor = no) Apply dark count correction?(flatcor = yes) Apply flat field correction?
(illumcor = no) Apply illumination correction?(fringecor = no) Apply fringe correction?
(readcor = no) Convert zero level image to readout correction? (scancor = no) Convert flat field image to scancorrection?\n
(readaxis = "line") Read out axis (column|line)(fixfile = "pambadpix.pix") File describing the bad lines and columns
(biassec = "image") Overscan strip image section
(trimsec = "image") Trim data section
Revision 1.0 14June 2003 Page 14 of 53
A. Charles Pullen, all rights reserved.

7/27/2019 zen of iraf
http://slidepdf.com/reader/full/zen-of-iraf 15/53
(zero = "zero.fit") Zero level calibration image
(dark = "") Dark count calibration image
(flat = "flat*.fit") Flat field images(illum = "") Illumination correction images(fringe = "") Fringe correction images
(minreplace = 1.) Minimum flat field value(scantype = "shortscan") Scan type (shortscan|longscan)
(nscan = 1) Number of short scan lines\n(interactive = no) Fit overscan interactively?
(function = "chebyshev") Fitting function(order = 1) Number of polynomial terms or spline pieces(sample = "*") Sample points to fit
(naverage = 1) Number of sample points to combine(niterate = 1) Number of rejection iterations
(low_reject = 3.) Low sigma rejection factor (high_reject = 3.) High sigma rejection factor
(grow = 0.) Rejection growing radius(mode = "ql")
This is a working par file, not the default. But, let's look at the important fields. 'images' is a set of images you want to work on at once. 'output' is what the images could be called if you just didn'toverwrite them. 'ccdtype' is the generic type of image to you want to work on (could be 'zero', 'flat',
or 'object'). Think of it as a subset of the 'image' parameter. 'fixpix' applies a bad pixel mask to theimage, more later on that step. 'overscan' uses the average pixel value in the BIASSEC area tosubtract pedestal from each row. 'trim' removes the bias strip and any other parts you specified inyour TRIMSEC. When 'BIASEC='image' IRAF will use the section defined in the image header. Or you could put it here. The various '...COR' parameters are correction steps. We will perform zero(bias), and flat corrections in sequence. Down farther, 'interactive' allows you to hand-tweak the bias,which is probably better left to IRAF for the beginner. Below that are the names of various images,some not yet made, that we will use in the image calibration. The rest can be left in their defaults for now. The great power of ccdproc is that you can do all the image calibration steps in one command.This is a great time saver. However, using ccdproc, we will do multiple passes through out imageset, so as to understand each step. We will do this by toggling on and off the various parameters.
So, put all your images in one directory (we'll call it 'image'). This should be a working directory, sothat the raw images are also stored somewhere else. You may be overwriting them, so you want a back-up set in case you (or IRAF) do something weird to them. There is serenity in knowing you canalways start from scratch. Change to that working directory at the IRAF command line with:' cd image'. Check that you are in the right directory with the 'path' command 'path', which shouldreturn something like: "yourcomputername!/home/username/image". Note: to go back, you either need to type the entire directory path, or do 'cd ..' which will move you back one level.
You can also do 'dir' to see what is in the directory:
104.3.cfg~ 104i1.fts 104stobs2~ 107r1.fts m67.coo.4
104.3.config~ 104i2.fts 107.coo 107r2.fts m67.mag.1104.5,cfg 104imset 107.mag 107r3.fts m67.mag.2104.ans 104imsets 107.mag.2 2try m67.mag.3104.cfg~ 104r1.fts 107b1.fts SA104BRI m67b.fts
E. Fixing Bad Pixels
Revision 1.0 14June 2003 Page 15 of 53
A. Charles Pullen, all rights reserved.
In many professional CCDs, there are bad pixels or even entire columns that don't work properly.These are there because the process of making semiconductors is not perfect, and the larger the area

7/27/2019 zen of iraf
http://slidepdf.com/reader/full/zen-of-iraf 16/53
of the chip, the greater the odds of something going wrong. The good news is that these defects are built into the chip, so they don't change from image to image. If they don't change, they can becorrected. The defects are most obvious on the bias images. Since a bias image is zero seconds, allyou really see are the defects and the underling bias current. The way IRAF corrects these defects isto interpolate between the bad pixel (or series of pixels such as in a column) and adjacent pixels thatare not damaged. It then replaces the "bad" pixel values with the interpolated ones.
You might well ask yourself: “Is this legitimate? Wouldn't it be better to just not use datacontaminated by a physical defect in the chip?” Probably! Except it is very hard to control exactlywhat pixels are going to be needed down the road. So, let’s just fix them and move on.
Since the bad pixels are physically on the chip, you need to make a bad pixel mask that tells IRAFwhich pixels are bad and need interpolation. An example of a mask made for the camera that took my images is in the Appendix. Each line is a coordinate set for the untrimmed image. "5 334 1 4"means "from pixel column 5 to column 334, and row 1 to row 4, inclusive”.
So, one must specify which pixels and/or columns you want to fix. The example mask was made
"with much cursing" (Gay, 2003) over time. The key point to making a mask is to identify the pixels properly. Note that they are integers. If whatever you are doing is giving you fractional row:column pixel coordinates, you are doing something wrong (however, star centroids may well be determinedto fractional pixel values).
One way to determine the grossest errors, like a bad column, is to use 'imexamine', place your cursor over the bad pixel (use the magnifier) and hit 'x'. This outputs: 1107.00 1213.00 5.08008showing the column and row coordinates, and the value of the pixel, respectively. You can also do ‘l’for a line plot (Figure 4). Note that I am zoomed in on the image (see the blue box on the magnifier.So, I zoom out, I can see that the bad column is the entire height of the image, from row 1 to row2048. But, while zoomed out, if I try 'x', I get different coordinates for the column number!: 1105.001988.00 7.08008
Figure 4 – Spike is the bad column
To show the whole image, your viewer is binning (using blocks of the image). Try moving your cursor with your left and rightarrow buttons. Note thecoordinates on the viewer - theyare changing in blocks of 4 or more pixels! So, to get accuratecoordinates, you have to bezoomed in on the image so thatyou are moving in one-pixelsteps. The better way to hunt for defects when zoomed is to dragthe magnifying blue box about theimage with your mouse. Thatway, you can see the whole imagein sections, but not loose pixel
Revision 1.0 14June 2003 Page 16 of 53
A. Charles Pullen, all rights reserved.

7/27/2019 zen of iraf
http://slidepdf.com/reader/full/zen-of-iraf 17/53
coordinate resolution.
The point of this exercise is that making up bad pixels masks by inspection is a pain. There are other ways. One is to take a flat field image of two different exposure lengths, then subtract them (Massy,1997; Wells & Bell, 1994). The resultant "image" is your bad pixel mask, because it only shows the
"high points". This process is covered in detail in the references. The good news is you only have toget the mask right, once, then use it over and over. So, given that the "bad pixel mask fairy" providesyou with a mask, as she did for me, let’s fix those pesky bad pixels.
Going back to epar ccdproc, let’s modify the parameter file to fix the bad pixels with fixpix:
cc> lpar ccdprocimages = "*.fit" List of CCD images to correct(output = "out*.fit") List of output CCD images
(ccdtype = "") CCD image type to correct(max_cache = 0) Maximum image caching memory (in Mbytes)
(noproc = no) List processing steps only?\n(f ixpix = yes) Fix bad CCD lines and columns?
(overscan = no) Apply overscan strip correction?(trim = no) Trim the image?(zerocor = no) Apply zero level correction?(darkcor = no) Apply dark count correction?(flatcor = yes) Apply flat field correction?
(illumcor = no) Apply illumination correction?(fringecor = no) Apply fringe correction?
(readcor = no) Convert zero level image to readout correction?(scancor = no) Convert flat field image to scan correction?\n
(readaxis = "line") Read out axis (column|line)(fixfile = "pambadpix.pix") File describing the bad lines and columns(biassec = "image") Overscan strip image section(trimsec = "image") Trim data section
(zero = "zero.fit") Zero level calibration image(dark = "") Dark count calibration image
(flat = "flat*.fit") Flat field images
It will confirm the image set (no parenthesis) and then run it by itself. Note that we are apply this toall images, so change 'ccdtype' to all with "" (double quotes). Run ccdproc again, then display a biasimage and see what it now looks like. In my case, Fig. 4a went to 4b. Magic!
Revision 1.0 14June 2003 Page 17 of 53
A. Charles Pullen, all rights reserved.

7/27/2019 zen of iraf
http://slidepdf.com/reader/full/zen-of-iraf 18/53
Figure 4b – Mostly FixedFigure 4a - defects
F. Overscan Corrections
So, now let’s do the first part of the overscan correction. Toggle overscan to 'on' with an 'epar ccdproc' and turn everything else off so that your ccdproc file looks something like:
images = "*.fit" List of CCD images to correct(output = "out*.fit") List of output CCD images
(ccdtype = "") CCD image type to correct(max_cache = 0) Maximum image caching memory (in Mbytes)
(noproc = no) List processing steps only?\n(fixpix = no) Fix bad CCD lines and columns?
(overscan = yes) Apply overscan strip correction?(trim = no) Trim the image?
(zerocor = no) Apply zero level correction?(darkcor = no) Apply dark count correction?(flatcor = no) Apply flat field correction?
(illumcor = no) Apply illumination correction?(fringecor = no) Apply fringe correction?
Once your par file is right, run 'ccdproc'
Revision 1.0 14June 2003 Page 18 of 53
A. Charles Pullen, all rights reserved.

7/27/2019 zen of iraf
http://slidepdf.com/reader/full/zen-of-iraf 19/53
Revision 1.0 14June 2003 Page 19 of 53
A. Charles Pullen, all rights reserved.
G. Overscan Trimming
Now that we've used the bias strip to adjust for row-by-row bias, we can get rid of it on all our images. Why? It just takes up memory, and looks ugly on our images. So, go back to epar ccdprocand toggle off 'overscan' and toggle on 'trim' as follows:
images = "*.fit" List of CCD images to correct
(output = "out*.fit") List of output CCD images(ccdtype = "") CCD image type to correct
(max_cache = 0) Maximum image caching memory (in Mbytes)(noproc = no) List processing steps only?\n(fixpix = no) Fix bad CCD lines and columns?
(overscan = no) Apply overscan strip correction?(trim = yes) Trim the image?
(zerocor = no) Apply zero level correction?(darkcor = no) Apply dark count correction?(flatcor = no) Apply flat field correction?
Run ccdproc again.
Now, look at an image with 'display' and zoom on the right side. There should be no bias strip . Itwill also have trimmed off the edges of the frame specified in the TRIMSEC part of the imageheader, or imputed into the same part of the 'ccdproc' par file,
H. Dark Subtraction
Thinned, back-illuminated CCDs have little dark current, so I did not do a dark subtraction.However, most amateur CCDs do have dark current, and it must be dealt with. Basically, the procedure is similar to what you'll see below for making master flats and bias images, using the'ccdred' task 'darkcombine'. If you make a master dark per Berry and Burnell (2000) (25+ images atan exposure time at least 5 times your longest exposure) IRAF can use a single median combined
image, the “master dark”, and apply it to all your frames. It will adjust the value of the dark subtraction based on the ratio of the exposure times. This is called a "scaled dark". Note, that youmust subtract a master bias image from each of your darks prior to combination.
There are potential problems with scaled darks. You are trusting that your dark current is truly linear,that there are no light-leaks in the system, and that the temperature is really constant. So, many people want to make a master dark of at least 10 to 25 images for each exposure time and cameratemperature you used in a given run. You then make master darks using 'darkcombine' for eachexposure time (and temperature if need be).Then using 'ccdproc' subtract, the appropriate dark fromthe object and flat images. Since the bias is contained in the dark, you do not do bias imagesubtraction from your image set.
I. Making a Master Bias Frame and Applying Bias
Our next step is to correct for additional bias by subtracting a master bias image. But first you haveto make it! We will use 'zerocombine' for that task.
Epar zerocombine and you should get:

7/27/2019 zen of iraf
http://slidepdf.com/reader/full/zen-of-iraf 20/53
Revision 1.0 14June 2003 Page 20 of 53
A. Charles Pullen, all rights reserved.
input = "bias*.fit" List of zero level images to combine(output = "zero.fit") Output zero level name
(combine = "median") Type of combine operation(reject = "minmax") Type of rejection
(ccdtype = "zero") CCD image type to combine
(process = no) Process images before combining?
(delete = no) Delete input images after combining?(clobber = no) Clobber existing output image?(scale = "none") Image scaling
(statsec = "") Image section for computing statistics(nlow = 0) minmax: Number of low pixels to reject
(nhigh = 1) minmax: Number of high pixels to reject(nkeep = 1) Minimum to keep (pos) or maximum to reject (neg(mclip = yes) Use median in sigma clipping algorithms?(lsigma = 3.) Lower sigma clipping factor (hsigma = 3.) Upper sigma clipping factor
(rdnoise = "rdnoise") ccdclip: CCD readout noise (electrons)(gain = "gain") ccdclip: CCD gain (electrons/DN)
(snoise = "0.") ccdclip: Sensitivity noise (fraction)(pclip = -0.5) pclip: Percentile clipping parameter (blank = 0.) Value if there are no pixels(mode = "ql")
'input' is the images you want to use to combine. Remember our file naming conventions? Here iswhere you use them. 'output' is what the combined bias frame will be called. 'combine' is thestatistical method you want to use. I prefer median combine for bias and flats, but you could use'mode' as well. 'reject' for a bias frame is suggested to be 'minmax'. 'ccdtype' is another way tospecify which images you would use from your 'input' set. So, with 'image=*.fit' you could use'ccdtype=zero' and still only combine the bias images. 'process' is for combining steps into one grandccdproc run. 'delete' is to get rid of your original bias images to keep them from cluttering up your directory -- use it at your own risk!
So, now that we are all set up, lets try 'zerocombine'. It will produce the image zero.fit (Fig.2b).Display zero.fit on your viewer, as well as one of the bias frames used to make it. Go to imexamine
(which works in the ccdred task, no need to move back to the cl> level) and look at the same pixelcoordinates with 'm' (image statistics).
For the master bias (zero.fit):
# SECTION NPIX MEAN MEDIAN STDDEV MIN MAX[1104:1108,1065:1069] 25 98.56 96. 26.88 48. 168.[850:854,1143:1147] 25 100.2 104. 28.39 40. 152.
For one of the original bias images:
[1240:1244,909:913] 25 1.64 1.08 2.931 -3.92 7.08[932:936,846:850] 25 2.12 1.08 4.036 -5.92 9.08
By median combining many bias frames, you have lowered the overall noise, which was the goal of the exercise. How many frames is enough? Some say as many as 25 to 50! The example was donewith 5. Note the apparent residual column defect on Fig. 2b. It is really an artifact of the viewer contrast, as it is invisible on a line plot.
Now, let’s apply that master bias (zero.fit) to the rest of our frames with ccdproc:

7/27/2019 zen of iraf
http://slidepdf.com/reader/full/zen-of-iraf 21/53
images = "*.fit" List of CCD images to correct(output = "out*.fit") List of output CCD images
(ccdtype = "object", "flat") CCD image type to correct(max_cache = 0) Maximum image caching memory (in Mbytes)
(noproc = no) List processing steps only?\n(fixpix = no) Fix bad CCD lines and columns?
(overscan = no) Apply overscan strip correction?(trim = no) Trim the image?
(zerocor =yes)) Apply zero level correction?
(darkcor = no) Apply dark count correction?(flatcor = yes) Apply flat field correction?
(illumcor = no) Apply illumination correction?(fringecor = no) Apply fringe correction?
(readcor = no) Convert zero level image to readout correction?(scancor = no) Convert flat field image to scan correction?\n
(readaxis = "line") Read out axis (column|line)(fixfile = "pambadpix.pix") File describing the bad lines and columns(biassec = "image") Overscan strip image section(trimsec = "image") Trim data section
(zero = "zero.fit") Zero level calibration image(dark = "") Dark count calibration image(flat = "flat*.fit") Flat field images
Note that for 'ccdtype' this ccdproc run will subtract the bias from both the flat field and objectimages. Run ccdproc, and move on to flat fielding!
J. Making Master Flat Field Frames and Applying Flat Field Corrections
Just like we made our master bias frame, we must make master flat frames for each filter used. You probably have guessed how we are going to do that – ‘flatcombine’!
Figure 5 – R Master FlatLook at the param file for ‘flatcombine’:
cc> lpar flatcombineinput = "flat*.fit" List of flat field images to combine
(output = "flat") Output flat field root name(combine = "median") Type of combine operation(reject = "crreject") Type of rejection
(ccdtype = "flat") CCD image type to combine(process = no) Process images before combining?(subsets = yes) Combine images by subset
parameter?(delete = no) Delete input images after
combining?(clobber = no) Clobber existing output image?(scale = "mode") Image scaling
(statsec = "") Image section for computingstatistics
(nlow = 1) minmax: Number of low pixels to
reject(nhigh = 1) minmax: Number of high pixels toreject
(nkeep = 1) Minimum to keep (pos) or maximumto reject (neg
(mclip = yes) Use median in sigma clippingalgorithms?
(lsigma = 3.) Lower sigma clipping factor (hsigma = 3.) Upper sigma clipping factor
(rdnoise = "0.") ccdclip: CCD readout noise(electrons)
Revision 1.0 14June 2003 Page 21 of 53
A. Charles Pullen, all rights reserved.

7/27/2019 zen of iraf
http://slidepdf.com/reader/full/zen-of-iraf 22/53
Revision 1.0 14June 2003 Page 22 of 53
A. Charles Pullen, all rights reserved.
(gain = "1.") ccdclip: CCD gain (electrons/DN)(snoise = "0.") ccdclip: Sensitivity noise (fraction)(pclip = -0.5) pclip: Percentile clipping parameter (blank = 1.) Value if there are no pixels(mode = "ql")
Are things beginning to look familiar? They should!
Input is as before, as is output. For output, "root name" means it will name the file flatX.fit where Xis the filter name (BVRI; O,1,2,3,4 - whatever is in the header by the keyword FILTERS). 'combine'is again set to median. 'reject' is set for cosmic rays - 'ccreject'. 'subsets' will keep your R flats fromgetting mixed up with your B flats. Leave the rest alone at this point.
Now, run ccdproc and you will get a median combine master flat for each filter. Take a look at themin display. Use 'imexamine' to look for hot pixels, or other problems.
Note that one additional step often needed is to take the median of the image and divide each pixel bythat value. This creates a "normalized" flat, with individual pixel values hovering around 1. You cando this step, if you wish, with the 'imarith' command. However, 'ccdproc' will do this for you when
applying the flat to the object image.
Let’s do that now -once more to ccdproc:
cc> lpar ccdprocimages = "*.fit" List of CCD images to correct(output = "out*.fit") List of output CCD images
(ccdtype = "object") CCD image type to correct(max_cache = 0) Maximum image caching memory (in Mbytes)
(noproc = no) List processing steps only?\n(fixpix = no) Fix bad CCD lines and columns?
(overscan = no) Apply overscan strip correction?(trim = no) Trim the image?
(zerocor = no) Apply zero level correction?(darkcor = no) Apply dark count correction?(flatcor = yes) Apply flat field correction?
(illumcor = no) Apply illumination correction?(fringecor = no) Apply fringe correction?
(readcor = no) Convert zero level image to readout correction?(scancor = no) Convert flat field image to scan correction?\n
(readaxis = "line") Read out axis (column|line)(fixfile = "pambadpix.pix") File describing the bad lines and columns(biassec = "image") Overscan strip image section(trimsec = "image") Trim data section
(zero = "zero.fit") Zero level calibration image(dark = "") Dark count calibration image(flat = "flat*.fit") Flat field images
Go ahead and run it, then look at the headers of your object fields. Here is an example of the finallines in a FITS header from a calibrated image:
FIXPIX = 'May 10 15:02 Bad pixel file is pambadpix.pix'CCDPROC = 'May 10 15:17 CCD processing done'TRIM = 'May 10 15:09 Trim data section is [2:2047,2:2047]'OVERSCAN= 'May 10 15:09 Overscan section is [2057:2072,2:2047] with mean=3204.4'ZEROCOR = 'May 10 15:09 Zero level correction image is zero.fit'LTV1 = 2048.00006509877

7/27/2019 zen of iraf
http://slidepdf.com/reader/full/zen-of-iraf 23/53
Revision 1.0 14June 2003 Page 23 of 53
A. Charles Pullen, all rights reserved.
LTV2 = 2047.99993490121FLATCOR = 'May 10 15:17 Flat field image is flatR.fit with scale=25884.08'
IRAF documents all your changes to the image in the header.
The short version is also helpful:
cc> imheader m67r m67r[2046,2046][real]: M67 R
It tells us that the image has been trimmed to 2046 by 2046 pixels. It is now "real", which means 32 - bit floating point.
K. Registering Images or Performing Astrometry
We are, unfortunately, not out of the woods yet. For our photometry, we will need to identify specificstars in a way IRAF can understand. This means pixel coordinates or a WCS astrometric solution.An astrometric solution provides header information to allow IRAF and DS9 to display coordinatesin RA and DEC to some precession epoch. These are much preferred over just pixel X and Y,
because you can then identify stars by their "proper names", RA and DEC.
As it stands right now, IRAF doesn't really have an astrometry routine. SAO puts out a WCScalculation tool called (oddly enough) WCS-Tools for use in LINUX. WCS-Tools is also free.Unfortunately for me, it would be another project to get it working! A friend who is a geophysicistand lives and breathes both Linux and astronmetry could not get WCS tools to work (Billings, 2003).I attempted to use the LINUX planetarium software Xephem that has a WCS tool. However, it wouldnot work on any of the object images, presumably due to their size, although "human error" (me!)cannot be ruled out either. So, pixel coordinates were used to identify specific stars. This createsanother problem.
In any of the object images, a given star is not at the same coordinates. So, the images had to be"registered" such that a given star was at the same place in all the images of that field. If you think of a FITS image as a 3D plot of z, y, and z (where x = row, y= column, z= the value of the pixel) it iseasy to visualize how images are registered. One takes an image of a given field, calls that themaster, and coordinates are compiled for a number of clear, well defined stars in each image. Onecan then calculate the amount of x,y transformation that is needed, and add or subtract these valuesfrom the entire matrix of x,y,z coordinates. If we were using photographic negatives, you couldimagine moving the film around until all the stars line up.
While the concept is simple, the IRAF execution was not. At the time I was trying to register theimages, I was having great inner turmoil with IRAF, and the tasked looked very daunting. So, I took
the easy, yet sinful, way past this karmic bump, and used the Windows software Mira 6.2 to do theregistration. In MIRA one loads the images into the program, clicks on the stars one wants to use asregistration points, and tells it to register the image stack to those stars. It worked fine, although ittook over 20 minutes to process an image stack of 9 SA107 images due to their 16 MB (each) size!This section will be rewritten for IRAF after I have had a chance to figure it out.
There is Windows camera software that will perform precision astrometry on images as they aretaken. It’s called PinPoint, which is part of the ASCOM Initiative (http://www.dc3.com). Use of this

7/27/2019 zen of iraf
http://slidepdf.com/reader/full/zen-of-iraf 24/53
software will make astrometry at the precision needed for my work just part of taking the image - Ihope!
Save your calibrated images in a different directory, and let’s try to extract some information fromthem!
IV. INSTRUMENTAL PHOTOMETRY
Don't tell me how difficult the Way.
The bird's path, winding far, isright before you. Water of the
Dokei Gorge, you return to the
ocean, I to the mountain.
Revision 1.0 14June 2003 Page 24 of 53
A. Charles Pullen, all rights reserved.
Hofuku Seikatsu
A. Identifying Standard Stars
Figure 6 shows part of SA107. It,and many others, has beencalibrated by Arlo Landolt (Landolt1992) to act as UBVRI standards.That means that their magnitudeand color is established andreferenced to the original equatorialUBV stars of Landolt and Morgan.However, finding out which star iswhich can be difficult. Nevertheless, correct identificationis critical.
Unlike most amateur photometricsoftware, one cannot directlyidentify stars with a point-and-click interface. But you can doalmost the same thing by making
up a coordinate (.coo) file for each field of your stars of interest.
Figure 6 – Partial Frame of SA107 with
dummy apertures and annuli
First, we have to decide which Landolt stars we want to use. If you said "all of them" you are bothright and wrong. The more standards you use, over the widest range of color, the better transformation and extinction coefficients you will get. However, not all Landolt stars are createdequal. Many of the "standard" stars were observed on just one or two nights, for only a fewobservations. Others may have dozens of observations, over many nights. Given this fact, you willnot be surprised to learn that several variable stars are among Landolt's standards! So, it balancenumber vs quality when choosing standards. For the purpose of my project, I choose the standardstars used by Dr. Gay in her research.

7/27/2019 zen of iraf
http://slidepdf.com/reader/full/zen-of-iraf 25/53
Revision 1.0 14June 2003 Page 25 of 53
A. Charles Pullen, all rights reserved.
Another issue is simply finding which star is which. The original plates from Landolt 1992 are fairlylarge scale, and even in an offset press published reprint (which was sent to me by Dr. Landolt uponrequest), it can be difficult to see which star is which in some cases. Some photometrists have madetheir own finder charts based on their own CCD images, if you can get some of these from a trustedsource they are worth their weight in gold. But, given that you have to use open resources, you canaccess the Landolt 1992 catalog and finder plates on-line from ESO LaSilla. Close-up images of
some of the Landolt stars, organized by RA, can be found at Lick Observatory (URLs in Resources)
Now that you've decided which stars to use, you need to tell IRAF their coordinates. Open an imagein 'display', and execute 'imexamine'. Find each star on your image, and record it's pixel coordinateswith ','. That is one of the quick photometry routines that will give you output like:
# COL LINE RMAG FLUX SKY N RMOM ELLIP PA PEAK MFWHM940.97 1132.59 13.28 48806.5 111.12 78 2.34 0.111 -9.8 7300.69 2.33
1050.24 1066.43 15.00 9988.9 110.39 80 2.31 0.152 -6.6 1520.14 2.291126.96 1072.26 14.45 16623.1 111.43 77 2.23 0.174 -16.2 2709.07 2.13842.48 874.10 16.16 3441.8 111.37 80 2.31 0.136 15.6 547.11 2.11
Note that the pixel coordinates are the centroids of the stars, so you don't have to be too careful where
you put your cursor. Note also the (MFWHM), this figure is in pixels, and will be used later to setaperture size. Finally, note that fractional coordinates are OK for this application.
Once you get this data, cut and paste it into a text file, say 107.coo (highlight the output in your Xwindow, open a text editor, place the cursor in it, and click both mouse buttons at once). All weneed are the coordinates, so you can delete all other information by hand.
Now, you might want to check that you have everything correct. One way to do this is to mark thestars with the coordinates found in the .coo file (Figure 6, above). That is done with 'tvmark', in thedigiphot.daophot package. Epar 'tvmark'
da> lpar tvmark frame = 1 Default frame number for display
coords = "107.pam.coo" Input coordinate list(logfile = "") Output log file(autolog = no) Automatically log each marking command
(outimage = "") Output snapped image(deletions = "") Output coordinate deletions list(commands = "") Image cursor: [x y wcs] key [cmd]
(mark = "circle") The mark type(radii = "12,20,25") Radii in image pixels of concentric circles
(lengths = "0") Lengths and width in image pixels of concentric(font = "raster") Default font
(color = 204) Gray level of marks to be drawn(label = no) Label the marked coordinates(number = yes) Number the marked coordinates
(nxoffset = 20) X offset in display pixels of number (nyoffset = 0) Y offset in display pixels of number
(pointsize = 5) Size of mark type point in display pixels(txsize = 2) Size of text and numbers in font units
(tolerance = 1.5) Tolerance for deleting coordinates in image pix(interactive = no) Mode of use
(mode = "ql")
The 'frame' is the DS9 frame the image is in. 'coods' is the .coo file you made. A 'outimage' wouldhave the marks embedded in it. 'mark type' is a circle, box, point, or none (which can be useful for

7/27/2019 zen of iraf
http://slidepdf.com/reader/full/zen-of-iraf 26/53
Revision 1.0 14June 2003 Page 26 of 53
A. Charles Pullen, all rights reserved.
just numbering stars. 'radi' is in pixels, and you can simulate an aperture and background annulus ,as I did above. 'color' is a code for the color of the mark, the help file has all the options. 'number'numbers the markings in order of their appearance in the .coo file The 'offset' is how much off thecenter of the coordinate to mark the number.
'tvmark' can be invoked with:
da> display 107r1 1da> tvmark Default frame number for display (2): 1Input coordinate list (107.pam.coo):
If you want to extract this image for later use, such as in a paper, you can either do a screen capture,or make it a 'snap' image from the 'tvmark' par file.
B. Using ‘daofind' for Star Identification
For your program stars, you may be interested in just a few, or as many as possible in the field. Inmy CMD project, I wanted all of them in M67. IRAF has a task (unique among photometric
software) for automatically finding large numbers of stars in a field, called 'daofind', also in thedaophot package with tvmark.
Figure 7 is my M67 field. Let’s look at the par file for daofind:
da> lpar daofindimage = "m67r" Input image(s)
output = "m67.coo.4" Output coordinate file(s) (default: image.coo.?(starmap = "") Output density enhancement image(s)(skymap = "") Output sky image(s)
(datapars = "") Data dependent parameters(findpars = "") Object detection parameters(boundary = "nearest") Boundary extension (constant|nearest |reflect|wr
(constant = 0.) Constant for boundary extension(interactive = no) Interactive mode ?
(verify = )_.verify) Verify critical daofind parameters ?(update = )_.update) Update critical daofind parameters ?
(verbose = )_.verbose) Print daofind messages ?(graphics = )_.graphics) Graphics device(display = )_.display) Display device
(icommands = "") Image cursor: [x y wcs] key [cmd](gcommands = "") Graphics cursor: [x y wcs] key [cmd]
(mode = "ql"
'image' is the image. 'output' is the output file name, a .coo extension will tell you it it is a coordinatefile. But now things get complicated. 'datapars' and 'fitpars' have their own par file!

7/27/2019 zen of iraf
http://slidepdf.com/reader/full/zen-of-iraf 27/53
Edit it by putting your cursor on that line in epar, and type ':e'. For datapars, we get:
PACKAGE = daophotTASK = datapars
Figure 7 – Most of M67
(scale = 1.) Image scale in units per pixel(fwhmpsf= 2.5) FWHM of the PSF
in scale units(emissio= yes) Features are positive?(sigma = 0.) Standard deviation of
background in counts(datamin= INDEF) Minimum gooddata value(datamax= INDEF) Maximum gooddata value(noise = poisson) Noise model(ccdread= ) CCD readout noiseimage header keyword(gain = ) CCD gain image header keyword(readnoi= 0.) CCD readout noise inelectrons
(epadu = 1.) Gain in electrons per count(exposur= EXPTIME) Exposure timeimage header keyword(airmass= AIRMASS) Airmass imageheader keyword(filter = FILTERS) Filter image header keyword(obstime= UT) Time of observationimage header keyword(itime = 30.) Exposure time(xairmas= 1.7070000171661) Airmass(ifilter= R) Filter (otime = 6:06:48.53) Time of observation
(mode = ql)
and for fitpars we get:
PACKAGE = daophotTASK = findpars
(thresho= 4.) Threshold in sigma for feature detection(nsigma = 1.5) Width of convolution kernel in sigma(ratio = 1.) Ratio of minor to major axis of Gaussian kernel(theta = 0.) Position angle of major axis of Gaussian kernel(sharplo= 0.2) Lower bound on sharpness for feature detection(sharphi= 1.) Upper bound on sharpness for feature detection(roundlo= -1.) Lower bound on roundness for feature detection
(roundhi= 1.) Upper bound on roundness for feature detection(mkdetec= yes) Mark detections on the image display ?(mode = ql)
'datapars' and 'fitpars' tell daofind what defines a "star" of interest to you. You can screen out stars based on minimum or maximum pixel value (noise or saturated), FWHM, or specific key words in animage, so it doesn't try to find stars in your flats. Using the default values, more or less, lets try tofind some stars:
Revision 1.0 14June 2003 Page 27 of 53
A. Charles Pullen, all rights reserved.

7/27/2019 zen of iraf
http://slidepdf.com/reader/full/zen-of-iraf 28/53
da> daofindInput image(s) (m67r):Output coordinate file(s) (default: image.coo.?) (m67.coo.example):
FWHM of features in scale units (2.5) (CR or value): New FWHM of features: 2.5 scale units 2.5 pixels
Standard deviation of background in counts (0.) (CR or value): New standard deviation of background: 0. counts
Detection threshold in sigma (4.) (CR or value):
New detection threshold: 4. sigma 0. countsMinimum good data value (INDEF) (CR or value):
New minimum good data value: INDEF countsMaximum good data value (INDEF) (CR or value):
New maximum good data value: INDEF counts
(many, many, many pages of screenoutput later...)
1632.18 2044.22 INDEF 0.373 -0.297 -0.302930691659.36 2044.74 INDEF 0.842 -0.281 0.572
930701678.52 2044.46 INDEF 0.687 -0.797 -0.67493071379.00 2046.02 INDEF 0.541 -0.525 -0.821
930721198.77 2046.00 INDEF 0.290 0.897 0.485
93073
threshold: 0. relerr: 1.140 0.2 <= sharp <= 1. -1. <=round <= 1.
IRAF ran away, producing a detection for nearly every pixel (note the final number of detections: 93,073). Let’s try again,and try to rein it in a bit.
First, discard that .coo file ' delm67.coo.example'. Then:
Figure 8 – daofind detection at the edge of
M67da> daofindInput image(s) (m67r):Output coordinate file(s) (default: image.coo.?) (m67.coo.example):FWHM of features in scale units (2.5) (CR or value):
New FWHM of features: 2.5 scale units 2.5 pixelsStandard deviation of background in counts (0.) (CR or value): 500
New standard deviation of background: 500. countsDetection threshold in sigma (4.) (CR or value):
New detection threshold: 4. sigma 2000. countsMinimum good data value (INDEF) (CR or value): 500
New minimum good data value: 500. countsMaximum good data value (INDEF) (CR or value): 50000
New maximum good data value: 50000. counts
...
1336.31 1985.12 -2.810 0.643 -0.220 -0.378 943607.48 1996.66 -4.849 0.597 -0.197 -0.110 944
Revision 1.0 14June 2003 Page 28 of 53
A. Charles Pullen, all rights reserved.

7/27/2019 zen of iraf
http://slidepdf.com/reader/full/zen-of-iraf 29/53
1053.98 2005.81 -2.561 0.615 0.347 -0.901 945179.96 2006.95 -2.576 0.608 -0.158 0.320 9461869.94 2008.86 -3.355 0.653 0.007 -0.066 947259.35 2013.66 -4.177 0.594 -0.168 0.019 9481198.58 2013.70 -2.346 0.609 0.036 -0.200 949495.01 2028.77 -1.826 0.593 -0.125 0.324 9501192.94 2033.69 -3.202 0.647 0.011 -0.007 951984.83 2041.23 -2.438 0.612 -0.438 -0.112 952
I want to include all the stars that are adequately exposed, but not stars that are saturated. One way totell this is to zoom in on a small section that has faint non-detected stars, Figure 9, as well as brightnon- detected stars and check them out with imexamine 'a' quick photometry. Its an iterative process,so be prepared to try different values. Finally, using the following values:
Figure 9 – Close up to evaluate daofind selectionda> daofindInput image(s) (m67r):Output coordinate file(s) (default: image.coo.?)(m67.coo.example2):
Revision 1.0 14June 2003 Page 29 of 53
A. Charles Pullen, all rights reserved.
FWHM of features in scale units (2.5) (CR or value): New FWHM of features: 2.5 scale units 2.5 pixels
Standard deviation of background in counts (0.) (CR or value):250 New standard deviation of background: 250. counts
Detection threshold in sigma (4.) (CR or value): New detection threshold: 4. sigma 1000. counts
Minimum good data value (INDEF) (CR or value): New minimum good data value: INDEF counts
Maximum good data value (INDEF) (CR or value): 50000
I find that the selected stars have reasonableerrors (for the most part) but the non-selected donot, or are saturated (peak >50,000 counts).
da> imexamine SELECTED
OL LINE RMAG FLUX SKY N RMOM ELLIP PAPEAK MFWHM1131.25 422.54 14.01 24840.8 216.78 81 2.75 0.148 35.03210.21 2.39# COL LINE COORDINATES# R MAG FLUX SKY PEAK E PA BETAENCLOSED MOFFAT DIRECT1131.26 422.54 1131.26 422.54
6.97 13.98 25502. 216.3 3198. 0.23 30 12.0 2.36 2.412.321116.67 371.62 1116.67 371.62
6.90 12.23 128470. 217.9 17209. 0.04 14 5.77 2.26
2.34 2.301093.00 356.17 1093.00 356.176.59 12.94 66718. 218.2 9016. 0.02 2 4.09 2.21 2.34
2.201097.19 343.35 1097.19 343.35
6.88 14.40 17355. 219. 2321. 0.08 5 12.0 2.32 2.402.30

7/27/2019 zen of iraf
http://slidepdf.com/reader/full/zen-of-iraf 30/53
NOT SELECTED
# R MAG FLUX SKY PEAK E PA BETA ENCLOSED MOFFAT DIRECT1113.30 417.62 1113.30 417.62
7.01 17.68 850.5 217.3 INDEF 1.01 39 INDEF 2.36 INDEF 2.321167.99 402.77 1167.99 402.77
7.43 16.87 1782. 213.6 167.3 0.15 29 6.35 2.49 2.83 2.49
1136.11 377.05 1136.11 377.056.79 15.96 4118. 217. 571.3 0.18 12 4.95 2.28 2.45 2.261126.59 359.31 1126.59 359.31
6.95 15.54 6068. 218.2 878.8 0.43 -45 4.12 2.27 2.29 2.321160.78 234.72 1160.78 234.72
2.70 17.25 1260. 215. 1081. 0.16 35 3.28 0.92 0.83 0.901198.58 289.39 1198.58 289.39
Figure 10 – Radial Profile
So, this is the coordinate file I'm goingto use later, which contains 1008 starsin the cluster.
C. Setting Aperture Size
Back at imexamine, we already knowour FWHM is around 2.5. Let’s dosome radial profiles ('r') and see howthe stars look, (Figure 10).
The FWHM of that star is about 2.3 pixels. If that is characteristic of theseeing, tracking, and focus for thewhole run (check multiple images!)then the rule of thumb is that my
aperture radius should be 4 to 5 timesthat number, or between 9 and 11 pixels. Just to be on the safe side, I'llchoose 12.
Figure 11 – Growth Curve
Want something more scientific? Youcan do a rate of growth plot as below(Figure 11). Notice that somewhere between 12 and 14 pixels, it mostly peaks out. This is really why I choose12. Note that in photpar you can set
multiple apertures with commas. Thisset was 2,4,6,8, etc. I then manuallydid phot on just one star. More on thatlater. So, at some point, one will seethat there is no further significant gainin magnitude - that is the aperture sizeto use. Massey & Davis (1992) say just use 12 pixels radius as your
Revision 1.0 14June 2003 Page 30 of 53
A. Charles Pullen, all rights reserved.

7/27/2019 zen of iraf
http://slidepdf.com/reader/full/zen-of-iraf 31/53
Revision 1.0 14June 2003 Page 31 of 53
A. Charles Pullen, all rights reserved.
aperture size if your images are between 2 and 4 pixels FWHM. Probably not bad advice...
Why not just make it big? You run the risk of getting light from other stars in it, and for single stars,you start to add noise in the form of background light. You also risk getting a bad pixel or cosmic rayhit in your aperture the larger it is as well.
For the beginning of my background annulus, I'm going to choose to start 10 more pixels out from thecenter, for a number of 12 +10 =22 in radius. I'll add 5 pixels for the outer edge of the backgroundannulus. Again, the idea is to get a good sampling of the background, but not run the risk of anymore contamination than necessary, which would happen if you were too close to the center star, or the annulus was too large.
But remember, you must use the same aperture and background annulus for all of your images, or getinto complicated and painful aperture corrections. Remember: The goal is inner peace through IRAF,
so keep it simple.
If you want to see how your choice looks on a radial plot that shows you the boundaries of your
aperture and annulus, you can do that with our next IRAF task - phot.
D. Extracting Raw Photometry with phot
Phot is a powerful aperture photometry task. You can run it from the apphot or daophot package.For unknown reasons, Massy and Davis (1992) suggest running it from the daophot package. Iwould bet that, like rfits and imh files, this is dated advice . Nevertheless , “disobedience to one’s
elders can bring bad karma”, so we'll comply.
If you look at the phot parameters you'll see:
da> lpar phot
image = "107*.fts" Input image(s)coords = "107.pam.coo" Input coordinate list(s) (default: image.coo.?)output = "std107.pam.mag" Output photometry file(s) (default: image.mag.skyfile = "" Input sky value file(s)
(plotfile = "") Output plot metacode file(datapars = "") Data dependent parameters
(centerpars = "") Centering parameters(fitskypars = "") Sky fitting parameters
(photpars = "") Photometry parameters(interactive = no) Interactive mode ?
(radplots = no) Plot the radial profiles?(verify = )_..verify) Verify critical phot parameters ?(update = )_.update) Update critical phot parameters ?
(verbose = )_.verbose) Print phot messages ?(graphics = )_.graphics) Graphics device(display = )_.display) Display device
(icommands = "") Image cursor: [x y wcs] key [cmd](gcommands = "") Graphics cursor: [x y wcs] key [cmd]
(mode = "ql")
It looks deceptively simple. 'image' is our input list, it probably could do multiple fields with the rightset up using commas, but I keep it separate. "coords" is our manual or daofind generated coordinatelist. 'output' is a text file with the data in it. From 'datapars' to 'photpars' are additional param files

7/27/2019 zen of iraf
http://slidepdf.com/reader/full/zen-of-iraf 32/53
Revision 1.0 14June 2003 Page 32 of 53
A. Charles Pullen, all rights reserved.
(like in daofind) we'll come back to. 'interactive' allows you to run the program one star at a time.'radplots' allows you to see how your aperture and background annulus selections look on a radial plot. 'verify' will prompt you for the key parameters for the task. And, if you change them from thecommand line, it will 'update' the par file with the new values.
Let’s use epar to see what is in the hidden pars file. You can epar phot first, then in the field for, say,
datapars, type ':e' to get to that par file. Or you could just type 'epar datapar', your choice.PACKAGE = daophot
TASK = datapars
(scale = 1.) Image scale in units per pixel(fwhmpsf= 2.5) FWHM of the PSF in scale units(emissio= yes) Features are positive ?(sigma = 0.) Standard deviation of background in counts(datamin= INDEF) Minimum good data value(datamax= INDEF) Maximum good data value(noise = poisson) Noise model(ccdread= ) CCD readout noise image header keyword(gain = ) CCD gain image header keyword(readnoi= 0.) CCD readout noise in electrons
(epadu = 1.) Gain in electrons per count(exposur= EXPTIME) Exposure time image header keyword(airmass= AIRMASS) Airmass image header keyword(filter = FILTERS) Filter image header keyword(obstime= UT) Time of observation image header keyword(itime = 30.) Exposure time(xairmas= 1.7070000171661) Airmass(ifilter= R) Filter (otime = 6:06:48.53) Time of observation(mode = ql)
You could use 'datamin' & 'datamax' to exclude stars that are too faint, or too bright. But, we alreadydid this in when we made our coordinate files. The other highlighted fields are header names thatwill be used to put header information in the outputted data file.
Close 'datapars' with :q, and look at 'centerpars':
PACKAGE = daophotTASK = centerpars
(calgori= centroid) Centering algorithm(cbox = 5.) Centering box width in scale units(cthresh= 1.) Centering threshold in sigma above background(minsnra= 1.) Minimum signal-to-noise ratio for centering algo(cmaxite= 10) Maximum iterations for centering algorithm(maxshif= 5.) Maximum center shift in scale units(clean = no) Symmetry clean before centering(rclean = 1.) Cleaning radius in scale units(rclip = 2.) Clipping radius in scale units(kclean = 3.) K-sigma rejection criterion in skysigma(mkcente= no) Mark the computed center (mode = ql)
We want to use 'centroid' as our centering method. A 5 pixel box should be able to account for anyscatter in our registered positions on the .coo file. You can also set 'maxshif' so that you'll get anerror warning if positions shift more than the number of pixels you specify. Save centerpars (':q') andepar fitskypars:

7/27/2019 zen of iraf
http://slidepdf.com/reader/full/zen-of-iraf 33/53
PACKAGE = daophot
TASK = fitskypars
(salgori= mode) Sky fitting algorithm(annulus= 22.) Inner radius of sky annulusin scale units(dannulu= 5.) Width of sky annulus in
scale units(skyvalu= 0.) User sky value(smaxite= 10) Maximum number of skyfitting iterations(sloclip= 0.) Lower clipping factor in
percent(shiclip= 0.) Upper clipping factor in
percent(snrejec= 50) Maximum number of skyfitting rejection iteratio(sloreje= 3.) Lower K-sigma rejection limitin sky sigma(shireje= 3.) Upper K-sigma rejection limitin sky sigma
Figure 12 – Radial Profile with Aperture and Annulus.
(note PSF of adjacent star)
(khist = 3.) Half width of histogram in sky sigma
(binsize= 0.10000000149012) Binsize of histogram in sky sigma(smooth = no) Boxcar smooth the histogram(rgrow = 0.) Region growing radius in scale units(mksky = no) Mark sky annuli on the display(mode = ql)
Choose 'mode’ for your 'salgori'. Here is where we set where the background annulus starts, and howwide it is. Finally, lets look at 'photpars'
PACKAGE = daophotTASK = photpars
(weighti= constant) Photometric weighting scheme(apertur= 12.) List of aperture radii in scale units
(zmag = 25.) Zero point of magnitude scale(mkapert= no) Draw apertures on the display(mode = ql)
'weighti' is always constant in daophot. 'apertur' is where you specify your aperture(s). If you wantmultiple, use commas ('10,12,14'). 'zmag' is a dummy zero point. It will be modified as part of thestandardization we will be doing later. It really should be zero, as you would then have trueinstrumental magnitudes. But, these are all negative numbers, so it might cause math problems for IRAF. Leave it at the default.
So, now the big moment: Let’s run phot, first in "manual" mode. Change phot pars to interactivewith rplot enabled. Load the image in the display, and type 'phot imagename'. Once you confirm the
parameters, you'll get a graphics cursor (blinking circle) on your display. Center it on a star, and hitthe space bar. You'll get this radial profile (Figure 12), with your aperture and annulus displayed, aswell as this output on your screen:
da> phot 107r1Input coordinate list(s) (default: image.coo.?) (104.pam.coo): 107.pam.cooOutput photometry file(s) (default: image.mag.?) (104.pam.mag): 107.mag.manualWarning: Graphics overlay not available for display device.107r1 965.19 995.57 111.2863 16.054 ok
Revision 1.0 14June 2003 Page 33 of 53
A. Charles Pullen, all rights reserved.

7/27/2019 zen of iraf
http://slidepdf.com/reader/full/zen-of-iraf 34/53
Revision 1.0 14June 2003 Page 34 of 53
A. Charles Pullen, all rights reserved.
Ignore the "Warning", it works fine!
There is a lot more information in the data file (107.mag.manual) lets look at it with an edit command(it's in the Appendix). The first section is all your parameters. The next tells you what all the fieldsare. The final section is your actual data. See the "noError"? That tells you that IRAF didn't haveany situations occur out of norms.
Now, lets get automated! Change interactive and rplots back to "no" and lets do the standards.
da> photInput image(s) (107*.fts):Input coordinate list(s) (default: image.coo.?) (107.pam.coo):Output photometry file(s) (default: image.mag.?) (std107.pam.mag): 107.mag.exampleCentering algorithm (centroid) (CR or value):
New centering algorithm: centroidCentering box width in scale units (5.) (CR or value):
New centering box width: 5. scale units 5. pixelsSky fitting algorithm (mode) (CR or value):
Sky fitting algorithm: modeInner radius of sky annulus in scale units (20.) (CR or value):
New inner radius of sky annulus: 20. scale units 20. pixelsWidth of the sky annulus in scale units (5.) (CR or value):
New width of the sky annulus: 5. scale units 5. pixelsFile/list of aperture radii in scale units (12) (CR or value):
Aperture radius 1: 12. scale units 12. pixelsMinimum good data value (INDEF) (CR or value):
New minimum good data value: INDEF countsMaximum good data value (INDEF) (CR or value):107b1.fts 1518.86 1108.62 56.14318 18.654 ok 107b1.fts 1025.16 1765.04 54.38914 18.256 ok 107b1.fts 965.30 995.60 54.86342 18.309 ok 107b1.fts 920.85 974.61 55.01133 20.204 ok 107b1.fts 934.42 449.73 54.79597 17.394 ok 107b1.fts 880.01 1111.66 55.1084 17.602 ok ...
Do the same with the other field, specifying a different .mag file name or append it to your other filewith ‘>>107.pam.mag’. Edit out the second set of parameters and field identifiers, so that you haveone file full of just the phot output of your standards.
Since the .mag files can be unwieldy, IRAF gives you a tool called 'txdump' to parse them. Here isan example to pull just select information out of a .mag file:
da> txdump 104.pam.mag image,id,xcenter,ycenter,ifilter,xairmass,mag,merr yes
104b1.fts 1 839.036 940.677 B 1.409 18.827 0.008104b1.fts 2 748.371 1093.615 B 1.409 19.518 0.013104b1.fts 3 488.016 877.080 B 1.409 21.068 0.045
104b1.fts 4 407.867 875.756 B 1.409 18.273 0.006104b1.fts 5 383.930 961.248 B 1.409 21.661 0.080104b1.fts 6 348.996 928.250 B 1.409 20.893 0.037...
If you wanted to make an output file that you could put into Excel, you can txdump to a file:
da> txdump 104.pam.mag >104mag.datFields to be extracted (image,id,xcenter,ycenter,ifilter,xairmass,mag,merr):Boolean expression for record selection (yes):da>

7/27/2019 zen of iraf
http://slidepdf.com/reader/full/zen-of-iraf 35/53
Revision 1.0 14June 2003 Page 35 of 53
A. Charles Pullen, all rights reserved.
Remember the "NoError" phrase? If you want to be sure you extract only data that in fact has"NoError", use the following boolean expression:
da> txdump *.pam.mag > 104.mag.datFields to be extracted (image,id,xcenter,ycenter,ifilter,xairmass,mag,merr):Boolean expression for record selection (yes): perror!="No_error"
104b1.fts 1 839.036 940.677 B 1.409 18.845 0.006
104b1.fts 2 748.371 1093.615 B 1.409 19.537 0.009104b1.fts 3 488.016 877.080 B 1.409 25.217 0.921104b1.fts 4 407.867 875.756 B 1.409 18.293 0.005104b1.fts 5 383.930 961.248 B 1.409 21.732 0.039...
Now, if all you wanted to do was differential photometry, without transforming to the standardsystem, you can import your data into Excel or use a PERL program to do the subtraction, and leaveIRAF behind. However, since the goal of my project was to work on the standard system, I'll walk you though those steps next.
V. STANDARD SYSTEM CORRECTION
Disciples as numerous as grains of sand in the River
Ganges, not one has gained enlightenment; they err in seeking it as a path taught by others. To eliminate
form and eradicate its traces, make utmost effort
and strive diligently to walk in nothingness.
Tung-shan Liang-chieh (807-869)
If you are not clear on what it means to put your data on the standard Johnson-Cousins BVRI systemrefer to some of the reference links. In brief summary, the idea is to find out from our standard fields
how both color and magnitude are affected by airmass, and to calculate the actual zero point for eachcolor and/or color index. This is why we took images of standard fields at different airmasses. IRAFcan determine extinction and transformation coefficients for you, then apply them to that massivem67.mag file. But, like all things on the path to Nirvana, it will take a bit of work.
In summary we will:
• Make an Image Set
• Make an Observations File
• Make a Configuration File
• Determine by Interactive Fitting our Transformation and Extinction Coefficients
• Check that the Coefficients can Back Calculate our Standard Star Values
A. Making an Image Set
We'll be using the photcal package, found in noao.digiphot, so load that. Our first step is to tell IRAFwhat images have standard star data. We can do that with 'mkimset'.The par file is:

7/27/2019 zen of iraf
http://slidepdf.com/reader/full/zen-of-iraf 36/53
Revision 1.0 14June 2003 Page 36 of 53
A. Charles Pullen, all rights reserved.
PACKAGE = photcalTASK = mkimsets
imlist = The input image listidfilter= The list of filter idsimsets = The output image set file(imobspa= ) The output image observing parameters file(input = photfiles) The source of the input image list(filter = ) The filter keyword(fields = ) Additional image list fields
(sort = ) The image list field to be sorted on(edit = yes) Edit the input image list before grouping(rename = yes) Prompt the user for image set names(review = yes) Review the image set file with the editor (list = )(mode = ql)
However, it may be easier to simply make it with a text editor. Here is the standard star imset I used for my project:
ph> type stdimset104_1 : 104b1.fts 104i1.fts 104r1.fts104_2 : 104b2.fts 104i2.fts 104r2.fts
107_1 : 107b1.fts 107i1.fts 107r1.fts107_2 : 107b2.fts 107i2.fts 107r2.fts107_3 : 107b3.fts 107i3.fts 107r3.fts
As can be seen, all an imset does is tell IRAF that there are two observations of the SA 104 field, andthree of the SA107 field, with what image names are in those observations. Note, rather than use 'edit',for a quick look at a file in the IRAF window, I used 'type'.
B. Making a Standard Star Observation File
'mknobsfile' is the task that makes a file of our standard observations, as well as creates format files tohelp IRAF find the right information the later tasks will need. Note! The command is mk nobsfile, not
mkobsfile! mkobsfile is a different command! Look at the help file to see the difference.
The mknobsfile par file is :
PACKAGE = photcalTASK = mknobsfile
photfile= std.pam.mag The input list of APPHOT/DAOPHOT databasesidfilter= B,I,R The list of filter idsimsets = stdimset The input image set fileobservat= std.pam.obs The output observations file(obspara= ) The input observing parameters file(obscolu= 2 3 4 5) The format of obsparams(minmage= 0.001) The minimum error magnitude(shifts = ) The input x and y coordinate shifts file(apercor= ) The input aperture corrections file(apertur= 1) The aperture number of the extracted magnitude(toleran= 5.) The tolerance in pixels for position matching(allfilt= yes) Output only objects matched in all filters(verify = no) Verify interactive user input ?(verbose= yes) Print status, warning and error messages ?(mode = ql)

7/27/2019 zen of iraf
http://slidepdf.com/reader/full/zen-of-iraf 37/53
Revision 1.0 14June 2003 Page 37 of 53
A. Charles Pullen, all rights reserved.
As usual, 'photfile' is your input file name. Note that I combined the two separate .mag files for SA104and SA107. 'idfilter' are your filter names. 'stdimset' is the name of the file made in the previous step.'obscolu' are the columns of relevant data in the input file, which if IRAF made the .mag file, should bedefault. Let’s run mknobsfile and see what happens:
ph> mknobsfileThe input list of APPHOT/DAOPHOT databases (std.pam.mag): stdcombo.pam.mag
The list of filter ids (B,I,R):The input image set file (stdimset):The output observations file (std.pam.obs.example): std.pam.obs
Observations file: std.pam.obsImage set: 104_1 6 stars written to the observations fileImage set: 104_2 6 stars written to the observations fileImage set: 107_1 18 stars written to the observations fileImage set: 107_2 18 stars written to the observations fileImage set: 107_3 18 stars written to the observations file
If you look at your directory, you'll see that a two new files were created:
ph> dir
104.pam.coo 107.pam.coo 107r3.fts m67i.fts104.pam.coo~ 107.pam.mag Apr01.obsfile m67r.fts104.pam.mag 107b1.fts AprLandolt.dat std.pam.invertfit104b1.fts 107b2.fts aperturegrowth.txt std.pam.obs
104b2.fts 107b3.fts aperturegrowth.txt stdcombo.pam.mag104i1.fts 107i1.fts fAprLandolt.dat stdimset104i2.fts 107i2.fts fstd.pam.obs.dat tAprLandolt.dat104r1.fts 107i3.fts m67.coo.example3104r2.fts 107r1.fts m67.mag107.mag.manual 107r2.fts m67b.fts
Looking at a bit of the .obs file,
ph> type std.pam.obs
# FIELD FILTER OTIME AIRMASS XCENTER YCENTER MAG MERR
104_1-1 B 3:09:02.9 1.409 839.036 940.677 18.827 0.008* I 3:14:50.0 1.387 839.282 940.609 16.451 0.004* R 3:04:43.5 1.431 839.065 940.633 16.918 0.006104_1-2 B 3:09:02.9 1.409 748.371 1093.615 19.513 0.012* I 3:14:50.0 1.387 748.586 1093.570 17.254 0.009* R 3:04:43.5 1.431 748.392 1093.597 17.633 0.010...
There is a fatal problem here, which is subtle and will drive you past the point of inner calm if you don'tcorrect it. See the star names (104_1-1, 104_1-2, etc.)? IRAF cannot match these to the Landolt catalog.
As you'll remember, you choose which stars to use, but they are named something like 104_350. So,you need to match up the proper names with the IRAF name for the individual star. Much drudgerywith a text editor awaits you. But, remember there is serenity in simple labor. Come back after you'vefixed the star names, and perhaps taken a walk to work off your unseemly lack of inner calm.

7/27/2019 zen of iraf
http://slidepdf.com/reader/full/zen-of-iraf 38/53
Revision 1.0 14June 2003 Page 38 of 53
A. Charles Pullen, all rights reserved.
It should be clear by now that IRAF will protect you from yourself to a large degree. It will not tolerateerrors in file format. If it doesn't add up, it will fault. Now, this trait doesn't protect you from giving itwrong information in the right format, but it is helpful to think of IRAF as a protective Godess, as itfaults, and faults, and faults until you get all these little errors fixed. At least it never holds a grudge...
not even the Greeks could say that of their Godesses!
If you did the same fields, night after night, you would still need to hand edit the .obs file from eachnight to correct the star names. This can cause karmic distress! Now, those willing to try to cut cornerson the way to Nirvana may be tempted to use Excel to import the column with the correct names from a previous night's file into the latest file that needs correcting. Go ahead, make IRAF’s day! Excel willdamage the file so that it won't work later by shuffling columns. Great karmic distress will ensue.
The problem is that you can save a text file in Excel only as a comma or tab delimited file. But, IRAFuses white space as the column delimiter. Use commas, and you can spend the rest of eternity handediting them out. Use tabs, and there will be problems reading the file. Remember, the “Great Satan of
Redmond” brought Excel into the world, and there are those who believe He is the AntiChrist...
If in fact you need to use the same fields, night after night, which is where IRAF really shines, you couldwrite a PERL or other script program to replace 104_1-1 with 104_350 wherever it finds it in the .obsfile. This is probably the best method for returning a sense of calm to your inner core.
We expected to make std.pam.obs, but what is this fstd.pam.obs.dat file?
ph> type fstd.pam.obs.dat# Declare the observations file variables
observations
TB 3 # time of observation in filter BXB 4 # airmass in filter BxB 5 # x coordinate in filter ByB 6 # y coordinate in filter BmB 7 # instrumental magnitude in filter Berror(mB) 8 # magnitude error in filter B
TI 10 # time of observation in filter IXI 11 # airmass in filter IxI 12 # x coordinate in filter IyI 13 # y coordinate in filter ImI 14 # instrumental magnitude in filter Ierror(mI) 15 # magnitude error in filter I
TR 17 # time of observation in filter R XR 18 # airmass in filter R xR 19 # x coordinate in filter R yR 20 # y coordinate in filter R mR 21 # instrumental magnitude in filter R error(mR) 22 # magnitude error in filter R
As you can see, the 'f' means "format". It tells IRAF what the fields in the .mag file are.
7/27/2019 zen of iraf
http://slidepdf.com/reader/full/zen-of-iraf 39/53
Revision 1.0 14June 2003 Page 39 of 53
A. Charles Pullen, all rights reserved.
C. Making Configuration Files
Next comes a step that caused a lot of problems for me early on, so there was much inner growthassociated with it. You need to tell IRAF which catalog to use, and what the format of that catalog is.You also have to tell IRAF what the transformation equations are that you want to use. Finely, you haveto tell IRAF how to interpret your .mag files. If you are able to use Landolt (1992) life is pretty simple.
The catalog is already installed, as are its format and transformation files. As would be seen in the'mkconfig' par file, respectively, those are:
catalog = photcal$catalogs/fnlandolt.dat # the path is different, it isn't in your working directory observations = fstds.pam.obs.dat # made with 'mknobsfile in the previous step
transform = tlandolt.dat
However, in my project, I had a problem. I have B, R, and I data. For the CMD, I was going to use R vs B-R. However, there is no data in Landolt 1992 for B-R. My options are V, B-V, V-R, R-I, and V-I.So, I had to calculate R and B-R from the available Landolt data, and make my own catalog, along withthe catalog format files. IRAF helps you with this, with the 'mkcatalog' task. However, it was a real
pain. Upon request, the instructor provided me with a catalog along with the format and transformationfiles for that catalog (Gay 2003). We'll continue on as if I was working with the onboard catalog.
Looking at the par file for 'mkconfig', you can see it is straightforward to use, once all the catalog andfomat files are right:
PACKAGE = photcalTASK = mkconfig
config = std.pam.cfg The new configuration filecatalog = fAprLandolt.dat The source of the catalog format specificationobservat= fstd.pam.obs.dat The source of the observations file format specitransfor= tAprLandolt.dat The source of the transformation equations
(templat= ) An existing template configuration file(catdir = )_.catdir) The standard star catalog directory(verify = no) Verify each new entry(edit = yes) Edit the new configuration file(check = yes) Check the configuration file(verbose= no) Verbose output(mode = ql)
Running mkconfig, I get the following in an editor (EMACS) window. This is IRAF’s way to let melook at the file and make any edits now.
# Declare the new Landolt UBVRI standards catalog variables
catalog
BR 2 # BR color R 3 # R magnitudeRI 4 # RI color error(BR) 5 # the BR color error error(R) 6 # the R magnitude error error(RI) 7 # the RI color error

7/27/2019 zen of iraf
http://slidepdf.com/reader/full/zen-of-iraf 40/53
Revision 1.0 14June 2003 Page 40 of 53
A. Charles Pullen, all rights reserved.
# Declare the observations file variables
observations
TB 3 # time of observation in filter BXB 4 # airmass in filter BxB 5 # x coordinate in filter ByB 6 # y coordinate in filter BmB 7 # instrumental magnitude in filter B
error(mB) 8 # magnitude error in filter B
TI 10 # time of observation in filter IXI 11 # airmass in filter IxI 12 # x coordinate in filter IyI 13 # y coordinate in filter ImI 14 # instrumental magnitude in filter Ierror(mI) 15 # magnitude error in filter I
TR 17 # time of observation in filter R XR 18 # airmass in filter R xR 19 # x coordinate in filter R yR 20 # y coordinate in filter R mR 21 # instrumental magnitude in filter R
error(mR) 22 # magnitude error in filter R
# Sample transformation section for the Landolt UBVRI system
transformation
fit b1=0.0, b2=0.35, b3=0.000BFIT : mB = (BR + R) + b1 + b2 * XB + b3 * BR
fit r1=0.0, r2=0.0, r3=0.000RFIT : mR = R + r1 + r2 * XR + r3 * BR
fit i1=0.0, i2=0.00, i3=0.000IFIT : mI = (R - RI) + i1 + i2 * XI + i3 * RI
For the transformation equations, the numbers after 'fit' mean as follows:
1 = zero point adjustment coefficient2= extinction coefficient3= color transformation coefficient
These are used as a "first approximation" by IRAF when it attempts to fit the transformation plots in thenext step. They can be set to zero in most cases. Note also in the transformation equations that "R-I" isdenoted as 'RI' etc. This is a syntax issue with IRAF.
So, if everything is to your liking, save the file and exit the editor. I got:
ph> mkconfigThe new configuration file (std.pam.cfg):The source of the catalog format specification (fAprLandolt.dat):The source of the observations file format specification (fstd.pam.obs.dat):The source of the transformation equations (tAprLandolt.dat):
** Beginning of compilation **** End of compilation **

7/27/2019 zen of iraf
http://slidepdf.com/reader/full/zen-of-iraf 41/53
Catalog input variables = 6First catalog column = 2Last catalog column = 7Observational input variables = 18First observational column = 3Last observational column = 22Fitting parameters = 9Constant parameters = 0Auxiliary (set) equations = 0
Transformation equations = 3Warnings = 0Errors = 0
You'll know all is well if 'Warnings' and 'Errors' is zero. If not, go to the help file for mkconfig to learnwhat they mean and try to fix the problem. In general, an error or warning means that something in oneof the three input files to mkconfig is not in exactly the right format. Remember, GIGO ("Garbage-In,Garbage-Out").
Figure 13 – No Convergence
D. Fitting the Transformation Plots
Now comes the fun part, seeing how goodyour standards data really is, and generatingthe transformation, zero point, and extinctioncoefficients using the task 'fitparams'. Let’slook at the par file first:
PACKAGE = photcalTASK = fitparams
observat= std.pam.obs List of observations filescatalogs= AprLandolt.dat List of standard catalog filesconfig = std.pam.cfg Configuration file
paramete= std.pam.ans Output parameters file(weighti= photometric) Weighting type(uniform,photometric,equations)(addscat= yes) Add a scatter term to the weights ?(toleran= 3.0000000000000E-5) Fit convergence tolerance(maxiter= 15) Maximum number of fit iterations(nreject= 0) Number of rejection iterations(low_rej= 3.) Low sigma rejection factor (high_re= 3.) High sigma rejection factor (grow = 0.) Rejection growing radius(interac= yes) Solve fit interactively ?(logfile= fitlog.dat) Output log file(log_unm= yes) Log any unmatched stars ?(log_fit= yes) Log the fit parameters and statistics?(log_res= yes) Log the results ?
(catdir = )_.catdir) The standard star catalog directory(graphic= stdgraph) Output graphics device(cursor = ) Graphics cursor input(mode = ql)
Here you name all the files you have made that are needed for the task. 'weighti' should be'photometric'. We'll start with the default 'toleran' as we can interactively change that as needed. Wewant to solve the fit interactively, and log errors and statistics in the logfile fitlog.dat. Lets run it!
Revision 1.0 14June 2003 Page 41 of 53
A. Charles Pullen, all rights reserved.

7/27/2019 zen of iraf
http://slidepdf.com/reader/full/zen-of-iraf 42/53
ph> fitparamsList of observations files (std.pam.obs):List of standard catalog files (AprLandolt.dat):Configuration file (std.pam.cfg):Output parameters file (std.pam.ans):
First you get an interactive graph (Figure 14). Notice the ominous phrase "Solution did not converge".This is IRAF's version of "I can't let you do that, Dave" (HAL 9000 in “2001, A Space Odyssey”).What it really means is that the solution doesn't fit to the tolerances you specified or accepted as thedefaults. Notice that you have three points at the bottom left part of the plot that are way out of the bounds of the rest of the points. These are stars that didn't fit well. Perhaps they are too faint, or theapertures are contaminated. Let’s get rid of them and try again.
Put your cursor on them one at a time, and type 'd'. This will change the '+' to a '*' meaning they have been removed from the calculation. Try the fit again by typing 'f'. That does it. Type 'q' to exit this plot,accept the solution with a 'yes', then 'n' for the next color. Continue until you are done with all of them.
Figure 14– note display problem, strange squares
As an example of when good stars go bad, look at Figure 14. It shows
another case of non-convergence. MyR and I fit did not work, even when Ideleted the stars at the bottom left. Ihad to change the tolerance to':tolerance 1.8e-4' before it wouldconverge. Clearly, there is a problemhere, and you can see that what should be linear is in fact curved - a sure signof trouble. So, I'd use R as a functionof R-I coefficients with a great deal of skepticism. This really means that, for
whatever reason, it's hard to put datafrom this camera and filters on thestandard system using I data.
Type 'q', then 'q' again to exit fitparams. Congratulations, you now have coefficients in your .ans file.Look in the Appendix for them, and be satisfied!
E. Back checking your Work
How good do these coefficients really work? IRAF can help you find out with a task in photcal called
'invertfit' which will calculate the values of your standard stars from your coefficients so you can seehow well they work. Look at the par file:
PACKAGE = photcalTASK = invertfit
observat= std.pam.obs List of observations filesconfig = std.pam.cfg Configuration file
paramete= std.pam.ans Fitted parameters file
Revision 1.0 14June 2003 Page 42 of 53
A. Charles Pullen, all rights reserved.

7/27/2019 zen of iraf
http://slidepdf.com/reader/full/zen-of-iraf 43/53
calib = std.pam.invertfit Output calibrated standard indices file(catalog= ) List of standard catalog files(errors = obserrors) Error computation type (undefined,obserrors,equa(objects= all) Objects to be fit (all,program,standards)(print = ) Optional list of variables to print(format = ) Optional output format string(append = no) Append output to anexisting file ?
Figure 15a – (B-R) Check (catdir = )_.catdir) The standard star catalog
directory(mode = ql)
It's pretty self-explanatory by this time.Let’s run it, and see what happens.
ph> invertfitList of observations files (std.pam.obs):Configuration file (std.pam.cfg):Fitted parameters file (std.pam.ans):Output calibrated standard indices file(std.pam.invertfit):
Taking a look at my output file: ph> type std.pam.invertfit
# Thu 16:17:02 05-Jun-2003# List of observations files:# std.pam.obs# Config: std.pam.cfg# Parameters: std.pam.ans## Computed indices for program and standard objects## Columns:
Fi ure 10 – Re ression all
Figure 11: R
Figure 15b R Check # 1 object id# 2 BR
# 3 error(BR)# 4 R # 5 error(R)# 6 RI# 7 error(RI)
104_350 1.047 0.011 13.244 0.006 0.4720.009104_470 1.014 0.018 13.960 0.010 0.3670.016104_364 0.989 0.064 15.492 0.038 0.2000.064104_366 1.361 0.008 12.407 0.004 0.5220.006104_479 1.566 0.102 15.553 0.042 0.7050.063104_367 0.888 0.058 15.450 0.035 0.2850.058...
I can see what my calculated values are. I can check for fit by inspection with my catalog file, such as:
ph> type AprLandolt.dat
Revision 1.0 14June 2003 Page 43 of 53
A. Charles Pullen, all rights reserved.

7/27/2019 zen of iraf
http://slidepdf.com/reader/full/zen-of-iraf 44/53
#ID BR R RI BRerr Rerr RIerr
Revision 1.0 14June 2003 Page 44 of 53
A. Charles Pullen, all rights reserved.
104_350 1.056 13.251 0.353 0.0067 0.0075 0.0045104_470 1.027 14.015 0.356 0.0225 0.0254 0.0035104_364 0.915 15.485 0.397 0.0573 0.0241 0.041104_366 1.387 12.391 0.464 0 0 0104_479 1.928 15.43 0.607 0.0304 0.0367 0.0035104_367 1.021 15.462 0.296 0.0389 0.0432 0.0042
But, this is extremely laborious for so manystandards. The easier way is to graph Landolt’svalues vs. my values and see how well it fits bylinear regression. This is, in fact, easiest to do inExcel (Figures 15a,b,&c).
As can be seen, there is pretty good fit for the R data, with only one point that is bad (107_611).B-R has several points that are not great,(104_368, 1-4_367, 104_479 and 107_611). R-I is just bad all over. There is a choice here. Were these
some of the points that were discarded during 'fitparams'? Check your log file. If so, then look at theimages and see why they are in error. Catalog entry wrong? Not a good choice from Landolt 1992 because of too few observations? Is there a contaminated aperture or background annulus? Try tounderstand why they are unusable. If you are really walking down the path of serenity, you will want togo back and redo you transformation and extinction coefficients without these stars in the mix. Or, youmight decide that their influence is not worth the effort. As with all things, the choice is yours, choosewisely!
Figure 15c – (R-I) Check
VI.THE FINISHED PRODUCT
Luke said: "I'm not afraid, Master Yoda."
Yoda replied: "You will be!"
Star Wars Episode IV - Return of the Jedi
Now that we have extracted our M67 photometry, and have transformation and extinction coefficients, itis time for the last step - converting that data to the standard system. We will use 'invertfit' for this task,as we did with our standards. However, you'll need to go back and make an imset, .obs, and .cfg file for M67, exactly as you did for your standards. Apply 'invertfit' as before, and your output file will be your data on the standard system. Something like:
# Thu 18:05:48 05-Jun-2003# List of observations files:# m67.obs# Config: m67.cfg# Parameters: std.pam.ans## Computed indices for program and standard objects## Columns:# 1 object id# 2 BR

7/27/2019 zen of iraf
http://slidepdf.com/reader/full/zen-of-iraf 45/53
# 3 error(BR)# 4 R # 5 error(R)# 6 RI# 7 error(RI)
m67_1-1 INDEF INDEF INDEF INDEF INDEF INDEFm67_1-2 INDEF INDEF INDEF INDEF INDEF INDEF
m67_1-3 INDEF INDEF INDEF INDEF INDEF INDEFm67_1-4 INDEF INDEF INDEF INDEF INDEF INDEFm67_1-5 INDEF INDEF INDEF INDEF INDEF INDEFm67_1-6 INDEF INDEF INDEF INDEF INDEF INDEFm67_1-7 1.488 0.005 12.001 0.002 0.360 0.003m67_1-8 1.296 0.007 12.690 0.003 0.522 0.004m67_1-9 INDEF INDEF INDEF INDEF INDEF INDEFm67_1-10 1.122 0.054 15.625 0.031 0.646 0.044m67_1-11 0.908 0.007 12.870 0.004 0.364 0.006m67_1-12 0.895 0.010 13.445 0.005 0.369 0.008m67_1-13 1.078 0.028 14.796 0.016 0.388 0.024m67_1-14 1.234 0.035 14.963 0.018 0.419 0.027m67_1-15 1.028 0.011 13.601 0.006 0.400 0.009m67_1-16 1.168 0.025 14.617 0.013 0.452 0.020
m67_1-17 0.968 0.047 15.470 0.029 0.504 0.042
Notice all the INDEF notations? That means that during the photometry, IRAF was not happy with theresults, and therefore did not print them. Out of 1003 stars chosen with daofind, only 18 had one or more INDEF magnitude or color indexes.
Now, to plot your CMD (remember - the goal of the exercise?). You can import this file into Excel and plot from there. I prefer GNUPLOT, so the file needs reshuffling to the format B-R vs R (x vs y) in twocolumns. I did this shuffling in Excel, and deleted the INDEF data because it will fault GNUPLOT.The resulting plot is Figure 16. Note the axes are V and B-V as I transformed them because I didn’t haveany V data and needed them that way in a CMD. Forget about it at this point!
The main sequence is clearly visible, although there seem to be a lot of stars all over the place. Onereason is that foreground stars have not been removed. Another reason is that there may be some pointsthat are so far out of reality due to the crowded field that the photometry is suspect. One will have to gothough each point (all 990) and decide if they belong in the plot, or are suffering from contamination or other problems before the final product is really ready for prime time. But, that will be the subject of another paper someday!
One minute of sitting, one inch of Buddha.
Like lightning all thoughts come and pass. Just once look into your mind-depths:
Nothing else has ever been.
Manzan (1649-1709)
Revision 1.0 14June 2003 Page 45 of 53
A. Charles Pullen, all rights reserved.

7/27/2019 zen of iraf
http://slidepdf.com/reader/full/zen-of-iraf 46/53
Approximateturn-off point
Figure 16 – CMD of M67
VII. ACKNOWLEDGEMENTS
Grateful acknowledgment is given to Dr. Pamela Gay & Dr. Dante Minniti for their forbearance andsupport during this project.
Acknowledgement is also given to years of photometric help, including IRAF and LINUX assistance, byDr. Arne A. Henden, Dr. Dirk Terrel, Gary Billings, and Aaron Price. Tim Hager has also providedcritical start up advise with IRAF. Of course, a task of this size could not have been done without thesupport of the author’s wife and child.
Revision 1.0 14June 2003 Page 46 of 53
A. Charles Pullen, all rights reserved.

7/27/2019 zen of iraf
http://slidepdf.com/reader/full/zen-of-iraf 47/53
Revision 1.0 14June 2003 Page 47 of 53
A. Charles Pullen, all rights reserved.
VIII . RESOURCES
• IRAF Tutorials and User Manuals: http://iraf.noao.edu/iraf/web/docs/docmain.html and sub pages
• SAO DS9 Viewer : http://hea-www.harvard.edu/RD/ds9/
• The Random Factory: http://www.randomfactory.com.
• WCS-Tools: http://tdc-www.harvard.edu/software/wcstools/• Xephem: http://www.clearskyinstitute.com/xephem/
• Mira Software: http://www.axres.com
• Online version of Landolt –92 with finder charts:http://www.ls.eso.org/lasilla/Telescopes/2p2T/Landolt/
• Close-up finder charts for selected Landolt stars:http://www.ucolick.org/~mountain/mhtechdocs/techdocs/standards/
• Excellent tutorial on photometry: http://observatory.ou.edu/book4512.html.
• “AAVSO Guide to CCD Photometry”: http://www.aavso.org/ccd/manual/.
• "Getting Started in CCD Photometry": http://www.aavso.org/committees/ccdnew.shtml.
• “Astronomical Photometry”, Henden and Kaitchuck, 1992:
http://www.willbell.com/photo/photo4.htm. (It's old, and deals with single channel photo-multiplier based photometers. But, the theory and applications are exactly the same as aCCD)
XI. REFERENCES
Berry, R. & Burnell, J.; 2000 "Handbook of Astronomical Image Processing", Willman Bell Publishers
Billings, G. 2003; Personal Communication
Gay, P. 2003 - Personal Communication
Hager, T.; 2002, Personal Communication
Landolt, A._ 1992 AJ 104 340
Massy, P. & Davis, L.E; 1992 "A User's Guide to Stellar CCD Photometry with IRAF", NOAO
Massy, P. ; 1997 "A User's Guide to CCD Reductions with IRAF", NOAO
Wells, L.A; Bell, D.J" "Cleaning Images of Bad Pixels and Cosmic Rays Using IRAF", NOAO
Zen Quotes from http://:www.dailyzen.com
Cover Art Work from http://www.thegalleryofchina.com/lotuspainting9.html

7/27/2019 zen of iraf
http://slidepdf.com/reader/full/zen-of-iraf 48/53
Revision 1.0 14June 2003 Page 48 of 53
A. Charles Pullen, all rights reserved.
X. APENDIX
LOGIN.CL
# LOGIN.CL -- User login file for the IRAF command language.
# Identify login.cl version (checked in images.cl).if (defpar ("logver"))
logver = "IRAF V2.11 May 1997"
set home = "/home/cpullen/"set imdir = "./pix/"set uparm = "home$uparm/"set userid = "cpullen"
# Set the terminal type.if (envget("TERM") == "sun") {
if (!access (".hushiraf")) print "setting terminal type to gterm..."
stty gterm} else {
if (!access (".hushiraf")) print "setting terminal type to xterm..."
stty xterm}
# Uncomment and edit to change the defaults.set editor = emacs#set printer = lwset stdimage = imt2048set stdimcur = stdimage#set stdplot = lw#set clobber = no#set filewait = yes#set cmbuflen = 512000#set min_lenuserarea = 64000set imtype = "fit"set imextn="fxf:fit,fts,fits oif:imh"
# IMTOOL/XIMAGE stuff. Set node to the name of your workstation to# enable remote image display. The trailing "!" is required.#set node = "my_workstation!"
# CL parameters you mighth want to change.#ehinit = "nostandout eol noverify"#epinit = "standout showall"showtype = yes
# Default USER package; extend or modify as you wish. Note that this can
# be used to call FORTRAN programs from IRAF.
package user
task $adb $bc $cal $cat $comm $cp $csh $date $dbx $df $diff = "$foreign"task $du $find $finger $ftp $grep $lpq $lprm $ls $mail $make = "$foreign"task $man $mon $mv $nm $od $ps $rcp $rlogin $rsh $ruptime = "$foreign"task $rwho $sh $spell $sps $strings $su $telnet $tip $top = "$foreign"task $touch $vi $emacs $w $wc $less $rusers $sync $pwd $gdb = "$foreign"
task $xc $mkpkg $generic $rtar $wtar $buglog = "$foreign"

7/27/2019 zen of iraf
http://slidepdf.com/reader/full/zen-of-iraf 49/53
Revision 1.0 14June 2003 Page 49 of 53
A. Charles Pullen, all rights reserved.
#task $fc = "$xc -h $* -limfort -lsys -lvops -los"task $fc = ("$" // envget("iraf") // "unix/hlib/fc.csh" //
" -h $* -limfort -lsys -lvops -los")task $nbugs = ("$(setenv EDITOR 'buglog -e';" //
"less -Cqm +G " // envget ("iraf") // "local/bugs.*)")task $cls = "$clear;ls"
if (access ("home$loginuser.cl"))cl < "home$loginuser.cl"
;
keep; clpackage
prcache directorycache directory page type help
# Print the message of the day.if (access (".hushiraf"))
menus = noelse {
clear; type hlib$motd}
# Delete any old MTIO lock (magtape position) files.if (deftask ("mtclean"))mtclean
elsedelete uparm$mt?.lok,uparm$*.wcs verify-
# List any packages you want loaded at login time, ONE PER LINE.images # general image operators
plot # graphics tasksdataio # data conversions, import exportlists # list processing
# The if(deftask...) is needed for V2.9 compatibility.if (deftask ("proto"))
proto # prototype or ad hoc tasks
tv # image displayutilities # miscellaneous utilitiesnoao # optical astronomy packages
keep
BADPIX MASK (Gay, 2003)
# untrimmed5 334 1 451 53 127 13352 53 134 25352 53 253 483
52 53 1 204873 73 2017 203373 73 1 204878 78 367 45378 78 1 204883 84 668 668298 299 1081 2048345 345 130 135442 442 673 695671 673 598 600

7/27/2019 zen of iraf
http://slidepdf.com/reader/full/zen-of-iraf 50/53
Revision 1.0 14June 2003 Page 50 of 53
A. Charles Pullen, all rights reserved.
684 685 1247 2048778 778 1867 1877819 820 179 2048834 835 1683 20481017 1019 1717 17211017 1018 1722 17271107 1107 1 20481116 1116 1 20481224 1225 1428 2048
1245 1245 482 4941290 1291 1072 20481450 1451 28 20481417 1417 1745 17501554 1554 1889 18951582 1582 421 4271684 1684 174 1781686 1687 174 1741758 1762 516 5201803 1803 1 20481834 1834 778 7811838 1842 134 1391882 1883 1 8401882 1882 838 2048
1897 1897 310 3151901 1901 1 3561907 1907 1740 1760
.MAG File
#K IRAF = NOAO/IRAFV2.11EXPORT version %-23s#K USER = cpullen name %-23s#K HOST = unit7 computer %-23s#K DATE = 2003-06-05 yyyy-mm-dd %-23s#K TIME = 04:35:25 hh:mm:ss %-23s#K PACKAGE = apphot name %-23s#K TASK = phot name %-23s#
#K SCALE = 1. units %-23.7g#K FWHMPSF = 2.5 scaleunit %-23.7g#K EMISSION = yes switch %-23b#K DATAMIN = INDEF counts %-23.7g#K DATAMAX = INDEF counts %-23.7g#K EXPOSURE = EXPTIME keyword %-23s#K AIRMASS = AIRMASS keyword %-23s#K FILTER = FILTERS keyword %-23s#K OBSTIME = UT keyword %-23s##K NOISE = poisson model %-23s#K SIGMA = 0. counts %-23.7g#K GAIN = "" keyword %-23s#K EPADU = 1. e-/adu %-23.7g#K CCDREAD = "" keyword %-23s
#K READNOISE = 0. e- %-23.7g##K CALGORITHM = centroid algorithm %-23s#K CBOXWIDTH = 5. scaleunit %-23.7g#K CTHRESHOLD = 1. sigma %-23.7g#K MINSNRATIO = 1. number %-23.7g#K CMAXITER = 10 number %-23d#K MAXSHIFT = 5. scaleunit %-23.7g#K CLEAN = no scaleunit %-23b#K RCLEAN = 1. scaleunit %-23.7g

7/27/2019 zen of iraf
http://slidepdf.com/reader/full/zen-of-iraf 51/53
Revision 1.0 14June 2003 Page 51 of 53
A. Charles Pullen, all rights reserved.
#K RCLIP = 2. scaleunit %-23.7g#K KCLEAN = 3. sigma %-23.7g##K SALGORITHM = mode algorithm %-23s#K ANNULUS = 22. scaleunit %-23.7g#K DANNULUS = 5. scaleunit %-23.7g#K SKYVALUE = 0. counts %-23.7g#K KHIST = 3. sigma %-23.7g#K BINSIZE = 0.1 sigma %-23.7g
#K SMOOTH = no switch %-23b#K SMAXITER = 10 number %-23d#K SLOCLIP = 0. percent %-23.7g#K SHICLIP = 0. percent %-23.7g#K SNREJECT = 50 number %-23d#K SLOREJECT = 3. sigma %-23.7g#K SHIREJECT = 3. sigma %-23.7g#K RGROW = 0. scaleunit %-23.7g##K WEIGHTING = constant model %-23s#K APERTURES = 12 scaleunit %-23s#K ZMAG = 25. zeropoint %-23.7g##N IMAGE XINIT YINIT ID COORDS LID \
#U imagename pixels pixels ## filename ## \#F %-23s %-10.3f %-10.3f %-5d %-23s %-5d##N XCENTER YCENTER XSHIFT YSHIFT XERR YERR CIER CERROR \#U pixels pixels pixels pixels pixels pixels ## cerrors \#F %-14.3f %-11.3f %-8.3f %-8.3f %-8.3f %-15.3f %-5d %-9s##N MSKY STDEV SSKEW NSKY NSREJ SIER SERROR \#U counts counts counts npix npix ## serrors \#F %-18.7g %-15.7g %-15.7g %-7d %-9d %-5d %-9s##N ITIME XAIRMASS IFILTER OTIME \#U timeunit number name timeunit \#F %-18.7g %-15.7g %-23s %-23s#
#N RAPERT SUM AREA FLUX MAG MERR PIER PERROR \#U scale counts pixels counts mag mag ## perrors \#F %-12.2f %-14.7g %-11.7g %-14.7g %-7.3f %-6.3f %-5d %-9s#107r1 965.000 995.000 1 107.pam.coo 0 \
965.187 995.567 0.187 0.567 0.007 0.006 0 NoError \111.2863 7.554567 2.194241 767 6 0 NoError \30. 1.417 R 6:06:48.53 \12.0164005.9 452.444 113655.1 16.054 0.004 0 NoError
.ans Transformation and Extinction Solution
cl> type std.pam.ans# Thu 15:53:26 05-Jun-2003
begin BFITstatus 0 (Solution converged)variance 0.00274461stdeviation 0.05238903avsqerror 0.003515426averror 0.05929103avsqscatter 7.911924E-4avscatter 0.02812814chisqr 0.7807333msq 0.002611807

7/27/2019 zen of iraf
http://slidepdf.com/reader/full/zen-of-iraf 52/53
Revision 1.0 14June 2003 Page 52 of 53
A. Charles Pullen, all rights reserved.
rms 0.05110584reference mBfitting (BR+R)+b1+b2*XB+b3*BR weights photometric
parameters 3 b1 (fit) b2 (fit) b3 (fit)
derivatives 3
0.10.10.1
values 34.2485970.278672-0.1007238
errors 30.068862890.052041310.01177141
# Thu 15:54:03 05-Jun-2003 begin RFIT
status 0 (Solution converged)variance 0.001376153stdeviation 0.03709653avsqerror 0.00143578averror 0.03789169avsqscatter 5.623257E-4avscatter 0.02371341chisqr 0.9584703msq 0.001309565rms 0.03618791reference mR fitting R+r1+r2*XR+r3*BR weights photometric
parameters 3r1 (fit)
r2 (fit)r3 (fit)
derivatives 30.10.10.1
values 33.5203950.10092930.008327574
errors 30.047973630.035347150.009378653
# Thu 15:58:35 05-Jun-2003 begin IFIT
status 0 (Solution converged)variance 0.01009456stdeviation 0.1004717avsqerror 0.01009277averror 0.1004628avsqscatter 0.009789092avscatter 0.09893984chisqr 1.000177

7/27/2019 zen of iraf
http://slidepdf.com/reader/full/zen-of-iraf 53/53
msq 0.009606113rms 0.09801078reference mIfitting (R-RI)+i1+i2*XI+i3*RIweights photometric
parameters 3i1 (fit)i2 (fit)i3 (fit)
derivatives 30.10.10.1
values 33.5351720.048111650.1618898
errors 30.19580160.14715520.105398