© 2010. all rights reserved. call management system installation and maintenance ati00685ien...
TRANSCRIPT

© 2010. All rights reserved.
Call Management System Installation and Maintenance
ATI00685IEN
Instructor Name – Javier Basualdo
Instructor email – [email protected]

© 2010. All rights reserved. 2
Instructor Introduction Name and time with Avaya
Experience with CMS
What the participants can expect to get out of this class

© 2010. All rights reserved. 3
Introductory Agenda uConnect logistics
Housekeeping and class rules
Participant introductions
Getting started with Toolwire
Course overview, course outline, schedule

© 2010. All rights reserved. 4
Logistics – Full Screen View To change to full screen view, once you have entered the course/meeting, press
Full Screen.
Participant ViewParticipant View
© 2010. All rights reserved. 5
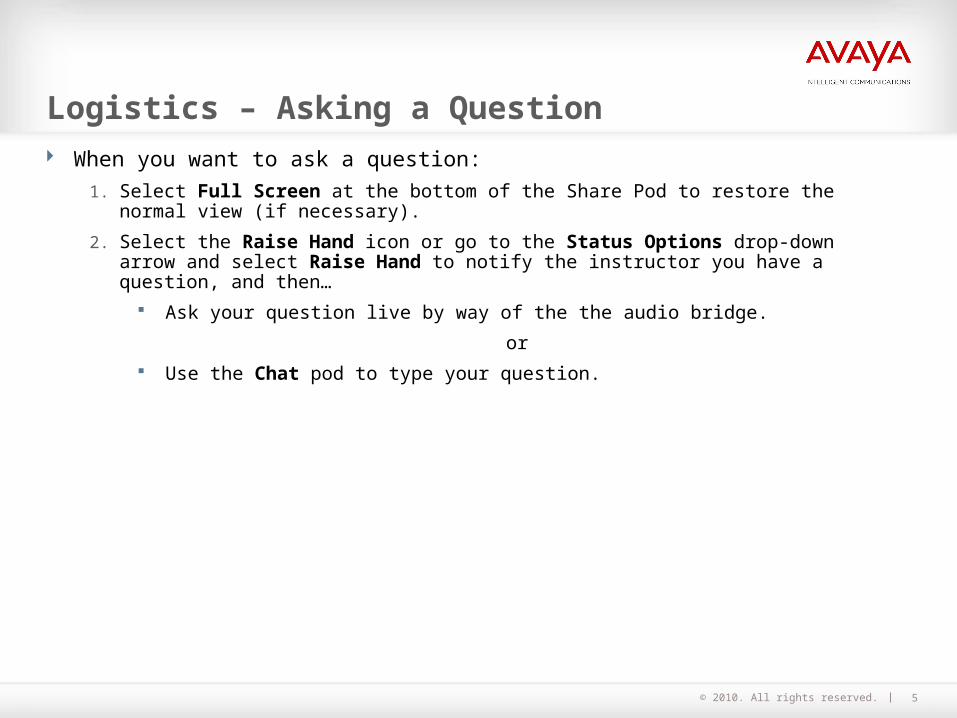
Logistics – Asking a Question When you want to ask a question:
1. Select Full Screen at the bottom of the Share Pod to restore the normal view (if necessary).
2. Select the Raise Hand icon or go to the Status Options drop-down arrow and select Raise Hand to notify the instructor you have a question, and then…
Ask your question live by way of the the audio bridge.
or
Use the Chat pod to type your question.

© 2010. All rights reserved. 6
Logistics – Asking a Question: Raise Hand
Participant ViewParticipant View
RaiseHand
RaiseHand
StatusOptionsStatus
Options

© 2010. All rights reserved. 7
Logistics – Asking a Question: Chat Pod

© 2010. All rights reserved. 8
Audio Test You or the participants might need to access the standard Volume Control Menu to
change volume or mute settings for the Volume and/or Wave controls.
Note
Advise the participant to consider using a telephone headset to prevent any distractions while in the virtual meeting.
© 2010. All rights reserved. 9
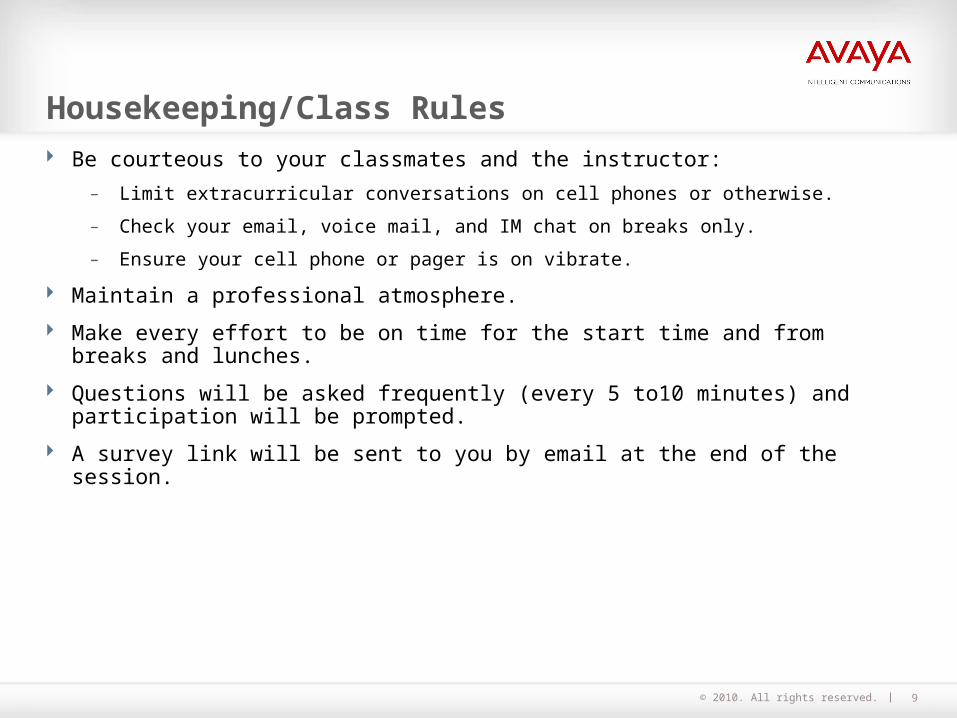
Housekeeping/Class Rules Be courteous to your classmates and the instructor:
– Limit extracurricular conversations on cell phones or otherwise.
– Check your email, voice mail, and IM chat on breaks only.
– Ensure your cell phone or pager is on vibrate.
Maintain a professional atmosphere.
Make every effort to be on time for the start time and from breaks and lunches.
Questions will be asked frequently (every 5 to10 minutes) and participation will be prompted.
A survey link will be sent to you by email at the end of the session.

© 2010. All rights reserved. 10
Day 1 – Session 1 (6 hours)
Day 2 – Session 2 (6 hours)
Schedule
This vILT course will take approximately 12 hours to complete.

© 2010. All rights reserved. 11
Q&A
© 2010. All rights reserved. 12
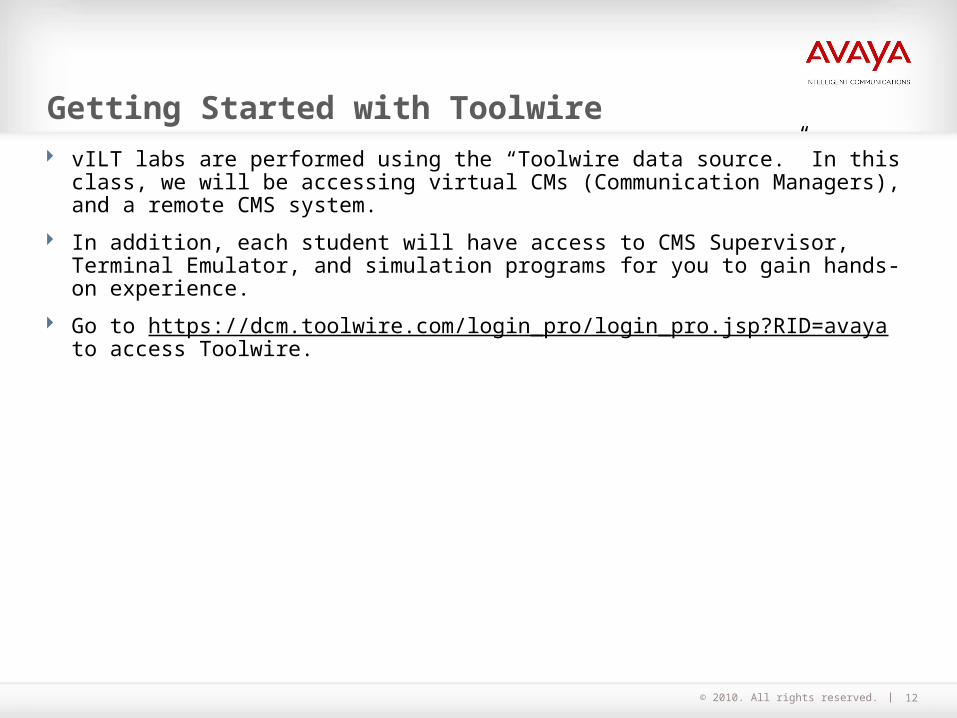
Getting Started with Toolwire vILT labs are performed using the “Toolwire data source.” In this class, we will be
accessing virtual CMs (Communication Managers), and a remote CMS system.
In addition, each student will have access to CMS Supervisor, Terminal Emulator, and simulation programs for you to gain hands-on experience.
Go to https://dcm.toolwire.com/login_pro/login_pro.jsp?RID=avaya to access Toolwire.

© 2010. All rights reserved. 13
First time users, select Before You Begin to:
– Update the Java client.
– Install the Citrix ICA Web Client.
– Verify that Flash 8 or higher is installed.
Getting Started with Toolwire (Continued)

© 2010. All rights reserved. 14
Getting Started with Toolwire (Continued) User Names and Passwords are provided by the
instructor.
For Client Options, leave Citrix XenApp Plug-in Client checked.
For Proxy Discovery Options, select Automatic Proxy Detection.
Click Login.

© 2010. All rights reserved. 15
Getting Started with Toolwire (Continued)
The administrator password is “admin.”

© 2010. All rights reserved. 16
Getting Started with Toolwire (Continued)
Your Toolwire desktop will look similar to this.

© 2010. All rights reserved. 17
Student Introductions Name/Group/Time with your company?
What experience do you have with CMS?
What do you expect to get out of this class?

© 2010. All rights reserved. 18
Course Overview
This course provides an overview of the process that a Business Partner will follow to set up a CMS system.
Students will have access to a Communication Manger (CM) and a Call Management System (CMS) in this class, and some hands-on exercises are included.
The course makes available several documents, job aids, and resources that students will be able to use for future CMS implementations.

© 2010. All rights reserved. 19
Course Outline
Chapter 1 - CMS Configurations, Installations, and Upgrades (Day 1)
…Tasks that you might be required to perform on a customer's CMS system…
Chapter 2 - CMS Installation or Platform Upgrade (Day 1)
…Procedure to prepare a system for production…
1) Prepare for the installation.
2) Administer the CM/CMS link.
3) Establish CMS connectivity.
4) Perform the setup procedures (Day 2).
5) Contact Avaya to complete the installation.
Chapter 3 - The Cutover (Day 2)
…Final steps at customer site…
1) The cutover and registration with Sun and Avaya
2) CMS administration
Chapter 4 - CMS Maintenance and Troubleshooting Overview (Day 2)
…Some common maintenance and troubleshooting procedures…

© 2010. All rights reserved. 20
Schedule (Approximate) Day 1: Chapters 1 and 2 presentation and hands-on exercises
Day 2: Chapters 3 and 4 presentation and hands-on exercises
The more interactive the students are, the better the experience is for all the students.

© 2010. All rights reserved. 21
Chapter 1
CMS Configurations, Installations, and Upgrades
Duration: 1.5 hours
© 2010. All rights reserved. 22
Chapter 1, Module 1
Duration: 1.5 hours

© 2010. All rights reserved. 23
Chapter Objectives
Identify the different CMS configurations a Business Partner might be required to administer for a customer.
After you complete this chapter, you will be able to:
© 2010. All rights reserved. 24
R15 and R16 CMS Supported Platforms For the first time, Avaya is selling and shipping two versions of CMS simultaneously.
R15 CMS is supported on the Sun Enterprise-V890, Netra-210, T5120, and T5220 platforms.
New R15 CMS installations are shipped on the T5120 and T5220.

© 2010. All rights reserved. 25
R15 and R16 CMS Supported Platforms (Continued) R16 CMS is supported on the T5120 and T5220 platforms.
R16 CMS uses RAID for file the system and IDS raw partitions – as opposed to R15 that uses disk mirroring and soft partitioning.
R16 systems are built with RAID 10 performance and redundancy hardware installed and configured.

© 2010. All rights reserved. 26
New Installation vs. Platform Upgrade Both are shipped as a new installation from the factory.
– On R15 CMS, standard CMS software is installed by default; expanded AUX is optional software.
– On R16 CMS, expanded AUX CMS software is the default and there is no other option.
A new installation is set up with new information from the customer.
A platform upgrade is typically set up to look like the existing CMS.

© 2010. All rights reserved. 27
Baseload Upgrade A baseload upgrade requires a PCN to be ordered from Avaya Maintenance.
– PCN = Product Change Notice = bug fix load
They are customer installable, but typically not performed by a customer.
They are service affecting. Solaris patches and CMS software are updated.

© 2010. All rights reserved. 28
Baseload Upgrade (Continued) Overview of process:
– Update Solaris patches and security script.
– Remove and install Supplemental Services if necessary.
– Remove CMS and say YES to preserve data.
– Install new CMS (and patches).
– Remove and install new Visual Vectors Server if necessary.
The process is documented in the Baseload Upgrade document: http://support.avaya.com/css/Products/P0030/Installation,%20Migrations,%20Upgrades%20&%20Configurations

© 2010. All rights reserved. 29
CMS System Restore A system restore might be required if a disk crashes or for other unforeseen
circumstances.
A restore can be performed by the customer, but typically is not.
The process is documented in the Software Installation Maintenance and Troubleshooting document: http://support.avaya.com/css/Products/P0030/Installation,%20Migrations,%20Upgrades%20&%20Configurations

© 2010. All rights reserved. 30
Quiz

© 2010. All rights reserved. 31
Chapter 1, Quiz 1
1. Which platforms are supported in R16 CMS?
2. Which platforms are supported in R15 CMS?
3. True or False: Both R15 and R16 CMS releases are shipped with RAID hardware on the T5120 platforms.
4. True or False: CMS R15 is shipped with expanded AUX CMS as the default.
5. True or False: If an existing customer needs a platform upgrade, the system is shipped from the factory as if it was a system for a new customer.
6. True or False: An example of a baseload upgrade is an upgrade from R15 to R16 CMS.
7. True or False: Both baseload upgrades and system restores can be performed by a customer.

© 2010. All rights reserved. 32
Q&A

© 2010. All rights reserved. 33
CUE Upgrade: R15 vs. R16 CMS A customer can upgrade to R15 CMS if the customer is on a supported platform.
A CMS Upgrade Express (CUE) upgrade includes CUE software and new hard drives.
Because of Solaris changes, the CUE process has changed since R14 CMS and earlier releases.
© 2010. All rights reserved. 34
CUE Upgrade: R15 vs. R16 CMS (Continued) R15 CUE:
– Netra upgrades to R15 CMS – no changes from the past.
– V890 upgrades require that the technician be on site to boot the CUE boot disk using the Solaris software DVD.
R16 CUE:
– RAID hardware is always included and must be installed before the CUE upgrade can be performed.
– Blank hard drives are shipped and the boot disk is built with a flash archive on the fly.

© 2010. All rights reserved. 35
CUE Upgrade: R15 vs. R16 CMS (Continued) R15 to R16 CUE upgrade:
– The customer must already be on a T5120 or T5220.
– R16 CUE kit is shipped with RAID hardware since R15 customers on these platforms did not require RAID.

© 2010. All rights reserved. 36
CUE Upgrade: R15 vs. R16 CMS (Continued) The CUE upgrade document is available for Avaya personnel only.
Upgrades are done by Avaya-authorized personnel based on the following conditions:
– In the United States and Canada, only Avaya CMS Provisioning personnel do upgrades. Avaya CMS Provisioning is assisted by on-site Avaya technicians.
– Outside the United States and Canada, Avaya-approved Business Partners or system integrators do upgrades.

© 2010. All rights reserved. 37
Quiz

© 2010. All rights reserved. 38
Chapter 1, Quiz 2
1. True or False: If an R14 customer wants to upgrade to R16 CMS, the CUE process can be used.
2. True or False: An R15 CUE kit is always shipped with RAID hardware that must be installed prior to the CUE upgrade.
3. True or False: The CUE process documentation is available on the Avaya Support Web site.
4. True or False: An R15 customer who is on a Netra 210 can use the CUE process to upgrade to R16 CMS.

© 2010. All rights reserved. 39
Q&A

© 2010. All rights reserved. 40
High Availability (HA) CMS Dual ACD links on the communication server.
Paired set of CMS servers each separately connected to one of the dual links, and through which simultaneous and identical sets of call data are received.
Separate network subnet connections for paired ACD-CMS combinations.

© 2010. All rights reserved. 41
High Availability (HA) CMS (Continued) Both platforms in a HA configuration should be identical models and must have the
same/similar CMS software load.
Requires Avaya Professional Services admin sync software.
Avaya High Availability is documented at:http://support.avaya.com/css/Products/P0030/Installation,%20Migrations,%20Upgrades%20&%20Configurations

© 2010. All rights reserved. 42
HA CMS
CMS HA server
Ethernet port
(port device hme0)
(port device eri0)
Ethernet port
CMS HA server
Ethernet port
(port device eri0)
(port device hme0)
Ethernet port
Communication server
C-LAN/Ethernet port
C-LAN/Ethernet port
Customer network
Hub
Hub
© 2010. All rights reserved. 43
Survivable CMS During normal operation, the survivable CMS operates in a “standby mode.”
CMS only collects ACD call data during a failover from the surviving environment controlled by the active ESS or LSP.
Requires Avaya Professional Services admin sync software.

© 2010. All rights reserved. 44
Standard vs. Expanded AUX CMS Standard CMS supports 10 AUX reason codes (0 to 9).
– For R15 CMS, systems are shipped from the factory with this version installed. Optional expanded AUX software is shipped if the customer orders it.
– For R16 CMS, all systems are shipped with Expanded AUX CMS and there is no other option.

© 2010. All rights reserved. 45
Standard vs. Expanded AUX CMS (Continued) Expanded AUX CMS supports more than 10 AUX reason codes (0 to 99).
– For R15 CMS, all systems are shipped with Standard CMS installed. If there is expanded AUX CMS on the order, you’ll be required to remove Standard and install the Expanded AUX software.
– For R15 CMS, 15-minute intervals are not supported with expanded AUX CMS.
– In R16 CMS, expanded AUX CMS is the default and 15-minute intervals are supported.

© 2010. All rights reserved. 46
Quiz

© 2010. All rights reserved. 47
Chapter 1, Quiz 3
1. True or False: HA and Survivable CMS both require Avaya Professional Services admin sync software.
2. True or False: Survivable CMS simultaneously collects data as a backup to the primary CMS.
3. True or False: 15-minute intervals are supported with expanded AUX CMS in both R15 and R16 CMS releases.

© 2010. All rights reserved. 48
Q&A
© 2010. All rights reserved. 49
Chapter Summary
Identify the different CMS configurations that you might be required to perform on a customer’s system.
Congratulations! Now you can:

© 2010. All rights reserved. 50
Chapter 2
CMS Installation or Platform Upgrade
Duration: 6.5 hours

© 2010. All rights reserved. 51
Chapter Objectives
Gather required system information from the customer.
Establish CMS connectivity.
Perform CM/CMS link administration on the CM.
Use the job aid procedure to prepare a CMS system for production.
Work with Avaya to complete the installation procedure.
After you complete this chapter, you will be able to:

© 2010. All rights reserved. 52
Chapter 2, Module 1: Prepare for the Installation
Duration: 30 min

© 2010. All rights reserved. 53
Module Objectives
Describe the information required for perform a new installation or an upgrade.
Describe the resources that must be scheduled for the installation procedure.
After you complete this module, you will be able to:

© 2010. All rights reserved. 54
Required Information: New Installation vs. Upgrade
New installation:
– Two IP addresses plus router andnetmask addresses
– Switch release and IP/CLAN address
– Technician name/number
– Modem number
– Data Storage Allocation (DSA) information
Platform upgrade: – One temporary IP address and
existing network information
– Existing authorizations
– Existing DSA and/or changes
– Existing master ACD
– Switch release at cutover
– Technician name/number
– Temporary modem number

© 2010. All rights reserved. 55
Data Storage Allocation
Data Storage Allocation values should be collected from the customer by pre-sales associates.

© 2010. All rights reserved. 56
CMS IP Addresses and Modems CMS IP addresses:
– CMS platforms commonly use two Ethernet ports to support network traffic.
• Nic1 (e1000g0) is used for CMS Supervisor and normal traffic flow.
• Nic2 (e1000g1) is used for the PBX switch link.
• These two NICs must be on separate subnetworks to alleviate miscommunication within the CMS Solaris platform.
• The NICs are set from the factory to auto detect.

© 2010. All rights reserved. 57
CMS IP Addresses and Modems (Continued) CMS modems (NAR only)
– CMS platforms are shipped with a modem and required adaptors and cables.
– Modems are preconfigured in the factory.
• You can find instructions for configuring a modem in SIMT document if necessary.
– If the provided adaptors and cables are not used, modem access will fail.

© 2010. All rights reserved. 58
Schedule Technician and Avaya Resources Installation coordination requires:
– A “provisioning” engineer
– On-site technician
– Avaya Professional Services to authorize licenses
– Avaya Professional Services to install interfaces for third-party applications.

© 2010. All rights reserved. 59
Quiz

© 2010. All rights reserved. 60
Chapter 2, Module 1 Quiz
1. True or False: You must always receive DSA values from a customer in order to run setup.
2. True or False: The adapters that are shipped with the modem are optional.
3. True or False: The two IP addresses required for a CMS network must be on separate subnetworks.
4. True or False: Either a Business Partner or Avaya can authorize agent licenses on the CMS.

© 2010. All rights reserved. 61
Q&A

© 2010. All rights reserved. 62
Module Summary
Describe the information required for preparing a new installation versus a platform upgrade.
Identify the resources that must be scheduled for the CMS installation.
Congratulations! Now you can:

© 2010. All rights reserved. 63
Chapter 2, Module 2: Administer the CMS/PBX Link
Duration: 1.5 hours

© 2010. All rights reserved. 64
Module Objectives
Administer a CMS link using the Communication Manager administration screens.
After you complete this module, you will be able to:

© 2010. All rights reserved. 65
Job Aids
Before we begin these next lessons, please save to your computer the CMS Job Aids document that has been made available to you in the Student Course Files pod. It’s also useful to print it out for use in this course and on your CMS jobs.

© 2010. All rights reserved. 66
Administer the CMS Link Avaya CMS Switch Connections, Administration, and Troubleshooting document:
– http://support.avaya.com/css/Products/P0030/Administration%20&%20System%20Programming
Link administration on the switch must match the ACD administration on the CMS.
The protocol between the two is determined by the least common denominator.

© 2010. All rights reserved. 67
Administer the CMS Link (Continued) Supported CMS/PBX compatibility (this is also on the job aid):
– CMS R13 supports these switch releases: R8, R9/R10, MV1, CM2, CM3
– CMS R13.1 supports the same + CM 3.1
– CMS R14/R14.1 supports R9/R10, MV1, CM2, CM3, CM3.1, CM4/5 (CM4, CM5, CM5.1)
– CMS R15 and R16 support CM2, CM3, CM3.1, CM4, CM5, CM5.1, CM5.2
– CMS R16.1 supports the same + CM6
--------------------------------------------------
– CM3.0 supports these CMS releases: V6, V8, V9, V11, R12, R13
– CM3.1 supports the same + R13.1 CMS
– CM4.0 supports CMS V11, R12, R13, R14
– CM5.0/CM5.1 supports CMS R12, CMS R13, R14, R14.1
– CM5.2 supports CMS R12, CMS R13, R14, R14.1, R15/R16
– CM6 supports the same + R16.1

© 2010. All rights reserved. 68
Administer the CMS Link change node-name IP
– list node-name
* add ip-interface <slot>
– list ip-interface clan (get board location)
* add data <module> – List data (find next available)
change communication processor
change system features (busy/release mis first)
* Required for CLAN only.

© 2010. All rights reserved. 69
Exercise

© 2010. All rights reserved. 70
Chapter 2, Module 2 Exercise – Administer the CMS Link
1. In your IE browser, access: https://dcm.toolwire.com/pro.
2. The instructor will distribute logins:
Usernames Passwords
acms0001 – acms000…. welcome
3. At the administration login screen, the password is admin.
4. Once you’re logged in to Toolwire, select the Terminal Emulator icon and select the virtualCM profile. Log in as craft, password crftpw. Accept the default terminal type, and select y to suppress alarms. Type sat to access the administration interface. Enter the crftpw password again. Then select 4410 as the terminal type.
Instructions to access the virtual CMs on Toolwire :

© 2010. All rights reserved. 71
Chapter 2, Module 2 Exercise – Administer the CMS Link
1. These are virtual Communication Managers; each student has access to a separate virtual CM. Use your job aid and the switch document referenced below.
Using your job aid, administer a CM/CMS link with this information:
CMS IP: 172.16.105.166
CMS is an R15, switch is a CM5.0
cms node name: cms
switch node name: switch-cms
local and remote = 1, channel 5001
2. Access the Avaya documentation for link administration:http://support.avaya.com/css/Products/P0030/Administration%20&%20System%20Programming

© 2010. All rights reserved. 72
Q&A

© 2010. All rights reserved. 73
Module Summary
Administer a CMS link on the Communication Manager.
Congratulations! Now you can:

© 2010. All rights reserved. 74
Chapter 2, Module 3: Establish CMS Connectivity
Duration: 30 min

© 2010. All rights reserved. 75
Module Objectives
Access the CMS and perform initial troubleshooting.
Connect the tape drive and test it.
Connect the CMS to the customer network and to the PBX.
After you complete this module, you will be able to:

© 2010. All rights reserved. 76
Connectivity Diagram
Remote console
ModemTelephone line to remote maintenance center
System console
External SCSI devices and
ethernet LAN connections
Serial port
USB port
USB port
Ethernet port
XVR-300 Graphics adapter
Network hub
Tape drive 1Target 4
(required)
To customer network for CMS Supervisor, network printers, and LAN backup
Ethernet port for switch link, CM 2.0 and later (supports up to eight ACDs)
For details switch link connectivity, see CMS Switch Connection Administration and Troubleshooting
Keyboard
Mouse
Monitor
SC port
J I
H
G
A
B
C
D
E
F
F
K
0
1

© 2010. All rights reserved. 77
New CMS from the Factory
Remember that systems are shipped from Sun’s factory for Avaya. Each system has all the software installed but is not administered.
Note that the system in the classroom has one ACD already set up and the link has been established. This is not what the systems look like straight from the factory.

© 2010. All rights reserved. 78
Modem Connection The on-site technician will need to make the physical connections.
The proper adapters must be used for Avaya maintenance support access, and for alarm origination manager (AOM) to work properly (NAR only).
– remote console adaptor is connected to the modem.
– straight thru adaptor is connected to the CMS.
– 10-wire cable with ground runs between the two adapters.

© 2010. All rights reserved. 79
If the system is remote, test dial-up access to the CMS. You should receive a connection and login prompt.
If the connection fails, verify that the adapters are connected properly.
If hardware is connected correctly but you still can’t get a connection, the technician will need to re-do the modem configuration. (See the job aid.)
Modem Connection (Continued)

© 2010. All rights reserved. 80
Tape Drive Connection Use the provided SCSI cable between the CMS and the tape drive rack mount
assembly.
On the CMS, the SCSI port A is the upper connection.
Verify you can see the tape drive:
– mt –f /dev/rmt/0c status
HP DDS-4 DAT (Sun) tape drive:
sense key(0x6)= Unit Attention residual= 0 retries= 0
file no= 0 block no= 0

© 2010. All rights reserved. 81
Customer Network Connection Connect the customer network to port 0.
Connect the switch link to port 1.
– This link can either be a direct connect with a cross-over cable or can be on a private network.

© 2010. All rights reserved. 82
T5120/T5220 Documentation Avaya Call Management System Sun SPARC Enterprise T5120/T5220 Computer
Hardware Installation, Maintenance, and Troubleshooting:
– http://support.avaya.com/css/Products/P0030/Installation,%20Migrations,%20Upgrades%20&%20Configurations

© 2010. All rights reserved. 83
Using Terminal Emulator to Access CMS A Terminal Emulator application is included on the CMS Supervisor DVD.
Create a profile to access CMS (or other products).
Remember that when logging in to CMS remotely, you cannot log in as root directly. You can log in as cms first, then su to root.

© 2010. All rights reserved. 84
Exercise

© 2010. All rights reserved. 85
Chapter 2, Module 3 Exercise – Using Avaya Terminal Emulator to Access CMS
1. Create a new Terminal Emulator profile to access the remote CMS. Call your profile “remoteCMS.” The CMS is on IP < ?? >. Log in as “cms” with the password sl33py.
2. Once logged in, verify that you can see the tape drive. What is the result you get? What type tape drive does it say is connected?
3. Access the T5*20 document on the Avaya Support Web site. Find the following instructions in the document:
a. Modem connectivity and configuration
b. Network connectivity
c. Switch connectivity
** Access Toolwire again (https://dcm.toolwire.com/pro).**

© 2010. All rights reserved. 86
Q&A

© 2010. All rights reserved. 87
Module Summary
Successfully connect to a CMS.
Verify that you can access the tape drive.
Identify CMS connectivity to peripherals.
Congratulations! Now you can:

© 2010. All rights reserved. 88
Chapter 2, Module 4: Prepare the CMS for Production
Duration: 3 hours

© 2010. All rights reserved. 89
Module Objectives
Given a CMS system from the factory, use the job aid to prepare the system for production.
Verify that the system is ready to hand off to a customer before the cutover.
After you complete this module, you will be able to:

© 2010. All rights reserved. 90
CMS from the Factory Recall from Chapter 1 that systems are shipped from the factory with all the required
software installed.
For R15, standard CMS is installed.
For R16, expanded AUX is installed and there is no other option.
With R15 CMS, there are separate CDs for CMS, VVS, CSS, and Informix.
With R16 CMS, all this software is on one DVD.

© 2010. All rights reserved. 91
CMS Software Compatibility
CMS SUN Informix Informix Informix Informix Supp. Visual
Rls Solaris IDS SQL ILS ESQL/SDK Services Vectors
R15 10(10/08) 9.40-UC4 7.32-UC4 3.30-MC2 9.51UC3/2.31UC3 cssr15aa.b vvsr14aa.c
R16 10(10/08) 11.50-FC4 7.50-UC1 NA NA cssr16aa.c vvsr16aa.c
R16 CMS uses RAID 10; RAID is not used for R15 CMS.

© 2010. All rights reserved. 92
Install Expanded AUX on R15 CMS Step 1: For R15, if the customer purchased expanded AUX, you must first remove
the standard CMS and install the expanded AUX CMS software.
– To find out if this is an R15 or R16 CMS and to get the load name, type pkginfo –x cms.
– The instructions are in the R15 Platform Upgrade document are NOT accurate; use our job aid.

© 2010. All rights reserved. 93
Install Expanded AUX on R15 CMS (Continued) The key thing to remember is that you DO NOT preserve data in this process.
Not preserving data reinitializes the database and breaks the disk mirroring.
– Note that the document doesn’t include re-establishing disk mirroring.

© 2010. All rights reserved. 94
Set up the CMS System Step 2: Set up default logins and passwords:
– The systems are shipped with root, cms, cmssvc, nuucp logins. From the factory, root has no password.
– Add root2 and nuucp2 logins:
• vi /etc/passwd
• Copy the line that includes the root login.
• Change root to root2; do the same for nuucpp2.
• Write and quit the file.

© 2010. All rights reserved. 95
Set up the CMS System (Continued) Step 2: Set up default logins and passwords (continued):
– vi references:
• http://www.lagmonster.org/docs/vi.html
• http://www.atmos.albany.edu/deas/atmclasses/atm350/vi_cheat_sheet.pdf
• http://www.eec.com/business/vi.html
– vi on-line tutorial:
• http://www.viemu.com/a_vi_vim_graphical_cheat_sheet_tutorial.html

© 2010. All rights reserved. 96
Set up the CMS System (Continued) Step 2: Set up default logins and passwords (continued):
– Syntax to add a password: passwd <login>
– Change passwords to these defaults:
• cms sl33py (give this to customer)
• root cms500 (give this to customer)

© 2010. All rights reserved. 97
Set up the CMS System (Continued) Step 3: Change the system uname:
– The default system uname is the serial number of the system.
– The following files need to be edited with vi editor:
• /opt/informix/etc/onconfig.cms
• /etc/hosts
• /etc/nodename
• /etc/hostname.* (two files for both interfaces)
• /usr/openwin/lib/xdm/Xservers
• /cms/install/cms_install/cms.install
• /var/sadm/pkg/cms/pkginfo
• /opt/informix/etc/sqlhosts/opt/cc/aas/admin.dat

© 2010. All rights reserved. 98
Set up the CMS System (Continued) Step 4: Administer Ethernet IP addresses:
– The following files need to be changed:
• /etc/hosts – add/change the IP address info for each NIC the CMS will use, default gateway for each NIC (use router, router_1 for the node name), and the clan/ACD the CMS will connect to.
• /etc/netmasks – includes the netmask address
• /etc/defaultrouter – includes either the router address or the router name if it’s identified in /etc/hosts (primary NIC only)

© 2010. All rights reserved. 99
Set up the CMS System (Continued) Step 5: Change the system time zone:
– ls /usr/share/lib/zoneinfo (lists time zone possibilities)
– vi /etc/default/init
• Set the time zone environmental variable in this file, for example, TZ=US/Central
• /etc/TIMEZONE is linked to /etc/default/init
– # ls -l /etc/T*
lrwxrwxrwx 1 root root 14 Dec 16 13:58 /etc/TIMEZONE -> ./default/init

© 2010. All rights reserved. 100
Chapter 2, Module 4 Exercise

© 2010. All rights reserved. 101
Chapter 2 Module 4 – vi Practice
1. Change the /etc/passwd<student#> file by following Step 2a of the process.
2. Follow Step 5 to edit the time zone file, for example, /etc/default/init<student#>. Change the time zone for a system in New York City.
** Access CMS on Toolwire again (https://dcm.toolwire.com/pro). Access Terminal Emulator and log in to CMS as cms. **
Remember that typically you’d be doing these steps as root. In this training, you’re given only a student login. Be sure to use online vi references is necessary.
In this exercise, you will only be doing Steps 2a and 5 of your job aid.

© 2010. All rights reserved. 102
Q&A

© 2010. All rights reserved. 103
Set up the CMS System (Continued) Step 6: Reboot the system:
– shutdown –y –g0 –i6 takes CMS down and brings it back up to a login prompt (reboot) – aka init 6
– Note: shutdown –y –g0 –i0 takes system down to OK prompt – aka init 0

© 2010. All rights reserved. 104
Set up the CMS System (Continued) Step 7: Authorize licenses:
– cmssvc: auth_display
– cmssvc: auth_set (requires password)
– Business Partners don’t have the authorization password and so are unable authorize the ACD, Supervisor, and Agent (Split/Skill Members) licenses.

© 2010. All rights reserved. 105
Set up the CMS System (Continued) Step 7: Authorize licenses (continued):
– Initial authorization licenses:
• The default is one ACD, two Supervisors, and one Agent.
• You will need to schedule Avaya to add the licenses on this system, and then come back and update the system based on the licenses.
• Based on the licenses, you will need to modify the following:
– Add additional ACDs if necessary
– Modify the Data Storage Allocation (DSA) based on agent licenses
> Split/skill members
> Total agents logged in

© 2010. All rights reserved. 106
Set up the CMS System (Continued) Step 8: Run CMS setup:
– You should have either received a DSA form from the customer/project manager, or you will use default values for the DSA.
– Select the setup option from the cmssvc menu.

© 2010. All rights reserved. 107
Set up the CMS System (Continued) Step 9: Install the Forecasting feature:
– Avaya installs this feature by default even if customers don’t plan to use it.
– Type cmsadm: pkg_install to install the Forecasting feature.

© 2010. All rights reserved. 108
Set up the CMS System (Continued) Step 10: Turn on CMS and perform miscellaneous administration:
– Select the run_cms option from the cmssvc menu and then turn on cms.
– Miscellaneous administration a customer could request:
• 15-minute storage intervals: System Setup: Storage Intervals
• Master ACD: System Setup: CMS State
• Non-default storage intervals: System Setup: Data Storage Allocation

© 2010. All rights reserved. 109
Set up the CMS System (Continued) Step 11: Verify the system while logged in as cms login:
– Once the system comes back up, verify the following things:
• Log in as cms (to verify the password).
• For R15 CMS, access the CMS menu and verify that the Free Space Allocation does not show negative values. If it does, modify the ACD. Exit back to Solaris. (See the screen shot on the next slide.)
• For R16 CMS, verify that you can access the CMS menu, and then exit back to Solaris.

© 2010. All rights reserved. 110
Set up the CMS System (Continued) Step 11: Verify the system with cms login (continued):
– R15 Free Space Allocation

© 2010. All rights reserved. 111
Set up the CMS System (Continued) Step 11: Verify the system logged in as root (continued):
• su root and verify root password.
• Type “date” and verify that the system date, time, and time zone are accurate.
• If the customer’s network is available, you should be able to ping the router and switch.
– ifconfig –a
– ping router; ping switch
– netstat –nr

© 2010. All rights reserved. 112
Set up the CMS System (Continued) Step 11: Verify the system logged in as root (continued):
• Verify that ODBC is running:
– . /opt/informix/bin/setenv (note dot space)
– onstat –g glo | grep tli (always running if IDS is on)
• If the customer is a new CMS user, it’s possible you can verify the link to the CM. Some places to check the status include:
– cd /cms/pbx/acd<#>; tail spi.err; you should be receiving data (DATAX).
– If the CMS is not receiving data from the CM, verify the CMS ACD administration (cmssvc: swinfo) and the CM link administration.

© 2010. All rights reserved. 113
Set up the CMS System (Continued) Step 11: Verify the system as root login (continued):
• If the system is R15 CMS, verify mirroring and disk drive:
– format (see screen shot)
– . /opt/informix/bin/setenv (note dot space)
– onstat –d | egrep “X|PD|MD|R” | pg (Informix command)
– metastat | grep State: | grep –v Okay | pg (Solaris command)
• If the system is R16 CMS, verify the status of the disk drive and RAID:
– format
– /opt/StorMan/arcconf getconfig 1 | egrep “logical device"

© 2010. All rights reserved. 114
Set up the CMS System (Continued) Step 11: Verify the system as root login (continued):
– R15 CMS T5220 format command

© 2010. All rights reserved. 115
Set up the CMS System (Continued) Step 11: Verify the system as root login (continued):
– R15 CMS T5220 onstat command

© 2010. All rights reserved. 116
Set up the CMS System (Continued) Step 12: Turn on Alarm Origination Manager and Visual Vectors Server:
– “aom start” to turn on AOM
– AOM sends alarms to Avaya over the modem if any of these things is a problem:
• Switch link is down
• Disk problems
• Archiver problems
– “setupaas” to turn on VVS
• Even if a customer doesn’t use Visual Vectors Server, Avaya turns it on.

© 2010. All rights reserved. 117
Set up the CMS System (Continued) Optional step: Migrate system admin data (optional):
– If this is a platform upgrade, and the cutover is within a week of this set up, customers typically want to have their admin data (users, dictionary, and so on) migrated.
– If tape drives are compatible, run a maintenance backup on the old system and move the tape to the new system.
– Tape drive compatibility:
• DDS4 cannot read or write to Dat72 tape.
• Dat72 tape can read and write to a DDS4 tape.
• LT0-4 is not compatible with either tape.

© 2010. All rights reserved. 118
Set up the CMS System (Continued) Optional step: Migrate system admin data (continued):
– Maintenance backup:
• From the CMS menu, select Maintenance: Back Up Data
• Backup log: /cms/maint/backup/back.log
– Migrate data:
• From the CMS menu, select System Setup: R3 Migrate Data
• System admin and Agent/Call Center admin migrations require the system to be in single-user mode.
– System admin can only be run ONCE!
• Historical migration is not service affecting.

© 2010. All rights reserved. 119
Set up the CMS System (Continued) Step 13: Make a system backup of the new CMS:
– Since this is all that can be done until cutover, it’s a good idea to have a system backup of what the system looks like now.
– As root, type “cmsadm” to display the menu.
– Select the item associated with system backup.
– Backup log: /cms/install/logdir/backup.log

© 2010. All rights reserved. 120
Quiz

© 2010. All rights reserved. 121
Chapter 2, Module 4 Quiz
1. What is the command to display CMS licenses?
2. What is the command to install CMS feature packages?
3. What is the command to run CMS setup?
4. True or False: CMS can be turned on from either the cmssvc or cmsadm menu.
5. Which CMS menu item allows you to change storage intervals, change the master ACD, and change DSA?
6. What is the reboot command to display a message to logged-in users, take the system down, and bring it back to a login prompt?
7. What is the command to run a system backup?
8. Which CMS screen do you use to migrate data?
© 2010. All rights reserved. 122
Chapter 2, Module 4 – Hands-On Simulation
** Access Toolwire again (https://dcm.toolwire.com/pro). You will be executing a simulation program. On the desktop is a “cms” folder. In that folder is another folder, “CMS Simulation Training”. Execute the .html file in that folder. **
This exercise provides an opportunity to practice the installation procedure using a simulation program. Use your job aid to complete the procedure.

© 2010. All rights reserved. 123
Q&A

© 2010. All rights reserved. 124
Module Summary
Use the job aid to prepare a CMS system for production.
Perform basic troubleshooting tasks.
Congratulations! Now you can:

© 2010. All rights reserved. 125
Chapter 2, Module 5: Schedule Avaya Professional Services
Duration: 1 hour
© 2010. All rights reserved. 126
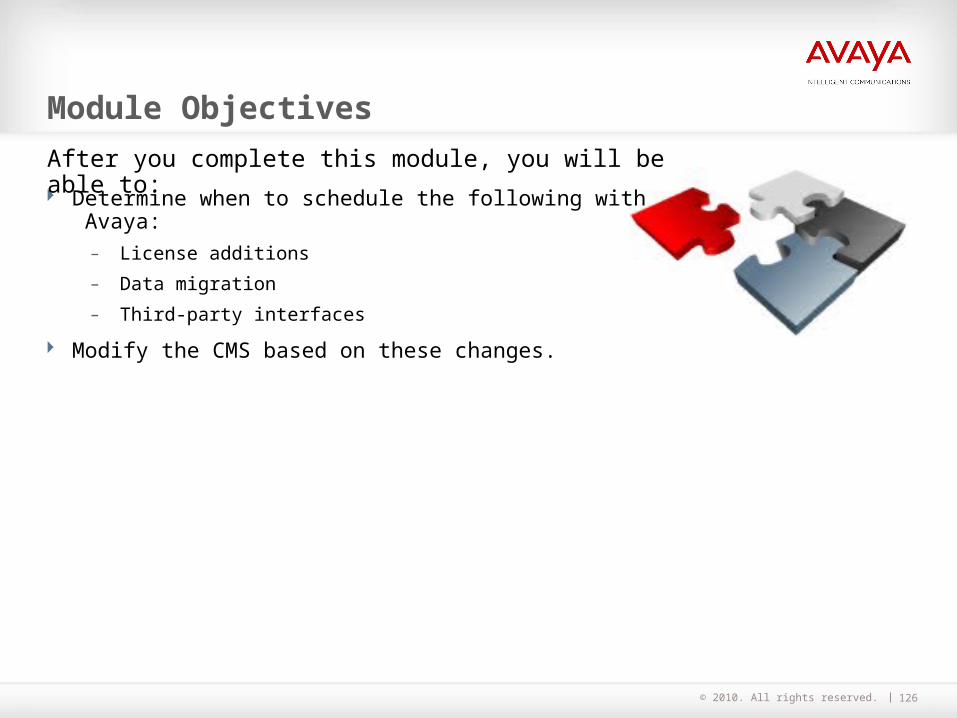
Module Objectives
Determine when to schedule the following with Avaya:
– License additions
– Data migration
– Third-party interfaces
Modify the CMS based on these changes.
After you complete this module, you will be able to:

© 2010. All rights reserved. 127
Schedule Professional Services with Avaya ACD, Supervisor, and Agent RTU licenses need to be authorized by Avaya
Professional Services (APS).
– After the Agent RTU (and split/skill members) is authorized, DSA will need to be modified to support the agent/skill pairs and agent login (See the screen shot on the next slide.).
– CM6 supports 120 skills per agents.
– CM3-CM5.2 supports 60 skills per agents.
Business Partners need to schedule APS at [email protected] .

© 2010. All rights reserved. 128
DSA with 1 agent RTU

© 2010. All rights reserved. 129
Default Authorizations

© 2010. All rights reserved. 130
Schedule Professional Services with Avaya Third-party interfaces must be installed by Avaya. These can include:
– Work Force Management (WFM)
– Geotel
– Network printers
– Admin Sync (auto sync) for HA CMS
Note
These third-party applications are not covered in this class. The interfaces are supported by Avaya, but the applications are not.

© 2010. All rights reserved. 131
Schedule Professional Services with Avaya A data migration will need to be scheduled with Avaya if the tape drives are not
compatible. Avaya will perform a “remote tape copy” migration.
Tape drive compatibility review:
– A Dat72 tape drive can read a DDS4 tape.
– A Dat72 tape drive can write to a DDS4 tape.
– A DDS4 tape drive cannot write to a Dat72 tape.
– A DDS4 tape drive can read a DAT72 tape.
– A LT0-4 tape drive cannot read from other tapes or write to other tapes.

© 2010. All rights reserved. 132
Quiz

© 2010. All rights reserved. 133
Chapter 2, Module 5 Quiz
1. What are the default licenses that a system is shipped with?
2. If a customer purchases 200 agent RTUs and has a Communication Manger 6, what can the split/skill member value be in DSA?
3. If a customer purchases 200 agent RTUs and has a Communication Manger 5.2, what can the split/skill member value be in DSA?
4. Which values in the DSA screen must be modified after the agent authorization is made?

© 2010. All rights reserved. 134
Q&A

© 2010. All rights reserved. 135
Chapter Summary
Describe the different types of CMS configurations that can be installed.
Set up a new CMS system.
Work with Avaya Professional Services to complete the implementation.
Congratulations! Now you can:

© 2010. All rights reserved. 136
Chapter 3
CMS Cutover
Duration: 2 hours

© 2010. All rights reserved. 137
Chapter Objectives
Prepare for the cutover with the customer and other resources.
Prepare for future changes a customer might request.
Use CMS Supervisor and the CMS ascii interface to perform CMS administration tasks.
After you complete this chapter, you will be able to:

© 2010. All rights reserved. 138
Chapter 3, Module 1: Prepare for the Cutover
Duration: 30 min

© 2010. All rights reserved. 139
Module Objectives
After you complete this module, you will be able to:
Schedule and perform the cutover tasks.
Register the CMS with Sun and Avaya.

© 2010. All rights reserved. 140
The CMS Cutover Schedule the cutover date with the customer.
Verify that the customer has installed CMS Supervisor on the client desktops.
Get the system racked and connected at the customer site.
– Establish network and CM connectivity.
If this is a platform upgrade, prepare to swap the temporary and permanent modem and IP addresses.

© 2010. All rights reserved. 141
The CMS Cutover (Continued) If this is a platform upgrade, prepare to migrate data.
– If tape drives are not compatible, a remote tape copy will be required by Avaya.
– Beginning with R16.1, T5220 will be shipped with the LT0-4 tape drive; T5120 can have Dat-72 or LT0-4.
– Determine if the tape drives are compatible:
• Dat-72 can read and write a DDS4 tape.
• DDS4 can only read a Dat-72 tape.
• The new LT0-4 tape drive is not compatible with either Dat-72 or DDS4.

© 2010. All rights reserved. 142
Register the CMS with Sun and Avaya Sun maintenance begins only when Sun receives notification of this CMS at a particular
customer address.
– APAC send the attached form to [email protected]; all others send it to [email protected].
Maintenance with Avaya begins only when the CMS is registered with the Avaya registration group.
– 1800-422-6560 x15265
– Systems are registered in a Maestro database where the Avaya passwords are located and changed regularly.
– This group also ensures that alarming is set up properly and creates a test alarm.

© 2010. All rights reserved. 143
Other CMS Change Requests Baseload upgrade
ACD changes, removals, additions, or consolidations
– Avaya authorization required for new ACDs
Data Storage Allocation (DSA) changes
IP changes
Uname changes
License additions
– Avaya authorization password required

© 2010. All rights reserved. 144
Quiz

© 2010. All rights reserved. 145
Chapter 3, Module 1 Quiz1. True or False: A backup on a DDS4 tape can be used to migrate data using a Dat-72
tape drive.
2. True or False: A backup on a Dat-72 tape can be used to migrate data using an LT0-4 tape drive.
3. True or False: Sun maintenance begins when customers pay their bill to Avaya.
4. True or False: Avaya maintenance on the CMS begins when customers pay their bill to Avaya.

© 2010. All rights reserved. 146
Q&A

© 2010. All rights reserved. 147
Module Summary
Cut the CMS system into service.
Register the CMS with Avaya and Sun.
Prepare for other changes a customer might request.
Congratulations! Now you can:

© 2010. All rights reserved. 148
Chapter 3, Module 2: Administer CMS
Duration: 1.5 hours

© 2010. All rights reserved. 149
Module Objectives
Administer CMS using the CMS Supervisor client application.
Administer CMS using the CMS ascii interface.
Use the Timetable feature to schedule a Maintenance backup.
After you complete this module, you will be able to:

© 2010. All rights reserved. 150
CMS Supervisor Create a CMS server.
Log in to CMS Supervisor with the cms login.
– Manual login
– cvsup terminal type
Installation and Getting Started and Reports documents: http://support.avaya.com/css/Products/P1052/All_Documents

© 2010. All rights reserved. 151
CMS Supervisor (Continued) Add a user; assign User Permissions.
– User Data
– Feature Access
– VDN, Split/Skill Access, and so on
Administration document: http://support.avaya.com/css/Products/P0030/Administration%20&%20System%20Programming

© 2010. All rights reserved. 152
CMS Supervisor (Continued) Set up the Dictionary:
– Login identifications
– Split/skills
– VDNs, and so on
Other administration:
– Agent administration
– Call center administration
– System setup

© 2010. All rights reserved. 153
Exercise (Part 1)

© 2010. All rights reserved. 154
Chapter 3, Module 2 Exercise (Part 1) – Using CMS Supervisor for CMS Administration
1. Create an R16 CMS server with IP address <??>. (Get the IP address from the instructor.)
2. Log in to Supervisor as cms.
3. Add a user (username whatever you’d like).
4. Give the user permission to the System Setup feature.
5. Give the user permission to VDNs 40010-40015 and 40045.
6. List all the users on the system.
7. List the VDNs the new user has permissions to.
** In Toolwire (https://dcm.toolwire.com/pro), launch CMS Supervisor. **

© 2010. All rights reserved. 155
CMS ascii Interface Most administration that you can do from Supervisor can be done using the CMS ascii
interface.
– Scripts are unique to Supervisor.
– Timetable and Shortcut are unique to CMS ascii.
Timetable – schedule tasks to run at a particular time.
– Timetable is how you’ll schedule nightly maintenance backups.
– The Timetable procedure is documented in the CMS Administration document.

© 2010. All rights reserved. 156
Exercise (Part 2)

© 2010. All rights reserved. 157
Chapter 3, Module 2 Exercise (Part 2) – Create a Timetable to Schedule a Nightly Backup
1. Create a Timetable entry to schedule a maintenance backup to run every morning at 5 a.m. starting tomorrow. Call the timetable “DailyMaint.”
2. Display the contents of your Timetable.
3. List all the Timetables on the system.
4. Delete the DailyMaint Timetable you just created.
** In Toolwire (https://dcm.toolwire.com/pro), launch the Terminal Emulator and open the remoteCMS profile. Log in as cms. **

© 2010. All rights reserved. 158
Q&A

© 2010. All rights reserved. 159
Module Summary
Administer CMS using the CMS Supervisor client application.
Administer CMS using the CMS ascii interface.
Schedule a maintenance backup.
Congratulations! Now you can:

© 2010. All rights reserved. 160
Chapter 4
Maintaining CMS
Duration: 1 hour

© 2010. All rights reserved. 161
Chapter Objectives
Use references to perform CMS maintenance routines.
Use references to perform basic troubleshooting on the CMS system.
After you complete this chapter, you will be able to:

© 2010. All rights reserved. 162
Maintenance and Troubleshooting We’ve already used these Solaris commands in this training session:
– mt –f /dev/rmt/0c status
– pkginfo –x cms
– su root and su cms cms
– date
– netstat –nr
– ping <hostname>
– ifconfig -a

© 2010. All rights reserved. 163
Maintenance and Troubleshooting (Continued) Solaris commands used in this training session (continued):
– cd /cms/pbx/acd<#>
– tail spi.err; tail –f spi.err
– format (R15 vs. R16)
– /opt/StorMan/arcconf getconfig 1 | egrep “logical”
– tail /cms/install/logdir/backup.log
– uname –a
– vi <file>
– passwd <username>

© 2010. All rights reserved. 164
Maintenance and Troubleshooting (Continued) We’ve already used these Informix commands in this training session:
– . /opt/informix/bin/setenv
– onstat –g glo | grep tli (to verify ODBC is running)
– onstat –d | grep “On-Line” (to verify IDS is running)
– R15 CMS only – check status of disk mirroring:
• onstat –d | pg
• onstat –d | egrep “PD|MD|R” | pg

© 2010. All rights reserved. 165
Maintenance and Troubleshooting (Continued) Some useful logs:
– /var/adm/messages
– /usr/elog/elog
– /cms/install/logdir/admin.log
– /cms/install/logdir/backup.log
– /cms/maint/backup/back.log
– /cms/maint/r3mig/<acd#>/mig.log
– /var/dt/Xerrors
– /opt/informix/cmsids.log
– /cms/pbx/<acd#>/spi.err

© 2010. All rights reserved. 166
Maintenance and Troubleshooting (Continued) Enable Solaris services:
– svcs –a
– svcs –a | grep <service>
– svcadm enable <service>
– svcadm disable <service>

© 2010. All rights reserved. 167
CMS Backups Review Cmsadm: Filesystem backup
– System backup.
– Log - /cms/install/logdir/backup.log.
– Avaya recommends this be run monthly.
Maintenance: Back Up Data
– Data backup.
– Includes system administration data, ACD administration, and historical data.
– Log - /cms/maint/backup/back.log.
– Avaya recommends a full backup be run daily.
.

© 2010. All rights reserved. 168
Link Troubleshooting Demo
1. Change the CMS system date.
a. tail –f spi.err.
b. Fix date.
2. Busy MIS.
a. tail spi.err.
b. Release MIS.
3. Change Reporting Adjunct in CM.
a. tail spi.err.
b. Fix it.

© 2010. All rights reserved. 169
Tape Drive Troubleshooting Demo
1. mt –f /dev/rmt/0c status
2. cd /dev/rmt; pwd; ls; rm *
3. mt –f /dev/rmt/0c status
4. devfsadm –C
5. mt –f /dev/rmt/0c status
6. cd /dev/rmt; pwd; ls

© 2010. All rights reserved. 170
Network Troubleshooting Demo
1. cat /etc/hosts
2. cat /etc/defaultrouter
3. cat /etc/netmasks
4. cat /etc/hostname.e1000g0 and e1000g1
5. ping <hostname>
6. netstat –nr
7. ifconfig -a

© 2010. All rights reserved. 171
Running CMS Setup from a Flat File Make sure you’ve done a Maintenance: Back up if you want to re-migrate data.
cd /cms/install/cms_install
/cms/install/bin/converter (Run the converter)
Converter creates a setup.out file
cp setup.out cms.install
© 2010. All rights reserved. 172
Running CMS Setup from a Flat File (Continued) When setup is run, if the cms.install file exists in /cms/install/cms_install, you’ll be
asked if you want to run setup from the terminal (interactive mode) or a flat file (this file).
If you select flat file, the setup uses the entries in the cms.install file to run in the background.
View the status of the setup in: /cms/install/logdir/admin.log.

© 2010. All rights reserved. 173
Exercise

© 2010. All rights reserved. 174
Chapter 4 – CMS Maintenance
1. Review the “man page” for these Solaris commands:
a. devfsadm
b. ifconfig
c. netstat
d. uname
2. Look at these logs:
a. /var/adm/messages
b. /usr/elog/elog
**Access Toolwire (https://dcm.toolwire.com/pro). From Terminal Emulator, select the remoteCMS profile and log in as cms.**

© 2010. All rights reserved. 175
Quiz

© 2010. All rights reserved. 176
Chapter 4 Quiz
1. What is the Solaris command to rebuild devices? a) devices, b) devfsadm –C, c) mount
2. Which of these network commands allows you to display or configure the network interfaces? a) ifconfig, b) /etc/hosts, c) prtdiag
3. Which error logs display link problem messages: a) /var/adm/messages and /usr/elog/elog, b) spi.err and /usr/elog/elog, c) backup.log and admin.log
4. Which command shows the status of the cdrom drive? a) eject, b) devfsadm, c) svcs
5. Which of these sets the Informix environment to enable you to run the onstat command? a) . /opt/informix/bin/setenv, b) . /opt/informix/setenv, c) . /opt/informix/etc/setenv
6. Which backup does Avaya recommend that you run each month? a) data maintenance backup, b) cmsadm filesystem backup
7. Which backup does Avaya recommend that you run daily? a) data maintenance backup, b) cmsadm filesystem backup
© 2010. All rights reserved. 177
Q&A

© 2010. All rights reserved. 178
Course Summary
Congratulations! You have completed the CMS Installation and Maintenance course.
