080308 v4 how to make a comic book
TRANSCRIPT
8/8/2019 080308 v4 How to Make a Comic Book
http://slidepdf.com/reader/full/080308-v4-how-to-make-a-comic-book 1/22
How to Make a Comic Book © Kevin Lane 2008
(on your home computer) Shades of Toad Productions
page 1 of 22
How to Make a Comic Book(on your home computer)
Abstract:
This document discusses how to make a comic book on a personal computer.
Introduction:
My name is Kevin Lane. I started a company called Shades of Toad Productions to sellmy creative works: novels, art, music, etc. I can be contacted at:
One of my ventures is a comic book entitled: Shades of Toad Presents.
After going through the process of completing my first issue, I would like to share my
approach and some techniques for others who aspire to produce their own comic book(s).
Producing a comic book is a large effort. Wherever possible I use the abilities of thepersonal computer (and associated technology) to remove as much burden as possible
from the comic book creator.
Disclaimers:
Some of the software programs mentioned in this document are my own creation.
Readers are free to use these programs for their own projects. Although the programs
work on my computer system, they may not work on other versions of OS/ platforms/ etc.
Source code and instructions for use for these programs is provided at my website for
individuals to re-compile/ modify to meet their own needs/ systems.
http://www.shadesoftoad.net/sot_comics/sot_comics.html
This document is not intended to say this is the only way comic books should be created.These are merely techniques I have found useful to meet my primary goal: telling stories
in visual format.
Some Details:
My comic book is a standard-sized print (6 5/8” x 10 1/4”), full color covers and full
color interiors, with 24 pages of interior content. The ‘live area’ (i.e. where the comiccontent resides) is 6” x 9” centered on the page. Some of my work goes outside the live
area- and even off the page. (Be sure to check with your printer in advance on their
recommended ‘live area’ dimensions.)
8/8/2019 080308 v4 How to Make a Comic Book
http://slidepdf.com/reader/full/080308-v4-how-to-make-a-comic-book 2/22
How to Make a Comic Book © Kevin Lane 2008
(on your home computer) Shades of Toad Productions
page 2 of 22
My personal computer is a low-end PC with a base model scanner/ printer. The scanneris capable of scanning 11 1/2” x 8 1/2” documents at 300 dpi. 300 dpi is the resolution
used for printing.
I do not use a drawing tablet- just a mouse and a keyboard.
I do use a digital camera on a tri-pod to snap quick poses locations/ objects/ figures. Theshots are downloaded to my PC and printed. Picture quality does not have to be great
because these photos are for reference/ guidance only. They are not part of the final
artwork.
The software drawing package I use is Paintshop Pro from Jasc Software (version 8.10).
Most any drawing program should suffice, so long as it has the ability to handle multiple
layers and color manipulation. (More on all that later.)
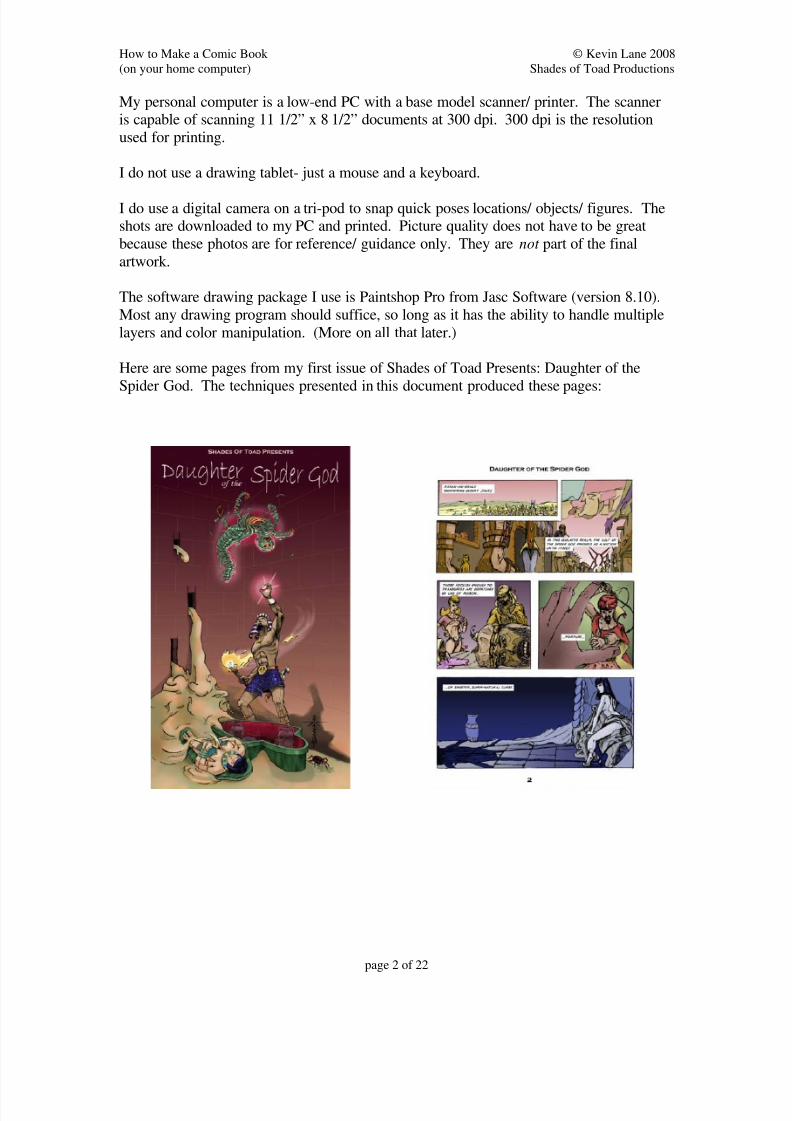
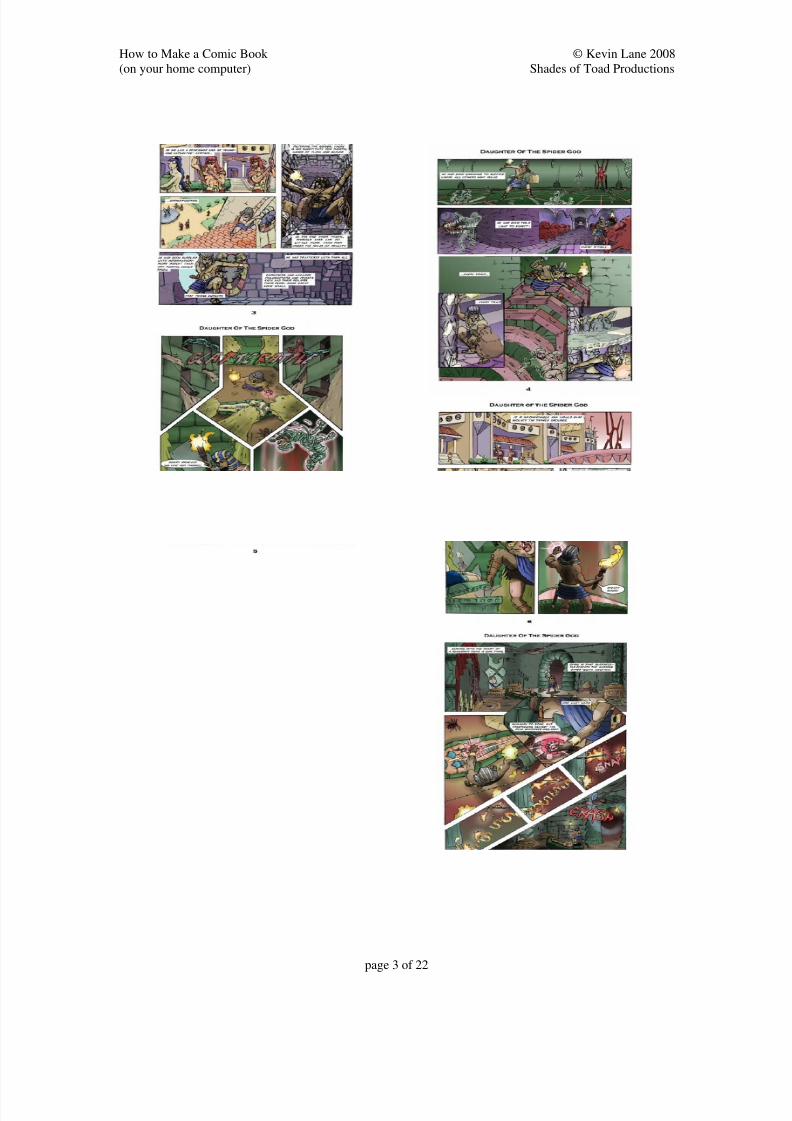
Here are some pages from my first issue of Shades of Toad Presents: Daughter of the
Spider God. The techniques presented in this document produced these pages:
8/8/2019 080308 v4 How to Make a Comic Book
http://slidepdf.com/reader/full/080308-v4-how-to-make-a-comic-book 3/22
How to Make a Comic Book © Kevin Lane 2008
(on your home computer) Shades of Toad Productions
page 3 of 22
8/8/2019 080308 v4 How to Make a Comic Book
http://slidepdf.com/reader/full/080308-v4-how-to-make-a-comic-book 4/22
How to Make a Comic Book © Kevin Lane 2008
(on your home computer) Shades of Toad Productions
page 4 of 22
StartI assume you have a story/ script completed and you are ready to begin the artwork!
Pencils ready… here we go!
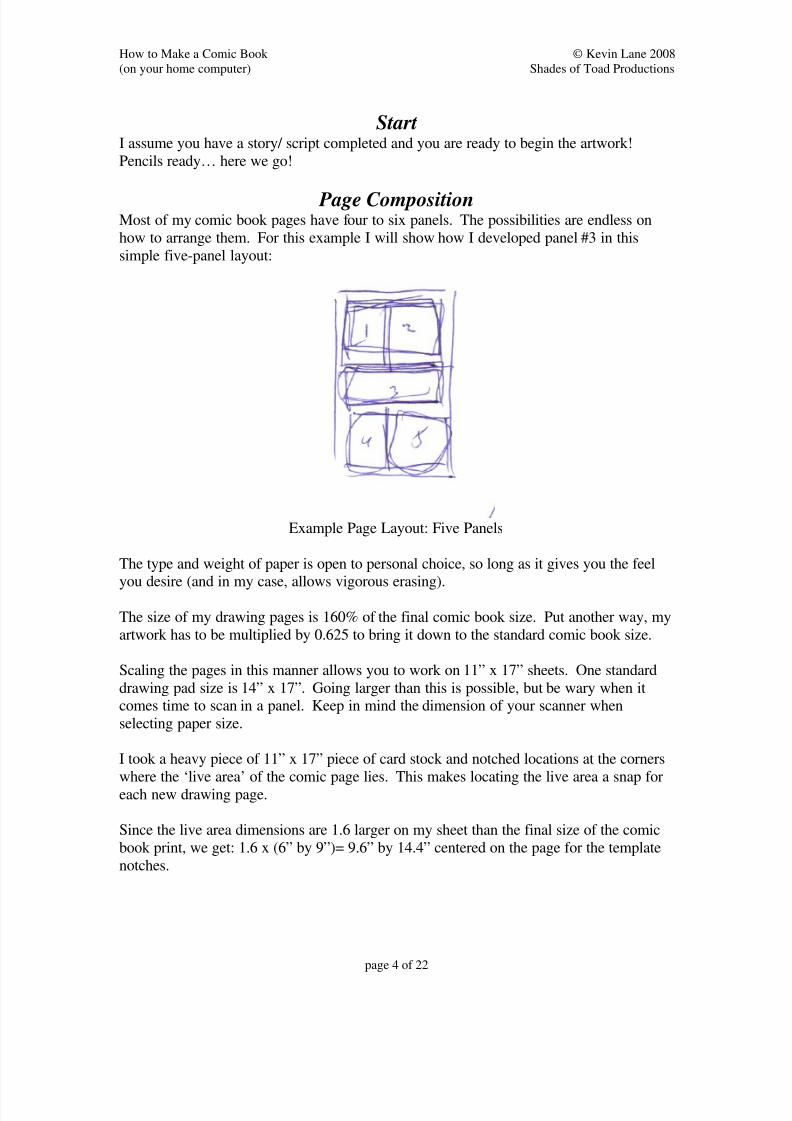
Page CompositionMost of my comic book pages have four to six panels. The possibilities are endless on
how to arrange them. For this example I will show how I developed panel #3 in this
simple five-panel layout:
Example Page Layout: Five Panels
The type and weight of paper is open to personal choice, so long as it gives you the feel
you desire (and in my case, allows vigorous erasing).
The size of my drawing pages is 160% of the final comic book size. Put another way, my
artwork has to be multiplied by 0.625 to bring it down to the standard comic book size.
Scaling the pages in this manner allows you to work on 11” x 17” sheets. One standard
drawing pad size is 14” x 17”. Going larger than this is possible, but be wary when itcomes time to scan in a panel. Keep in mind the dimension of your scanner when
selecting paper size.
I took a heavy piece of 11” x 17” piece of card stock and notched locations at the corners
where the ‘live area’ of the comic page lies. This makes locating the live area a snap for
each new drawing page.
Since the live area dimensions are 1.6 larger on my sheet than the final size of the comic
book print, we get: 1.6 x (6” by 9”)= 9.6” by 14.4” centered on the page for the template
notches.
8/8/2019 080308 v4 How to Make a Comic Book
http://slidepdf.com/reader/full/080308-v4-how-to-make-a-comic-book 5/22
How to Make a Comic Book © Kevin Lane 2008
(on your home computer) Shades of Toad Productions
page 5 of 22
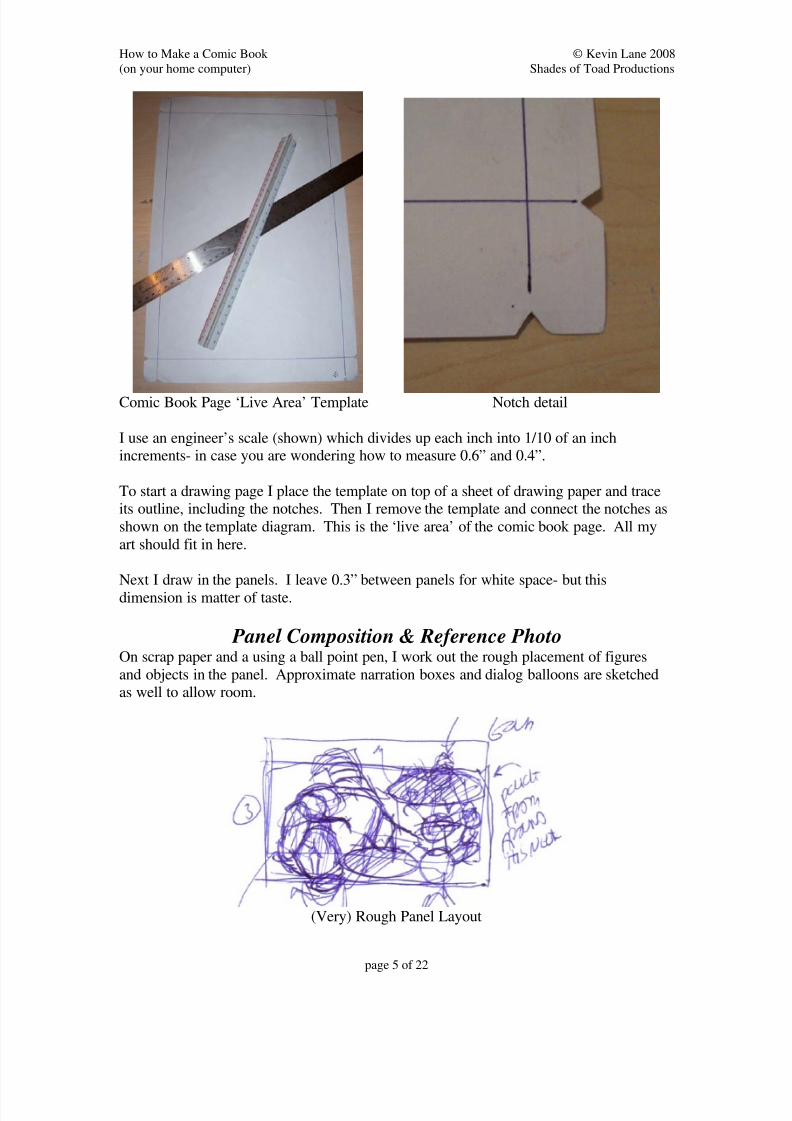
Comic Book Page ‘Live Area’ Template Notch detail
I use an engineer’s scale (shown) which divides up each inch into 1/10 of an inchincrements- in case you are wondering how to measure 0.6” and 0.4”.
To start a drawing page I place the template on top of a sheet of drawing paper and traceits outline, including the notches. Then I remove the template and connect the notches as
shown on the template diagram. This is the ‘live area’ of the comic book page. All my
art should fit in here.
Next I draw in the panels. I leave 0.3” between panels for white space- but this
dimension is matter of taste.
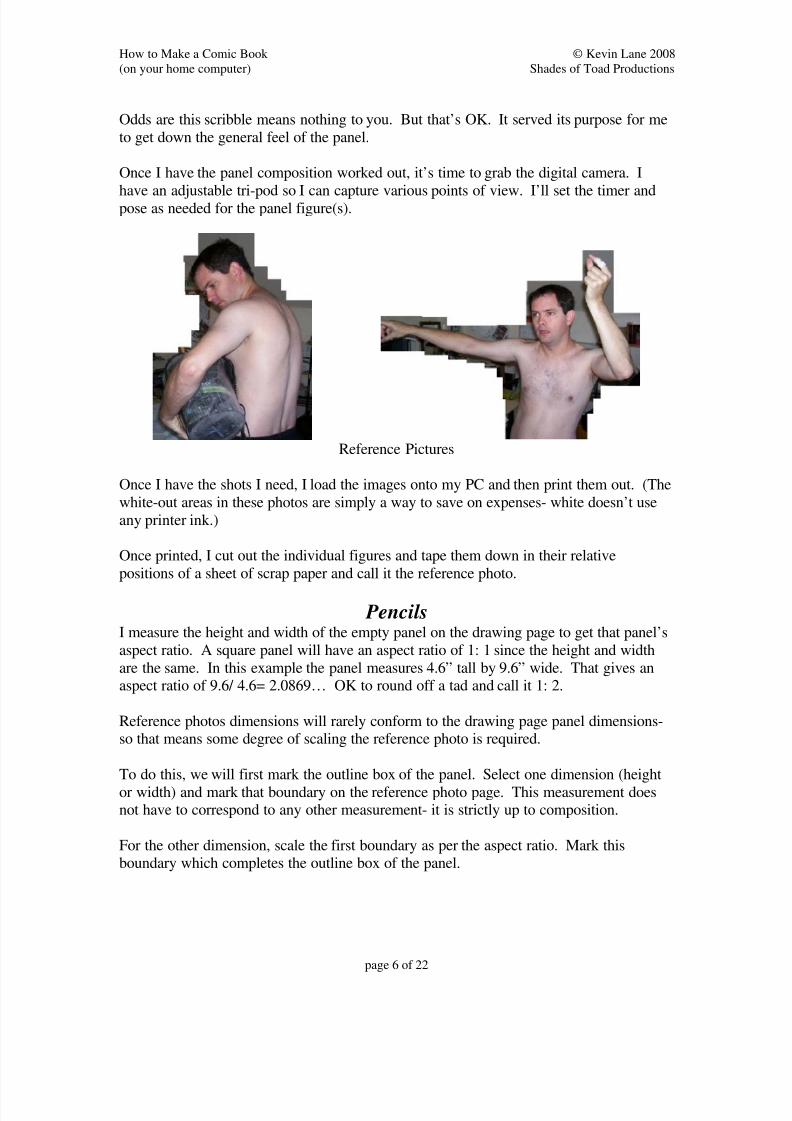
Panel Composition & Reference PhotoOn scrap paper and a using a ball point pen, I work out the rough placement of figures
and objects in the panel. Approximate narration boxes and dialog balloons are sketchedas well to allow room.
(Very) Rough Panel Layout
8/8/2019 080308 v4 How to Make a Comic Book
http://slidepdf.com/reader/full/080308-v4-how-to-make-a-comic-book 6/22
How to Make a Comic Book © Kevin Lane 2008
(on your home computer) Shades of Toad Productions
page 6 of 22
Odds are this scribble means nothing to you. But that’s OK. It served its purpose for me
to get down the general feel of the panel.
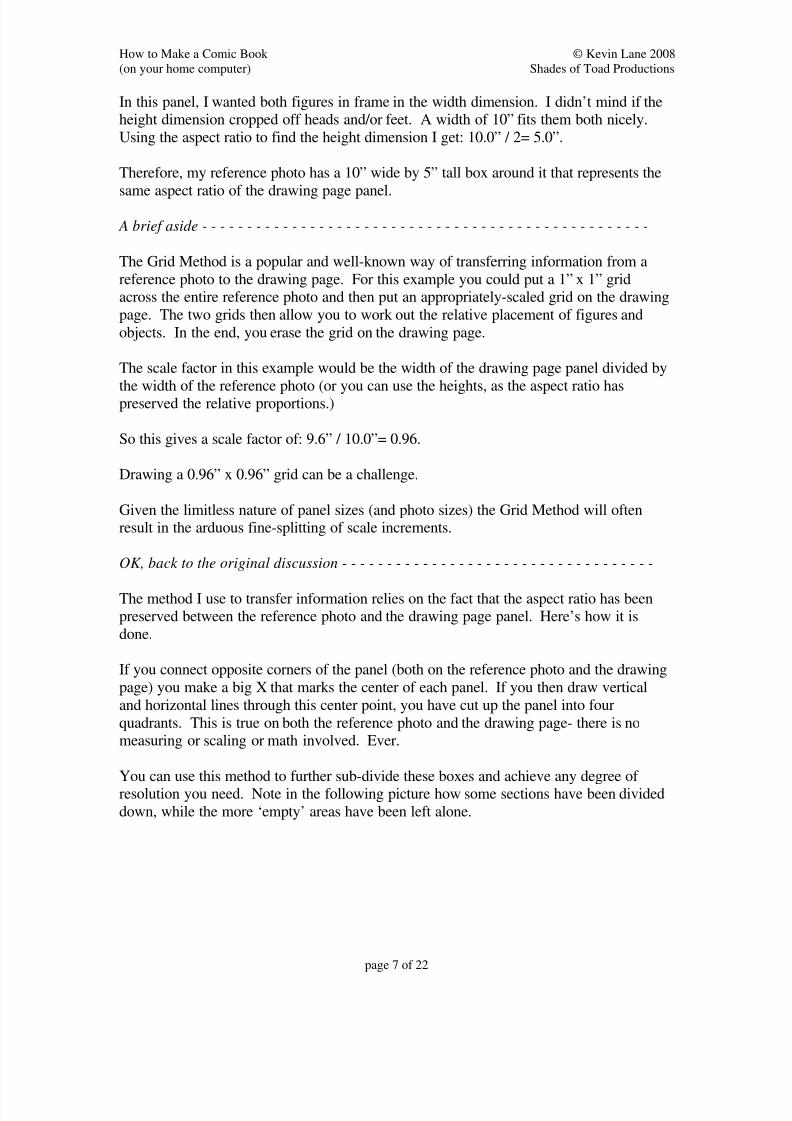
Once I have the panel composition worked out, it’s time to grab the digital camera. I
have an adjustable tri-pod so I can capture various points of view. I’ll set the timer andpose as needed for the panel figure(s).
Reference Pictures
Once I have the shots I need, I load the images onto my PC and then print them out. (The
white-out areas in these photos are simply a way to save on expenses- white doesn’t use
any printer ink.)
Once printed, I cut out the individual figures and tape them down in their relative
positions of a sheet of scrap paper and call it the reference photo.
PencilsI measure the height and width of the empty panel on the drawing page to get that panel’s
aspect ratio. A square panel will have an aspect ratio of 1: 1 since the height and width
are the same. In this example the panel measures 4.6” tall by 9.6” wide. That gives anaspect ratio of 9.6/ 4.6= 2.0869… OK to round off a tad and call it 1: 2.
Reference photos dimensions will rarely conform to the drawing page panel dimensions-so that means some degree of scaling the reference photo is required.
To do this, we will first mark the outline box of the panel. Select one dimension (height
or width) and mark that boundary on the reference photo page. This measurement doesnot have to correspond to any other measurement- it is strictly up to composition.
For the other dimension, scale the first boundary as per the aspect ratio. Mark thisboundary which completes the outline box of the panel.
8/8/2019 080308 v4 How to Make a Comic Book
http://slidepdf.com/reader/full/080308-v4-how-to-make-a-comic-book 7/22
How to Make a Comic Book © Kevin Lane 2008
(on your home computer) Shades of Toad Productions
page 7 of 22
In this panel, I wanted both figures in frame in the width dimension. I didn’t mind if theheight dimension cropped off heads and/or feet. A width of 10” fits them both nicely.
Using the aspect ratio to find the height dimension I get: 10.0” / 2= 5.0”.
Therefore, my reference photo has a 10” wide by 5” tall box around it that represents the
same aspect ratio of the drawing page panel.
A brief aside - - - - - - - - - - - - - - - - - - - - - - - - - - - - - - - - - - - - - - - - - - - - - - - - - -
The Grid Method is a popular and well-known way of transferring information from a
reference photo to the drawing page. For this example you could put a 1” x 1” gridacross the entire reference photo and then put an appropriately-scaled grid on the drawing
page. The two grids then allow you to work out the relative placement of figures and
objects. In the end, you erase the grid on the drawing page.
The scale factor in this example would be the width of the drawing page panel divided by
the width of the reference photo (or you can use the heights, as the aspect ratio haspreserved the relative proportions.)
So this gives a scale factor of: 9.6” / 10.0”= 0.96.
Drawing a 0.96” x 0.96” grid can be a challenge.
Given the limitless nature of panel sizes (and photo sizes) the Grid Method will oftenresult in the arduous fine-splitting of scale increments.
OK, back to the original discussion - - - - - - - - - - - - - - - - - - - - - - - - - - - - - - - - - - -
The method I use to transfer information relies on the fact that the aspect ratio has beenpreserved between the reference photo and the drawing page panel. Here’s how it is
done.
If you connect opposite corners of the panel (both on the reference photo and the drawing
page) you make a big X that marks the center of each panel. If you then draw vertical
and horizontal lines through this center point, you have cut up the panel into four
quadrants. This is true on both the reference photo and the drawing page- there is nomeasuring or scaling or math involved. Ever.
You can use this method to further sub-divide these boxes and achieve any degree of resolution you need. Note in the following picture how some sections have been divided
down, while the more ‘empty’ areas have been left alone.
8/8/2019 080308 v4 How to Make a Comic Book
http://slidepdf.com/reader/full/080308-v4-how-to-make-a-comic-book 8/22
How to Make a Comic Book © Kevin Lane 2008
(on your home computer) Shades of Toad Productions
page 8 of 22
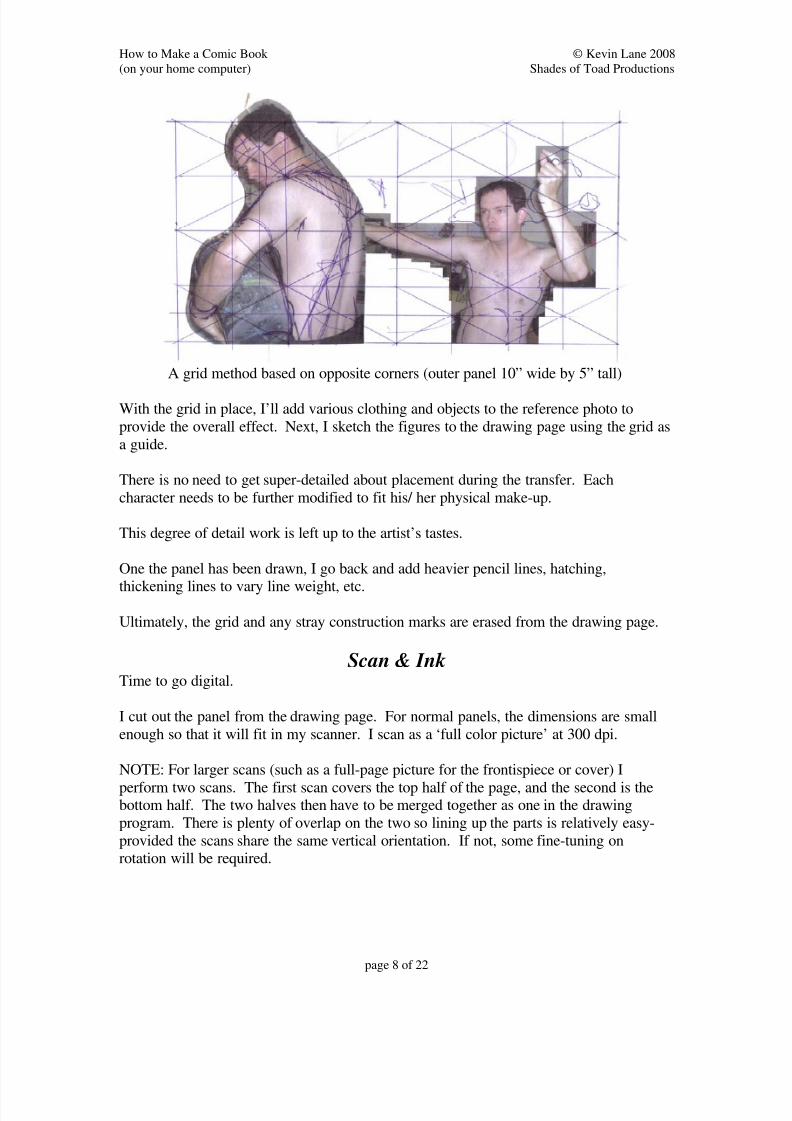
A grid method based on opposite corners (outer panel 10” wide by 5” tall)
With the grid in place, I’ll add various clothing and objects to the reference photo to
provide the overall effect. Next, I sketch the figures to the drawing page using the grid as
a guide.
There is no need to get super-detailed about placement during the transfer. Each
character needs to be further modified to fit his/ her physical make-up.
This degree of detail work is left up to the artist’s tastes.
One the panel has been drawn, I go back and add heavier pencil lines, hatching,
thickening lines to vary line weight, etc.
Ultimately, the grid and any stray construction marks are erased from the drawing page.
Scan & InkTime to go digital.
I cut out the panel from the drawing page. For normal panels, the dimensions are small
enough so that it will fit in my scanner. I scan as a ‘full color picture’ at 300 dpi.
NOTE: For larger scans (such as a full-page picture for the frontispiece or cover) I
perform two scans. The first scan covers the top half of the page, and the second is thebottom half. The two halves then have to be merged together as one in the drawing
program. There is plenty of overlap on the two so lining up the parts is relatively easy-
provided the scans share the same vertical orientation. If not, some fine-tuning onrotation will be required.
8/8/2019 080308 v4 How to Make a Comic Book
http://slidepdf.com/reader/full/080308-v4-how-to-make-a-comic-book 9/22
How to Make a Comic Book © Kevin Lane 2008
(on your home computer) Shades of Toad Productions
page 9 of 22
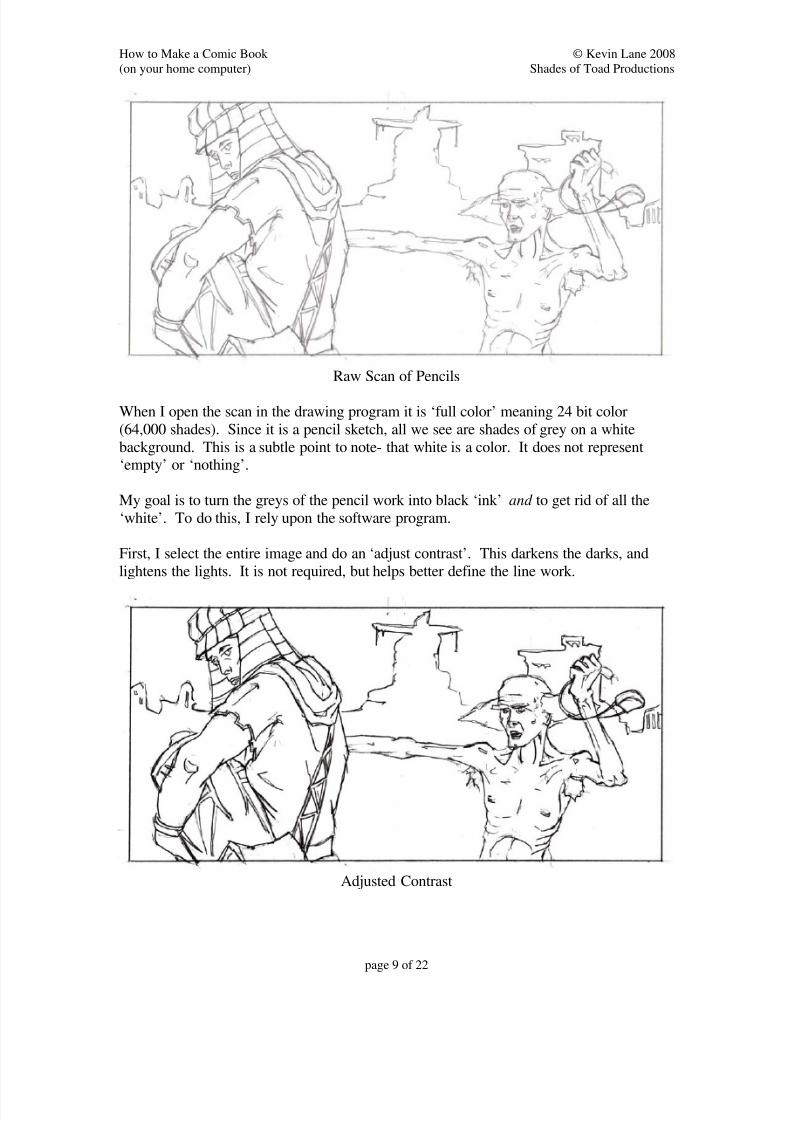
Raw Scan of Pencils
When I open the scan in the drawing program it is ‘full color’ meaning 24 bit color
(64,000 shades). Since it is a pencil sketch, all we see are shades of grey on a white
background. This is a subtle point to note- that white is a color. It does not represent‘empty’ or ‘nothing’.
My goal is to turn the greys of the pencil work into black ‘ink’ and to get rid of all the
‘white’. To do this, I rely upon the software program.
First, I select the entire image and do an ‘adjust contrast’. This darkens the darks, and
lightens the lights. It is not required, but helps better define the line work.
Adjusted Contrast
8/8/2019 080308 v4 How to Make a Comic Book
http://slidepdf.com/reader/full/080308-v4-how-to-make-a-comic-book 10/22
How to Make a Comic Book © Kevin Lane 2008
(on your home computer) Shades of Toad Productions
page 10 of 22
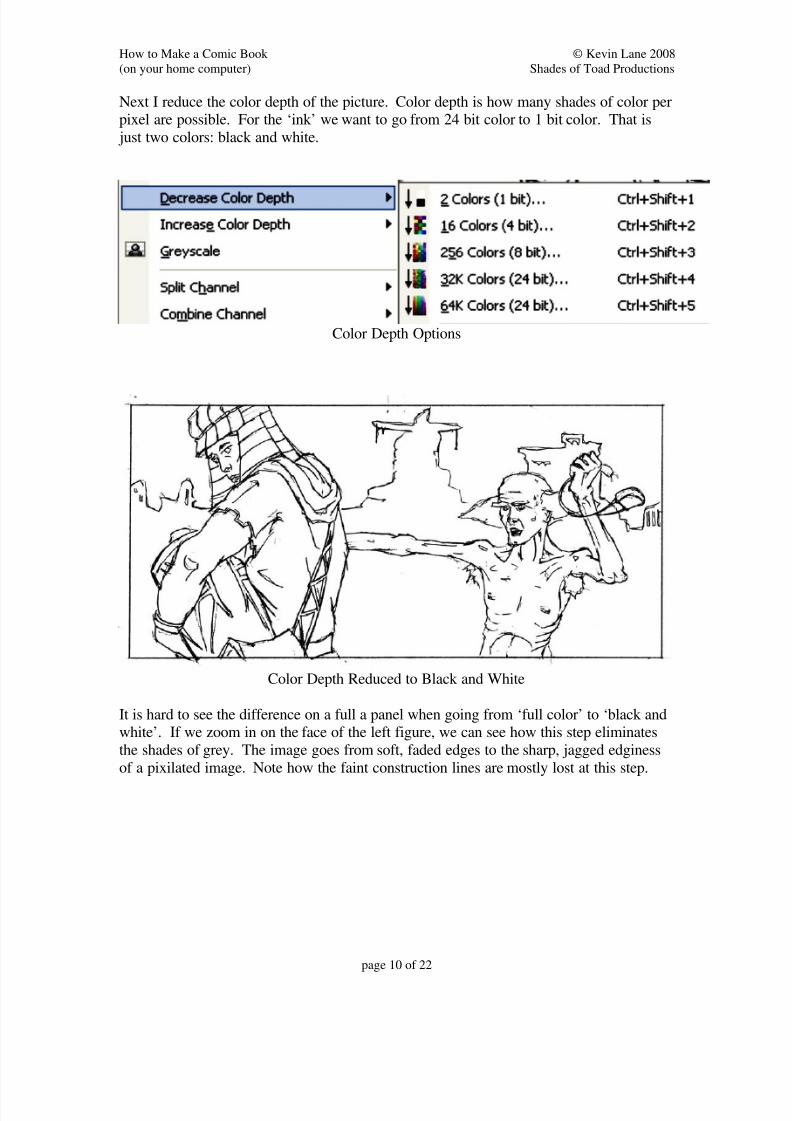
Next I reduce the color depth of the picture. Color depth is how many shades of color perpixel are possible. For the ‘ink’ we want to go from 24 bit color to 1 bit color. That is
just two colors: black and white.
Color Depth Options
Color Depth Reduced to Black and White
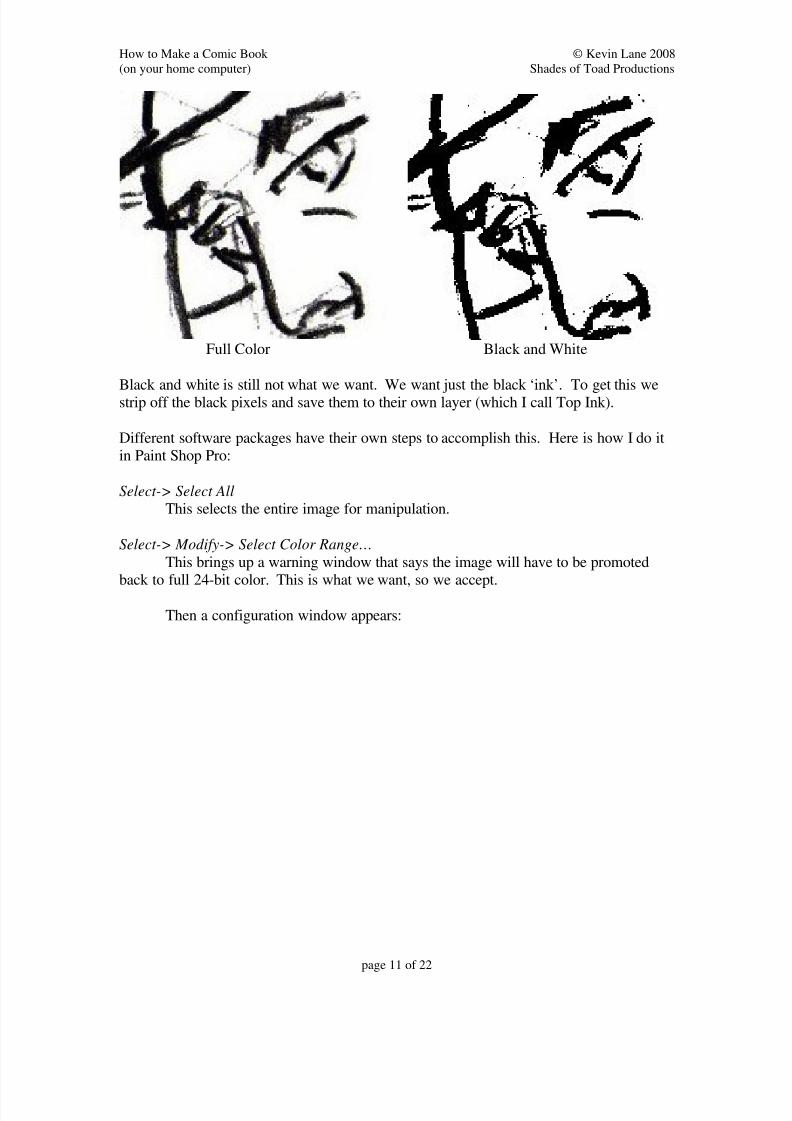
It is hard to see the difference on a full a panel when going from ‘full color’ to ‘black andwhite’. If we zoom in on the face of the left figure, we can see how this step eliminates
the shades of grey. The image goes from soft, faded edges to the sharp, jagged edginess
of a pixilated image. Note how the faint construction lines are mostly lost at this step.
8/8/2019 080308 v4 How to Make a Comic Book
http://slidepdf.com/reader/full/080308-v4-how-to-make-a-comic-book 11/22
How to Make a Comic Book © Kevin Lane 2008
(on your home computer) Shades of Toad Productions
page 11 of 22
Full Color Black and White
Black and white is still not what we want. We want just the black ‘ink’. To get this westrip off the black pixels and save them to their own layer (which I call Top Ink).
Different software packages have their own steps to accomplish this. Here is how I do itin Paint Shop Pro:
Select-> Select All
This selects the entire image for manipulation.
Select-> Modify-> Select Color Range…
This brings up a warning window that says the image will have to be promotedback to full 24-bit color. This is what we want, so we accept.
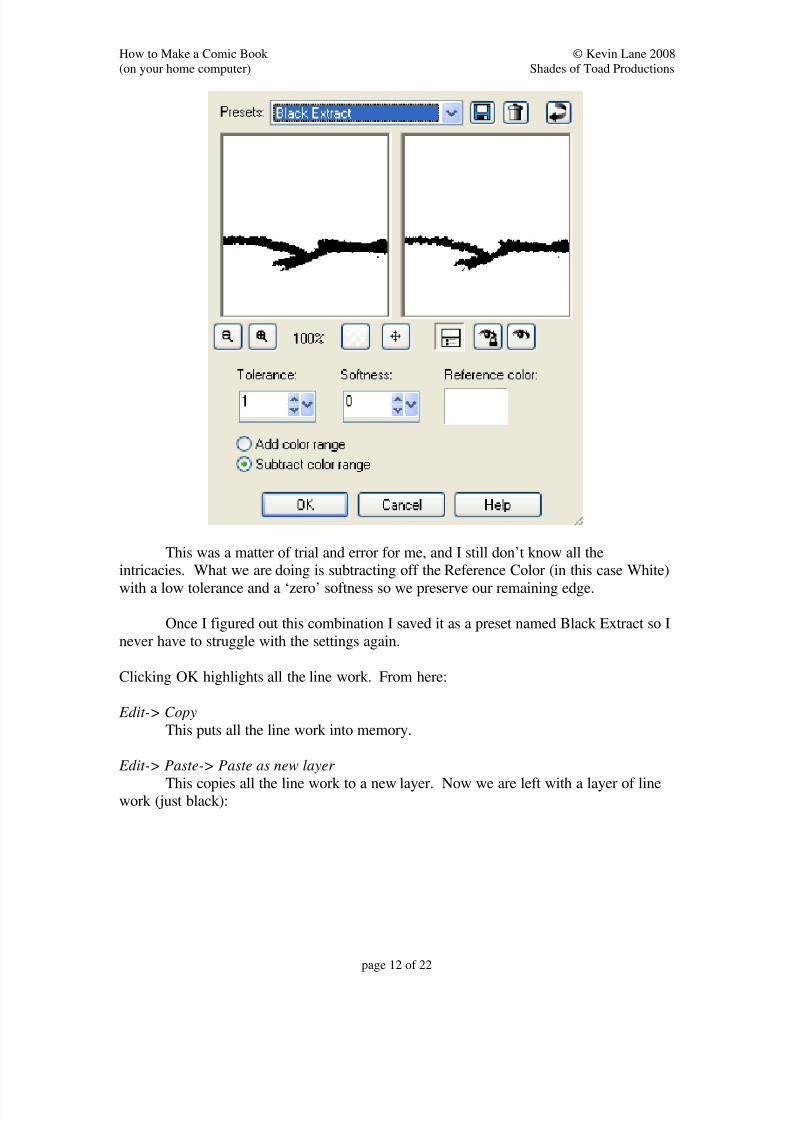
Then a configuration window appears:
8/8/2019 080308 v4 How to Make a Comic Book
http://slidepdf.com/reader/full/080308-v4-how-to-make-a-comic-book 12/22
How to Make a Comic Book © Kevin Lane 2008
(on your home computer) Shades of Toad Productions
page 12 of 22
This was a matter of trial and error for me, and I still don’t know all theintricacies. What we are doing is subtracting off the Reference Color (in this case White)
with a low tolerance and a ‘zero’ softness so we preserve our remaining edge.
Once I figured out this combination I saved it as a preset named Black Extract so I
never have to struggle with the settings again.
Clicking OK highlights all the line work. From here:
Edit-> Copy
This puts all the line work into memory.
Edit-> Paste-> Paste as new layer
This copies all the line work to a new layer. Now we are left with a layer of linework (just black):
8/8/2019 080308 v4 How to Make a Comic Book
http://slidepdf.com/reader/full/080308-v4-how-to-make-a-comic-book 13/22
How to Make a Comic Book © Kevin Lane 2008
(on your home computer) Shades of Toad Productions
page 13 of 22
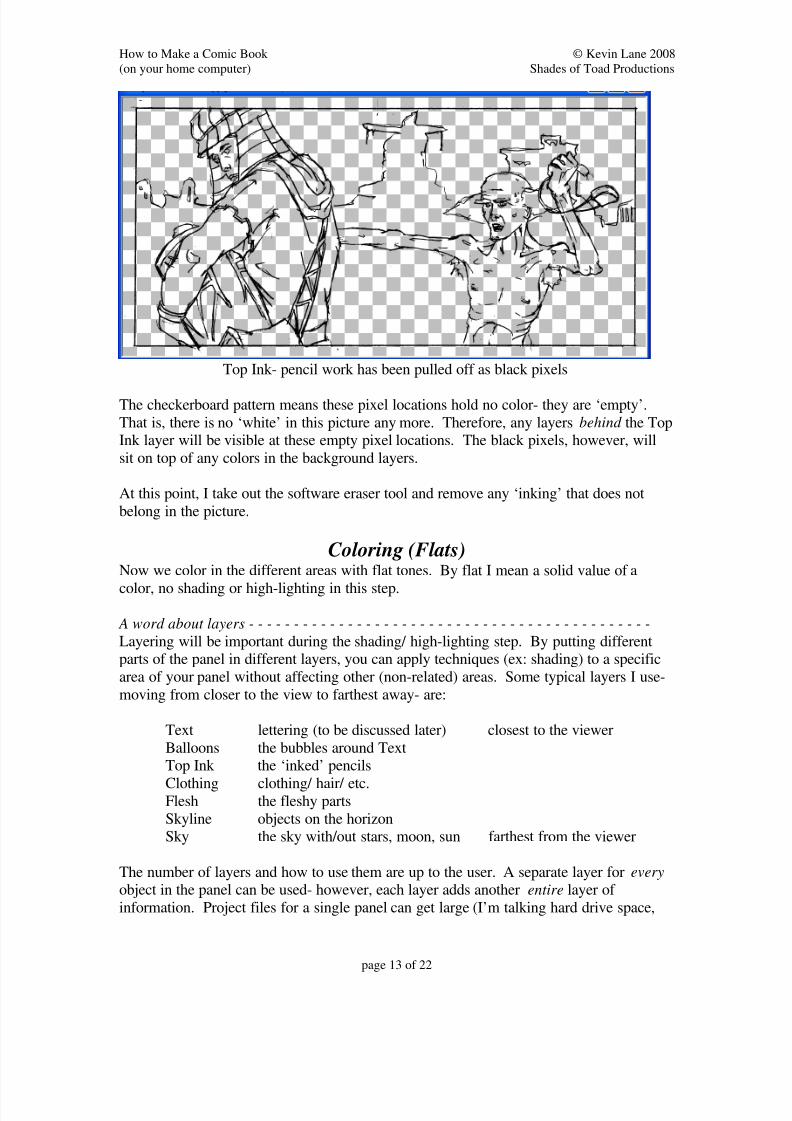
Top Ink- pencil work has been pulled off as black pixels
The checkerboard pattern means these pixel locations hold no color- they are ‘empty’.
That is, there is no ‘white’ in this picture any more. Therefore, any layers behind the TopInk layer will be visible at these empty pixel locations. The black pixels, however, will
sit on top of any colors in the background layers.
At this point, I take out the software eraser tool and remove any ‘inking’ that does not
belong in the picture.
Coloring (Flats)Now we color in the different areas with flat tones. By flat I mean a solid value of a
color, no shading or high-lighting in this step.
A word about layers - - - - - - - - - - - - - - - - - - - - - - - - - - - - - - - - - - - - - - - - - - - - -
Layering will be important during the shading/ high-lighting step. By putting differentparts of the panel in different layers, you can apply techniques (ex: shading) to a specific
area of your panel without affecting other (non-related) areas. Some typical layers I use-
moving from closer to the view to farthest away- are:
Text lettering (to be discussed later) closest to the viewer
Balloons the bubbles around TextTop Ink the ‘inked’ pencils
Clothing clothing/ hair/ etc.Flesh the fleshy parts
Skyline objects on the horizonSky the sky with/out stars, moon, sun farthest from the viewer
The number of layers and how to use them are up to the user. A separate layer for every object in the panel can be used- however, each layer adds another entire layer of
information. Project files for a single panel can get large (I’m talking hard drive space,
8/8/2019 080308 v4 How to Make a Comic Book
http://slidepdf.com/reader/full/080308-v4-how-to-make-a-comic-book 14/22
How to Make a Comic Book © Kevin Lane 2008
(on your home computer) Shades of Toad Productions
page 14 of 22
100’s of Mega-byes) pretty quick if dozens of layers are added. Ten layers should bemore than enough for most panels.
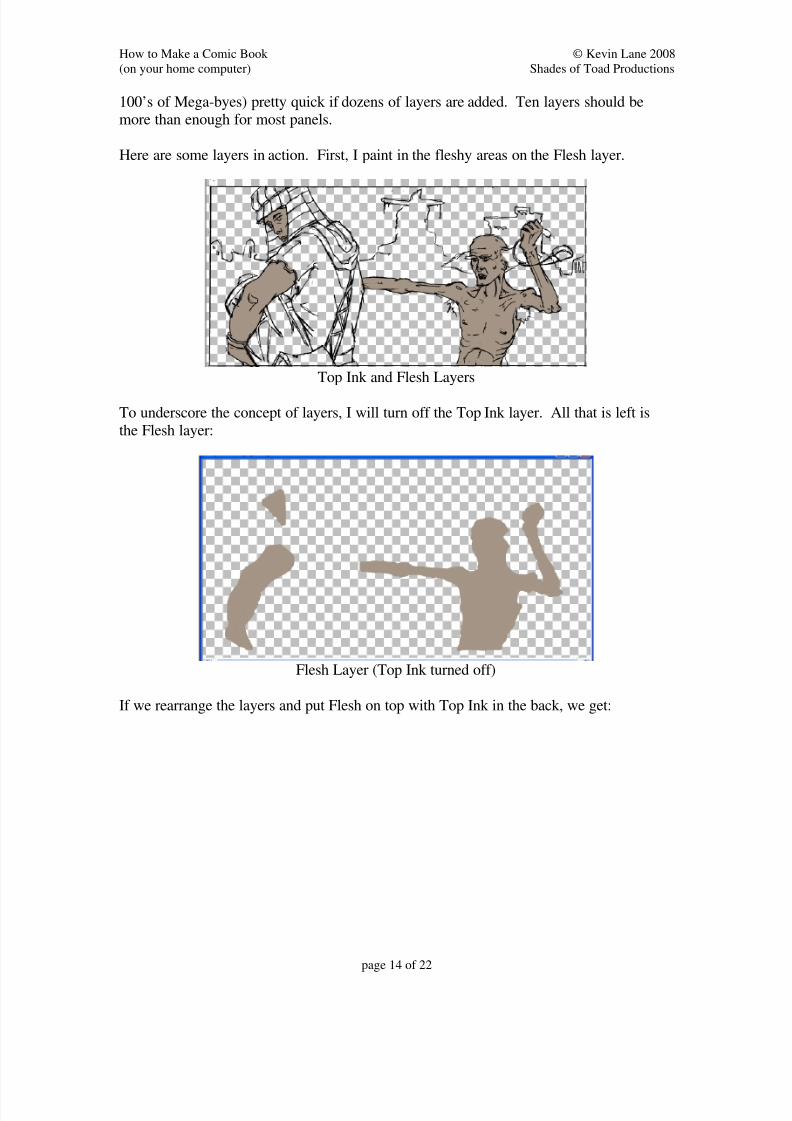
Here are some layers in action. First, I paint in the fleshy areas on the Flesh layer.
Top Ink and Flesh Layers
To underscore the concept of layers, I will turn off the Top Ink layer. All that is left is
the Flesh layer:
Flesh Layer (Top Ink turned off)
If we rearrange the layers and put Flesh on top with Top Ink in the back, we get:

8/8/2019 080308 v4 How to Make a Comic Book
http://slidepdf.com/reader/full/080308-v4-how-to-make-a-comic-book 15/22
How to Make a Comic Book © Kevin Lane 2008
(on your home computer) Shades of Toad Productions
page 15 of 22
Flesh layer on top, Top Ink in the back
Hopefully, the layer concept is clear at this point. Let us proceed with coloring…
Clothing (and hair) layer: This layer sits on top of the Flesh layer, but beneath the Top
Ink layer. Notice how the eyebrows of the figure on the right are on top of the fleshcolor. There was no need to carefully color the flesh layer around these eyebrows. The
entire skull is a solid flesh color, and the eyebrows sit on top. The same situation isevident on the left figure’s wristband. The flesh underneath is not seen, so its tidiness is
not crucial.
Clothing (and Hair) Layer
The lesson here is: areas on layers that are covered by other layers do not need to be
meticulous- or even filled in! One way to save time.
Coloring (Shading)After filling in a complete panel with ‘flats’ we start shading/ highlighting. Different
drawing programs will offer different shading/ highlighting tools. In this application, anadjustable-size drawing tool lightens/ darkens as you swipe over existing color.
Although not required, I have turned off the other colored layers to show the Flesh and
Top Ink layers. All the shading is done on the Flesh layer, so the Top Ink is not affected.
8/8/2019 080308 v4 How to Make a Comic Book
http://slidepdf.com/reader/full/080308-v4-how-to-make-a-comic-book 16/22
How to Make a Comic Book © Kevin Lane 2008
(on your home computer) Shades of Toad Productions
page 16 of 22
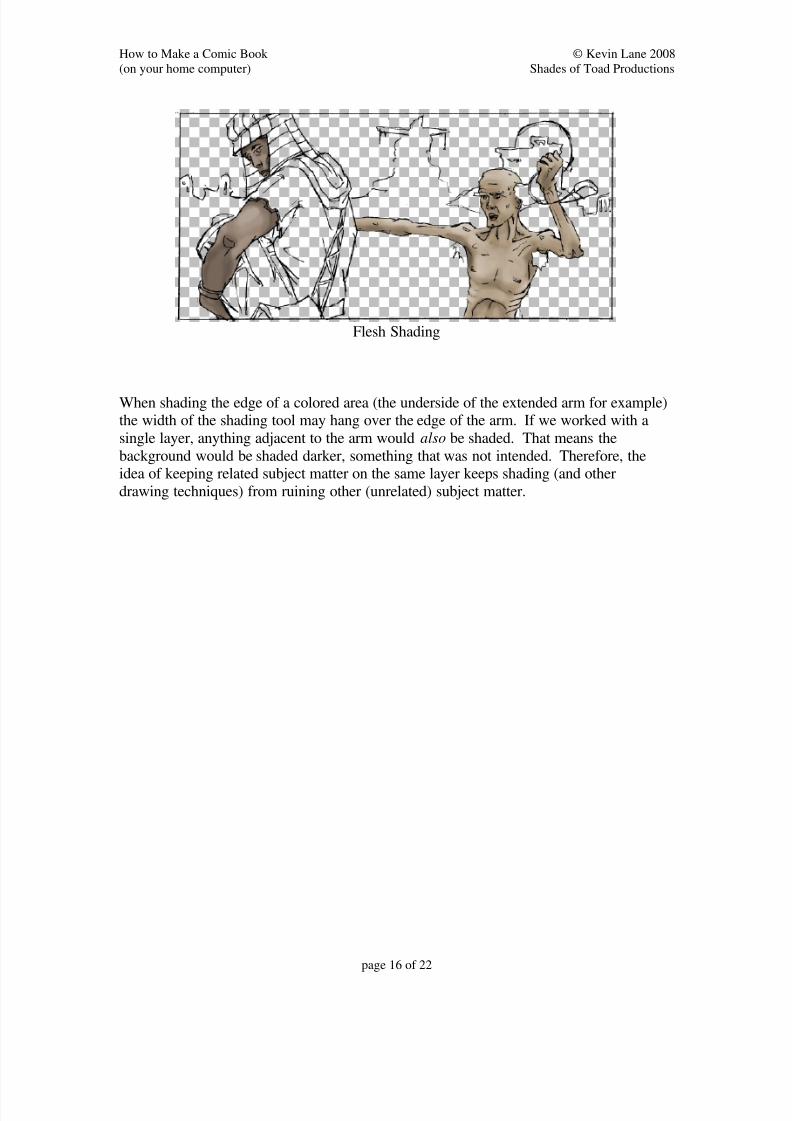
Flesh Shading
When shading the edge of a colored area (the underside of the extended arm for example)the width of the shading tool may hang over the edge of the arm. If we worked with a
single layer, anything adjacent to the arm would also be shaded. That means the
background would be shaded darker, something that was not intended. Therefore, theidea of keeping related subject matter on the same layer keeps shading (and other
drawing techniques) from ruining other (unrelated) subject matter.
8/8/2019 080308 v4 How to Make a Comic Book
http://slidepdf.com/reader/full/080308-v4-how-to-make-a-comic-book 17/22
How to Make a Comic Book © Kevin Lane 2008
(on your home computer) Shades of Toad Productions
page 17 of 22
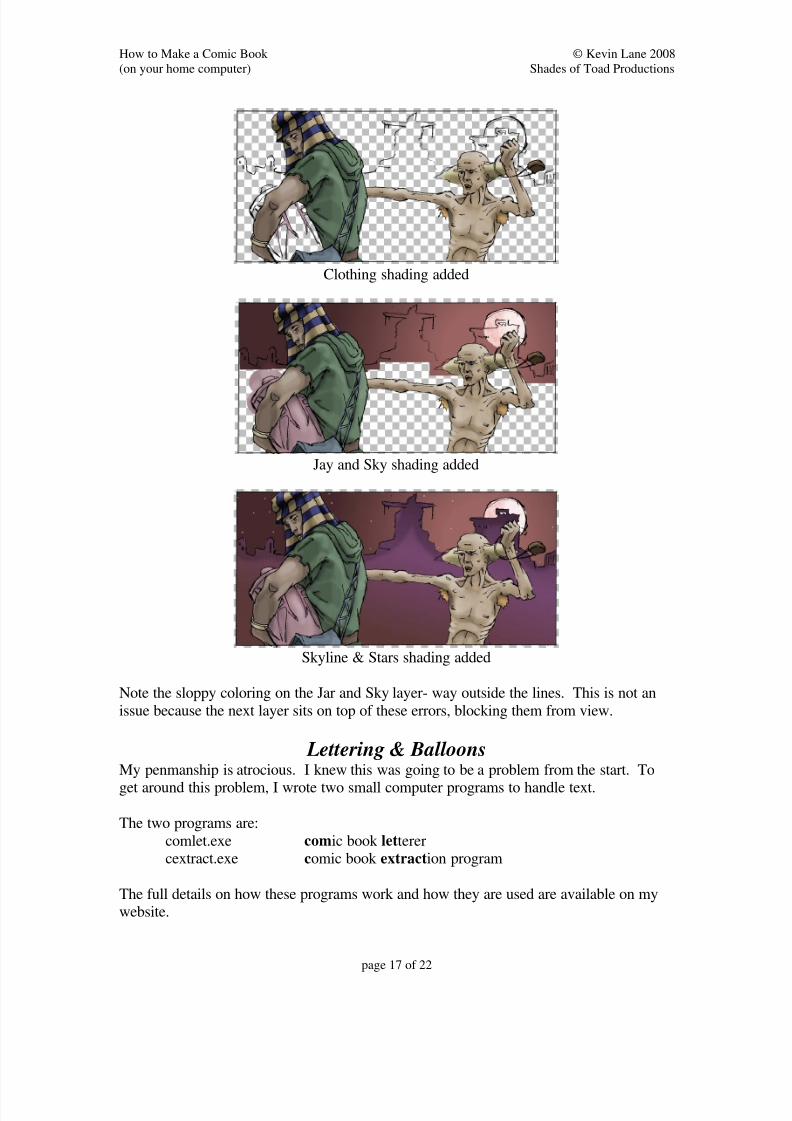
Clothing shading added
Jay and Sky shading added
Skyline & Stars shading added
Note the sloppy coloring on the Jar and Sky layer- way outside the lines. This is not an
issue because the next layer sits on top of these errors, blocking them from view.
Lettering & BalloonsMy penmanship is atrocious. I knew this was going to be a problem from the start. To
get around this problem, I wrote two small computer programs to handle text.
The two programs are:
comlet.exe comic book letterercextract.exe comic book extraction program
The full details on how these programs work and how they are used are available on mywebsite.

8/8/2019 080308 v4 How to Make a Comic Book
http://slidepdf.com/reader/full/080308-v4-how-to-make-a-comic-book 18/22
How to Make a Comic Book © Kevin Lane 2008
(on your home computer) Shades of Toad Productions
page 18 of 22
http://www.shadesoftoad.net/sot_comics/sot_comics.html
For this discussion I will provide a brief overview of their uses.
comlet.exeTo use this program I write the desired verbiage to a generic text file. comlete.exe readsthat file and then uses a look-up ‘font file’ to create a bitmap (.BMP) of the letters
required. Then I open this bitmap file and copy/ paste the ‘lettered’ text into the comic
book panel.
The nice thing about this program is any a variety of fonts can be used for the look-up
font file. I use different fonts for different characters to give them ‘accents’.
The look-up font file is a text file that can be modified by hand (i.e. no special viewer
program required.) However, these files are large and edits can be tedious. To get
around manual edits, I created:
cextract.exe
This program turns handwritten letters into the look-up ‘font file’ format. I scrawl a
desired font in ink, scan it into the PC as a bitmap (.BMP) file, and cextract.exe does therest.
That said, putting lettering into a panel requires two layers: one for the text, and one forthe balloons (or boxes) to hold the text. These two layers sit on top of the Top Ink layer-
otherwise the ink lines would obscure the dialogue.
Text and Balloon layers added
Typically, I place the text first, and then draw the balloons in after I have the lettering
where it flows best.
For the balloons, I draw the full balloon size in some color, say blue. When I have it
sized properly, I draw the white interior. This leaves a uniform outer edge of blue. A
simple flood fill turns the blue to black.
8/8/2019 080308 v4 How to Make a Comic Book
http://slidepdf.com/reader/full/080308-v4-how-to-make-a-comic-book 19/22
How to Make a Comic Book © Kevin Lane 2008
(on your home computer) Shades of Toad Productions
page 19 of 22
The reason I do not start with black in the first place is because the text is black as well.It is difficult to size the balloons when the text is not visible. (Black on black is hard to
see.)
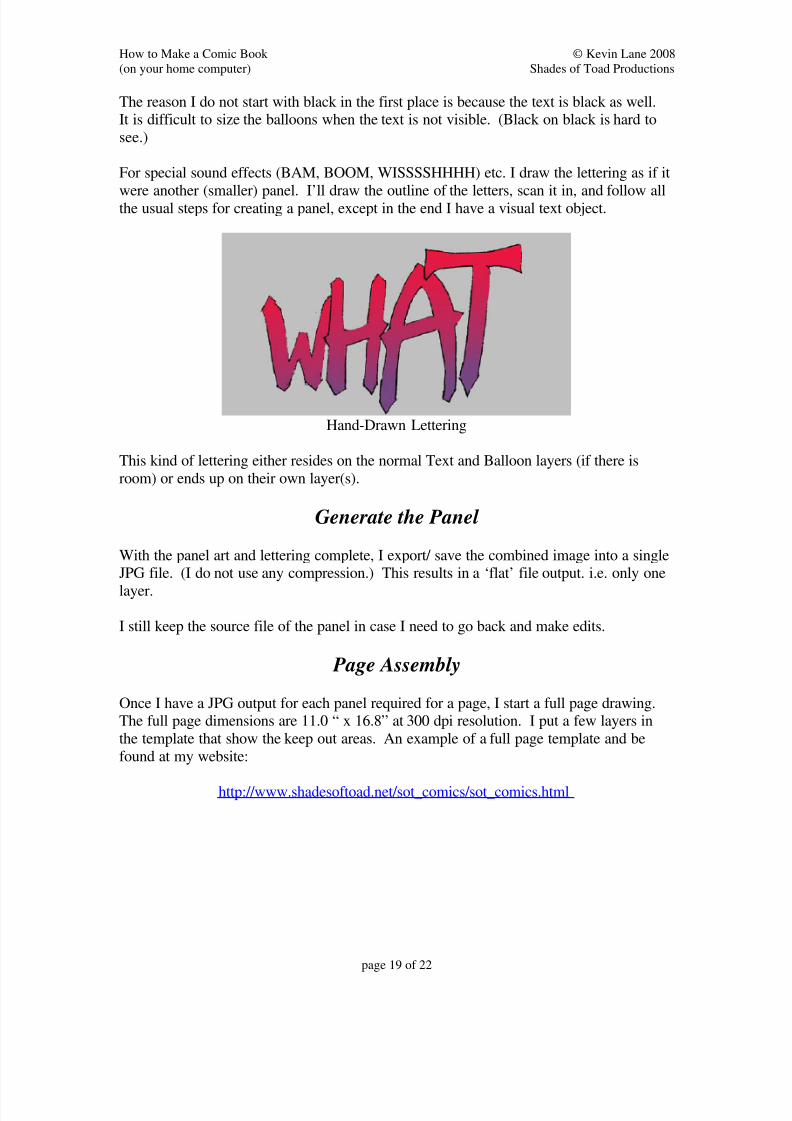
For special sound effects (BAM, BOOM, WISSSSHHHH) etc. I draw the lettering as if it
were another (smaller) panel. I’ll draw the outline of the letters, scan it in, and follow allthe usual steps for creating a panel, except in the end I have a visual text object.
Hand-Drawn Lettering
This kind of lettering either resides on the normal Text and Balloon layers (if there is
room) or ends up on their own layer(s).
Generate the Panel
With the panel art and lettering complete, I export/ save the combined image into a singleJPG file. (I do not use any compression.) This results in a ‘flat’ file output. i.e. only one
layer.
I still keep the source file of the panel in case I need to go back and make edits.
Page Assembly
Once I have a JPG output for each panel required for a page, I start a full page drawing.The full page dimensions are 11.0 “ x 16.8” at 300 dpi resolution. I put a few layers in
the template that show the keep out areas. An example of a full page template and be
found at my website:
http://www.shadesoftoad.net/sot_comics/sot_comics.html

8/8/2019 080308 v4 How to Make a Comic Book
http://slidepdf.com/reader/full/080308-v4-how-to-make-a-comic-book 20/22
How to Make a Comic Book © Kevin Lane 2008
(on your home computer) Shades of Toad Productions
page 20 of 22
Comic Book Full Page with Keep-Out Areas Marked
The outer reddish edge is the ‘bleed area’ which gets trimmed off during the printing
process. This is 1/8” (or 37 pixels) wide.
The yellow and blue areas frame the ‘live area’. Text for the comic book title (Shades of
Toad Presents) and the page number (21 in this example) are outside the ‘live’ area, butwithin the ‘bleed’ area, which works out fine. These dimensions are 9.6” by 14.4” (as
mentioned earlier).
The thin red crosshair lines help to center the page header/ footers. These text fields are
from the software application, not the font generation programs I have written. But
there’s no reason not to use home-grown font for these entries as well.
Each panel JPG is copied to the page as a separate layer to facilitate ease of placement.

8/8/2019 080308 v4 How to Make a Comic Book
http://slidepdf.com/reader/full/080308-v4-how-to-make-a-comic-book 21/22
How to Make a Comic Book © Kevin Lane 2008
(on your home computer) Shades of Toad Productions
page 21 of 22
Individual Panels with Keep-Out Areas Shown
Note how the panels line up inside the keep-out areas. Artwork does not have to stay
inside this area. However, variations in printing processes will result in a varying degreeof cropped artwork that lies outside this area.
Turning off these guides results in the final page:

8/8/2019 080308 v4 How to Make a Comic Book
http://slidepdf.com/reader/full/080308-v4-how-to-make-a-comic-book 22/22
How to Make a Comic Book © Kevin Lane 2008
(on your home computer) Shades of Toad Productions
The Final Page
Once the final page is set, it too is exported as a single flat file (one layer).
Pulling it All Together
I re-size all the comic book pages by 0.625 to get the final comic book dimensions. Thisis done in the drawing package.
Most drawing packages offer a variety of output formats (JPG, BMP, TIF, etc.), as wellas color capture schemes (RGB, CYMK, etc.) Ultimately, it is your printer who you will
have to appease in these details.
Afterthought
I just realized I lied. The line work on the cover of the comic book was done with pen
and ink, not pencil. Other than that, everything in Daughter of the Spider God was
created using the techniques listed in this document.