1 understanding hardware profiles a hardware profile stores configuration settings for a set of...
TRANSCRIPT

1
Understanding Hardware Profiles
• A hardware profile stores configuration settings for a set of devices and services.
• Microsoft Windows 2000 can store multiple hardware profiles.

2
Creating or Modifying a Hardware Profile

3
Activating a Hardware Profile
• Windows 2000 prompts the user to select a profile during startup.
• If no profile is selected, the default profile is used.
• If there is only one profile, it is automatically used.
• The time delay can be set to 0 to automatically use the default profile.
• To override the default profile, press the Spacebar during the system prompt.

4
Viewing Hardware Profiles Properties
• Display the Available Hardware Profiles list.
• Select a profile, and click Properties.
• This Is A Portable Computer check box is selected if Windows 2000 identifies your computer as a portable unit.

5
Setting Display Properties

6
Using Multiple Displays

7
Performance Options

8
Virtual Memory Manager
9
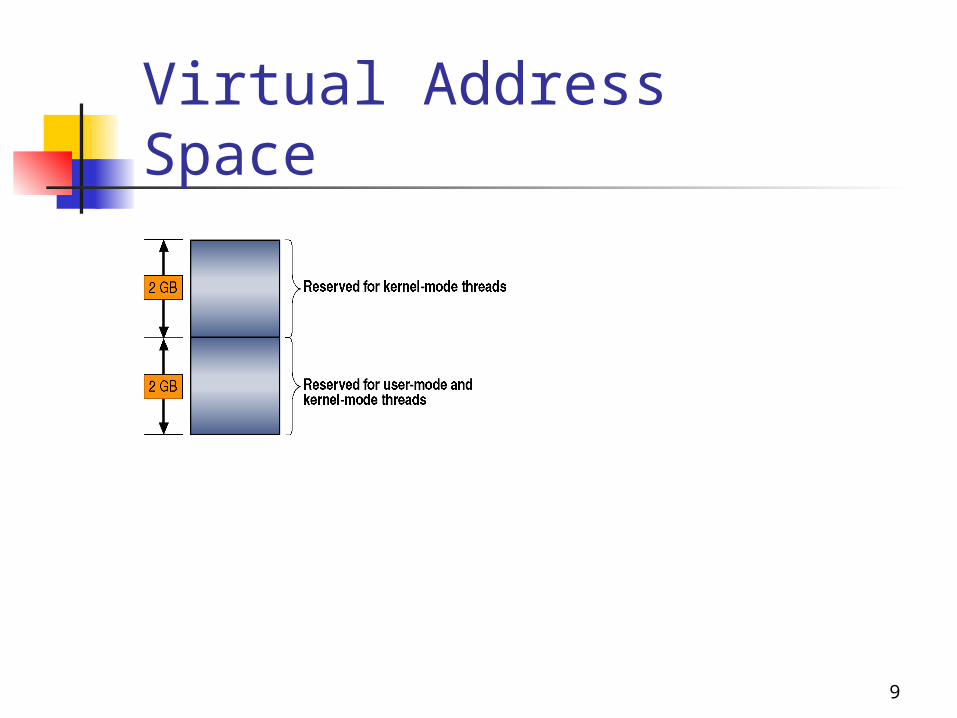
Virtual Address Space

10
Paging

11
Paging File Size

12
Virtual Memory Warning

13
Registry Size

14
Enhancing Performance
• Create a paging file for each hard disk.
• Move the paging file off the drive containing the Windows 2000 systemroot folder.
• Note: When you install Windows 2000, Setup creates the virtual memory paging file, Pagefile.sys, on the partition (volume) where you installed Windows 2000.
• Set the paging file’s initial size to the Maximum Size value.

15
Environment Variables

16
Startup and Recovery Settings

17
Installing Plug and Play Hardware
• Windows 2000 automatically detects and configures most Plug and Play devices.
• Use the Add/Remove Hardware wizard to initiate automatic installation.
18
Installing Non–Plug and Play Hardware
• Windows 2000 automatically detects and configures many Non–Plug and Play devices.
• Use the Add/Remove Hardware wizard to initiate automatic installation.

19
Add/Remove Hardware Wizard
• The Add/Remove Hardware wizard is located in Control Panel.
• Click Next to close the Welcome page.
• Select Add/Troubleshoot A Device, and click Next.
• The wizard searches for new devices.

20
Choose A Hardware Device Page

21
Confirming Hardware Installation

22
Installing Hardware Manually
• Determine which hardware resources are required.
• Determine the available hardware resources.
• Change hardware resource assignments.
Determining Which Hardware Resources Are Required
• Interrupts
• I/O ports
• Direct Memory Access (DMA)
• Memory
04/18/23 18:02 Windows 2000 Professional / Chapter 4 23

24
Determining the Available Hardware Resources

25
Changing Hardware Resource Assignments
• Use Device Manager.
• Print the contents of Device Manager.
• Device Manager does not change the resources used by a non–Plug and Play device.
• Device Manager changes the device configuration for the operating system.
Configuring and Trouble-shooting the Desktop Environment
• Use the Regional Options icon in Control Panel to Configure Multiple Languages and Multiple Locations.
• Use the Accessibility Options icon in Control Panel to configure Accessibility Options.
• Use icons in Control Panel such as the FAX icon, the Internet Options icon, and the Phone and Modem Options icon to Configure Additional Desktop Settings.
04/18/23 18:02 Windows 2000 Professional / Chapter 4 26