11 ad hoc reporting
TRANSCRIPT
The Compliance Assistant User Guide Ad Hoc Reporting
11-1
11 Ad Hoc Reporting This chapter includes information regarding customized reports that users can create using data entered into the CA program, including: • Explanation of Ad Hoc Reporting • Accessing Ad Hoc Reporting • List Screen • Creating a New Ad Hoc Report • Running an Ad Hoc Report from the List Screen • Editing an Existing Ad Hoc Report • Using the "Save As" Option • Deleting an Ad Hoc Report • Helpful Hints
Explanation of Ad Hoc Reporting o The Ad Hoc Reporting section allows users to create and customize reports using the data
items in the CA program. Because there are so many data items in the CA program, the data needs to be organized into different database tables. Each category is an alias for a database table within the program. The categories are comprised of fields from the database and some special fields, which can be two fields combined together (e.g., "SA General - Name" is first name and last name) or a result of a database procedure (e.g., "SA Award – Revenue Dist. Amount").
o The ad hoc reporting feature provides a user the ability to generate reports on many of the
data items contained in the categories. o There is a list of tables and fields within the CA program provided as a supplement to the
CA User Guide. The list will assist users with identifying the tables in the program along with the names of each data item within the categories.
o There are sample ad hoc reports posted on the CA website at NCAA.org as a supplement to
the CA User Guide.
The Compliance Assistant User Guide Ad Hoc Reporting
11-2
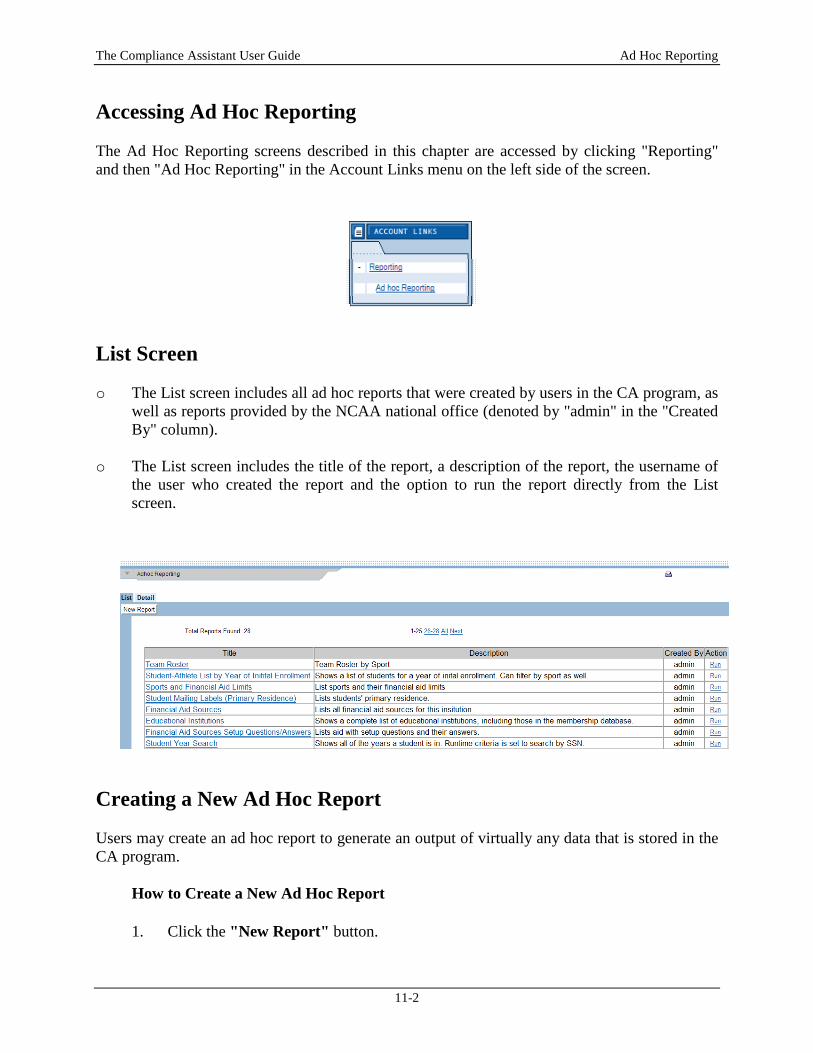
Accessing Ad Hoc Reporting
The Ad Hoc Reporting screens described in this chapter are accessed by clicking "Reporting" and then "Ad Hoc Reporting" in the Account Links menu on the left side of the screen.
List Screen
o The List screen includes all ad hoc reports that were created by users in the CA program, as
well as reports provided by the NCAA national office (denoted by "admin" in the "Created By" column).
o The List screen includes the title of the report, a description of the report, the username of
the user who created the report and the option to run the report directly from the List screen.
Creating a New Ad Hoc Report Users may create an ad hoc report to generate an output of virtually any data that is stored in the CA program.
How to Create a New Ad Hoc Report
1. Click the "New Report" button.
The Compliance Assistant User Guide Ad Hoc Reporting
11-3
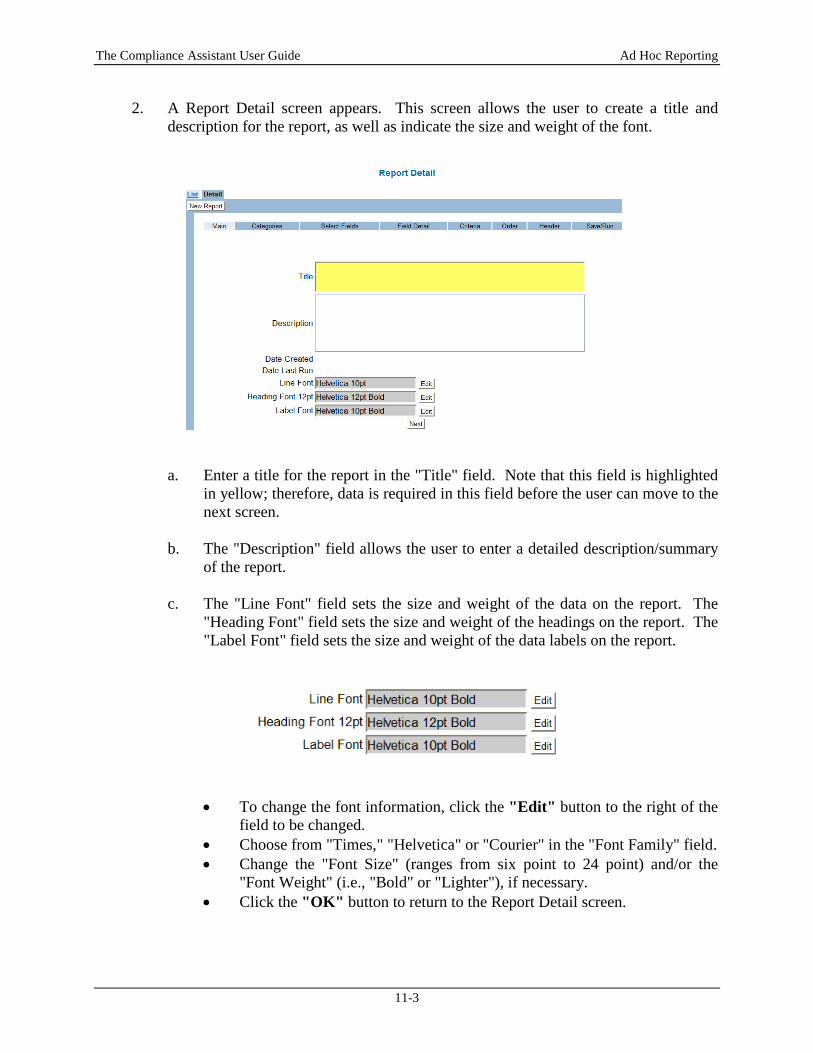
2. A Report Detail screen appears. This screen allows the user to create a title and description for the report, as well as indicate the size and weight of the font.
a. Enter a title for the report in the "Title" field. Note that this field is highlighted in yellow; therefore, data is required in this field before the user can move to the next screen.
b. The "Description" field allows the user to enter a detailed description/summary
of the report. c. The "Line Font" field sets the size and weight of the data on the report. The
"Heading Font" field sets the size and weight of the headings on the report. The "Label Font" field sets the size and weight of the data labels on the report.
• To change the font information, click the "Edit" button to the right of the field to be changed.
• Choose from "Times," "Helvetica" or "Courier" in the "Font Family" field. • Change the "Font Size" (ranges from six point to 24 point) and/or the
"Font Weight" (i.e., "Bold" or "Lighter"), if necessary. • Click the "OK" button to return to the Report Detail screen.
The Compliance Assistant User Guide Ad Hoc Reporting
11-4
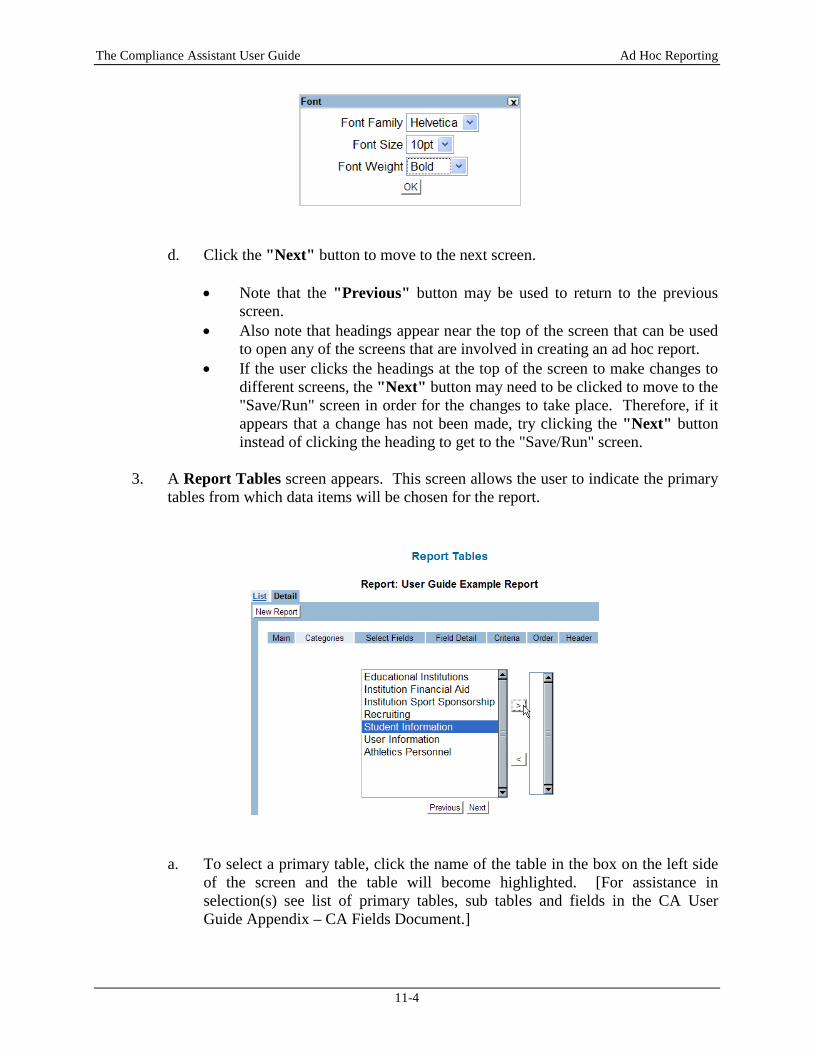
d. Click the "Next" button to move to the next screen.
• Note that the "Previous" button may be used to return to the previous screen.
• Also note that headings appear near the top of the screen that can be used to open any of the screens that are involved in creating an ad hoc report.
• If the user clicks the headings at the top of the screen to make changes to different screens, the "Next" button may need to be clicked to move to the "Save/Run" screen in order for the changes to take place. Therefore, if it appears that a change has not been made, try clicking the "Next" button instead of clicking the heading to get to the "Save/Run" screen.
3. A Report Tables screen appears. This screen allows the user to indicate the primary
tables from which data items will be chosen for the report.
a. To select a primary table, click the name of the table in the box on the left side of the screen and the table will become highlighted. [For assistance in selection(s) see list of primary tables, sub tables and fields in the CA User Guide Appendix – CA Fields Document.]

The Compliance Assistant User Guide Ad Hoc Reporting
11-5
b. Click the "Forward" (right) arrow button between the boxes to move the table to the box on the right side of the screen. Data items from tables added to the box on the right side will be available to add to the ad hoc report.
c. If a primary table is incorrectly selected and actually should not be on the report, the table can be moved back to the box on the left side of the screen by highlighting the table name and clicking the "Back" (left) arrow button between the boxes.
d. Once a primary table is selected (only one primary table may be selected per report), the screen will refresh and the sub tables of the primary table will appear in the box on the left side of the screen.
e. To select sub tables, click the name of a sub table in the box on the left side of
the screen and the table will become highlighted. f. Click the "Forward" (right) arrow button between the boxes to move the table
to the box on the right side of the screen.
g. To select another sub table, repeat these steps.

The Compliance Assistant User Guide Ad Hoc Reporting
11-6
• Note that more than one sub table may be selected on a report. • If creating a report with student-athlete data, the "Student Information"
table will be the primary table. • Adding the "Student Years" sub table to a report will provide other tables
that are not seen when only the "Student Information" table is selected (e.g., "SA Sport," "SA Aid Award," "SA Continuing Eligibility"). These tables contain information that is different for a student-athlete in each academic year.
• Note that the "Student Years" sub table contains a data item called "SA Years – Sport Aid Counts." This field should be used on a report when a student-athlete's name should only appear for the sport in which his or her aid counts (e.g., when running a report containing financial aid information). If this field is used, the "SA Sport" table should not be on the report or it will cause names to be listed more than one time. See the Report Filter section for more information on how to prevent names from appearing multiple times.
h. Once all the sub tables needed are selected click the "Next" button.
4. A Report Fields – Selection screen appears. This screen allows the user to choose the
data items (from the previously selected tables) to appear on the ad hoc report.
a. The "Available Fields" box on the left side of the screen contains the data items available in the selected sub tables that were chosen for the report. The "Selected Fields" box on the right side of the screen contains the data items that will appear on the report.
The Compliance Assistant User Guide Ad Hoc Reporting
11-7
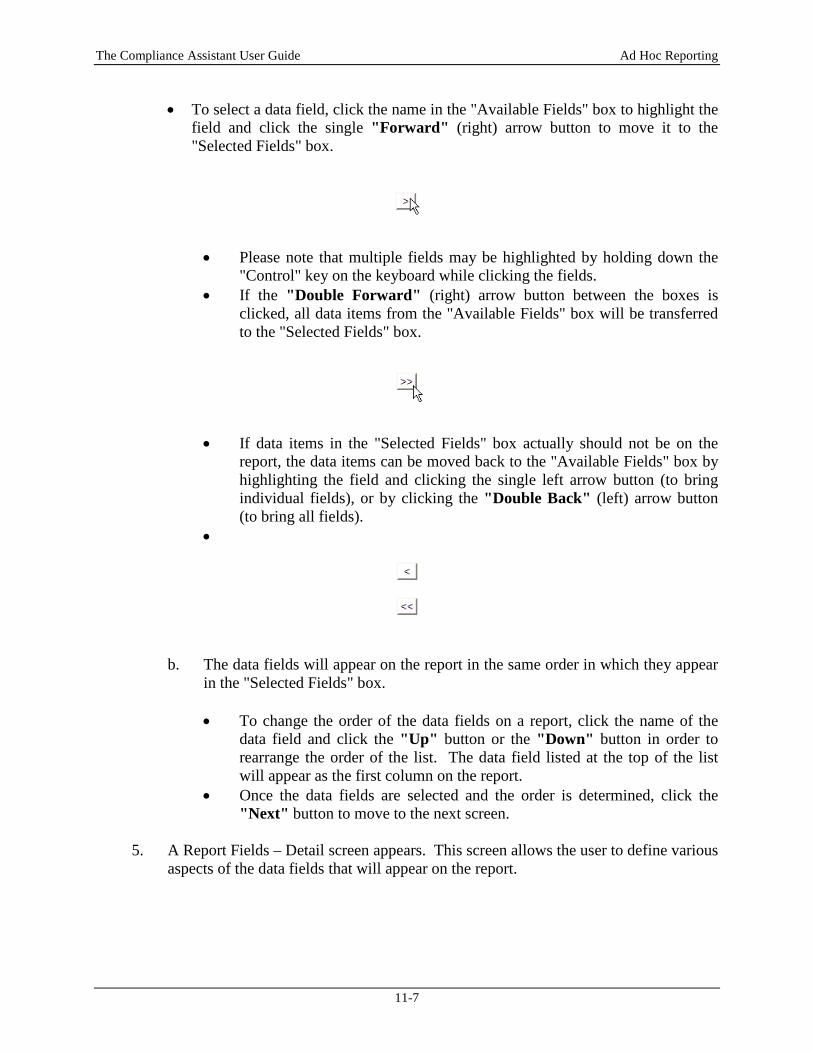
• To select a data field, click the name in the "Available Fields" box to highlight the field and click the single "Forward" (right) arrow button to move it to the "Selected Fields" box.
• Please note that multiple fields may be highlighted by holding down the "Control" key on the keyboard while clicking the fields.
• If the "Double Forward" (right) arrow button between the boxes is clicked, all data items from the "Available Fields" box will be transferred to the "Selected Fields" box.
• If data items in the "Selected Fields" box actually should not be on the report, the data items can be moved back to the "Available Fields" box by highlighting the field and clicking the single left arrow button (to bring individual fields), or by clicking the "Double Back" (left) arrow button (to bring all fields).
•
b. The data fields will appear on the report in the same order in which they appear in the "Selected Fields" box.
• To change the order of the data fields on a report, click the name of the
data field and click the "Up" button or the "Down" button in order to rearrange the order of the list. The data field listed at the top of the list will appear as the first column on the report.
• Once the data fields are selected and the order is determined, click the "Next" button to move to the next screen.
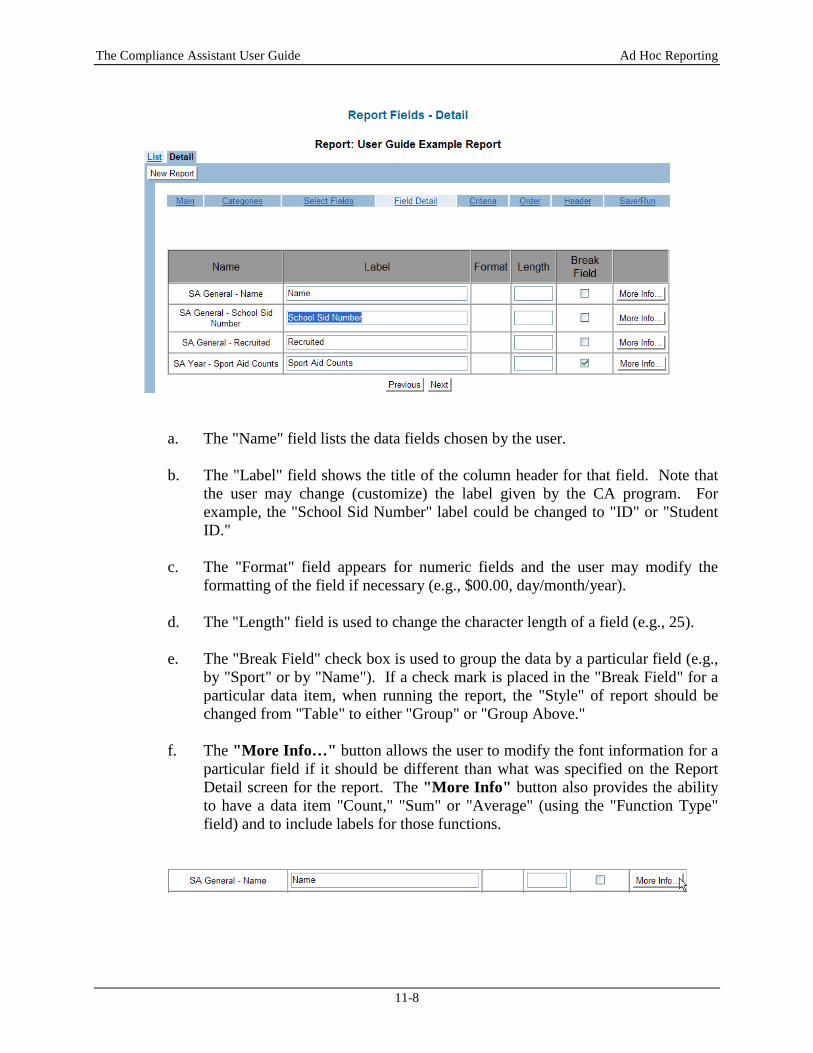
5. A Report Fields – Detail screen appears. This screen allows the user to define various
aspects of the data fields that will appear on the report.
The Compliance Assistant User Guide Ad Hoc Reporting
11-8
a. The "Name" field lists the data fields chosen by the user. b. The "Label" field shows the title of the column header for that field. Note that
the user may change (customize) the label given by the CA program. For example, the "School Sid Number" label could be changed to "ID" or "Student ID."
c. The "Format" field appears for numeric fields and the user may modify the
formatting of the field if necessary (e.g., $00.00, day/month/year). d. The "Length" field is used to change the character length of a field (e.g., 25). e. The "Break Field" check box is used to group the data by a particular field (e.g.,
by "Sport" or by "Name"). If a check mark is placed in the "Break Field" for a particular data item, when running the report, the "Style" of report should be changed from "Table" to either "Group" or "Group Above."
f. The "More Info…" button allows the user to modify the font information for a
particular field if it should be different than what was specified on the Report Detail screen for the report. The "More Info" button also provides the ability to have a data item "Count," "Sum" or "Average" (using the "Function Type" field) and to include labels for those functions.
The Compliance Assistant User Guide Ad Hoc Reporting
11-9
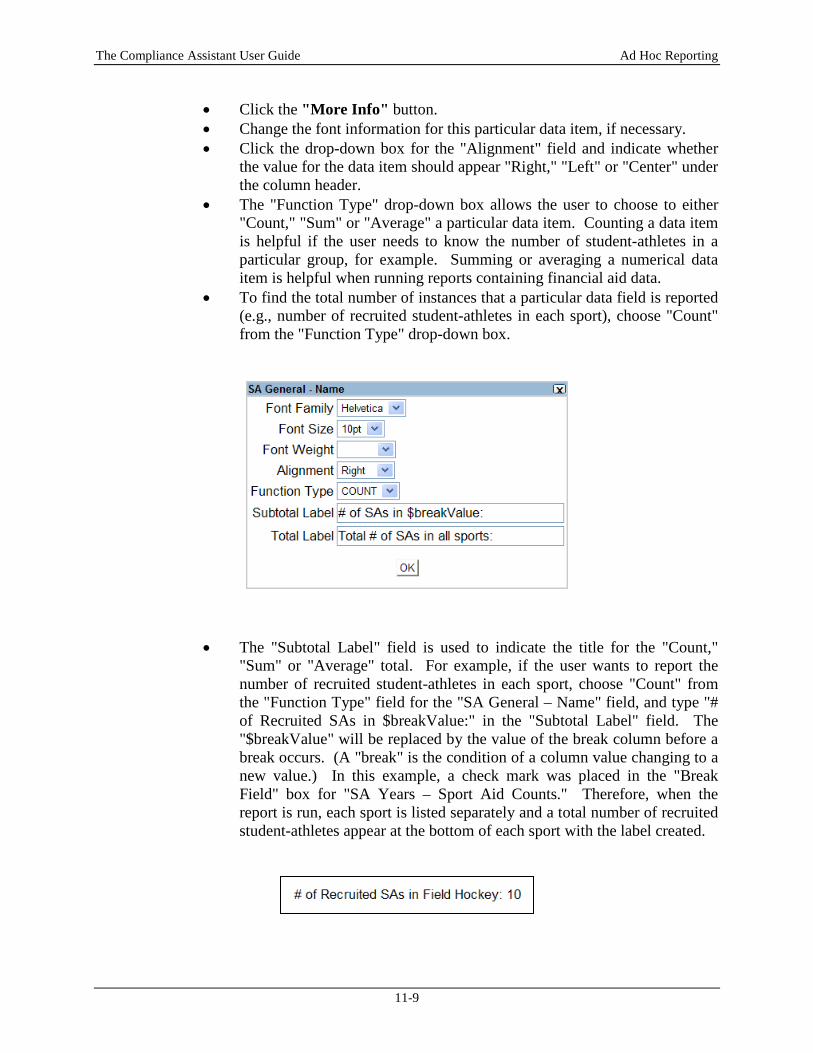
• Click the "More Info" button. • Change the font information for this particular data item, if necessary. • Click the drop-down box for the "Alignment" field and indicate whether
the value for the data item should appear "Right," "Left" or "Center" under the column header.
• The "Function Type" drop-down box allows the user to choose to either "Count," "Sum" or "Average" a particular data item. Counting a data item is helpful if the user needs to know the number of student-athletes in a particular group, for example. Summing or averaging a numerical data item is helpful when running reports containing financial aid data.
• To find the total number of instances that a particular data field is reported (e.g., number of recruited student-athletes in each sport), choose "Count" from the "Function Type" drop-down box.
• The "Subtotal Label" field is used to indicate the title for the "Count," "Sum" or "Average" total. For example, if the user wants to report the number of recruited student-athletes in each sport, choose "Count" from the "Function Type" field for the "SA General – Name" field, and type "# of Recruited SAs in $breakValue:" in the "Subtotal Label" field. The "$breakValue" will be replaced by the value of the break column before a break occurs. (A "break" is the condition of a column value changing to a new value.) In this example, a check mark was placed in the "Break Field" box for "SA Years – Sport Aid Counts." Therefore, when the report is run, each sport is listed separately and a total number of recruited student-athletes appear at the bottom of each sport with the label created.
The Compliance Assistant User Guide Ad Hoc Reporting
11-10
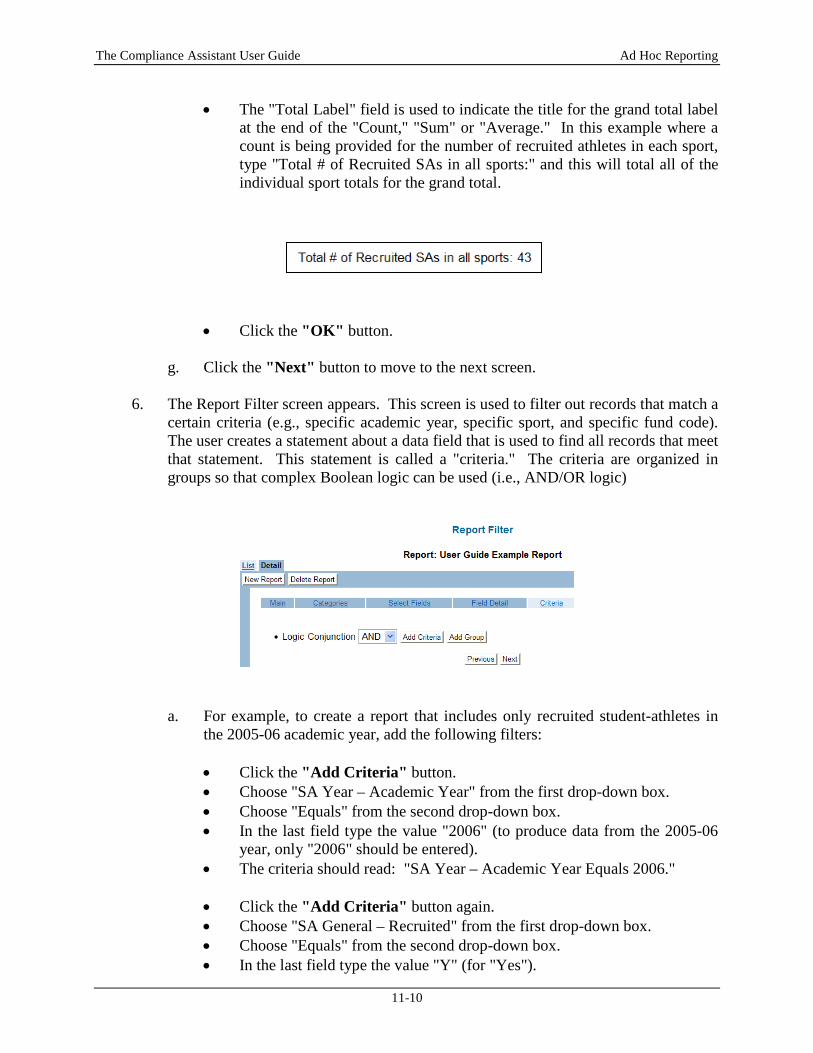
• The "Total Label" field is used to indicate the title for the grand total label at the end of the "Count," "Sum" or "Average." In this example where a count is being provided for the number of recruited athletes in each sport, type "Total # of Recruited SAs in all sports:" and this will total all of the individual sport totals for the grand total.
• Click the "OK" button. g. Click the "Next" button to move to the next screen.
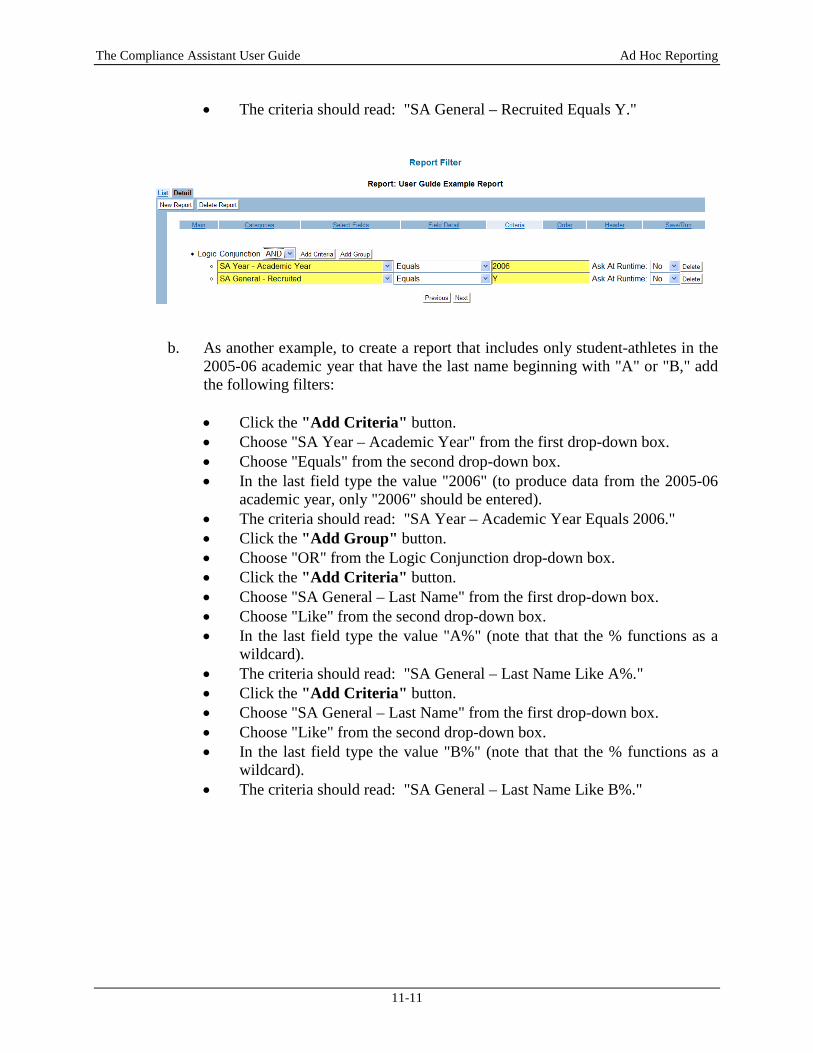
6. The Report Filter screen appears. This screen is used to filter out records that match a
certain criteria (e.g., specific academic year, specific sport, and specific fund code). The user creates a statement about a data field that is used to find all records that meet that statement. This statement is called a "criteria." The criteria are organized in groups so that complex Boolean logic can be used (i.e., AND/OR logic)
a. For example, to create a report that includes only recruited student-athletes in the 2005-06 academic year, add the following filters:
• Click the "Add Criteria" button. • Choose "SA Year – Academic Year" from the first drop-down box. • Choose "Equals" from the second drop-down box. • In the last field type the value "2006" (to produce data from the 2005-06
year, only "2006" should be entered). • The criteria should read: "SA Year – Academic Year Equals 2006." • Click the "Add Criteria" button again. • Choose "SA General – Recruited" from the first drop-down box. • Choose "Equals" from the second drop-down box. • In the last field type the value "Y" (for "Yes").
The Compliance Assistant User Guide Ad Hoc Reporting
11-11
• The criteria should read: "SA General – Recruited Equals Y."
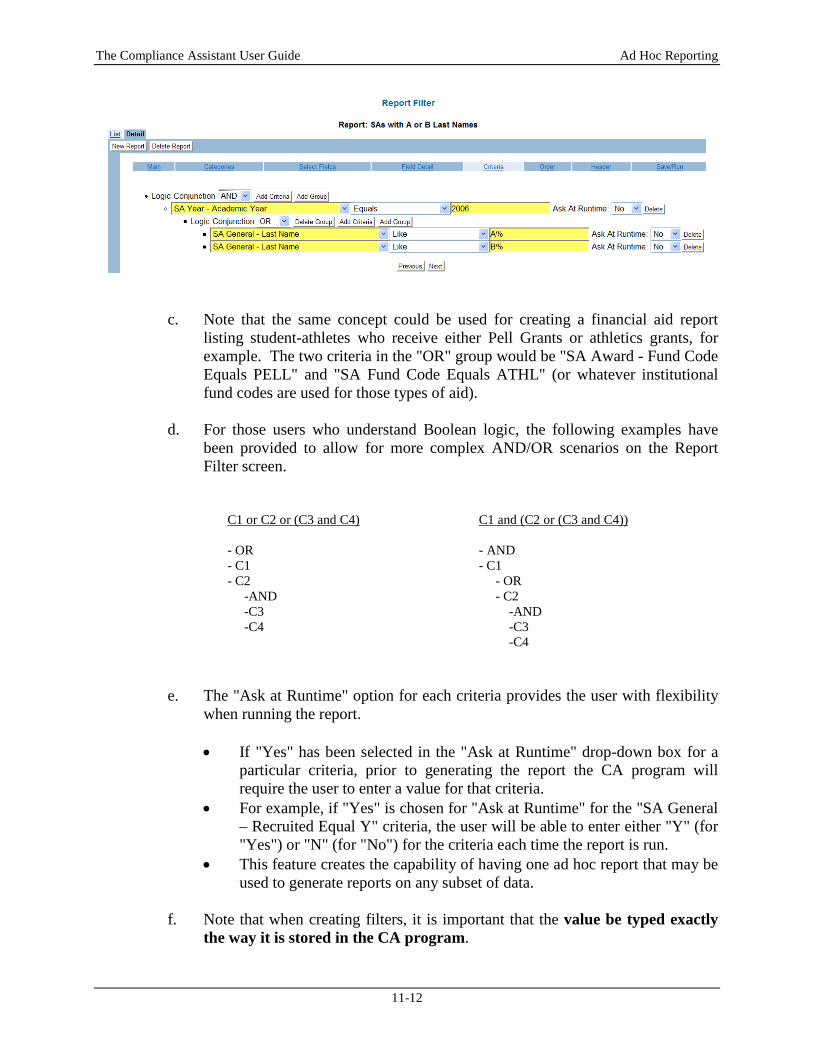
b. As another example, to create a report that includes only student-athletes in the 2005-06 academic year that have the last name beginning with "A" or "B," add the following filters:
• Click the "Add Criteria" button. • Choose "SA Year – Academic Year" from the first drop-down box. • Choose "Equals" from the second drop-down box. • In the last field type the value "2006" (to produce data from the 2005-06
academic year, only "2006" should be entered). • The criteria should read: "SA Year – Academic Year Equals 2006." • Click the "Add Group" button. • Choose "OR" from the Logic Conjunction drop-down box. • Click the "Add Criteria" button. • Choose "SA General – Last Name" from the first drop-down box. • Choose "Like" from the second drop-down box. • In the last field type the value "A%" (note that that the % functions as a
wildcard). • The criteria should read: "SA General – Last Name Like A%." • Click the "Add Criteria" button. • Choose "SA General – Last Name" from the first drop-down box. • Choose "Like" from the second drop-down box. • In the last field type the value "B%" (note that that the % functions as a
wildcard). • The criteria should read: "SA General – Last Name Like B%."
The Compliance Assistant User Guide Ad Hoc Reporting
11-12
c. Note that the same concept could be used for creating a financial aid report listing student-athletes who receive either Pell Grants or athletics grants, for example. The two criteria in the "OR" group would be "SA Award - Fund Code Equals PELL" and "SA Fund Code Equals ATHL" (or whatever institutional fund codes are used for those types of aid).
d. For those users who understand Boolean logic, the following examples have
been provided to allow for more complex AND/OR scenarios on the Report Filter screen.
C1 or C2 or (C3 and C4) - OR - C1 - C2 -AND -C3 -C4
C1 and (C2 or (C3 and C4)) - AND - C1 - OR - C2 -AND -C3 -C4
e. The "Ask at Runtime" option for each criteria provides the user with flexibility when running the report.
• If "Yes" has been selected in the "Ask at Runtime" drop-down box for a
particular criteria, prior to generating the report the CA program will require the user to enter a value for that criteria.
• For example, if "Yes" is chosen for "Ask at Runtime" for the "SA General – Recruited Equal Y" criteria, the user will be able to enter either "Y" (for "Yes") or "N" (for "No") for the criteria each time the report is run.
• This feature creates the capability of having one ad hoc report that may be used to generate reports on any subset of data.
f. Note that when creating filters, it is important that the value be typed exactly
the way it is stored in the CA program.

The Compliance Assistant User Guide Ad Hoc Reporting
11-13
• For example, the value for the "Recruited" field is stored as "Y" or "N" instead of "Yes" or "No." If "Yes" is typed in the value field, no records will be found and no names will appear on the report.
• Also, if "Female" is typed in the value field for the "Gender" field, no names would appear on the report since that field is stored by "F" rather than "Female."
• If a filter is created for "Sport Code," note that the three-letter code for the sport must be typed in capital letters in order for the report to generate data. The codes for sports can be found on the Sports Sponsorship section of the Setup area.
• Some choices in a drop-down box are stored as numbers in a list (e.g., "1," "2").
• If a filter is created that causes no information to appear on the report, the user should type a different value for the criteria since it may be stored differently in the background of the CA program.
g. It is important to note that filtering by an academic year is essential in order to
receive only the data for one academic year (and not all of the years that the student-athlete has data in the CA program). The "SA Years – Academic Year Equals (year)" filter should be used on reports involving student-athlete data that should be reported for one academic year. If running reports with eligibility information, academic year filters also may be necessary for the tables used in the Eligibility area (e.g., "SA Terms – Academic Year").
h. Users also may find that names are listed multiple times on an ad hoc report.
This may be caused by the lack of the academic year filters (as mentioned above), or it may have to do with the use of the "SA Sport" table on a report. The following is an explanation of how to eliminate names appearing multiple times on an ad hoc report.
• Using the "SA Year - Sport Aid Counts" field will report student-athletes
only in the sport in which their aid counts, which is what is needed for many reports, including those with financial aid data so the aid is not listed for each sport in which the athlete participates. If this field is used, the "SA Sports - Sport Code" field (or any field from the "SA Sport" table) should not be used. The "SA Sport" table actually should not even be selected on the report. This is because when the "SA Sport" table is added to a report; it causes names to be shown multiple times since it lists them one time for every sport in which they participate.
• If it is necessary to have a field from the "SA Sport" table on the report and/or the student-athlete should be listed for each sport in which he or she participates, it is possible for the report to not list names multiple times. In this case, the "SA Year – Sport Aid Counts" field should not be used and the "SA Sports – Sport Code" field should be used instead. The student-athlete will be listed for each sport in which he or she participates, but if the "Break Field" check box on the Report Fields – Detail screen is checked for "SA Sports – Sport Code," then student-athlete names will
The Compliance Assistant User Guide Ad Hoc Reporting
11-14
appear one time under their respective sport names. When running a report in which the "Break Field" has a check mark, the "Style" drop-down box on the Save/Run screen should be changed from "Table" to either the "Group" or "Group Above" option. This will then cause the sports to be listed separately and names listed one time.
• If these instructions have been followed and names still appear multiple times, ensure that the correct academic year filters have been created (as explained in the item above).
i. Once the report filters have been completed, click the "Next" button to move to
the next screen.
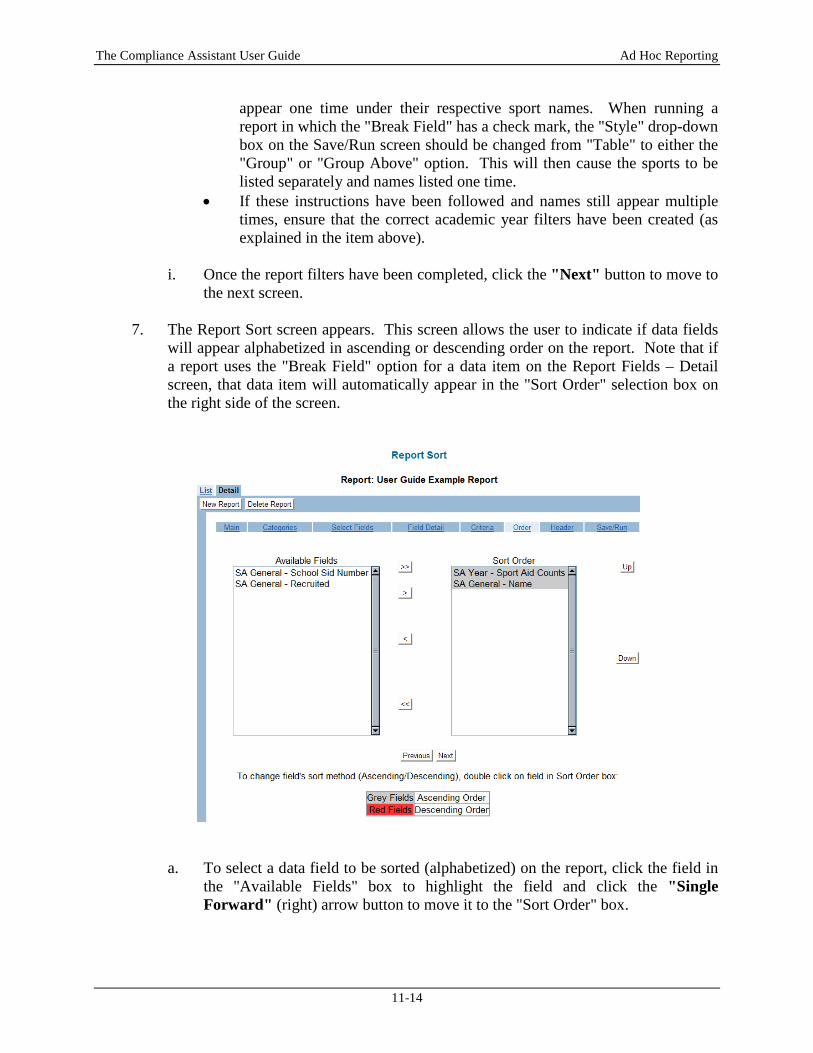
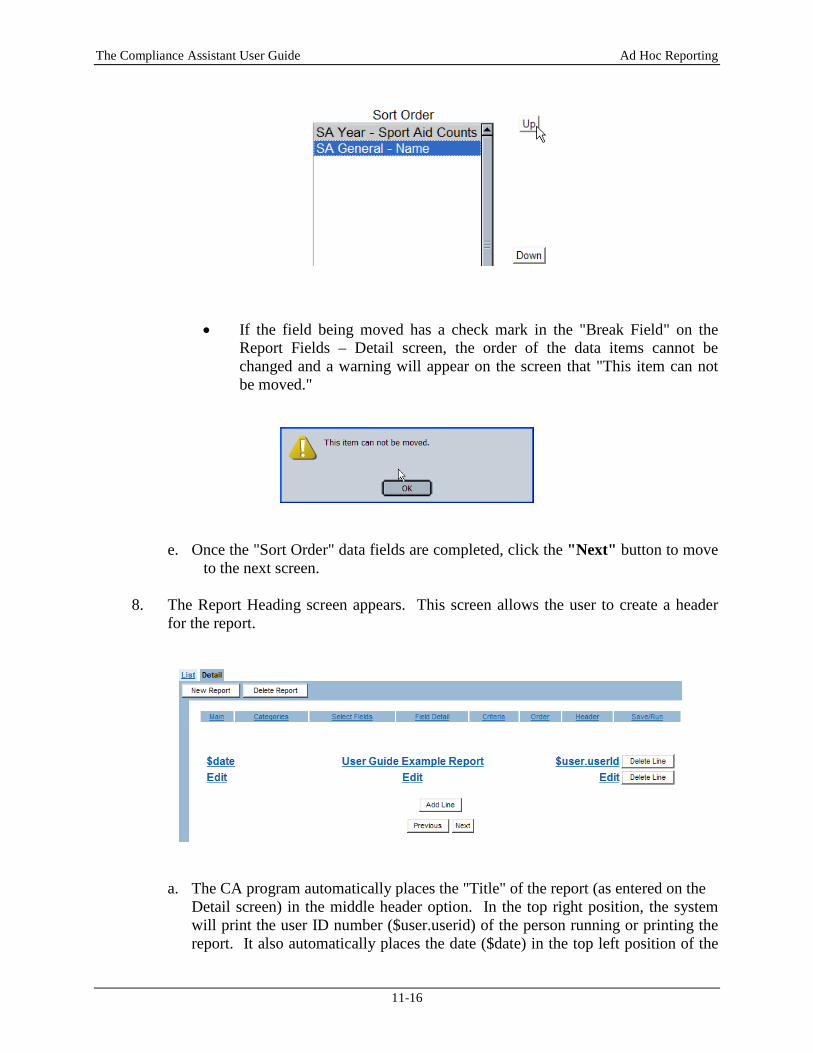
7. The Report Sort screen appears. This screen allows the user to indicate if data fields will appear alphabetized in ascending or descending order on the report. Note that if a report uses the "Break Field" option for a data item on the Report Fields – Detail screen, that data item will automatically appear in the "Sort Order" selection box on the right side of the screen.
a. To select a data field to be sorted (alphabetized) on the report, click the field in the "Available Fields" box to highlight the field and click the "Single Forward" (right) arrow button to move it to the "Sort Order" box.
The Compliance Assistant User Guide Ad Hoc Reporting
11-15
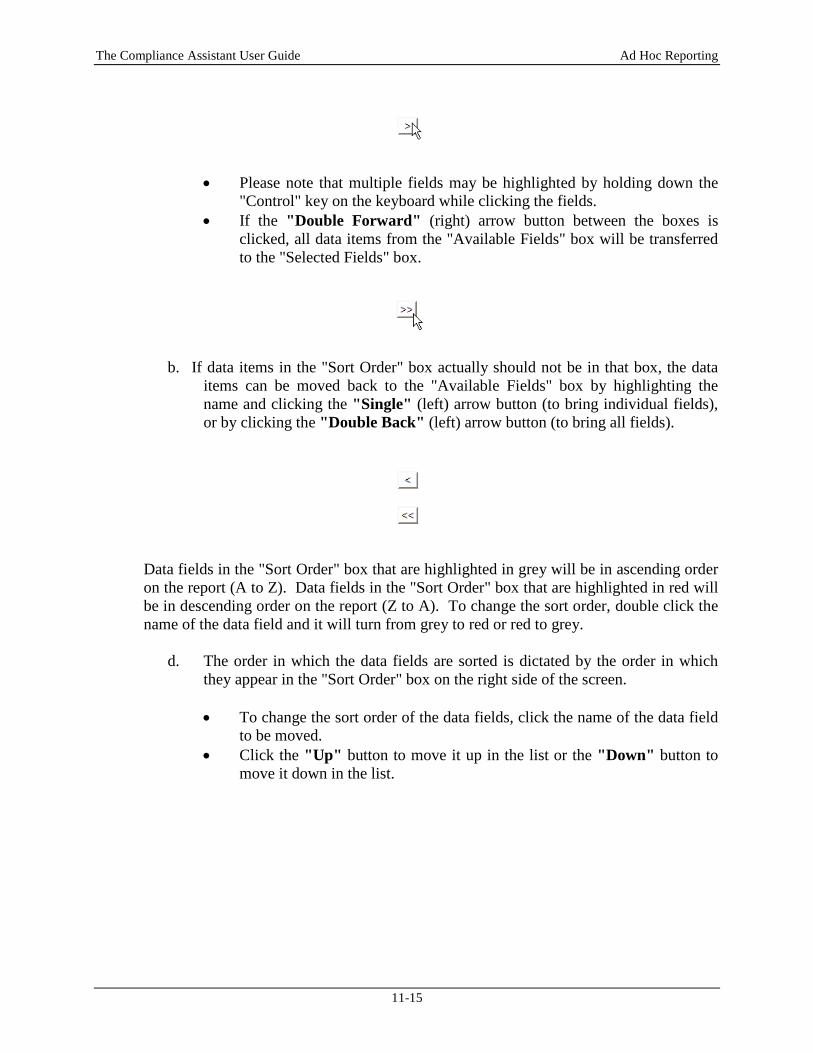
• Please note that multiple fields may be highlighted by holding down the "Control" key on the keyboard while clicking the fields.
• If the "Double Forward" (right) arrow button between the boxes is clicked, all data items from the "Available Fields" box will be transferred to the "Selected Fields" box.
b. If data items in the "Sort Order" box actually should not be in that box, the data items can be moved back to the "Available Fields" box by highlighting the name and clicking the "Single" (left) arrow button (to bring individual fields), or by clicking the "Double Back" (left) arrow button (to bring all fields).
Data fields in the "Sort Order" box that are highlighted in grey will be in ascending order on the report (A to Z). Data fields in the "Sort Order" box that are highlighted in red will be in descending order on the report (Z to A). To change the sort order, double click the name of the data field and it will turn from grey to red or red to grey.
d. The order in which the data fields are sorted is dictated by the order in which
they appear in the "Sort Order" box on the right side of the screen.
• To change the sort order of the data fields, click the name of the data field to be moved.
• Click the "Up" button to move it up in the list or the "Down" button to move it down in the list.
The Compliance Assistant User Guide Ad Hoc Reporting
11-16
• If the field being moved has a check mark in the "Break Field" on the Report Fields – Detail screen, the order of the data items cannot be changed and a warning will appear on the screen that "This item can not be moved."
e. Once the "Sort Order" data fields are completed, click the "Next" button to move
to the next screen.
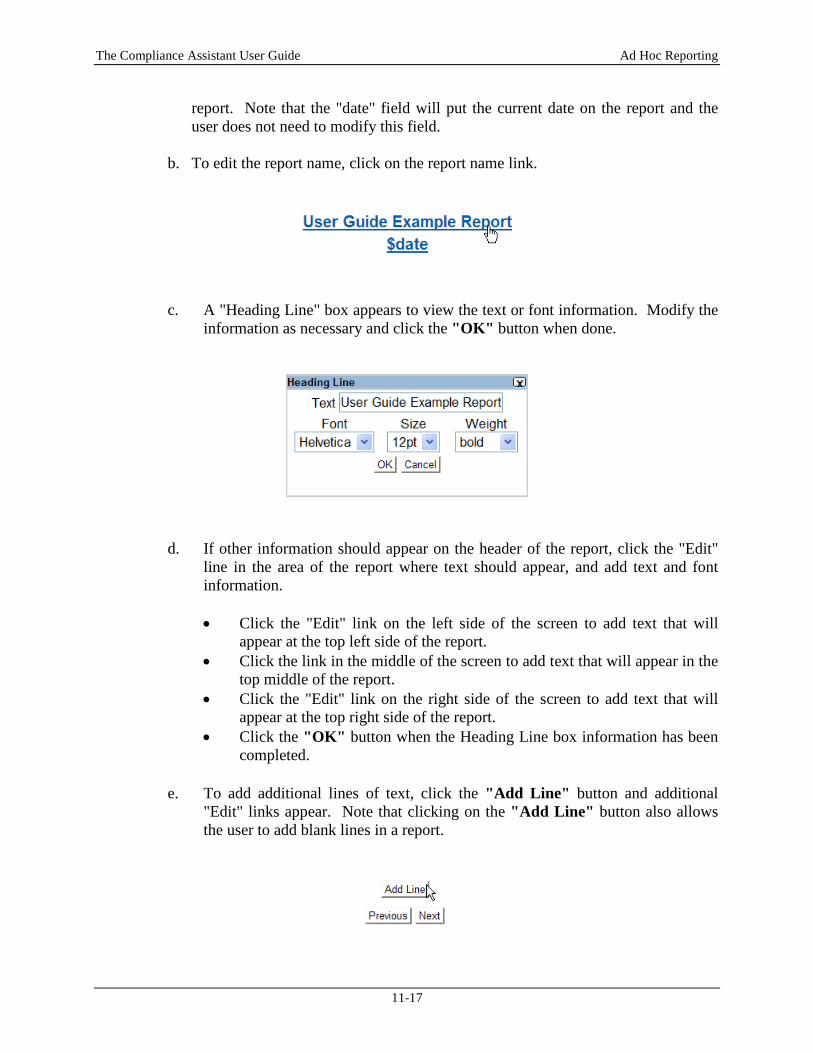
8. The Report Heading screen appears. This screen allows the user to create a header for the report.
a. The CA program automatically places the "Title" of the report (as entered on the Detail screen) in the middle header option. In the top right position, the system will print the user ID number ($user.userid) of the person running or printing the report. It also automatically places the date ($date) in the top left position of the
The Compliance Assistant User Guide Ad Hoc Reporting
11-17
report. Note that the "date" field will put the current date on the report and the user does not need to modify this field.
b. To edit the report name, click on the report name link.
c. A "Heading Line" box appears to view the text or font information. Modify the information as necessary and click the "OK" button when done.
d. If other information should appear on the header of the report, click the "Edit" line in the area of the report where text should appear, and add text and font information. • Click the "Edit" link on the left side of the screen to add text that will
appear at the top left side of the report. • Click the link in the middle of the screen to add text that will appear in the
top middle of the report. • Click the "Edit" link on the right side of the screen to add text that will
appear at the top right side of the report. • Click the "OK" button when the Heading Line box information has been
completed.
e. To add additional lines of text, click the "Add Line" button and additional "Edit" links appear. Note that clicking on the "Add Line" button also allows the user to add blank lines in a report.
The Compliance Assistant User Guide Ad Hoc Reporting
11-18
f. To delete a line of text, click the "Delete Line" button next to the "Edit" link for the line of data to be removed.
g. Click the "Next" button when all lines have been completed to move to the
next screen.
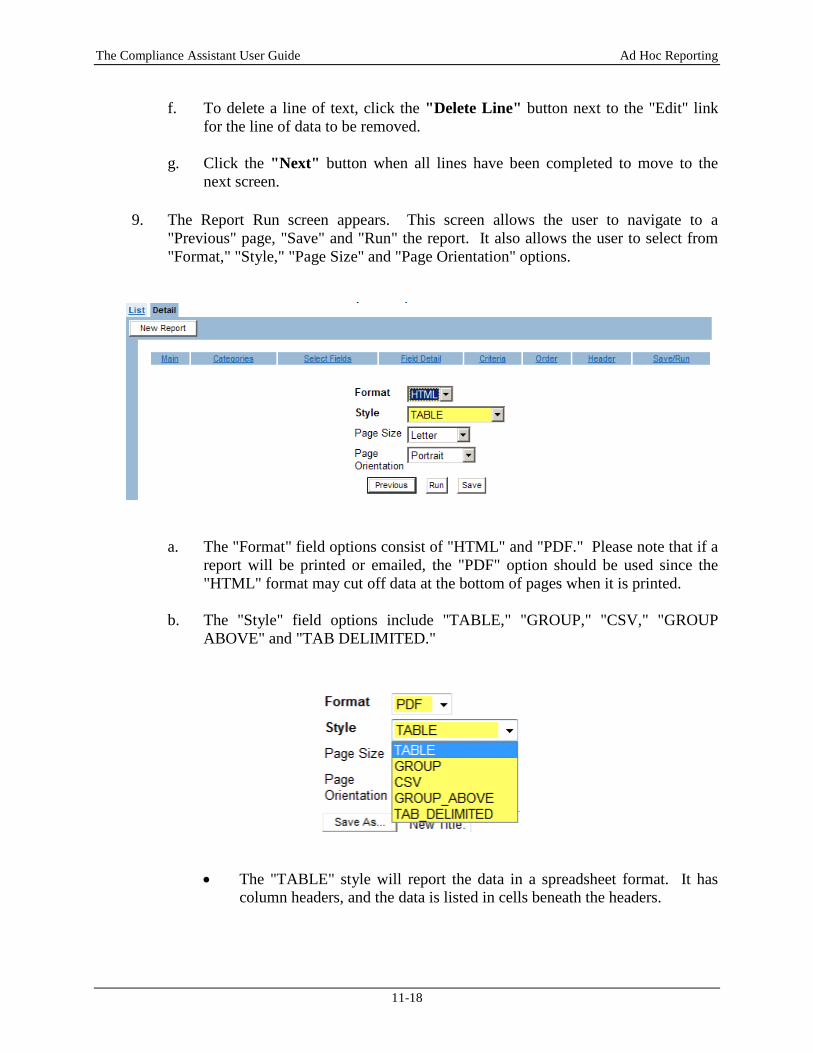
9. The Report Run screen appears. This screen allows the user to navigate to a "Previous" page, "Save" and "Run" the report. It also allows the user to select from "Format," "Style," "Page Size" and "Page Orientation" options.
a. The "Format" field options consist of "HTML" and "PDF." Please note that if a report will be printed or emailed, the "PDF" option should be used since the "HTML" format may cut off data at the bottom of pages when it is printed.
b. The "Style" field options include "TABLE," "GROUP," "CSV," "GROUP
ABOVE" and "TAB DELIMITED."
• The "TABLE" style will report the data in a spreadsheet format. It has
column headers, and the data is listed in cells beneath the headers.
The Compliance Assistant User Guide Ad Hoc Reporting
11-19
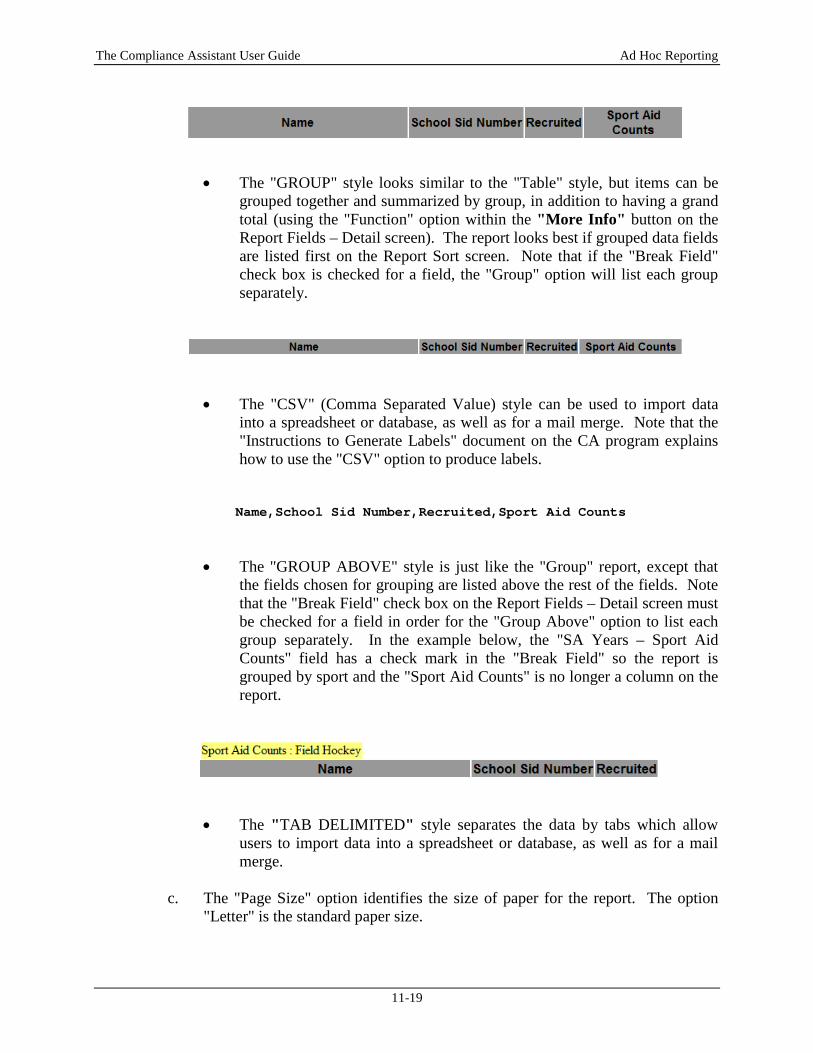
• The "GROUP" style looks similar to the "Table" style, but items can be grouped together and summarized by group, in addition to having a grand total (using the "Function" option within the "More Info" button on the Report Fields – Detail screen). The report looks best if grouped data fields are listed first on the Report Sort screen. Note that if the "Break Field" check box is checked for a field, the "Group" option will list each group separately.
• The "CSV" (Comma Separated Value) style can be used to import data into a spreadsheet or database, as well as for a mail merge. Note that the "Instructions to Generate Labels" document on the CA program explains how to use the "CSV" option to produce labels.
Name,School Sid Number,Recruited,Sport Aid Counts
• The "GROUP ABOVE" style is just like the "Group" report, except that the fields chosen for grouping are listed above the rest of the fields. Note that the "Break Field" check box on the Report Fields – Detail screen must be checked for a field in order for the "Group Above" option to list each group separately. In the example below, the "SA Years – Sport Aid Counts" field has a check mark in the "Break Field" so the report is grouped by sport and the "Sport Aid Counts" is no longer a column on the report.
• The "TAB DELIMITED" style separates the data by tabs which allow users to import data into a spreadsheet or database, as well as for a mail merge.
c. The "Page Size" option identifies the size of paper for the report. The option
"Letter" is the standard paper size.
The Compliance Assistant User Guide Ad Hoc Reporting
11-20
d. The "Page Orientation" field contains options of either "Portrait" or "Landscape."
e. Click the "Save" button to save the report in the List. Note that when changes are made to the report, the "Save" button should be clicked before running the report in order for those changes to be saved.
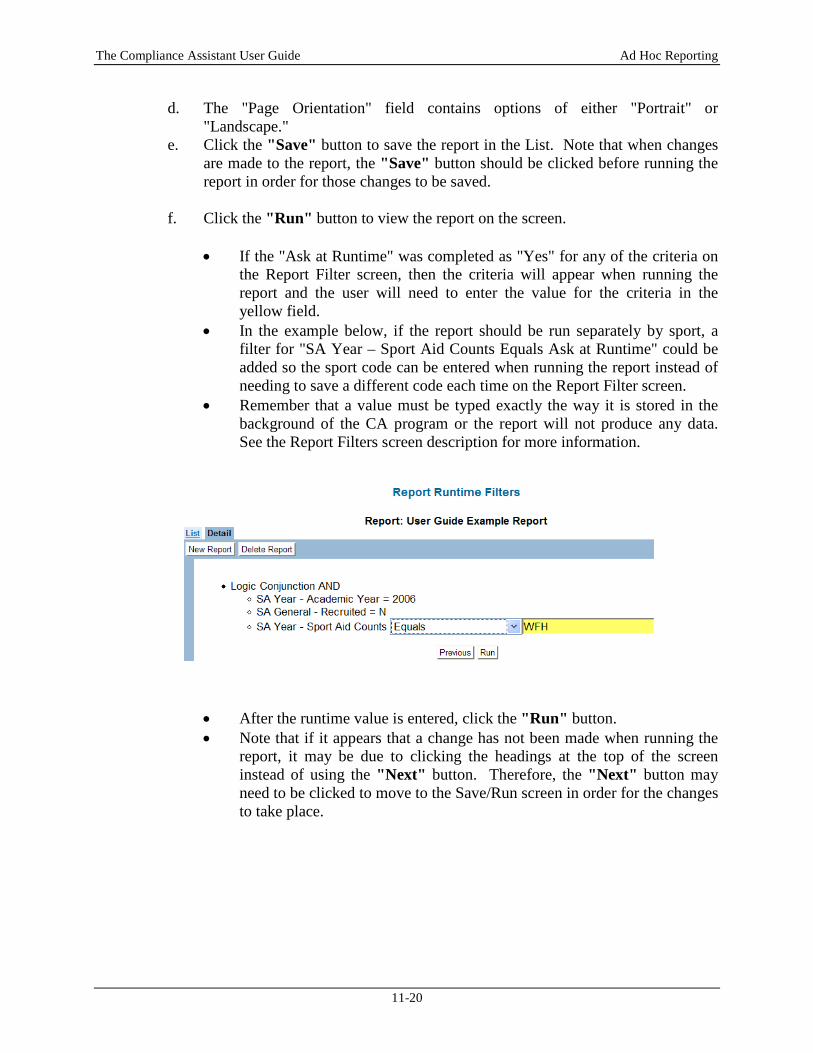
f. Click the "Run" button to view the report on the screen.
• If the "Ask at Runtime" was completed as "Yes" for any of the criteria on the Report Filter screen, then the criteria will appear when running the report and the user will need to enter the value for the criteria in the yellow field.
• In the example below, if the report should be run separately by sport, a filter for "SA Year – Sport Aid Counts Equals Ask at Runtime" could be added so the sport code can be entered when running the report instead of needing to save a different code each time on the Report Filter screen.
• Remember that a value must be typed exactly the way it is stored in the background of the CA program or the report will not produce any data. See the Report Filters screen description for more information.
• After the runtime value is entered, click the "Run" button. • Note that if it appears that a change has not been made when running the
report, it may be due to clicking the headings at the top of the screen instead of using the "Next" button. Therefore, the "Next" button may need to be clicked to move to the Save/Run screen in order for the changes to take place.
The Compliance Assistant User Guide Ad Hoc Reporting
11-21
Running an Ad Hoc Report from the List Screen An ad hoc report may be run during the creation or modification of the report, or it may be run directly from the List screen once the report has been saved.
How to Run an Ad Hoc Report from the List Screen
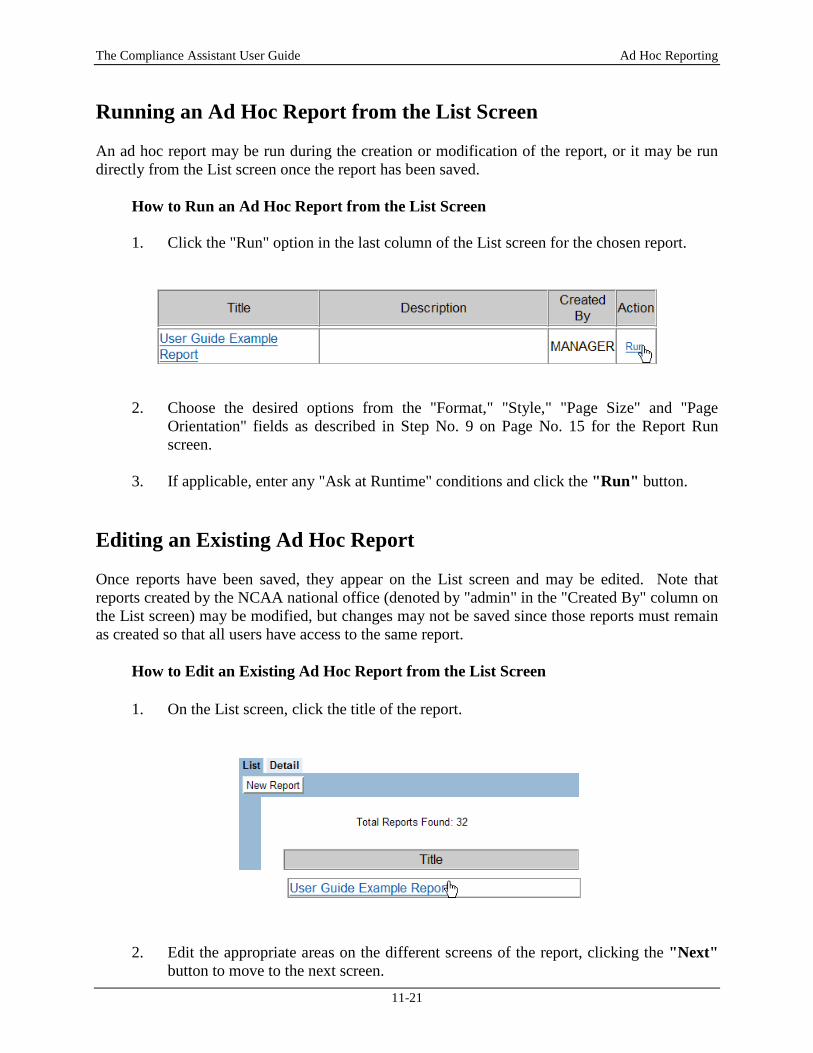
1. Click the "Run" option in the last column of the List screen for the chosen report.
2. Choose the desired options from the "Format," "Style," "Page Size" and "Page Orientation" fields as described in Step No. 9 on Page No. 15 for the Report Run screen.
3. If applicable, enter any "Ask at Runtime" conditions and click the "Run" button.
Editing an Existing Ad Hoc Report
Once reports have been saved, they appear on the List screen and may be edited. Note that reports created by the NCAA national office (denoted by "admin" in the "Created By" column on the List screen) may be modified, but changes may not be saved since those reports must remain as created so that all users have access to the same report.
How to Edit an Existing Ad Hoc Report from the List Screen
1. On the List screen, click the title of the report.
2. Edit the appropriate areas on the different screens of the report, clicking the "Next" button to move to the next screen.
The Compliance Assistant User Guide Ad Hoc Reporting
11-22
3. Click the "Save" button on the last screen to save any modifications to the report.
4. Click the "Run" button to view the report. Using the "Save As" Option
The "Save As" option allows the user to take an existing report, chose to "Save As" and make modifications to the new report without changing the original report. This option helps users save time in making modifications or additions to an already useful report without having to recreate the entire report. Note this option does not apply to reports denoted as "admin" in the "Created By" column on the List screen as mentioned above in this section.
How to Create an Ad Hoc Report Using the "Save As" Option
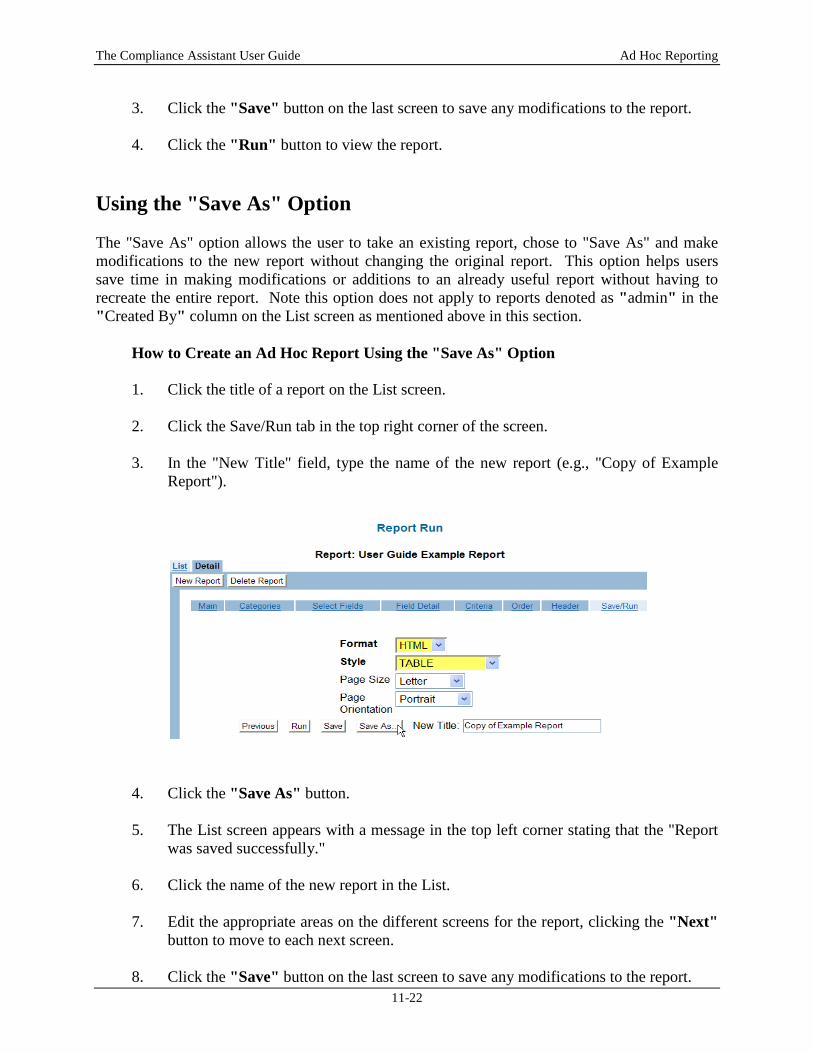
1. Click the title of a report on the List screen. 2. Click the Save/Run tab in the top right corner of the screen. 3. In the "New Title" field, type the name of the new report (e.g., "Copy of Example
Report").
4. Click the "Save As" button. 5. The List screen appears with a message in the top left corner stating that the "Report
was saved successfully." 6. Click the name of the new report in the List. 7. Edit the appropriate areas on the different screens for the report, clicking the "Next"
button to move to each next screen. 8. Click the "Save" button on the last screen to save any modifications to the report.
The Compliance Assistant User Guide Ad Hoc Reporting
11-23
9. Click the "Run" button to view the report. Deleting an Ad Hoc Report
Ad hoc reports created by a user may be deleted; however, reports created by the NCAA national office (denoted by "admin" in the "Created By" column on the List screen) may not be deleted.
How to Delete an Ad Hoc Report from the List Screen
1. Click the title of the report on the List screen. 2. The Report Fields – Detail screen appears.
a. Click the "Delete Report" button. b. A dialog box will appear asking, "Are you sure you want to delete this record?"
• Click the "OK" button to delete the report permanently and return to the
List screen. • Click the "Cancel" button to keep the report.
Helpful Hints o Become familiar with data fields in the CA program before attempting the ad hoc reporting
feature. o Start simple when creating reports. If using filters, add one criteria and then run the report
to see if data appears. Go back to the Report Filter screen and add other criteria. Run the report again to ensure that data appears. Continue this process until the desired result is achieved. If multiple data items and multiple filters are added initially, the report may generate no data and it will be difficult to determine what is causing the problem.
o Once reports are created in an academic year, they are created for all years and may be
modified appropriately to receive correct academic year information (e.g., by using the "SA Years – Academic Year" filter).
o If the report should list student-athlete data for only one academic year, create a filter on
the Report Filter screen for "SA Years – Academic Year Equals (year)." Make sure to use the second part of the academic year when typing the value for the year criteria (e.g., for 2005-06 data, type "2006" as the value for the academic year filter).
o If there should be multiple years of data on the report, do not create an academic year filter
on the Report Filter screen. Instead, choose to "Group" by academic year (by clicking the "Break Field" option for an academic year data item on the Report Fields – Detail screen
The Compliance Assistant User Guide Ad Hoc Reporting
11-24
and choosing the "Group" or "Group Above" option in the "Style" drop-down box when running the report).
o See the Report Filter section in this chapter for more information on how to stop names
from appearing multiple times on a report. o Have fun with ad hoc reporting since it can provide tremendous reporting capabilities of
data that has been entered into the CA program.