2013-on 2.0 tsi atmospheric/recirculating valve...
TRANSCRIPT

2013-ON 2.0 TSI ATMOSPHERIC/RECIRCULATING VALVE
INSTALLATION
Tools required:
- 5mm allen key/socket
- T30 torx driver
- Stanley knife
*In the 2013-on Mk7 Golf chassis (including Seat Leon, Audi A3, Jetta GLi, Skoda Octavia,
Scirocco TSI) the valve will be bolted to the turbo which is located at the rear of the
engine bay on the right hand side, where the pipe from the airfilter attaches to the turbo.
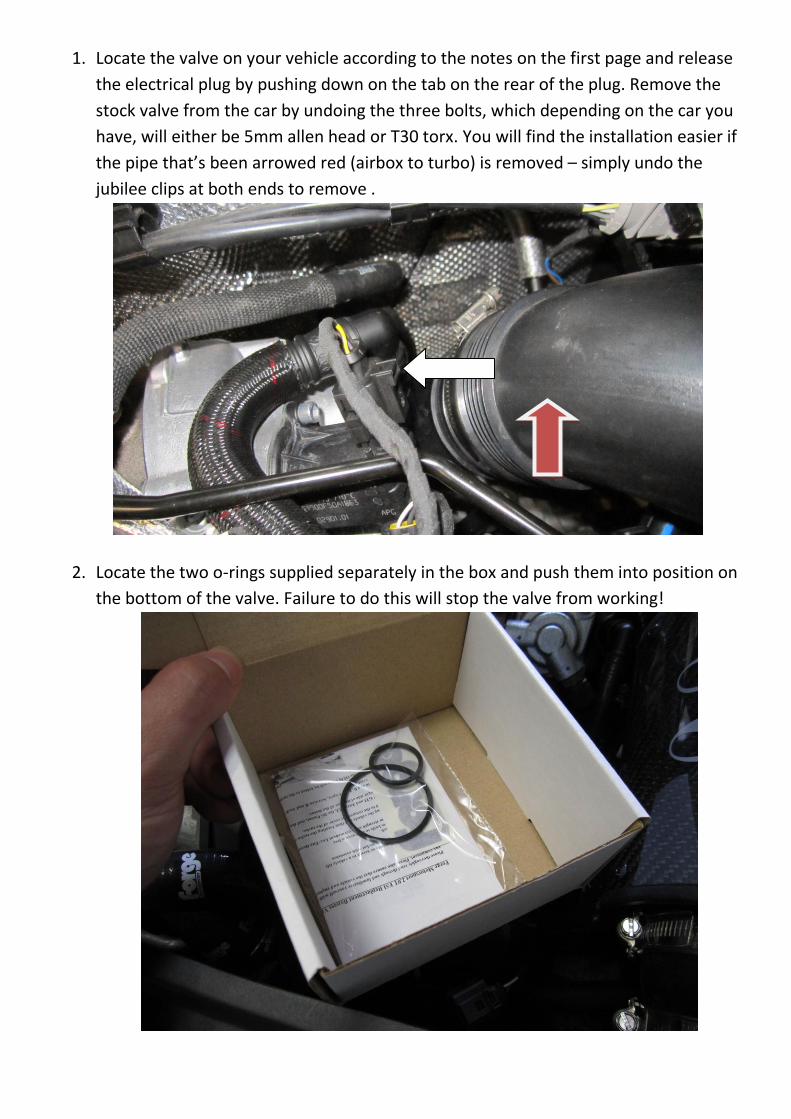
1. Locate the valve on your vehicle according to the notes on the first page and release
the electrical plug by pushing down on the tab on the rear of the plug. Remove the
stock valve from the car by undoing the three bolts, which depending on the car you
have, will either be 5mm allen head or T30 torx. You will find the installation easier if
the pipe that’s been arrowed red (airbox to turbo) is removed – simply undo the
jubilee clips at both ends to remove .
2. Locate the two o-rings supplied separately in the box and push them into position on
the bottom of the valve. Failure to do this will stop the valve from working!
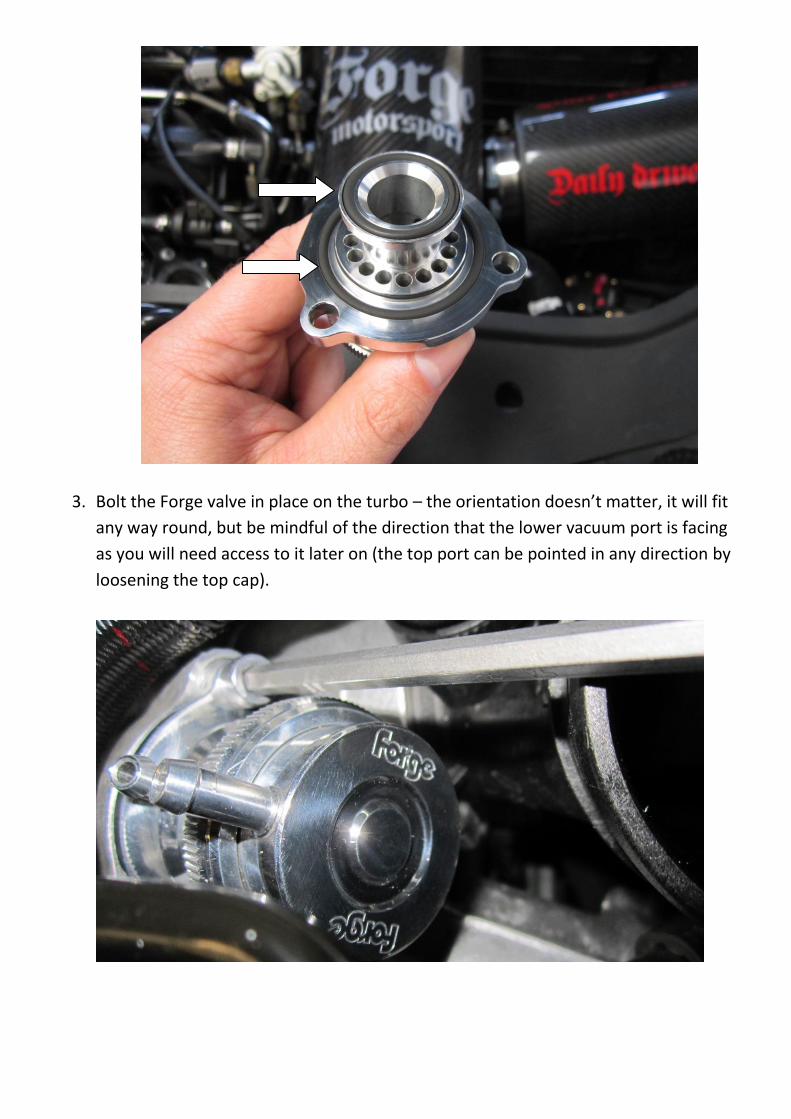
3. Bolt the Forge valve in place on the turbo – the orientation doesn’t matter, it will fit
any way round, but be mindful of the direction that the lower vacuum port is facing
as you will need access to it later on (the top port can be pointed in any direction by
loosening the top cap).
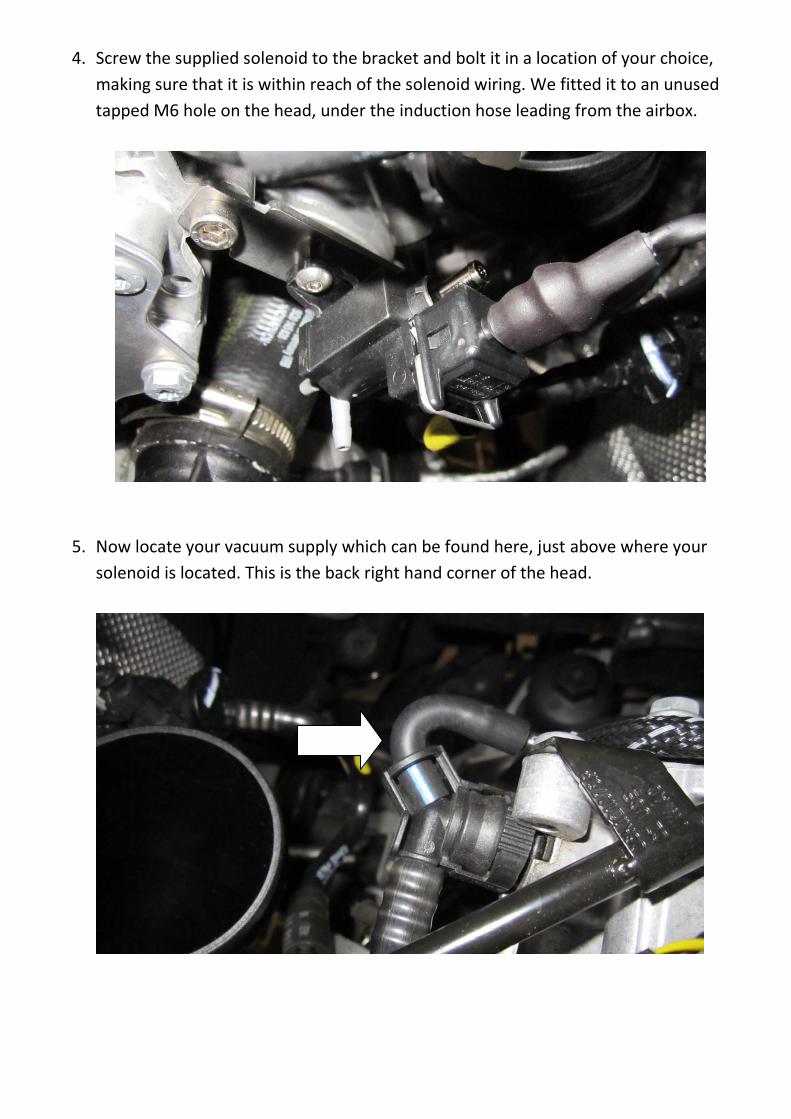
4. Screw the supplied solenoid to the bracket and bolt it in a location of your choice,
making sure that it is within reach of the solenoid wiring. We fitted it to an unused
tapped M6 hole on the head, under the induction hose leading from the airbox.
5. Now locate your vacuum supply which can be found here, just above where your
solenoid is located. This is the back right hand corner of the head.
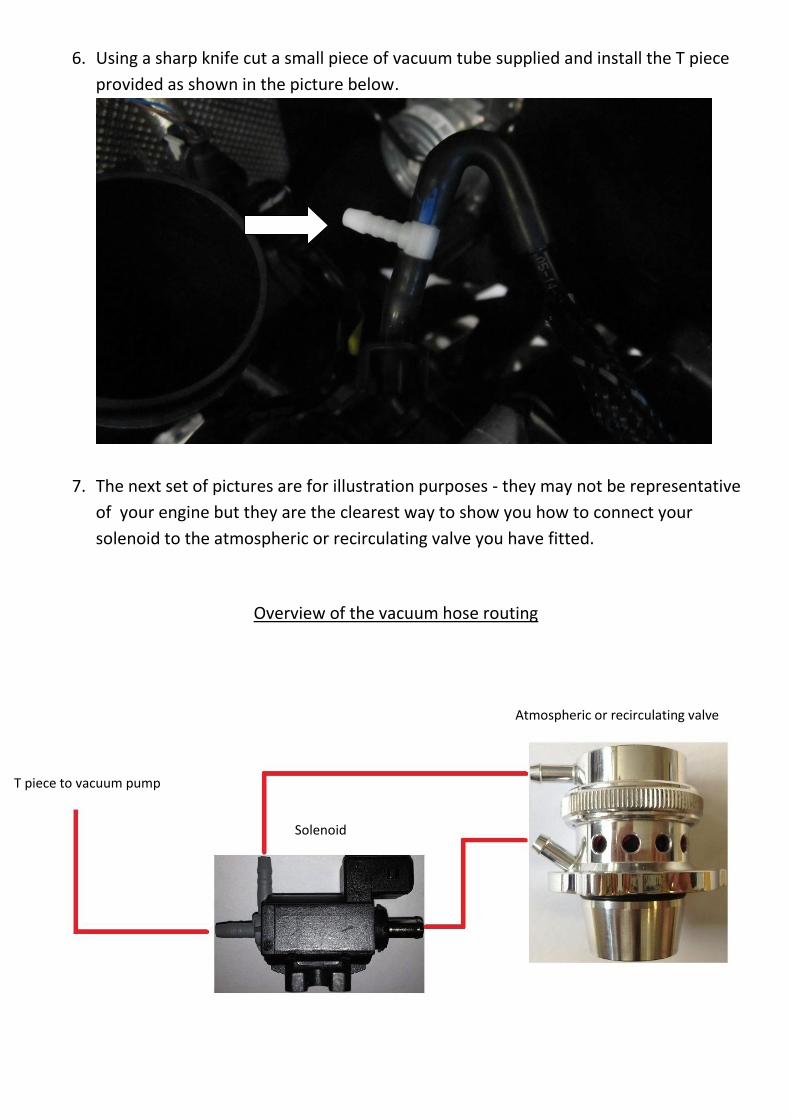
6. Using a sharp knife cut a small piece of vacuum tube supplied and install the T piece
provided as shown in the picture below.
7. The next set of pictures are for illustration purposes - they may not be representative
of your engine but they are the clearest way to show you how to connect your
solenoid to the atmospheric or recirculating valve you have fitted.
Overview of the vacuum hose routing
T piece to vacuum pump
Solenoid
Atmospheric or recirculating valve

8. Using a sharp blade, cut the first vacuum line to length to go from the t-piece you just
fitted, to the HORIZONTAL plastic port on the solenoid (the opposite end from the
electrical connector).
9. The second vacuum line should go from the rear METAL port on the solenoid to
the LOWER port on the valve.
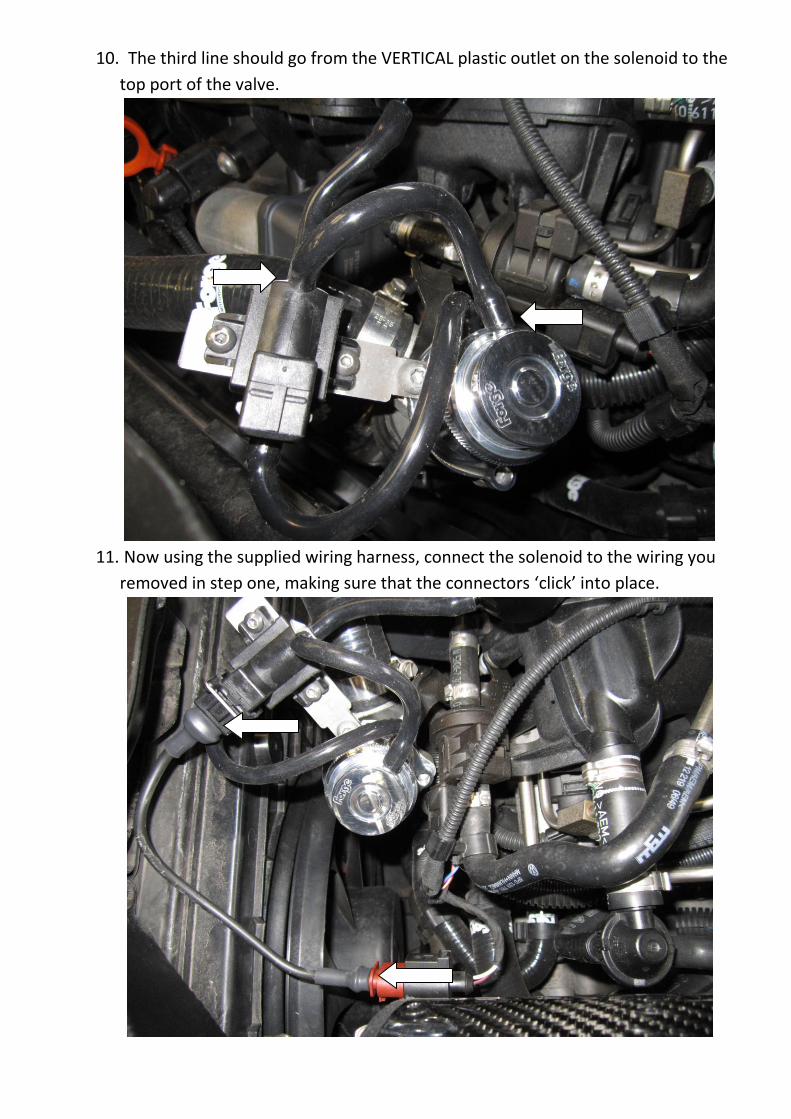
10. The third line should go from the VERTICAL plastic outlet on the solenoid to the
top port of the valve.
11. Now using the supplied wiring harness, connect the solenoid to the wiring you
removed in step one, making sure that the connectors ‘click’ into place.

12. Finally, use the supplied cable ties to secure the ends of the vacuum lines to the
solenoid, valve and vacuum takeoff, then clip off the excess.
13. Installation is complete ! Please test drive your car to confirm all is well.