2nd topic stencil and data linkage
TRANSCRIPT

Microsoft Visio 2010
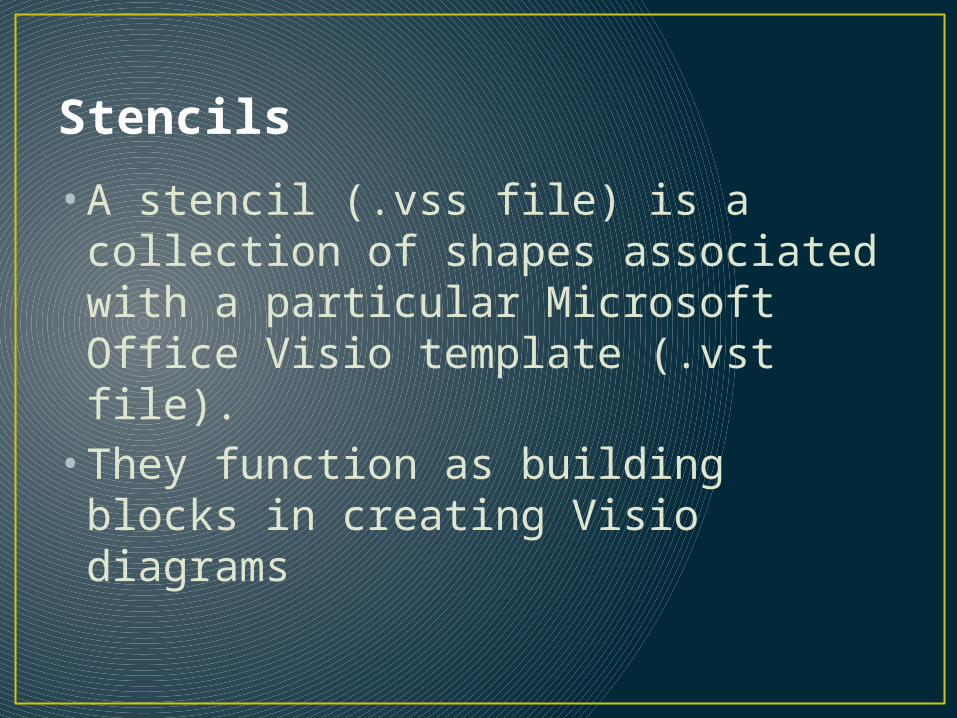
Stencils
• A stencil (.vss file) is a collection of shapes associated with a particular Microsoft Office Visio template (.vst file).• They function as building blocks in
creating Visio diagrams

Types of stencils
There are two types of stencils 1. Default stencils: they are built in
stencils which are given under a specific diagram template. All shapes in a stencil are logically related to the specific template.
2. New stencils: users can create a new stencil to hold shapes that she uses often and wants to find quickly.

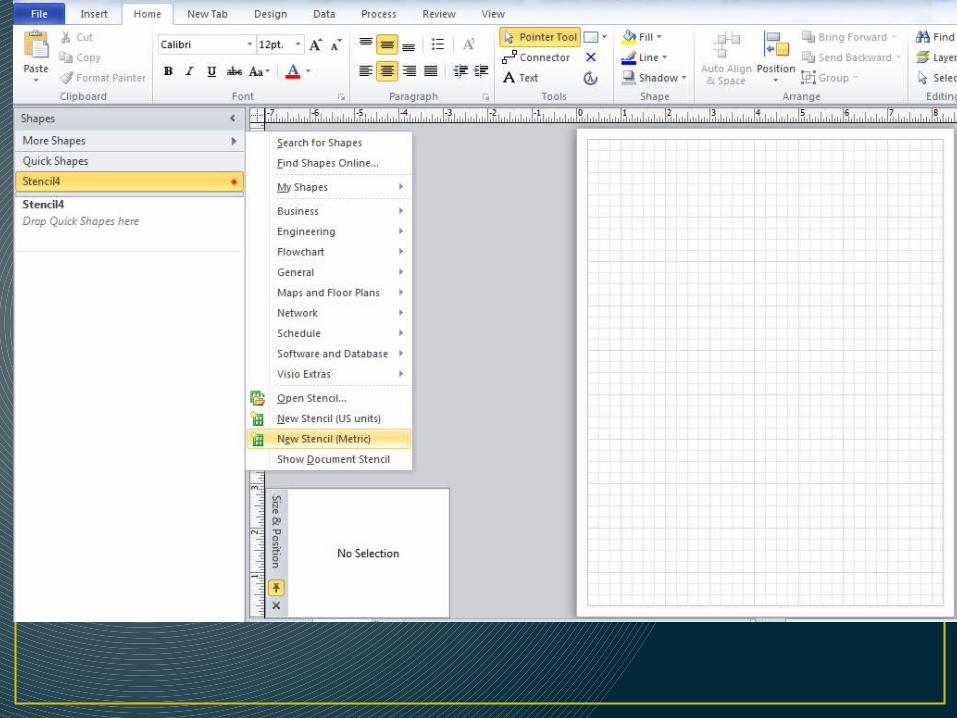
Create a new stencil
• In the Shapes window, click More Shapes, and then click New Stencil.
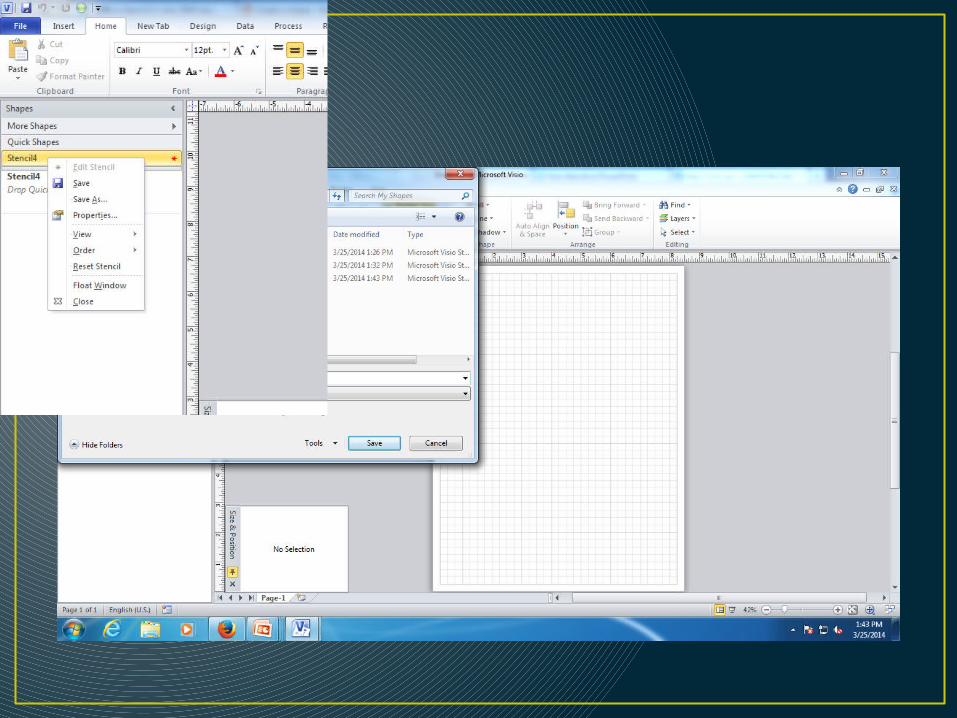
• In the Shapes window, right-click the title bar of the new stencil, and then click Save As.
• Type a name for your stencil, and then click Save. By default, custom stencils are saved in your My Shapes folder.
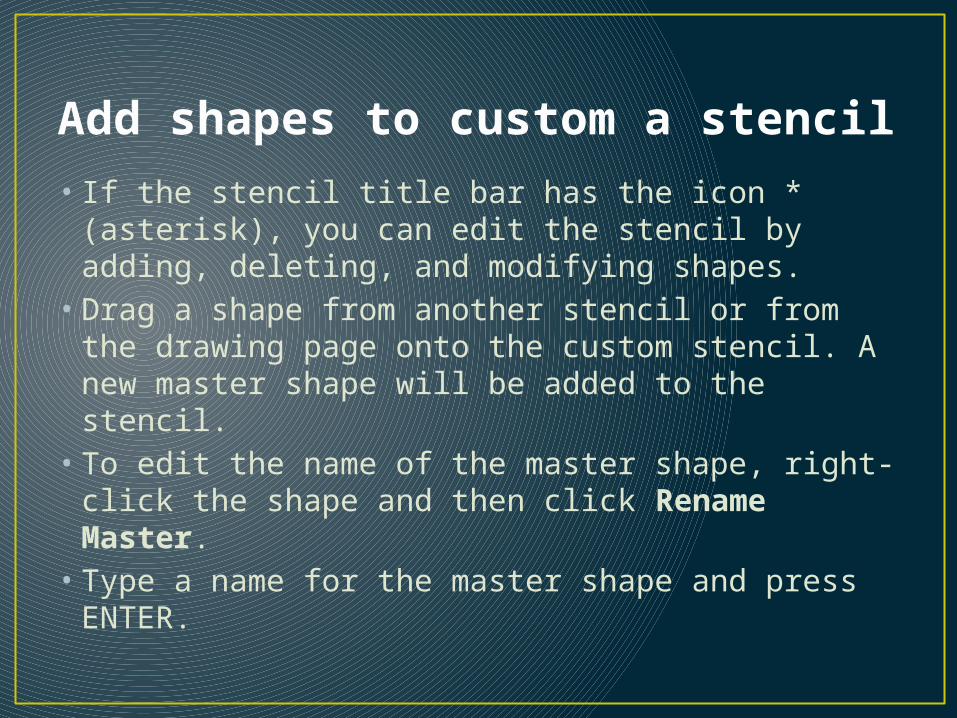
Add shapes to custom a stencil• If the stencil title bar has the icon * (asterisk),
you can edit the stencil by adding, deleting, and modifying shapes.
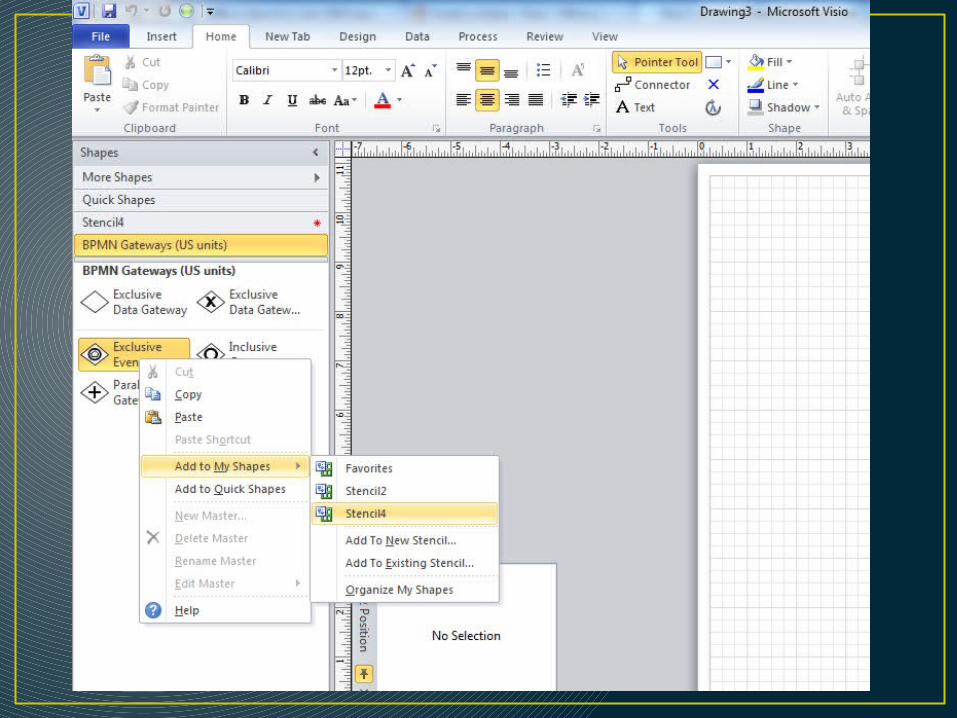
• Drag a shape from another stencil or from the drawing page onto the custom stencil. A new master shape will be added to the stencil.
• To edit the name of the master shape, right-click the shape and then click Rename Master.
• Type a name for the master shape and press ENTER.
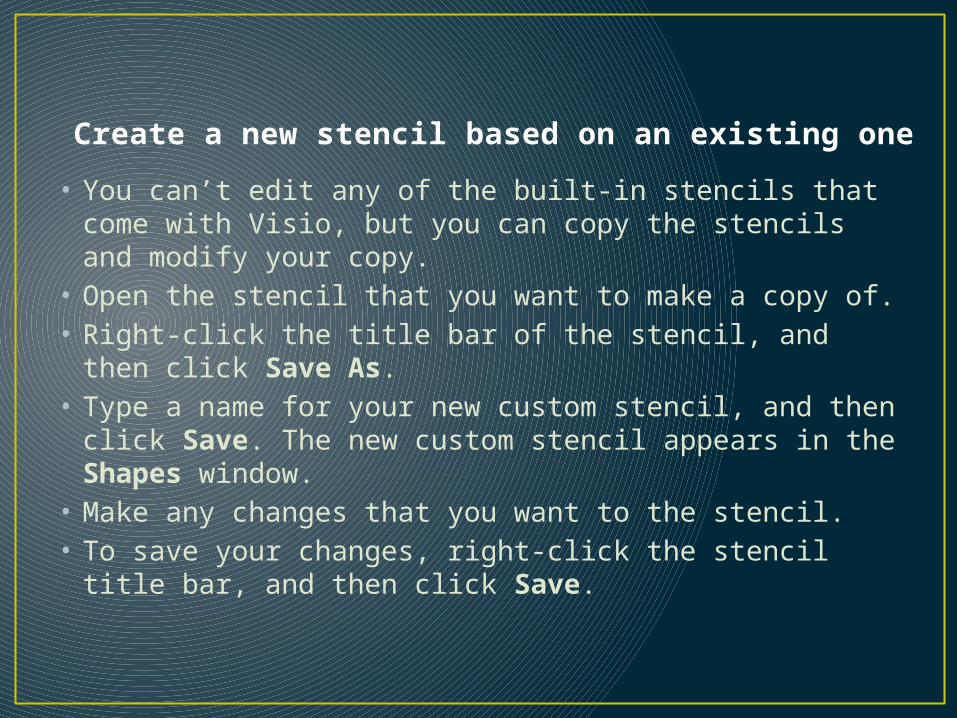
Create a new stencil based on an existing one
• You can’t edit any of the built-in stencils that come with Visio, but you can copy the stencils and modify your copy.
• Open the stencil that you want to make a copy of. • Right-click the title bar of the stencil, and then click
Save As.• Type a name for your new custom stencil, and then
click Save. The new custom stencil appears in the Shapes window.
• Make any changes that you want to the stencil. • To save your changes, right-click the stencil title
bar, and then click Save.
Create a custom shape
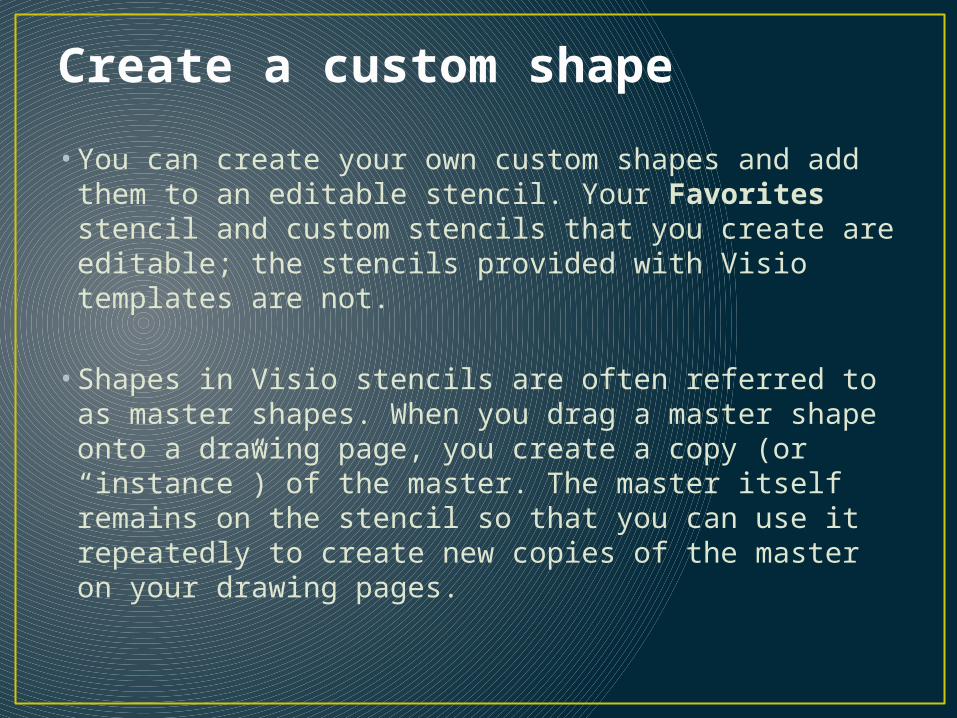
• You can create your own custom shapes and add them to an editable stencil. Your Favorites stencil and custom stencils that you create are editable; the stencils provided with Visio templates are not.
• Shapes in Visio stencils are often referred to as master shapes. When you drag a master shape onto a drawing page, you create a copy (or “instance”) of the master. The master itself remains on the stencil so that you can use it repeatedly to create new copies of the master on your drawing pages.

Create a Custom Shape
• Right-click the stencil
window and then click
New Master.
• In the New Master dialog box,
specify characteristics for the
shape. Click OK.
• A blank shape icon appears
• in the stencil.

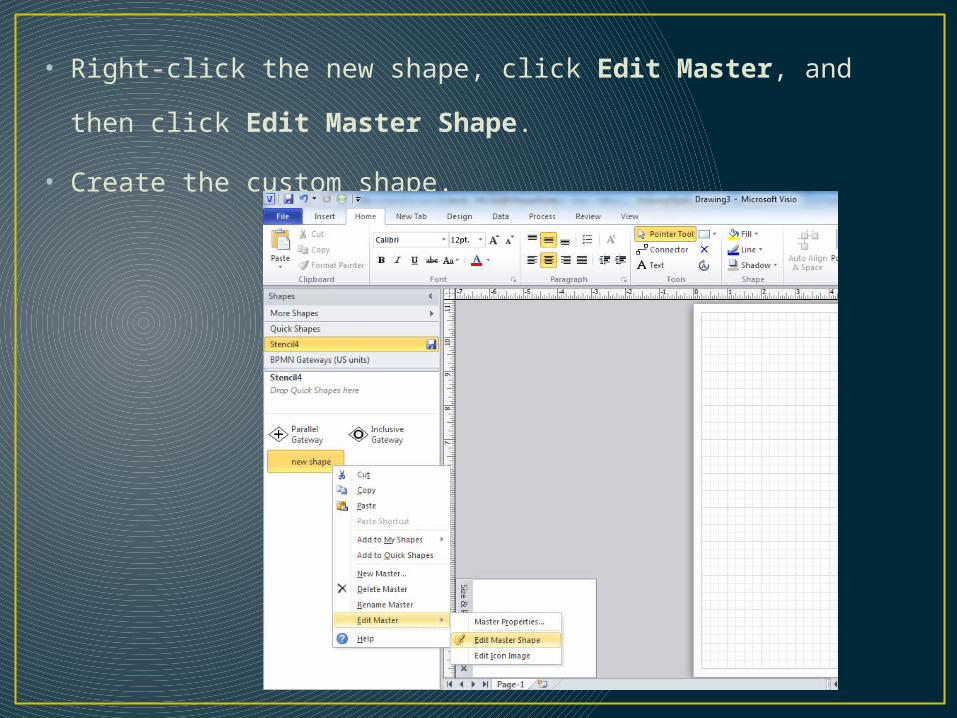
• Right-click the new shape, click Edit Master, and then click
Edit Master Shape.
• Create the custom shape.
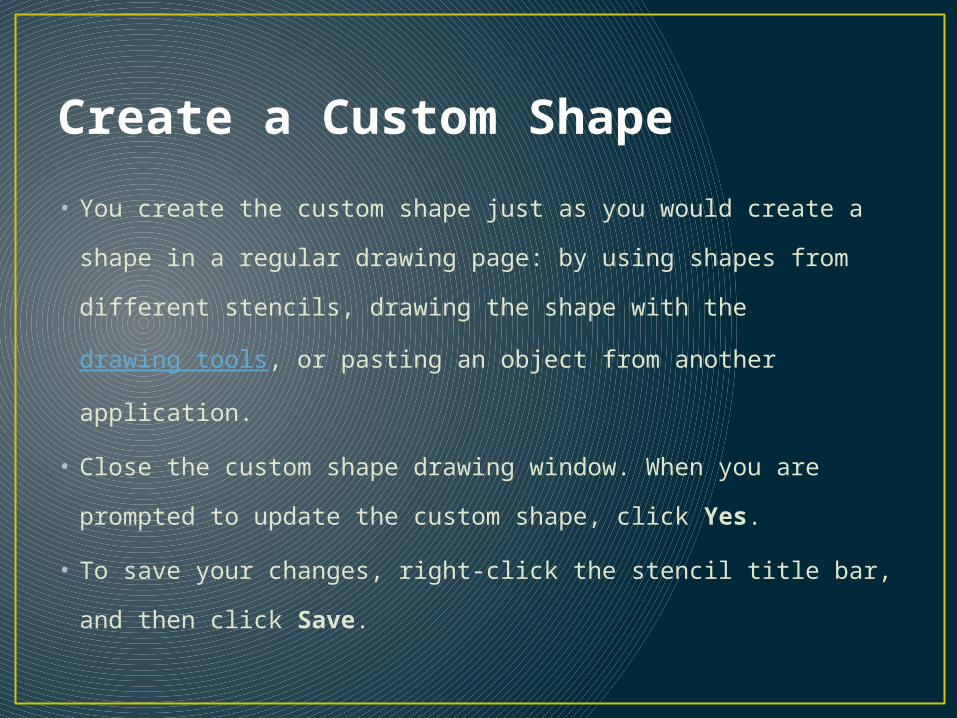
Create a Custom Shape
• You create the custom shape just as you would create a
shape in a regular drawing page: by using shapes from
different stencils, drawing the shape with the drawing tools
, or pasting an object from another application.
• Close the custom shape drawing window. When you are
prompted to update the custom shape, click Yes.
• To save your changes, right-click the stencil title bar, and
then click Save.

Linking data to shapes

Step 1:• Create an excel sheet by entering data
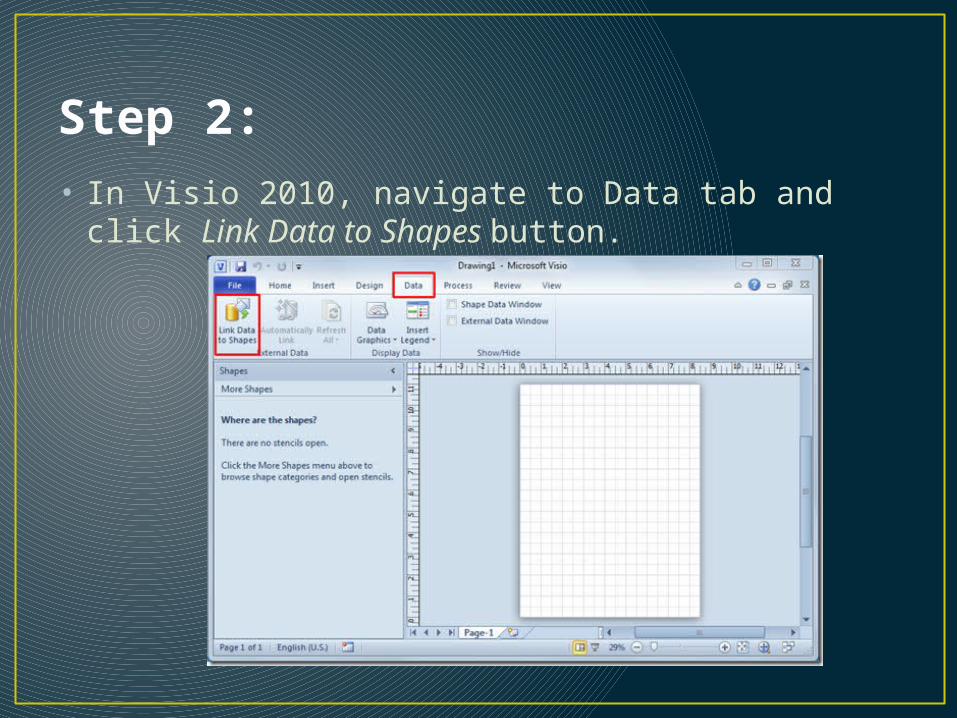
Step 2:• In Visio 2010, navigate to Data tab and click Link
Data to Shapes button.
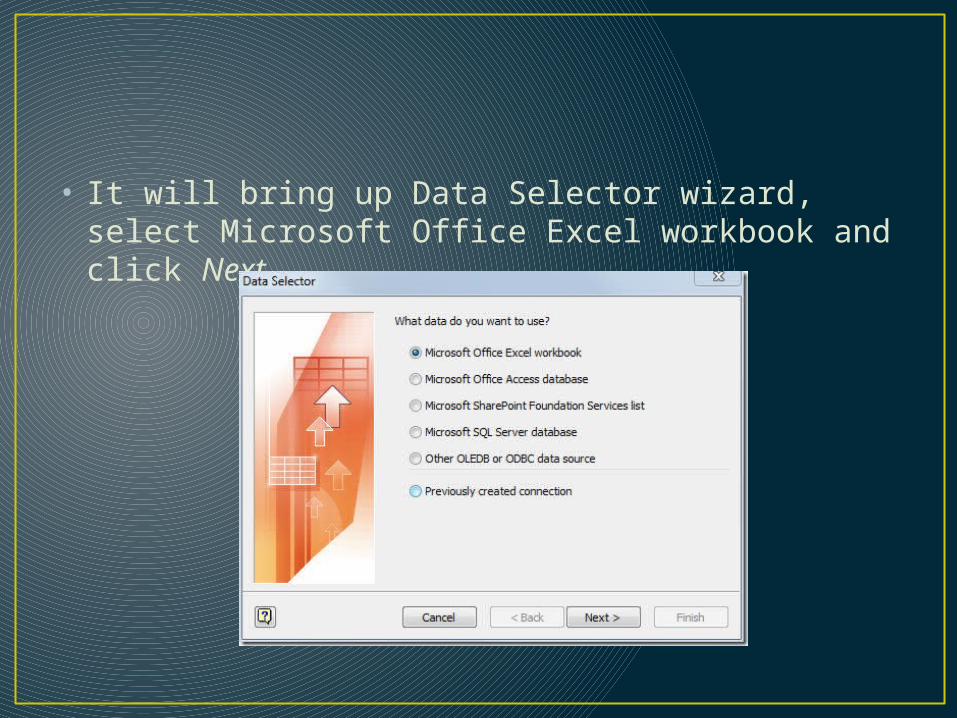
• It will bring up Data Selector wizard, select Microsoft Office Excel workbook and click Next.
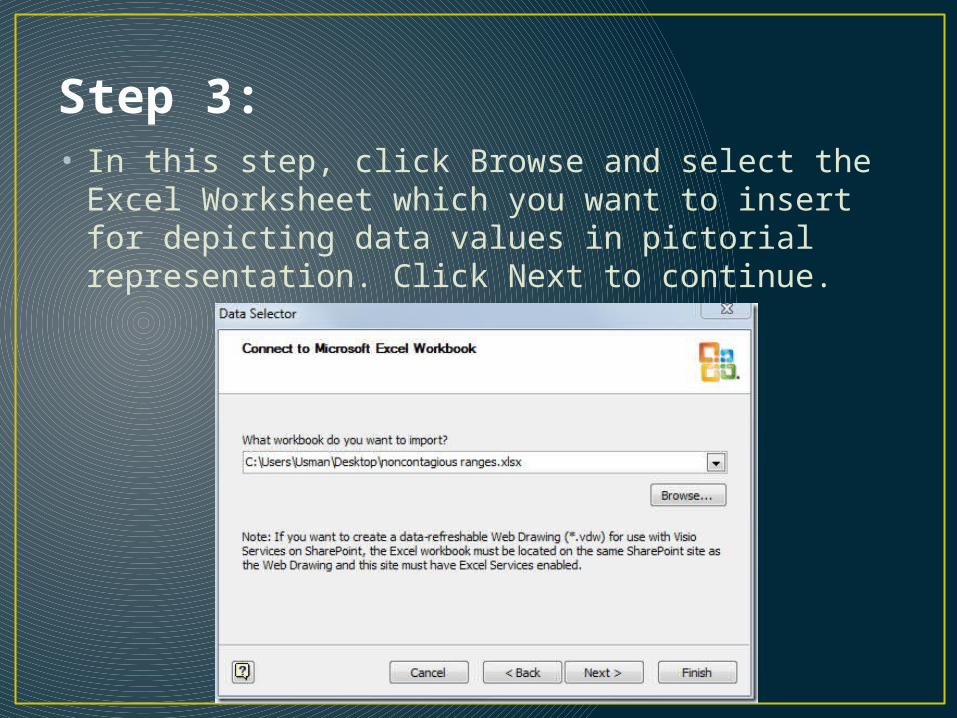
Step 3:• In this step, click Browse and select the Excel
Worksheet which you want to insert for depicting data values in pictorial representation. Click Next to continue.
Step 4:• Select the Excel worksheet which you want to
include. You can also select range, by clicking Select Custom range. We will also enable first row of data contains column headings option, as in our case first row of Excel spreadsheet contains column headings. click Next to continue.
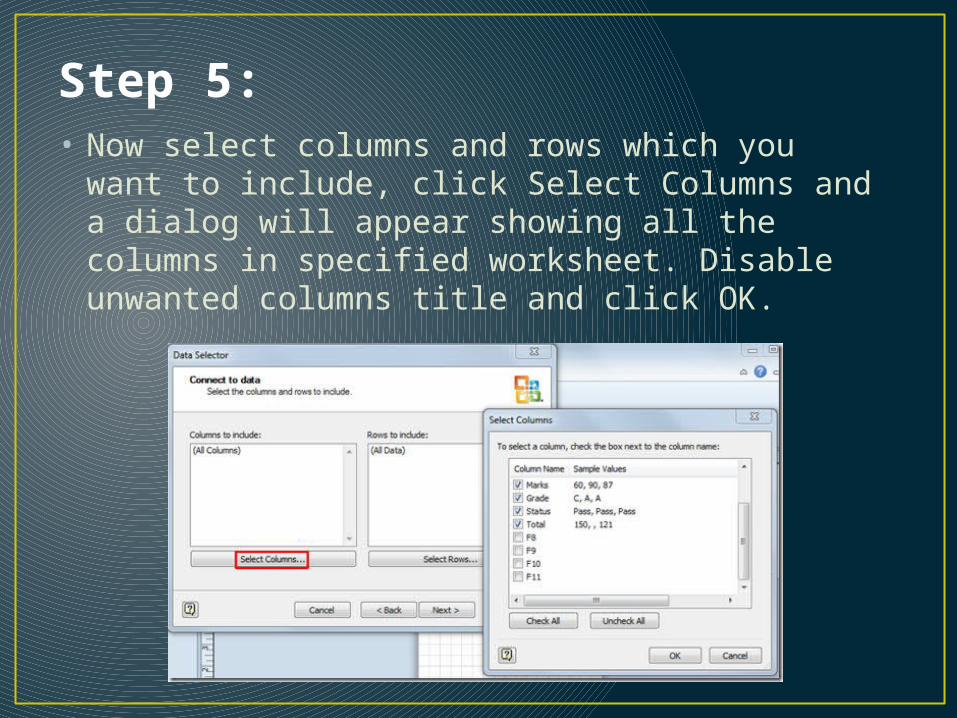
Step 5:• Now select columns and rows which you want to
include, click Select Columns and a dialog will appear showing all the columns in specified worksheet. Disable unwanted columns title and click OK.
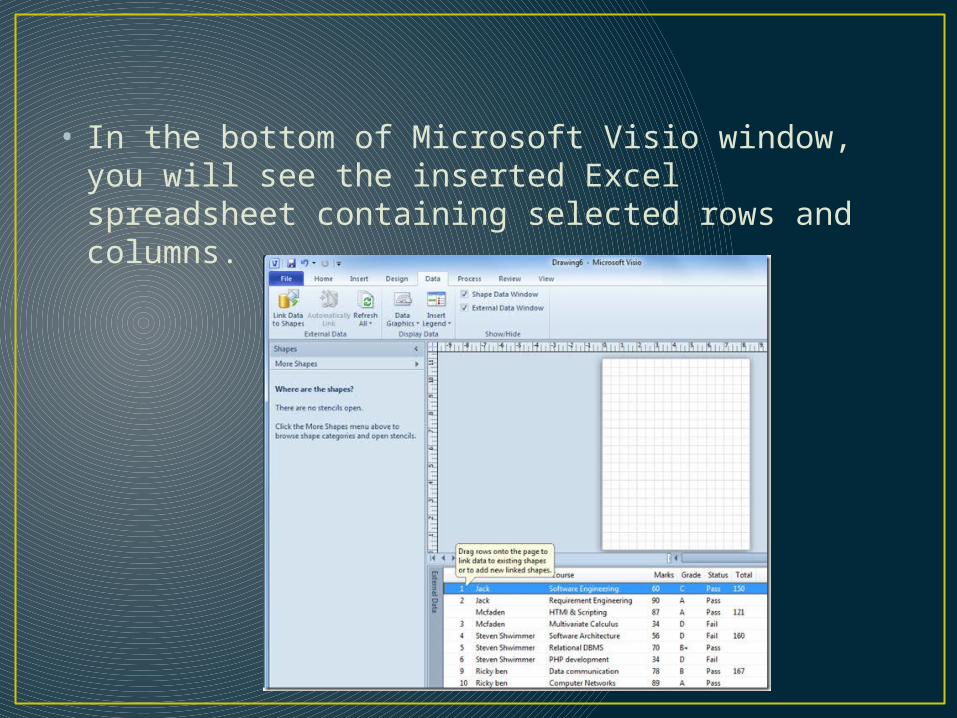
• In the bottom of Microsoft Visio window, you will see the inserted Excel spreadsheet containing selected rows and columns.
• Now, you just need to drag the data and drop it over the shape .It will automatically show you the data value with the shape as the excel sheet is linked with the diagram.
• Task: Make an organizational Chart of Kinnaird college by linking excel sheet with shapes in Visio.