3d rotate tool manual - 360° product viewer3d rotate tool manual limitations images count for the...
TRANSCRIPT
3D Rotate Tool Manual www.yofla.com
Thanks for choosing the 3D Rotate Tool!
Table of Contents:
Features
Limitations
Step by Step Instructions
Available FlashVars
ActionScript Api
ZIP vs. XML+Images
XML file explained
Config Utility
Getting the Images
Embedding the SWF in a Web page
Theme Creation / Modification
SWC Component
Contact and Support
How the tool works:
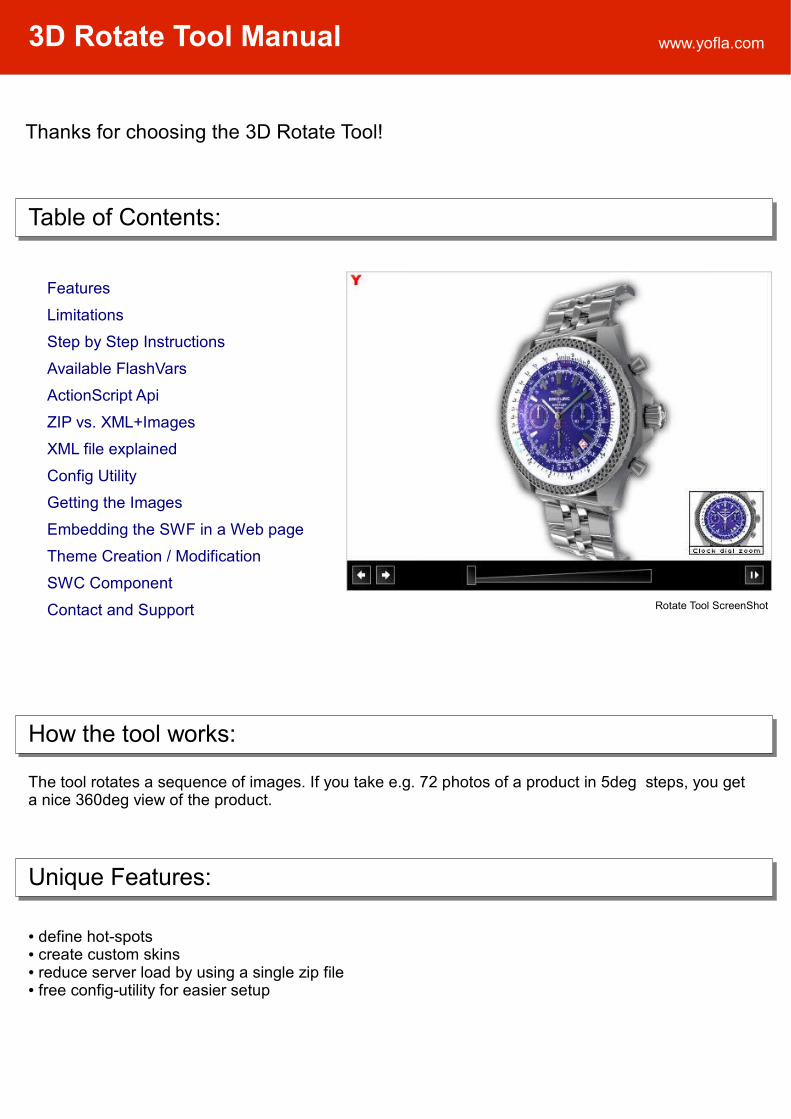
The tool rotates a sequence of images. If you take e.g. 72 photos of a product in 5deg steps, you get a nice 360deg view of the product.
Rotate Tool ScreenShot
Unique Features:
● define hot-spots● create custom skins● reduce server load by using a single zip file● free config-utility for easier setup
3D Rotate Tool Manual www.yofla.com
Features
Preloader - show custom splash image - custom preloader - show loaded images option - option not to load images unless user presses a button
Rotation - rotate in 360deg, or limit rotation to e.g. 180deg - rotate in multiple horizontal levels - choose horizontal or vertical axis of rotation - rotate once option - autorestart option - set speed and direction of the rotation
User Control - choose which buttons to show - disable mouse control - set custom drag speed
Theming - modify color, size and position of any UI item - plug in descriptions in your language (all languages flash supports are supported)
Hotspots - close-up hotspot - zoom a selected part of image with description - zoom hotspot - integrated Flash Zoomer for zooming larger images - URL hotspot - define url to open - JavaScript hotspot - define JavaScript function to run Other Features - Security feature : protect your swf from being stolen and used by others - Zip archive support – load a singe file instead config.xml + dozens of images
3D Rotate Tool Manual www.yofla.com
Limitations
Images countFor the best performance all images used for the rotation are loaded in memory. If hundreds of images at high resolution are used, the memory is quickly filled up and disk caching slows the performance of the computer. For example on a 1GB computer this happens if more than 200 images at the resolution of 640x480px (or higher) are used.
Maximum Image resolutionThe Flash Zoomer plugin can accept an image of size maximum 2880px in width or height. This is an limitation of the Flash Player v.9, it might change in the future.
Flash player versionThe v.4 of the tool uses AS3 language, therefore flash player 9 or higher is required. The older version of the rotate tool (v.3) runs flash player 7 and higher. Email me if you need the older version.
Flash CS3 requiredIf you want to customize the theme the rotate tool uses, or the change the width or height of the rotate tool theme, you need Adobe Flash CS3 or higher installed to edit the fla file.
Some flash knowledge is requiredTo edit the rotate tool theme some flash knowledge is required. You need to know how to edit a movieclip, set width and height of a rectangle, show and hide layers, modify textfields. No expert knowledge of flash is required, if you have ever created a simple banner you will have no problem editing the rotate tool theme movie.
Size of the movieclip can not be set in the html codeDue to the theme model used it is not possible to set the size using width and height parameter in the html document. To use the rotate tool with a different size, you must edit the fla file and scale the assets accordingly.If you set scale using the width and height parameter in the html also the assets like buttons and custom cursors might get scaled.
3D Rotate Tool Manual www.yofla.com
Step by Step Instructions
Follow this walk-through to set up your first 3D presentation:
1. Get the Images.You need the images of the object you want to present. For a smooth animation at least 72 images are required (one image for every 5 degrees of a full 360 degree turn). If you are not sure how to do it, check the "Getting the Images" chapter. Put the images in a single folder.Note: Currently only JPG, PNG and GIF images are supported.
2. Run the free config utility.Note: Currently only Windows version is available If you don't use Windows or do not want to use the config utility, move to step 2.b
» Press "Choose Directory" button and select the directory with the images you have prepared in step 1. The images will load and appear in the right panel of the tool. » To keep this walk-through simple, leave the "Output" option set to Single File (zip). For more information on this option see the chapter “ZIP vs. XML+Images”. » You don't need to modify any of the parameters now. They are set to defaults and will provide a working setup. If you feel you want them edit now, you take a look on the chapter "XML file explained" where all the options are described. » Pres the "Save" button and choose location to save the datafile. Give a datafile a custom name if you like, e.g. product007.zip.Update: Old config utility (win only): http://www.yofla.com/down/3d-rotate/config-utility.zip New config utility (air based): distributed in the zip archive
3. Embed in html page Now you have your zip file ready and all you need is embed the swf into your webpage and set the flashvar paramater "dataFile" to the path to your created datafile.If you have stored your datafile in e.g. www.example.com/products/product007.zip, set the flashVar as follows: dataFile=/products/product007.zip.
If you don't know how to embedd a swf in the html page, follow the instruction in the "Embedding the SWF in a Web page" chapter.
Note: depending on the theme used, some ui elements might appear to be misplaced You have the options to edit the theme and reposition the scrollbars/buttons or to disable them in the editing the config.xml or in the config utility.
2.b Setting up the tool without the config utility If you don't use Window or you don't wont to use the config utility, you need to edit the config xml file by hand in an editor of your choice (Notepad, Pspad, Komodo Edit).
» First create an empty folder and name it e.g. "product007". This folder will contain your images and a config.xml file.Than copy your images prepared in step one in the empty folder. I suggest to copy the images into a folder named "images". You should end up with this structure:
product007/ images/ image1.jpg image2.jpg image3.jpg ...
3D Rotate Tool Manual www.yofla.com
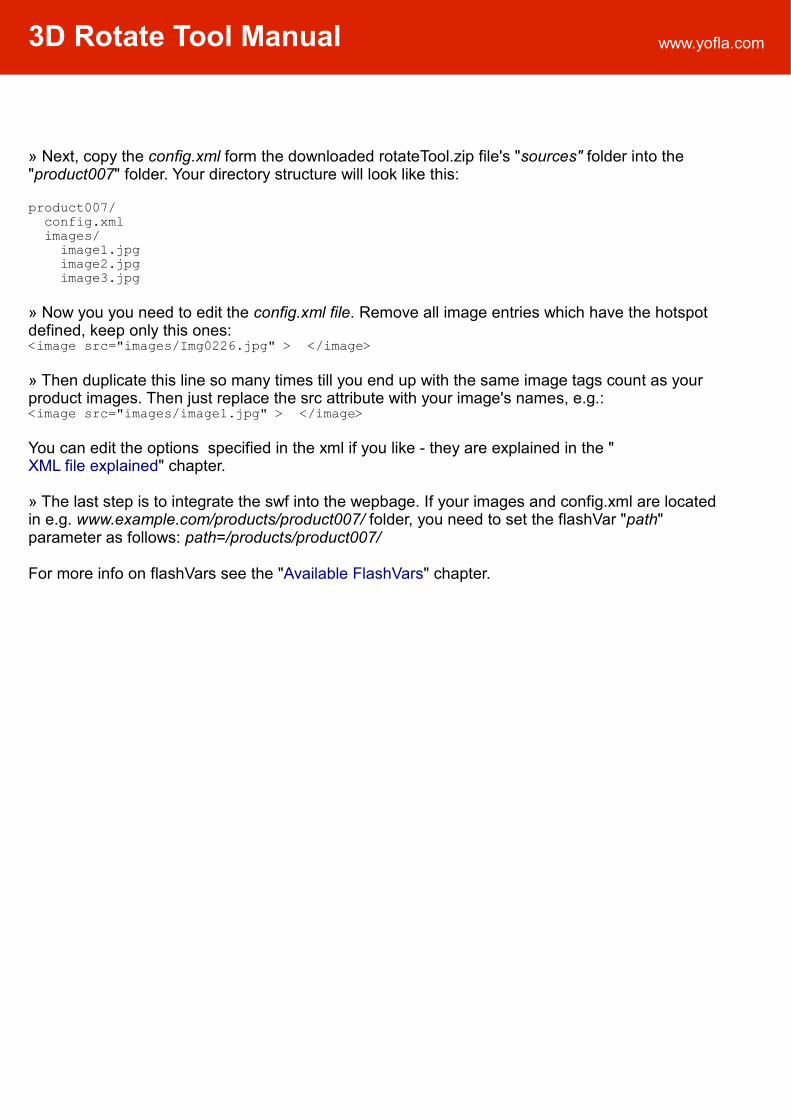
» Next, copy the config.xml form the downloaded rotateTool.zip file's "sources" folder into the "product007" folder. Your directory structure will look like this:
product007/ config.xml images/ image1.jpg image2.jpg image3.jpg
» Now you you need to edit the config.xml file. Remove all image entries which have the hotspot defined, keep only this ones:<image src="images/Img0226.jpg" > </image>
» Then duplicate this line so many times till you end up with the same image tags count as your product images. Then just replace the src attribute with your image's names, e.g.:<image src="images/image1.jpg" > </image>
You can edit the options specified in the xml if you like - they are explained in the "XML file explained" chapter.
» The last step is to integrate the swf into the wepbage. If your images and config.xml are located in e.g. www.example.com/products/product007/ folder, you need to set the flashVar "path" parameter as follows: path=/products/product007/
For more info on flashVars see the "Available FlashVars" chapter.
3D Rotate Tool Manual www.yofla.com
Available FlashVars
FlashVars determine the source images and the config file (or the datafile) the tool will use to display the product presentation. You set the flashVars in the html code. Depending on which method you use when embedding the swf into html page, you must set the flashvars on as much as three diferent locations (code for Mozilla browsers, code for IE and for Javascript) see the chapter “Embedding the SWF in a Web page“ for more details.
Available flashVars:
1. dataFileIs the path to the zip archive which contains the packed images and the config.xml file.
2. pathIs the path to the folder which contains the config.xml file. The path is prepended to the image source specified in the image tag in config.xml
3. configFileIs the custom filename of the config.xml when path flashvar is used if not defined config.xml is used
4. configFileUrlIs the url of custom config file. For example you can use http://www.example.com/product.php?id=124
» So you set one of the following:
- datafile- path- configFileUrl- path + configFile
Setting e.g. both path and dataFile is wrong.
3D Rotate Tool Manual www.yofla.com
ActionScript Api
The rotate tool is initialized using ActionScript. You create a the rotate tool instance issuing this command:Note: you can find this commands in actions of the first frame in the downloaded demo .fla files
var rotateTool : RotateToolApp = new RotateToolApp(rotateToolTheme);
rotateToolTheme is the name of the instance on the stage which does contain the theme assets.
You start the tool with this command:rotateTool.start();
If you want to remove the tool from the stage, use this command:rotateTool.release();
Other commands:
rotateTool.domains="www.yofla.com;yofla.com;localhost"Set domains the tool is allowed to run on. Separate the domains by a semicolon. If the compiled swf is run on a different domain than specified here, an error message is displayed. This is a security feature which prevents somebody stealing the swf from your site. If you don't enter any domain this security feature is disabled.
rotateTool.showErrors = false;If set before calling the start() command, the error reporting is turned off.
rotateTool.setImage(7);Displays the image with provided id. For example id 7 is the eighth image in the config.xml.
rotateTool.setNewPath("/otherproduct/"); Removes the loaded images and loads new images specified by the path parameter. See Available FlashVars chapter for more details on the path parameter.
rotateTool.setNewDataFile("otherFile.zip"); Removes the loaded images and loads new images specified by the dataFile parameter, when using zip file instead of images + config.xml;
rotateTool.stopRotation(); stops the rotationrotateTool.startRotation(); starts the rotationrotateTool.disableControls(); disables button & mouse control rotateTool.enableControls(); enables button & mouse control
rotateTool.zoomOut(); Zooms out if the tool is zoomed
rotateTool.getActualImage(); Returns id of currently displayed image. The first image in config.xml has the id 0.
3D Rotate Tool Manual www.yofla.com
ActionScript Api
» It is possible to set the dataFile or path before the start() command is issued, in case you don't want to use the flashVar parameters (e.g. in the case the rotateTool is a part of a larger project.)
use:rotateTool.path = "/otherproduct/";
or :rotateTool.dataFile = "product007.zip";
thenrotateTool.start();
to “hard code” the path to the images in the swf.
Events:
You can add eventListeners to the rotateToolApp instance and listen for various events. Currently 3 Events are avaiable, example:
var rotateToolApp = new RotateToolApp(rotateToolTheme);rotateToolApp.path = myPath;rotateToolApp.addEventListener(RotateToolApp.INITIALIZED, rotateToolInitialized);rotateToolApp.addEventListener(RotateToolApp.LOADING_PROGRESS, progressListener);rotateTool.addEventListener(RotateToolApp.HOTSPOT_CLICK, hotspotClickListener );
INITIALIZEDIs dispatched when all images are loaded. Event type is flash.events.Event
LOADING_PROGRESSInforms on how many images are loaded – useful e.g. for your custom preloader. Event type is com.yofla.utils.CustomEvent and it has a property “obj” which holds a number from 0 to 1.
HOTSPOT_CLICKIs issued when a hotpsot is clicked. Event type is com.yofla.rotateTool.events.HotspotEvent. Event has a property hotspot with some public data, the most important is hotspot.xmlData – the xml dat of the hotspot as in the config.xmlother public properties are counterparts of attributes specified in the xml, e.g. hotspot.offsetX is the specified (or inherited) offsetX attribute.
3D Rotate Tool Manual www.yofla.com
ZIP vs. XML+Images
Advantages and disadvantages of using a zip datafile over Xml file + images:
Advantages of using the zip datafile:- less requests on server = faster loading time- easier setup
Disadvantages of using the zip datafile:- unable to use a preloader image / splash screen- unable to display loaded images- no native support of the hotspots definition in the config utility- only Url and JavaScript and CloseUp hotspots are currently supported
Advantages of using images + xml file- easier config.xml editing- easier to swap/modify images
Disadvantages of using images + xml file- if many files are used e.g.100, then 100 separate Http requests are made on the server. The loader is set up that no more than 8 requests are made as the same time.
For most of my project I prefer using the xml + images approach. This has the advantage that you can edit the xml really fast and you can also update the images fast - without the need of repacking the zip file. My usual work flow is that I create the set of images and config.xml using the config utility and then I just edit the config.xml to adjust speed, user interface look, or add the hot-spots.
3D Rotate Tool Manual www.yofla.com
XML file explained
Very often you will edit the config.xml file to add hot-spots or customize the user interface. Use your favorite editor, notepad works but there are better. I use Pspad (http://www.pspad.com/en/) and Komodo Edit (http://www.activestate.com/Products/komodo_ide/komodo_edit.mhtml). Komodo Edit is free and checks you XML syntax on the fly
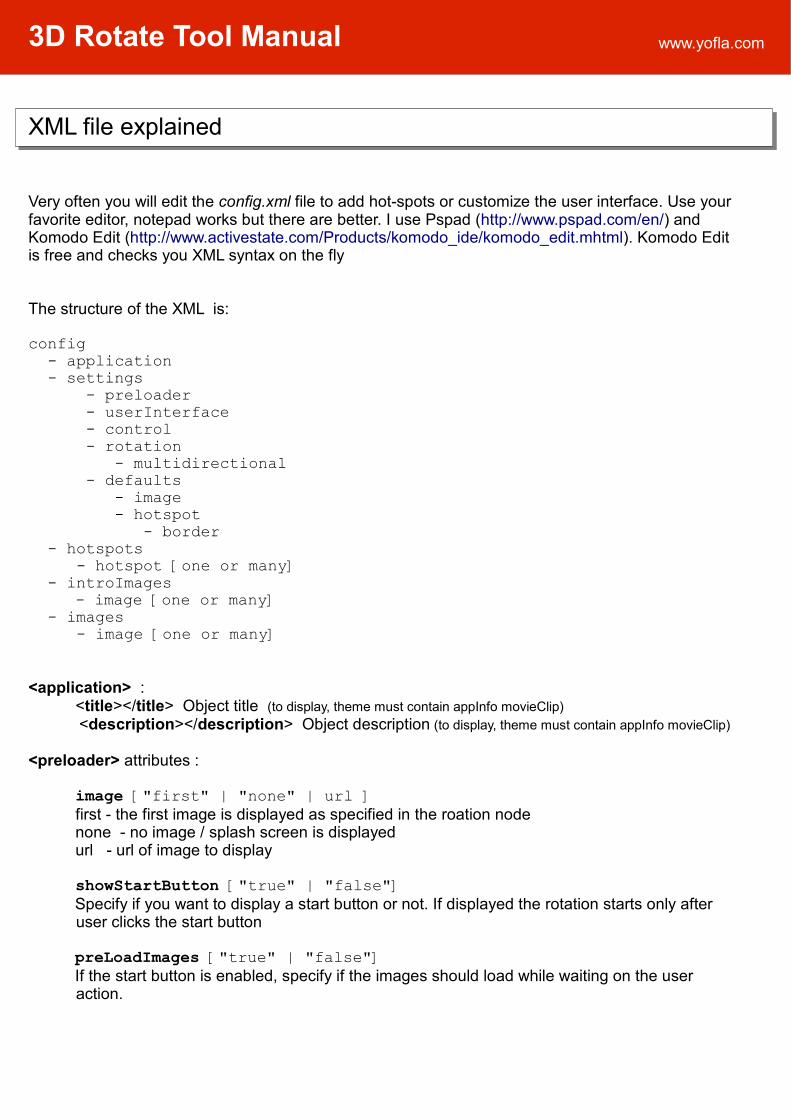
The structure of the XML is:
config - application - settings - preloader - userInterface - control - rotation - multidirectional - defaults - image - hotspot - border - hotspots - hotspot [one or many] - introImages
- image [one or many] - images - image [one or many]
<application> :<title></title> Object title (to display, theme must contain appInfo movieClip)<description></description> Object description (to display, theme must contain appInfo movieClip)
<preloader> attributes :
image ["first" | "none" | url ]first - the first image is displayed as specified in the roation nodenone - no image / splash screen is displayedurl - url of image to display
showStartButton ["true" | "false"]Specify if you want to display a start button or not. If displayed the rotation starts only after user clicks the start button
preLoadImages ["true" | "false"]If the start button is enabled, specify if the images should load while waiting on the user action.
3D Rotate Tool Manual www.yofla.com
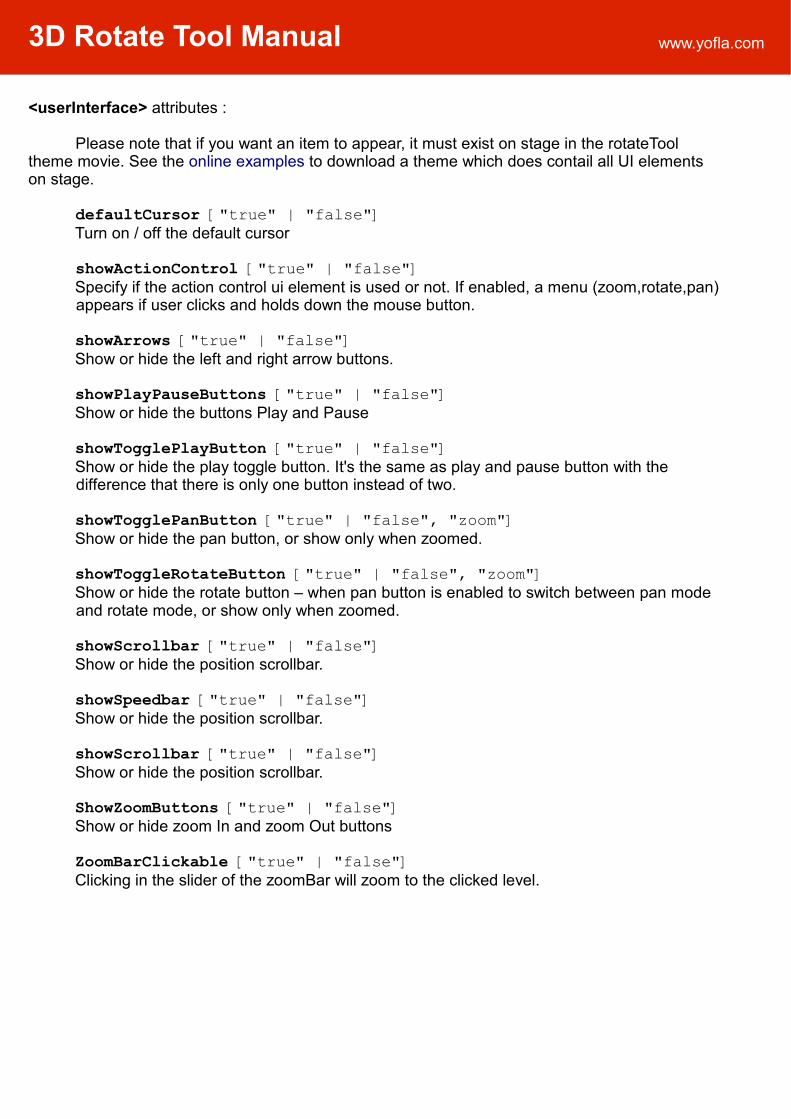
<userInterface> attributes :
Please note that if you want an item to appear, it must exist on stage in the rotateTool theme movie. See the online examples to download a theme which does contail all UI elements on stage.
defaultCursor ["true" | "false"]Turn on / off the default cursor
showActionControl ["true" | "false"]Specify if the action control ui element is used or not. If enabled, a menu (zoom,rotate,pan) appears if user clicks and holds down the mouse button.
showArrows ["true" | "false"]Show or hide the left and right arrow buttons.
showPlayPauseButtons ["true" | "false"]Show or hide the buttons Play and Pause
showTogglePlayButton ["true" | "false"]Show or hide the play toggle button. It's the same as play and pause button with the difference that there is only one button instead of two.
showTogglePanButton ["true" | "false", "zoom"]Show or hide the pan button, or show only when zoomed.
showToggleRotateButton ["true" | "false", "zoom"]Show or hide the rotate button – when pan button is enabled to switch between pan mode and rotate mode, or show only when zoomed.
showScrollbar ["true" | "false"]Show or hide the position scrollbar.
showSpeedbar ["true" | "false"]Show or hide the position scrollbar.
showScrollbar ["true" | "false"]Show or hide the position scrollbar.
ShowZoomButtons ["true" | "false"]Show or hide zoom In and zoom Out buttons
ZoomBarClickable ["true" | "false"]Clicking in the slider of the zoomBar will zoom to the clicked level.
3D Rotate Tool Manual www.yofla.com
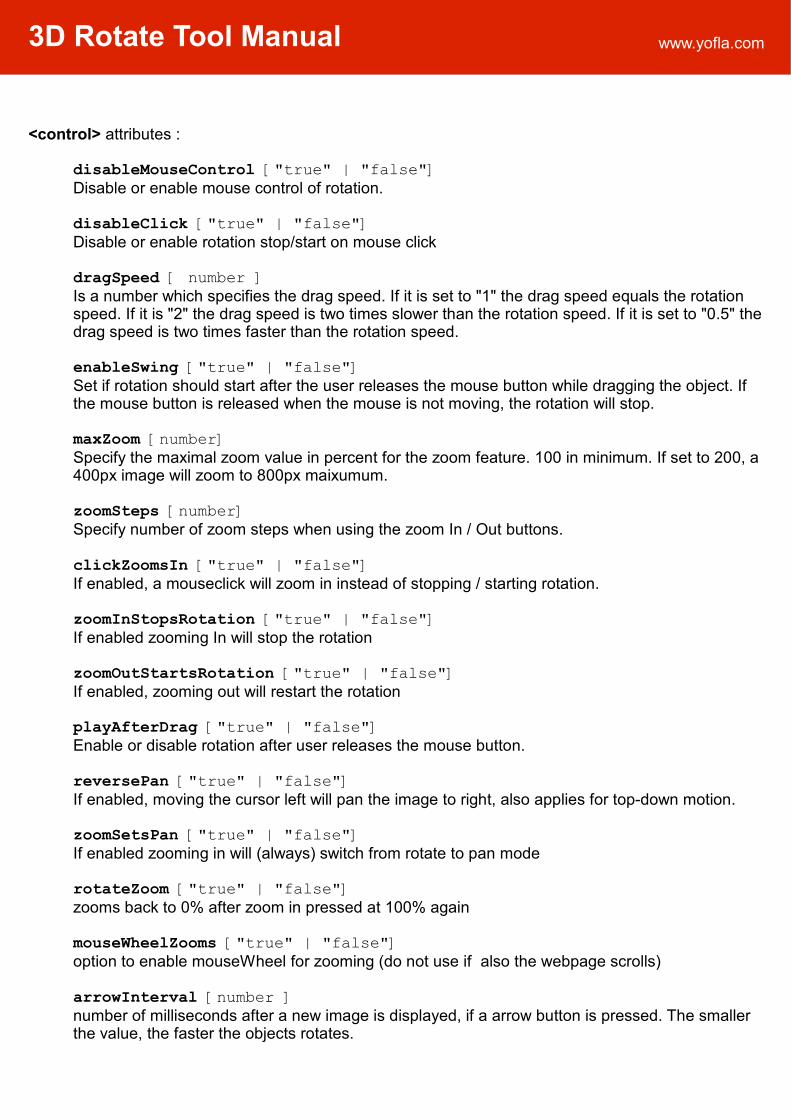
<control> attributes :
disableMouseControl ["true" | "false"]Disable or enable mouse control of rotation.
disableClick ["true" | "false"]Disable or enable rotation stop/start on mouse click
dragSpeed [ number ]Is a number which specifies the drag speed. If it is set to "1" the drag speed equals the rotation speed. If it is "2" the drag speed is two times slower than the rotation speed. If it is set to "0.5" the drag speed is two times faster than the rotation speed.
enableSwing ["true" | "false"]Set if rotation should start after the user releases the mouse button while dragging the object. If the mouse button is released when the mouse is not moving, the rotation will stop.
maxZoom [number]Specify the maximal zoom value in percent for the zoom feature. 100 in minimum. If set to 200, a 400px image will zoom to 800px maixumum.
zoomSteps [number]Specify number of zoom steps when using the zoom In / Out buttons.
clickZoomsIn ["true" | "false"]If enabled, a mouseclick will zoom in instead of stopping / starting rotation.
zoomInStopsRotation ["true" | "false"]If enabled zooming In will stop the rotation
zoomOutStartsRotation ["true" | "false"]If enabled, zooming out will restart the rotation
playAfterDrag ["true" | "false"]Enable or disable rotation after user releases the mouse button.
reversePan ["true" | "false"]If enabled, moving the cursor left will pan the image to right, also applies for top-down motion.
zoomSetsPan ["true" | "false"]If enabled zooming in will (always) switch from rotate to pan mode
rotateZoom ["true" | "false"]zooms back to 0% after zoom in pressed at 100% again
mouseWheelZooms ["true" | "false"]option to enable mouseWheel for zooming (do not use if also the webpage scrolls)
arrowInterval [number ]number of milliseconds after a new image is displayed, if a arrow button is pressed. The smaller the value, the faster the objects rotates.
3D Rotate Tool Manual www.yofla.com
reverseDrag ["true" | "false"]If you have images are in reversed order, use this setting to swap drag direction.
smoothStop ["true" | "false"]If enabled, the rotation starts and stops whith a small delay.
<rotation> attributes :
autoRestart [number]Restarts the rotation after defined time. Specify in seconds. If set to “0”, the rotation does not resume automatically
bounce ["true" | "false"]Use this setting if you have a photos of a product which does have not a view of all 360 degrees. A water tap is a perfect example. The tool reverses the rotation after it reaches the last or the first image.
firstImage [ number ]Define with which image the rotation starts.
rotate ["true" | "false"]Start or stop rotation afer all images are loaded.
rotateDirection ["-1" | "1"]The default direction of rotation. Use 1 or -1 to swap rotation direction.
rotatePeriod [ number ]Specify the duration of rotation in seconds.
rotationAxis ["vertical" | "horizontal"]Specify the axis of rotation for your pictures.
disabledIfZoom ["true" | "false"]Disable the possibility to rotate (using mouse or buttons) if a view is zoomed
If you have shoot the images of rotation for more horizontal levels, you set the data in the <multiDirectional> attributes:
verticalSteps [ number ] number of horizontal levels
horizontalSteps [ number ] number of shoots per horizontal level
verticalSensitivity [number]pixel span in vertical direction after which images at a next level are shown
traverse [ 0 | 1 | -1]Define if tool should step on next/previous horizontal level if all images in the current level are shown (i.e. after rotating 360degrees).
3D Rotate Tool Manual www.yofla.com
<defaults> nodeThe defaults note specifies defaults for all the image and hotspot nodes. See description of image and hotpsot nodes to see it's all available parameters. In the defaults node, these default parameters can be set:
<image>:showDescription, showHotspots, showTitle, shrinkToFit, zoomToFit
<hotspot> :height, width, radius, showTitle, type
<border> :color, color2, type, thickness
<hotspots> node
In the hotspots node you define hotspots which are shared among more than one image. This is extremely handy if you share e.g. one close-up image for ten or more frames. Note that still every single image can have it's individual hotspots defined which do not rely on this <hotspots> node.
<hotspot>See hotspot node description on the next pages for complete attribute list of an hotspot. A hotspot defined in <hotspots> node must have the attribute id, which is used as a reference for other hotspots.
<images> node
Images node is the core of the config.xml file. It contains the images which make the 3D animation of your product. The images node contains an <image> node for every image in the animation. Each image node can have unlimited number of hotspot nodes.
Structure of the image node:image - hotspot - hotspot - .... - description
<image> node attributes:
src [string]Path to the image. Provide relative path to the value of the the path flashVar, if path flahsVar is used. If configFileUrl flashVar is used, provide absolute path to the image.
srcLarge [string]Optional parameter - path to a large image. When zoomed, the large image is loaded and displayed.
showDescription ["true" | "false"]Applies only on image defined in a close up hotspot. If enabled, the image description is shown right away, without the need on clicking on the image title. The image description is defined in description node: <description><![CDATA[This is description ]]></description>
3D Rotate Tool Manual www.yofla.com
showTitle ["true" | "false"]Applies only on image defined in a close up hotspot. If disabled, the image info title is not shown. shrinkToFit ["true" | "false"]If image is larger than the defined area in the theme movie, it will shring to fit in this area.
zoomToFit ["true" | "false"]If image is smaller than the defined area in the theme movie, it will zoom to fit this area.
showHotspots ["true" | "false"]Enable or disable showing hotspots for this image.
<description> <![CDATA[string]]> </description>Contains description of the image for close up image.
<hotspot> node:
Every image can have hotspots defined. If you want to use one hotspot for two or more images, it is handy to define the hotspot in the <hotspots> node and reference it with the source attribute. The structure of the hotspot in the <hotspots> node or in the <image> node is the same, except of the id / source parameter
Structure of the hotspot node:
- hotspot - borderand one of: - image - zoom - url - javacript
Hotspot attributes:
source [ string ]If this attribute is defined, all hotspot parameters and content is copied from the source hotspot defined in <hotspots> node. If you define additional parameters, the ones of the source hotspots are overridden
offsetX [ number ]X offset of the hotspot from image's top left corner in pixels
offsetY [ number ]Y offset of the hotspot from image's top left corner in pixels
3D Rotate Tool Manual www.yofla.com
type ["circle" | "disc" | "rectangle" | "custom" ]circle : hotspot has the shape of a circledisc : hotspot has the shape of filled circle - discrectangle: hotspot has the shape of a rectanglecustom : hotspot has the shape of the custom hotspot defined in the rotateToolTheme movie
className [String]The class definition of a movieClip, which is used when custom hotspot type is used. If this parameter is ommited, the default com...CustomHotspotComponent is used (a custom hotspot movieClip in the library).
showTitle ["true" | "false"]Show or hide a small title movie which appears next to the cursor on a hotspot mouse over action.
width [number]Width of the hotspot, if hotspot is of rectangle type.
height [number]Height of the hotspot, if hotspot is of rectangle type.
radius [number]radios of the hotspot, if hotspot is of type disc or circle
absolutePosition ["true" | "false"]if set to true the hotspot position does not change when the image is zoomed, the offsetX and offsetY are relative to the position of the images movie in the fla.
<border> nodeThe border node defines the border of the hotspot. Attributes:
type [ “solid” | “double” | “none”]solid : a single lined outlinedouble : double lined outlinenone : hotspot has not outline
width [number]Is the thickness of the border.
color [RRGGBB]Color of the border in hex format. E.g. for red “FF0000”.
color2 [RRGGBB]The second border color, if border type double is specified.
<image> hotspot nodeRepresents the close-up hotspot. After a close-up hotspot is clicked, an image is loaded and its title/description is displayed. See description of image node attributes on this page. What is interesting, you might define again new hotspots for this image – you can nest the close-up hotspots.
3D Rotate Tool Manual www.yofla.com
<zoom> hotspot nodeRepresents the Flash Zoomer hotspot. If clicked a larger image is loaded which can be zoomed in and out. Due to Flash player limitation the loaded image can be of 2880px in widht or height maximum.
Attributes:src [ string ]Path to the zoomed image. If the rotateTool is initailized with the path flashVar, the path is prepended. If using the zip archive, use the image's path in the archive.
title [ string ]Title which displays on hotspot mouse over.
<url> hotspot nodeRepresents the URL hotspot. If clicked, an http link is opened.
src [ string ]Is the http link of your choice.
title [ string ]Title which displays on hotspot mouse over.
target [ "_blank" | "_top" | "_slelf" ]Target window for the url link.
<javascript> nodeRepresents the JavaScript hotspot. If JavaScript hotspot is clicked a defined JavaScript function is called.
command [string]Name of the JavaScript function.
attribute [string]Attribute which will be passed to the function specified in command attribute.
title [string]Title which displays on hotspot mouse over.
3D Rotate Tool Manual www.yofla.com
<introImages> node
IntroImages node is a collection of images which display once before the rotation. They are useful for an intro-animation you want to display before the rotation starts. If you do not define this node, no intro images are shown.
Structure of the introImages node:introImages - image - ....
<introImages> node attributes:
duration [number]If set to 0, or if it is not provided, the interval between showing the next image is of the same speed as the rotation. You can override this by setting a number greater than 0, in seconds. If you set e.g. “2”, the whole duration of the intro animation will be 2 seconds.
replay ["true" | "false"]If the user presses play (or togglePlay) button, the intro animation is re-played. If set to false (default), the intro animation is not re-played.
3D Rotate Tool Manual www.yofla.com
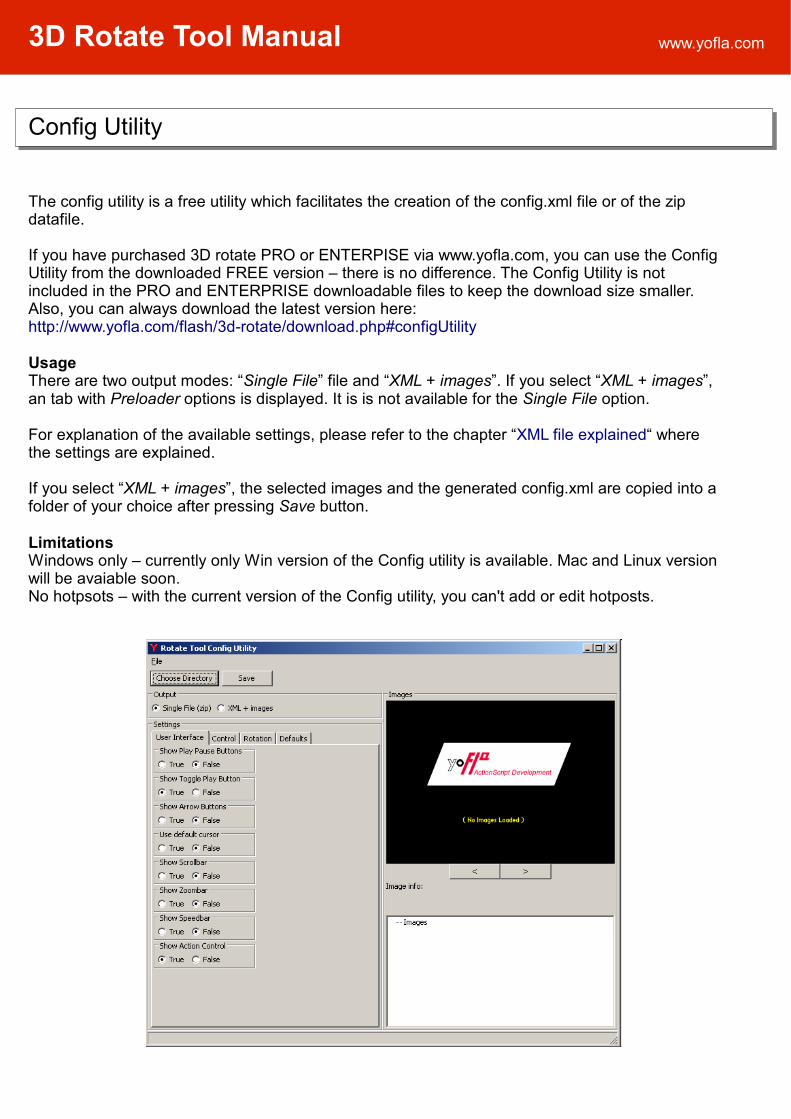
Config Utility
The config utility is a free utility which facilitates the creation of the config.xml file or of the zip datafile.
If you have purchased 3D rotate PRO or ENTERPISE via www.yofla.com, you can use the Config Utility from the downloaded FREE version – there is no difference. The Config Utility is not included in the PRO and ENTERPRISE downloadable files to keep the download size smaller. Also, you can always download the latest version here:http://www.yofla.com/flash/3d-rotate/download.php#configUtility
UsageThere are two output modes: “Single File” file and “XML + images”. If you select “XML + images”, an tab with Preloader options is displayed. It is is not available for the Single File option.
For explanation of the available settings, please refer to the chapter “XML file explained“ where the settings are explained.
If you select “XML + images”, the selected images and the generated config.xml are copied into a folder of your choice after pressing Save button.
LimitationsWindows only – currently only Win version of the Config utility is available. Mac and Linux version will be avaiable soon.No hotpsots – with the current version of the Config utility, you can't add or edit hotposts.
3D Rotate Tool Manual www.yofla.com
Getting the Images
There are two ways how to get images for your product presentation. One is the good old fashioned photography, the other are Computer Generated Images (CGI).
Photography.Depending on your budged, you can use services of an professional or shoot the photos by yourself. When shooting images by yourself you will need good lighting and a turntable. Here are some external links on this topic:
Making a turntable: http://wiki.panotools.org/Self-made_object_turntable http://www.philohome.com/turntable/turntable.htm Studio Lighting: http://digital-photography-school.com/blog/how-to-make-a-inexpensive-light-tent/
Excellent guide on how to take photos on a turntable: http://beckerexhibits.wustl.edu/3D/howto/index.html
This are just few links for your inspiration, there are more useful tutorials on the net on studio- lightning.
CGIIn some cases a viable alternative to photographs are CGI images. If you have no experiences with CGI software, I recommend outsource this task to a professional. If want to try to create the CGI images by yourself, there is the best free (and open-source) program Blender3D http://www.blender.org/
From the paid software my favorite is Cinema 4D, but there are many others as 3D Studio MAX, Lightwave, Maya and others...
I cooperate with CGI professionals so if you decide to go with CGI images you can contact me at [email protected]
3D Rotate Tool Manual www.yofla.com
Embedding the SWF in a Web page
This part of the tutorial is hosted on-line, please visit:
http://www.yofla.com/flash/embedding-swf/
for more information on how to embed a swf in a webpage.
3D Rotate Tool Manual www.yofla.com
Theme Creation / Modification
The 3d rotate tool.v4 came with a new theming approach. You can set any position of the ui elements or of the rotated images. The disadvantage of this approach is that you can't scale the final swf. If you have designed your theme to be 500x400px, you can't change the swf's width and height to other values in the html code.
The best way how to create a new theme is to start modifying a current one. It is important that the instance names of the movies on the stages do not change, otherwise the tool will stop working.
Also the assets which are not used must not be deleted. You can move them to a layer which you hide so they don't interfere with your work. Turn off the displaying of these assets in config.xml.
In many cases the the tool scans for the width and height of the instances on the stage. Because of this you need to set their width or height by editing their content and not by scaling them. If you don't edit the content of the images movie, but resize the image movie itself, it will break the theme.
The rotateToolTheme movie which you edit has many layers. Hide layers you don't need fore easier editing.
Here follows a simple description of each layer and how to modify it:
- Background Layer- change background to your desired width and height- change background color / alpha if desired
- Images layer / movie- specifies the target into which images are loaded- you can adjust its size an position- do not set it's size of the image movie directly, edit the content of the image movie to change it's size- you can adjust the color of the images movie content or set it to transparent
- Controls layer - replace the content of the buttons if you like - reposition the buttons freely - just keep in mind not to change the instance names - the width of the scrollbar movies must not be wider than the scrollbar background, the scroll percentage is computed as the fraction of handle position and scrollbar width. - don't delete unused instances, they won't show if turned off in config.xml
- Preloader- contains the movie preloader, which contains the movie percentage
- if 50% are loaded, the percentage movie advances to frame 50 - this is how the preloader works- most of the YoFLA's examples just tween a stripe from 0 to 100% width in 100 frames, but you can use any animation you like. When editing the width of the YoFLA's preloader:- set stripe's background width- set width of the content of the tweened stripe to the same width, I recommend doing this this at frame 100.
3D Rotate Tool Manual www.yofla.com
- Image Plugin Layer
- Background layer - scale the content of the background, it is the area which will the plugin cover when opened - optionaly adjust it's color - ImageTarget layer - scale the content of the imageTarget movie, it the area in wich the image will be displayed - make imageTarget movie samaller if you want the title bar to not overlap the image - optionaly adjust it's color - ImageInfo layer - contains the imateTitle and imageDescription Movie
- the Y position does not matter - the tool aligns it automaticaly to the bottom of the background movie
- ImageTitle Movie - adjust the color height of the background bar, update font size and color
- showMore button - you can plug in your content, its a movieClip with to states (labeled frames) show and hide
- ImageDescription Movie- adjust the font, size, or the color of the background movie. the height of the background movie is adjusted automatically
- Close button layer - you may plug in your own close button - Preloader layer - see preloader description on the above page
3D Rotate Tool Manual www.yofla.com
- FlashZoomer Plugin Layer
- Background layer- adjust the size and color of the background layer, it is the area the zoomer will cover- you might delete this layer
- Image layer- adjust the size and color of the background layer (again, edit the content of the movie, not the movie alone), it is the area the loaded image will cover
- Controls layer- plug in your own buttons, or reposition the buttons. As always, do not rename the instance names or delete the instances
- Navigator Movie:- Target movie
- adjust the size of the content of the navigator's target movie to change size of the navigator window. You may also adjust it color or transparency
- Highlite movie- border layer is the inner border of the highlite rectangle- border2 layer is the outer border of the highlite rectangle- adjust colors or width of the borders- you may delete one border if you wish
- Selection Movie
- contains the border and the inside content of the selection rectangle, when zooming a region- adjust colors as you like it
- Preloader- see instruction on how to edit preloader on the previous page
- Hotspot layer- hotspotTitle Movie
- is the title which displays on hotspot mouse over action and contains the hotspot title text. You may adjust the font, font size, font color, background rectangle size and color. Again, edit the content of the background movie, not the movie itself
- customHotspot Movie
- edit the movie to plug in your own custom hotspot
- Cursors layer- cursors movie
- edit the cursors movie to plug in your own custom cursors
3D Rotate Tool Manual www.yofla.com
SWC Component
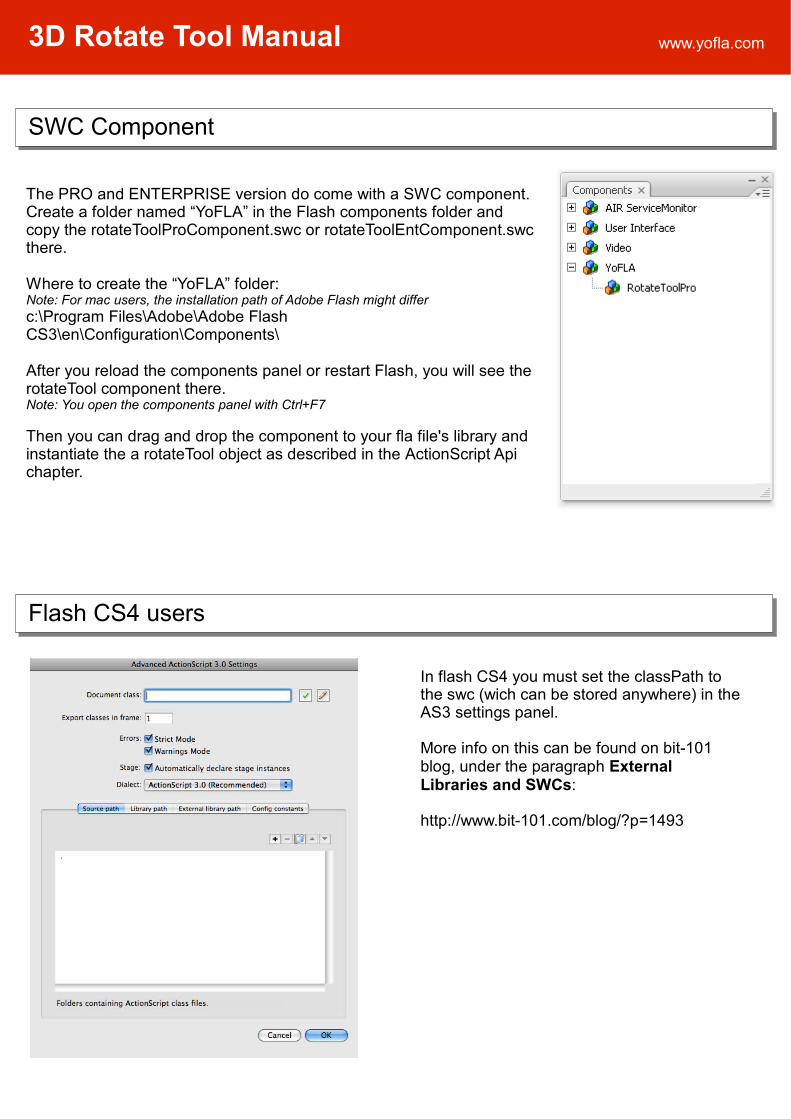
The PRO and ENTERPRISE version do come with a SWC component. Create a folder named “YoFLA” in the Flash components folder and copy the rotateToolProComponent.swc or rotateToolEntComponent.swc there.
Where to create the “YoFLA” folder:Note: For mac users, the installation path of Adobe Flash might differc:\Program Files\Adobe\Adobe Flash CS3\en\Configuration\Components\
After you reload the components panel or restart Flash, you will see the rotateTool component there. Note: You open the components panel with Ctrl+F7
Then you can drag and drop the component to your fla file's library and instantiate the a rotateTool object as described in the ActionScript Api chapter.
Flash CS4 users
In flash CS4 you must set the classPath to the swc (wich can be stored anywhere) in the AS3 settings panel.
More info on this can be found on bit-101 blog, under the paragraph External Libraries and SWCs:
http://www.bit-101.com/blog/?p=1493
3D Rotate Tool Manual www.yofla.com
Using custom hotspots
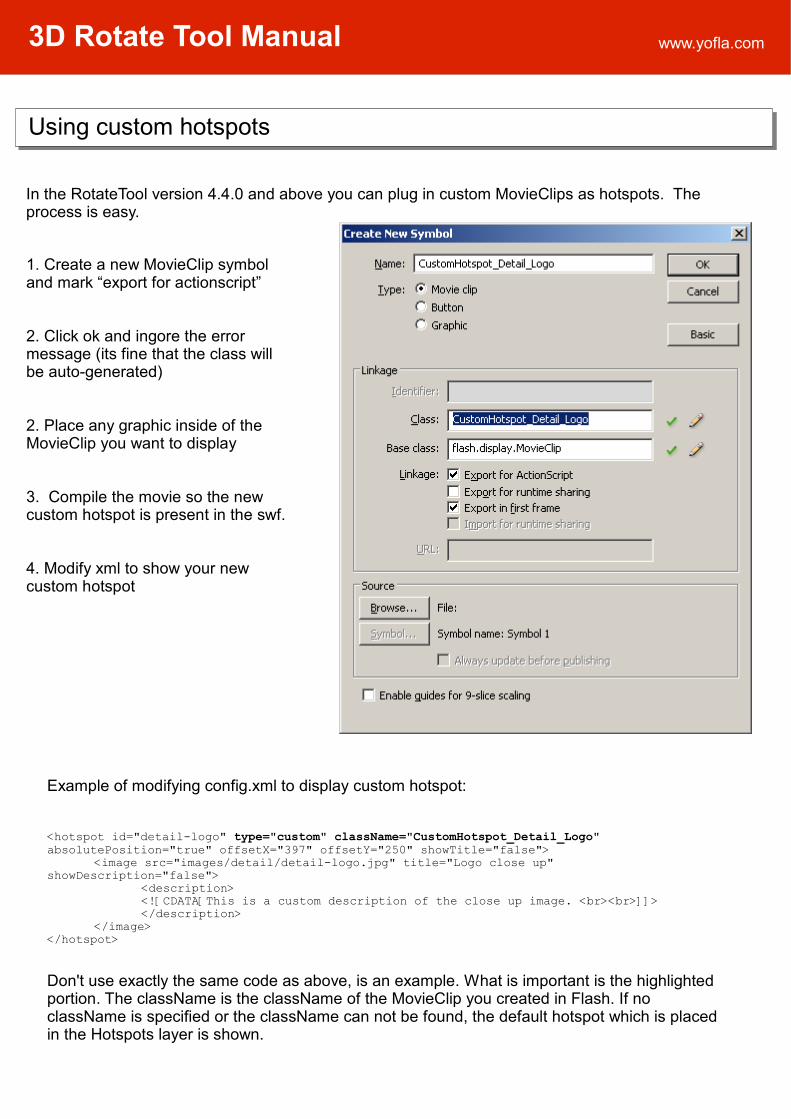
In the RotateTool version 4.4.0 and above you can plug in custom MovieClips as hotspots. The process is easy.
1. Create a new MovieClip symbol and mark “export for actionscript”
2. Click ok and ingore the error message (its fine that the class will be auto-generated)
2. Place any graphic inside of the MovieClip you want to display
3. Compile the movie so the new custom hotspot is present in the swf.
4. Modify xml to show your new custom hotspot
Example of modifying config.xml to display custom hotspot:
<hotspot id="detail-logo" type="custom" className="CustomHotspot_Detail_Logo" absolutePosition="true" offsetX="397" offsetY="250" showTitle="false">
<image src="images/detail/detail-logo.jpg" title="Logo close up" showDescription="false">
<description><![CDATA[This is a custom description of the close up image. <br><br>]]></description>
</image></hotspot>
Don't use exactly the same code as above, is an example. What is important is the highlighted portion. The className is the className of the MovieClip you created in Flash. If no className is specified or the className can not be found, the default hotspot which is placed in the Hotspots layer is shown.
3D Rotate Tool Manual www.yofla.com
Feedback is welcome!
Author:© Matus Laco, actionscript developerwww.yofla.com
Contact email address:[email protected]
Actual 3D Rotate Tool version:4.5.x
Manual date:Last updated: 20. Aug 2009url: http://www.yofla.com/flash/3d-rotate/manual.php
This is the first version of the manual and I continue updating it. I welcome your feedback to improve it, Thanks!
YoFLA.com is not affiliated with Adobe Systems Incorporated, USA. Adobe Flash is a registered trademark of Adobe Systems, Inc in the United States of America and/or other countries.
Other
Support
If you have troubles implementing the tool please contact me at [email protected]. I usually do respond on questions regarding the rotateTool, but I can't provide free Flash lessons :)
Also try to take a look on our community forum, where you can search for answers and post questions:http://www.yofla.com/forum/index.php?action=vtopic&forum=1
BlogNews about the 3D Rotate Tool (updates, examples) and about other YoFLA software can be found on the YoFLA blog: http://blog.yofla.com
About the tool