about illustrator - georgia state university · vector versus rastor illustrator is a vector based,...
TRANSCRIPT
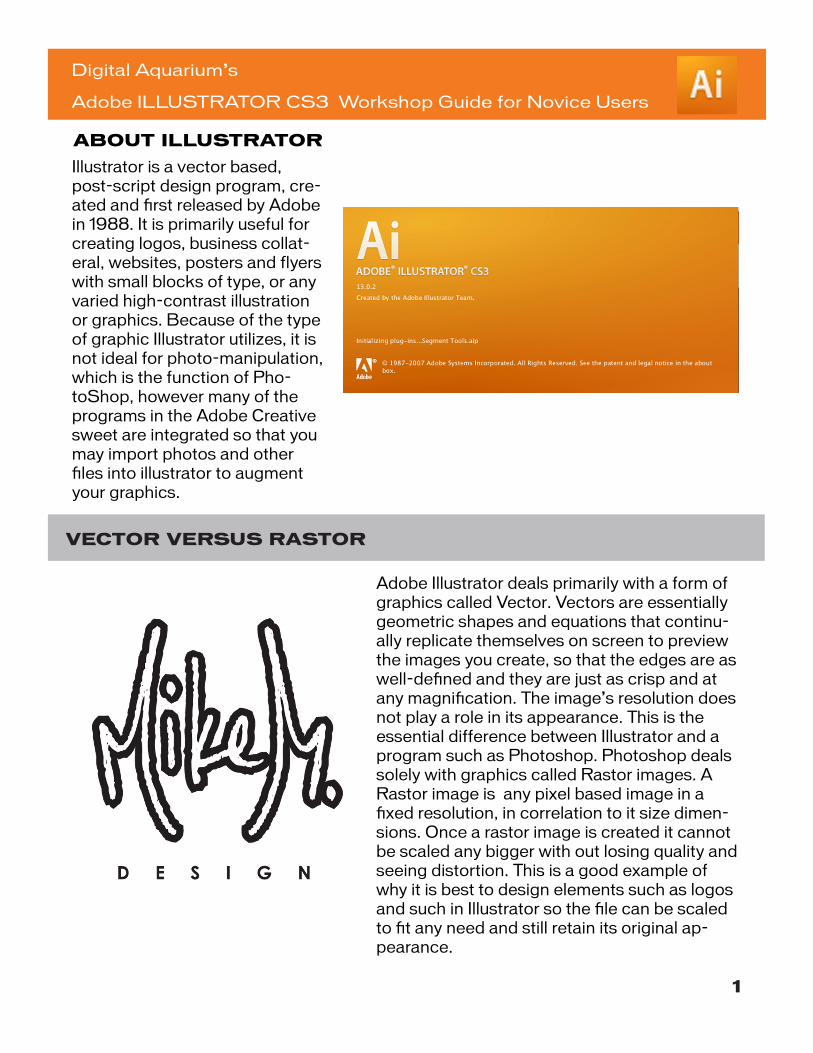
VECTOR VERSUS RASTOR
Illustrator is a vector based, post-script design program, cre-ated and first released by Adobe in 1988. It is primarily useful for creating logos, business collat-eral, websites, posters and flyers with small blocks of type, or any varied high-contrast illustration or graphics. Because of the type of graphic Illustrator utilizes, it is not ideal for photo-manipulation, which is the function of Pho-toShop, however many of the programs in the Adobe Creative sweet are integrated so that you may import photos and other files into illustrator to augment your graphics.
Adobe Illustrator deals primarily with a form of graphics called Vector. Vectors are essentially geometric shapes and equations that continu-ally replicate themselves on screen to preview the images you create, so that the edges are as well-defined and they are just as crisp and at any magnification. The image’s resolution does not play a role in its appearance. This is the essential difference between Illustrator and a program such as Photoshop. Photoshop deals solely with graphics called Rastor images. A Rastor image is any pixel based image in a fixed resolution, in correlation to it size dimen-sions. Once a rastor image is created it cannot be scaled any bigger with out losing quality and seeing distortion. This is a good example of why it is best to design elements such as logos and such in Illustrator so the file can be scaled to fit any need and still retain its original ap-pearance.
Digital Aquarium’s
Adobe ILLUSTRATOR CS3 Workshop Guide for Novice Users
ABOUT ILLUSTRATOR
1

RGB Versus CMYK
DOCUMENT SETUP
You must decide at this point whether or not your design will ever be printed. That is because there are two major color modes that you can design with in Illustrator. If you are only ever going to be viewing your document on screen, for example if you are designing a website, it is safe to design in RGB mode. RGB stands for RED, GREEN, and BLUE. Those are all the colors your screens and monitors use to generate the infinite colors you can achieve in RGB mode. However, if your document is ever to be printed, for example; logos, flyers, etc., you should design in CMYK. CMYK stands for CYAN, MAGENTA, YELLOW, and BLACK. These are the pigments your printer uses to create the colors that are possible in mix-ing CMYK. This is also called PROCESS color. A printer that uses process color cannot create the pure colors that your screen can generate so if you design in CMYK mode, Illustrator will help you keep the colors you choose within the printable range, also called the gamut. After you choose a color mode on the opening screen you can adjust all the settings on the following menu that will ap-pear.
Here you can name you document, choose the document size from the presets, create a custom size in the height and width, change the units of measure from inches to points for screen mea-surements to picas, and change the color mode to CMYK or RGB.
2

THE WORKSPACE AND PALETTES
Below is the minimally designed palette bar that will be located by default on the right of the screen. When you click on an icon the palette will expand and can be detached by simply dragging it off the bar. Below is a summary of the palettes you will use most often.
2. SwatchesAre readily selectable colors that are conveniently chosen with a click. They save you from having to remember the number from the mixer above if you want to re-use a color more than once. You may chose from many swatch libraries or create your own.
1--
2--
3--
4--
5--
6--
7--
8--
9--
10--
11--
12--
1. Color PickerYou can choose a color from the small color gamut on the bottom or mix your own color from the sliders. They affect both the fill color and stroke. There is also an expanded color picker you can choose in the tool bar which is discussed later.
3. BrushesAre simulated brush marks, pen nibs, banners, etc that follow the path of the brush tool on the tool bar. See the brush tool. There are many brush libraries to choose from or you can create your own.
3

4. SymbolsVectorized objects that you can replicate and “paint with” using the Symbol Sprayer tool. You can choose from many symbol libraries or cre-ate your own. You may also replicate just one instance of a symbol and use vectorized pieces from it.
5. StrokeStroke is the line around an object. Here you can adjust the thickness, roundness, and create a dashed line around an object.
6. GradientHere you can create a gradi-ent of colors and adjust the severity of the gradients and choose between linear and radial gradients.
7. TransparencyThis is where you can adjust the opacity of an object. You can also choose from several Blending Modes.
1--
2--
3--
4--
5--
6--
7--
8--
9--
10--
11--
12--
THE WORKSPACE AND PALETTES
4
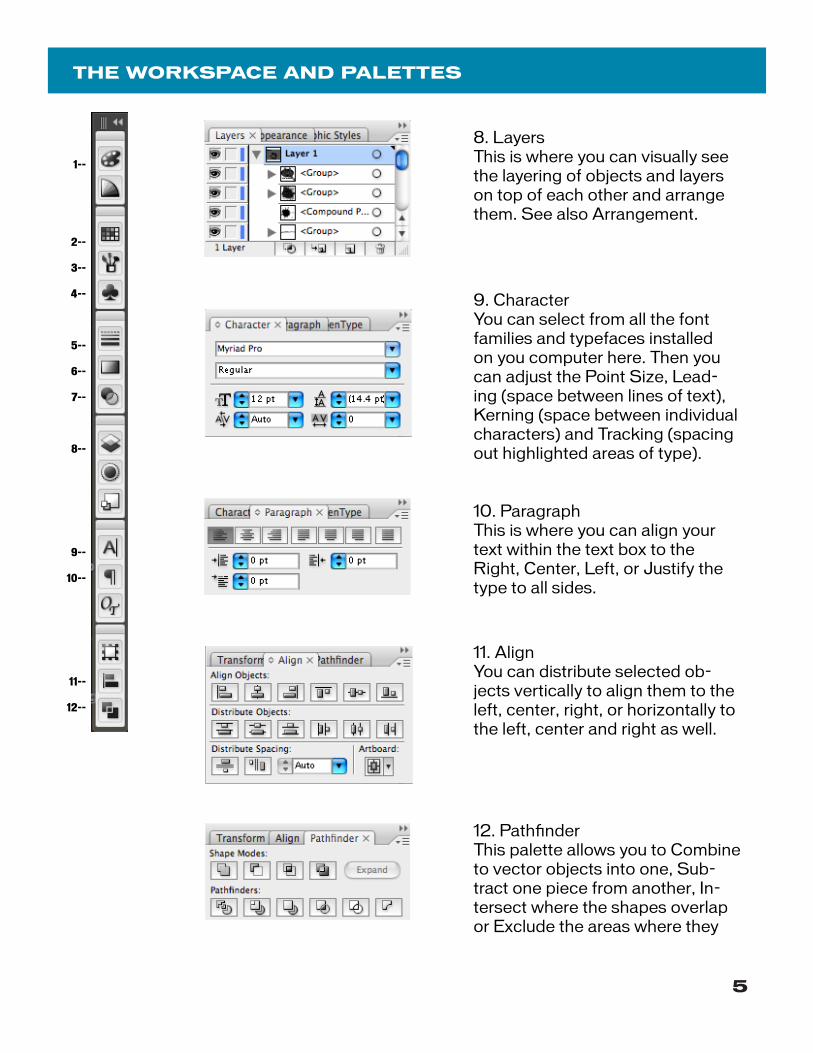
8. LayersThis is where you can visually see the layering of objects and layers on top of each other and arrange them. See also Arrangement.
9. CharacterYou can select from all the font families and typefaces installed on you computer here. Then you can adjust the Point Size, Lead-ing (space between lines of text), Kerning (space between individual characters) and Tracking (spacing out highlighted areas of type).
10. ParagraphThis is where you can align your text within the text box to the Right, Center, Left, or Justify the type to all sides.
11. AlignYou can distribute selected ob-jects vertically to align them to the left, center, right, or horizontally to the left, center and right as well.
12. PathfinderThis palette allows you to Combine to vector objects into one, Sub-tract one piece from another, In-tersect where the shapes overlap or Exclude the areas where they
1--
2--
3--
4--
5--
6--
7--
8--
9--
10--
11--
12--
THE WORKSPACE AND PALETTES
5

THE TOOL BAR
Below is the TOOL BAR. The icons represent all of the tools, arrows, brushes, etc., that you need to perform all the manual functions in Illustrator. Tools with a small arrow at the lower right corner reveal other functions if you hold the mouse button over them.
1. Selection - used to select and move objects on the page - enables free transform.
2. a. Direct Selection - used to manipulate and edit individual nodes and vectors. b. Group Selection - can select individual pieces in a group of ob- jects without ungrouping them.
3. Magic Wand - Selects every object of the same color in a document.
4. Lasso - Selects anchor points within a non-geometric marquee.
1--
3--
5--
7--
9--
11--
13--
15--
17--
19--
21--
23--
25--
27--
29--
--2
--4
--6
--8
--10
--12
--14
--16
--18
--20
--22
--24
--26
--28
--30
5. a. Pen - Lays anchor points to create vectors and pull nodes into non geometric shapes. b. Add Anchor Point - Adds an anchor point to a vector segments c. Delete Anchor Point - Deletes anchor points from vector seg- ments. d. Convert Anchor Point - Changes an anchor point with nodes and
6. a. Type - Draws text boxes and creates blocks of type. b. Type in a Shape - Type within an area created by the shape tool or pen tool. c. Type on a Path - Type on an irregular line segment. d. Vertical Type e. Vertical Type on a Shape f. Vertical Type on a Path
7. a. Line Segment - Creates perfectly angled straight line segments b. Curve - Creates perfect curved line segments c. Spiral d. Rectangular Grid e. Polar Grid
6

THE TOOL BAR
1--
3--
5--
7--
9--
11--
13--
15--
17--
19--
21--
23--
25--
27--
29--
--2
--4
--6
--8
--10
--12
--14
--16
--18
--20
--22
--24
--26
--28
--30
8. a. Rectangle - Creates rectangles and perfect squares. b. Rounded Rectangle - Creates rectangular shapes with rounded corners. c. Ellipse - Creates ellipses and perfect circles. d. Polygon - Creates shapes with as little as 3 sides, triangles, or even 100 sides. e. Star - Creates star shapes with as little as three arms f. Flare - Creates a vectorized lens flare.9. Brush - Uses and replicates marks chosen from the Brushes menu to create a hand-drawn look.
10. a. Pencil - Creates irregular stroked lines. b. Smoother - Removes sharp edges from lines. c. Eraser - Deletes segments from lines.
11. a. Rotate b. Reflect
12. a. Scale b. Shear c. Reshape
13. a. Warp - “Liquefies” an object as if it were paint. b. Swirl c. Pucker d. Bloat e. Scallop f. Crystallize14. Free Transform
7
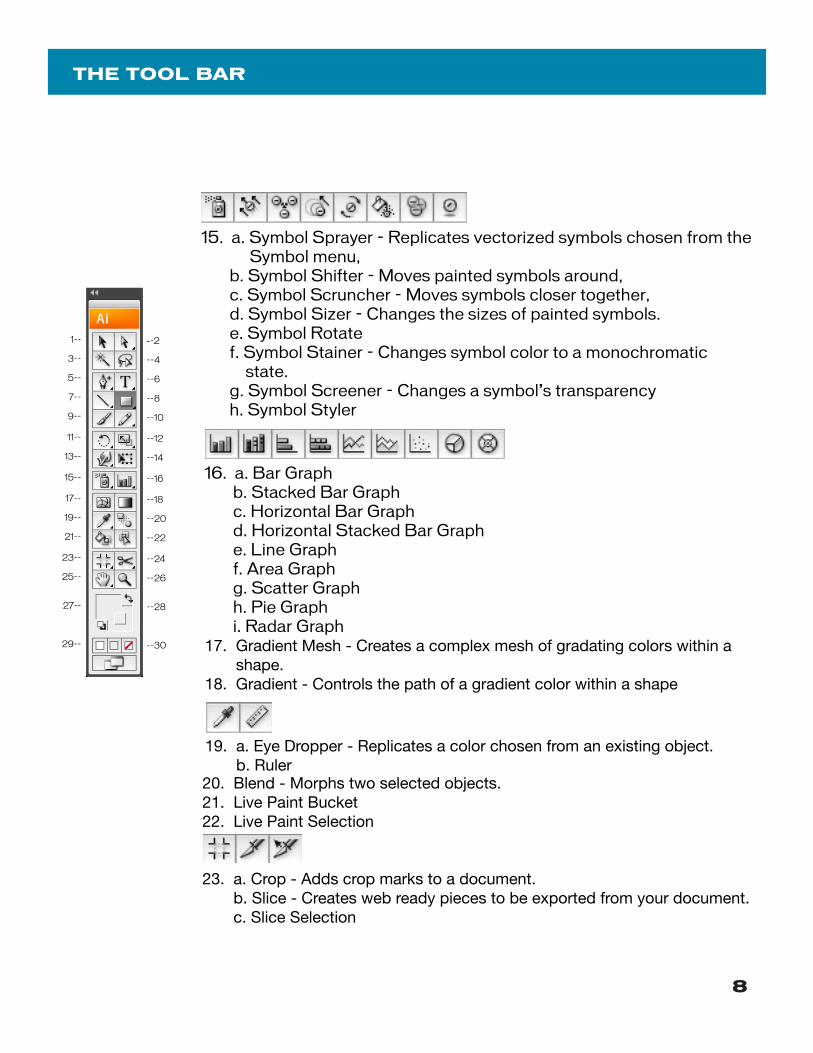
16. a. Bar Graph b. Stacked Bar Graph c. Horizontal Bar Graph d. Horizontal Stacked Bar Graph e. Line Graph f. Area Graph g. Scatter Graph h. Pie Graph i. Radar Graph17. Gradient Mesh - Creates a complex mesh of gradating colors within a shape.18. Gradient - Controls the path of a gradient color within a shape
19. a. Eye Dropper - Replicates a color chosen from an existing object. b. Ruler20. Blend - Morphs two selected objects.21. Live Paint Bucket22. Live Paint Selection
23. a. Crop - Adds crop marks to a document. b. Slice - Creates web ready pieces to be exported from your document. c. Slice Selection
THE TOOL BAR
1--
3--
5--
7--
9--
11--
13--
15--
17--
19--
21--
23--
25--
27--
29--
--2
--4
--6
--8
--10
--12
--14
--16
--18
--20
--22
--24
--26
--28
--30
15. a. Symbol Sprayer - Replicates vectorized symbols chosen from the Symbol menu, b. Symbol Shifter - Moves painted symbols around, c. Symbol Scruncher - Moves symbols closer together, d. Symbol Sizer - Changes the sizes of painted symbols. e. Symbol Rotate f. Symbol Stainer - Changes symbol color to a monochromatic state. g. Symbol Screener - Changes a symbol’s transparency h. Symbol Styler
8

25. Glove - Moves the page26. Zoom27. Fill Color - Selects an objects inner color.28. Stroke Color - Selects the color of the line around an object.29. Color/Gradient/None - Adds a previously selected color or gradient, ` or takes away color
THE TOOL BAR
1--
3--
5--
7--
9--
11--
13--
15--
17--
19--
21--
23--
25--
27--
29--
--2
--4
--6
--8
--10
--12
--14
--16
--18
--20
--22
--24
--26
--28
--30
24. a. Scissor - Cuts line segments. b. Eraser - Erases fill color and stroke from objects. c. Knife - Cuts shapes out of objects.
KEYBOARD SHORTCUTS
Simple key strokes that will save tons of time!
Move - Space barCopy - COMMAND key and “c”Cut - COMMAND key and “x”Paste - COMMAND key and “v”Save - COMMAND key and “s”Save as - COMMAND key and SHIFT key and “s”Select all - COMMAND key and “a”Zoom in - COMMAND key and “+”Zoom out - COMMAND key and “-”Group - COMMAND key and “g”Ungroup - COMMAND key and SHIFT key “g”Bring forward - COMMAND key and “}”Forward all - COMMAND key and SHIFT key and “}”Set backward - COMMAND key and “{“Backward all - COMMAND key and SHIFT key and “{“
9