afro samurai guide - بازی سنتر · comes from playing through a level like a god. if...
TRANSCRIPT

Afro Samurai Guide
Afro Samurai is a game that sets out to prove one thing: blood is beautiful. Based on the Adult Swim anime series featuring the voice talents of Samuel L. Jackson, the interactive adaptation is occasionally a joy to watch, occasionally tense and frequently challenging.
We're here to help you with that last part. In this guide, you should find a virtual road map through the game, from beginning to end, with notes along the way that will give you the edge over the memorable bosses you encounter. We also take the time to point out every murder of crows hidden throughout the adventure. Why waste your time digging through every nook and cranny when we've done it for you?
In this Afro Samurai strategy guide, you'll find:
� BASICS // Focus attacks and other fight strategies for bosses.
� FAQ // Answers to a few common Afro Samurai questions. � WALKTHROUGH // A complete Afro Samurai walkthrough
with boss tips and more.
With a little bit of skill and with this guide at your side, you can be unstoppable. Like a samurai.
Guide by: Jason Venter
© 2008, IGN Entertainment, Inc. May not be sold, distributed, transmitted, displayed, published or broadcast, in whole or part, without IGN’s express permission. You
may not alter or remove any trademark, copyright or other notice from copies of the content. All rights reserved.
Page 1© 2008 IGN Entertainment, Inc.
Afro Samurai Basics
There are some people who might argue that Afro Samurai is a total button masher, and they'd sort of be right. You can play it like that, but it makes things a lot more difficult than they really need to be and it deprives you of the joy that comes from playing through a level like a god. If you're going to wear the number two headband, you should act the part, right? Here, then, are a few tips to help you do just that.
Learn how to use focus attacks
This is the most important thing you can possibly do. Focus attacks not only help you through some tough battles when used optionally, but they also are required at various points. Therefore, you'd do well to get acquainted with them early. To use a focus attack, you'll first need to enter the focus mode. This can be done whenever you like, provided you have enough energy left on your meter (which slowly refills as you fight). When you enter the mode, everything will slow down to a crawl. You can still take damage?and will, if you were foolish about the use of the ability?but now you can input commands that let you unleash an afro-fused fury. Your weak horizontal attack and your stronger vertical slice both morph into something more when you charge them up while in focus mode. While everything is briefly slowed, press and hold the horizontal slash button until your controller rumbles, then release it. You'll let loose with a wide strike that can separate torsos from legs and even deflect bullets that snipers have fired. That's incredibly useful. Similarly, using the heavier attack can split an opponent in half from head to foot. There will also be instances throughout the game where you have to use one such technique or another to solve simple puzzles.
Don't be afraid to go on the offensive
When you battle, you're probably going to take damage until you get used to the game's finer points. Even then, some enemies are really good at ganging up on you and damaging you just when you were about to do something spectacular. Since damage is pretty much a given, it's important to know what you can do to rectify the problem. Incredibly, the best way to survive is to make sure that you're quickly taking out weaker enemies. Regularly mashing the light and heavy attack buttons will do okay, but it could be awhile before any enemies fall. By then, you might have taken some damage and perhaps you've even been killed. A delightful alternative is to use focus attacks, as described above. A horizontal attack might take out three or four enemies in less than a half-second. If you were starting to turn red and about to die, such strikes can turn things around completely. Late in the game, you'll often be mobbed by enemies. If you try to run around and look for a teddy bear to slash for health, you're probably going to take damage and you may even die. Instead, rush the nearest group of weaklings and demolish them. Your life meter will thank you.
Play it smart when you're fighting bosses
We provide detailed information on how to beat each boss throughout the game, but you might not even need that. All you really need to know is that a lot of bosses are really difficult until you pay attention. Then they often go down with barely a whimper. In most instances, the trick is to watch for moments where the boss over extends himself. When this happens, you're free to attack for some pretty hefty damage. Many bosses will mash you like potatoes if you approach them head-on. Not only that, but you probably won't even reduce their life meters. If you wait until an attack misses you and then move in for the kill, though, there's a good chance that you can strike from the back or side and then dart out of the way before your opponent even has a chance to retaliate. This strategy isn't limited to just the big bosses, either; there are numerous weaker enemies throughout the game who will fall to the same techniques.
Page 2© 2008 IGN Entertainment, Inc.

Afro Samurai FAQ
The camera is not your friend, but it works
If you've played a lot of action games, you probably already know the drill: the camera is almost never wher eyou want it to be. That's true here, and with an extra wrinkle: horizontal control is reversed. So when you tell it to pan left, it'll go right and vice-versa. One of the easiest ways to combat this is to get used to panning a lot. As you're moving throughout most battle areas, you can pan around to see where the bulk of your enemies are, then rush toward them while the camera continues to pan. As you get near to where you remember them being, you can then start slashing with your sword until the camera catches up to you. This generally allows you to approach without taking damage, then you can follow up with a focus attack once you see where you need to aim. Sometimes, you can also use the camera to figure out where you're supposed to go next. If you're trying to reach a ledge and the camera won't swing that way, it usually means that the ledge can't be reached from your current position. It's actually almost like a compass, reliably guarding you through each stage. Keep the above tips in mind and you'll have little difficulty working your way through the bulk of the adventure. If you need any help beyond that, it's time to read through the 'Walkthrough' portion.
Q // What am I supposed to do when ninja poker begins?
A // The goal here is to defeat the enemies with focused attacks in a way that allows you to sever a hand, a leg and a head within the time limit. There are other combinations you can perform, but the hand/leg/head one is the one that will yield the largest reward. You can have some impact on what piece you sever by entering focus mode and pressing the button that corresponds to the attack you wish to use, then moving the left stick before releasing your attack button. This will cause white lines to appear over the body of your enemy. You can adjust where your strike will land depending on your opponent's position, making it easier to obtain the parts you need.
Q // Should I worry about how I take care of the enemies, or can I just button mash?
A // Defeating the enemies with focus attacks will allow you to level up more quickly. Or at least, it seems that way. Though the technique may seem difficult to master at first, you'll actually need to use it a lot to easily survive battles in the final stages of the game. Get used to doing it early and you'll quickly gain levels, which does make you a more powerful fighter (even if there are no obvious on-screen meters to prove it).
Q // How do I get rid of the snipers?
A // There are several points throughout the game where snipers will attack you. The game will let you know when they're on the scene, but they are often out of reach. They also have a tendency to pepper you with shots from a distance while you try to fight anyone else in the area. The trick here is to watch for the cutaway scene indicating that they're about to fire a bullet. As they do, quickly enter focus mode and then press and hold the button to perform a focused horizontal slash. Continue to hold the button until the controller rumbles?or until you see a white fleck enter your range of vision while in focus mode, if you don't have a rumbling controller?and then release it. You will perform a perfect slash that sends the bullet back toward the person who sent it. If this all seems a little too difficult, you can also just keep moving and work your way through the stage until you reach a point where you can finally move up close to hit the sniper with a melee attack. Deflecting bullets is simply more efficient.
Page 3© 2008 IGN Entertainment, Inc.

Afro Samurai Walkthrough
The game begins with you right in the middle of things, though really you should just look at these opening sequences as a non-boring tutorial segment.
Table of Contents
01 The Daimyo's Story
02 The Daimyo's Story (cont.)
03 The Daimyo's Story (cont.)
04 School Invasion
05 School Invasion (cont.)
06 School Invasion (cont.)
07 Okiku's Story
08 Okiku's Story (cont.)
09 Okiku's Story (cont.)
10 Okiku's Story (cont.)
11 The Lowdown East Pass
12 The Lowdown East Pass (cont.)
13 The Lowdown East Pass (cont.)
14 The Lowdown East Pass (cont.)
15 Doppelganger
16 Doppelganger (cont.)
17 Kuma's Story
18 Kuma's Story (cont.)
19 The Empty Seven's Story
20 The Empty Seven's Story (cont.)
21 The Empty Seven's Story (cont.)
22 The Empty Seven's Story (cont.)
23 Justice's Story
Page 4© 2008 IGN Entertainment, Inc.
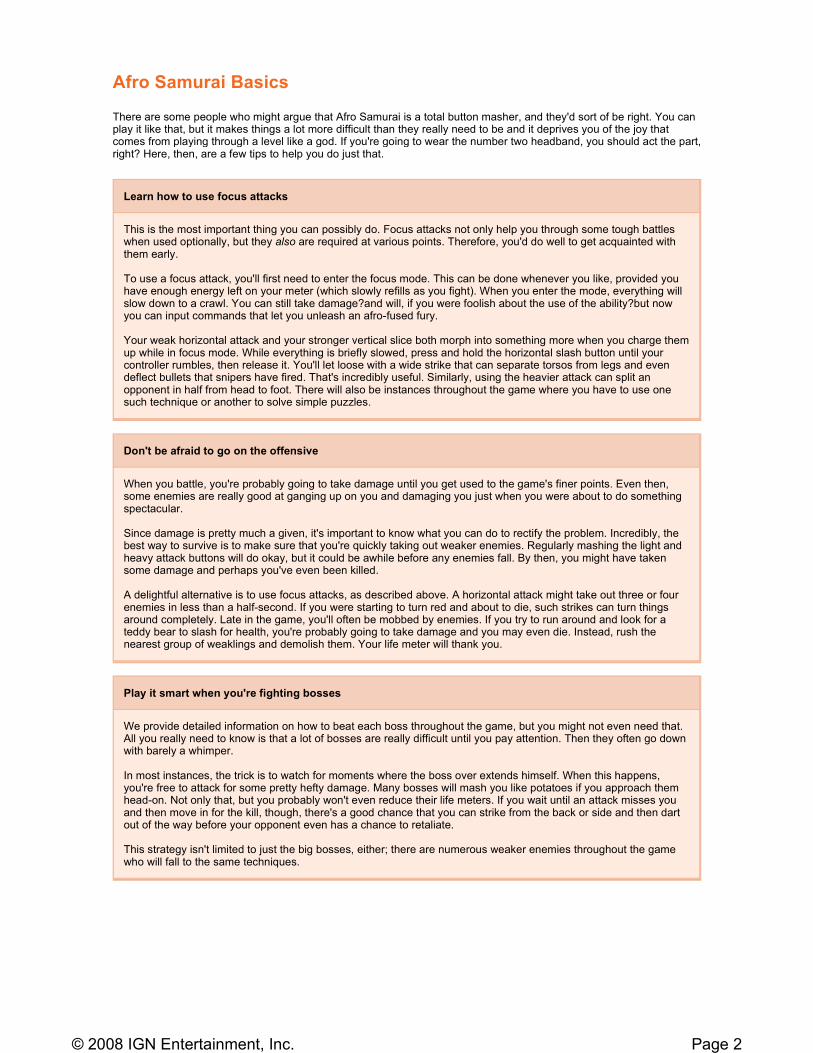
Following some brief narration, you'll be able to start forward toward a rickety wooden bridge, where the game will acquaint you with the controls necessary to perform light hits, heavy ones and to kick. Immediately, you'll be taking on basic goons who shouldn't give you much difficulty as you go through the attacks the game has just prescribed. The game notes that you can string together your hits to perform combo attacks and also advises you that you can do so to produce more blood on-screen. All of this is true, so you know what to do.
Once you've dispatched of the first handful of adversaries, there will be a brief flash to a closed door and you'll be informed that you can open doors by kicking them. From the bridge, then, continue along the dusty trail that leads between assorted huts. You'll come to a branch in the path. To the right, you should see light glinting on a closed door, and to the left a large tree trunk. You can try exploring here, but there's nothing to find except invisible walls. Go ahead and approach the door, then kick it open as the game is persistently suggesting.
Through that door, you'll trigger a cutscene and then it's time to get to business. The game has just briefed you on how to focus and charge attacks, which is what you should be doing for this fight. Using these techniques should allow you to easily dispatch of the few weak opponents and then you'll be free t chase after your final foe (who escapes out the door).
As you head right down this alley?the only direction you can go, really?you'll come across a larger group of enemies. Like the ones you just fought, these fellows will go down quickly to focus attacks. It's also pretty easy to string together combo attacks here, so try to do that as possible. When you've cleared the last of the standard foes, the screen will split to let you know that you've just done something great. Then you'll be attacked by a more impressive opponent. You can still win easily with focus attacks, which will cause another of the enemies to appear. Defeat him and now you're free to resume your chase.
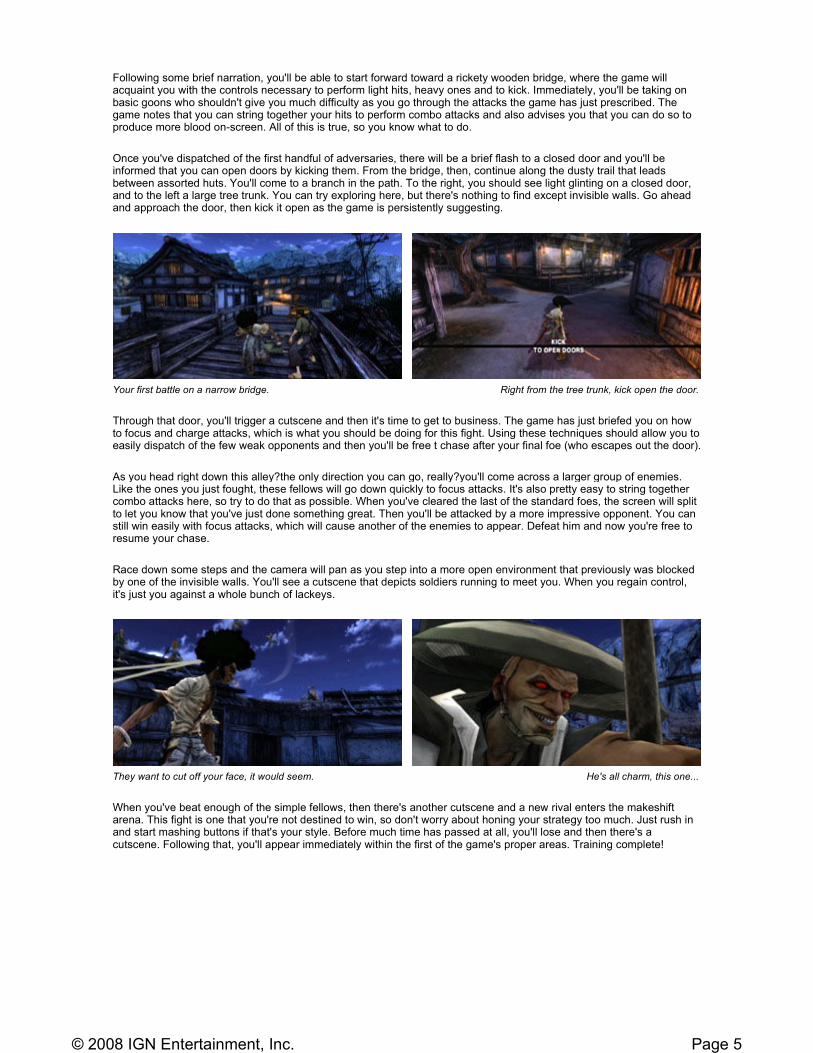
Race down some steps and the camera will pan as you step into a more open environment that previously was blocked by one of the invisible walls. You'll see a cutscene that depicts soldiers running to meet you. When you regain control, it's just you against a whole bunch of lackeys.
When you've beat enough of the simple fellows, then there's another cutscene and a new rival enters the makeshift arena. This fight is one that you're not destined to win, so don't worry about honing your strategy too much. Just rush in and start mashing buttons if that's your style. Before much time has passed at all, you'll lose and then there's a cutscene. Following that, you'll appear immediately within the first of the game's proper areas. Training complete!
Your first battle on a narrow bridge. Right from the tree trunk, kick open the door.
They want to cut off your face, it would seem. He's all charm, this one...
Page 5© 2008 IGN Entertainment, Inc.
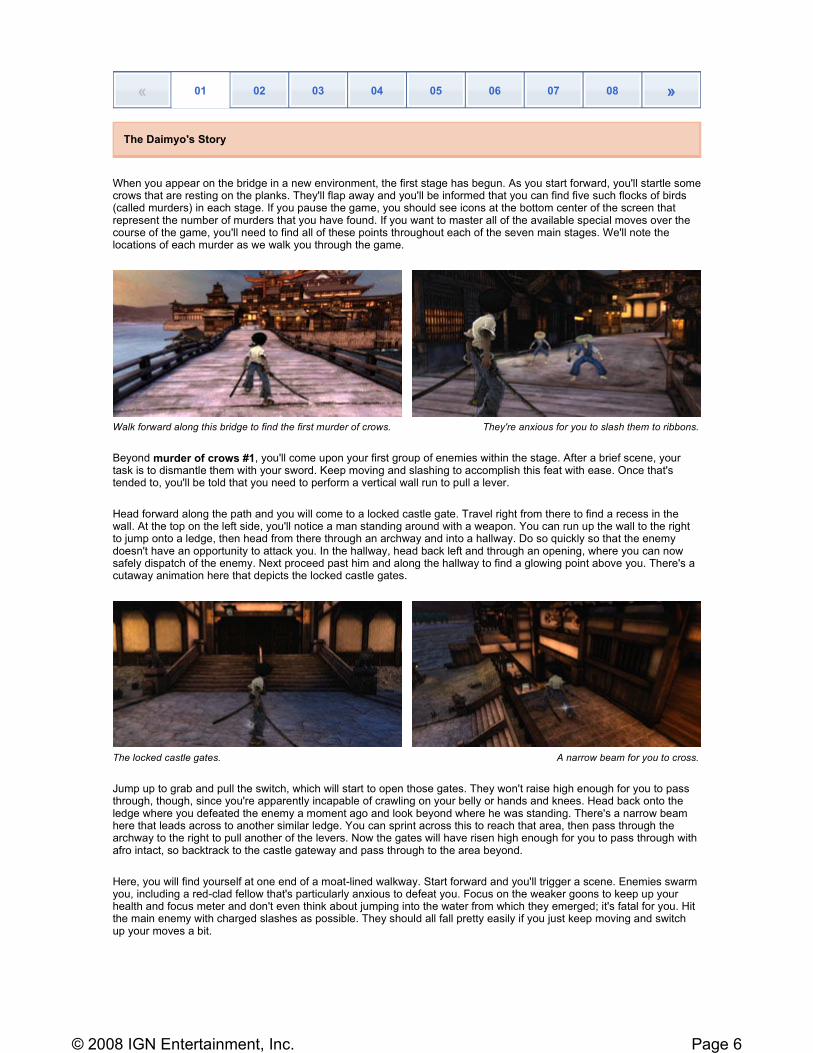
When you appear on the bridge in a new environment, the first stage has begun. As you start forward, you'll startle some crows that are resting on the planks. They'll flap away and you'll be informed that you can find five such flocks of birds (called murders) in each stage. If you pause the game, you should see icons at the bottom center of the screen that represent the number of murders that you have found. If you want to master all of the available special moves over the course of the game, you'll need to find all of these points throughout each of the seven main stages. We'll note the locations of each murder as we walk you through the game.
Beyond murder of crows #1, you'll come upon your first group of enemies within the stage. After a brief scene, your task is to dismantle them with your sword. Keep moving and slashing to accomplish this feat with ease. Once that's tended to, you'll be told that you need to perform a vertical wall run to pull a lever.
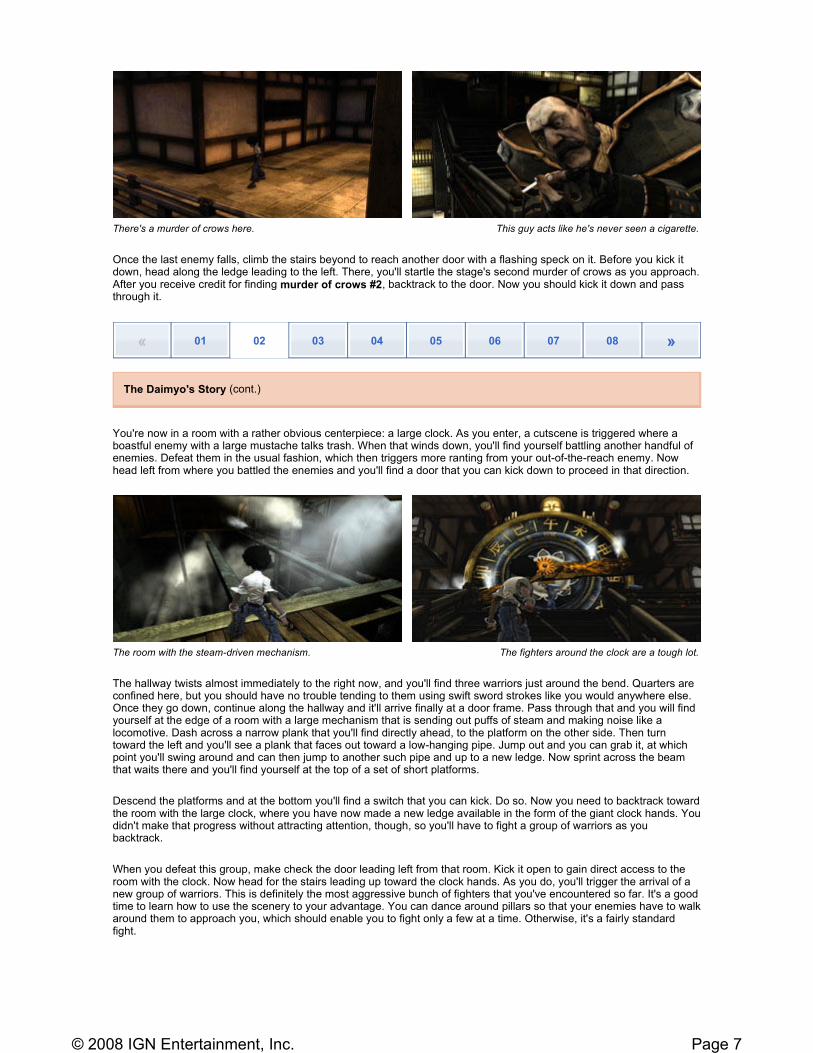
Head forward along the path and you will come to a locked castle gate. Travel right from there to find a recess in the wall. At the top on the left side, you'll notice a man standing around with a weapon. You can run up the wall to the right to jump onto a ledge, then head from there through an archway and into a hallway. Do so quickly so that the enemy doesn't have an opportunity to attack you. In the hallway, head back left and through an opening, where you can now safely dispatch of the enemy. Next proceed past him and along the hallway to find a glowing point above you. There's a cutaway animation here that depicts the locked castle gates.
Jump up to grab and pull the switch, which will start to open those gates. They won't raise high enough for you to pass through, though, since you're apparently incapable of crawling on your belly or hands and knees. Head back onto the ledge where you defeated the enemy a moment ago and look beyond where he was standing. There's a narrow beam here that leads across to another similar ledge. You can sprint across this to reach that area, then pass through the archway to the right to pull another of the levers. Now the gates will have risen high enough for you to pass through with afro intact, so backtrack to the castle gateway and pass through to the area beyond.
Here, you will find yourself at one end of a moat-lined walkway. Start forward and you'll trigger a scene. Enemies swarm you, including a red-clad fellow that's particularly anxious to defeat you. Focus on the weaker goons to keep up your health and focus meter and don't even think about jumping into the water from which they emerged; it's fatal for you. Hit the main enemy with charged slashes as possible. They should all fall pretty easily if you just keep moving and switch up your moves a bit.
« 01 02 03 04 05 06 07 08 »
The Daimyo's Story
Walk forward along this bridge to find the first murder of crows. They're anxious for you to slash them to ribbons.
The locked castle gates. A narrow beam for you to cross.
Page 6© 2008 IGN Entertainment, Inc.
Once the last enemy falls, climb the stairs beyond to reach another door with a flashing speck on it. Before you kick it down, head along the ledge leading to the left. There, you'll startle the stage's second murder of crows as you approach. After you receive credit for finding murder of crows #2, backtrack to the door. Now you should kick it down and pass through it.
You're now in a room with a rather obvious centerpiece: a large clock. As you enter, a cutscene is triggered where a boastful enemy with a large mustache talks trash. When that winds down, you'll find yourself battling another handful of enemies. Defeat them in the usual fashion, which then triggers more ranting from your out-of-the-reach enemy. Now head left from where you battled the enemies and you'll find a door that you can kick down to proceed in that direction.
The hallway twists almost immediately to the right now, and you'll find three warriors just around the bend. Quarters are confined here, but you should have no trouble tending to them using swift sword strokes like you would anywhere else. Once they go down, continue along the hallway and it'll arrive finally at a door frame. Pass through that and you will find yourself at the edge of a room with a large mechanism that is sending out puffs of steam and making noise like a locomotive. Dash across a narrow plank that you'll find directly ahead, to the platform on the other side. Then turn toward the left and you'll see a plank that faces out toward a low-hanging pipe. Jump out and you can grab it, at which point you'll swing around and can then jump to another such pipe and up to a new ledge. Now sprint across the beam that waits there and you'll find yourself at the top of a set of short platforms.
Descend the platforms and at the bottom you'll find a switch that you can kick. Do so. Now you need to backtrack toward the room with the large clock, where you have now made a new ledge available in the form of the giant clock hands. You didn't make that progress without attracting attention, though, so you'll have to fight a group of warriors as you backtrack.
When you defeat this group, make check the door leading left from that room. Kick it open to gain direct access to the room with the clock. Now head for the stairs leading up toward the clock hands. As you do, you'll trigger the arrival of a new group of warriors. This is definitely the most aggressive bunch of fighters that you've encountered so far. It's a good time to learn how to use the scenery to your advantage. You can dance around pillars so that your enemies have to walk around them to approach you, which should enable you to fight only a few at a time. Otherwise, it's a fairly standard fight.
There's a murder of crows here. This guy acts like he's never seen a cigarette.
« 01 02 03 04 05 06 07 08 »
The Daimyo's Story (cont.)
The room with the steam-driven mechanism. The fighters around the clock are a tough lot.
Page 7© 2008 IGN Entertainment, Inc.
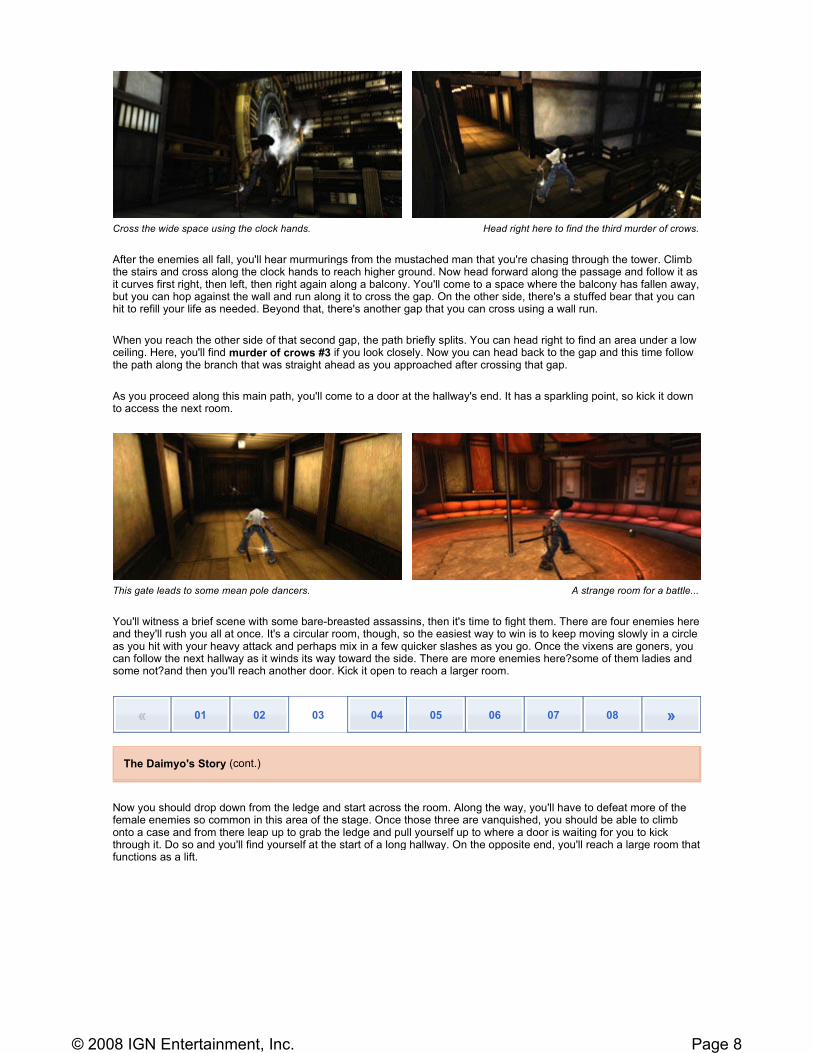
After the enemies all fall, you'll hear murmurings from the mustached man that you're chasing through the tower. Climb the stairs and cross along the clock hands to reach higher ground. Now head forward along the passage and follow it as it curves first right, then left, then right again along a balcony. You'll come to a space where the balcony has fallen away, but you can hop against the wall and run along it to cross the gap. On the other side, there's a stuffed bear that you can hit to refill your life as needed. Beyond that, there's another gap that you can cross using a wall run.
When you reach the other side of that second gap, the path briefly splits. You can head right to find an area under a low ceiling. Here, you'll find murder of crows #3 if you look closely. Now you can head back to the gap and this time follow the path along the branch that was straight ahead as you approached after crossing that gap.
As you proceed along this main path, you'll come to a door at the hallway's end. It has a sparkling point, so kick it down to access the next room.
You'll witness a brief scene with some bare-breasted assassins, then it's time to fight them. There are four enemies here and they'll rush you all at once. It's a circular room, though, so the easiest way to win is to keep moving slowly in a circle as you hit with your heavy attack and perhaps mix in a few quicker slashes as you go. Once the vixens are goners, you can follow the next hallway as it winds its way toward the side. There are more enemies here?some of them ladies and some not?and then you'll reach another door. Kick it open to reach a larger room.
Now you should drop down from the ledge and start across the room. Along the way, you'll have to defeat more of the female enemies so common in this area of the stage. Once those three are vanquished, you should be able to climb onto a case and from there leap up to grab the ledge and pull yourself up to where a door is waiting for you to kick through it. Do so and you'll find yourself at the start of a long hallway. On the opposite end, you'll reach a large room that functions as a lift.
Cross the wide space using the clock hands. Head right here to find the third murder of crows.
This gate leads to some mean pole dancers. A strange room for a battle...
« 01 02 03 04 05 06 07 08 »
The Daimyo's Story (cont.)
Page 8© 2008 IGN Entertainment, Inc.
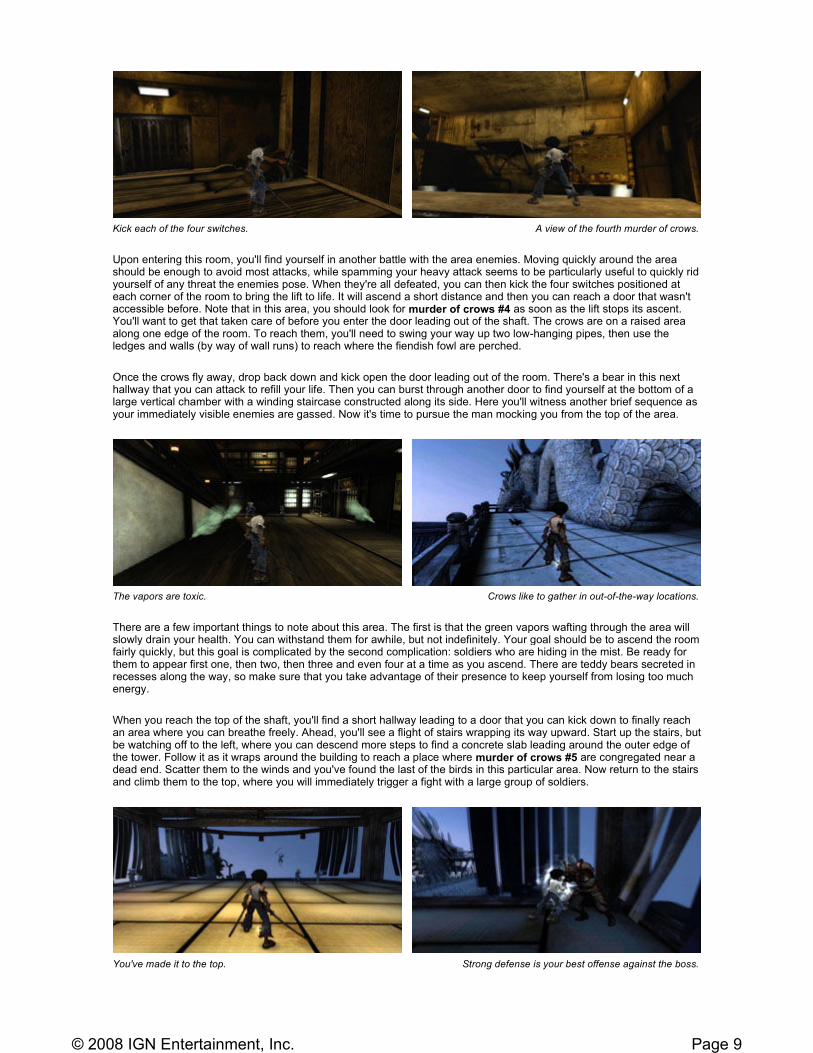
Upon entering this room, you'll find yourself in another battle with the area enemies. Moving quickly around the area should be enough to avoid most attacks, while spamming your heavy attack seems to be particularly useful to quickly rid yourself of any threat the enemies pose. When they're all defeated, you can then kick the four switches positioned at each corner of the room to bring the lift to life. It will ascend a short distance and then you can reach a door that wasn't accessible before. Note that in this area, you should look for murder of crows #4 as soon as the lift stops its ascent. You'll want to get that taken care of before you enter the door leading out of the shaft. The crows are on a raised area along one edge of the room. To reach them, you'll need to swing your way up two low-hanging pipes, then use the ledges and walls (by way of wall runs) to reach where the fiendish fowl are perched.
Once the crows fly away, drop back down and kick open the door leading out of the room. There's a bear in this next hallway that you can attack to refill your life. Then you can burst through another door to find yourself at the bottom of a large vertical chamber with a winding staircase constructed along its side. Here you'll witness another brief sequence as your immediately visible enemies are gassed. Now it's time to pursue the man mocking you from the top of the area.
There are a few important things to note about this area. The first is that the green vapors wafting through the area will slowly drain your health. You can withstand them for awhile, but not indefinitely. Your goal should be to ascend the room fairly quickly, but this goal is complicated by the second complication: soldiers who are hiding in the mist. Be ready for them to appear first one, then two, then three and even four at a time as you ascend. There are teddy bears secreted in recesses along the way, so make sure that you take advantage of their presence to keep yourself from losing too much energy.
When you reach the top of the shaft, you'll find a short hallway leading to a door that you can kick down to finally reach an area where you can breathe freely. Ahead, you'll see a flight of stairs wrapping its way upward. Start up the stairs, but be watching off to the left, where you can descend more steps to find a concrete slab leading around the outer edge of the tower. Follow it as it wraps around the building to reach a place where murder of crows #5 are congregated near a dead end. Scatter them to the winds and you've found the last of the birds in this particular area. Now return to the stairs and climb them to the top, where you will immediately trigger a fight with a large group of soldiers.
Kick each of the four switches. A view of the fourth murder of crows.
The vapors are toxic. Crows like to gather in out-of-the-way locations.
You've made it to the top. Strong defense is your best offense against the boss.
Page 9© 2008 IGN Entertainment, Inc.
The soldiers aren't any tougher here than they have been elsewhere in the tower. Repeated use of your heavy attack should be enough to make short work of them, but don't pat yourself on the back just yet. Your next challenge is more substantial, and appears immediately after you dispatch of the last standard goon.
Boss Battle Start
Your first real boss battle, while interesting, shouldn't prove particularly difficult. The strategy to win is actually simple and is explained in detail... by no one other than the boss himself! As you and he dance your way around the tower exchanging blows, you'll want to block his attacks just as he initiates them. His sword should glint as he's swinging, and that's the moment you want to press the button to block. If you timed it correctly, your magnificent defense will knock your opponent off balance. As he struggles to recover, you can hit him with a heavy blow or two that will send him staggering back. Don't try to press the attack beyond that, since he recovers pretty quickly and will just wind up hurting you. Instead, repeat the process that worked once. Each time, you should be able to get in a blow while avoiding damage yourself. Go through that process a few times and you'll be watching the end-of-stage cutscene before you know it.
Boss Battle End
When you win the fight, there's a brief sequence and then you're thrown immediately into the next stage.
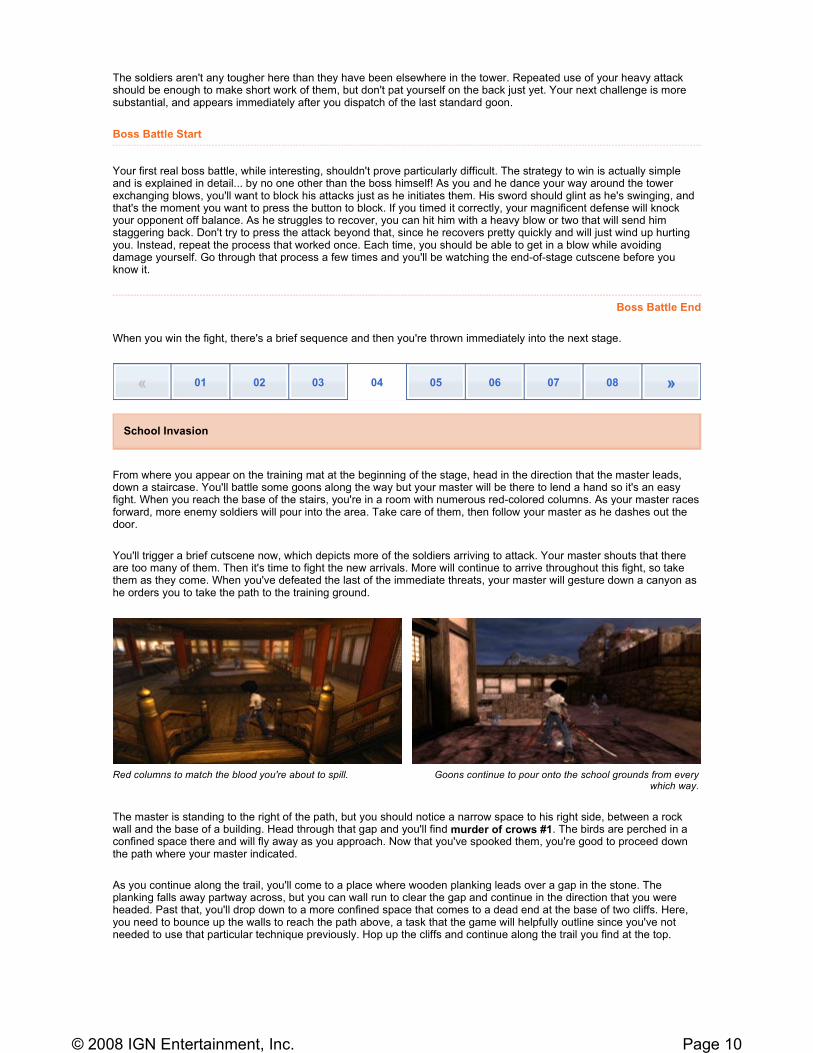
From where you appear on the training mat at the beginning of the stage, head in the direction that the master leads, down a staircase. You'll battle some goons along the way but your master will be there to lend a hand so it's an easy fight. When you reach the base of the stairs, you're in a room with numerous red-colored columns. As your master races forward, more enemy soldiers will pour into the area. Take care of them, then follow your master as he dashes out the door.
You'll trigger a brief cutscene now, which depicts more of the soldiers arriving to attack. Your master shouts that there are too many of them. Then it's time to fight the new arrivals. More will continue to arrive throughout this fight, so take them as they come. When you've defeated the last of the immediate threats, your master will gesture down a canyon as he orders you to take the path to the training ground.
The master is standing to the right of the path, but you should notice a narrow space to his right side, between a rock wall and the base of a building. Head through that gap and you'll find murder of crows #1. The birds are perched in a confined space there and will fly away as you approach. Now that you've spooked them, you're good to proceed down the path where your master indicated.
As you continue along the trail, you'll come to a place where wooden planking leads over a gap in the stone. The planking falls away partway across, but you can wall run to clear the gap and continue in the direction that you were headed. Past that, you'll drop down to a more confined space that comes to a dead end at the base of two cliffs. Here, you need to bounce up the walls to reach the path above, a task that the game will helpfully outline since you've not needed to use that particular technique previously. Hop up the cliffs and continue along the trail you find at the top.
« 01 02 03 04 05 06 07 08 »
School Invasion
Red columns to match the blood you're about to spill. Goons continue to pour onto the school grounds from every
which way.
Page 10© 2008 IGN Entertainment, Inc.
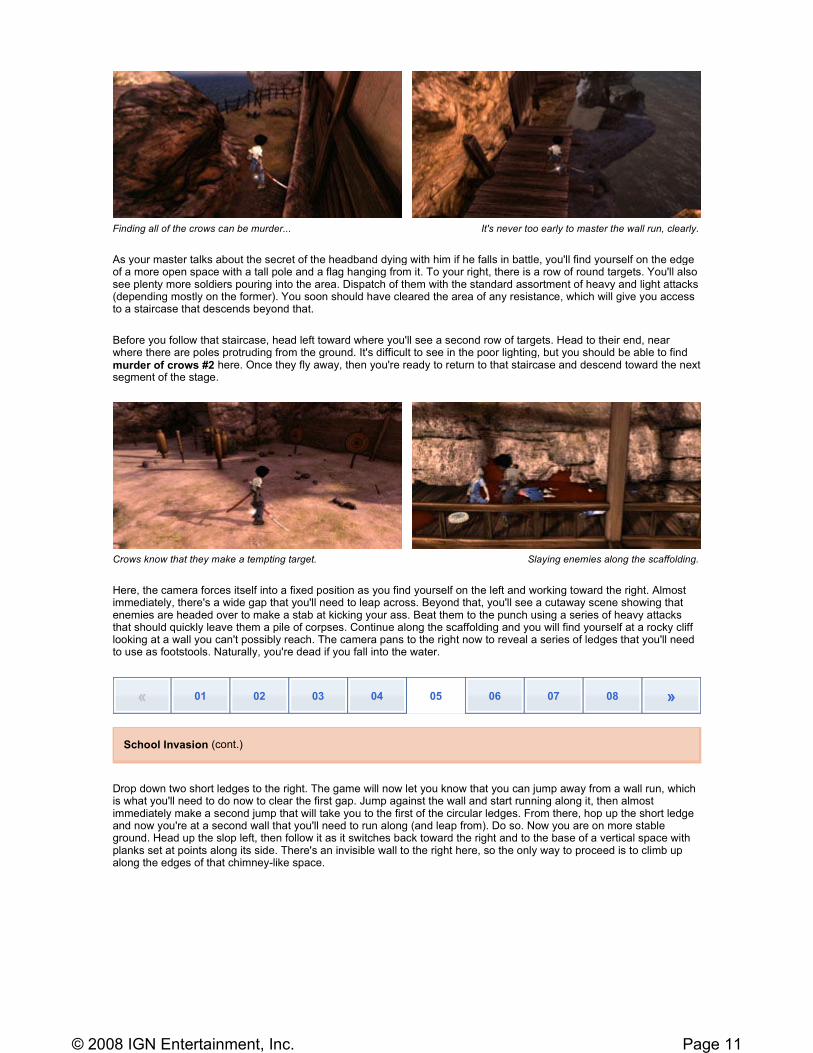
As your master talks about the secret of the headband dying with him if he falls in battle, you'll find yourself on the edge of a more open space with a tall pole and a flag hanging from it. To your right, there is a row of round targets. You'll also see plenty more soldiers pouring into the area. Dispatch of them with the standard assortment of heavy and light attacks (depending mostly on the former). You soon should have cleared the area of any resistance, which will give you access to a staircase that descends beyond that.
Before you follow that staircase, head left toward where you'll see a second row of targets. Head to their end, near where there are poles protruding from the ground. It's difficult to see in the poor lighting, but you should be able to find murder of crows #2 here. Once they fly away, then you're ready to return to that staircase and descend toward the next segment of the stage.
Here, the camera forces itself into a fixed position as you find yourself on the left and working toward the right. Almost immediately, there's a wide gap that you'll need to leap across. Beyond that, you'll see a cutaway scene showing that enemies are headed over to make a stab at kicking your ass. Beat them to the punch using a series of heavy attacks that should quickly leave them a pile of corpses. Continue along the scaffolding and you will find yourself at a rocky cliff looking at a wall you can't possibly reach. The camera pans to the right now to reveal a series of ledges that you'll need to use as footstools. Naturally, you're dead if you fall into the water.
Drop down two short ledges to the right. The game will now let you know that you can jump away from a wall run, which is what you'll need to do now to clear the first gap. Jump against the wall and start running along it, then almost immediately make a second jump that will take you to the first of the circular ledges. From there, hop up the short ledge and now you're at a second wall that you'll need to run along (and leap from). Do so. Now you are on more stable ground. Head up the slop left, then follow it as it switches back toward the right and to the base of a vertical space with planks set at points along its side. There's an invisible wall to the right here, so the only way to proceed is to climb up along the edges of that chimney-like space.
Finding all of the crows can be murder... It's never too early to master the wall run, clearly.
Crows know that they make a tempting target. Slaying enemies along the scaffolding.
« 01 02 03 04 05 06 07 08 »
School Invasion (cont.)
Page 11© 2008 IGN Entertainment, Inc.
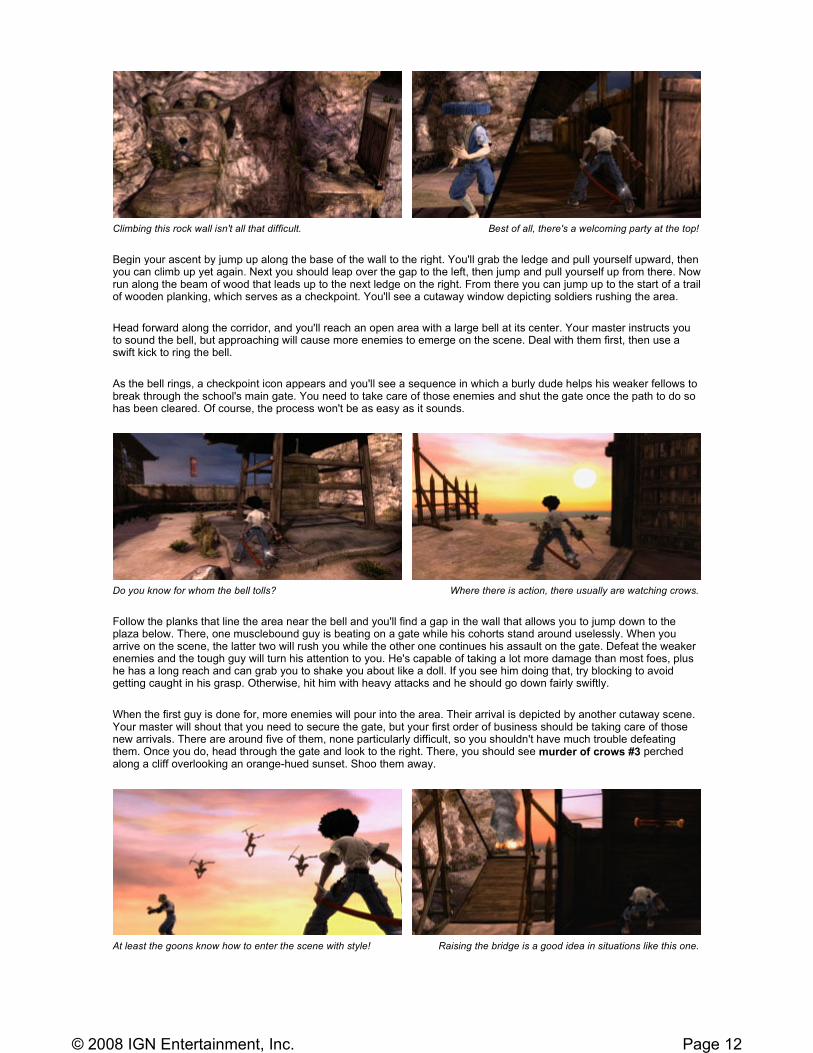
Begin your ascent by jump up along the base of the wall to the right. You'll grab the ledge and pull yourself upward, then you can climb up yet again. Next you should leap over the gap to the left, then jump and pull yourself up from there. Now run along the beam of wood that leads up to the next ledge on the right. From there you can jump up to the start of a trail of wooden planking, which serves as a checkpoint. You'll see a cutaway window depicting soldiers rushing the area.
Head forward along the corridor, and you'll reach an open area with a large bell at its center. Your master instructs you to sound the bell, but approaching will cause more enemies to emerge on the scene. Deal with them first, then use a swift kick to ring the bell.
As the bell rings, a checkpoint icon appears and you'll see a sequence in which a burly dude helps his weaker fellows to break through the school's main gate. You need to take care of those enemies and shut the gate once the path to do so has been cleared. Of course, the process won't be as easy as it sounds.
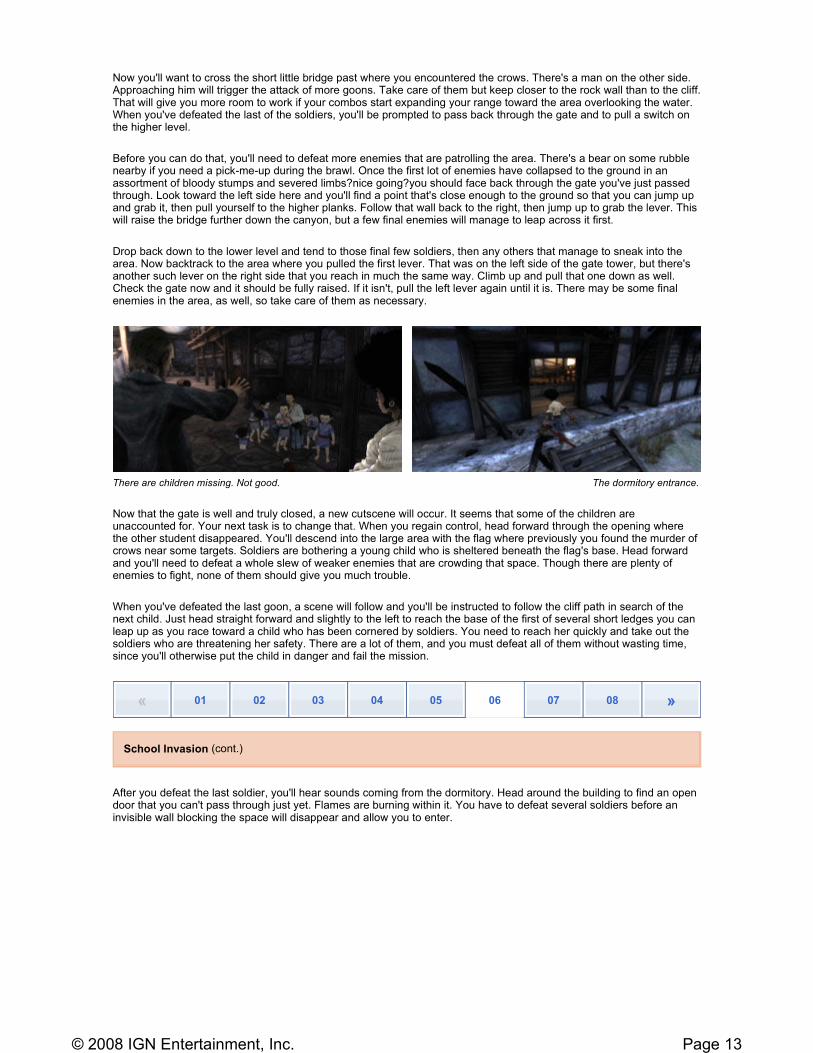
Follow the planks that line the area near the bell and you'll find a gap in the wall that allows you to jump down to the plaza below. There, one musclebound guy is beating on a gate while his cohorts stand around uselessly. When you arrive on the scene, the latter two will rush you while the other one continues his assault on the gate. Defeat the weaker enemies and the tough guy will turn his attention to you. He's capable of taking a lot more damage than most foes, plus he has a long reach and can grab you to shake you about like a doll. If you see him doing that, try blocking to avoid getting caught in his grasp. Otherwise, hit him with heavy attacks and he should go down fairly swiftly.
When the first guy is done for, more enemies will pour into the area. Their arrival is depicted by another cutaway scene. Your master will shout that you need to secure the gate, but your first order of business should be taking care of those new arrivals. There are around five of them, none particularly difficult, so you shouldn't have much trouble defeating them. Once you do, head through the gate and look to the right. There, you should see murder of crows #3 perched along a cliff overlooking an orange-hued sunset. Shoo them away.
Climbing this rock wall isn't all that difficult. Best of all, there's a welcoming party at the top!
Do you know for whom the bell tolls? Where there is action, there usually are watching crows.
At least the goons know how to enter the scene with style! Raising the bridge is a good idea in situations like this one.
Page 12© 2008 IGN Entertainment, Inc.
Now you'll want to cross the short little bridge past where you encountered the crows. There's a man on the other side. Approaching him will trigger the attack of more goons. Take care of them but keep closer to the rock wall than to the cliff. That will give you more room to work if your combos start expanding your range toward the area overlooking the water. When you've defeated the last of the soldiers, you'll be prompted to pass back through the gate and to pull a switch on the higher level.
Before you can do that, you'll need to defeat more enemies that are patrolling the area. There's a bear on some rubble nearby if you need a pick-me-up during the brawl. Once the first lot of enemies have collapsed to the ground in an assortment of bloody stumps and severed limbs?nice going?you should face back through the gate you've just passed through. Look toward the left side here and you'll find a point that's close enough to the ground so that you can jump up and grab it, then pull yourself to the higher planks. Follow that wall back to the right, then jump up to grab the lever. This will raise the bridge further down the canyon, but a few final enemies will manage to leap across it first.
Drop back down to the lower level and tend to those final few soldiers, then any others that manage to sneak into the area. Now backtrack to the area where you pulled the first lever. That was on the left side of the gate tower, but there's another such lever on the right side that you reach in much the same way. Climb up and pull that one down as well. Check the gate now and it should be fully raised. If it isn't, pull the left lever again until it is. There may be some final enemies in the area, as well, so take care of them as necessary.
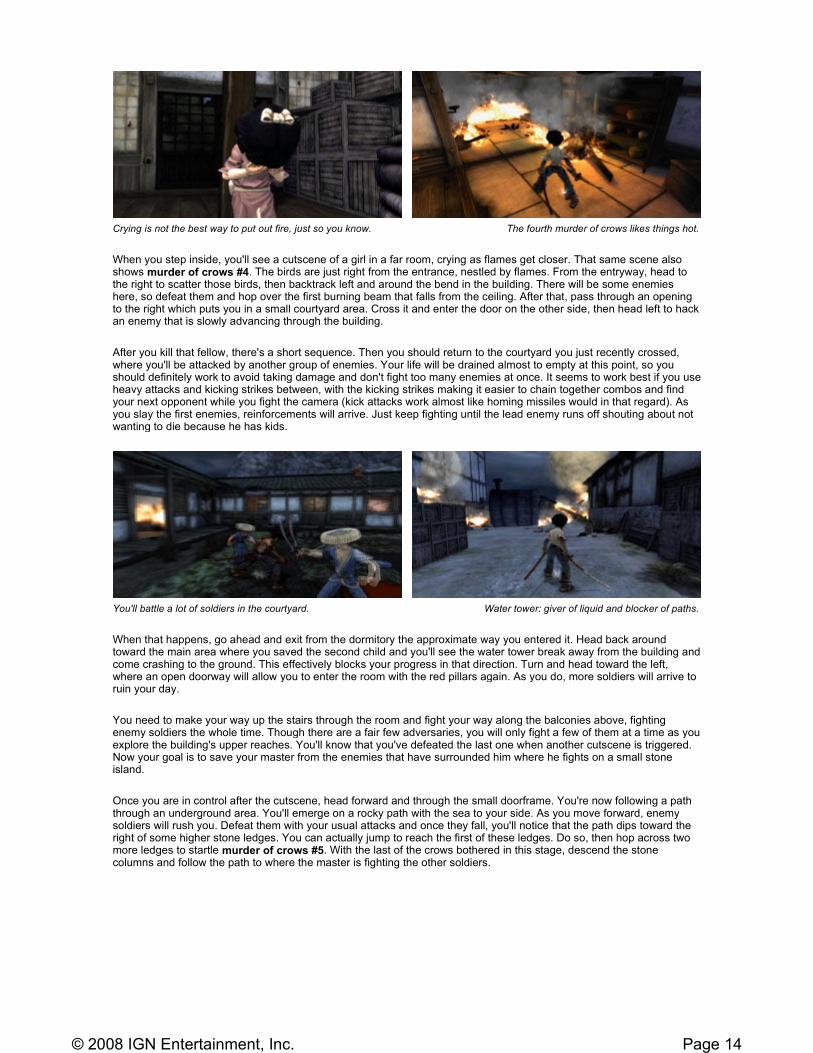
Now that the gate is well and truly closed, a new cutscene will occur. It seems that some of the children are unaccounted for. Your next task is to change that. When you regain control, head forward through the opening where the other student disappeared. You'll descend into the large area with the flag where previously you found the murder of crows near some targets. Soldiers are bothering a young child who is sheltered beneath the flag's base. Head forward and you'll need to defeat a whole slew of weaker enemies that are crowding that space. Though there are plenty of enemies to fight, none of them should give you much trouble.
When you've defeated the last goon, a scene will follow and you'll be instructed to follow the cliff path in search of the next child. Just head straight forward and slightly to the left to reach the base of the first of several short ledges you can leap up as you race toward a child who has been cornered by soldiers. You need to reach her quickly and take out the soldiers who are threatening her safety. There are a lot of them, and you must defeat all of them without wasting time, since you'll otherwise put the child in danger and fail the mission.
After you defeat the last soldier, you'll hear sounds coming from the dormitory. Head around the building to find an open door that you can't pass through just yet. Flames are burning within it. You have to defeat several soldiers before an invisible wall blocking the space will disappear and allow you to enter.
There are children missing. Not good. The dormitory entrance.
« 01 02 03 04 05 06 07 08 »
School Invasion (cont.)
Page 13© 2008 IGN Entertainment, Inc.
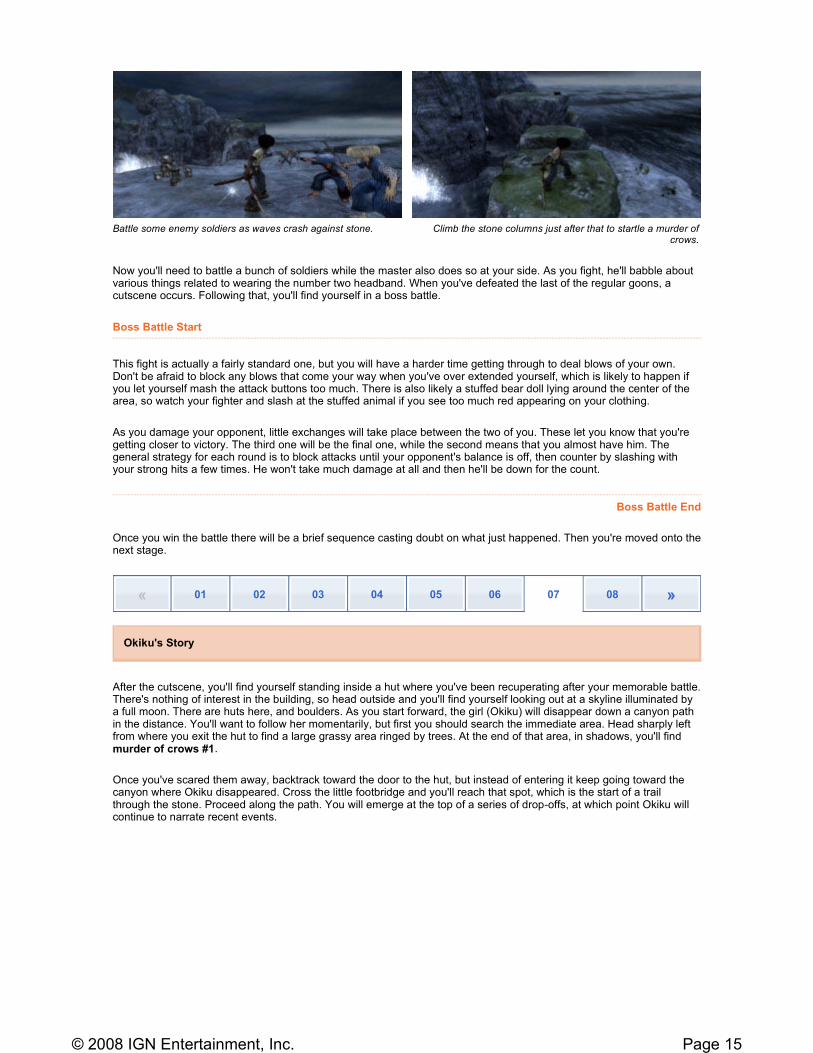
When you step inside, you'll see a cutscene of a girl in a far room, crying as flames get closer. That same scene also shows murder of crows #4. The birds are just right from the entrance, nestled by flames. From the entryway, head to the right to scatter those birds, then backtrack left and around the bend in the building. There will be some enemies here, so defeat them and hop over the first burning beam that falls from the ceiling. After that, pass through an opening to the right which puts you in a small courtyard area. Cross it and enter the door on the other side, then head left to hack an enemy that is slowly advancing through the building.
After you kill that fellow, there's a short sequence. Then you should return to the courtyard you just recently crossed, where you'll be attacked by another group of enemies. Your life will be drained almost to empty at this point, so you should definitely work to avoid taking damage and don't fight too many enemies at once. It seems to work best if you use heavy attacks and kicking strikes between, with the kicking strikes making it easier to chain together combos and find your next opponent while you fight the camera (kick attacks work almost like homing missiles would in that regard). As you slay the first enemies, reinforcements will arrive. Just keep fighting until the lead enemy runs off shouting about not wanting to die because he has kids.
When that happens, go ahead and exit from the dormitory the approximate way you entered it. Head back around toward the main area where you saved the second child and you'll see the water tower break away from the building and come crashing to the ground. This effectively blocks your progress in that direction. Turn and head toward the left, where an open doorway will allow you to enter the room with the red pillars again. As you do, more soldiers will arrive to ruin your day.
You need to make your way up the stairs through the room and fight your way along the balconies above, fighting enemy soldiers the whole time. Though there are a fair few adversaries, you will only fight a few of them at a time as you explore the building's upper reaches. You'll know that you've defeated the last one when another cutscene is triggered. Now your goal is to save your master from the enemies that have surrounded him where he fights on a small stone island.
Once you are in control after the cutscene, head forward and through the small doorframe. You're now following a path through an underground area. You'll emerge on a rocky path with the sea to your side. As you move forward, enemy soldiers will rush you. Defeat them with your usual attacks and once they fall, you'll notice that the path dips toward the right of some higher stone ledges. You can actually jump to reach the first of these ledges. Do so, then hop across two more ledges to startle murder of crows #5. With the last of the crows bothered in this stage, descend the stone columns and follow the path to where the master is fighting the other soldiers.
Crying is not the best way to put out fire, just so you know. The fourth murder of crows likes things hot.
You'll battle a lot of soldiers in the courtyard. Water tower: giver of liquid and blocker of paths.
Page 14© 2008 IGN Entertainment, Inc.
Now you'll need to battle a bunch of soldiers while the master also does so at your side. As you fight, he'll babble about various things related to wearing the number two headband. When you've defeated the last of the regular goons, a cutscene occurs. Following that, you'll find yourself in a boss battle.
Boss Battle Start
This fight is actually a fairly standard one, but you will have a harder time getting through to deal blows of your own. Don't be afraid to block any blows that come your way when you've over extended yourself, which is likely to happen if you let yourself mash the attack buttons too much. There is also likely a stuffed bear doll lying around the center of the area, so watch your fighter and slash at the stuffed animal if you see too much red appearing on your clothing.
As you damage your opponent, little exchanges will take place between the two of you. These let you know that you're getting closer to victory. The third one will be the final one, while the second means that you almost have him. The general strategy for each round is to block attacks until your opponent's balance is off, then counter by slashing with your strong hits a few times. He won't take much damage at all and then he'll be down for the count.
Boss Battle End
Once you win the battle there will be a brief sequence casting doubt on what just happened. Then you're moved onto the next stage.
After the cutscene, you'll find yourself standing inside a hut where you've been recuperating after your memorable battle. There's nothing of interest in the building, so head outside and you'll find yourself looking out at a skyline illuminated by a full moon. There are huts here, and boulders. As you start forward, the girl (Okiku) will disappear down a canyon path in the distance. You'll want to follow her momentarily, but first you should search the immediate area. Head sharply left from where you exit the hut to find a large grassy area ringed by trees. At the end of that area, in shadows, you'll find murder of crows #1.
Once you've scared them away, backtrack toward the door to the hut, but instead of entering it keep going toward the canyon where Okiku disappeared. Cross the little footbridge and you'll reach that spot, which is the start of a trail through the stone. Proceed along the path. You will emerge at the top of a series of drop-offs, at which point Okiku will continue to narrate recent events.
Battle some enemy soldiers as waves crash against stone. Climb the stone columns just after that to startle a murder of
crows.
« 01 02 03 04 05 06 07 08 »
Okiku's Story
Page 15© 2008 IGN Entertainment, Inc.
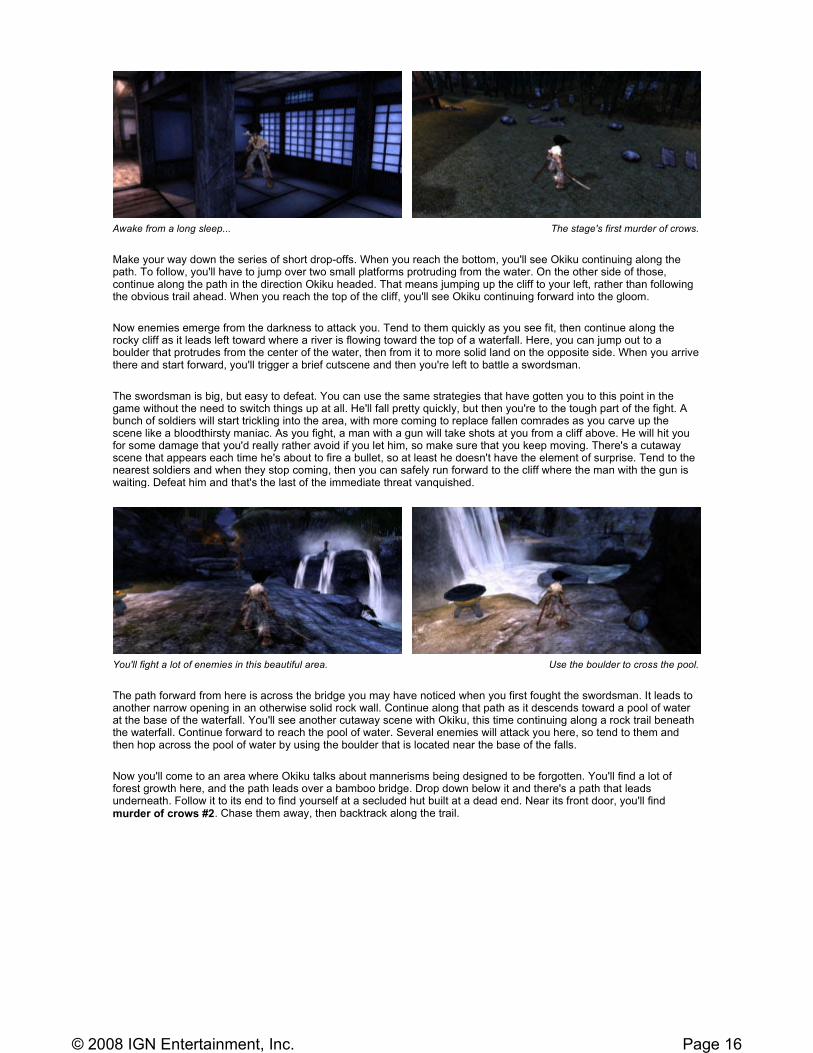
Make your way down the series of short drop-offs. When you reach the bottom, you'll see Okiku continuing along the path. To follow, you'll have to jump over two small platforms protruding from the water. On the other side of those, continue along the path in the direction Okiku headed. That means jumping up the cliff to your left, rather than following the obvious trail ahead. When you reach the top of the cliff, you'll see Okiku continuing forward into the gloom.
Now enemies emerge from the darkness to attack you. Tend to them quickly as you see fit, then continue along the rocky cliff as it leads left toward where a river is flowing toward the top of a waterfall. Here, you can jump out to a boulder that protrudes from the center of the water, then from it to more solid land on the opposite side. When you arrive there and start forward, you'll trigger a brief cutscene and then you're left to battle a swordsman.
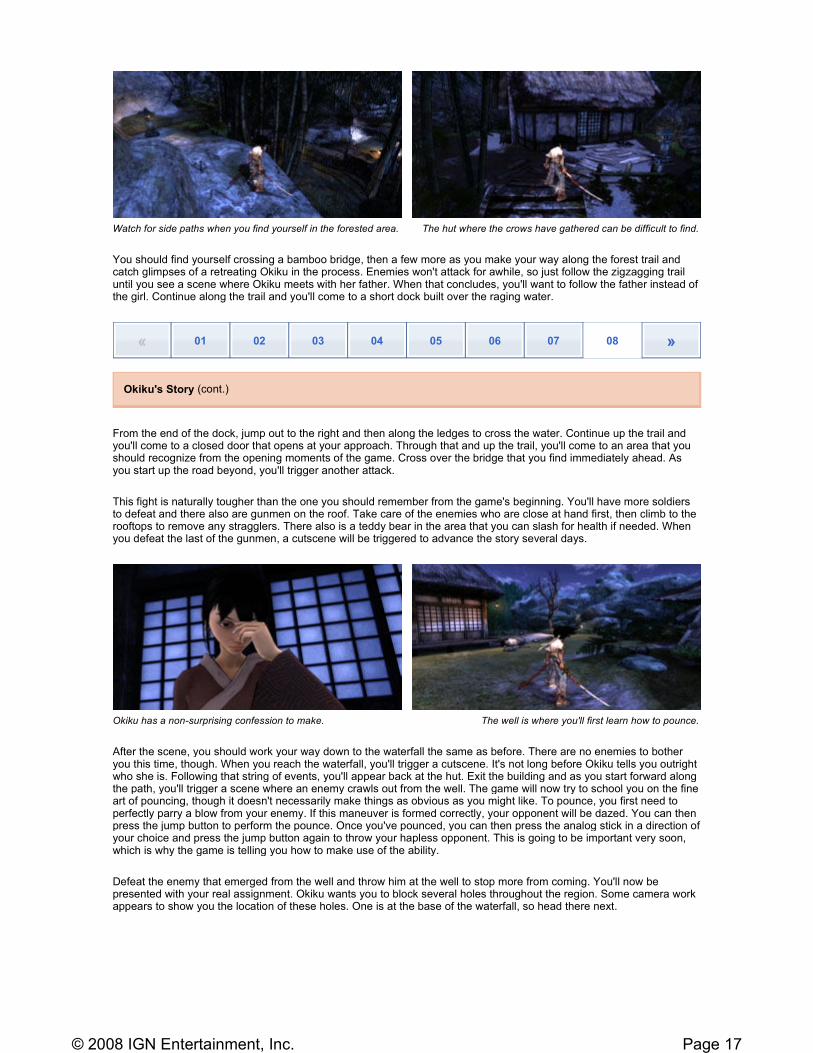
The swordsman is big, but easy to defeat. You can use the same strategies that have gotten you to this point in the game without the need to switch things up at all. He'll fall pretty quickly, but then you're to the tough part of the fight. A bunch of soldiers will start trickling into the area, with more coming to replace fallen comrades as you carve up the scene like a bloodthirsty maniac. As you fight, a man with a gun will take shots at you from a cliff above. He will hit you for some damage that you'd really rather avoid if you let him, so make sure that you keep moving. There's a cutaway scene that appears each time he's about to fire a bullet, so at least he doesn't have the element of surprise. Tend to the nearest soldiers and when they stop coming, then you can safely run forward to the cliff where the man with the gun is waiting. Defeat him and that's the last of the immediate threat vanquished.
The path forward from here is across the bridge you may have noticed when you first fought the swordsman. It leads to another narrow opening in an otherwise solid rock wall. Continue along that path as it descends toward a pool of water at the base of the waterfall. You'll see another cutaway scene with Okiku, this time continuing along a rock trail beneath the waterfall. Continue forward to reach the pool of water. Several enemies will attack you here, so tend to them and then hop across the pool of water by using the boulder that is located near the base of the falls.
Now you'll come to an area where Okiku talks about mannerisms being designed to be forgotten. You'll find a lot of forest growth here, and the path leads over a bamboo bridge. Drop down below it and there's a path that leads underneath. Follow it to its end to find yourself at a secluded hut built at a dead end. Near its front door, you'll find murder of crows #2. Chase them away, then backtrack along the trail.
Awake from a long sleep... The stage's first murder of crows.
You'll fight a lot of enemies in this beautiful area. Use the boulder to cross the pool.
Page 16© 2008 IGN Entertainment, Inc.
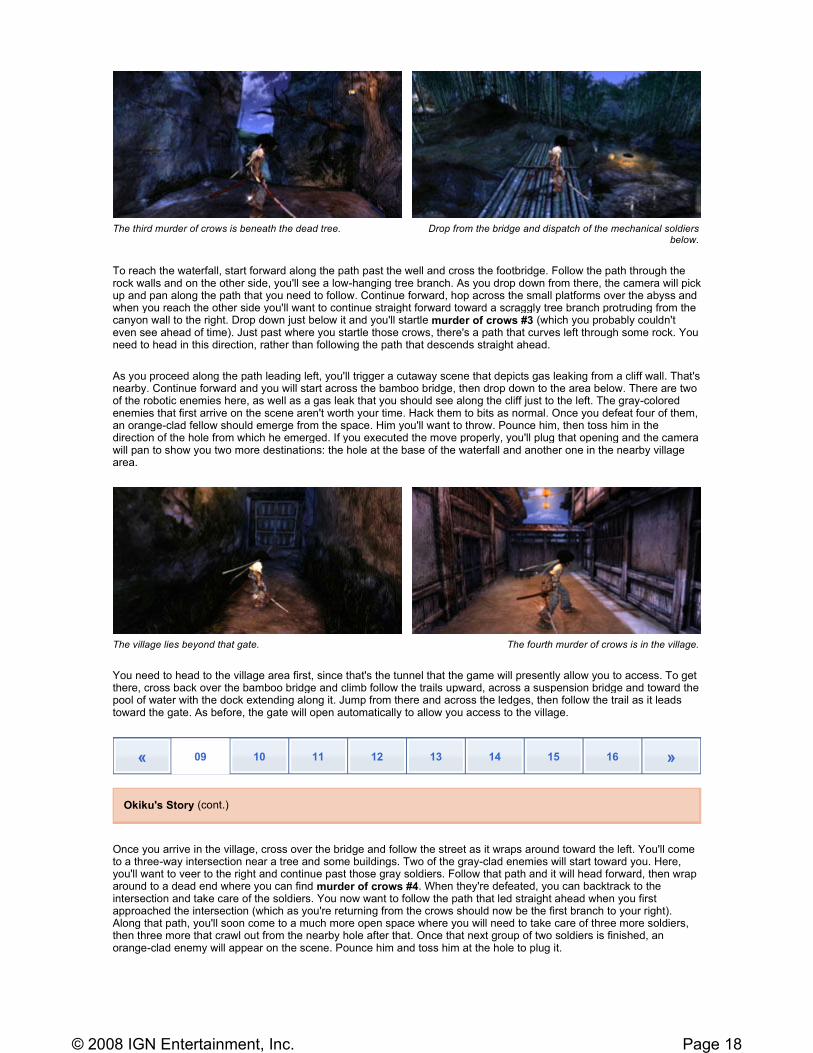
You should find yourself crossing a bamboo bridge, then a few more as you make your way along the forest trail and catch glimpses of a retreating Okiku in the process. Enemies won't attack for awhile, so just follow the zigzagging trail until you see a scene where Okiku meets with her father. When that concludes, you'll want to follow the father instead of the girl. Continue along the trail and you'll come to a short dock built over the raging water.
From the end of the dock, jump out to the right and then along the ledges to cross the water. Continue up the trail and you'll come to a closed door that opens at your approach. Through that and up the trail, you'll come to an area that you should recognize from the opening moments of the game. Cross over the bridge that you find immediately ahead. As you start up the road beyond, you'll trigger another attack.
This fight is naturally tougher than the one you should remember from the game's beginning. You'll have more soldiers to defeat and there also are gunmen on the roof. Take care of the enemies who are close at hand first, then climb to the rooftops to remove any stragglers. There also is a teddy bear in the area that you can slash for health if needed. When you defeat the last of the gunmen, a cutscene will be triggered to advance the story several days.
After the scene, you should work your way down to the waterfall the same as before. There are no enemies to bother you this time, though. When you reach the waterfall, you'll trigger a cutscene. It's not long before Okiku tells you outright who she is. Following that string of events, you'll appear back at the hut. Exit the building and as you start forward along the path, you'll trigger a scene where an enemy crawls out from the well. The game will now try to school you on the fine art of pouncing, though it doesn't necessarily make things as obvious as you might like. To pounce, you first need to perfectly parry a blow from your enemy. If this maneuver is formed correctly, your opponent will be dazed. You can then press the jump button to perform the pounce. Once you've pounced, you can then press the analog stick in a direction of your choice and press the jump button again to throw your hapless opponent. This is going to be important very soon, which is why the game is telling you how to make use of the ability.
Defeat the enemy that emerged from the well and throw him at the well to stop more from coming. You'll now be presented with your real assignment. Okiku wants you to block several holes throughout the region. Some camera work appears to show you the location of these holes. One is at the base of the waterfall, so head there next.
Watch for side paths when you find yourself in the forested area. The hut where the crows have gathered can be difficult to find.
« 01 02 03 04 05 06 07 08 »
Okiku's Story (cont.)
Okiku has a non-surprising confession to make. The well is where you'll first learn how to pounce.
Page 17© 2008 IGN Entertainment, Inc.
To reach the waterfall, start forward along the path past the well and cross the footbridge. Follow the path through the rock walls and on the other side, you'll see a low-hanging tree branch. As you drop down from there, the camera will pick up and pan along the path that you need to follow. Continue forward, hop across the small platforms over the abyss and when you reach the other side you'll want to continue straight forward toward a scraggly tree branch protruding from the canyon wall to the right. Drop down just below it and you'll startle murder of crows #3 (which you probably couldn't even see ahead of time). Just past where you startle those crows, there's a path that curves left through some rock. You need to head in this direction, rather than following the path that descends straight ahead.
As you proceed along the path leading left, you'll trigger a cutaway scene that depicts gas leaking from a cliff wall. That's nearby. Continue forward and you will start across the bamboo bridge, then drop down to the area below. There are two of the robotic enemies here, as well as a gas leak that you should see along the cliff just to the left. The gray-colored enemies that first arrive on the scene aren't worth your time. Hack them to bits as normal. Once you defeat four of them, an orange-clad fellow should emerge from the space. Him you'll want to throw. Pounce him, then toss him in the direction of the hole from which he emerged. If you executed the move properly, you'll plug that opening and the camera will pan to show you two more destinations: the hole at the base of the waterfall and another one in the nearby village area.
You need to head to the village area first, since that's the tunnel that the game will presently allow you to access. To get there, cross back over the bamboo bridge and climb follow the trails upward, across a suspension bridge and toward the pool of water with the dock extending along it. Jump from there and across the ledges, then follow the trail as it leads toward the gate. As before, the gate will open automatically to allow you access to the village.
Once you arrive in the village, cross over the bridge and follow the street as it wraps around toward the left. You'll come to a three-way intersection near a tree and some buildings. Two of the gray-clad enemies will start toward you. Here, you'll want to veer to the right and continue past those gray soldiers. Follow that path and it will head forward, then wrap around to a dead end where you can find murder of crows #4. When they're defeated, you can backtrack to the intersection and take care of the soldiers. You now want to follow the path that led straight ahead when you first approached the intersection (which as you're returning from the crows should now be the first branch to your right). Along that path, you'll soon come to a much more open space where you will need to take care of three more soldiers, then three more that crawl out from the nearby hole after that. Once that next group of two soldiers is finished, an orange-clad enemy will appear on the scene. Pounce him and toss him at the hole to plug it.
The third murder of crows is beneath the dead tree. Drop from the bridge and dispatch of the mechanical soldiers
below.
The village lies beyond that gate. The fourth murder of crows is in the village.
« 09 10 11 12 13 14 15 16 »
Okiku's Story (cont.)
Page 18© 2008 IGN Entertainment, Inc.
Now you have one final hole that you need to plug before you can descend into the pit that appeared at the base of the waterfall. The final hole is actually near the waterfall, along the rock wall up and to the left. Backtrack through the village and descend along the rock path. Ahead, you'll see a broken bridge that should be familiar to you since you've explored this area before. From this side, you can jump over the water to the other side and then continue forward while veering left. You'll see the boulder at the base of the falls. Jump onto it, and then from there to the opposite bank. Now follow that rock path upward. As you do, a cutaway scene will depict enemies emerging from a hole in the wall.
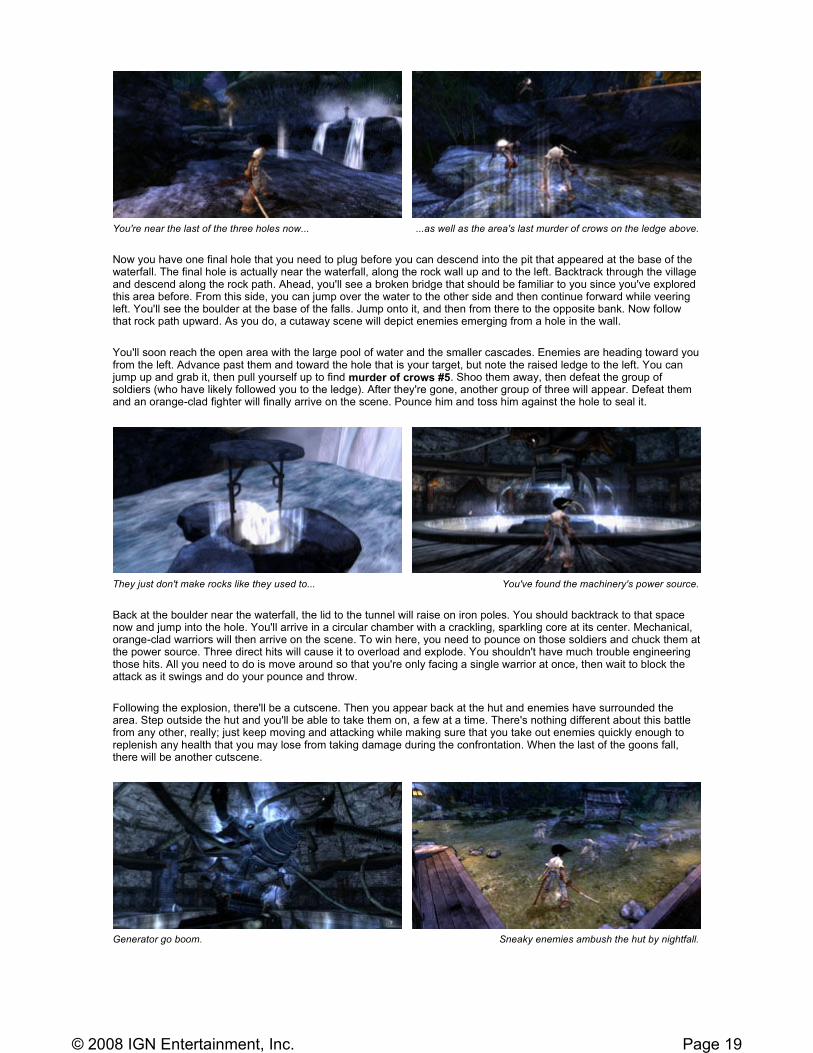
You'll soon reach the open area with the large pool of water and the smaller cascades. Enemies are heading toward you from the left. Advance past them and toward the hole that is your target, but note the raised ledge to the left. You can jump up and grab it, then pull yourself up to find murder of crows #5. Shoo them away, then defeat the group of soldiers (who have likely followed you to the ledge). After they're gone, another group of three will appear. Defeat them and an orange-clad fighter will finally arrive on the scene. Pounce him and toss him against the hole to seal it.
Back at the boulder near the waterfall, the lid to the tunnel will raise on iron poles. You should backtrack to that space now and jump into the hole. You'll arrive in a circular chamber with a crackling, sparkling core at its center. Mechanical, orange-clad warriors will then arrive on the scene. To win here, you need to pounce on those soldiers and chuck them at the power source. Three direct hits will cause it to overload and explode. You shouldn't have much trouble engineering those hits. All you need to do is move around so that you're only facing a single warrior at once, then wait to block the attack as it swings and do your pounce and throw.
Following the explosion, there'll be a cutscene. Then you appear back at the hut and enemies have surrounded the area. Step outside the hut and you'll be able to take them on, a few at a time. There's nothing different about this battle from any other, really; just keep moving and attacking while making sure that you take out enemies quickly enough to replenish any health that you may lose from taking damage during the confrontation. When the last of the goons fall, there will be another cutscene.
You're near the last of the three holes now... ...as well as the area's last murder of crows on the ledge above.
They just don't make rocks like they used to... You've found the machinery's power source.
Generator go boom. Sneaky enemies ambush the hut by nightfall.
Page 19© 2008 IGN Entertainment, Inc.
When the cutscene ends, you'll need to run around to the other side of the building. There, you'll find yourself facing the stage's boss battle.
Boss Battle Start
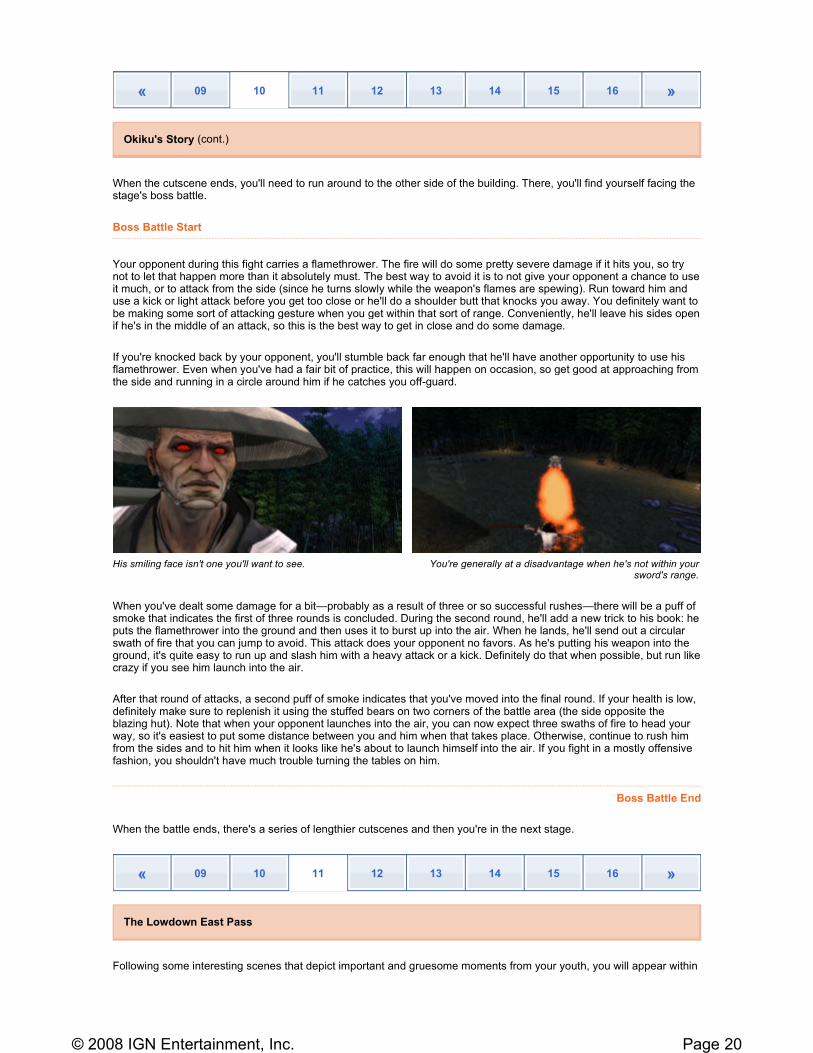
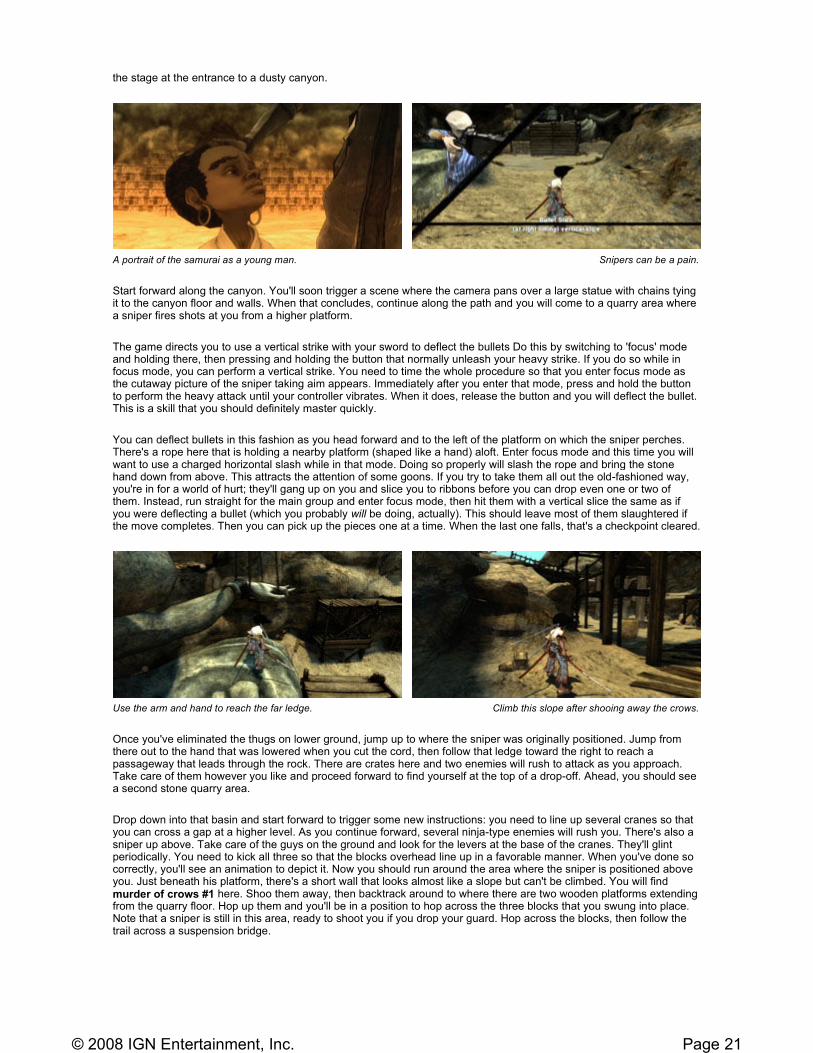
Your opponent during this fight carries a flamethrower. The fire will do some pretty severe damage if it hits you, so try not to let that happen more than it absolutely must. The best way to avoid it is to not give your opponent a chance to use it much, or to attack from the side (since he turns slowly while the weapon's flames are spewing). Run toward him and use a kick or light attack before you get too close or he'll do a shoulder butt that knocks you away. You definitely want to be making some sort of attacking gesture when you get within that sort of range. Conveniently, he'll leave his sides open if he's in the middle of an attack, so this is the best way to get in close and do some damage.
If you're knocked back by your opponent, you'll stumble back far enough that he'll have another opportunity to use his flamethrower. Even when you've had a fair bit of practice, this will happen on occasion, so get good at approaching from the side and running in a circle around him if he catches you off-guard.
When you've dealt some damage for a bit—probably as a result of three or so successful rushes—there will be a puff of smoke that indicates the first of three rounds is concluded. During the second round, he'll add a new trick to his book: he puts the flamethrower into the ground and then uses it to burst up into the air. When he lands, he'll send out a circular swath of fire that you can jump to avoid. This attack does your opponent no favors. As he's putting his weapon into the ground, it's quite easy to run up and slash him with a heavy attack or a kick. Definitely do that when possible, but run like crazy if you see him launch into the air.
After that round of attacks, a second puff of smoke indicates that you've moved into the final round. If your health is low, definitely make sure to replenish it using the stuffed bears on two corners of the battle area (the side opposite the blazing hut). Note that when your opponent launches into the air, you can now expect three swaths of fire to head your way, so it's easiest to put some distance between you and him when that takes place. Otherwise, continue to rush him from the sides and to hit him when it looks like he's about to launch himself into the air. If you fight in a mostly offensive fashion, you shouldn't have much trouble turning the tables on him.
Boss Battle End
When the battle ends, there's a series of lengthier cutscenes and then you're in the next stage.
Following some interesting scenes that depict important and gruesome moments from your youth, you will appear within
« 09 10 11 12 13 14 15 16 »
Okiku's Story (cont.)
His smiling face isn't one you'll want to see. You're generally at a disadvantage when he's not within your
sword's range.
« 09 10 11 12 13 14 15 16 »
The Lowdown East Pass
Page 20© 2008 IGN Entertainment, Inc.
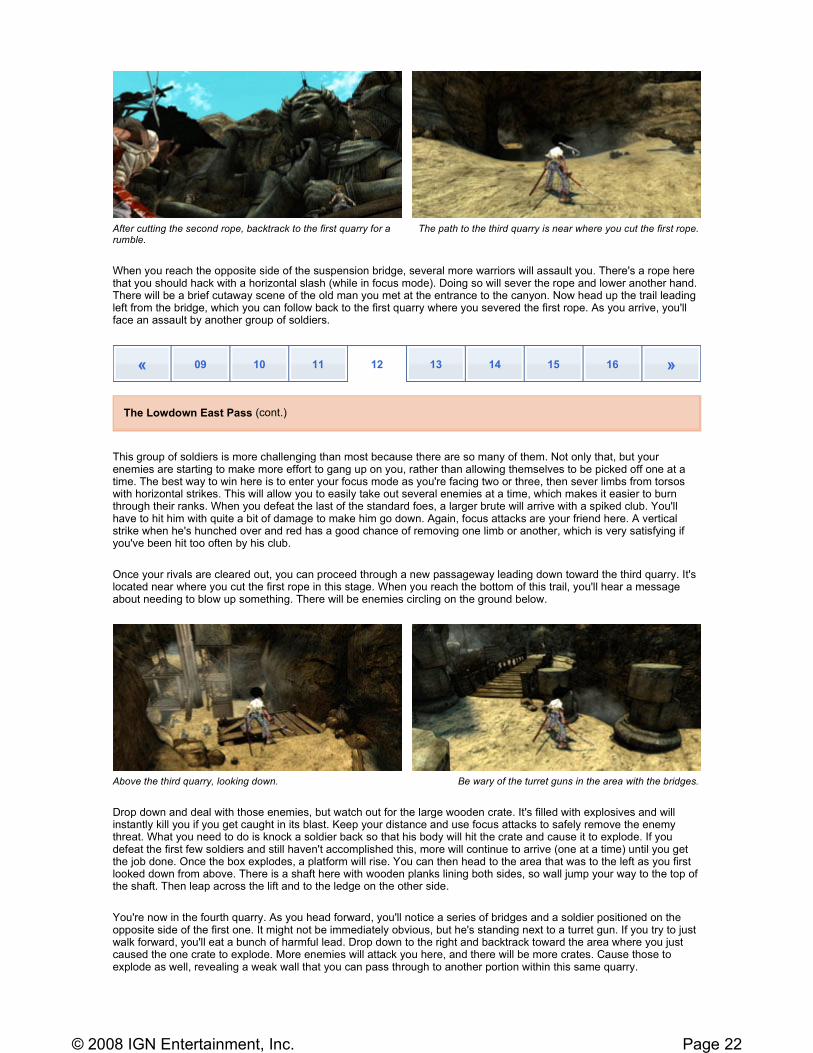
the stage at the entrance to a dusty canyon.
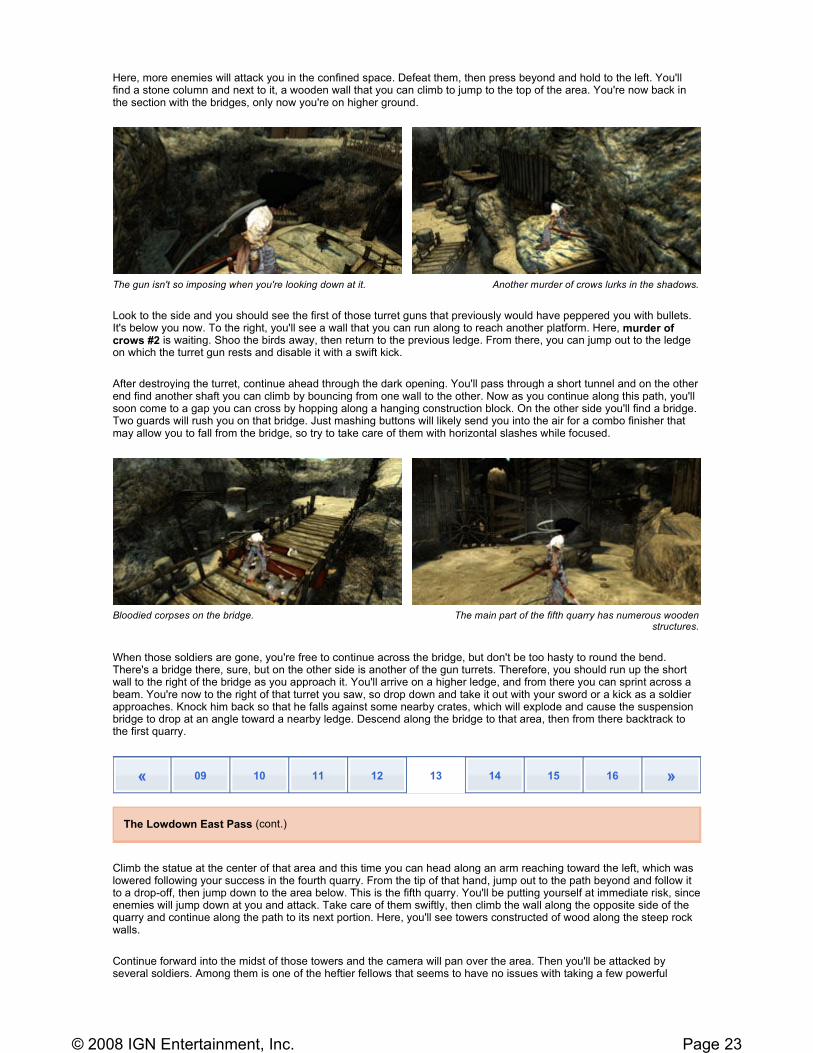
Start forward along the canyon. You'll soon trigger a scene where the camera pans over a large statue with chains tying it to the canyon floor and walls. When that concludes, continue along the path and you will come to a quarry area where a sniper fires shots at you from a higher platform.
The game directs you to use a vertical strike with your sword to deflect the bullets Do this by switching to 'focus' mode and holding there, then pressing and holding the button that normally unleash your heavy strike. If you do so while in focus mode, you can perform a vertical strike. You need to time the whole procedure so that you enter focus mode as the cutaway picture of the sniper taking aim appears. Immediately after you enter that mode, press and hold the button to perform the heavy attack until your controller vibrates. When it does, release the button and you will deflect the bullet. This is a skill that you should definitely master quickly.
You can deflect bullets in this fashion as you head forward and to the left of the platform on which the sniper perches. There's a rope here that is holding a nearby platform (shaped like a hand) aloft. Enter focus mode and this time you will want to use a charged horizontal slash while in that mode. Doing so properly will slash the rope and bring the stone hand down from above. This attracts the attention of some goons. If you try to take them all out the old-fashioned way, you're in for a world of hurt; they'll gang up on you and slice you to ribbons before you can drop even one or two of them. Instead, run straight for the main group and enter focus mode, then hit them with a vertical slice the same as if you were deflecting a bullet (which you probably will be doing, actually). This should leave most of them slaughtered if the move completes. Then you can pick up the pieces one at a time. When the last one falls, that's a checkpoint cleared.
Once you've eliminated the thugs on lower ground, jump up to where the sniper was originally positioned. Jump from there out to the hand that was lowered when you cut the cord, then follow that ledge toward the right to reach a passageway that leads through the rock. There are crates here and two enemies will rush to attack as you approach. Take care of them however you like and proceed forward to find yourself at the top of a drop-off. Ahead, you should see a second stone quarry area.
Drop down into that basin and start forward to trigger some new instructions: you need to line up several cranes so that you can cross a gap at a higher level. As you continue forward, several ninja-type enemies will rush you. There's also a sniper up above. Take care of the guys on the ground and look for the levers at the base of the cranes. They'll glint periodically. You need to kick all three so that the blocks overhead line up in a favorable manner. When you've done so correctly, you'll see an animation to depict it. Now you should run around the area where the sniper is positioned above you. Just beneath his platform, there's a short wall that looks almost like a slope but can't be climbed. You will find murder of crows #1 here. Shoo them away, then backtrack around to where there are two wooden platforms extending from the quarry floor. Hop up them and you'll be in a position to hop across the three blocks that you swung into place. Note that a sniper is still in this area, ready to shoot you if you drop your guard. Hop across the blocks, then follow the trail across a suspension bridge.
A portrait of the samurai as a young man. Snipers can be a pain.
Use the arm and hand to reach the far ledge. Climb this slope after shooing away the crows.
Page 21© 2008 IGN Entertainment, Inc.
When you reach the opposite side of the suspension bridge, several more warriors will assault you. There's a rope here that you should hack with a horizontal slash (while in focus mode). Doing so will sever the rope and lower another hand. There will be a brief cutaway scene of the old man you met at the entrance to the canyon. Now head up the trail leading left from the bridge, which you can follow back to the first quarry where you severed the first rope. As you arrive, you'll face an assault by another group of soldiers.
This group of soldiers is more challenging than most because there are so many of them. Not only that, but your enemies are starting to make more effort to gang up on you, rather than allowing themselves to be picked off one at a time. The best way to win here is to enter your focus mode as you're facing two or three, then sever limbs from torsos with horizontal strikes. This will allow you to easily take out several enemies at a time, which makes it easier to burn through their ranks. When you defeat the last of the standard foes, a larger brute will arrive with a spiked club. You'll have to hit him with quite a bit of damage to make him go down. Again, focus attacks are your friend here. A vertical strike when he's hunched over and red has a good chance of removing one limb or another, which is very satisfying if you've been hit too often by his club.
Once your rivals are cleared out, you can proceed through a new passageway leading down toward the third quarry. It's located near where you cut the first rope in this stage. When you reach the bottom of this trail, you'll hear a message about needing to blow up something. There will be enemies circling on the ground below.
Drop down and deal with those enemies, but watch out for the large wooden crate. It's filled with explosives and will instantly kill you if you get caught in its blast. Keep your distance and use focus attacks to safely remove the enemy threat. What you need to do is knock a soldier back so that his body will hit the crate and cause it to explode. If you defeat the first few soldiers and still haven't accomplished this, more will continue to arrive (one at a time) until you get the job done. Once the box explodes, a platform will rise. You can then head to the area that was to the left as you first looked down from above. There is a shaft here with wooden planks lining both sides, so wall jump your way to the top of the shaft. Then leap across the lift and to the ledge on the other side.
You're now in the fourth quarry. As you head forward, you'll notice a series of bridges and a soldier positioned on the opposite side of the first one. It might not be immediately obvious, but he's standing next to a turret gun. If you try to just walk forward, you'll eat a bunch of harmful lead. Drop down to the right and backtrack toward the area where you just caused the one crate to explode. More enemies will attack you here, and there will be more crates. Cause those to explode as well, revealing a weak wall that you can pass through to another portion within this same quarry.
After cutting the second rope, backtrack to the first quarry for a rumble.
The path to the third quarry is near where you cut the first rope.
« 09 10 11 12 13 14 15 16 »
The Lowdown East Pass (cont.)
Above the third quarry, looking down. Be wary of the turret guns in the area with the bridges.
Page 22© 2008 IGN Entertainment, Inc.
Here, more enemies will attack you in the confined space. Defeat them, then press beyond and hold to the left. You'll find a stone column and next to it, a wooden wall that you can climb to jump to the top of the area. You're now back in the section with the bridges, only now you're on higher ground.
Look to the side and you should see the first of those turret guns that previously would have peppered you with bullets. It's below you now. To the right, you'll see a wall that you can run along to reach another platform. Here, murder of crows #2 is waiting. Shoo the birds away, then return to the previous ledge. From there, you can jump out to the ledge on which the turret gun rests and disable it with a swift kick.
After destroying the turret, continue ahead through the dark opening. You'll pass through a short tunnel and on the other end find another shaft you can climb by bouncing from one wall to the other. Now as you continue along this path, you'll soon come to a gap you can cross by hopping along a hanging construction block. On the other side you'll find a bridge. Two guards will rush you on that bridge. Just mashing buttons will likely send you into the air for a combo finisher that may allow you to fall from the bridge, so try to take care of them with horizontal slashes while focused.
When those soldiers are gone, you're free to continue across the bridge, but don't be too hasty to round the bend. There's a bridge there, sure, but on the other side is another of the gun turrets. Therefore, you should run up the short wall to the right of the bridge as you approach it. You'll arrive on a higher ledge, and from there you can sprint across a beam. You're now to the right of that turret you saw, so drop down and take it out with your sword or a kick as a soldier approaches. Knock him back so that he falls against some nearby crates, which will explode and cause the suspension bridge to drop at an angle toward a nearby ledge. Descend along the bridge to that area, then from there backtrack to the first quarry.
Climb the statue at the center of that area and this time you can head along an arm reaching toward the left, which was lowered following your success in the fourth quarry. From the tip of that hand, jump out to the path beyond and follow it to a drop-off, then jump down to the area below. This is the fifth quarry. You'll be putting yourself at immediate risk, since enemies will jump down at you and attack. Take care of them swiftly, then climb the wall along the opposite side of the quarry and continue along the path to its next portion. Here, you'll see towers constructed of wood along the steep rock walls.
Continue forward into the midst of those towers and the camera will pan over the area. Then you'll be attacked by several soldiers. Among them is one of the heftier fellows that seems to have no issues with taking a few powerful
The gun isn't so imposing when you're looking down at it. Another murder of crows lurks in the shadows.
Bloodied corpses on the bridge. The main part of the fifth quarry has numerous wooden
structures.
« 09 10 11 12 13 14 15 16 »
The Lowdown East Pass (cont.)
Page 23© 2008 IGN Entertainment, Inc.
slashes to the chest, so focus your attacks on him first as possible. A few focused horizontal slashes should make quick work of him, and by then his cohorts probably have also died.
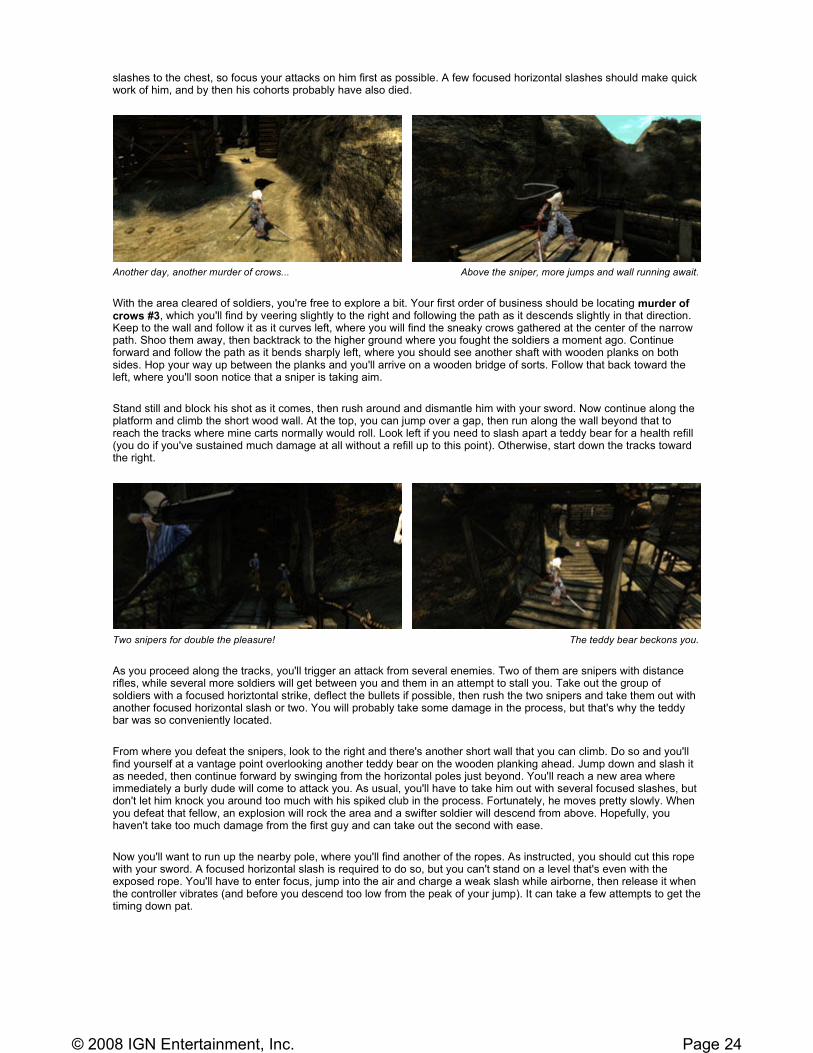
With the area cleared of soldiers, you're free to explore a bit. Your first order of business should be locating murder of crows #3, which you'll find by veering slightly to the right and following the path as it descends slightly in that direction. Keep to the wall and follow it as it curves left, where you will find the sneaky crows gathered at the center of the narrow path. Shoo them away, then backtrack to the higher ground where you fought the soldiers a moment ago. Continue forward and follow the path as it bends sharply left, where you should see another shaft with wooden planks on both sides. Hop your way up between the planks and you'll arrive on a wooden bridge of sorts. Follow that back toward the left, where you'll soon notice that a sniper is taking aim.
Stand still and block his shot as it comes, then rush around and dismantle him with your sword. Now continue along the platform and climb the short wood wall. At the top, you can jump over a gap, then run along the wall beyond that to reach the tracks where mine carts normally would roll. Look left if you need to slash apart a teddy bear for a health refill (you do if you've sustained much damage at all without a refill up to this point). Otherwise, start down the tracks toward the right.
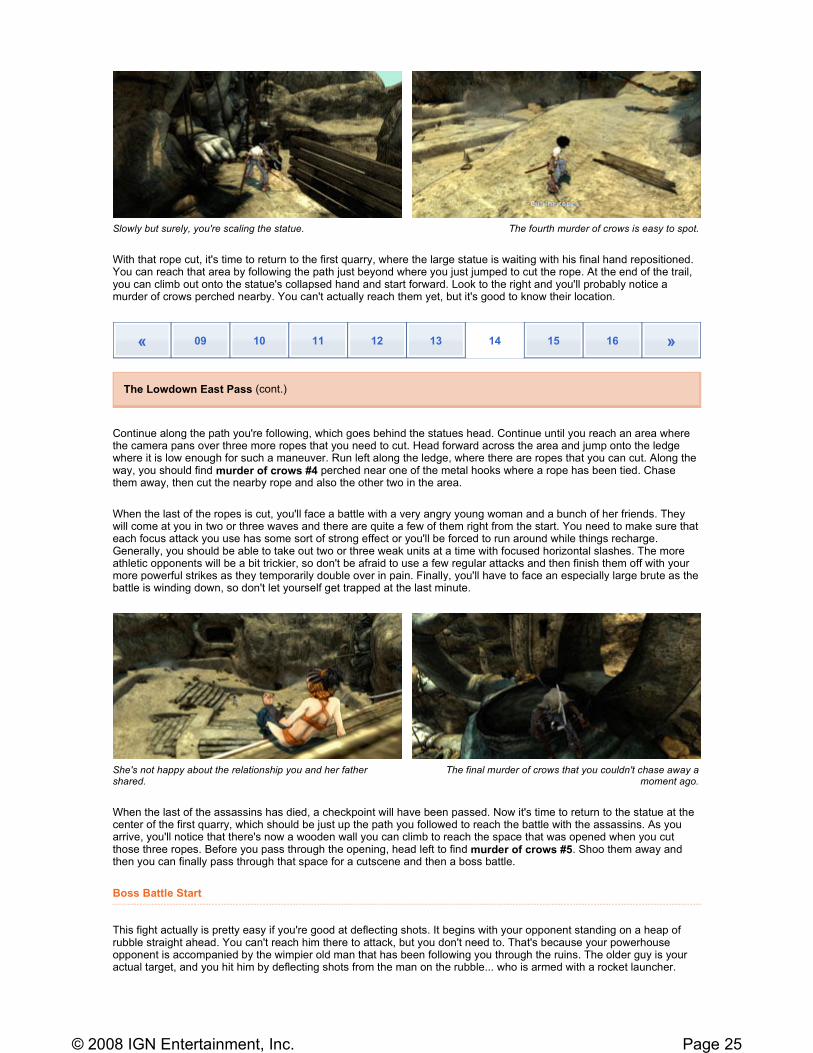
As you proceed along the tracks, you'll trigger an attack from several enemies. Two of them are snipers with distance rifles, while several more soldiers will get between you and them in an attempt to stall you. Take out the group of soldiers with a focused horiztontal strike, deflect the bullets if possible, then rush the two snipers and take them out with another focused horizontal slash or two. You will probably take some damage in the process, but that's why the teddy bar was so conveniently located.
From where you defeat the snipers, look to the right and there's another short wall that you can climb. Do so and you'll find yourself at a vantage point overlooking another teddy bear on the wooden planking ahead. Jump down and slash it as needed, then continue forward by swinging from the horizontal poles just beyond. You'll reach a new area where immediately a burly dude will come to attack you. As usual, you'll have to take him out with several focused slashes, but don't let him knock you around too much with his spiked club in the process. Fortunately, he moves pretty slowly. When you defeat that fellow, an explosion will rock the area and a swifter soldier will descend from above. Hopefully, you haven't take too much damage from the first guy and can take out the second with ease.
Now you'll want to run up the nearby pole, where you'll find another of the ropes. As instructed, you should cut this rope with your sword. A focused horizontal slash is required to do so, but you can't stand on a level that's even with the exposed rope. You'll have to enter focus, jump into the air and charge a weak slash while airborne, then release it when the controller vibrates (and before you descend too low from the peak of your jump). It can take a few attempts to get the timing down pat.
Another day, another murder of crows... Above the sniper, more jumps and wall running await.
Two snipers for double the pleasure! The teddy bear beckons you.
Page 24© 2008 IGN Entertainment, Inc.
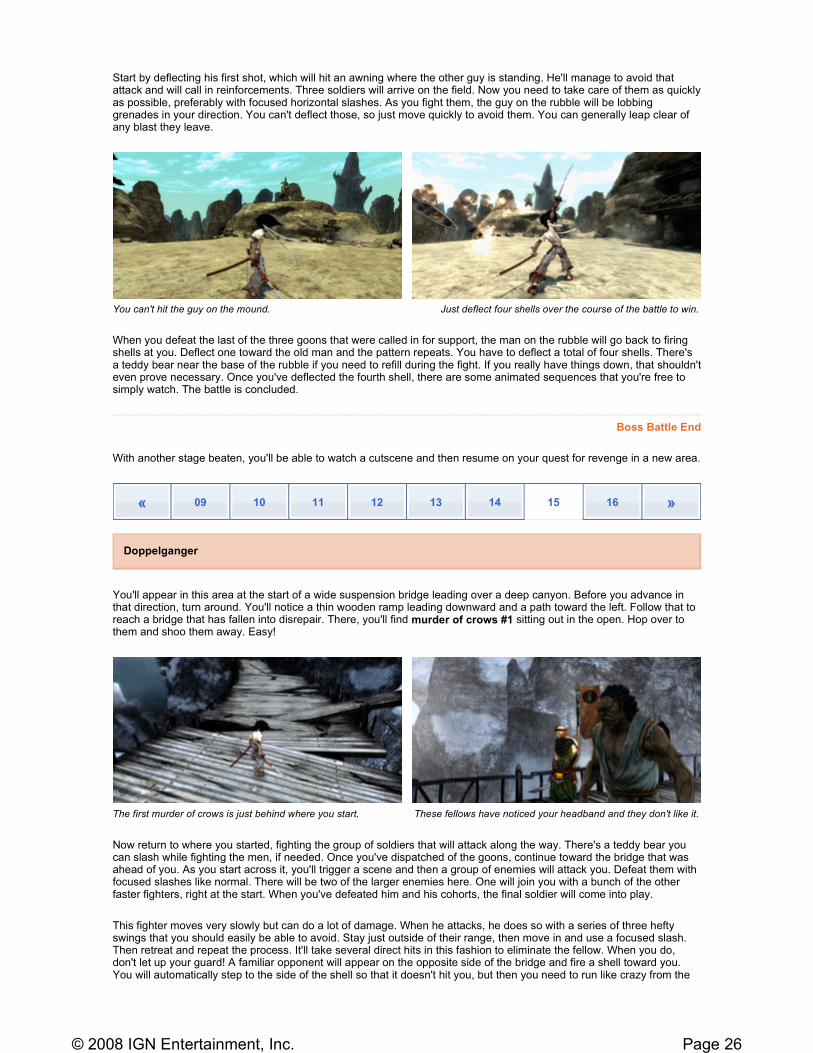
With that rope cut, it's time to return to the first quarry, where the large statue is waiting with his final hand repositioned. You can reach that area by following the path just beyond where you just jumped to cut the rope. At the end of the trail, you can climb out onto the statue's collapsed hand and start forward. Look to the right and you'll probably notice a murder of crows perched nearby. You can't actually reach them yet, but it's good to know their location.
Continue along the path you're following, which goes behind the statues head. Continue until you reach an area where the camera pans over three more ropes that you need to cut. Head forward across the area and jump onto the ledge where it is low enough for such a maneuver. Run left along the ledge, where there are ropes that you can cut. Along the way, you should find murder of crows #4 perched near one of the metal hooks where a rope has been tied. Chase them away, then cut the nearby rope and also the other two in the area.
When the last of the ropes is cut, you'll face a battle with a very angry young woman and a bunch of her friends. They will come at you in two or three waves and there are quite a few of them right from the start. You need to make sure that each focus attack you use has some sort of strong effect or you'll be forced to run around while things recharge. Generally, you should be able to take out two or three weak units at a time with focused horizontal slashes. The more athletic opponents will be a bit trickier, so don't be afraid to use a few regular attacks and then finish them off with your more powerful strikes as they temporarily double over in pain. Finally, you'll have to face an especially large brute as the battle is winding down, so don't let yourself get trapped at the last minute.
When the last of the assassins has died, a checkpoint will have been passed. Now it's time to return to the statue at the center of the first quarry, which should be just up the path you followed to reach the battle with the assassins. As you arrive, you'll notice that there's now a wooden wall you can climb to reach the space that was opened when you cut those three ropes. Before you pass through the opening, head left to find murder of crows #5. Shoo them away and then you can finally pass through that space for a cutscene and then a boss battle.
Boss Battle Start
This fight actually is pretty easy if you're good at deflecting shots. It begins with your opponent standing on a heap of rubble straight ahead. You can't reach him there to attack, but you don't need to. That's because your powerhouse opponent is accompanied by the wimpier old man that has been following you through the ruins. The older guy is your actual target, and you hit him by deflecting shots from the man on the rubble... who is armed with a rocket launcher.
Slowly but surely, you're scaling the statue. The fourth murder of crows is easy to spot.
« 09 10 11 12 13 14 15 16 »
The Lowdown East Pass (cont.)
She's not happy about the relationship you and her father shared.
The final murder of crows that you couldn't chase away a moment ago.
Page 25© 2008 IGN Entertainment, Inc.
Start by deflecting his first shot, which will hit an awning where the other guy is standing. He'll manage to avoid that attack and will call in reinforcements. Three soldiers will arrive on the field. Now you need to take care of them as quickly as possible, preferably with focused horizontal slashes. As you fight them, the guy on the rubble will be lobbing grenades in your direction. You can't deflect those, so just move quickly to avoid them. You can generally leap clear of any blast they leave.
When you defeat the last of the three goons that were called in for support, the man on the rubble will go back to firing shells at you. Deflect one toward the old man and the pattern repeats. You have to deflect a total of four shells. There's a teddy bear near the base of the rubble if you need to refill during the fight. If you really have things down, that shouldn't even prove necessary. Once you've deflected the fourth shell, there are some animated sequences that you're free to simply watch. The battle is concluded.
Boss Battle End
With another stage beaten, you'll be able to watch a cutscene and then resume on your quest for revenge in a new area.
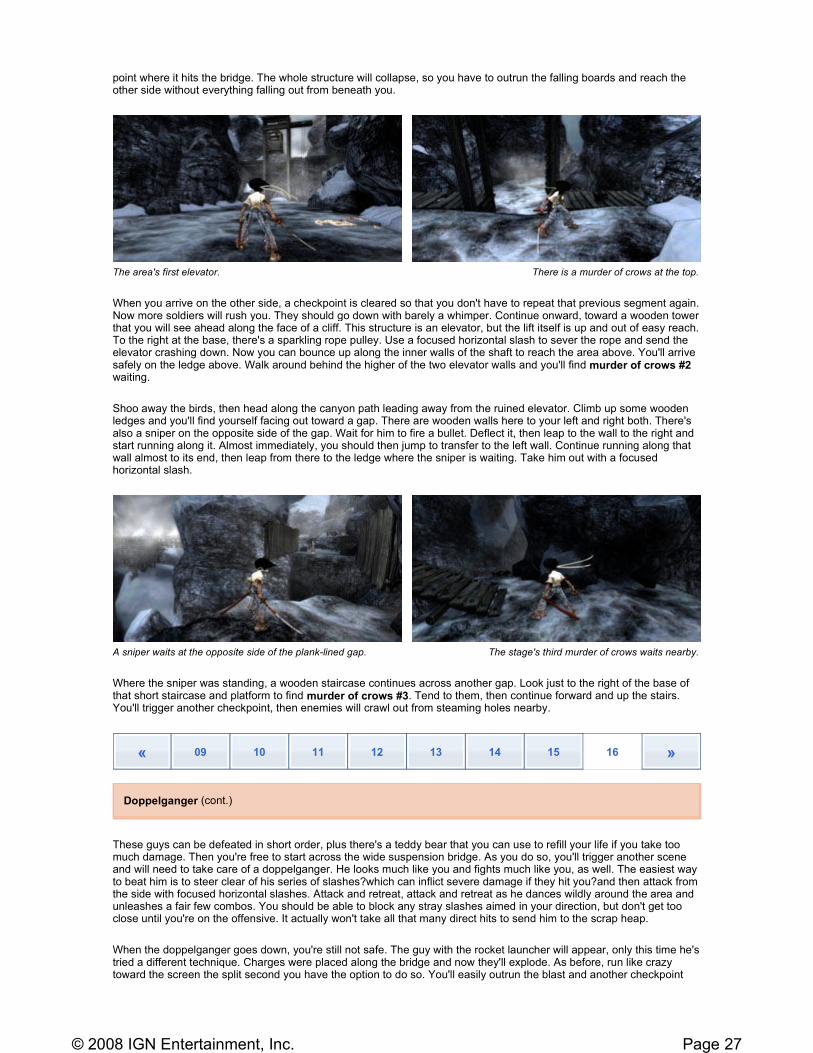
You'll appear in this area at the start of a wide suspension bridge leading over a deep canyon. Before you advance in that direction, turn around. You'll notice a thin wooden ramp leading downward and a path toward the left. Follow that to reach a bridge that has fallen into disrepair. There, you'll find murder of crows #1 sitting out in the open. Hop over to them and shoo them away. Easy!
Now return to where you started, fighting the group of soldiers that will attack along the way. There's a teddy bear you can slash while fighting the men, if needed. Once you've dispatched of the goons, continue toward the bridge that was ahead of you. As you start across it, you'll trigger a scene and then a group of enemies will attack you. Defeat them with focused slashes like normal. There will be two of the larger enemies here. One will join you with a bunch of the other faster fighters, right at the start. When you've defeated him and his cohorts, the final soldier will come into play.
This fighter moves very slowly but can do a lot of damage. When he attacks, he does so with a series of three hefty swings that you should easily be able to avoid. Stay just outside of their range, then move in and use a focused slash. Then retreat and repeat the process. It'll take several direct hits in this fashion to eliminate the fellow. When you do, don't let up your guard! A familiar opponent will appear on the opposite side of the bridge and fire a shell toward you. You will automatically step to the side of the shell so that it doesn't hit you, but then you need to run like crazy from the
You can't hit the guy on the mound. Just deflect four shells over the course of the battle to win.
« 09 10 11 12 13 14 15 16 »
Doppelganger
The first murder of crows is just behind where you start. These fellows have noticed your headband and they don't like it.
Page 26© 2008 IGN Entertainment, Inc.
point where it hits the bridge. The whole structure will collapse, so you have to outrun the falling boards and reach the other side without everything falling out from beneath you.
When you arrive on the other side, a checkpoint is cleared so that you don't have to repeat that previous segment again. Now more soldiers will rush you. They should go down with barely a whimper. Continue onward, toward a wooden tower that you will see ahead along the face of a cliff. This structure is an elevator, but the lift itself is up and out of easy reach. To the right at the base, there's a sparkling rope pulley. Use a focused horizontal slash to sever the rope and send the elevator crashing down. Now you can bounce up along the inner walls of the shaft to reach the area above. You'll arrive safely on the ledge above. Walk around behind the higher of the two elevator walls and you'll find murder of crows #2 waiting.
Shoo away the birds, then head along the canyon path leading away from the ruined elevator. Climb up some wooden ledges and you'll find yourself facing out toward a gap. There are wooden walls here to your left and right both. There's also a sniper on the opposite side of the gap. Wait for him to fire a bullet. Deflect it, then leap to the wall to the right and start running along it. Almost immediately, you should then jump to transfer to the left wall. Continue running along that wall almost to its end, then leap from there to the ledge where the sniper is waiting. Take him out with a focused horizontal slash.
Where the sniper was standing, a wooden staircase continues across another gap. Look just to the right of the base of that short staircase and platform to find murder of crows #3. Tend to them, then continue forward and up the stairs. You'll trigger another checkpoint, then enemies will crawl out from steaming holes nearby.
These guys can be defeated in short order, plus there's a teddy bear that you can use to refill your life if you take too much damage. Then you're free to start across the wide suspension bridge. As you do so, you'll trigger another scene and will need to take care of a doppelganger. He looks much like you and fights much like you, as well. The easiest way to beat him is to steer clear of his series of slashes?which can inflict severe damage if they hit you?and then attack from the side with focused horizontal slashes. Attack and retreat, attack and retreat as he dances wildly around the area and unleashes a fair few combos. You should be able to block any stray slashes aimed in your direction, but don't get too close until you're on the offensive. It actually won't take all that many direct hits to send him to the scrap heap.
When the doppelganger goes down, you're still not safe. The guy with the rocket launcher will appear, only this time he's tried a different technique. Charges were placed along the bridge and now they'll explode. As before, run like crazy toward the screen the split second you have the option to do so. You'll easily outrun the blast and another checkpoint
The area's first elevator. There is a murder of crows at the top.
A sniper waits at the opposite side of the plank-lined gap. The stage's third murder of crows waits nearby.
« 09 10 11 12 13 14 15 16 »
Doppelganger (cont.)
Page 27© 2008 IGN Entertainment, Inc.
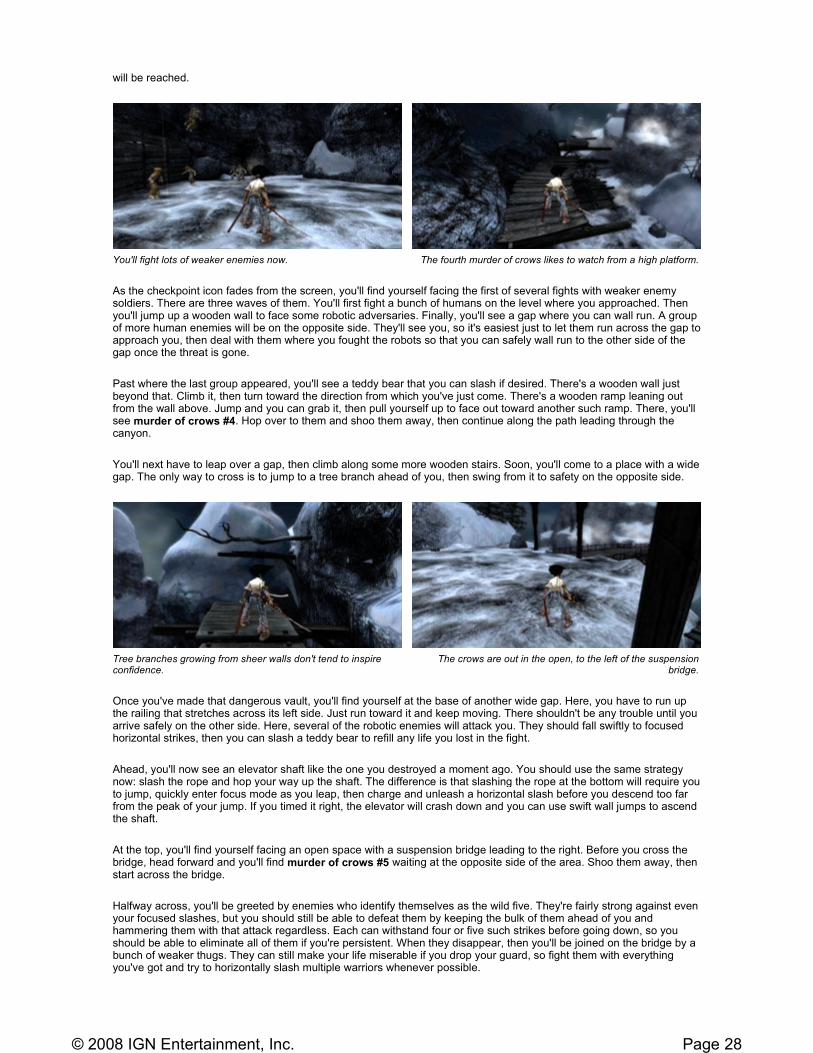
will be reached.
As the checkpoint icon fades from the screen, you'll find yourself facing the first of several fights with weaker enemy soldiers. There are three waves of them. You'll first fight a bunch of humans on the level where you approached. Then you'll jump up a wooden wall to face some robotic adversaries. Finally, you'll see a gap where you can wall run. A group of more human enemies will be on the opposite side. They'll see you, so it's easiest just to let them run across the gap to approach you, then deal with them where you fought the robots so that you can safely wall run to the other side of the gap once the threat is gone.
Past where the last group appeared, you'll see a teddy bear that you can slash if desired. There's a wooden wall just beyond that. Climb it, then turn toward the direction from which you've just come. There's a wooden ramp leaning out from the wall above. Jump and you can grab it, then pull yourself up to face out toward another such ramp. There, you'll see murder of crows #4. Hop over to them and shoo them away, then continue along the path leading through the canyon.
You'll next have to leap over a gap, then climb along some more wooden stairs. Soon, you'll come to a place with a wide gap. The only way to cross is to jump to a tree branch ahead of you, then swing from it to safety on the opposite side.
Once you've made that dangerous vault, you'll find yourself at the base of another wide gap. Here, you have to run up the railing that stretches across its left side. Just run toward it and keep moving. There shouldn't be any trouble until you arrive safely on the other side. Here, several of the robotic enemies will attack you. They should fall swiftly to focused horizontal strikes, then you can slash a teddy bear to refill any life you lost in the fight.
Ahead, you'll now see an elevator shaft like the one you destroyed a moment ago. You should use the same strategy now: slash the rope and hop your way up the shaft. The difference is that slashing the rope at the bottom will require you to jump, quickly enter focus mode as you leap, then charge and unleash a horizontal slash before you descend too far from the peak of your jump. If you timed it right, the elevator will crash down and you can use swift wall jumps to ascend the shaft.
At the top, you'll find yourself facing an open space with a suspension bridge leading to the right. Before you cross the bridge, head forward and you'll find murder of crows #5 waiting at the opposite side of the area. Shoo them away, then start across the bridge.
Halfway across, you'll be greeted by enemies who identify themselves as the wild five. They're fairly strong against even your focused slashes, but you should still be able to defeat them by keeping the bulk of them ahead of you and hammering them with that attack regardless. Each can withstand four or five such strikes before going down, so you should be able to eliminate all of them if you're persistent. When they disappear, then you'll be joined on the bridge by a bunch of weaker thugs. They can still make your life miserable if you drop your guard, so fight them with everything you've got and try to horizontally slash multiple warriors whenever possible.
You'll fight lots of weaker enemies now. The fourth murder of crows likes to watch from a high platform.
Tree branches growing from sheer walls don't tend to inspire confidence.
The crows are out in the open, to the left of the suspension bridge.
Page 28© 2008 IGN Entertainment, Inc.

Once you defeat the last of those soldiers, you'll be free to continue toward the end of the bridge, where you'll witness another scene and then be engaged in a boss battle.
Boss Battle Start
This fight takes place entirely in the air and it shouldn't prove terribly difficult. You'll mostly just have trouble getting near enough to your opponent to actually hit him. Since you're falling through the air the whole time, all you can really do is guard any attacks that seem to come your way?though none do so with any real frequency?and wait for the robot you're battling to get within striking range.
When your adversary does come close, that's when you should use a focused strike to horizontally or vertically slash him for some nice damage. However, that doesn't mean that you should rely just on those attacks. It's also worth your while (particularly at the start of the fight) to just mash your light attack button. Your rival in the air moves with incredible speed, so he's not going to fall to a steady string of heavier blows. Mix things up a bit and try to move toward your opponent whenever you see him. Be ready to block as needed, but mostly this is a fight that can be won by staying on the offensive as much as possible.
Boss Battle End
When you win the battle, there's another cutscene and then you're taken to the next stage, as usual.
After the cutscene that displays when you first appear in the area, head forward down the steps to a 'T' in the path. Follow the bend to the right first, where you'll run almost immediately into murder of crows #1. The birds are positioned in plain sight, along the snowy path leading into the dead end. Now backtrack to the 'T' and this time take the path that led left from the base of the stairs (which now is straight ahead of you). As you follow it, you'll find it bending toward the right.
As you round the bend, you'll trigger another scene. The bear-shaped warrior, Kuma, will appear. Following the scene, you'll be engaged in a battle. This one is pretty easy to win. Step out of the way of the initial rush, then move in close and attack with a series of focused horizontal shots. Four or five hits should result in a whirlwind of rubble. When it
The real trouble with this fight is that it's difficult to get close. When you get close, you can use quick attacks that eventually
lead to decisive victory.
« 17 18 19 20 21 22 23 -- »
Kuma's Story
Head right from the 'T' in the path to find crows. Going left leads to your first encounter with Kuma.
Page 29© 2008 IGN Entertainment, Inc.
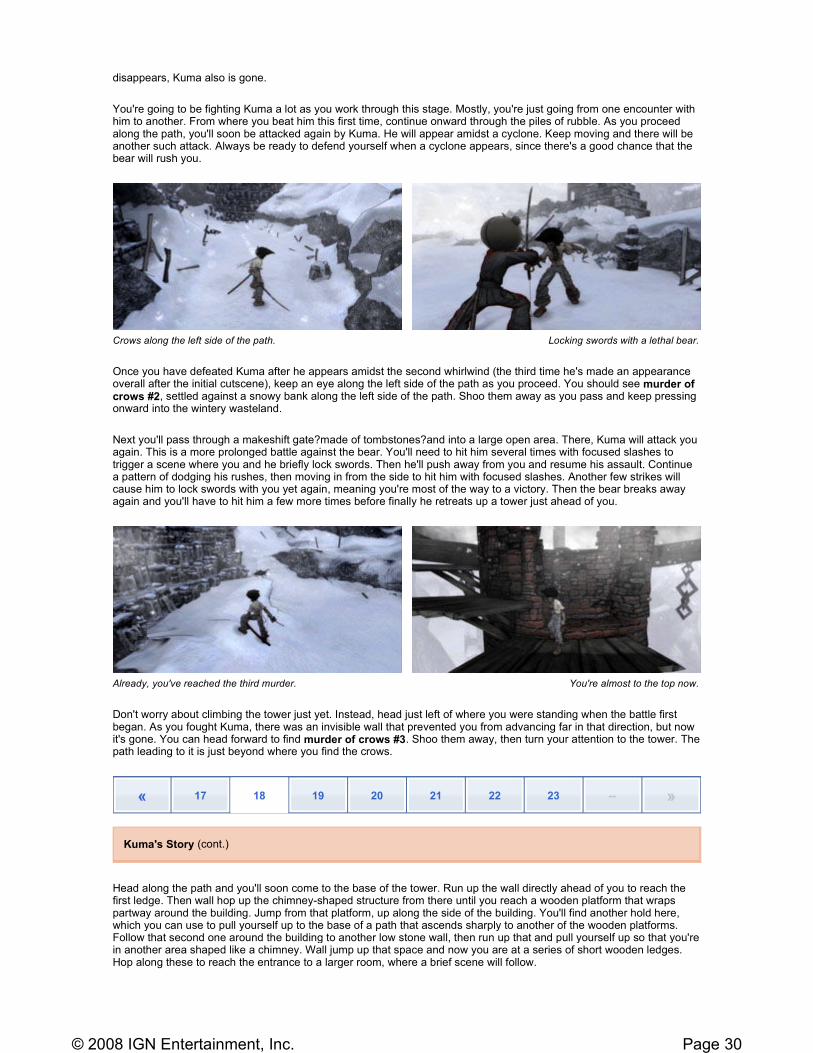
disappears, Kuma also is gone.
You're going to be fighting Kuma a lot as you work through this stage. Mostly, you're just going from one encounter with him to another. From where you beat him this first time, continue onward through the piles of rubble. As you proceed along the path, you'll soon be attacked again by Kuma. He will appear amidst a cyclone. Keep moving and there will be another such attack. Always be ready to defend yourself when a cyclone appears, since there's a good chance that the bear will rush you.
Once you have defeated Kuma after he appears amidst the second whirlwind (the third time he's made an appearance overall after the initial cutscene), keep an eye along the left side of the path as you proceed. You should see murder of crows #2, settled against a snowy bank along the left side of the path. Shoo them away as you pass and keep pressing onward into the wintery wasteland.
Next you'll pass through a makeshift gate?made of tombstones?and into a large open area. There, Kuma will attack you again. This is a more prolonged battle against the bear. You'll need to hit him several times with focused slashes to trigger a scene where you and he briefly lock swords. Then he'll push away from you and resume his assault. Continue a pattern of dodging his rushes, then moving in from the side to hit him with focused slashes. Another few strikes will cause him to lock swords with you yet again, meaning you're most of the way to a victory. Then the bear breaks away again and you'll have to hit him a few more times before finally he retreats up a tower just ahead of you.
Don't worry about climbing the tower just yet. Instead, head just left of where you were standing when the battle first began. As you fought Kuma, there was an invisible wall that prevented you from advancing far in that direction, but now it's gone. You can head forward to find murder of crows #3. Shoo them away, then turn your attention to the tower. The path leading to it is just beyond where you find the crows.
Head along the path and you'll soon come to the base of the tower. Run up the wall directly ahead of you to reach the first ledge. Then wall hop up the chimney-shaped structure from there until you reach a wooden platform that wraps partway around the building. Jump from that platform, up along the side of the building. You'll find another hold here, which you can use to pull yourself up to the base of a path that ascends sharply to another of the wooden platforms. Follow that second one around the building to another low stone wall, then run up that and pull yourself up so that you're in another area shaped like a chimney. Wall jump up that space and now you are at a series of short wooden ledges. Hop along these to reach the entrance to a larger room, where a brief scene will follow.
Crows along the left side of the path. Locking swords with a lethal bear.
Already, you've reached the third murder. You're almost to the top now.
« 17 18 19 20 21 22 23 -- »
Kuma's Story (cont.)
Page 30© 2008 IGN Entertainment, Inc.
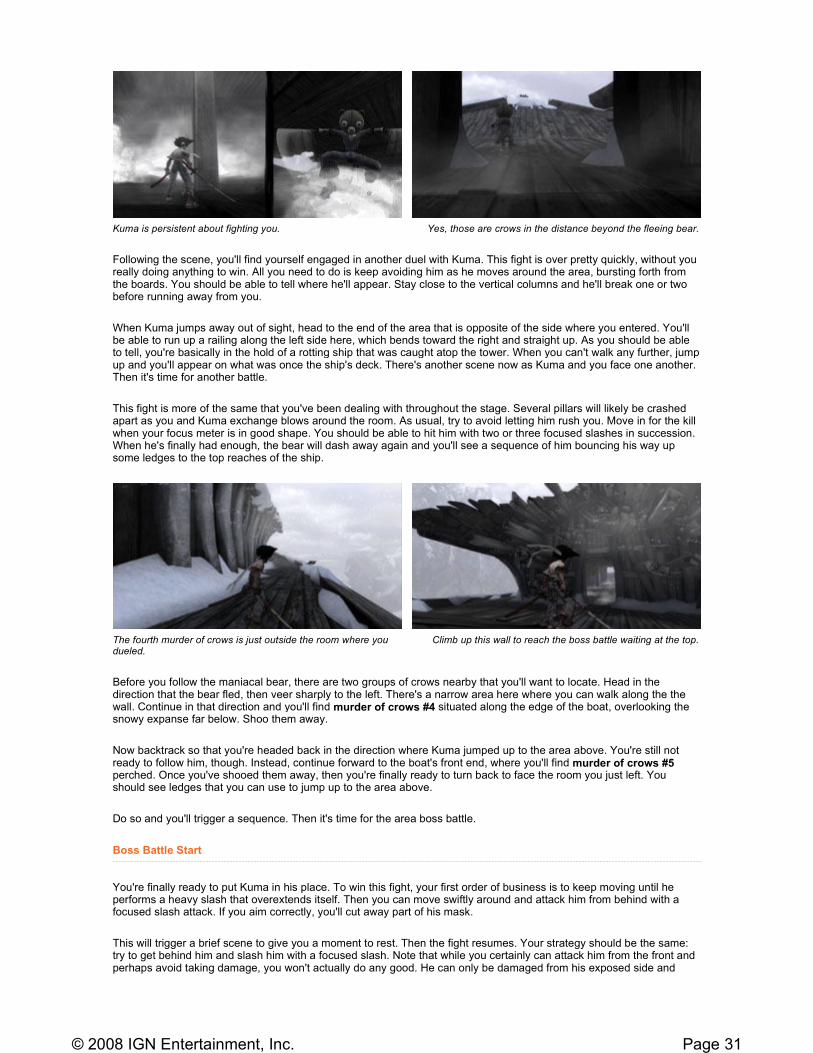
Following the scene, you'll find yourself engaged in another duel with Kuma. This fight is over pretty quickly, without you really doing anything to win. All you need to do is keep avoiding him as he moves around the area, bursting forth from the boards. You should be able to tell where he'll appear. Stay close to the vertical columns and he'll break one or two before running away from you.
When Kuma jumps away out of sight, head to the end of the area that is opposite of the side where you entered. You'll be able to run up a railing along the left side here, which bends toward the right and straight up. As you should be able to tell, you're basically in the hold of a rotting ship that was caught atop the tower. When you can't walk any further, jump up and you'll appear on what was once the ship's deck. There's another scene now as Kuma and you face one another. Then it's time for another battle.
This fight is more of the same that you've been dealing with throughout the stage. Several pillars will likely be crashed apart as you and Kuma exchange blows around the room. As usual, try to avoid letting him rush you. Move in for the kill when your focus meter is in good shape. You should be able to hit him with two or three focused slashes in succession. When he's finally had enough, the bear will dash away again and you'll see a sequence of him bouncing his way up some ledges to the top reaches of the ship.
Before you follow the maniacal bear, there are two groups of crows nearby that you'll want to locate. Head in the direction that the bear fled, then veer sharply to the left. There's a narrow area here where you can walk along the the wall. Continue in that direction and you'll find murder of crows #4 situated along the edge of the boat, overlooking the snowy expanse far below. Shoo them away.
Now backtrack so that you're headed back in the direction where Kuma jumped up to the area above. You're still not ready to follow him, though. Instead, continue forward to the boat's front end, where you'll find murder of crows #5 perched. Once you've shooed them away, then you're finally ready to turn back to face the room you just left. You should see ledges that you can use to jump up to the area above.
Do so and you'll trigger a sequence. Then it's time for the area boss battle.
Boss Battle Start
You're finally ready to put Kuma in his place. To win this fight, your first order of business is to keep moving until he performs a heavy slash that overextends itself. Then you can move swiftly around and attack him from behind with a focused slash attack. If you aim correctly, you'll cut away part of his mask.
This will trigger a brief scene to give you a moment to rest. Then the fight resumes. Your strategy should be the same: try to get behind him and slash him with a focused slash. Note that while you certainly can attack him from the front and perhaps avoid taking damage, you won't actually do any good. He can only be damaged from his exposed side and
Kuma is persistent about fighting you. Yes, those are crows in the distance beyond the fleeing bear.
The fourth murder of crows is just outside the room where you dueled.
Climb up this wall to reach the boss battle waiting at the top.
Page 31© 2008 IGN Entertainment, Inc.
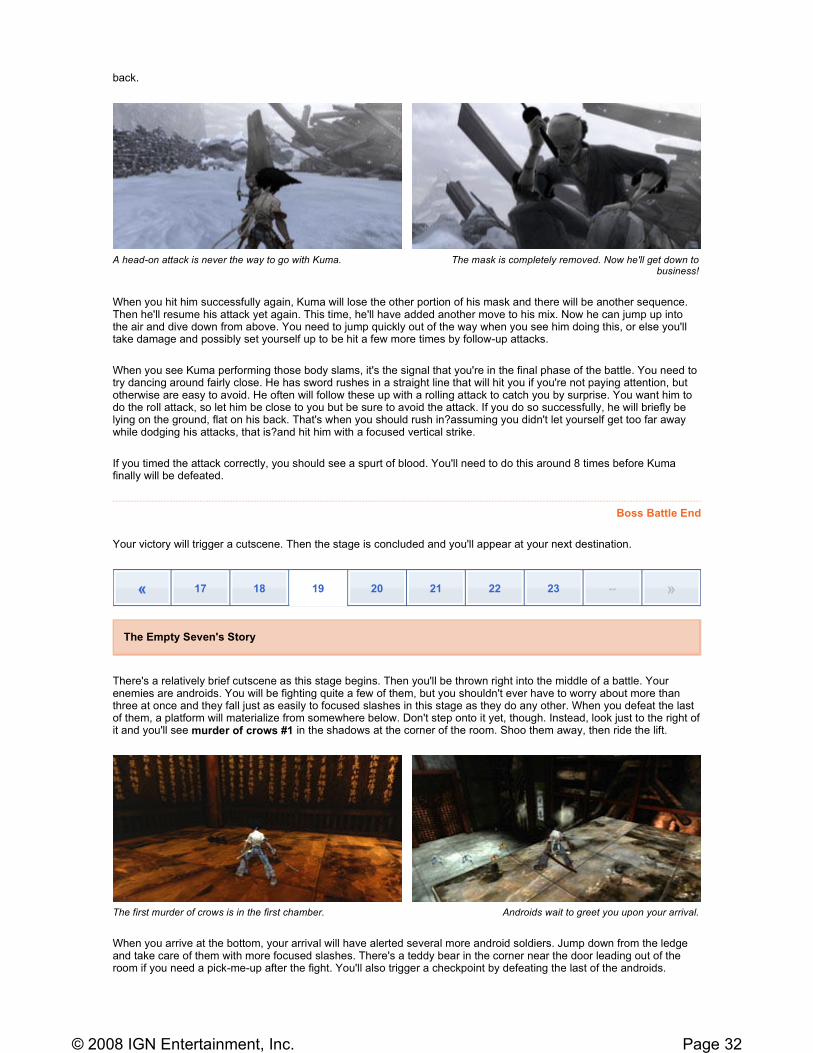
back.
When you hit him successfully again, Kuma will lose the other portion of his mask and there will be another sequence. Then he'll resume his attack yet again. This time, he'll have added another move to his mix. Now he can jump up into the air and dive down from above. You need to jump quickly out of the way when you see him doing this, or else you'll take damage and possibly set yourself up to be hit a few more times by follow-up attacks.
When you see Kuma performing those body slams, it's the signal that you're in the final phase of the battle. You need to try dancing around fairly close. He has sword rushes in a straight line that will hit you if you're not paying attention, but otherwise are easy to avoid. He often will follow these up with a rolling attack to catch you by surprise. You want him to do the roll attack, so let him be close to you but be sure to avoid the attack. If you do so successfully, he will briefly be lying on the ground, flat on his back. That's when you should rush in?assuming you didn't let yourself get too far away while dodging his attacks, that is?and hit him with a focused vertical strike.
If you timed the attack correctly, you should see a spurt of blood. You'll need to do this around 8 times before Kuma finally will be defeated.
Boss Battle End
Your victory will trigger a cutscene. Then the stage is concluded and you'll appear at your next destination.
There's a relatively brief cutscene as this stage begins. Then you'll be thrown right into the middle of a battle. Your enemies are androids. You will be fighting quite a few of them, but you shouldn't ever have to worry about more than three at once and they fall just as easily to focused slashes in this stage as they do any other. When you defeat the last of them, a platform will materialize from somewhere below. Don't step onto it yet, though. Instead, look just to the right of it and you'll see murder of crows #1 in the shadows at the corner of the room. Shoo them away, then ride the lift.
When you arrive at the bottom, your arrival will have alerted several more android soldiers. Jump down from the ledge and take care of them with more focused slashes. There's a teddy bear in the corner near the door leading out of the room if you need a pick-me-up after the fight. You'll also trigger a checkpoint by defeating the last of the androids.
A head-on attack is never the way to go with Kuma. The mask is completely removed. Now he'll get down to
business!
« 17 18 19 20 21 22 23 -- »
The Empty Seven's Story
The first murder of crows is in the first chamber. Androids wait to greet you upon your arrival.
Page 32© 2008 IGN Entertainment, Inc.
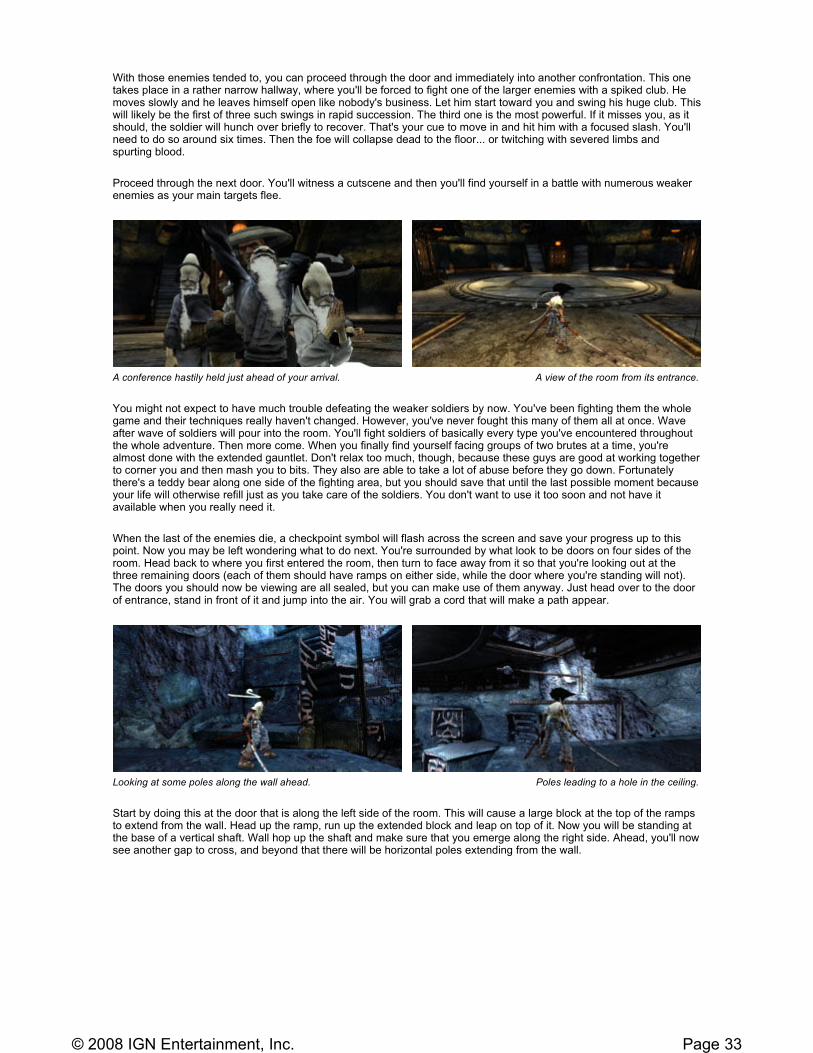
With those enemies tended to, you can proceed through the door and immediately into another confrontation. This one takes place in a rather narrow hallway, where you'll be forced to fight one of the larger enemies with a spiked club. He moves slowly and he leaves himself open like nobody's business. Let him start toward you and swing his huge club. This will likely be the first of three such swings in rapid succession. The third one is the most powerful. If it misses you, as it should, the soldier will hunch over briefly to recover. That's your cue to move in and hit him with a focused slash. You'll need to do so around six times. Then the foe will collapse dead to the floor... or twitching with severed limbs and spurting blood.
Proceed through the next door. You'll witness a cutscene and then you'll find yourself in a battle with numerous weaker enemies as your main targets flee.
You might not expect to have much trouble defeating the weaker soldiers by now. You've been fighting them the whole game and their techniques really haven't changed. However, you've never fought this many of them all at once. Wave after wave of soldiers will pour into the room. You'll fight soldiers of basically every type you've encountered throughout the whole adventure. Then more come. When you finally find yourself facing groups of two brutes at a time, you're almost done with the extended gauntlet. Don't relax too much, though, because these guys are good at working together to corner you and then mash you to bits. They also are able to take a lot of abuse before they go down. Fortunately there's a teddy bear along one side of the fighting area, but you should save that until the last possible moment because your life will otherwise refill just as you take care of the soldiers. You don't want to use it too soon and not have it available when you really need it.
When the last of the enemies die, a checkpoint symbol will flash across the screen and save your progress up to this point. Now you may be left wondering what to do next. You're surrounded by what look to be doors on four sides of the room. Head back to where you first entered the room, then turn to face away from it so that you're looking out at the three remaining doors (each of them should have ramps on either side, while the door where you're standing will not). The doors you should now be viewing are all sealed, but you can make use of them anyway. Just head over to the door of entrance, stand in front of it and jump into the air. You will grab a cord that will make a path appear.
Start by doing this at the door that is along the left side of the room. This will cause a large block at the top of the ramps to extend from the wall. Head up the ramp, run up the extended block and leap on top of it. Now you will be standing at the base of a vertical shaft. Wall hop up the shaft and make sure that you emerge along the right side. Ahead, you'll now see another gap to cross, and beyond that there will be horizontal poles extending from the wall.
A conference hastily held just ahead of your arrival. A view of the room from its entrance.
Looking at some poles along the wall ahead. Poles leading to a hole in the ceiling.
Page 33© 2008 IGN Entertainment, Inc.
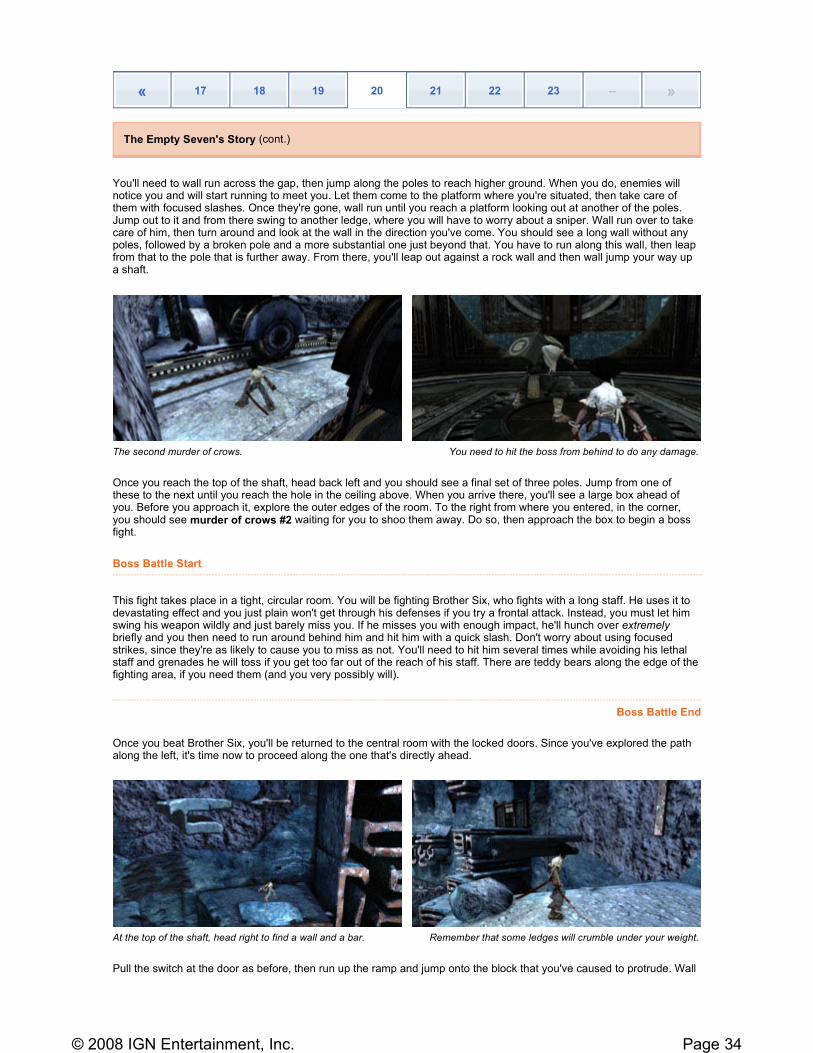
You'll need to wall run across the gap, then jump along the poles to reach higher ground. When you do, enemies will notice you and will start running to meet you. Let them come to the platform where you're situated, then take care of them with focused slashes. Once they're gone, wall run until you reach a platform looking out at another of the poles. Jump out to it and from there swing to another ledge, where you will have to worry about a sniper. Wall run over to take care of him, then turn around and look at the wall in the direction you've come. You should see a long wall without any poles, followed by a broken pole and a more substantial one just beyond that. You have to run along this wall, then leap from that to the pole that is further away. From there, you'll leap out against a rock wall and then wall jump your way up a shaft.
Once you reach the top of the shaft, head back left and you should see a final set of three poles. Jump from one of these to the next until you reach the hole in the ceiling above. When you arrive there, you'll see a large box ahead of you. Before you approach it, explore the outer edges of the room. To the right from where you entered, in the corner, you should see murder of crows #2 waiting for you to shoo them away. Do so, then approach the box to begin a boss fight.
Boss Battle Start
This fight takes place in a tight, circular room. You will be fighting Brother Six, who fights with a long staff. He uses it to devastating effect and you just plain won't get through his defenses if you try a frontal attack. Instead, you must let him swing his weapon wildly and just barely miss you. If he misses you with enough impact, he'll hunch over extremely briefly and you then need to run around behind him and hit him with a quick slash. Don't worry about using focused strikes, since they're as likely to cause you to miss as not. You'll need to hit him several times while avoiding his lethal staff and grenades he will toss if you get too far out of the reach of his staff. There are teddy bears along the edge of the fighting area, if you need them (and you very possibly will).
Boss Battle End
Once you beat Brother Six, you'll be returned to the central room with the locked doors. Since you've explored the path along the left, it's time now to proceed along the one that's directly ahead.
Pull the switch at the door as before, then run up the ramp and jump onto the block that you've caused to protrude. Wall
« 17 18 19 20 21 22 23 -- »
The Empty Seven's Story (cont.)
The second murder of crows. You need to hit the boss from behind to do any damage.
At the top of the shaft, head right to find a wall and a bar. Remember that some ledges will crumble under your weight.
Page 34© 2008 IGN Entertainment, Inc.
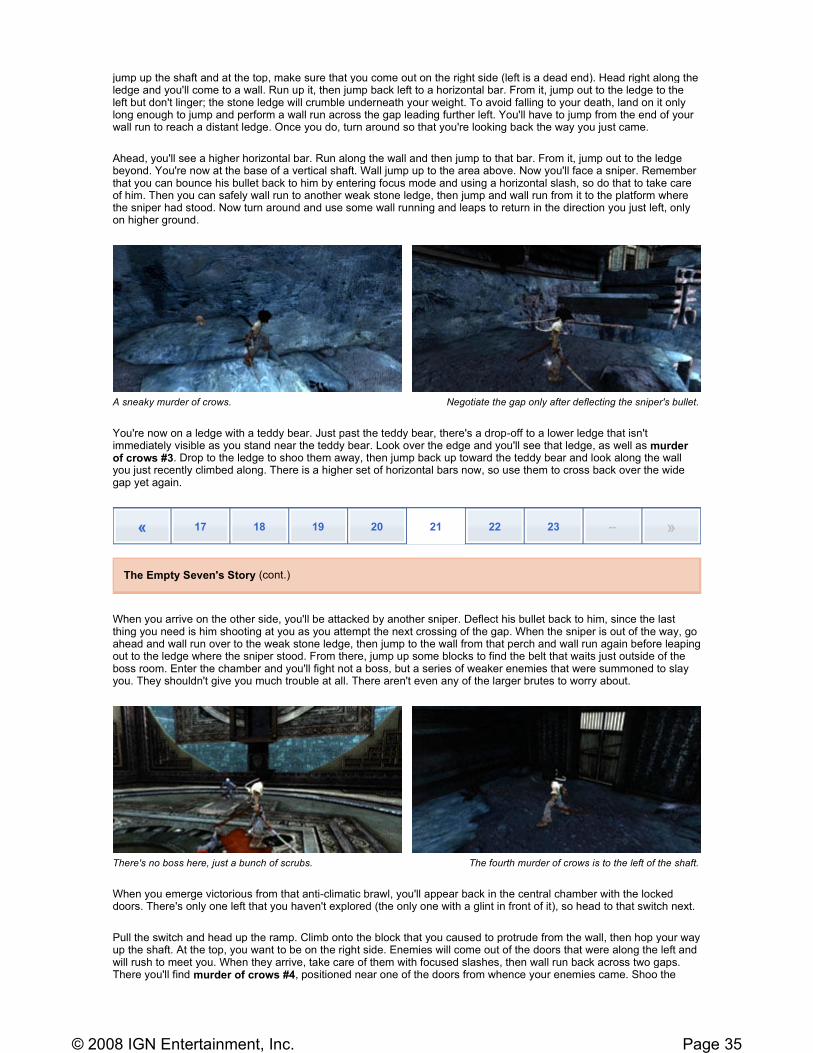
jump up the shaft and at the top, make sure that you come out on the right side (left is a dead end). Head right along the ledge and you'll come to a wall. Run up it, then jump back left to a horizontal bar. From it, jump out to the ledge to the left but don't linger; the stone ledge will crumble underneath your weight. To avoid falling to your death, land on it only long enough to jump and perform a wall run across the gap leading further left. You'll have to jump from the end of your wall run to reach a distant ledge. Once you do, turn around so that you're looking back the way you just came.
Ahead, you'll see a higher horizontal bar. Run along the wall and then jump to that bar. From it, jump out to the ledge beyond. You're now at the base of a vertical shaft. Wall jump up to the area above. Now you'll face a sniper. Remember that you can bounce his bullet back to him by entering focus mode and using a horizontal slash, so do that to take care of him. Then you can safely wall run to another weak stone ledge, then jump and wall run from it to the platform where the sniper had stood. Now turn around and use some wall running and leaps to return in the direction you just left, only on higher ground.
You're now on a ledge with a teddy bear. Just past the teddy bear, there's a drop-off to a lower ledge that isn't immediately visible as you stand near the teddy bear. Look over the edge and you'll see that ledge, as well as murder of crows #3. Drop to the ledge to shoo them away, then jump back up toward the teddy bear and look along the wall you just recently climbed along. There is a higher set of horizontal bars now, so use them to cross back over the wide gap yet again.
When you arrive on the other side, you'll be attacked by another sniper. Deflect his bullet back to him, since the last thing you need is him shooting at you as you attempt the next crossing of the gap. When the sniper is out of the way, go ahead and wall run over to the weak stone ledge, then jump to the wall from that perch and wall run again before leaping out to the ledge where the sniper stood. From there, jump up some blocks to find the belt that waits just outside of the boss room. Enter the chamber and you'll fight not a boss, but a series of weaker enemies that were summoned to slay you. They shouldn't give you much trouble at all. There aren't even any of the larger brutes to worry about.
When you emerge victorious from that anti-climatic brawl, you'll appear back in the central chamber with the locked doors. There's only one left that you haven't explored (the only one with a glint in front of it), so head to that switch next.
Pull the switch and head up the ramp. Climb onto the block that you caused to protrude from the wall, then hop your way up the shaft. At the top, you want to be on the right side. Enemies will come out of the doors that were along the left and will rush to meet you. When they arrive, take care of them with focused slashes, then wall run back across two gaps. There you'll find murder of crows #4, positioned near one of the doors from whence your enemies came. Shoo the
A sneaky murder of crows. Negotiate the gap only after deflecting the sniper's bullet.
« 17 18 19 20 21 22 23 -- »
The Empty Seven's Story (cont.)
There's no boss here, just a bunch of scrubs. The fourth murder of crows is to the left of the shaft.
Page 35© 2008 IGN Entertainment, Inc.
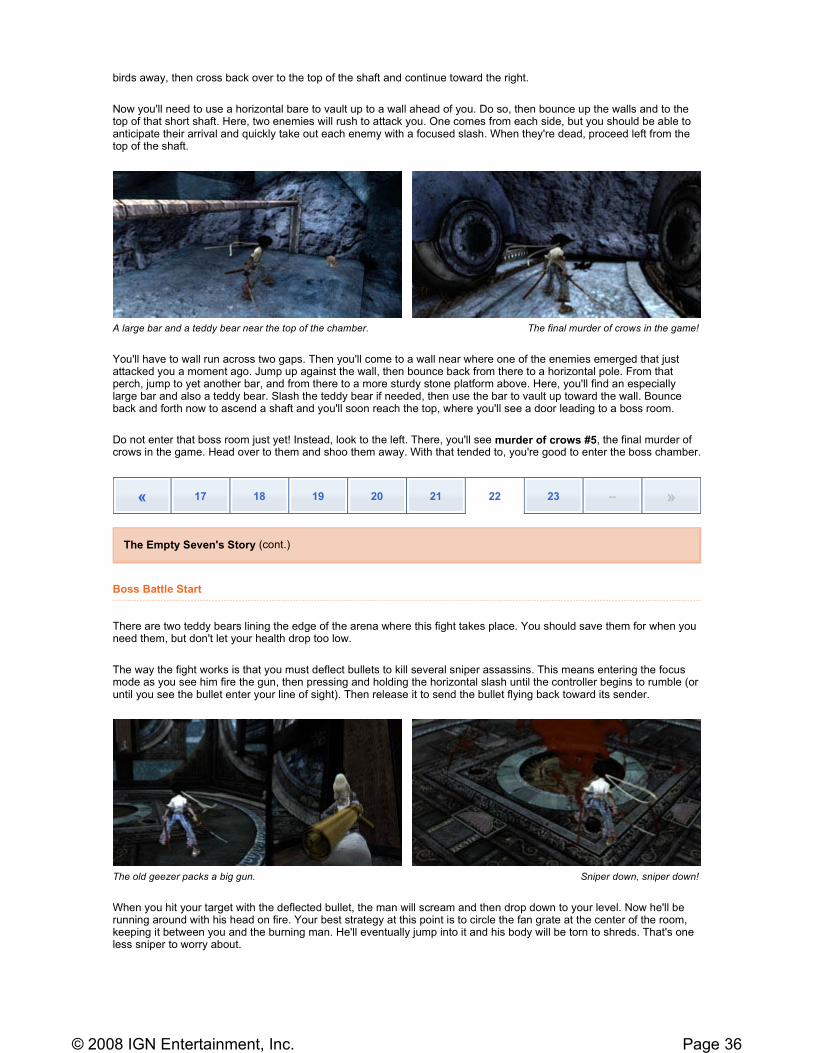
birds away, then cross back over to the top of the shaft and continue toward the right.
Now you'll need to use a horizontal bare to vault up to a wall ahead of you. Do so, then bounce up the walls and to the top of that short shaft. Here, two enemies will rush to attack you. One comes from each side, but you should be able to anticipate their arrival and quickly take out each enemy with a focused slash. When they're dead, proceed left from the top of the shaft.
You'll have to wall run across two gaps. Then you'll come to a wall near where one of the enemies emerged that just attacked you a moment ago. Jump up against the wall, then bounce back from there to a horizontal pole. From that perch, jump to yet another bar, and from there to a more sturdy stone platform above. Here, you'll find an especially large bar and also a teddy bear. Slash the teddy bear if needed, then use the bar to vault up toward the wall. Bounce back and forth now to ascend a shaft and you'll soon reach the top, where you'll see a door leading to a boss room.
Do not enter that boss room just yet! Instead, look to the left. There, you'll see murder of crows #5, the final murder of crows in the game. Head over to them and shoo them away. With that tended to, you're good to enter the boss chamber.
Boss Battle Start
There are two teddy bears lining the edge of the arena where this fight takes place. You should save them for when you need them, but don't let your health drop too low.
The way the fight works is that you must deflect bullets to kill several sniper assassins. This means entering the focus mode as you see him fire the gun, then pressing and holding the horizontal slash until the controller begins to rumble (or until you see the bullet enter your line of sight). Then release it to send the bullet flying back toward its sender.
When you hit your target with the deflected bullet, the man will scream and then drop down to your level. Now he'll be running around with his head on fire. Your best strategy at this point is to circle the fan grate at the center of the room, keeping it between you and the burning man. He'll eventually jump into it and his body will be torn to shreds. That's one less sniper to worry about.
A large bar and a teddy bear near the top of the chamber. The final murder of crows in the game!
« 17 18 19 20 21 22 23 -- »
The Empty Seven's Story (cont.)
The old geezer packs a big gun. Sniper down, sniper down!
Page 36© 2008 IGN Entertainment, Inc.

Repeat the process twice and the sniper will get smarter. He'll start firing bursts of multiple bullets. The bursts of fire can't be deflected. Just keep moving until you see the cutaway animation of the sniper taking aim. Then enter focus mode and deflect the bullet as normal. Once you time your deflection correctly and hit the third sniper, he'll die and the boss battle is complete.
Boss Battle End
Unfortunately, you're not done with the stage. A short cutscene will depict the death of the final sniper, then you'll find yourself battling a bunch of smaller foes in the same chamber. All you need to do now is survive until everything goes dark, which it'll do once you've defeated around 10 or 12 of the androids that are swarming you. Keep fighting them with focused slashes and don't let yourself get cornered. This shouldn't be a tough fight uneless you allowed the snipers to drain your resources too much.
When the lights go dark, a series of cutscenes follow and then you are in another battle. You're on a small island now and you must fight hordes of enemies. They're all wearing blue jumpsuits and sporting white afros...
This fight is going to last for awhile. You will need to slice your way through more soldiers at once than you've ever battled anywhere else in the game. Your opponents move quickly, too, and they're good at ganging up together to hit you. The only way you'll have a chance at surviving is if you keep killing your enemies. Every one you slay helps your life meter a little bit, which is important when there are so many guys trying to beat you down at once. As long as you keep the focus slashes coming and you keep hitting your targets, you will be able to keep your life meter nearly full and you will burn through one enemy after another.
Like most major fights in the game, this one has three phases. There aren't really any differences between them, though. Just keep moving and slashing and there will be two cutscenes along the way to let you know when you're making real progress (since otherwise the stream of enemies can seem endless).
When you've slain the last enemy, a third cutscene will follow and then the stage is complete.
Finally, you have a chance to bring justice to the man who lopped off your father's head. Like the previous stage, this one begins with a brief cutscene and then moves immediately into a battle.
Boss Battle Start
This fight takes place in a stand of dead trees. Your enemy is a gunslinger and he will pepper you with bullets if you try to attack him head on. The only way to get anywhere near him is to use the trees for cover and to keep moving so that he can't hone in on your position. Once you get close to him, you can come around a tree and then enter a focus attack to hit him with a vertical or horizontal slice. Now you have the advantage, if only briefly. Press against him while you can, hitting him with a combination of standard and focus attacks until he vaporizes.
Now you'll have to listen to a monologue as your enemy taunts you. Keep moving around the area, running a circle around the pile of junk at the center of the area. Keep an eye out for your enemy. When the chatter stops, that's a good sign that he's probably somewhere close by, perhaps even behind you. If you're near him, use more attacks to keep on the offensive. If you're not, then repeat the process of using the trees for coverage to get within range.
There sure are a lot of him! Can things ever be the same again?
« 17 18 19 20 21 22 23 -- »
Justice's Story
Page 37© 2008 IGN Entertainment, Inc.
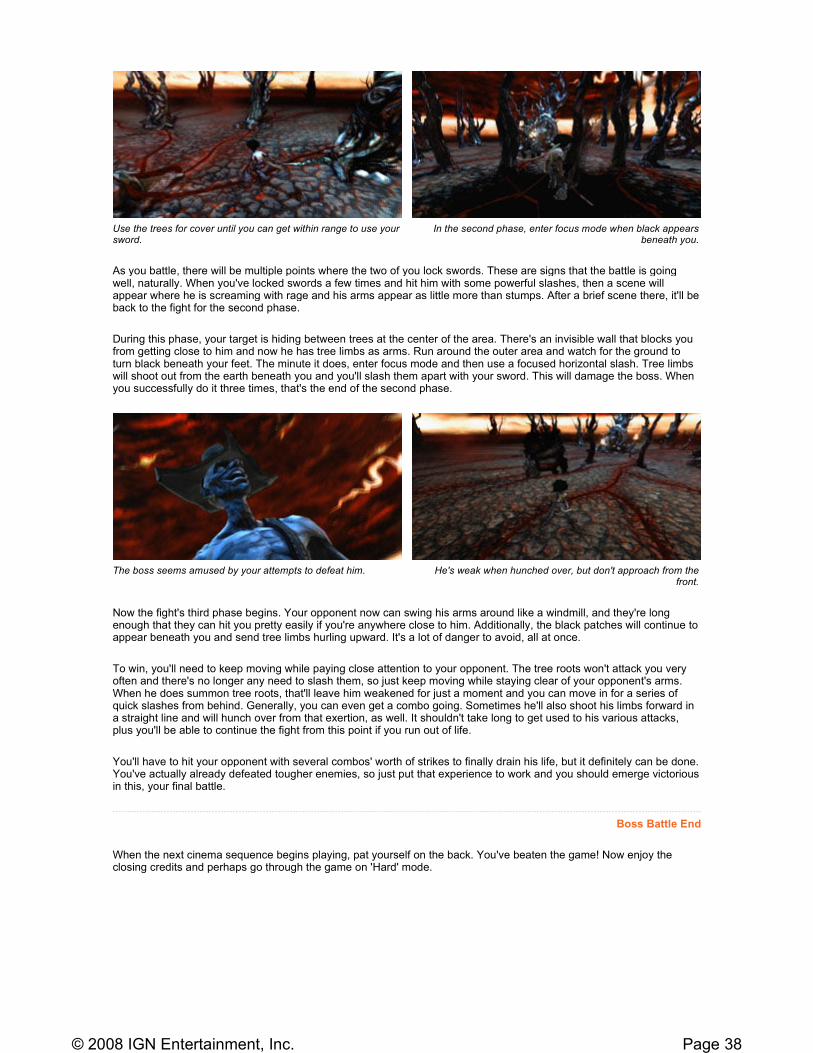
As you battle, there will be multiple points where the two of you lock swords. These are signs that the battle is going well, naturally. When you've locked swords a few times and hit him with some powerful slashes, then a scene will appear where he is screaming with rage and his arms appear as little more than stumps. After a brief scene there, it'll be back to the fight for the second phase.
During this phase, your target is hiding between trees at the center of the area. There's an invisible wall that blocks you from getting close to him and now he has tree limbs as arms. Run around the outer area and watch for the ground to turn black beneath your feet. The minute it does, enter focus mode and then use a focused horizontal slash. Tree limbs will shoot out from the earth beneath you and you'll slash them apart with your sword. This will damage the boss. When you successfully do it three times, that's the end of the second phase.
Now the fight's third phase begins. Your opponent now can swing his arms around like a windmill, and they're long enough that they can hit you pretty easily if you're anywhere close to him. Additionally, the black patches will continue to appear beneath you and send tree limbs hurling upward. It's a lot of danger to avoid, all at once.
To win, you'll need to keep moving while paying close attention to your opponent. The tree roots won't attack you very often and there's no longer any need to slash them, so just keep moving while staying clear of your opponent's arms. When he does summon tree roots, that'll leave him weakened for just a moment and you can move in for a series of quick slashes from behind. Generally, you can even get a combo going. Sometimes he'll also shoot his limbs forward in a straight line and will hunch over from that exertion, as well. It shouldn't take long to get used to his various attacks, plus you'll be able to continue the fight from this point if you run out of life.
You'll have to hit your opponent with several combos' worth of strikes to finally drain his life, but it definitely can be done. You've actually already defeated tougher enemies, so just put that experience to work and you should emerge victorious in this, your final battle.
Boss Battle End
When the next cinema sequence begins playing, pat yourself on the back. You've beaten the game! Now enjoy the closing credits and perhaps go through the game on 'Hard' mode.
Use the trees for cover until you can get within range to use your sword.
In the second phase, enter focus mode when black appears beneath you.
The boss seems amused by your attempts to defeat him. He's weak when hunched over, but don't approach from the
front.
Page 38© 2008 IGN Entertainment, Inc.