android on intel architecture: rom cooking tutorial
TRANSCRIPT
Android on Intel Architecture:ROM Cooking Tutorial
Ron MunitzFounder & CTO
[email protected]@android-x86.orghttps://github.com/ronubo/AnDevCon
AnDevCon November 2013
@ronubo

This work is licensed under the Creative Commons Attribution-ShareAlike 4.0 International License. To view a copy of this license, visit http://creativecommons.org/licenses/by-sa/4.0/
© Copyright Ron Munitz 2013
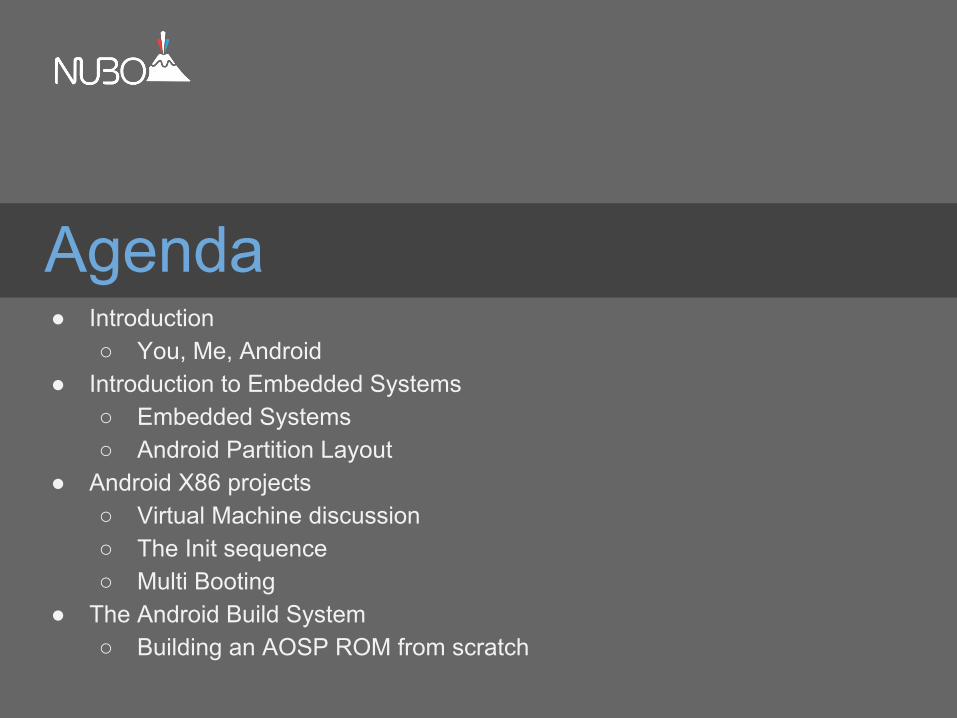
Agenda● Introduction
○ You, Me, Android● Introduction to Embedded Systems
○ Embedded Systems○ Android Partition Layout
● Android X86 projects○ Virtual Machine discussion○ The Init sequence○ Multi Booting
● The Android Build System○ Building an AOSP ROM from scratch
Introduction to ROM Cooking
AnDevCon November 2013
@ronubo
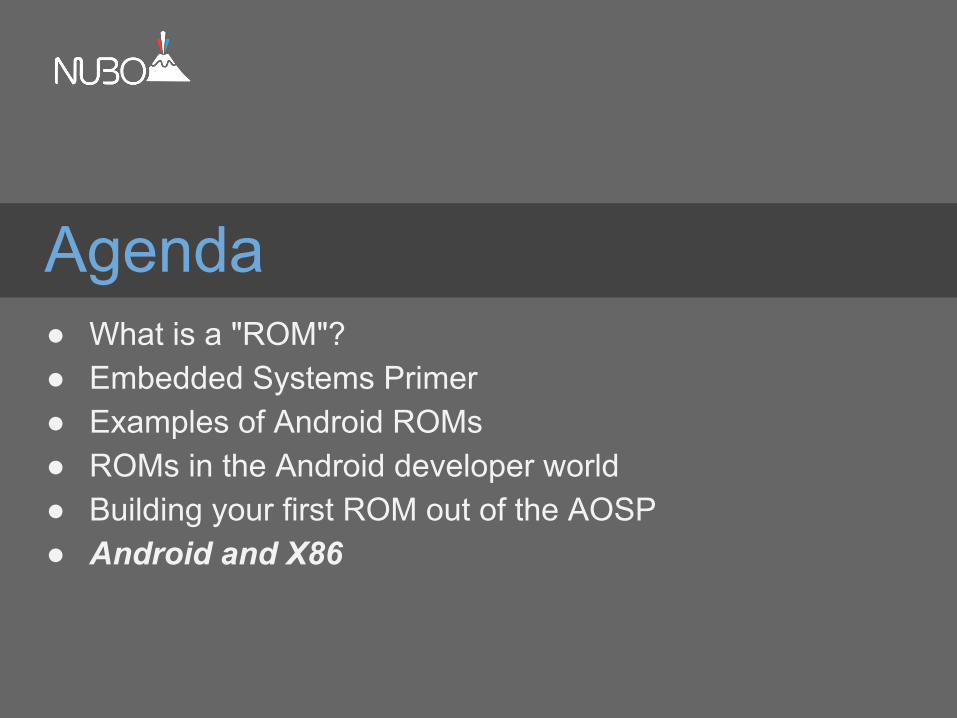
Agenda● What is a "ROM"?● Embedded Systems Primer● Examples of Android ROMs● ROMs in the Android developer world● Building your first ROM out of the AOSP● Android and X86
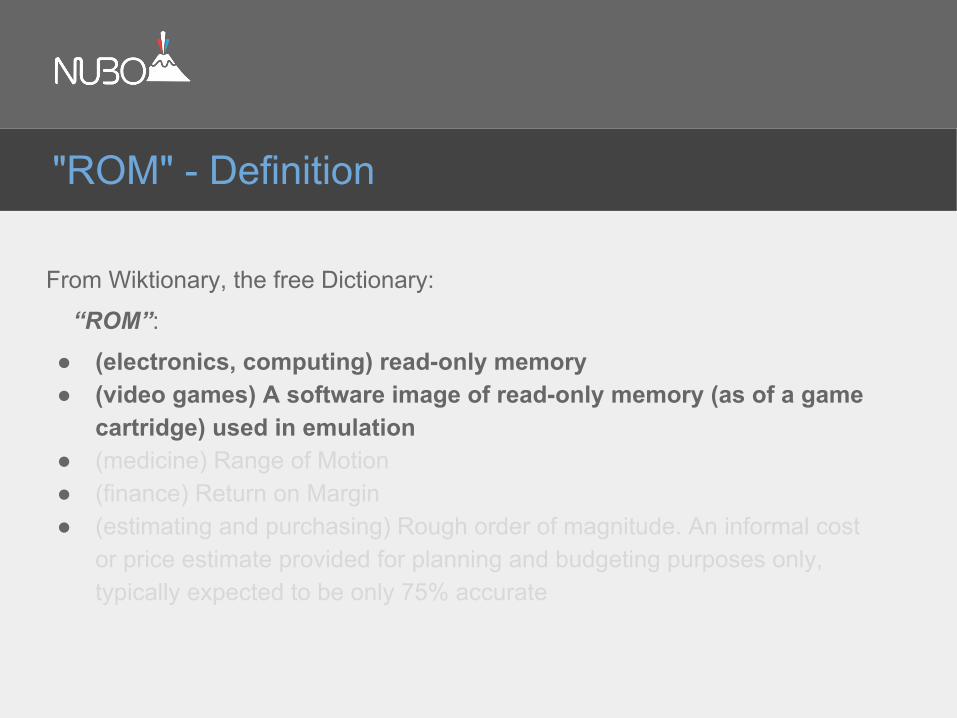
From Wiktionary, the free Dictionary:
“ROM”:
● (electronics, computing) read-only memory● (video games) A software image of read-only memory (as of a game
cartridge) used in emulation● (medicine) Range of Motion● (finance) Return on Margin● (estimating and purchasing) Rough order of magnitude. An informal cost
or price estimate provided for planning and budgeting purposes only, typically expected to be only 75% accurate
"ROM" - Definition
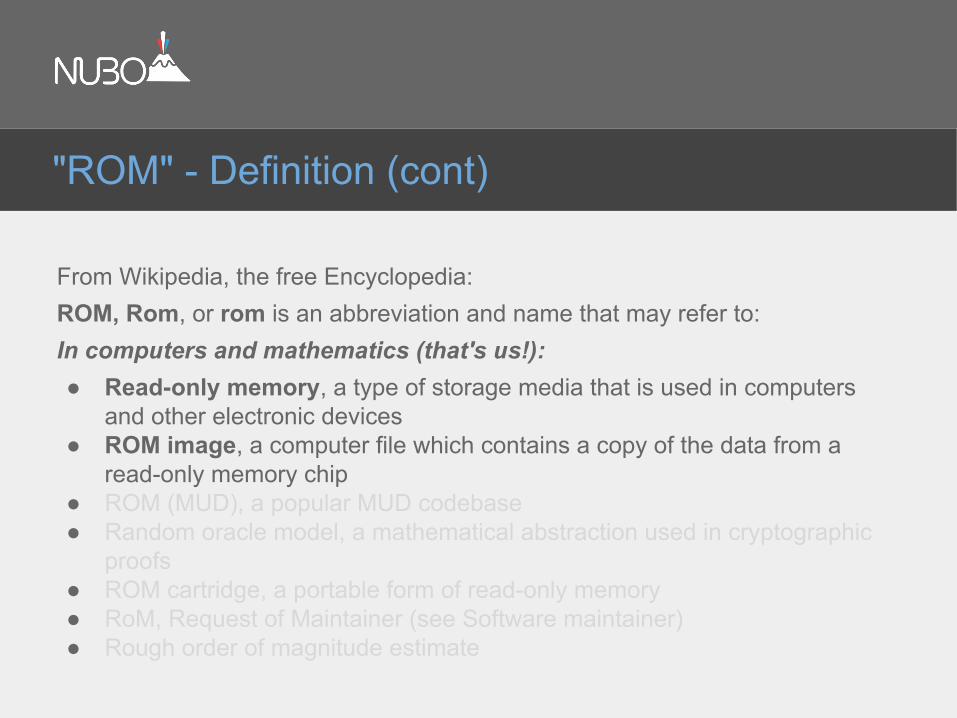
From Wikipedia, the free Encyclopedia:ROM, Rom, or rom is an abbreviation and name that may refer to:In computers and mathematics (that's us!):● Read-only memory, a type of storage media that is used in computers
and other electronic devices● ROM image, a computer file which contains a copy of the data from a
read-only memory chip● ROM (MUD), a popular MUD codebase● Random oracle model, a mathematical abstraction used in cryptographic
proofs● ROM cartridge, a portable form of read-only memory● RoM, Request of Maintainer (see Software maintainer)● Rough order of magnitude estimate
"ROM" - Definition (cont)
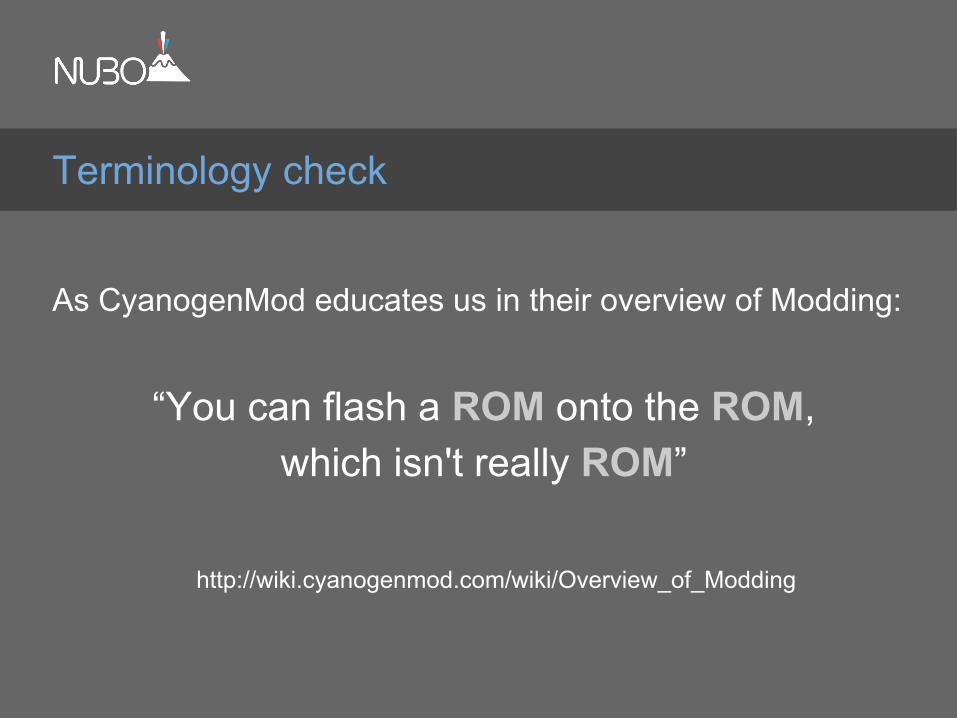
As CyanogenMod educates us in their overview of Modding:
“You can flash a ROM onto the ROM, which isn't really ROM”
http://wiki.cyanogenmod.com/wiki/Overview_of_Modding
Terminology check
Embedded Build Systems Primer - A quick detour for the novice
AnDevCon
November 2013
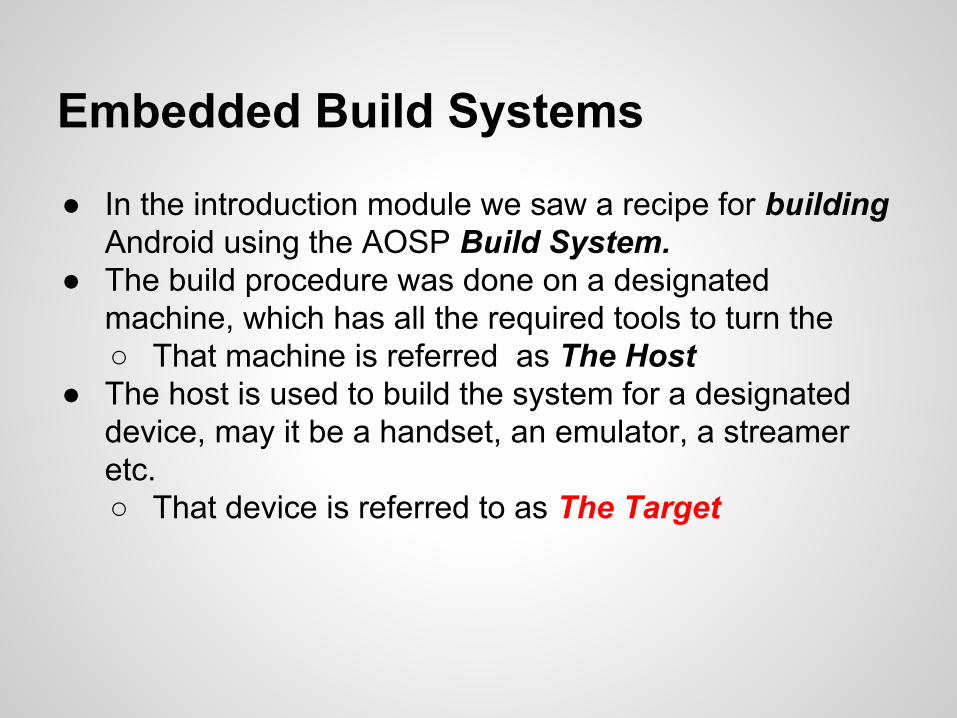
Embedded Build Systems
● In the introduction module we saw a recipe for building Android using the AOSP Build System.
● The build procedure was done on a designated machine, which has all the required tools to turn the ○ That machine is referred as The Host
● The host is used to build the system for a designated device, may it be a handset, an emulator, a streamer etc. ○ That device is referred to as The Target

● In Embedded Software Development, the common case is that host != target
● They may have the same attributes:○ architecture (i.e x86, arm, mips…), ○ library versions (libc, libstdc++, …) ○ toolchains (gcc, ar, …)
● But they do not have to, and will usually have little to nothing in common.
● Hence, the build system uses a cross Toolchain, to cross compile build artifacts for the target on the host.
Embedded Build Systems
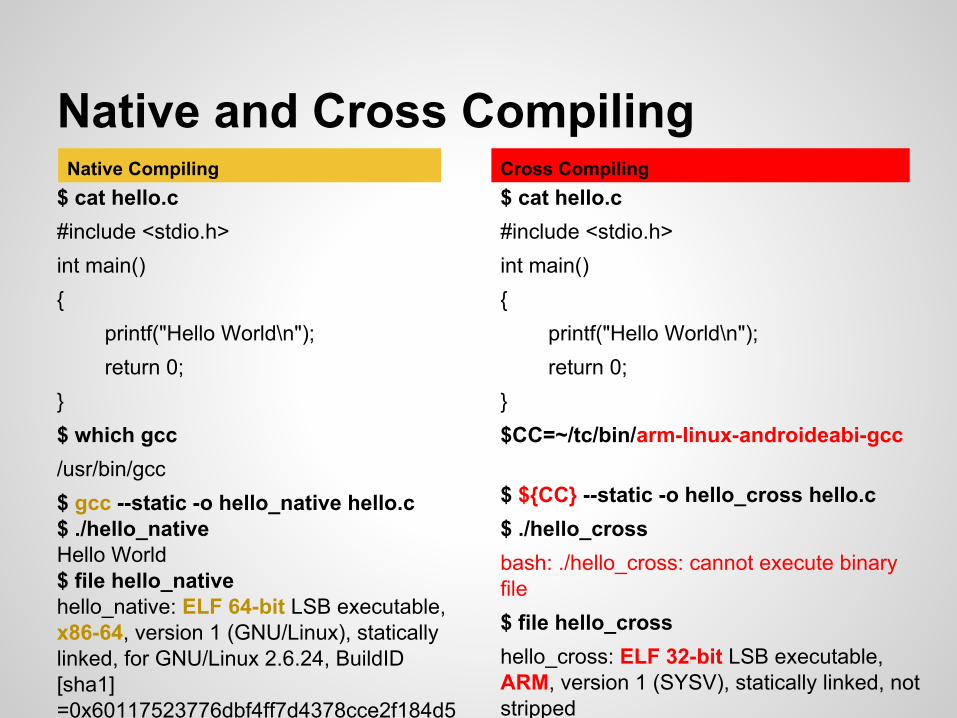
Native and Cross Compiling$ cat hello.c #include <stdio.h>int main() {
printf("Hello World\n");return 0;
}$ which gcc/usr/bin/gcc$ gcc --static -o hello_native hello.c $ ./hello_native Hello World$ file hello_native hello_native: ELF 64-bit LSB executable, x86-64, version 1 (GNU/Linux), statically linked, for GNU/Linux 2.6.24, BuildID[sha1]=0x60117523776dbf4ff7d4378cce2f184d56f1b93c, not stripped
$ cat hello.c #include <stdio.h>int main() {
printf("Hello World\n");return 0;
}$CC=~/tc/bin/arm-linux-androideabi-gcc
$ ${CC} --static -o hello_cross hello.c $ ./hello_cross bash: ./hello_cross: cannot execute binary file$ file hello_cross hello_cross: ELF 32-bit LSB executable, ARM, version 1 (SYSV), statically linked, not stripped
Native Compiling Cross Compiling
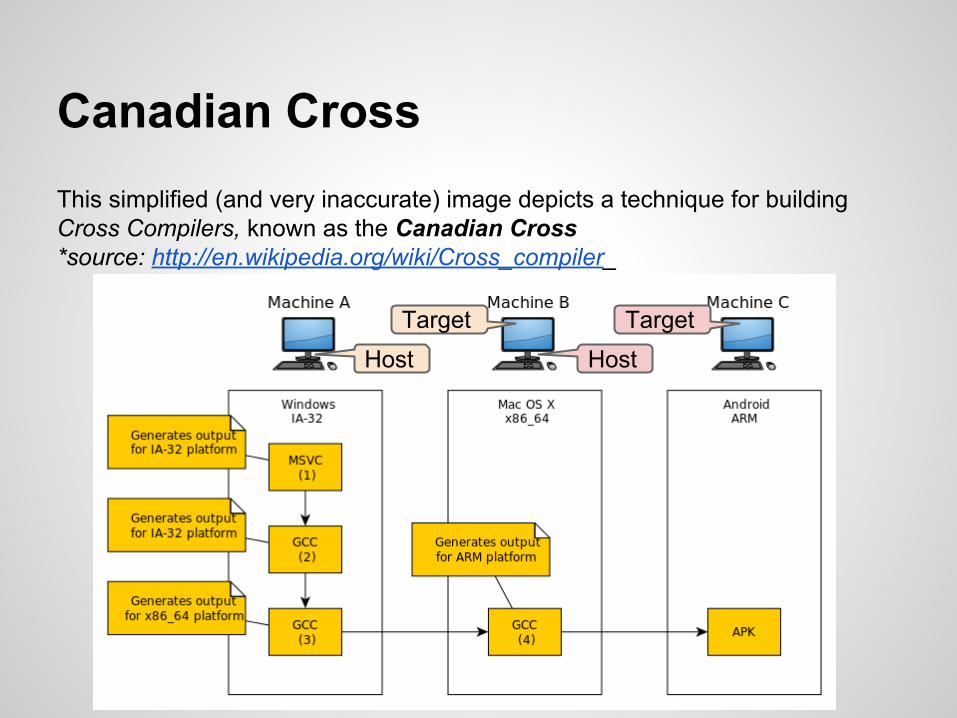
Canadian Cross This simplified (and very inaccurate) image depicts a technique for building Cross Compilers, known as the Canadian Cross *source: http://en.wikipedia.org/wiki/Cross_compiler_
HostTarget Target
Host

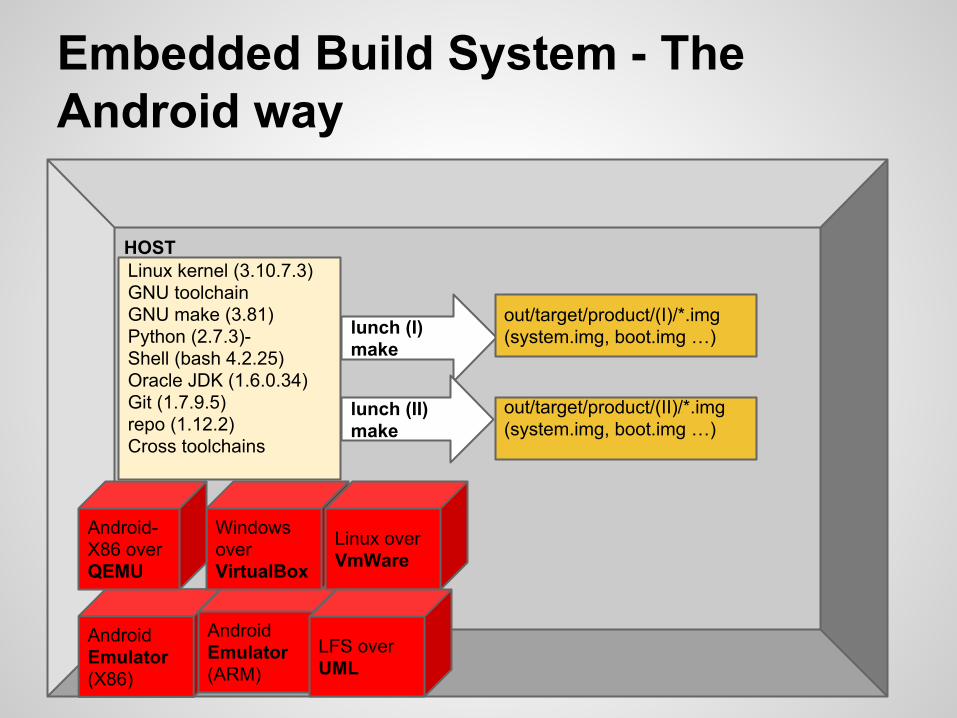
HOST
Embedded Development Overview
TARGETLinux kernel (3.10.7.3)GNU toolchainGNU make (3.81)Python (2.7.3)-Shell (bash 4.2.25)Oracle JDK (1.6.0.34)Git (1.7.9.5)repo (1.12.2)Cross toolchains
Android Emulator (X86)
Android Emulator (ARM)
Windows over VirtualBox
Linux over VmWare
Android-X86 over QEMU
LFS over UML
BSPKernelDrivers (?)Userspace (?)Shell (?)Graphics (?)...
?

HOST
Connecting the host with the target - The Android way
TARGETLinux kernel (3.10.7.3)GNU toolchainGNU make (3.81)Python (2.7.3)-Shell (bash 4.2.25)Oracle JDK (1.6.0.34)Git (1.7.9.5)repo (1.12.2)Cross toolchains
Android Emulator (X86)
Android Emulator (ARM)
Windows over VirtualBox
Linux over VmWare
Android-X86 over QEMU
LFS over UML
BSPKernelDrivers (?)Userspace (?)Shell (?)Graphics (?)...
fastboot
adb
HOST
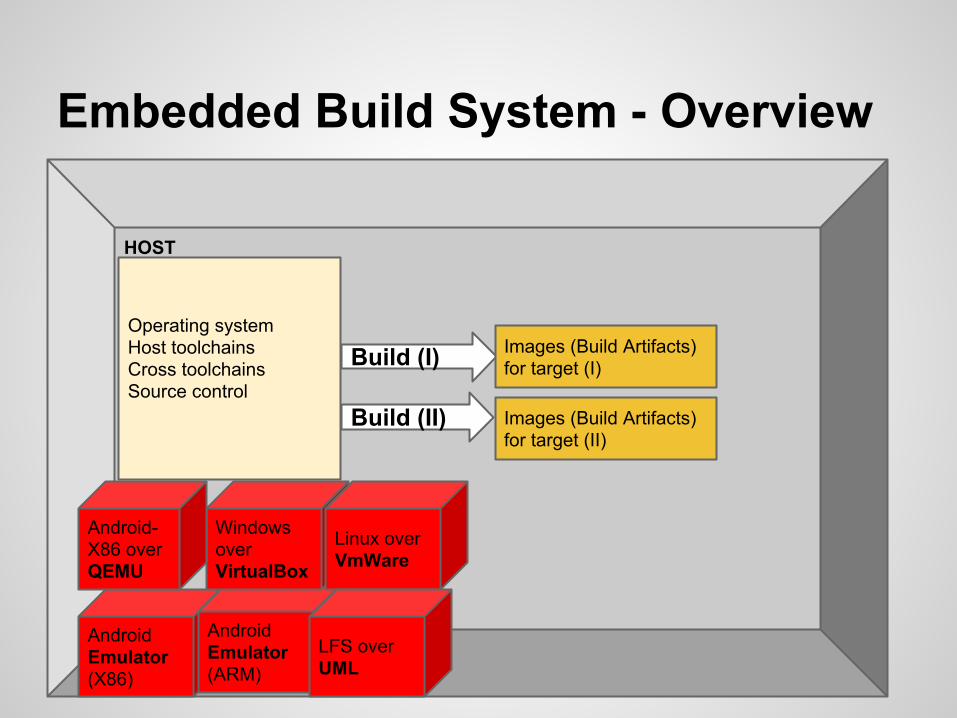
Embedded Build System - Overview
Operating systemHost toolchainsCross toolchainsSource control
Android Emulator (X86)
Android Emulator (ARM)
Windows over VirtualBox
Linux over VmWare
Android-X86 over QEMU
LFS over UML
Build (I) Images (Build Artifacts) for target (I)
Build (II) Images (Build Artifacts) for target (II)
HOST
Embedded Build System - The Android way
Linux kernel (3.10.7.3)GNU toolchainGNU make (3.81)Python (2.7.3)-Shell (bash 4.2.25)Oracle JDK (1.6.0.34)Git (1.7.9.5)repo (1.12.2)Cross toolchains
Android Emulator (X86)
Android Emulator (ARM)
Windows over VirtualBox
Linux over VmWare
Android-X86 over QEMU
LFS over UML
lunch (I) make
out/target/product/(I)/*.img(system.img, boot.img …)
lunch (II) make
out/target/product/(II)/*.img(system.img, boot.img …)
HOST
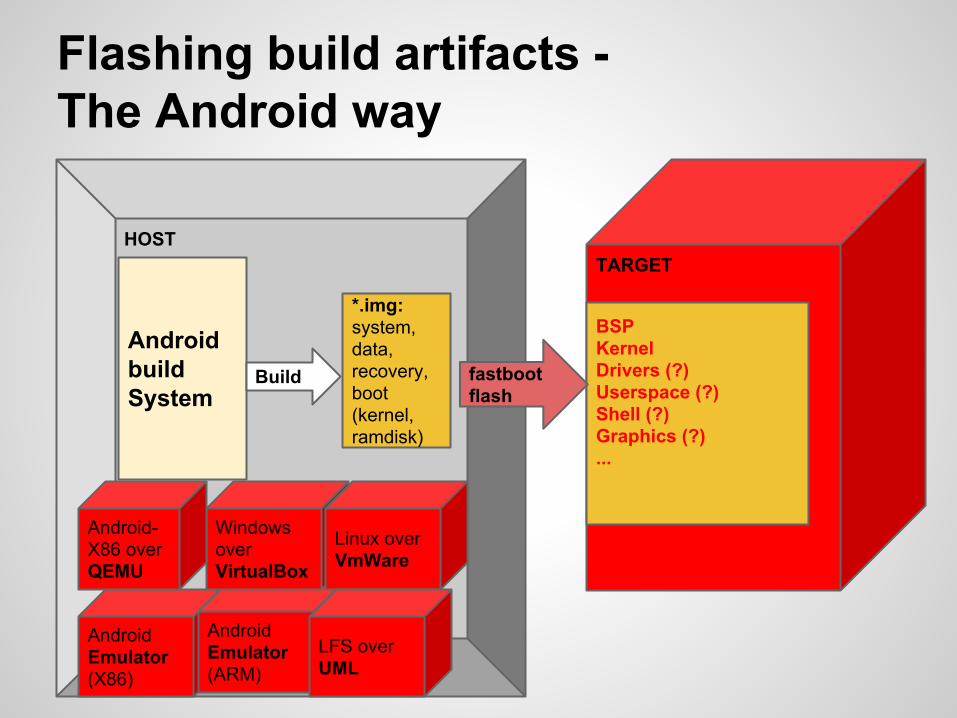
Flashing build artifacts -The Android way
TARGET
Android build System
Android Emulator (X86)
Android Emulator (ARM)
Windows over VirtualBox
Linux over VmWare
Android-X86 over QEMU
LFS over UML
BSPKernelDrivers (?)Userspace (?)Shell (?)Graphics (?)...
*.img: system, data, recovery, boot (kernel, ramdisk)
Build fastboot flash
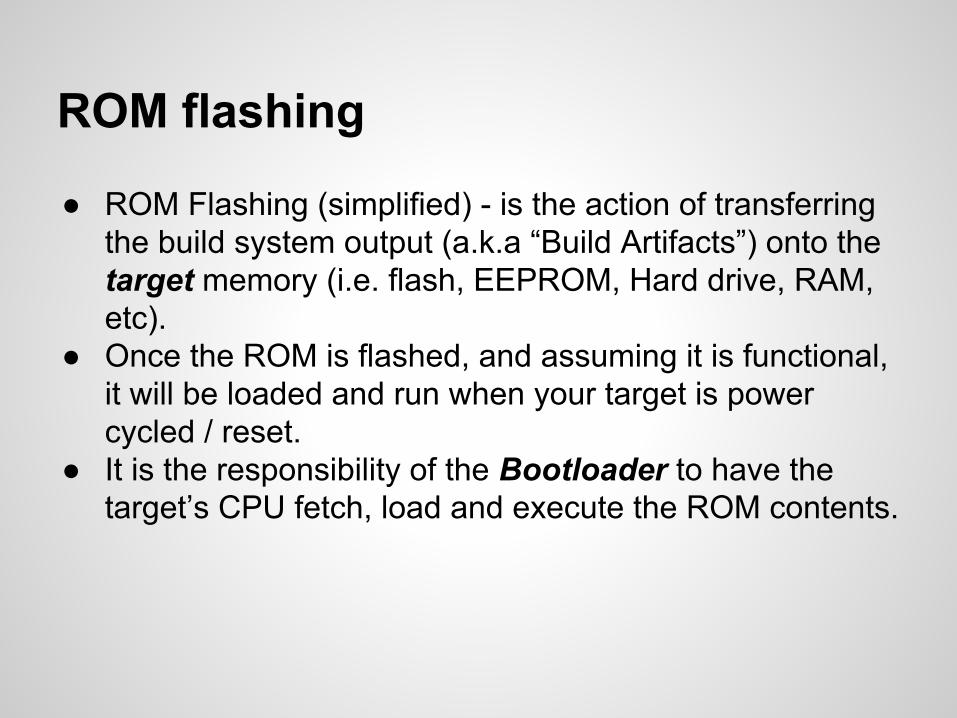
● ROM Flashing (simplified) - is the action of transferring the build system output (a.k.a “Build Artifacts”) onto the target memory (i.e. flash, EEPROM, Hard drive, RAM, etc).
● Once the ROM is flashed, and assuming it is functional, it will be loaded and run when your target is power cycled / reset.
● It is the responsibility of the Bootloader to have the target’s CPU fetch, load and execute the ROM contents.
ROM flashing
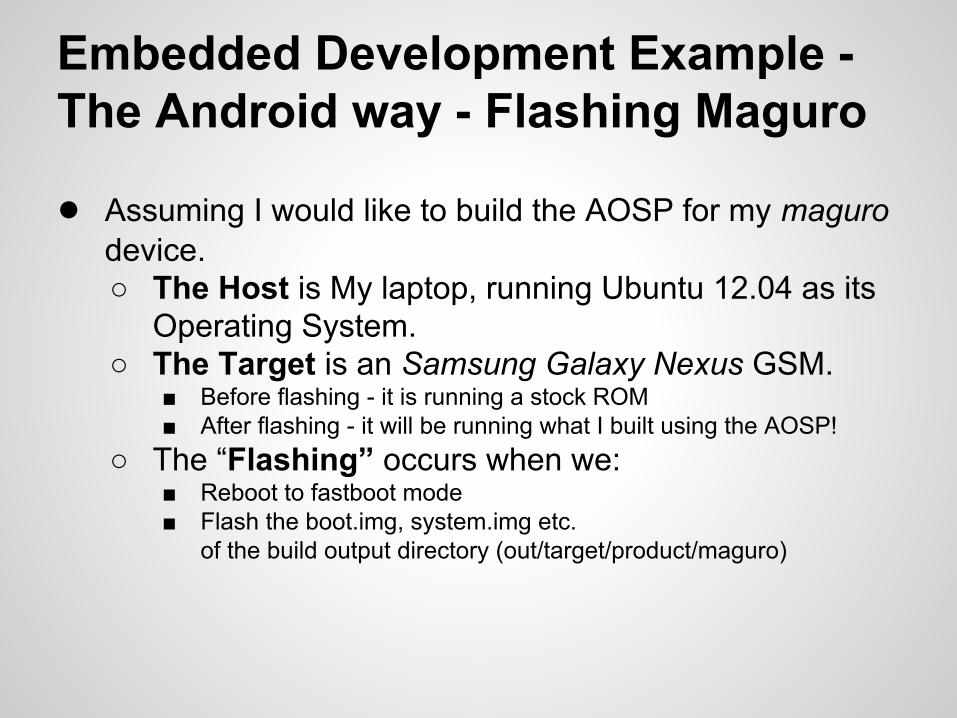
Embedded Development Example - The Android way - Flashing Maguro
● Assuming I would like to build the AOSP for my maguro device.○ The Host is My laptop, running Ubuntu 12.04 as its
Operating System.○ The Target is an Samsung Galaxy Nexus GSM.
■ Before flashing - it is running a stock ROM■ After flashing - it will be running what I built using the AOSP!
○ The “Flashing” occurs when we: ■ Reboot to fastboot mode ■ Flash the boot.img, system.img etc.
of the build output directory (out/target/product/maguro)
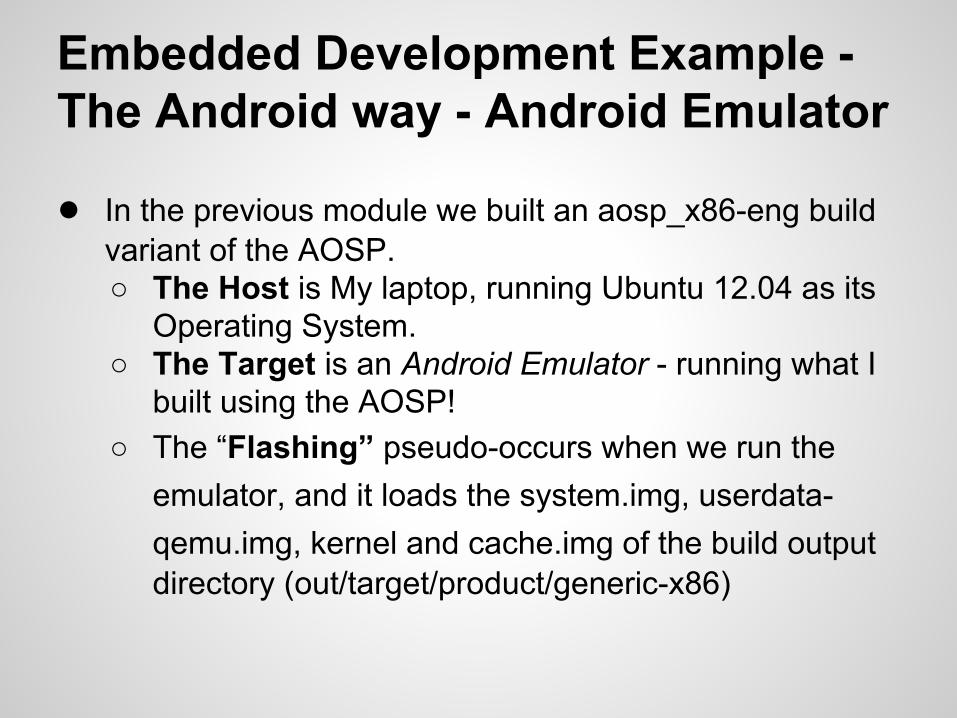
Embedded Development Example - The Android way - Android Emulator
● In the previous module we built an aosp_x86-eng build variant of the AOSP.○ The Host is My laptop, running Ubuntu 12.04 as its
Operating System.○ The Target is an Android Emulator - running what I
built using the AOSP!○ The “Flashing” pseudo-occurs when we run the
emulator, and it loads the system.img, userdata-qemu.img, kernel and cache.img of the build output directory (out/target/product/generic-x86)
And Back to the Android World!
AnDevCon
November 2013
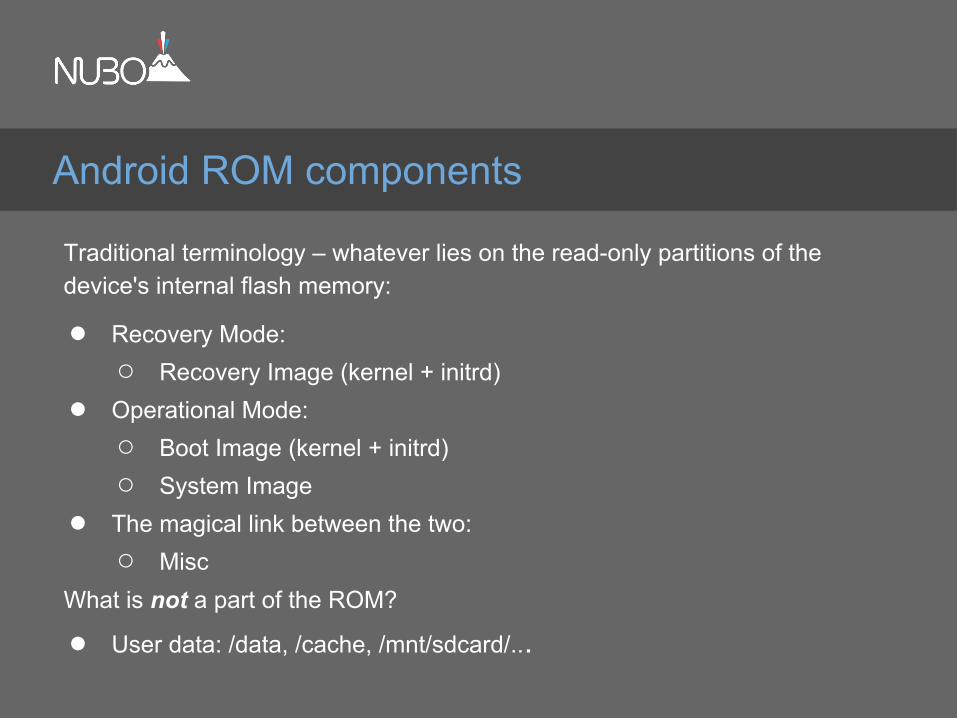
Traditional terminology – whatever lies on the read-only partitions of the device's internal flash memory:
● Recovery Mode:○ Recovery Image (kernel + initrd)
● Operational Mode:○ Boot Image (kernel + initrd)○ System Image
● The magical link between the two:○ Misc
What is not a part of the ROM?
● User data: /data, /cache, /mnt/sdcard/...
Android ROM components
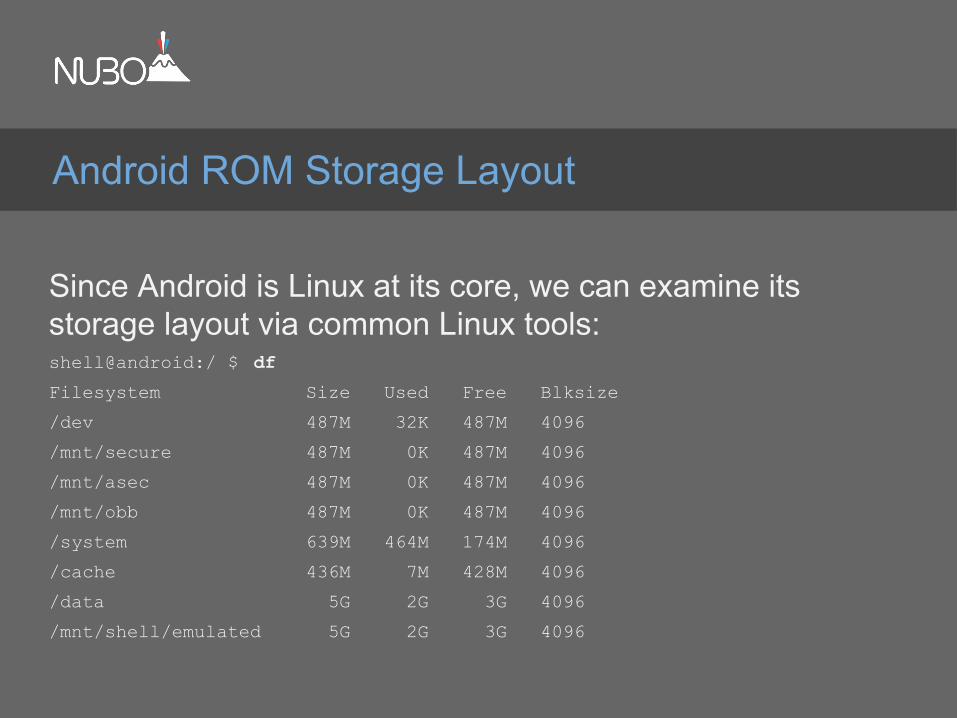
Since Android is Linux at its core, we can examine its storage layout via common Linux tools:shell@android:/ $ df
Filesystem Size Used Free Blksize
/dev 487M 32K 487M 4096
/mnt/secure 487M 0K 487M 4096
/mnt/asec 487M 0K 487M 4096
/mnt/obb 487M 0K 487M 4096
/system 639M 464M 174M 4096
/cache 436M 7M 428M 4096
/data 5G 2G 3G 4096
/mnt/shell/emulated 5G 2G 3G 4096
Android ROM Storage Layout
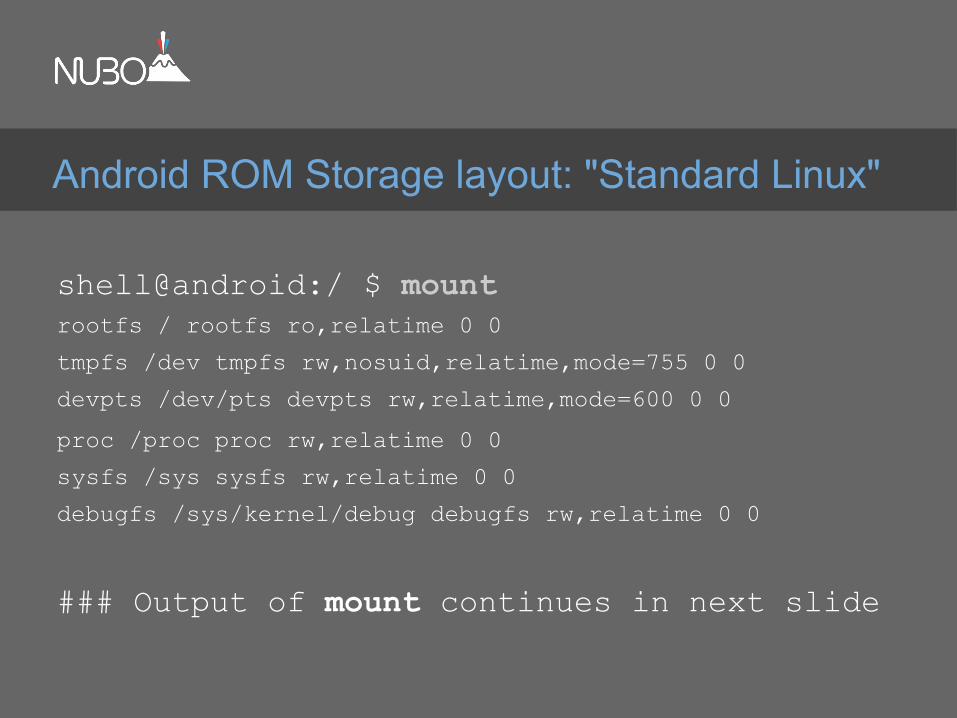
shell@android:/ $ mount rootfs / rootfs ro,relatime 0 0
tmpfs /dev tmpfs rw,nosuid,relatime,mode=755 0 0
devpts /dev/pts devpts rw,relatime,mode=600 0 0
proc /proc proc rw,relatime 0 0
sysfs /sys sysfs rw,relatime 0 0
debugfs /sys/kernel/debug debugfs rw,relatime 0 0
### Output of mount continues in next slide
Android ROM Storage layout: "Standard Linux"
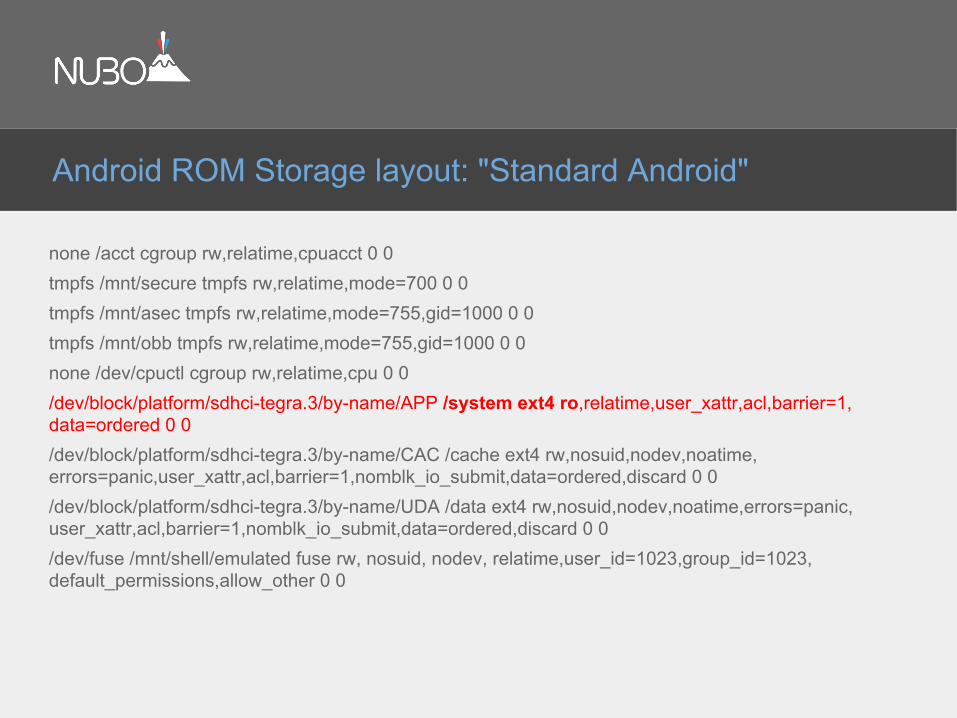
none /acct cgroup rw,relatime,cpuacct 0 0 tmpfs /mnt/secure tmpfs rw,relatime,mode=700 0 0tmpfs /mnt/asec tmpfs rw,relatime,mode=755,gid=1000 0 0tmpfs /mnt/obb tmpfs rw,relatime,mode=755,gid=1000 0 0none /dev/cpuctl cgroup rw,relatime,cpu 0 0/dev/block/platform/sdhci-tegra.3/by-name/APP /system ext4 ro,relatime,user_xattr,acl,barrier=1,data=ordered 0 0/dev/block/platform/sdhci-tegra.3/by-name/CAC /cache ext4 rw,nosuid,nodev,noatime,errors=panic,user_xattr,acl,barrier=1,nomblk_io_submit,data=ordered,discard 0 0/dev/block/platform/sdhci-tegra.3/by-name/UDA /data ext4 rw,nosuid,nodev,noatime,errors=panic,user_xattr,acl,barrier=1,nomblk_io_submit,data=ordered,discard 0 0/dev/fuse /mnt/shell/emulated fuse rw, nosuid, nodev, relatime,user_id=1023,group_id=1023,default_permissions,allow_other 0 0
Android ROM Storage layout: "Standard Android"
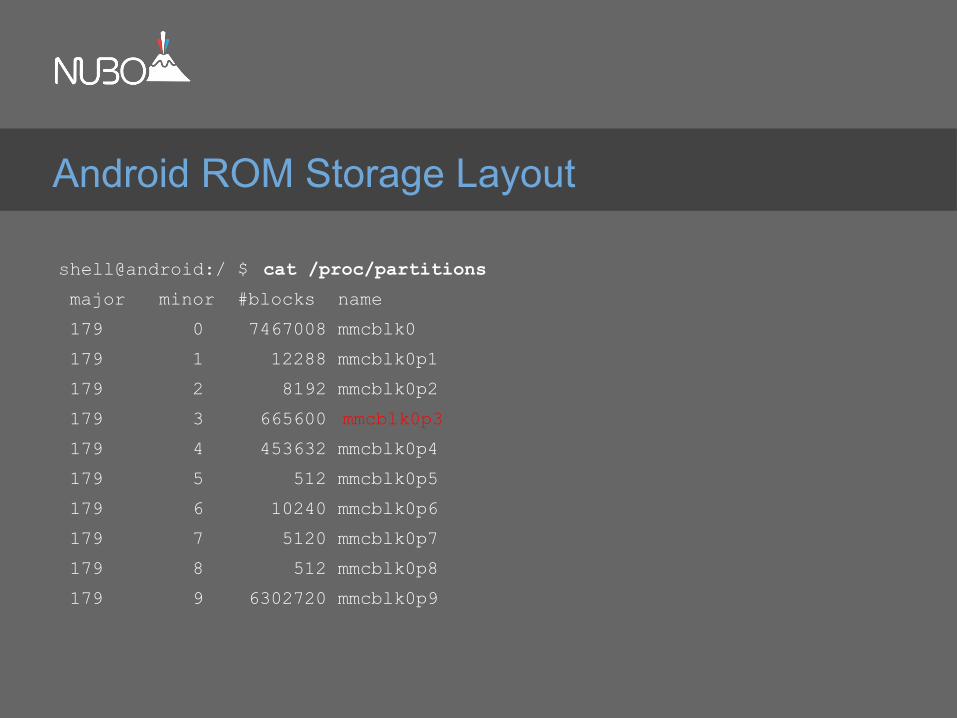
shell@android:/ $ cat /proc/partitions
major minor #blocks name
179 0 7467008 mmcblk0
179 1 12288 mmcblk0p1
179 2 8192 mmcblk0p2
179 3 665600 mmcblk0p3
179 4 453632 mmcblk0p4
179 5 512 mmcblk0p5
179 6 10240 mmcblk0p6
179 7 5120 mmcblk0p7
179 8 512 mmcblk0p8
179 9 6302720 mmcblk0p9
Android ROM Storage Layout
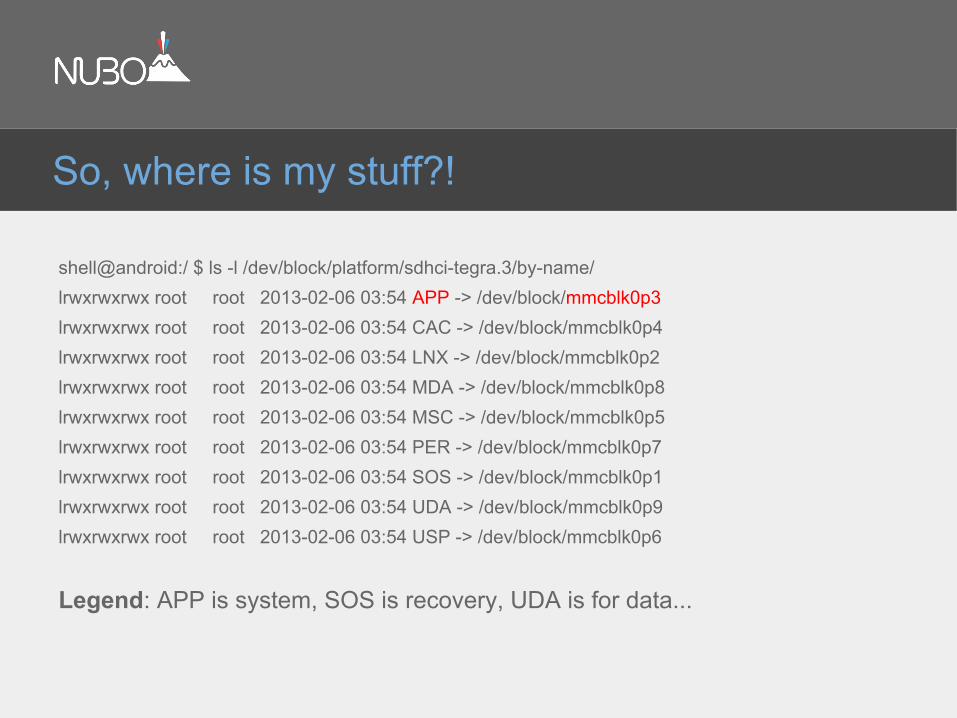
shell@android:/ $ ls -l /dev/block/platform/sdhci-tegra.3/by-name/ lrwxrwxrwx root root 2013-02-06 03:54 APP -> /dev/block/mmcblk0p3lrwxrwxrwx root root 2013-02-06 03:54 CAC -> /dev/block/mmcblk0p4lrwxrwxrwx root root 2013-02-06 03:54 LNX -> /dev/block/mmcblk0p2lrwxrwxrwx root root 2013-02-06 03:54 MDA -> /dev/block/mmcblk0p8lrwxrwxrwx root root 2013-02-06 03:54 MSC -> /dev/block/mmcblk0p5lrwxrwxrwx root root 2013-02-06 03:54 PER -> /dev/block/mmcblk0p7lrwxrwxrwx root root 2013-02-06 03:54 SOS -> /dev/block/mmcblk0p1lrwxrwxrwx root root 2013-02-06 03:54 UDA -> /dev/block/mmcblk0p9lrwxrwxrwx root root 2013-02-06 03:54 USP -> /dev/block/mmcblk0p6
Legend: APP is system, SOS is recovery, UDA is for data...
So, where is my stuff?!
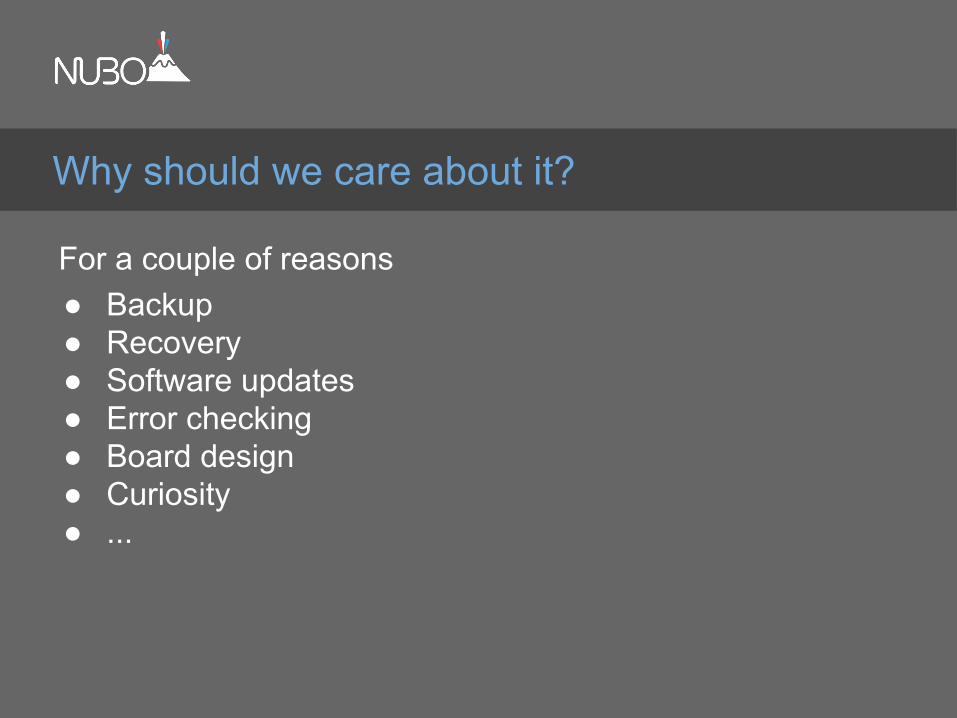
For a couple of reasons:● Backup● Recovery● Software updates● Error checking● Board design ● Curiosity ● ...
Why should we care about it?
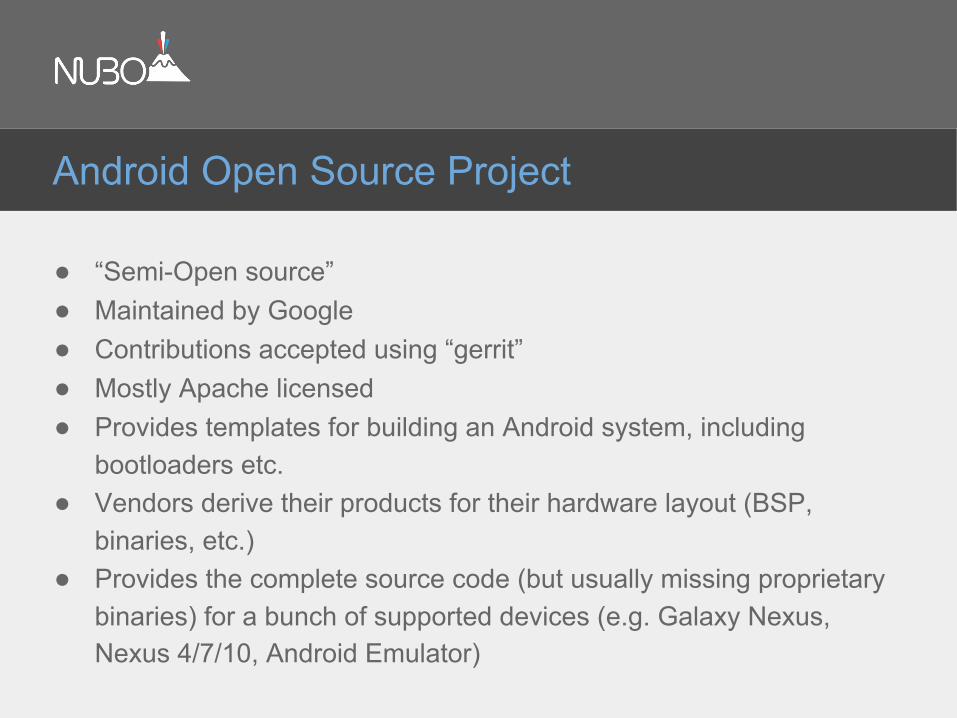
● “Semi-Open source”● Maintained by Google● Contributions accepted using “gerrit”● Mostly Apache licensed● Provides templates for building an Android system, including
bootloaders etc.● Vendors derive their products for their hardware layout (BSP,
binaries, etc.)● Provides the complete source code (but usually missing proprietary
binaries) for a bunch of supported devices (e.g. Galaxy Nexus, Nexus 4/7/10, Android Emulator)
Android Open Source Project
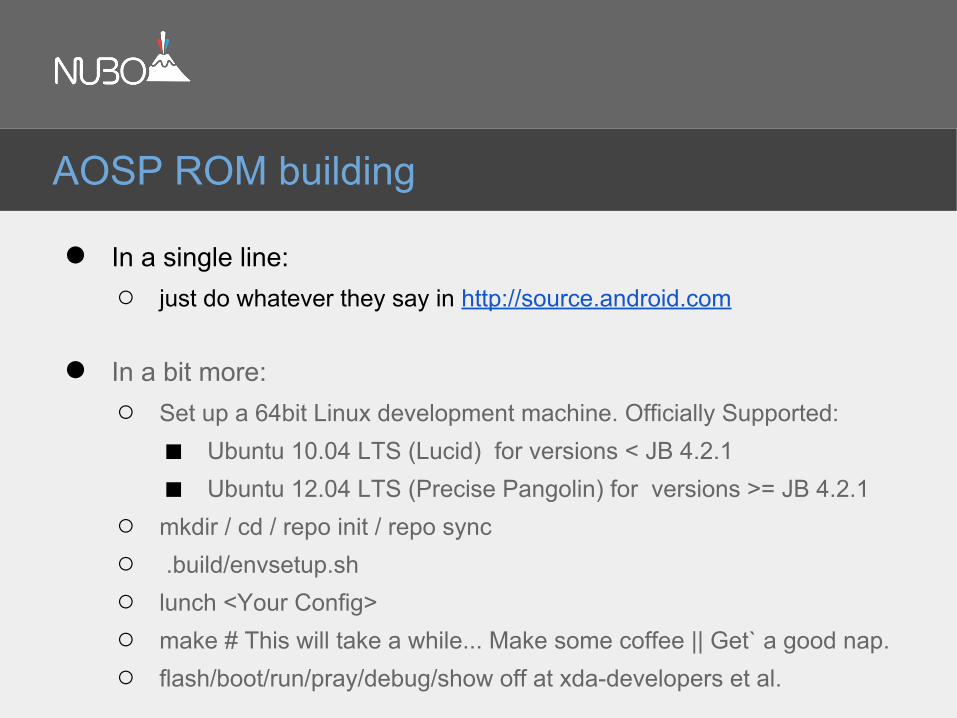
● In a single line:○ just do whatever they say in http://source.android.com
● In a bit more:○ Set up a 64bit Linux development machine. Officially Supported:
■ Ubuntu 10.04 LTS (Lucid) for versions < JB 4.2.1 ■ Ubuntu 12.04 LTS (Precise Pangolin) for versions >= JB 4.2.1
○ mkdir / cd / repo init / repo sync○ .build/envsetup.sh○ lunch <Your Config>○ make # This will take a while... Make some coffee || Get` a good nap.○ flash/boot/run/pray/debug/show off at xda-developers et al.
AOSP ROM building
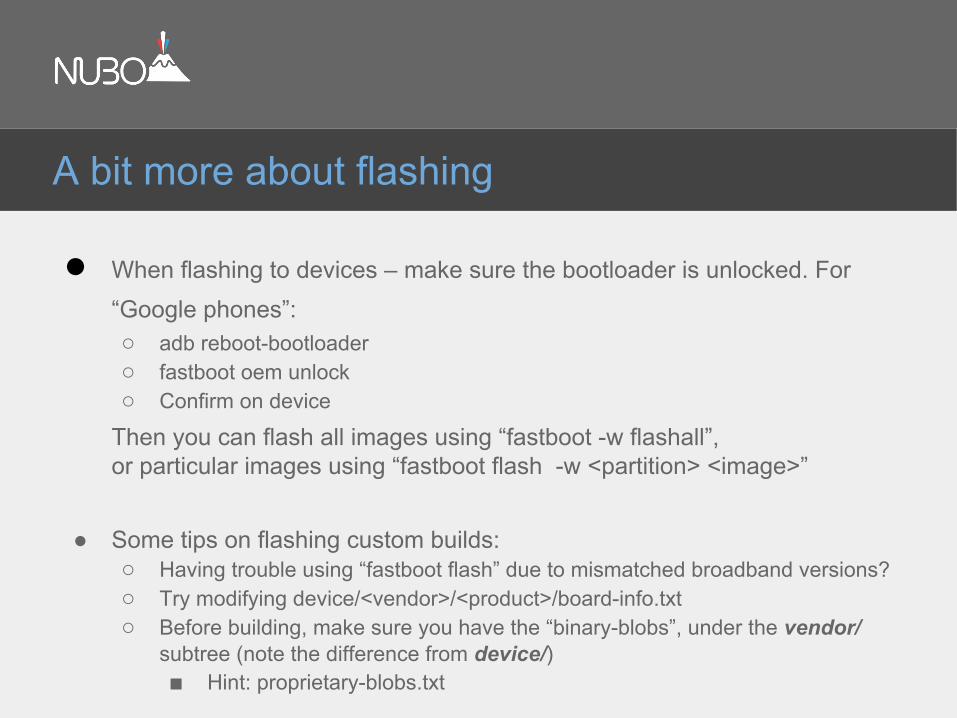
● When flashing to devices – make sure the bootloader is unlocked. For “Google phones”:○ adb reboot-bootloader○ fastboot oem unlock ○ Confirm on device
Then you can flash all images using “fastboot -w flashall”, or particular images using “fastboot flash -w <partition> <image>”
● Some tips on flashing custom builds:○ Having trouble using “fastboot flash” due to mismatched broadband versions?○ Try modifying device/<vendor>/<product>/board-info.txt○ Before building, make sure you have the “binary-blobs”, under the vendor/
subtree (note the difference from device/)■ Hint: proprietary-blobs.txt
A bit more about flashing
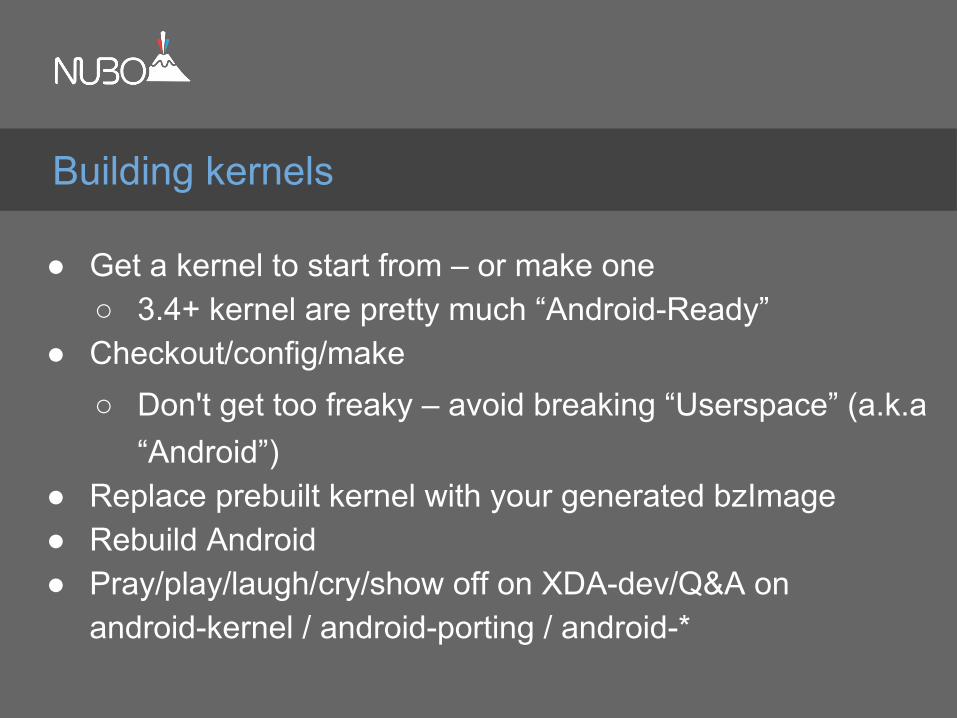
● Get a kernel to start from – or make one○ 3.4+ kernel are pretty much “Android-Ready”
● Checkout/config/make○ Don't get too freaky – avoid breaking “Userspace” (a.k.a
“Android”)● Replace prebuilt kernel with your generated bzImage ● Rebuild Android● Pray/play/laugh/cry/show off on XDA-dev/Q&A on
android-kernel / android-porting / android-*
Building kernels

$ git clone https://android.googlesource.com/kernel/<target>.git
Some kernel targets hosted by the AOSP:
● Common - common kernel tree. Based on Linux 3.4+
● msm – Qualcomm msm (HTC Nexus One, LG Nexus 4)
● Omap – TI's OMAP (Samsung Galaxy Nexus)
● Tegra – Nvidia's Tegra (Motorola Xoom, Asus Nexus 7)
● Exynos - Samsung Exynos (Samsung Nexus 10)
● Goldfish - Android emulator (2.6.29)
Getting Kernel Sources
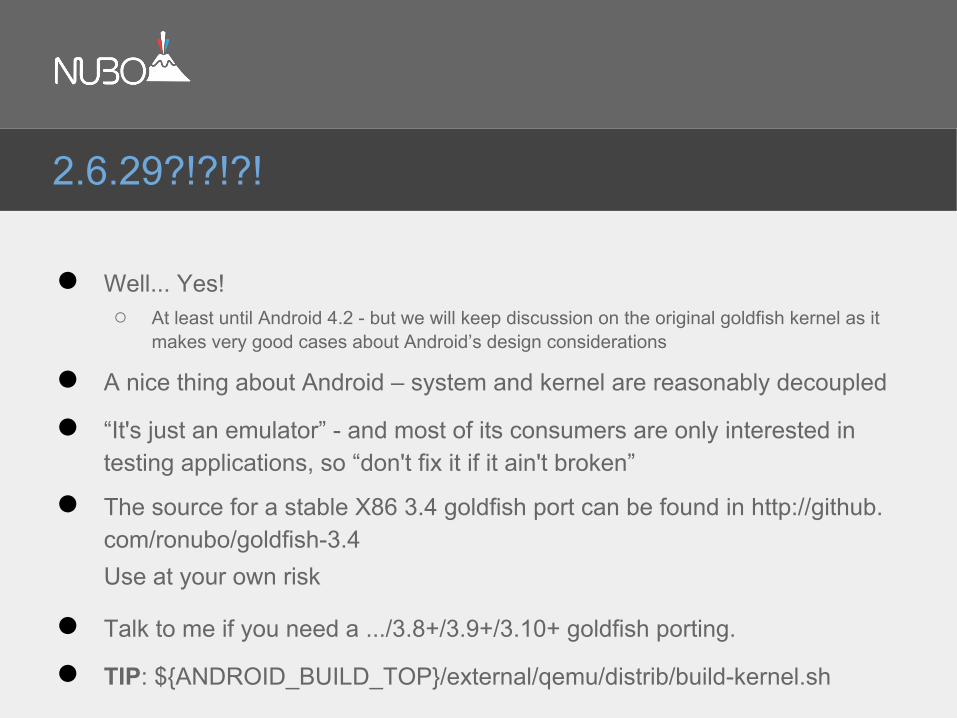
● Well... Yes!○ At least until Android 4.2 - but we will keep discussion on the original goldfish kernel as it
makes very good cases about Android’s design considerations
● A nice thing about Android – system and kernel are reasonably decoupled
● “It's just an emulator” - and most of its consumers are only interested in testing applications, so “don't fix it if it ain't broken”
● The source for a stable X86 3.4 goldfish port can be found in http://github.com/ronubo/goldfish-3.4 Use at your own risk
● Talk to me if you need a .../3.8+/3.9+/3.10+ goldfish porting.
● TIP: ${ANDROID_BUILD_TOP}/external/qemu/distrib/build-kernel.sh
2.6.29?!?!?!
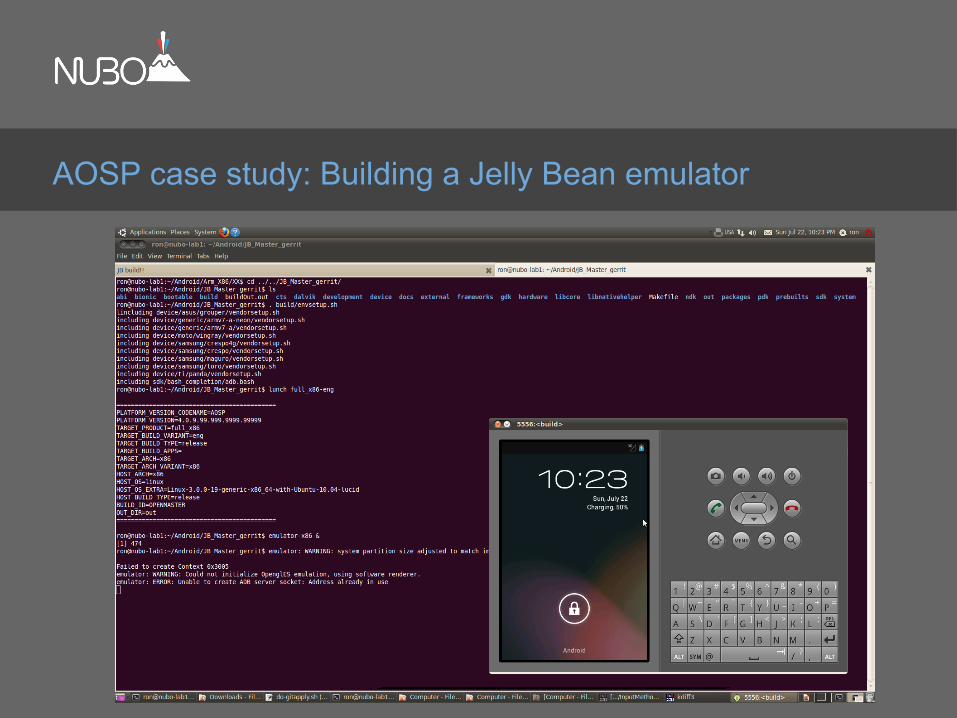
AOSP case study: Building a Jelly Bean emulator
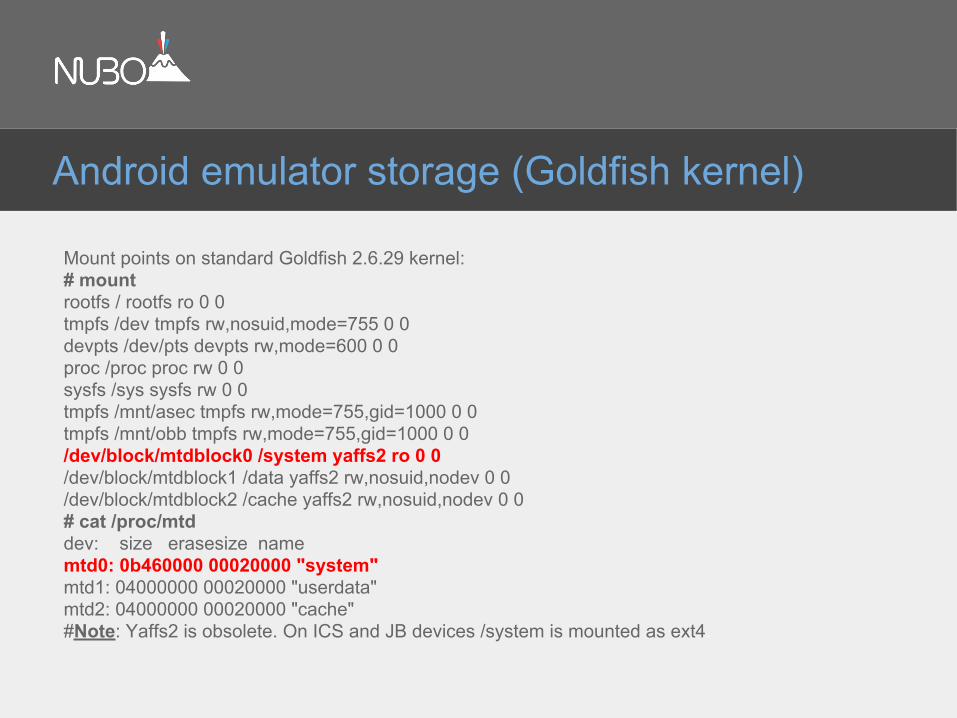
Mount points on standard Goldfish 2.6.29 kernel:# mountrootfs / rootfs ro 0 0tmpfs /dev tmpfs rw,nosuid,mode=755 0 0devpts /dev/pts devpts rw,mode=600 0 0proc /proc proc rw 0 0sysfs /sys sysfs rw 0 0tmpfs /mnt/asec tmpfs rw,mode=755,gid=1000 0 0tmpfs /mnt/obb tmpfs rw,mode=755,gid=1000 0 0/dev/block/mtdblock0 /system yaffs2 ro 0 0/dev/block/mtdblock1 /data yaffs2 rw,nosuid,nodev 0 0/dev/block/mtdblock2 /cache yaffs2 rw,nosuid,nodev 0 0# cat /proc/mtddev: size erasesize namemtd0: 0b460000 00020000 "system"mtd1: 04000000 00020000 "userdata"mtd2: 04000000 00020000 "cache"#Note: Yaffs2 is obsolete. On ICS and JB devices /system is mounted as ext4.
Android emulator storage (Goldfish kernel)
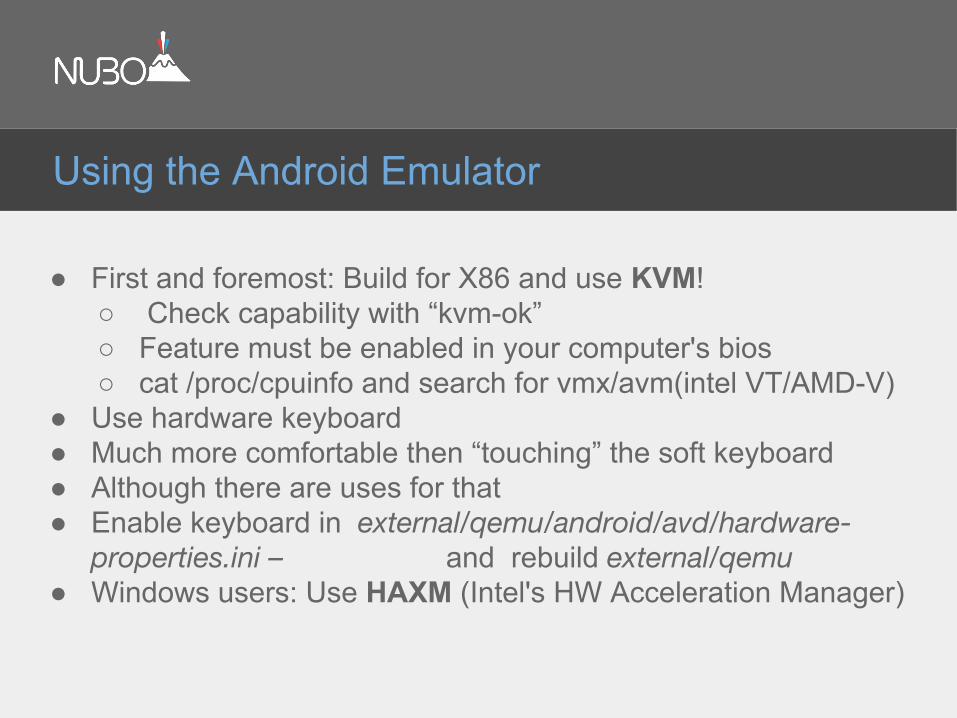
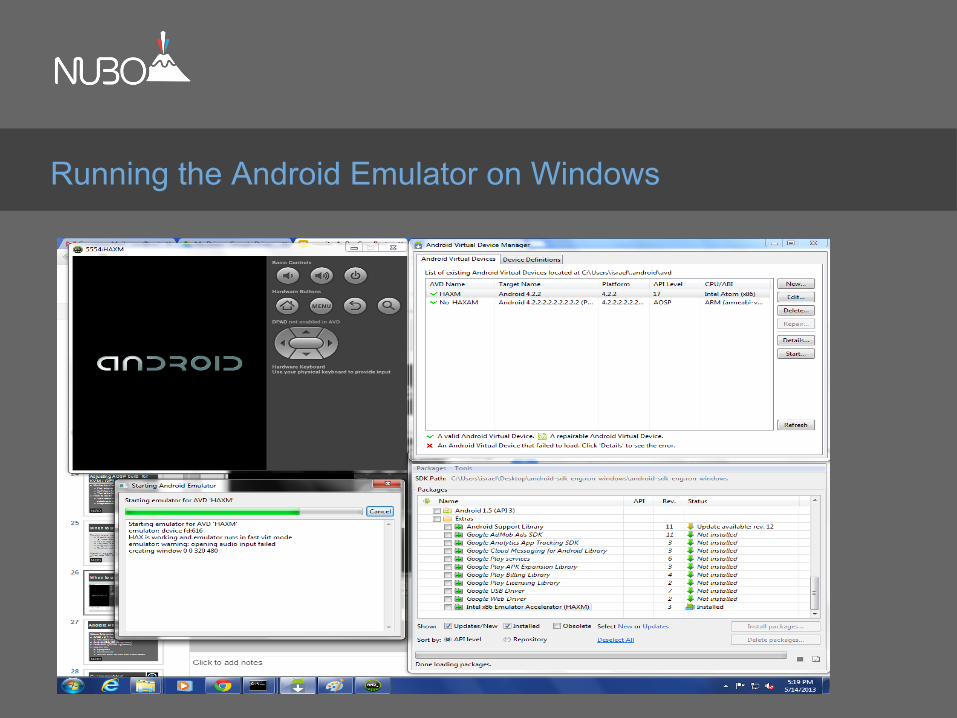
● First and foremost: Build for X86 and use KVM! ○ Check capability with “kvm-ok” ○ Feature must be enabled in your computer's bios ○ cat /proc/cpuinfo and search for vmx/avm(intel VT/AMD-V)
● Use hardware keyboard ● Much more comfortable then “touching” the soft keyboard● Although there are uses for that● Enable keyboard in external/qemu/android/avd/hardware-
properties.ini – and rebuild external/qemu ● Windows users: Use HAXM (Intel's HW Acceleration Manager)
Using the Android Emulator
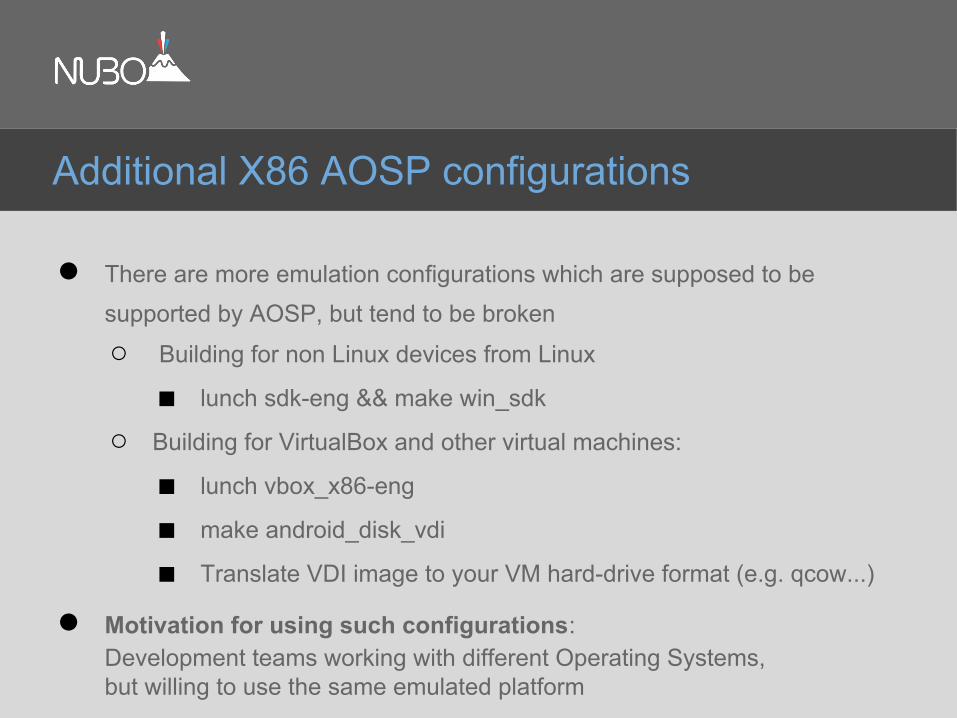
● There are more emulation configurations which are supposed to be supported by AOSP, but tend to be broken ○ Building for non Linux devices from Linux
■ lunch sdk-eng && make win_sdk
○ Building for VirtualBox and other virtual machines:
■ lunch vbox_x86-eng
■ make android_disk_vdi
■ Translate VDI image to your VM hard-drive format (e.g. qcow...)
● Motivation for using such configurations:Development teams working with different Operating Systems, but willing to use the same emulated platform
Additional X86 AOSP configurations
● Motivation - fast linux bringup procedure○ First, bring-up the target OS on a virtual machine○ Verify basic functionality○ Then adjust for a designated hardware
● How to do it?○ Short answer - use emulator images with some adjustments, mount
ext4, set sdcard etc...○ Pragmatic answer: In the next session
Adjusting AOSP build for KVM / QEMU (a teaser)
The short answer would be – whenever you can.○ Great for application development
■ when used with KVM/HAXM○ Has no dependency on a particular hardware○ Very easy to build○ Integrates well with the AOSP tools○ Relatively well documented
Overall – it is a good ROM. Most used ROM for a reason.
When to use the emulator
Running the Android Emulator on Windows
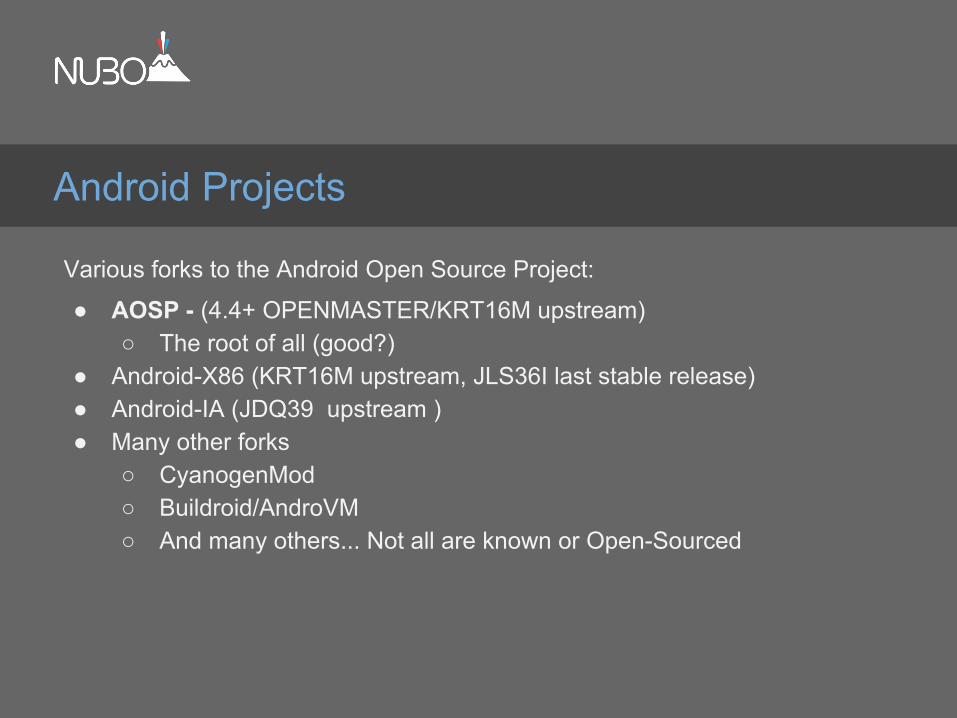
Various forks to the Android Open Source Project:
● AOSP - (4.4+ OPENMASTER/KRT16M upstream)○ The root of all (good?)
● Android-X86 (KRT16M upstream, JLS36I last stable release)● Android-IA (JDQ39 upstream )● Many other forks
○ CyanogenMod○ Buildroid/AndroVM○ And many others... Not all are known or Open-Sourced
Android Projects

A custom, open source distribution spawned off the AOSP● Provides optimizations and support for over 40
different devices, along with binaries● Builds routine similar to AOSP (note: “brunch”)● http://wiki.cyanogenmod.com/wiki/Main_Page
CyanogenMod (special guest star)
Android, X86, Google, Intel and Android-X86
AnDevCon November 2013
@ronubo
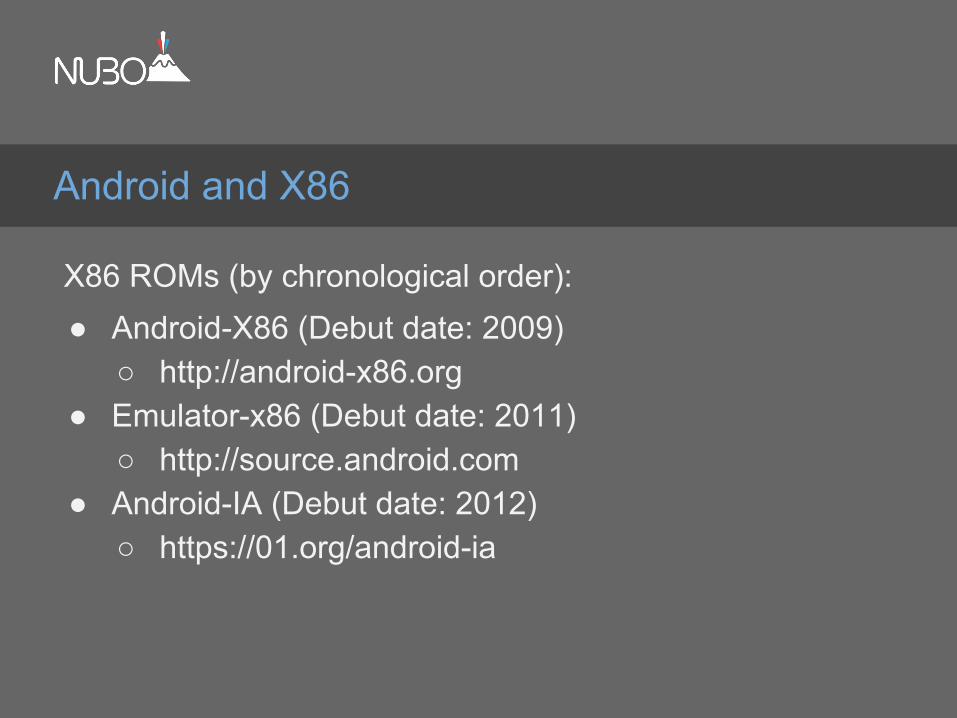
X86 ROMs (by chronological order):● Android-X86 (Debut date: 2009)
○ http://android-x86.org● Emulator-x86 (Debut date: 2011)
○ http://source.android.com● Android-IA (Debut date: 2012)
○ https://01.org/android-ia
Android and X86
The common reference, having the most recent version of the Android platform (Userspace) versions.Provides the QEMU based Android Emulator: + Works on any hosted OS + Supports multiple architectures
- But slow on non X86 ones - Performs terribly if virtualized - Has no installer for X86 devices - Very old kernel +/- An emulator. For better and for worse.
AOSP
+ Developed by the open source community
+ Developer/Linux user friendly
+ Multi-Boot friendly
+ Generally supports many Intel and AMD devices
+/- But of course requires specific work on specific HW
+ VM friendly
+ Mature, Recognized and stable
- Delays in new releases (You can help!) - Latest version (4.4) is still very buggy, but it’s been out only for a week
+/- Latest stable version (4.3) still needs some work for some devices + The ICS 4.0.4 release is amazing - including running ARM apps
Android-X86
+ Installer to device
+ Relatively new versions of android and kernel+ Works great on ivy-bridge devices+ Integrated Ethernet Configuration Management - Development for devices based on intel solutions only- Very unfriendly to other OS's - Not developer friendly – unless they make it such- Community work can be better. But it is seems to be getting better- Intel phones are not based on it (at the moment)+ Made impressive progress in early 2013- But suspended development at Android 4.2.2 ? Project resumption at Kit-Kat?
Android-IA
PSCG
● Android is Linux○ Therefore the required minimum to run it would be:
■ A Kernel■ A filesystem■ A ramdisk/initrd... Whatever makes you happy with your kernel's
init/main.c's run_init_process() calls.See http://lxr.linux.no/linux+v3.6.9/init/main.c
○ This means that we can achieve full functionality with■ A kernel (+ramdisk)■ A rootfs where Android system/ will be mounted (ROM)■ Some place to read/write data
Android is Linux

Android-IA is Android
Android-IA is, of course, Linux as well. However, it was designed to conform to Android OEM's partition layout, and has no less than 9 partitions:
○ boot - flashed boot.img (kernel+ramdisk.img)○ recovery - Recovery image○ misc - shared storage between boot and recovery○ system - flashed system.img - contents of the System partition○ cache - cache partition○ data - data partition○ install - Installation definition○ bootloader - A vfat partition containing android syslinux bootloader (<4.2.2)
- A GPT partition containing gummiboot (Only option in 4.2.2)○ fastboot - fastboot protocol (flashed droidboot.img)
Note: On android-ia-4.2.2-r1, the bootable live.img works with a single partition, enforcing EFI. It still has its issues - but it is getting there.
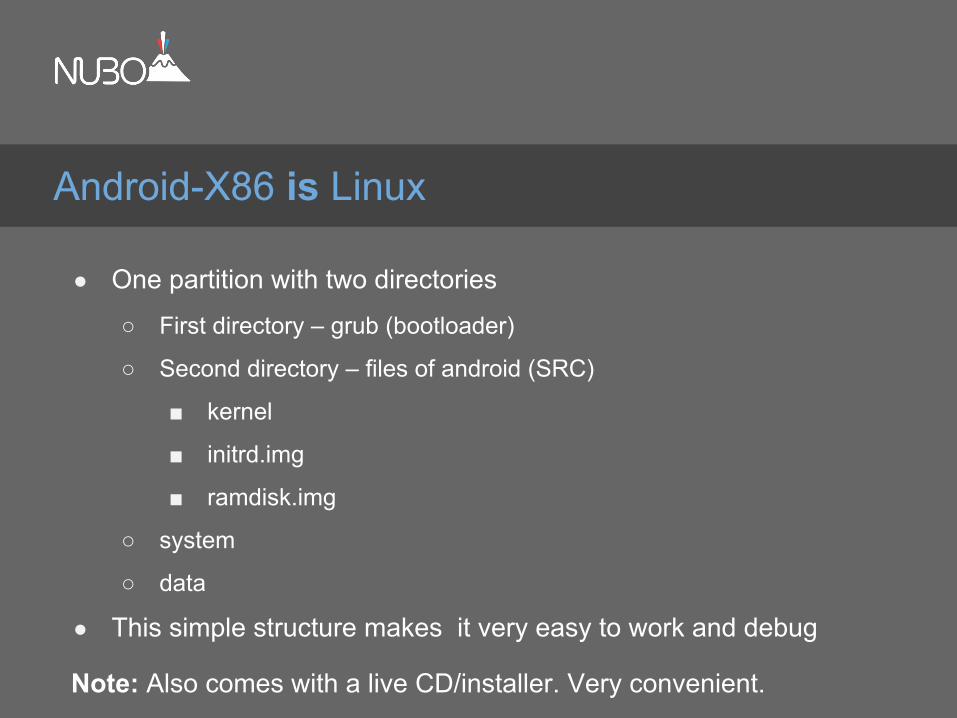
● One partition with two directories
○ First directory – grub (bootloader)
○ Second directory – files of android (SRC)
■ kernel
■ initrd.img
■ ramdisk.img
○ system
○ data
● This simple structure makes it very easy to work and debug
Note: Also comes with a live CD/installer. Very convenient.
Android-X86 is Linux
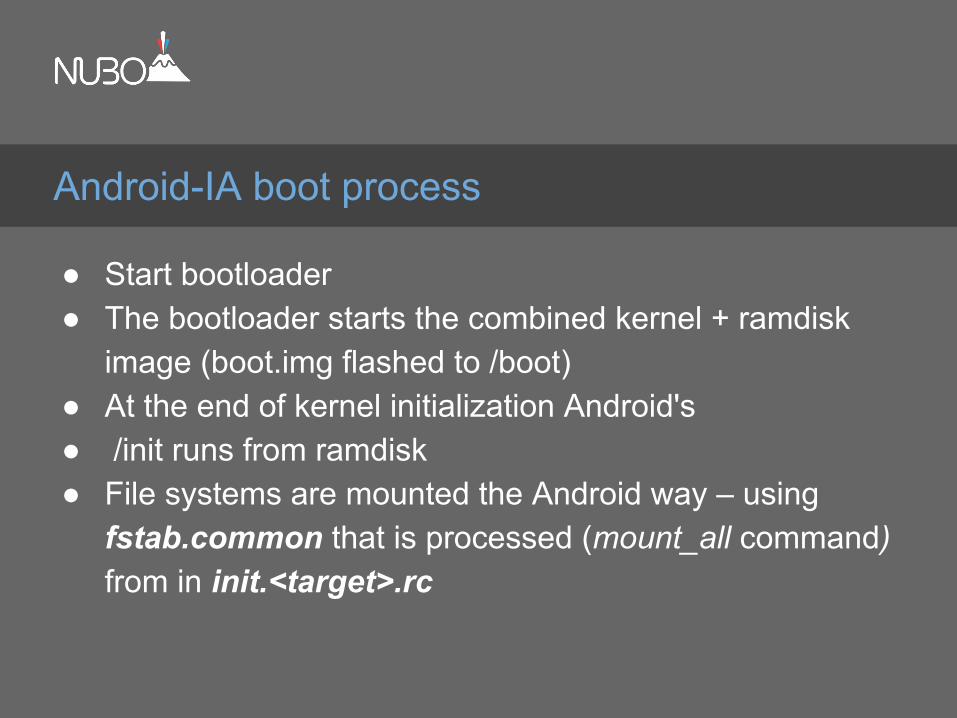
● Start bootloader● The bootloader starts the combined kernel + ramdisk
image (boot.img flashed to /boot)● At the end of kernel initialization Android's● /init runs from ramdisk● File systems are mounted the Android way – using
fstab.common that is processed (mount_all command) from in init.<target>.rc
Android-IA boot process
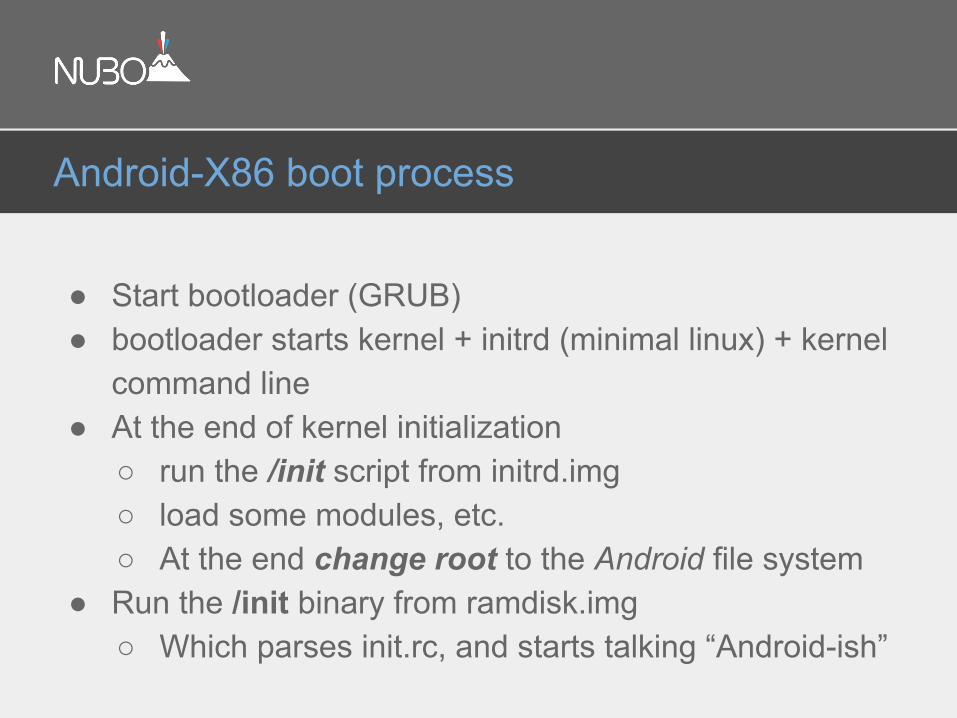
● Start bootloader (GRUB)● bootloader starts kernel + initrd (minimal linux) + kernel
command line● At the end of kernel initialization
○ run the /init script from initrd.img○ load some modules, etc. ○ At the end change root to the Android file system
● Run the /init binary from ramdisk.img○ Which parses init.rc, and starts talking “Android-ish”
Android-X86 boot process
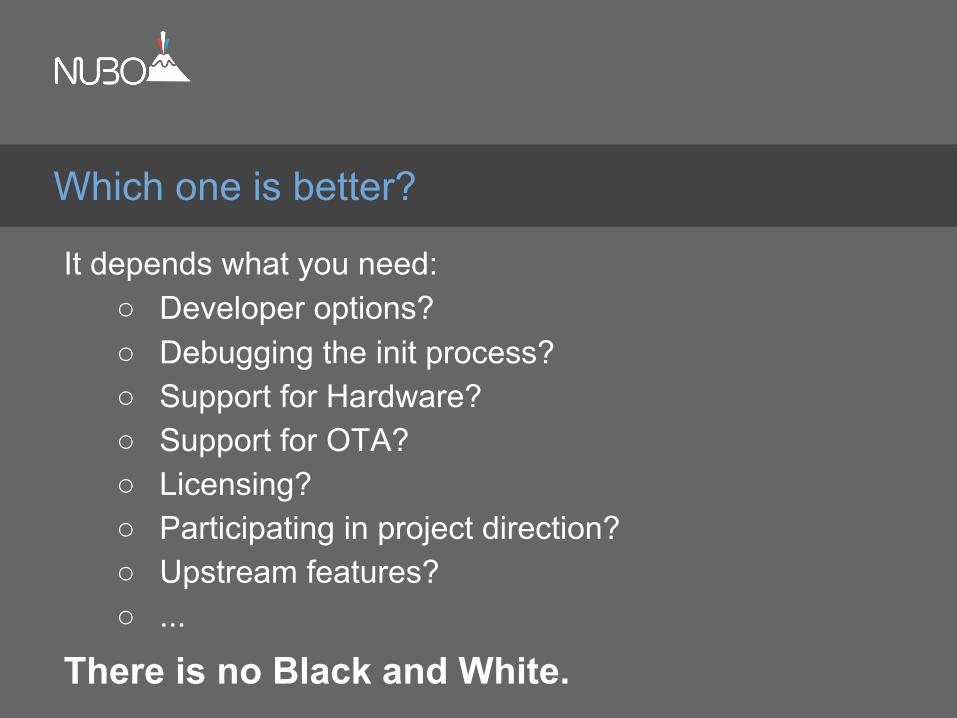
It depends what you need:○ Developer options?○ Debugging the init process?○ Support for Hardware?○ Support for OTA?○ Licensing? ○ Participating in project direction?○ Upstream features?○ ...
There is no Black and White.
Which one is better?
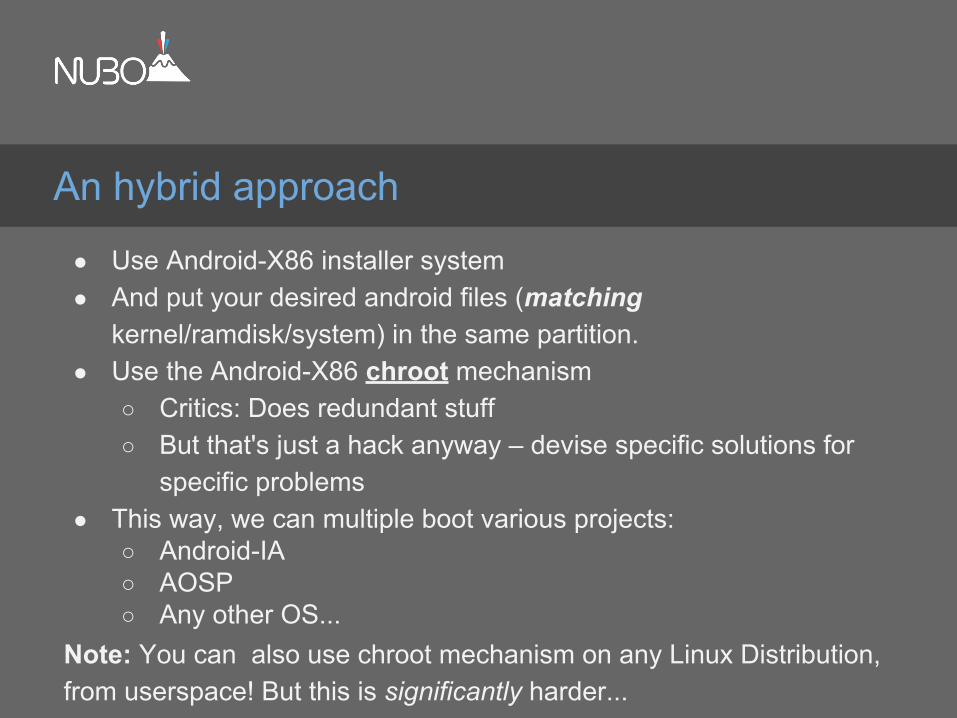
● Use Android-X86 installer system● And put your desired android files (matching
kernel/ramdisk/system) in the same partition.● Use the Android-X86 chroot mechanism
○ Critics: Does redundant stuff○ But that's just a hack anyway – devise specific solutions for
specific problems● This way, we can multiple boot various projects:
○ Android-IA○ AOSP○ Any other OS...
Note: You can also use chroot mechanism on any Linux Distribution, from userspace! But this is significantly harder...
An hybrid approach
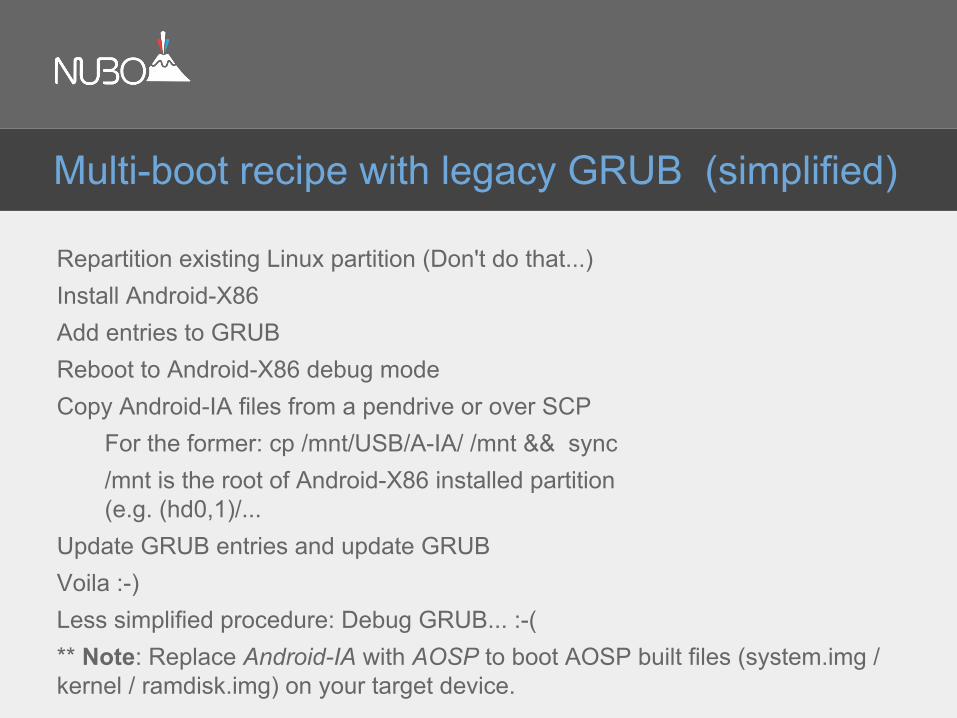
Repartition existing Linux partition (Don't do that...)Install Android-X86Add entries to GRUBReboot to Android-X86 debug modeCopy Android-IA files from a pendrive or over SCP
For the former: cp /mnt/USB/A-IA/ /mnt && sync/mnt is the root of Android-X86 installed partition (e.g. (hd0,1)/...
Update GRUB entries and update GRUBVoila :-)Less simplified procedure: Debug GRUB... :-( ** Note: Replace Android-IA with AOSP to boot AOSP built files (system.img / kernel / ramdisk.img) on your target device.
Multi-boot recipe with legacy GRUB (simplified)
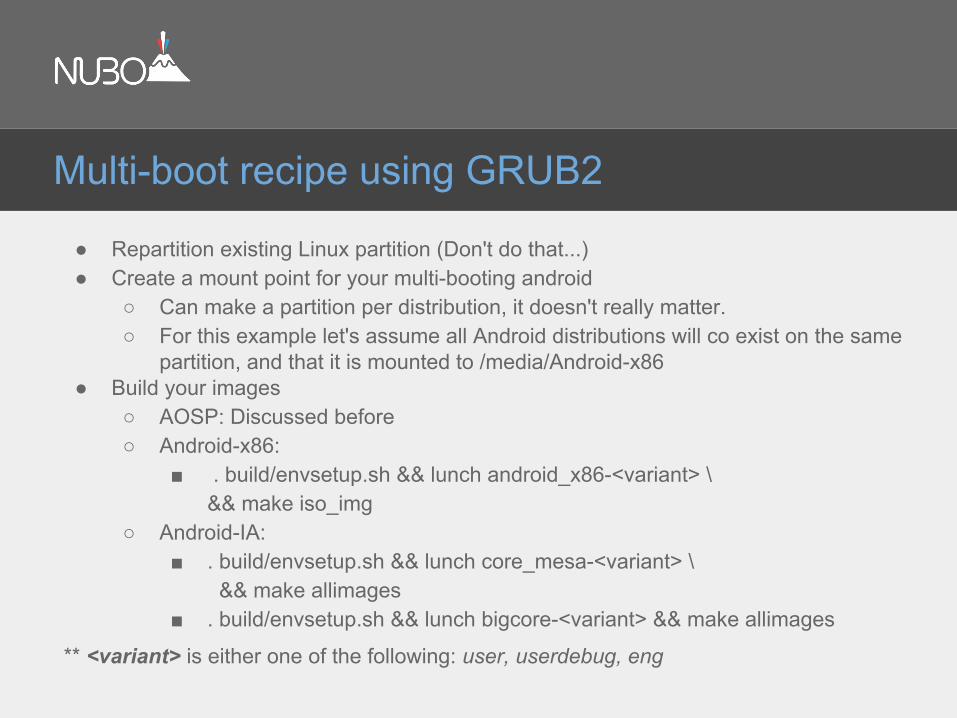
● Repartition existing Linux partition (Don't do that...)● Create a mount point for your multi-booting android
○ Can make a partition per distribution, it doesn't really matter.○ For this example let's assume all Android distributions will co exist on the same
partition, and that it is mounted to /media/Android-x86● Build your images
○ AOSP: Discussed before○ Android-x86:
■ . build/envsetup.sh && lunch android_x86-<variant> \ && make iso_img
○ Android-IA: ■ . build/envsetup.sh && lunch core_mesa-<variant> \
&& make allimages■ . build/envsetup.sh && lunch bigcore-<variant> && make allimages
** <variant> is either one of the following: user, userdebug, eng
Multi-boot recipe using GRUB2
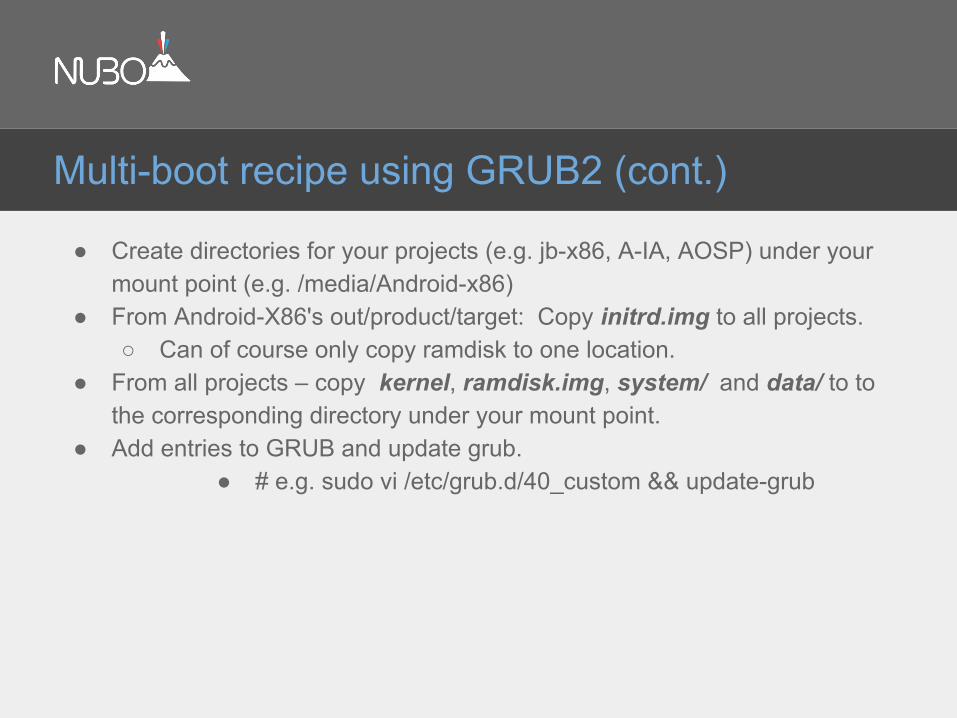
● Create directories for your projects (e.g. jb-x86, A-IA, AOSP) under your mount point (e.g. /media/Android-x86)
● From Android-X86's out/product/target: Copy initrd.img to all projects. ○ Can of course only copy ramdisk to one location.
● From all projects – copy kernel, ramdisk.img, system/ and data/ to to the corresponding directory under your mount point.
● Add entries to GRUB and update grub.● # e.g. sudo vi /etc/grub.d/40_custom && update-grub
Multi-boot recipe using GRUB2 (cont.)
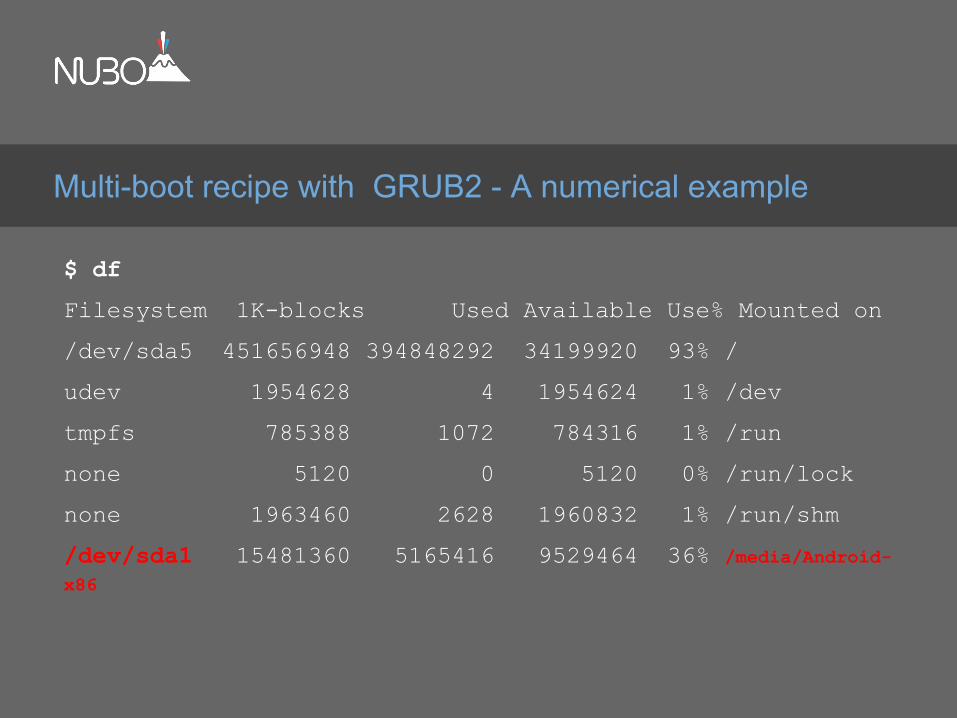
$ df
Filesystem 1K-blocks Used Available Use% Mounted on
/dev/sda5 451656948 394848292 34199920 93% /
udev 1954628 4 1954624 1% /dev
tmpfs 785388 1072 784316 1% /run
none 5120 0 5120 0% /run/lock
none 1963460 2628 1960832 1% /run/shm
/dev/sda1 15481360 5165416 9529464 36% /media/Android-x86
Multi-boot recipe with GRUB2 - A numerical example
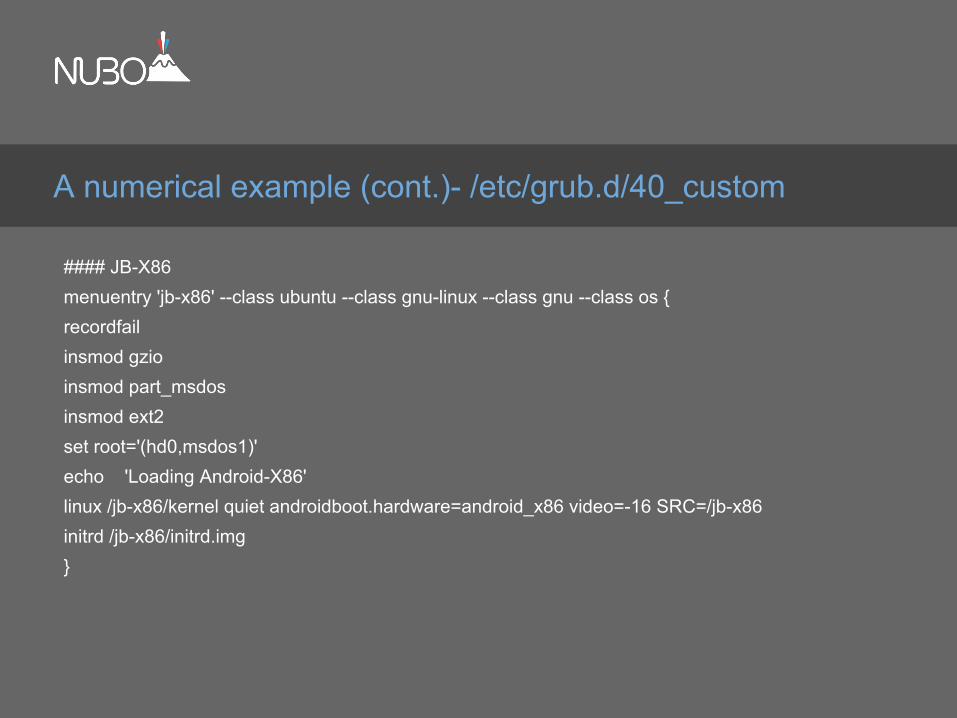
#### JB-X86 menuentry 'jb-x86' --class ubuntu --class gnu-linux --class gnu --class os {recordfailinsmod gzioinsmod part_msdosinsmod ext2set root='(hd0,msdos1)'echo 'Loading Android-X86'linux /jb-x86/kernel quiet androidboot.hardware=android_x86 video=-16 SRC=/jb-x86initrd /jb-x86/initrd.img}
A numerical example (cont.)- /etc/grub.d/40_custom
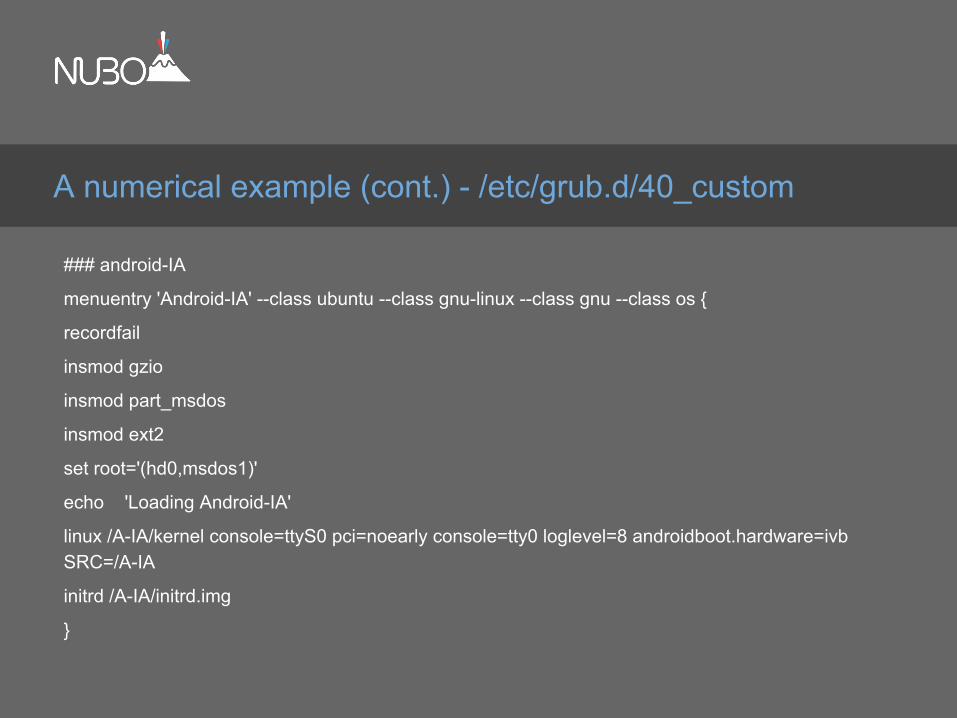
### android-IA
menuentry 'Android-IA' --class ubuntu --class gnu-linux --class gnu --class os {
recordfail
insmod gzio
insmod part_msdos
insmod ext2
set root='(hd0,msdos1)'
echo 'Loading Android-IA'
linux /A-IA/kernel console=ttyS0 pci=noearly console=tty0 loglevel=8 androidboot.hardware=ivb SRC=/A-IA
initrd /A-IA/initrd.img
}
A numerical example (cont.) - /etc/grub.d/40_custom

● In this session:○ We have listed various ways to build ROMs for
■ AOSP devices■ AOSP emulator(-X86)■ Android-X86■ Android-IA
○ We have also discussed multi booting several configurations using the Android-X86 build system
● In the next module, we will:○ Explore the Android build system○ See how to create and modify those projects for easy customizable
X86 developer friendly targets!
Coming up next...
Building Our First Customized Device
https://github.com/ronubo/AnDevCon
AnDevCon November 2013
@ronubo
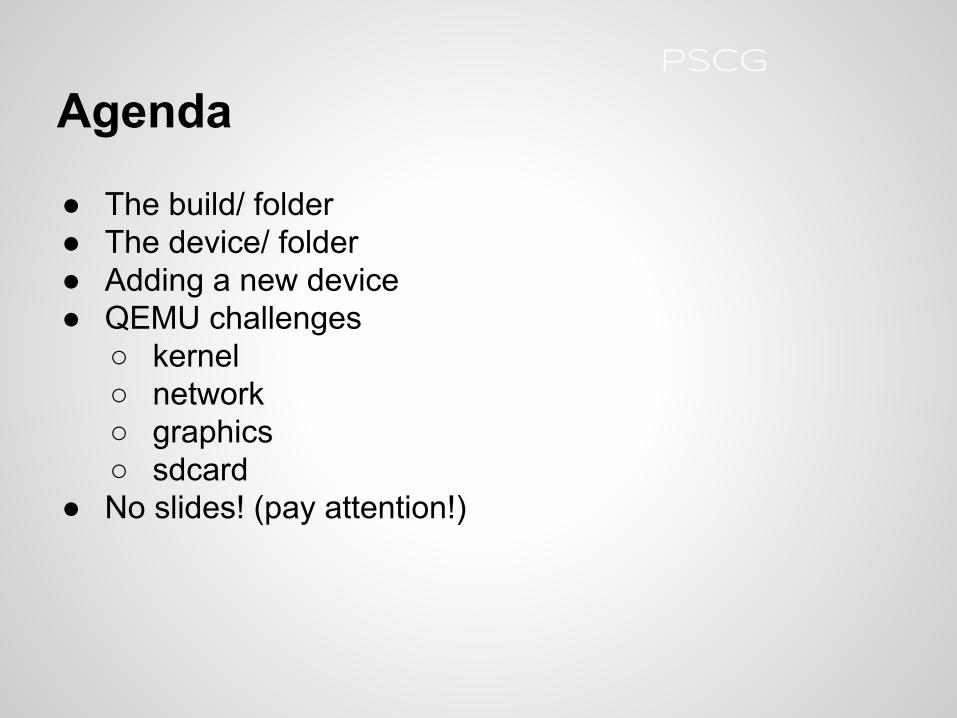
Agenda
● The build/ folder● The device/ folder● Adding a new device● QEMU challenges
○ kernel○ network ○ graphics○ sdcard
● No slides! (pay attention!)
PSCG
Challenges
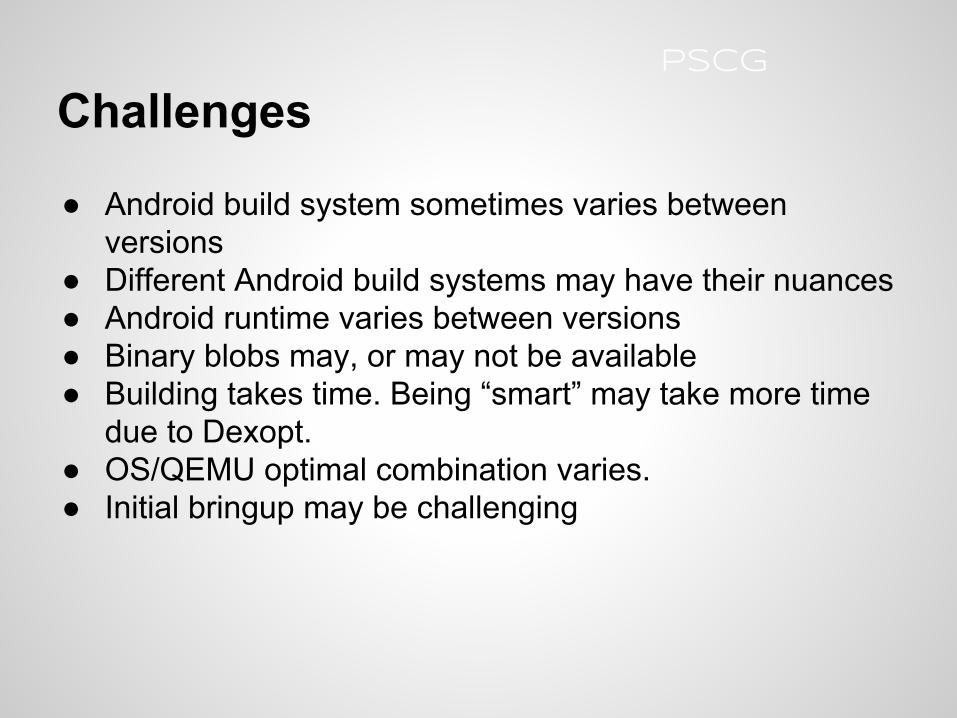
● Android build system sometimes varies between versions
● Different Android build systems may have their nuances● Android runtime varies between versions● Binary blobs may, or may not be available● Building takes time. Being “smart” may take more time
due to Dexopt.● OS/QEMU optimal combination varies.● Initial bringup may be challenging
PSCG
● The AOSP is hosted at http://source.android.com ● The Android-x86.org project is hosted at http://Android-X86.org ● The Android-IA project is hosted at https://01.org/android-ia ● Device trees shown in the next session are available at
https://github.com/ronubo/AnDevCon● Android Internals course - @thePSCG● Android Customization course - @thePSCG● Introduction to Embedded Android course - Ron Munitz.
Taught at Afeka College of Engineering, Tel-Aviv, Israel● You are welcome to contact me in the social networks (@ronubo)
References

Thank You
AnDevConNovember 2013