angels of armageddon: the royal air force … · angels of armageddon: the royal air force in the...
TRANSCRIPT
ANGELS OF ARMAGEDDON: THE ROYAL AIR FORCE IN THE BATTLE OF MEGIDDO
A thesis presented to the Faculty of the U.S. Army Command and General Staff College in partial
fulfillment of the requirements for the degree
MASTER OF MILITARY ART AND SCIENCE
Military History
by
GARY J. MOREA, MAJ, USA B.S., United States Military Academy, West Point, New York, 1994
Fort Leavenworth, Kansas 2007
Approved for public release; distribution is unlimited.

REPORT DOCUMENTATION PAGE Form Approved
OMB No. 0704-0188 Public reporting burden for this collection of information is estimated to average 1 hour per response, including the time for reviewing instructions, searching existing data sources, gathering and maintaining the data needed, and completing and reviewing this collection of information. Send comments regarding this burden estimate or any other aspect of this collection of information, including suggestions for reducing this burden to Department of Defense, Washington Headquarters Services, Directorate for Information Operations and Reports (0704-0188), 1215 Jefferson Davis Highway, Suite 1204, Arlington, VA 22202-4302. Respondents should be aware that notwithstanding any other provision of law, no person shall be subject to any penalty for failing to comply with a collection of information if it does not display a currently valid OMB control number. PLEASE DO NOT RETURN YOUR FORM TO THE ABOVE ADDRESS. 1. REPORT DATE (DD-MM-YYYY)
15-06-2007 2. REPORT TYPE Master’s Thesis
3. DATES COVERED (From - To) Aug 2006 - Jun 2007 5a. CONTRACT NUMBER 5b. GRANT NUMBER
4. TITLE AND SUBTITLE Angels of Armageddon: The Royal Air Force in the Battle of Megiddo
5c. PROGRAM ELEMENT NUMBER 5d. PROJECT NUMBER 5e. TASK NUMBER
6. AUTHOR(S) Gary J. Morea, MAJ, USA
5f. WORK UNIT NUMBER
7. PERFORMING ORGANIZATION NAME(S) AND ADDRESS(ES) U.S. Army Command and General Staff College
8. PERFORMING ORGANIZATION REPORT NUMBER
ATTN: ATZL-SWD-GD 1 Reynolds Ave. Ft. Leavenworth, KS 66027-1352
9. SPONSORING / MONITORING AGENCY NAME(S) AND ADDRESS(ES) 10. SPONSOR/MONITOR’S ACRONYM(S) 11. SPONSOR/MONITOR’S REPORT NUMBER(S) 12. DISTRIBUTION / AVAILABILITY STATEMENT Approved for public release; distribution is unlimited.
13. SUPPLEMENTARY NOTES
14. ABSTRACT Egypt and Palestine offered the British an opportunity to fight a war of movement. Unlike the Western Front, Egypt and Palestine were undeveloped with wide expanses of land. It was ripe for the development of maneuver warfare using the mechanical products of the industrial age: motor cars, machine guns, tanks and aeroplanes. In particular, the use of aeroplanes proved vital to the successful British defense of the Suez Canal by providing reconnaissance of enemy formations and early warnings of attack. This role of the Royal Flying Corps expanded in this theater to cover the breadth and depth of British efforts at the tactical, operational and strategic levels. The strategic success of the Royal Air Force in wrestling air superiority from the Germans was the key that allowed the Egyptian Expeditionary Force (EEF) to prepare and conduct its campaign against the central powers across the plains surrounding Megiddo. It provided the EEF intelligence of enemy positions, freedom to maneuver forces undetected, and the depth to attack and rout the retreating Turkish forces to the point of annihilation. The evolution of local air superiority in Palestine, properly coordinated with the ground offensive, was the deciding factor for victory in that theater. 15. SUBJECT TERMS Megiddo, RFC, Royal Flying Corps, Royal Air Force, RAF, Palestine, Egypt, Suez Canal, Salmond, Allenby, Yilderim, Gaza, Beersheba, Jerusalem
16. SECURITY CLASSIFICATION OF:
17. LIMITATION OF ABSTRACT
18. NUMBER OF PAGES
19a. NAME OF RESPONSIBLE PERSON
a. REPORT Unclassified
b. ABSTRACT Unclassified
c. THIS PAGE Unclassified
UU
162
19b. TELEPHONE NUMBER (include area code)
Standard Form 298 (Re . 8-98) vPrescribed by ANSI Std. Z39.18

ii
MASTER OF MILITARY ART AND SCIENCE THESIS APPROVAL PAGE
Name of Candidate: MAJ Gary J. Morea Thesis Title: Angels of Armageddon: The Royal Air Force in the Battle of Megiddo Approved by: _______________________________________, Thesis Committee Chair LTC (Ret.) Thomas G. Bradbeer, M.M.A.S., M.A. _______________________________________, Member LTC (Ret.) Richard S. Faulkner, M.M.A.S., M.A. _______________________________________, Member Stephen A. Bourque, Ph.D. Accepted this 15th day of June 2007 by: , Director, Graduate Degree Programs Robert F. Baumann, Ph.D. The opinions and conclusions expressed herein are those of the student author and do not necessarily represent the views of the U.S. Army Command and General Staff College or any other governmental agency. (References to this study should include the foregoing statement.)

iii
ABSTRACT
ANGELS OF ARMAGEDDON: THE ROYAL AIR FORCE IN THE BATTLE OF MEGIDDO, by Gary J. Morea, 162 pages. Egypt and Palestine offered the British an opportunity to fight a war of movement. Unlike the Western Front, Egypt and Palestine were undeveloped with wide expanses of land. It was ripe for the development of maneuver warfare using the mechanical products of the industrial age: motor cars, machine guns, tanks and aeroplanes. In particular, the use of aeroplanes proved vital to the successful British defense of the Suez Canal by providing reconnaissance of enemy formations and early warnings of attack. This role of the Royal Flying Corps expanded in this theater to cover the breadth and depth of British efforts at the tactical, operational and strategic levels. The strategic success of the Royal Air Force in wrestling air superiority from the Germans was the key that allowed the Egyptian Expeditionary Force (EEF) to prepare and conduct its campaign against the central powers across the plains surrounding Megiddo. It provided the EEF intelligence of enemy positions, freedom to maneuver forces undetected, and the depth to attack and rout the retreating Turkish forces to the point of annihilation. The evolution of local air superiority in Palestine, properly coordinated with the ground offensive, was the deciding factor for victory in that theater.

iv
ACKNOWLEDGMENTS
My first extension of gratitude goes out to my Committee members: Mr.
Bradbeer, Mr. Faulkner and Dr. Bourque whose guidance, mentoring and patience
provided me focus and clarity throughout the year. I also want to thank the staff of the
Combined Arms Research Library for maintaining such a rich source of material as well
as a friendly and accommodating climate. To Ms. Helen Davis, for saving me hours of
agonizing formatting corrections. You are an institution unto yourself. Finally, I want to
thank my bride, Michelle, for your patience, understanding and encouragement over the
past year. I could not have done this without you.

v
TABLE OF CONTENTS
Page
MASTER OF MILITARY ART AND SCIENCE THESIS APPROVAL PAGE ............. ii
ABSTRACT....................................................................................................................... iii
ACKNOWLEDGMENTS ................................................................................................. iv
ACRONYMS..................................................................................................................... ix
ILLUSTRATIONS ............................................................................................................. x
TABLES ........................................................................................................................... xii
CHAPTER 1. INTRODUCTION ....................................................................................... 1
Allenby Enters Jeruselem, 1917 ......................................................................................1 Significance of Megiddo..................................................................................................2
Translation of the Name.............................................................................................. 2 Geography of Megiddo ............................................................................................... 3 Pharaoh Thutmose III ................................................................................................. 4 Allenby........................................................................................................................ 6
Importance of Airpower...................................................................................................7 Reconnaissance ................................................................................................................9 Air-Ground Integration ..................................................................................................11
Artillery spotting....................................................................................................... 12 Bombing.................................................................................................................... 14 Ground attack............................................................................................................ 15
Deny Enemy Air Capabilities ........................................................................................17 Overall Effect.................................................................................................................18 The Road To War In Palestine.......................................................................................19
CHAPTER 2. PHASE I: AUGUST 1914 TO FEBRUARY 1916 ................................... 24
Leadership......................................................................................................................24 Commander-in-Chief Egypt, Lieutenant-General Sir John Maxwell ....................... 24 Initial Flight Commander – Captain S. D. Massey................................................... 26 Lieutenant-Colonel W. G. H. Salmond..................................................................... 28
Equipment ......................................................................................................................30 British........................................................................................................................ 30 German...................................................................................................................... 31
Training and Tactics ......................................................................................................32
vi
Organization and Operations .........................................................................................33 Summary ........................................................................................................................38
CHAPTER 3. PHASE II: MARCH 1916 TO APRIL 1917 ............................................. 41
Leadership......................................................................................................................42 Commander, Mediterranean Expeditionary Force -- Lieutenant-General Sir Archibald Murray...................................................................................................... 42 Commander, Middle East Brigade, RFC-- Brigadier General Geoffrey Salmond ... 44
Equipment ......................................................................................................................45 British Aeroplanes .................................................................................................... 45 German Aeroplanes .................................................................................................. 45
Training and Tactics ......................................................................................................46 The Training Brigade in Egypt ................................................................................. 46
Organization and Operations .........................................................................................48 Australian Flying Corps arrives in Egypt ................................................................. 48 Development of the Middle East Brigade................................................................. 49 Defense of Suez in August 1916--the Battle of Romani........................................... 51 Advance into Palestine.............................................................................................. 52
Cavalry Raid on Bir El Mazar ...............................................................................52 1st Battle of Gaza...................................................................................................53 2nd Battle of Gaza. ................................................................................................56
Summary ........................................................................................................................57
CHAPTER 4. PHASE III: APRIL 1917 TO NOVEMBER 1918 .................................... 62
Leadership......................................................................................................................63 Commander, Egyptian Expeditionary Force -- General Sir Edmund H. H. Allenby 63 Commander, Middle East Brigade, Royal Air Force (1 April 1918) -- Major-General Sir Geoffrey Salmond ............................................................................................... 64
Equipment ......................................................................................................................67 British........................................................................................................................ 67 German...................................................................................................................... 67
Training and Tactics ......................................................................................................68 The Gosport School .................................................................................................. 68 The Formation of the Training Group in Egypt........................................................ 70
Organization and Operations .........................................................................................71 “Bloody April” 1917................................................................................................. 71 Reorganization of EEF.............................................................................................. 72 Capture of Beersheba................................................................................................ 73 Capture of Gaza ........................................................................................................ 76 Capture of Jerusalem................................................................................................. 78
Summary ........................................................................................................................80

vii
CHAPTER 5. THE BATTLE OF MEGIDDO ................................................................. 83
Airpower Before the Battle............................................................................................83 Airpower During the Battle ...........................................................................................92 Airpower in Pursuit........................................................................................................95
CHAPTER 6. THE LEGACY OF MEGIDDO .............................................................. 101
APPENDIX A. HISTORIC MEGIDDO......................................................................... 114
Solomon .......................................................................................................................114 Pharaoh Necho II .........................................................................................................114 Saladin..........................................................................................................................115 Mamluke Sultan Qutuz ................................................................................................117
APPENDIX B. EQUIPMENT DEVELOPMENT ......................................................... 120
Phase I: August 1914 to February 1916.......................................................................120 British Aircraft ........................................................................................................ 120
Maurice and Henri Farmans (Maurice Farman S.11 “Shorhorn”).......................120 French Nieuports (80 hp) .....................................................................................121 B.E. 2 (Bleroit Experimental version 2) ..............................................................122
German Aircraft ...................................................................................................... 123 Rumpler C-I .........................................................................................................123 Fokker E I ............................................................................................................124
Phase II: March 1916 – April 1917..............................................................................126 Machine Guns ......................................................................................................... 126
Lewis Gun............................................................................................................126 Parabellum gun ....................................................................................................127 Vickers Gun .........................................................................................................127 Hotchkiss..............................................................................................................128 Spandau................................................................................................................129
British Aeroplanes .................................................................................................. 129 DeHaviland DH2 .................................................................................................129 Bristol F2 .............................................................................................................130 Martinsydes..........................................................................................................131
German Aeroplanes ................................................................................................ 132 Halberstadt Fighters .............................................................................................132 Fokker E III..........................................................................................................133
Phase III: April 1917 to November 1918.....................................................................135 British Aircraft ........................................................................................................ 135
Handley Page Bomber O/400 ..............................................................................135 Sopwith Camels ...................................................................................................136
viii
R.E.8 ....................................................................................................................137 S.E.5a ...................................................................................................................137 Vickers Bullets.....................................................................................................138
German Aircraft ...................................................................................................... 139 Halberstadts D.II ..................................................................................................139 Albatross D III .....................................................................................................140
APPENDIX C. AIRCRAFT COMPARISON CHART ................................................. 142
GLOSSARY ................................................................................................................... 143
BIBLIOGRAPHY........................................................................................................... 144
INITIAL DISTRIBUTION LIST ................................................................................... 148
CERTIFICATION FOR MMAS DISTRIBUTION STATEMENT .............................. 149
ix
ACRONYMS
ANA Arab Northern Army
CIGS Chief of the Imperial General Staff
CTC Camel Transport Corps
DMC Desert Mounted Corps
EEF Egyptian Expeditionary Force
ELC Egyptian Labor Corps
GOC General Officer Commanding
LOCs Lines of Communications
RAF Royal Air Force
RFC Royal Flying Corps
RNAS Royal Naval Air Service
x
ILLUSTRATIONS
Page Figure 1. The Jezreel Valley, Megiddo, and the Via Maris ..............................................4
Figure 2. Map of the Battle of Megiddo 1457 B.C. ..........................................................5
Figure 3. Map of EEF Area of Operations, 1914-1918...................................................27
Figure 4. Aircraft at Ismailia prepared for Reconnaissance Work..................................34
Figure 5. Aerial View of Ismailia and Lake Timsah from a Farman Aircraft ................34
Figure 6. Map of the Eastern Desert from Cairo to Gaza................................................50
Figure 7. The Gaza-Beersheba Line................................................................................73
Figure 8. Map of Megiddo, 1918. ...................................................................................88
Figure 9. Photo of Maurice Farman Aeroplane.............................................................120
Figure 10. Photo of Henry Farman Aircraft ....................................................................120
Figure 11. Photo of Nieuport 4G with Float Gear...........................................................121
Figure 12. Photo of B.E.2a Aircraft ................................................................................122
Figure 13. Photo of Rumpler C-I German Aircraft .........................................................123
Figure 14. Sketch of Fokker E-I Monoplane...................................................................124
Figure 15. Sketch of Lewis Gun (Aerial Version) ..........................................................126
Figure 16. Sketch of German Parabellum Gun (Aerial Version) ....................................127
Figure 17. Sketch of Vickers Machine Gun ....................................................................127
Figure 18. Sketch of Hotchkiss Machine Gun ................................................................128
Figure 19. Sketch of German Spandau Machine Gun.....................................................129
Figure 20. Sketch of DH 2 Aeroplane.............................................................................129
Figure 21. Sketch of Bristol F2 Fighter...........................................................................130
Figure 22. Sketch of Martinsyde Bomber .......................................................................131

xi
Figure 23. Photo of Halberstadt Fighter..........................................................................132
Figure 24. Photo of Eindecker E-III Monoplane.............................................................133
Figure 25. Sketch of British Handley Page Bomber .......................................................135
Figure 26. Sketch of Sopwith Camel Fighter ..................................................................136
Figure 27. Sketch of R.E.8 Reconnaissance Aeroplane ..................................................137
Figure 28. Sketch of S.E.5 Reconnaissance Aeroplane ..................................................137
Figure 29. Sketch of Vickers Bullet Fighter....................................................................138
Figure 30. Sketch of German Halberstadt Fighter ..........................................................139
Figure 31. Sketch of German Albatross D-III Fighter ....................................................140

xii
TABLE
Page Table 1. WWI AIRCRAFT IN MIDDLE EAST COMPARISON TABLE................142
1
CHAPTER 1
INTRODUCTION
Allenby Enters Jerusalem, 1917
By the end of 1917, the Allies were facing a dark period. The Italian offensive
was reversed at Caporetto; the communist revolution caused the Russians to abandon the
war; Romania withdrew; and the Germans launched a successful counteroffensive at
Cambrai.1 Yet in a separate corner of the world, there was another front of the Great War
that was raging. The area was Palestine and a triumphant leader was driving the allies
from victory to victory against the Turko-German forces defending there. His name was
Sir Edmund Allenby and his force was the Egyptian Expeditionary Force (EEF).
In stark contrast to the gloom enshrouding the allies in Europe, Sir Edmund
Allenby walked through the Jaffa gate into the historic city of Jerusalem on 11 December
1917. The capture of Jerusalem was a definitive point for the Palestinian front as it
represented an important operational victory for Allenby and placed his forces at the
doorstep of the Turko-German Force Headquarters. The victory also had a heartening
effect on the morale of the Allies.
Egypt and Palestine offered the British an opportunity to fight a war of
movement. Unlike the Western Front, Egypt and Palestine were undeveloped with wide
expanses of land and low density of people and material. It was ripe for maneuver
warfare using the mechanical products of the industrial age: motor cars, machine guns,
tanks and aeroplanes. In particular, it was the use of aeroplanes that proved vital to the
successful British defense of the Suez Canal by providing reconnaissance of enemy
formations and early warnings of attack. This role of the Royal Flying Corps expanded in
2
this theater to cover the breadth and depth of British efforts at the tactical, operational and
strategic levels of war.
Thesis: The actions of the Royal Air Force at the Battle of Megiddo were the
culmination of three phases of development. Driven by capable leadership, and fueled by
an ever-evolving aircraft manufacturing industry, the RAF quickly evolved as a learning
organization able to capitalize on the emerging third dimension of warfare. What the
RAF achieved at Megiddo was a systematic dominance of battlespace which contributed
directly to the victory of Allied Forces in the Palestinian theater.
Significance of Megiddo
Translation of the Name
The name “Armageddon” connotes biblical references to the end of the world--
but it is also a location on the globe. The name Harmageddon or Armageddon derives
from the Hebrew “Har,” meaning tell or hill, and “Mageddon,” referring to the ancient
city of Megiddo. Therefore the name quite literally refers to the ruins of the ancient city
of Megiddo--a city with a history of military significance. This significance was not lost
on the forces arrayed in Palestine in September 1918. In fact, General Allenby’s decisive
Palestine campaign so closely resembled the strategy used by the Pharaoh Thutmose in
1457 B.C. that many historians debate whether Allenby was in fact replicating the ancient
strategy. According to author and archaeologist Eric H. Cline, Allenby was aware of the
history if Megiddo and of the campaign waged by the Pharaoh Thutmose III.
Furthermore, according to Cline, Allenby was offered the honor to add “of Armageddon”
to his title, but refused believing it to be too sensational. Instead, he accepted the more
3
s and
benign title: “Allenby of Megiddo,” thereby demonstrating his understanding of
Megiddo’s significance.
Geography of Megiddo
Megiddo sat upon key terrain in the ancient world. It is located at the mouth of the
Musmuss Pass, half-way between the great cities of Nablus and Haifa, and twelve miles
Southwest of Nazareth. It sits at the entrance to the vast Plain of Esdraelon (the Greek
translation of Jezreel) and has a vantage of the pass and the plain all the way to Haifa
some fifteen miles to the Northwest.2 Most significant, though, is that Megiddo sat
astride a great road intersection, connecting the coastal road from Egypt to Damascu
Mesopotamia. This road, known as the Via Maris (way of the sea), was one of the most
important communication and trade routes of the ancient world3 (see figure 1).
There were many famous and infamous historic figures associated with Megiddo:
Solomon, Pharaoh Necho II, Saladin, and the Mamluke Sultan Qutuz (see appendix A).
Yet of the many battles that were recorded to have been fought in the vicinity of
Megiddo, there was one that bears the most significance to the actions of Allenby and the
Egyptian Expeditionary Force of the First World War--Pharaoh Thutmose III. It was the
details of this battle which bore the controversy over Allenby’s decisions during his
Palestine Campaign. Was he conscious of Thutmose III’s victory at Megiddo and did he
try to recreate it?
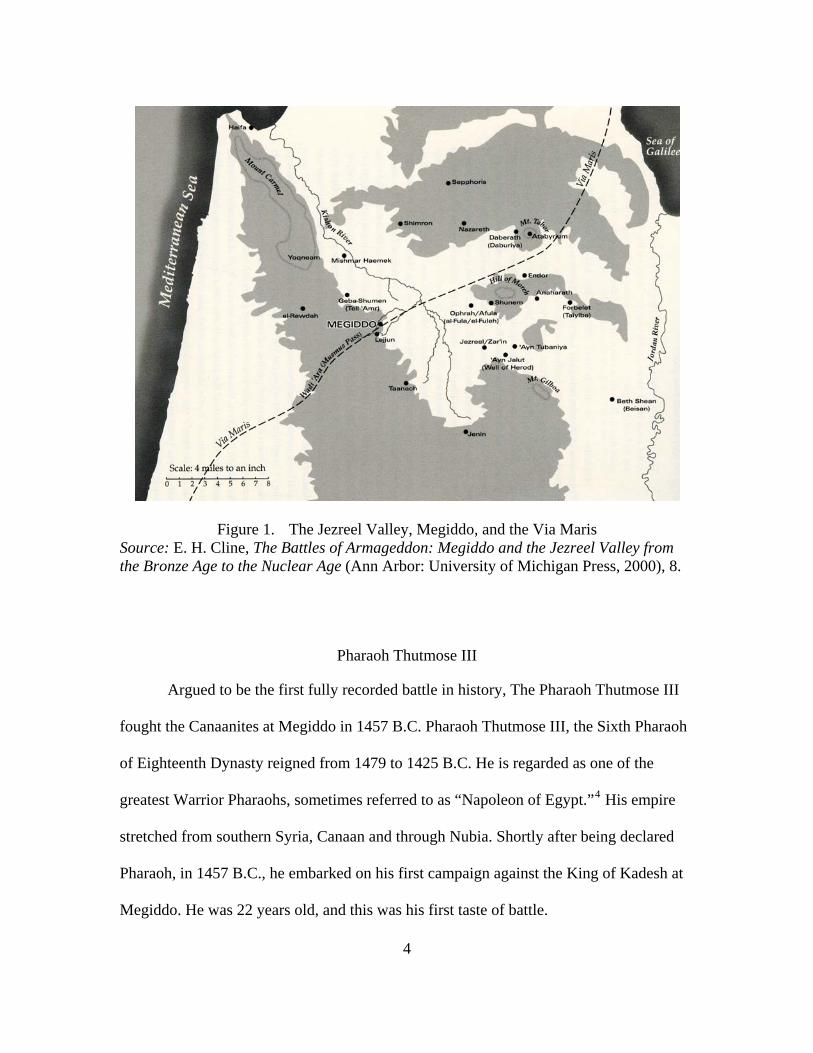
Figure 1. The Jezreel Valley, Megiddo, and the Via Maris
Source: E. H. Cline, The Battles of Armageddon: Megiddo and the Jezreel Valley from the Bronze Age to the Nuclear Age (Ann Arbor: University of Michigan Press, 2000), 8.
Pharaoh Thutmose III
Argued to be the first fully recorded battle in history, The Pharaoh Thutmose III
fought the Canaanites at Megiddo in 1457 B.C. Pharaoh Thutmose III, the Sixth Pharaoh
of Eighteenth Dynasty reigned from 1479 to 1425 B.C. He is regarded as one of the
greatest Warrior Pharaohs, sometimes referred to as “Napoleon of Egypt.”4 His empire
stretched from southern Syria, Canaan and through Nubia. Shortly after being declared
Pharaoh, in 1457 B.C., he embarked on his first campaign against the King of Kadesh at
Megiddo. He was 22 years old, and this was his first taste of battle.
4

Despite his councils trying to convince him otherwise, Thutmose used a narrow
mountain pass, known as the Musmuss pass, to maneuver his army through and emerge
between the Canaanite forces and the city of Megiddo. It was this decision that revealed
Thutmose’s tactical prowess. His choice was to either take the larger passes towards
Megiddo to the North and South or to maneuver through a very narrow pass which would
make his army vulnerable to a Canaanite ambush. Thutmose gambled that the Canaanites
would also think like his council and expect him to come from the alternate Northern or
Southern passes. His gamble paid off.
Figure 2. Map of the Battle of Megiddo 1457 B.C.
Source: Yohanan Aharoni, Carta’s Atlas of the Bible (Jerusalem: Carta, 1964), 32 (accessed online 24 MAR 07) www.nefertiti.iwebland.com/megiddobattle.htm.
5

6
Battle occurred on 9 May, 1457 B.C. (based on his accession), the Canaanites
escaped into Megiddo and Thutmose laid siege to the city for eight months. The battle
that ensued was a complete and decisive victory for Thutmose, and is considered to be
the largest of his seventeen campaigns. The successful campaign changed the political
dynamics of the region. Thutmose III gained control of all of northern Canaan by taking
Megiddo, and established an Egyptian presence in the Levant that lasted for the next two
hundred years.5
Allenby
Until 1918, there was relatively little fighting on the hill of Megiddo. There was
nothing of significance at Megiddo in September 1918 that the Allies were seeking to
capture. There are no roads or rails that pass through it, nor are there any navigable
rivers. The “significant” terrain were the towns of Tul Karm, Sebustiye and Nablus,
which were major rail junctions Northwest of Jaffa; as well as the port of Haifa, and
Samakh. The latter of which represented the juncture of the Palestinian Rail network and
the Jordan River, where it meets Lake Tiberius. The significance of calling this battle
Megiddo, which was to be the critical battle of the entire Palestinian Campaign and,
indeed, the Middle-Eastern Theater, was the fact Megiddo became the epicenter of the
British and Allied advance from Gaza to Aleppo. The latter being the location where the
campaign ended when the Turks sued for peace and armistice.
Yet General Allenby’s campaign does resemble the strategy employed by
Thutmose III three millenniums ago. Allenby, like Thutmose, advanced with a force from
Egypt and maneuvered his forces up the coast to attack the enemy forces arrayed in the
7
Jezreel valley. Allenby used all the resources at his disposal to overwhelm the Turkish
defenders around Megiddo to include a new instrument of war –the airplane.
Importance of Airpower
The instrument of war that played such a prominent part in Allenby’s Palestine
Campaign had a very humble beginning. It is important to understand how rudimentary
the aeroplane was at the outset of the war in order to gain an appreciation for how quickly
it developed and how far it progressed.
The evolution of manned flight began as near fantasy at the turn of the century.
But at the outset of war in 1914 it quickly developed to satiate military necessity. Prior to
1907, heavier-than-air flight was relegated to a club of fanciful dreamers who bankrolled
their own projects and often wound up penniless. The Wright brothers’ first flight at Kitty
Hawk, North Carolina in December 1903, was a milestone for heavier-than-air flight, but
was not the revolutionary catalyst for aviation enthusiasm. In fact, the Wright brothers
spent a great deal of time and energy trying to convince the U.S. Congress to purchase a
“flyer,” but were rejected in January 1905. The Wrights then turned to European nations
from 1905 to 1908 for aviation contracts. By December 1908, Wilbur Wright astounded
spectators in France with his feats of aerobatics and flight duration--setting a record of 2
hours and 20 minutes of continuous flight. This record, coupled with the accomplishment
of the French aviator Henri Farman, who flew his airplane almost 30 kilometers, from
Bouy to Reims on 30 October 1908, had a dramatic effect on the development of aircraft.
Now for the first time in the history of its development, heavier-than-air machines were
demonstrating their military applicability, specifically, their suitability as a platform from
which to conduct reconnaissance.6

8
During this same period of time, lighter-than-air aircraft were evolving on the
world stage. While hot air balloons had first made their appearance in 1783, they where
most successfully used throughout the nineteenth century as tethered observation
platforms. Free flight of balloons, however, was a very difficult and unreliable method of
flight. The emergence of the powered dirigible in 1884 changed this. By the turn of the
twentieth century, Count Ferdinand von Zeppelin had developed a monstrous airship for
the German General Staff. By 1907, Zeppelin had designed an airship over 128 meters
long, with a volume of 11,300 cubic meters capable of flying over 350 kilometers in
under eight hours.7 This captured the attention of the world--especially Britain.
Always concerned about an invasion from the European mainland, Britain grew
ever-more concerned about the aviation developments east of the Rhine. This concern
was fueled by H.G. Wells, who published his War in the Air in 1907; and by Sir Charles
Rolls, of the Rolls Royce Company, who testified before the Committee of Imperial
Defense that due to aviation developments “England will cease to be an Island.”8 It was
under these circumstances that the aeroplane emerged on the European stage in 1908. It
was evolving from romantic endeavor to military necessity.
By 1909 aviation was an emerging industry. Companies sprang up all over the
world to design, build, test, and sell their aircraft to governments concerned about
keeping pace with their potential adversaries. During this same year, the importance and
usefulness of dirigibles began to wane. The German General Staff itself was beginning to
note the military inadequacies of the Zeppelin airships. Yet, the Zeppelin was a symbol of
German pride, ingenuity and engineering and Germany was not ready to scrap the
9
airship. Instead, Germany divided its efforts between the continued development of
airships as well as aeroplanes.
Germany’s distraction and pride in the development and production of Zeppelins
caused her to ignore, for the most part, the advances in aeroplanes and aeroplane
technology that were taking place elsewhere in Europe. Ironically, the threat that the
Zeppelins posed to France and Britain was the catalyst for those countries to develop
aeroplanes as a counter-threat. As a result, Britain had aircraft in Egypt in defense of the
Suez Canal in 1914. These aircraft were unopposed.
While the aircraft industry tested and experimented with various aeroplane
designs, the airmen and military commanders experimented with developing roles for this
new weapon of war. The Royal Flying Corps, like other air forces in its day, developed
three roles for their aircraft: reconnaissance, air-ground integration, and denying enemy
air capabilities.
Reconnaissance
[The airplane’s] first duty was reconnaissance. All its other and later uses were consequences of this central purpose, and were forced on it by the hard logic of events.9
Sir Walter Raleigh, The War in the Air
In the First World War the airmen proved their usefulness, if not their
indispensability. The airmen gave eyes to the army. In their efforts against the Russians,
German observation planes played a vital role in the victory at Tannenberg, to which
Field Marshal von Hindenburg commented, “Without the airmen no Tannenberg.”10 The
airmen serving in the Palestine Brigade of the Royal Flying Corps were absolutely
10
critical to the success in that theater. Mastery of the skies meant, most of all, knowledge
of the enemy’s positions and possible intentions through aerial reconnaissance.
As previously mentioned, the usefulness of aerial reconnaissance dates back to the
hot air balloon. The foremost mission of the aeroplane was reconnaissance. Direct
incorporation of aircraft with ground forces began in 1910, when the British Army used
civilian aviators to participate in maneuvers on Salisbury Plain. This was the first time
that reconnaissance was carried out by airplane. After this many other countries
performed similar experiments. In 1911, the French, who were far ahead of the British in
aircraft manufacturing and aeronautical science, carried out maneuvers in Picardy and
confirmed the value of the airplane for reconnaissance purposes. Furthermore, the French
noted that single-seat airplanes had to fly twice as much for its pilots to bring back the
same amount of information supplied by the two-seated variants--carrying a pilot and an
observer.11 Squadrons of these two-seated observation planes were introduced in 1912,
and quickly became the preferred aerial reconnaissance configuration.
The development of the reconnaissance mission for the airmen meant the
development of techniques to capture the information that was observed and then to be
able to communicate this information to the user in a timely manner. In the early days of
the war, the pilots would rapidly sketch what they observed and then drop this
information to the awaiting courier on the ground as they flew over. But this method was
quickly replaced by the photograph. By 1914, aerial photography had already been used
for approximately fifty years. So the technique proved to be extremely valuable in
providing detailed information of enemy positions and possible intentions. Some of these
cameras were capable of taking a series of photographs. Dubbed automatic cameras,
11
these cameras provided a storybook gallery of the area being observed.12 One of the
pioneers of this technology was Gioulio Douhet, who would distinguish himself after the
war with his book entitled The Command of the Air.
Many countries carried out military maneuvers incorporating aircraft from 1910
to 1914, and virtually all identified the limiting factor of the airplane in reconnaissance--
communication. The U.S. Army used airplanes in small-scale maneuvers in 1912 and
determined that the information was much more accurate and full than that obtained by
the cavalry. However, it also noted that the observers had no rapid or easy means to relay
their information to the ground.13 The only logical solution was to incorporate wireless
telegraph into the cockpits. But this technology needed to be refined for use in aircraft.
The Germans followed suit with two-seated observations planes. This division of
duties in the cockpit allowed for more reliable information and better photographs. In
fact, the photographic information supplied by aerial observers became so ubiquitous that
by 1916 photographic intelligence was being passed down to brigade headquarters. By
the end of the war, photographs of objectives were even passed down to the trenches!14
After the war, the Germans calculated that if all the aerial photographs they had made
were laid out, they would cover an area six times larger than Germany.15
Air-Ground Integration
While photographs proved to be an important part of intelligence gathering, the
observation aircraft also provided a critical role in rapidly developing situations. After
1916, observation aircraft would often be called upon to work in cooperation with the
infantry, in order to provide information to the headquarters of the infantry’s progress on
the battlefield during offenses.16 As Allenby’s forces attacked up the Plain of Sharon in
12
1918, observation aircraft flew out in front of each corps and reported any enemy
observations to the corps’ lead elements.17 The observation aircraft also proved to be a
valuable tool for evaluating the effects of artillery and communicating corrections to the
gunners. Eventually, the airplane was used to perform the task for which it was most
feared--bombing and ground-attack. Therefore, the role of air-ground integration was
comprised of three sub-tasks: artillery spotting, bombing, and ground attack.
Artillery spotting
Tethered balloons had been in service in most armies throughout the second half
of the nineteenth century. These balloons performed a valuable function for artillery.
Since the range of artillery was increasing to the point that the artillerists were no longer
able to view the effectiveness of their fires, observers in balloons performed this function.
This was a dangerous business since the balloons were obvious targets for enemy guns as
well as aircraft. The French artillery had pushed to acquire aircraft for their purposes as
early as 1909. The Italians had assigned a unit out of the Italian air service to develop
spotting techniques in 1912.18
Prior to the outset of the war, most countries that possessed airplanes were
experimenting with spotting techniques. Reliable and timely communication between the
observers and artillerymen remained as the limiting factor to the airplane’s effectiveness
in artillery spotting. Early in the war, most pilots dropped notes with sketches or map
indications to the artillerymen. When the conditions permitted, some pilots would simply
land their planes near the gun positions and discuss their observations with the
artillerymen face-to-face.19 These techniques were time-consuming. Like the dilemma
involved with the aerial reconnaissance mission, what was needed was a means for the
13
pilots to communicate with the ground while they were observing the rounds impacting.
Again, the answer was wireless telegraphy.
At first these wireless systems were bulky and unreliable. But by late 1915,
wireless transmitters had become fixtures on observation aircraft flying over the Western
and Italian Fronts.20 The greatest limitation of the wireless system was that the pilots
could not receive information in the cockpit. But these difficulties were eventually
worked out and the airplane proved to be more reliable in the artillery spotting role than
balloons mostly because of its range, versatility of view, and the fact that it could fly on
windy days.
Evidence of the evolution of the role of artillery spotting into normal operations is
found in the communiqués of the British Royal Flying Corps. In 1915, most of the efforts
of artillery spotting or cooperation are noted as separate entries, such as the following
report listed under the title “Artillery co-operation” in Communiqué No. 2, 26-31 July
1915:
2Lt Reid with Lt Russell, 2 Sqn, obtained a direct hit in a gun emplacement when registering for the 10th Battery.
Capt Collins and Lt Sweet registering for 3rd Bde, obtained two direct hits on and set fire a portion of the enemy’s works On the 28th July, a machine of I Sqn directed battery fire on an ammunition column. A direct hit blew up the depot.21
By 1916 the reports involving artillery cooperation were simply part of the dated activity
and not given separate consideration or notation. The effectiveness of the cooperation
was also becoming more catastrophic as evidenced by the following communiqué dated 2
August 1916:
Eighty-six targets were engaged with aeroplane observation and 8 with kite balloon with very successful results.
14
Twelve batteries were successfully dealt with by the Reserve Army artillery observed by machines of the XVth Wing, and 7 by the IVth Army and 4th Brigade.
Direct hits were seen on 9 gun emplacements, and explosions were caused in nine cases, one being very extensive.22
One of the most important adaptations for artillery spotting was the development
of grid-square systems. This system which was in use by the French as early as 1911,
divided maps into geometric squares which were identified by pairs of numbers. Similar
to the grid reference system still in use today. W.G. H. Salmond, who would become the
commander of the Royal Flying Corps in Palestine, worked out a system of artillery-to-
air cooperation based on this squared map, which was adopted by the Royal Flying Corps
in France. The system was dubbed “Major Salmond’s System.”23 As the officer
responsible for the development, training and success of the RFC’s Palestine Brigade,
Salmond frequently gave classes on the subject as well as general cooperation between
the RFC and the other arms which fostered cooperation throughout the EEF24
Bombing
The fear of attack from the heavens predates the emergence of the airplane.
Perhaps it was the desire to harness this capability that drove the development of powered
flight. In any event, the capability to effectively bomb targets deep in the enemy’s rear
from the air was arguably the most predictable development of aerial warfare and the
most feared. However, this capability was not immediately available at the outset of the
First World War. By the end of the war, however, effective bombing of carefully planned
ground targets were very effective and proved to be decisive in the Battle of Megiddo.
While the ominous airships captured the public attention during the first weeks of
the war, it was the airplane that made routine bombing a reality.25 The dirigibles proved

15
to be vulnerable to air as well as ground attack and therefore did not provide the strategic
reconnaissance and bombing capabilities for which it was designed. Instead, the bombing
capabilities evolved out of the airplane squadrons. As early as September 1914, the Royal
Flying Corps issued orders for all reconnaissance pilots to carry bombs. The French also
saw the value in allowing the observation aircraft to perform bombing missions, but the
French recognized the importance of organizing units specifically for this duty. Late in
1914, the French combined three escadrilles (flying squadrons) to form Groupe De
Bombardement No. 1 (G.B. 1).26
By 1915, bombers became an extension of artillery--being able to strike at targets
30 or more miles behind enemy lines and on the reverse slopes of hills.27 But there was a
strategic purpose for bombing that was beginning to manifest itself in the capabilities
demonstrated by the early and rudimentary “bombers.” In March 1915, the British used
bombers at the battle of Neuve-Chapelle. They concentrated their efforts on the railway
stations and junctions. Although the results were not dramatic, they did serve to slow the
flow of men and munitions to the front lines. In spring of that same year, the Germans
began using gas at Ypres, Belgium. In response, the French bombed the Badische Analin
und Soda Fabrik, where they believed that the Germans were producing chlorine gas.28
The groundwork had thus been laid for the need to develop an airplane capable of
longer range and greater bomb load capacity. These aircraft, such as the British Handley-
Page 0/100 and German Gothas became available in 1916.
Ground Attack
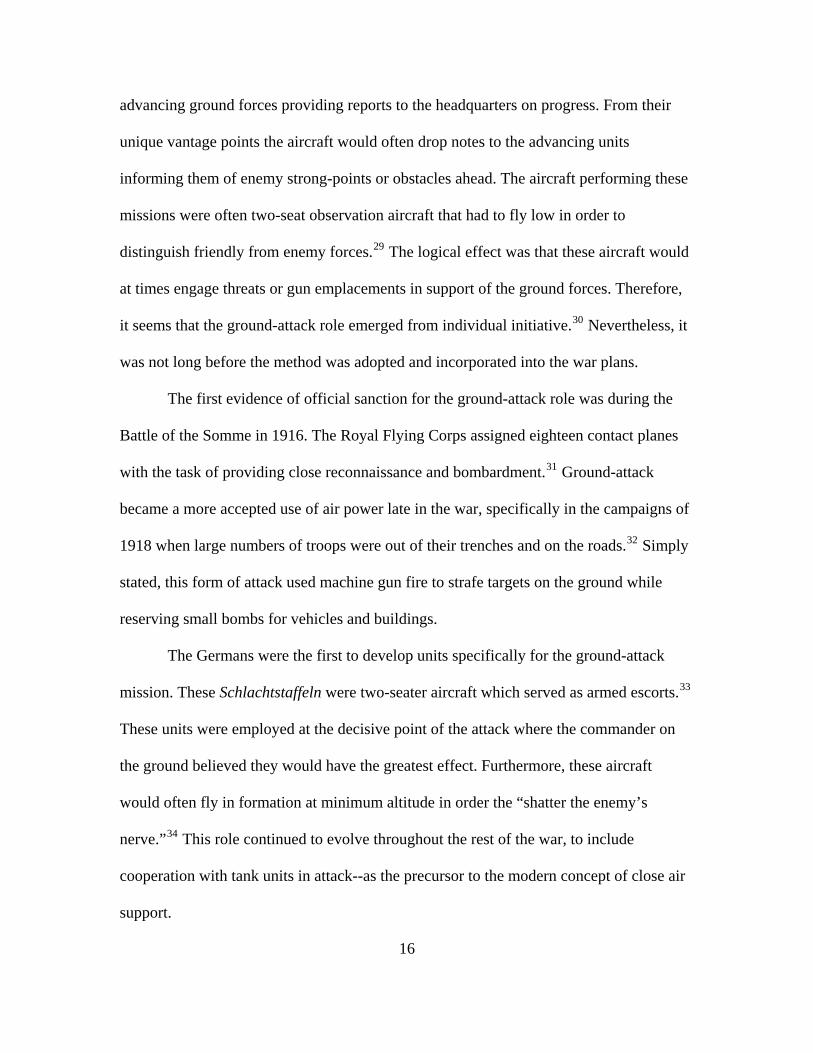
As the war continued to evolve, a new role for aircraft emerged--ground-attack.
Aircraft were serving in contact patrols in which they would follow closely with
16
advancing ground forces providing reports to the headquarters on progress. From their
unique vantage points the aircraft would often drop notes to the advancing units
informing them of enemy strong-points or obstacles ahead. The aircraft performing these
missions were often two-seat observation aircraft that had to fly low in order to
distinguish friendly from enemy forces.29 The logical effect was that these aircraft would
at times engage threats or gun emplacements in support of the ground forces. Therefore,
it seems that the ground-attack role emerged from individual initiative.30 Nevertheless, it
was not long before the method was adopted and incorporated into the war plans.
The first evidence of official sanction for the ground-attack role was during the
Battle of the Somme in 1916. The Royal Flying Corps assigned eighteen contact planes
with the task of providing close reconnaissance and bombardment.31 Ground-attack
became a more accepted use of air power late in the war, specifically in the campaigns of
1918 when large numbers of troops were out of their trenches and on the roads.32 Simply
stated, this form of attack used machine gun fire to strafe targets on the ground while
reserving small bombs for vehicles and buildings.
The Germans were the first to develop units specifically for the ground-attack
mission. These Schlachtstaffeln were two-seater aircraft which served as armed escorts.33
These units were employed at the decisive point of the attack where the commander on
the ground believed they would have the greatest effect. Furthermore, these aircraft
would often fly in formation at minimum altitude in order the “shatter the enemy’s
nerve.”34 This role continued to evolve throughout the rest of the war, to include
cooperation with tank units in attack--as the precursor to the modern concept of close air
support.
17
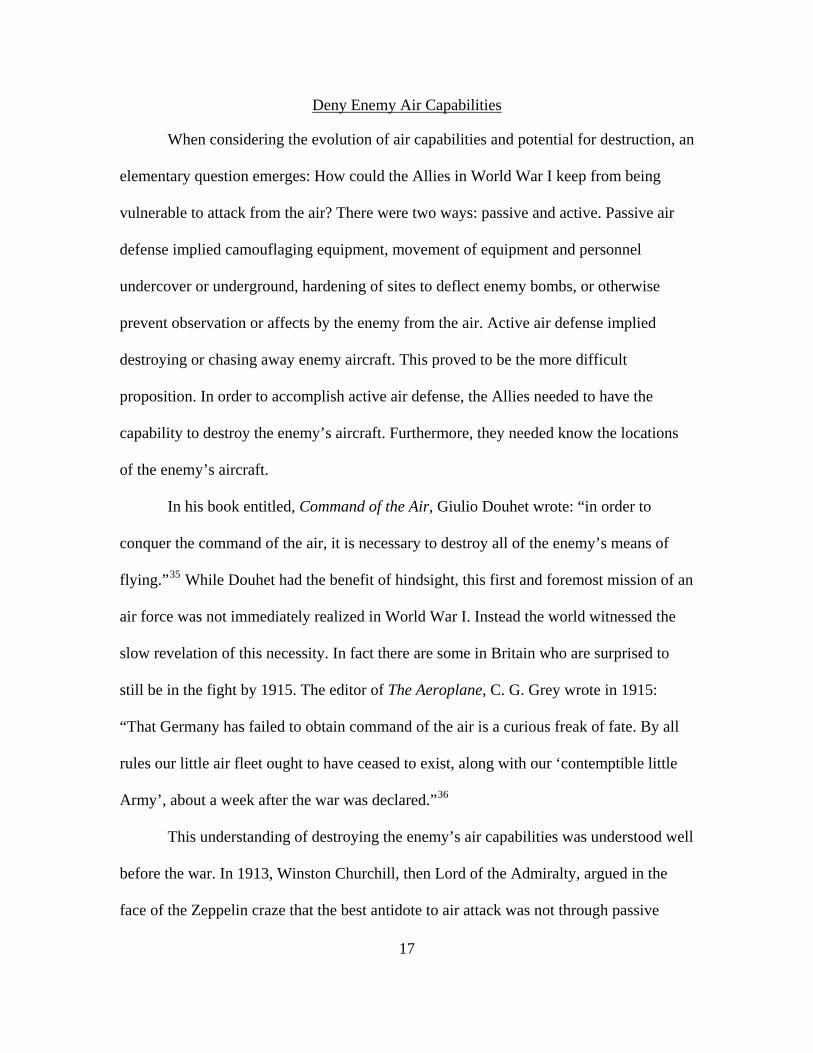
Deny Enemy Air Capabilities
When considering the evolution of air capabilities and potential for destruction, an
elementary question emerges: How could the Allies in World War I keep from being
vulnerable to attack from the air? There were two ways: passive and active. Passive air
defense implied camouflaging equipment, movement of equipment and personnel
undercover or underground, hardening of sites to deflect enemy bombs, or otherwise
prevent observation or affects by the enemy from the air. Active air defense implied
destroying or chasing away enemy aircraft. This proved to be the more difficult
proposition. In order to accomplish active air defense, the Allies needed to have the
capability to destroy the enemy’s aircraft. Furthermore, they needed know the locations
of the enemy’s aircraft.
In his book entitled, Command of the Air, Giulio Douhet wrote: “in order to
conquer the command of the air, it is necessary to destroy all of the enemy’s means of
flying.”35 While Douhet had the benefit of hindsight, this first and foremost mission of an
air force was not immediately realized in World War I. Instead the world witnessed the
slow revelation of this necessity. In fact there are some in Britain who are surprised to
still be in the fight by 1915. The editor of The Aeroplane, C. G. Grey wrote in 1915:
“That Germany has failed to obtain command of the air is a curious freak of fate. By all
rules our little air fleet ought to have ceased to exist, along with our ‘contemptible little
Army’, about a week after the war was declared.”36
This understanding of destroying the enemy’s air capabilities was understood well
before the war. In 1913, Winston Churchill, then Lord of the Admiralty, argued in the
face of the Zeppelin craze that the best antidote to air attack was not through passive

18
defense but through active bombing of the enemy’s aerodromes on the ground. He
believed that the Zeppelins were far more vulnerable to bombing attacks in their sheds
than to anything that might be mustered against them while in the air.37 Evidence of this
was in the successful bombing raids carried out by the Royal Naval Air Service (RNAS)
against the dirigible shed at Dusseldorf in September and October 1914. In which they
succeeded in destroying both the shed and the dirigible inside.38
In the final analysis, it was imperative to deny the enemy air capability or to at
least minimize its effectiveness in order to then exploit the command of the air. This was
either accomplished through the destruction of the enemy’s aircraft or the destruction of
the enemy’s aerodromes/airfields, or both. According to Giulio Douhet, “it is not enough
to shoot down all the birds in flight if you want to wipe out the species; there remain the
eggs and the nests.”39
What the Royal Air Force accomplished in Palestine in 1918 was a brilliant
combination of both passive and active air defense. While the superior numbers and
matched quality of the British aircraft prevented the Germans from passing over the lines,
the EEF also took great pains to camouflage and hide their equipment from aerial
observation. The RAF flew missions over friendly lines and photographed positions to
verify the passive defensive efforts and assist in the correction of shortcomings.40
Overall Effect
Air power evolved throughout World War I. By war’s end, both sides produced
better machines, developed better tactics and reaped better results when compared to the
beginning of the war. While both sides understood the importance of achieving command
of the air, it remained an illusive goal for much of the war. Any advantage in air power
19
that one side achieved, through some innovation, was often short lived and not fully
coordinated or exploited with other plans or tactics on the ground--with exception.
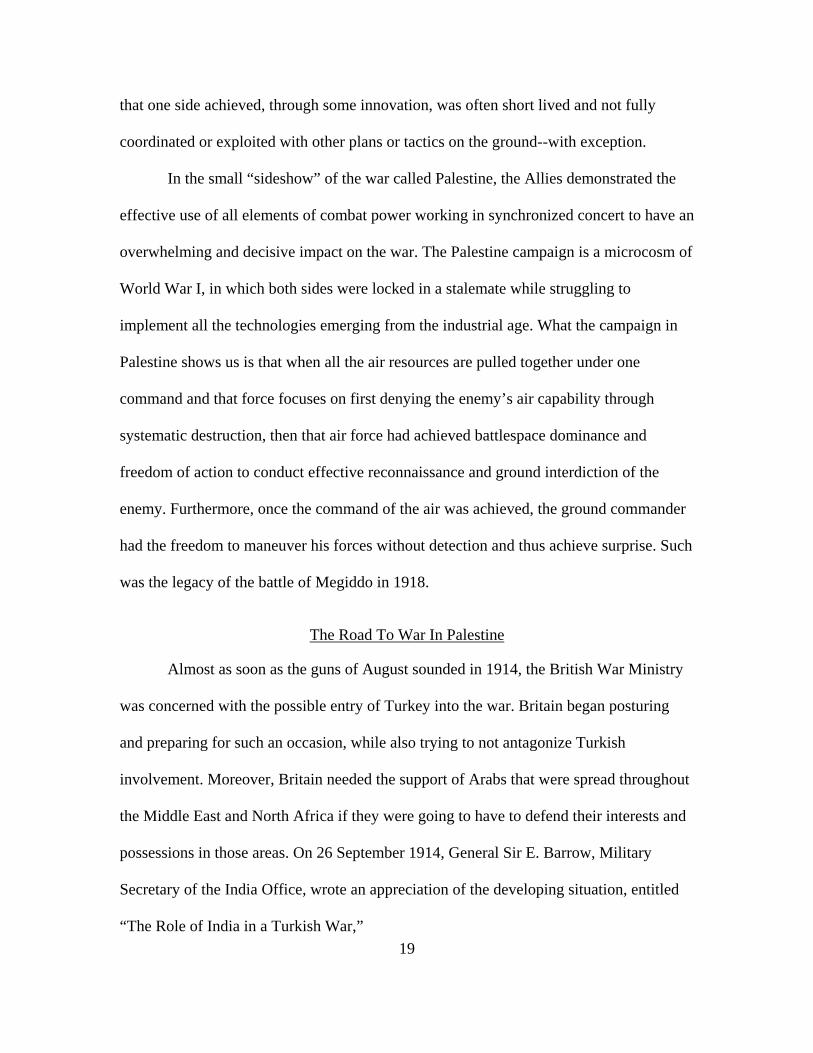
In the small “sideshow” of the war called Palestine, the Allies demonstrated the
effective use of all elements of combat power working in synchronized concert to have an
overwhelming and decisive impact on the war. The Palestine campaign is a microcosm of
World War I, in which both sides were locked in a stalemate while struggling to
implement all the technologies emerging from the industrial age. What the campaign in
Palestine shows us is that when all the air resources are pulled together under one
command and that force focuses on first denying the enemy’s air capability through
systematic destruction, then that air force had achieved battlespace dominance and
freedom of action to conduct effective reconnaissance and ground interdiction of the
enemy. Furthermore, once the command of the air was achieved, the ground commander
had the freedom to maneuver his forces without detection and thus achieve surprise. Such
was the legacy of the battle of Megiddo in 1918.
The Road To War In Palestine
Almost as soon as the guns of August sounded in 1914, the British War Ministry
was concerned with the possible entry of Turkey into the war. Britain began posturing
and preparing for such an occasion, while also trying to not antagonize Turkish
involvement. Moreover, Britain needed the support of Arabs that were spread throughout
the Middle East and North Africa if they were going to have to defend their interests and
possessions in those areas. On 26 September 1914, General Sir E. Barrow, Military
Secretary of the India Office, wrote an appreciation of the developing situation, entitled
“The Role of India in a Turkish War,”
20
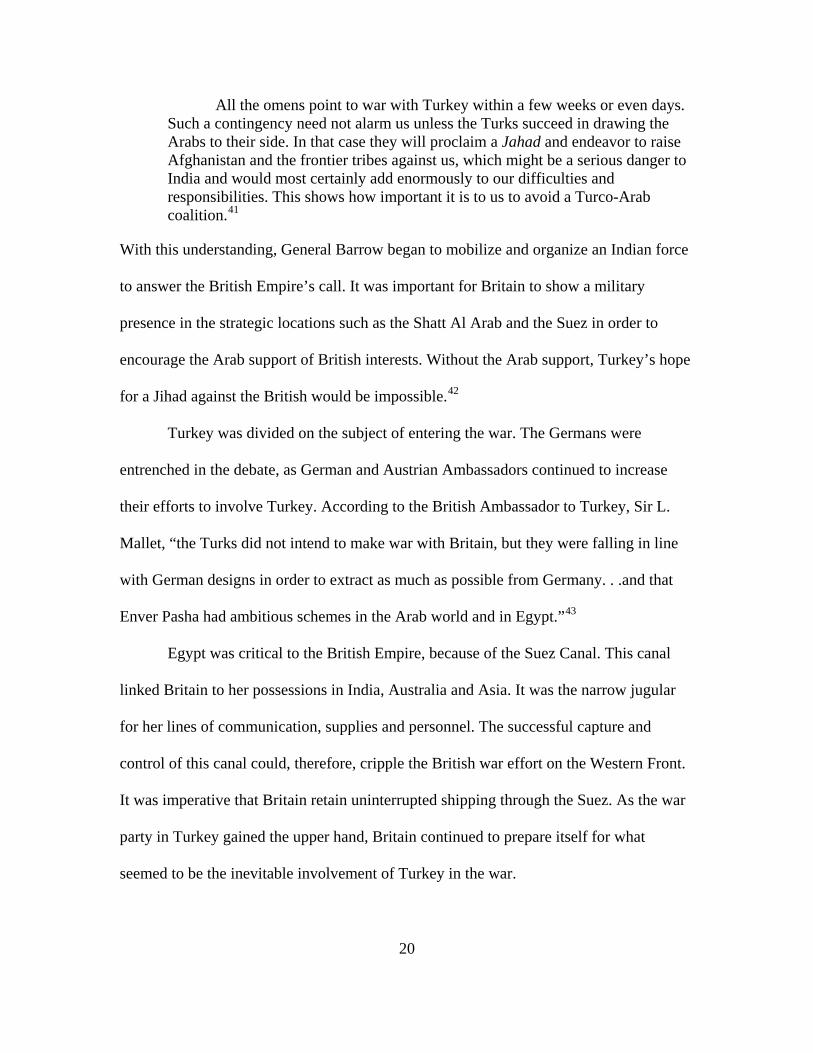
All the omens point to war with Turkey within a few weeks or even days. Such a contingency need not alarm us unless the Turks succeed in drawing the Arabs to their side. In that case they will proclaim a Jahad and endeavor to raise Afghanistan and the frontier tribes against us, which might be a serious danger to India and would most certainly add enormously to our difficulties and responsibilities. This shows how important it is to us to avoid a Turco-Arab coalition.41
With this understanding, General Barrow began to mobilize and organize an Indian force
to answer the British Empire’s call. It was important for Britain to show a military
presence in the strategic locations such as the Shatt Al Arab and the Suez in order to
encourage the Arab support of British interests. Without the Arab support, Turkey’s hope
for a Jihad against the British would be impossible.42
Turkey was divided on the subject of entering the war. The Germans were
entrenched in the debate, as German and Austrian Ambassadors continued to increase
their efforts to involve Turkey. According to the British Ambassador to Turkey, Sir L.
Mallet, “the Turks did not intend to make war with Britain, but they were falling in line
with German designs in order to extract as much as possible from Germany. . .and that
Enver Pasha had ambitious schemes in the Arab world and in Egypt.”43
Egypt was critical to the British Empire, because of the Suez Canal. This canal
linked Britain to her possessions in India, Australia and Asia. It was the narrow jugular
for her lines of communication, supplies and personnel. The successful capture and
control of this canal could, therefore, cripple the British war effort on the Western Front.
It was imperative that Britain retain uninterrupted shipping through the Suez. As the war
party in Turkey gained the upper hand, Britain continued to prepare itself for what
seemed to be the inevitable involvement of Turkey in the war.
21
Turkey’s fate was determined on 29 October, 1914 as the German naval ships
Goeben and Breslau along with some Turkish destroyers, entered the Black sea and
bombarded several Russian ports. Russia declared war on Turkey on 2 November, France
and Britain made their declarations on 5 November.44 Once their alliance with the
Ottoman Empire was secured in November of 1914, the Germans prodded the Turks to
attack the Suez Canal. Thus the competition for the Middle-East ensued, as the forces on
each side gradually developed and mobilized their relative strengths in the region.
This struggle in the Middle East, specifically in Egypt and Palestine resulted in
three distinct phases that were characterized and distinguished by leadership, tactics,
training, and operations.
1Cyril Falls, Military Operations Egypt and Palestine from June 1917 to the End
of the War, Vol. 1 (London: H. M. Stationary Office, 1930), 265.
2E. H. Cline, The Battles of Armageddon: Megiddo and the Jezreel Valley from the Bronze Age to the Nuclear Age (Ann Arbor: University of Michigan Press., 2000 ), 7.
3Israeli Foreign Ministry. “Megiddo - The Solomonic Chariot City.” Jewish Virtual Library (Available from: http://www.jewishvirtuallibrary.org/jsource/ Archaeology/Megiddo.html, accessed online 24 March 2007).
4J. H. Breasted, Ancient Times: A History of the Early World; an Introduction to the Study of Ancient History and the Career of Early Man, Outlines of European History 1. (Boston: Ginn and Company, 1914), 85.
5Cline, 22.
6John H. Morrow, The Great War in the Air (Washington: Smithsonian Institute Press, 1993), 8.
7Ibid., 3.
8Ibid., 4.
9Sir Walter Raleigh, The War in the Air: Being the Story of the Part Played in the Great War by the Royal Air Force, Vol. 1 (Oxford: Clarendon Press, 1922), 213.

22
10Lee B. Kennett, The First Air War, 1914-1918 (New York: The Free Press,
1991), 32.
11Ibid., 17.
12Ibid., 37.
13Ibid., 17.
14Ibid., 37.
15Ibid., 38.
16Ibid.
17Falls, 523.
18Kennett, 33.
19Ibid., 33.
20Ibid., 34.
21Chistopher Cole, ed., Royal Flying Corps Communiqués, 1915-1916 (London: Tom Donovan Publishing, Ltd., 1969), 21.
22Ibid., 205.
23Anne Baker, From Biplanes to Spitfires: The Life of Air Chief Marshal Sir Geoffrey Salmond (S. Yorkshire: Pen & Sword Books, 2003), 49.
24Ibid., 85.
25Kennett, 47.
26Ibid., 49.
27Ibid., 48.
28Ibid., 49.
29Ibid., 211.
30Ibid.
31Ibid.
32Ibid., 212.
23
33Ibid., 211.
34Ibid.
35Giulio Douhet, The Command of the Air, trans. Dino Ferrari (New York: Coward-McCann, 1942; reprint, 1983), 34.
36Harald Penrose, British Aviation: The Great War and Armistice, 1915-1919 (London: Putnam, 1969), 12.
37Malcom Cooper, The Birth of Independent Air Power: British Air Policy in the First World War (London: Allen & Unwin, Inc., 1986), 50.
38Kennett, 50.
39Douhet, 34.
40Falls, 462.
41F. J. Moberly, The Campaign in Mesopotamia, 1914-1918, Vol. 1 (London: HMSO, 1923), 86.
42Ibid., 87.
43Ibid., 96.
44Ibid., 98.

24
CHAPTER 2
PHASE I: AUGUST 1914 TO FEBRUARY 1916
This first phase of operations in Egypt and Palestine was, essentially, a defensive
economy-of-force effort on the part of the British. Although the Suez Canal in Egypt was
vitally important to the British, they could not afford to send their best leaders and
equipment away from the “big” fight in Europe. However, their decisions did make
sense. The British did place in command an officer who had a great deal of experience in
the region, and they did send a sufficient size force to defend the canal. The British also
sent aircraft to Egypt in order to provide early warning of an attack on the canal. It was
this small compliment of aircraft that gave the British the important edge they needed to
thwart the Turkish plans and efforts to seize the canal. By the end of this phase the British
learned a valuable lesson regarding the use of aeroplanes in defensive operations--aerial
reconnaissance was essential to an effective defense against a superior force.
Leadership
Commander-in-Chief Egypt, Lieutenant-General Sir John Maxwell
John Grenfell Maxwell received his commission on 22 March 1879 in the 42nd
Highlanders Regiment. He distinguished himself throughout his career and spent a good
amount of time in Egypt. He commanded the 2nd Egyptian Brigade in 1898, and the 14th
Brigade in South Africa. He was knighted in 1900 and appointed as Military Governor of
Pretoria (1900-01). Then he returned to Egypt in 1908 as the General Officer
Commanding (GOC) British Troops, and remained in that post until 1912. In the
prosecution of his duties, Maxwell also gained a reputation as an Egyptologist.1
25
When the “guns of August” sounded in 1914, Maxwell was 55 years old and not
in command. He expected a choice assignment, since his friend, Lord Herbert Kitchener,
was now Secretary of State for War; but it did not come. He traveled to France in the
beginning of the War as head of the British Military Mission to the French Army GHQ.
He remained on the Western Front until just after the First Battle of the Marne. In
September 1914, he returned to Egypt as Commander-in-Chief. Yet Maxwell never really
seemed satisfied at his position. He regarded it as “little better than Quartermaster
General of the Army . . . providing endless training and supplies to troops destined for
Gallipoli, Salonika and Palestine.”2
By 1915 Egypt was indeed growing into a key staging and logistics base for
operations in the peripheries. But Maxwell continued to feel as though he was not being
permitted to influence strategy. By spring of 1916, he requested to be relieved of
command and return home. His transfer took place in March 1916. His subsequent
assignment was as the Commander-In-Chief of Ireland--just in time for the Easter
Rebellion of 1916. He was notorious for his harsh treatment of Irish prisoners to include
the executions of rebel leaders and the imposition of martial law. He was promoted to
General in 1919, and retired from service in 1922. General John G. Maxwell died in
1929.
As the first commander of the British forces in Egypt, Maxwell was a good choice
due to his experience in the region. However, by 1914 Maxwell had spent almost too
much time there. Instead of facing his command in Egypt with enthusiasm and optimism,
Maxwell viewed it more like a sentence that he was serving. He had not spent time on the
Western Front, and although he had coordinated a very successful defense of the canal he

26
.D.
Massey
3.
e. He
nt
surveill
pilots
Britain bringing with them two Renault engines and miscellaneous
supplies.5
skulked as if he was being left out of the war. The commanders that followed Maxwell
took a more energetic and optimistic approach to the command, which represented a fresh
opportunity in a stagnant war.
Initial Flight Commander, Captain S. D. Massey
As the British began to make preparations in defense of the Suez, a flight of
aeroplanes was dispatched from Britain on 4 November 1914--the day before Britain
formally declared war on Turkey.3 The intent of these aeroplanes was to conduct
essential aerial reconnaissance of Turkish positions to provide early warning to the
British forces defending the canal. This small force was commanded by Captain S
.
Massey had been in command of the Indian Flying School at Sitapur since 191
He arrived at Alexandria, Egypt on 17 November with three Maurice Farman pusher
aeroplanes. In addition to these, two old but air-worthy Henri Farmans were acquired
from an Italian firm in Cairo. Massey was given a site for his aerodrome at Ismailia,
which was an ideal location in the center of the Canal Zone (see figure 2). Contractors
from Cairo soon began erecting sheds to house the aircraft. Massey wasted little tim
launched his first reconnaissance flight on 27 November and maintained freque
ance of the canal zone area and out East to a range of about 45 miles.4
In December the first mechanics and an engineer for the Ismailia flight arrived
from the Indian Flying School at Sitpur. They brought with them one B.E.2a and two
Maurice Faraman aeroplanes--all without engines. At about the same time, three
arrived from

27
Figure 3. Map of EEF Area of Operations
What Captain Massey did for the RFC in Egypt was to provide a good
springboard for the many operations to follow. Getting the airmen involved immediately
28
s
n until the RFC in Egypt was an integral and critical part of the British Forces
there.
ed in
outh
He graduated from staff college in 1912 and attached to the 8th
Hussar
nds
utical
into the effort of the canal’s defense was not only critical to the operation but was also
critical to the establishment of the organization. It gave the airmen a sense of purpose a
well as the reputation for willingness to work hard and conduct operations in even the
harshest conditions. The commanders that followed Massey continued to build upon this
reputatio
Lieutenant-Colonel W. G. H. Salmond
William Geoffrey Salmond graduated from Woolwich and was commission
the Royal Artillery at the age of 19. He was the son of Major General Sir William
Salmond--a heroic officer who was knighted in 1902 for his part in the South African
war. Geoffrey, as he was known to family and friends, spent his first assignment in S
Africa where he was first exposed to the use of observation balloons that worked in
conjunction with artillery. Geoffrey Salmond spent another year in South Africa and a
year in China during the Boxer rebellion. He was accepted to the Staff College in 1910
where he became obsessed with flying and began to read anything he could get his hands
on regarding the subject.
s in Amesbury.6
It was during his time at Amesbury that Geoffrey Salmond first took to the skies.
He volunteered himself on several occasions to serve as an observer on test flights from
Larkhill field. Then began flying lessons with the Sopwith Flying School at Brookla
in 1912. The school was started by Thomas Octavius Sopwith, who would go on to
develop the Sopwith Airplane Company and contribute greatly to the British aerona
industry. Salmond completed his basic flight training in 1913 at the Central Flying
29
k
f
ry Aeronautics.8 Geoffrey Salmond’s career in the RFC was off to a promising
start.
n command of No. 1 Squadron, whose origins date to
the ver
e was
porated in the battle of Loos in April 1915 and then was adopted all
along the front.11
School at Upavon and was awarded his Royal Flying Corps Flight Certificate on 6 March
1913.7 On 12 April, Captain Salmond received orders to report to the War Office to wor
on the Staff of General Sir David Henderson, who was the newly appointed Director o
Milita
On 9 August 1914, Geoffrey Salmond departed for France to establish the RFC
headquarters there. Upon his arrival, the British army was facing the onslaught of the
German offensive and was in retreat from Maubeuge on 16 August 1914. The retreat
continued from Maubeuge to Melun from 16 August to 4 September, with the RFC
headquarters moving nine times in ten days. He was promoted to Major on 12 November
1914. In January 1915, he was give
y start of British Aviation.
Shortly after taking command of the Squadron, the Battle of Neuve Chapell
launched. Salmond’s Squadron was given the task of strategic reconnaissance and
bombing of special military objectives.9 The battle of Neuve Chapelle was the first time
that aeroplanes were used in a specific bombing role. Shortly after this battle, Geoffrey
Salmond was working closely with the artillery to identify and neutralize the German
guns. It was during this time that Salmond noticed the problems and difficulties between
air and artillery.10 Being both an artillery officer and a pilot placed Salmond in the unique
position to understand both sides of the equation. He developed a plan for integrating air
and artillery which he produced in pamphlet form and briefed to the highest levels. The
plan was first incor
30
On 18 August 1915, Geoffrey Salmond was promoted to Temporary Lieutenant
Colonel and given the command of Fifth Wing. This wing was stationed at Gosport and
was preparing for departure to Egypt. The wing consisted of two squadrons, Numbers 14
and 17, which were equipped with B.E. 2c aeroplanes and support equipment. In
November 1915, Lieutenant Colonel Salmond and his “handful of aeroplanes” arrived in
Port Said and immediately began to assemble and prepare the aeroplanes for operations.
Salmond set up his headquarters in Heliopolis, which was located between Cairo and
Ismailia. He sent “A” flight from 14 Squadron to replace 30 Squadron which departed for
Mesopotamia in October.12 Fifth Wing was the only air support available to all forces in
the Middle East. Salmond assumed the duty of cooperation of air assets with ground
forces and conducted operations in a manner that was described as “close, cordial and
informed.”13
Equipment
British
The aircraft that the British initially sent in defense of the Suez Canal were some
of the oldest types that they possessed--Maurice and Henry Farman aeroplanes. These
machines were little better than box-kite aircraft, but had an endurance of over three
hours of continuous flight. This made a great difference in reconnaissance efforts.
Furthermore, the fact that the British had aircraft when the Turks did not, made the age
and obsolescence of these aircraft irrelevant.
The British also had support of a few Nieuport 4G aircraft which were in service
with the Royal Navy. These aircraft were equipped with float landing gear and provided
vital reconnaissance for Maxwell along the northern edges of the Sinai. Reconnaissance

31
missions by these aircraft began in December 1914, and continued through to March
1915. However, as the Gallipoli campaign began in February 1915, many of these aircraft
and their associated vessels departed the shores of the Sinai. There was a sharp decline in
the availability of reconnaissance aircraft during this time.
Finally, the British had the very capable B.E. 2 (Bleroit Experimental version 2).
The B.E. 2c was introduced in 1914 and featured built up cockpits, modified wing and
tail configurations (designed to provide a more stable reconnaissance platform), and a
Lewis machine gun for the observer. This aircraft would become the workhorse for the
Royal Air Corps in the EEF until the spring of 1916 when the German planes began to
arrive in theater. These British aeroplanes quickly proved to be no match for the German
planes. The edge that the British had enjoyed over their enemy for over a year was lost.
German
The Germans were relatively late to incorporate aircraft into the Palestinian
theater of operations. In fact, no aircraft were used in support of the Turkish attacks
against the Suez Canal in 1915. The first German aircraft began to arrive in Palestine in
the Spring of 1916. The allies first noticed the presence of German planes when
seaplanes from the aircraft carrier Ben-my-Chree made a reconnaissance mission on 7
March 1916, over Beersheba and photographed an aerodrome with six hangars that had
been erected near the town. This was in fact, the 300th Squadron, a German air unit from
Hamburg, Germany. They were equipped with fourteen Rumpler aircraft.14
By this time in the war both sides began to realize that the war on the peripheries
could have an important impact on the war in Europe. So this introduction of German
aircraft into the Palestinian theater is indicative of the shift in German Strategy. The types
32
of aircraft that the Germans provided were the very latest. And this fact would be used by
the British proponents to argue for comparable equipment to be sent to Egypt.
Training and Tactics
The Royal Flying Corps was established by Royal Warrant on 13 May 1912, and
the Central Flying School at Upavon began teaching military flying in August. Many of
the pilots that were accepted into those first few classes already had some civilian flight
training that they privately funded. Much of the early training took place in Farman style
aeroplanes and many of the first flyers came from the Royal Engineers.15
For the balance of 1914, most of the missions assigned to the RFC were for
reconnaissance of enemy positions. In Egypt, the first reconnaissance flight took place on
27 November 1914, and these flights provided extremely valuable operational
information. While there was some bombing of Turkish forces in that initial phase of the
war, these tactics were mostly used as harassment measures and did not have a decisive
impact. The bombing tactics were initially the rudimentary practice of tossing grenades
from the cockpit while flying over the target. This evolved by early 1915 to the practice
of strapping 20 pound bombs to the underside of the wings or fuselage of the
reconnaissance aircraft. But even the enemy admitted that these bombing attacks “at first
caused panic among the men. . .but they soon got used to it.”16
In 1915, several developments were emerging in the manner in which aeroplanes
were employed in combat. While on the European continent there were improvements in
artillery and air cooperation, thanks to the plan introduced by Major Salmond; in Egypt
the RFC was improving and refining its reconnaissance and ground-attack methods. The
operations in the Western Desert and in Darfur were providing the RFC valuable training
33
opportunities rich with targets while the action along the canal zone grew stagnant. The
British pilots were developing techniques of sketching enemy positions and relaying this
information to ground forces. In one instance, RFC pilots coordinated their
reconnaissance operations with the British sloop Clematis which fired on Senussi targets
10,000 yards away, causing the enemy to rout.17
As the allies evacuated the Gallipoli peninsula in January 1916, Egypt began to
take on renewed importance and interest. In February, Lieutenant Colonel Salmond
moved the Fifth Wing headquarters to Ismailia, where the new commander of British
Forces in Egypt, Lieutenant General Murray, had set up his headquarters. Soon after
setting up at Ismailia, Lieutenant Colonel Salmond began “a course of lectures for
military officers, two days a week, to explain the organization of the Royal Flying Corps
and its methods of cooperation with other arms.”18 These lectures grew in popularity and
helped to foster a spirit of cooperation and sympathy between the arms.
From their introduction into Egypt in November 1914 until April 1916, the RFC
was able to conduct operations fairly unmolested. By mid-April 1916, the first German
aeroplanes were seen over the Sinai and these aircraft, mostly Rumplers and Fokkers,
began to interdict the British aerial reconnaissance aircraft. Lieutenant Colonel Salmond
remarked in a letter to his wife: “German aeroplanes have appeared and are making
things much more lively.”19
Organization and Operations
The organization of the RFC in Egypt evolved as the force grew in both quality
and quantity of machines and pilots during this first phase of the war in the Palestinian
Theater. Once the first aircraft and crews disembarked in Alexandria, Egypt on 17
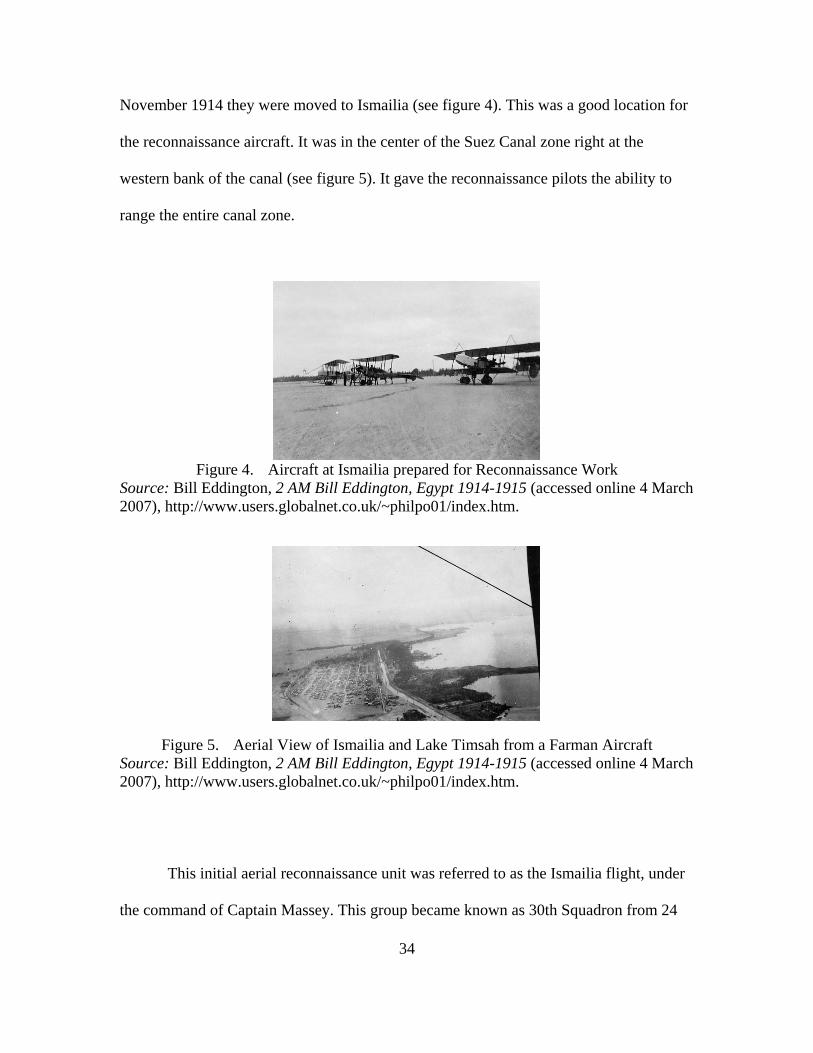
November 1914 they were moved to Ismailia (see figure 4). This was a good location for
the reconnaissance aircraft. It was in the center of the Suez Canal zone right at the
western bank of the canal (see figure 5). It gave the reconnaissance pilots the ability to
range the entire canal zone.
Figure 4. Aircraft at Ismailia prepared for Reconnaissance Work Source: Bill Eddington, 2 AM Bill Eddington, Egypt 1914-1915 (accessed online 4 March 2007), http://www.users.globalnet.co.uk/~philpo01/index.htm.
Figure 5. Aerial View of Ismailia and Lake Timsah from a Farman Aircraft Source: Bill Eddington, 2 AM Bill Eddington, Egypt 1914-1915 (accessed online 4 March 2007), http://www.users.globalnet.co.uk/~philpo01/index.htm.
This initial aerial reconnaissance unit was referred to as the Ismailia flight, under
the command of Captain Massey. This group became known as 30th Squadron from 24
34
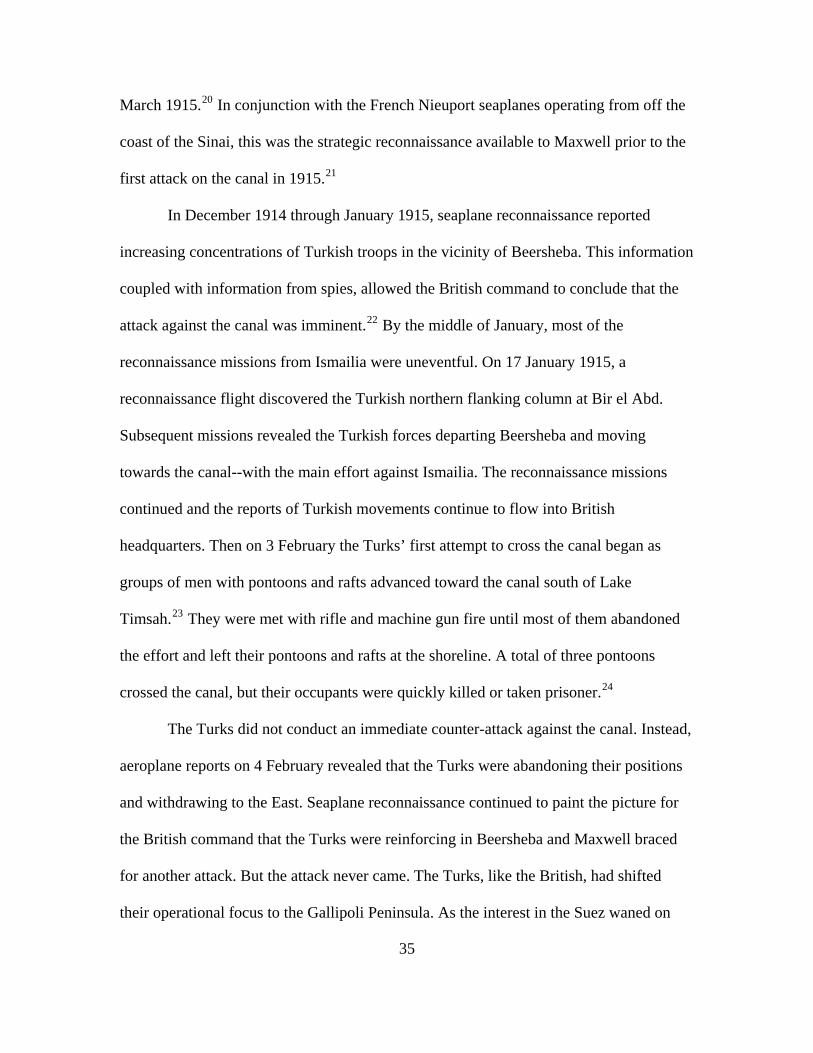
35
March 1915.20 In conjunction with the French Nieuport seaplanes operating from off the
coast of the Sinai, this was the strategic reconnaissance available to Maxwell prior to the
first attack on the canal in 1915.21
In December 1914 through January 1915, seaplane reconnaissance reported
increasing concentrations of Turkish troops in the vicinity of Beersheba. This information
coupled with information from spies, allowed the British command to conclude that the
attack against the canal was imminent.22 By the middle of January, most of the
reconnaissance missions from Ismailia were uneventful. On 17 January 1915, a
reconnaissance flight discovered the Turkish northern flanking column at Bir el Abd.
Subsequent missions revealed the Turkish forces departing Beersheba and moving
towards the canal--with the main effort against Ismailia. The reconnaissance missions
continued and the reports of Turkish movements continue to flow into British
headquarters. Then on 3 February the Turks’ first attempt to cross the canal began as
groups of men with pontoons and rafts advanced toward the canal south of Lake
Timsah.23 They were met with rifle and machine gun fire until most of them abandoned
the effort and left their pontoons and rafts at the shoreline. A total of three pontoons
crossed the canal, but their occupants were quickly killed or taken prisoner.24
The Turks did not conduct an immediate counter-attack against the canal. Instead,
aeroplane reports on 4 February revealed that the Turks were abandoning their positions
and withdrawing to the East. Seaplane reconnaissance continued to paint the picture for
the British command that the Turks were reinforcing in Beersheba and Maxwell braced
for another attack. But the attack never came. The Turks, like the British, had shifted
their operational focus to the Gallipoli Peninsula. As the interest in the Suez waned on

36
both sides, resources were diverted to assist in other flashpoints of the war. A large part
of the British troops from Egypt were sent to Gallipoli, while the RFC detachment
remained at Ismailia. This detachment departed for Mesopotamia in October to join two
flights that were already operating there as part of No. 30 Squadron.25
Egypt did not go without aircraft for very long. In November 1915, Fifth wing
was established in Egypt under the command of the very able Lieutenant-Colonel
W.G.H. Salmond, who took over responsibility of all airplane cooperation in theater. The
Fifth wing was made up of No. 14 and No. 17 Squadrons as well as “X” Aircraft Park.
The Wing headquarters was initially established at Heliopolis, while the “X” Aircraft
Park was placed in a former Swiss Iron Foundry at Abbassia--located between Heliopolis
and Cairo.26
By the time that the Fifth Wing had arrived in Egypt, Turkey and her allies had
developed threats towards the British position on the Suez from three different directions.
The first threat came from the Turkish forces mobilizing and consolidating at Beersheba
for an attack against the canal. The second threat was from the unrest that was brewing in
the Sudan, where the Sultan of Darfur was threatening to attack Kordofan. And the third
threat was from the growing tribe of Bedouin, called the Senussi, that was rising in the
desert West of Cairo. These Senussi had been infiltrated by Turkish and German agents
over the past year and were persuaded to initiate a Jihad against all of Turkey’s enemies--
which included the British outposts West of Cairo.27 The Fifth wing spent the rest of
1915 in support of British operations against the Senussi in the Western Egyptian desert
and against the forces of Darfur.
37
In December 1915, Maxwell decided to push his defenses out to the East of the
canal to protect the canal zone from artillery fire. This required tremendous preparations.
Once the British abandoned their operations on the Gallipoli Peninsula, their attention
turned once again to the defense of the Suez Canal. In January 1916, British troops were
sent directly from the Dardanelles to Egypt. At this time, Lieutenant-General Sir
Archibald Murray was appointed to the command of the Mediterranean Expeditionary
group responsible for the defense of the Suez Canal. Meanwhile, Lieutenant-General
Maxell remained in “general command in Egypt with responsibility for the defense of the
Western Frontier.”28 This was an awkward arrangement at best, and by 10 March 1916
Sir John Maxwell returned to Britain and Sir Archibald Murray assumed command of all
of Egypt.29
In February 1916, Lieutenant-Colonel Salmond collocated the Fifth Wing
Headquarters with Murray’s headquarters at Ismailia. Salmond initiated a series of
lectures at Ismailia to military officers in order to explain the organization, capabilities
and combined-arms effects of the Royal Flying Corps. The main duty of the RFC during
the first few months of 1916 was to conduct reconnaissance duties in cooperation with
the Topographical Section of the Intelligence Branch. This greatly improved the accuracy
of aerial reconnaissance reports.
In April 1916 the tables began to turn for the Palestinian theater as the first
German aeroplanes were seen over the Sinai. The German Rumpler and Fokker E-I
fighters quickly gained a technical superiority over the British and retained it until the
autumn of the next year. A new phase was emerging, one in which the British would have
38
to fight for the information that until now had been readily available. Furthermore, the
British would have to fight off the German observers.
Summary
The small force that the British sent to defend the Suez Canal towards the end of
1914, succeeded because it possessed the capability to conduct aerial reconnaissance.
Although they were outnumbered, the British were able to concentrate their forces
effectively due to the information they gained from aerial reconnaissance. The British
managed to maintain their dominance in the air throughout 1915 simply because there
was no air threat opposing them in the theater. The end of this phase, February 1916, was
a period of transition.
The British managed to stave off two attacks on the canal by early 1916, when the
First Lord of the Admiralty, Winston Churchill, argued that the British should attempt a
more indirect approach to the war. The Egyptian Expeditionary Force (EEF) was born.
The intent behind the British efforts in the middle-east was to defeat the Turkish forces;
remove the Ottoman Empire from the war; and threaten the German-Austrian territories
from the Balkans.30
New British leadership and German aircraft were being introduced into the
theater. This fact was indicative of the change, change in the dynamics of the theater as
well as in the strategy of the war effort. By early 1916, Germany was beginning to
produce better aircraft and in sufficient quantities to proliferate all theaters of the war.
The aircraft the Germans sent to Palestine were some of the best of their time. The
Palestine Brigade of the Royal Flying Corps was no longer alone in the air over the Sinai.
And the German pilots were quite unwelcomed company.
39
This first phase set the stage for the RFC in this theater. The RFC in Egypt was an
integral part of the British force. Under the direction of Salmond, the importance,
relevance and capabilities of the RFC continued to develop throughout the war in this
theater. Salmond provided not only the direction and energy for the RFC in Egypt, but he
was also the source of continuity throughout the three phases of operations in Palestine.
1John Bourne, Sir John Grenfell Maxwell (1859-1929) (Available from:
http://www. firstworldwar.bham.ac.uk/donkey/maxwell.htm, accessed 28 February 2007), 1.
2Michael Duffy, Who's Who: Sir John Maxwell (Available from: http://www. firstworldwar.com/bio/maxwell_john.htm, accessed 13 February 2007), 1.
3H.A. Jones, The War in the Air, Vol. 5 (Oxford: Clarendon Press, 1935), 160.
4Ibid.
5Ibid., 161.
6Baker, A., 12.
7Ibid., 23.
8Ibid., 24.
9Ibid., 62.
10Ibid., 67.
11Ibid., 68.
12Ibid., 79.
13Jones, The War in the Air, Vol. 5, 178.
14Ibid., 179.
15Baker, A., 20.
16Jones, The War in the Air, Vol. 5, 163.
17Ibid., 167.

40
18Ibid., 178.
19Baker, A., 86.
20Jones, The War in the Air, Vol. 5, 166.
21Ibid., 165.
22Ibid., 161.
23Ibid., 163.
24Ibid.
25Ibid., 166.
26Ibid., 165.
27Baker, A., 81.
28Jones, The War in the Air, Vol. 5, 177.
29Ibid., 178.
30Baker, A., 106.

41
CHAPTER 3
PHASE II: MARCH 1916 TO APRIL 1917
This phase of operations in Egypt and Palestine was a period of transition. The
Allied Forces in this theater transitioned from the defense to the offense, while the Turks
abandoned their attempts to seize the Suez Canal and transitioned to the defense of the
Gaza Beersheba line in lower Palestine. In the meantime, The Royal Flying Corps in
Egypt was now facing opposition in the air for the first time in the war. The RFC was
woefully outmatched in the quality of aircraft compared to the German Air Service in
Palestine, and did not receive aircraft to effectively oppose the Germans until the end of
this phase.
As a result, the RFC focused on the development of pilot training and innovations
to improve all facets of their support role. This transition served to strengthen the
structure of the RFC, improve the quality of its pilots, and provide broader and more
effective support to the EEF’s offensive operations. Although this phase was marked with
two failed attempts to seize Gaza, these failures served as the catalyst for change,
improvement and victory. Specifically, the German Air Service’s uncontested aerial
reconnaissance of Allied dispositions provided the Turkish defense of Gaza the same
edge that the Allies enjoyed during their defense of the Suez Canal. By the end of this
phase the RFC learned the dual nature of their role, to deny the enemy’s aerial
reconnaissance abilities while exploiting their own.

42
Leadership
Commander, Mediterranean Expeditionary Force, Lieutenant-General Sir Archibald Murray
One of the most significant changes during this phase of operations in Egypt and
Palestine was Lieutenant-General Murray’s assumption of command. His presence
brought with it a fresh perspective and an enthusiasm for offensive operations. He was
out to prove himself.
Archibald Murray was in command of a division when war broke out in August
1914. He relinquished this post when he was offered the position of Chief of Staff to
General Sir John French and the original British Expeditionary Force. Murray was an
“unhappy” choice however.1 The position was originally earmarked for Sir Henry
Wilson, but Wilson was deemed politically unacceptable after the “Curragh Mutiny,” an
incident that took place on 20 July 1914, in County Kildare, Ireland. Murray’s
appointment as French’s Chief of Staff was a recipe for failure.
Most of Murray’s subordinate staff officers had worked closely with Sir Henry
Wilson at the War Office’s Directorate of Military Operations. The commander and
chief, General French, was also a close personal friend of Wilson and openly admitted to
his “preference of Wilson’s company and advice.”2 Murray’s position was further
complicated by Wilson himself, who remained at the General Headquarters as MGGS,
and made every attempt to undermine Murray’s authority.
Despite the difficulty of his position, Murray is solely to blame for being unable
to overcome the situation through demonstration of ability, strength of will or force of
character. He was replaced in January 1915 by Sir William Robertson and was appointed
as Deputy and then Chief of the Imperial General Staff (CIGS). He was again replaced by

43
Sir William Robertson in December 1915, and in January 1916, Murray was offered
command of the British forces in Egypt, which he renamed as the Egyptian Expeditionary
Force, or EEF.3
Murray was enthusiastic about his new command. It was a post in which he was
able to exercise his ideas with a certain amount of autonomy and without being
undermined at every turn. Murray received guidance from General Robertson, as the
CIGS, who emphasized to him that France was Britain’s primary theater. He also
received guidance from Lord Kitchener, the Secretary of State for War, who told him that
he must “maintain as active a defense as possible” in order to prevent the Turks from
ranging the canal zone with artillery.4 As a result, Murray made the decision to extend his
defenses east of the canal by about 11,000 yards. He established a formidable defense of
the canal zone which comprised of two lines of defensive trench works as well as
fortified bridgeheads at the canal.
Almost as soon as he took command, Sir Archibald Murray stressed the
importance of an air photographic survey. He stressed the cooperation between the aerial
observers and the Topographical section of the Intelligence Branch. The two
organizations working together were able to develop pin-point reference systems in
which even the most featureless areas of the desert where identifiable. There was
extensive aerial photography taken of the canal zone during this period and the
photographs were transferred to 1:20,000 squared maps. This technique was a further
development of the system Lieutenant Colonel Salmond had devised in France.5
Once the canal zone defenses were complete, Murray made the decision to cross
the Sinai. Whether it was out of his desire to stir his men out of the complacency of static
44
defense or out of the desire to vindicate himself with an impressive victory over the
Turks, we will never know. However, crossing the Sinai with an army was a logistical
nightmare. Murray decided to initiate the construction of a rail and water-pipe system
across the Sinai to sustain his forces as they marched across. This effort was undertaken
mostly by the Egyptian Labour Corps (ELC) and its offspring the Camel Transport Corps
(CTC).6 This force of Egyptian laborers were employed in digging trenches, laying
railway lines and water pipes in order to spare the British soldiers of this back-breaking
mundane work--so that they could be prepared to fight. In the process the ELC and CTC
laid the foundation for the future success of the Egyptian Expeditionary Force with their
bare hands. Despite whatever criticism might be leveled against Sir Archibald Murray,
his defensive preparations and logistic infrastructure in Egypt were great achievements
upon which any future British successes would depend.
Commander, Middle East Brigade, RFC, Brigadier General Geoffrey Salmond
On 1 July 1916, Geoffrey Salmond was promoted to Brigadier General and given
command of the Middle East Brigade. The Brigade consolidated all detachments located
in Egypt, Mesopotamia, East Africa and, later, Salonika under one command. In addition
to this, Brigadier General Salmond received permission to form the Twentieth Reserve
Wing. This wing was to consist of three squadrons--the 21, 22, and 23 Squadrons, as well
as an aircraft park and depot.7 The squadrons, park and depot were due to arrive between
June and September and would be located at Abukir, Egypt. The purpose of this wing
was to train pilots for the Middle East Brigade and also to serve as a general training
establishment for the RFC.
45
Equipment
British Aeroplanes
For most of this phase of operations in Egypt and Palestine, the RFC was
operating the same equipment it had since the end of 1915. The majority of the aircraft in
the RFC were reconnaissance platforms until late in 1916, when the RFC received both
Martinsyde Bombers and DH2 fighters. (See Appendix B). Upon receipt of the DH2
fighters the RFC in Egypt designated its first single-seat fighter squadron, Number 24
Squadron. The significance of this disparity of aircraft quality on the part of the RFC
during this phase meant that they had to adapt. Adaptation takes cunning and ingenuity.
During this phase, the RFC improved upon what it had by increasing wireless
communication capabilities, artillery spotting techniques and piloting skills (mostly to
avoid the German fighters).
German Aeroplanes
During early 1916, the Germans introduced their newest fighter, the Fokker
Eindecker E-I. This monoplane was responsible for the period known as the “Fokker
Scourge” in which the German fighters dominated the skies over the Western Front. The
Fokkers had a similar effect over the skies of Palestine. This aircraft utilized a
synchronization gear which caused the forward firing machine gun to pause when the
propeller blade was directly in front of the barrel, thus it allowed the pilot fire forward. It
was one of the first dedicated fighters developed in the war and its introduction caught
the Allies unprepared to challenge, and caused them to feverishly work to develop a cure
for the “Fokker Scourge.”
46
The Germans had made some impressive aircraft developments in 1916, but none
that surpassed the edge they obtained with the production of the Fokker eindeckers. By
the Spring of 1917, the Albatross fighters were dominating the scene on the Western
Front. But these aircraft did not see service in the Palestine theater. From 1916 to 1917,
the German pilots flying in support of the Yilderim were flying mostly Rumpler C-I and
Fokker eindeckers.
Training and Tactics
The Training Brigade in Egypt
During the Spring and Summer of 1916 there was a great deal of activity in the
RFC. Due to the quickly developing technologies in the aviation industry as well as the
toll that the German Fokkers were having on the British aeroplanes, the RFC had to begin
to produce not only a better quality of pilot but also a quantity that would outpace the
casualty rate among pilots. Salmond realized how ideal the conditions were in Egypt for
flight training. Flight training depended so greatly on the weather, which in Britain was
mostly adverse towards training. Salmond noticed that in Egypt, there was hardly a time
that the aeroplanes were grounded due to adverse weather.
Geoffrey Salmond wrote to General Henderson, his former boss, suggesting that
Egypt’s good weather and climate would be an ideal training ground for pilots of the
RFC. His notion was supported by General Trenchard and soon after by the British
Government.8 It was an ambitious undertaking; but Geoffrey Salmond was an ambitious
man.
In response to the ideas suggested by Lieutenant Colonel Salmond in the early
Spring of 1916, the War Office decided to organize a training establishment for pilots in
47
Egypt. The intent for this training organization was to have one hundred pilots under
instruction at a time. In order to accomplish this, three reserve squadrons would be
needed. The personnel were dispatched to Egypt in July 1916, and the three squadrons
were formed: No. 21 was organized at Abassia on 12 July, while Nos. 22 and 23 were
established at Abu Qir on 24 August. These three reserve squadrons were grouped
together to form the Twentieth Reserve Wing on 15 September under the command of
Lieutenant Colonel A.G. Board.9 The students entered No 21 Squadron for elementary
flight training, passed into No. 22 Squadron for intermediate training, and into No. 23
Squadron for advanced tactical training and graduation. Some of these students returned
to Britain after 15 hours of solo time, while the rest filled flying positions within the
Middle East Brigade.10
Another type of innovation was being carried out in the Training Brigade--
training for noncommissioned officers and mechanics. The No. 3 School of Military
Aeronautics, officially formed in November 1916, but actually began as early as August
in a back room of the officer’s mess. Lectures and practical exercises were carried out on
subjects ranging from engines to rigging. The first examination was given in September
1916. In December 1916, a fourth Squadron was added to the Twentieth Reserve Wing---
57 Squadron, formed at Ismailia from personnel trained by the Fifth Wing. The official
history of the air war comments that “as a result of the efficient training organization in
Egypt, the Middle East Brigade came to be not only self-dependent, but it also was able
to supply trained pilots for other theaters of war.”11
Due to the expansion of the brigade as a whole, even the small functions that had
developed over the past year were amplified. “A small training class grew into a school
48
of aerial gunnery; from another class there developed a school of military aeronautics;
and separate schools came to be established for instruction in artillery co-operation and in
bombing.”12 All this instruction in addition to the cadet wing (Twentieth Reserve Wing)
provided a rich exchange of ideas within the brigade. Furthermore, the growth of these
organizations required temporary as well as semi-permanent facilities. The Middle East
Brigade had its own engineer for these projects and he managed a large force of native
laborers. This group constructed aerodromes, hangars, depots, and repair centers.
Organization and Operations
Australian Flying Corps arrives in Egypt
At the end of 1915, the Army council had suggested that the Dominions should
raise squadrons for the Royal Flying Corps. Australia accepted the challenge and formed
the No 1. Australian Flying Corps. This force consisted of 28 officers, 195 other ranks
but no aeroplanes or technical equipment. They departed Melbourne on 16 March 1916,
and arrived at the Suez on 14 April.13 It took approximately six weeks to outfit the No. 1
AFC Squadron with aeroplanes and equipment. They received mostly B.E.2a and B.E.2c
aircraft.14 By 1916, these variants were already outdated and underpowered. To the credit
of Australian Flying Corps, they were able to make do with the machines and even
innovate with them.
A young Lieutenant named L.J. Wackett was particularly inventive. He devised
an arrangement for a Lewis gun to mount on the top wing of his B.E.2c. This gave two
German Rumplers quite a surprise when, while being pursued by them, he turned on them
and fired--the Rumplers disengaged. He also created a system in which he could sling
and drop canisters from underneath his aircraft. Later in the war, this device allowed 1st

49
Squadron the ability to deliver over 100,000 rounds of ammunition to Monash’s
advancing machine gunners.15
By the end of 1916, the AFC No. 1 Squadron received Bristol Scouts as fighter
escorts. Two AFC pilots, Lieutenants W.J. Weir and Carrick S. Paul, painted their plane
bright yellow. As such, they earned a reputation among their own squadron as well as
among the Turks. Their success led the Turks to order: “All ranks are to take immediate
cover on approach of the yellow English airplane.” Lieutenant Weir would become one
of the few aces in the Palestine theater of operations.16
Development of the Middle East Brigade
As mentioned previously, the Middle East Brigade was formed on 1 July 1916,
under the command of the newly promoted Brigadier General W. G. H. Salmond. With
its headquarters at Ismailia (see figure 6), the brigade consisted of No. 14 and 17
Squadrons of the RFC and No.1 Squadron of the AFC, as well as the Twentieth Reserve
Wing (consisting of Nos. 21, 22, and 23 Squadrons), the “X” Aircraft Park, and “X”
Aircraft Depot, all in Egypt; In addition to these, the Brigade had the No. 30 Squadron
and Aircraft park in Mesopotamia and the No. 26 Squadron and Aircraft Park in East
Africa. This Brigade was responsible for the administration, organization and
maintenance of all RFC detachments in the Middle East.17

Figure 6. Map of the Eastern Desert from Cairo to Gaza Source: H. A. Jones, The War in the Air, Vol. 5 (Oxford: Clarendon Press, 1935), 161.
The formation of this brigade created an increased personnel requirement to
satisfy the demands of its rapidly expanding role and responsibility. Most of these
personnel were obtained by “combing through the armies in the four theaters of war.”18
As a result, many of the officers and men of the Middle East Brigade had served in all
theaters of the Middle East, either on the ground or in the air. Therefore, many of the
squadrons were representative of the whole brigade. This coupled with the organization
50
51
and expansion of training establishments in Egypt, gave the Brigade a reputation for
capability and innovation.
The Middle East Brigade Headquarters was called upon at times to develop
solutions for unprecedented problems as the War Office struggled to develop new tactics
to suit the rapidly changing conditions of the war. In this way, the Brigade Headquarters
“constituted a clearing house for ideas.”19 The Middle East Brigade Staff studied
operations in all theaters of the war and communicated ideas between the theaters
regarding the successes or failures of tactics and techniques.20
Defense of Suez in August 1916: the Battle of Romani
From the end of June to the middle of July 1916, air reconnaissance reported a
considerable growth in activity at the Turkish camp of Bir el Mazar, located
approximately forty-two miles from Romani (see figure 6). These reports coupled with
reports from agents that warned of a Turkish advance on Qatiya--a British outpost. But
the British command grew doubtful whether the attack was imminent and was inclined to
believe that the campaigning season was over, and that the Turks would probably wait
until winter. On 19 July, air reconnaissance confirmed the presence of approximately
8,000 Turkish troops with camel transport moving west from Bir el Mazar. The offensive
was on.21
The British General Staff adopted a strategy of allowing the Turks to proceed
with their attack against British prepared positions in order to facilitate a British
envelopment and counter-attack. Therefore, the Royal Flying Corps did not harass the
advancing Turks, but continued to provide reports of their positions. Brigadier-General
Salmond issued orders on 1 August 1916, detailing the cooperation plan for the RFC and
52
ved.23
AFC squadrons from Qantara to directly coordinate with the British 52nd Division and
the Anzac Mounted Division located at Romani.22 The Turks initiated their bold attack
on the night of 3 August and the battle raged until the next evening. During the fight,
pilots from the Middle East Brigade flew daring missions to interdict, report and direct
artillery fires. In one instance, an aerial observer directed artillery for over an hour on the
Turkish camp at Hod um Ugba, in which four direct hits were achie
The British advance began on the morning of 5 August as the Turks pounded a
retreat. The Turks did attempt to make a stand at Oghratina (half-way between Romani
and Bir el Mazar) (see Figure 5) on 6 August, but this melted away after two days. By 13
August, the British occupied Salmana and the Turks retreated to El Arish. The Turks lost
approximately 4,000 troops as prisoners, while the British suffered 1,130 casualties (202
of which were killed). The RFC had flown all available aeroplanes in support of the
battle, which consisted of approximately seventeen aircraft, with the pilots flying an
average of three missions per day while the fighting persisted.24
Advance into Palestine
Cavalry Raid on Bir El Mazar
After the attack on the Suez canal was thwarted in August 1916, the Turks
withdrew but left an outpost force at Bir el Mazar. Despite their Turks’ loss, however, the
German pilots did not relent their air attacks and continued to be aggressive. They
attacked Port Said on 1 September and inflicted 46 casualties, also dropping bombs on
the carrier Raven II--which caused considerable damage to the ship and prevented its
expedition to the Red Sea.25
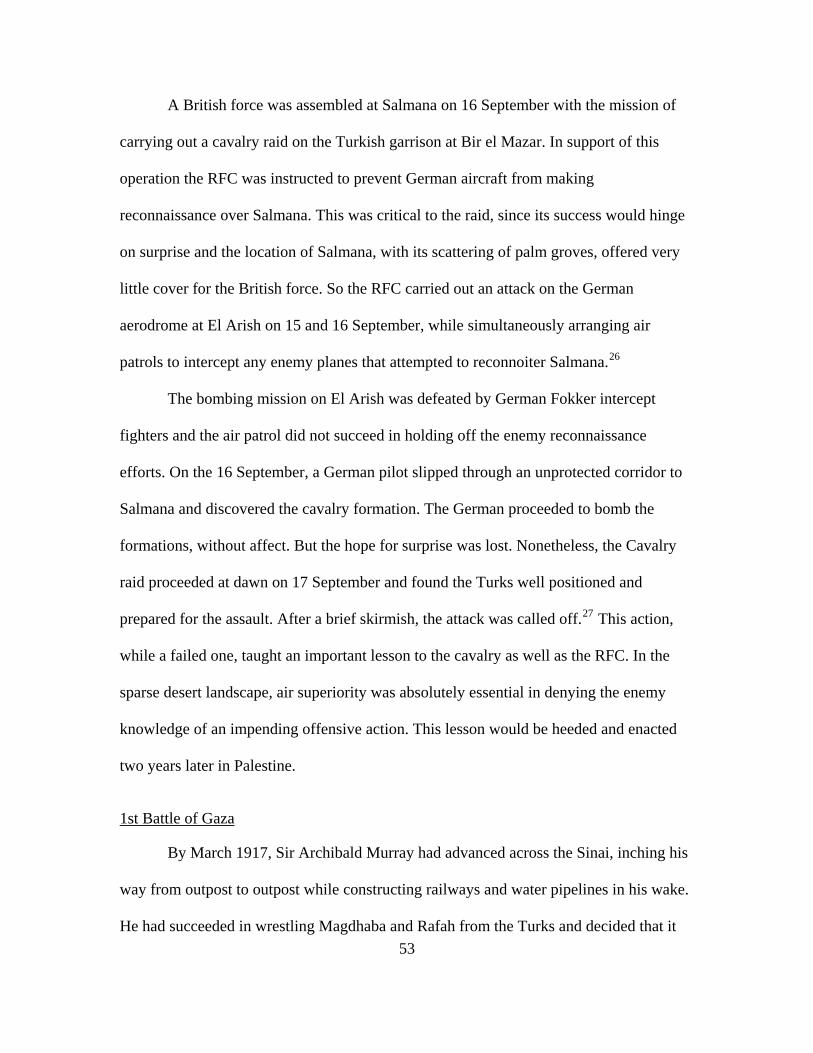
53
A British force was assembled at Salmana on 16 September with the mission of
carrying out a cavalry raid on the Turkish garrison at Bir el Mazar. In support of this
operation the RFC was instructed to prevent German aircraft from making
reconnaissance over Salmana. This was critical to the raid, since its success would hinge
on surprise and the location of Salmana, with its scattering of palm groves, offered very
little cover for the British force. So the RFC carried out an attack on the German
aerodrome at El Arish on 15 and 16 September, while simultaneously arranging air
patrols to intercept any enemy planes that attempted to reconnoiter Salmana.26
The bombing mission on El Arish was defeated by German Fokker intercept
fighters and the air patrol did not succeed in holding off the enemy reconnaissance
efforts. On the 16 September, a German pilot slipped through an unprotected corridor to
Salmana and discovered the cavalry formation. The German proceeded to bomb the
formations, without affect. But the hope for surprise was lost. Nonetheless, the Cavalry
raid proceeded at dawn on 17 September and found the Turks well positioned and
prepared for the assault. After a brief skirmish, the attack was called off.27 This action,
while a failed one, taught an important lesson to the cavalry as well as the RFC. In the
sparse desert landscape, air superiority was absolutely essential in denying the enemy
knowledge of an impending offensive action. This lesson would be heeded and enacted
two years later in Palestine.
1st Battle of Gaza
By March 1917, Sir Archibald Murray had advanced across the Sinai, inching his
way from outpost to outpost while constructing railways and water pipelines in his wake.
He had succeeded in wrestling Magdhaba and Rafah from the Turks and decided that it
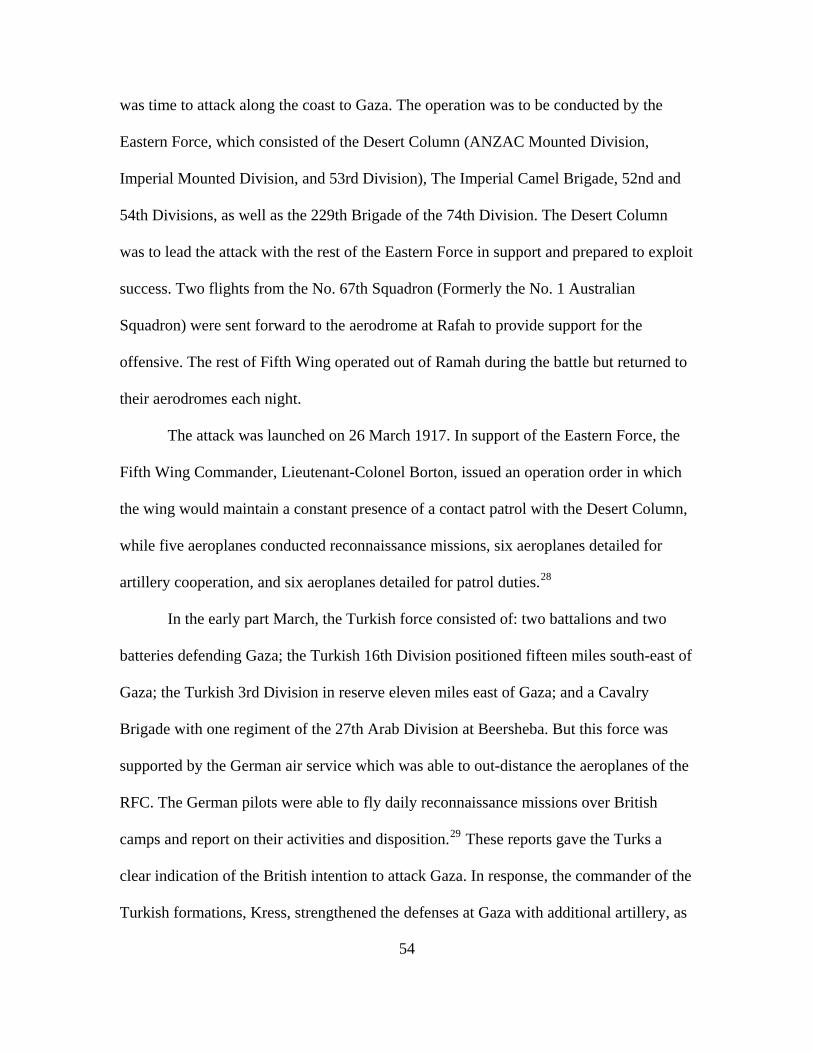
54
was time to attack along the coast to Gaza. The operation was to be conducted by the
Eastern Force, which consisted of the Desert Column (ANZAC Mounted Division,
Imperial Mounted Division, and 53rd Division), The Imperial Camel Brigade, 52nd and
54th Divisions, as well as the 229th Brigade of the 74th Division. The Desert Column
was to lead the attack with the rest of the Eastern Force in support and prepared to exploit
success. Two flights from the No. 67th Squadron (Formerly the No. 1 Australian
Squadron) were sent forward to the aerodrome at Rafah to provide support for the
offensive. The rest of Fifth Wing operated out of Ramah during the battle but returned to
their aerodromes each night.
The attack was launched on 26 March 1917. In support of the Eastern Force, the
Fifth Wing Commander, Lieutenant-Colonel Borton, issued an operation order in which
the wing would maintain a constant presence of a contact patrol with the Desert Column,
while five aeroplanes conducted reconnaissance missions, six aeroplanes detailed for
artillery cooperation, and six aeroplanes detailed for patrol duties.28
In the early part March, the Turkish force consisted of: two battalions and two
batteries defending Gaza; the Turkish 16th Division positioned fifteen miles south-east of
Gaza; the Turkish 3rd Division in reserve eleven miles east of Gaza; and a Cavalry
Brigade with one regiment of the 27th Arab Division at Beersheba. But this force was
supported by the German air service which was able to out-distance the aeroplanes of the
RFC. The German pilots were able to fly daily reconnaissance missions over British
camps and report on their activities and disposition.29 These reports gave the Turks a
clear indication of the British intention to attack Gaza. In response, the commander of the
Turkish formations, Kress, strengthened the defenses at Gaza with additional artillery, as
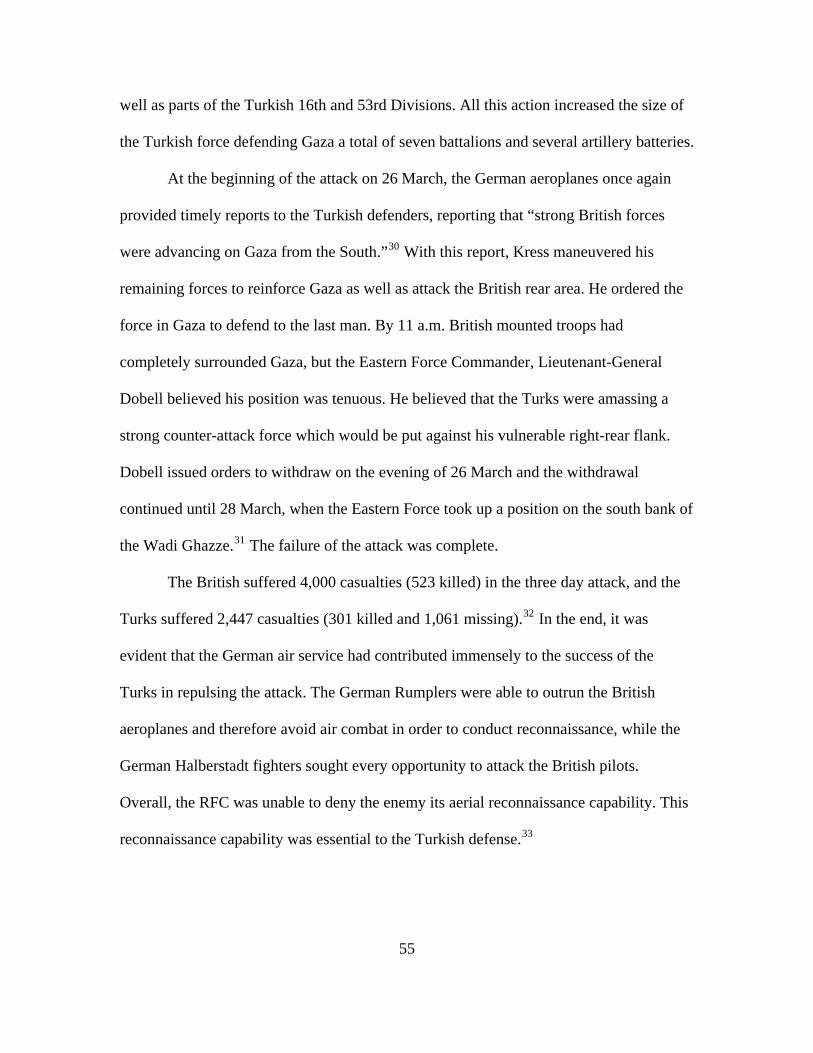
55
well as parts of the Turkish 16th and 53rd Divisions. All this action increased the size of
the Turkish force defending Gaza a total of seven battalions and several artillery batteries.
At the beginning of the attack on 26 March, the German aeroplanes once again
provided timely reports to the Turkish defenders, reporting that “strong British forces
were advancing on Gaza from the South.”30 With this report, Kress maneuvered his
remaining forces to reinforce Gaza as well as attack the British rear area. He ordered the
force in Gaza to defend to the last man. By 11 a.m. British mounted troops had
completely surrounded Gaza, but the Eastern Force Commander, Lieutenant-General
Dobell believed his position was tenuous. He believed that the Turks were amassing a
strong counter-attack force which would be put against his vulnerable right-rear flank.
Dobell issued orders to withdraw on the evening of 26 March and the withdrawal
continued until 28 March, when the Eastern Force took up a position on the south bank of
the Wadi Ghazze.31 The failure of the attack was complete.
The British suffered 4,000 casualties (523 killed) in the three day attack, and the
Turks suffered 2,447 casualties (301 killed and 1,061 missing).32 In the end, it was
evident that the German air service had contributed immensely to the success of the
Turks in repulsing the attack. The German Rumplers were able to outrun the British
aeroplanes and therefore avoid air combat in order to conduct reconnaissance, while the
German Halberstadt fighters sought every opportunity to attack the British pilots.
Overall, the RFC was unable to deny the enemy its aerial reconnaissance capability. This
reconnaissance capability was essential to the Turkish defense.33
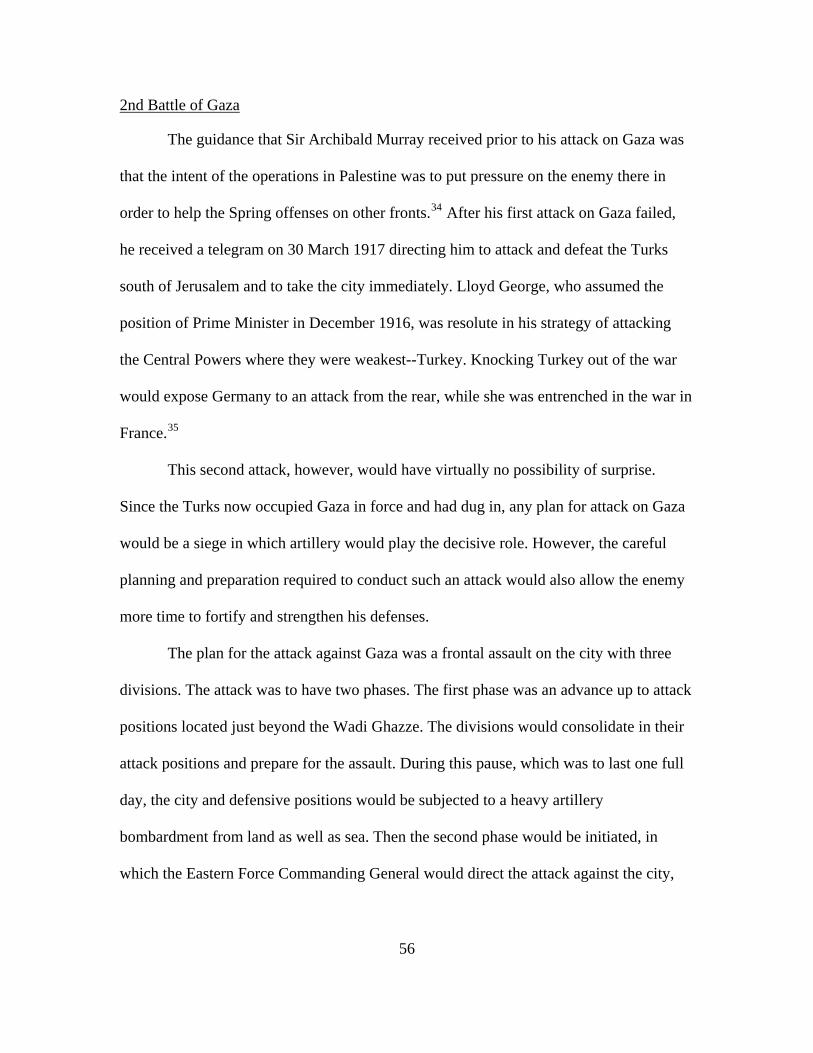
56
2nd Battle of Gaza
The guidance that Sir Archibald Murray received prior to his attack on Gaza was
that the intent of the operations in Palestine was to put pressure on the enemy there in
order to help the Spring offenses on other fronts.34 After his first attack on Gaza failed,
he received a telegram on 30 March 1917 directing him to attack and defeat the Turks
south of Jerusalem and to take the city immediately. Lloyd George, who assumed the
position of Prime Minister in December 1916, was resolute in his strategy of attacking
the Central Powers where they were weakest--Turkey. Knocking Turkey out of the
would expose Germany to an attack from the rear, while she was entrenched in the w
France.
war
ar in
35
This second attack, however, would have virtually no possibility of surprise.
Since the Turks now occupied Gaza in force and had dug in, any plan for attack on Gaza
would be a siege in which artillery would play the decisive role. However, the careful
planning and preparation required to conduct such an attack would also allow the enemy
more time to fortify and strengthen his defenses.
The plan for the attack against Gaza was a frontal assault on the city with three
divisions. The attack was to have two phases. The first phase was an advance up to attack
positions located just beyond the Wadi Ghazze. The divisions would consolidate in their
attack positions and prepare for the assault. During this pause, which was to last one full
day, the city and defensive positions would be subjected to a heavy artillery
bombardment from land as well as sea. Then the second phase would be initiated, in
which the Eastern Force Commanding General would direct the attack against the city,
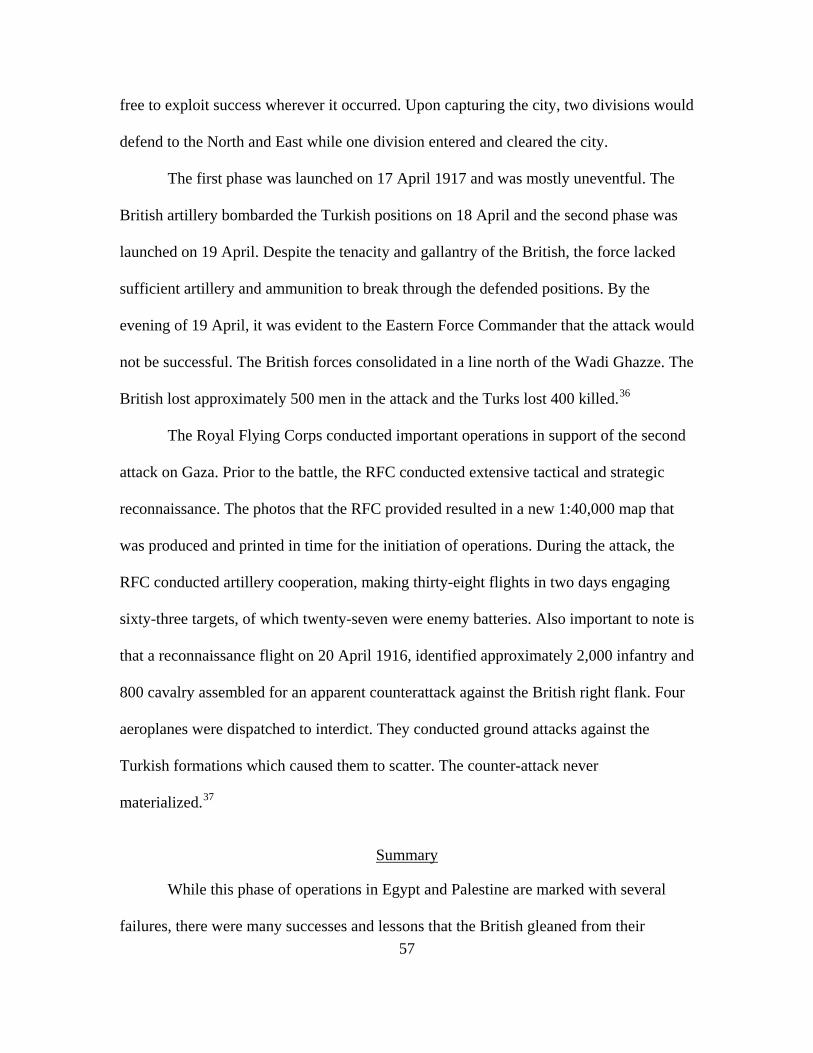
57
free to exploit success wherever it occurred. Upon capturing the city, two divisions would
defend to the North and East while one division entered and cleared the city.
The first phase was launched on 17 April 1917 and was mostly uneventful. The
British artillery bombarded the Turkish positions on 18 April and the second phase was
launched on 19 April. Despite the tenacity and gallantry of the British, the force lacked
sufficient artillery and ammunition to break through the defended positions. By the
evening of 19 April, it was evident to the Eastern Force Commander that the attack would
not be successful. The British forces consolidated in a line north of the Wadi Ghazze. The
British lost approximately 500 men in the attack and the Turks lost 400 killed.36
The Royal Flying Corps conducted important operations in support of the second
attack on Gaza. Prior to the battle, the RFC conducted extensive tactical and strategic
reconnaissance. The photos that the RFC provided resulted in a new 1:40,000 map that
was produced and printed in time for the initiation of operations. During the attack, the
RFC conducted artillery cooperation, making thirty-eight flights in two days engaging
sixty-three targets, of which twenty-seven were enemy batteries. Also important to note is
that a reconnaissance flight on 20 April 1916, identified approximately 2,000 infantry and
800 cavalry assembled for an apparent counterattack against the British right flank. Four
aeroplanes were dispatched to interdict. They conducted ground attacks against the
Turkish formations which caused them to scatter. The counter-attack never
materialized.37
Summary
While this phase of operations in Egypt and Palestine are marked with several
failures, there were many successes and lessons that the British gleaned from their

58
experiences. First, Murray succeeded in thwarting the Turkish attacks against the Suez
Canal so successfully that the Turks abandoned their effort against it. Furthermore, his
series of counter-attacks drove the Turks across the Sinai towards Gaza. In his wake,
Murray successfully established critical logistic nodes and a fresh water pipeline across
the Northern coast of the Sinai. These actions set the conditions for success in the next
phase, upon which Allenby capitalized.
As far as the RFC Palestine Brigade is concerned, this phase, although marred in
failures, was their springboard to success. As a result of the German Air Service’s
successful aerial reconnaissance efforts, the Turks were able to mount effective defenses
at Bir El Mazar and Gaza. In the sparse desert terrain it is difficult to mask movements of
large forces to achieve surprise. It is especially difficult to conceal these movements from
aerial observation. The Palestine Brigade learned that their foremost mission in support
of the ground forces was to deny the enemy aerial reconnaissance. To accomplish this
task it was absolutely essential that the RFC possess the right equipment, specifically
fighters, that were superior or at least comparable to those of the German Air Service.
The failures of the EEF at Gaza caught the attention of the British War Ministry. The
RFC would get everything they requested and more.
Although the RFC Palestine Brigade was outclassed by the German aircraft, there
was an important edge that the brigade was honing. By the end of this phase, the
Palestine Brigade was churning out a good volume of trained pilots and mechanics,
approximately 100 pilots per month average.38 As a result, the RFC was generating a
pilot to plane ratio that was far exceeding that of the German Air Service. The quality of
the British pilots was also improving as a result of professional dialogue and training
59
methods within the RFC. In contrast, the German Air Service in Palestine was having
difficulty maintaining a steady flow of trained pilots. Furthermore, disease and poor
medical conditions was slowly eroding the pool of pilots that were available to the
Germans. Machines themselves are nothing without capable operators.
Finally, although the Germans had a technological edge over the British in Egypt,
they failed to fully capitalize on it. They neither sought to destroy the British aerodromes
in Egypt, nor did they fully integrate their efforts with the Turkish ground forces. Instead,
they acted independently, providing good reconnaissance of the British lines and
harassing the British reconnaissance efforts. But they did not act decisively to destroy the
RFC in Palestine.
1J.M. Bourne, Who's Who in World War One (London: Routledge, 2001).
2Ibid.
3David R. Woodward, Hell in the Holy Land: World War I in the Middle East (Lexington: University Press of Kentucky, 2006), 20.
4Ibid., 20.
5Baker, A., 85.
6Woodward, 36.
7Jones, War in the Air, vol.5, 449.
8Baker, A., 88.
9Jones, War in the Air, vol.5, 449.
10Ibid., 450.
11Ibid., 188.
12Ibid..
60
13F. M. Cutlack, The Official History of Australia in the War of 1914-1918, vol. 7,
The Australian Flying Corps, ed. Robert O’Neill (St. Lucia, Queensland: University of Queensland Press, 1923), 33.
14Ibid., 31-33.
15Cameron Riley, The Australian Flying Corps 1914-1919 (Available from: www.australianflyingcorps.org/2002_1999/afc_about.htm, accessed 18 March 2007).
16Ibid.
17Jones, War in the Air, vol.5, 189.
18Ibid., 188.
19Ibid.
20Ibid., 189.
21Ibid., 192.
22Ibid., 193.
23Ibid., 194.
24Ibid.
25Ibid., 196.
26Ibid.
27Ibid., 197.
28Ibid., 209.
29Ibid., 210.
30Ibid.
31Ibid., 213.
32Ibid., 214.
33Ibid.
34Ibid., 215.
35Baker, A., 106.

61
36Jones, War in the Air, vol.5, 217.
37Ibid.
38Ibid., 451.
62
CHAPTER 4
PHASE III: APRIL 1917 TO NOVEMBER 1918
This phase of operations in Palestine was a period of culmination. By the time
Allenby arrived in theater, the EEF as well as the RFC Palestine Brigade were already
sewing the seeds for future success. The EEF was establishing vital logistic nodes across
the Northern Sinai and assisting the Arab Northern Army in their operations East of the
Jordan River. The RFC was providing very well trained pilots and was continuing to
hone the innovations that it had made in the way of artillery spotting techniques and air-
to-ground communications.
While this phase began with the German Air Service dominating the skies in
virtually all theaters of the war, it ended in their ultimate defeat in the air as well as on the
ground. As an organization, the RFC Palestine Brigade learned valuable lessons from the
first two phases of operations in Egypt and Palestine. Specifically, they learned the
importance of aerial reconnaissance in defensive operations. If there was to be any hope
for success on the ground, the RFC needed to ensure two things: that the enemy was
denied the ability to conduct aerial reconnaissance, and that the RFC maintained routine,
rapid and accurate reporting of enemy positions and friendly progress.
The quality of leadership, training, equipment and planning culminated in this
phase of operations in Palestine. The RFC as well as the EEF capitalized on the
evolutionary development and maturation of infrastructure and personnel in this phase,
while Allenby provided the impetus, direction and energy for success.
63
Leadership
Commander, Egyptian Expeditionary Force General Sir Edmund H. H. Allenby
Edmund Henry Hynman Allenby was born in Brackenhurst, Nottinghamshire,
Britain in 1861. He was educated at Haileybury College and graduated from the Royal
Military College, Sandhurst in 1881. He was commissioned in the 6th Inniskilling
Dragoons and served in South Africa from 1884-1885. He attended Staff College in
Camberley in 1894 along with Captain Douglas Haig of the 7th Hussars; it was there that
the two officers initiated a personal rivalry that lasted through to the First World War.
Allenby graduated Staff college in 1897 and returned to South Africa at the
outbreak of the Boer War in 1899. While there, Allenby served as second in command of
the Inniskillings and was given command of a cavalry squadron in which capacity he
excelled. In April 1900, he was given temporary command of the Inniskillings when the
commander was wounded and returned to Britain. Allenby served in the Boer War with
distinction until the war’s end in 1902, capturing the attention of both Lords Roberts and
Kitchener.
When the war broke out in 1914, Allenby was made commander of a Cavalry
Division in the British Expeditionary Force. After his skillful covering force actions
following the BEF’s retreat from the Battle of Mons, Allenby was promoted to GOC
Cavalry Corps, V Corps. In April and May 1917, Allenby commanded Third Army at the
Battle of Arras. In terms of casualties suffered per day, Arras was the costliest British
battle of the war. The battle began well, but his advance soon halted and met stiffening
German resistance. As the casualties began to mount, several of Allenby’s subordinate
64
commanders voiced their protests to Field Marshall Haig. Allenby was relieved of
command on 9 June 1917 and replaced by Julian Byng. While Allenby regarded the relief
to be the result of his failure at Arras as well as his tactical arguments with Haig, he
didn’t realize that there were other forces at work.
After the failure of the second attack on Gaza, Lloyd George pressed the War
Department for a successor to Sir Archibald Murray. General Robertson suggested Sir
Edmund Allenby, Lord Kitchener and Sir John French gave their support for the
recommendation. When Allenby arrived in London and conferred with Lloyd George he
was inspired by the Prime Minister’s enthusiasm. The Prime Minister explained to
Allenby that he would have freedom of action to conduct his campaigns as he saw fit and
that he was to ask for all the reinforcements and supplies that he might need. But there
was a price. Lloyd George demanded of Allenby that he “take Jerusalem by Christmas.”1
General Sir Edmund Allenby took over command of the Egyptian Expeditionary
Force in Cairo on 28 June 1917. At once, his mere presence had begun to change the
attitude and atmosphere of the force. The arrival of Allenby in Egypt was most
eloquently stated by T. E. Lawrence: “Allenby’s coming had re-made the English. His
breadth of personality swept away the mist of private or departmental jealousies behind
which Murray and his men had worked.”2
Commander, Middle East Brigade, Royal Air Force (1 April 1918), Major-General Sir Geoffrey Salmond
With the arrival of Allenby in Cairo in June 1917, there was a palpable change in
the atmosphere of the Egyptian Expeditionary Force. The men of the EEF, including
65
Salmond, savored it. His arrival also brought great changes for the Middle East Brigade.
Salmond received a telegram while on leave in Britain in July 1917 which read:
To G.O.C. Middle East Brigade, Egypt. 10/7/17. It has been decided to raise a fighter squadron in Egypt, the officers, pilots and personnel to be found locally so far as possible. Squadron equipment will be sent from England. No further allotment of aeroplanes will be made at present beyond those already allocated at the beginning of this month, nor will any definite type of machine be laid down at present, but for the next two or three months it is assumed that this equipment will consist partly of Bristol Fighters, Bristol Monoplanes and Vickers Bullets. If assistance is absolutely necessary in personnel, please cable particulars of minimum requirements. The Squadron will be designated No. 111.3
At last, a fighter squadron in Egypt! Shortly after his return to Egypt, Salmond received
word from the War office that another squadron, No. 113, was to be raised in Egypt at
Ismailia. It was Allenby that ordered the Bristol Fighters for Egypt. Allenby was a
cavalry man and witnessed first-hand the importance of aeroplanes in conducting
reconnaissance and of the fighter aircraft in conducting counter-reconnaissance. Allenby
wanted to wrestle the enemy's eyes from the skies, and with the promise of a new fighter
squadron, Salmond would be happy to do it.
As preparations were being made in October 1917 for the attack into Palestine,
Brigadier General Salmond received word that he was being sent back to Britain. German
Gothas carried out a daylight raid on London on 7 July 1917. They killed fifty-seven
people in the process, and the event led to a public outcry regarding British air defense
preparedness. In reaction to the attack, the British Government initiated a series of
sweeping decisions to examine the reshuffling of the British Air Organizations and the
direction of Air Operations. Much to his disappointment, Salmond was being summoned
home to be part of the process of remodeling the RFC.4 These were the birth pangs of the
Royal Air Force.
66
As Salmond awaited transport in Cairo bound for Britain, he received a hand
written letter from Allenby, who was on the move towards Jerusalem. It read:
GHQ Egyptian Expeditionary Force: My dear Salmond, I hear that you are still in Cairo, stopped by the congestion on the Italian railways. I take the opportunity to write and thank you for the splendid work of organization and training you carried out while you were here. Its results are shown in the mastery of the air which our flying men have attained. Their exploits have been wonderful--nothing stops them--in fighting or reconnaissance. We have won a great victory; I wish you were with us, to take part in the success you have done so much to ensure. It must be galling you to have missed it. I wish you the best of good fortune, and am your gratefully and sincerely.”5
And so, while the Middle East Brigade fought to control the skies over the successfully
advancing EEF, Salmond returned to London. He was not present for Allenby’s victories
at Beersheba nor for his triumphant march into Jerusalem. But Allenby did not forget the
man who was a key to his success.
After his victory in Jerusalem in December 1917, Allenby recommended to the
War Office that the RFC command in the Middle Eastern Theater be reorganized. Since
the service had been greatly expanded, Allenby recommended that the RFC HQ there be
raised to the status of a Division, with a Major General in command. Allenby then added
the special request of Geoffrey Salmond to return to Egypt to take command of the Royal
Flying Corps Middle East. The War Office, still drunk from Allenby’s remarkable victory
were more than happy to honor Allenby’s request. Major General Geoffrey Salmond
departed for Egypt on Christmas Eve.6 Upon his return, Salmond got to work preparing
for Allenby’s next offensive--the march towards Damascus. To do this, the RFC Middle
East would have to control the skies and keep the enemy’s aircraft out of action before
and during the advance.
67
Equipment
British
In this phase of the operations in Egypt and Palestine, the RFC received the tools
they so desperately needed. Single seat fighters such as Sopwith Camels and S.E. 5s (See
Appendix B) provided the RFC with aeroplanes that were at least a match, if not superior
to the machines in the German Air Service. These new British fighters were faster and
nimbler than their German counterparts, and the Middle East Division of the RAF
received them in sufficient quantities to be a credible threat. By June 1918, the Middle
East Division RAF possessed 49 modern fighters and over 190 reconnaissance aircraft.7
In addition to the new fighters, the Middle East Division received a Handley Page
Bomber in August 1918. This machine, a large four-engine bomber, was capable of long
distance bombing while carrying large payloads (see appendix B). This aircraft gave the
EEF real aerial offensive capability. It was used decisively at the opening of the Battle of
Megiddo to destroy the key communication centers for the enemy’s General
Headquarters. By the time the Battle of Megiddo began, the quality and quantity of the
aircraft available in the Middle East culminated. All the latest and greatest tools of the
time were available to Middle East Division RAF, and they made good use of them.
German
The German Air Service continued to field the most modern equipment in their
arsenal throughout this phase of operations in Palestine. They were equipped with
Rumpler C.4s, Halberstadts, Fokker E-IIIs, and Albatross fighters (see appendix B).
However, they did not receive them in quantities that were comparable to the numbers
that the British were fielding in this theater, nor did the Germans possess a logistic
68
system for repair parts and maintenance that was comparable to the British. They had to
rely upon the supplies sent by way of the Anatolian railway from Constantinople, much
of these supplies were diverted to the Caucuses.8 The fact remains that the Germans did
not lose their edge in the quality of aircraft that they supplied to the Palestine theater.
Instead, the German Air Service suffered an erosion of air parity in Palestine due to the
quantity of aircraft they could maintain in the air, as well as the deterioration of the health
and nerve of the German pilots.
Training and Tactics
The Gosport School
The most significant development in this phase of the war was the improvement
of flight training for military pilots. In 1916, Major R. R. Smith-Barry was given
command of No.1 Reserve Squadron at Gosport. Smith-Barry had received his flight
certificate in 1911, and served with Nos. 5 and 60 Squadrons in France before returning
to Britain in December 1916. He was taking with him two years of experience in the
development of aerial combat techniques and procedures.9
By late 1916, there was still a lot about aeroplanes and flying that were mysteries.
Although there was a consensus among pilots and trainers at the time regarding certain
control inputs and their anticipated results, there were some activities related to flight that
were regarded as anomalies, even as acts of God. One such eventuality was the
phenomenon of spinning. Up until 1916, most pilots who had the unfortunate fate of
entering a spin never regained control and met their deaths. There were a few notable
exceptions. While in France, Major J. A. Chamier emerged from a cloud in a spin. While
falling helplessly, Chamier recalled an incident that occurred before the war, when
69
Lieutenant W. Parke recovered his aeroplane from a spin very near the ground. When he
emerged from the cockpit, Lieutenant Parke admitted that he managed to recover the
aircraft by doing “everything wrong.”10 Chamier did the opposite of what his experience
as a pilot would have otherwise suggested and he recovered the aeroplane. He referred
his story to the Headquarters of the RFC.
This experience began to reveal that there were no anomalies to flight, all flight
characteristics could be explained and controlled. This was proven to Smith-Barry
himself when he was introduced to Captain R. Balcombe-Brown, a New Zealand pilot
from No. 1 Squadron (while Smith-Barry was still serving with the No. 60 Squadron in
France). Balcombe-Brown claimed to have discovered how to initiate a spin as well as
emerge from one. Smith-Barry was skeptical, but followed the directions given by the
New Zealander, as did several of his pilots. To their astonishment, Balcombe-Brown was
right. According to the official record of the war in the air, it was the explanation of
maneuvers such as controlled spins, that became the “key-note” of the Smith-Barry
system.11
When Smith-Barry took over the No. 1 Reserve (Training) Squadron at Gosport,
he began to foster his ideas regarding the aeroplane and flight. According to one of his
instructors at the time:
The gospel he preached was that the aeroplane was a nice tempered, reasonable machine that obeys a simple honest code of rules at all times and in any weather. And by shedding a flood of light on the mysteries of its control he drove away the fear and the real danger that existed for those who were flying aeroplanes in the blackest ignorance even of first principles.12
As a result of his successful techniques, which were rapidly becoming known throughout
the RFC, Major Smith-Barry was given free reign to develop his ideas and create a school
70
for “Special Flying.” As a result, the Gosport School was formally established in August
1917. The first task of the school would be to educate the flying instructors, who would
in turn impart these methods upon their student pilots. In October 1917 a pamphlet was
circulated entitled, General Methods of Teaching Scout Pilots. This pamphlet had the
effect of initiating the transformation of training principles and techniques long before the
instructors were circulated throughout the breadth of the Royal Flying Corps.13
Another booklet entitled simply, Flying Instruction, detailed the principles
developed at the Gosport School and was widely disseminated throughout the newly
formed Royal Air Force from the Spring of 1918 and onwards.14 The Gosport school was
quickly gaining attention for its revolutionary training methods. John Salmond,
Geoffrey’s younger brother (also an RFC pilot), visited the Gosport School and adopted
the method for use in all pilot training schools in Britain.15 At the time, Major General
John Salmond was in command of the Training Division in Britain. It was these efforts
that standardized and greatly enhanced the instruction that pilots received. As a result,
Britain began to produce more competent pilots from the schools who arrived at their
operational squadrons with at least better than rudimentary skills in the ways of aerial
combat.
The Formation of the Training Group in Egypt
The changes in pilot training that were sweeping through Britain in 1917 were
also felt in Egypt. Whether it was due to the communication of ideas that the Gosport
School fostered or whether it was due to the personal relationship between Geoffrey
Salmond and his younger brother John--who happened to be in charge of the Training
71
Division in Britain--is uncertain. What is known is that the Training Brigade expanded
greatly in 1917.
In July 1917, the British Government decided to double the size of the Royal
Flying Corps. As a result, the War Office decided, once again, to take advantage of the
favorable flying conditions in Egypt. In August 1917, the Thirty-Second Training Wing
was established in Egypt. Therefore by September 1917 there existed three reserve wings
in Egypt: the Thirty-eighth at Heliopolis, the Thirty-Second at Ismailia, and the
Twentieth at Abu Qir. The Thirty-second and Twentieth wings contained an elementary
squadron and three higher training squadrons each. On 1 November 1917, the three
training wings along with the Cadet Wing and School of Aeronautics became a Training
Group under the command of Colonel P. L. W. Herbert. Colonel Herbert was a
commander of a training group in Britain and was freshly conversant in the ideas and
techniques that were being implemented there.16 What this meant for the RFC Palestine
Brigade was that there was a “fresh bench” of pilots from which to draw.
Organization and Operations
“Bloody April” 1917.
In the latter part of 1916, the Germans began to put together the elements of what
would become known as “Jastas” which was short for Jagdstaffeln which is translated as
“hunting echelons.” These were fighter-pure formations developed to wrestle air
superiority away from the allies. The tool intended to get this job done was the Albatross
D.I. The first Jasta made its debut on Sunday, 17 September 1916. It pounced on two
British flights of B.E.2c and F.E.2b aircraft and cut them to pieces.17
72
The Royal Flying Corps’ offensive strategy was to render the German air service
ineffectual by continually flying on the German side of the lines. While this might be a
feasible strategy if the RFC possessed equipment that was at least equal to or superior
than that of the Germans, by late 1916 the British D.H.2s and two seat reconnaissance
aeroplanes were no match for the Albatross series of aeroplanes that were beginning to
patrol the skies over the front.
The Germans fielded over thirty Jastas on the western front by the Spring of
1917. These squadrons, now equipped with Albatross D.IIIs, “played havoc” on the RFC
who continued to cross the German lines as part of their offensive plan. Almost every
time they did so, they were cut down. Things were not much better on the front in
Palestine, but they were about to improve.
Reorganization of EEF
When General Allenby assumed command on 28 June 1917, he immediately set
out to inspect and evaluate the status of his force and weigh it against the task of winning
an offensive in Palestine. He sent a cable to London on 12 July with his assessment. He
requested two additional divisions, as well as additional artillery, and aircraft. He
proposed to form two infantry corps and one cavalry corps all under a general
headquarters. In support of this force, he requested three additional aircraft squadrons so
that he would have a squadron in support of each corps, one for the general headquarters,
and one fighter squadron. He added that the aircraft should be of the latest type.18 The
request was approved and the additional forces began to flow in almost immediately.
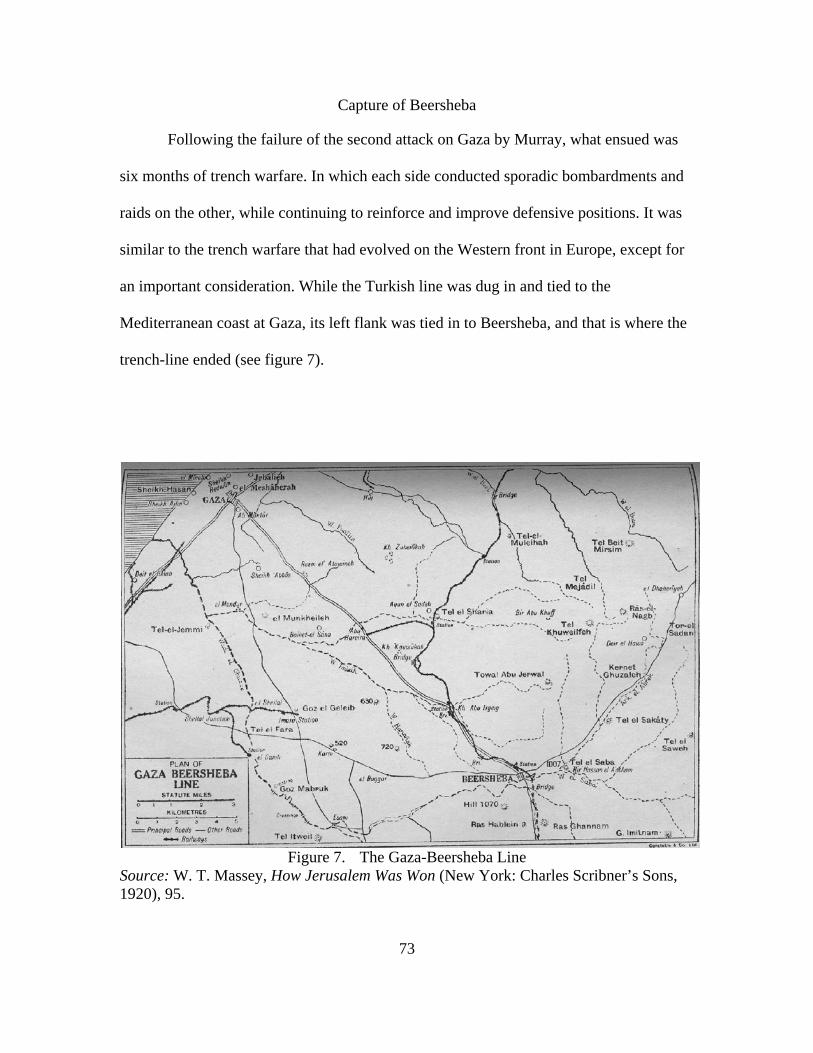
Capture of Beersheba
Following the failure of the second attack on Gaza by Murray, what ensued was
six months of trench warfare. In which each side conducted sporadic bombardments and
raids on the other, while continuing to reinforce and improve defensive positions. It was
similar to the trench warfare that had evolved on the Western front in Europe, except for
an important consideration. While the Turkish line was dug in and tied to the
Mediterranean coast at Gaza, its left flank was tied in to Beersheba, and that is where the
trench-line ended (see figure 7).
Figure 7. The Gaza-Beersheba Line Source: W. T. Massey, How Jerusalem Was Won (New York: Charles Scribner’s Sons, 1920), 95.
73
74
On 5 October 1917 General Robertson sent a telegraph to Allenby explaining that
the War Cabinet had “insisted upon the desirability of eliminating Turkey from the war at
a blow. It was thought that her general condition was now such that a heavy defeat. .
.might induce her to break with her allies.”19 Allenby, while asking for reinforcements
and additional equipment, devised his plan for the attack based upon the means at his
immediate disposal. His intention was to take Gaza, but not by a direct assault upon it.
Instead, Allenby intended to attack the enemy’s weak flank at Beersheba first,
consolidate on the objective and attack against Gaza from the West and Northwest.20
The operation depended upon the swift capture of Beersheba, while it was un-
reinforced. Surprise, therefore, would be key. Allenby explained to General Chauvel,
Commander of the Desert Mounted Corps, that he needed to be in position both
Southwest and East of Beersheba before the enemy had time to realize from where the
attack would come. The risk was that any hint at a large attack against Beersheba might
cause the enemy to withdraw from Beersheba and reinforce Gaza. Allenby’s plan for
achieving surprise was through successful counter-reconnaissance and the use of
deception.
According to the official history of the EEF, the enemy commander of the Sinai
Front informed the Yilderim Group Command on 19 September 1917 that “the mastery
of the air has unfortunately for some weeks completely passed over to the British.”21 The
RFC was succeeding in keeping the enemy insulated from the movement of the British
formations. Furthermore, Allenby was holding a few Bristol fighters in reserve until a
few days prior to the attack when he intended to intensify the air campaign against the
enemy. According to the official record of the EEF:
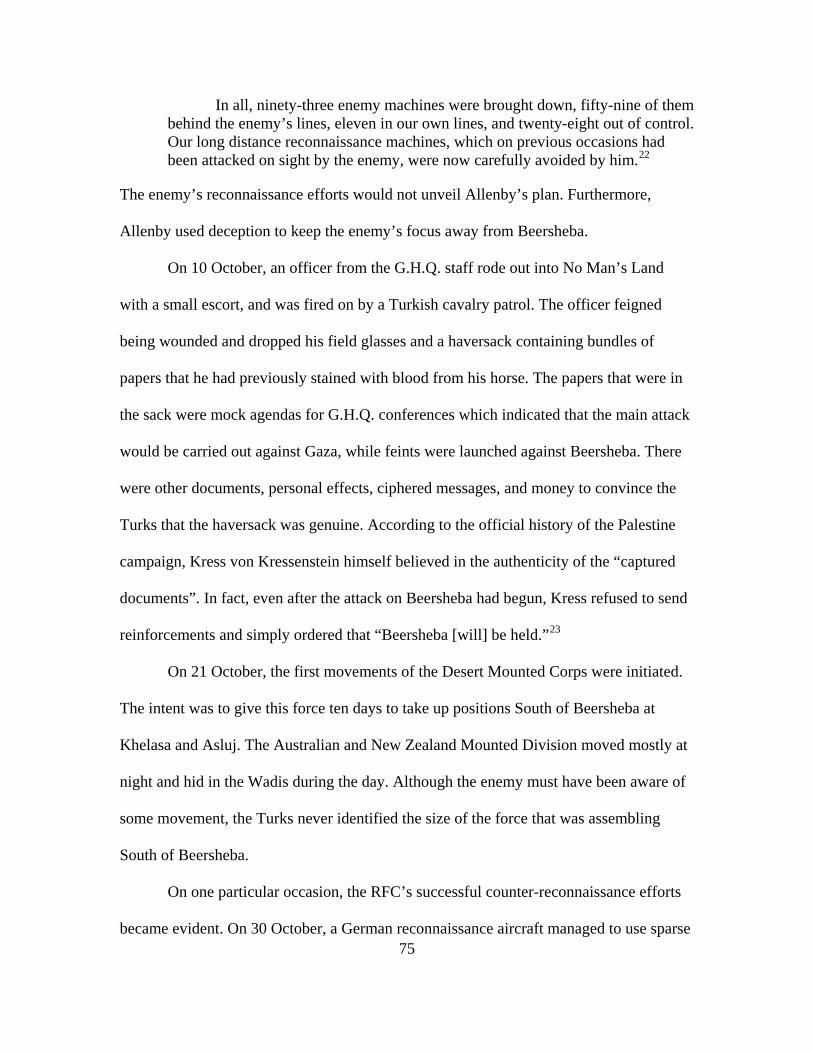
75
In all, ninety-three enemy machines were brought down, fifty-nine of them behind the enemy’s lines, eleven in our own lines, and twenty-eight out of control. Our long distance reconnaissance machines, which on previous occasions had been attacked on sight by the enemy, were now carefully avoided by him.22
The enemy’s reconnaissance efforts would not unveil Allenby’s plan. Furthermore,
Allenby used deception to keep the enemy’s focus away from Beersheba.
On 10 October, an officer from the G.H.Q. staff rode out into No Man’s Land
with a small escort, and was fired on by a Turkish cavalry patrol. The officer feigned
being wounded and dropped his field glasses and a haversack containing bundles of
papers that he had previously stained with blood from his horse. The papers that were in
the sack were mock agendas for G.H.Q. conferences which indicated that the main attack
would be carried out against Gaza, while feints were launched against Beersheba. There
were other documents, personal effects, ciphered messages, and money to convince the
Turks that the haversack was genuine. According to the official history of the Palestine
campaign, Kress von Kressenstein himself believed in the authenticity of the “captured
documents”. In fact, even after the attack on Beersheba had begun, Kress refused to send
reinforcements and simply ordered that “Beersheba [will] be held.”23
On 21 October, the first movements of the Desert Mounted Corps were initiated.
The intent was to give this force ten days to take up positions South of Beersheba at
Khelasa and Asluj. The Australian and New Zealand Mounted Division moved mostly at
night and hid in the Wadis during the day. Although the enemy must have been aware of
some movement, the Turks never identified the size of the force that was assembling
South of Beersheba.
On one particular occasion, the RFC’s successful counter-reconnaissance efforts
became evident. On 30 October, a German reconnaissance aircraft managed to use sparse

76
cloud cover to infiltrate across the lines and reconnoiter the now prepared British forward
attack positions. As the reconnaissance pilots attempted to re-cross the lines back to their
base, they were found and pounced upon by a patrolling Bristol fighter and shot down.
The Germans tried to escape once on the ground but were captured. Found in their
possession were photographic plates, marked maps and notes--information that might
have had a devastating affect on Allenby’s plan.24 In all, there were seven encounters
with enemy aeroplanes from 28 to 31 October, but the German pilots retreated on all
occasions.25
The attack began at 5:55 am on the morning of 31 October 1917 with an artillery
bombardment of the Turkish positions at Beersheba. The XX Corps initiated their
movement by 07:00 and before the day was out, Beersheba was in British hands--the
final assault being a cavalry charge of the 4th Lighthorse Brigade. The XX Corps
captured 2,000 prisoners and thirteen guns.
Capture of Gaza
While Beersheba was secured by the British, the high ground North of Beersheba
as well as Gaza remained to be captured. The defenses of Gaza were a series of positions
and trenches stretching from the Mediterranean Sea along the Gaza-Beersheba road for
approximately thirty miles. By now, Gaza was a fortress, defended by three Turkish
divisions. Opposing them were the British XXI Corps supported by nine Naval gunboats
off the coast of Gaza and two RFC squadrons.
The attack on Gaza began on the evening of 1 November 1917 at 23:00. It was
initiated with an artillery bombardment from land and sea on the Gaza defensive
positions. Approximately 10,000 British infantry took part in the assault against
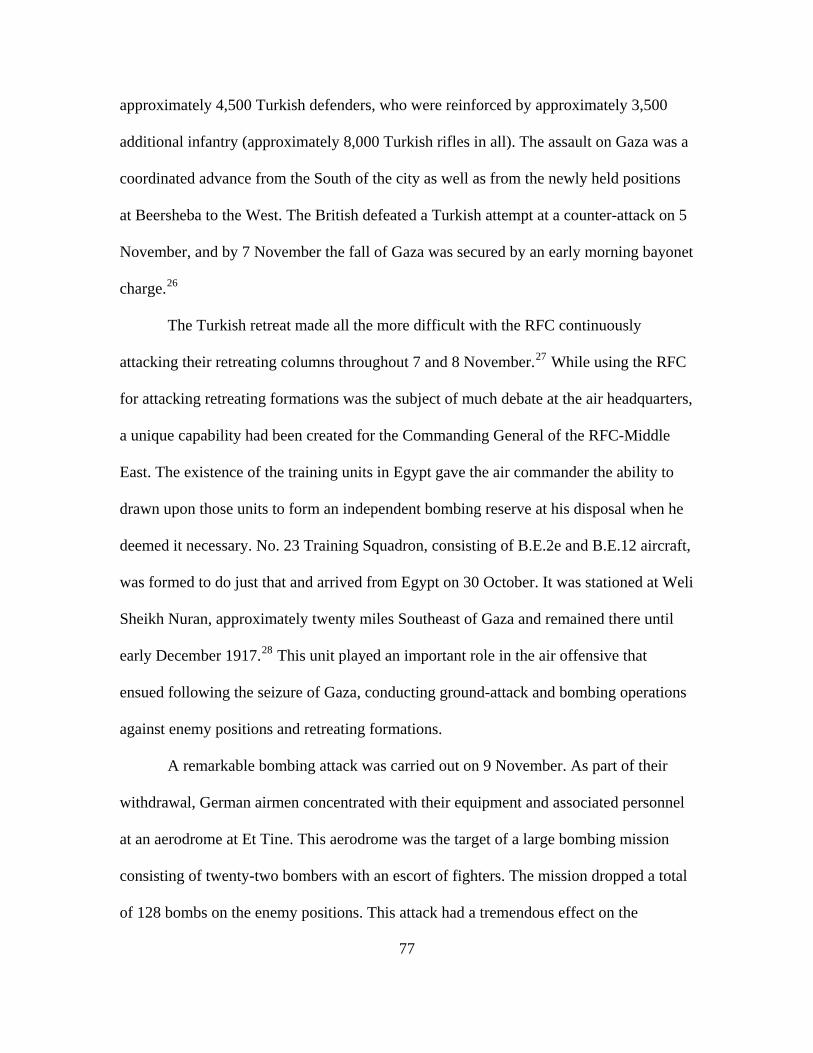
77
approximately 4,500 Turkish defenders, who were reinforced by approximately 3,500
additional infantry (approximately 8,000 Turkish rifles in all). The assault on Gaza was a
coordinated advance from the South of the city as well as from the newly held positions
at Beersheba to the West. The British defeated a Turkish attempt at a counter-attack on 5
November, and by 7 November the fall of Gaza was secured by an early morning bayonet
charge.26
The Turkish retreat made all the more difficult with the RFC continuously
attacking their retreating columns throughout 7 and 8 November.27 While using the RFC
for attacking retreating formations was the subject of much debate at the air headquarters,
a unique capability had been created for the Commanding General of the RFC-Middle
East. The existence of the training units in Egypt gave the air commander the ability to
drawn upon those units to form an independent bombing reserve at his disposal when he
deemed it necessary. No. 23 Training Squadron, consisting of B.E.2e and B.E.12 aircraft,
was formed to do just that and arrived from Egypt on 30 October. It was stationed at Weli
Sheikh Nuran, approximately twenty miles Southeast of Gaza and remained there until
early December 1917.28 This unit played an important role in the air offensive that
ensued following the seizure of Gaza, conducting ground-attack and bombing operations
against enemy positions and retreating formations.
A remarkable bombing attack was carried out on 9 November. As part of their
withdrawal, German airmen concentrated with their equipment and associated personnel
at an aerodrome at Et Tine. This aerodrome was the target of a large bombing mission
consisting of twenty-two bombers with an escort of fighters. The mission dropped a total
of 128 bombs on the enemy positions. This attack had a tremendous effect on the

78
enemy’s morale as evidenced by von Kressenstein’s remarks, “On the afternoon of the
9th of November there broke out a panic at Et Tine. . . . This did more to break the heart
of the Eight Army and to diminish its fighting strength than all the hard fighting that had
gone before.”29 The RFC-Middle East, as well as Allenby took very keen note on the
effectiveness of aircraft on the retreating enemy. When troops on the ground were in
position to take advantage of such a panicked flight--the annihilation of an army is
entirely possible.
Capture of Jerusalem
As the Turks fled, Allenby’s forces pursued. The Turks offered some sporadic
resistance as they retrograded. At Junction Station the Turks managed to offer a
coordinated and organized defense. The 75th Division halted West of Junction Station for
the night. Early the next morning, 14 November 1917, the Turks abandoned their defense
at Junction Station and the 75th Division moved in and occupied the station. The Turks
were now broken into two groups, one fleeing north and the other east. The reports at the
time indicated that the groups were small and scattered and not likely to offer an
organized defense.30 Overall the EEF had advanced sixty miles in fifteen days and drove
an enemy of nine infantry and one cavalry division out of entrenched positions they had
defended and improved for six months. The EEF gave battle during the pursuit wherever
the opportunity arose. The enemy lost almost two-thirds of its force following the capture
of Gaza and the pursuit. In all, over 9,000 Turkish prisoners, 80 artillery pieces, 100
machine guns, and large quantities of ammunition and supplies were captured.31
Allenby’s forces continued the pressure on the fleeing Turks fighting and
defeating the forces they met in Jaffa, Judea, Auja, and on the outskirts of Jerusalem. By

79
1 December, the EEF was solidifying its positions around Jerusalem and converging on
the holy city. The date of the attack was set for 8 December 1917. On 7 December, the
favorable weather that the EEF had been graced with during their rapid movement
through the desert finally broke. It rained almost continuously for three days. This made
the flow of supplies to the attacking forces very difficult as the roads became almost
impassable.32 It also meant that the RFC could not get planes in the air to assist with the
attack or to provide intelligence regarding the Turkish positions and movements. No. 113
Squadron sent up one aeroplane for a reconnaissance on 8 December, flown by their
Squadron commander himself.33
The attack began at dawn on 8 December 1917--in spite of the heavy rains. By
evening the Turks lost their hold on Jerusalem and fled to the hills north and east of the
city. As they fled, No. 14 Squadron manhandled their aeroplanes to the top of a small
steep hill in order to give the pilots a flying start. In this manner the squadron managed to
fly fifty hours, dropping approximately 100 twenty-pound bombs on the fleeing and
demoralized Turks.34 These ground attacks on the Turks continued from 10 through 12
December. The EEF occupied a line across the Nablus-Jerusalem road four miles north of
Jerusalem, as well as a position east of Jerusalem across the road to Jericho. Jerusalem
was isolated by the morning of 9 December, the city surrendered at about noon.35
On 11 December 1917, General Allenby walked through the Jaffa gate into the
holy city of Jerusalem. According to the official history, “He was conducted to the steps
of the citadel, where the notables of the city awaited him. A proclamation was read, and
after the chief inhabitants had been presented, the commander-in-chief passed out again
the way he had come.”36 The Turks suffered heavy casualties in the conduct of this

80
operation, but nothing could compare to the impact that this British victory had on the
morale of the Turkish soldiers and leaders. The strategic blow to Turkey was significant,
but they were not yet finished. At Jerusalem, the EEF consolidated their forces and
prepared for the next advance against the Turks.
Summary
The success that Allenby was able to achieve at Beersheba, Gaza and Jerusalem
depended heavily on the fact that the enemy was thoroughly deceived and overwhelmed.
The RFC succeeded in denying the enemy the ability to conduct aerial reconnaissance
and therefore kept them blind to the movements and intentions of Allenby’s forces. This
is the key. It is not enough to have superiority in the air, what the RFC achieved in this
phase was dominance of the aerial reconnaissance role.
After Jerusalem, the RFC did not sit on its laurels. Instead, the newly formed RFC
Middle Eastern Division continued to put pressure on the German Air Service in
Palestine. By the time Allenby was ready to launch his final offensive in Autumn 1918,
the German Air Service was effectively shut down. In nine months, the RFC achieved
mastery of the skies over Palestine.
1Bourne, Who's Who in World War One, 5-6.
2T. E. Lawrence, Seven Pillars of Wisdom (New York: Random House, 1926), 383.
3Baker, A., 110.
4Ibid., 116.
5Ibid., 115.
6Ibid., 120.

81
7H. A. Jones, The War in the Air, vol. 6: Appendices (Oxford: Clarendon Press,
1937), Appendix XL.
8General Liman Von Sanders, Five Years in Turkey (Annapolis: The United States Naval Institute, 1927), 255.
9Jones, The War in the Air, vol 5., 429.
10Ibid., 430.
11Ibid., 431.
12Ibid.
13Ibid., 432.
14Ibid., 445.
15Baker, A., 88.
16Jones, The War in the Air, vol. 5, 453.
17Thomas R. Funderburk, The Early Birds of War: The Daring Pilots and Fighter Aeroplanes of World War I (New York: Grosset & Dunlap, 1968), 93.
18Jones, The War in the Air, vol. 5, 225.
19Falls, 27.
20Brian Gardner, Allenby of Arabia (New York: Coward-McCann, Inc, 1965), 125.
21H. Pirie-Gordon, ed., A Brief Record of the Advance of the Egyptian Expeditionary Force, June 1917 to October 1918, 2nd ed. (London: H.M. Stationary Office, 1919), 112.
22Ibid., 112.
23Falls, 43.
24Jones, The War in the Air, vol. 5, 236.
25Ibid., 239.
26Pirie-Gordon, 5.
27Ibid., 6.
82
28Jones, The War in the Air, vol. 5, 241.
29Ibid., 243.
30Ibid., 247.
31Pirie-Gordon, 7.
32Ibid., 9.
33Jones, The War in the Air, vol. 5, 248.
34Ibid., 248.
35Pirie-Gordon, 10.
36Jones, The War in the Air, vol. 5, 249.
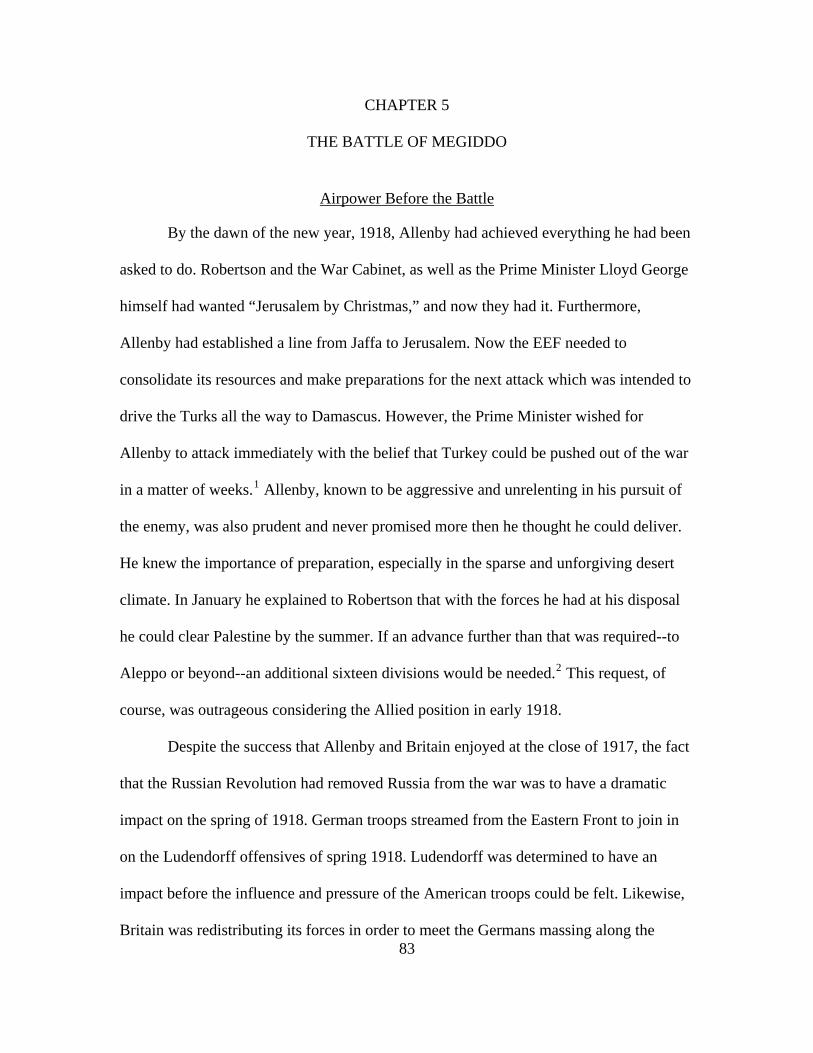
83
CHAPTER 5
THE BATTLE OF MEGIDDO
Airpower Before the Battle
By the dawn of the new year, 1918, Allenby had achieved everything he had been
asked to do. Robertson and the War Cabinet, as well as the Prime Minister Lloyd George
himself had wanted “Jerusalem by Christmas,” and now they had it. Furthermore,
Allenby had established a line from Jaffa to Jerusalem. Now the EEF needed to
consolidate its resources and make preparations for the next attack which was intended to
drive the Turks all the way to Damascus. However, the Prime Minister wished for
Allenby to attack immediately with the belief that Turkey could be pushed out of the war
in a matter of weeks.1 Allenby, known to be aggressive and unrelenting in his pursuit of
the enemy, was also prudent and never promised more then he thought he could deliver.
He knew the importance of preparation, especially in the sparse and unforgiving desert
climate. In January he explained to Robertson that with the forces he had at his disposal
he could clear Palestine by the summer. If an advance further than that was required--to
Aleppo or beyond--an additional sixteen divisions would be needed.2 This request, of
course, was outrageous considering the Allied position in early 1918.
Despite the success that Allenby and Britain enjoyed at the close of 1917, the fact
that the Russian Revolution had removed Russia from the war was to have a dramatic
impact on the spring of 1918. German troops streamed from the Eastern Front to join in
on the Ludendorff offensives of spring 1918. Ludendorff was determined to have an
impact before the influence and pressure of the American troops could be felt. Likewise,
Britain was redistributing its forces in order to meet the Germans massing along the
84
Western Front. Allenby would have to send forces back to Europe in order to support the
defensive efforts there. Therefore, instead of receiving additional forces for the offensive
operations he was planning, he was losing forces. Allenby sent two full divisions (the
52nd and 74th), twenty-four British battalions from his other divisions, as well as nine
Yeomanry regiments, five heavy artillery batteries and five machine-gun companies. In
all 60,000 troops were sent from Egypt to Europe.3
General Jan Christian Smuts was dispatched from the War Office to examine the
situation in the Middle East and to send back his assessment. Allenby received Smuts
cordially and within a month Smuts cabled home his assessment which agreed with
everything that Allenby had said.4 Furthermore, since the Western Front was having a
considerable drain on manpower and resources from the Middle East, it was quite
impossible to continue offensives in both Palestine and Mesopotamia. Smuts
recommended that the offensives in Mesopotamia be sacrificed and that the troops and
resources from that front be sent to reinforce the EEF in Palestine.5
Allenby and his staff continued to plan for the autumn 1918 offensive.
Furthermore, he received reinforcements and replacements in the form of three infantry
divisions and a cavalry brigade from Mesopotamia, as well as an Indian cavalry division
from France.6 There were still well over 250,000 British troops in Egypt and Palestine
which formed the nucleus of Allenby’s divisions. These troops were reinforced by Indian
and other forces (such as troops from Australia, New Zealand, Hong Kong, Singapore,
France, Italy and South Africa). There were even three battalions of Jewish soldiers sent
to Allenby as a result of the Balfour Declaration.7 Serving with one of these battalions
85
was a young David Ben Gurion, who would eventually become the Prime Minister of
Israel.
The re-organization of the EEF continued throughout much of the summer. By the
autumn of 1918, Allenby’s force consisted of the Desert Mounted Corps (under
Lieutenant-General Sir Harry Chauvel), the XX Corps (under Lieutenant-General Sir
Philip Chetwode), and the XXI Corps (under Lieutenant-General Sir E.S. Bulfin). By the
eve of the offensive the EEF had a total force of about 12,000 cavalry, 57,000 infantry,
540 guns and 350 machine guns.8 But there were changes also taking place in the camps
of his enemy.
On 1 March 1918, General Liman von Sanders replaced General von Falkenhayn.
Like Allenby, von Sanders was an old cavalryman, with a keen knowledge of the Turks
and a knack for fighting defensive operations. In fact, he was considered to be one of the
best defensive generals of his day. He quickly assessed the situation he faced along the
Palestinian front:
Hence there were two battle districts: the land west of the Jordan, where by far the greater part of the British Army in Palestine confronted us, and the land east of the Jordan, where the Arabs were making war against us, led by the British and assisted with every kind of war material.9
Von Sanders had two armies under his command, the Seventh and Eighth. He also
controlled part of the Fourth Army headquartered in Damascus for purposes of supply.
Sanders set to work immediately to reinforce his positions all along the Palestinian front--
calling all effective troops within the control of the Army Group to move to the front
lines.10 By the eve of the offensive the Yilderim had a force of approximately 3,000
cavalry, 23,000 infantry, 340 guns, and 600 machine guns. There were an additional force
86
of approximately 6,000 infantry and some cavalry troops were occupied with the Arab
siege of Maan or along the rail line to Dera out in the eastern desert.11
In the mean time, Major General Geoffrey Salmond was back in the saddle,
commanding the newly expanded Middle East Division of the Royal Air Force. He now
had sufficient numbers of the most state-of-the-art aircraft available from Britain: Bristol
fighters, RE8s, and Vickers Bullets. Salmond was determined to dominate the skies over
Palestine and Egypt and keep the German air service from flying during the autumn
offensive. This was a lofty goal and one that had to be acted upon immediately if it was
to be achieved. August would prove to be the decisive month for the RAF British pilots
were continuously in the air and gave chase to any enemy machine they encountered
regardless of the type or number. According to captured enemy documents the British
pilots were having an extraordinary effect on the German Air Forces: 25 August 1918--
“In consequence of lively hostile flying activity, no reconnaissance could be carried
out.”12
Salmond was achieving the effect he desired. Later in the year, he described in a
lecture that, “In August 1918 the Palestine Brigade had attained mastery of the air. By
this I mean that although occasionally German machines did fly, if they once saw our
machines they never fought, but went to ground, the personnel ran off.”13 By the end of
August 1918, over ninety German aircraft had been destroyed. By suffering losses they
were unable to quickly replace and by the effect that the Royal Air Force was having on
the enemy’s morale--the German Air Service in Palestine was effectively being shut
down.

87
The timing of this effect was critical. Allenby was planning for his operation to
commence on 19 September 1918, but was still considering the exact execution of the
attack. His first plan, briefed in strict secrecy to his three corps commanders on 1 August
1918, conceived of the XXI Corps attacking on the enemy’s right flank with five infantry
divisions, the Desert Mounted Corps would then advance through the gap provided by the
XXI Corps and proceed up the Plain of Sharon to the Nahr Iskanderune line (a streambed
running from Tul Karm to the Mediterranean Sea). The mission of the DMC would be to
protect the XXI Corps left flank and to advance onto Sebustiye (Samaria) thereby sitting
astride the Nabulus-Tul Karm railway and road networks; meanwhile the XX Corps
would attack astride the Nabulus road.14 This scheme was bold and, if successful, would
trap a considerable portion of the Turkish forces and cut an important logistic line.
After three weeks of contemplation, however, Allenby altered his plan and on 22
August 1918 briefed his commanders that he decided to expand the scope of the
operation.15 The first step would occur on the night preceding the main attack--in which
the XX Corps would advance up to positions east of the Bireh-Nabulus road in order to
defend the right flank of the main attack and to prevent the enemy exits into the lower
Jordan valley. The main attack would still be initiated by the XXI Corps under Bulfin,
whose task would be to break through the enemy defensive line from the railway at Tul
Karm to the sea. Once through, the XXI Corps would turn right and continue to advance
in a northeasterly direction towards Samaria and Attara. Meanwhile, the Desert Mounted
Corps, with their gap now open between Tul Karm and the Mediterranean Sea, was to
advance across the Nahr Falik and turn to the right in the vicinity of Jelameh to advance
in a northeasterly direction across the hills of Samaria and enter the Plain of Esdraelon at
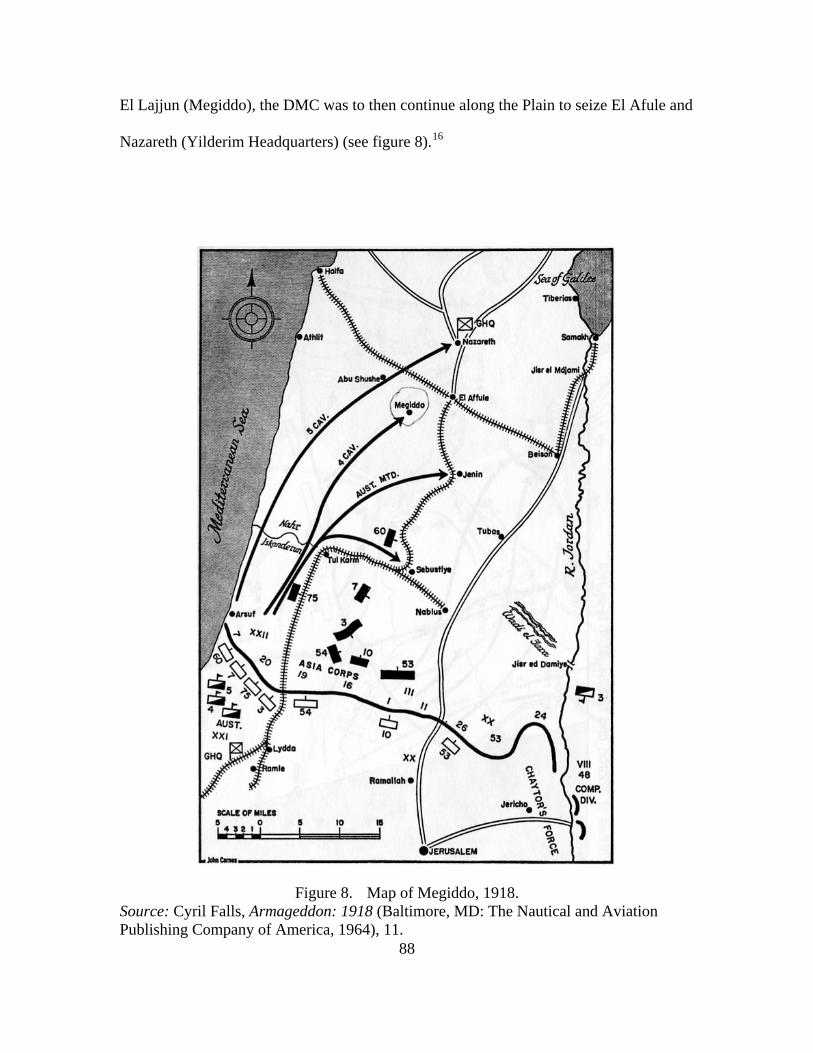
El Lajjun (Megiddo), the DMC was to then continue along the Plain to seize El Afule and
Nazareth (Yilderim Headquarters) (see figure 8).16
Figure 8. Map of Megiddo, 1918.
88
Source: Cyril Falls, Armageddon: 1918 (Baltimore, MD: The Nautical and Aviation Publishing Company of America, 1964), 11.

89
In all, this advance of the DMC would be approximately 50 miles. This plan was
bold and audacious but relied heavily upon surprise and speed. In order to achieve this,
Allenby had to ensure the strictest of secrecy and that his moves remain undetected by
the enemy. Allenby had two things going for him in the preparations for his offensive--
Lawrence with the Arab Northern Army, and the Royal Air Force.
The Arab Northern Army was carrying out incursions and ambush attacks against
the Turks in the vicinity of Amman and as far north as Dera. These attacks proved to be
frustrating to the German staff and damaging to their logistics and communications. But
more importantly the actions of the Northern Arab Army served to tie up considerable
numbers of Turkish troops and provided a great concern to von Sanders himself who
expressed his concern in a letter to Ludendorff, in which he stated that he “had to expect
a big attack in the coast sector” but believed that his forces could “weather it.”17 His
greatest concern, therefore, was to the east where his lines of communication to
Damascus were in jeopardy and where he believed that the British might exploit his
relative weakness. He stated “the constantly increasing force of the hostile Arabs held the
shortest line to these communications.”18 The Northern Arab Army was providing
Allenby with his operational diversion.
The Royal Air Force, as previously mentioned, had attained “mastery of the air”
by the end of August 1918. This is evidenced by the significant reduction in German
reconnaissance missions over the lines. In June 1918, Yilderim aircraft crossed over the
EEF’s lines approximately 100 times. By the last week in August 1918, the number of
crossings was reduced to 18. And during the first three weeks in September, only 4
enemy aircraft flew across the EEF lines.19 The Royal Air Force-Middle East Division
90
forward deployed the Palestine Brigade which consisted of two wings supporting the
offensive--the Fifth and Fortieth Wings. Squadrons occupied and operated from
aerodromes in Sarona, Ramle and Jerusalem. From these locations, the RAF remained
within 10 miles of the front lines, while the German aerodromes at Jenin and Elfule were
25 to 40 miles away respectively.
To support the offensive, the Palestine Brigade was organized as follows. The
Fifth Wing was headquartered in Ramle with its three squadrons divided out, each in
support of a corps: No. 14 Squadron supporting XX Corps from Junction Station; No.
113 Squadron supporting the XXI Corps from Sarona; and No. 142 Squadron supporting
the Desert Mounted Corps also from Sarona. The No. 142 Squadron also sent one flight
out to support Chaytor’s Force which was anchored into the Dead Sea and defending a
line along the West Bank of the Jordan River. This flight in support of Chaytor operated
from Jerusalem. Furthermore, No. 142 Squadron would move up to, occupy and operate
from the Turkish Aerodrome at Jenin once it was captured. The task and purpose of these
corps squadrons would be to conduct artillery cooperation, contact patrols and tactical
reconnaissance out to a distance of ten thousand yards in front of the advancing forces.20
The Fortieth Wing was also headquartered at Ramle, its responsibility would be to
support the EEF headquarters. It consisted of three squadrons which would conduct
strategic missions. The No. 1 Squadron (Australian Flying Corps) was responsible to
conduct strategic photography and reconnaissance from Ramle; the No. 111 Squadron
(the newly formed fighter squadron) was to provide escort for reconnaissance missions as
well as offensive patrols from Ramle; and the No. 144 Squadron was to conduct strategic
bombing operations from Junction Station. Furthermore, it was stressed to the ground

91
forces that the Turkish aerodromes and landing grounds were to remain clear of traffic
and bivouacs so that they may be put into use as quickly as possible.21
As Allenby concentrated his forces and put all the pieces in place to launch his
offensive, concealment of his movements became his most critical concern. No
movement was to be conducted at concealed bivouacs between 0430 and 1830. And if it
was absolutely necessary to water the horses during the day it would be done between
1200 and 1400, at which time the RAF would increase patrols to fend off enemy
reconnaissance efforts. No fires were to be lit, and the RAF would fly over and
photograph each artillery and gun emplacement in order to determine if the locations
were sufficiently camouflaged or otherwise recognizable from the air. According to the
official history of the battle, “The concealment of the British movements depended,
however, rather than upon any other single precautionary measure, on the activity of the
Royal Air Force.”22 For these measures as well as for dominating the counter-
reconnaissance efforts of the EEF, the RAF Palestine Brigade was indispensable.
In a captured enemy Intelligence Disposition Map issued to the Yilderim Army
Group on the day before the offensive, the Yilderim Army Headquarters had the EEF’s
force distribution completely wrong. It was evident that the Yilderim had no idea of the
British moves. The map shows no alteration of forces along the front, nor any
concentration of cavalry on the coast. This, in conjunction with the enemy air service
reports that “no essential changes had taken place in the distribution of the British
Forces,”23 is evidence to the absolute efficiency and effectiveness of the EEF’s
concentration of forces and clandestine moves, as well as the complete impotence of the
enemy’s aerial reconnaissance efforts--the stage was set.
92
Airpower During the Battle
Early on the morning of 19 September 1918, a Handley Page O/400 bomber took
off with over one thousand pounds of bombs which it delivered upon the telegraph and
telephonic exchange at El Afule. Within five hours five DH9s of No. 144 Squadron
attacked the target again, while eight other aircraft attacked von Sanders GHQ at
Nazareth. In conjunction with these attacks, No. 142 Squadron bombed the Yilderim 8th
Army HQ at Tul Karm and the No. 144 Squadron attacked the 7th Army HQ at
Nabulus.24 The effect of these initial bombing missions was that the Yilderim HQ had
virtually no communications with its subordinate Army HQs for the next crucial two days
and the enemy would have no knowledge of Allenby’s movements.
Major-General Salmond was determined to keep the German air service from
playing any role in the offensive. The best way to accomplish this, was to keep them from
getting into the air. He kept patrols of two DH9 bombers flying over the airfield at Jenin
all day long. Every two hours the two-aircraft contingent was replaced with fresh aircraft
and crews. As they departed their patrols, the aircraft dove down and machine-gunned the
hangars at Jenin. Furthermore, the patrolling aircraft would drop their bombs on the
airfield at he slightest sign of activity. As a result, no German aircraft left that airfield.25
The ground campaign began early in the morning of 19 September, at 0430 with a
fifteen minute artillery barrage. The preparatory bombardment comprised of an average
of one gun per 50 yards and was assisted by the Royal Navy destroyers offshore: Druid
and Forester. In all, an average of one thousand shells per minute were fired, making this
the heaviest preparatory bombardment conducted in this theater.26 The Infantry of the
XXI Corps advanced as the creeping barrage opened the way before them. As they
93
attacked forward, three aircraft continually patrolled the area in front of the XXI Corps
and conducted artillery cooperative fires against thirty-two active enemy batteries.27 Due
to the reconnaissance efforts of the RAF prior to the offensive, virtually all of the 8th
Army’s artillery positions were known. As a result, any Turkish artillery that fired against
the advancing troops was quickly silenced by devastatingly accurate counter-battery fire.
The Turkish positions were quickly overrun and by late afternoon the Turkish XXII
Corps and 8th Army headquarters at Tul Karm fell to the EEF XXI Corps. Ultimately, the
British captured 7,000 prisoners and 100 guns. The Yilderim XXII Corps ceased to
exist.28
Remnants of the Turkish Eight Army retreated down the road from Tul Karm to
Nablus, in an effort to cross the Jordan. Once the news of the retreat was wired to
General Borton, Commander of the Palestine Brigade, the RAF sprung their first planned
ground attack operation. Aeroplanes began to bomb and strafe the fleeing Turks from
mid-day until dark. Dropping eleven-and-a-quarter tons of bombs and spraying 66,000
machine gun rounds into the Turkish formations.29 These bombing attacks that began on
19 September became a prominent feature of the offensive and denied the Turks the
ability to make an orderly withdrawal.
At 0700 the lead elements of the Desert Mounted Corps, the 5th Cavalry Division,
began its march through the gap that the XXI Corps was providing. The 5th Cavalry
moved quickly through the breech and overran the light resistance they faced as well as
the third line of Turkish defenders. By noon they had traversed 25 miles and took up
position southwest of Acre. The 4th Cavalry launched at 0840 and traveled up the length
of the Plain of Sharon arriving at the entrance to the Musmuss pass by 1630. After a four-
94
hour halt for water, the 4th Cavalry commander dispatched his lead element into the
Musmuss pass--the 2nd Lancers of the 10th Brigade. The rest of the 4th Cavalry Division
followed in quick succession. By 0330, the 2nd Lancers had emerged from the pass onto
the Plain of Esdraelon, 5 miles from El Afule and 10 miles from the Yilderim General
Headquarters at Nazareth. As they fed and watered their horses, the 2nd Lancers spotted
the Turkish 13th Depot Regiment moving toward the Tel Megiddo. The 13th Regiment
was ordered by von Sanders to block the Musmuss pass. The Lancers sprung into action
by fixing and flanking the Turks. The Turks were surprised and were unable to
concentrate accurate fire against the lancers. After forty-six Turks were trampled and
ridden down with the lance, the remaining 470 Turks surrendered.30
In the meantime, elements of the 5th Cavalry Division seized El Afule and
Nazareth by 0715 on the morning of the 20 September. Unfortunately for the EEF, Liman
von Sanders was not found in or around the G.H.Q. The 5th Cavalry soon found itself in
an urban fight in Nazareth, which it would continue to fight for the next two days. By
0800 on the morning of the 20 September, the lead elements of the 4th Cavalry Division
found the 5th Cavalry already at El Afule rounding up the remnants of the Turkish
defenders. The airfield at El Afule was so quickly and effectively captured that two
German aeroplanes were still on the ground and intact when the D.M.C. troops seized it.
In fact, as the D.M.C. troops were securing the airfield a German D.F.W. aeroplane
arrived to deliver two bags of mail for the German headquarters. When the pilot realized
the situation, he tried to take off but was engaged by a gunner from an armored car.
Wounded, both the pilot and observer surrendered.31 As soon as it was captured and
secured, the RAF began to fly petrol, oil and spare parts into El Afule and turned the
95
German Aerodrome into a forward staging base for strategic reconnaissance flights.32 By
mid-afternoon, the 4th Cavalry proceeded on to the southeast to close off Beisan and
complete the trap. In all, the 4th Cavalry Division, traveled the farthest in the two days of
the Desert Mounted Corps’ great cavalry charge--riding over 70 miles in 34 hours. For
the rest of the day, the 4th and 5th Cavalry Divisions spread out across the rear of the
Turkish lines.
The RAF also provided valuable support for the quick moving cavalry. Flying in
advance of the D.M.C., No. 113 Squadron flew patrols to provide reconnaissance for the
advancing cavalry. In one instance, on the morning of 19 September, a reconnaissance
aeroplane from No. 113 Squadron dropped a message to the lead elements of the 5th
Cavalry Division. The pilot informed them that there were approximately two hundred
infantry laying in wait in an orchard east of Basse el Hindi. The lead Squadron, without
waiting for covering fire, attacked at once. After a brief but fierce fight, the squadron
captured the orchard, taking about sixty prisoners, two guns and twelve wagons. The
audacious squadron suffered two wounded and one killed in the action.33
Airpower in Pursuit
Very little was left to chance in the planning for this offensive, to include the
pursuit of the enemy in the event of a retreat. It was a model of good staff work. Due to
the difficulties of the terrain, the EEF staff identified that escape for the Turkish forces
were limited to five routes: (1) Tul Karm to Samaria, (2) Samaria to Jenin, (3) Anebta to
Jenin, (4) Nablus through the Wadi Fara to Jisr ed Damiye on the Jordan, and (5) Balata
through the Wadi Fara to Beisan. Prior to the offensive the RAF photographed these
passes and analyzed them to identify choke points that could be bombed to cut off the

96
Turks in retreat.34 No. 1 Squadron was given the task to patrol these passes and report
back their observations via long range wireless communication.
As the Turkish forces began to flee, the RAF diverted its attention to harass, slow
or, in some cases, cut off the enemy’s retreat. According to the official history of the
EEF, on 20 and 21 September, every available machine was used for bombing the
retreating enemy.35 But the most significant of these efforts was the actions against the
retreating Turks in the Wadi Al Fara. The overwhelming success of the RAF in blocking
the retreat of the Turkish forces in the Wadi Fara was both controversial as well as
demonstrative of the effective use of airpower against a canalized and virtually
defenseless enemy.
In the early morning hours of 21 September, a pilot and observer from the No. 1
Squadron, Australian Flying Corps, spotted a column of Turkish moving southeast along
the Nabulus-Wadi Fara road. The observer sent a report back to the aerodrome using
wireless telegraph.36 It was urgent that this movement be stopped. While the 4th Cavalry
had seized Beisan and was blocking the enemy retreat there, there were no EEF forces in
position to close the crossings over the Jordan River. The only option available was the
employment of the RAF. All available machines were at once mobilized for the attack.37
The priority for the attacks was given to the No. 1 Squadron, Australian Flying
Corps using Bristol Fighters carrying eight 20-pound bombs each, No. 144 Squadron
using DH9’s carrying one 112-pound bomb and eight 20-pound bombs, and No. 111
Squadron using S.E.5s carrying four 20-pound bombs. The attack commenced just after
0600 and increased in tempo throughout the day. They were timed in such a manner that
two aircraft arrived over the objective every three minutes to bomb and strafe the column,
97
and that an additional six aircraft arrived every half-hour to attack. These attacks lasted
until about noon, at which time ground forces arrived in a position to block the retreating
Turks.
In all, 88 bombing and strafing passes dropped nine-and-a-quarter tons of bombs
and fired 56,000 machine gun rounds against the Turks retreating in the narrow confines
of the Wadi Fara. The initial attacks focused on the lead elements of the column, once
these elements where destroyed and there was enough wreckage blocking the rout, the
subsequent aircraft strafed and bombed along the column. The way was completely
blocked with debris consisting of 87 guns, 55 motor lorries, 4 motor cars, and 932
wagons.38 Tactfully, the official record is silent in regards to the number of lives lost in
the wadi.
By 24 September, nearly all the area west of Amman was cleared of Turkish
forces. On 25 September, the head of a mixed column was seen traveling from Amman
enroute to Mafrak railway station, located between Amman and Dera. The No. 1
Squadron had a new target. Between 0600 and 0800 on the 25 September, ten aeroplanes
from the A.F.C. bombed, strafed and thoroughly demoralized this retreating force. The
squadron also went on to attack Mafrak station dropping four tons of bombs and firing
20,000 machine gun rounds into the area in three sequential attacks. Many Turks fled on
horse or foot and managed to escape the carnage. Approximately six to seven thousand
fugitive Turks, mostly from the Fourth Army managed to escape by way of Dera to
Damascus.39
The remnants of the Turkish II Corps surrendered to Chaytor’s Force at Amman
on 28 September, while the rest of the Fourth Army fled towards Damascus. On the
98
morning of the 29 September, a reconnaissance flight from No. 1 squadron reported
spotting almost the full strength of the Turkish fugitives on the road twenty miles south
of Damascus. At noon, five aeroplanes from No. 1 Squadron bombed these columns,
causing the Turks to flee in all directions. On the morning of 1 October, the 3rd
Lighthorse Brigade entered the city of Damascus. While some pockets of fighting
continued on the outskirts of the city, these were in reality the death throes of the
Yilderim.
The EEF continued to pursue the retreating Turks fighting small pitched battles
along the way from Damascus through Homs all the way to Aleppo. On 26 October, three
Turkish envoys were transported to the British Battleship Agamemnon, and after four
days of negotiation Turkey signed an armistice on 30 October 1918.40 Turkey was out of
the war.
On 19 February 1919, General Allenby addressed the No. 1 Squadron, Australian
Flying Corps in a farewell speech:
Major Addison, officers and men: It gives me considerable pleasure to have this opportunity of addressing you prior to your return to Australia. We have just reached the end of the greatest war known to history. The operations in this theater of the war have been an important factor in bringing about the victorious result. The victory gained in Palestine and Syria has been one of the greatest in the war, and undoubtedly hastened the collapse that followed in other theaters. This squadron played an important part in making this achievement possible. You gained for us absolute supremacy of the air, thereby enabling my cavalry, artillery, and infantry to carry out their work on the ground practically unmolested by hostile aircraft. This undoubtedly was a factor of paramount importance in the success of our arms here. I desire therefore personally to congratulate you on your splendid work. I congratulate you, not only the flying officers, but also your mechanics, for although the officers did the work in the air, it was good work on the part of your mechanics that kept a high percentage of your machines serviceable. I wish you all bon voyage, and trust that the peace now attained will mean for you all future happiness and prosperity. Thank you, and good-bye.41
99
This is probably the best sentiments expressed by Allenby regarding the part of the RAF
in the Palestine campaign. Since he did not keep a journal nor any other record of his
thoughts or decisions, the only insights we have into his mind are what is available in the
official record of the Egyptian Expeditionary Force and from what can be garnered from
letters and speeches such as this one.
1Gardner, 165.
2Ibid., 166.
3Baker, A., 131.
4Gardner, 167.
5Ibid., 167.
6Ibid.
7Ibid., 168.
8David L. Bullock, Allenby's War: The Palestine-Arabian Campaigns, 1916-1918 (London: Blandford Press, 1988), 127.
9Sanders, 201.
10Ibid., 203.
11Bullock, Allenby's War, 127.
12Pirie-Gordon, 112.
13Baker, 132.
14Falls, 448.
15Ibid., 449.
16Pirie-Gordon, 26.
17Sanders, 261.
18Ibid., 261.
100
19Bullock, Allenby’s War, 124.
20Falls, 460.
21Ibid., 461.
22Ibid., 462.
23Pirie-Gordon, plate 40.
24Bullock, Allenby's War, 130.
25Baker, A., 134-135.
26Bullock, Allenby's War, 131.
27Pirie-Gordon, 113.
28Bullock, Allenby's War, 131.
29David L. Bullock, “Swift as Eagles: The Victory of the Royal Air Force in Palestine, 1914-1918.” (Ph.D. Diss., Kansas State University, 1995), 456.
30Bullock, Allenby's War, 133.
31Cutlack, 158.
32Bullock, “Swift as Eagles,” 458.
33Falls, 523.
34Bullock, Allenby's War, 135.
35Pirie-Gordon, 113.
36Cutlack, 159.
37Pirie-Gordon, 113.
38Ibid., 113.
39Cutlack, 167.
40Falls, 620-621.
41Cutlack, 171.

101
CHAPTER 6
THE LEGACY OF MEGIDDO
The legacy of the Battle of Megiddo is a lesson in the proper employment of
technology in war--not as a “silver bullet” or panacea, but rather as an enhancement to
the ground maneuver plan. Once a particular weapon of war is widely available, neither
secrecy nor defensive measures will prevent its exploitation. What is important in the use
of technology for war is: rapid adoption of the technology into service; experimentation,
trial and professional dialogue in its use; training of operators as well as ground forces in
the weapon’s relevance; mass production and dissemination; and sensible incorporation
of the technology into the organizational force structure. Furthermore, in regards to the
dissemination of the technology, it is better to mass many elements in a few places than
to attempt to position a few elements over a massive area.
The RAF at the battle of Megiddo illustrated the effectiveness of a well integrated
technology. It is not to say that the British were alone in their quest. Most air forces at the
time were struggling, with varying degrees of success, to develop and improve aeroplanes
while simultaneously trying to integrate them into the war effort. The French developed
bomber squadrons and the Germans developed fighter squadrons or Jastas. While these
were innovative, they were not linked with the ground maneuver plan. Instead, these
developments took on lives of their own. What did the French strategic bombing
initiatives do for the Nivelle Offensive? And how much did “bloody April” assist the
Ludendorff Offensives? The answer is: not much. The reason for this is that these
advantages were fleeting, unanticipated and uncoordinated. Conversely, the 1918 gradual

102
intensification of the RAF’s air campaign in Palestine was timed to coincide with
Allenby’s autumn offensive. It was not a separate effort, but was indeed part of Allenby’s
overall plan. Furthermore, the participation of the RAF in all phases of the offensive
further illustrates the comprehensive integration of the RAF with the ground maneuver
plan.
The synchronization of air and ground efforts at the Battle of Megiddo presaged
the success of concepts such as blitzkrieg, combined-arms warfare, and air-land battle. It
remains uncertain as to whether the Germans used the Battle of Megiddo as a template
for the development of their inter-war doctrine. However, they were on the receiving end
of Allenby’s offensive and the Battle of Megiddo was decisive. If military history teaches
us nothing else, it teaches us that the vanquished are often more observant learners than
the victors.
There is much to learn from the study of the Battle of Megiddo. In this microcosm
of the First World War, we witness the impact of politics on war and vice-versa. We see
the importance of leadership in the development and employment of a military force. We
observe the importance of learning for a military organization and the communication of
this learning through dialogue, literature and training. Finally, we perceive the
importance of timing in the planning and conduct of military operations. Specifically, by
studying the Battle of Megiddo we behold the essence of achieving battlespace
dominance (local air superiority) and the exploitation of this dominance through a
carefully coordinated combined arms effort.
The Battle of Megiddo was neither a lucky stroke nor a “flash in the pan” of
history. Instead, it was the gradual culmination of three phases of development for the
103
British Forces in Palestine. These three phases are distinguished by their unique
characteristics of leadership, capabilities (based on equipment, training, and tactics), and
operational employment.
In the first phase of operations in Egypt, the British organized a force that was
determined to defend. This phase, which spanned from August 1914 to February 1916,
was demonstrative of the British attitude. By the time they sent forces to defend their
interests in Egypt, specifically the Suez Canal, the British had already suffered some
disastrous defeats at the hands of the Germans in Europe. Instead of achieving a quick
victory, the British were facing the prospect of a protracted war as the Western Front
stabilized and the great wound, that was the network of trenches across the face of the
European continent, began to fester.
The force that the British sent to Egypt in 1914 was not one of conquest, but was
rather an economy-of-force. The British were not yet interested in destroying the Turkish
Army that was massing on the Sinai Peninsula. By November 1914, they were more
concerned with just being able to defend their interests in the region. But the British sent
something to Egypt that gave their small force the important edge they needed--an
aeroplane detachment of the Royal Flying Corps. This small compliment of aircraft
served to amplify the British defenses by providing vital aerial reconnaissance. Due to the
efforts of this handful of aeroplanes and pilots, the British knew when and where the
Turks were moving. Thus, the British had the time to maneuver ground forces in order to
counter the Turkish threat. By the end of this first phase of operations in Egypt, the
British had learned a valuable lesson in the industrial age of warfare--aerial
reconnaissance was critical to an effective defense.

104
As operations in Palestine transitioned into the second phase, from March 1916 to
April 1917, the newly named Egyptian Expeditionary Force began to hone its offensive
spirit and take the fight to the Turks. This second phase is characterized by the tempered
security of the Suez Canal, the successful expansion of the EEF across the Sinai, and the
British attacks against the Turkish force at Gaza. Although their two attacks against Gaza
were unsuccessful, this last element of this phase again demonstrated to the British the
importance of aerial reconnaissance in the conduct of a defense. This time it was the
Turks who benefited from the virtually unmolested aerial reconnaissance provided by
their allies in the German Air Service.
Also characteristic of this second phase of operations in Palestine was the
introduction of the German Air Service into the theater, equipped with aeroplanes that
were superior to those of the Royal Flying Corps. Throughout this phase, the RFC
wrestled with the German Air Service for control of the skies. The fact that the RFC
could not prevent the Germans from conducting aerial reconnaissance of British
formations meant that the ground maneuver plan could not achieve surprise or numerical
superiority at the point of attack. This was evident at the battles for Gaza.
The third phase of operations in Palestine, from April 1917 to November 1918,
was characterized by a sense of British domination which culminated in the battle of
Megiddo in September of 1918. This phase witnessed the gradual and deliberate mastery
of the skies by the newly formed Royal Air Force Middle Eastern Division. Equipped
with sufficient amounts of the most modern aircraft, which were at least equal to those of
the Germans, the RAF succeeded in effectively shutting down the German Air Service.
105
They accomplished this feat twice during this phase: prior to Allenby’s offensive against
Gaza /Jerusalem and again during the Battle of Megiddo.
Within each phase of operations in Egypt and Palestine the characteristics of
leadership, capabilities and operations were distinct. In the first phase the leadership for
the British efforts in Egypt was provided by Lieutenant General Maxwell. While
competent and knowledgeable of Egypt, Maxwell was unsatisfied with his assignment
and longed to be more integral to the strategic decisions of the war. To his credit,
Maxwell established and maintained a robust defense of the Suez Canal, and managed to
stave off two large-scale attacks against it. In fact, he laid the foundation for all British
efforts in Egypt and Palestine to build upon. Maxwell understood the importance of
incorporating aerial reconnaissance into the defense of the Suez Canal, and used all
aircraft at his disposal, from both the RFC and RNAS, to accomplish this vital mission.
For the duration of his command in Egypt, Maxwell and his British force defended the
canal on all sides. He used the RFC’s aeroplanes, the only aircraft in theater for much of
this phase, to provide early warning and information in support of the defensive
measures.
In contrast to Maxwell’s defensive posture, the second phase of operations in
Egypt and Palestine represented a transition. Lieutenant General Murray pushed his
defensive lines out more than 11,000 yards from the canal zone. Once these defenses
were completed, Murray decided to drive his Egyptian Expeditionary Force across the
Sinai. In so doing, he built a network of logistic nodes as well as a water pipeline across
the northern Sinai. This system was vital to the British efforts in the region. In regards to
the use of aviation in his efforts, Murray stressed the importance of an air photographic

106
survey and had the RFC cooperate with the topographical section of the intelligence
division to produce detailed maps of the featureless desert. This survey and the resultant
maps gave the British an important edge in navigating across the Sinai and in establishing
detailed plans for follow-on operations. While Murray was enthusiastic and skilled as a
commander, he lacked the sizeable force necessary to break the Turkish defenses at Gaza
and the aircraft that could challenge and defeat the German Air Service.
Murray’s failures at Gaza, coupled with a shift in British strategy regarding the
Palestine Theater, ushered in the third phase of operations which was characterized by
British domination. Beginning with the appointment of General Edmund H. H. Allenby,
the British force in Palestine was being set up for success. Furthermore, the British War
office was now ready and prepared to give the EEF all that they needed, within reason, to
destroy the Turkish forces in the region and push them out of the war. Allenby’s
leadership was in stark contrast to his two predecessors. He was cunning, offensive
minded and cognizant of the full breadth of warfare in the industrial age. Due to his
influence and insistence, the RFC/RAF received sufficient quantities of the most modern
aircraft in the British inventory. Armed with these aircraft the RFC/RAF managed to
dominate the skies over Palestine, a feat which Allenby exploited and capitalized upon to
deceive and defeat the Turkish forces at Gaza, Jerusalem and Megiddo.
While the leadership of the EEF changed with each phase, there was a source of
continuity of leadership within the RFC/RAF in Palestine. Geoffrey Salmond came to
Egypt in August 1915 and remained until November 1918. He was an enthusiastic leader
who not only provided guidance to the air forces under him, but was also an integral part
of the fostering of understanding and cooperation between the RFC/RAF and the ground
107
forces. Salmond was involved in all facets of aviation operations in Palestine and was
constantly expanding the roles of aeroplanes in the war effort while simultaneously
striving to increase the accuracy and effectiveness of the roles that aeroplanes performed.
Salmond was instrumental to the overwhelming success of the RFC/RAF in Palestine and
is a model of an officer with technical and tactical proficiency, as well as keen sense for
the strategic employment of tactical resources. While Allenby’s leadership drove the EEF
to success over the Turks at Gaza, Jerusalem and Megiddo, it was the remarkable and
committed leadership of Salmond that paved the way for Allenby.
While each phase is distinct in terms of leadership, they were also unique in
regards to the capabilities that were available or developed during each phase’s time
period. These capabilities are defined as the equipment, tactics and training available at
the time. In the first phase, the aeroplanes introduced into Egypt were extremely
rudimentary, comprised of mostly Farmans, Nieuports, and B.E.2s (see appendix B);
these aircraft were good enough to be used in aerial reconnaissance roles. Not much more
was required of them. In this first phase of operations in Egypt, the Turks did not have
any aircraft available to them until the spring of 1916. Therefore, for much of this phase,
the RFC enjoyed their solitude in the skies above Egypt and the Sinai.
In the beginning of the second phase of operations in Egypt and Palestine, the
edge slipped to the German Air Service. By April 1916 German aircraft were flying
reconnaissance in support of the Turks throughout Palestine and the Sinai. These aircraft,
mostly Rumplers and Fokker Eindeckers (see appendix B), were superior in speed,
performance and firepower, than the aircraft flown by the British from Egypt. These
same types of German aircraft were causing havoc in the skies over the Western Front as
108
well. To compensate, the British increased the size of the Royal Flying Corps. They took
advantage of the favorable flying weather in Egypt and created a training brigade there,
responsible for developing skilled pilots for all theaters of the war. This brigade was a
great success. Under the direction of Salmond, it built upon the principles taught at the
famous Gosport school in Britain. By the end of this phase, the Egypt Training Brigade
was producing over 100 pilots each month. While the quality and quantity of pilots were
improving, the aircraft that the British were flying were still inferior to those of the
Germans.
In the third phase of operations in Palestine, the RAF matured into a decisive
force. Not only was it producing large numbers of skilled pilots, but in 1917 the Palestine
Brigade of the RAF finally received aircraft that were more than a match for the German
Air Service. Aeroplanes such as the Sopwith Camel and S.E. 5a (see appendix B) arrived
in Palestine in quantities that were sufficient to reduce both the size of the German Air
Service as well as the morale of the German pilots. Once the RFC/RAF regained its edge
in 1917, it held it and honed it until the end of the war. The tenacity and skill of the
RFC/RAF pilots coupled with the high quality of aeroplanes with which they were
equipped allowed them to wrestle the skies from the German Air Service and achieve
complete air dominance in Palestine just prior to the Battle of Megiddo.
In terms of the types of operations that were conducted in Egypt and Palestine,
each phase witnessed unique operational postures. The first phase was characterized by a
defensive posture, in which the British forces were building up their defenses around the
Suez Canal. During this first phase, the British repelled two Turkish attacks from the
Eastern Desert as well as attacks from the Western Desert, launched by the Senussi and
109
Sultan of Darfur. The second phase was characterized by a transitional posture in which
the EEF secured its defense of the Suez Canal and transitioned to the conduct of
offensive operations. As a result, the EEF swept across the northern Sinai up to Gaza, and
established a critical logistic support structure in its wake. The third phase was
characterized by a culmination of British offensive capability which they brought to bear
in a synchronized and coordinated effort against the Turko-Germanic force that opposed
them in Palestine.
Throughout all three phases of operations, the support provided by the RFC/RAF
in Egypt and Palestine was essential. From the aerial reconnaissance missions in early
1915 that galvanized the British defense of the Suez to the domination of the skies over
Palestine in 1918 that facilitated Allenby’s maneuver, the RFC/RAF in that theater was
an integral part of operations and involved in all levels of planning and coordination.
There is very little scholarship dedicated to the actions of the RFC/RAF in Egypt
and Palestine. The sheer number of troops and equipment involved in that theater was a
fraction of what was employed on the Western Front. Furthermore, the Western Front
was in far closer proximity to the British homeland. For these reasons, the campaigns that
were carried out in the other theaters of the First World War are often overshadowed in
the analysis of the British actions on the Western Front. And as is often the case, the
important lessons of war are misunderstood or unappreciated.
In military operations, the seizure of high ground is often critical to success. The
high ground offers the vantage from which to observe enemy movements, increase the
strength of the defense, and give impetus to an attack. In the First World War the high
ground was in the skies above the terrain, temporarily occupied by each side. But high
110
ground cannot be shared, out of military necessity, it must be seized and exploited. The
RAF achieved this at the Battle of Megiddo.
In Palestine, the RFC/RAF demonstrated that the domination of battlespace is not
something that can be achieved over-night. Instead, it is a systemic and deliberate
process. Furthermore, mastery of the skies is only useful if it is linked to operations on
the ground. Due to the capabilities of aeroplanes in the First World War, the sky could
not be “occupied” for a prolonged duration of time. Therefore, the command of the air
was a tenuous position that was best exploited when it was linked to a ground maneuver
plan that focused on speed and maneuver. As the ground forces advanced, the enemy
airdromes were captured and the enemy’s capability to fight for the skies was further
deteriorated. The RAF in cooperation with the EEF achieved this at the Battle of
Megiddo. The analysis of the RAF’s actions leading up to the Battle of Megiddo is
important in understanding the process by which the RAF attained air dominance prior to
the battle. Once air dominance was attained, the RAF then demonstrated how airpower
could be exploited in all facets of military operations during the Battle of Megiddo.
In the application of military strategy, the knowledge of the enemy is critical. The
logical converse to this is also critical--to deny the enemy knowledge of yourself. This is
achieved through deliberate, energetic and responsive counter-reconnaissance efforts. By
September 1918, the RAF virtually shut down the German Air Service that was providing
vital aerial reconnaissance to the Turkish forces. Consequently, the Turks did not possess
accurate information regarding the disposition and array of the British forces prior to the
battle of Megiddo. Just prior to the attack, Allenby was able to reposition his forces in

111
order to mass more cavalry on his left flank without tipping his hand to the Turks. This
was due to the RAF’s aggressive counter-reconnaissance patrols.
Communication is vital to the command and control of ground forces. This is
especially important once contact is made with the enemy. The aerial bombardment of
the telephone and telegraph exchange at El Afule just prior to launching the ground
offensive on 19 September 1918, effectively severed communications from von Sanders’
General Headquarters to his subordinate commanders.1 By the time the enemy realized
what was happening, it was too late and retreat became the only option.
In order to prevent German aircraft from interdicting or disrupting the EEFs
offensive, the RAF maintained a constant presence over the Jenin Aerodrome throughout
the first day of the attack. These patrols circled the airfield and attacked any sign of
activity at the aerodrome.2 No German aircraft left the ground that day. The RAF
dominated the battlespace.
The role of artillery cooperation during the battle of Megiddo was thorough.
Before the offensive, reconnaissance patrols provided extensive photographic coverage of
the Turkish artillery positions. These were mapped and prioritized before the battle.
During the offensive, reconnaissance aircraft flew in support of each Corps to provide
artillery spotting, thereby increasing the accuracy and effectiveness of the British
artillery. The thorough work of the RAF before and during the battle of Megiddo
increased the lethality of the British artillery to quickly neutralize the Turkish artillery
from influencing the battle.
As the Turkish forces pounded a retreat, the RAF again acted decisively. Based
on reconnaissance photographs, the RAF had identified possible escape routes for the
112
Turkish forces. Once reconnaissance aircraft spotted large columns of Turks moving
along the Wadi Al Fara on 21 September 1918, the RAF sprang into action. All available
aircraft were mobilized to attack the fleeing Turks. The RAF maintained an unrelenting
four-hour ground attack on the Turkish column.3 The Turks were demoralized, dispersed
and devastated. The RAF effectively transformed the Turkish retreat into a rout.
In all aspects of the Battle of Megiddo, the RAF demonstrated the enormous
capabilities of aircraft when effectively incorporated into the ground maneuver plan. Due
to its actions before, during and after the battle, the RAF’s dominance of its battlespace
was the decisive element that enabled the quick and overwhelming victory of the British
over the Turks. While the Battle of Megiddo is a fantastic illustration of combined arms
warfare, it was actions of the RAF before, during and after the battle that made it a
decisive victory for the British.
Throughout its efforts in Egypt and Palestine, the RFC/RAF evolved as a learning
organization spurred on by the competent and committed leadership of people like W. G.
H. Salmond, and Edmund Allenby. For the RAF, therefore, the Battle of Megiddo is not
only the culmination of their efforts, but it represents the validation of the organizational
learning process. As we close this chapter of history and return our focus to the
contemporary environment, the thought that lingers is: are the technologies in use today
fully integrated and coordinated to achieve operational and strategic goals? Particular
technologies and “specialists” are only relevant if they and their efforts are integrated and
directed toward a desired endstate. It is up to military leaders to become competent in the
breath of full spectrum operations in order to understand when and where to employ
technology for decisive effect. This is the legacy of Megiddo.

113
1Pirie-Gordon, 113.
2Ibid.
3Ibid.
114
APPENDIX A
HISTORIC MEGIDDO
Solomon
Megiddo reached its peak under Solomon in the tenth century B.C. Solomon
rebuilt Megiddo as a royal city to administer the northern part of the kingdom. During his
reign the city of Megiddo was surrounded by a sturdy casement wall (two parallel walls
with partitions between them, creating rooms). The casements served as barracks or
stables.1 The Bible records that Solomon fortified the city of Megiddo:
This is the account of the forced labor that King Solomon conscripted to build the house of the Lord and his own house, the Millo, and the wall of Jerusalem, Hazor, Megiddo, Gezer . . . as well as all of Solomon’s storage cities, the cities for his chariots, the cities for his cavalry, and Whatever Solomon desired to build, in Jerusalem, in Lebanon, and in all the land of his dominion.
There is no evidence that Solomon ever fought a battle in the Jezreel valley during his
reign, but the fact that he took such effort in fortifying the city of Megiddo suggests that
he was concerned about the need to defend it. While it remains uncertain who he believed
he needed to defend the city against, there is a theory that he was concerned about the rise
to prominence of the Pharaoh Shoshenq I in Egypt. The fact that Shoshenq I lead a
successful campaign into Syria-Palestine five years after Solomon’s death in 930 B.C.
and captured Megiddo, among many other cities, echoes the wisdom of Solomon.2
Pharaoh Necho II
This chapter of the history of Megiddo is indeed fraught with controversy and
mystery. There are varying accounts of what occurred in 609 B.C., which include the
Bible, Josephus and the Apocrypha. There are slightly differing pictures of the events in
115
the various translations of the Bible and this is the largest source of controversy over the
incident.
Necho II was the King of the Twenty-Sixth Dynasty of Egypt. He reigned from
610-595 B.C. In the Spring of 609 B.C. Necho II was answering the call of his Assyrian
Ally to fight against the Babylonians. The battle was to take place at Carchemish, located
in Northern Syria. This meant that Necho II and his army would have to transverse across
the Sinai and all of Palestine and Syria to get there. Necho asked the King Josiah, of
Judah, for permission to march through his lands. Instead of granting permission to King
Necho, Josiah and his army marched out to the Jezreel valley and awaited the Egyptian
army to emerge from the Musmuss Pass.3
As the Egyptians gathered in the Jezreel valley the Judean army was arrayed with
Josiah in his chariot riding up and down the front lines encouraging his men. Josiah then
gave the order to attack. As the battle ensued, Josiah was struck by an arrow and whisked
away by chariot. His death marked the end of a brief hope in the rejuvenation of Judah.
Furthermore, it marked the beginning of the end for the kingdoms of Israel and Judah. In
less than 20 years from Josiah’s death, both Israel and Judah would fall to the hands of
the Babylonians under King Nebuchadnezzar. He destroyed the city of Jerusalem in 597
B.C. and laid waste to the Temple.4 Israel and Judah never recovered from that fateful
day on the plains of Megiddo.
Saladin
The twelfth century Muslim leader best known for his total annihilation of a
Crusader force in 1187 A.D. at the battle of Hattin, was the Kurdish leader known as
Saladin. The name Saladin, or Salah ad-Din is an honorific title which translates as The
116
Righteousness of the Faith. This man, who was born in Tikrit in 1138 A.D., was a warrior
and General of great renown.5 He rose to power during the interval between the second
and third crusades, after swearing to take back the Holy Land from the Crusaders. Saladin
made several forays into the Jezreel valley before and after the Battle of Hattin. In fact,
Saladin at least four times repeated the same tactic of crossing Jordan river, entering the
Jezreel Valley and harassing the Crusader outposts there.6
The Crusaders had an opportunity to learn from an event that occurred in 1183, at
a place called Ayn Jalut (the “Spring of Goliath”), located Southeast of Megiddo. When
in mid-September of that year, Saladin and his army moved into the Jezreel valley after
capturing the city of Aleppo (in modern day Syria) and several cities in Mesopotamia.
The Crusaders assembled their force under the command of Guy de Lusignan--a
controversial figure whom many of the crusaders considered to be incompetent. The
Crusaders moved from their base in Sepphoris to Al-Fula, a city located 10 miles East of
Megiddo. The Crusaders then moved on Saladin’s army, which was camped at Ayn Jalut,
to which Saladin unexpectedly withdrew his forces about one mile away into the open
valley near a place called Ayn Tubaniya. The Crusader force occupied Ayn Jalut
themselves and remained within sight of Saladin’s forces.7
Saladin sent forth daily raids, intent on drawing the Crusaders out from Ayn Jalut,
but to no avail. Finally, on October 6th, Saladin withdrew his forces to Mount Tabor,
perhaps hoping that the Crusaders would pursue him. However, the Crusaders only
marched back to Al-Fula before returning to their base at Sepphoris. Saladin re-crossed
the Jordan on 8 October and returned with his army to Damascus.8

117
While this event is far from decisive, it was a strategic victory for the crusaders,
who only lamented at the fact that Guy de Lusignan failed to attack and defeat Saladin
with the largest Crusader army every assembled. The crusaders accused Guy de Lusignan
of cowardice. When, in fact, the actions of the Crusaders demonstrated that whenever
Saladin’s army entered the Jezreel valley it did so with only enough logistics to sustain
them for a short while. If the crusader force could continue to prevent Saladin from
decisive actions, he may commit a desperate act to force a decision or at least continue to
be vulnerable as his supplies were exhausted.
Mamluke Sultan Qutuz
In the thirteen century the Mongol Horde ventured out from the Steppes of Asia
and cut a swath of destruction and devastation in their wake. As they moved across the
Middle East and into Syria-Palestine, a clash ensued between the Mongols and another
revolutionary force--the Mamlukes. The Mamlukes were almost all of Turkish origin who
were purchased as children slaves and brought to Egypt. Once there they were converted
to Islam and raised under a Mamluke sergeant. Upon reaching adulthood, they were
offered their freedom in return for service in the Egyptian army. The Mamlukes were
regarded as fierce warriors and were favored by the thirteenth century Egyptian sultans.9
Saif ad-Din Qutuz was appointed as regent to the Sultan Aybak in 1253. When
the sultan was assassinated in 1257, Qutuz remained as regent for the Sultan’s son, al-
mansour Ali. Qutuz overthrew Ali in 1259 and made himself Sultan. As such, he raised
an army and appointed the Mamluke General Baibars to lead it.10 Qutuz rejected the
Mongol Ambassadors who demanded the Egyptians to surrender, and had the
ambassadors executed. Qutuz and his army departed Cairo in July 1260, crossed the
118
Sinai, marched through Gaza and camped outside of the Crusader city of Acre. There
they received food and supplies from the Franks who occupied Acre.
Meanwhile, the Mongols under the command of Kitbuqa marched out from
Damascus to meet the advancing Mamluke army. The Mongols took up a position at the
city of Ayn Jalut, the same place where the Crusader forces met Saladin in the previous
century. Qutuz sent his Mamluke advance guard out under the command of General
Baibars, while he led the rest of the army from Acre towards Ayn Jalut. The battle of Ayn
Jalut took place on September 3rd, 1260. The fighting was fierce. The Mongols attacked
first against the Mamluke left flank. As it gave way, Qutuz reorganized his forces and
counterattacked the Mongols, in which he surrounded and overwhelmed them. In the end,
Kitbuqa was killed and his decapitated head was sent to Cairo as evidence of the
Mamluke victory.11
This was the first time that the Mongols were ever defeated in battle. Their air of
invincibility was forever shattered. The very course of Western civilization was
determined. This great victory of Qutuz, was one that was short-lived. On October 22nd,
General Baibars, angered that Qutuz had not appointed him as governor of Syria,
assassinated Qutuz and proclaimed himself Sultan.12
1Israeli Foreign Ministry. “Megiddo - The Solomonic Chariot City.” Jewish
Virtual Library (Available from: http://www.jewishvirtuallibrary.org/jsource/ Archaeology/Megiddo.html, accessed online 24 March 2007).
2Cline, 78.
3Ibid., 90.
4Ibid., 100.

119
5“Saladin,” Wikipedia.com (Wikimedia Foundation Inc., 2007, available from:
http://en.wikipedia.org/wiki/Saladin, accessed online 14 November 2006).
6Cline, 126.
7Ibid., 133.
8Ibid., 134.
9Ibid., 144.
10“Saladin,” Wikipedia.com.
11Cline, 149.
12Ibid., 151.
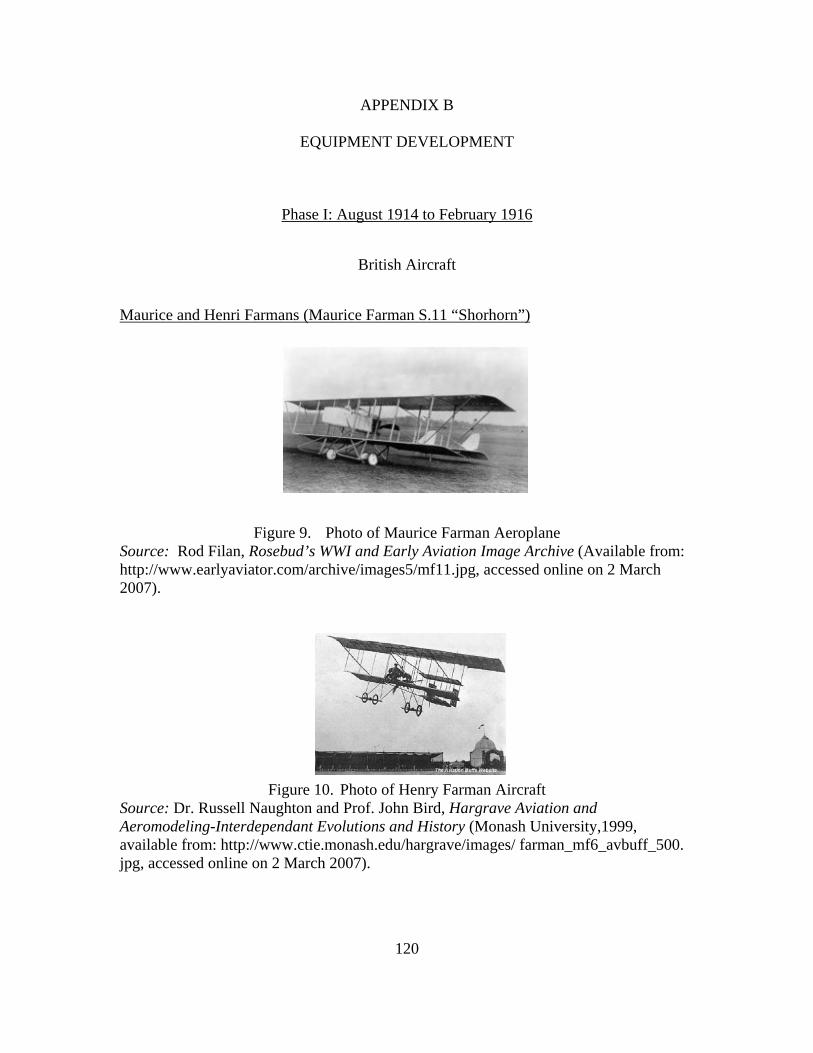
APPENDIX B
EQUIPMENT DEVELOPMENT
Phase I: August 1914 to February 1916
British Aircraft
Maurice and Henri Farmans (Maurice Farman S.11 “Shorhorn”)
Figure 9. Photo of Maurice Farman Aeroplane Source: Rod Filan, Rosebud’s WWI and Early Aviation Image Archive (Available from: http://www.earlyaviator.com/archive/images5/mf11.jpg, accessed online on 2 March 2007).
Figure 10. Photo of Henry Farman Aircraft Source: Dr. Russell Naughton and Prof. John Bird, Hargrave Aviation and Aeromodeling-Interdependant Evolutions and History (Monash University,1999, available from: http://www.ctie.monash.edu/hargrave/images/ farman_mf6_avbuff_500. jpg, accessed online on 2 March 2007).
120
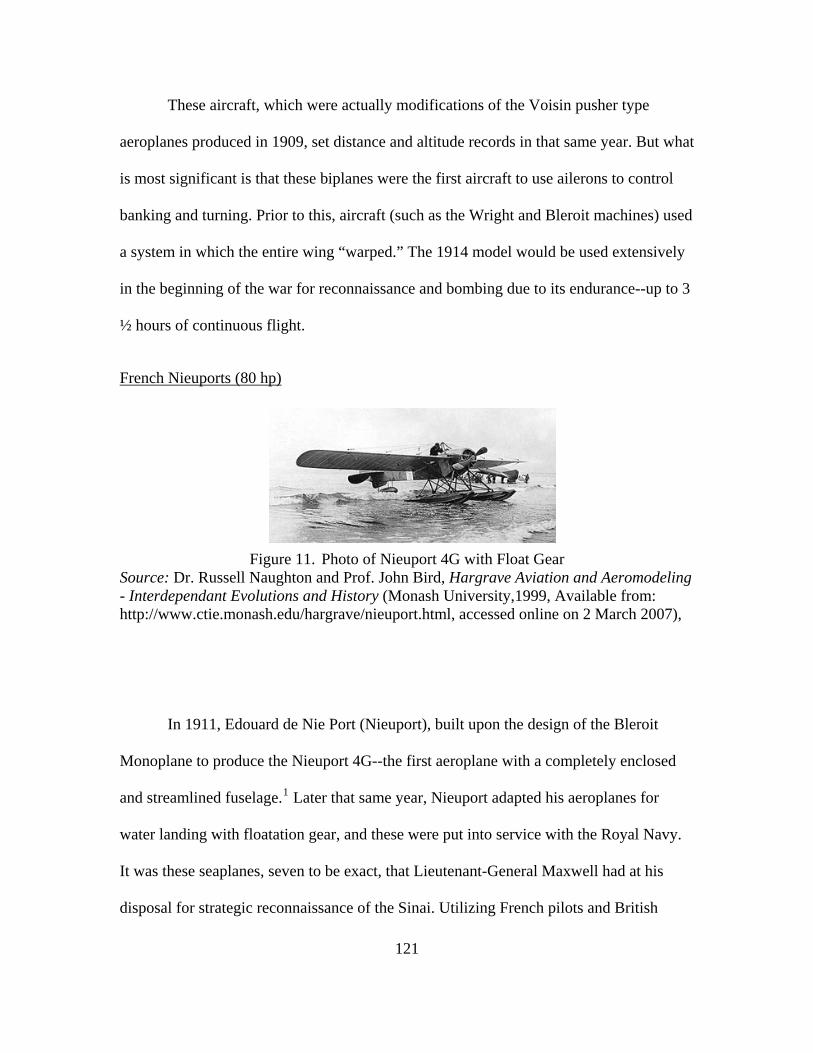
These aircraft, which were actually modifications of the Voisin pusher type
aeroplanes produced in 1909, set distance and altitude records in that same year. But what
is most significant is that these biplanes were the first aircraft to use ailerons to control
banking and turning. Prior to this, aircraft (such as the Wright and Bleroit machines) used
a system in which the entire wing “warped.” The 1914 model would be used extensively
in the beginning of the war for reconnaissance and bombing due to its endurance--up to 3
½ hours of continuous flight.
French Nieuports (80 hp)
Figure 11. Photo of Nieuport 4G with Float Gear
Source: Dr. Russell Naughton and Prof. John Bird, Hargrave Aviation and Aeromodeling - Interdependant Evolutions and History (Monash University,1999, Available from: http://www.ctie.monash.edu/hargrave/nieuport.html, accessed online on 2 March 2007),
In 1911, Edouard de Nie Port (Nieuport), built upon the design of the Bleroit
Monoplane to produce the Nieuport 4G--the first aeroplane with a completely enclosed
and streamlined fuselage.1 Later that same year, Nieuport adapted his aeroplanes for
water landing with floatation gear, and these were put into service with the Royal Navy.
It was these seaplanes, seven to be exact, that Lieutenant-General Maxwell had at his
disposal for strategic reconnaissance of the Sinai. Utilizing French pilots and British
121
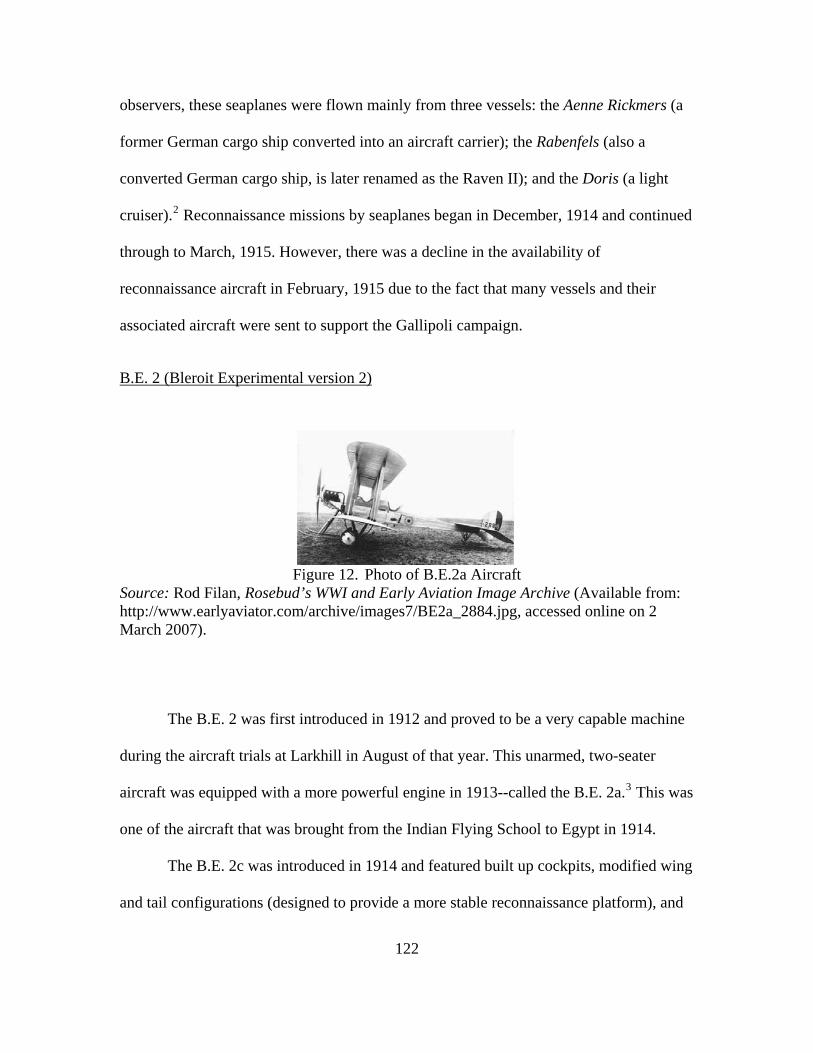
observers, these seaplanes were flown mainly from three vessels: the Aenne Rickmers (a
former German cargo ship converted into an aircraft carrier); the Rabenfels (also a
converted German cargo ship, is later renamed as the Raven II); and the Doris (a light
cruiser).2 Reconnaissance missions by seaplanes began in December, 1914 and continued
through to March, 1915. However, there was a decline in the availability of
reconnaissance aircraft in February, 1915 due to the fact that many vessels and their
associated aircraft were sent to support the Gallipoli campaign.
B.E. 2 (Bleroit Experimental version 2)
Figure 12. Photo of B.E.2a Aircraft Source: Rod Filan, Rosebud’s WWI and Early Aviation Image Archive (Available from: http://www.earlyaviator.com/archive/images7/BE2a_2884.jpg, accessed online on 2 March 2007).
The B.E. 2 was first introduced in 1912 and proved to be a very capable machine
during the aircraft trials at Larkhill in August of that year. This unarmed, two-seater
aircraft was equipped with a more powerful engine in 1913--called the B.E. 2a.3 This was
one of the aircraft that was brought from the Indian Flying School to Egypt in 1914.
The B.E. 2c was introduced in 1914 and featured built up cockpits, modified wing
and tail configurations (designed to provide a more stable reconnaissance platform), and
122
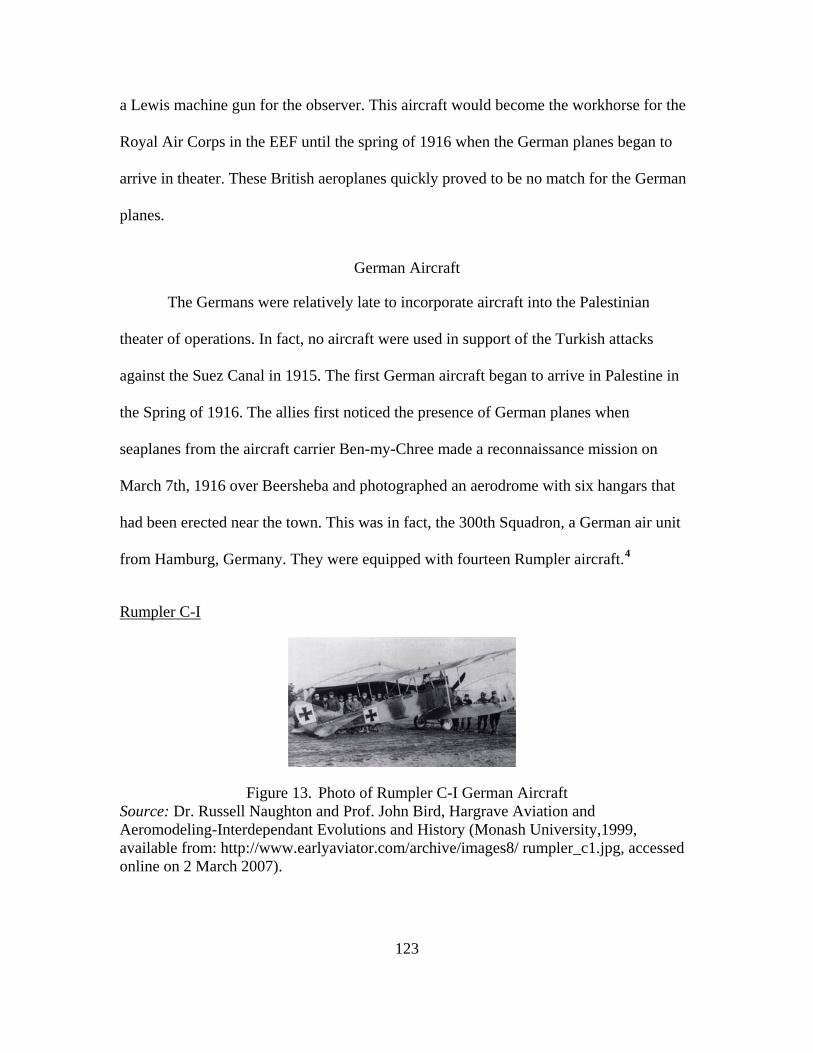
a Lewis machine gun for the observer. This aircraft would become the workhorse for the
Royal Air Corps in the EEF until the spring of 1916 when the German planes began to
arrive in theater. These British aeroplanes quickly proved to be no match for the German
planes.
German Aircraft
The Germans were relatively late to incorporate aircraft into the Palestinian
theater of operations. In fact, no aircraft were used in support of the Turkish attacks
against the Suez Canal in 1915. The first German aircraft began to arrive in Palestine in
the Spring of 1916. The allies first noticed the presence of German planes when
seaplanes from the aircraft carrier Ben-my-Chree made a reconnaissance mission on
March 7th, 1916 over Beersheba and photographed an aerodrome with six hangars that
had been erected near the town. This was in fact, the 300th Squadron, a German air unit
from Hamburg, Germany. They were equipped with fourteen Rumpler aircraft.4
Rumpler C-I
Figure 13. Photo of Rumpler C-I German Aircraft Source: Dr. Russell Naughton and Prof. John Bird, Hargrave Aviation and Aeromodeling-Interdependant Evolutions and History (Monash University,1999, available from: http://www.earlyaviator.com/archive/images8/ rumpler_c1.jpg, accessed online on 2 March 2007).
123

The Rumpler C-I was a two seat reconnaissance aircraft equipped with two
parabellum machine guns. It used a 150 hp Mercedes Benz engine which gave it top
speed of 95 mph. It was faster and all around better aircraft than anything that the British
had in the skies over Palestine. It first made its appearance on the Western front in
December of 1915. It was one of the first two-seater biplanes to be specifically designed
to be equipped with a machine gun to be used in combat--at a time when most planes
were modifications of civilian versions. This plane proved to be reliable, rugged and a
favorite among German air crews.
Fokker E I
Figure 14. Sketch of Fokker E-I Monoplane Source: W. Ira Boucher, An Illustrated History of World War I (W. Ira Boucher,1999, available from: http://www.wwiaviation.com/german1915.html, accessed online 4 March 2007).
The Fokker E-I, which stands for Eindecker (german for “single wing”) version I,
was a successful single seat fighter which entered service in 1915. It was built on the
design of the Fokker MK5 reconnaissance aircraft, but was fitted with a forward firing
parabellum machine gun. By 1916, this aircraft and its successors were responsible for a
period known as the “Fokker Scourge” in which the German fighter aircraft dominated
the skies over the Western front.
124

125
What was unique with this aircraft, other than its single wing design, was the fact
that it had synchronization gear, which caused the forward firing machine gun to stop (or
pause) when the propeller blade was directly in front of the barrel. This ingenuous
mechanical linkage of the gun to the propeller allowed the pilot to fire forward without
shooting through the propeller blade.
1Dr. Russell Naughton, The Farman Brothers (CTIE, 2002, available from:
http://www.ctie.monash.edu.au/hargrave/farman.html, accessed online 1 March 2007).
2Jones, The War in the Air, 161.
3“Royal Aircraft Factory B.E.2,” Wikepedia.com (Wikipedia Foundation, Inc., 2007, available from: http://en.wikipedia.org/wiki/Royal_Aircraft_Factory_BE.2, accessed online 2 March 2007).
4Jones, The War in the Air, 179.
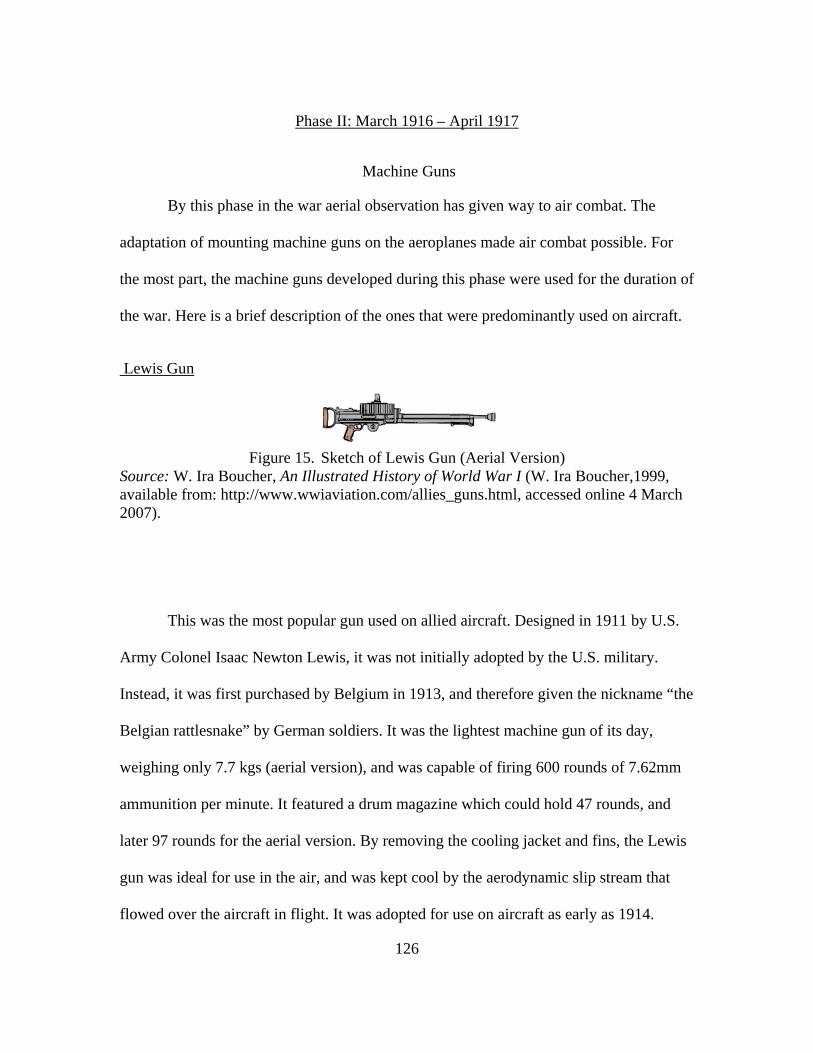
Phase II: March 1916 – April 1917
Machine Guns
By this phase in the war aerial observation has given way to air combat. The
adaptation of mounting machine guns on the aeroplanes made air combat possible. For
the most part, the machine guns developed during this phase were used for the duration of
the war. Here is a brief description of the ones that were predominantly used on aircraft.
Lewis Gun
Figure 15. Sketch of Lewis Gun (Aerial Version) Source: W. Ira Boucher, An Illustrated History of World War I (W. Ira Boucher,1999, available from: http://www.wwiaviation.com/allies_guns.html, accessed online 4 March 2007).
This was the most popular gun used on allied aircraft. Designed in 1911 by U.S.
Army Colonel Isaac Newton Lewis, it was not initially adopted by the U.S. military.
Instead, it was first purchased by Belgium in 1913, and therefore given the nickname “the
Belgian rattlesnake” by German soldiers. It was the lightest machine gun of its day,
weighing only 7.7 kgs (aerial version), and was capable of firing 600 rounds of 7.62mm
ammunition per minute. It featured a drum magazine which could hold 47 rounds, and
later 97 rounds for the aerial version. By removing the cooling jacket and fins, the Lewis
gun was ideal for use in the air, and was kept cool by the aerodynamic slip stream that
flowed over the aircraft in flight. It was adopted for use on aircraft as early as 1914.
126

Parabellum gun
Figure 16. Sketch of German Parabellum Gun (Aerial Version) Source: W. Ira Boucher, An Illustrated History of World War I (W. Ira Boucher,1999, available from: http://www.wwiaviation.com/allies_guns.html, Accessed online 4 March 2007).
This gun was the first weapon that was widely adopted for use on German
reconnaissance aircraft. This gun was a modification of the Maschineengewehr 08
otherwise known as the MG08, and entered service towards the end of 1914. The weapon
fired 7.92mm ammunition at a rate of 700 rounds per minute from a circular drum which
enclosed fabric ammunition belts. Its design was for the intended use on German aircraft.
But in 1915, this weapon proved to be incompatible with the newly incorporated
interrupter gear. Therefore, the gun was used on observation aircraft only after 1915.
Vickers Gun
Figure 17. Sketch of Vickers Machine Gun Source: W. Ira Boucher, An Illustrated History of World War I (W. Ira Boucher,1999, available from: http://www.wwiaviation.com/allies_guns.html, accessed online 4 March 2007).
127

This machine gun was formally adopted by the British in 1912. It was designed
on the model of the Maxim machine gun. It fired 7.62mm ammunition at a rate of 450
rounds per minute, and was affectionately referred to as the “Queen of the battlefield” by
British troops. The one major drawback of this weapon was its weight--over 15kg. This
made the weapon almost unwieldy. On the ground it was operated by a team of six men.
Once the British adopted interrupter gear in their aircraft, some aeroplanes were outfitted
with the Vickers gun. By late 1915 and onwards, however, the Lewis gun was replacing
many of the Vickers on the battlefield and above it.
Hotchkiss
Figure 18. Sketch of Hotchkiss Machine Gun Source: W. Ira Boucher, An Illustrated History of World War I (W. Ira Boucher,1999, available from: http://www.wwiaviation.com/allies_guns.html, accessed online 4 March 2007).
First adopted by the French in 1900, this machine gun had a few variations, the
most popular of which was the model 1909. This featured a gas-powered, air-cooled
system that was relatively lightweight (12kg). Since the gun’s magazine feed was
considered unreliable, this weapon worked best when fired in short bursts, which made it
ideal for use on tanks and aeroplanes.
128
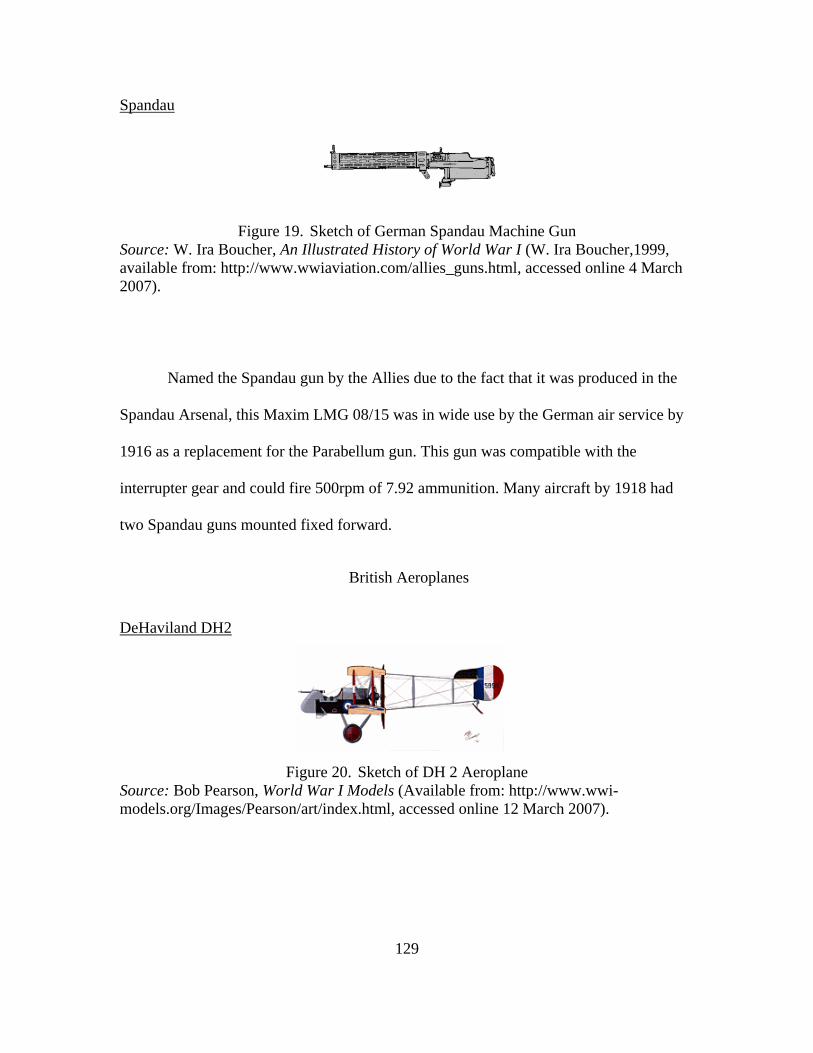
Spandau
Figure 19. Sketch of German Spandau Machine Gun Source: W. Ira Boucher, An Illustrated History of World War I (W. Ira Boucher,1999, available from: http://www.wwiaviation.com/allies_guns.html, accessed online 4 March 2007).
Named the Spandau gun by the Allies due to the fact that it was produced in the
Spandau Arsenal, this Maxim LMG 08/15 was in wide use by the German air service by
1916 as a replacement for the Parabellum gun. This gun was compatible with the
interrupter gear and could fire 500rpm of 7.92 ammunition. Many aircraft by 1918 had
two Spandau guns mounted fixed forward.
British Aeroplanes
DeHaviland DH2
Figure 20. Sketch of DH 2 Aeroplane Source: Bob Pearson, World War I Models (Available from: http://www.wwi-models.org/Images/Pearson/art/index.html, accessed online 12 March 2007).
129

First introduced in 1916, the DH2 was the British answer to the “Fokker
Scourge.” It was the second design by Geoffrey DeHavilland for the Aircraft
Manufacturing Company. This aircraft featured an atypical pusher configuration which
allowed it to mount a forward fixed machine gun. This was a necessary consideration,
since the British had not yet developed a synchronization or interrupter gear to fire
forward through propeller blades. The D.H.2 was a sturdy aircraft with a simple and
clean design. It had an excellent rate of climb and an impressive 14,000 foot ceiling,
which outmatched the Fokkers. It was also faster than the German Fokkers. Number 24
Squadron was the first to receive these aircraft late in 1916, and it became the first single-
seat fighter squadron.
Bristol F2
Figure 21. Sketch of Bristol F2 Fighter Source: Bob Pearson, World War I Models (Available from: http://www.wwi-models.org/Images/Pearson/art/index.html, accessed online 12 March 2007).
Originally designed to be a two-seat reconnaissance aircraft to replace the
obsolete B.E.2, the Bristol F-2 was modified to become a fighter aircraft as another
British response to the Fokker eindeckers that were menacing the skies. Frank Barnwell
designed the Bristol F-2 (also referred to as the Bristol Fighter, Brisfitt or Biff) for the
British & Colonial Aeroplane Company in the Spring of 1916. The aircraft entered
130

service in March, 1917 and within its first few weeks of service four of the first six
aircraft were shot down by the Baron Von Richthofen and his Jastas.
Despite its unimpressive debut, the Bristol Fighter was a formidable aircraft. It
was capable of speeds of 123 mph and a ceiling of 21, 500 feet. It was armed with two
Lewis machine guns--one forward fixed and the other on a scarf mount in the rear. Once
the RFC pilots learned to control the powerful 275 horsepower engine, the machine
proved capable of competing with and defeating the best aircraft the Germans could field.
By the end of the war in 1918, the Bristol fighter was the most successful fighter on the
western front. These aircraft would remain in service with the RAF until the 1930s.
Martinsydes
Figure 22. Sketch of Martinsyde Bomber Source: Cameron Riley, Australian Flying Corps 1914-1919 (2001, available from: http://www.australianflyingcorps.org/2002_1999/afc_aircraft_martinsyde.htm, accessed online 18 March 2007).
In order to fulfill the requirements of long range bombing, the Martinsyde
company of Brooklands, Weybridge designed the Martinsyde G.100 in 1915. This
aircraft was a large single-seat aircraft, with twin bays and over five hour’s endurance.
The G.102 variant was equipped with a 160 hp engine and was the aircraft that was
delivered to the RFC in Egypt in 1916. The large wingspan allowed for the lifting of
131
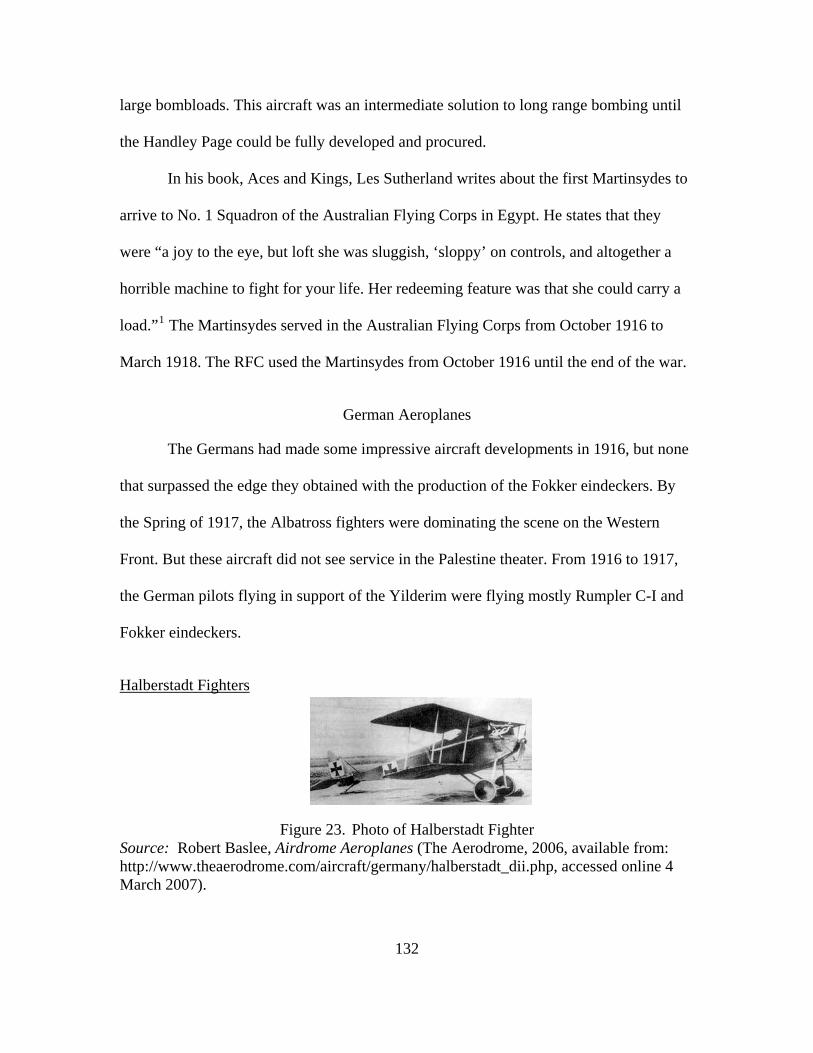
large bombloads. This aircraft was an intermediate solution to long range bombing until
the Handley Page could be fully developed and procured.
In his book, Aces and Kings, Les Sutherland writes about the first Martinsydes to
arrive to No. 1 Squadron of the Australian Flying Corps in Egypt. He states that they
were “a joy to the eye, but loft she was sluggish, ‘sloppy’ on controls, and altogether a
horrible machine to fight for your life. Her redeeming feature was that she could carry a
load.”1 The Martinsydes served in the Australian Flying Corps from October 1916 to
March 1918. The RFC used the Martinsydes from October 1916 until the end of the war.
German Aeroplanes
The Germans had made some impressive aircraft developments in 1916, but none
that surpassed the edge they obtained with the production of the Fokker eindeckers. By
the Spring of 1917, the Albatross fighters were dominating the scene on the Western
Front. But these aircraft did not see service in the Palestine theater. From 1916 to 1917,
the German pilots flying in support of the Yilderim were flying mostly Rumpler C-I and
Fokker eindeckers.
Halberstadt Fighters
Figure 23. Photo of Halberstadt Fighter Source: Robert Baslee, Airdrome Aeroplanes (The Aerodrome, 2006, available from: http://www.theaerodrome.com/aircraft/germany/halberstadt_dii.php, accessed online 4 March 2007).
132

These aircraft were introduced in the summer of 1916 as a stop-gap measure to
counter the allied single-seat fighters that were now giving chase to the Fokker
Eindeckers. However, the Halberstadt were not that much better. The advantage of this
machine was that it could climb higher than the Eindecker (13,123 feet as opposed to
9,840 ft). It also had a Spandau machine gun fixed forward on the port side of the
fuselage. Most of the Halberstadts were removed from the European theater by late 1916
and replaced by the Albatross. The Halberstadts from Europe were sent to other theaters
such as Mesopotamia and Palestine.
Fokker E III
Figure 24. Photo of Eindecker E-III Monoplane Source: Robert Baslee, Airdrome Aeroplanes (The Aerodrome, 2006, available from: http://www.airdromeaeroplanes.com/Default.asp?page=63, accessed online 4 March 2007).
This was the most common and successful variant of the Fokker Eindeckers. It
had larger wings than the EI; a more powerful (100 hp) engine; a larger fuel tank (21.5
gals) which gave it more endurance and range; and it was equipped with a single Spandau
machine gun. The Spandau machine gun, nick-named “the Devil’s Paintbrush,” fired 500
133
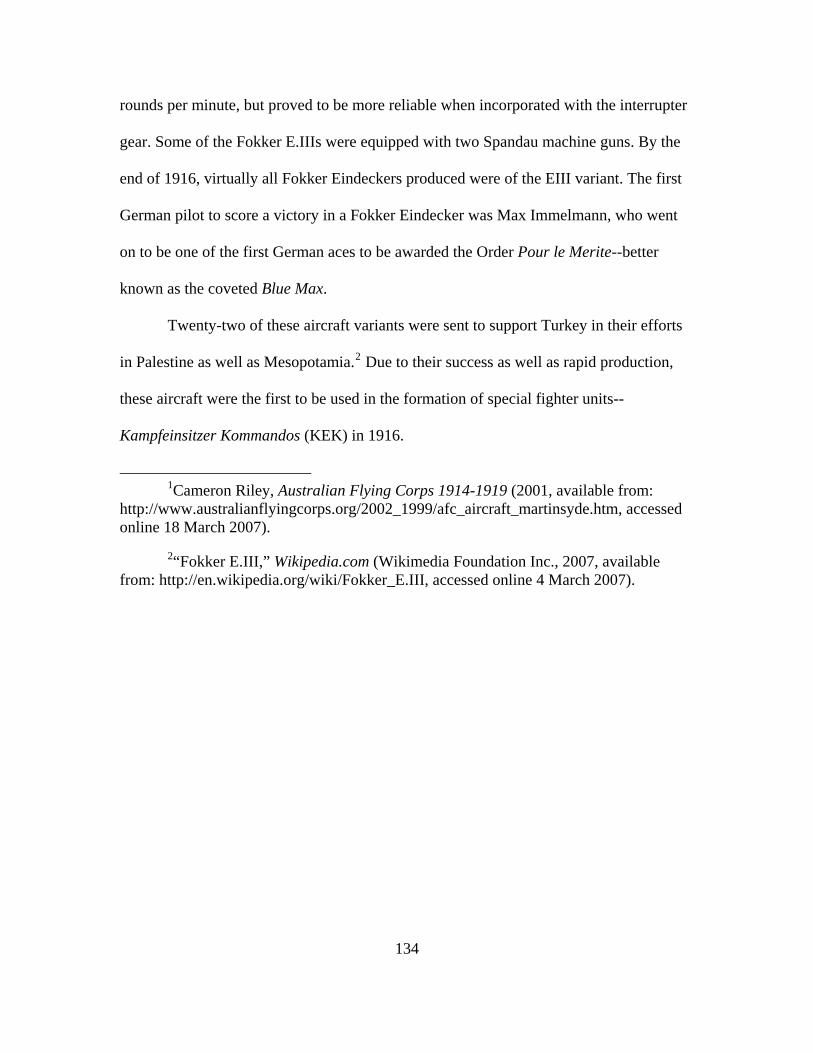
134
rounds per minute, but proved to be more reliable when incorporated with the interrupter
gear. Some of the Fokker E.IIIs were equipped with two Spandau machine guns. By the
end of 1916, virtually all Fokker Eindeckers produced were of the EIII variant. The first
German pilot to score a victory in a Fokker Eindecker was Max Immelmann, who went
on to be one of the first German aces to be awarded the Order Pour le Merite--better
known as the coveted Blue Max.
Twenty-two of these aircraft variants were sent to support Turkey in their efforts
in Palestine as well as Mesopotamia.2 Due to their success as well as rapid production,
these aircraft were the first to be used in the formation of special fighter units--
Kampfeinsitzer Kommandos (KEK) in 1916.
1Cameron Riley, Australian Flying Corps 1914-1919 (2001, available from:
http://www.australianflyingcorps.org/2002_1999/afc_aircraft_martinsyde.htm, accessed online 18 March 2007).
2“Fokker E.III,” Wikipedia.com (Wikimedia Foundation Inc., 2007, available from: http://en.wikipedia.org/wiki/Fokker_E.III, accessed online 4 March 2007).
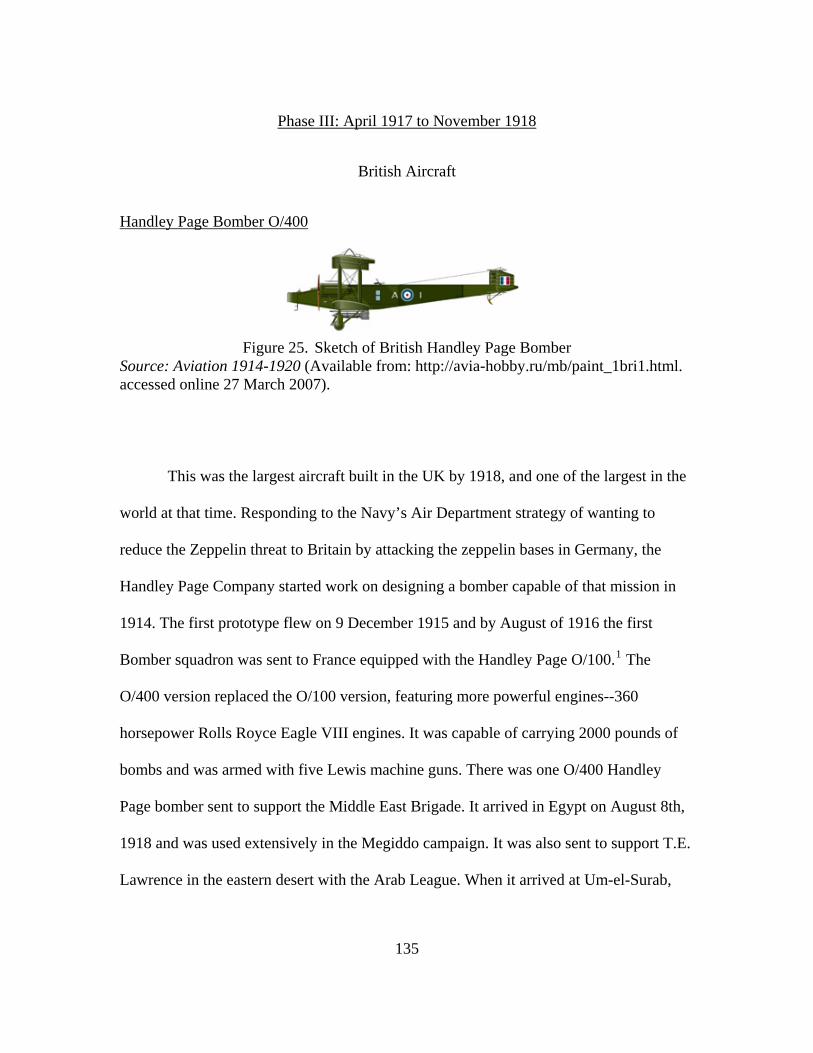
Phase III: April 1917 to November 1918
British Aircraft
Handley Page Bomber O/400
Figure 25. Sketch of British Handley Page Bomber Source: Aviation 1914-1920 (Available from: http://avia-hobby.ru/mb/paint_1bri1.html. accessed online 27 March 2007).
This was the largest aircraft built in the UK by 1918, and one of the largest in the
world at that time. Responding to the Navy’s Air Department strategy of wanting to
reduce the Zeppelin threat to Britain by attacking the zeppelin bases in Germany, the
Handley Page Company started work on designing a bomber capable of that mission in
1914. The first prototype flew on 9 December 1915 and by August of 1916 the first
Bomber squadron was sent to France equipped with the Handley Page O/100.1 The
O/400 version replaced the O/100 version, featuring more powerful engines--360
horsepower Rolls Royce Eagle VIII engines. It was capable of carrying 2000 pounds of
bombs and was armed with five Lewis machine guns. There was one O/400 Handley
Page bomber sent to support the Middle East Brigade. It arrived in Egypt on August 8th,
1918 and was used extensively in the Megiddo campaign. It was also sent to support T.E.
Lawrence in the eastern desert with the Arab League. When it arrived at Um-el-Surab,
135

136
gs are foals.”2
the Arabs that witnessed it marveled and remarked “Indeed and at last they have sent us
THE aeroplane, of which these [other] thin
Sopwith Camels
Figure 26. Sketch of Sopwith Camel Fighter Source: Bob Pearson and Chris Banyai-Riepl, History in Illustration (CBRNP, 1996, available from: http://www.cbrnp.com/profiles/quarter1/barkers-camel.htm, accessed online 31 May 2007).
These aircraft were designed to replace the Sopwith Pup and were introduced into
service in June 1917. This was a relatively difficult aircraft to fly but it did provide the
pilot with some remarkable aerobatic capability. It was capable of making very sharp
turns to the right and could loop quickly making it a very agile adversary particularly to
the German Albatross. It was armed with two forward fixed Vickers machine guns,
which made it lethal to both air and ground targets. By the middle of 1918, it was already
approaching obsolescence as a fighter but was re-designated for a ground-attack role. Its
agility and success (Camels were credited with shooting down 1,294 enemy aircraft)
made it one of the most memorable aircraft of the war.

R.E.8
Figure 27. Sketch of R.E.8 Reconnaissance Aeroplane Source: Bob Pearson, World War I Models (Available from: http://www.wwi-models.org/Images/Pearson/art/A3843.jpg, accessed online 12 March 2007).
The Reconnaissance Experimental 8 (R.E. 8) was designed to replace the aging
B.E.2. It was equipped with a more powerful engine (150 hp) and was armed with a
forward fixed Vickers machine gun and a Lewis gun on a Scarff ring in the rear
observer’s cockpit. At best, it was a mediocre aeroplane, yet it remained in service from
its introduction in June 1917 until the end of the war. It served as the standard British
reconnaissance and artillery spotting aircraft. Over 4,000 of this aeroplane were produced
to include one at the ‘X’ Aircraft park in Egypt.
S.E.5a
Figure 28. Sketch of S.E.5 Reconnaissance Aeroplane Source: Bob Pearson and Chris Banyai-Riepl, History in Illustration (CBRNP, 1996, available from: http://www.cbrnp.com/profiles/quarter1/raf.htm, accessed online 31 May 2007).
137

The Scout Experimental 5 was originally designed and produced by the Royal
Aircraft Factory at Farnborough. It was built around the 150 hp Hispano-Suiza V8
engine, then upgraded to the 200 hp Wolseley Viper engine (a licensed high-compression
upgrade to the Hispano Suiza engine made by the Wolseley Motor Company). The
aircraft with the improved powerplant were given the designation S.E. 5a. This aircraft
was capable of speeds of 138mph, making it one of the fastest aircraft of the war--
certainly faster than any German machine of the period.3 The Middle East Brigade began
to receive these aircraft in November, 1917. According to the Official Record of the
Egyptian Expeditionary Force, “this type [S.E.5a] with the Bristol Fighters, gained for us
the complete superiority in the air, which we held to the end.”4
Vickers Bullets
Figure 29. Sketch of Vickers Bullet Fighter Source: Aviation 1914-1920 (Available from: http://avia-hobby.ru/mb/paint_1bri1.html. accessed online 27 March 2007).
This single seat scout (F.B. 19) was based on the original design by Harold
Barnwell’s Vickers E.S.I which was known as the “Barnwell Bullet.” Although its design
was aesthetically sleek and clean, it suffered from many flaws that made it an unpopular
aircraft. For example, the rounded cockpit obstructed the pilot’s view. And the cowling
covered engine had problems remaining cool. The one redeeming quality of this machine
138
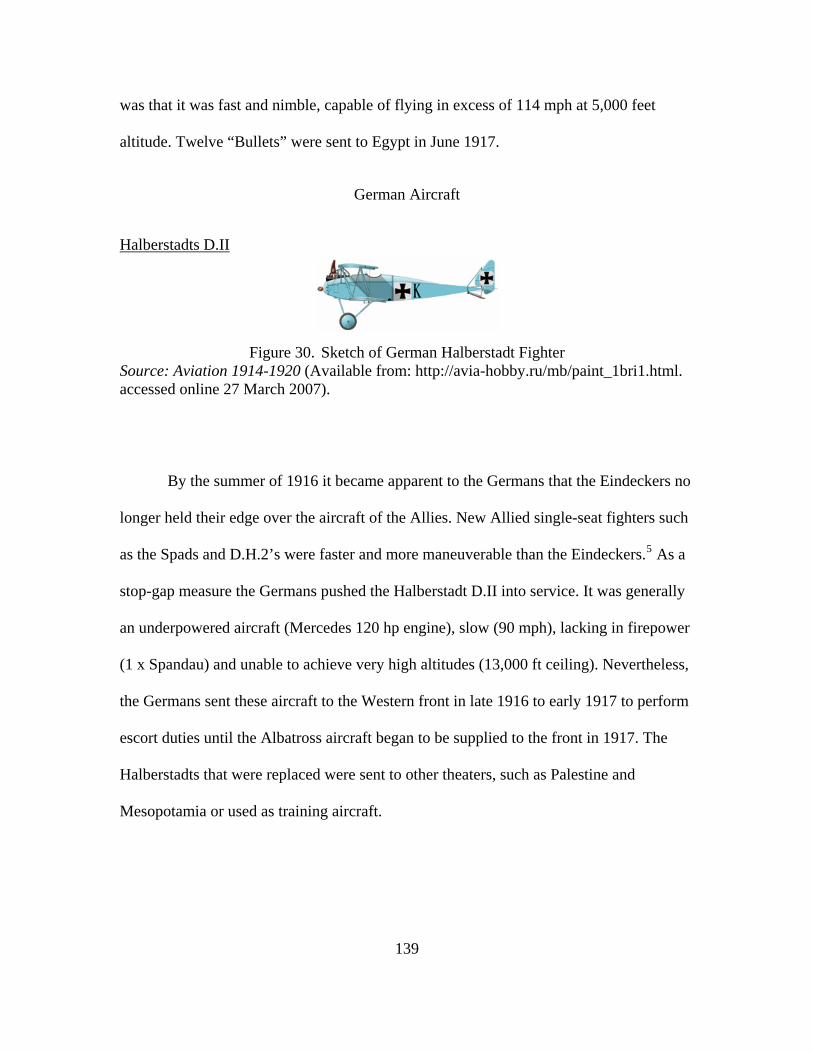
was that it was fast and nimble, capable of flying in excess of 114 mph at 5,000 feet
altitude. Twelve “Bullets” were sent to Egypt in June 1917.
German Aircraft
Halberstadts D.II
Figure 30. Sketch of German Halberstadt Fighter Source: Aviation 1914-1920 (Available from: http://avia-hobby.ru/mb/paint_1bri1.html. accessed online 27 March 2007).
By the summer of 1916 it became apparent to the Germans that the Eindeckers no
longer held their edge over the aircraft of the Allies. New Allied single-seat fighters such
as the Spads and D.H.2’s were faster and more maneuverable than the Eindeckers.5 As a
stop-gap measure the Germans pushed the Halberstadt D.II into service. It was generally
an underpowered aircraft (Mercedes 120 hp engine), slow (90 mph), lacking in firepower
(1 x Spandau) and unable to achieve very high altitudes (13,000 ft ceiling). Nevertheless,
the Germans sent these aircraft to the Western front in late 1916 to early 1917 to perform
escort duties until the Albatross aircraft began to be supplied to the front in 1917. The
Halberstadts that were replaced were sent to other theaters, such as Palestine and
Mesopotamia or used as training aircraft.
139

Albatross D III
Figure 31. Sketch of German Albatross D-III Fighter Source: Bob Pearson and Chris Banyai-Riepl, History in Illustration (CBRNP, 1996, available from: http://www.cbrnp.com/profiles/quarter1/albatros.htm, accessed online 31 May 2007).
First conceived in 1915 by the aircraft designers Thelen and Schubert, this aircraft
was an idea whose time had come. It represented a good combination of airframe and
engine, featuring the 160 horsepower Mercedes DIII, which made it capable of achieving
speeds in excess of 120 mph. When it went into production in 1917, it was able to take
advantage of an improved version of the synchronization gear. As a result, the Albatross
was armed with two, forward fixed, synchronized Spandau machine guns--making it the
first twin-gun fighter. Baron Manfred Von Richthofen, the infamous “Red Baron”, was
one of the first pilots of the war to receive the Albatross D.III. The Albatross D.III was
the aircraft responsible for the destruction wrought on the RFC in April, 1917--better
known to the RFC as “Bloody April”.6
1Penrose, 87.
2Baker, A., 139.
3“Royal Aircraft Factory S.E.5a,” Wikipedia.com (Wikimedia Foundation Inc., 2007, available from: http://en.wikipedia.org/wiki/Royal_Aircraft_Factory_S.E.5a, accessed online 14 March 2007).
4Pirie-Gordon, 112.
140

141
5Funderburk, 87.
6Ibid., 97.
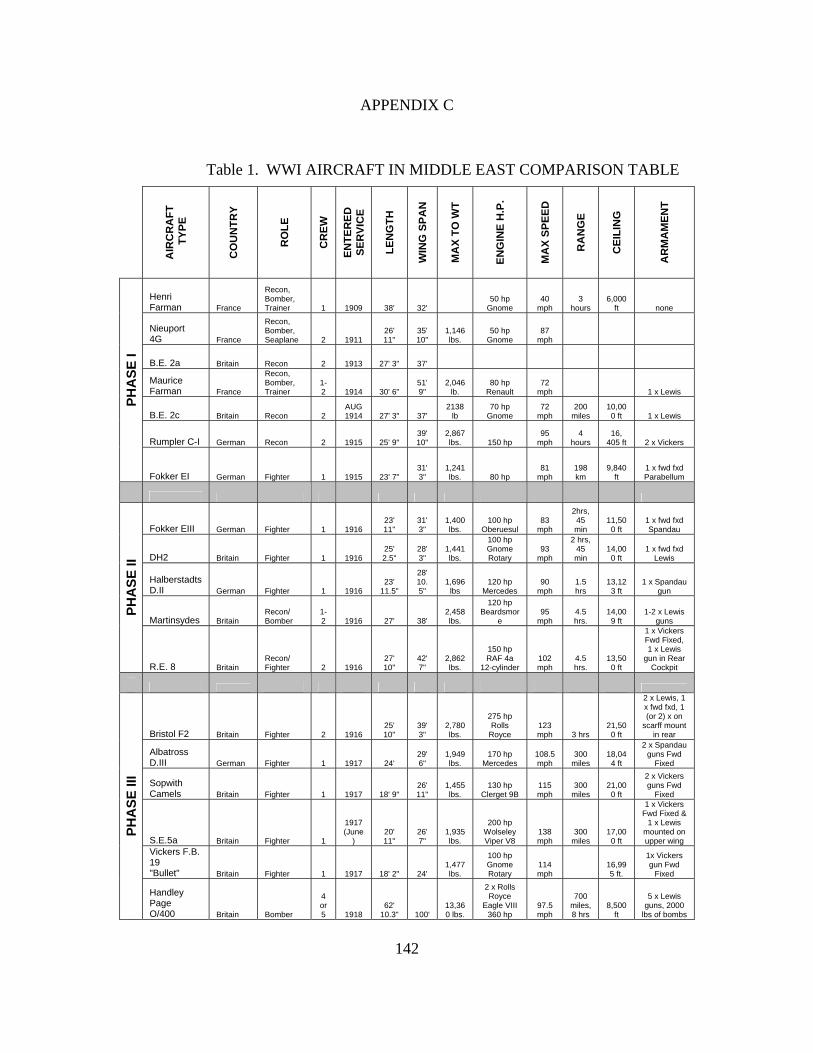
142
APPENDIX C
Table 1. WWI AIRCRAFT IN MIDDLE EAST COMPARISON TABLE
AIR
CR
AFT
T
YPE
CO
UN
TRY
RO
LE
CR
EW
ENTE
RED
SE
RVI
CE
LEN
GTH
WIN
G S
PAN
MA
X TO
WT
ENG
INE
H.P
.
MA
X SP
EED
RA
NG
E
CEI
LIN
G
AR
MA
MEN
T
Henri Farman France
Recon, Bomber, Trainer 1 1909 38' 32'
50 hp Gnome
40 mph
3 hours
6,000 ft none
Nieuport 4G France
Recon, Bomber, Seaplane 2 1911
26' 11"
35' 10"
1,146 lbs.
50 hp Gnome
87 mph
B.E. 2a Britain Recon 2 1913 27' 3" 37'
Maurice Farman France
Recon, Bomber, Trainer
1-2 1914 30' 6"
51' 9"
2,046 lb.
80 hp Renault
72 mph 1 x Lewis
B.E. 2c Britain Recon 2 AUG 1914 27' 3" 37'
2138 lb
70 hp Gnome
72 mph
200 miles
10,000 ft 1 x Lewis
Rumpler C-I German Recon 2 1915 25' 9" 39' 10"
2,867 lbs. 150 hp
95 mph
4 hours
16, 405 ft 2 x Vickers
PHA
SE I
Fokker EI German Fighter 1 1915 23' 7" 31' 3"
1,241 lbs. 80 hp
81 mph
198 km
9,840 ft
1 x fwd fxd Parabellum
Fokker EIII German Fighter 1 1916 23' 11"
31' 3"
1,400 lbs.
100 hp Oberuesul
83 mph
2hrs, 45 min
11,500 ft
1 x fwd fxd Spandau
DH2 Britain Fighter 1 1916 25' 2.5"
28' 3"
1,441 lbs.
100 hp Gnome Rotary
93 mph
2 hrs, 45 min
14,000 ft
1 x fwd fxd Lewis
Halberstadts D.II German Fighter 1 1916
23' 11.5"
28' 10.5"
1,696 lbs
120 hp Mercedes
90 mph
1.5 hrs
13,123 ft
1 x Spandau gun
Martinsydes Britain Recon/ Bomber
1-2 1916 27' 38'
2,458 lbs.
120 hp Beardsmor
e 95
mph 4.5 hrs.
14,009 ft
1-2 x Lewis guns
PHA
SE II
R.E. 8 Britain Recon/ Fighter 2 1916
27' 10"
42' 7"
2,862 lbs.
150 hp RAF 4a
12-cylinder 102 mph
4.5 hrs.
13,500 ft
1 x Vickers Fwd Fixed, 1 x Lewis
gun in Rear Cockpit
Bristol F2 Britain Fighter 2 1916 25' 10"
39' 3"
2,780 lbs.
275 hp Rolls
Royce 123 mph 3 hrs
21,500 ft
2 x Lewis, 1 x fwd fxd, 1 (or 2) x on
scarff mount in rear
Albatross D.III German Fighter 1 1917 24'
29' 6"
1,949 lbs.
170 hp Mercedes
108.5 mph
300 miles
18,044 ft
2 x Spandau guns Fwd
Fixed
Sopwith Camels Britain Fighter 1 1917 18' 9"
26' 11"
1,455 lbs.
130 hp Clerget 9B
115 mph
300 miles
21,000 ft
2 x Vickers guns Fwd
Fixed
S.E.5a Britain Fighter 1
1917 (June
) 20' 11"
26' 7"
1,935 lbs.
200 hp Wolseley Viper V8
138 mph
300 miles
17,000 ft
1 x Vickers Fwd Fixed &
1 x Lewis mounted on upper wing
Vickers F.B. 19 "Bullet" Britain Fighter 1 1917 18' 2" 24'
1,477 lbs.
100 hp Gnome Rotary
114 mph
16,995 ft.
1x Vickers gun Fwd
Fixed
PHA
SE II
I
Handley Page O/400 Britain Bomber
4 or 5 1918
62' 10.3" 100'
13,360 lbs.
2 x Rolls Royce
Eagle VIII 360 hp
97.5 mph
700 miles, 8 hrs
8,500 ft
5 x Lewis guns, 2000
lbs of bombs
143
GLOSSARY
Arab Northern Army (ANA). This was the loose formation of Arab fighters headed by Feisal and the famous T. E. Lawrence (Lawrence of Arabia). They played a significant role in the Southern and Eastern parts of the Palestine Theater. This force was also responsible for keeping the Turkish forces off-balance and spread out along their lines of communications by conducting frequent raids against railroad depots and outposts.
Desert Mounted Corps (DMC). This was the overall command of fast maneuver forces consisting of two cavalry divisions and one mounted division (Australian). This corps was comprised of horse cavalry as well as tanks and motorized cars, it also contained the machine gun corps.
Egyptian Expeditionary Force (EEF). Formed in 1916, this force was developed as a response to Turkish attacks against the Suez Canal and British outposts in Egypt. This is the force that would eventually launch the Palestine Campaign and defeat the Turkish and German armies in the theater.
LOCs -- Lines of Communications. This refers to the routes by which military forces flow supplies, personnel and information between the front lines of troops and the support bases and depots located well behind the front lines.
Royal Flying Corps (RFC). This was the designation of the aircraft and personnel that flew missions in support of the ground forces.
Royal Naval Air Service (RNAS). The designation of aircraft and personnel flying mission in support of Royal Naval operations.
Royal Air Force (RAF). In February 1918, the RFC and RNAS were combined to form the Royal Air Force--the world’s first Independent Air Force.
Yilderim – (translation: lightning) Code name for the army group consisting of the Turkish sixth and seventh armies and the German Asia Corps. This group was formed in 1915 following the British capture of Baghdad. The intent of this group was to recapture Baghdad.
Wadi – a dried riverbed. These terrain features define the landscape of the middle-east. The are often deep and circuitous. They can provide masking of movement, navigation and defense in the arid desert plains. In the Palestine Theater of operations these ran generally east-west from the Mediterranean, Dead, Red and Galilee seas as well as the Jordan River.
144
BIBLIOGRAPHY
Baker, Anne. From Biplanes to Spitfires: The Life of Air Chief Marshal Sir Geoffrey Salmond. S. Yorkshire: Pen and Sword Books, 2003.
Baker, Chris. “The Despatches of Lieutenant-General Sir John Maxwell.” The Long, Long Trail: The British Army in the Great War. Available from: http://www. 1914-1918.net/maxwell_first_despatch.htm. Accessed online 31 May 2007.
Boucher, W. Ira. The Story of World War I Aviation. Available from: http://www. wwiaviation. com/toc.html. Accessed online 4 March 2007.
Bourne, J. M. Who's Who in World War One. London: Routledge, 2001.
________. “Sir John Grenfell Maxwell (1859-1929) Lieutenant-General.” Firstworldwar.com. Available from: http://www.firstworldwar.bham.ac.uk/ donkey/maxwell.htm. Accessed online 28 February 2007.
Bowen, Ezra. The Knights of the Air. The Epic of Flight Series. Alexandria: Time-Life Books, 1980.
Breasted, J. H. Ancient Times: A History of the Early World: An Introduction to the Study of Ancient History and the Career of Early Man. Outlines of European History 1. Boston: Ginn and Company, 1914.
Budiansky, Stephen. Air Power: The Men, Machines and Ideas That Revolutionized War, from Kitty Hawk to Gulf War II. New York: Penguin Books, 2004.
Bullock, David L. Allenby's War: The Palestine-Arabian Campaigns, 1916-1918. London: Blandford Press, 1988.
________. "Swift as Eagles: The Victory of the Royal Air Force in Palestine, 1914-1918." Ph.D. Diss., Kansas State University, 1995.
Cline, E. H. The Battles of Armageddon: Megiddo and the Jezreel Valley from the Bronze Age to the Nuclear Age. Ann Arbor: University of Michigan Press, 2000.
Cole, Chistopher, ed. Royal Flying Corps Communiques 1915-1916. London: Tom Donovan Publishing Ltd., 1969.
_______. Royal Air Force Communiques 1918. London: Tom Donovan Publishing Ltd., 1969.
Cooper, Malcom. The Birth of Independent Air Power: British Air Policy in the First World War. London: Allen & Unwin, Inc, 1986.
145
Cutlack, F. M. The Australian Flying Corps. Vol. 7, The Official History of Australia in the War of 1914-1918. Edited by Robert O'Neill. St. Lucia, Queensland: University of Queensland Press, 1923.
Douhet, Giulio. The Command of the Air. Translated by Dino Ferrari. New York: Coward-McCann, 1942. Reprinted in 1983 by the Office of Air Force History.
Dowsen, E. M. “Further Notes on Aeroplane Photography in the Near East.” The Geographical Journal 58, no. 5 (1921): 359-370.
Duffy, Michael. “Who's Who: Sir John Maxwell.” Firstworldwar.com. Available from: http://www.firstworldwar.com/bio/maxwell_john.htm. Accessed online February 13 2007.
Eddington, Bill. 2 AM Bill Eddington, Egypt 1914-1915. Available from: http://www. users.globalnet.co.uk/~philpo01/index.htm. Accessed online 4 March 2007.
Falls, Cyril. Military Operations Egypt and Palestine from June 1917 to the End of the War. Vol. 1. London: H. M. Stationary Office, 1930.
________. Armageddon: 1918. 2nd ed. Baltimore: The Nautical and Aviation Publishing Company of America, 1964.
Fisher, C. S. “The Excavation of Armageddon.” Oriental Institute Communications No. 4. Chicago: University of Chicago Press, 1929.
“Fokker E.III.” Wikipedia: The Free Encyclopedia. Wikimedia Foundation Inc. Updated 28 April 2007, Encyclopedia on-line. Available from: http://en.wikipedia.org/ wiki/Fokker_E.III. Internet. Retrieved 4 May 2007.
Funderburk, Thomas R. The Early Birds of War: The Daring Pilots and Fighter Aeroplanes of World War I. New York: Grosset and Dunlap, 1968.
Gardner, Brian. Allenby of Arabia. New York: Coward-McCann, Inc., 1965.
Greenhous, Bereton. “Evolution of a Close Ground-Support Role for Aircraft in World War I.” Military Affairs 39, no. 1 (1975):22-28.
Gullett, H. S. The Australian Imperial Force in Sinai and Palestine: 1914-1918 Vol. 6. The Official History of Australia in the War of 1914-1918. Edited by Robert O’Neil. St. Lucia: University of Queensland Press, 1923.
Hallion, Richard P. Strike from the Sky: the History of Battlefield Air Attack, 1911-1945. Washington: Smithsonian Institute Press, 1989.
146
Hoeppner, Ernest von. Germany’s War in the Air: The Development and Operations of German Military Aviation in the World War. The Great War Series. Nashville: The Battery Press, 1921.
Israeli Foreign Ministry. “Megiddo - The Solomonic Chariot City.” Jewish Virtual Library. Available from: http://www.jewishvirtuallibrary.org/jsource/ Archaeology/Megiddo.html. Accessed online 24 March 2007.
Jones, H. A. The War in the Air. Vol. 5. Oxford: Clarendon Press, 1935.
________. The War in the Air. Vol. 6: Appendices. Oxford: Clarendon Press, 1937.
Kennett, Lee B. The First Air War, 1914-1918. New York: The Free Press, 1991.
Lawrence, T. E. Seven Pillars of Wisdom. New York: Random House, 1926.
Massey, W. T. How Jerusalem Was Won. New York: Charles Scribner’s Sons, 1920.
Moberly, F. J. The Campaign in Mesopotamia, 1914-1918. Vol. 1. London: HMSO, 1923.
Morely, Robert M. “Earning Their Wings: British Pilot Training, 1912-1918.” MA Thesis, University of Saskatchewan, 2006.
Morrow, John H. The Great War in the Air. Washington: Smithsonian Institute Press, 1993.
Murray, Williamson. War in the Air 1914-1945. Smithsonian History of Warfare. Edited by John Keegan. New Yrok: HarperCollins, 2005.
Naughton, Dr. Russell. “The Farman Brothers.” Hargrave: Aviation and Aeromodeling – Interdependent Evolutions and Histories. Available from: http://www.ctie. monash.edu.au/hargrave/farman.html. Accessed online 1 March 2007.
Paris, Michael. “Air Power and Imperial Defense 1880-1919.” Journal of Contemporary History 24, no. 2 (1989): 209-225.
Penrose, Harald. British Aviation: The Great War and Armistice, 1915-1919. London: Putnam, 1969.
Perrett, Bryan. Megiddo 1918: The Last Great Cavalry Victory. Osprey Military Campaign Series, ed. Marcus Cowper. Oxford: Osprey Publishing, 1999.
Pirie-Gordon, H., ed. A Brief Record of the Advance of the Egyptian Expeditionary Force, June 1917 to October 1918. London: H.M. Stationary Office, 1919.
Raleigh, Sir Walter. The War in the Air: Being the Story of the Part Played in the Great War by the Royal Air Force. Vol. 1. Oxford: Clarendon Press, 1922.
147
Riley, Cameron. The Australian Flying Corps 1914-1919. Available from: http://www. australianflyingcorps.org/2002_1999/afc_about.htm. Accessed online 18 March 2007.
“Royal Aircraft Factory B.E.2.” Wikipedia: The Free Encyclopedia. Wikimedia Foundation Inc. Updated 21 MAY 2007, Encyclopedia on-line. Available from: http://en.wikipedia.org/wiki/Royal_Aircraft_Factory_BE.2. Internet. Retrieved 2 March 2007.
“Saladin.” Wikipedia: The Free Encyclopedia. Wikimedia Foundation Inc. Updated 21 October 2006, Encyclopedia on-line. Available from http://en.wikipedia.org/wiki/ Saladin. Internet. Retrieved 14 November 2006.
Sanders, General Liman Von. Five Years in Turkey. Annapolis: The United States Naval Institute, 1927.
Smyth, John. Leadership in Battle 1914-1918: Commanders in Action. London: David and Charles, 1975.
Thomas, H. Hamshaw. “Geographical Reconnaissance by Aerial Photography, with Special Reference to the Work Done on the Palestinian Front.” The Geographical Journal 55, no. 5 (1920): 349-370.
Townshend, Charles V. F. My Campaign in Mesopotamia. London: Thornton Butterworth, 1920.
Wikipedia: The Free Encyclopedia. Wikimedia Foundation Inc. Updated 21 MAY 2007, Encyclopedia on-line. Available from http://en.wikipedia.org. Internet. Retrieved 5 December 2003.
Woodward, David R. Hell in the Holy Land: World War I in the Middle East. Lexington: University Press of Kentucky, 2006.

148
INITIAL DISTRIBUTION LIST
Combined Arms Research Library U.S. Army Command and General Staff College 250 Gibbon Ave. Fort Leavenworth, KS 66027-2314 Defense Technical Information Center/OCA 825 John J. Kingman Rd., Suite 944 Fort Belvoir, VA 22060-6218 LTC (Ret.) Thomas G. Bradbeer, M.M.A.S., M.A. Department of Leadership USACGSC 1 Reynolds Ave. Fort Leavenworth, KS 66027-1352 LTC (Ret.) Richard S. Faulkner, M.M.A.S., M.A. Department of Military History USACGSC 1 Reynolds Ave. Fort Leavenworth, KS 66027-1352 Stephen A. Bourque, Ph.D. Department of Military History USACGSC 1 Reynolds Ave. Fort Leavenworth, KS 66027-1352

CERTIFICATION FOR MMAS DISTRIBUTION STATEMENT
1. Certification Date: 15 June 2007 2. Thesis Author: MAJ Gary J. Morea 3. Thesis Title: Angels of Armageddon: The Royal Air Force in the Battle of Megiddo 4. Thesis Committee Members:
Signatures:
5. Distribution Statement: See distribution statements A-X on reverse, then circle appropriate distribution statement letter code below: A B C D E F X SEE EXPLANATION OF CODES ON REVERSE If your thesis does not fit into any of the above categories or is classified, you must coordinate with the classified section at CARL. 6. Justification: Justification is required for any distribution other than described in Distribution Statement A. All or part of a thesis may justify distribution limitation. See limitation justification statements 1-10 on reverse, then list, below, the statement(s) that applies (apply) to your thesis and corresponding chapters/sections and pages. Follow sample format shown below: EXAMPLE Limitation Justification Statement / Chapter/Section / Page(s) Direct Military Support (10) / Chapter 3 / 12 Critical Technology (3) / Section 4 / 31 Administrative Operational Use (7) / Chapter 2 / 13-32 Fill in limitation justification for your thesis below: Limitation Justification Statement / Chapter/Section / Page(s) / / / / / / / / / / 7. MMAS Thesis Author's Signature:
149
150
STATEMENT A: Approved for public release; distribution is unlimited. (Documents with this statement may be made available or sold to the general public and foreign nationals). STATEMENT B: Distribution authorized to U.S. Government agencies only (insert reason and date ON REVERSE OF THIS FORM). Currently used reasons for imposing this statement include the following: 1. Foreign Government Information. Protection of foreign information. 2. Proprietary Information. Protection of proprietary information not owned by the U.S. Government. 3. Critical Technology. Protection and control of critical technology including technical data with potential military application. 4. Test and Evaluation. Protection of test and evaluation of commercial production or military hardware. 5. Contractor Performance Evaluation. Protection of information involving contractor performance evaluation. 6. Premature Dissemination. Protection of information involving systems or hardware from premature dissemination. 7. Administrative/Operational Use. Protection of information restricted to official use or for administrative or operational purposes. 8. Software Documentation. Protection of software documentation - release only in accordance with the provisions of DoD Instruction 7930.2. 9. Specific Authority. Protection of information required by a specific authority. 10. Direct Military Support. To protect export-controlled technical data of such military significance that release for purposes other than direct support of DoD-approved activities may jeopardize a U.S. military advantage. STATEMENT C: Distribution authorized to U.S. Government agencies and their contractors: (REASON AND DATE). Currently most used reasons are 1, 3, 7, 8, and 9 above. STATEMENT D: Distribution authorized to DoD and U.S. DoD contractors only; (REASON AND DATE). Currently most reasons are 1, 3, 7, 8, and 9 above. STATEMENT E: Distribution authorized to DoD only; (REASON AND DATE). Currently most used reasons are 1, 2, 3, 4, 5, 6, 7, 8, 9, and 10. STATEMENT F: Further dissemination only as directed by (controlling DoD office and date), or higher DoD authority. Used when the DoD originator determines that information is subject to special dissemination limitation specified by paragraph 4-505, DoD 5200.1-R. STATEMENT X: Distribution authorized to U.S. Government agencies and private individuals of enterprises eligible to obtain export-controlled technical data in accordance with DoD Directive 5230.25; (date). Controlling DoD office is (insert).