arch 2501 design communication 1 dalhousie university school … · 2020-05-05 · freehand drawing...
TRANSCRIPT

ARCH 2501 Design Communication 1Dalhousie University School of Architecture Fall 2019

How the course works (Attendance/Class Partici-pation):
This is a course where you learn the content in class, which means student participation is expected and en-couraged. Class time will consist of a mix between, short lectures, large and small group discussions, presentations, hands on activities, and/or field work. Students must come to class prepared to discuss the readings and/or presentation for that week. If you are going to be absent, it is still your responsibility to make sure your assignment is on time. I will not provide lecture notes to students. This is a studio class, and if you are not here, your chances of succeeding in this class are not good.

ARCH 2501 Design Communication 1Dalhousie University School of Architecture Fall 2019
Class Time: Thursday, 2:35pm to 5:25pmRoom: IND. ENG. & CONT. ED. 121, Sexton CampusCourse Instructor: Ken KamCourse T.A.: Lauren Abbass, Yan Yuan Office: HA-15 (Ralph M. Medjuck Building)Contact: 494 3283, [email protected] hours: 3
Calendar Description
This course studies principles and techniques for documenting, analyzing, and presenting characteristics of the built and natural environments. Using manual and dig-ital media, students learn freehand drawing, mapping, and photographic narrative.
Additional Description
Architects, scientists, political activists, manufac-turers, and others employ a variety of visual tools to study and engage with the world. Students in this course learn to evaluate maps, simple technical drawings, and other visual devices, and use them to analyze actual situations and to generate and present innovations. Hands-on work is emphasized, but no prior experience in drawing or design is needed. Learning Objectives
• learn to observe, document, and present formal and spatial qualities of the built environment
• gain an awareness of manual media for describing the built environment
For this a three-credit-hour course, each student is ex-pected to spend approximately nine hours per week on course-related activities, including classes, readings, and assignments.
AssignmentsStudents must complete all assignments to finish course. More details during class.
Equipment and Materials: TBA
• Dalhousie University and the Faculty of Architecture and Planning provide student access to digital software.
• Digital software: Google Maps, Adobe Photoshop, InDesign, Illustrator, Microsoft PowerPoint/Keynotes.
• Printing is available from the Faculty’s print shop and com-mercial printers (Staples, Wade, etc.).
Evaluation Criteria and StandardsAssignments are graded by the instructors, in consultation with the course assistants. Each assignment is evaluated according to two basic criteria:
• ability to observe, document, and present formal and spatial quali-ties of the built environment
• awareness of manual media and techniques for describing the built environment
There are no group assignments in the course, so all assignments will be as-sessed individually. There are 12 assignments, each worth from 10% (best 10). Undergraduate standards are noted in the undergraduate calendar (Academic Regulations > 17.1):
• Excellent (A–, A, A+): Considerable evidence of original thinking; demonstrated outstanding capacity to analyze and synthesize; out-standing grasp of subject matter; evidence of extensive knowledge base.
• Good (B–, B, B+): Evidence of grasp of subject matter, some evidence of critical capacity and analytical ability; reasonable understanding of relevant issues; evidence of familiarity with the literature.
• Satisfactory (C–, C, C+): Evidence of some understanding of the subject matter; ability to develop solutions to simple problems; benefiting from his/her university experience.
• Marginal pass (D): Evidence of minimally acceptable familiarity with subject matter, critical and analytical skills.
• Inadequate (F): Insufficient evidence of understanding of the subject matter; weakness in critical and analytical skills; limited or irrelevant use of the literature.
Without medical documentation, the grade for a late assignment will be deducted 5% per weekday (more detail in class).No assignments will be accepted after Dec.5.wwwwwwww
Student Rights and ResponsibilitiesPlease see the School’s “Academic Regulations” page (tinyurl.com/dal-arch-regulations) for a summary of university policies affecting academic courses:
• Accommodation Policy for Students• Academic Integrity• Code of Student Conduct• Services Available to Students

1. Freehand Sketch & Contour Drawings2. Perspectives3. Tone4. A Wanderer’s Sketchbook
5. The Visible City6. The Hidden City7. The Invisible City8. The Urban Map
10. Photographs - a time machine11. The Approach12. A Narrative Structure13. Final Thoughts
FALL 2019
Photographic Narrative
Mapping
Freehand Drawing

Reflection
Sep. 12
Sep. 19
Sep. 26
Oct. 3
Oct. 10
Oct. 17
Oct. 24
Oct. 31
Nov. 7
Nov. 21
Nov. 14 - No Class
Nov. 28
Sep. 5

Objectives:
Investigation through Freehand Sketching and Contour Drawing | Looking at Landscapes: careful observation and description, construction lines, expressive and
communicative lines, control, pressure, line weight, place-ment on the page.
Exercise 1.1: Freehand Sketch Exterior ElevationsYou will be assigned to one of three downtown Halifax locations to sketch a series of exterior building elevations/facades. Include a 100-word companion text to describe what you have learned from the sketches.
General process (more details are presented during class):1. How to build a drawing.2. Knowing the “ Tools of the Trade ”.3. Understanding - Line stroke, quality, weights, and types.4. Practice, practice, practice - creating the drawings.
Goal: Using drawing as a mean of description. You will be able to analyze and sketch/draw well-proportioned build-ing elevations, and apply proper line properties.
What you need: ∙ Wood graphite pencils (4H - 8B) ∙ Multiple sheets of letter size paper
Readings: 1. Jenkins, Eric J. 2012. “Sketching as a Bodily Skill.”
In Drawn to Design.
Freehand drawing
Freehand Sketching & Contour Drawings

Freehand drawing
Drawing of Palazzo Chiericati, Vicenza, Italy, scanned at six different stages from
guidelines to finished drawing
Using a pencil to find proportions
Eric J. Jenkins, Drawn to Design, 26-27
How to build a drawing

students’ work (Arch 2000, 2013), elevation on Barrington Street
Freehand drawing
http://bobthelurker.deviantart.com/art/Freehand-Architectural-Street-Elevation-No-1-278900115
Freehand drawing
Description:
Investigation through Perspective Drawing | Bota-nizing on the Asphalt: concepts of vanishing points, picture plane, eye level and the difference between
one-point and two-point perspective.
Exercise 1.2: one and two point perspectiveYou will be assigned to three Halifax downtown locations and sketch a series of freehand one and two point perspective draw-ings. Include a 100-word companion text to describe what you have learned from the sketches.
General process (more details are presented during class):1. Understanding perspective drawing.2. Knowing the terms.3. Understanding the relationship between plan and
perspective drawings.4. Practice, practice, practice - creating the drawings.
Goal: Using drawing as a mean of observation. Through the act of creating perspective drawings, you will learn how to analyze/study volumetric fluctuations, textures, and the scale of buildings.
What you need: ∙ Wood graphite pencils (4H - 8B) ∙ Sketchbooks
Readings: 1. Gill, W. Robert, 2006 “Introduction to Basic Per-
spective”. In Perspective From Basic to Creative.2. Bergerijk, Herman van, and Deborah Haupmann.
1998. “Introduction.” In Notation of Herman Hertzberger.
Perspectives
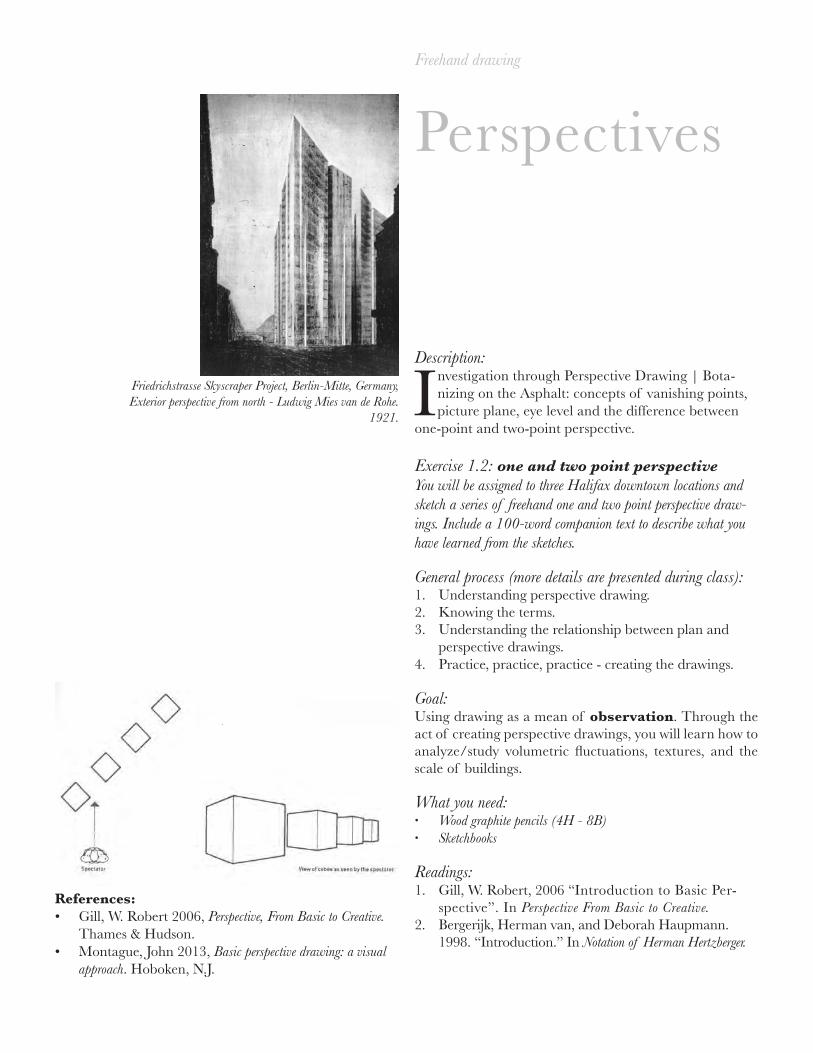
Friedrichstrasse Skyscraper Project, Berlin-Mitte, Germany, Exterior perspective from north - Ludwig Mies van de Rohe.
1921.
References:• Gill, W. Robert 2006, Perspective, From Basic to Creative.
Thames & Hudson.• Montague, John 2013, Basic perspective drawing: a visual
approach. Hoboken, N.J.
Freehand drawing
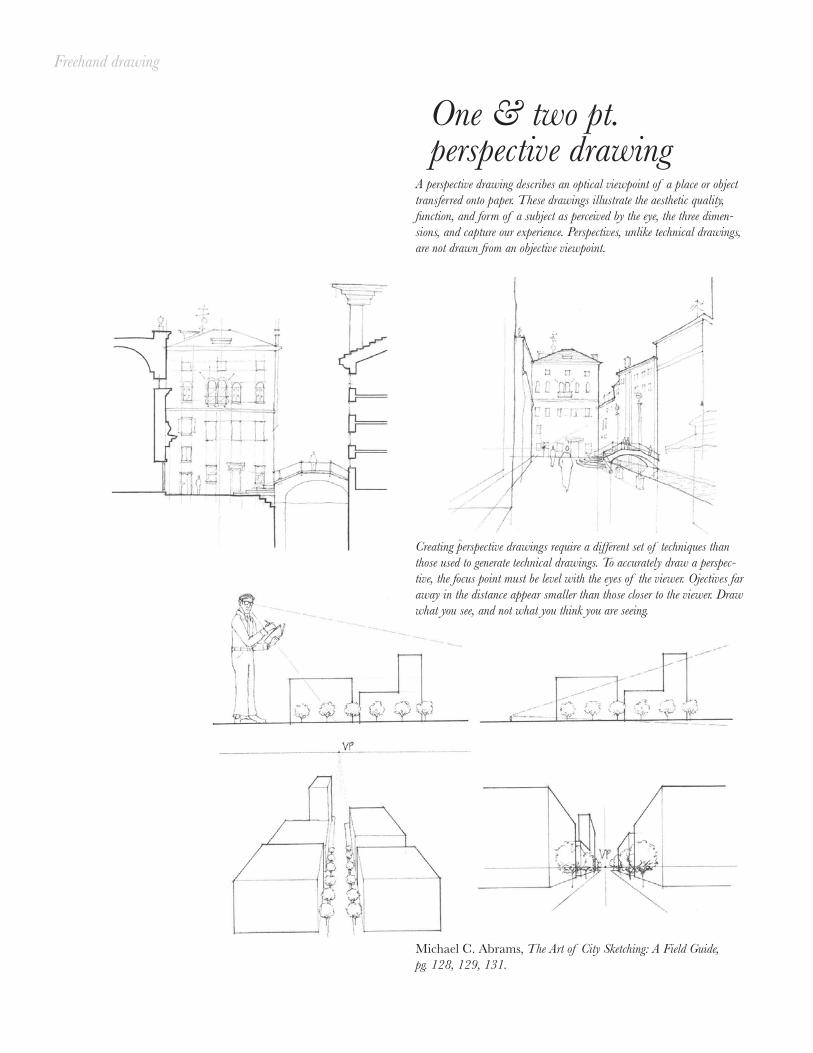
One & two pt. perspective drawing
A perspective drawing describes an optical viewpoint of a place or object transferred onto paper. These drawings illustrate the aesthetic quality, function, and form of a subject as perceived by the eye, the three dimen-sions, and capture our experience. Perspectives, unlike technical drawings, are not drawn from an objective viewpoint.
Creating perspective drawings require a different set of techniques than those used to generate technical drawings. To accurately draw a perspec-tive, the focus point must be level with the eyes of the viewer. Ojectives far away in the distance appear smaller than those closer to the viewer. Draw what you see, and not what you think you are seeing.
Michael C. Abrams, The Art of City Sketching: A Field Guide, pg. 128, 129, 131.

Niall Bird, University of PortsmouthA series of small sketches through an urban route serve as snapshots of a city.
Freehand drawing
Freehand drawing
Description:
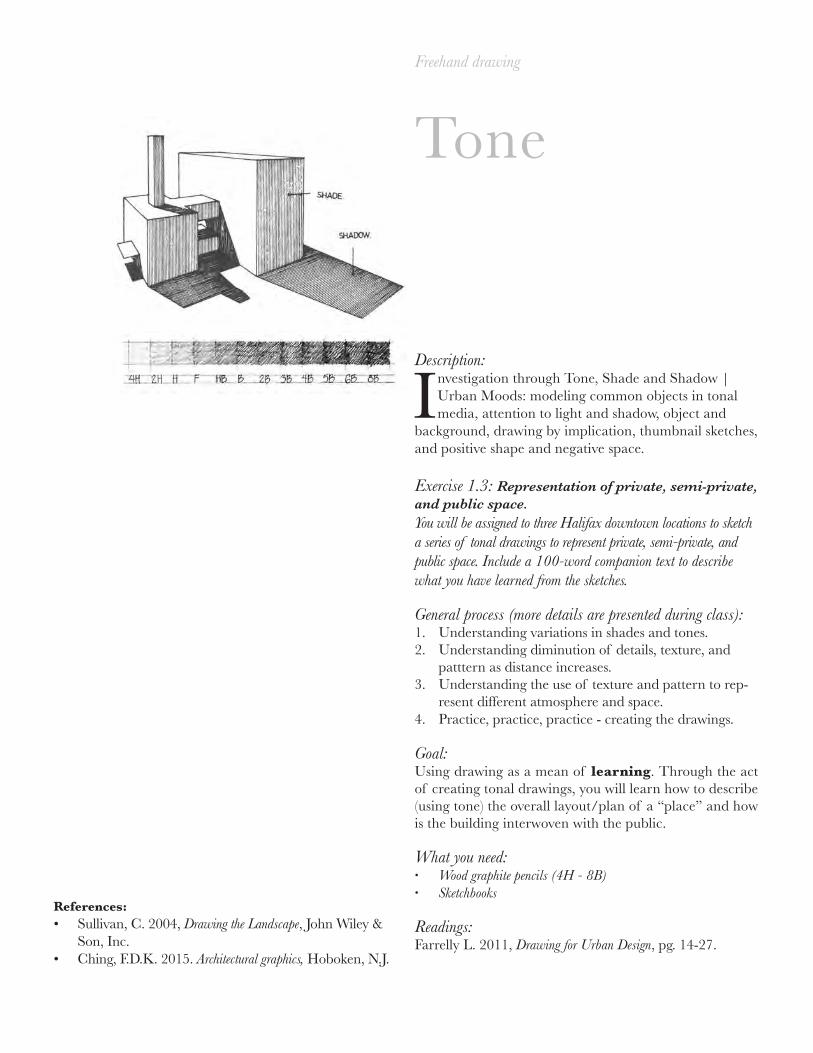
Investigation through Tone, Shade and Shadow | Urban Moods: modeling common objects in tonal media, attention to light and shadow, object and
background, drawing by implication, thumbnail sketches, and positive shape and negative space.
Exercise 1.3: Representation of private, semi-private, and public space.You will be assigned to three Halifax downtown locations to sketch a series of tonal drawings to represent private, semi-private, and public space. Include a 100-word companion text to describe what you have learned from the sketches.
General process (more details are presented during class):1. Understanding variations in shades and tones.2. Understanding diminution of details, texture, and
patttern as distance increases. 3. Understanding the use of texture and pattern to rep-
resent different atmosphere and space.4. Practice, practice, practice - creating the drawings.
Goal: Using drawing as a mean of learning. Through the act of creating tonal drawings, you will learn how to describe (using tone) the overall layout/plan of a “place” and how is the building interwoven with the public.
What you need: ∙ Wood graphite pencils (4H - 8B) ∙ Sketchbooks
Readings: Farrelly L. 2011, Drawing for Urban Design, pg. 14-27.
Tone
References:• Sullivan, C. 2004, Drawing the Landscape, John Wiley &
Son, Inc. • Ching, F.D.K. 2015. Architectural graphics, Hoboken, N.J.
Freehand drawing
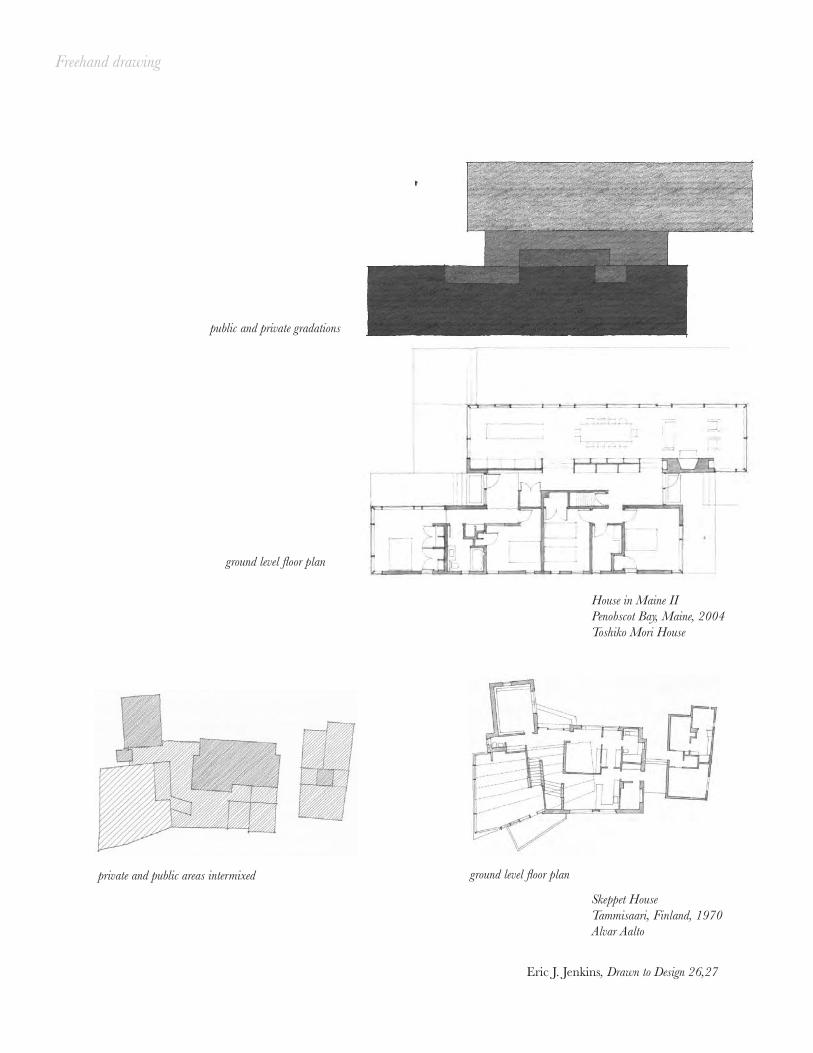
ground level floor plan
public and private gradations
House in Maine IIPenobscot Bay, Maine, 2004Toshiko Mori House
ground level floor planprivate and public areas intermixed
Skeppet HouseTammisaari, Finland, 1970Alvar Aalto
Eric J. Jenkins, Drawn to Design 26,27

Freehand drawing
students’ work (Arch 2000, 2016)private, semi-private, and public tonal drawings

Freehand drawing
Description:
Investigation, observe, and learn about a site through a series of facades, perspective, and tonal drawings.
Exercise 1.4: Serial views through a city You are assigned to a location in Halifax downtown to sketch a series of freehand drawings. These drawings are to demon-strate a clear understanding of the wanderer’s journey. Include a 100-words companion text to describe what you’ve learned from the sketches.
General process (more details are presented during class):1. Develop a walking plan or strategy.2. Develop a plan drawing.3. Select view points and decide how may drawings are
necessary to show a clear understand of the site/journey.4. Practice, practice, practice - creating the drawings.
Goal: Using drawings to understand a site.
What you need: ∙ Wood graphite pencils (4H - 8B) ∙ Sketchbooks
Readings:NO reading this week
Due Date: TBA
A Wanderer’sS k e t c h b o o kstep by step Serial Views Through a City
References:• Holmes M.T. 2014, The Urban Sketcher: Techniques for
seeing and drawing on location, North Light Books.• Campanario G. 2012, The Art of Urban Sketching: Draw-
ing on Location around the world, Quarry Books. • Bower S. 2016, The Urban Sketching Handbook: Under-
standing Perspective: Easy Techniques for Mastering Perspective Drawing on Location (Urban Sketching Handbooks), Quarry Books.
http://www.rosiegainsborough.com/illustration.html

Freehand drawing
G. Cullen, Townscape, The Architectural Press, London, 1961 (17,19)
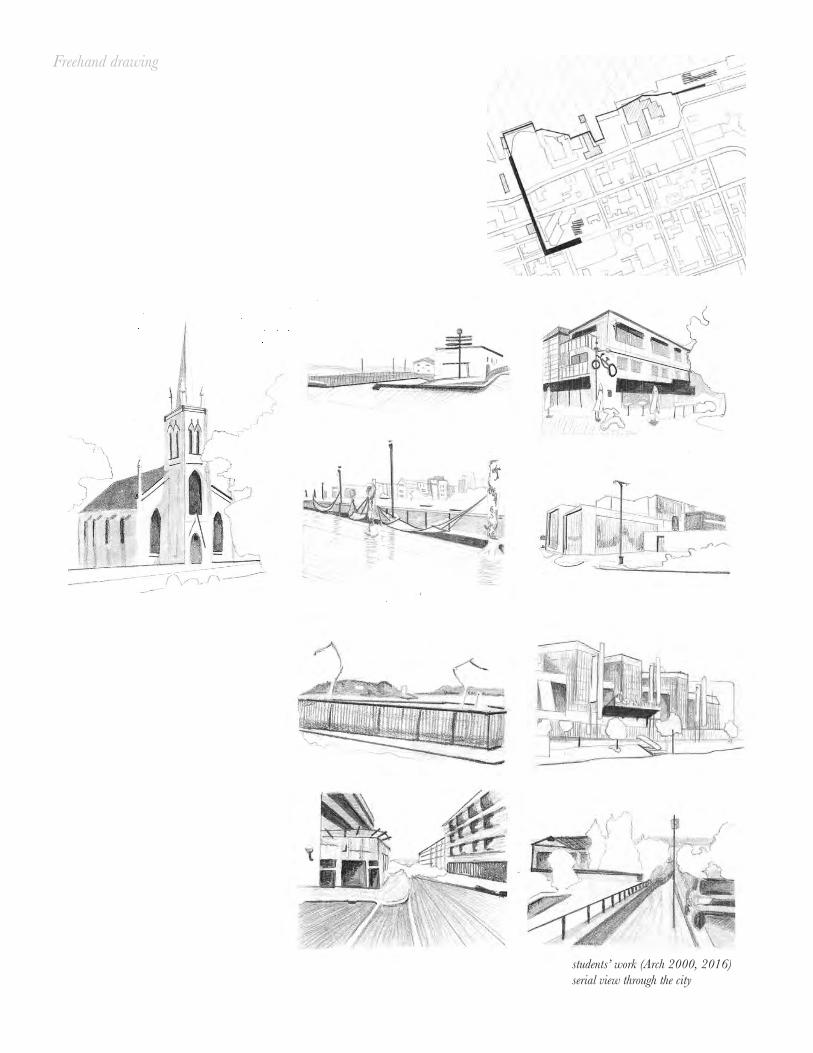
students’ work (Arch 2000, 2016)serial view through the city
Freehand drawing
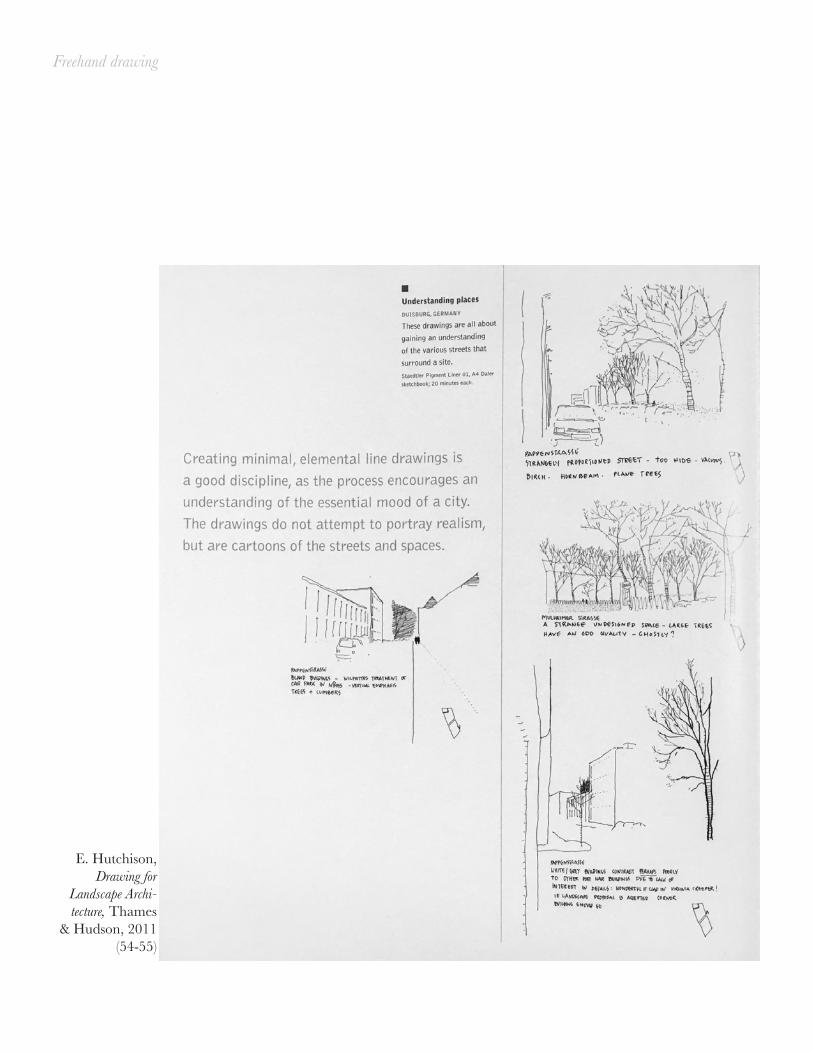
E. Hutchison, Drawing for
Landscape Archi-tecture, Thames
& Hudson, 2011 (54-55)
Freehand drawing

Freehand drawing

Mapping
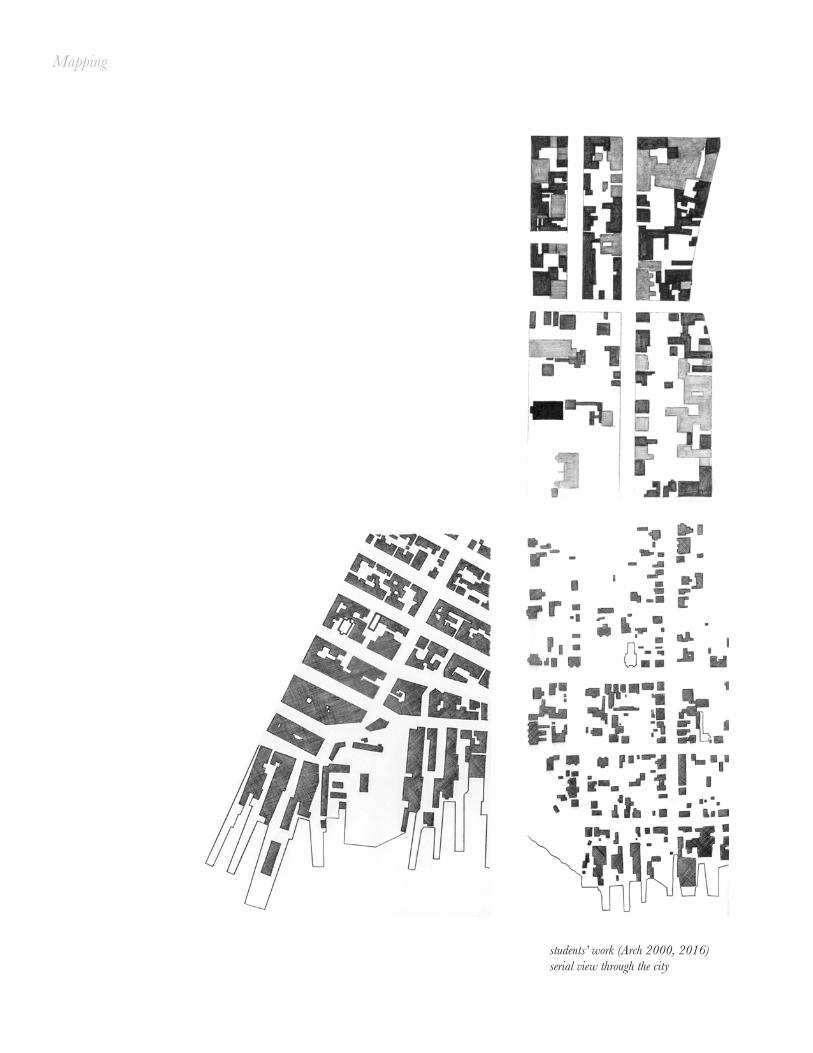
Description:
When starting a site analysis, a map of a city will help thinking and provide a base for a drawing. Analytical drawings can begin with tracing over
a base map and isolate particular aspect of the city’s orga-nization. Separating these informations like power lines, vegetation, or property lines..etc, allow the city to be read as a series of layers.
Exercise 2.1: You are assigned to an area or a street in Hali-fax. You are to create and compare different visible elements of the site by producing a series of trace paper drawings. Include a 100-words companion text to describe what you’ve learned from the exercise.
General process (more details are presented during class):1. Create a base map of an area or a street (figure-
ground map).2. Identify visible elements on two different parts of the
area or street.3. Using tonal/texture drawing methods from previous
weeks and produce multiple layers of visible elements by tracing over a base map (e.g. vegetation, power line post...etc.)
Goal: To use a number of analytical drawings, shown together, to better understand the composition of a site. What you need: ∙ Trace paper ∙ Wood graphite pencils (4H - 8B) ∙ Sketchbook
Readings: • Sanborn Maps - https://www.loc.gov/collections/
sanborn-maps/articles-and-essays/sanborn-samplers/
The Visible City( s i t e a n a l y s i s )
References:
• Urban Design Associates, The Urban Design Handbook: Techniques and Working Methods, W.W. Norton & Compa-ny; 2nd edition.
• LaGro J. A., Site Analysis: Informing Context-Sensitive and Sustainable Site Planning and Design, Wiley; 3rd edition
Sanborn Fire Insurance Map from Boston, Suffolk County, Massa-chusetts - https://www.loc.gov/collections/sanborn-maps/?fa=sub-
ject%3Aboston

Mapping
Lorraine Farrelly, Drawing for Urban Design, 75
Mapping
students’ work (Arch 2000, 2016)serial view through the city
Mapping
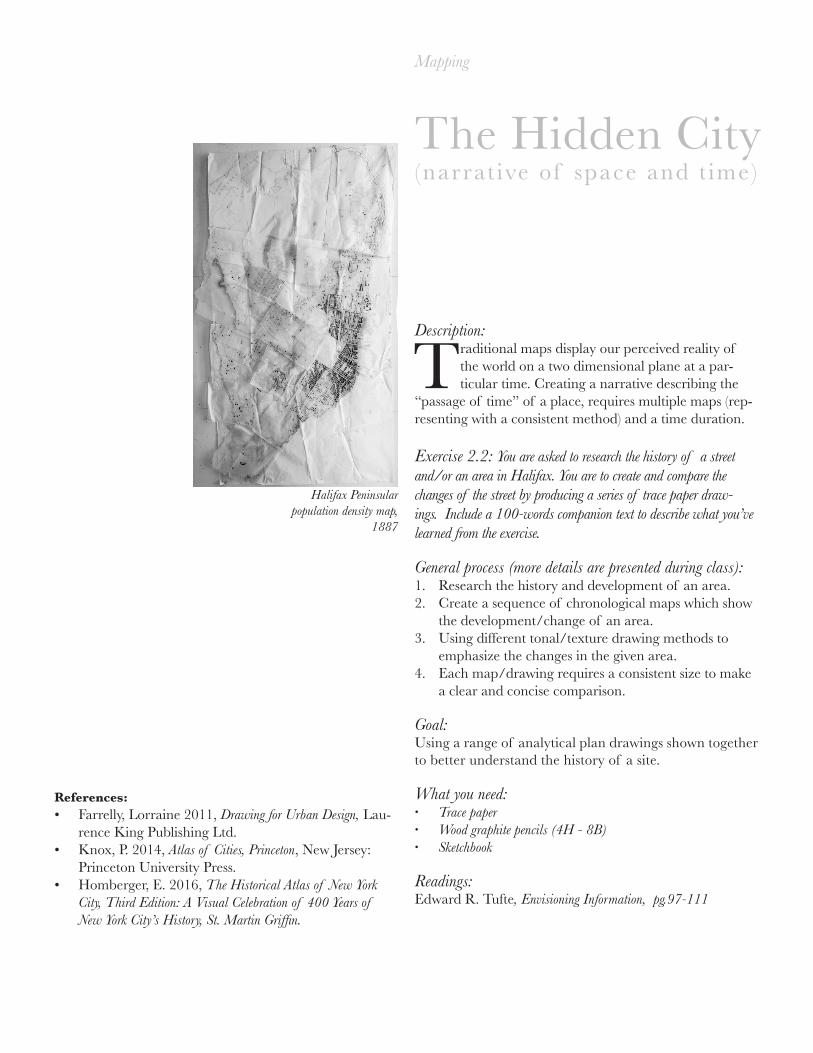
Description:
Traditional maps display our perceived reality of the world on a two dimensional plane at a par-ticular time. Creating a narrative describing the
“passage of time” of a place, requires multiple maps (rep-resenting with a consistent method) and a time duration.
Exercise 2.2: You are asked to research the history of a street and/or an area in Halifax. You are to create and compare the changes of the street by producing a series of trace paper draw-ings. Include a 100-words companion text to describe what you’ve learned from the exercise.
General process (more details are presented during class):1. Research the history and development of an area.2. Create a sequence of chronological maps which show
the development/change of an area. 3. Using different tonal/texture drawing methods to
emphasize the changes in the given area. 4. Each map/drawing requires a consistent size to make
a clear and concise comparison.
Goal: Using a range of analytical plan drawings shown together to better understand the history of a site. What you need: ∙ Trace paper ∙ Wood graphite pencils (4H - 8B) ∙ Sketchbook
Readings: Edward R. Tufte, Envisioning Information, pg.97-111
The Hidden City(narrat ive of space and t ime)
References:• Farrelly, Lorraine 2011, Drawing for Urban Design, Lau-
rence King Publishing Ltd. • Knox, P. 2014, Atlas of Cities, Princeton, New Jersey:
Princeton University Press.• Homberger, E. 2016, The Historical Atlas of New York
City, Third Edition: A Visual Celebration of 400 Years of New York City’s History, St. Martin Griffin.
Halifax Peninsular population density map,
1887

Mapping
Norman Crowe, Building Cities, Toward a civil and sustainable environment, pg.106-107

Mapping
Peter Cook, The City, Seen as a Garden of Ideas,
pg.60

Mapping

E. Hutchison, Drawing for Landscape Architecture, Thames & Hudson, 2011 pg 54-55
Mapping
Mapping
Description:
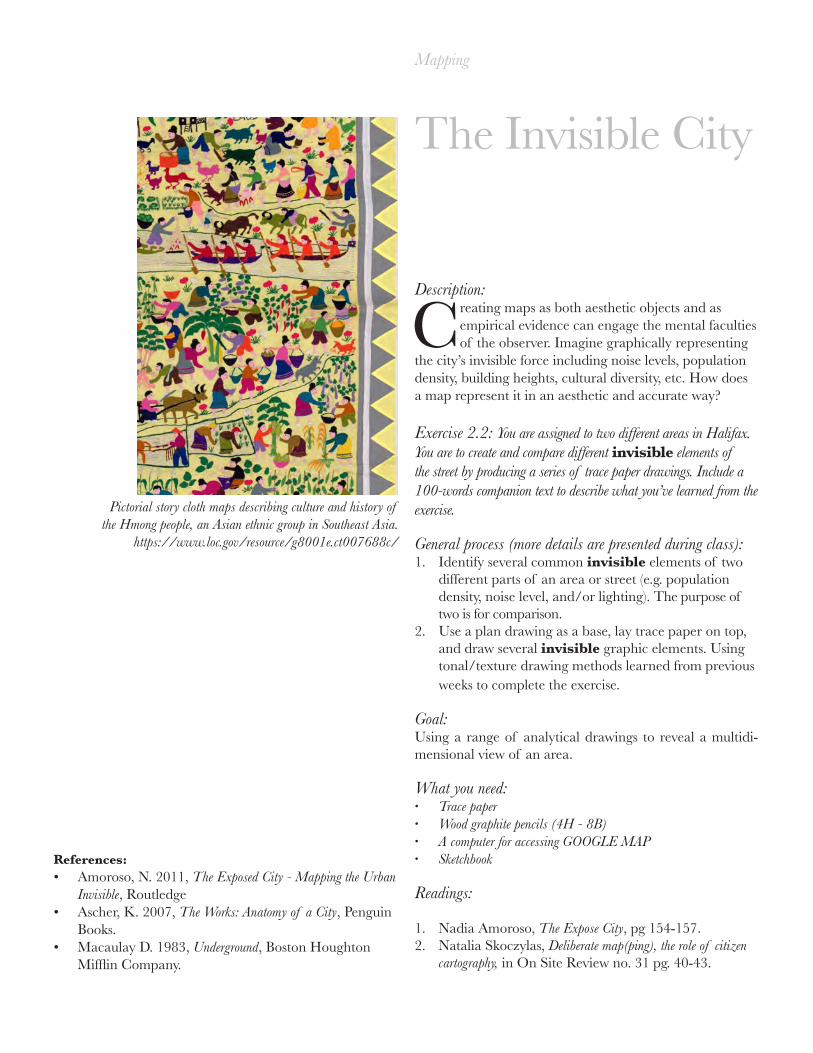
Creating maps as both aesthetic objects and as empirical evidence can engage the mental faculties of the observer. Imagine graphically representing
the city’s invisible force including noise levels, population density, building heights, cultural diversity, etc. How does a map represent it in an aesthetic and accurate way?
Exercise 2.2: You are assigned to two different areas in Halifax. You are to create and compare different invisible elements of the street by producing a series of trace paper drawings. Include a 100-words companion text to describe what you’ve learned from the exercise.
General process (more details are presented during class):1. Identify several common invisible elements of two
different parts of an area or street (e.g. population density, noise level, and/or lighting). The purpose of two is for comparison.
2. Use a plan drawing as a base, lay trace paper on top, and draw several invisible graphic elements. Using tonal/texture drawing methods learned from previous weeks to complete the exercise.
Goal: Using a range of analytical drawings to reveal a multidi-mensional view of an area.
What you need: ∙ Trace paper ∙ Wood graphite pencils (4H - 8B) ∙ A computer for accessing GOOGLE MAP ∙ Sketchbook
Readings:
1. Nadia Amoroso, The Expose City, pg 154-157.2. Natalia Skoczylas, Deliberate map(ping), the role of citizen
cartography, in On Site Review no. 31 pg. 40-43.
The Invisible City
References:• Amoroso, N. 2011, The Exposed City - Mapping the Urban
Invisible, Routledge• Ascher, K. 2007, The Works: Anatomy of a City, Penguin
Books.• Macaulay D. 1983, Underground, Boston Houghton
Mifflin Company.
Pictorial story cloth maps describing culture and history of the Hmong people, an Asian ethnic group in Southeast Asia.
https://www.loc.gov/resource/g8001e.ct007688c/

Nadia Amoroso, The Exposed City, Mapping the Urban Invisibles, pg 120
Mapping
Mapping
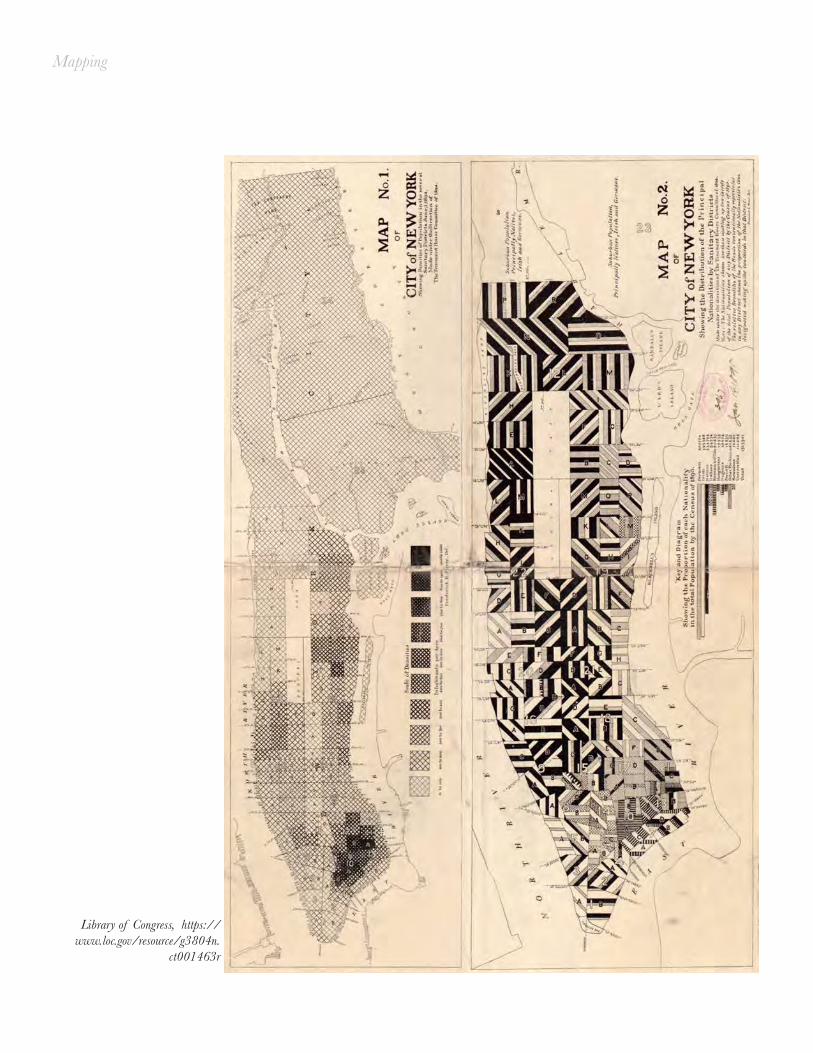
Library of Congress, https://www.loc.gov/resource/g3804n.
ct001463r

Mapping
Description:
Many types of information about an area of a city can be graphically represented - noise lev-els, transportation patterns, air quality, cultural
diversity, political ridings, population density, vegetations, etc.. If this area could be defined by these characteristics, what form would it take? How could it be mapped?
Exercise 2.4: You are to create a layered map of all three as-pects of an area in Halifax: visible, hidden, and invisible. Include a 200-words companion text to describe what you’ve learned.
General process (more details are presented during class):1. Create a base map of an area or a street.2. Identify visible, hidden, and invisible elements you like
to represent3. Choose an appropriate method of representation.4. Compose your elements on paper5. Follow the composition and use tonal/texture/line
drawing to produce multiple layers of your chosen elements on paper.
Goal: Balancing between the informative measures of visual-ization and the aesthetic side of creating a map, students are to experiment with different representation methods in creating a multidimensional map (elements, space, and time). What you need: ∙ Multiple sheets of drawing paper (11x17) ∙ Wood graphite pencils (4H - 8B) ∙ Trace paper ∙ Sketchbook
Readings: No reading.
The Urban Map
References:• Desimini, J. 2016, Cartographic Grounds: Projecting the
Landscape Imaginary, location, Princeton Architecture Press.
• Hutchison, Edward. 2016, Drawing for Landscape Archi-tecture: Sketch to Screen to Site, Thames & Hudson.
• Knox, P. 2012, Palimpsests: Biographies of 50 City Dis-tricts, Birkhauser.
Station centrale des aéronefs à Notre-Dame, in Le Vingtième
Siècle by Albert Robida

Mapping
Competition University, Vienna 4, 1974 Traffic system

Mapping
Leung, Monica. 2011Thesis project: Border Infrastructure,
Translating the Structure of the In-Between.
Photography
Description:
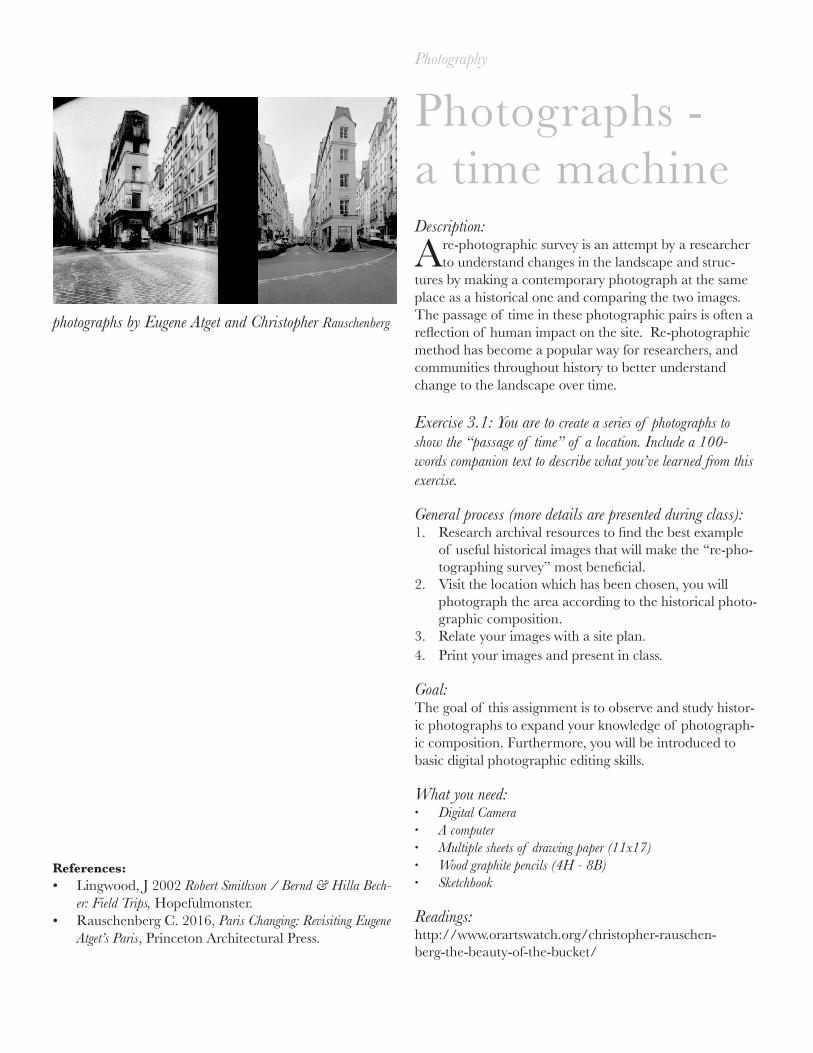
A re-photographic survey is an attempt by a researcher to understand changes in the landscape and struc-
tures by making a contemporary photograph at the same place as a historical one and comparing the two images. The passage of time in these photographic pairs is often a reflection of human impact on the site. Re-photographic method has become a popular way for researchers, and communities throughout history to better understand change to the landscape over time.
Exercise 3.1: You are to create a series of photographs to show the “passage of time” of a location. Include a 100- words companion text to describe what you’ve learned from this exercise.
General process (more details are presented during class): 1. Research archival resources to find the best example
of useful historical images that will make the “re-pho-tographing survey” most beneficial.
2. Visit the location which has been chosen, you will photograph the area according to the historical photo-graphic composition.
3. Relate your images with a site plan.4. Print your images and present in class.
Goal: The goal of this assignment is to observe and study histor-ic photographs to expand your knowledge of photograph-ic composition. Furthermore, you will be introduced to basic digital photographic editing skills. What you need: ∙ Digital Camera ∙ A computer ∙ Multiple sheets of drawing paper (11x17) ∙ Wood graphite pencils (4H - 8B) ∙ Sketchbook
Readings: http://www.orartswatch.org/christopher-rauschen-berg-the-beauty-of-the-bucket/
Photographs -a time machine
photographs by Eugene Atget and Christopher Rauschenberg
References:• Lingwood, J 2002 Robert Smithson / Bernd & Hilla Bech-
er: Field Trips, Hopefulmonster.• Rauschenberg C. 2016, Paris Changing: Revisiting Eugene
Atget’s Paris, Princeton Architectural Press.
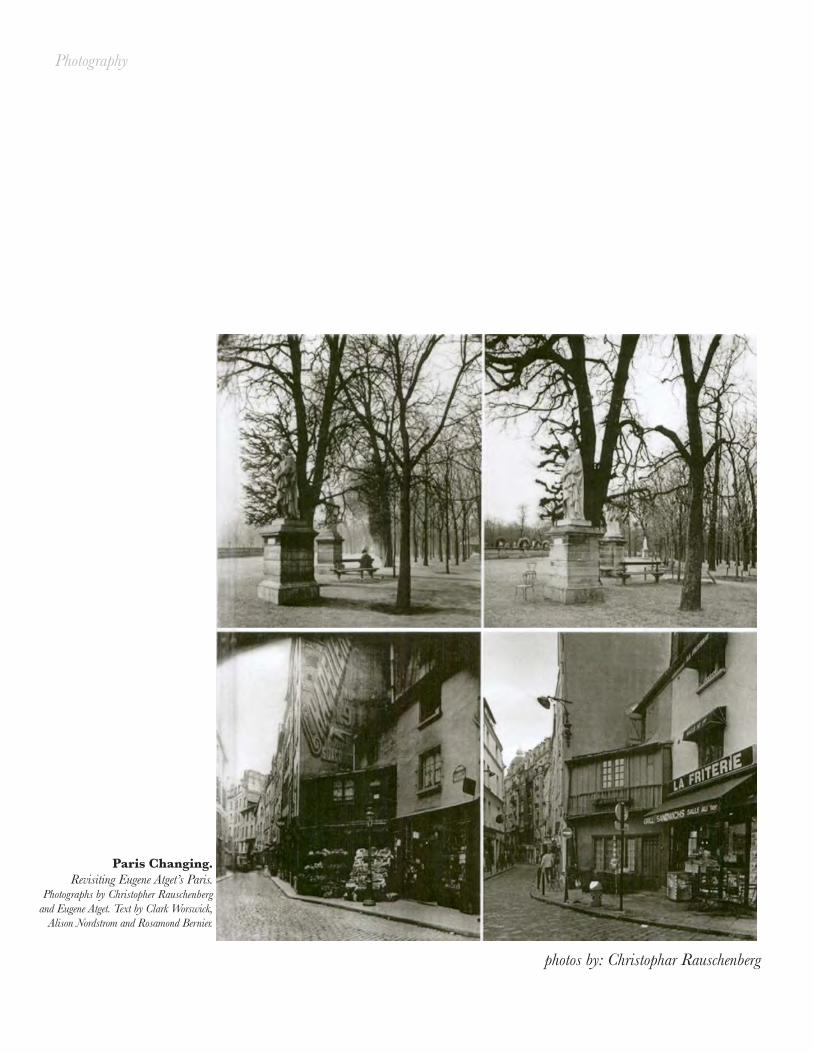
photos by: Christophar Rauschenberg
Paris Changing. Revisiting Eugene Atget’s Paris.
Photographs by Christopher Rauschenberg and Eugene Atget. Text by Clark Worswick,
Alison Nordstrom and Rosamond Bernier.
Photography

photos by: Lauren McCrimmon (Visual thinking - 2011)
Photography

Photography
Description:
Composition plays the most important role in how photographers express an idea. A good grasp of
identifying a clear subject and background is the key to convey that message clearly. The concept of reducing/eliminating subjects and elements from the camera frame by the movement of the body is a photographer’s first act in expressing a point of view.
Exercise 3.2: Create narrative by using a series of photo-graphs to describe “a walking experience”. Include a 100 words companion text.
General process (more details are presented during class): 1. Choose a walking path within Halifax with a signif-
icant amount of monument types or recognizable objects along the way (path across a field may not be appropriate).
2. Walk the path and take notes and sketch the signifi-cant objects in your sketchbook, e.g. a door, a lamp post, a wall, or a statue etc....
3. Study the notes/sketches, revisit the area at different times and capture the objects with your camera.
4. Beware of how to take the photographs so all images can link together to describe a narrative.
5. Layout/Compose your photographs on a page.6. Present your work in class.
Goal: The goal of this assignment is to make you aware of your decisions in photographic composition. It can guide or manipulate the observers’ view and serve the photogra-pher’s intention. What you need: ∙ Digital Camera ∙ A computer with photo editing software ∙ Multiple sheets of drawing paper (11x17) ∙ Wood graphite pencils (4H - 8B) ∙ Sketchbook ∙ access to a printer
Readings: • A review of The American, Robert Frank by Eric Kim -
http://erickimphotography.com/blog/2013/01/07/timeless-lessons-street-photographers-can-learn-from-robert-franks-the-americans/
The Approach Conveying ideas with images
photograph by Vivian Maiert, Chicago
References:• Schulz, A. 2014, Architectural Photography: Composition,
Capture, and Digital Image Processing, Rocky Nook.• Baldwin, G. 2013, Architecture in Photographs. J. Paul
Getty Museum Press.

The Approach, Ken Kam
Photography

path & texture, Yuan Yuan Li (Visual Thinking 2011)
Photography

Photography
Description:
The city streets we inhabit consist of different layers of architectural details: signage, statues, gates, the texture
of a particular wall, etc...Each street tells a story. Photo-graphs are good at showing evidence of existing conditions. The act of photography is not only a practice of recording images but also a sociological one. By recording a series of photographs at a particular area, observers can understand, in part, what are the visual contents of the area. The chal-lenge lies in the rigor of the process.
Exercise 3.3: Create a series of photographs to show the “character” of a street. Include a 100-words companion text to describe what you’ve learned from the exercise.
General process (more details are presented during class): 1. Choose a street in downtown Halifax.2. Walk the street several times and observe without a
camera.3. Take notes and do sketches on subjects that reflect the
condition and character of the street. For now con-centrate on objects not people.
4. Study the notes/sketches, revisit the area and capture with your camera.
5. Layout/Compose your photographs on a page.6. Present your work in class.
Goal: The goal of this assignment is to encourage you to be clear and use consistent photographic composition tech-niques to heighten the understanding of your study area. What you need: ∙ Digital Camera ∙ A computer ∙ Multiple sheets of drawing paper (11x17) ∙ Wood graphite pencils (4H - 8B) ∙ Sketchbook ∙ access to a printer
Readings: 1. Ken Garland, Look up, pg. 60. In “City Levels, Ireson,
Ally; Barley, Nick”.2. Two Cities, Chen Zhen pg. 64. In “City Levels, Ireson,
Ally; Barley, Nick.”3. Lisa Rapoport, Walking as reproduction, pg 22-25. In
“On Site Review”.
A Narrative Structure
abandon motel, photo: Ken Kam
References:• Mora G., Hill J. 2004 Walker Evans: The Hungry Eye,
Harry N. Abrams Inc.• Robinson, M. 2013, Urban Impressions Thee Changing
Face of New York in the 1970s by Marianne Robinson. Re-gent Press.

Street in Paris, Ken Kam
Street in Paris, Ken Kam
Photography

students’ work (Arch 2000, 2013)
Photography