b matthews
TRANSCRIPT

THE FLORIDA STATE UNIVERSITY
COLLEGE OF ARTS AND SCIENCES
IMPLEMENTING NETWORK SECURITY PROTOCOLS IN
A SIMULATED NETWORK ENVIRONMENT
By:
Bradford Matthews
A Project Report submitted to the
Department of Computer Science
in partial fulfillment of the
requirements for the degree of
Master of Science
Degree Awarded:
Spring Semester, 2006

2
The members of the Committee approve the Project of Bradford P. Matthews defended
on April 19, 2006.
________________________
Breno de Mederios
Professor Directing Project
________________________
Mike Burmester
Committee Member
________________________
Lois Hawkes
Committee Member
The Office of Graduate Studies has verified and approved the above named committee members.

3
Acknowledgment
The program that was evaluated and used in coursework lab experiments was Simnet, written by
students of Johns Hopkins University. Also, would like to thank Sun Microsystems for allowing
having free use of their Java Studio Enterprise 8 to write labs and draw diagrams for Simnet and
its plug-ins. I appreciate the use of the SRP and MTI/A0 Labs that written by Dr. de Medeiros.
Lastly I would thank Justin Brunet and Justin Lebar from the Young Scholars program for their
help in testing the proof of concepts.

4
Table of Contents
ACKNOWLEDGMENT ............................................................................................................................................ 3
ABSTRACT................................................................................................................................................................. 5
INTRODUCTION....................................................................................................................................................... 6
FSU YOUNG SCHOLARS ........................................................................................................................................ 9
UNDERSTANDING SIMNET................................................................................................................................. 11
MTI/AO LAB ............................................................................................................................................................ 14
ARCHITECTURE OF SIMNET............................................................................................................................. 16
APPENDIX A –LABS............................................................................................................................................... 17
1.SRP ............................................................................................................................................................. 17 2.UNDERSTANDING SIMNET .......................................................................................................................... 23 3.MTI/AO LAB .............................................................................................................................................. 27 4. AUTHENTICATION...................................................................................................................................... 37
APPENDIX B –SIMNET DIAGRAMS................................................................................................................... 42
PING DEPENDENCIES ....................................................................................................................................... 42 PING SEQUENCE DIAGRAM.............................................................................................................................. 44 TRACEROUTE DEPENDENCIES ......................................................................................................................... 46 TRACEOUTE SEQUENCE................................................................................................................................... 48 TCPECHOSERVER........................................................................................................................................... 50 SERVER SEQUENCE- RUN............................................................................................................................... 52 TCPECHOCLIENT............................................................................................................................................ 54 CLIENT – CONNECT ......................................................................................................................................... 55 SOCKET DEPENDENCIES .................................................................................................................................. 57 SOCKET –CONNECT......................................................................................................................................... 58 SOCKET –RECEIVE .......................................................................................................................................... 59 SOCKET – SEND............................................................................................................................................... 60 SOCKET –RELIABLE SEND ............................................................................................................................... 61 SERVER SOCKET.............................................................................................................................................. 62 SERVER SOCKET – BIND.................................................................................................................................. 64 SERVER SOCKET – LISTEN............................................................................................................................... 65 SERVER SOCKET – ACCEPT ............................................................................................................................. 66
REFERENCE............................................................................................................................................................ 67

5
Abstract
Internet crime is rising to record heights, requiring education to focus on information security.
Due to the size of today's networks, training activities must use scaled-down and/or simulated
environments. In order for such training platforms to be successful, they must be more cost-
effective and easier to maintain than comparable real networks, while accurately modeling the
real-world environment. The labs designed in this project were written for one such simulated
network: Simnet.
This report narrates my contribution to an effort to test and determine if Simnet could be used as
a platform for coursework lab experiments to enrich the teaching of graduate-level network
security courses. This was done through a small, successful case study, in collaboration with
undergraduate students participating in Florida State University's Young Scholars Program.

6
Introduction
As society becomes more technological, criminals find new ways to fleece innocent citizens of
their hard-earned money. Criminals have resorted to using a computer with Internet to perform
crimes such as identity theft, selling contraband, stalking, and network hacking. A single
incident can result in total damages that amount into the millions. The act of using a computer to
commit a crime has become known as “cyber-crime.”
The cyber-crime rate has increased every year, almost double the previous years’ reported
incidents. The reported incidents involving a computer in 2000 were 21,756, whereas in 2003,
the reports sky-rocketed to 137,5291. These statistics reflect only reported incidences; however
it is estimated that only 34% of incidents are actually reported.2 With cyber-crime on the rise,
education on defending and dealing with these threats are needed.
Due to increases in these types of cyber-crimes, special training is given in network security
protocols. Traditionally this is taught through building a Secure Networking Lab. This is where
a person or an organization builds a private computer network that is completely separate from
another private or public network. The Secure network lab usually consists of at-least one server,
router, firewall, two client computers, network cables, and the operating systems to run the
machines. While using this approach allows students to see every aspect of the network
communication, it does so at a cost.
1 CERT Crime Statistics, http://www.cert.org/stats/cert_stats.html
2 Crime-Research, http://www.crime-research.org/library/Advisor.htm

7
This conventional model of education does come at a price both financially and metaphorically.
First off, to put this model together for one student alone can cost into the thousands of dollars.
The price of the operating systems can cost one hundred dollars a license, the hardware alone is
expensive, now multiply it by thirty for the average class of students. Not many institutions can
afford this due to funding. This is just for small networks, what happens if one would want to
simulate network transmissions over a large network? If using one large network in place of
thirty smaller networks, more problems arise. First encumbrance is how to set up a structure that
would be suitable for the instructor to grade and provide feedback to students in a reasonable
amount of time. The second encumbrance dealing with multiple students working on the same
network is multifaceted, presenting problems such as: One student accidentally or intentionally
disabling one node, one student doing all the work while another copies from them, and even
cross-contamination when a student is altering another's work either accident or intentional.
There are contemporary approaches that answer these problems that are presented.
One contemporary scheme is that of Simulated Network Environments. This is a system that
generates an environment that models network interaction on a single machine in order for a user
to test their network models on. Based on this premise, one student can simulate an entire
network on one system, drastically cutting cost down. In addition to cutting cost down, this also
alleviates the burden of the instructor in designing and grading the students’ projects. This
eliminates the worry about cross contamination due to each student working in their own
environment. Even-though this proposition answers the problems that traditional teaching
presented, this system does have its limitations.
8
Every solution is not perfect and has all the answers, likewise this holds true with simulated
environments. As this answers the problems presented previously, Simulated Networks also
present their own obstacles. These range from what system they have to be executed on, such as
only Linux kernel systems, to hardware limitations, such as how much free memory is needed to
operate. One such example of this Simulated Network Environment is Simnet, written by
students at Johns Hopkins University.
Simnet is the environment that all the labs will be written to use. I will be going through the
process of setting up the structure in which the program will be used. This will range from
prototyping the lab setup, receiving problems that arise, dealing with those problems and finally
prototyping the final lab. In addition to lab designs, I have to confirm that Simnet does operate as
a Network Simulator. In order to check for this I have to go in and detail the architecture of this
program. Once completed, an Instructor can confidently use Simnet to demonstrate and reinforce
implementing network security protocols.

9
FSU Young Scholars
Providing the foundation for Network Security labs was being a mentor for two Young Scholars
students, Justin Lebar and Justin Brunet. Through working with these two scholars I was able to
develop the basis of future labs. This is accomplished by helping them out with introducing them
to java network programming, Simnet, network security protocol SRP. In the course of dealing
with these students I was able to catch problems that need to be fixed for the future.
Upon first introductions with Justin Lebar and Justin Brunet, they were challenged on their Java
language knowledge. Their first assignment was to write a program that found the early prime
numbers; both did well. Once their competence in Java was established it was time to move onto
the network program. The general idea here is two parts, first is to gain more experience in Java
programming, and second to reinforce that computers send information back and forth during
network transmission. While showing the two scholars that information is exchanged during
network transmission, the information is visible for all to see. This leads into discussions on how
communications are sent securely.
As a precursor to complex schemes, the two Justin's learned about Public key Cryptography.
Specifically their first encounter with the idea was of the Diffie-Hellman protocol. Diffie-
Hellman protocol, a part of public key cryptography, is used when two people want to share a
public key. An example of Diffie-Hellman is where Alice and Bob want to have a shared public
key. To do this Alice picks an integer, a, and sends ga mod p to Bob. Bob picks an integer, b, and
sends gb mod p to Alice. They determine that g
ab mod p is the decryption key.

10
Once the young scholars have the basic comprehension of secure network protocols it is time to
implement an actual protocol. For this I have decided to take a previous assignment that I have
done originally in java and have it implemented into the Simnet program. Having already written
the program in java, I will serve as an excellent resource of knowledge enabling the young
scholars to ask for assistance in coding their Simnet version, when it comes to the protocol. This
program was the Secure Remote Password (SRP) protocol from Network Security Fall 2004 (See
Appendix A.1.SRP).

11
Understanding Simnet
While coding SRP protocol, several problems arose, not with the protocol but with
understanding Simnet and how it works. These barriers range from some basic operations of
loading a network file and starting that network to navigation techniques and using plug-ins. Due
to this, a lab should be developed for students so that they can become better acquainted with the
program. In addition just to navigating through the program the students should be able to create
their own network files and that those created networks should operate as real networks. These
combinations of problems resulted in the design of the following lab to help students understand
Simnet.
The FSU Graduate students that were worked with had never seen or heard of Simnet. They have
little knowledge of Simnet, such as where to get it and how to install it, much less use it. This is
why it is a good idea to start with the explanation of where to download Simnet and how to
install it. The students should be sure to download the latest version from the official website,
“http://simnet.isi.jhu.edu/ “. Along with the program file, it is recommended that the student
downloads the manual. The file that is downloaded is not an executable file; however it is a
compressed file that stores all the source files of this program. Now they need to decompress the
file to a specified folder in order to compile the program. Even though the program was written
in java, it is required that you use a program, called Ant, to compile Simnet. Once Ant has been
run the students have a working version of Simnet.
In order to run Simnet the students have to change to the Simnet’s root directory. While in this

12
directory the user is able to run Simnet which is now an executable file. To do this, they type in
“./Simnet”, the only sign that the program is running is a prompt that is a colon. From here, the
students are to load a network; the network is stored in a file format. To load the network the
student must type “load networks/test.net” and press enter. This is to load the network topology
described by the file “test.net” which is located in the networks directory. Now the students type
“start all” and press Enter. This is simulating turning on all the computers and routers on the
network. Once all the nodes are turned on the students are to type “usp” and press Enter. USP
stands for “update shortest path”. This allows all nodes to initialize their routing tables. If this
command is not run there will be no routes. This action is similar to how the Routing
Information protocol works. Now the students will have an operational network.
Upon the creation of an operation network the students have to know how to navigate around the
network and use plug-ins on the network. Navigation is simple; all the students have to do is use
the “select” command. The select command is where the student types in “select” followed by a
space and then the node’s name. The students should test the connectivity by using “traceroute”
function. This operates in the same manner as select and is also a built in command. Now that
you know that everything is working it is time to move onto loading and using plug-ins.
Next the students are to load their plug-ins. The command to load a plug-in is “plug in”. It must
be formatted as follows, “plug in all directory.pluginfilename ID”. The first part, “plug in”, is the
command itself. The second part, “All”, is telling the program to apply the plug-in to all nodes.
The third part, “directory.pluginfilename” is where the plug-in is located and what it is. The
fourth part, “ID”, is what its ID number will be. Its ID number can not be the same as any

13
previously loaded plug-ins ID number. Now that the students understand how to operate Simnet,
students can forward onto creating their own networks to use in Simnet. These ideas came
together to form the lab, Understanding Simnet (Please see Appendix A.2.Understanding
Simnet).

14
MTI/AO Lab
The students should have a basic understanding of Simnet before writing a protocol plug-in. The
first plug-in that the students will program is similar to what the two young scholars coded for
the SRP lab. The students will be coding a plug-in that will be using MTI/AO as a
communications protocol.
Even though the students know how to operate Simnet and utilize the plug-ins they are still
uncertain on how to code a plug-in from scratch. Therefore they are going to be given a base
plug-in to modify rather than create their own from scratch. The simple client, TCPEchoClient,
and server, TCPEchoServer, are used together to open up a communication channel between two
nodes. They will be modifying these two source files so that the simple communications will
now be a simple encrypted communication.
This secure communication is accomplished in two steps, secure authentication and secure
messaging. During secure authentication the client sends a packet formatted with a session ID,
Client ID, public key, and timestamp, the server receives the packet and checks for all the
parameters to correspond to the expected information. If those conditions compare successfully
the server sends the same type of packet back however with its own information, thus completing
the authentication handshake. After authentication has performed successfully the transmissions
sent between client and server are sent using the secure packet format with encrypted and
authenticator fields. This completes the secure communications.
During the completion of MTI/AO protocol, the secure packets that are sent between the client
and server need to be coded in a specialized way. The authentication messages (Appendix
A.4.Authentication) and secure messages that are sent need to utilize the serializable and

15
cloneable functions of java. Due to this, the students will be given an abstract class that provides
the framework for these messages. The students will then have the backbone of the plug-in coded
for them already so they will be able to focus on the network protocol aspect of this project.
(Please see Appendix A.3.MTI/A0 for Lab)

16
Architecture of Simnet
During the course of this project it has become necessary to delve into the architecture of Simnet.
There were two reasons that this needed to be done. First was to determine if the simulator
accurately portrayed working network. Second is that Simnet is a large and complex
environment and due to this complexity, students had trouble visualizing key components.
With this program being large it is easy to get confused on which functions accomplish a
particular means. To see how the simulator acts as a real network, there has to be some basic
understanding of what classes control it. The Main class is Simulator; this is what runs the entire
operation, from moving a packet node to node, what protocol is used, and defining a particular
node’s ID. The next class that is just as important is BPF class, one can think of this as a
representation for the hardware. Meaning that this class acts as the network card on the
workstations, it represents the physical movement of packets from destination to destination.
Finally the last major component is socket classes, which quite simply what its description
means. Now that one generally understands how Simnet operates, we can look at dependencies
and the process of certain functions. This can found in Appendix B –Simnet Diagrams.

17
Appendix A –Labs
1.SRP
Specifications:
The SRP protocol has two phases:
1) Key agreement phase
2) Authentication phase, based on the common key agreed in (1).
The picture below describes the two messages that constitute the first phase. Each server
maintains a database of user entries, which are triples of:
• A username;
• A verifier, which is essentially a number in the interval [2, p - 2], where p is a very large
prime. The value of p is part of the public specification of the system.
• A salt;
Of these, the salt is generated at random when the server first establishes the user entry. The
verifier is provided by the user and is a one-way function of the username, the "raw"
password, and the salt. (Since the raw password is never used directly for purposes of
authentication, this protocol is secure against off-line dictionary attacks if the salt is unknown.)

18
The verifier is computed (by Alice) as follows:
• The username (say, "Alice") is represented as a byte array (using the byte values of
ASCII characters). For instance, you could have the byte array <Alice>. We will use
<username> for the byte representation of an arbitrary user's name.
• This value <username> is hashed using the function SHA-1 to obtain a hashed identity
HID.
• This value is prefixed by the byte representation of the salt value (which Bob gives to
Alice) and postfixed with the byte corresponding to ASCII character ":" + the byte
representation of the user's password (which should not include the character ":"):
o <salt> | HID | <:> | <raw password>, where | represents string concatenation.
• The hash function SHA-1 is applied to the above to obtain
o X = SHA-1( <salt> | HID | <:> | <raw password>).
• The value X is then interpreted as an integer, using the following convention: If an array
of bytes has bytes [b0, b1, b2, ..., bn], then it represents the integer 256n *b0 + 256
n-1 * b1 +
... + bn, where the individual bytes bk are naturally identified with the numbers in the
interval [0, 255].
• The verifier is finally computed as v = gX mod p, where 'mod' indicates modular
arithmetic. Alice gives this value 'v' to Bob, but not her password. Here, 'g' is also a
number in the interval [2, p -2], and is part of the system's public specification.
One of the reasons why Java is used in this class (as opposed to C/C++) is that it has native
support for arbitrary-precision arithmetic (i.e., arithmetic operations involving very large

19
numbers). Please refer to the class BigInteger.
When Alice needs to identify herself with Bob, she engages in the following protocol:
The challenge values A and B are computed using specific algorithms:
• Alice chooses a random value 'a' in the interval [2, p - 2] and computes A = ga mod p.
• Bob computes a random value 'b' in the same interval and computes B = (v + gb) mod p.
This phase is completed with the generation of the common session key KAB from the shared
values. On her side, Alice computes:
• S = (B - v) ( a + u x )
mod p,
while Bob computes:

20
• S = (A vu) b mod p.
Here the value u is an unsigned, 32-bit value obtaining from the first 4 bytes of the value SHA-
1(B) -- using our previously described convention to convert between integers and byte arrays.
It is not hard to check that both values of S resulting from these different computations are
equal. Bob and Alice must use different ways to compute S because Alice knows the value 'a'
and Bob the value 'b', but not conversely. Only Alice or Bob may compute S as one needs to
know at least one of these two values to execute either algorithm. The result is that S is a shared,
secret value.
From S, the common key is derived by computing a function called SHAInterleaves(). This function
is essentially SHA-1 (which results in a 160-bit output), interleaved to obtain a 320-bit output:
• K = KAB = SHAInterleaves(S).
After the common key is computed, Alice and Bob can authenticate each other:

21
After this, they use the shared K to encrypt and authenticate messages back and forth.
In your implementation the messages will be encrypted with 112-bit triple-DES-ede in CBC
mode, and authenticated with HmacSHA1 using a 128-bit key.
The steps are as follows:
1. Initialize the cipher using DESede with PKCS5 padding. You can give it any size byte
buffer to encrypt. The output will be of byte size a multiple of 8.
2. Compute the HmacSHA1 using the hmac key. Attach to the end of your encryption.
3. On the other end, yo can check the Hmac first, and if it succeeds, you can decrypt (after
truncating the buffer to eliminate the trailing Hmac value.
In other words, you will use the bytes b[0] through b[23] of the shared key K as a key K1
encryption, and bytes b[24] through b[40] of K as a key K2 for authentication. You will use the
encrypt-then-authenticate paradigm, i.e., you will first CBC-encrypt all messages, then process

22
the encrypted message through the MAC to get an authentication tag that is attached to the end
of the message.
To finalize the specification of the assignment, you need the description of the SHAInterleaves()
function. It is as such:
Start with a byte array T = {T[0], T[1], T[2], ..., T[n]}. First shrink T, if needed, by removing
any zero bytes in the first positions. In other words, T[0] should not equal the byte 0. Then
make sure that T does not have an odd number of bytes, by dropping an extra byte at the
beginning. Split T into two byte arrays alternating the indices.
• E = T[0] | T[2] | T[4] | ...
• F = T[1] | T[3] | T[5] | ...
Both E and F should be exactly half the length of T. Hash each one with regular SHA-1, i.e.
• G = SHA-1(E)
• H = SHA-1(F)
Then interleave the two hashes back together to form the output, i.e.
result = G[0] | H[0] | G[1] | H[1] | ... | G[19] | H[19]
The result will be 40 bytes (320 bits) long.
23
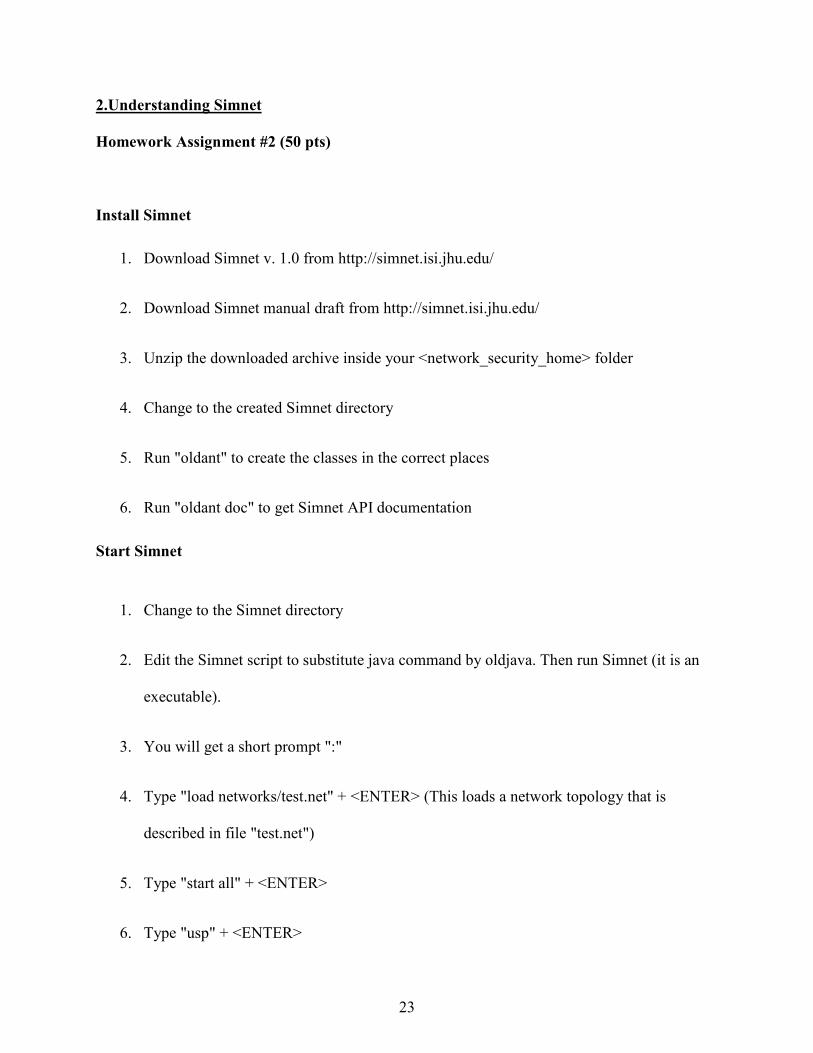
2.Understanding Simnet
Homework Assignment #2 (50 pts)
Install Simnet
1. Download Simnet v. 1.0 from http://simnet.isi.jhu.edu/
2. Download Simnet manual draft from http://simnet.isi.jhu.edu/
3. Unzip the downloaded archive inside your <network_security_home> folder
4. Change to the created Simnet directory
5. Run "oldant" to create the classes in the correct places
6. Run "oldant doc" to get Simnet API documentation
Start Simnet
1. Change to the Simnet directory
2. Edit the Simnet script to substitute java command by oldjava. Then run Simnet (it is an
executable).
3. You will get a short prompt ":"
4. Type "load networks/test.net" + <ENTER> (This loads a network topology that is
described in file "test.net")
5. Type "start all" + <ENTER>
6. Type "usp" + <ENTER>

24
(This makes all nodes initialize their routing tables by testing links. If you don't run this
command you have no routes anywhere. USP = update shortest path)
7. To choose a network node, use the command "select".
For instance, "select JHU" will transport you to the JHU prompt.
8. Test connectivity by using traceroute. For instance, "traceroute ATT"
9. Load the network dump plugin: "plug in all simnet.PacketDump 1"
(This loads the class PacketDump which enables capture of packets. These will be
recorded in <hostname>.log files. The modifier "all" loads the class in all nodes. If it was
ommitted, only the selected node would do packet capture and logging. The number `1`
basically assigns a process identity to the packet dumper, so you can identify different
services in the same node.)
10. Type "dump any any" (This causes the packet dumper in the selected node to start
capturing and logging files from any
source address to any destination address)
11. Load a TCP-based echo server. "plug in submission.Demo.TCPEchoServer 10". This
enables the selected node to run an "echo" server.
12. Type "open xxx" where "xxx" is a number in the range 100---65000 to enable to the Echo
server to bind to port xxx and listen for incoming connections
13. Select some other node
14. Type "plug in submission.Demo.TCPEchoClient ??" where ?? is not 1 or 10. (Why not 1
or 10)?
25
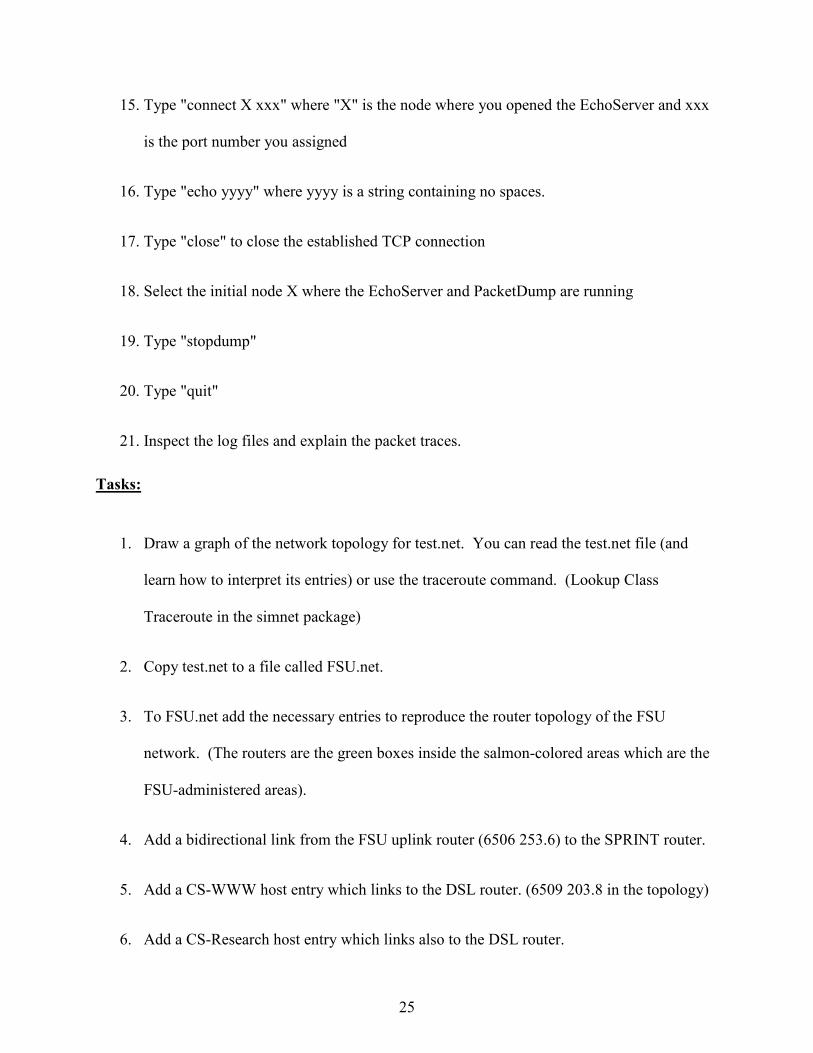
15. Type "connect X xxx" where "X" is the node where you opened the EchoServer and xxx
is the port number you assigned
16. Type "echo yyyy" where yyyy is a string containing no spaces.
17. Type "close" to close the established TCP connection
18. Select the initial node X where the EchoServer and PacketDump are running
19. Type "stopdump"
20. Type "quit"
21. Inspect the log files and explain the packet traces.
Tasks:
1. Draw a graph of the network topology for test.net. You can read the test.net file (and
learn how to interpret its entries) or use the traceroute command. (Lookup Class
Traceroute in the simnet package)
2. Copy test.net to a file called FSU.net.
3. To FSU.net add the necessary entries to reproduce the router topology of the FSU
network. (The routers are the green boxes inside the salmon-colored areas which are the
FSU-administered areas).
4. Add a bidirectional link from the FSU uplink router (6506 253.6) to the SPRINT router.
5. Add a CS-WWW host entry which links to the DSL router. (6509 203.8 in the topology)
6. Add a CS-Research host entry which links also to the DSL router.
26
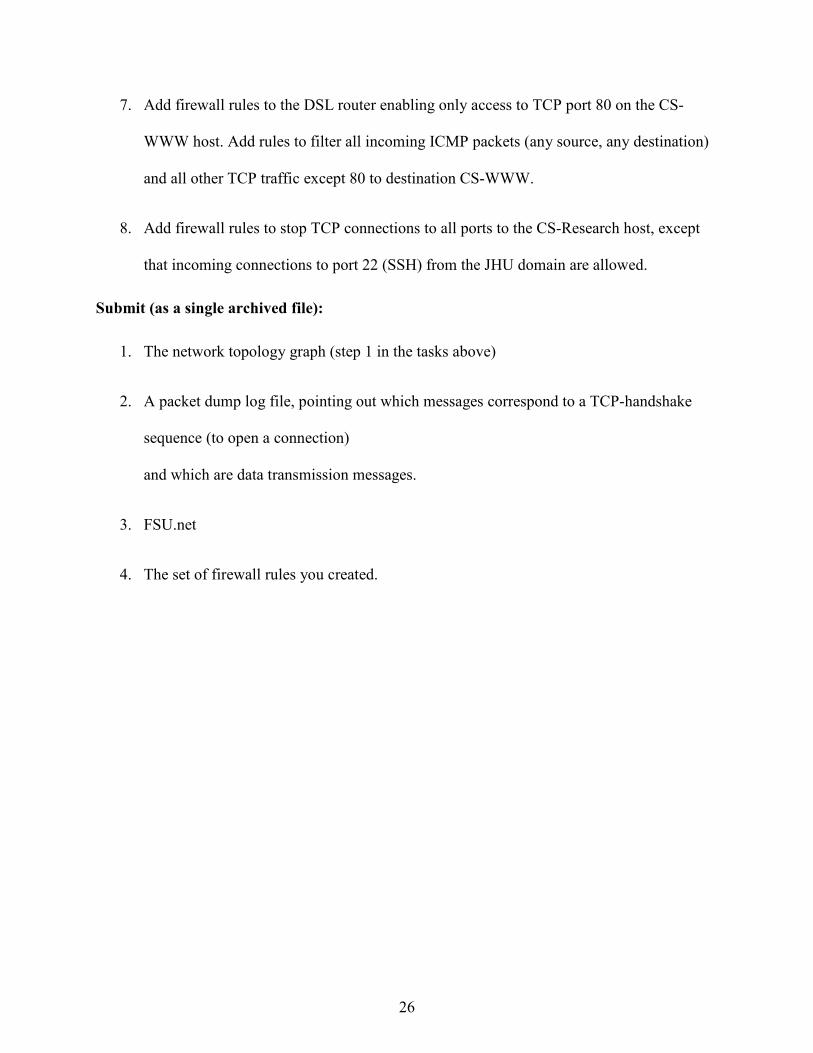
7. Add firewall rules to the DSL router enabling only access to TCP port 80 on the CS-
WWW host. Add rules to filter all incoming ICMP packets (any source, any destination)
and all other TCP traffic except 80 to destination CS-WWW.
8. Add firewall rules to stop TCP connections to all ports to the CS-Research host, except
that incoming connections to port 22 (SSH) from the JHU domain are allowed.
Submit (as a single archived file):
1. The network topology graph (step 1 in the tasks above)
2. A packet dump log file, pointing out which messages correspond to a TCP-handshake
sequence (to open a connection)
and which are data transmission messages.
3. FSU.net
4. The set of firewall rules you created.

27
3.MTI/AO Lab
The following lab’s protocol was written up by Dr. de Medeiros, the abstract classes were
provided by me.
Goal of Assignment:
Implement the MTI/A0 key agreement protocol (authenticated Diffie-Hellman Key Exchange)
Due date: 11/09/2005
References:
• Class slides
• Handbook of Applied Cryptography, chapter 12.
http://www.cacr.math.uwaterloo.ca/hac/about/chap12.pdf
Motivation:
• Implement Elgamal, a common method for key agreement used as a building block in
multiple protocols.
• Implement secure network channels.
Recipe for Success:

28
• Start working on the assignment as soon as possible. Give yourself enough time.
• Start by reading the references. Make sure you understand the protocol thoroughly, by
drawing diagrams of the messages, making sure you understand what cryptographic
primitives (Diffie-Hellman, symmetric encryption, hashes) are being used.
• Follow up by familiarizing yourself with the Java security classes, and with the
BigInteger class.
• Re-use your experience with previous exercies.
• Carefully inspect the code for the TCPEchoServer and TCPEchoClient in
simnet.Demo.submission package.
• Test your code as your build it. Test individual units.
• Be honest and work individually. Do not share your code.
Recipe(s) for Failure:
• Do not study carefully the protocol, skim it or ask a friend a couple of questions and
assume to have understood it.
• Download the existing code and try to hack your way to somewhere.
• Wait until the last few days to start. You will probably need a considerable amount of
time to become familiar with the APIs. It is better taking it in a little at a time, and build
momentum over several weeks.
• Cheat. Share your code.
29
Grading of assignment:
1. MTI/A0 implemented correctly: 50% of the grade.
2. If SecureMessages implemented correctly: 40% of grade
3. Documentation: 10%
Specifications:
You should modify the TCPEchoClient and TCPEchoServer Classes in the submission.Demo
subpackage of Simnet.
The modified classes should be called TCPDHClient and TCPDHServer.
In order to generate DH public key parameters, use the classes
org.bouncycastle.crypto.generators.DHParametersGenerator an
org.bouncycastle.crypto.params.DHParameters;
DHParametersGenerator DHgen = new DHParametersGenerator();
SecureRandom srand = new SecureRandom();
DHgen.init(2048,80,srand);
DHParameters DHparam = DHgen.generateParameters();
try {

30
OutputStream fileout = new FileOutputStream("DHparams.out");
ObjectOutputStream oout = new ObjectOutputStream(fileout);
DHParametersWrapper dhwrap = new DHParametersWrapper();
dhwrap.setDHParameters(DHparam);
oout.writeObject(dhwrap);
oout.close();
} catch(IOException e) {
e.printStackTrace();
}
Execute this code immediately to generate your params once. Make a backup copy of your
params. Generating the params the first time may take hours! Having the same
parameters as another student is considered cheating. (The probability that you will
generate the same params as somebody else by chance is probably smaller than an elephant
will suddenly materialize on your living room by quantum effects.) This parameter is used
by both Client and Server.
Once you have generated the DH parameters, you can generate your private key (a securely
random BigInteger numBits long, where numBits is the bitlength of q. You can call
BigInteger q = DHparam.getQ();
method on DHparam to get the value q, and compute its bitlength as q.bitLength();
Once a client and server keys have been generated they can be saved as
DHPublicKeyParameters. You should also save your private keys separately (as BigIntegers)

31
You should proceed the same way to obtain the values used in the MTI/A0 algorithm.
It is required that the TCPDHClient be invoked when one must "connect" to a listening server
(an instance of
TCPDHServer).
After the completion of the 3-way TCP handshake, the TCPDHClient must send a message
containing a single
object that implements the following interface.
===================================MTI/A0 implementation
public interface CryptographicAuthenticationMessage {
public String getSenderName(); // returns the name of the client sending this message
public Object getAlgorithmSpecs();
// For this protocol, the return value should be of type
// org.bouncycastle.crypto.params.DHPublicKeyParameters;
// Since this class should be serializable, you will need to keep
your DHPublicKeyParameters
//using a DHPublicKeyParametersWrapper instance.

32
public java.sql.Timestamp getTimestamp(); // The time this message was created
public Object[] getArguments(); // The other arguments of this protocol.
public String getSessionID(); // In this protocol, it is computed as the concatenation of Sender
name, the special
// character sequence '::' followed by the receiver's name, another '::'
and the
// string obtained by calling the method toString() in the Timestamp.
}
The server, at this point, should:
1) Check that it knows the Sender by name
2) Check that the public key part of the DHPublicKeyParameters returned by the
getAlgorithmSpecs() corresponds to the sender. (You should assume a few associations of
public keys and names).
3) Check that the timestamp is not too different from the current time at the server (acceptable
clock skew of at most 5 seconds).
4) Check that the sessionID is computed correctly from the Sender's name, the server's name, and
the sender's timestamp.
5) Read the value returned by getArguments().
If all steps succeed, the server continues with the protocol. Otherwise, it should ignore the

33
message. (And time out if no valid message is received within 30 seconds).
Note that the returned array by getArguments() should contain a single object, OF TYPE
BigInteger, the value A = ga mod p which specified as a random value in a DH key exchange.
The response by the server is of the same type (CryptographicAuthenticationMessage), with the
appropriate changes:
1) The sender name is the server's name
2) The DHPublicKeyParameters are the server's parameters
3) The timestamp is that of the server
4) The sessionID is THE SAME AS THE VALUE SENT BY THE CLIENT.
5) getArguments() should return a single value OF TYPE BigInteger, namely B = gb mod p
which is the random value in a DH Key Exchange.
The shared pre-key should be computed as in the MTI/A0 key exchange, i.e., as pre-K = gax + by
mod p, where x is the private key of the server, and y the private key of the client. More
specifically,
i.) Client computes pre-key pre-K = (Public key of server)a B
y mod p.
ii.) Server computes pre-key pre-K = (Public key of client)b A
x mod p.
The server and client then initialize a SecureRandom generator, set the seed to be the value of the

34
pre-key (converted to bytes using toByteArray()), and compute a 1280-bit output. The first 512
bits will be used as encryption key (Kenc0,Kenc1) for AES-256. The second 512 bits will be
used as authentication keys (Kauth0,Kauth1) for HMAC-SHA256. The next 128-bits are IV0,
and the following 128-bits are IV1.
============================================End of MTI/A0 implementation
Now, each party must prove that they have computed the same pre-key. The client starts,
sending a message of type
public interface SecureMessage {
public byte[] getEncrypted();
public byte[] getAuthenticator();
}
The bytes returned by getEncrypted are computed as follows: First compute a String contained
the concatenation of
1) The number '0'
2) '::'

35
3) SessionID
5) '::'
5) A.toString() // A is the random challenge by the client
6) '::'
7) B.toString() // B is the random challenge by the server
Then convert the above String to a byteArray, and encrypt it using AES-CBC with PKCS7
padding and with IV = IV0 and key Kenc0. The output is the value of getEncrypted();
The value returned by getAuthenticator() should be the HMAC-SHA256 digest of the byte array
returned, getEncrypted() computed under the authentication key Kauth0.
The server must first verify if the authenticator is computed correctly from the encrypted value.
Then it should decrypt and check that the contents are as expected. It should reply with a
message also of the type SecureMessage. The only difference is that
the value in (1) should be '1', the IV used in encryption should be IV1, and the keys should by
Kenc1 and Kauth1.
After this, the client should wait for messages of the type "echo X", where X is a string, and
transmit it as a SecureMessage. Here, the String 'X' is just converted to byteArray and encrypted
(without re-setting the cipher in AES-CBC mode, still with IV = IV0), as well as authenticated---
here re-setting the MAC each time.

36
The Server should verify the MAC, decrypt, re-encrypt the message using the IV = IV1, Kenc1,
and authenticate it with Kauth1.
The Client must verify and decrypt the Server messages, printing the result on screen as an
echoed value. If the authentication fails, the client prints an error.
Every time a server of client detects an error, it should ignore and continue waiting for the next
message. If idle for more than 30 seconds (including erroneous messages), the client and/or
server should close the connection using a TPC RST packet.
Deliverables:
1) TCPDHClient and TCPDHServer classes, and auxiliary classes.
2) Two serialized objects of type DHPublicKeyParametersWrapper, in files named
serverKey.public and clientKey.public; (use ObjectOutputStream to write these)
3) Two serialized objects of type BigInteger (the private keys), in files named serverKey.private
and clientKey.private.
4) A file containing the server and client names.

37
4. Authentication
Abstract for My Authentication Message
package assign3;
import submission.Demo.*;
import simnet.*;
import java.io.*;
import org.bouncycastle.crypto.params.DHParameters;
import org.bouncycastle.crypto.params.DHPublicKeyParameters;
import java.security.SecureRandom;
import java.math.BigInteger;
import java.sql.Timestamp;
/**
* Shows how an implimented Authentication message works that
* implements: CryptographicAuthenticationMessage, Serializable, and Cloneable.
* You might need to change some varable names.
* DHPublicKeyParetersWrappers is based on Dr.Brenos DHParamaters class
*/
public class MyAuthenticationMessage implements CryptographicAuthenticationMessage,
Serializable, Cloneable {

38
// DATA MEMBERS
String SenderName;
//name of the node sending message
DHPublicKeyParametersWrapper AlgorithmSpecsWrapper; // a
DHPublicKeyParametersWrapper stroing th public key of the sendor
java.sql.Timestamp timestamp; // The time this
message was created and sent
Object[] arguments = new Object[1]; // the other
agruments of the message example g^x mod p and g^y mod p
String SessionID; //
the session id string of the message
DHPublicKeyParametersWrapper PubKeyClientwrapper1 = new
DHPublicKeyParametersWrapper();
/**
* Creates the authenticatio message useing the following parameters
* @param SenderNamein
* @param AlgorithmSpecsin
* @param Timestampin
* @param argumentsin

39
* @param SessionIDin
*/
public MyAuthenticationMessage(String SenderNamein, DHPublicKeyParametersWrapper
AlgorithmSpecsin, java.sql.Timestamp Timestampin ,Object[] argumentsin, String SessionIDin)
{
// Sets the SenderName for the input parameter
SenderName = SenderNamein;
// Sets the Algorithms specs by copying inputed object
AlgorithmSpecsWrapper = new DHPublicKeyParametersWrapper();
AlgorithmSpecsWrapper = AlgorithmSpecsin;
// Sets the TimeStamp
timestamp = new java.sql.Timestamp(Timestampin.getTime() );
// Set the Message Arguments
arguments[0] = argumentsin[0];
// Associates the SessionID to the one inputted
SessionID = SessionIDin;
}

40
/**
*This is how to use the implimented clone.
*The command to create clones
**/
public Object clone() throws CloneNotSupportedException {
return super.clone();
}
/**
* Implementation of CryptographicAuthenticationMessage right below
* From inside your server and client you call each of these functions to use.
* IE=> B = ((DHPublicKeyParameters) IN.getAlgorithmSpecs())
*/
public String getSenderName()
{
return SenderName;
}
public Object getAlgorithmSpecs()
{
return ( (Object) AlgorithmSpecsWrapper.getDHPublicKeyParameters() );

41
}
public java.sql.Timestamp getTimestamp()
{
return timestamp;
}
public Object[] getArguments()
{
return arguments;
}
public String getSessionID()
{
return SessionID;
}
}

42
Appendix B –Simnet Diagrams
Ping Dependencies

43
Here Ping is dependent on the BPF, Pluggable, and Application Layers of Simnet. As you can
see the IP_Packet is sent in that form that mimics a real packet. The actual path of how Ping
works can be seen through the sequence diagram.

44
Ping Sequence Diagram

45
Here the Ping command parses itself with the destination and source IDs to form a packet. Why
it is calling INT is because while in Simnet the Node names are actually referenced internally by
integers (i.e. FSU = 1 and UF = 3456). Once the packet is formed it is passed off to the proper
node through BPF (which is kind of like the network itself), then waits for a response. Then the
displays the returned information back to the screen.

46
Traceroute Dependencies

47
This is the same as the ping command however it also has the ICMP_packet to be included as
well.

48
Traceoute Sequence

49
Here the traceroute sequence, this one is complicated by just looking at it. However most of it is
looping for counting down the hops from the first node to the final destination. Just as in Ping the
program looks up the destination node to ping by its ID number and sends a ping packet to that
node. However though this time it changes the packet’s TTL to 0 and counts up till it reaches the
destination address.

50
TCPEcho Client and Server
In order for to understand how to write network plug-ins for Simnet lets look at the architecture
of one such client and server to see how it is done.
TCPEchoServer
The Server side dependencies one can see it uses the server socket an Echo server as its
inheritance. Therefore we will have to see the Server Socket as well. For the time being though
one can see that all the user really needs is use the commands open, send, and close and the echo

51
server will take care of the rest. But by delving deeper into this one can see that bind and listen is
taken care of the socket itself. The Run command takes care of the server operating and listening.

52
Server Sequence- RUN

53
From the running standpoint of the server, it binds to the socket with the one that the server is
given, checks to make sure that socket is available, listen on that socket, and accepts a
connection. Once that socket is accepted, the server branches off a new thread to do whatever
TCPEchoServer is slated to do then close the connection and wait for another connection to
repeat this all over again. Let’s look at the client overview side of this operation next.

54
TCPEchoClient
One can see this is the same as the server dependencies, just dealing with the client side of echo
client.

55
Client – Connect

56
This is a lot simpler than the Server side. All this does is open a random socket, connects to the
specified server address, start whatever it needs to do and closes when done.
If students use these two sources as there basis for writing there own plug-in they will have an
easy start, they will not have to worry about writing the listen statement, binding, connecting or
even sending functions. However if students really want to optimize their programs they will
have to write from scratch. The next few pages are the socket and server socket classes that they
will need to know in order to write their own code. Once they are familiar with the in-depth
socket side, programming can become easier.

57
Socket Dependencies

58
Socket –Connect
59
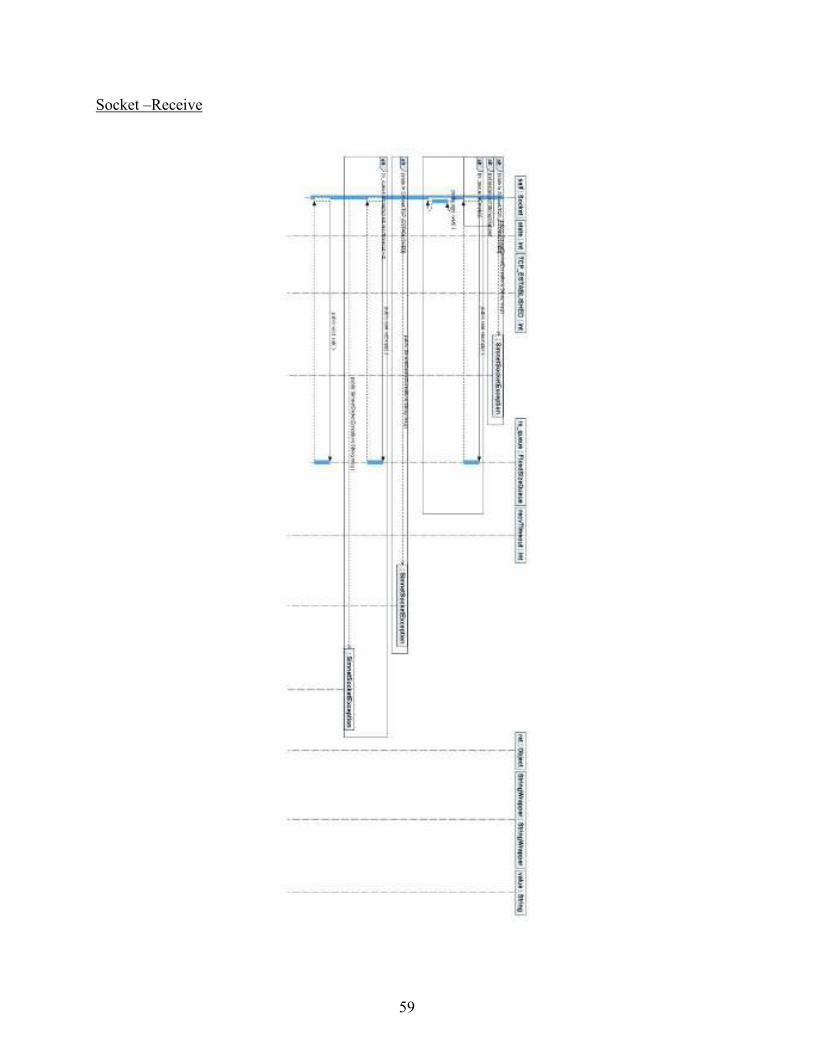
Socket –Receive

60
Socket – Send
61
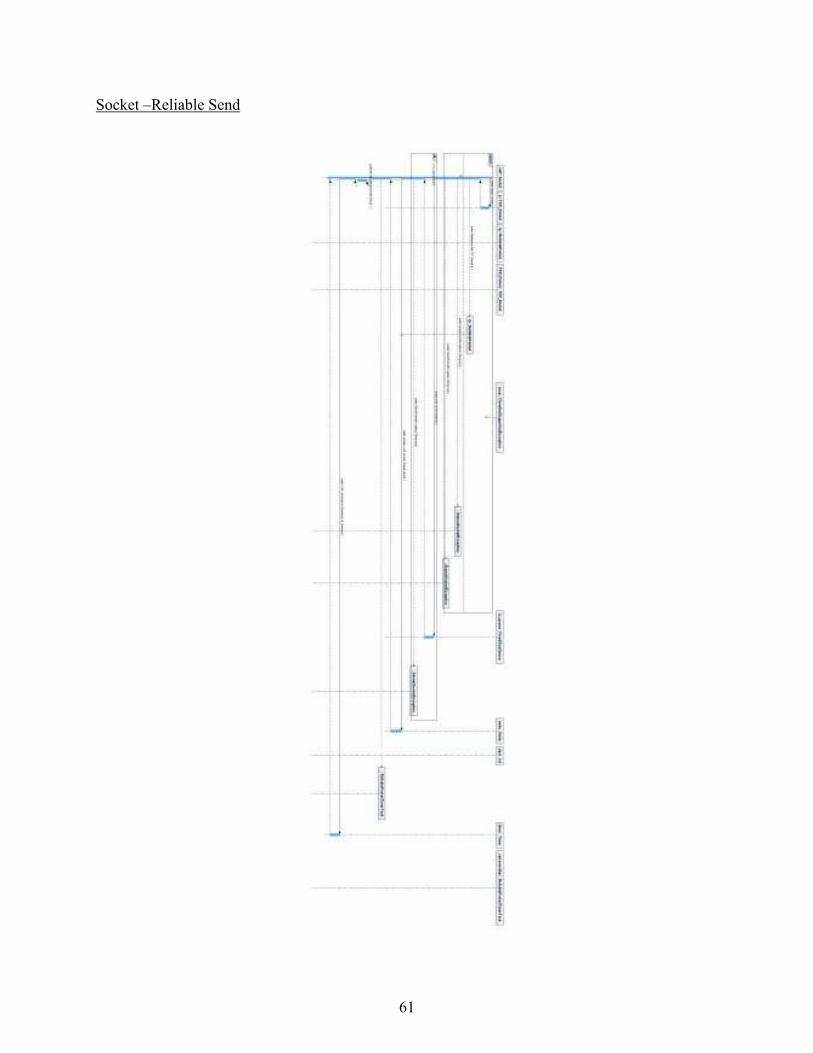
Socket –Reliable Send

62
Server Socket

63
Since the Server Socket inherited the Socket class the Send, Reliable Send, and Receive are the
same.

64
Server Socket – Bind

65
Server Socket – Listen

66
Server Socket – Accept

67
Reference
1. CERT Crime Statistics, http://www.cert.org/stats/cert_stats.html
2. Crime-Research, http://www.crime-research.org/library/Advisor.htm
3. Simnet, Simulated Network Environment, http://simnet1.isi.jhu.edu/
4. Simnet Manual, http://simnet1.isi.jhu.edu/manual.pdf
5. Ant, http://ant.apache.org/
6. Sun Microsystems Java Studio Enterprise.