bairs basic overview 1 - university of california,...
TRANSCRIPT

BAIRS Basic
Created on June 7, 2008
Overview
© 2008 Regents of the University of California All rights reserved. Published 2008. Restricted Rights Printed in the United States of America. No part of this document may be reproduced or transmitted in any form or by any means, electronic or mechanical, including photocopying and recording, for any purpose without the express written permission of Financial Systems User Support, University of California, Berkeley.
Financial Systems User Support
Training Guide
Page iii
Table of Contents
BAIRS Basic Overview 1.................................................................................... 1 BAIRS Availability..........................................................................................................1 BAIRS User Support .....................................................................................................1 Request Access to BAIRS/BIS......................................................................................1 Request Access to BAIRS/BIS ....................................................................................2
Configure Your Computer to Use BAIRS ....................................................................18 Berkeley Reporting Portal ...........................................................................................19 Login to the Berkeley Reporting Portal via BLU.........................................................19 Login to the Berkeley Reporting Portal via the Browser ............................................24
Understand Your Data.................................................................................................28 Improve BAIRS Performance......................................................................................31 Navigating BAIRS - Basic Workspace, Main Page & Toolbars ...................................32 Understand Personal Page and Explore Section.......................................................34 Navigate the Main Page - Learn about Parameters/ Run Reports ............................40

Financial Systems User Support
Training Guide
Page 1
BAIRS Basic Overview 1
BAIRS Availability BAIRS Availability The Berkeley Reporting Portal (the gateway to both BAIRS and BIS) is available from 7:00 am to midnight, Monday - Saturday. BAIRS is not available on Sundays.
BAIRS User Support User Support Help Desk The Budget & Finance User Support Help Desk: 643-4250 Call with questions regarding BAIRS reports, such as
• getting started - installing Hyperion Intelligence Client, accessing reports • help identifying the best report to answer a specific business question • understanding report data • assistance using the BAIRS - Advanced features
Web Page http://www.bai.berkeley.edu Weekly Office Hours BAIRS (or BFS) issues Sign up via ICE at http://hrweb.berkeley.edu/ice/home/ for drop-in sessions with any questions pertaining to BAIRS or BFS . All Office Hours sessions are held at 2168 Shattuck Ave.
Request Access to BAIRS/BIS Only authorized users may access BAIRS/BIS reports. Access is restricted in two ways:
• What type of data a user can see – general ledger (tempbudg and actuals), permbudg, and payroll. A user can be given access to one, two or all three types

Training Guide
Financial Systems User Support
Page 2
of data and this will impact both the data he/she can retrieve as well as which reports he/she can access in the reporting portal. Users cannot see reports which contain data to which they do not have access.
• What chartstrings a user can see. Generally users are given access to their department’s or unit’s data, based on the campus organizational tree. A user can be given access to one org code, several org codes or an entire sub-unit, department or control unit (org node).
Note: For some BAIRS users, typically faculty Principal Investigators (PI), access to data is restricted within an organizational unit to particular funds, flexfields or project codes. This is referred to as FFP access (Fund, Flex, Project).
Request Access to BAIRS/BIS
Procedure
In this example, we will request access to BAIRS.
Financial Systems User Support
Training Guide
Page 3
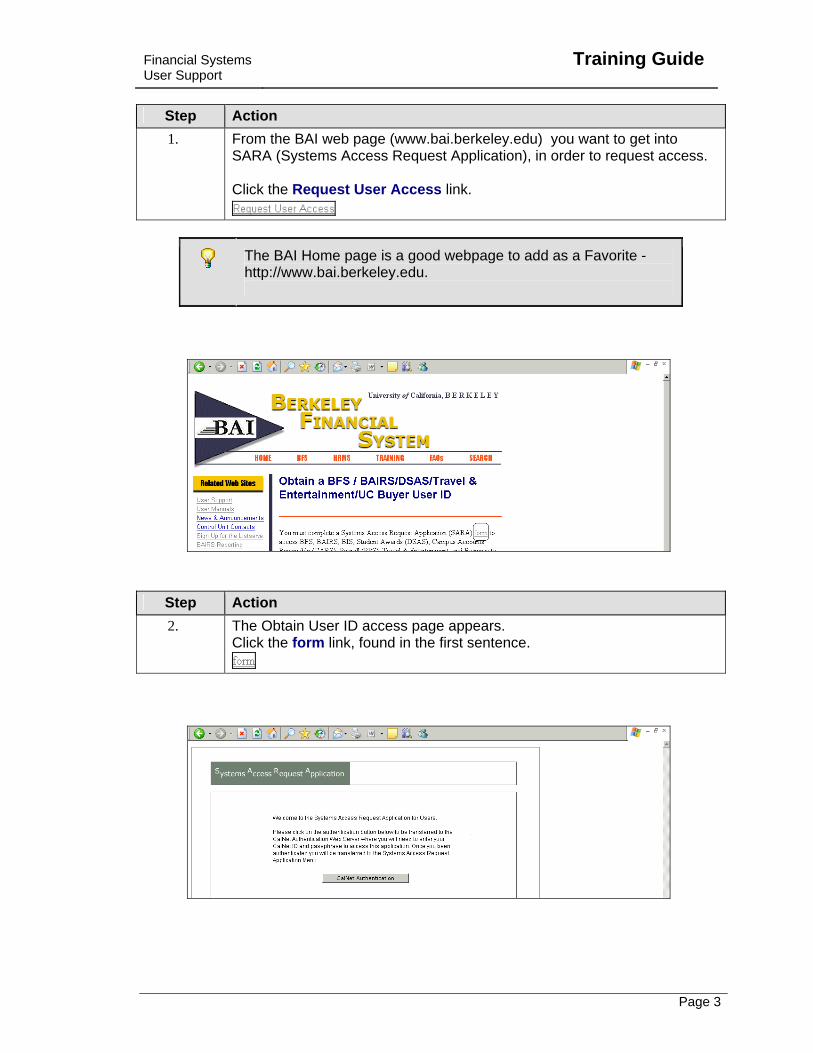
Step Action 1. From the BAI web page (www.bai.berkeley.edu) you want to get into
SARA (Systems Access Request Application), in order to request access. Click the Request User Access link.
The BAI Home page is a good webpage to add as a Favorite - http://www.bai.berkeley.edu.
Step Action 2. The Obtain User ID access page appears.
Click the form link, found in the first sentence.
Training Guide
Financial Systems User Support
Page 4
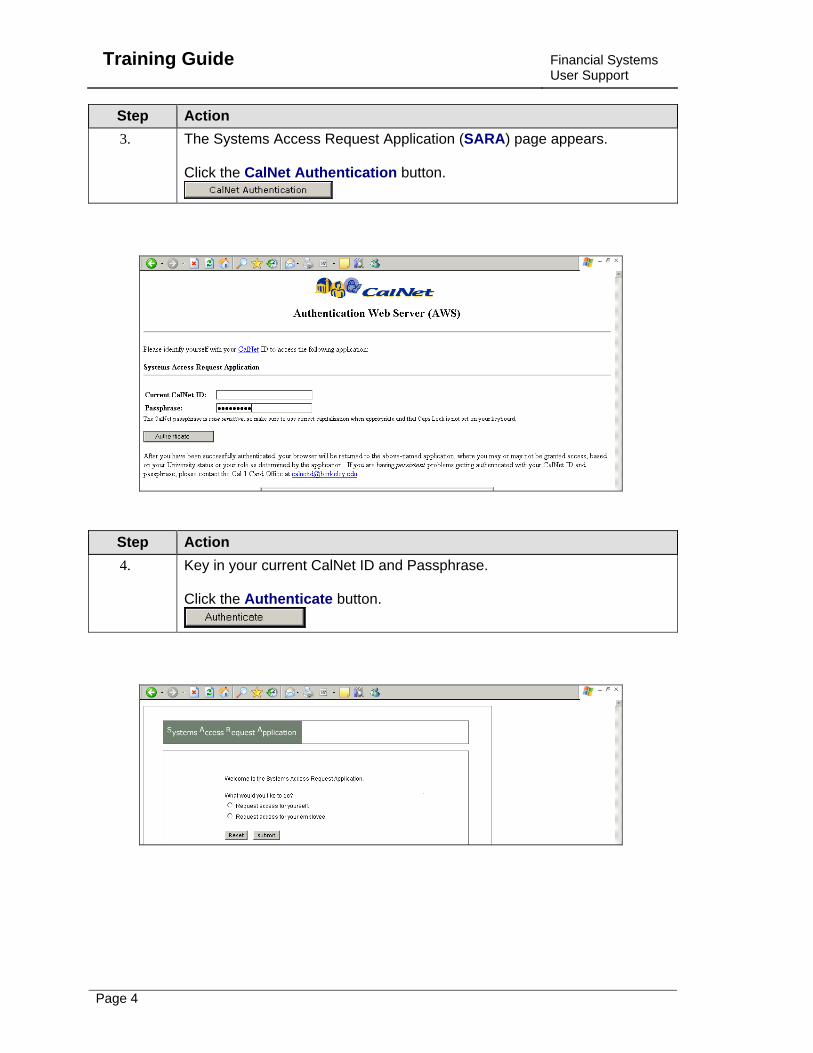
Step Action 3. The Systems Access Request Application (SARA) page appears.
Click the CalNet Authentication button.
Step Action 4. Key in your current CalNet ID and Passphrase.
Click the Authenticate button.
Financial Systems User Support
Training Guide
Page 5
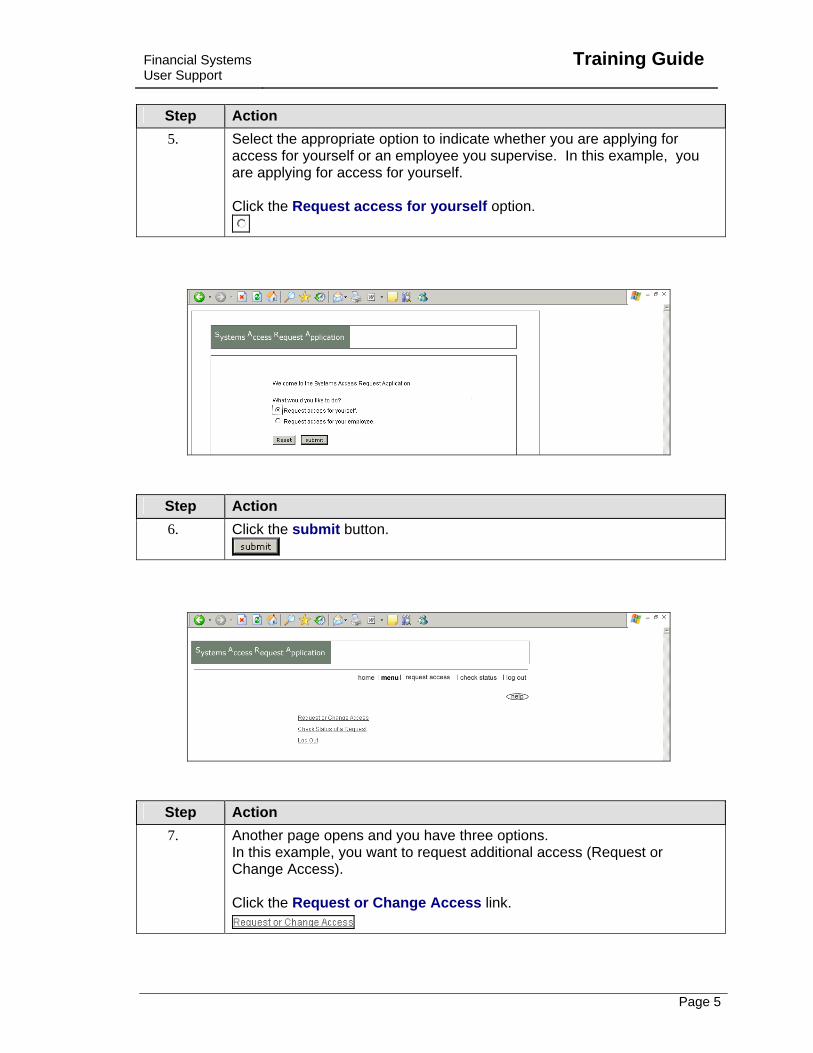
Step Action 5. Select the appropriate option to indicate whether you are applying for
access for yourself or an employee you supervise. In this example, you are applying for access for yourself. Click the Request access for yourself option.
Step Action 6. Click the submit button.
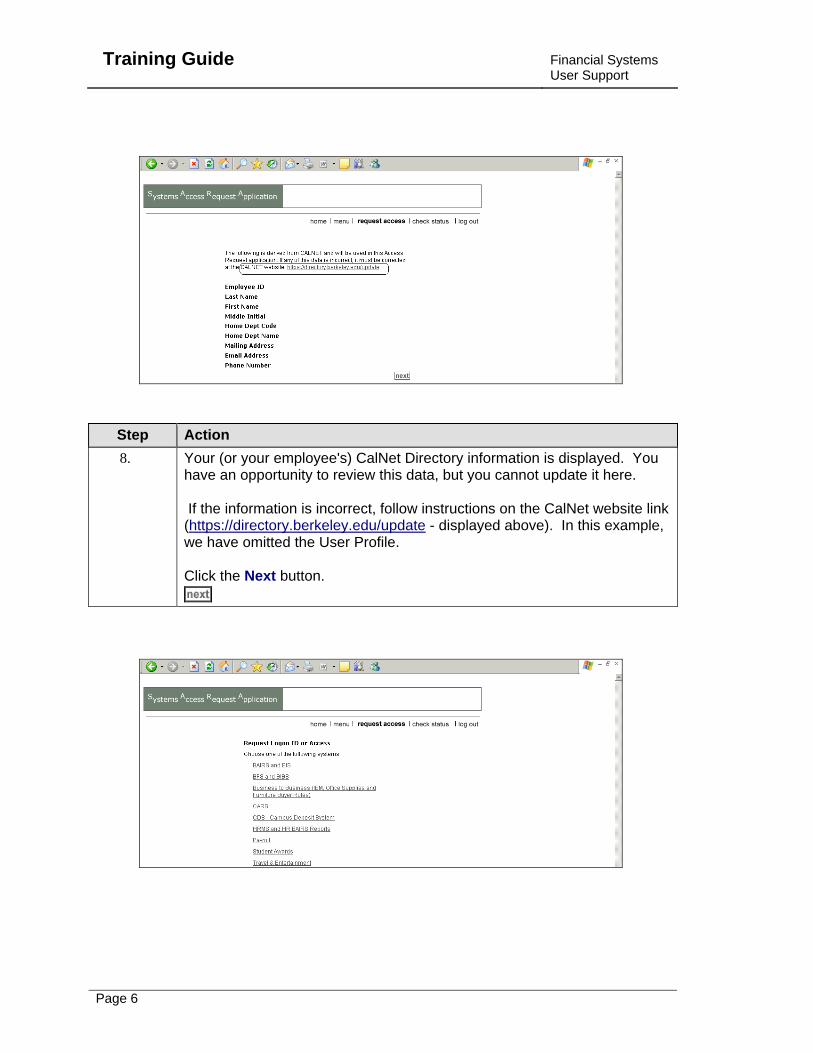
Step Action 7. Another page opens and you have three options.
In this example, you want to request additional access (Request or Change Access). Click the Request or Change Access link.
Training Guide
Financial Systems User Support
Page 6
Step Action 8. Your (or your employee's) CalNet Directory information is displayed. You
have an opportunity to review this data, but you cannot update it here. If the information is incorrect, follow instructions on the CalNet website link (https://directory.berkeley.edu/update - displayed above). In this example, we have omitted the User Profile. Click the Next button.
Financial Systems User Support
Training Guide
Page 7
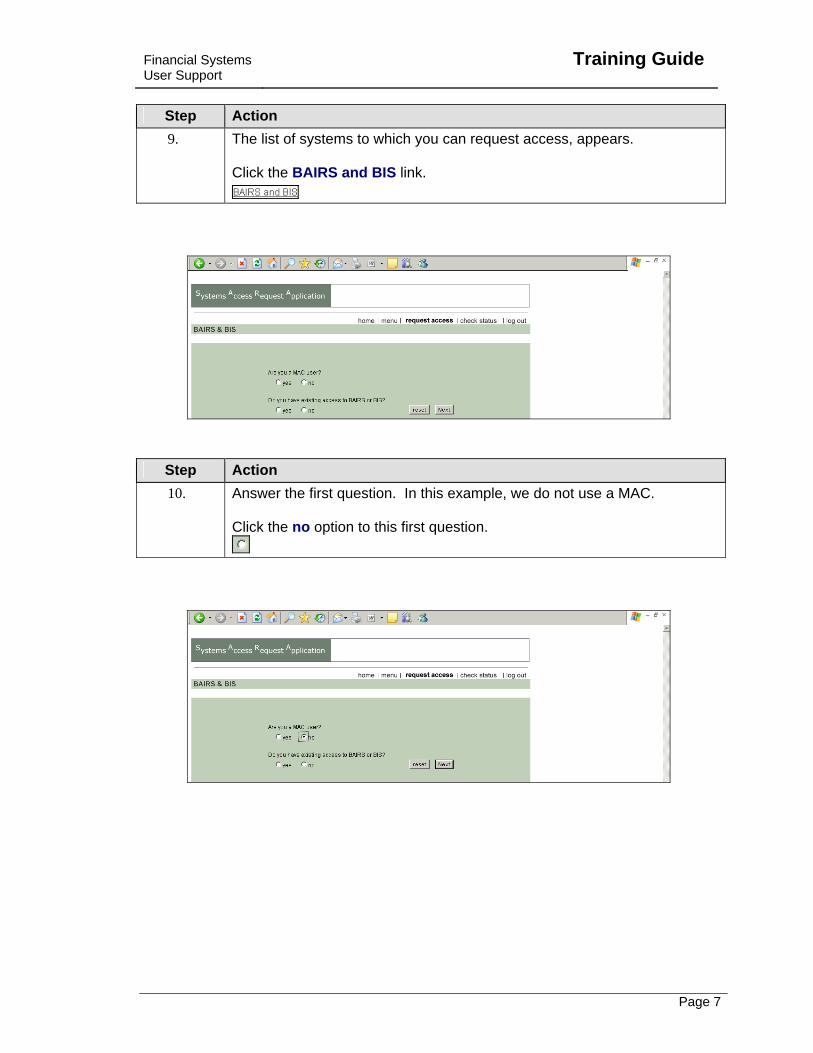
Step Action 9. The list of systems to which you can request access, appears.
Click the BAIRS and BIS link.
Step Action 10. Answer the first question. In this example, we do not use a MAC.
Click the no option to this first question.
Training Guide
Financial Systems User Support
Page 8
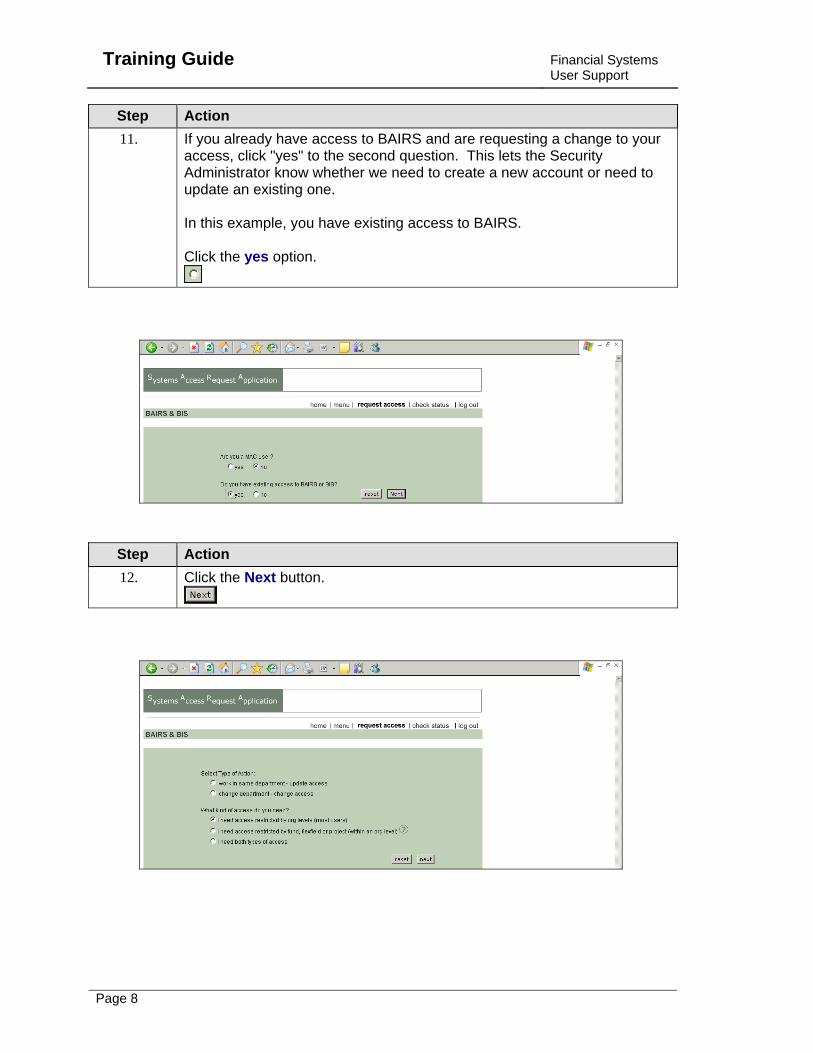
Step Action 11. If you already have access to BAIRS and are requesting a change to your
access, click "yes" to the second question. This lets the Security Administrator know whether we need to create a new account or need to update an existing one. In this example, you have existing access to BAIRS. Click the yes option.
Step Action 12. Click the Next button.

Financial Systems User Support
Training Guide
Page 9
Step Action 13. In this example, we continue to work in the same department.
Click the work in same department - update access option.
Step Action 14. Some users, especially faculty Principal Investigators, would restrict
access further by fund, flexfield or project within an organization. Most users should accept the default option to the question, "What kind of access do you need?". Click the next button.
Training Guide
Financial Systems User Support
Page 10
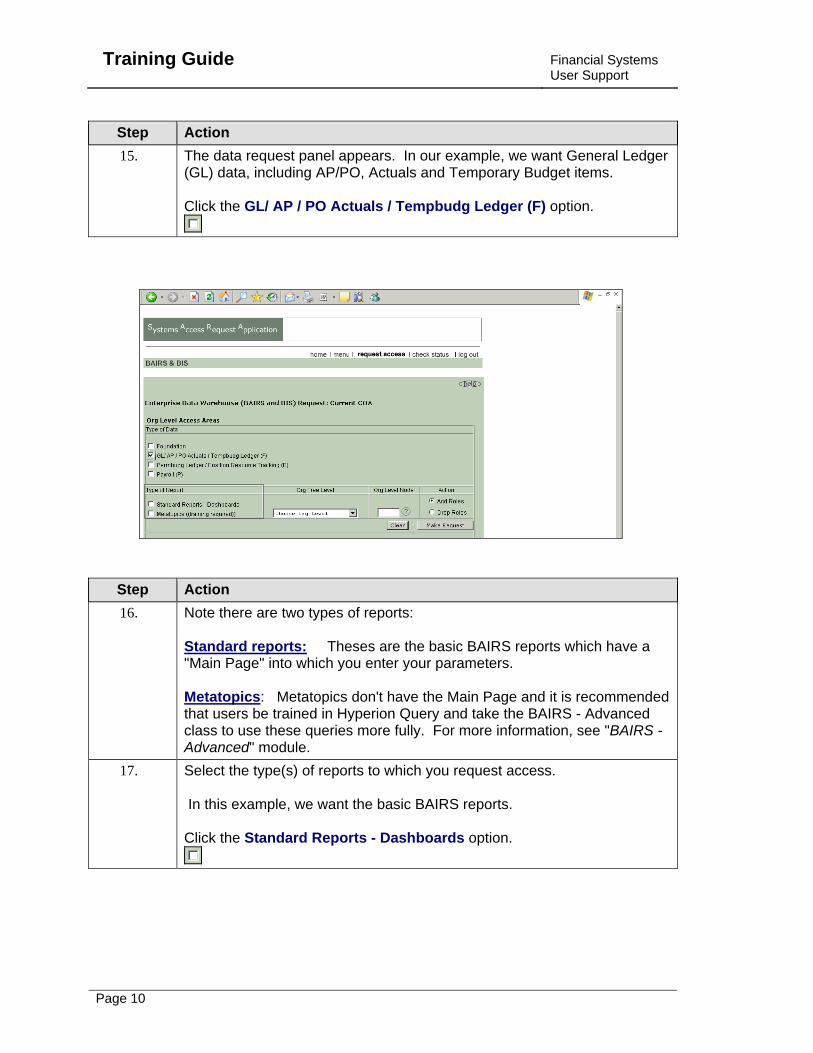
Step Action 15. The data request panel appears. In our example, we want General Ledger
(GL) data, including AP/PO, Actuals and Temporary Budget items. Click the GL/ AP / PO Actuals / Tempbudg Ledger (F) option.
Step Action 16. Note there are two types of reports:
Standard reports: Theses are the basic BAIRS reports which have a "Main Page" into which you enter your parameters. Metatopics: Metatopics don't have the Main Page and it is recommended that users be trained in Hyperion Query and take the BAIRS - Advanced class to use these queries more fully. For more information, see "BAIRS - Advanced" module.
17. Select the type(s) of reports to which you request access. In this example, we want the basic BAIRS reports. Click the Standard Reports - Dashboards option.
Financial Systems User Support
Training Guide
Page 11
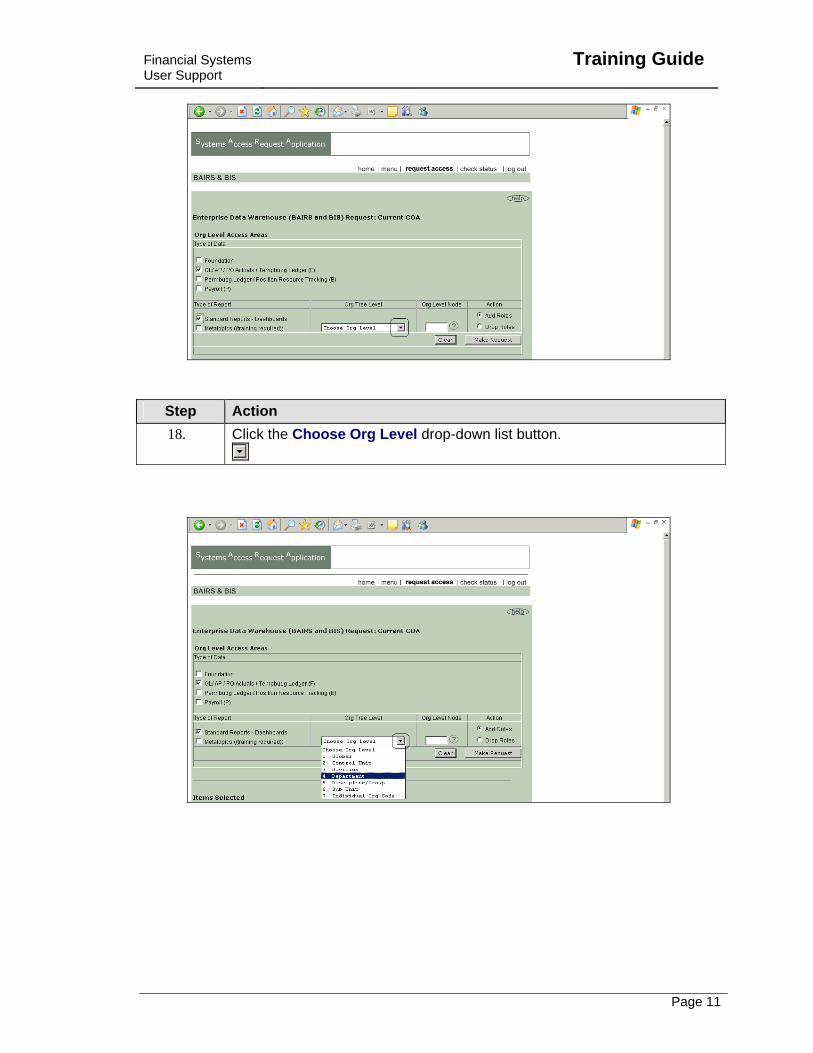
Step Action 18. Click the Choose Org Level drop-down list button.
Training Guide
Financial Systems User Support
Page 12
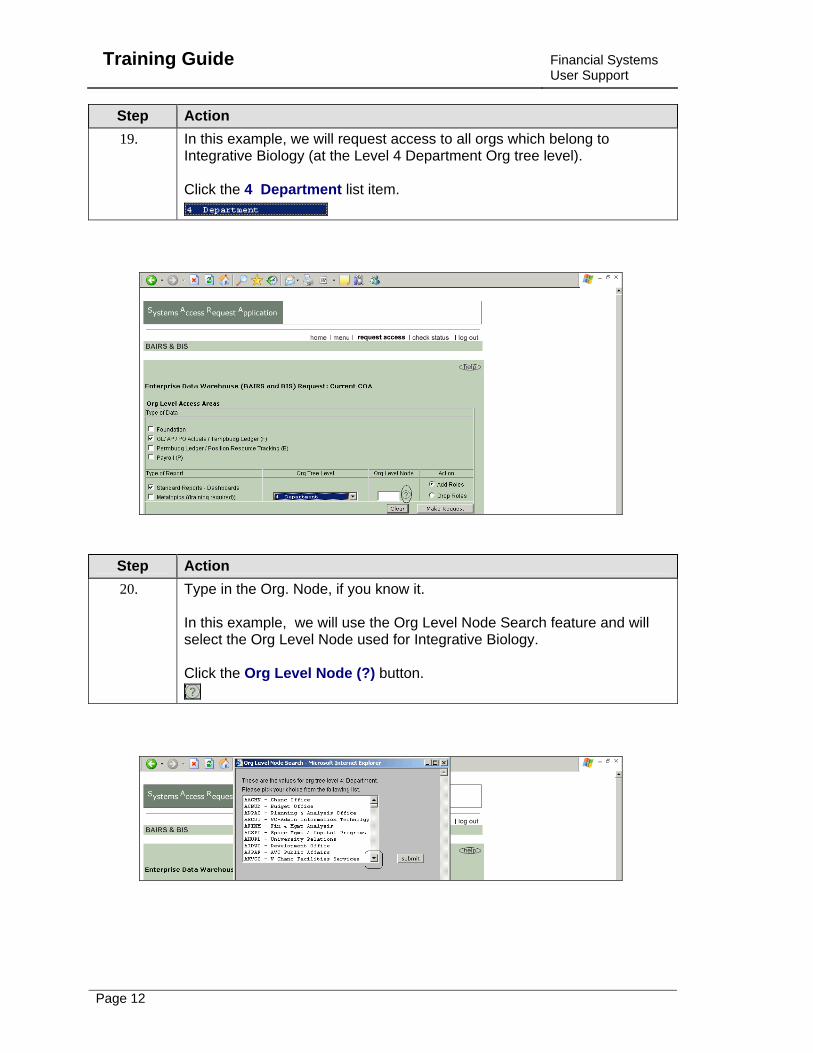
Step Action 19. In this example, we will request access to all orgs which belong to
Integrative Biology (at the Level 4 Department Org tree level). Click the 4 Department list item.
Step Action 20. Type in the Org. Node, if you know it.
In this example, we will use the Org Level Node Search feature and will select the Org Level Node used for Integrative Biology. Click the Org Level Node (?) button.

Financial Systems User Support
Training Guide
Page 13
Step Action 21. The Org Level Node Search panel opens.
In this example, we wish to locate the appropriate value for Integrative Biology. Click the scrollbar.
Step Action 22. Scroll to the desired Org Node.
Click the IBIBI - Integrative Biology list item.
Step Action 23. Click the submit button.
Training Guide
Financial Systems User Support
Page 14
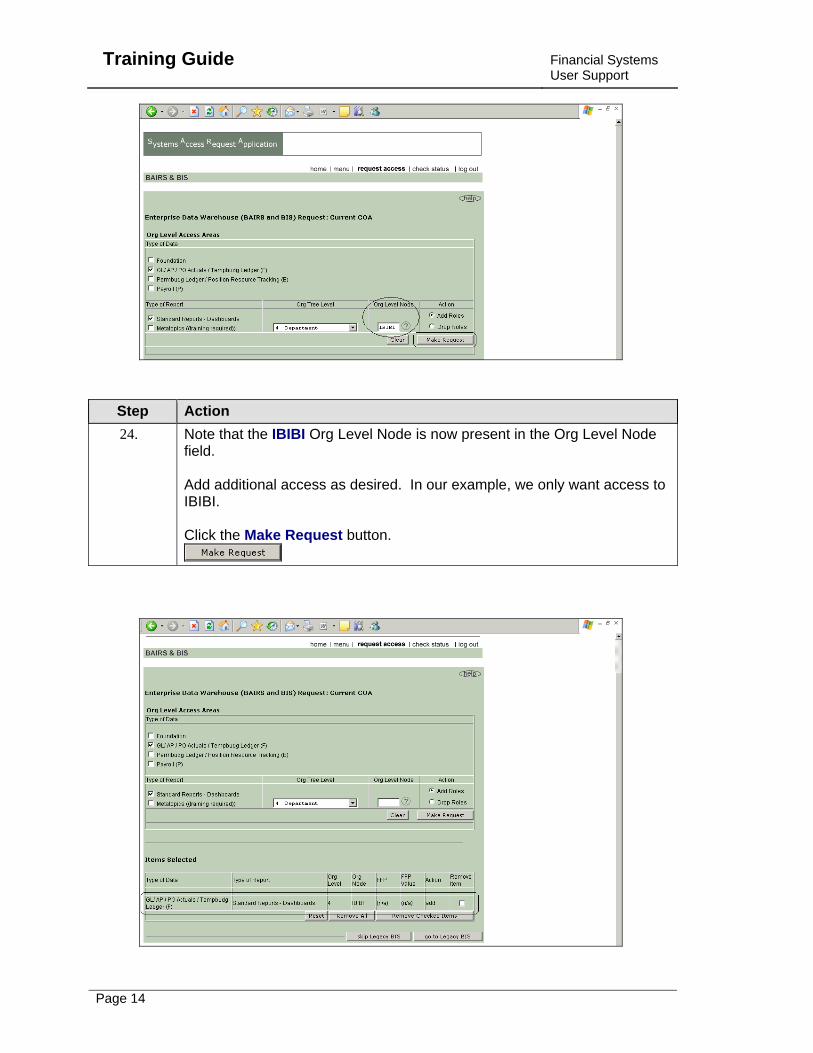
Step Action 24. Note that the IBIBI Org Level Node is now present in the Org Level Node
field. Add additional access as desired. In our example, we only want access to IBIBI. Click the Make Request button.
Financial Systems User Support
Training Guide
Page 15
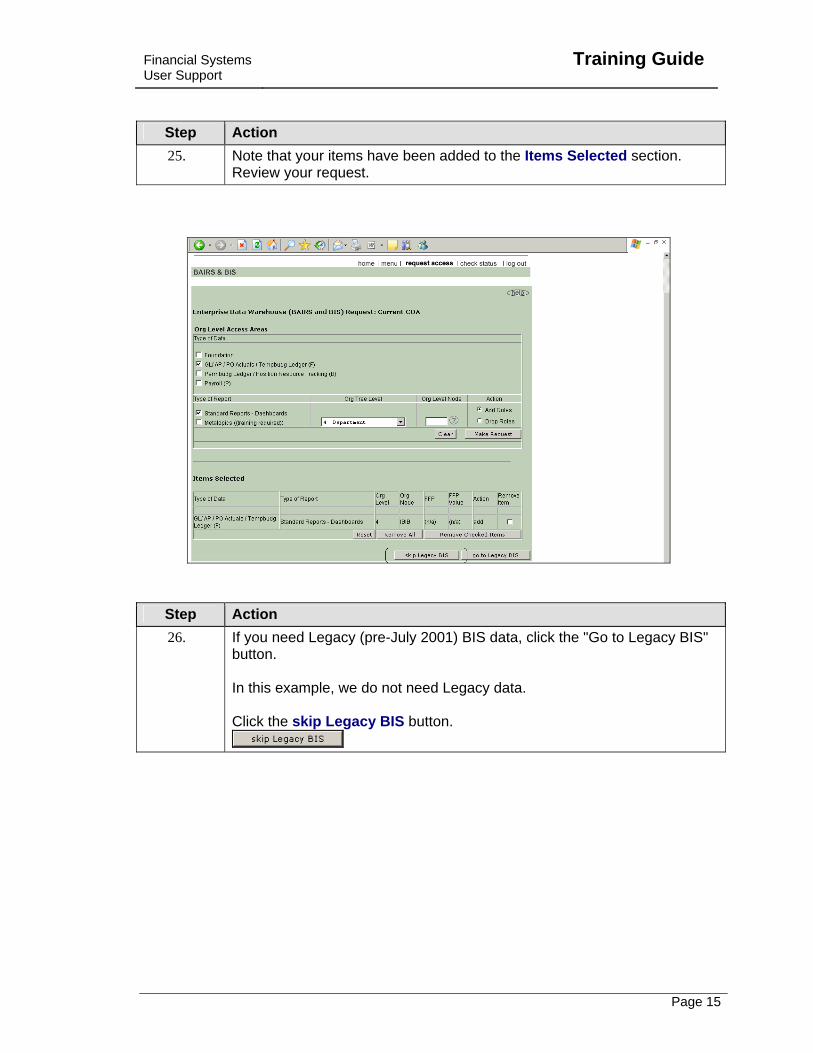
Step Action 25. Note that your items have been added to the Items Selected section.
Review your request.
Step Action 26. If you need Legacy (pre-July 2001) BIS data, click the "Go to Legacy BIS"
button. In this example, we do not need Legacy data. Click the skip Legacy BIS button.
Training Guide
Financial Systems User Support
Page 16
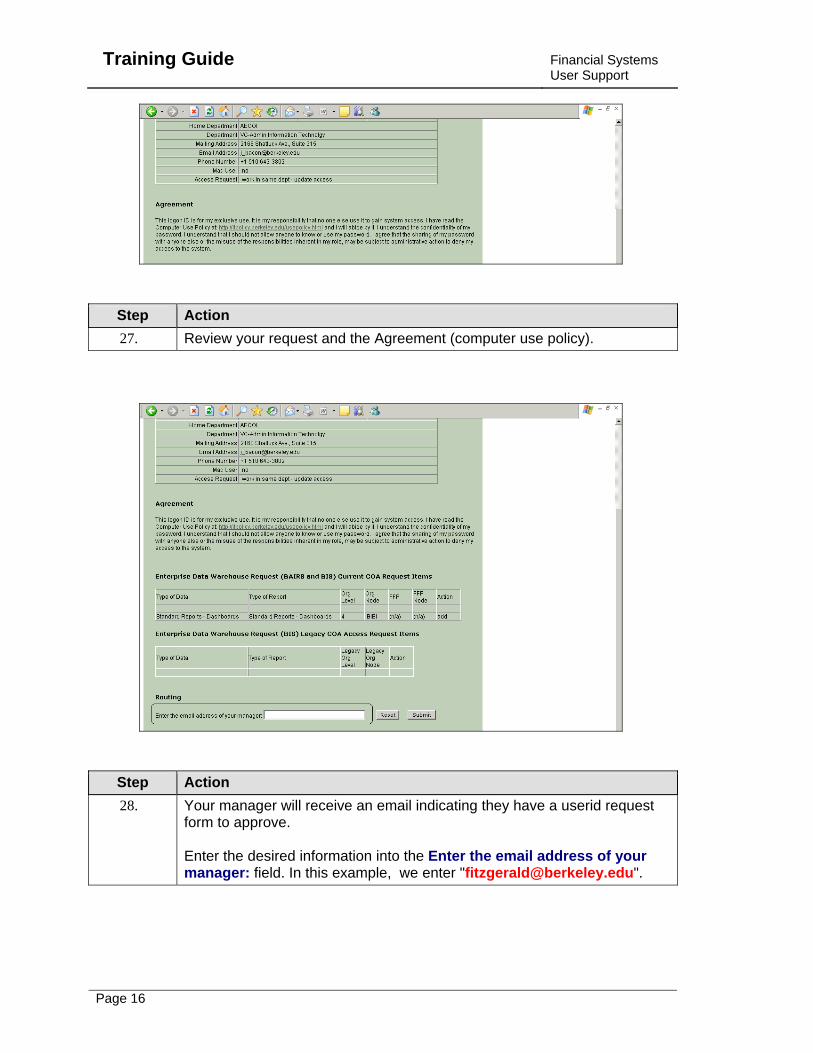
Step Action 27. Review your request and the Agreement (computer use policy).
Step Action 28. Your manager will receive an email indicating they have a userid request
form to approve. Enter the desired information into the Enter the email address of your manager: field. In this example, we enter "[email protected]".
Financial Systems User Support
Training Guide
Page 17
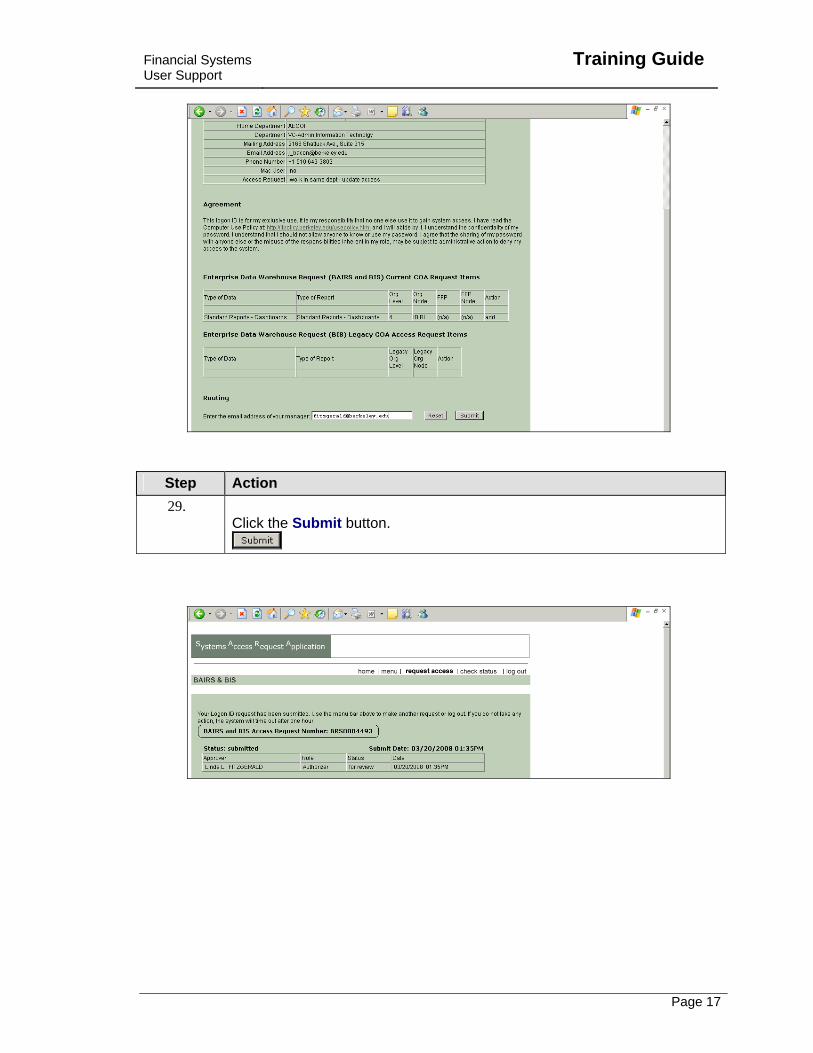
Step Action 29.
Click the Submit button.
Training Guide
Financial Systems User Support
Page 18
Step Action 30. Note there is now a BAIRS and BIS Access Request Number.
If approved, your manager will then forward the form to your control unit representative or directly to [email protected], if your control unit does not review userid requests. Your BIS/BAIRS access will generally be established (or changed) in 2-3 business days from the time the central security administrators receive the form from your manager or control unit representative. You will receive an email informing you that your access has been established or changed. At any time, you or your manager can check the status of your request by following steps 1-6 above and then clicking Check Status of Request.
31. We have finished our request for BAIRS/BIS access. End of Procedure.
Configure Your Computer to Use BAIRS Browsers PC Users The supported browsers for PC users are Internet Explorer 6 & 7 and Firefox 2.0 MAC users MAC users running HTML reports, will be able to use Firefox 2.0 For MAC users running reports using the Interactive Reporting Web Client will need to go through Citrix. For additional information on how to Configure your computer, see the BAI webpage at http://www.bai.berkeley.edu/. Installation of plug-in If you choose to run the reports using the Interactive Reporting Web Client, you will need to install the plug-in. This one-time installation will require an Administrator to install the software. PC Users Only one version of the plug-in can reside on you PC. If you decide to install the new plug-in v 9.3, you must first uninstall the Hyperion Intelligence Client v 8.2. For additional information about the installation of the Hyperion 9.3 plug-in, see the BAI webpage at http://www.bai.berkeley.edu/.
Financial Systems User Support
Training Guide
Page 19
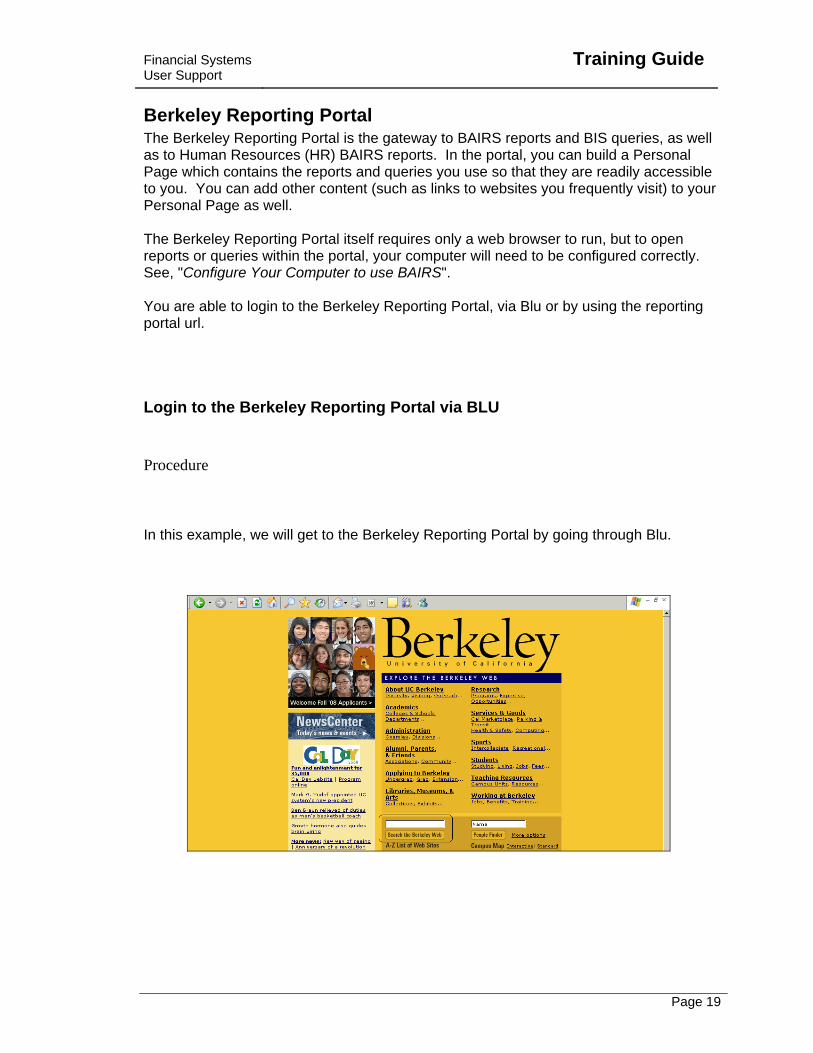
Berkeley Reporting Portal The Berkeley Reporting Portal is the gateway to BAIRS reports and BIS queries, as well as to Human Resources (HR) BAIRS reports. In the portal, you can build a Personal Page which contains the reports and queries you use so that they are readily accessible to you. You can add other content (such as links to websites you frequently visit) to your Personal Page as well. The Berkeley Reporting Portal itself requires only a web browser to run, but to open reports or queries within the portal, your computer will need to be configured correctly. See, "Configure Your Computer to use BAIRS". You are able to login to the Berkeley Reporting Portal, via Blu or by using the reporting portal url.
Login to the Berkeley Reporting Portal via BLU
Procedure
In this example, we will get to the Berkeley Reporting Portal by going through Blu.
Training Guide
Financial Systems User Support
Page 20
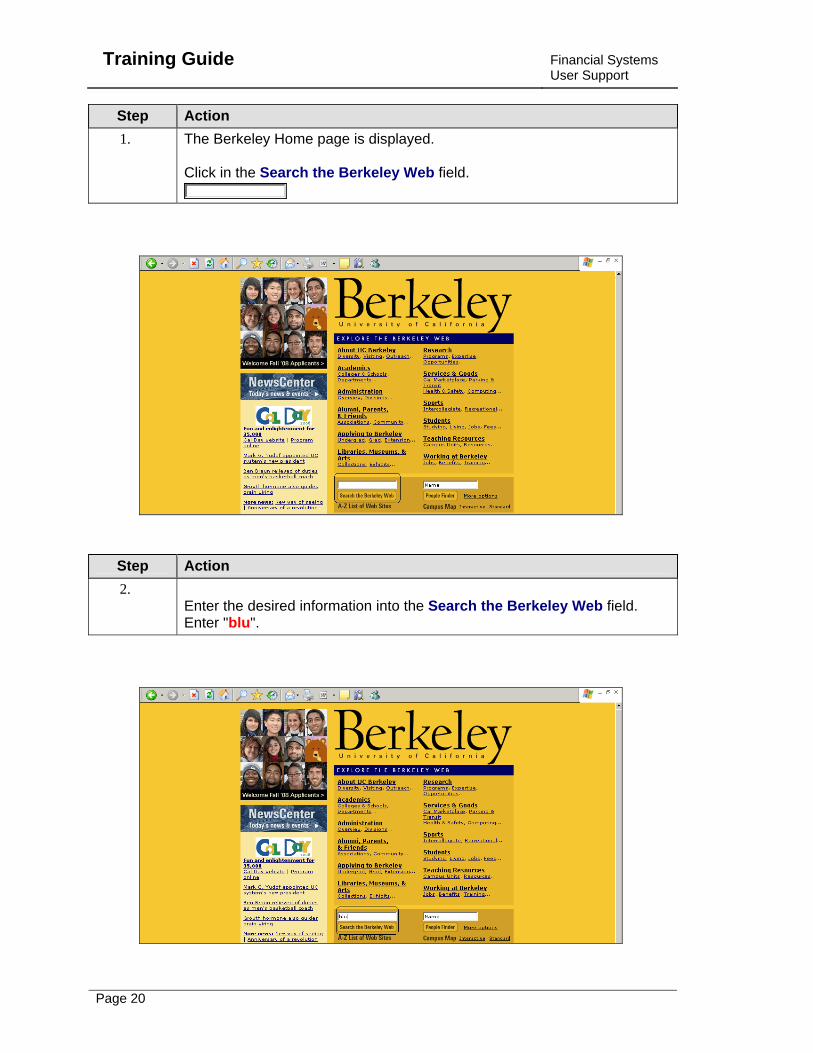
Step Action 1. The Berkeley Home page is displayed.
Click in the Search the Berkeley Web field.
Step Action 2.
Enter the desired information into the Search the Berkeley Web field. Enter "blu".

Financial Systems User Support
Training Guide
Page 21
Step Action 3.
Click the Search the Berkeley Web button.
Step Action 4. The results of your search appear. You need to select the Blu portal.
Click the Blu link.
Step Action 5. The Blu login page appears. Note there is a great deal of information
available on this page. Click the Login to BLU button.
Training Guide
Financial Systems User Support
Page 22
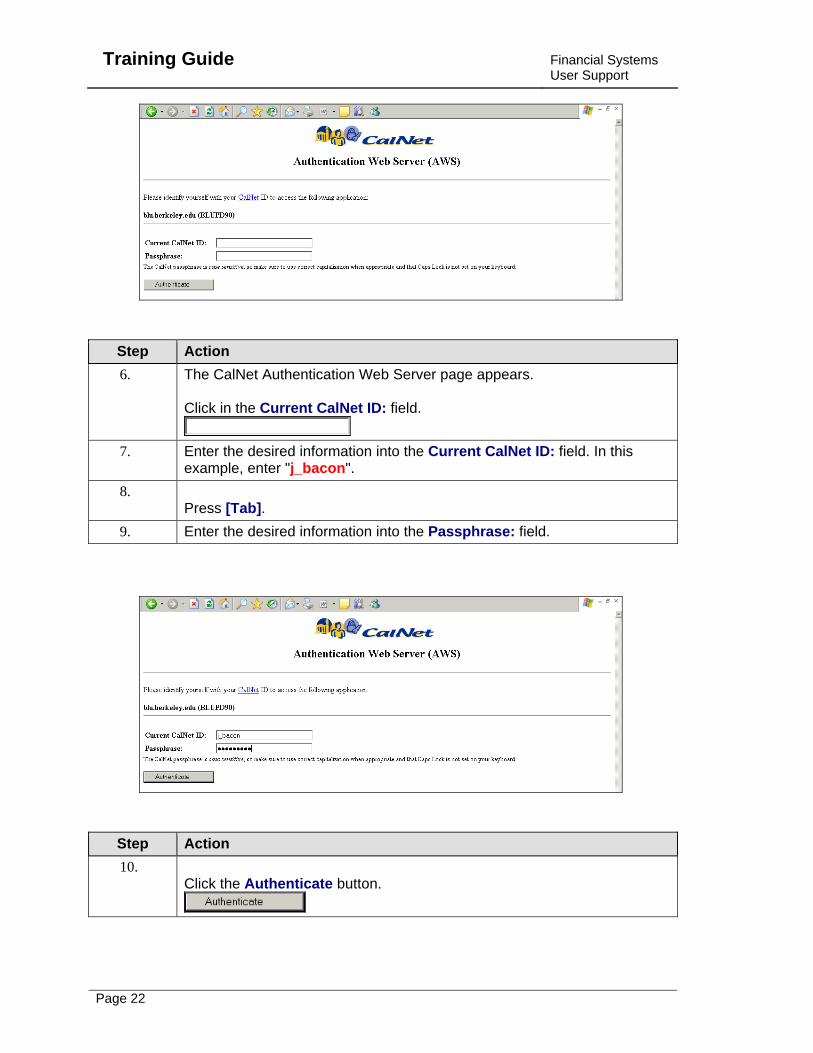
Step Action 6. The CalNet Authentication Web Server page appears.
Click in the Current CalNet ID: field.
7. Enter the desired information into the Current CalNet ID: field. In this
example, enter "j_bacon". 8.
Press [Tab]. 9. Enter the desired information into the Passphrase: field.
Step Action 10.
Click the Authenticate button.
Financial Systems User Support
Training Guide
Page 23
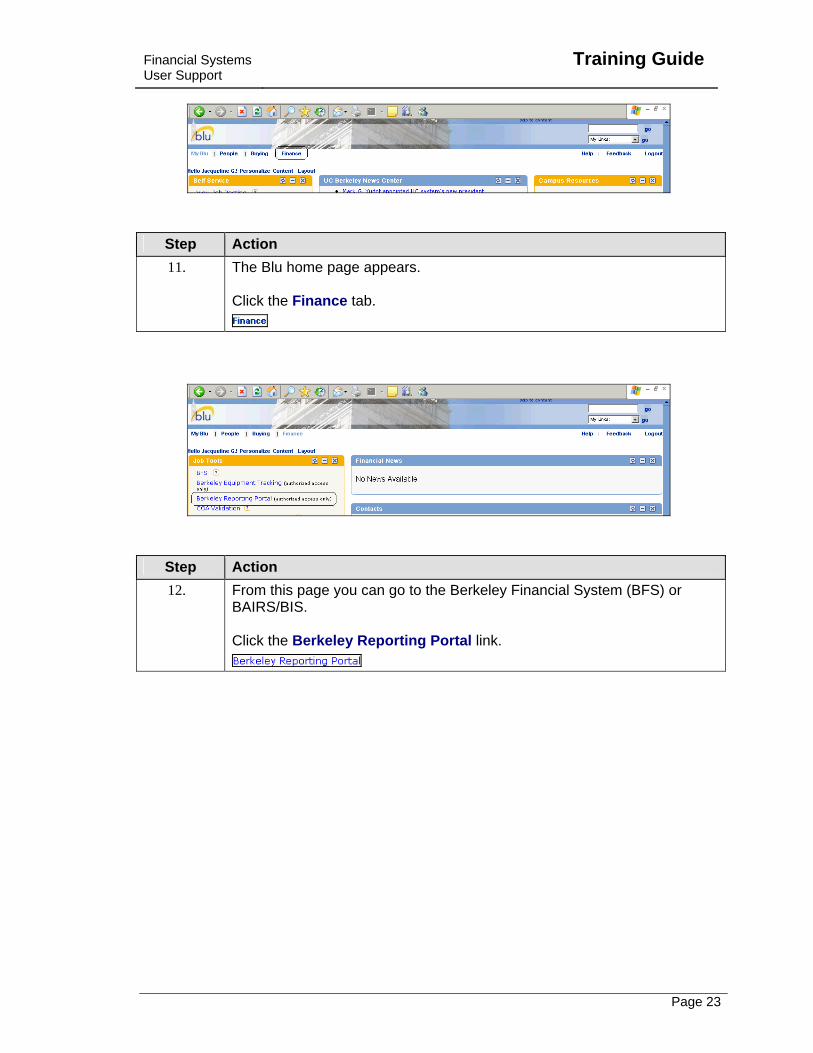
Step Action 11. The Blu home page appears.
Click the Finance tab.
Step Action 12. From this page you can go to the Berkeley Financial System (BFS) or
BAIRS/BIS. Click the Berkeley Reporting Portal link.
Training Guide
Financial Systems User Support
Page 24
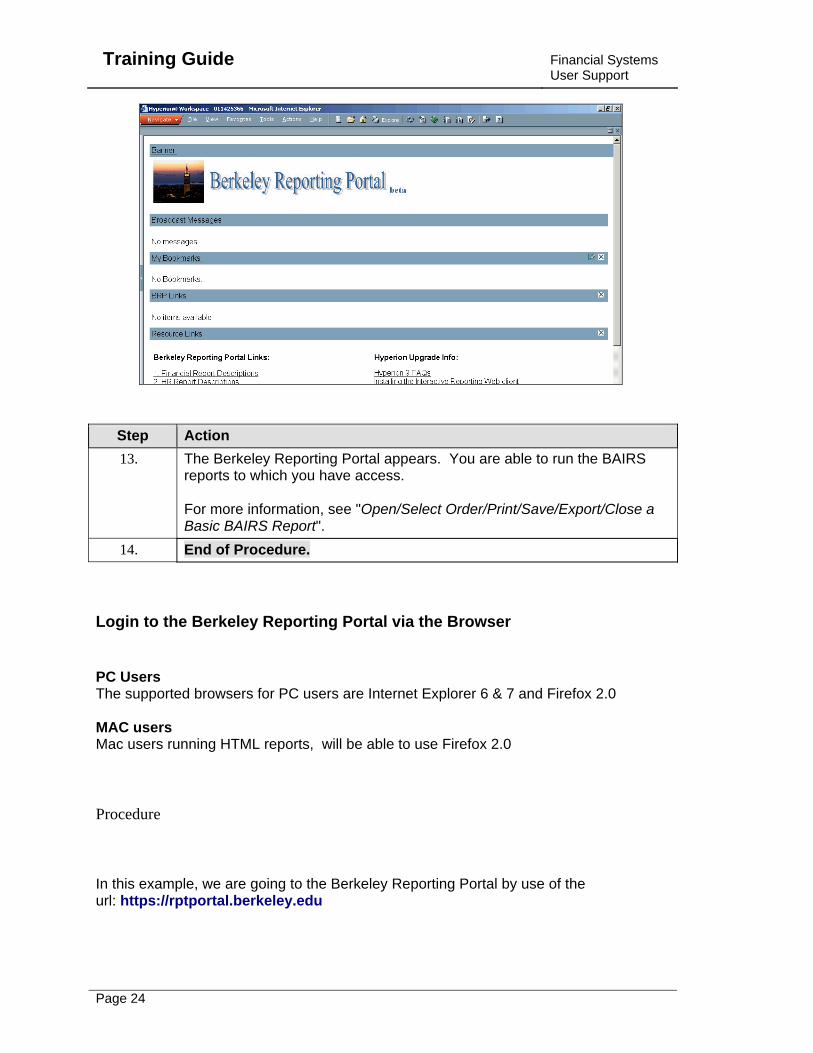
Step Action 13. The Berkeley Reporting Portal appears. You are able to run the BAIRS
reports to which you have access. For more information, see "Open/Select Order/Print/Save/Export/Close a Basic BAIRS Report".
14. End of Procedure.
Login to the Berkeley Reporting Portal via the Browser PC Users The supported browsers for PC users are Internet Explorer 6 & 7 and Firefox 2.0 MAC users Mac users running HTML reports, will be able to use Firefox 2.0
Procedure
In this example, we are going to the Berkeley Reporting Portal by use of the url: https://rptportal.berkeley.edu
Financial Systems User Support
Training Guide
Page 25
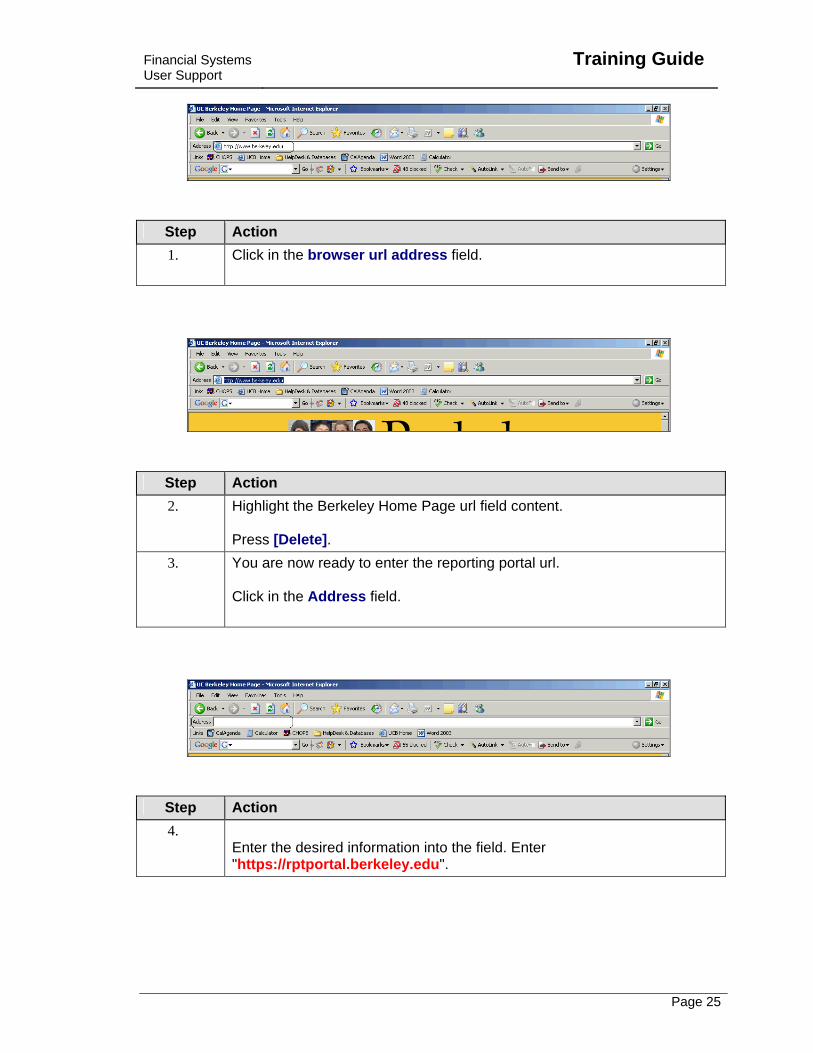
Step Action 1. Click in the browser url address field.
Step Action 2. Highlight the Berkeley Home Page url field content.
Press [Delete].
3. You are now ready to enter the reporting portal url. Click in the Address field.
Step Action 4.
Enter the desired information into the field. Enter "https://rptportal.berkeley.edu".
Training Guide
Financial Systems User Support
Page 26
Step Action 5.
Press [Enter].
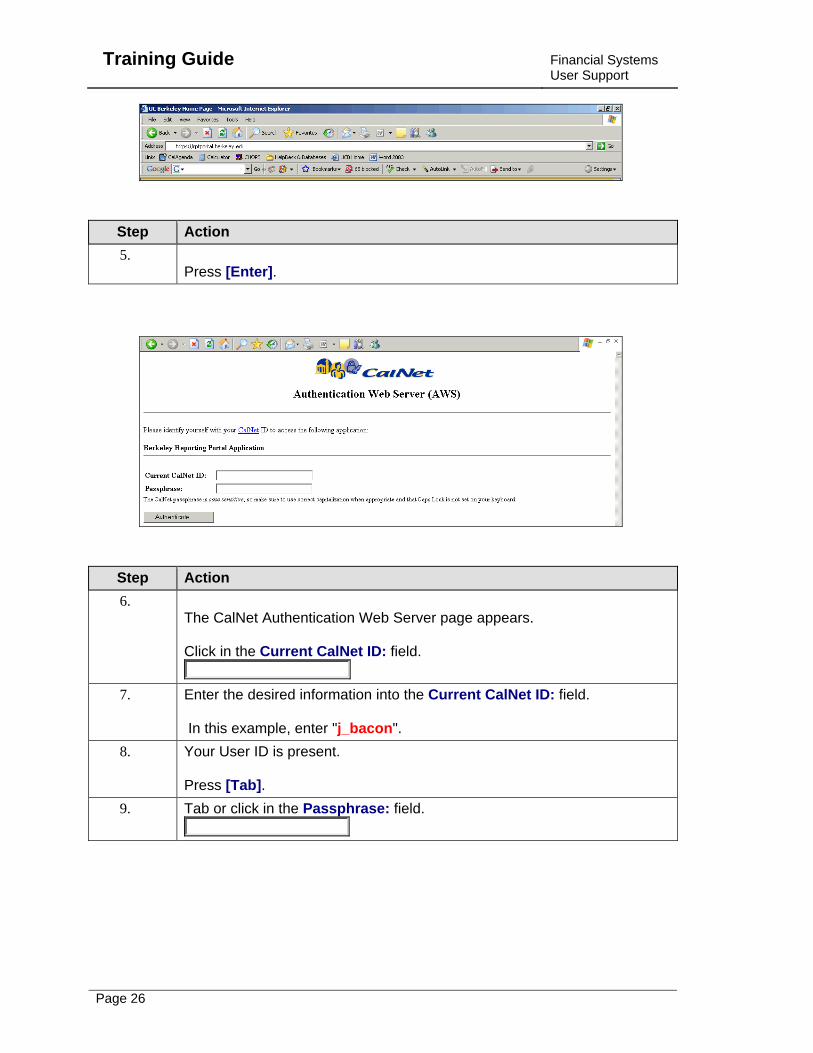
Step Action 6.
The CalNet Authentication Web Server page appears. Click in the Current CalNet ID: field.
7. Enter the desired information into the Current CalNet ID: field.
In this example, enter "j_bacon".
8. Your User ID is present. Press [Tab].
9. Tab or click in the Passphrase: field.

Financial Systems User Support
Training Guide
Page 27
Step Action 10. You have entered your CalNet Passphrase, which displays as shown
there. Click the Authenticate button.
Step Action 11. Note that if when you select the Authenticate button and you have a
problem with your CalNet ID or Passphrase (as documented in an Error Message), there is information on this screen for helpful resources with the CalNet system.

Training Guide
Financial Systems User Support
Page 28
Step Action 12. Your logon was successful, allowing you access to the reporting portal. 13. End of Procedure.
Understand Your Data This section provides background information about some of the fields for which you can enter parameters, such as month, program code, account, transaction type and estimated overhead. It is important that you understand the fields and what parameters to enter in order to get the data you want. Month The most commonly used BAIRS reports have one of two ways for selecting the month(s) you'd like to include in your report. GL Detail Reports: GL Detail reports such as the GL_Detail_Standard allow you to select one or more months from a listbox. For additional information, see "Navigate the Main Page - Learn about Parameters/Run Report". GL Detail reports allow you to see detailed transactions for multiple months if you need to research something and aren't sure which month contains the activity. Detail reports such as the Standard/Expanded or Customer Reports should only be run for continuous months to properly calculate and reflect Ending Balances. These reports derive the Ending Balances from the first period's beginning balance plus the activity for the selected month(s). Thus, if you ran your report for January and March (but not February), your balances would be missing February's activity.

Financial Systems User Support
Training Guide
Page 29
GL Summary Reports: GL Summary reports like the GL_Sum_by_Account or GL_Sum_by_Five_Chartfields, require you to select one month only. These reports are always cumulative or "as of" reports. They summarize your balances as of the month you select. In other words, if you want your balances as of February, you do not (and cannot) select July to February; you simply select February, and the report summarizes for the fiscal year to date (or inception to date for contracts and grants). When selecting a month for your report, it's important to be aware of what activity will be included in the report. Remember that the month typically closes on the 6th business day of the following month - so January's transactions, for example, are typically not complete until around February 9. Until the month is closed and the BAIRS database has refreshed overnight, you cannot assume all activity is included in your report. This is particularly important for payroll and for overhead allocations for contracts & grants. See below for additional information on "Overhead". Both payroll and overhead items post during the 6 business day close and can dramatically affect your financial balances between the end of the calendar month and the close of the fiscal month. So you can always run a report for the current month; just remember that the month is not complete until the scheduled close date posted on the BAI website in the Budget & GL section and you have a listserve stating that the Fiscal Month has closed. You will be notified via the BFS User's listserve when the month has officially closed, or if there is a delay in the closing process. For more information on the month close schedule see http://www.bai.berkeley.edu/gl/finjourn.htm#monthly. Program Code Users with contract & grant funds should be aware that overhead is posted to program code 80, so if you want a complete picture of your activity, including both direct and indirect costs, you should generally leave Program Code set to "Ignore", to get all program codes. Account The account default setting for most BAIRS reports is the "Dept Rev & all Expenses" account option. With this account option, you will get all of your department's revenue and expense accounts, as well as all funds which have been appropriated to you in the temporary budget, including gifts, grants and central campus allocations. Staff in departments that do not sell products or services outside of the UC campuses, can either accept this default setting or select "5-Expense Accounts". If you do not use revenue accounts, none will be captured if you use the default--the query will only bring back your expenses. Revenue accounts are used only for sales of goods or services outside the University of California. Sales of goods or services to "customers" within the UC system are booked to account 59000 - Recharge Income, which is in the expense account range. Recharge income is therefore captured on reports run for Expense accounts. The option "All Revenue and Expenses" includes both department revenue accounts (those beginning
Training Guide
Financial Systems User Support
Page 30
with 40, 46, 47, 48 & 49), and the revenue side of Contract, Grants, Gifts and Endowment Income (those beginning with 41,42, 43, 44 &45). Most departments will never need to select the "All Revenue and Expenses" account option, or those beginning with 1, 2, or 3. These are generally used by central campus offices like Budget and General Accounting. Transaction Type The GL_Transaction_Verification report allows the user to select one or more Transaction Types to include in the report. The types listed are as follows: PCARD - Procurement Card transactions BJRNL - Temporary Budget Journals FJRNL - Financial Journals VCHR - Vouchers PO - Purchase Orders REQ - Requisitions The GL_Transaction_Verification report is designed to provide you with a list of transactions which impacted your org codes but were not approved on-line by your processing unit. This is intended to provide a tool for departments to easily review only that activity which they did not review on-line already. This then becomes a monthly reconciliation process to complement the on-line review/approval of POs, Reqs, Vouchers and Journals. This report therefore includes recharges (financial journals), budget allocations or entries from Extramural Fund Accounting for your control unit, as well as entries done in other units where your org code was used in error. In addition, if you include VCHR in your Transaction Type selection, this report will also provide you with CTS (US Bank Trust or American Express will appear as the vendor) and FedEx charges. Selecting a Transaction Type can narrow down your report search effectively. For example, if you only want to see your recharges you can select FJRNL as the Transaction Type and that is (mostly) what you will get. If you want to see just budget entries (such as gifts or new grants from Extramural Fund Accounting, for example), you can select BJRNL as the Transaction Type. Unlike the other Transaction Types, the PCARD option will give you the transactions for your processing unit. This provides users with an easy way to monitor their department's bluCard activity. Estimated Overhead The GL_Detail_Standard report has a box for estimated overhead. Click this box if you want to include estimated overhead in your report. Overhead applies only to contract and grant funds. Estimated overhead is for expenditures you have incurred where overhead has not yet been applied. "True" overhead posts to the ledger at month close. For example, October overhead does not
Financial Systems User Support
Training Guide
Page 31
post until early November (typically 6 business days after the end of October). Until that time, if you run a report for a contract or grant fund for the month of October, the unexpended balance will appear higher than it should, because the overhead had not yet been applied to October's direct charges. If you click the "Estimate Overhead" checkbox, BAIRS will estimate October's overhead for you.
Improve BAIRS Performance Improving Performance Governing Currently, "governing" is turned on in BAIRS between the hours of 9 am and 3:30 pm, Monday through Friday. During those hours, any query which will run for longer than 30 minutes will be prevented from beginning. Users will receive a similar error message if their queries exceed 30 minutes: "Brio.Insight ODS Error-1019:ODS failed to execute the query Server Name: GRANITE message: The SQL Server is terminating this process. Message Number (5702) Severity (0)." Once a query starts, at 30 minutes elapsed time, the query will move to a lower priority consumer group during the hours from 7 am - 12 midnight. When it's in the lower priority consumer group, it will run until completion or until 12 midnight. Any query will be prevented from starting that will run longer than 120 minutes from 7 am - 9 am and 3:30 pm - 12 midnight. If you are having trouble getting the report you need, please call the Budget & Finance User Support Help Desk at 3-4250. We can either help you change your parameters so the report runs faster or work with you and the technical staff to get you the data you need. Reports Run Summary reports if possible. If you are looking for the "balances" in your accounts, run a summary report. Detail reports such as the GL Detail Standard Report are for exactly that, "detail" transactions. It is advised for reconciliation to run the GL Transaction Verification Report each month along with the summary report(s) of your choosing. The GL Transaction Verification Report contains only those transactions posted to your org codes by another processing unit and therefore require additional review. Included in this report might be recharges, new grant/gift appropriations and PO's prepared in error by other departments using your org code. Org Code / Org Node In general, reports will run faster if you enter parameters for the org, as opposed to choosing "Ignore" for the org field. A single org code, when possible, is fastest. But using Org Node to capture all of your department's data is preferable to selecting
Training Guide
Financial Systems User Support
Page 32
"Ignore" and Org Node generates the same results (for users with departmental level security). If you cancel a query by exiting your browser or pressing Alt-End, please call the BFS/BAIRS Help Desk at 3-4250 so that we can cancel the query from behind the scenes. Canceling a report on your computer often does not cancel it on the database. Queries which are left running, use system resources that other users need. For additional information, see "Cancel a Query".
Navigating BAIRS - Basic Workspace, Main Page & Toolbars The Hyperion Workspace is the area that contains the Personal page, the Explore section and other documents open within the workspace. All open content will have a tab at the bottom of the screen (much like Excel has worksheets). The Personal page contains Broadcast messages, useful links and bookmarks of your most commonly used reports or URL's. The Explore section contains the report folders. You can subscribe to reports to be added as bookmarks to your Personal Page and add folders to your favorites menu. See "Add/Remove Folder as a Favorite", "Add/Remove Bookmarks", and "Personalize Content from your Personal Page". Note: Toolbar icons change depending on what type of workspace or content you are working on. Presented below are some typical examples.

Financial Systems User Support
Training Guide
Page 33
Training Guide
Financial Systems User Support
Page 34
Understand Personal Page and Explore Section The Berkeley Reporting Portal has two primary modes: Personal Page and Explore. You set up your Personal Page to include the content (reports, queries, links) that you need. You use the Explore section to locate the reports and queries you want to add to your Personal Page or to run a report. Each time you login to the reporting portal, you might start on your Personal Page. Therefore, you want the reports, queries and links you use frequently to appear on your Personal Page to make them easily accessible. (See "Add/Remove a Report as a Bookmark " and "Add /Remove a Report Folder as a Favorite". You can run reports from the Explore section as well as from your Personal Page, but when you are in the Explore section, you will be scrolling through all reports to find the one you want.
Procedure
In this example, we will examine both the Personal Page and the Explore section.
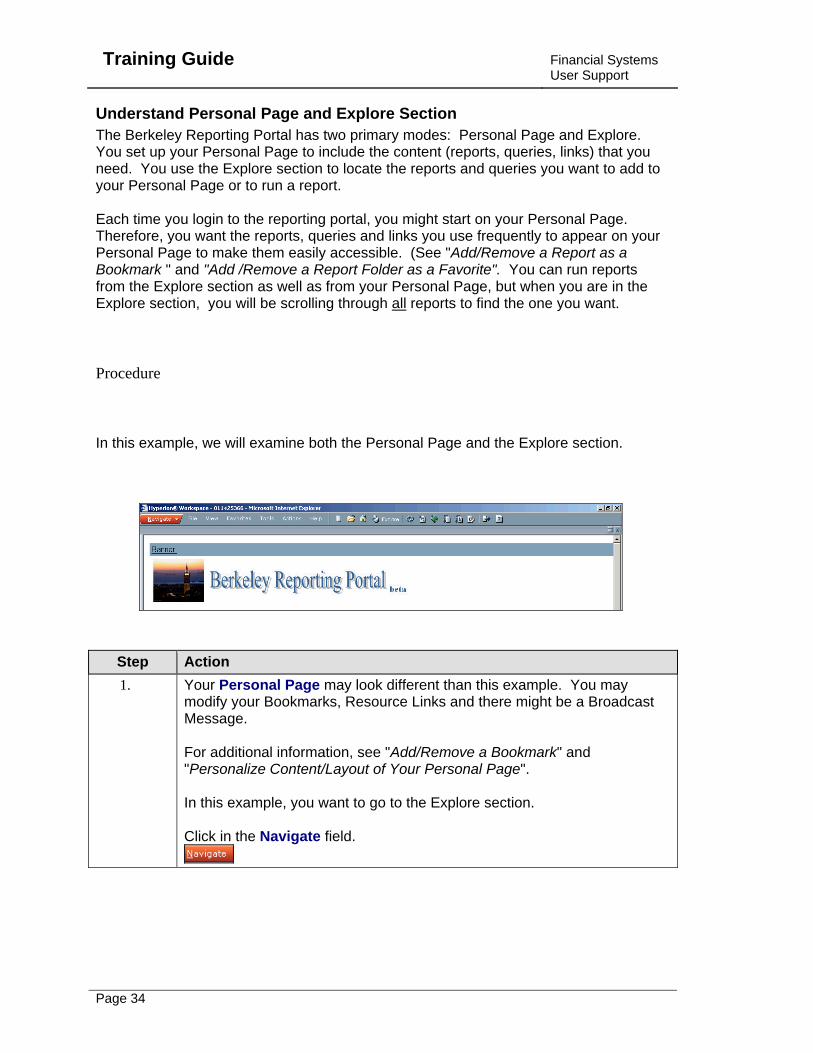
Step Action 1. Your Personal Page may look different than this example. You may
modify your Bookmarks, Resource Links and there might be a Broadcast Message. For additional information, see "Add/Remove a Bookmark" and "Personalize Content/Layout of Your Personal Page". In this example, you want to go to the Explore section. Click in the Navigate field.
Financial Systems User Support
Training Guide
Page 35
Step Action 2. The Navigate drop-down menu appears.
Click the Explore option.
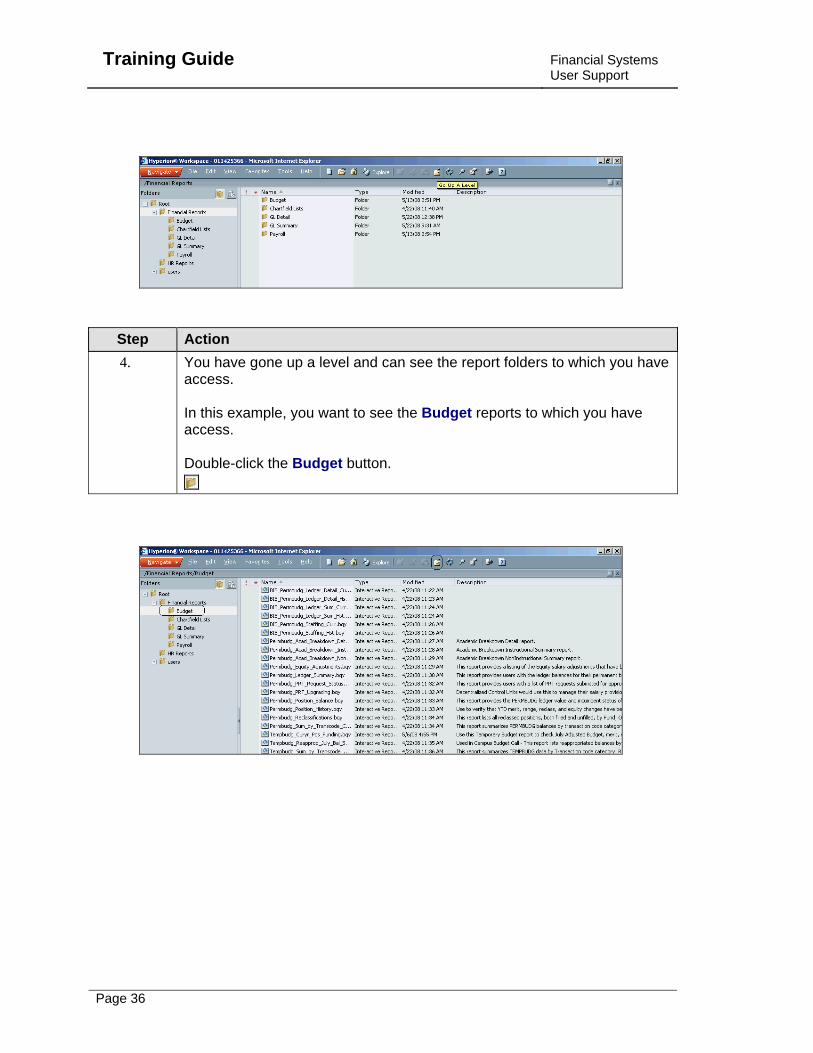
Step Action 3. The Explore section displays. Reports and queries are stored in folders in
the portal, similar to how files are stored on your computer. Depending upon your access, you might see different reports from those displayed here. In the left section, you can see the various folders to which you have access. Note you may run both financial and Human Resources (HR) reports from this portal. In this example, we would like to modify our view of the center section (now displaying GL Detail reports). We would like to see our list of Budget reports. Click the Go Up A Level button.
Training Guide
Financial Systems User Support
Page 36
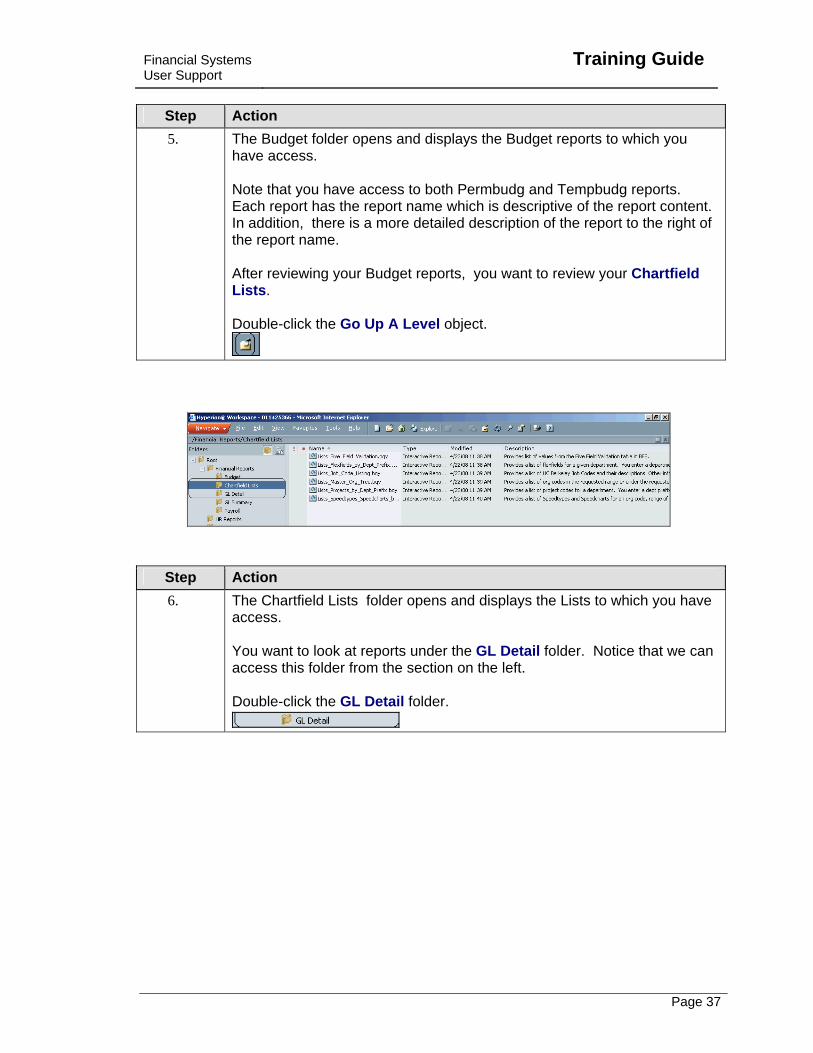
Step Action 4. You have gone up a level and can see the report folders to which you have
access. In this example, you want to see the Budget reports to which you have access. Double-click the Budget button.
Financial Systems User Support
Training Guide
Page 37
Step Action 5. The Budget folder opens and displays the Budget reports to which you
have access. Note that you have access to both Permbudg and Tempbudg reports. Each report has the report name which is descriptive of the report content. In addition, there is a more detailed description of the report to the right of the report name. After reviewing your Budget reports, you want to review your Chartfield Lists. Double-click the Go Up A Level object.
Step Action 6. The Chartfield Lists folder opens and displays the Lists to which you have
access. You want to look at reports under the GL Detail folder. Notice that we can access this folder from the section on the left. Double-click the GL Detail folder.

Training Guide
Financial Systems User Support
Page 38
Step Action 7. You review the Detail reports to which you have access.
The GL_Customer reports are an example of reports that require you to be granted access to payroll data. In order to have access to some of these reports, you need to request payroll access. For additional information, see "Request Access to BAIRS/BIS". You want to see Summary reports. Double-click the Go Up A Level object.
Step Action 8. The Summary Report folder opens. You review your Summary reports.
Double-click the Go Up A Level option.

Financial Systems User Support
Training Guide
Page 39
Step Action 9. As we navigate the Explore section, you want to close your report folders
to the left. Click the Root button.
Step Action 10. Note that the files on the left are closed.
In this example, you want to go to your Personal Page. Click the Favorites option.
Training Guide
Financial Systems User Support
Page 40
Step Action 11. The Favorites drop-down menu appears.
Click the My Personal Page option.
Step Action 12. End of Procedure.
Navigate the Main Page - Learn about Parameters/ Run Reports Departments verify and reconcile the transactions affecting their orgs by running various BAIRS reports. The GL_Detail_Transaction_Verification report displays transactions affecting your orgs which originated OUTSIDE your processing unit. Departments are strongly encouraged to use this report for monthly review of transactions (rather than the Standard or Expanded Detail) as the majority of transactions in the department have already been prepared, reviewed and in some cases approved by departmental staff. The GL_Detail_Transaction_Verification Report includes only those transactions which did not go through this process. For more detailed information about which report to run and why, see "Understand Your Data". Please note that you can specify different levels of the organizational tree for use in running a report. The default value is to show transactions which ordinate outside the L4 Department level, but it can be changed if you work in a subunit of a department and want all transactions which originate outside of your L5 or L6 unit level to be considered "exceptions" for the verification report.
Financial Systems User Support
Training Guide
Page 41
Procedure
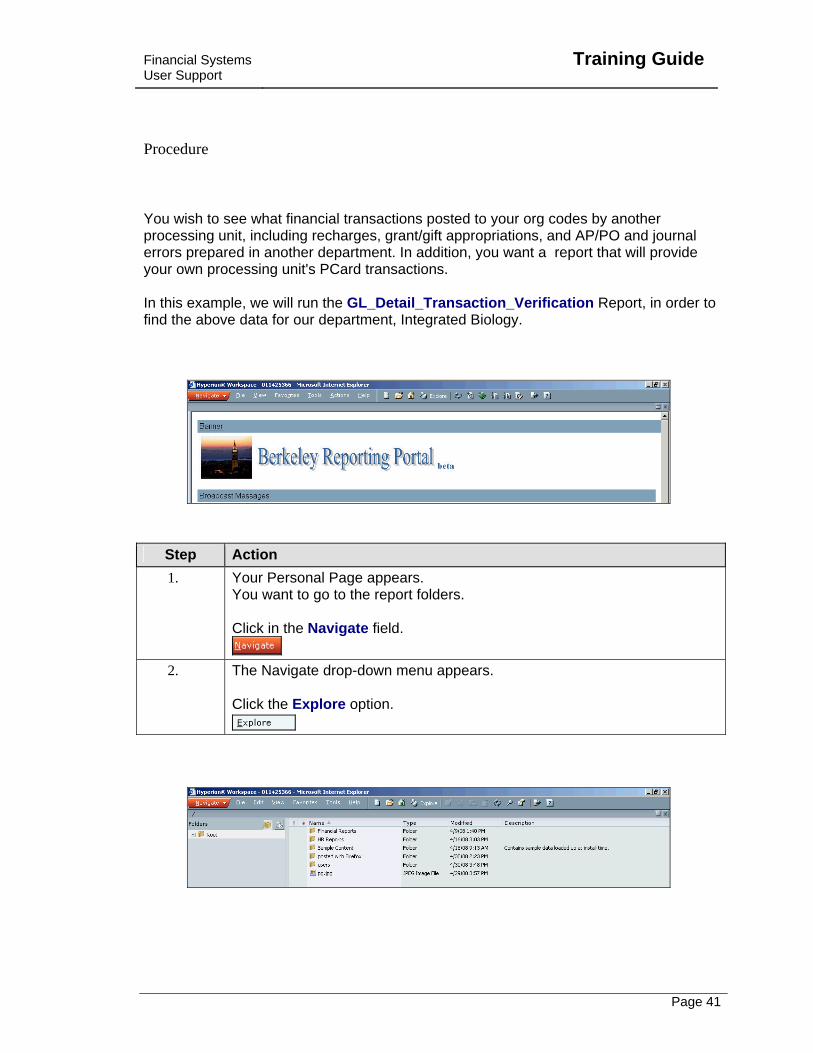
You wish to see what financial transactions posted to your org codes by another processing unit, including recharges, grant/gift appropriations, and AP/PO and journal errors prepared in another department. In addition, you want a report that will provide your own processing unit's PCard transactions. In this example, we will run the GL_Detail_Transaction_Verification Report, in order to find the above data for our department, Integrated Biology.
Step Action 1. Your Personal Page appears.
You want to go to the report folders. Click in the Navigate field.
2. The Navigate drop-down menu appears.
Click the Explore option.

Training Guide
Financial Systems User Support
Page 42
Step Action 3. The Explore section appears. Notice that because of your access, you
can run both Financial Reports and Human Resources (HR) Reports. For more detailed information about the Personal Page and the Explore section, see "Navigating BAIRS - Basic Workspace, Main Page & Toolbars".
Step Action 4. The Explore section displays.
In this example, we are interested in running a Financial report. Double-click the Financial Reports button.
Step Action 5. The various Financial Report folders appear. We know that the report we
are looking for is a detail report. Double-click the GL Detail button.
Financial Systems User Support
Training Guide
Page 43
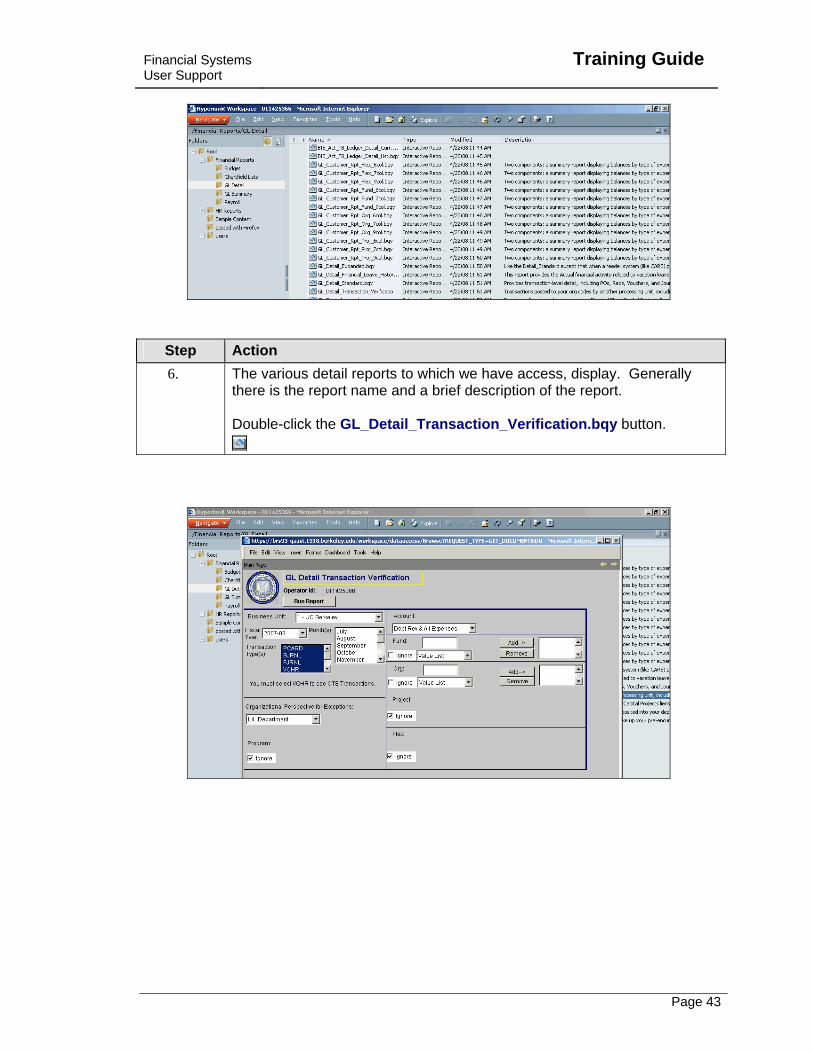
Step Action 6. The various detail reports to which we have access, display. Generally
there is the report name and a brief description of the report. Double-click the GL_Detail_Transaction_Verification.bqy button.
Training Guide
Financial Systems User Support
Page 44
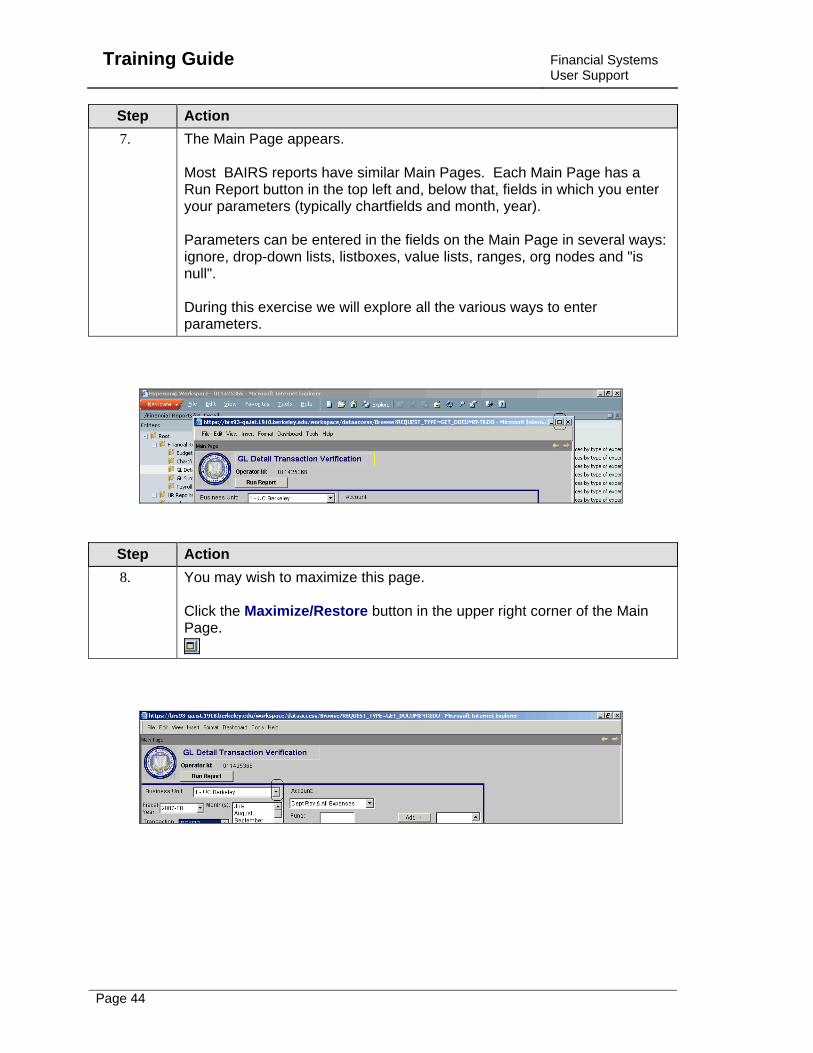
Step Action 7. The Main Page appears.
Most BAIRS reports have similar Main Pages. Each Main Page has a Run Report button in the top left and, below that, fields in which you enter your parameters (typically chartfields and month, year). Parameters can be entered in the fields on the Main Page in several ways: ignore, drop-down lists, listboxes, value lists, ranges, org nodes and "is null". During this exercise we will explore all the various ways to enter parameters.
Step Action 8. You may wish to maximize this page.
Click the Maximize/Restore button in the upper right corner of the Main Page.
Financial Systems User Support
Training Guide
Page 45
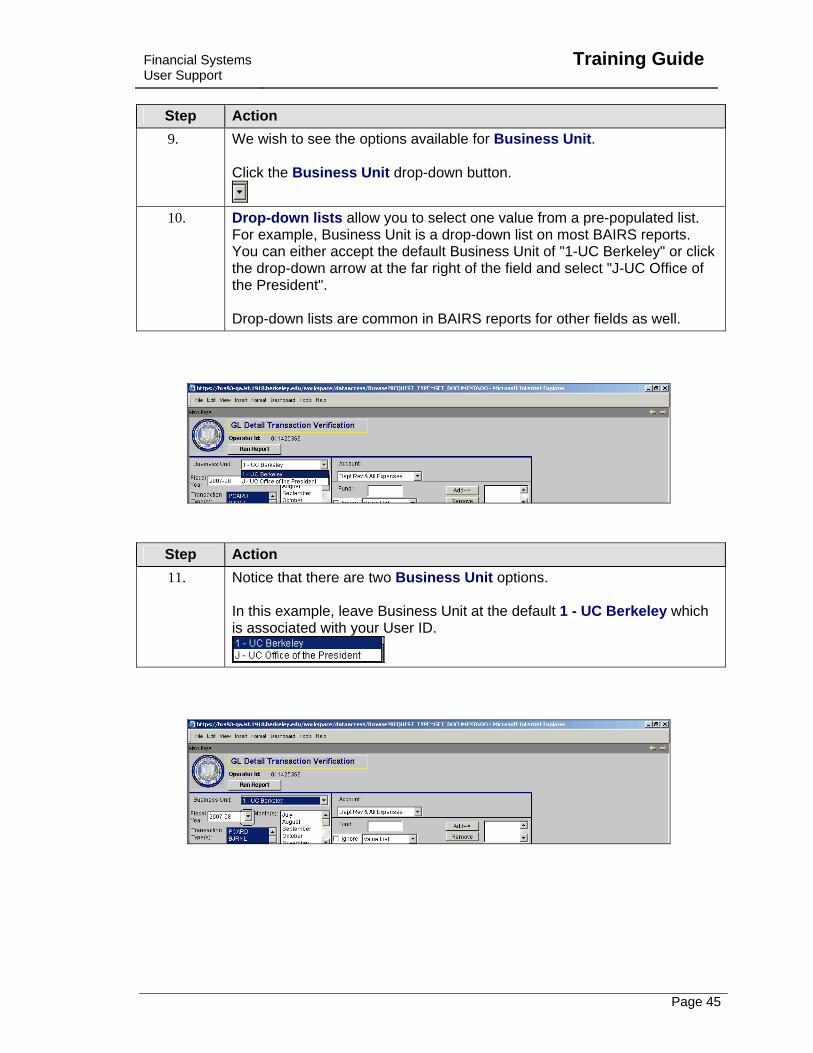
Step Action 9. We wish to see the options available for Business Unit.
Click the Business Unit drop-down button.
10. Drop-down lists allow you to select one value from a pre-populated list.
For example, Business Unit is a drop-down list on most BAIRS reports. You can either accept the default Business Unit of "1-UC Berkeley" or click the drop-down arrow at the far right of the field and select "J-UC Office of the President". Drop-down lists are common in BAIRS reports for other fields as well.
Step Action 11. Notice that there are two Business Unit options.
In this example, leave Business Unit at the default 1 - UC Berkeley which is associated with your User ID.

Training Guide
Financial Systems User Support
Page 46
Step Action 12. You are able to specify which Fiscal Year to review.
Click the Fiscal Year drop-down button.
Step Action 13. The various Fiscal Years pre-populated options appear.
Highlight 2004-05.
Financial Systems User Support
Training Guide
Page 47
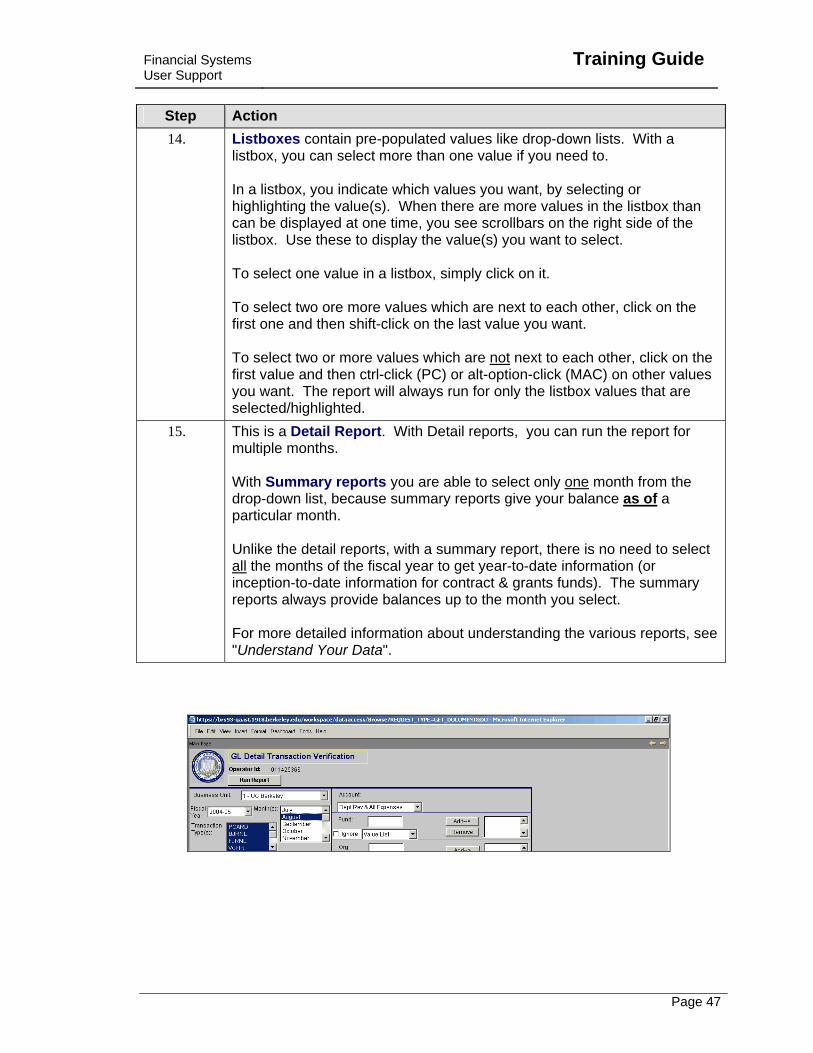
Step Action 14. Listboxes contain pre-populated values like drop-down lists. With a
listbox, you can select more than one value if you need to. In a listbox, you indicate which values you want, by selecting or highlighting the value(s). When there are more values in the listbox than can be displayed at one time, you see scrollbars on the right side of the listbox. Use these to display the value(s) you want to select. To select one value in a listbox, simply click on it. To select two ore more values which are next to each other, click on the first one and then shift-click on the last value you want. To select two or more values which are not next to each other, click on the first value and then ctrl-click (PC) or alt-option-click (MAC) on other values you want. The report will always run for only the listbox values that are selected/highlighted.
15. This is a Detail Report. With Detail reports, you can run the report for multiple months. With Summary reports you are able to select only one month from the drop-down list, because summary reports give your balance as of a particular month. Unlike the detail reports, with a summary report, there is no need to select all the months of the fiscal year to get year-to-date information (or inception-to-date information for contract & grants funds). The summary reports always provide balances up to the month you select. For more detailed information about understanding the various reports, see "Understand Your Data".
Training Guide
Financial Systems User Support
Page 48
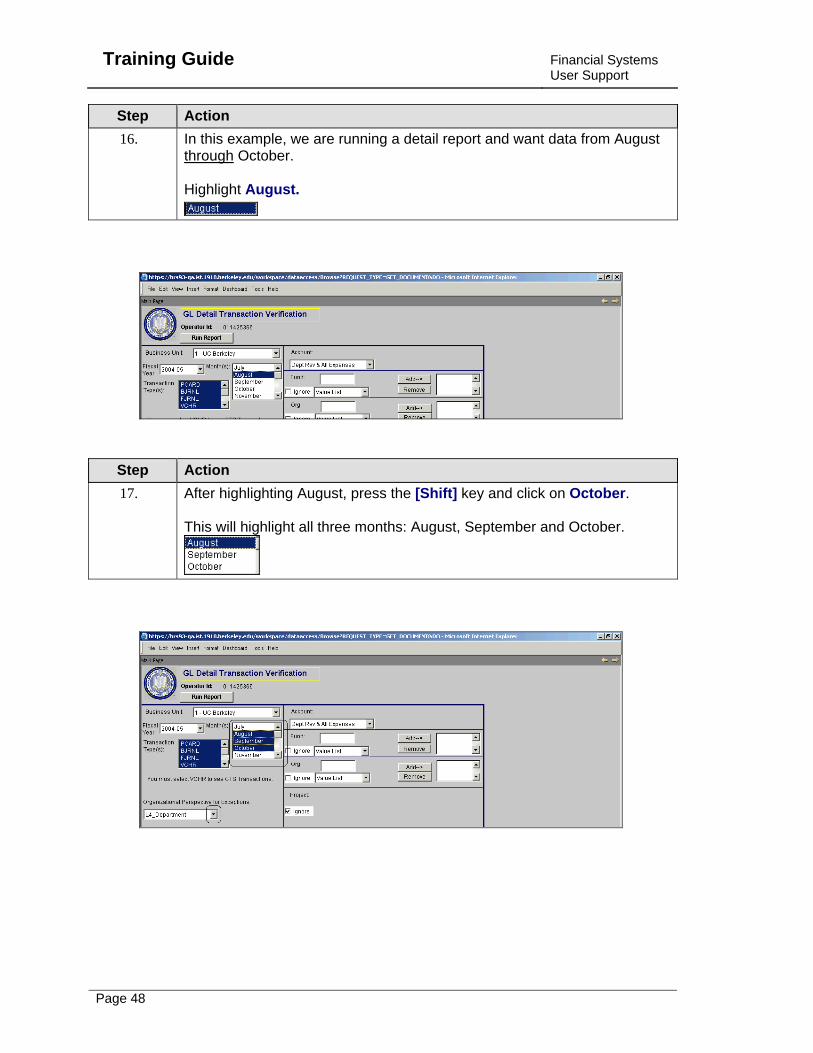
Step Action 16. In this example, we are running a detail report and want data from August
through October. Highlight August.
Step Action 17. After highlighting August, press the [Shift] key and click on October.
This will highlight all three months: August, September and October.

Financial Systems User Support
Training Guide
Page 49
Step Action 18. Notice that all three months are now highlighted.
We want to learn about Organizational Perspective. For this report, you can change the Organizational Perspective. That is, you can determine at which level of the Master Organization Tree you wish to look at data. Typically, the Organizational Perspective will default to the Organizational level that is associated with your User ID access. In this example, you have access at the L4_Department level. We wish, however, to understand the other Organizational Perspectives and will examine the various options available. For additional information about the Master Org Tree, use the BAI webpage (www.bai.berkeley.edu) and look at Chart of Accounts. Click the Organizational Perspective drop-down button.
Training Guide
Financial Systems User Support
Page 50
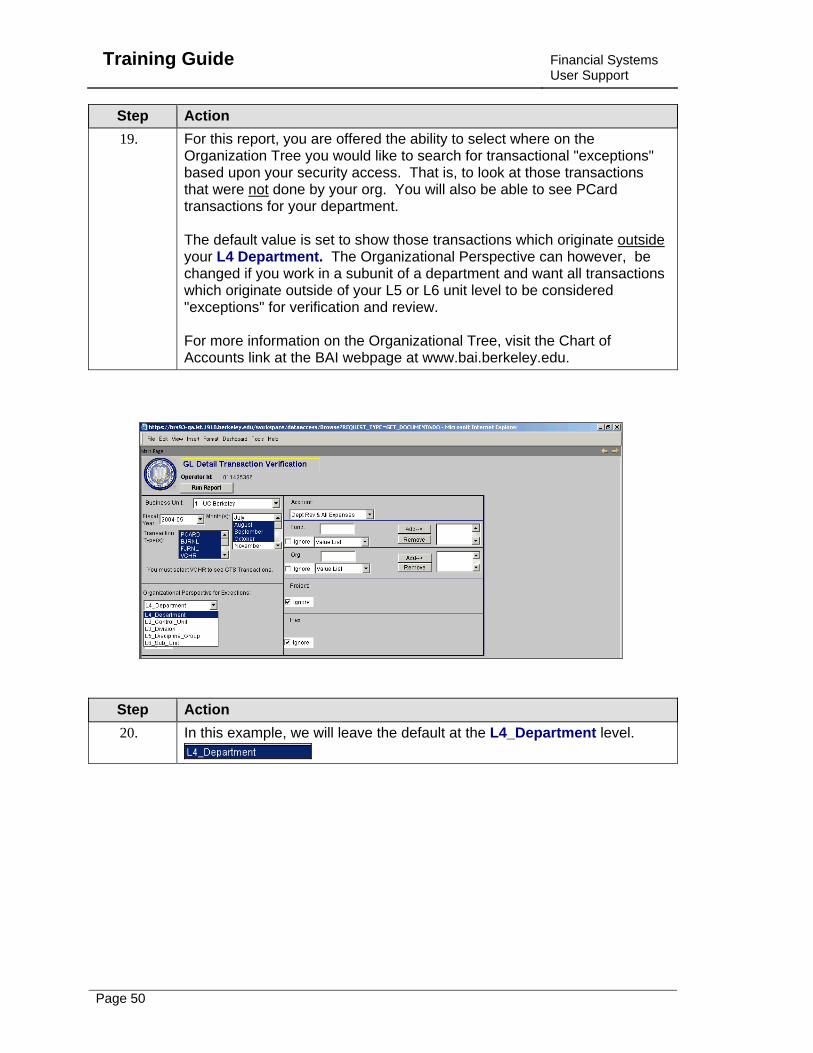
Step Action 19. For this report, you are offered the ability to select where on the
Organization Tree you would like to search for transactional "exceptions" based upon your security access. That is, to look at those transactions that were not done by your org. You will also be able to see PCard transactions for your department. The default value is set to show those transactions which originate outside your L4 Department. The Organizational Perspective can however, be changed if you work in a subunit of a department and want all transactions which originate outside of your L5 or L6 unit level to be considered "exceptions" for verification and review. For more information on the Organizational Tree, visit the Chart of Accounts link at the BAI webpage at www.bai.berkeley.edu.
Step Action 20. In this example, we will leave the default at the L4_Department level.

Financial Systems User Support
Training Guide
Page 51
Step Action 21. Notice that Ignore is the default setting on most reports for Program,
Project, and Flex fields because users typically want their reports to contain all program codes, all projects and all flexfields. When the Ignore box is checked for a particular value, such as program code, your report will contain data for ALL program codes that match your other parameters. When you check the Ignore box, it is the same as saying, "all". When the Ignore box is unchecked, this makes other parameter-setting options available.

Training Guide
Financial Systems User Support
Page 52
Step Action 22. In this example, we want to see all Program Codes associated with your
parameters. If you need to, click the Ignore field.
Step Action 23. Notice that Account has the default setting of, Dept Rev & All Expenses.
You want to review the Account options. Click the Account drop-down button.
Financial Systems User Support
Training Guide
Page 53
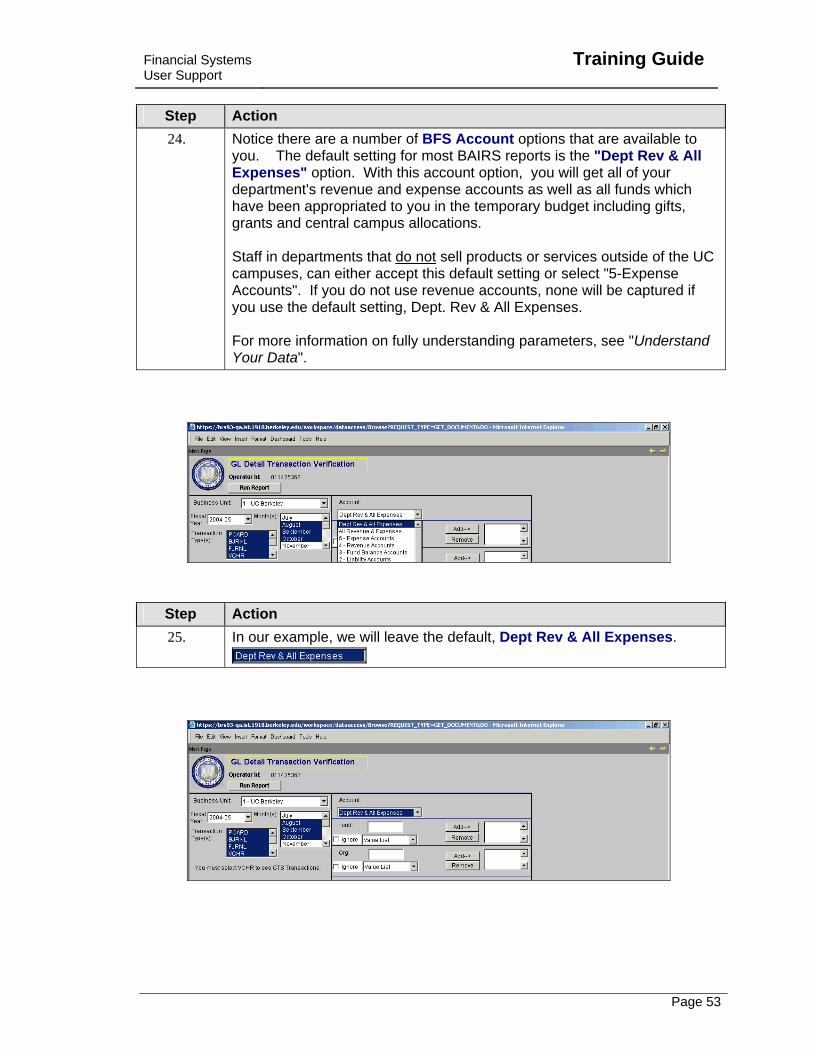
Step Action 24. Notice there are a number of BFS Account options that are available to
you. The default setting for most BAIRS reports is the "Dept Rev & All Expenses" option. With this account option, you will get all of your department's revenue and expense accounts as well as all funds which have been appropriated to you in the temporary budget including gifts, grants and central campus allocations. Staff in departments that do not sell products or services outside of the UC campuses, can either accept this default setting or select "5-Expense Accounts". If you do not use revenue accounts, none will be captured if you use the default setting, Dept. Rev & All Expenses. For more information on fully understanding parameters, see "Understand Your Data".
Step Action 25. In our example, we will leave the default, Dept Rev & All Expenses.
Training Guide
Financial Systems User Support
Page 54
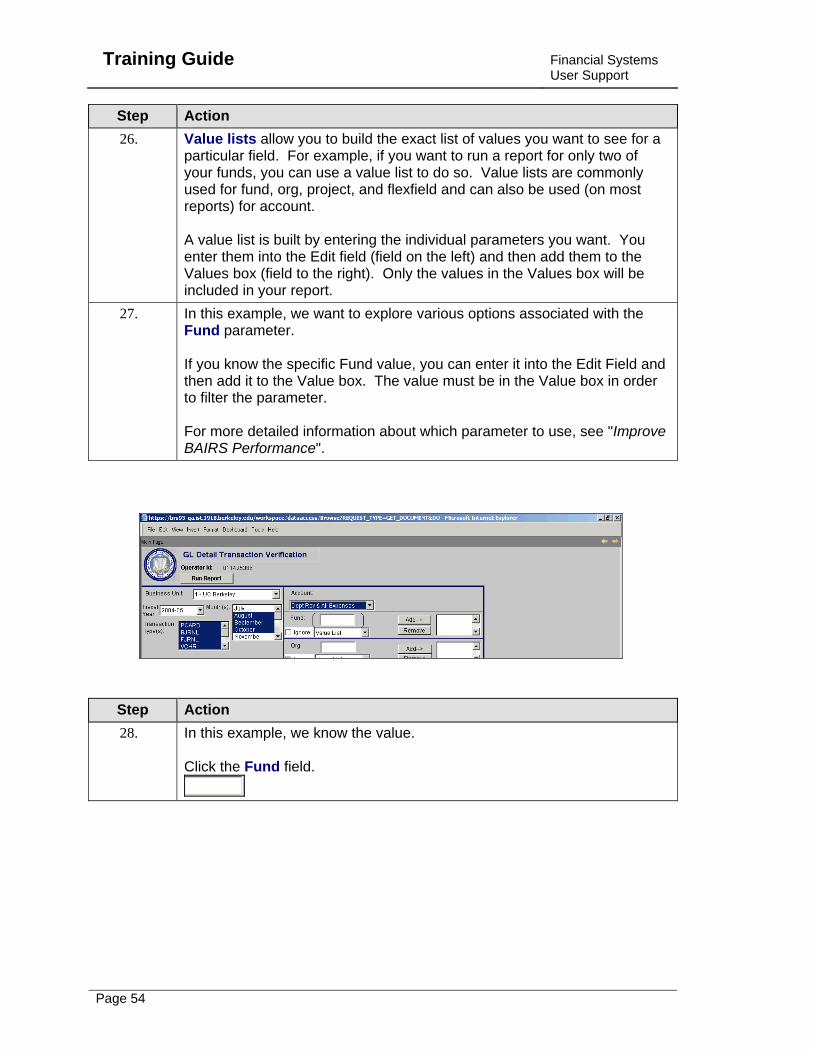
Step Action 26. Value lists allow you to build the exact list of values you want to see for a
particular field. For example, if you want to run a report for only two of your funds, you can use a value list to do so. Value lists are commonly used for fund, org, project, and flexfield and can also be used (on most reports) for account. A value list is built by entering the individual parameters you want. You enter them into the Edit field (field on the left) and then add them to the Values box (field to the right). Only the values in the Values box will be included in your report.
27. In this example, we want to explore various options associated with the Fund parameter. If you know the specific Fund value, you can enter it into the Edit Field and then add it to the Value box. The value must be in the Value box in order to filter the parameter. For more detailed information about which parameter to use, see "Improve BAIRS Performance".
Step Action 28. In this example, we know the value.
Click the Fund field.

Financial Systems User Support
Training Guide
Page 55
Step Action 29. Enter the desired information into the Fund field. Enter "20397".
Step Action 30. You want to move the value from the Edit field to the Values box.
Click the Add--> button.
Training Guide
Financial Systems User Support
Page 56
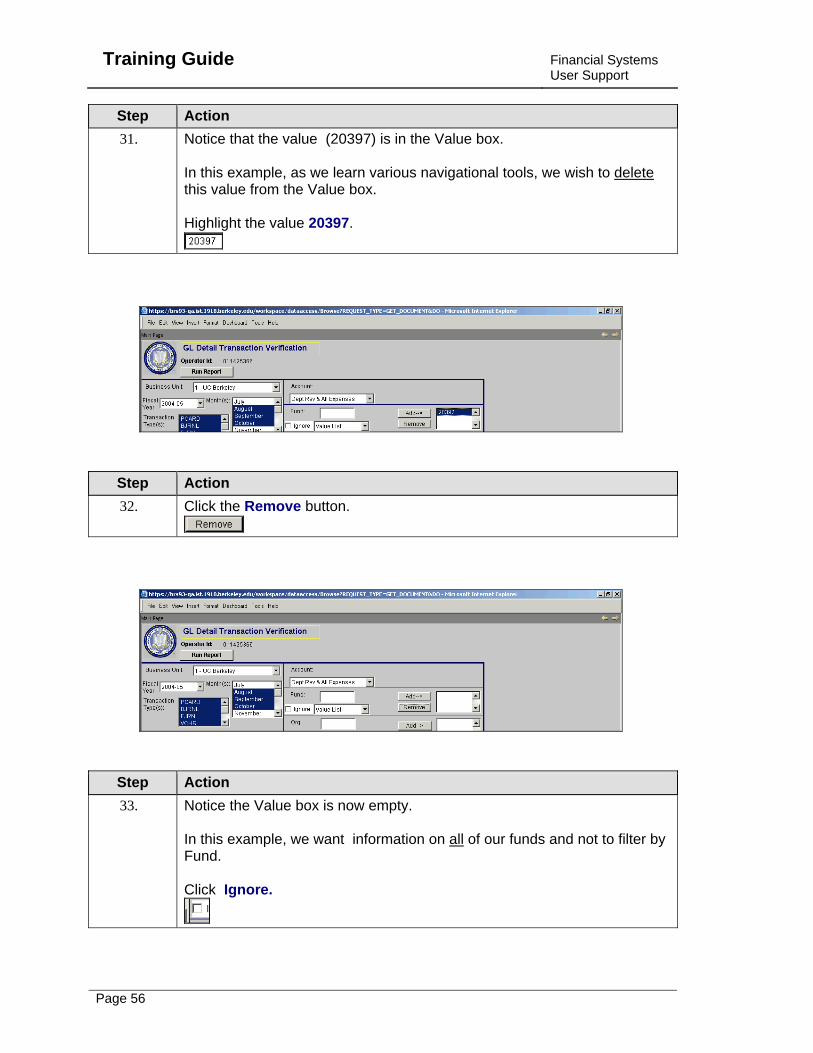
Step Action 31. Notice that the value (20397) is in the Value box.
In this example, as we learn various navigational tools, we wish to delete this value from the Value box. Highlight the value 20397.
Step Action 32. Click the Remove button.
Step Action 33. Notice the Value box is now empty.
In this example, we want information on all of our funds and not to filter by Fund. Click Ignore.

Financial Systems User Support
Training Guide
Page 57
Step Action 34. Enter the Org value if you know it.
In this example, we will review the various Org field options. Click the Org drop-down button.
Step Action 35. There are three Org options listed.
In this example, we want to understand the range option.

Training Guide
Financial Systems User Support
Page 58
Step Action 36. Ranges allow you to run your report for a contiguous range of values. For
example, if you want to get a report for orgs 12300-12307, inclusive, you can use a range to do so. Range is rarely, if ever, the default parameter-setting option, but range is available for account, fund, org, project and flexfield on most reports.
37. There is a "From" box and a "To" box. Enter the first account for your range in the "From" box. Enter the last account for your range in the "To" box. Ranges are inclusive, so your report will include your "From" value and your "To" value as well as all values in between.
Step Action 38. In this example, we want to look at another way to filter the Org. field.
Click the Org drop-down button.
Financial Systems User Support
Training Guide
Page 59
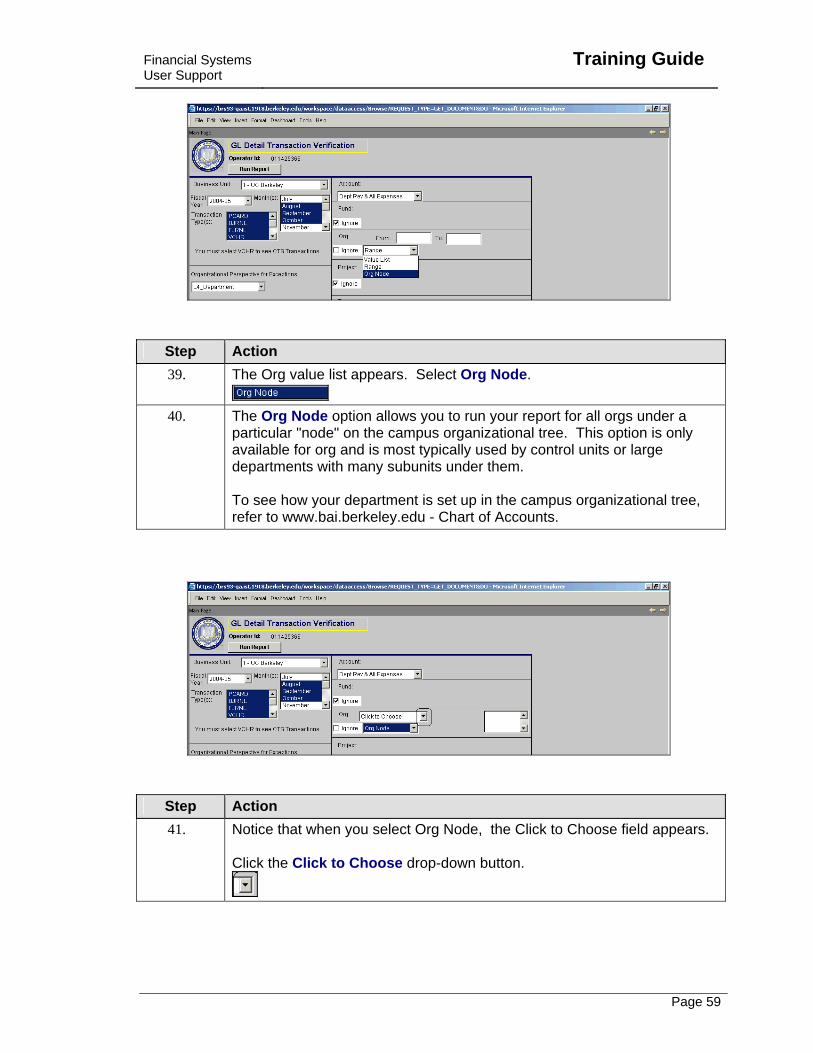
Step Action 39. The Org value list appears. Select Org Node.
40. The Org Node option allows you to run your report for all orgs under a
particular "node" on the campus organizational tree. This option is only available for org and is most typically used by control units or large departments with many subunits under them. To see how your department is set up in the campus organizational tree, refer to www.bai.berkeley.edu - Chart of Accounts.
Step Action 41. Notice that when you select Org Node, the Click to Choose field appears.
Click the Click to Choose drop-down button.
Training Guide
Financial Systems User Support
Page 60
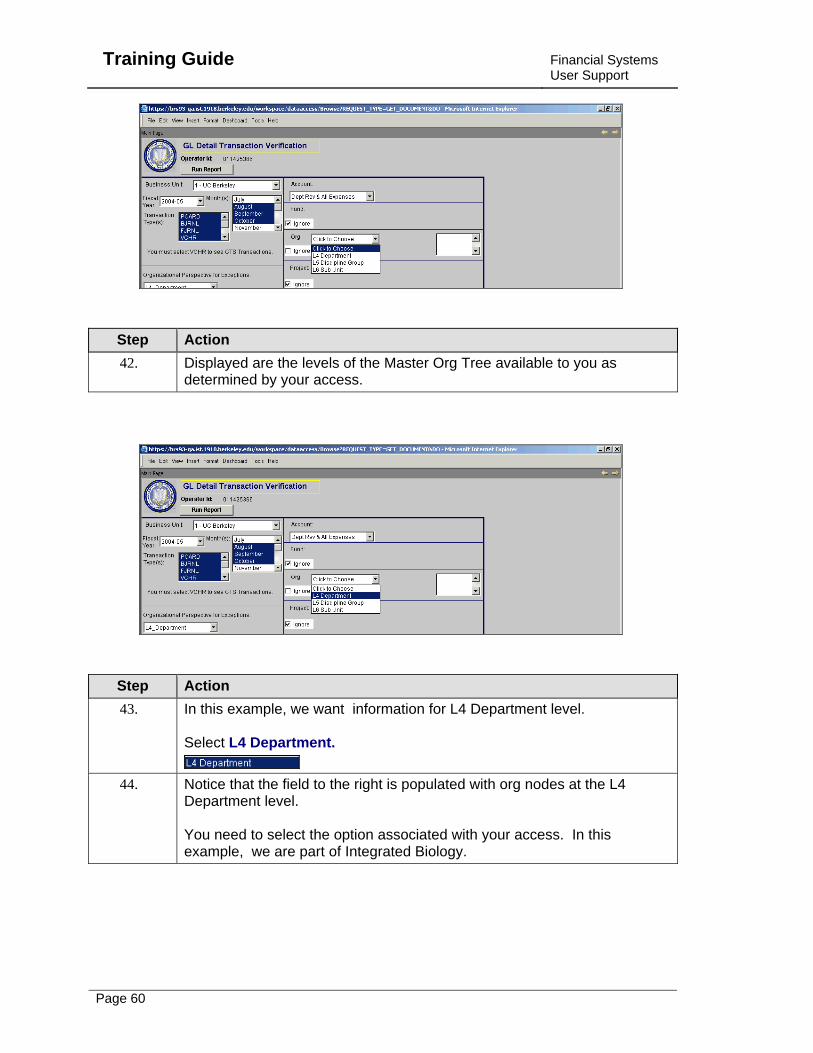
Step Action 42. Displayed are the levels of the Master Org Tree available to you as
determined by your access.
Step Action 43. In this example, we want information for L4 Department level.
Select L4 Department.
44. Notice that the field to the right is populated with org nodes at the L4
Department level. You need to select the option associated with your access. In this example, we are part of Integrated Biology.
Financial Systems User Support
Training Guide
Page 61
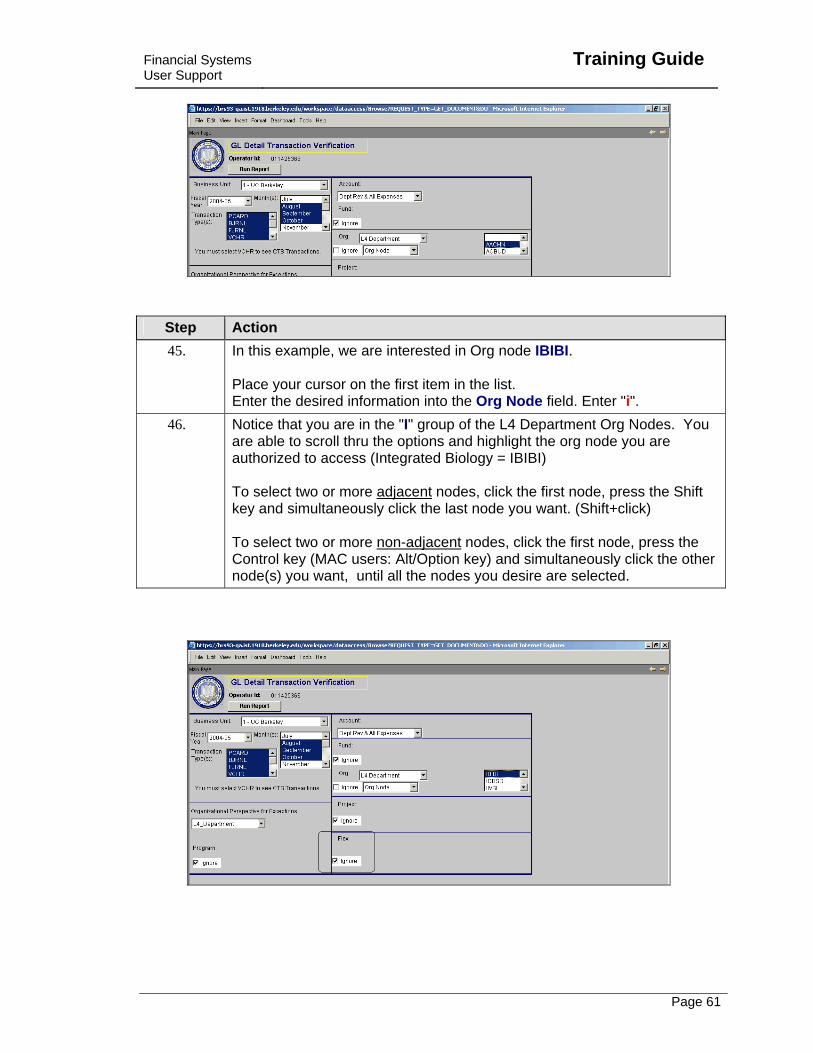
Step Action 45. In this example, we are interested in Org node IBIBI.
Place your cursor on the first item in the list. Enter the desired information into the Org Node field. Enter "i".
46. Notice that you are in the "I" group of the L4 Department Org Nodes. You are able to scroll thru the options and highlight the org node you are authorized to access (Integrated Biology = IBIBI) To select two or more adjacent nodes, click the first node, press the Shift key and simultaneously click the last node you want. (Shift+click) To select two or more non-adjacent nodes, click the first node, press the Control key (MAC users: Alt/Option key) and simultaneously click the other node(s) you want, until all the nodes you desire are selected.
Training Guide
Financial Systems User Support
Page 62
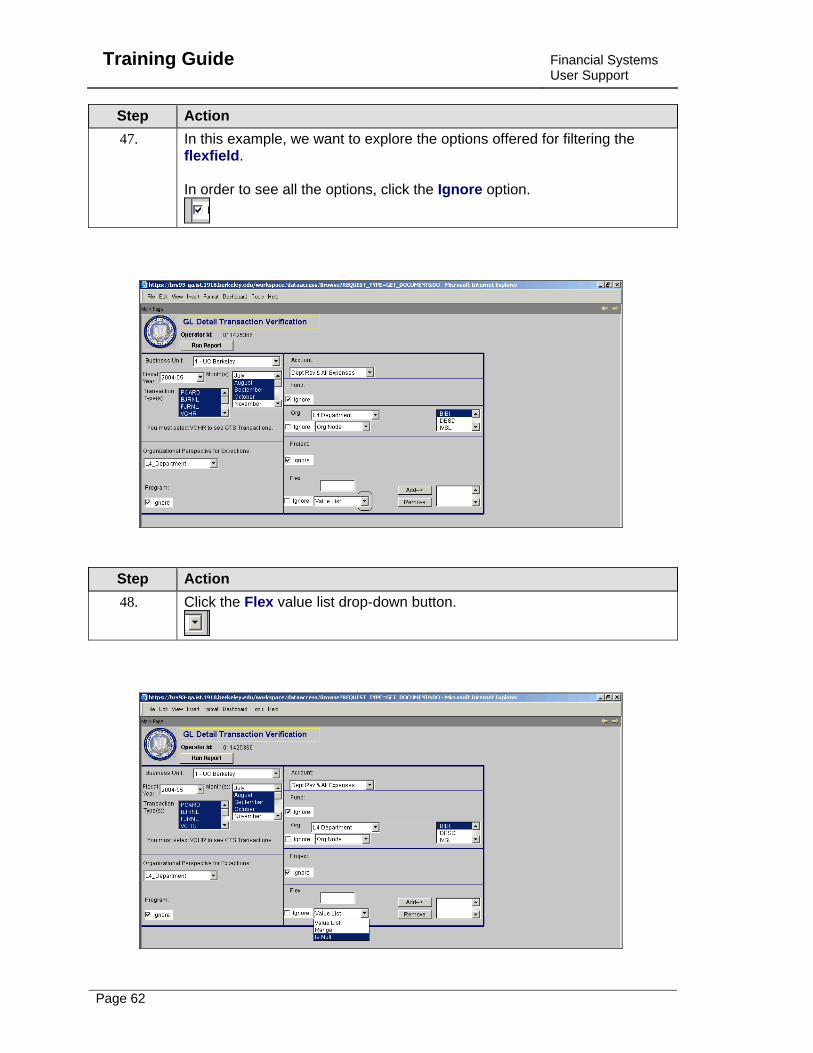
Step Action 47. In this example, we want to explore the options offered for filtering the
flexfield. In order to see all the options, click the Ignore option.
Step Action 48. Click the Flex value list drop-down button.
Financial Systems User Support
Training Guide
Page 63
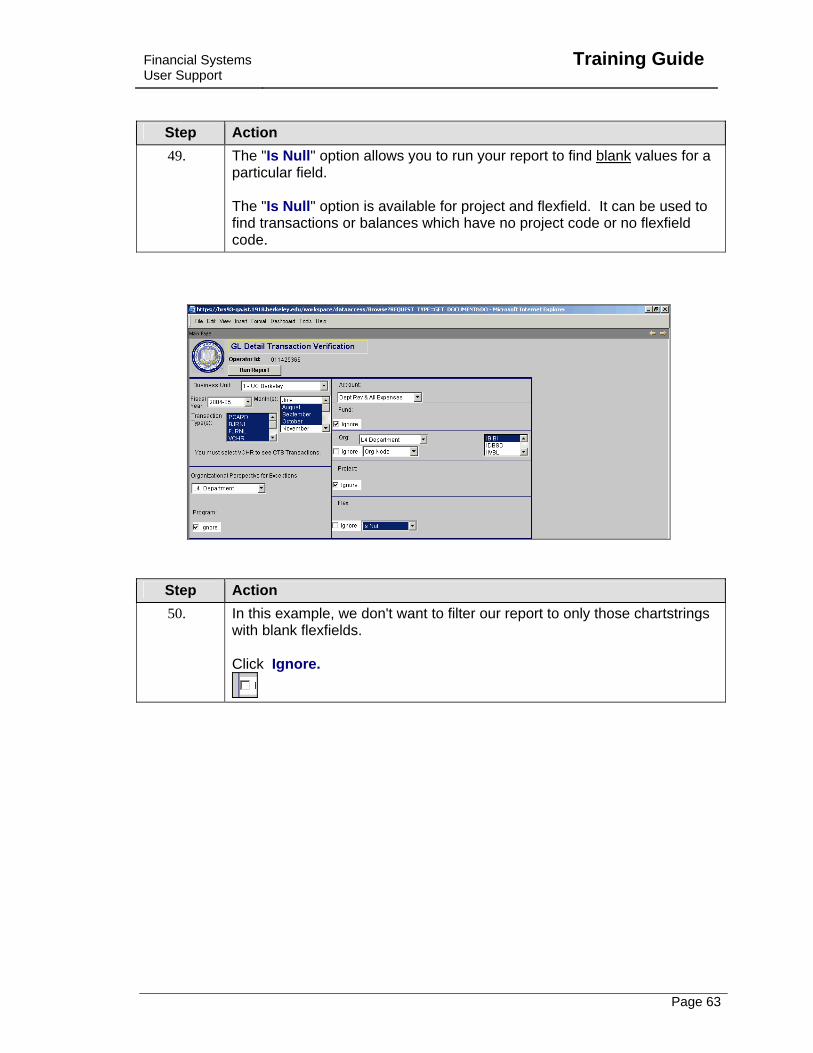
Step Action 49. The "Is Null" option allows you to run your report to find blank values for a
particular field. The "Is Null" option is available for project and flexfield. It can be used to find transactions or balances which have no project code or no flexfield code.
Step Action 50. In this example, we don't want to filter our report to only those chartstrings
with blank flexfields. Click Ignore.

Training Guide
Financial Systems User Support
Page 64
Step Action 51. Once you have set your parameters, the Main Page might look like this.
You now want to run your report. Click the Run Report button.
Financial Systems User Support
Training Guide
Page 65
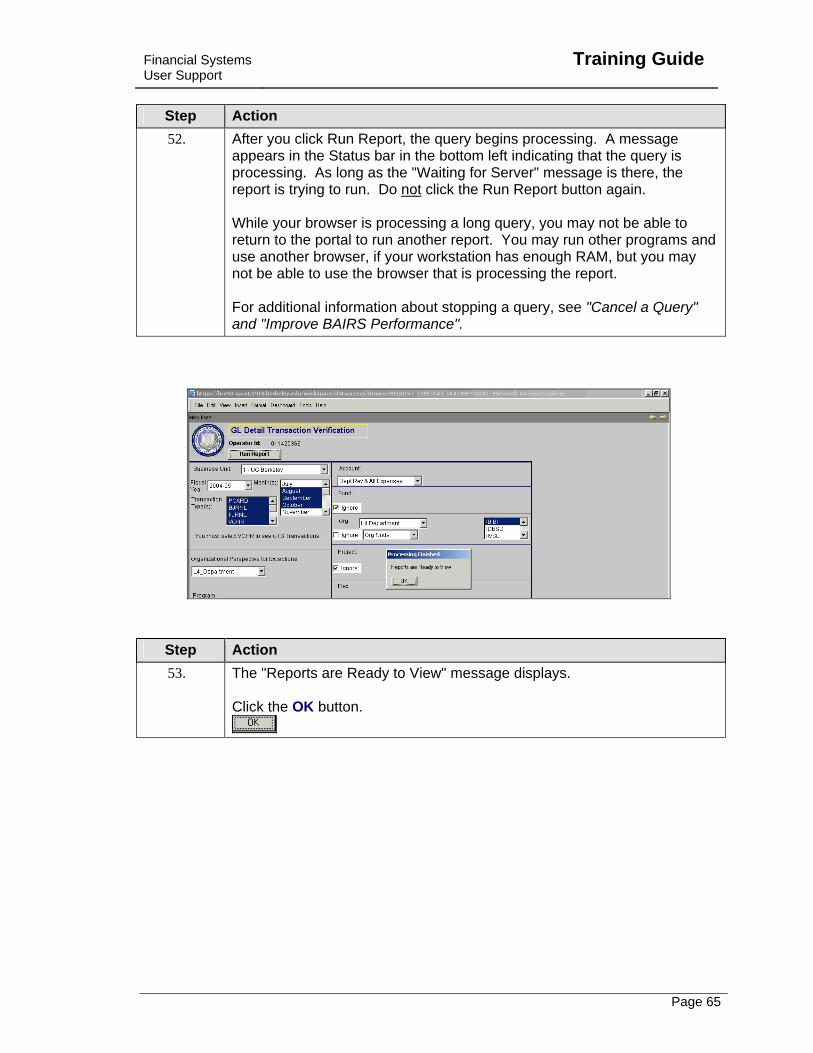
Step Action 52. After you click Run Report, the query begins processing. A message
appears in the Status bar in the bottom left indicating that the query is processing. As long as the "Waiting for Server" message is there, the report is trying to run. Do not click the Run Report button again. While your browser is processing a long query, you may not be able to return to the portal to run another report. You may run other programs and use another browser, if your workstation has enough RAM, but you may not be able to use the browser that is processing the report. For additional information about stopping a query, see "Cancel a Query" and "Improve BAIRS Performance".
Step Action 53. The "Reports are Ready to View" message displays.
Click the OK button.
Training Guide
Financial Systems User Support
Page 66
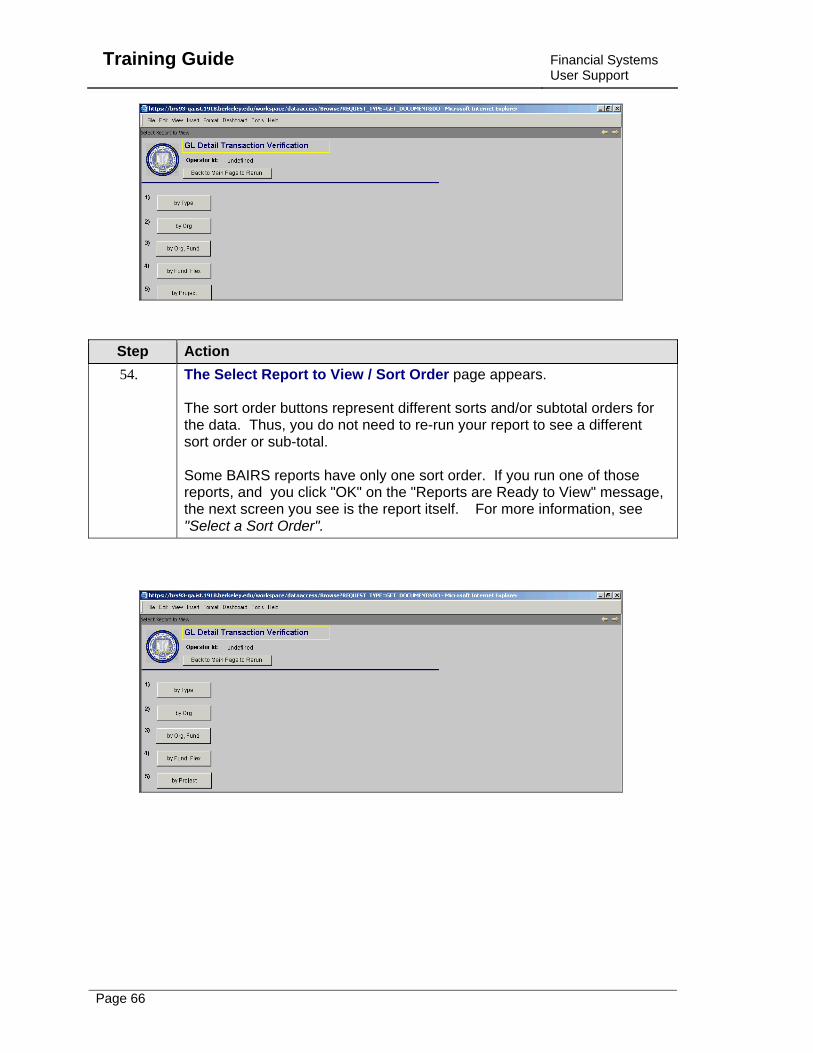
Step Action 54. The Select Report to View / Sort Order page appears.
The sort order buttons represent different sorts and/or subtotal orders for the data. Thus, you do not need to re-run your report to see a different sort order or sub-total. Some BAIRS reports have only one sort order. If you run one of those reports, and you click "OK" on the "Reports are Ready to View" message, the next screen you see is the report itself. For more information, see "Select a Sort Order".
Financial Systems User Support
Training Guide
Page 67
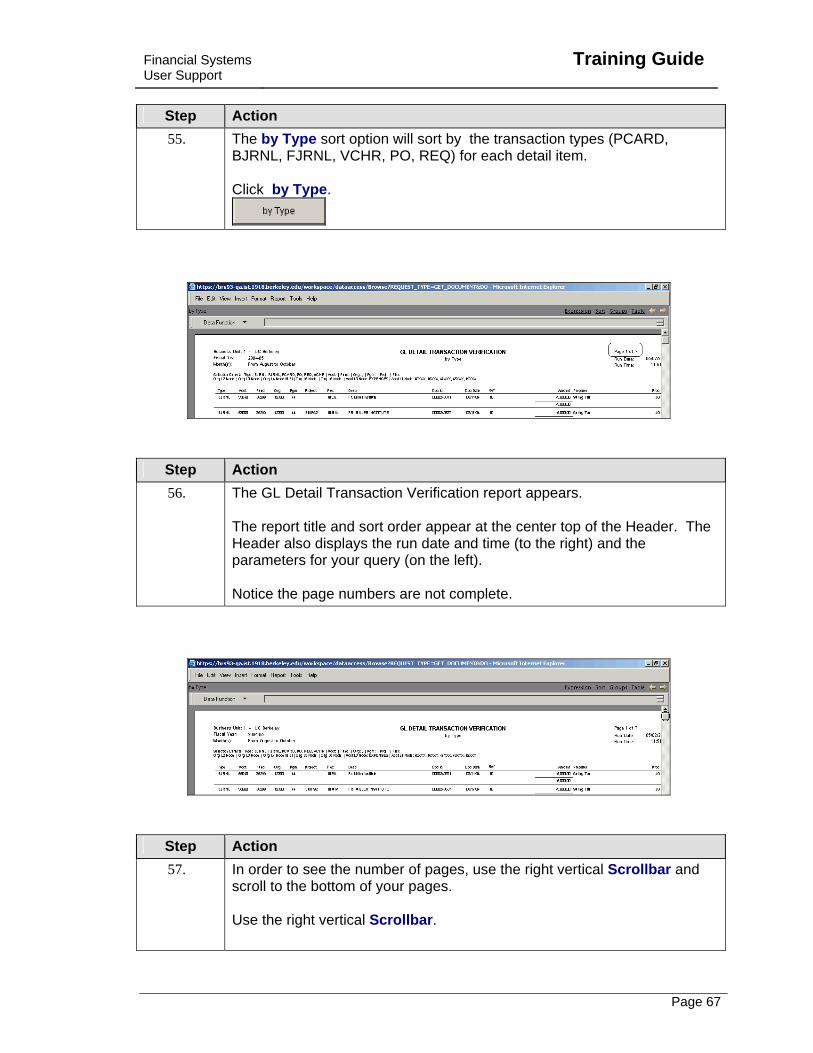
Step Action 55. The by Type sort option will sort by the transaction types (PCARD,
BJRNL, FJRNL, VCHR, PO, REQ) for each detail item. Click by Type.
Step Action 56. The GL Detail Transaction Verification report appears.
The report title and sort order appear at the center top of the Header. The Header also displays the run date and time (to the right) and the parameters for your query (on the left). Notice the page numbers are not complete.
Step Action 57. In order to see the number of pages, use the right vertical Scrollbar and
scroll to the bottom of your pages. Use the right vertical Scrollbar.
Training Guide
Financial Systems User Support
Page 68
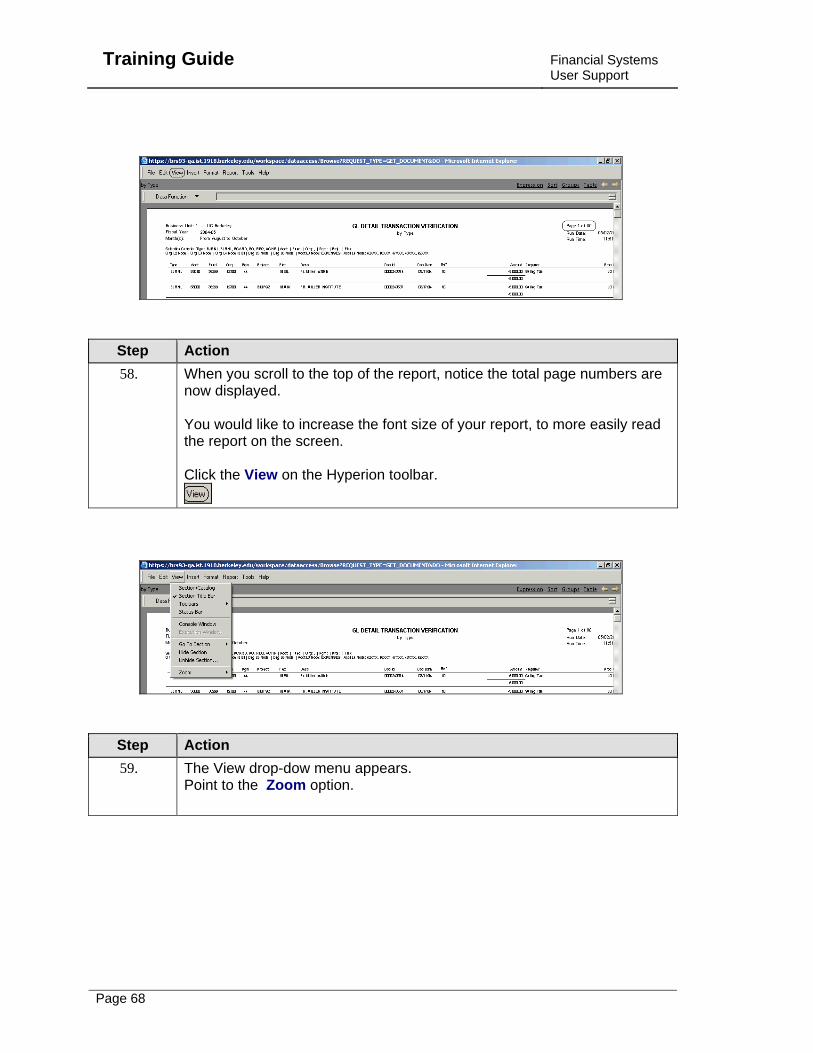
Step Action 58. When you scroll to the top of the report, notice the total page numbers are
now displayed. You would like to increase the font size of your report, to more easily read the report on the screen. Click the View on the Hyperion toolbar.
Step Action 59. The View drop-dow menu appears.
Point to the Zoom option.

Financial Systems User Support
Training Guide
Page 69
Step Action 60. The Zoom drop-down menu appears.
Click 150%. This does not change the font on the report that you might print.
61. Notice that the font is larger.
If you would like a different sort order or sub-total or if you would like to change parameters, you are able to remain in the report and move back to the prior screen. Click the Back Arrow.
62. You may return to the Main Page and rerun the report with different
parameters or you may sort the report by a different sort order. Click the Back to Main Page to Rerun Report.
63. You could change the parameters and re-run the report.
End of Procedure.