basic excel capabilities mba 7025 statistical business analysis reviewed at various places in data...
TRANSCRIPT

Basic Excel Capabilities
MBA 7025Statistical Business Analysis
Reviewed at various places in Data Analysis and Decision Making with Microsoft Excel

L99A MBA 7025 - Basic Excel, Office 2007
2
Objective of module
• Learn basic Excel capabilities.
• Practice using Excel “Functions”.

L99A MBA 7025 - Basic Excel, Office 2007
3
Basic Spreadsheets Capabilities
• Cut, Copy, Paste & Paste Special• Cell corner Copy• Add or delete Rows or Columns• Change width/height of row/column• Font, alignment, boarder & number of cell• Referencing and calculations with cells.• Data / Sort• Naming cell or range of cells• Insert / Function / Average• Sum, Max, Min, Count, Small and Large• Single quote for equation statement. • REPLACE command.• DATA / Group & FORMAT: Column, Hide. • Grab an entire column of data (CTRL+SHIFT, down arrow).
L99A MBA 7025 - Basic Excel, Office 2007
4
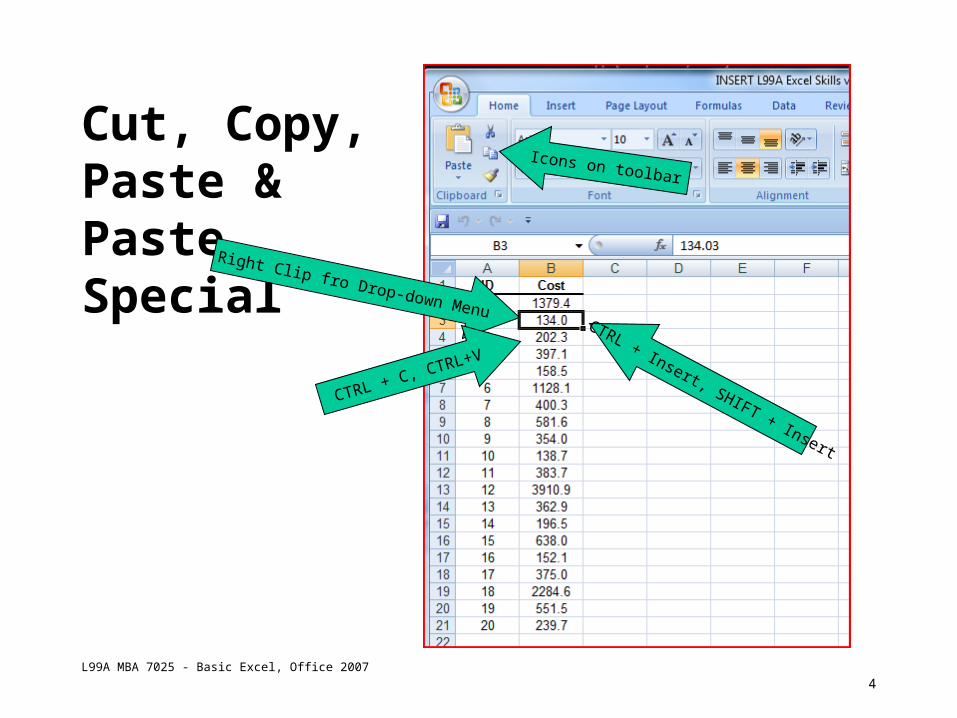
Cut, Copy, Paste & Paste Special
Icons on toolbar
Right Clip fro Drop-down Menu
CTRL + C, CTRL+VCTRL + Insert, SHIFT + Insert

L99A MBA 7025 - Basic Excel, Office 2007
5
Cell corner Copy
Grab corner, hold left button and pull down.
Release corner

L99A MBA 7025 - Basic Excel, Office 2007
6
Cell corner Copy
Double click corner

L99A MBA 7025 - Basic Excel, Office 2007
7
Add or delete Rows or Columns
NO
Right Click, then Insert or Delete from Drown-down menu
Right Click, then Insert or Delete
from Drown-down menu

L99A MBA 7025 - Basic Excel, Office 2007
8
Add or delete Rows or Columns
Yes

L99A MBA 7025 - Basic Excel, Office 2007
9
Change width/height of row/column
Right Click, then Row Height
from Drop-down menu
Right Click, then Column Width from Drop-down menu

L99A MBA 7025 - Basic Excel, Office 2007
10
Font, alignment, boarder & number of cell.

L99A MBA 7025 - Basic Excel, Office 2007
11
Font, alignment, boarder & number of cell.

L99A MBA 7025 - Basic Excel, Office 2007
12
Font, alignment, boarder & number of cell.

L99A MBA 7025 - Basic Excel, Office 2007
13
Referencing and calculations with cells.
Relative addressing

L99A MBA 7025 - Basic Excel, Office 2007
14
Referencing and calculations with cells.
Absolute addressing

L99A MBA 7025 - Basic Excel, Office 2007
15
Data / Sort
DA
TA
: Sor
t

L99A MBA 7025 - Basic Excel, Office 2007
16
Naming cell or range of cells
1) Hi-lite array of data
2) Give arra
y a name
3) Use name in subsequent calculations

L99A MBA 7025 - Basic Excel, Office 2007
17
Insert / Function / Average

L99A MBA 7025 - Basic Excel, Office 2007
18
Examples of Insert Functions

L99A MBA 7025 - Basic Excel, Office 2007
19
Excel Function - COUNTIF

L99A MBA 7025 - Basic Excel, Office 2007
20
Single quote for equation statement.
Single quote

L99A MBA 7025 - Basic Excel, Office 2007
21
REPLACE command.
EDIT: Replace

L99A MBA 7025 - Basic Excel, Office 2007
22
DATA / Group
DATA: Group / G
roup

L99A MBA 7025 - Basic Excel, Office 2007
23
FORMAT: Column, Hide.
FORMAT: Column, Hide
Right Click, then Hide from Drop-down menu

L99A MBA 7025 - Basic Excel, Office 2007
24
Grab an entire column of data (CTRL+SHIFT, down arrow).
Hi-lite top cell, th
en CTRL+SHIFT, down arrow

L99A MBA 7025 - Basic Excel, Office 2007
25
Preferred Pasting Procedures
• Paste ‘Excel Worksheets’ in to other documents (WORD or POWER POINT) using “Paste Special”, “ Picture”.
– Do NOT use “Paste” which sometimes creates an active table. Definitely don’t use “Paste Link” which will create a live link to the original Excel spreadsheet.
– If the object to be pasted in a picture or graph use “Picture Enhanced Metafile”, instead of “Picture”
Sometimes
YES
YES
NO

L99A MBA 7025 - Basic Excel, Office 2007
26
Capturing Procedures
• Paste Menus from other program into WORD and POWER POINT y using “Alt”-”Print Screen” to capture the current, active image in the other program and send it to the clip board. Then, use regular “Paste” to insert a picture of the menu into your document.
• Note, if “Print Screen” (without holding down Alt) is used, the entire screen is captured.
• Alternatively, if you only want a portion of the active, image use the Snipping Tool. Access this by clicking on the following /All Programs/Accessories/Snapping Tool/