bird spider 360°tm - bird b gone you for purchasing the bird•b•gone® bird spider 360°™. for...
TRANSCRIPT
Installation Instructions
800.392.6915 | www.birdbgone.com | made in the USA
Thank you for purchasing the Bird•B•Gone® Bird Spider 360°™. For best results please read these instructions before using and retain them for future reference.
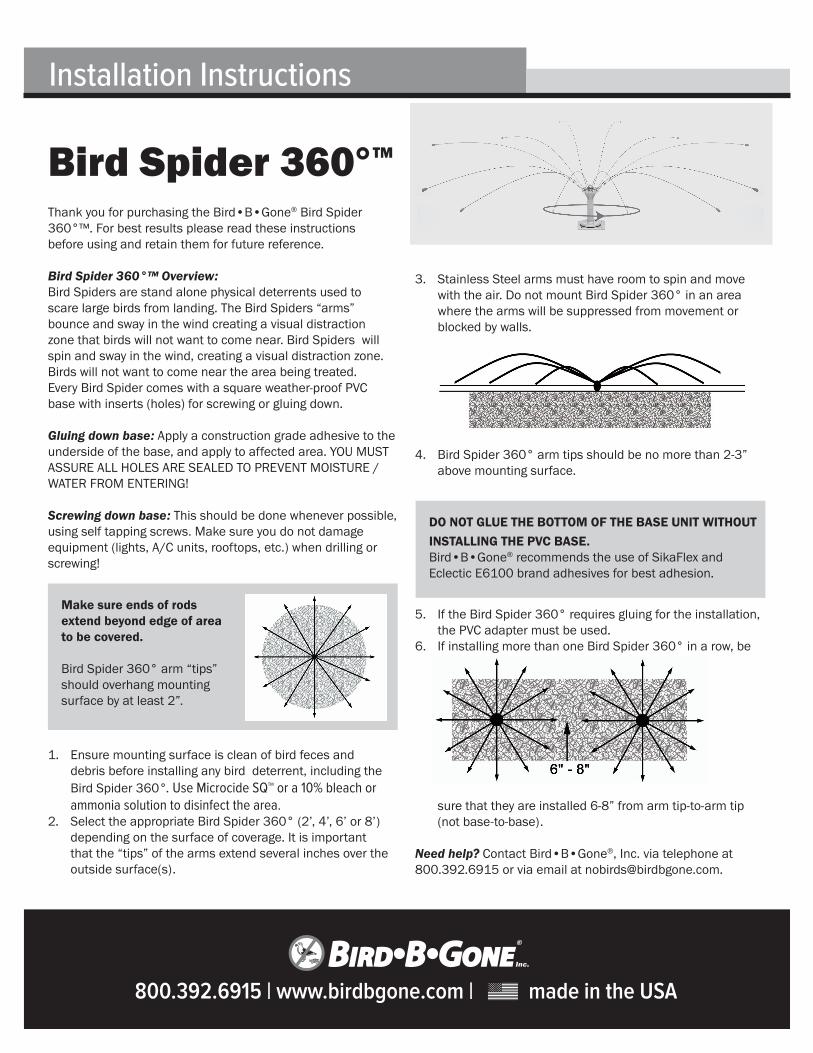
Bird Spider 360°™ Overview:Bird Spiders are stand alone physical deterrents used to scare large birds from landing. The Bird Spiders “arms” bounce and sway in the wind creating a visual distraction zone that birds will not want to come near. Bird Spiders will spin and sway in the wind, creating a visual distraction zone. Birds will not want to come near the area being treated. Every Bird Spider comes with a square weather-proof PVC base with inserts (holes) for screwing or gluing down.
Gluing down base: Apply a construction grade adhesive to the underside of the base, and apply to affected area. YOU MUST ASSURE ALL HOLES ARE SEALED TO PREVENT MOISTURE / WATER FROM ENTERING!
Screwing down base: This should be done whenever possible, using self tapping screws. Make sure you do not damage equipment (lights, A/C units, rooftops, etc.) when drilling or screwing!
1. Ensure mounting surface is clean of bird feces and debris before installing any bird deterrent, including the Bird Spider 360°. Use Microcide SQ™ or a 10% bleach or ammonia solution to disinfect the area.
2. Select the appropriate Bird Spider 360° (2’, 4’, 6’ or 8’) depending on the surface of coverage. It is important that the “tips” of the arms extend several inches over the outside surface(s).
3. Stainless Steel arms must have room to spin and move with the air. Do not mount Bird Spider 360° in an area where the arms will be suppressed from movement or blocked by walls.
4. Bird Spider 360° arm tips should be no more than 2-3” above mounting surface.
5. If the Bird Spider 360° requires gluing for the installation, the PVC adapter must be used.
6. If installing more than one Bird Spider 360° in a row, be
sure that they are installed 6-8” from arm tip-to-arm tip (not base-to-base).
Need help? Contact Bird•B•Gone®, Inc. via telephone at 800.392.6915 or via email at [email protected].
Bird Spider 360°TM
Make sure ends of rods extend beyond edge of area to be covered.
Bird Spider 360° arm “tips” should overhang mounting surface by at least 2”.
DO NOT GLUE THE BOTTOM OF THE BASE UNIT WITHOUT INSTALLING THE PVC BASE.Bird•B•Gone® recommends the use of SikaFlex and Eclectic E6100 brand adhesives for best adhesion.

Installation Instructions
800.392.6915 | www.birdbgone.com | made in the USA
OPTIONAL MOUNTING BASES:If you are unable to glue or screw your Bird Spider 360° into place, Bird•B•Gone® offers a series of mounting bases for various surfaces including a Sand Bag Base, a Boat Base and a Rail Mount (sold separately). Call 800.392.6915 for additional details.
BOAT ADAPTATION
Boat Base (MMBSBB2)Attach the Bird Spider 360° Base directly to the Boat Base with the screws supplied.• Do not mount onto the PVC supplied attachment first.• Each of the four “corners” of the Bird Spider 360° Boat
Base has holes. This makes it easy to “bungee” or tie down the base to a canopy top, cover, etc. ... And also allows for easy removal of this ideal boat protective device!
Sandbag Base (MMBSBB-SB)Use the Sandbag Base on Boats where the Bird Spider 360° Boat Base is not appropriate (i.e. Bimini Tops and larger areas).• Attach the Bird Spider 360° Base directly to the Sandbag
Base with the screws supplied with Sandbag Base. Follow instructions supplied with screws. (Screws used for the PVC attachment will not work with the Sandbag Base.)
• Do not mount onto the PVC supplied attachment first• Although the Bird Spider 360° Sandbag Base is weighted,
it should always be secured to the boat. High winds or extreme shifts in weather could remove the Sand Bag Base and cause damage if it is not properly secured
Railing Mount (MMRLMNT)Use the Railing Mount to secure the Bird Spider 360° to boat rails, pole fences, and other railing areas. The Bird•B•Gone® Railing Mount easily secures to railing sizes up to 1 7/8” thick and can be easily removed and stowed while sailing or cruising.