brain game – code club · brain game introduction in this project you’ll learn how to create a...
TRANSCRIPT

Brain Game
IntroductionIn this project you’ll learn how to create a times table quiz, in which you have toget as many answers correct as you can in 30 seconds.
Step 1: Creating questionsLet’s start by creating random questions for the player to answer.
Activity Checklist
Start a new Scratch project, and delete the cat sprite so that your projectis empty. You can find the online Scratch editor at jumpto.cc/scratch-
new.
Choose a character and a backdrop for your game. You can choose anyyou like! Here’s an example:
1
This content is for non-commercial use only and we reserve the right at any time to withdraw permission for use. © 2012-2016 Raspberry Pi Foundation. UKRegistered Charity 1129409

Create 2 new variables called number 1 and number 2 . These variables
will store the 2 numbers that will be multiplied together.
Add code to your character, to set both of these variables to a random
number between 2 and 12.
when clicked
set to pick random 2 to
12number 1
▼
set to pick random 2 to
12number 2
▼
You can then ask the player for the answer, and let them know if theywere right or wrong.
2
This content is for non-commercial use only and we reserve the right at any time to withdraw permission for use. © 2012-2016 Raspberry Pi Foundation. UKRegistered Charity 1129409

Save your project
Challenge: Changing costumes
Can you change your character’s costumes, so that they
when clicked
set to pick random 2 to
12number 1
▼
set to pick random 2 to
12number 2
▼
ask join number 1 join x number 2 and
wait
if
answer =
number 1 *
number 2
then
say yes! :) for 2 secs
else
say nope :( for 2 sec
s
Test your project fully, by answering one question correctly and one withthe wrong answer.
Add a forever loop around this code, so that the player is asked lots of
questions.
Create a countdown timer on the stage, using a variable called time .
The ‘Ghostbusters’ project has instructions for making a timer (in step 5)if you need help!
Test your project again - you should be able to continue askingquestions until the time runs out.
3
This content is for non-commercial use only and we reserve the right at any time to withdraw permission for use. © 2012-2016 Raspberry Pi Foundation. UKRegistered Charity 1129409
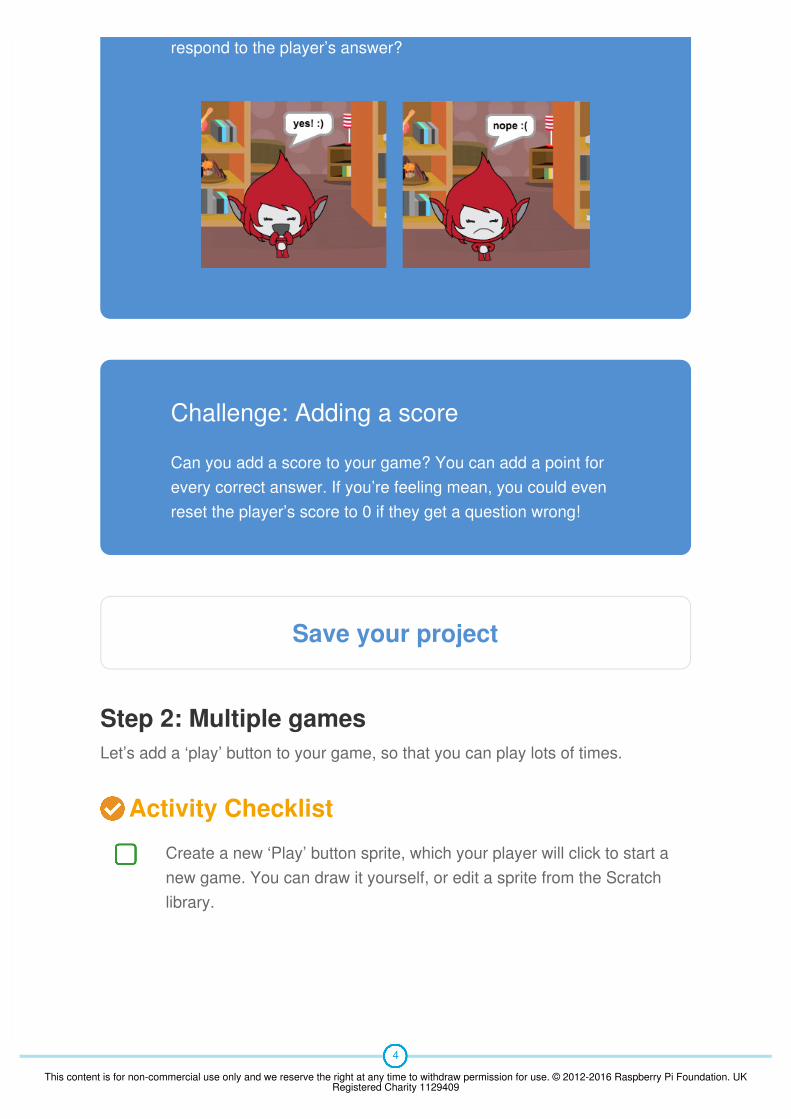
respond to the player’s answer?
Challenge: Adding a score
Can you add a score to your game? You can add a point forevery correct answer. If you’re feeling mean, you could evenreset the player’s score to 0 if they get a question wrong!
Save your project
Step 2: Multiple gamesLet’s add a ‘play’ button to your game, so that you can play lots of times.
Activity Checklist
Create a new ‘Play’ button sprite, which your player will click to start anew game. You can draw it yourself, or edit a sprite from the Scratchlibrary.
4
This content is for non-commercial use only and we reserve the right at any time to withdraw permission for use. © 2012-2016 Raspberry Pi Foundation. UKRegistered Charity 1129409

Add this code to your new button.
This code shows the play button when your project is started. When thebutton is clicked, it is hidden and then broadcasts a message that willstart the game.
when clicked
show
when this sprite clicked
hide
broadcast start ▼
You’ll need to edit your character’s code, so that the game starts whenthey receive the start message, and not when the flag is clicked.
Replace the when flag clicked code with when I receive start .
Click the green flag and then click your new play button to test it. Youshould see that the game doesn’t start until the button is clicked.
Did you notice that the timer starts when the green flag is clicked, andnot when the game starts?
5
This content is for non-commercial use only and we reserve the right at any time to withdraw permission for use. © 2012-2016 Raspberry Pi Foundation. UKRegistered Charity 1129409

Can you fix this problem?
Click on the stage, and replace the stop all block with an end message.
You can now add code to your button, to show it again at the end ofeach game.
when I receive end ▼
show
You’ll also need to stop your character asking questions at the end ofeach game:
when I receive end ▼
stop other scripts in sprite
▼
Test your play button by playing a couple of games. You should notice
6
This content is for non-commercial use only and we reserve the right at any time to withdraw permission for use. © 2012-2016 Raspberry Pi Foundation. UKRegistered Charity 1129409

Save your project
Challenge: Start screen
Can you add another backdrop to your stage, which willbecome your game’s start screen? You can use the when I
receive start and when I receive end blocks to switch between
that the play button shows after each game. To make testing easier, youcan shorten each game, so that it only lasts a few seconds.
set to 10time ▼
You can even change how the button looks when the mouse hoversover it.
when clicked
show
forever
if touching ? thenmouse-pointer ▼
set effect to 30fisheye ▼
else
set effect to 0fisheye ▼
7
This content is for non-commercial use only and we reserve the right at any time to withdraw permission for use. © 2012-2016 Raspberry Pi Foundation. UKRegistered Charity 1129409

backdrops.
You can also show and hide your character, and even showand hide your timer by using these blocks:
Save your project
Step 3: Adding graphicsInstead of your character just saying yes! :) or nope :( to the player, let’s add
some graphics that will let the player know how they are doing.
show variable time ▼
hide variable time ▼
Create a new sprite called ‘Result’, containing both a ‘tick’ and a ‘cross’costume.
8
This content is for non-commercial use only and we reserve the right at any time to withdraw permission for use. © 2012-2016 Raspberry Pi Foundation. UKRegistered Charity 1129409
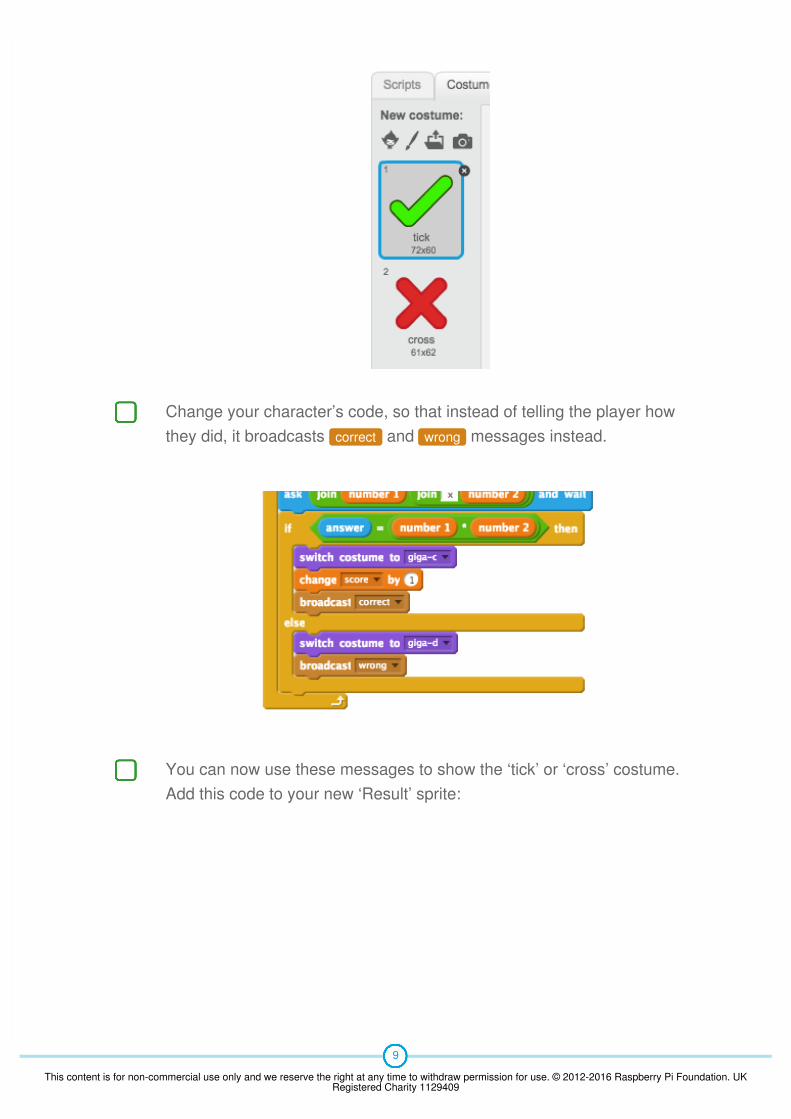
Change your character’s code, so that instead of telling the player howthey did, it broadcasts correct and wrong messages instead.
You can now use these messages to show the ‘tick’ or ‘cross’ costume.Add this code to your new ‘Result’ sprite:
9
This content is for non-commercial use only and we reserve the right at any time to withdraw permission for use. © 2012-2016 Raspberry Pi Foundation. UKRegistered Charity 1129409

Test out your game again. You should see a tick whenever you get aquestion correct, and a cross whenever you get one wrong!
Have you noticed that the code for when I receive correct and when I receive
wrong is nearly identical? Let’s create a function to make it easier for you
to make changes to your code.
On your ‘Result’ sprite, click More Blocks , and then ‘Make a Block’.
Create a new function called animate .
10
This content is for non-commercial use only and we reserve the right at any time to withdraw permission for use. © 2012-2016 Raspberry Pi Foundation. UKRegistered Charity 1129409

You can then add the animation code into your new animation function,and then just use the function twice:
Now, if you want to show the tick and the cross for a longer or shortertime, you only need to make one change to your code. Try it!
Instead of just showing and hiding the tick and the cross, you couldchange your animation function, so that the graphics fade in.
11
This content is for non-commercial use only and we reserve the right at any time to withdraw permission for use. © 2012-2016 Raspberry Pi Foundation. UKRegistered Charity 1129409

Save your project
Challenge: Improved animation
Can you improve the animation of your graphics? You couldcode the tick and cross so that they fade out as well as fadein. Or, you could use other cool effects:
Save your project
define animate
set effect to 100ghost ▼
show
repeat 25
change effect by -4ghost ▼
hide
12
This content is for non-commercial use only and we reserve the right at any time to withdraw permission for use. © 2012-2016 Raspberry Pi Foundation. UKRegistered Charity 1129409

Challenge: Sound and music
Can you add sound effects and music to your game? Forexample:
Save your project
Challenge: Race to 10 points
Can you change your game, so that instead of answering asmany questions as they can in 30 seconds, the player has tosee how quickly they can get 10 questions correct?
To do this, you’ll only need to change your timer code. Canyou see what needs to be changed?
Playing a sound when the player gets an answer right orwrong;Adding a ticking sound to your countdown timer;Playing a sound when the time is up;
play drum 10 ▼ for 0.1 beats
You could also constantly play music on a loop (if you’renot sure how to do this, step 4 of the ‘Rock Band’ projectwill help you).
13
This content is for non-commercial use only and we reserve the right at any time to withdraw permission for use. © 2012-2016 Raspberry Pi Foundation. UKRegistered Charity 1129409

Save your project
Challenge: Instruction screen
Can you add an instructions screen to your game, telling yourplayer how to play the game? You’ll need an ‘Instructions’button, and another stage background.
You may also need a ‘Back’ button to take you to the mainmenu.
when I receive start ▼
set to 30time ▼
repeat until time =
0
wait 1 secs
change by -1time ▼
broadcast end ▼
broadcast main menu ▼
14
This content is for non-commercial use only and we reserve the right at any time to withdraw permission for use. © 2012-2016 Raspberry Pi Foundation. UKRegistered Charity 1129409

Save your project
15
This content is for non-commercial use only and we reserve the right at any time to withdraw permission for use. © 2012-2016 Raspberry Pi Foundation. UKRegistered Charity 1129409