civil air patrol basic instructor course · civil air patrol basic instructor course the civil air...
TRANSCRIPT
CIVIL AIR PATROL
NATIONAL HEADQUARTERS MAXWELL AFB AL 36112-6332
1
CIVIL AIR PATROL BASIC INSTRUCTOR COURSE
The Civil Air Patrol (CAP) Basic Instructor course presents basic teaching principles and their
application in CAP. It also discusses various teaching methods and techniques and ways to
evaluate learning. The course is intended for instructors engaged in on-the-job training (OJT),
informal, and formal instruction. The use of a name or trademark of any specific manufacturer,
commercial product, commodity, or service in this course does not imply endorsement by Civil
Air Patrol. Much of the information in the course is derived from AFMAN 36-2236, 12
November 2003, Personnel, Guidebook for Air Force Instructors (A copy of AFMAN 36-2236
is available under the ―Instructor Tools‖ on the main website page.
Introduction
This course provides the practical information needed to teach adult and adolescent students.
While it applies to most educational situations, the emphasis is on a military setting similar to
that found in Civil Air Patrol. The majority of information in the course has been tested and
utilized at the Air Force's Academic Instructor School at Maxwell Air Force Base, Alabama.
CAP training/education courses do more than train to a task, fill a square on the promotion
checklist, or provide an interesting weekend with fellow members and friends. CAP courses
reinforce the values we believe in as members, provide tools to work smarter and faster, give a
glimpse of the future, and help shape and save lives.
CAP instructors are a special breed. They take on the herculean task of building and teaching
meaningful lessons which move members forward, sharing knowledge and reinforcing CAP’s
culture of selfless service as the Air Force Auxiliary to members old and new.
Key to the success of any CAP course is the ability for the instructor to organize his/her thoughts
about the lesson to be presented. Instructors should use a student-centered approach to lesson-
writing; that is, the instructor should view the lesson from the point of view of the students: what
they already know about the topic, what they are expected to know at the conclusion of the
lesson, and most importantly, how the students are expected to use the material at the unit and
beyond. The following figure encompasses these thoughts.

2
The job of the lesson developer is not solely to write content on paper, but to organize the lesson
in a logical progression, and at the level of learning the student is expected to master. We’ll
discuss levels of learning in a few minutes.
In the approach presented in this course, the acceptable evidence that successful teaching has
taken place comes from indications of change in student behavior. As important as good texts,
lectures, and audiovisual materials are, they are only part of the process. At least as important is
feedback to the student in the form of encouragement, comments on written papers, correction of
mistakes, and similar teaching activities.
This course is designed to help instructors develop lesson objectives, the intermediate desired
learning outcomes that make up the lesson, the actual text of the lesson, the use of graphics and
other tools, and finally the proper composition of exam questions.
Getting Started
The instructor may be assigned a topic around which to develop a course or they may develop a
course to cover an area of need in the unit. The course may be taught by the instructor in a
classroom setting or self-taught by the student online. This course will focus on the development
of a lesson that will be taught in a classroom setting. In a self-taught, or distance learning,
course some of the work required by the instructor is removed because items like classroom
setting and delivery method will not have to be determined.
Level of learning of
the students
What they already
know about the
subject
What you want them
to know
The level of learning
you want them to be at
How should students
apply what they learn
Content
This model shows the thought process of developing a course. After the topic has
been selected; you consider the square on the right first. What do you want students
to know; at what level; and what do you want them to do with it? From this comes
the lesson objective(s) which come out of the square on the left. To determine the
objectives, the instructor has to take into consideration what the students already
know about the subject. From these two blocks, the instructor can develop the
content for the course.
Then consider the square on the left. What is their present level of learning; and what do they
already know? There will be a delta between what they know and what you want them to know.
The class segment fills the delta. The DLOs and the content bring students from the left to the right.
3
Below are the areas we’ll address in the course that are required for an instructor to develop a
lesson/course:
1. Developing Lesson Objective(s)
2. Choosing the Level of Learning
3. Researching the Topic
4. Selecting the Instructional Method (In this course, we’ll look primarily at the
formal/informal lecture and performance-demonstration methods)
5. Developing the Desired Learning Outcomes (DLO)
6. Lesson Plan (writing content)
7. Evaluating content against lesson objective and DLOs
8. Writing Evaluations (i.e. multiple choice questions, performance)
9. Developing Instructional Aids
1. Lesson Objective
When we are deciding what to teach and how we're going to measure our success in the teaching
environment, it isn't enough to simply determine who our students are, what they will need to
know, or how we will present the material to them. If our planning stops there, we've failed to
consider the most important element of the lesson-planning process—what our students will be
able to do once they have received and processed the information presented. We have to identify
what the student will be able to do through the objectives we develop.
A lesson objective is a statement that describes the overall take-away for the student. An
example from the Unit Commanders Course:
The lesson is: Hazing
The lesson objective is: Comprehend Civil Air Patrol’s Hazing policy.
This is the big task the student has to master for the course/instructor to be successful. The
objective will focus your development of the lesson. After you determine the objective you need
to develop the necessary level of learning.

4
2. Choosing the Level of Learning
For the instructor, everything turns on the level of learning s/he wishes to have the student
master. What is the level of learning? Simply stated, it is the degree of mastery of the material by
the student. For the purpose of this course, we’ll describe the two most often-used domains of
learning (developed by Benjamin Bloom): the Cognitive domain and the Affective domain.
Cognitive Domain of Learning
The Cognitive domain of learning is concerned with the student’s ability to intellectually process
and use the information presented in the lesson. An example would be for a new member to
explain the history of CAP.
Within the cognitive domain, there are six levels of learning: knowledge, comprehension,
application, analysis, synthesis, and evaluation. For most CAP courses, the instructor will use
the first three levels -- knowledge, comprehension, and application. For this reason, we’ll focus
our attention on the first three levels from the least complex to the most complex:
• Knowledge level: Strictly recall and recognition. Descriptors in lesson objectives and
desired learning outcomes would include words such as: list, name, match, state, define,
outline, or identify.
• Comprehension level: Beyond rote memorization. Comprehension is the ability of the
student to see relationships, concepts or abstractions. This involves translation,
interpreting, or estimating. Descriptors in lesson objectors and desired learning outcomes
would include words such as: explain, in your own words, compare, contrast, predict,
summarize, solve, or generalize.
• Application level: The ability to use learned material in new situations. Descriptors in
lesson objectives and desired learning outcomes would include words such as: solve,
prepare, compute, develop, construct, modify, or teach.
Affective Domain of Learning
The Affective domain of learning talks about the student’s ability to accept the material
presented and incorporate the material into their professional and personal life. The Affective
domain talks about culture and the student’s state of mind. The student may or may not know
what your affective learning objective is, but it’s vitally important that YOU know how you want
the student to react to the content. This can be difficult for instructors to determine because it is a
subjective area rather than objective.

5
There are five levels of learning in the affective domain, from the least complex to the most
complex:
• Receiving: willingness to pay attention, (has to take test to get award)
• Responding: reacts voluntarily or complies, (wants to take the test)
• Valuing: acceptance, (glad to take the test and wants to use what they learned)
• Organization: rearrangement of values system, (changes habits to use what they’ve
learned)
• Characterization: incorporates value into lifestyle, (the true believer)
As mentioned earlier, the affective domain of learning is important for you to take into
consideration as an instructor when developing a lesson/course. In fact some courses will spell
out the affective objectives in the lesson plan. For CAP lessons/courses we will not be spelling
out the affective objectives for lessons. For that reason, you will not see the affective domain
mentioned again in this course. But we do want you to understand what these are because
thinking about what you want your students to ―Get‖ will naturally seep into your thought
process. Now we’ll see how the cognitive domain figures into writing lesson objectives.
Writing Lesson Objectives
We often begin our lesson planning with an objective or objectives clearly in mind. At other
times, the objective may be shaped by the research and additional planning we do. In other
words, although the first step of the lesson planning process is to determine the objective, our
objective may not fully evolve until after we have completed other steps of the process.
Objectives need to be student-centered. We should not state them in terms of what we want to
teach, but rather in terms of what we want our students to learn. For instance, the objective
of a lesson on developing a lesson plan might be for each student to know the steps of effective
lesson planning.
Many courses we teach will be at a higher level than the knowledge level. We might want each
student to comprehend the steps appropriate to effective lesson planning or even to be able to
apply the steps of lesson planning. But whatever the level, the student-centered objective should
guide our subsequent planning. Without a clear objective, we won't know if we, or more
importantly, our students ever get there. It is usually helpful to plan with a general-to-specific
strategy; that is, by starting with general objectives and ending with very precise performances.
Let us examine the three elements of the Level of Learning objective (the primary objective of
the lesson) as it relates to instruction.
Student Centeredness. Note that we chose to not include the statement "The objective of
this lesson is for each student to know (comprehend, apply, etc.) …", but we see that this
statement is implied in the objectives below.

6
Level of Learning (LOL). Each objective contains a specific LOL (know, comprehend,
or apply), but only one level is contained in each objective. For this reason, we should
always state the highest level we want our students to reach in the lesson.
Specific Subject. How specific to make the subject of the lesson normally depends on
two variables—the scope of the content covered by the objective and the LOL.
Below are examples of Objectives.
State the significant developments in military aviation (1) prior to World War I, (2)
during World War I, and (3) between World War I and World War II.
Comprehend the concept of time management.
Comprehend the importance of motivation in unit command.
Apply the Carkuff counseling approach to given counseling situations.
After writing or determining an instructional objective, we are ready to decide on the main points
of the lesson and gather materials about the lesson topic through research.
3. Researching the Topic
This may seem to be a throw-away step for some topics, because instructors may be well-versed
in the topic assigned. It is attractive to just jump in and begin writing. You should resist that
temptation. Instructors do not write for themselves, but for students that have had little, if any,
experience with the topic. Researching the topic gives the author a fresh look at the material,
reminds them of important little things they may have forgotten, and exposes them to the latest
material which the student relies on the lesson to provide.
In researching the topic, give thought to using materials both within and outside of CAP’s own
documents. For some topics, you may have to quote a regulation. For other topics, such as the
more conceptual ones, you may want to use a combination of CAP and other writings. If you use
an outside source, be sure to cite the source. Also, try to stay away from copyrighted material
unless you get a release to use the material from the author or publisher (there is a copy of the
copyright guide attached to the course).
NOTE: Generally speaking, we don’t use copyrighted materials. The exception is
something like a definition from Webster’s dictionary, or a short passage out of a
reference. Also remember to cite the reference. The problem with using material you
even think is copyrighted is it brings you and Civil Air Patrol in conflict with copyright
laws.

7
Be sure that you research the topic to meet the lesson objective. Remember, you have developed
the lesson objectives for a reason; it’s tempting to add more material than necessary for the
student to achieve the lesson objective. When you begin adding more material, it not only
increases your workload, but will more than likely confuse the student when the lesson is taught.
Use the lesson objective to help narrow the focus.
4. Selecting the Instructional Method
After deciding exactly what to teach, and doing the research, the instructor determines how best
to teach the material and what instructional method to use. When related to instruction, "method"
refers to a combination of techniques or skills used by the instructor to engage students in
meaningful learning experiences. A method is a broad approach to instruction—for example, the
lecture method or the guided discussion method. A technique, on the other hand, is a specific
concrete skill or procedure used in implementing a method—for example, the technique of using
the chalkboard or of using an analogy as support material. This section will help you not only
determine which method to use to teach a lesson, it will provide information on how to teach the
lesson when students are involved.
Philosophy Underlying Selection
You should choose a teaching method suited to the student's needs as a learner. In making the
selection, consider the way people learn—by doing, discussing, listening, observing, and
participating. Select the instructional method most effective for guiding students toward the
desired learning outcomes. Your role is to select the method and the techniques that will result in
a meaningful learning experience.
If, for example, you want students to gain skill in performing a certain task, one of the activities
should be practice performing the task. If the desired outcome is knowledge, students should
observe, listen, and/or read so they can relate what they are learning to their own experience. If
students must learn to apply a principle, the instructor should ask them to solve problems or
perform tasks requiring an application of that principle.
The instructional approach you choose for one learning outcome may be different from the
approaches you select for other outcomes in the same lesson. Your primary concern is to plan
and select the most appropriate approach for students to achieve each outcome.
When writing course content, you’ll typically stick to either an informal lecture-type method or
demonstration-performance, depending on the topic and objectives. While case studies may be
used and are often harder to develop and write from the author’s point-of-view, it provides the
student with an opportunity to reach a higher level of learning and allows them to immerse
themselves intellectually.

8
Many lessons will lend themselves to both methods being used in tandem throughout the lesson.
The instructor can provide some content, to cover a Desired Learning Outcome (DLO), and then
allow the student to apply the information in a short case or by demonstrating a task; then go on
to the next DLO. Most of the course you teach will involve some component of lecture so we’ll
discuss lectures first.
The Teaching Lecture Method
A teaching lecture is a formal or informal presentation of information, concepts, or principles by
a single individual. Due to the nature of lectures, the highest level of student learning that it
should be used for is comprehension.
Formal Lecture. Normally, communication in a formal lecture is one-sided—from the
instructor with no verbal participation by students. Because it is impersonal, a formal lecture
is usually given to a large audience. Even though structured and often rehearsed, the formal
lecture should have a natural and conversational delivery style without overuse of notes.
Informal Lecture. The audience for an informal lecture is usually smaller than for a formal
one. Considerable verbal interaction between instructor and student is often possible in the
form of both questions and discussion. The delivery style is even more conversational with
students often addressed directly by name.
Advantages and Disadvantages of the Lecture Method. The lecture method is one of the most
efficient teaching methods for presenting many facts or ideas in a relatively short time. Material
that has been logically organized can be presented concisely in rapid sequence. Because of its
advantages, a majority of Air Force and CAP instructors use the lecture method at least part of
the time.
- Advantages. The lecture is a convenient method when you are instructing large groups.
The lecture is often used to supplement material from other sources or for information
difficult to obtain in other ways. If students do not have time for research or they do not
have access to reference material, the lecture can fill the bill. In subject areas where
information is available in widely scattered places (textbooks, journals, tapes), the lecture
allows the instructor to summarize and emphasize pertinent material. Reports, current
research, and information that changes frequently may not be easily available in written
form. The lecture can give students the most up-to-date information.
- Disadvantages. Although the lecture method can be an effective and efficient teaching
method, it has a number of disadvantages as follows:
o The lecture does not lead to maximum achievement in certain types of learning.
Speech skills, cooperative group thinking, and motor skills, for example, are
difficult to teach with the lecture method. Students can develop such skills well
only through practice. Moreover, the formal lecture alone is generally not
9
appropriate for presenting material above the comprehension level of the
cognitive domain. Because it allows for little or no student verbal participation,
the formal lecture may also be inefficient for comprehension-level lessons in
which concepts and principles are developed.
o The formal lecture does not provide teachers with an opportunity to estimate
student progress before an examination. This is true for a formal lecture. When
using an informal lecture, the instructor should use questions to access student
understanding. You need to be careful not to present more information than your
students can absorb, remember you usually don’t have an accurate means during
the lecture to determine what they have learned.
o Learning is an active process—the lecture method, however, tends to foster
passiveness and dependence on the instructor.
The first two disadvantages of the lecture—difficulty in achieving certain types of learning and
ineffectiveness of assessing student learning—are inherent to the method. The third—student
passivity—while characteristic of the method can be alleviated with an effective informal
lecture. The bottom-line is you have to be enthusiastic if you expect the students to be
enthusiastic.
When faced with the responsibility for planning and preparing a lecture, a primary requirement is
to analyze the students. This requirement is especially critical because students tend to be passive
when hearing a lecture. Your analysis of the students will greatly influence how you plan your
instruction.
Research indicates that clear attention, motivation, and overview steps in the introduction of the
lesson significantly improve learning by appealing to students, giving them a reason to listen,
and providing a forecast of what will be taught. The introduction also establishes a common
ground between the instructor and students. (See the introduction on the CAP sample lesson
plan.) Strong organization and clear verbal and visual support in the body of the lesson help
students understand and retain the material. A complete conclusion to the lesson—final
summary, remotivation, and closure—reteaches, challenges, and leaves the students with a
satisfying sense of completeness.
Appropriate humor (that which supports the subject and/or lesson) is useful in a lecture. Humor
relaxes both teachers and students. Humor serves this role especially well at the beginning of a
lecture because it places the teacher directly in communication with the students. There are two
reasons to use humor in the body of the lecture. One is to bring back the attention of the students;
humor regains attention. The second reason is to emphasize an important point. Although a
humorous story or anecdote is seldom real proof, it may be the most powerful memory or
clarification device a speaker can use. To be effective, the story or anecdote must be tied to the
topic. Humor must be used properly to be effective. There are five essentials to using humor.

10
- Know the Item Thoroughly. If you know the story and have told it before, you will be
able to tell it again and know the kind of response to expect. Generally a good rule to
follow is not to use a story or humorous item unless you have told it several times in
informal situations so you can both practice and gauge the reactions of others.
- Don't Use Off-Color Stories to Get a Cheap Laugh. Even people who laugh at such
stories in private often lose respect for the teacher who uses them in public.
- Vitalize Humor. Stories should be personalized so they are believable and sound as if
they really happened. Rather than talk about "this guy I heard about" or "this truck
driver," give names to the characters in the stories. Successful comedians and speakers
nearly always vitalize their humor.
- Don't Laugh Before the Audience Laughs. If you fail to get the story across, laughing
alone on a platform is disaster. If the joke fails, leave it and go on.
- Capitalize on the Unexpected. One of the primary elements of humor is that people
laugh when they are surprised. Types of humor that depend on the unexpected are: quips
(of course men aren't what they used to be—they used to be boys); puns (try our bread,
we knead the dough); exaggeration (the heat was so terrific last week that I saw a hound
dog chasing a rabbit; they were both walking); and understatement (if at first you don't
succeed…well, so much for skydiving).
Questions. In both the formal and informal lecture, questions may be used to add continuity to
the lesson. You may plan rhetorical questions to use within a main point or in the conclusion of
the formal lecture. Questions encourage students to review in their own minds the information
presented. They also indicate areas of special importance and should be phrased to allow
students to see the relationship of these areas to the lesson objective. The CAP sample lesson
provides suggested questions, and possible answers, for use in the lecture. By listing the
questions and possible answers, anyone familiar with the subject can teach the course and
present the answers to the students if they are off track.
Physical Behavior. Communication experts tell us that over half of our meanings may be
communicated nonverbally. Some nonverbal meaning is communicated through vocal cues, eye
contact, body movement, and gestures carry additional meaning. As teachers, we need to know
how physical behavior can improve our lecturing skill and thus enhance learning.
- Eye Contact. Eye contact is one of the most important factors of nonverbal
communication. Nothing will enhance your delivery more than effective eye contact with
your students.
11
- Body Movement. Body movement is another important factor of dynamic and meaningful
physical behavior. Good body movement is important because it catches the eye of the listener.
It helps hold the attention needed for learning to occur. Effective body movement can be
described as free and purposeful. You should be free to move around the class. You should not
feel restrained to stay behind the lectern, but should move with reason and purpose. Use your
movement to punctuate, direct attention, and otherwise aid learning.
- Gestures. Gestures may be used to clarify or emphasize ideas in the lecture. By gestures
we mean the purposeful use of the hands, arms, shoulders, and head to reinforce what is
being said. Fidgeting with a paper clip, rearranging and shuffling papers, and scratching
your ear are not useful gestures. They are not purposeful and they distract from the verbal
message. Placing both hands in your pockets, behind your back, or in front of you in the
fig-leaf position severely limits your ability to gesture. Holding your shoulders and head
in one position during the lecture will also rob you of an effective means of strengthening
your communication.
- Use of the Voice. A good lecturing voice has three important characteristics: it is
reasonably pleasant, it is easily understood, and it expresses differences in meaning.
Technically we might label these three properties as quality, intelligibility, and variety.
The Demonstration-Performance Method
The demonstration-performance (D-P) method is a proven method for teaching mental or
physical skills that require student practice for skill mastery. This method is based on the
principle that students learn best by doing. Many of the things we do in CAP fit into this
category. If you want to determine if someone knows how to salute, you could have them
explain it to you, but the best way is for them to demonstrate their understanding by actually
saluting after being shown how to perform appropriately.
When you use the D-P method to teach, you need to demonstrate the particular procedure to the
students and then act as a supervisor while they practice the skill. During the practice period,
point out errors and help the students eliminate rough spots and/or errors in their performances.
In the D-P method, the instructor tells and shows students how to do the skill, they practice under
the instructor's supervision, and then they are evaluated on their performance against
predetermined criteria.
Planning and Developing a D-P Lesson. The D-P lesson consists of explanation, demonstration,
performance-supervision, and evaluation phases. If all these phases are included in one
continuous block or period of instruction, they should be preceded by an introduction and
followed by a conclusion. The lesson will include an introduction (discussed later in the lesson)
which includes an attention step, motivation step, and an overview. If there is a potential for
physical harm, the overview must include safety procedures. The next area, the body, is where
you, as the instructor, will describe or demonstrate to the students how to perform the skill. In
the body of the lesson plan, avoid using unnecessary jargon for technical terms that a different
instructor or student may not understand.

12
Instructional aids are particularly important in a D-P lesson. The best instructional aid is the
actual equipment to be used. Other useful aids are charts, mock-ups, and models. When using
aids, be sure they are readable, accurate, and that all students can see them.
Evaluation Phase. The most important consideration in the evaluation phase is to develop an
appropriate rating instrument or written test. To be valid, the evaluation must accurately measure
the student’s ability to perform the Desired Learning Objective (DLO). For example, if the DLO
states that the skill will be accomplished without assistance, then the instructor must cover or
remove all instructional aids, erase the board, put away work sheets, and ensure that the students
actually do the skill without references.
The conclusion to a D-P lesson will consists of the three elements recommended for all lessons—
summary, remotivation, and closure (discussion later in the lesson). The remotivation and closure
(also discussed later) should be used to reteach, challenge, and leave the students with a satisfying
sense of completeness. In the summary, instructors should review the task steps with emphasis on
any areas of difficulty experienced by a majority of the students. Areas of difficulty experienced by
only one or two students may be better addressed on an individual basis.
Once you have the overall objectives and teaching method determined, you need to develop the
desired learning outcomes to focus the students.
5. Developing the Desired Learning Outcomes
We have discussed that we need to have the ability observe students knowing, comprehending,
or even applying what they have learned. Thus, we need a vehicle that will give us a basis on
which to plan our evaluation of achieving course objectives.
After we have carefully communicated the level of learning we want our students to reach, we
must decide which student behaviors we will accept as evidence of learning. In physical tasks or
simple cognitive learning, the decision is quite simple; there may be a one-to-one correlation
between the behavior required and the real-world activity. For example, in order to measure
whether a student knows the spelling of the word "university," we would ask the student to spell
the word. Or to test one's driving skill, the teacher would have the student drive a car. Many
organizations use Samples of Behavior to specify these behaviors. In Civil Air Patrol, we
identify these behaviors as Desired Learning Outcomes (DLO).
The desired learning outcomes represent the path you want the students to take when learning the
content of the lesson and achieving the lesson objective. It’s useful, then, to think of the DLOs as
subsets of the lesson objective.
When constructing DLOs, there are four things to keep in mind. First, each DLO must tie
directly to the learning objective. For instance, let’s examine the DLOs for the Hazing segment
of the Unit Commanders’ Course.
13
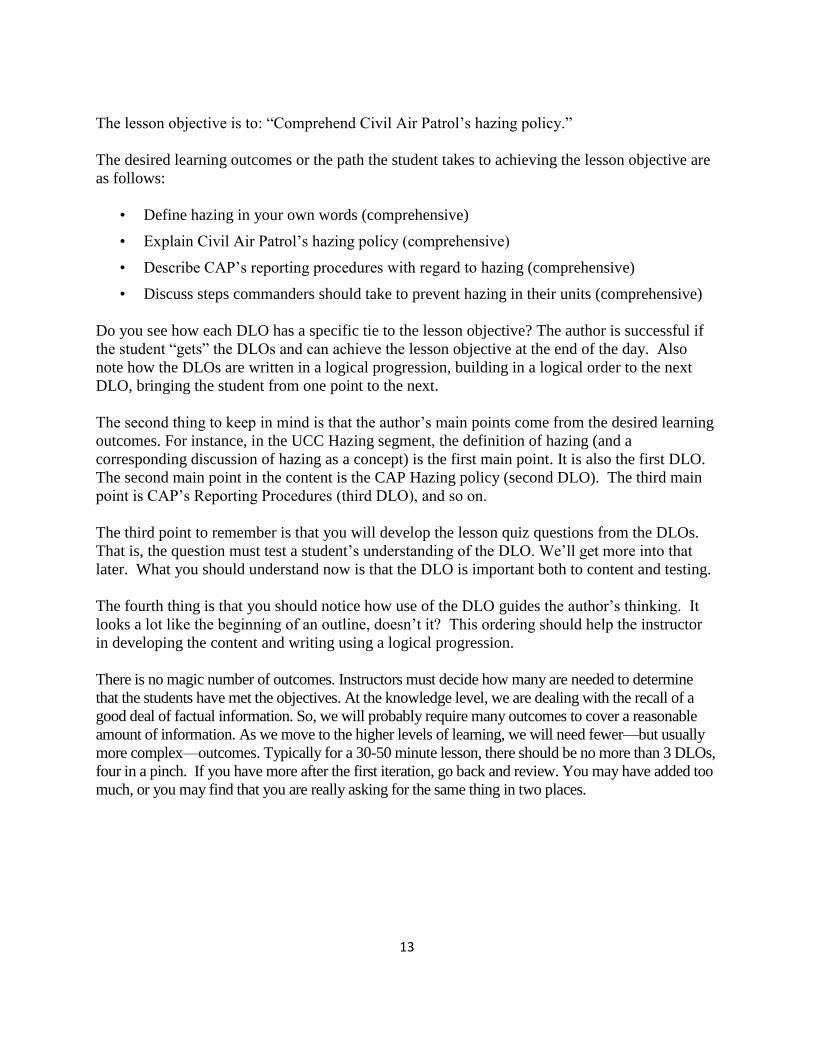
The lesson objective is to: ―Comprehend Civil Air Patrol’s hazing policy.‖
The desired learning outcomes or the path the student takes to achieving the lesson objective are
as follows:
• Define hazing in your own words (comprehensive)
• Explain Civil Air Patrol’s hazing policy (comprehensive)
• Describe CAP’s reporting procedures with regard to hazing (comprehensive)
• Discuss steps commanders should take to prevent hazing in their units (comprehensive)
Do you see how each DLO has a specific tie to the lesson objective? The author is successful if
the student ―gets‖ the DLOs and can achieve the lesson objective at the end of the day. Also
note how the DLOs are written in a logical progression, building in a logical order to the next
DLO, bringing the student from one point to the next.
The second thing to keep in mind is that the author’s main points come from the desired learning
outcomes. For instance, in the UCC Hazing segment, the definition of hazing (and a
corresponding discussion of hazing as a concept) is the first main point. It is also the first DLO.
The second main point in the content is the CAP Hazing policy (second DLO). The third main
point is CAP’s Reporting Procedures (third DLO), and so on.
The third point to remember is that you will develop the lesson quiz questions from the DLOs.
That is, the question must test a student’s understanding of the DLO. We’ll get more into that
later. What you should understand now is that the DLO is important both to content and testing.
The fourth thing is that you should notice how use of the DLO guides the author’s thinking. It
looks a lot like the beginning of an outline, doesn’t it? This ordering should help the instructor
in developing the content and writing using a logical progression.
There is no magic number of outcomes. Instructors must decide how many are needed to determine
that the students have met the objectives. At the knowledge level, we are dealing with the recall of a
good deal of factual information. So, we will probably require many outcomes to cover a reasonable
amount of information. As we move to the higher levels of learning, we will need fewer—but usually
more complex—outcomes. Typically for a 30-50 minute lesson, there should be no more than 3 DLOs,
four in a pinch. If you have more after the first iteration, go back and review. You may have added too
much, or you may find that you are really asking for the same thing in two places.
14
6. Lesson Planning Format
Writing the Content
The fun begins here. The good news is we’ve given you a format around which the writer can
develop the lesson (you can get to the lesson plan template on the opening page). It will walk
you through the steps needed to complete a lesson plan and make the look and feel consistent
among all the courses in CAP.
That said, it’s also where the real work begins. It’s time to take all the research, thoughts, stories,
lesson objectives, and DLOs and put it together into a coherent package that a student can learn
from.
Using the Lesson Format Template
Using the lesson format is relatively simple. The author should already have the lesson objective,
the DLOs, and the research completed before writing the first draft of the content in the lesson
format template.
First thing to do is to insert the lesson title in both the header and in the lesson title box. Then
save the lesson on the computer (I know it sounds obvious, but it’s easy to get burned).
Next, fill in the lesson objective and the desired learning outcomes.
Once you have the lesson objectives and DLOs, the lesson outline should start to flow. Recall the
basic writing techniques for essays and papers learned in high school, college, and through
CAP’s Officer Basic Course, CAP’s ECI-13, SLS, CLC and RSC courses, as well as the Tongue
and Quill, and John Kline’s, Speaking Effectively.
Remember that everything in the lesson, including the main points have a distinct beginning,
middle and end. Don’t skimp on the introductions and summary/transitions, as they provide the
flow and context for the student. Skimping on these parts makes the flow very choppy, and the
student may not realize that the writer is building a connection for him/her.
It’s easier to write the body of the main point in the lesson before writing the introduction and
summary/transition to the next main point.
Write the overall lesson introduction and the lesson summary and closure last. The body of the
lesson will provide the fodder for the introduction. The lesson summary and closure should
reference the introduction and then tie the main points together for the student. The information
below, along with the sample lesson plan, should help with the contents of the introduction,
body, and conclusion of the lesson plan.

15
Introduction. The introduction to a lesson should serve several purposes—to establish a
common ground between the instructor and students, to capture and hold attention, to outline
the lesson and relate it to the overall course, to point out benefits to the student, and to lead
the student into the lesson content. While humor may be appropriate, the introduction should
be free of irrelevant stories, jokes, or incidents distracting from the lesson objective. It should
not contain long or apologetic remarks likely to dampen student interest in the lesson. Your
introduction should do the following three things: gain attention, motivate, and provide an
overview of lesson material.
Attention. To gain attention, you may relate some incident focusing students on the
subject and providing a background for the lesson. Another approach may be to make an
unexpected or surprising statement or ask a question that relates the lesson to group
needs. A rhetorical question (Have you ever...? or Can you imagine...?) may be effective.
In all instances, the primary concern is to focus student attention on the subject.
Motivation. You should use the introduction to discuss specific reasons why the students
need to learn the lesson. In the motivation, the instructor should make a personal appeal
to students and reinforce their desire to learn. The appeal may relate the learning to career
advancement or to some other need.
Overview. For most instructional methods, the introduction should provide an overview
of what is to be covered. An overview should have a clear, concise presentation of the
objective and main points as a road map for learning. Students understand better and
retain more when they know what to expect. The purpose of the overview is to prepare
students to listen to the body of the lesson.
Body. The body of your lesson will contain the main points as major subdivisions. The
major sections of the lesson will contain the support material and various teaching exercises
to achieve instructional objectives and is preceded by an introduction and followed by a
conclusion. Strong organization and clear verbal and visual support in the body of the
teaching plan will help students understand and retain the material. Below is an example of
the body of a lesson plan to show the organization of main points. (See the attachments for
a full lesson/teaching plan)
The next page contains a skeleton lesson plan.
16
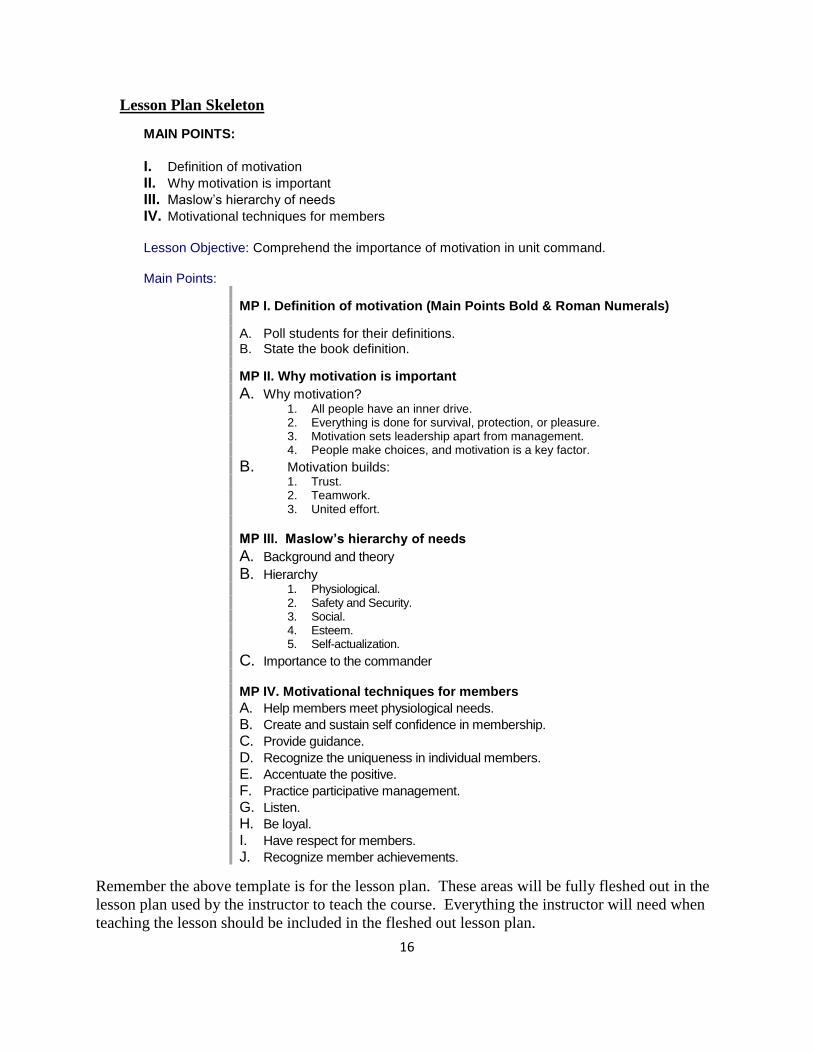
Lesson Plan Skeleton
MAIN POINTS:
I. Definition of motivation
II. Why motivation is important
III. Maslow’s hierarchy of needs
IV. Motivational techniques for members
Lesson Objective: Comprehend the importance of motivation in unit command. Main Points:
MP I. Definition of motivation (Main Points Bold & Roman Numerals)
A. Poll students for their definitions. B. State the book definition.
MP II. Why motivation is important
A. Why motivation? 1. All people have an inner drive. 2. Everything is done for survival, protection, or pleasure. 3. Motivation sets leadership apart from management. 4. People make choices, and motivation is a key factor.
B. Motivation builds: 1. Trust. 2. Teamwork. 3. United effort.
MP III. Maslow’s hierarchy of needs
A. Background and theory
B. Hierarchy 1. Physiological. 2. Safety and Security. 3. Social. 4. Esteem. 5. Self-actualization.
C. Importance to the commander MP IV. Motivational techniques for members
A. Help members meet physiological needs.
B. Create and sustain self confidence in membership.
C. Provide guidance.
D. Recognize the uniqueness in individual members.
E. Accentuate the positive.
F. Practice participative management.
G. Listen.
H. Be loyal.
I. Have respect for members.
J. Recognize member achievements.
Remember the above template is for the lesson plan. These areas will be fully fleshed out in the
lesson plan used by the instructor to teach the course. Everything the instructor will need when
teaching the lesson should be included in the fleshed out lesson plan.
17
Conclusion. The conclusion of a lesson may stick with the students longer than anything else
said. For this reason, we should give much care to its preparation. The conclusion of most
lessons should accomplish three things: summarize, remotivate, and provide closure.
Summary. Summaries come after all main points of the lesson have been made. An
effective summary retraces the important elements of the lesson. By reviewing the main
points, it can aid students' retention of information and give them a chance to fill in
missing information in their notes.
Remotivation. The purpose of the remotivation is to instill in students a desire to retain
and use what they have learned. The remotivation step is your last chance to let students
know why the information presented in the lesson is so important. The remotivation may
also provide the groundwork for future lessons or reasons the information will help the
students do their jobs more effectively. But whatever the reasons given, they should be
ones appealing directly to the students and show the importance of the subject matter
learned.
Closure. For many instructors, the closure presents the most difficult challenge in
planning a lesson. Students need to be released from active participation. Sometimes
instructors who don't know how to close will say, "Well that's about all I have to say," or
"I guess I don't have anything else." This type of closure is not very satisfying. There are
many more effective ways of closing. Sometimes vocal inflection can signal that the
lesson is ending. Quotations, stories, or humorous incidents can also provide effective
closure. Sometimes when the lesson is to be followed by others in the same block of
instruction, we might say something such as, "Next time, then, we will continue with our
discussion of... . Between now and then if you have any questions, come to my office and
I'll see if I can answer them for you."
Now that the content has been put together, it’s time to make sure everything makes sense. You
do that by ensuring your content teaches what you intended in your lesson objectives and desired
learning objectives (DLOs).
7. Evaluating the Content Against the Lesson Objectives and DLOs
After you’ve put everything together, re-read the content to make sure that the content answers
the lesson objective and the DLOs. Sometimes, the content leads itself into another direction as
the author develops it, so the DLOs keep the author honest. It’s also possible that the content
written, while not in line with a DLO, actually better serves the lesson objective. In that case
consider changing the DLO or content.

18
It’s also helpful to have at least two other people read the lesson: one person reading for content
and harmony with the lesson objective and DLOs, and the other to check for spelling and
grammatical errors. Please don’t have one person do both, because these are two completely
different editing tasks. Someone reading for content might not catch a grammatical or spelling
error; and a type editor is looking strictly at spelling and sentence structure. For demonstration-
performance lessons, the people should test the demonstrations for accuracy.
Once the lesson is finished, put it away for a day. Don’t read it, don’t look at notes. Just forget
about it. Then read it one more time, and make any changes necessary. Once the lesson is put
together, we need to decide on the evaluation/test to determine if the student understands the
material. The next section will provide excellent guidance on how to determine your evaluation.
8. Writing Multiple-Choice Questions
Instructors continually evaluate their students in one way or another. This practice provides the
instructor with the necessary feedback to judge whether the teaching is effective or not. The
evaluation may be part of a formal testing program or it may be quite informal. It may be as
elaborate as a simulation of a real-life problem or situation or as simple as questioning a single
student. Teachers may evaluate just to see how students are progressing or they may need to give
grades and make pass or fail decisions. So, in this sense, every instructor must be an evaluator.
Not all instructors, are involved in actually writing and preparing tests. However, they usually give tests
or at least make informal evaluations of students in and outside of class, such as in on-the-job training.
Therefore, all instructors should be familiar with evaluation procedures and principles that govern the
creation of test items to determine whether students are successfully learning the material presented.
One of the questions you need to ask yourself prior to determining an evaluation is: Why are we
testing? Do we test to improve instruction, pinpoint student deficiencies, identify specific degrees of
skill achievement, or to predict success on a future job? Our answers to these questions will determine
the procedures needed to reach these goals. If we are evaluating solely to assign grades, measuring
instruments will be much simpler. Our primary reason for evaluating is usually to determine whether
students can perform a job (represented by our stated objectives). Our task, then, is to ensure there is a
strong correlation between the objective and the tasks required by the job. As you write test questions,
you need to continually remind yourself that test questions are written to evaluate student mastery of
the DLOs for the course.
To determine whether an objective realistically represents the job our students will be tasked to
perform, we must ask the following questions: Can the student's behavior be realistically represented by
word or pictures on a pencil-and-paper test? Must students perform in real situations for the evaluation
to be valid? Do students need an active or passive knowledge of the material in our course? Will they
respond in much the same form as we taught them or do we want them to translate or synthesize the
material in some way? Do we need to modify our curriculum and course materials to get the kind of
evaluation we really need? NOTE: Physical performance and essay testing require more time to
accomplish and evaluate, so we must plan for them if they are necessary.
19
When the knowledge, activity, or skill is important for safety or to protect life, or if it threatens
the destruction of an expensive piece of equipment, then we should expect the student to perform
correctly the first time, every time on the job. In some fields, such as medical or maintenance,
students must perform the critical elements of the required skill under realistic conditions for
evaluation. Less important or less critical skills may be evaluated by administering a pencil-and-
paper test.
Most of the test/quizzes you write or administer in CAP will be multiple choice tests. Often
these will be open book. A common myth of open book multiple choice tests is that it represents
a ―gimmee‖ to the student. A ―gimmee‖ test is an indictment of the test question construction,
not of the method. Tough, comprehension level test questions with good distracters will still
stump a student who hasn’t studied the material. This is why the Air War College uses this
method in their distance learning programs. The objective is to create questions that will test
comprehension and understanding, not if they can simply locate the answer in the content
presented. To write valid/appropriate test questions that test the student’s ability you need to
know the various parts of a test question.
Parts of a Multiple Choice Test Question
Multiple choice tests are constructed of three parts: the question or statement itself (called the
―stem‖), the possible answers presented (the ―alternatives‖), which consist of the correct choice
within the alternatives (the ―keyed response‖) and the others composed to attract students less
familiar with the lesson content (the ―distracters‖).
The Stem
The stem of the test item is the statement or question that the author wants the student to answer.
Remember that the test item exercises the student’s mastery of the DLOs, so the stem of the
question should be tied to the DLO and content (BEWARE: do not use the DLO as the stem of
the question, it makes it too easy).
As an example, using the first DLO and corresponding content from the UCC ―Hazing‖ segment
(Define hazing in your own words), an author could build this stem: ―Cadet Smith is told by
Cadet First Sergeant Jones to complete 25 pushups for failing to salute Lt Barker in the courtyard
outside the squadron building. Is this considered hazing?‖
This stem, while not mirroring the DLO, directly exercises the student’s knowledge of the DLO
by having the student evaluate a situation and judge whether the situation meets a given criteria
(which the student is being tested on).
20
The Alternatives
The alternatives in the question require the student to pick the best possible answer (the keyed
response) from among the four choices. There is always one correct choice, with the others
being incorrect for one reason or another. In CAP we usually do not use weighted alternatives
where a student is given partial credit for a ―less correct‖ answer.
Constructing the alternatives is a challenging part of the test writing process. The distracters
(incorrect choices) must be close enough to attract a student who has not read the material, and
who doesn’t fully understand the material. A good distracter will catch a lazy student, even if
the test is open book.
In looking at the stem constructed above, we can develop one correct answer and three
distracters.
―Cadet Smith is told by Cadet First Sergeant Jones to complete 25 pushups for failing to salute
Lt Barker in the courtyard outside the squadron building. Is this considered hazing?‖
a. No, CAP regulations permit physical training as punishment for cadets. (wrong choice
because physical punishment is expressly forbidden in CAPR 52-10).
b. Yes, it is hazing under the guidance in CAPP 52-18 Physical Training (wrong choice
because the pamphlet is not a regulation, manual, or policy letter and is not considered
―guidance.‖)
c. Yes, it is hazing because CAPR 52-10 considers pushups as a punitive measure and is
considered physical punishment. (correct answer)
d. No, unless Cadet First Sergeant Jones cannot successfully complete the same number of
pushups if officially challenged by Cadet Smith. (wrong choice because CAPR 52-10
make no such provision for challenges)
For those who may not be familiar with the nuances of CAPR 52-10, or the Hazing segment of
the UCC, the choices can be confusing.
Remember, the objective of the lesson and of the quizzes is to make the students familiar with
the material presented, and show them where they can get more information. In other words, the
fact that a member knows that their hat device should be on the left hand side of their flight cap,
1 ¼ inches away from the front fold and centered on the lower flap isn’t really the important
thing. What is important is that they know that there is a method of wearing the cap, that they
want to wear their uniform correctly as a sign of pride in CAP, and that they know there’s a
manual out there which can show them how to wear their uniform properly.
A well-designed DLO should yield three or four questions each. With this in mind, the number
of questions on your quizzes/tests should be determined by the material. Remember the
emphasis should be on the student and what the student should have learned in the lesson/course.
The quiz is your check to see if the student has gained the intended knowledge.

21
9. Developing Instructional Aids
In the preceding pages, we learned that selecting a method for a particular teaching situation is
far from an accidental process. In order to reach our teaching objective most efficiently, we must
carefully consider the advantages and limitations of each method. The same care is needed to
select instructional aids that will support the lesson and make your teaching task easier.
What are the factors you should consider in selecting instructional aids? Ideally, the type of aid
should be determined by the lesson objective. For example, if a learning outcome requires
students to identify or recognize an item or process, the instructor would likely select a medium
that visually displays the item or process. If the objective is for the student to recognize an alarm
bell or a particular set of sounds, then, or course, an audio tape or some other audio device is
needed.
Having made this decision, the next factor to determine is which form of visual aid is most
appropriate, by asking the following questions: Must the actual item or process be seen, or will a
replica or simulation do as well? Is motion required? Is color required? Will a large number of
students view the aid at the same time and place, or will the number and the location vary? Have
existing aids been surveyed to determine whether the materials required are already available? Is
the equipment or other capability available to display or present the instructional aid? The
answers to these questions will help you select your aids.
An important point to remember when creating instructional aids is to constantly put yourself in
your students' positions. Walk through the classroom to view or listen to your aids from your
students' perspective. Ask yourself the following questions: Is this instructional aid doing the job
I want it to do? Are the students able to read the information I'm trying to present? Can the
students read my writing? Give each of your instructional aids an honest evaluation before you
present it. The answers to these questions will help you select your aids. Visual materials should
certainly be interesting, but the primary purpose of any visual aid is to portray or support an idea
graphically. Below are some general guidelines for instructional aids.
- Handwritten Aids. Not everyone possesses the perfect penmanship we all want to display.
Great penmanship or freehand is a skill that comes from many hours of practice. The rule of
thumb for having a legible instructional aid is to always print versus using the cursive style.
Remember, your penmanship skill will develop as you practice, practice, practice. For
spontaneous writing, as you might need in a case study, remember to slow down and accurately
develop each letter of the alphabet. The size of your printed information is very important. The
rule of thumb is 1 inch high for every 10 feet of classroom, up to 30 feet. If you are going to teach
students who are sitting more than 30 feet away, consider using a different type of instructional
aid. An easy test is for you or a coworker to sit and evaluate your visual aid from the distance of
the farthest student. This will allow you to adjust your instructional aid as required.
22
- Electronic Presentations. Electronic presentation is an option in wide use (PowerPoint
for example). Electronic presentations are put together with the use of a computer system.
The computer gives us many options in letter style (font), size, and colors. However, not
all fonts, sizes, and colors are appropriate for an effective visual presentation. In general,
PowerPoint presentations should have no more than 3 – 4 short points each. It is
designed to be a memory jogger and illustrator, not texts. Instructors should not
use the slides as “Notes” to be read to the class. (See PowerPoint Briefing Template
attached to the course).
o Font Selection. There are a multitude of fonts (letter styles) to select from;
however, the ones that seem to work best are the block type fonts, such as Arial,
Avant-Garde, and Times New Roman. If a fancier font is desired, boldface or
italicize fonts. Remember, simple fonts allow your students to read the
information comfortably.
o Font Size. When choosing a font size, use 32- to 40-point size for the titles and
between 20 to 24 points for your main and subpoints. Any smaller, and your
information will become difficult for students to read.
o Color Selection. Color has a significant role in creating effective instructional
aids. Always use contrasting colors. If you choose a dark font, use a light
background, and if you select a light font then select a dark background. Never
choose a font color similar to your background color. This makes reading the
information difficult because your words blend into the background. You should
test your presentation on an actual projector and screen because very often what
looks good on a computer doesn’t come across the same way when projected.
o Presentation Design. When creating your presentation, be consistent in design. If
you decide to use yellow print on a blue background with your unit logo on the
lower-right side, continue to use this same design throughout the entire
presentation. Changing the design of each slide can become a distraction for your
students. Also, using a different background color on each slide may cause your
students to wonder why you are presenting information this way. They will
question the meaning of the slides, such as, "Is the red slide more important than
the blue slide or is the yellow slide the one I need to remember?" Staying
consistent helps eliminate confusion—it's important in all aspects of your aid.
o Emphasizing Key Points. The way you emphasize key words or ideas can also
become a distraction for some students. The computer systems have given us
many options in this area as well. You might emphasize key words or ideas by
boldfacing, underlining, italicizing, and increasing the font size. Again the key to
success is consistency. Choose one of the options and stick with it throughout
your presentation. Don’t let the animation become distracting. Animation is to
emphasis points and not to distract from the points you are trying to make.

23
o Using Clipart. The computer has made everyone an artist. You can now easily
dress up your slide with the click of a button. Only use images that relate to the
information presented on the instructional aid. Don't just use a piece of clipart for
the sake of having something on the aid. If the clipart doesn't enhance your
instructional aid information, then don't use it.
o Video Footage. Video clips are being used more and more within the classroom.
They are the perfect aid to give your students a moving example of a subject. The
video clip is a tool to support you in helping your students gain a better
understanding of the material. A video clip should only be a few minutes in
length, and should not extend through your entire presentation time. To be
effective, the selected clip should be in good taste and recorded in good quality.
Follow the copyright guidelines provided in Title 17, United States Code,
Copyrights (attached to the lesson).
o Handouts. Handouts are effective and very reliable. A handout can be created by
printing out an electronic presentation on paper or just handwriting your main
points on a sheet of paper. A handout should give the student something to refer
to at a later time. It can be the key to a successful presentation if the electronic
options are not possible. Handouts can also be used to let students apply what
they are learning. You can give them a case and ask them to apply the points you
have presented.
Proofreading. Be on a constant lookout for misspelled words or grammatical errors in all visual
aids. Computers have software installed to check for these things, but the human eye is the best
line of defense when it comes to checking your instructional aids. Have a coworker look over
your work with a careful eye. By doing this you are almost certain to have an error-free
instructional aid ready to support your lesson objective.
It doesn't take an enormous amount of work to create an effective instructional aid. Simple rules
of thumb and common sense are good tools to have in your academic toolbox to create the aid
needed to support your valuable information. Constantly put yourself in the students' positions
and evaluate your instructional aids. Always proof, reproof, and final proof your instructional
aids for effectiveness and accuracy. The result will be a powerful tool to bring your students to a
higher level of learning.

24
Conclusion
By taking this course, you’ve taken a big step in your CAP career toward becoming a valuable
resource for your unit. You will also find you can use the information in this short course in
your everyday life to develop and present material on almost any subject from computers to
Sunday school lessons.
Go to the main page/web site and click on the quiz to complete the course. The quiz is open
book and you must score 80 percent to get credit for the course. Once you successfully complete
the quiz, download the certificate and make a copy for your PDO.
Like any task you will improve your performance as an instructor if you learn from your
mistakes and strive not to repeat them.
Best of luck and congratulations on completing the CAP Basic Instructor Course.
Course Attachments (All on opening screen of course)
1. Lesson Plan Template
2. Instructor Guide Sample
3. Student Guide Sample
4. Briefing Template
5. CAP Seminar Advisor Guide
6. Cadet Staff Handbook (pages 14 – 16 provide a lesson plan guide)
7. Copyright Law (Title 17 of US Code)