commitment on the part of native instruments gmbh. … · commitment on the part of native...
TRANSCRIPT

The information in this document is subject to change without notice and does not represent acommitment on the part of Native Instruments GmbH. The software described by this docu-ment is subject to a License Agreement and may not be copied to other media. No part of thispublication may be copied, reproduced or otherwise transmitted or recorded, for any purpose,without prior written permission by Native Instruments GmbH, hereinafter referred to as NativeInstruments.
“Native Instruments”, “NI” and associated logos are (registered) trademarks of Native Instru-ments GmbH.
Mac, Mac OS, GarageBand, Logic, iTunes and iPod are registered trademarks of Apple Inc.,registered in the U.S. and other countries.Windows, Windows Vista and DirectSound are registered trademarks of Microsoft Corporationin the United States and/or other countries.
Bitwig Studio™ is a trademark of Bitwig GmbH.
All other trademarks are the property of their respective owners and use of them does not implyany affiliation with or endorsement by them.
Software version: 2.0.2 (12/2016)
Document authored by: Native Instruments GmbH
Disclaimer

NATIVE INSTRUMENTS GmbHSchlesische Str. 29-30D-10997 BerlinGermanywww.native-instruments.de
NATIVE INSTRUMENTS North America, Inc.6725 Sunset Boulevard5th FloorLos Angeles, CA 90028USAwww.native-instruments.com
NATIVE INSTRUMENTS K.K.YO Building 3FJingumae 6-7-15, Shibuya-ku,Tokyo 150-0001Japanwww.native-instruments.co.jp
NATIVE INSTRUMENTS UK Limited18 Phipp StreetLondon EC2A 4NUUKwww.native-instruments.co.uk
© NATIVE INSTRUMENTS GmbH, 2016. All rights reserved.
Contact
Table of Contents1 Welcome ..................................................................................................................5
1.1 Document Conventions ............................................................................................................... 5
2 Installation ...............................................................................................................7
2.1 Setup in Controller Editor ........................................................................................................... 7
2.2 Setup in Bitwig Studio ................................................................................................................ 8
3 Transport and Global Functions ..................................................................................10
4 Matrix and Note Input ................................................................................................13
5 Smart Strip and Mixing ..............................................................................................16
Table of Contents
MASCHINE JAM Bitwig Studio Template - Manual - 4
1 Welcome
Welcome to the MASCHINE JAM Bitwig Studio Template Manual. This document describeshow to setup the Bitwig Studio Template and use a MASCHINE JAM controller to operate Bit-wig Studio.
This template provides very detailed control over Bitwig Studio and doubles the functionality ofyour MASCHINE JAM controller.
On behalf of the entire NATIVE INSTRUMENTS team, we hope you find this template useful.
1.1 Document Conventions
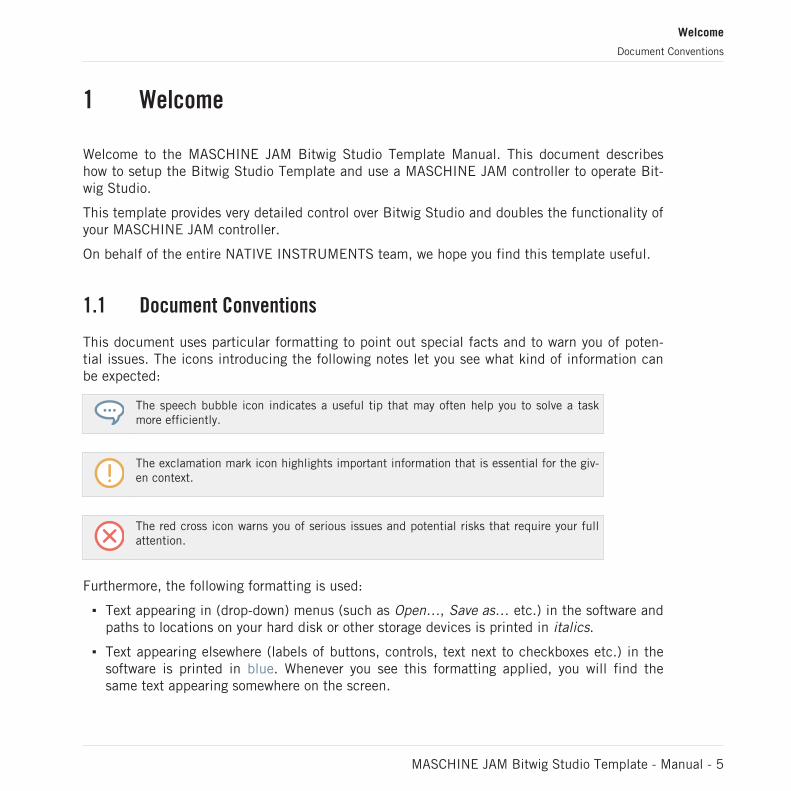
This document uses particular formatting to point out special facts and to warn you of poten-tial issues. The icons introducing the following notes let you see what kind of information canbe expected:
The speech bubble icon indicates a useful tip that may often help you to solve a taskmore efficiently.
The exclamation mark icon highlights important information that is essential for the giv-en context.
The red cross icon warns you of serious issues and potential risks that require your fullattention.
Furthermore, the following formatting is used:
▪ Text appearing in (drop-down) menus (such as Open…, Save as… etc.) in the software andpaths to locations on your hard disk or other storage devices is printed in italics.
▪ Text appearing elsewhere (labels of buttons, controls, text next to checkboxes etc.) in thesoftware is printed in blue. Whenever you see this formatting applied, you will find thesame text appearing somewhere on the screen.
Welcome
Document Conventions
MASCHINE JAM Bitwig Studio Template - Manual - 5

▪ Important names and concepts are printed in bold.
▪ References to keys on your computer’s keyboard you’ll find put in square brackets (e.g.,“Press [Shift] + [Enter]”).
► Single instructions are introduced by this play button type arrow.
→ Results of actions are introduced by this smaller arrow.
Welcome
Document Conventions
MASCHINE JAM Bitwig Studio Template - Manual - 6
2 Installation
The Bitwig Studio Template is integrated in both the Native Instruments Controller Editor aswell as Bitwig Studio. Therefore, the installation procedure only requires a few steps before youcan start using your MASCHINE JAM controller to operate Bitwig Studio.
2.1 Setup in Controller Editor
To load the Bitwig Studio Template in Controller Editor, follow the steps below. This is re-quired before loading the Bitwig Template in Bitwig Studio.
Ensure that you have installed the latest version of Controller Editor. You can downloadthe latest version with Native Access or from the Native Instruments website.
1. Connect the MASCHINE JAM controller to your computer.
2. Start Controller Editor. It automatically recognizes your controller.
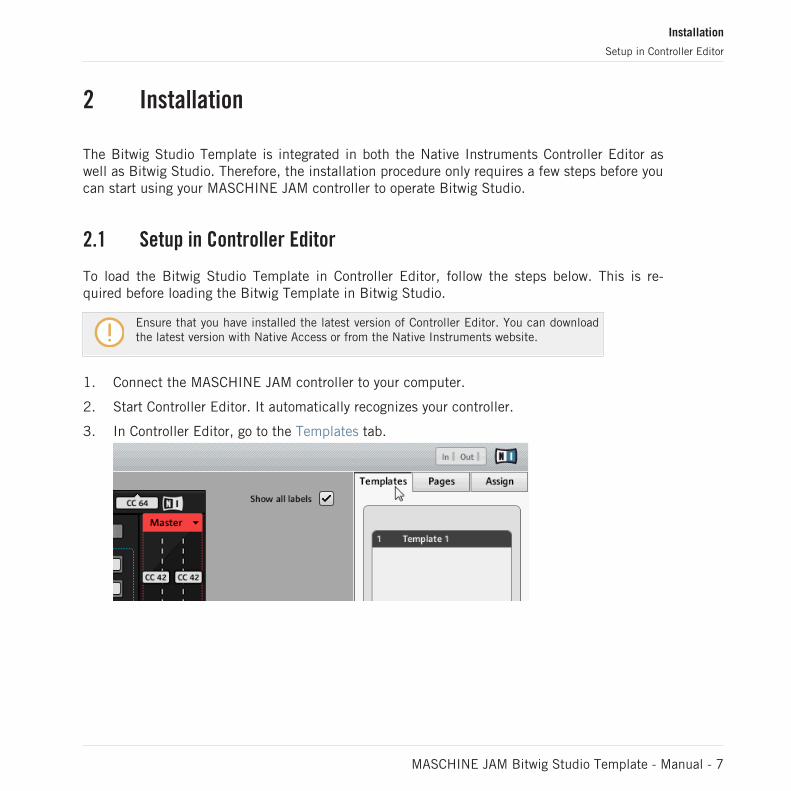
3. In Controller Editor, go to the Templates tab.
Installation
Setup in Controller Editor
MASCHINE JAM Bitwig Studio Template - Manual - 7

4. Click on the Factory Templates drop-down menu in the Templates tab and select BitwigStudio.
→ The Bitwig Studio Template is added to the list of Templates and selected as the current-ly active Template. You can close Controller Editor.
2.2 Setup in Bitwig Studio
To load the Bitwig Studio Template in Bitwig Studio, follow the steps below.
Ensure that you have installed the latest version of Bitwig Studio. The Bitwig StudioTemplate for MASCHINE Jam is integrated in Bitwig Studio 1.3.15 or later versions.
1. Connect your MASCHINE JAM controller and ensure that the Bitwig Studio Template isselected in Controller Manager (see section ↑2.1, Setup in Controller Editor for details).
2. Start Bitwig Studio.
Installation
Setup in Bitwig Studio
MASCHINE JAM Bitwig Studio Template - Manual - 8
3. Open Bitwig Studio's Preferences and go to the Controllers tab.
4. Click on Detect available controllers to automatically add MASCHINE JAM as a controllerin Bitwig Studio.
→ The Bitwig Studio Template is now set up and ready to use. You can close the Preferen-ces.
If you are on Windows and use a different MASCHINE JAM controller than initially in-stalled on your computer, you cannot use the function to Detect available controllers au-tomatically. In this case, open the Add controller manually menu and select MaschineJam from the Native Instruments sub-menu. Afterwards, assign MASCHINE JAM’s MIDIports to the new Maschine JAM entry in the list of controllers.
Installation
Setup in Bitwig Studio
MASCHINE JAM Bitwig Studio Template - Manual - 9

3 Transport and Global Functions
The Bitwig Studio Template offers full control over Bitwig Studio’s transport as well as manyother global functions.
12
2
1
710
11
89 56
3
4
Global and transport controls on MASCHINE JAM
Transport and Global Functions
MASCHINE JAM Bitwig Studio Template - Manual - 10

(1) Group buttons: These buttons select tracks, create new Instrument Tracks on empty chan-nels, or control a number of different functions depending on the selected mode.
▪ Hold MUTE: The Group buttons mute tracks.
▪ Hold SOLO: The Group buttons solo tracks.
▪ REC MODE (SHIFT + GRID): The Group buttons arm tracks for recording.
Holding SHIFT and pressing the Group buttons controls the following functions:
▪ A: Show Note Editor Panel
▪ B: Activate audio engine
▪ D: Previous project tab
▪ E: Next project tab
▪ G: Save project
▪ H: Show Device Panel
(2) Encoder: The encoder is used to control a number of different parameters, depending onthe selected mode. Holding SHIFT while turning the encoder allows for fine adjustments.
▪ MST: The encoder controls the master level.
▪ GRP: The encoder controls the level of selected track.
▪ TEMPO: The encoder controls the tempo of the project.
▪ PAT LENGTH (SHIFT + SOLO): The encoder controls the length of the selected clip.
▪ GRID: The encoder controls the grid size in STEP mode.
(3) BROWSE: Opens and closes the Browser window.
(4) SWING: Holding SWING while turning the encoder controls either the global shuffleamount or the global shuffle rate. You can toggle between the two parameters by holdingSWING and pressing the encoder. Holding SWING and pressing the encoder while turning al-lows for fine adjustments of the global shuffle amount.
(5) SELECT: Holding SELECT and pressing the Group button of an empty track creates a newAudio Track.
Transport and Global Functions
MASCHINE JAM Bitwig Studio Template - Manual - 11

(6) TEMPO / TAP: When TEMPO is selected, the encoder controls the tempo of the project.Holding SHIFT while turning the encoder allows for fine adjustments in increments of 0.1BPM. Pressing the encoder while turning allows for coarse adjustments in increments of 10BPM. TAP (SHIFT + TEMPO) lets you tap in a tempo with your finger.
(7) LOOP: LOOP (SHIFT + Page Right button) toggles the loop switch on or off.
(8) METRO (SHIFT + Page Left button): Toggles the metronome on or off.
(9) REC: Starts the recording for the selected clip on the active track. If no clip is selected inthe active track, a new clip is recorded to the first empty slot. SHIFT + REC toggles the over-dub mode on or off.
(10) PLAY: Starts or stops the playback of the project. SHIFT + PLAY stops the playback andresets the transport to the start position.
(11) SHIFT: Allows you to access secondary functions for buttons. You can also hold SHIFTwhile using the encoder and the Touch Strips for fine adjustments.
(12) SONG: Toggles between Arrange Panel View and Mix Panel View. Pressing SHIFT + SONGchanges the representation of the Clip Launcher on MASCHINE JAM’s 8x8 click-pad matrixbetween vertical (default) and horizontal views. The horizontal view matches the Clip Launcherin Bitwig Studio’s Arrange Panel View.
Transport and Global Functions
MASCHINE JAM Bitwig Studio Template - Manual - 12

4 Matrix and Note Input
The 8x8 click-pad matrix is where you play Bitwig Studio’s Clip Launcher as well as the instru-ments in your project by using various modes for entering notes into clips.
7
8
9
10
2
1
5
6
4
3
Matrix and note input controls on MASCHINE JAM
Matrix and Note Input
MASCHINE JAM Bitwig Studio Template - Manual - 13

(1) 8x8 click-pad matrix: Controls the Clip Launcher and lets you enter notes into clips whenthe STEP / PIANO ROLL or PAD MODE / KEYBOARD modes are selected. Additional functionsare available in the top row of the grid when pressing the SHIFT button.
▪ UNDO: Lets you undo the last edit in the project.
▪ REDO: Lets you redo the last edit in the project.
▪ QUANT: Quantizes the selected clip by 100%.
▪ QUANT 50%: Quantizes the selected clip by 50%.
▪ SEMI- / SEMI+: If no note is selected in the current MIDI clip, these buttons shift all notesup or down by one semitone. Otherwise, only selected notes are shifted.
▪ OCT- / OCT+: If no note is selected in the current MIDI clip, these buttons shift all notesup or down by one octave. Otherwise, only selected notes are shifted.
(2) Scene Buttons: These buttons launch all clips in the corresponding scene.
(3) LOCK: Restricts PIANO ROLL mode to monophonic input.
(4) PAT LENGTH (SHIFT + SOLO): When enabled, the encoder controls the length of the se-lected clip. Holding SHIFT while turning the encoder allows for fine adjustments. HoldingSHIFT and pressing the encoder while turning allows for extra fine adjustments.
(5) GRID: When enabled, the encoder controls the grid size in STEP mode.
(6) D-Pad: Steps through the Clip Launcher in groups of eight clips in all directions. PressSHIFT to step through one clip at a time.
(7) DUPLICATE / DOUBLE: Duplicates a track (DUPLICATE + Group button) or a clip (DUPLI-CATE + clip button). It also selects and launches the new clip. DOUBLE (SHIFT + DUPLI-CATE) + clip button doubles the length of the clip including its content. In STEP / PIANOROLL or PAD MODE / KEYBOARD modes, pressing DUPLICATE duplicates the selected clip.DOUBLE (SHIFT + DUPLICATE) doubles the length of the clip including its content.
(8) CLEAR: Deletes a clip (CLEAR + Clip button). In STEP / PIANO ROLL or PAD MODE / KEY-BOARD modes, the pressing CLEAR deletes the content of the selected clip.
(9) PAD MODE / KEYBOARD: Enables PAD MODE if the selected track is hosting a Drum Ma-chine. Enables KEYBOARD mode if the selected track is hosting an Instrument.
Matrix and Note Input
MASCHINE JAM Bitwig Studio Template - Manual - 14
In KEYBOARD mode, the scale can be set with the D-Pad. Press left and right for setting thescale type. Pressing up and down sets the root key’s octave. Pressing SHIFT + D-Pad up /down shifts the root key by one semitone.
(10) STEP / PIANO ROLL: Enables STEP mode if the selected track is hosting a Drum Ma-chine. Enables PIANO ROLL mode if the selected track is hosting an Instrument. In bothmodes, the clips are organized in pages that can be accessed by pressing the Scene buttons.
In PIANO ROLL mode, the root note is highlighted. The position in the clip and the scale canbe set with the D-Pad. Pressing left and right adjusts the position in the clip. Pressing SHIFT +D-Pad left / right sets the scale type. Pressing up and down shifts the piano roll up and downin octaves. Pressing SHIFT + up / down shifts the piano roll up and down in semitones. Press-ing SELECT + left / right sets the root note. Pressing SELECT + up / down selects another clipin the selected track. Pressing SHIFT + SELECT shifts the piano roll to show the lowest note inthe clip.
In STEP mode, the D-Pad is used to navigate in the clip and select the base note for the cur-rent set of drum chains. Pressing left and right adjusts the position in the clip. Pressing upand down shifts the base note up and down in octaves. Pressing SHIFT + D-Pad up / downshifts the base note up and down in semitones. The lower left quadrant of the 8x8 click-padmatrix controls velocity for entered notes (lowest value in the lower left corner, highest value inthe upper right corner).
Matrix and Note Input
MASCHINE JAM Bitwig Studio Template - Manual - 15

5 Smart Strip and Mixing
The Smart Strips give you full control over the Bitwig mixer as well as your instruments andeffects.
2 3
568
1
9
10
11
12
7
13 4
Smart Strip and mixing controls on MASCHINE JAM
Smart Strip and Mixing
MASCHINE JAM Bitwig Studio Template - Manual - 16

(1) Touch Strips: The Touch Strips are used to control the mixer as well as device parameters,depending on the selected mode. Holding SHIFT and using the Touch Strips allows for fine ad-justments.
▪ LEVEL: The Touch Strips control the levels for each track.
▪ AUX: The Touch Strips control the sends for each track.
▪ CONTROL: The Touch Strips control device parameters for the selected track.
▪ PERFORM: The Touch Strips and the Group buttons control the Effect Tracks and the mas-ter track.
(2) MST: When enabled, the encoder controls the master level.
(3) GRP: When enabled, the encoder controls the level of selected track.
(4) PERFORM: When enabled, the Touch Strips and the Group buttons control the EffectTracks and the master track.
(5) MUTE: When held, the Group buttons mute tracks.
(6) SOLO: When held, the Group buttons solo tracks.
(7) REC MODE (SHIFT + GRID): When enabled, the Group buttons arm tracks for recording.
(8) Page buttons: Used for parameter bank navigation in CONTROL mode by switching betweenbanks of parameters of the selected device.
(9) AUTO: Writes modulation to the clip envelopes of the selected clip.
(10) CONTROL: When enabled, the Touch Strips control device parameters for the selectedtrack. Pressing CONTROL + Page left / right navigates between devices. Pressing SHIFT +CONTROL + Page right selects the first device in a Chain. Pressing SHIFT + CONTROL + Pageleft selects the parent device of the current Chain.
(11) AUX: When enabled, the Touch Strips control the sends for each track. Pressing AUXagain toggles between all available sends.
(12) LEVEL: When enabled, the Touch Strips control the levels for each track. To control thepanorama for each track, press SHIFT + LEVEL.
(13) MACRO: When enabled, the Touch Strips control the 8 device macros.
Smart Strip and Mixing
MASCHINE JAM Bitwig Studio Template - Manual - 17