connecting to secure wi-fi in qsb boardroom locations 01 september 2013
TRANSCRIPT

Connecting to Secure Wi-Fi in QSB Boardroom Locations
01 September 2013

Windows 7 - Check Wi-Fi Connections
This set-up applies to the secure Wi-Fi connection at the Queen’s School of Business boardroom locations only.
• Check you are able to see the wireless connection• Take note of the network name:
– Queensu_MBA_WPA2– Queensu_TOR_WPA2
Do Not attempt to connect to the network

Windows 7 – Control Panel
• Open Start menu– Click on the Control Panel to open it

Windows 7 – Control Panel
• In Control Panel, select View Network Status and Tasks• If you do not see this view, change the View by: to Category
view

Windows 7 – Wireless Network
• Select Set up a new connection or network
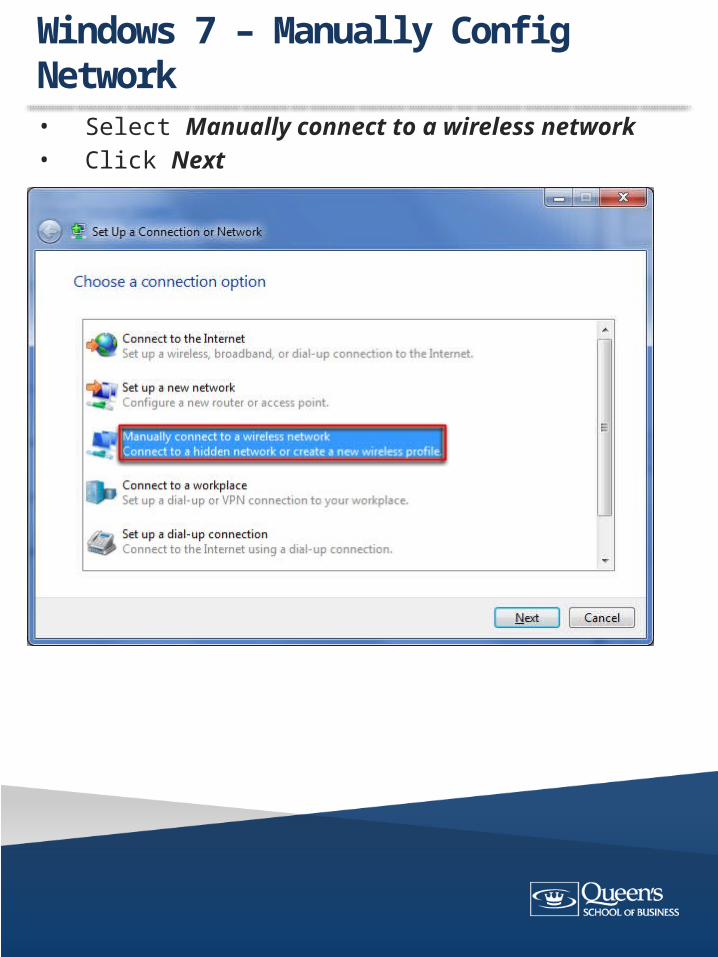
Windows 7 – Manually Config Network
• Select Manually connect to a wireless network• Click Next

Windows 7 – Manually Config Network
• Enter the Network Name that you observed on page 1– Queensu_MBA_WPA2– Queensu_Tor_WPA2
• Change Security type: WPA2-Enterprise• Change Encryption type: AES• Select Start this connection automatically• Click the Next button

Windows 7 – Manually Config Network
• Click Change connection settings

Windows 7 – Wireless Network Properties
On the Connection tab:• Select Connect automatically when this network is in range• De-select all other options• Select Security tab

Windows 7 – Wireless Network Properties
On the Security tab• Change Security type: WPA2-Enterprise• Change Encryption Type: AES• Change Choose a network authentication method Choosing
the default Microsoft: Protected (PEAP) will not work– Cisco (PEAP)
• Select Settings

Windows 7 – PEAP Properties
On the Connection Tab• De-select Use anonymous outer identity:• De-select Validate server certificate• Select Enable Fast Reconnect• Select User Credentials tab

Windows 7 – PEAP Properties
On the User Credentials tab• Select Use saved username and password• Enter your NetID in to the Username field• Enter your NetID password in to the Password and Confirm
Password fields• Click OK button

Windows 7 – Wireless Network Properties
On the Security Tab• Select Remember my credentials … if you do not want to
enter your NetID every time you use this wireless connection• Select Advanced settings

Windows 7 – Advanced Settings
• De-select Specify authentication mode:• De-select Enable single sign on for this network• Select the 802.11 settings tab

Windows 7 – Advanced Settings
On the 801.11 settings tab• Select Enable Pairwise Master Key (PMK)caching
– PMK time to live = 720– Number of entries = 128
• De-select the other values• Click the OK button

Windows 7 – Wireless Network Properties
On the Security tab• Click the OK button

Windows 7 – Manually Config Network
• Click the Close button

Windows 7 - Connecting
• From the System Tray click the wireless icon
• Select the WPA2 wireless network Queensu_MBA_WPA2• Click the Connect button. Be patient, it may take a few
minutes for the connection to complete this first time.

Windows 7 - Connecting
• Select Public Network

Windows 7 - Connecting
• You are now connected to the WPA2 network• Click the Close button• You do not need to disconnect from this network before
leaving the facility.• If you saved your user name and password this connection
should automatically connect the next time you are in the facility.