contents - prologuelegend of mana saved data. when the power is turned on, the opening demo will...
TRANSCRIPT


Getting Started . . . . . . . . . . . . . . 2
Controls . . . . . . . . . . . . . . . . . . . 3
Party Member Characters . . . . . . . 4
Other Characters . . . . . . . . . . . . . 5
Creating a New World . . . . . . . . . 6
Playing the Game . . . . . . . . . . . . 7
Land Creation System . . . . . . . . . . 8
Using the Menu Screen . . . . . . . . 10
Battle System . . . . . . . . . . . . . . . 16
Battle Strategies . . . . . . . . . . . . . 20
Home . . . . . . . . . . . . . . . . . . . . 21
Helpful Hints . . . . . . . . . . . . . . . 25
Credits . . . . . . . . . . . . . . . . . . . 28
Limited Warranty/Game Tips . . . . 29
CONTENTS - PROLOGUE 1
LINK MARKS SHOWN ON RELATED PAGES
If information in a section of this manual is related to otherinformation listed on other pages, the link icon shown belowwill appear next to the heading on the page.
[Example] When the link mark to the left is shown, refer to the "Battle System" heading on page 16.
p16
WORLD ENCYCLOPEDIA #1: from "THE BEGINNING"
A twinkling consciousness became a star that sparkled in the night and banished the darkness. The Mana Goddessacquired consciousness by gazing into the light of that sun. She made Fa’Diel, a great land, but so far an empty one.
WORLD ENCYCLOPEDIA #18: from "THE MANA TREE"
The Mana Tree sustained the bond between the world of humans and of Faeries. Plants exist in both the human and Faeriedimensions. They absorb the Mana of Fa’Diel and release it into the atmosphere. Humans use trees for fuel and tools,harnessing their power within inanimate objects. Faeries use the Mana released by plants to make Fa’Diel a better place.
WORLD ENCYCLOPEDIA #32: from "ARTIFICERS"
There were two types of magical beings. One type was imbued with life. Another type had hidden powers. The latter werecalled artifacts. Artifacts had weaker magical powers than Eyes of Flame, but were simpler to construct. Creating Eyes ofFlame was fraught with accidents, so making artifacts became the most popular kind of magic.
TM
WARNING: READ BEFORE USING YOUR PLAYSTATION® GAME CONSOLE.A very small percentage of individuals may experience epileptic seizures when exposed to certainlight patterns or flashing lights. Exposure to certain patterns or backgrounds on a television screenor while playing video games, including games played on the PlayStation game console, mayinduce an epileptic seizure in these individuals. Certain conditions may induce previouslyundetected epileptic symptoms even in persons who have no history of prior seizures or epilepsy.If you, or anyone in your family, has an epileptic condition, consult your physician prior toplaying. If you experience any of the following symptoms while playing a video game – dizziness,altered vision, eye or muscle twitches, loss of awareness, disorientation, any involuntarymovement, or convulsions – IMMEDIATELY discontinue use and consult your physician beforeresuming play.
WARNING TO OWNERS OF PROJECTION TELEVISIONS: Do not connect your PlayStation game console to a projection TV without first consulting the usermanual for your projection TV, unless it is of the LCD type. Otherwise, it may permanently damageyour TV screen.
USE OF UNOFFICIAL PRODUCT:The use of unofficial products and peripherals may damage your PlayStation game console andinvalidate your console warranty.
HANDLING YOUR PLAYSTATION DISC:• This compact disc is intended for use only with the PlayStation game console.
• Do not bend it, crush it, or submerge it in liquids.
• Do not leave it in direct sunlight or near a radiator or other source of heat.
• Be sure to take an occasional rest break during extended play.
• Keep this compact disc clean. Always hold the disc by the edges and keep it in its protectivecase when not in use. Clean the disc with a lint-free, soft, dry cloth, wiping in straight linesfrom center to outer edge. Never use solvents or abrasive cleaners.

When playing the game with 2 players, Controllers mustbe inserted into both Controller ports 1 and 2. The DUALSHOCK™ Analog Controller stick may be usedonly when the LED is lit, but the vibration function canbe used even when the LED is turned off. The vibration function can be turned ON/OFF byaccessing the "Config" section of the Menu Screen.
•If the L1/L2/R1/R2 buttons are pressed at the sametime as the START/SELECT buttons, a SOFT RESET will beexecuted, and the game will return to the Legend of ManaTitle Screen.
CONTROLS 3
L2 buttonL1 button
R2 button
button
button
button
button
R1 button
right stick
SELECT button START buttonANALOG mode switch/ LED
directional button
left stick
L R
SELECT START
NOTE:You may have a Controller that looks like this, if so please follow the digital instructions below.
p14
FIELD SCREEN/TOWN MAP SCREEN
Character control and information gathering in Fields and towns.
directional button Direct Character movementleft stick Direct Character movementSTART button Display Menu Screen≈ button Talk, inspectΩ button Enable character to run when pressed at
the same time as the directional button or left stick
√ button Display Menu Screen
RING COMMAND SCREEN
Ring commands are displayed when usingthe den at home, at the Corral, or at theWorkshops.
directional button Switch ring commandsleft stick Switch ring commands≈ button ExecuteΩ button CancelR1 button Switch ring commandsL1 button Switch ring commands
WORLD MAP SCREEN
On the World Map, land creation andmovement between lands is possible.
directional button Cursor movementleft stick Cursor movementSELECT button Display Help Screen≈ button ExecuteΩ button Cancel√ button Artifact selectionç button Display Mana Level
BATTLE SCREEN
Movement buttons during battle can be edited in the Menu Screen.
directional button Character movementleft stick Character movementSTART button Pause≈ button Quick attackΩ button Ability√ button Power Attackç button AbilityR1 button Special Technique or MagicR2 button Special Technique or MagicL1 button Special Technique or MagicL2 button Special Technique or Magic
MENU SCREEN
directional button Cursor movementleft stick Cursor movementSTART button Return to Field Screen≈ button ExecuteΩ button CancelR1 button Skip to the next screenL1 button Skip to the previous screen
One-Hand Operation withthe Analog ControllerWhen in battle, the left stickon the Analog Controller hasthe same function as thedirectional button. Also,pressing the left stick in hasthe same effect as pressingthe ≈ button. Pressing theL1 button while using the leftstick will cause the characterto run.
Set up your PlayStation® game console according to the instructionsin its instruction manual. Make sure the power is off beforeinserting or removing a compact disc. Insert the Legend of Mana™disc, and close the disc cover. If continuing a previously savedgame, insert a MEMORY CARD with Legend of Mana saved data.When the power is turned ON, the opening demo will begin. TheSTART button or ≈ button can be pressed during the demo toadvance to the Title Screen. After the opening demo is completed,the screen will switch to the Title Screen. Select <New Game> or<Load Game> by pressing the directional button UP/DOWN,then press the ≈ button to execute the selection.
STARTING A NEW GAMEIf playing the game for the first time, select <New Game>.
1. Select the main character’s gender.
Select whether the main character will be male orfemale by pressing the directional button LEFT/RIGHT.Pressing the ≈ button after selecting will execute thecommand. The events in the game and story are notaffected by the main character’s gender. Press the Ω button to return to the Title Screen.
2. Select the main character’s initial equipment
After the main character has been selected, selectthe initial equipment (weapon) for the character.There are a total of 11 types of weapons. Aftermaking a selection by pressing the directionalbutton UP/DOWN, press the ≈ button toexecute. Weapon techniques will differ dependingon which weapon is selected. It is possible topurchase different types of weapons throughoutthe journey and to switch equipment.
GETTING STARTED2
OPEN
®
POWER
RESET
disc cover
RESET button
POWER button
POWER indicator
Controller port 1
MEMORY CARD slot
OPEN button
Knife Equipped in each hand. Designed for close combat.Sword Long, one-handed weapon. Possible to equip a shield.Axe One-handed weapon used by swinging down. Possible to equip a shield. 2H Sword Two-handed weapon with great destructive power.2H Axe Two-handed weapon used by swinging down.Hammer Two-handed weapon used to attack by pounding.Spear Two-handed weapon that is a basic piercing weapon.Staff Two-handed weapon with a long reach.Glove Two-handed pounding weapon used in close combat.Flail Two-handed weapon capable of various attacks.Bow Two-handed weapon capable of long-range attacks.
p10
Main Character: Male Main Character: Female

Here are some of the other characters living in the world of Fa’Diel. Some may provide you with helpful information.
OTHER CHARACTERS 5
LI’L CACTUS MISS YUKA TEAPO
REVEREND
NOUVELLE
MARK RACHEL
INSPECTOR
BOYD
WATTS PELICAN PROFESSOR
BOMB
DUELLE
Here is a brief introduction to some of the characters who will join you in your adventures.
PARTY MEMBER CHARACTERS4
NICCOLO
A merchant whose family hasbeen in business forgenerations. Has an affinity formoney and his own unique setof values.
DAENA
A young soldier-in-training.She is currently looking fora way to save a friend introuble.
PEARL
A shy and gentle Jumi.She has a tendency tobecome lost when deep inthought.
ELAZUL
With piercing blue eyes and acape of sand, this knight ofJumi makes a stunningimpression. He is on a missionalong with Pearl to findallies. (But for what?)
ESCAD
A man with a strong senseof justice, he will doanything to defend whathe believes is right. He fights for the cause ofjustice with an overbearingsense of righteousness.
SIERRA
A female dragoon in theservice of the WhiteDragon. She has highexpectations and hates tocompromise.
LARC
A young dragoon withintense feelings. Hisown impulsivenessleads him into greattrouble.
LISA
An elf twin and the oldersister of Bud. Lost bothparents in a magic experimentgone awry. She keeps herfather’s broom as a memento.
BUD
Lisa’s younger brother. A playful child and avidreader who idolizesmagicians. He retains hismother’s frying pan as areminder of her.

Legend of Mana allows the player to structure the World Map freely through the land creation system. In order to advance the game, the player must clear various events and gain new locations on the World Map. Examine various locations and build a unique world.
MOVEMENT METHOD: Between Lands & Inside Towns
The following three screens are used for movement. From the location that the player has created on the World Map, the player enters the Field Mapand has the ability to move freely. The Town Map is displayed when the player enters a town. The player is able to move between lands at all timesexcept during forced events.
MAP SCREENS
Home and dungeons have no Town Maps.
COLLECTING INFORMATION: Collecting Information & Events
Towns and dungeons exist on the Field. In towns, there are many types of residents, and if the player stands in front ofthem and presses the ≈ button, they will begin a conversation. Events may occur depending on answers selected duringthe conversation. At other times, events may occur just by entering a particular location. While there are a number ofimportant events that must be completed before reaching the ending, it is not necessary to finish every event.
PLAYING THE GAME 7
Introduction to Fa’Diel’s species Vol. 1:(Sproutlings)Little creatures that seem to appear out of nowhereand end up living in any town. They all share thesame mind with each other.
World MapOn the World Map, the player may
move between created locations.
Town MapWhen the character enters a location from the
World Map, the Town Map is displayed. The dotson the roads that extend through the town are
different locations within the town. The directionalbutton will move the character on this map.
Field MapWhen the character moves onto a blue dot on the Town Map,
he or she will enter that location and the screen will change to theField Map, where town locations such as shops and other buildingsmay be entered. Most of the game takes place on the Field Map
(or Field), from character interactions to enemy encounters.
p8 p25
1. Select the character’s name
The default name for the main character at the beginning of a new game is “YOU.” To change this name, select theletter type from a list displayed on the left side of the screen. With the directional button, move the cursor to theletter screen and press the ≈ button to execute the command. A maximum of ten letters can be entered. To deleteletters, set the cursor to and press the ≈ button or Ω button. To select default names, set the cursor to AUTOand press the ≈ button. Move the cursor to <UNDO> and press the ≈ button to restore the default name. Whenselecting the name to be used, press the ≈ button at <OK!>.
2. Select the location for land creation on the World Map
After the name has been selected, a large area map will be displayed. Press the ≈ button to display aframe. Move the frame with the directional button and select the location for land creation to takeplace. The ≈ button must be pressed twice for the command to be executed. Depending on thelocation of the frame, Some sections may not be suited for land creation – be aware of these areas.(See right).
3. Determine the position of your Home
Once the location for land creation has been determined, the land creation process is next. Use the Mailbox to determine where toposition Home. For details concerning the land creation operation, see page 8. Home may not be placed in the ocean.
4. The adventure begins at Home
When Home appears, the prologue will begin, explaining the background of the story. After the prologue, the game play begins atHome. At Home, the player can do things like save the game, care for pets, and create weapons.
LOAD GAME: Continuing the game from saved data
When <Load Game> is selected, the screen will switch to the Loading Screen. After selecting the MEMORY CARD slot by pressingthe directional button LEFT/RIGHT, select the saved data by pressing the directional button UP/DOWN. The play time, charactername, saved land name, and data order is displayed on the bottom portion of the screen. Press the ≈ button to resume the gamefrom the selected saved data.
Save and Continue
To save, press the ≈ button while standing near a Save Point. After selecting <Save>, the screen will switch to the Save Screen.After selecting the MEMORY CARD and Save Slot to save the data, press the ≈ button. Even if the whole party is defeated, it isstill possible to try again.
Save Points: In front of the bed on the second story of Home. In front of the Save Point on the Field Maps. At Miss Yuka’s Inn inthe town of Domina.
CREATING A NEW WORLD6
Light areas are OKIf the area within the frame is thesame color as the surrounding areas,it is possible to incorporate this areainto the World Map.
Dark areas won’t workAreas in which there is too muchwater or dark areas within the frameare not suitable.
p21
p21
p20
∫

In the world of Fa’Diel, the Land Creation System, World Map, Mana levels, and spirits are all related. Read on to find out how...
POINT 1: MANA & SPIRITS HAVE EIGHT DIFFERENT ELEMENTS
Mana is the source of all life and has eight elements, each of which is ruled by a spirit. The world is filled with Mana, but the concentration tends todiffer between locations. Locations where the Mana level is high for a certain element affects the same element in locations nearby. When entering aland, if the player is lucky, the spirit of the elements which are a part of that land may make an appearance.
SPIRITS & THEIR CHARACTERISTICS
POINT 2: KEEP THE MANA LEVEL IN MIND
The Mana of the newly formed land gives neighboring lands the power of Mana, and it has the ability to change theMana Level according to the elements (4 stages, from 0 to 3). The Mana Level of the land highlighted by the cursorwill be shown in the bottom left corner of the map. Use the directional button to switch the elements of the Mana beingchecked. The overall Mana level may be checked by pressing the ç button.
POINT 3: THE RELATIONSHIP BETWEEN ARTIFACTS & LAND
The land that appears when the artifact is released has already been decided. Each artifact has one memory sealed within it.
LAND CREATION SYSTEM 9
Introduction to Fa’Diel’s species Vol. 2: (Faeries)Deeply love nature and dislike humans. But they are still interested in what humansare up to.
Wisp - “Spirit of Light”that lightens the world andgoverns sacred light.
Shade - “Spirit of Darkness”that covers the land withcomplete darkness.
Dryad - “Spirit of the Trees”that governs the strength oftrees.
Aura - “Spirit of Gold”,the master of all elementsproduced.
Salamander - “Spirit of Fire”that is able to manipulatescorching fire.
Gnome - “Spirit of the Land”that protects the land.
Jinn - “Spirit of the Wind”that controls the weather.
Undine - “Spirit of Water”that is the source of life.
p18
The Land Creation System involves strategically placing artifacts (see below) on the World Map, thereby forming new lands and creating the world thatthe game takes place in. The story unfolds as new lands are created.
LAND CREATION PROCESS: PLACING ARTIFACTS ON THE WORLD MAP
1) Obtain Artifacts
The first step in the land creation process is to obtain mysterious items called artifacts. Artifacts may be obtained throughtalking to townsfolk, completing events, and other accomplishments. The absolute number is not certain – obtain as manyas possible. Open the “items” section of the Menu screen to check artifacts you have acquired.
Artifacts with Ancient Power
Artifacts are crafted works of art holding strange powers, created by wise ancients long ago. They arerepositories of the land’s long-forgotten memories and the many events that once took place there. The lost memories come to life when the power of the artifact is released.
2) Select the Location to Place the Artifacts
To place an artifact on the World Map, press the ≈ button to move the cursor to the artifact selection wheel. If morethan one artifact is possessed, select an artifact by pressing the directional button LEFT/RIGHT and confirm the selectionby pressing the ≈ button. (To cancel, press the Ω button). After selecting an artifact and considering the Mana Level ofthe lands nearby, select where to position the artifact with the directional button. An artifact may only be placed in areaswhere the World Map is highlighted. After selecting a space, press the ≈ button to finalize the selection. Press theSELECT button to call up a Help Screen that shows the basics of this operation.
3) Place the Artifacts and Create New Lands
After the location for an artifact has been determined, its sealed memories are released, and a new land will appear. Once a new land has been created, it is not possible to seal it again, so it is important to evaluate the situation beforeplacing an artifact. To move between lands, select the land to move to with the directional button and press the √ buttonto execute the command.
4) Continue the Journey Upon Entering New Lands
Once you have arrived at a different land, you can enter it by pressing the ≈ button. The screen will change according tolocation: if the location is a town, the screen will change to a Town Map, and if the location is a dungeon, the screen willchange to a Field Map. The calender in the upper right-hand corner of the screen advances one day for each space youmove. Each day of the week is related to the power of magic and to certain events – remember to check them when necessary.
LAND CREATION SYSTEM8
p14
p9

Equipment Window Commands
•SKILL: Adjusting Button Configurations
Each button can be customized with a different action for battle. Move the cursor to the right side, select the button tochange with the directional button and ≈ button, select the action to assign from the list that appears, and then press the ≈ button to confirm. Please see below regarding other operations.
Setting AbilitiesAbilities refer to actions taken during battle, such as jumping or spinning. Select the ability by pressing the directional buttonUP/DOWN and press the ≈ button to execute the command. Up to two abilities may be set.
Setting Special Techniques/MagicSpecial Techniques and magic are set to the R1, R2, L1, and L2 buttons. Select the button to set and press the ≈ button. Afterselecting a Special Technique or magic from the menu that appears, a list of each that are available will be displayed. Make a selectionby pressing the directional button UP/DOWN and confirm it by pressing the ≈ button.
*The action buttons that can be distributed among abilities, special attacks, and magic can be freely interchanged with the “Config” option described on page 14.
USING THE MENU SCREEN 11
Equip- This command allows the character to change the items they have equipped. To equip an item, select the item to be changedby pressing the directional button UP/DOWN (change options with the √ button) and then press the ≈ button. If this is the itemthe player intends to change, the player must set the cursor to <Change> and press the ≈ button once again.
Auto-Select - This command automatically equips an item stronger than the selected item.
Total-Auto - This command automatically selects the strongest weapon and armor items in your inventory.
Status - This command allows the status of the selected item to be checked. (see page 13)
Remove - This command removes equipped items. Once a weapon has been unequipped, all associated Special Techniques that havebeen preset will be canceled. Reset all Special Techniques for the newly equipped weapon.
p16
Introduction to Fa’Diel’s species Vol. 3: (Pirate Penguins)Penguins that have the tendency to tell sillyjokes a little too often. Extremely proud ofthe fact that they are pirates, though theydon’t seem to act like pirates very often.
On the Field Map, switch to the Menu Screen by pressing the START or √ button. Menu headings are displayed on the left hand side. Each heading is displayed below.
STATUS - [Status + Equip + Ability/Technique/Magic]
Here, a character’s status may be checked, equipment changed, and Abilities confirmed. Switch between screens with the L1/R1 button.
•STATUS: Checking the Status of the Main Character
It is possible to check the current condition of the main character. Set the cursor to the character’s face icon and press the ≈ button or the rightdirectional button to move the cursor to the right hand side. Two icons also become available, “EQUIP” and “SKILL” which are described below.
1. Portrait2. Name3. Level4. Hit Points – damage the character can take.5. Experience Points necessary to reach the next level6. Parameters7. Synchronized effects during battle
Status Windows for NPCs & Pet Monsters
When the main character’s party includes NPCs (Non-Player Characters), pet monsters, or Golems, a new menu bar will appearin the left hand column under the main character’s portrait. The status of other party members can be checked in the samemanner as the main character. It is possible to change the names of pets and Golems.
•EQUIP: Equipping Weapons & Armor
The character is able to equip different types of weapons and armor. After weapons and armor have been purchased or created, they must be equippedbefore they can be used. To open the equipment window, move the cursor to the right, select the weapons or armor, and press the ≈ button. Pleaserefer to the following section regarding other operations.
1. Weapon currently equipped 2. Attack power of the equipped weapon3. Armor currently equipped4. Total value for each defensive item
USING THE MENU SCREEN10
Status page 10Items page 12Config page 14Event List page 14Return page 15
p19
12
12
3
4
4
6
3
7
5

•Weapons: Checking the Elements & Status of Weapons
Move the cursor by pressing the directional button UP/DOWN, select a weapon, and press the ≈ button to check a weapon.To organize the weapon list, first mark the weapon you want to move with the ≈ button. Move the cursor to anotherweapon and press the ≈ button again to switch entries. Pressing the √ button displays data such as parameter bonuses,Plunge Attacks, elemental levels, and elemental essences.
•Armor: Checking the Elements & Status of Armor
The operation is similar to the weapon menu. Pressing the √ button displays defense bonuses, elemental defense bonuses, andstatus abnormality defense bonuses. At the top of the armor list, defense power relative to monster attacks such as “strike” and“slash” will be displayed. There are 12 types of armor, starting with shields and helmets, armor, batons, mail, and accessories.
USING THE MENU SCREEN 13
WEAPON SELECTION SCREENARMOR SELECTION SCREEN
INSTRUMENT SELECTION SCREEN
Select the item in question from eachscreen, press the ≈ button twice andselect status from the menu headings
Menu Relationship Between Weapons/Armor/InstrumentsWeapons, armor, and instruments all have the same structure level. The first level is the selectionscreen, and below that lies the Status Screen and Detail Screen.
Press the √ button
STATUS DETAILS
DISPLAYS DATA
Press the L1/R1 button
Status of Each Weapon (p 2)Change the name of a weapon bysetting the cursor to the name ofthe weapon and pressing the ≈button. Switch weapons with theL2/R2 buttons.
Details of Each Weapon (p 23)Check the bonuses, elementallevel, and mystic powers of theweapons. Switch weapons withthe L2/R2 buttons.
Status of Each ArmorLike weapons, the names of armormay also be changed. ElementalDefense levels and statusabnormalities will be displayedthrough icons.
Details of Each Armor (p 23)Check the bonuses, elementallevel, and mystic powers of thearmor. Switch armor with theL2/R2 buttons.
p17
MENU SCREEN ICONS
Status Icons - These icons are used on the Status Screens of characters, weapons, armor, and instruments. Elements corresponding to each statushave no effect on Mana Level.
Elemental Essence Icons - These icons are used on the Status Screens of pet monsters, weapons, armor, and instruments. The elementalessences are added mostly to instrumental magic since such magic directly receives the effects of each element.
Defense Icons - These icons are used on the Status Screens of armor and character equipment.
ITEMS (Items + Weapons + Armor + Instruments + Artifacts)
Some inventory items are components for weapons and instruments. They can be categorized under weapons, armor, instruments, and artifacts.If the player sets the cursor to the item icons and presses the ≈ button, each type of icon will be displayed. If the cursor is set to each icon andthe ≈ button is pressed twice, the cursor will move to the right.
•ITEM: Checking Items
The items the character possesses can be checked here. The details of each item will be displayed if the cursoris set alongside the icons with the directional button. Pages can be skipped with the L1/R1 button. Fouricons also become available, “WEAPON”, “ARMOR”, “INST”, and “ARTIFACT”, which are described below.The amount of money possessed by the party is displayed at the bottom right hand corner of the screen.
USING THE MENU SCREEN12
Power - Affects the destructivepower of heavy weapons thatrequire strength.
Skills - Affects the destructivepower of weapons that requiregreat dexterity.
Defense - Affects theresistance to physical attacksfrom monsters.
Magic - Affects the resistanceto the magic attacks thatmonsters use.
HP - Represents basic physicalpower, affects resistance topoison.
Spirit - Affects resistance to amonster’s status magic.
Charm - Affects the successrate of the character’s ownstatus magical power.
Luck - Affects the appearancerate of treasure chests withinthe dungeons.
Light - A light elemental essencelevel that Wisp possesses.
Darkness - A darknesselemental essence of whichShade is very much a part.
Tree - A tree elementalessence level that is blessed byDryad.
Gold - A gold elementalessence level with the powerof Aura.
Fire - A fire elemental essencelevel that affects the destructivepower of Salamander.
Earth - An earth elementalessence level with the power ofthe land, governed by Gnome.
Wind - A wind elementalessence level that can absorbthe power of Jinn.
Water - A water elementalessence level that has thepower of Undine.
Strikes - Defense power thatcounters hits from monsters.
Slash - Defense power thatcounters slash attacks frommonsters.
Pierce - Defense power thatcounters thrust attacks frommonsters.
Magic - Defense power thatcounters magic attacks frommonsters.

•Button: Setting the Action/Attack Button Positions
Change button functions in this menu by swapping the position of the buttons. After moving the cursor to the rightside, select the button to be switched by pressing the directional button UP/DOWN and press the ≈ button. Move thecursor to the button that will swap positions with the selected one and press the ≈ button to complete the process. If the ≈ button is pressed at this time, it is possible to switch the buttons back to the default setting (initial setting).
RETURN: Close the Menu & Return to the Game
If the cursor is set to the “Return” icon and the ≈ or Ω button is pressed, the Menu Screen will close. Also, if the cursor is set to other icons and theΩ button is pressed, the cursor will automatically move to “Return.”
USING THE MENU SCREEN 15
•Instruments: Checking the Elemental Essences & Status of Instruments
The operation is similar to the weapon menu. Pressing the √ button displays the elemental level and magic(the magic name on top, followed by spiritand target area). The destructive power of the magic will also be displayed in the upper right hand corner of the list. There are eight elements for thefollowing four types of instruments:
•Harp•Flute•Drum•Marimba
•Artifacts: Reading the Artifact List
It is possible to examine obtained artifacts. The characteristics of an artifact will be displayed on the bottom of thescreen when the cursor is set to the artifact by pressing the directional button UP/DOWN. A check mark will appear tothe left of the name of artifacts that have already been used to create lands. Skip pages by pressing the L1/R1 buttons.
EVENT LIST: Displays Events in a List Format
Here, a list of events that have occurred can be viewed. The event names that have a round yellow icon next to them havealready been completed. When new artifacts cannot be obtained, check the event list and attempt to finish an event thathas not yet been completed.
GAME ENVIRONMENT: Setting the Game Environment
When changing the sound setting, select STEREO or MONO by pressing the directional button LEFT/RIGHT, and pressthe ≈ button to execute the command. Select vibration function ON/OFF by pressing the directional buttonLEFT/RIGHT and press the ≈ button to execute. At the bottom right hand corner of the screen, the play time isdisplayed.
•Config: Adjusting Game Settings & Button Positions for Battle
This icon lets the player customize sound and controller options and change button functions for battle. The “BUTTON” icon also becomes available andwill be discussed below.
USING THE MENU SCREEN14
Status of Each Instrument (p12)The name of the instrument can bechanged as with weapons. Thedestructive power of magic, themagic of the instrument, spiritsthat protect the instrument, andthe magic route can be checked.
Details of Each Instrument (p23)The bonuses of the instrument,elemental level, and mystic powerscan be checked. Switch instrumentswith the L2/R2 buttons.
p18
p8 p9
p7
p11

Attack with a Power Attack
This is a single but powerful attack. The only drawback is its slow recovery.
Ability: Various Actions in Battle
Abilities refer to jumping, defending, lunging, and all other actions that can be performed during battle. Two of theseactions can be assigned to the controller buttons. In the initial setting, there are eight learned abilities. New abilities canbe acquired by using the abilities, or through the combined use of abilities that have been assigned to the buttons.
Special Techniques: Attack Methods With Immense Destructive Power
As Action Abilities are used, Special Techniques can be learned in which one strike is filled with immense destructive power. The techniques learned willdepend on the weapons equipped, and the number is vast. Special Techniques can be set to each button using the Menu Screen (maximum of 4), andbutton positions can be switched with the Config Menu. Special Techniques may be performed during battle once the blue Special Technique Meterreaches maximum. To check button assignments during battle, press the START button to pause the game. When each button is pressed, the techniquesand ability names will be displayed.
Status Abnormalities Occur when Struck by Special Attacks from Monsters
Depending on the monster attacks, there will be instances when status abnormalities will occur during battle (they will recover naturally). Some abnormalities are introduced below, but there are other abnormalities that are not listed.
BATTLE SYSTEM 17
Action Abilities and Special Techniquesare assigned to buttons in the
Menu Screen.
When the Special Technique Meter at thetop of the screen reaches maximum capacity,
a Special Technique can be performed.
As abilities are used more frequently, it ispossible to learn more Special Techniques.
Name: Symptom:Poison Prevents natural recovery of Hit Points.
Confusion Up and down commands, right and left commands will be reversed.
Sleep Characters cannot be controlled while asleep, though receiving damage will wake them up.
Petrification The character’s body will become stone, and the character cannot be controlled for some time.
KO When a character’s Hit Points are depleted, he or she will be rendered unconscious.
p11
Many different monsters roam the dungeons of Fa’Diel. If a wandering monster is encountered while exploring a dungeon, battle ensues will be initiated.
1) Character’s face2) Synchro energy gem3) Hit Points4) Special Technique Meter (Special Techniques are usable when this bar fills up)
The flow of battle is explained as follows:
1) Battle Begins When Monsters AppearWhen monsters appear on the Field, movement becomes restricted, and the game enters battle mode. The main character and otherparty members will take up a battle stance. When this occurs, the game cannot progress until all the monsters have been defeated.
2) Defeat Monsters by Continuously AttackingAttack type include normal attacks, Special Techniques, and magic. Watch the movements of the monster and maneuver to avoiddamage from attacks.
3) Gems & Money, Obtaining ItemsUpon defeating monsters, blue colored gems, money, and other items appear on the Field. After some time, the objects willdisappear, so pick up these items as soon as they appear.
4) Battle Ends With the Display of the Confirmation ScreenWhen all monsters have been defeated, the money and number of gems collected will appear on the screen, notifying the player thatthe battle has been completed. If NPCs and pets are present, the gems that they have obtained will be added to their respectiveexperience points.
TYPES OF ATTACKS
•Normal Attack: Attack with an Equipped Weapon
There are two types of normal attacks. One is the quick attack in which swift attack movements are conducted one after the other (≈ button is thedefault setting). The other attack is the power attack, which strikes the enemy with one powerful blow (√ button is the default setting). In either case,if the strikes hit the enemy, the Special Technique Meter at the top of the screen will begin to fill. The function of the buttons can be changed with the“Config” option of the Menu Screen (p 14).
Attack with Quick Attacks
Although a single strike is not very powerful, quick attacks allow the player to strike continuously. The rate aweapon can strike again varies by the weapon type.
BATTLE SYSTEM16
p17 p18
p10
1
2
34

Battling Alongside NPCs, Pet Monsters, and Golems.
Characters such as NPCs, pet monsters, and Golems can join you in your adventures. As long as the 2P Control Settingare set to Auto Mode (default setting), party member’s will fight, use Special Techniques, and cast magic by themselves.When a party member’s Hit Points are depleted, her or she will not be able to move for a certain amount of time. Petmonsters and Golems cannot be in the same party together.
Character Synchronization
During battle, there will be times when electricity can be seen running between each character’s Special Technique Meter. This shows that they areundergoing synchronization. Synchronization creates helpful effects. Each NPC has different types of synchronization, so check the type available in theMenu Screen upon forming a party.
BATTLE SYSTEM 19
Main Synchronization TypesHP Recovery Speeds up Hit Point recovery. The main character gives this power.
Bonus Lucre Increases obtainable money after defeating enemies. Niccolo gives this power.
Attack Gauge PLS Fills the Special Technique Meter faster. Elazui gives this power.
Spirit Plus Increases spirtual ability. Bud gives this power.
Introduction to Fa’Diel’s species Vol. 3: (Dudbears)Diggers who work for Roger’s miningbusiness. Now they are forced to join his newreligious activities, with a dog as their lord.
p4 p22 p24
p17
MAGIC: Summoning the powers of the Elemental Spirits through instruments.
First, an instrument must be purchased in town and assigned to a button in the Menu Screen. During battle, while this button is held, the target areabecomes visible, and when the button is released, a spirit will appear and will activate the magic. This magic may be used an infinite number of timesduring battle, and the destructive power of the magic will differ according to character level, type of magical instrument, and power. Enchantedinstruments may be created in the Instrument Workshop (p23).
Main Instruments & Their Magic
Play Music for a Spirit & Earn Elemental Coins
In areas where the Mana Level is high, there are times when the patron spirit will appear. Upondiscovering a spirit, an instrument selection screen will appear, letting the player select instrumentsand play a song. If the spirit likes the tune, it will move closer. Move toward the spirit to receive anElemental Coin. This is an important item in creating new magical instruments.
BATTLE SYSTEM18
Magical instruments can bepurchased in the shops
within towns.
The orbit of the effective rangedepends on the type of magic
and instrument.
By calling the spirits andabsorbing their power, the player
will be able to use their magic.
FlowHarp - This instrumentholds the power of Undine. Ahalf-circular target area appearsand deals damage with bubbles.
GoldenHarp - This instrumentholds the power of Aura. Ahalf-circular target area appearsand damages with shrapnel.
FlameFlute - This instrumentholds the power of Salamander.A wave target area appears andengulfs the enemy in flames.
ShineFlute - This instrumentholds the power of Wisp. Ahalf-circular target area appearsand attacks with light.
GustMarimba - This instrumentholds the power of Jinn. Arandom target area appears andsummons tornadoes.
WoodMarimba - This instrumentholds the power of Dryad. Adonut-like target area appearsand attacks by shooting splinters.
EarthDrum - This instrumentholds the power of Gnome. A target area spreads fromwithin and attacks with bedrock.
DarkDrum - This instrumentholds the power of Shade. Atarget area spreads from within,engulfing the enemy in darkness.
p23

Home is the main character’s base of operations. To the west of this home lie the Workshops, to the east lies the Monster Corral, andto the south lies the Backyard Orchard. Creation events take place in each location. There are three rooms in the Workshops, and atotal of five types of creation events to experience.
The Study on the First FloorThe room on the right side of the first floor of the house is the study. Stand in front of the bookshelfand press the ≈ button to view the menu ring. Various books you receive during your adventures can beread here.
HOME 21
EQUIPMENT SMITHY (p23)
GOLEM LABORATORY (p24)
INSTRUMENT WORKSHOP (p23) BACKYARD ORCHARD (p22) MONSTER CORRAL (p22)
Relationship of Creative Events
Create a Golem body from weapons and armorStrengthen weapons and armor with fruitColor the Golem with fruitCapture baby pet monsters with fruit or use fruit as pet food
1
1
2
2
3
3
4
4
Four useful suggestions for battle are given here. Use these as a guide to learning new techniques.
POINT 1: Change Weapons & Attack in Different Ways
To become familiar with the various attacks available, equip different types of weapons. In doing so, the player will learndifferent variations of Special Techniques and will be able to fight at short as well as long range.
POINT 2: Change Abilities Frequently
Change abilities often to learn new, more sophisticated techniques.
POINT 3: Learn Plunge Attacks
Plunge attacks are sophisticated techniques in which quick attacks or action abilites are used consecutively, allowing thecharacter to deal an immense amount of damage. A blue afterimage shows when a plunge attack is performed.
POINT 4: Retry with “Continue”
When all members in your party are out of Hit Points, the continue screen shown to the left will appear. Press the ≈ button to take on the challenge again.
BATTLE STRATEGIES20
p10
p11

EQUIPMENT SMITHY: Create Original Weapons & Armor
There are three rooms in the Workshops located to the west side of the Home. One of the rooms is the Equipment Smithy. Here, items are used asmaterial to create new weapons, and extra or secondary material can be added to provide additional effects. Select the type and items by pressing thedirectional button UP/DOWN and pressing the ≈ button. Test a variety of materials in order to create the ultimate weapon.
Weapon & Armor Creation/Using the Menu Ring
INSTRUMENT WORKSHOP: Create Powerful Enchanted Instruments
Pre-made enchanted instruments may be purchased in shops. Raw materials can be also collected and taken to the Instrument Workshop to create anoriginal instrument. The creation method is basically the same as equipment, but for musical instruments it is necessary to use Elemental Coins. Elemental Coins are extremely precious, so they should be saved and used for creating the ultimate musical instrument.
Instrument Creation/Using the Menu Ring
HOME 23
Upon entering the room,the ring icon will
automatically appear.
Equipment that has beenforged or altered can be
tested outside.
Elemental Coins can beobtained by playing music
for spirits.
After a musical instrument hasbeen completed, the power of
the spirit which was addedlast will be displayed.
p18
Forge a Weapon Select a weapon type and main component.
Temper a Weapon Select a weapon to temper and the secondary material with which to alter.
Forge Armor Select an armor type and main component.
Alter Armor Select an armor to alter and the secondary material with which to alter.
Encyclopedias Encyclopedias will be displayed with a menu ring (p21).
Cancel Select “Cancel” to exit the Equipment Smithy.
Make an Instrument Select the instrument type, materials, and an Elemental Coin.
Encyclopedias Encyclopedias will be displayed with a menu ring (p21).
Cancel Select “Cancel” to exit the Instrument Workshop.
MONSTER CORRAL: Raise Pets to Take Along on the Journey
Upon completing a specific event, the Monster Corral of the Home will become available for use. When entering this Corral, a menu ring appears, making it possible to raise pet monsters (details below). Normally, pets are captured as eggs and arebrought to the Corral by Pelican. A maximum of five pets can be raised at once. The pets will undergo severaltransformations and, after completely maturing, will be able to join the party as a member.
Monster Corral/Using the Menu Ring
BACKYARD ORCHARD: Using Trent’s Menu
Once the event involving the enormous aged tree, Trent, had been cleared, fruit can be grown in the orchard on the south side of the Home. To growfruit, talk to Trent and select <Give Seeds>. Over time, the fruit will grow and ripen. To gather the ripe fruit, stand in front of the shadow of thefruit and press the ≈ button. The fruit may be used in various ways.
Backyard Orchard/Using Trent’s Commands
HOME22
Duelle explains how tocapture a monster egg.
Mature pets can be namedand allowed to graze the land.
When seeds are given, thefruit receives blessing from
Mana and will ripen.
Given time, fruit will growbased on the type of seed.
p19
p24
Take a Pet Select the pet with the directional button and press the ≈ button twice to have the pet join the party.
Leave Pet Select this command to remove the pet from the party.
Feed Select the pet with the directional button and choose the food to give it from the food box.
Graze Select the pet with the directional button and execute. Up to three pets can be selected.
Sell After selecting the pet, talk with the owner of the item shop to reach an agreement.
Encyclopedias Encyclopedias will be displayed with a menu ring (p21).
Cancel Select “Cancel” to exit the Monster Corral.
Give Seed A seed ring command will appear. Select the seed to give to Trent.
Talk to Him Chat with Trent.
Cancel End the conversation with Trent.
The following points of advice will assist in advancing and getting the most out of the game.
HELPFUL HINTS 25
HINT 1: VISIT THE SHOPS IN TOWNPurchasing weapons and armor at the shops in town will greatly increase a character’s chances of doing well inbattle. The variety of items sold changes according to the land’s particular Mana Level. To purchase an item,stand in front of the shopkeeper and press the ≈ button. After moving the cursor to <Buy Item>, pressthe ≈ button again. Next, select the item to be purchased by pressing the directional button UP/DOWNand change the number of items to be purchased by pressing the directional button LEFT/RIGHT. Press the≈ button again, and a confirmation screen will appear. If there are no errors, set the cursor to <Yes> andpress the ≈ button. Press the Ω button to cancel. The steps are the same when selling unwanted items.
HINT 2: INVITE A FRIEND’S CHARACTER TO JOIN YOU
In this game, it is possible to have another main character appear as a second player. To do this, visit thechurch in the town of Domina and talk with Nouvelle. After selecting <About Using 2P> under the “Aboutbattle” heading, follow the message hints and go to the empty building in the Center of Domina. No NPCs canbe in the party. Press the ≈ button when standing in front of the door, and select the data you want to loadfrom the MEMORY CARD. The second main character will join your party in a different color than the existingmain character.
NOTE: Main characters with the same data cannot be summoned. In order to save second player data and goseparate ways, stand in front of the shack door again and press the ≈ button twice. Select the slot from which secondplayer data was loaded and the second player data (experience points and levels) is automatically saved, and the twomain characters can separate from one another.
HINT 3: CHANGE SETTING TO ALLOW TWO SIMULTANEOUS PLAYERSIn addition to saving at an Inn’s front desk and other save points, it is also possible to set the game to allowtwo players to play simultaneously. Stand in front of the Save Point and press the ≈ button. Set the cursor to<2P Control> and press the ≈ button. When the setting window opens, select the mode by pressing thedirectional button UP/DOWN and press the ≈ button again to execute the selection.
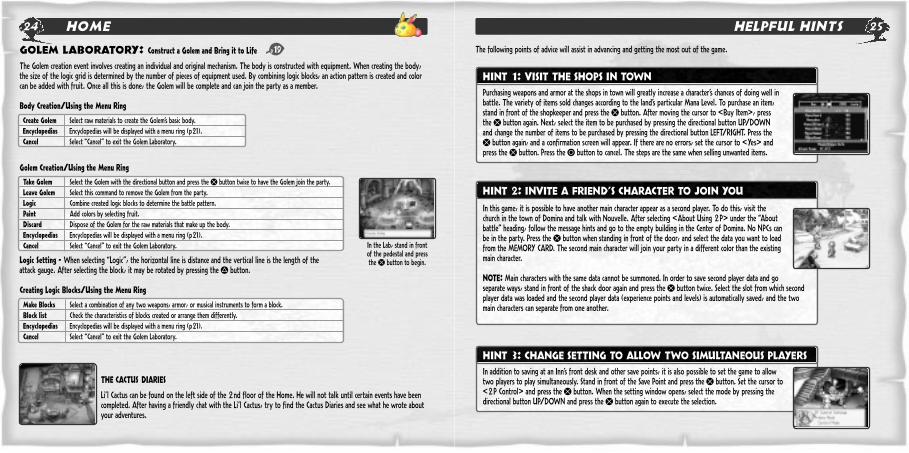
GOLEM LABORATORY: Construct a Golem and Bring it to Life
The Golem creation event involves creating an individual and original mechanism. The body is constructed with equipment. When creating the body,the size of the logic grid is determined by the number of pieces of equipment used. By combining logic blocks, an action pattern is created and colorcan be added with fruit. Once all this is done, the Golem will be complete and can join the party as a member.
Body Creation/Using the Menu Ring
Golem Creation/Using the Menu Ring
Logic Setting - When selecting “Logic”, the horizontal line is distance and the vertical line is the length of the attack gauge. After selecting the block, it may be rotated by pressing the ç button.
Creating Logic Blocks/Using the Menu Ring
THE CACTUS DIARIES
Li’l Cactus can be found on the left side of the 2nd floor of the Home. He will not talk until certain events have beencompleted. After having a friendly chat with the Li’l Cactus, try to find the Cactus Diaries and see what he wrote aboutyour adventures.
HOME24
Create Golem Select raw materials to create the Golem’s basic body.
Encyclopedias Encyclopedias will be displayed with a menu ring (p21).
Cancel Select “Cancel” to exit the Golem Laboratory.
Take Golem Select the Golem with the directional button and press the ≈ button twice to have the Golem join the party.
Leave Golem Select this command to remove the Golem from the party.
Logic Combine created logic blocks to determine the battle pattern.
Paint Add colors by selecting fruit.
Discard Dispose of the Golem for the raw materials that make up the body.
Encyclopedias Encyclopedias will be displayed with a menu ring (p21).
Cancel Select “Cancel” to exit the Golem Laboratory.
Make Blocks Select a combination of any two weapons, armor, or musical instruments to form a block.
Block list Check the characteristics of blocks created or arrange them differently.
Encyclopedias Encyclopedias will be displayed with a menu ring (p21).
Cancel Select “Cancel” to exit the Golem Laboratory.
In the Lab, stand in frontof the pedestal and pressthe ≈ button to begin.
p19

WHERE IS THE MANA TREE?
WHAT HAPPENED TO THISONCE BEAUTIFUL WORLD?
Solve these mysteries and more with the BradyGAMESLegend of Mana™ Official Strategy Guide.
Find and complete every side quest and explorethe walkthrough and bestiary sections to carry out every mission and rebuild Fa’Diel.
To purchase the BradyGAMES Legend of Mana™ Official Strategy Guide, visit your local electronics, book, or software retailer or order the book via the web at www.bradygames.com.
www.bradygames.com
www.squaresoft.comISBN 1-56686-986-2UPC 7-52073-86986-1Price $14.99 US / $21.95 CAN
HELPFUL HINTS26
HINT 4: A MYSTERIOUS ALLY WILL HELP YOUAt some point in the journey, a mysterious giant creature by the name of Boink may be encountered.Boink has special powers, and those who talk to the creature will be transported to another location.Use this shortcut to your advantage - it will prove to be very useful in moving forward quickly.
HINT 5: MINI EVENTS CAN TAKE PLACE ANYWHEREIn addition to the events that move the story forward, there are other events to experience, such asraising pets or creating weapons. There are also various mini-events in which it is possible to use afriend’s saved data. Feel free to investigate all options - it’s your world, after all.
HINT 6: BENEFITS AFTER COMPLETING THE GAMEOnce the the game has been played to its end, play again to take advantage of special benefits. Saveddata can be continued, and abilities, Special Techniques, pets, Golems, Encyclopedias, etc. can be carriedover to the new game. Play more than once to get the most out of the world of Fa’Diel.

LIMITED WARRANTY/GAME TIPS 29
For a period of ninety (90) days from the date of purchase, Square Electronic Arts L.L.C. (SQEA) warrants to the original purchaser of this SQEAsoftware product that the medium on which this computer program is recorded is free from defects in materials and workmanship. SQEA agreesfor a period of ninety (90) days from the date of purchase, to either repair or replace, at its option, free of charge, any SQEA software productthat does not meet the above warranty, postage paid, with proof of purchase. This warranty is not applicable to normal wear and tear. Thiswarranty shall not be applicable and shall be void if the defect in the SQEA software product has arisen through abuse, unreasonable use,mistreatment or neglect.
LIMITATIONS – The above warranty is in lieu of all other warranties, and no other representations or claims of any nature shall be binding on orobligate SQEA. ANY IMPLIED WARRANTIES APPLICABLE TO THIS SOFTWARE PRODUCT, INCLUDING WARRANTIES OF MERCHANTABILITY,COURSE OF DEALING IN TRADE AND FITNESS FOR A PARTICULAR PURPOSE, ARE LIMITED TO THE NINETY (90) DAY PERIOD DESCRIBEDABOVE. IN NO EVENT WILL SQEA BE LIABLE FOR ANY SPECIAL, INCIDENTAL, OR CONSEQUENTIAL DAMAGES RESULTING FROMPOSSESSION, USE OR MALFUNCTION OF THIS SQEA SOFTWARE PRODUCT. Some states do not allow limitations as to how long an impliedwarranty lasts and/or exclusions or limitations of incidental or consequential damages so the above limitations and/or exclusions of liability maynot apply to you. This warranty gives you specific rights, and you may also have other rights that vary from state to state.
NOTICE – This manual and the software described in this manual are copyrighted. All rights in the manual and the software are reserved. No partof this manual or the described software may be copied, reproduced, translated, or reduced to any electronic medium or machine-readable formwithout the prior written consent of SQEA. The described software may not be reversed engineered, decompiled or otherwise disassembled.
RETURNS WITHIN 90 DAY WARRANTY PERIOD – To replace defective media within the 90-day warranty period, send the defective media, acopy of the original sales receipt, a return address, and a small note describing the difficulties you are experiencing to Electronic Arts CustomerWarranty, P.O. Box 9025, Redwood City, CA 94065-9025. If you have warranty questions, you can also contact Customer Warranty at (650) 628-1900, fax (650) 628-5999. Hours of operation: Monday - Friday, 8:30am - 11:45am and 1pm - 4:30pm, Pacific Standard Time.
RETURNS AFTER WARRANTY – To replace defective media after the ninety (90) day warranty period has expired, send the original CD to theElectronic Arts’ address above. Enclose a statement of the defect, your name, your return address, and a check or money order for $15.
REPLACEMENT MEDIA – The above provisions apply to any replacement media or software provided by SQEA hereunder, including the abovewarranties and limitations.
TECHNICAL SUPPORT – For technical support questions, you can call (714) 428-0599. Representatives are available Monday-Friday 8am - 5pm,Pacific Standard Time.
SQUARESOFT GAME TIPSGame Tips are available for all SQUARESOFT PlayStation titles:
U.S.: 1-900-407-KLUE (1-900-407-5583) $.95/min. Automated Tips, $1.25/min. Live Assistance.Canada: 1-900-451-KLUE (1-900-451-5583) $1.50/min. Automated Tips only.
Prices subject to change. Callers under 18 years of age must obtain permission from a parent or guardian before calling.Game tips are available for callers within the U.S. and Canada only. Touch-tone phone required. Live assistance is availablefor SQUARESOFT titles published on the PlayStation game console only. Game counselors are available Monday-Friday, 8am - 5pm, Pacific Standard Time. Automated support is available 24 hours a day, 7 days a week.
SQUARESOFT OnlineShop online or register for upcoming sweepstakes, prizes, and more at www.squaresoft.com!
CREDITS28
SQUARE CO., LTD.
Director Koichi Ishii
Producer Akitoshi Kawazu
Program Main/Battle Tomoki Anazawa
Game Design & System Design Chief Akihiko Matsui
Art Director & Map BG Graphic Design Chief Koji Tsuda
Battle Effect & Battle Design Chief Hiroshi Takai
Character Illustration & Character Graphic Design Chief Shinichi Kameoka
Music Yoko Shimomura
Story & Event Data Chief Nobuyuki Inoue
World Map System Design Chief & Sub System Design Daisuke Fukugawa
Map Data Chief Hiroyuki Kuwata
Boss Monster Design Chief Toshiaki Matsumoto
Pet Monster Graphic Design Chief Noriko Sasaki
Localization DepartmentGeneral Manager Koji Yamashita
Deputy General Manager Akira Kashiwagi
Localization Coordinator Kazuyoshi Tashiro
Localization Specialist Amanda J. Katsurada
SQUARTZ CO., LTD.
President Hiromi Masuda
Quality Assurance Section Hideaki Matsuoka, Shiro Koizumi
SQUARE SOFT, INC.
Localization Staff
Localization Specialist Brody Phillips
Editors Brian Bell, Richard Amtower
Associate Producer Aki Kozu
Quality Assurance StaffQA Manager Jonathan Williams
Assistant QA Manager Mike Givens
Lead Analyst Derek C. Smith
Assistant Lead Analyst Jaime J. Bencia
Product Analysts Bryan D. Chen, Michael D. Christoffers, Jonathan Domasig, Jonathan Mankin, Jim Robles, Terry R. Stone, Shane Viall, Joshua Walter
QA Translators Dana J. Kwon, Rintaro Yoshida, Kenji Nakamura
SQUARE ELECTRONIC ARTS L.L.C.
Senior Customer Service Manager Rick Thompson
Assistant Customer Service Manager Fernando Bustamante
Customer Service Lead Alaine DeLeon
Customer Support Representatives Caroline Liu, Patrick Cervantes, John Montes, James Dilonardo, Mark Abarca, Mark Acero, Alan Deguzman, Ryan Riley
Public Relations/Events Manager Lisa M. Ahern
Assistant PR Manager Francine DeMore
Business Development Manager Elaine Di Iorio
Product Coordinator Beth Faust
Sales Coordinator Sean Montgomery
Media Planner Kyoko Yamashita
Creative Planner Keiko Kato
Assistant Product Managers Andrew Shiozaki, Mitsuru George Torii
Product Associates Andy Hsu, Irene Sam, Brad Varey, Junko Shibata-Burke
Product Administrative Assistant Mari Nishikawa
Marketing Assistant Rika Maruya
Marketing Manager Kenji Mimura
Vice Chairman Yoshihiro Maruyama
President Jun Iwasaki
Packaging/Manual Design Steven Wright, Beeline Group, Inc.
Special Thanks To Beeline Group, Inc., BradyGAMES, C.H.E.N. PR, The Kenwood Group, Saatchi & Saatchi Los Angeles, Virtual InterActive Inc.