corresponding curriculum guide available here
TRANSCRIPT

TAKE WINTER BY STORM TEACHER’S GUIDE
© S. Cosgrove 2012

Take Winter By Storm | 2
INTRODUCTIONJoin Newspapers In Education and Take Winter By Storm as we prepare your students and their families for wild winter weather. This teacher’s guide accompanies the Take Winter By Storm tabloid and articles, which ran in The Seattle Times on November 6, 9 and 11 respectively. You can visit the NIE website (seattletimes.com/nie) to find the exact location of these pages in the newspaper.
THE SEATTLE TIMES NEWSPAPERS IN EDUCATION (NIE)To enroll in The Seattle Times NIE program and receive free access to the Print Replica (e-edition) of the newspaper, lesson plans and curriculum guides, as well as the in-paper content for this guide, please email [email protected] or call 206.652.6290.
NOTE TO EDUCATORSThese lessons were written at a fourth- to fifth-grade level to address the following Washington State Science standards; however, teachers of all grade levels are encouraged to modify the guide to fit the needs of their individual classes.
2.4-5 INQ. A Scientific investigations involve asking and answering questions and comparing the answers with evidence from the real world.
2.4-5 INQ. B Scientists plan and conduct different kinds of investigations, depending on the questions they are trying to answer. Types of investigations include systematic observations and descriptions, field studies, models, and open-ended explorations as well as controlled experiments.
2.4-5 INQ. C An experiment involves a comparison. For an experiment to be valid and fair, all of the things that can possibly change the outcome of the experiment should be kept the same, if possible.
2.4-5 INQ. D Investigations involve systematic collection and recording of relevant observations and data.
2.4-5 INQ. E Repeated trials are necessary for reliability.
2.4-5 INQ. G Scientific explanations emphasize evidence, have logically consistent arguments, and use known scientific principles, models and theories.
2.4-5 INQ. H Scientists communicate the results of their investigations verbally and in writing. They review and ask questions about the results of other scientists’ work.
2.4.2 Understands emergency situations and demonstrates skills to respond appropriately and safely. Describes safety rules to follow in case of a disaster.
TABLE OF CONTENTS
Lesson 1 Winter Weather Emergency Preparedness
Lesson 2 Windstorms
Lesson 3 Heavy Rainstorms
Lesson 4 Snow, Ice and Freezing Temperatures

Take Winter By Storm | 3
LESSON 1: WINTER WEATHER EMERGENCY PREPAREDNESS
WHAT EXACTLY IS A “STATE OF EMERGENCY”? Washington state defines an emergency or disaster as “an event or set of circumstances which:(i) Demands immediate action to preserve public health, protect life, protect public property, or to provide relief to any stricken community overtaken by such occurrences, or
(ii) Reaches such a dimension or degree of destructiveness as to warrant the governor declaring a state of emergency pursuant to RCW 43.06.010.” Former Governor Christine Gregoire declared a state of emergency during the snow-and-ice storm of January 2012.
You and your family will be better prepared for any future emergencies if you develop a Family Emergency Communication Plan. Refer to the Newspapers In Education and TakeWinterByStorm. org websites for more information. Emergency Contact Cards are also available on the websites, translated into multiple languages. There are several online tools available that can help you reunite with your family and loved ones after an emergency, such as social media channels, Google Person Finder and American Red Cross “Safe and Well” registry.
INTRODUCTORY EXERCISEBrainstorm with a partner to determine which items should be in your family’s emergency preparedness kit. Think about food, water and staying warm. Then think about what your family might need in an emergency kit. Does your family have pets? Are there grandparents living with you who might need extra personal or medical items to make them feel comfortable? Do any of the items differ depending on the type of emergency, such as a snowstorm versus a windstorm?
Now, think about what preparedness items you might need at school in case of an emergency. Are there any special needs or dietary restrictions that any students in your class may need? What are those? List the general items that everyone could share (i.e. flashlights, batteries, fire extinguisher, etc.), and how many items each individual student may need (i.e. amount of water, non-perishable food/snacks, etc.).
LESSON 1: ACTIVITY
Stir Up a Typhoon (Credits: Pacific Science Center)The Columbus Day Storm of 1962 originated from Typhoon Freda, evolving into an extra-tropical cyclonic storm causing great destruction to the Pacific Northwest.
Concepts1. In meteorology, a cyclone is an area of closed, circular fluid motion rotating in the same direction as the Earth. This is usually characterized by inward spiraling winds that rotate counterclockwise in the Northern Hemisphere and clockwise in the Southern Hemisphere.
2. A typhoon is a mature tropical cyclone that develops in the northwestern part of the Pacific Ocean between 180° and 100°E.
3. The clouds in a typhoon and cyclone can be seen as circular bands that spiral around a typhoon’s eye.
Learning Objectives1. Duplicate the swirling motion around the eye of a typhoon.
MaterialsPictures of typhoons and cyclones (search online with an adult)Large round bowl Spoon Food coloring with dropper Water

Take Winter By Storm | 4
Process1. Have you ever heard the term “eye of the storm”? Q: What do you think this means? Q: What do you know about it? Q: Is it windy in the eye? Q: Why does the eye exist?
2. Like any tropical cyclone, there are six main requirements for typhoon formation and development: sufficiently warm sea-surface temperatures, atmospheric instability, high humidity in the lower to middle levels of the troposphere, enough Coriolis force to develop a low pressure center, a pre-existing low level focus or disturbance, and low vertical wind shear. The majority of storms form between June and November, while tropical cyclone formation is at a minimum between December and May.
3. Observe the pictures of the cyclones and typhoons. Can you find the things you mentioned? • Warm ocean air • Rotating/swirling air • Eye
4. Get out the bowl and pour water inside
5. Moving the spoon in a circular motion around the side of the bowl, stir the water.
6. When the water is moving fast, stop stirring and immediately put several drops of food coloring into the center of the swirling water. The color will move out from the center, forming bands — much as clouds in a cyclone do.
EXTENSION ACTIVITY 1
Create a Classroom Preparedness KitUse the checklist and emergency contact card printouts on TakeWinterByStorm.org to prepare a classroom preparedness kit.
With class input, discuss and list the items the class needs. Send home your class list with a note sharing your class’s involvement in helping to prepare for emergencies and create a safe community. Request items you need help supplying to be brought back to class by a specific date.
Along with the note and the list, send home the Take Winter By Storm preparedness checklists and emergency contact cards with students to make sure their families are prepared, too. Ask parents to complete emergency contact cards for their families and put one in their child’s backpack in case of an emergency. Preparedness at home and school creates a safe community all around.
Put all items in a large preparedness kit. Review and update twice a year. Daylight saving dates are a great time to review, check expiration dates and update your preparedness kits.
Take Winter By Storm Materials to Accompany Lesson 1:• General Preparedness Wheedle coloring sheet • Wheedle and Noodle Pet Preparedness coloring sheet• Take Winter By Storm Checklist• Take Winter By Storm Emergency Contact Card • Take Winter By Storm Family Communication Plan • Take Winter By Storm Pet Preparedness Checklist • Take Winter By Storm Home Maintenance Checklist • Take Winter By Storm Preparedness on a Budget Checklist
Take Winter By Storm checklists and emergency contact cards are available for download in multiple languages, including Spanish, Mandarin, Cantonese, Japanese, Korean, Vietnamese, Tagalog, Russian and Somali. Newspapers In Education Materials to Accompany Lesson 1: “Get Weather Ready with Take Winter By Storm”: https://ad.seattletimes.com/FlippingBook/NIE/2016/TakeWinterByStorm/
‘Are you ready for winter weather?’: http://www.seattletimes.com/nwshowcase/take-winter-by-storm/are-you-ready-for-winter-weather/
‘Checklists for winter-storm prep’: http://www.seattletimes.com/nwshowcase/take-winter-by-storm/checklists-for-winter-storm-prep/

Take Winter By Storm | 5
LESSON 2: WINDSTORMS
INTRODUCTORY EXERCISE Research The Seattle Times archives at seattletimes.com to locate an article about a strong windstorm in the area. What precautions did people take? What precautions didn’t they take?
LESSON 2: ACTIVITY 1
What Causes Windstorms? (Credits: National Weather Service/NOAA)What precautions didn’t they take?
ObjectiveLearn how the source for the earth’s wind comes from the sun.
OverviewUsing a toaster, the students will observe that wind is created by rising heat.
Total Time3 minutes
SuppliesToasterPinwheel
BackgroundWe feel the wind every day. The air is almost always in motion. One day it may be from the north and the next day from the south. There are many sources for wind, including mechanical sources such as fans and, in nature, falling rain as it drags air along. But what is the origin of wind on the earth?
Procedure1. Turn the toaster on to allow the unit to heat.2. Ask the students where wind comes from.3. Ask the students if a toaster can create wind.4. Hold the pinwheel 10-15 inches above the top of the toaster to allow the pinwheel to spin.5. Turn the toaster off.
NoteWhile hot plates and open flames will produce better results, the toaster is utilized to minimize fire risks should a student reproduce the experiment at home.
DiscussionMost younger students will say clouds or trees cause the wind and that toasters cannot produce wind. They will quickly see that toasters do produce wind. Explain that wind is just air molecules in motion. The glowing coils in the toaster produces infrared radiation, heating the toaster. The heated metal then warms the air in the toaster, making the air less dense, which makes it rise — creating wind.
The source for the earth’s heat is the sun. The radiation from the sun heats the ground. The ground, in turn, heats the air and, as demonstrated, the air rises. As it rises, cooler air comes in to replace the rising air: what we feel as wind.
The faster the air rises, the faster the wind blows to take its place. Every time you feel the wind, regardless of whether it’s from the north, south, east or west, somewhere else in the world the wind is rising. The term for this rising air is convection.
The wind patterns we experience have their source in convection.

Take Winter By Storm | 6
LESSON 2: ACTIVITY 2
Go with the Flow(Credits: National Weather Service/NOAA)
ObjectiveThe students will discover that the faster air moves, the lower the pressure becomes within that flow of air.
OverviewCreate low pressure by blowing between two soda cans.
Total Time5 minutes
Supplies Two empty soda cansLevel surface
BackgroundBernoulli’s principle states that in fluid flow, an increase in velocity occurs simultaneously with a decrease in pressure.
Procedure1. Lay the two cans parallel to each other, about 1 inch apart, near the edge of a level surface.2. Put your face down near the surface and blow between the two cans.3. It will take some trial and effort, but eventually the two cans will roll together.
DiscussionThe effect is Bernoulli’s principle in action, named after the Dutch/Swiss mathematician/scientist Daniel Bernoulli. By blowing between the two cans, you are making the air between them move faster than the surrounding air (which is basically calm). The cans roll together as the higher pressure surrounding the two cans (away from the air flow) pushes the cans together toward the region of lower pressure.
EXTENSION ACTIVITY 1Create a poster or flyer to share with the class or your community to inform others on winter weather emergency preparedness. What are the most important tips to remember? Teachers, post your class posters and flyers as a photo on the Take Winter By Storm Facebook page and help other communities get prepared, too.
Full Lesson Plans and Detailed Information for Winds/Jet Streams: 1. Surface Pressure: www.srh.noaa.gov/jetstream/synoptic/ll_analyze_slp.htm 2. Air Temperature: www.srh.noaa.gov/jetstream/synoptic/ll_analyze_temp.htm 3. Dew Point Temperature: www.srh.noaa.gov/jetstream/synoptic/ll_analyze_dp.htm 4. Air Pressure Change: www.srh.noaa.gov/jetstream/synoptic/ll_analyze_app.htm
Take Winter By Storm Materials to Accompany Lesson 2: • Wind Preparedness Wheedle coloring sheet • Take Winter By Storm Wind Preparedness Checklist
Newspapers In Education Materials to Accompany Lesson 2: “Get Weather Ready with Take Winter By Storm”: https://ad.seattletimes.com/FlippingBook/NIE/2016/TakeWinterByStorm/
‘Are you ready for winter weather?’: http://www.seattletimes.com/nwshowcase/take-winter-by-storm/are-you-ready-for-winter-weather/
‘Checklists for winter-storm prep’: http://www.seattletimes.com/nwshowcase/take-winter-by-storm/checklists-for-winter-storm-prep/
Take Winter By Storm | 7
LESSON 3: HEAVY RAINSTORMS
Whether it’s a torrential downpour or a prolonged rainfall buildup lasting several days, heavy rains affect people, homes and land differently based on the location. Below are some of the risks associated with a heavy rainstorm:
• Street flooding, which causes deep, standing puddles on roadways and dangerous driving conditions • Basement flooding, which can cause loss of valuables and dangerous situations • Transportation routes affected by flooding and landslides • Evacuation orders due to flooding rivers • Damaged buildings due to severe flooding • Landslides causing severe damage to — or even loss of — homes • Prolonged power outages due to downed lines caused by landslides and flooding
Be prepared for a rainstorm by watching weather forecasts with your family. Be aware of potential heavy rains or rainfall buildup over multiple days. Keep rain gear, water-repellent clothing and extra warm clothing handy at home and in your family’s vehicle to use in an emergency.
INTRODUCTORY EXERCISE
Discuss the following questions with a partner or group: • How do you think rain is created? • Why are some rainstorms stronger than others? • Why does it rain more in Seattle than other parts of the country? • How do you measure rainfall?
LESSON 3: ACTIVITY
The Rain Man (Credits: National Weather Service/NOAA)
ObjectiveDemonstrate the concept of precipitation.
OverviewThe students will see the hydrologic cycle in action as the water evaporates and condenses to form rain.
Total Time30 minutes
Supplies Mayonnaise-sized jarResealable sandwich bagIce cubesHot water
BackgroundWhat goes up must come down. Precipitation is the most commonly seen aspect of the hydrologic cycle.
Procedure 1. Add about 2 inches (5 cm) of hot water to the mayonnaise jar.2. Add the ice cubes to the sandwich bag and seal it.3. Place the sandwich bag over the mouth of the jar, allowing one end of the bag to form a tip inside of the jar. This will allow the condensed water to collect at one location.4. After a few minutes, the water (rain) will begin to drip from the sandwich bag, returning to the water.
DiscussionDespite the sometimes excessive rainfall that occurs, only about 0.3% of all water on the earth is found in the atmosphere, and only a small fraction of that is seen as rain. Most of the water in the atmosphere is in the gaseous state called water vapor. So while the hydrologic cycle is essential for life due to the water it brings, the vast amount of water in the cycle is found in the oceans, lakes and groundwater.

Take Winter By Storm | 8
EXTENSION ACTIVITY 1
Make a Rain Gauge(Credits: National Weather Service/NOAA/The Community Collaborative Rain, Hail and Snow Network)
Sign-up for a FREE program called CoCoRaHS — Community Collaborative Rain, Hail and Snow Network — at: http://www.cocorahs.org/Content.aspx?page=CoCoRaHS-Schools-Teachers
Purpose Activity BasicsStudents will be introduced to a national study in which they will learn to read and collect precipitation data. As participants in CoCoRaHS, students will learn how to use and read rain gauges, as well as how to collect precipitation measurements using different tools.
OverviewWhile learning how to collect precipitation data, students will use mathematical skills, learn about the importance of taking multiple measurements and explore the difficulties scientists may encounter while gathering scientific data in the field.
Student OutcomesStudents will be able to: • Collect precipitation measurements of either rain or snow using the rain gauge. • Gain knowledge of the importance of taking multiple measurements while collecting quantitative scientific data. • Use mathematical skills in order to read and record data for the study. • Infer difficulties scientists may come across while gathering scientific data in the field.
MaterialsOfficial CoCoRaHS rain gaugeRuler with one-tenth-inch markingsContainer full of waterSpongeWaterproof cover, such as a tarp, to put on the table/desk used for the demonstrationStudent notebooks
Full lesson plan available at: www.cocorahs.org/Media/docs/CoCoSchools_Equipment_and_Measurments.pdf
EXTENSION ACTIVITY 2
Measure the Pressure — The “Wet” Barometer (Credits: National Weather Service/NOAA)
ObjectiveMake your own barometer.
OverviewUsing simple items, the student will make a device for indicating air-pressure changes, called a barometer.
Total TimeConstruction time: 5 minutes. Observation time: 10 days.
Supplies Glass or beaker with straight sidesPlastic rulerTape1 foot of clear plastic tubingMolding clay or chewing gumWaterFood coloring

Take Winter By Storm | 9
BackgroundThe amount of air over us is constantly changing. As a result, the weight of that air, called pressure, is constantly changing. These changes in air pressure are indications of changes in our weather. We measure this change using a device called a barometer (bar-meter or measurer).
The first barometer was created by Evangelista Torricelli in 1643. Torricelli was actually trying to discover the reason that water would rise no more than 33 feet up a tube through the use of a suction pump. He had first built a water barometer, but it required a glass tube 60 feet long. Aware that mercury was 14 times heavier than water, he constructed a tube only 35 inches long. Filling the tube with mercury and inverting the tube into a bowl of mercury caused the mercury in the tube to drop to a level around 30 inches and created a vacuum at the top of the tube.
Procedure1. Place the ruler in the glass and tape it to one side. (Make sure the numbers are visible.)2. Tape the plastic tube onto the ruler in the glass. (Make sure the tube is not touching the bottom of the glass.)3. Fill the glass about halfway with water. Add a drop or two of food coloring and mix thoroughly.4. Using the tube like a straw, draw some water about two-thirds into the straw.5. Using your tongue, trap the water in the tube, then cap the end of the tube with model clay or chewing gum.6. Record the height of the water in the tube.7. At the same time every day, for the next 10 days, record the height of the water in the tube, paying close attention to the change in the weather as the water level changes.
DiscussionWhat the students have constructed is a water barometer (also known as “storm glass”); these types of barometers date back to the 17th century. The actual change in pressure will occur too slowly for direct observation. Usually the change in pressure will be most noticeable for only a 24-hour period.
As a storm approaches, the mass of air around your location decreases. Therefore, the pressure decreases as well. After a cold front passes, higher pressure moves in and the students will see the pressure rise.
Over and above the pressure changes associated with storms, there are four daily pressure fluctuations in the atmosphere. These diurnal changes are due to the sun heating the atmosphere. The amplitudes of this daily change depend upon the latitude, season and altitude.
The changes are greatest at the equator, decreasing toward the poles, where it becomes zero. Also, the higher the altitude, the greater the daily change.
Take Winter By Storm Materials to Accompany Lesson 3: • Heavy Rains Preparedness Wheedle coloring sheet • Take Winter By Storm Heavy Rains Preparedness Checklist
Newspapers In Education Materials to Accompany Lesson 3:
“Get Weather Ready with Take Winter By Storm”: https://ad.seattletimes.com/FlippingBook/NIE/2016/TakeWinterByStorm/
‘Are you ready for winter weather?’: http://www.seattletimes.com/nwshowcase/take-winter-by-storm/are-you-ready-for-winter-weather/
‘Checklists for winter-storm prep’: http://www.seattletimes.com/nwshowcase/take-winter-by-storm/checklists-for-winter-storm-prep/
Take Winter By Storm | 10
LESSON 4: SNOW, ICE AND FREEZING TEMPERATURES
INTRODUCTORY EXERCISE
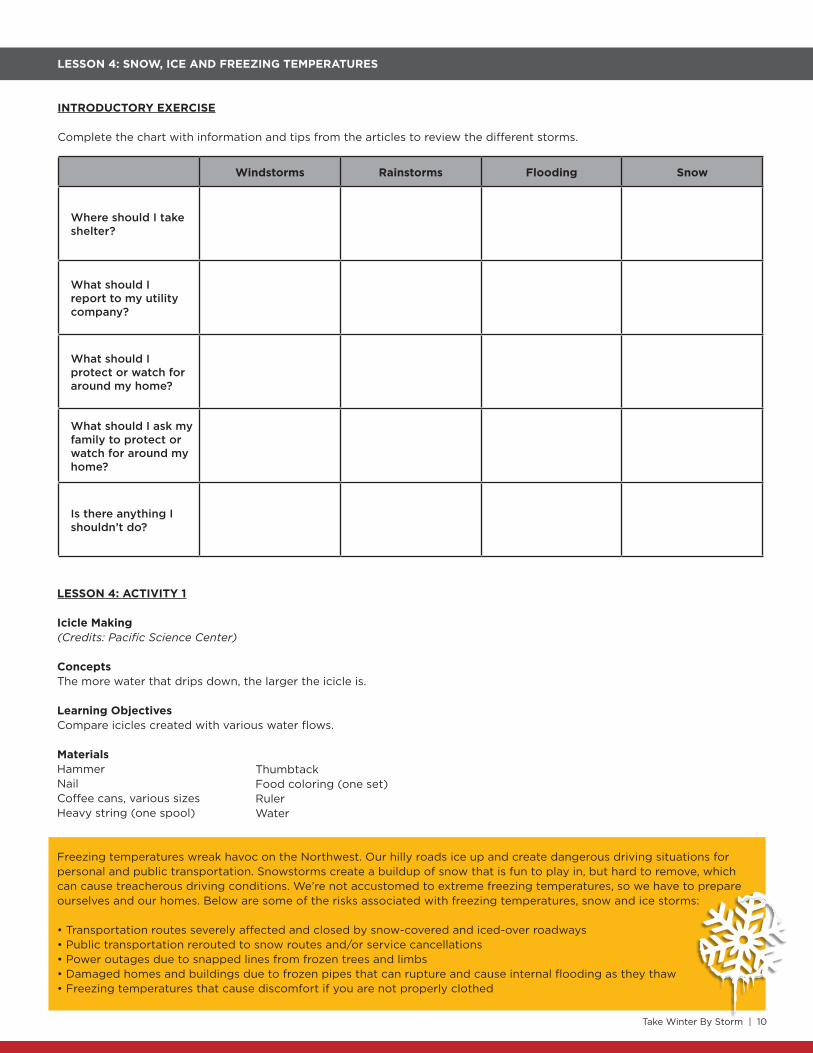
Complete the chart with information and tips from the articles to review the different storms.
Windstorms Rainstorms Flooding Snow
Where should I take shelter?
What should I report to my utility company?
What should I protect or watch for around my home?
What should I ask my family to protect or watch for around my home?
Is there anything I shouldn’t do?
LESSON 4: ACTIVITY 1
Icicle Making (Credits: Pacific Science Center)
ConceptsThe more water that drips down, the larger the icicle is.
Learning ObjectivesCompare icicles created with various water flows.
Materials Hammer Nail Coffee cans, various sizes Heavy string (one spool)
Freezing temperatures wreak havoc on the Northwest. Our hilly roads ice up and create dangerous driving situations for personal and public transportation. Snowstorms create a buildup of snow that is fun to play in, but hard to remove, which can cause treacherous driving conditions. We’re not accustomed to extreme freezing temperatures, so we have to prepare ourselves and our homes. Below are some of the risks associated with freezing temperatures, snow and ice storms:
• Transportation routes severely affected and closed by snow-covered and iced-over roadways • Public transportation rerouted to snow routes and/or service cancellations • Power outages due to snapped lines from frozen trees and limbs • Damaged homes and buildings due to frozen pipes that can rupture and cause internal flooding as they thaw • Freezing temperatures that cause discomfort if you are not properly clothed
Thumbtack Food coloring (one set) RulerWater

Take Winter By Storm | 11
Process Use the nail to punch three holes, evenly spaced, along the top of each can.
Tie string through each hole and then tie the other ends of the string together to form a loop with which to hang them.
In the bottom center of each can, make a hole with the thumbtack, varying the size of the hole from can to can.
On a cold night, take the cans outside and fill with water (or use a freezer).
Using the food coloring, tint the water a different color for each can.
Hang the cans in a safe place.
The next morning, check the icicles and measure.
Explanation The size of the icicle will depend on the size of the hole in the bottom of the can. The larger the hole, the larger the icicle — because icicles form when water drips from the same place for a long time. So if more water drips, more water will freeze into an icicle.
As residents of cold climates know, icicles form when melting snow begins dripping from a surface such as the edge of a roof. For an icicle to grow, there must be a constant layer of water flowing over it.
The growth of an icicle is caused by the diffusion of heat away from the icicle by a thin fluid layer of water and the resulting updraft of air traveling over the surface. The updraft of air occurs because the icicle is generally warmer than its surrounding environment, and thus convective heating causes the air surrounding the icicle to rise. As the rising air removes heat from the liquid layer, some of the water freezes, and the icicle grows thicker and elongates.
LESSON 4: ACTIVITY 2
Sticky Ice(Credits: Pacific Science Center)
ConceptsSalt changes the freezing temperature of water, making ice melt more quickly.
Learning ObjectivesDemonstrate that salt changes the way ice acts. (Provided to Take Winter By Storm by Pacific Science Center)
Materials Ice Water Bowl String Salt (one small container)
Process Get a bowl of water with an ice cube in it. Look at the bowl and make observations about the ice cube.
Grab a piece of string and try to pick up the ice. Only the string can be touching the ice (no hands!). Work on this for a while, but realize that this is a pretty impossible task, so don’t let this step go on so long that you get frustrated.
When you are ready, it’s time to bring out the secret ingredient: salt! Grab a small container of salt (hint: it works better on the ice than in the water). Now try again.
As you’re working, here is some help with the salty solution: Lay the string gently across the ice and put salt over the ice cube. Slowly count to 10 and — presto! — the ice will stick to the string.

Take Winter By Storm | 12
Background InformationSalt melts ice. The chemical principles behind the use of salt are matter and equilibrium.
Everything is made up of atoms. Combining several atoms — for example, two hydrogen atoms and one oxygen atom — produces one molecule of water. A beaker of water is made up of millions of molecules. These molecules move around. When they are cooled down to freezing, below 0°C or 32°F, they move slower until a seed crystal is formed. This crystal increases in size as it captures more slow-moving molecules until all the water is frozen. If this ice is placed on a plate at room temperature, the molecules at the surface begin to move faster, creating a layer of water on the surface of the ice. More water is formed as the molecules in the ice come in contact with the liquid and begin to move faster until all the ice has melted.
Equilibrium is the preservation of balance between two systems: for example, water and ice. The balance between water and ice is maintained at 0°C, the temperature at which water melts. Heating or cooling the ice/water mixture above or below this temperature upsets the balance and causes a change in the equilibrium (melting or freezing). The addition of a foreign substance such as salt will also disrupt the equilibrium. The foreign molecules dissolve in the water but do not pack easily into the tight structure of the solid. This means that the rate of freezing is slower as the total number of water molecules captured by the ice per second decreases. The rate of melting does not change in the presence of foreign molecules, so melting occurs faster than freezing. This is why salt melts ice.
Also, adding salt lowers the temperature at which water freezes. Freshwater freezes at 0°C. The saltier the water is, the colder it has to be to freeze. The freezing point of seawater is around -1.9°C, although the freezing point changes at different concentrations of salt. The more salt, the lower/colder the freezing point. Other substances, such as different chemicals we put on roads and sidewalks to prevent them from freezing, also cause the freezing point of water to get lower.
LESSON 4: EXTENSION ACTIVITYWrite the Wheedle About Preparedness
Write the Wheedle a letter or note about one of the following topics:1. What winter-weather preparation he should do to be prepared for living atop the Space Needle with his little friend Noodle.2. What your family has done to get prepared for winter weather.
Post the note (and a picture, if you’d like) to Take Winter By Storm’s Facebook page. (Use the Create a Classroom Preparedness Kit Extension Activity in Lesson 1 as an activity for this writing project.) The Wheedle may pick your letter or note for an upcoming media event!
Take Winter By Storm Materials to Accompany Lesson 4:
• Snow, Ice and Freezing Temperatures Preparedness Wheedle coloring sheet • Take Winter By Storm Freezing Temperatures Preparedness Checklist • Take Winter By Storm Winter Driving Preparedness Checklist • Take Winter By Storm Winter Public Transportation Checklist
Newspapers In Education Materials to Accompany Lesson 4:
“Get Weather Ready with Take Winter By Storm”: https://ad.seattletimes.com/FlippingBook/NIE/2016/TakeWinterByStorm/
‘Are you ready for winter weather?’: http://www.seattletimes.com/nwshowcase/take-winter-by-storm/are-you-ready-for-winter-weather/
‘Checklists for winter-storm prep’: http://www.seattletimes.com/nwshowcase/take-winter-by-storm/checklists-for-winter-storm-prep/
LESSON 1–4 EXTENSION ACTIVITYKnow the Weather Coming Your Way — Be A Sky Watcher!(Credits: Pacific Science Center and National Weather Service/NOAA)
Concepts • There are different types of clouds at different levels of atmosphere. Different clouds produce different types of weather.
• Know what type of weather is coming your way by looking to the clouds.
Learning ObjectivesParticipants will be able to:
• Use creativity to make a cloud representing a real type, and place it in the correct level of the atmosphere
• Understand the weather patterns that clouds create.
Take Winter By Storm | 13
MaterialsYarn, light blue – one spool Cotton swabs – one boxHalloween spider webbing – one bag White tissue paper – one packagePillow stuffing – one bag Gray spray paint – one canAqua Net hairspray – one can Print posters of cloud types (11”x17” size paper) – one per table and/or one per student
English Cloud Chart: science-edu.larc.nasa.gov/cloud_chart/PDFs/NOAA-NASA-CloudChart.pdfSpanish Cloud Chart: science-edu.larc.nasa.gov/cloud_chart/PDFs/Cloudchart_ESP.pdf
Process1. Pass out a long piece of string to each table. Tell them that when they are done with the activity, this string is going to hang from the ceiling over their table. Tell them they are going to make clouds over their tables to decorate the room.
2. Talk about how different types of clouds form at different elevations.
Q: Can anyone describe looking out the window of an airplane on a beautiful day with white puffy clouds? Talk about takeoff: What do you see at first, after a few minutes and as time keeps going? (Pass through the clouds.)
3. Clouds form as different types the higher up they are. For this activity, imagine your table is the earth, and the ceiling is high up in the atmosphere, above the clouds.
Q: How many feet do you think that would be? (60,000 feet is the top of highest cumulonimbus thunderhead clouds.)
4. You can think about clouds at three levels:
High-Level Clouds: They form above 16,000 feet (6,000 meters). Since the temperatures are so cold at such high elevations, these clouds are composed primarily of ice crystals. High-level clouds are typically thin and white in appearance, but can appear in a magnificent array of colors when the sun is low on the horizon. Example: cirrus
Mid-Level Clouds: The bases of mid-level clouds typically appear at 6,500 feet (2,000 meters). Because of their lower altitudes, they are composed primarily of water droplets; however, they can also be composed of ice crystals when temperatures are cold enough. Examples: altocumulus, altostratus, nimbostratus
Low-Level Clouds: Low-level clouds are composed mostly of water droplets since their bases generally lie below 6,500 feet (2,000 meters). However, when temperatures are cold enough, these clouds may also contain ice particles and snow. Examples: cumulus, stratocumulus
5. Divide your string into three sections, for high-, mid- and low-level clouds. Use paper and tape to label the different sections.
6. Now, use your poster to choose as a table two to three different clouds you want to make to hang over your table. Your job is to get them to look like the real thing as much as possible. They will be hung so that they fall at the right elevation. You will be able to use these materials (show them everything outlined above). If you want to darken a cloud to gray, an adult can spray-paint it for you outside (be sure to lay garbage bags down so you don’t permanently paint the walkway).
7. After you are finished producing the clouds, attach the string to them carefully, making sure it is the right length so that when it is hung it will fall in the right level of the atmosphere. Also attach a label somewhere on the string so that you can tell what kind of cloud it is.
8. Once the clouds are up, look at all the clouds over the other tables (“cloud gazing”).
BackgroundClouds form when air becomes cold enough to form water droplets or ice crystals. There are many different types of clouds, but it is often difficult to tell which are which because they are constantly changing. Clouds are described using some of these Latin words: • Cirrus: a lock of curly hair. • Cumulus: a heap or pile.
• Stratus: a layer. • Nimbus: rain-bearing.

Take Winter By Storm | 14

Take Winter By Storm | 15

Take Winter By Storm | 16

Take Winter By Storm | 17
Take Winter By Storm | 18
Take Winter By Storm | 19
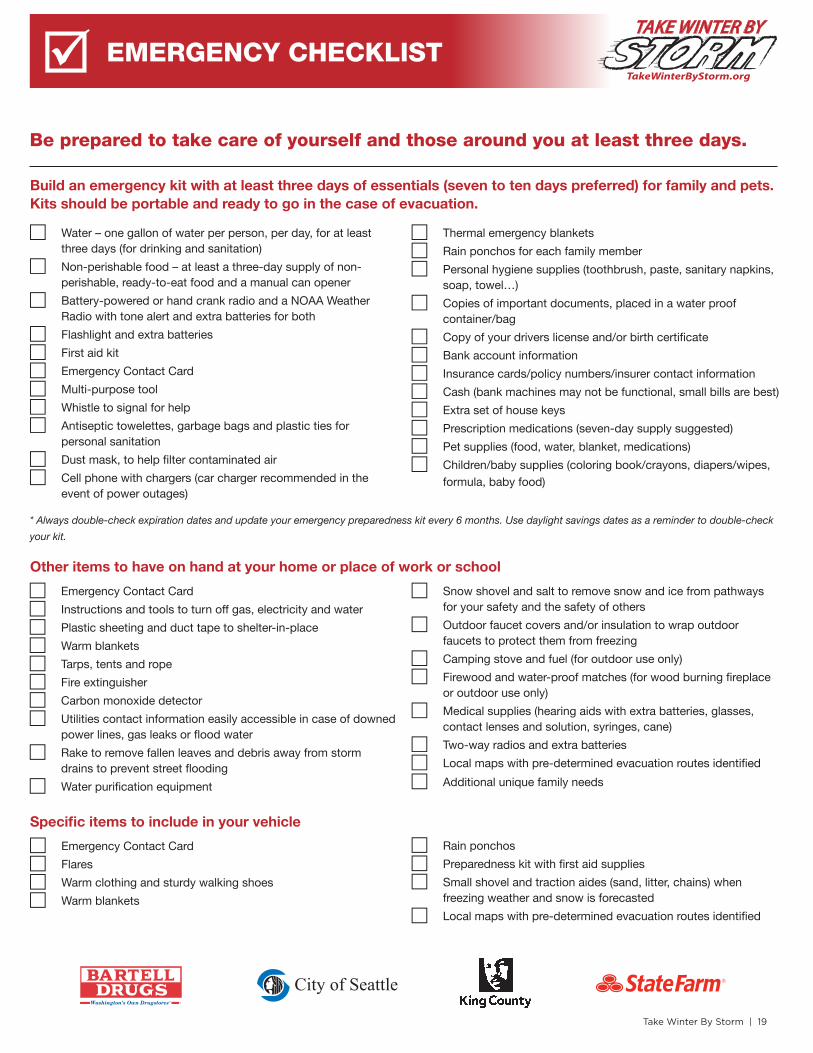
Be prepared to take care of yourself and those around you at least three days.
EMERGENCY CHECKLIST
F Water – one gallon of water per person, per day, for at least three days (for drinking and sanitation)
F Non-perishable food – at least a three-day supply of non-perishable, ready-to-eat food and a manual can opener
F Battery-powered or hand crank radio and a NOAA Weather Radio with tone alert and extra batteries for both
F Flashlight and extra batteries
F First aid kit
F Emergency Contact Card
F Multi-purpose tool
F Whistle to signal for help
F Antiseptic towelettes, garbage bags and plastic ties for personal sanitation
F Dust mask, to help filter contaminated air
F Cell phone with chargers (car charger recommended in the event of power outages)
F Thermal emergency blankets
F Rain ponchos for each family member
F Personal hygiene supplies (toothbrush, paste, sanitary napkins, soap, towel…)
F Copies of important documents, placed in a water proof container/bag
F Copy of your drivers license and/or birth certificate
F Bank account information
F Insurance cards/policy numbers/insurer contact information
F Cash (bank machines may not be functional, small bills are best)
F Extra set of house keys
F Prescription medications (seven-day supply suggested)
F Pet supplies (food, water, blanket, medications)
F Children/baby supplies (coloring book/crayons, diapers/wipes, formula, baby food)
* Always double-check expiration dates and update your emergency preparedness kit every 6 months. Use daylight savings dates as a reminder to double-check
your kit.
Build an emergency kit with at least three days of essentials (seven to ten days preferred) for family and pets. Kits should be portable and ready to go in the case of evacuation.
Other items to have on hand at your home or place of work or school
F Emergency Contact Card
F Instructions and tools to turn off gas, electricity and water
F Plastic sheeting and duct tape to shelter-in-place
F Warm blankets
F Tarps, tents and rope
F Fire extinguisher
F Carbon monoxide detector
F Utilities contact information easily accessible in case of downed power lines, gas leaks or flood water
F Rake to remove fallen leaves and debris away from storm drains to prevent street flooding
F Water purification equipment
F Snow shovel and salt to remove snow and ice from pathways for your safety and the safety of others
F Outdoor faucet covers and/or insulation to wrap outdoor faucets to protect them from freezing
F Camping stove and fuel (for outdoor use only)
F Firewood and water-proof matches (for wood burning fireplace or outdoor use only)
F Medical supplies (hearing aids with extra batteries, glasses, contact lenses and solution, syringes, cane)
F Two-way radios and extra batteries
F Local maps with pre-determined evacuation routes identified
F Additional unique family needs
Specific items to include in your vehicle
F Emergency Contact Card
F Flares
F Warm clothing and sturdy walking shoes
F Warm blankets
F Rain ponchos
F Preparedness kit with first aid supplies
F Small shovel and traction aides (sand, litter, chains) when freezing weather and snow is forecasted
F Local maps with pre-determined evacuation routes identified
City of Seattle

Take Winter By Storm | 20
EMERGENCY CHECKLIST
F Water – one gallon of water per person, per day, for at least three days (for drinking and sanitation)
F Non-perishable food – at least a three-day supply of non-perishable, ready-to-eat food and a manual can opener
F Battery-powered or hand crank radio and a NOAA Weather Radio with tone alert and extra batteries for both
F Flashlight and extra batteries
F First aid kit
F Emergency Contact Card
F Multi-purpose tool
F Whistle to signal for help
F Antiseptic towelettes, garbage bags and plastic ties for personal sanitation
F Dust mask, to help filter contaminated air
F Cell phone with chargers (car charger recommended in the event of power outages)
F Thermal emergency blankets
F Rain ponchos for each family member
F Personal hygiene supplies (toothbrush, paste, sanitary napkins, soap, towel…)
F Copies of important documents, placed in a water proof container/bag
• Copy of your drivers license and/or birth certificate
• Bank account information
• Insurance cards/policy numbers/insurer contact information
F Cash (bank machines may not be functional, small bills are best)
F Extra set of house keys
F Prescription medications (seven-day supply suggested)
F Pet supplies (food, water, blanket, medications)
F Children/baby supplies (coloring book/crayons, diapers/wipes, formula,
baby food)
Other items to have on hand at your home or place of work or school
F Emergency Contact Card
F Instructions and tools to turn off gas, electricity and water
F Plastic sheeting and duct tape to shelter-in-place
F Warm blankets
F Tarps, tents and rope
F Fire extinguisher
F Carbon monoxide detector
F Utilities contact information easily accessible in case of downed power lines, gas leaks or flood water
F Rake to remove fallen leaves and debris away from storm drains to prevent street flooding
Build an emergency kit with at least three days of essentials (seven to ten days preferred) for
family and pets. Kits should be portable and ready to go in the case of evacuation.
* Always double-check expiration dates and update your emergency preparedness kit every 6 months. Use daylight savings dates as a reminder to double-check
your kit.
F Snow shovel and salt to remove snow and ice from pathways for your safety and the safety of others
F Outdoor faucet covers and/or insulation to wrap outdoor faucets to protect them from freezing
F Camping stove and fuel (for outdoor use only)
F Firewood and water-proof matches (for wood burning fireplace or outdoor use only)
F Water purification equipment
F Medical supplies (hearing aids with extra batteries, glasses, contact lenses and solution, syringes, cane)
F Two-way radios and extra batteries
F Local maps with pre-determined evacuation routes identified
F Additional unique family needs
Take Winter By Storm and The Wheedle, from “Wheedle on the Needle” by author Stephen Cosgrove, have teamed up to get you and your family prepared for winter weather. Get prepared now to take care of yourself and those around you for at least three days. Follow the checklist below...
© S. Cosgrove 2012
City of Seattle

Take Winter By Storm | 21
Directions:Print out a card for every member of your household and for all of your preparedness sites. Fill in your emergency contact information. Carry this card with you and keep one in your preparedness kit, home communication center, automobile and at your place of work or school to reference in the event of an emergency.
Police: 9-1-1 or
Fire: 9-1-1 or
Ambulance: 9-1-1 or
Poison Control Center: 1-800-222-1222
Healthcare Provider:
Insurance Provider:
Utilities (gas, electricity, water):
Name:
Address:
Home Phone:
Work Phone:
Cell Phone:
Local Contact
Name:
Phone (day):
Phone (night):
Address:
Out-of-area Contact
Name:
Phone (day):
Phone (night):
Meeting Place Outside of Neighborhood
Location Name:
Phone:
Address:
Other
Impo
rtan
t Pho
ne N
umbe
rs
My Contact Inform
ation Em
ergency ContactsM
eeting Place Information
FOLDHERE
FOLDHERE
FOLDHERE
Visit TakeWinterByStorm.org for more valuable information on creating an emergency communications plan, putting together an emergency preparedness kit and other important preparedness information.
Police: 9-1-1 or
Fire: 9-1-1 or
Ambulance: 9-1-1 or
Poison Control Center: 1-800-222-1222
Healthcare Provider:
Insurance Provider:
Utilities (gas, electricity, water):
Name:
Address:
Home Phone:
Work Phone:
Cell Phone:
Local Contact
Name:
Phone (day):
Phone (night):
Address:
Out-of-area Contact
Name:
Phone (day):
Phone (night):
Meeting Place Outside of Neighborhood
Location Name:
Phone:
Address:
Other
Impo
rtan
t Pho
ne N
umbe
rs
My Contact Inform
ation Em
ergency ContactsM
eeting Place Information
Visit TakeWinterByStorm.org for more valuable information on creating an emergency communications plan, putting together an emergency preparedness kit and other important preparedness information.
EMERGENCY CONTACT CARD
City of Seattle

Take Winter By Storm | 22
FAMILY COMMUNICATION PLAN
Make a Family Communication Plan Your family may not be together when a storm disaster strikes. Plan how you will stay informed and contact one another. Review what you will do in different situations.
Discuss with your family and/or friends how to prepare for and respond to emergencies that are most likely to happen where
you live, learn, work and play. Identify responsibilities for each member of your household and plan to work together as a team.
Learn how to use technology to be weather ready for storms. Go to www.TakeWinterByStorm.org for National Weather Service
forecasts for your local area, weather information resources and to register for alert systems in your area.
Ask places your family frequents if they have site-specific emergency plans. Schools, childcare providers, workplaces and
apartment buildings should have a plan, know who they will communicate with families during a crisis, and store adequate food,
water and other basic supplies. Find out if they are prepared to “shelter-in-place” if need be, and where they plan to go if they
must evacuate. Post this contact information on your Family Communication Plan and Emergency Contact Card.
Identify a safe out-of-neighborhood meeting place. During a storm related disaster, family members may not be in the same
location. In case your neighborhood has been damaged in a storm related event, a safe out-of-neighborhood meeting place may
be the best alternative. This place may also be the best place to meet in case family members get separated. Know the phone
number and contact information of your family out-of-neighborhood meeting place.
Identify an out-of area contact. After a disaster, long distance phone lines may be more reliable than local lines. Ask a friend
or relative who lives outside of Washington state to be your “family contact.” After a disaster, your family contact becomes a
communication point to share information with all household members. Your plan depends on everyone knowing your contact’s
phone number.
Complete the Family Communication Plan on the next page and post in places your family spends most of their time.
Complete the Emergency Contact Card and place in all preparedness kits, home communication center, automobile and at
your place of work or school. You can find downloadable cards at TakeWinterByStorm.org.
Program all emergency contact numbers into all of your phones and keep a list with you because your personal address book
on your phone may not be accessible. Tell your local emergency contact and out-of-area contact that you’ve listed them as
emergency contacts. Make sure your out-of-neighborhood meeting place has a phone available for communication.
Use text messaging if network disruptions are causing phone calls not to go through. Wireless phones will not work if the
electricity is out. Corded (also known as land line) phones are the most reliable.
Stay informed. Tune in to local media channels for important updates and directives. Go to TakeWinterByStorm.org for links
on how to register for alert systems in your area.
Get your children involved in emergency preparedness. Go to TakeWinterByStorm.org for fun games and educational resources for children.
City of Seattle
Take Winter By Storm | 23
PET PREPAREDNESS
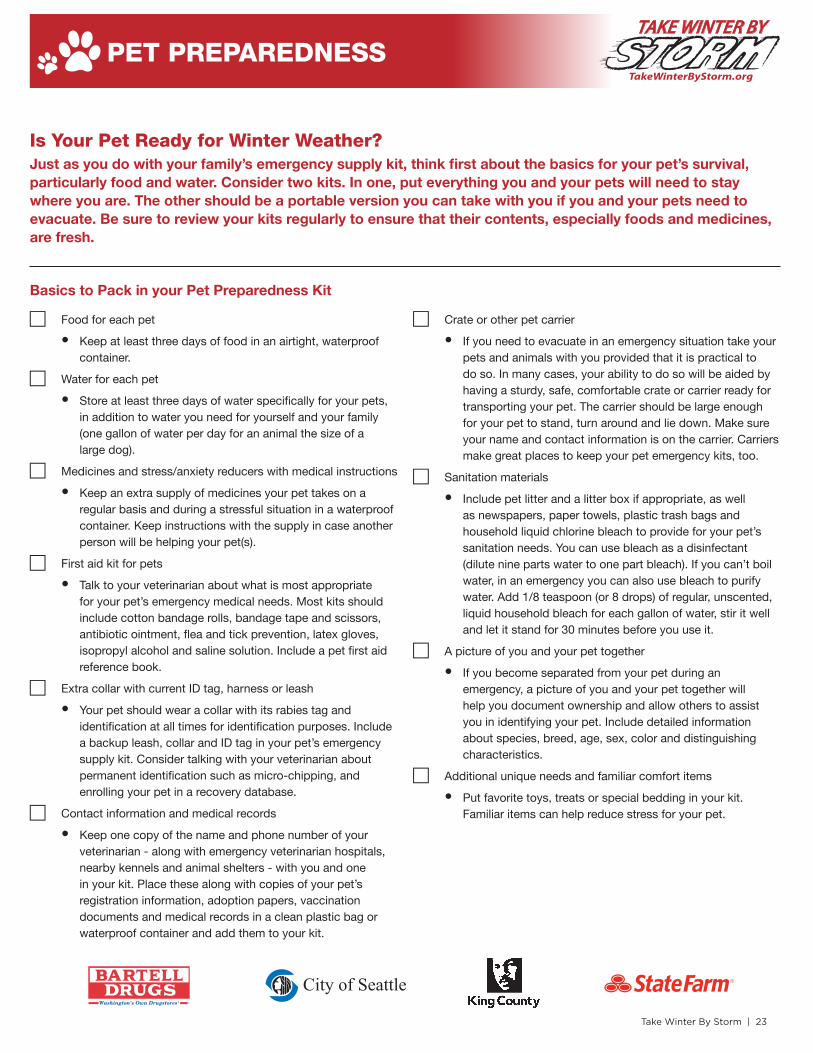
Is Your Pet Ready for Winter Weather?Just as you do with your family’s emergency supply kit, think first about the basics for your pet’s survival, particularly food and water. Consider two kits. In one, put everything you and your pets will need to stay where you are. The other should be a portable version you can take with you if you and your pets need to evacuate. Be sure to review your kits regularly to ensure that their contents, especially foods and medicines, are fresh.
Basics to Pack in your Pet Preparedness Kit
F Food for each pet
• Keep at least three days of food in an airtight, waterproof container.
F Water for each pet
• Store at least three days of water specifically for your pets, in addition to water you need for yourself and your family (one gallon of water per day for an animal the size of a large dog).
F Medicines and stress/anxiety reducers with medical instructions
• Keep an extra supply of medicines your pet takes on a regular basis and during a stressful situation in a waterproof container. Keep instructions with the supply in case another person will be helping your pet(s).
F First aid kit for pets
• Talk to your veterinarian about what is most appropriate for your pet’s emergency medical needs. Most kits should include cotton bandage rolls, bandage tape and scissors, antibiotic ointment, flea and tick prevention, latex gloves, isopropyl alcohol and saline solution. Include a pet first aid reference book.
F Extra collar with current ID tag, harness or leash
• Your pet should wear a collar with its rabies tag and identification at all times for identification purposes. Include a backup leash, collar and ID tag in your pet’s emergency supply kit. Consider talking with your veterinarian about permanent identification such as micro-chipping, and enrolling your pet in a recovery database.
F Contact information and medical records
• Keep one copy of the name and phone number of your veterinarian - along with emergency veterinarian hospitals, nearby kennels and animal shelters - with you and one in your kit. Place these along with copies of your pet’s registration information, adoption papers, vaccination documents and medical records in a clean plastic bag or waterproof container and add them to your kit.
F Crate or other pet carrier
• If you need to evacuate in an emergency situation take your pets and animals with you provided that it is practical to do so. In many cases, your ability to do so will be aided by having a sturdy, safe, comfortable crate or carrier ready for transporting your pet. The carrier should be large enough for your pet to stand, turn around and lie down. Make sure your name and contact information is on the carrier. Carriers make great places to keep your pet emergency kits, too.
F Sanitation materials
• Include pet litter and a litter box if appropriate, as well as newspapers, paper towels, plastic trash bags and household liquid chlorine bleach to provide for your pet’s sanitation needs. You can use bleach as a disinfectant (dilute nine parts water to one part bleach). If you can’t boil water, in an emergency you can also use bleach to purify water. Add 1/8 teaspoon (or 8 drops) of regular, unscented, liquid household bleach for each gallon of water, stir it well and let it stand for 30 minutes before you use it.
F A picture of you and your pet together
• If you become separated from your pet during an emergency, a picture of you and your pet together will help you document ownership and allow others to assist you in identifying your pet. Include detailed information about species, breed, age, sex, color and distinguishing characteristics.
F Additional unique needs and familiar comfort items
• Put favorite toys, treats or special bedding in your kit. Familiar items can help reduce stress for your pet.
City of Seattle

Take Winter By Storm | 24
PREPAREDNESS ON A BUDGET
Preparedness on a Budget
Plan for the types of natural disasters that can happen in your area.
Create your own personalize list. You may not need everything included in “ready-made” kits and there may be additional
items you need based on your personal situation. For example, if you have pets, you may need special items. Don’t forget to
have supplies in your car and at work.
Look around your home first for items you can place in your kit using the personalized list you create. You may be surprised
how many items you already have around your home that just need to be pulled together.
Budget emergency preparedness items as a “normal” expense. Even $20 a month can go a long way to helping you be ready.
Buy one preparedness item each time you go to the grocery store.
Save by shopping sales. Make use of coupons and shop at stores with camping supplies and used goods. Dollar and used
goods stores have a lot of needed supplies.
Test your emergency preparedness kit every 6 months. Only replace and cycle through those items that have a shelf life
(i.e. water, food, batteries). You may want to test the radio and flashlight at the same time to make sure they are in good
working order. Use Daylight Savings dates as your preparedness test reminder dates.
Store water in safe containers. You don’t have to buy more expensive bottled water, but make sure any containers you use for
water storage are safe and disinfected.
Request preparedness items as gifts. We all receive gift we don’t need or use. What if your friends and family members gave
you gifts that could save your life? Don’t forget to protect them by sending preparedness gifts their way, too.
Think ahead. You are more likely to save money if you can take your time with focused and strategic shopping. It’s when
everyone is at the store right before a storm hits that you might buy things in urgency. Use a list to avoid duplicating items
when you are stressed or panicked.
Review your insurance policy annually and make necessary changes. When a disaster strikes, you want to know that your
coverage will help you get back on your feet. Renters need policies too, in order to cover personal property.
Update contact records. Have an accurate phone list of emergency contact numbers. If you are prepared, you may be able to
help friends and neighbors who need assistance. By sharing preparedness supplies, you can help each other.
Trade one night out to fund your family emergency preparedness kit. For example, taking a family of four to the movies can
cost upwards of $80-$100. Just one night of sacrifice could fund a family emergency preparedness kit.
City of Seattle

Take Winter By Storm | 25
EMERGENCY PREPAREDNESS KIT
Additional items to have on hand at your home and work or school:
F 7 gallon water holding container
F Plastic sheeting and duct tape
F Additional blankets
F Fire extinguisher
F Carbon monoxide detector
F Wrench or pliers to turn off utilities
F Rake
F Snow shovel
F Deicer
F Sand/non-clumping litter
F Outdoor faucet insulation materials/covers
F Camping stove and fuel (for outdoor use only)
F Firewood and water-proof matches (for wood burning fireplace or outdoor use only)
F Water purification equipment
F Medical supplies (hearing aids and batteries, glasses, contact lenses and solution, syringes, cane)
F Emergency reference materials such as a first aid book
F Household liquid chlorine bleach (unscented with no added cleaners) and medicine dropper
• You can use bleach as a disinfectant (dilute nine parts water to one part bleach). If you can’t boil water, in an emergency you can also use bleach to purify water. Add 1/8 teaspoon (or 8 drops) of regular, unscented, liquid household bleach for each gallon of water, stir it well and let it stand for 30 minutes before you use it.
F Two-way radios
F Safety beacon/flashing light
F Extra batteries (AAA, AA, C, D, 9-volt)
Shopping List:Think first about the basics for your family’s survival, particularly food and water. Consider two kits. In one, put everything you and your family will need to stay where you are. The other should be a portable version you can take with you in case of evacuation. Be sure to review your kits regularly to ensure that their contents, especially foods and medicines, are fresh.
Basics to pack in your Preparedness Kits for your home, work or school and vehicle:
F Water - one gallon of water per person, per day, for at least three days (for drinking and sanitation)
F Non-perishable food - at least a three-day supply of non-perishable, ready-to-eat food
F Battery powered radio/hand crank radio
F NOAA Weather Radio with tone alert
F Batteries (AAA, AA, C, D, 9-volt)
F Flashlight
F First aid kit
F Multi-purpose tool
F Whistle
F Antiseptic towelettes
F Garbage bags with plastic ties
F Dust mask
F Cell phone charger
F USB hand crank charger (may be included on hand crank radio)
F Blankets for each person
F Rain ponchos
F Personal hygiene supplies (toothbrush, paste, sanitary napkins, soap, towel, etc.)
F Prescription medications (seven-day supply suggested)
F Cash
F Can opener
F Paper and pencil for notes
F Pet supplies (food, water, blanket, medications)
F Children/baby supplies (diapers/wipes, formula, baby food, coloring book/crayons)
City of Seattle

Take Winter By Storm | 26
HOUSE MAINTENANCE LIST
Your house is more than just an investment: It’s your home. So naturally, you’ll want to take good care of it. Take the time to prepare your home prior to the oncoming cold weather. Ready everything for the cold months ahead.
F Create and follow a weatherization/risk management plan for your home or property (like the one below) to minimize storm impacts and follow each year at the beginning of storm season.
F Conduct annual reviews of your property insurance to understand and address coverage needs. Ask about flood insurance or coverage for sewer/storm drain back-up.
F Complete a detailed home inventory of your possessions and keep in a safe place away from your home (like a safe deposit box). You can find a downloadable form at TakeWinterByStorm.org.
Roof, Attic and Gutters
F Check your roof for loose, missing, worn, or damaged shingles and make sure flashing is secure around vents and chimneys to eliminate flying debris and reduce the chance of possible water damage.
F Inspect the insulation in your attic and crawl space. Seal areas around recessed lights, the attic hatch, and plumbing vents that may be allowing warm air from the living space below to enter the attic.
F Gutters should be clean, properly aligned, and securely attached. Inspect gutters a few times during the fall and winter months, especially if there are many trees around your house.
F Gutters and downspouts should direct water away from the foundation, as well as away from walkways and driveways, so that they do not become slippery or icy.
Outside Walls and Framing
Foundations and Basements
F Check soffits, siding, brick walls, trim, and flashing for damage, looseness, warping, and decay.
F Look for termite damage and signs of other insects or rodents.
F Keep snow build-up off of surfaces that could collapse.
F Check foundations for signs of settling, such as bulging or shifting. Have a professional inspect cracks more than 1/8-inch wide.
F Check the foundation for small cracks or openings where mice or other pests can tunnel in. Winter is when they seek the warmth indoors, so seal up any possible entrances.
F Look in your basement and crawl spaces for dampness and leakage. Standing water could be a sign of improper drainage, which can weaken the foundation.
F Test your sump pump before every wet season. Consider installing battery-operated backup sump pumps to protect against a power failure or mechanical failure of the primary pump.
Smoke and Carbon Monoxide Detectors
F Check that detectors are functioning; change batteries at least once a year.
F Replace units every eight years.
While following a general home maintenance schedule is important year-round, there are specific maintenance efforts you should focus on to protect your home during cold winter months. These guidelines can help you weather the winter season with a well-maintained home.
City of Seattle

Take Winter By Storm | 27
GET READY FOR WIND STORMS
Watch weather forecasts for potential wind storms. These guidelines can help you get prepared before the winds blow.
Power Outages
Personal Preparedness
F Use the Take Winter By Storm Checklist to prepare an emergency kit, including a radio, flashlight, extra batteries, a first-aid kit, emergency contact information, water, and non-perishable food. You can find a detailed list at TakeWinterByStorm.org.
F Keep flashlights, extra batteries and your utility’s contact information in an easy-access location at home and work in case of power outages.
F Prepare for power outages in advance of storm season.
• If you are planting trees near power lines, make sure to plant the right tree in the right place so it’s growth doesn’t interfere with power lines.
• Call your electric utility if you see trees on or near your property that are interfering with power lines.
F Report power outages or downed power lines as soon as they occur by calling your utility.
F Always stay away from downed power lines; or anything near a power line.
F If you find yourself near a downed power line, shuffle your feet away from the power line to avoid ground shock.
F Do not drive over downed power lines. Should a power line fall on your car when you’re driving, stay in the car until help arrives.
F If you must leave your car because of fire or other danger, jump away from the vehicle so that you do not touch the vehicle and ground at the same time. Land with your feet together and shuffle your feet away from the line to a safe location.
F If your power goes out, use flashlights. Avoid candles, oil lamps or anything with an open flame.
F Never use charcoal or gas grills as an indoor heating or cooking source. They can cause carbon monoxide poisoning.
F Use light sticks or small flashlights as landing strips for trip-prone areas in your home. Pick-up clutter around the floors to avoid stubbed toes.
F Follow manufacturer’s instructions when operating a generator. Test the operation of generators prior to a power outage and review manufacturer recommendations on connections and fueling. Locate generators outdoors and far from doors, windows and vents that could allow carbon monoxide to come indoors.
F Never use a generator inside homes, garages, crawlspaces, sheds or similar areas. Deadly levels of carbon monoxide can quickly build up in these areas and can linger for hours, even after the generator has shut off.
F Install battery-operated carbon monoxide alarms or plug-in carbon monoxide alarms with battery back-up in your home, according to the manufacturer’s instructions. Test batteries often.
F Keep your contact devices (cell phones, smart phones, laptops, tablets) fully charged in case of a power outage or prior to heading out into the elements for an extended length of time. To ensure backup, bring chargers and vehicle chargers for your contact devices with you.
F Use text messaging if power outages and network disruptions are causing phone calls not to go through. Wireless phones will not work if the electricity is out. Corded (also known as land line) phones are the most reliable.
F Stay informed. Use your battery or hand crank radio to tune in to local media channels for important updates and directives. Go to TakeWinterByStorm.org for links on how to register for alert systems in your area.
When wind storms strike, first ensure your own safety. Then check in with family, friends, and neighbors to make sure they are OK.
City of Seattle

Take Winter By Storm | 28
GET READY FOR HEAVY RAINS AND FLOODING
Watch weather forecasts for the potential of heavy rains or rainfall build-up over multiple days. These guidelines can help you get prepared before the waters rise.
Personal Preparedness
F Use the Take Winter By Storm Checklist to prepare an emergency kit, including a radio, flashlight, extra batteries, a first-aid kit, emergency contact information, water, and non-perishable food. You can find a detailed list at TakeWinterByStorm.org.
F Keep rain gear, water repellent clothing and extra warm clothing handy at home, work and in your vehicle to use in an emergency.
Drainage/Landslides
F Rake leaves and debris away from storm drains to keep them clear to avoid flooding streets and damage to personal property.
F Report flooding drains and streets as soon as possible.
F Double-check your homeowner’s policy to see if you are covered for storm water damage in your home – if not, add this coverage to your insurance.
F Watch the patterns of storm water drainage on slopes near your home, and note the places where runoff water converges.
F Grade property so water drains away from the foundation and downspouts direct water and from property into the storm drainage system.
F Watch the hills around your home for any signs of land movement, such as small landslides, debris flows or progressively tilting trees. Contact your local geotechnical or
structural engineer to determine the severity of the problem.Flooding
F Keep valuables on high shelves when storing materials in basements or in areas that are prone to floods.
F Stay out of flooding basements. You could be electrocuted or drown.
F Never drive into standing water or around road-closure signs.
F If your vehicle stalls in water, abandon it and get to higher ground. It takes only a foot or two of rapidly-moving water to sweep away a car.
F If you live near rivers that historically flood, be prepared for river flooding. Have an emergency kit ready to grab and go in case of evacuation.
F Be safe. If a flood warning is issued, get to higher ground immediately! Follow evacuation and other official directions during flood emergencies, but don’t wait for them if you think you are in danger.
F Walking or playing around flood waters is dangerous; you can be knocked from your feet in water only six inches deep!
F Homeowners, renters and businesses should purchase flood insurance.
F If your natural gas furnace shuts down because of flooding, shut off the electric supply to the furnace until the water recedes and ducts are dry.
F If you smell a natural gas odor or suspect a leak, leave your home or building immediately and call your natural gas utility or 911.
F Notify your natural gas utility if flooding causes water levels to cover your gas meter. A representative from the utility will need to check the meter and regulator before any gas appliance can be used.
F If you have to evacuate your home or building as the result of a flood, shut off your gas and electricity, only if you can do so safely. This may prevent damage to your gas and electric appliances.
F Call your natural gas utility to schedule a service-check for your natural gas appliances after they have dried out and the area
around the affected appliances has been cleaned.
When heavy rains strike, first ensure your own safety. Then check in with family, friends, and neighbors to make sure they are OK.
City of Seattle

Take Winter By Storm | 29
GET READY FOR FREEZING TEMPERATURES AND SNOWFALL
Watch weather forecasts for potential of freezing temperatures and snow. These guidelines can help you get prepared before the freeze and snow.
When freezing temperatures and snow strike, first ensure your own safety. Then check in with family, friends, and neighbors to make sure they are OK.
Personal Preparedness
F Use the Take Winter By Storm Checklist to prepare an emergency kit, including a radio, flashlight, extra batteries, a first-aid kit, emergency contact information, water, and non-perishable food. You can find a detailed list at TakeWinterByStorm.org.
F Keep cold weather clothing and extra blankets handy at home, work and in your vehicle to use in an emergency to minimize heat loss.
F Keep portable heaters away from furniture, draperies and other flammable materials.
Cold/Freezing Weather Home Maintenance
Before the cold hits...
F Insulate pipes in your home’s crawl spaces and attic. These exposed pipes are most susceptible to freezing. Remember - the more insulation you use, the better protected your pipes will be.
F Heat tape or thermostatically-controlled heat cables can be used to wrap pipes. Be sure to use products approved by an independent testing organization, such as Underwriters Laboratories Inc., and only for the intended use (exterior or interior). Closely follow all manufacturers’ installation and operation instructions.
F Seal leaks that allow cold air inside near where pipes are located. Look for air leaks around electrical wiring, dryer vents and pipes. Use caulk or insulation to keep the cold out and the heat in. With severe cold, even a tiny opening can let in enough cold air to cause a pipe to freeze.
F Wrap outdoor pipes and faucets to keep them from freezing.
F Disconnect garden hoses and, if practical, use an indoor valve to shut off and drain water from pipes leading to outside faucets. This reduces the chance of freezing in the short span of pipe just inside the house.
When the mercury drops...
F A trickle of hot and cold water might be all it takes to keep your pipes from freezing. Let warm water drip overnight, preferably from a faucet on an outside wall.
F Open cabinet doors to allow heat to get to un-insulated pipes under sinks and appliances near exterior walls.
F Clear your sidewalks of snow and ice with salt, deicer and/or snow shoveling to avoid injuries on your property.
F Keep snow build-up off of surfaces that could collapse.
Before you leave your home for travel...
F Set the thermostat in your house no lower than 55°F (12°C).
F Ask a friend or neighbor to check your house daily to make sure it’s warm enough to prevent freezing.
F Shut off and drain the water system. Be aware that if you have a fire protection sprinkler system in your house, it will be deactivated when you shut off the water.
City of Seattle

Take Winter By Storm | 30
GET READY FOR WINTER WEATHER DRIVING
Double-check weather forecasts and traffic reports during winter weather storms. These guidelines can help you get prepared prior to your travels.
Winter Vehicle Maintenance
F Before the weather turns bad, make sure your vehicle is properly serviced and maintained. Ensure the electrical systems, brakes, batteries, lights, windshield wipers, antifreeze and heating and cooling systems are in good shape.
F Check your tires - they are very important. Keep tires properly inflated and make sure they have adequate tread. Plan ahead - tire dealers are busiest before and during winter storms.
F Use the Take Winter By Storm Checklist to prepare a vehicle emergency kit, including a radio, flashlight, extra batteries, a first-aid kit, emergency contact information, water, and non-perishable food. You can find a detailed list at TakeWinterByStorm.org.
F Double-check your vehicle for winter weather travel gear like extra warm clothing, a blanket, a small shovel, sand or non-clumping litter, emergency flares, deice materials, tire chains, and an ice scraper.
F As the temperature drops, keep your gas tank at least half full; the extra gas helps reduce condensation that can plug your fuel line with ice and stall your engine in cooler weather.
F Make sure your vehicle is completely up to date on regular scheduled maintenance to avoid costly repairs, reduce C02 emissions, and maintain optimum fuel economy.
F Carry tire chains and double check they are a proper fit for your vehicle’s tires.
Additional Items To Include In Your Vehicle*
F Portable Water
• Four, 16oz bottles per person per day (change out frequently)
F Non-perishable Food
• Easy-open snack bars, trail mix, crackers
F First aid kit, including personal medications
F Flashlight and extra batteries
F Emergency Contact Card
• Place with vehicle insurance information
F Winter clothing for each traveler
• Carry coats, boots, hats, gloves/mittens and/or scarves for each traveler – anything that would keep them warm if they need to evacuate the vehicle
F Whistle to signal for help
F Hand warmers
F Blankets for each traveler
F Rain gear
F Emergency flares and bright roadside traffic signal (cone, triangle)
F Safety beacon/flashing light
F Tool kit
• Include adjustable wrench, screw driver with adjustable bits (flat, square, Phillips), hammer, tow rope, duck tape
F Deicer for vehicles
F Ice scraper/brush
F Jumper cables
F Small shovel and traction aids (sand, non-clumping litter, chains)
F Paper, pen and local maps (with pre-determined travel routes)
• If you must leave your vehicle, be sure to leave a note telling others your travel plans
F Cell phone charger and/or extra battery
F Antiseptic towelettes, garbage bags and plastic ties for personal sanitation
*For a list to build a more detailed personal preparedness kit for your vehicle, go to TakeWinterByStorm.org.
City of Seattle

Take Winter By Storm | 31
GET READY TO USE PUBLIC TRANSPORTATION DURING WINTER WEATHER
Watch weather forecasts for potential of freezing temperatures and snow. These guidelines can help you get prepared before the freeze and snow.
Know Before You Go
How To Prepare Yourself
F Well before winter weather arrives, make a plan and a back-up plan for using public transportation when travel conditions worsen. Check websites of the various transportation agencies you use to find winter-travel information.
F Check weather and road conditions before you leave. If traffic is delayed in the areas where you plan to travel, then transit will likely be delayed.
F Check online for the status of rail, bus or ferry service with the appropriate agency.
F Know the snow routing for the systems and routes you use; be aware that some locations might not be served during snowy or icy weather.
F Subscribe to alerts offered by the different transit agencies you use, or may want to use during winter weather.
F Also, subscribe to local and regional emergency alert notifications.
F Know your employer’s policies about coming to work in an emergency, and when transportation services are limited.
F If you plan to telecommute, test your hardware and software in advance and keep chargers and extra batteries for backup.
F Give yourself extra time to travel by bus, train or ferry. Winter weather can disrupt schedules and routes. Also, increased ridership during bad weather can result in crowded rides.
F Be prepared for a longer-than-usual wait on the phone for the customer information service.
F Head for boarding areas at major transportation hubs. For bus service, go to stops on main arterials or at major transfer points such as park-and-ride lots, transit centers, or shopping centers.
F Dress warmly for the walk to bus stops, train stations, and ferry docks. Be sure to wear appropriate footwear for the weather. You may have to wait outdoors longer than you would normally.
F Pack and bring extra portable water, non-perishable food, mini first aid kit, medicines, small flashlight with extra batteries and a whistle (to signal for help) with you just case of an emergency.
F Bus riders should wait at bus stops at the very top or very bottom of hills, because buses are often unable to stop for passengers on inclines.
F Be aware that bus tracking programs lose accuracy when buses are rerouted or significantly delayed, so your favorite smartphone apps may not be reliable during this time.
F Keep your contact devices (cell phones, smart phones, laptops, tablets) fully charged prior to heading out in the elements for an extended length of time. To ensure backup, bring chargers for your contact devices with you.
City of Seattle