cranial osteopathy final - chirovideo.com · cranial osteopathy introduction: this is a...
TRANSCRIPT

1

Cranial OsteopathyTable of Contents
Cranial Osteopathy Page #
CHAPTER 1 7
The Four Diaphragms of the body
7
The Urogenital Diaphragm
7
Respiratory Diaphragm 8
Thoracic Inlet 8
Atlanto-occipital area 8
CHAPTER 2 9
Cranial Motions 9
Sphenobasilar movements
9
Flexion and extension 9
Side bending 9
Torsion 10
Lateral strain 10
Vertical strain 10
Spheno-basilar compression
10
The Vault Hold 11
2

Cranial Osteopathy Page #
The Classical Vault Hold
11
Extension phase 11
Side bending 12
Testing for torsion 12
Test for lateral strain 12
Vertical Strain 13
Spheno-basilar Compression
13
CHAPTER 3 14
Sutural Corrections 14
The “V” Spread Technique-Directing
Fluid Technique
14
CHAPTER 4 14
Cranial Corrections 14
The Temporal Bones-Temporal motion
14
Monitoring temporal motion
15
Testing the rotational component
15
Ch 5:The Parietal lift 16
Ch 6: The Frontal Bone
17
3

Cranial Osteopathy Page #
Motion 17
Frontal adjustment 17
An alternative 18
Rhinitis or sinusitis 18
Ch 7: The Zygoma 18
CHAPTER 8 18
TMJ Correction 19
Summary 19
CHAPTER 10 21
Intraoral Contacts 21
Corrections shown with a skull
21
The maxillary arch 21
The vomer 22
The hamulus 22
The palatines 23
Corrections shown on a patient
23
Test the maxilla for flexion & extension
24
Correction 25
Maxillary Sheer (lateral movement)
26
4
Cranial Osteopathy Page #
Torsion 26
The Vomer 27
Pterygoids 29
The Palatines 27
CHAPTER 11 29
CV4 29
CHAPTER 12 31
Conclusion 31
5
Cranial Osteopathy
Introduction: This is a demonstration of cranial osteopathy. My name is Tony Bryant. Iʼm an osteopath, British trained, currently working in Auckland, New Zealand. Iʼd like to introduce you to two concepts today. The first is of the fascia of the body which predispose longitudinally. If you can imagine the fascia as a complete system containing envelopes for the muscles and the various organs, you will get an idea of the whole continuity of the fascial system, including the dural tube and the CSF. This will give you a good base to look at craniopathy from. The second is the craniosacral motion itself, which is a newly discovered physiological system with a steady rhythm of about 8-10 cycles in the normal person, which persists throughout life. This is related to the production of CSF in the lateral ventricles by the choroid plexi. The most popular explanation of the craniosacral rhythm is that the sagittal sinus and possibly the straight sinus contain receptors which cause the lateral ventricles to shut off the production of CSF, allowing the natural boundaries of the dural compartment and the plates of the skull to compress the CSF, which is then dispersed through the venous system. This is the most popular of 3 new theories. It is known that the ventricles produce about 500 ccs of CSF in the course of a day. This is palpable on the cranium of the subject.
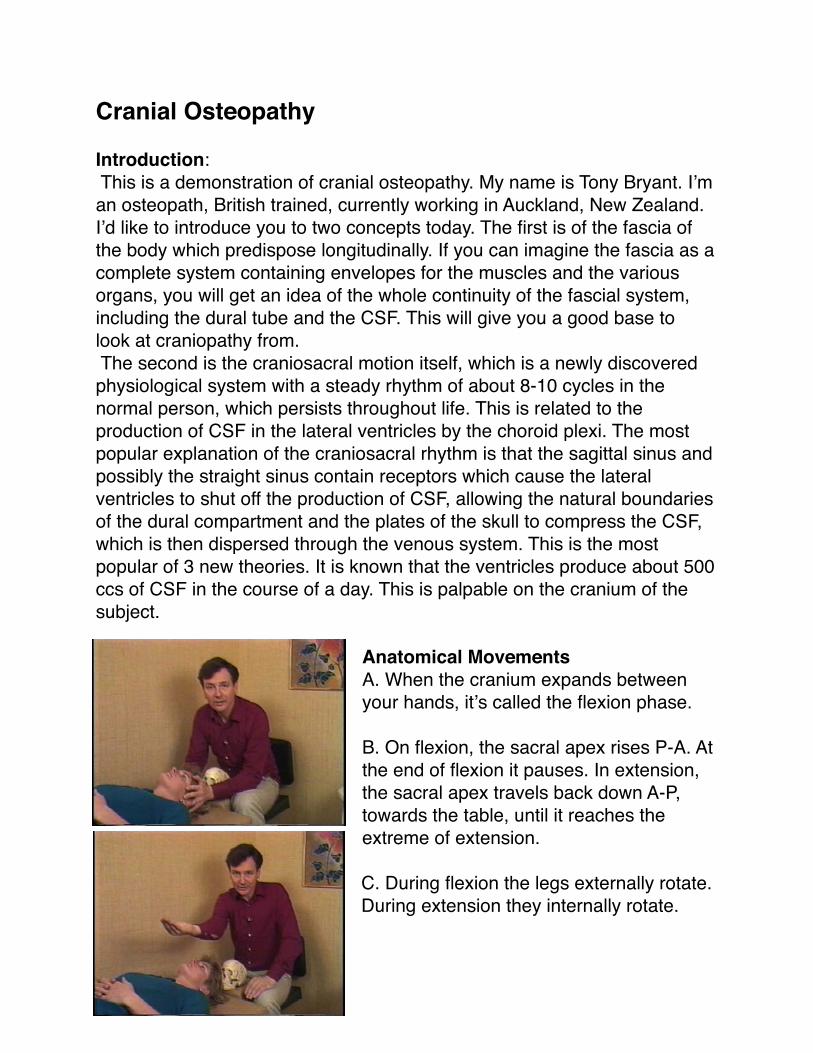
Anatomical Movements A. When the cranium expands between your hands, itʼs called the flexion phase. B. On flexion, the sacral apex rises P-A. At the end of flexion it pauses. In extension, the sacral apex travels back down A-P, towards the table, until it reaches the extreme of extension.
C. During flexion the legs externally rotate. During extension they internally rotate.
6

I. The Four Diaphragms of the body Connect in with the body and blend your awareness in your hands down the layers from the skin into the fascia. Stop as soon as you feel the fascial tension engaging in your hands.
A.The Urogenital Diaphragm 1. Place your lower hand on the sacral base from L4-S2 and your right hand superior to the pubic bone. Feel for which way the fascia is pulling you independent of the breath. Follow the energy pull of the fascia and go with it. Allow the tissues to move into the direction of ease. Follow the tissue into a barrier until there is a pause and the fascial tension stops. Wait until
you feel the tissue fully release. You may feel a pulsing, heat, energy or a relaxation of the tissue. If you notice a similar pattern, interrupt it by stopping the pattern at any point. Just hold it to see how body works itself out. The fascia will either melt or you can try again and there will be a new pattern. Encourage that.
B. Lumbosacral Decompression-(Standing on the patientʼs right side) Place your right palm vertically on the sacral apex and your fingers on the sacral base. Your third and fourth phalanges are spread apart, holding the center of the sacrum. The left hand is cupping the spinous processes of L4 & L5 horizontally with the first two joints of the fingers. Ask the patient to lift up their buttocks so you can slide your hand underneath. Your lower hand is vertical and your upper hand is horizontal. Encourage the motion and then hold it in the position of ease.C. Gapping the Sacroiliac-The right hand remains on the sacrum. Place their coccyx in your palm. Place your left elbow on the right ASIS and your right hand on the left ASIS. Press right to left and left to right, pressing medially. Feel for the sacral base to drop tableward. Feel for how high up thereʼs a restriction in the dura.
7
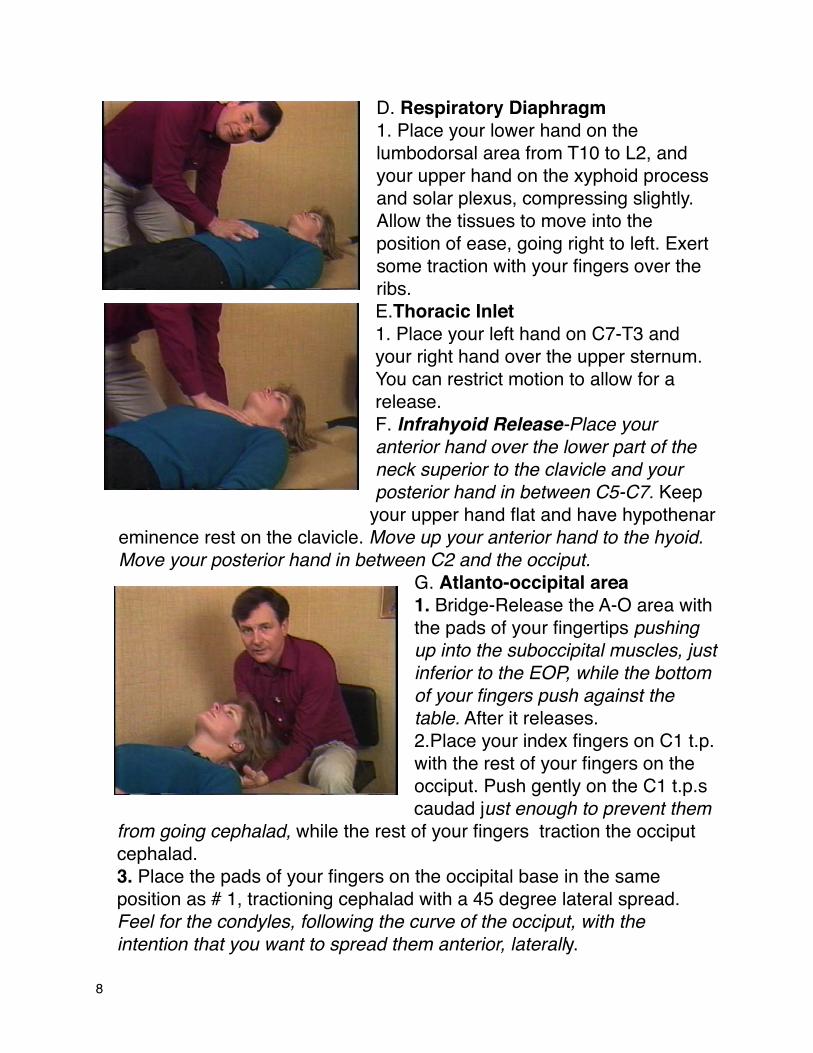
D. Respiratory Diaphragm 1. Place your lower hand on the lumbodorsal area from T10 to L2, and your upper hand on the xyphoid process and solar plexus, compressing slightly. Allow the tissues to move into the position of ease, going right to left. Exert some traction with your fingers over the ribs. E.Thoracic Inlet 1. Place your left hand on C7-T3 and your right hand over the upper sternum. You can restrict motion to allow for a release.F. Infrahyoid Release-Place your anterior hand over the lower part of the neck superior to the clavicle and your posterior hand in between C5-C7. Keep
your upper hand flat and have hypothenar eminence rest on the clavicle. Move up your anterior hand to the hyoid. Move your posterior hand in between C2 and the occiput.
G. Atlanto-occipital area 1. Bridge-Release the A-O area with the pads of your fingertips pushing up into the suboccipital muscles, just inferior to the EOP, while the bottom of your fingers push against the table. After it releases. 2.Place your index fingers on C1 t.p. with the rest of your fingers on the occiput. Push gently on the C1 t.p.s caudad just enough to prevent them
from going cephalad, while the rest of your fingers traction the occiput cephalad. 3. Place the pads of your fingers on the occipital base in the same position as # 1, tractioning cephalad with a 45 degree lateral spread. Feel for the condyles, following the curve of the occiput, with the intention that you want to spread them anterior, laterally.
8
4. Back the occiput away from the atlas. The intention is to use the occiput as a hand to traction the dural tube. Traction the dura from the occiput. Notice the first place you get stuck. Follow the tension and allow it to release. II. Cranial Motions
A. Sphenobasilar movements
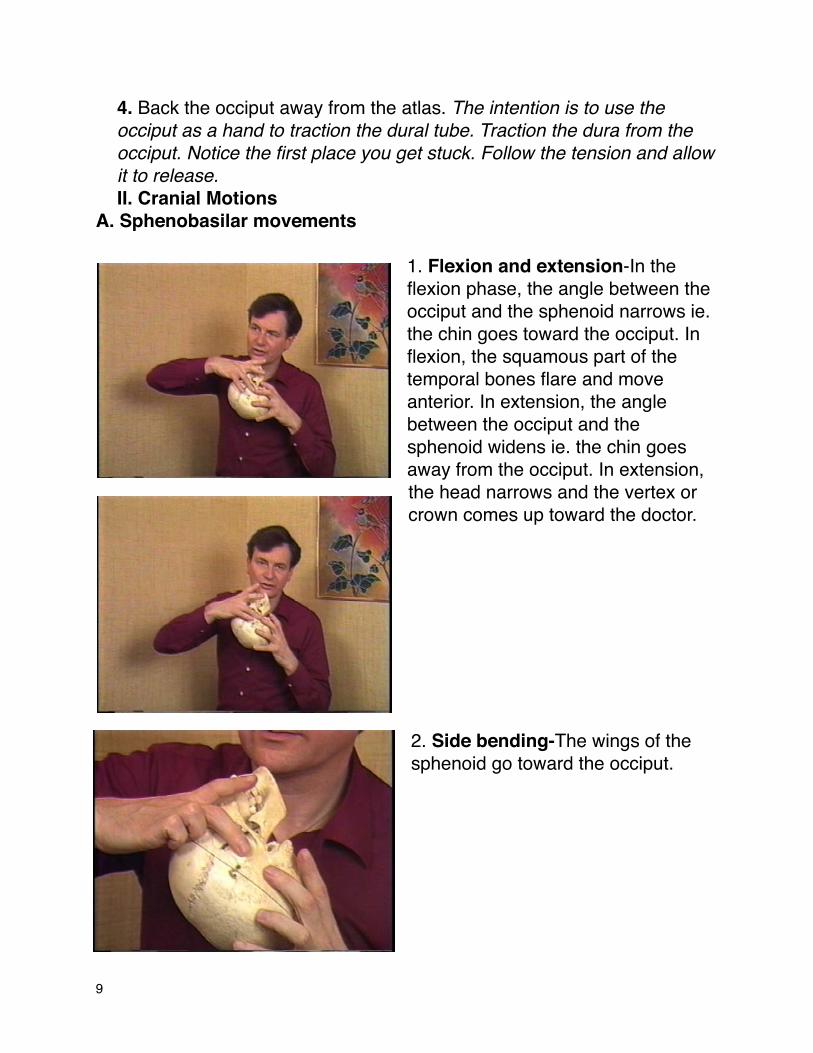
1. Flexion and extension-In the flexion phase, the angle between the occiput and the sphenoid narrows ie. the chin goes toward the occiput. In flexion, the squamous part of the temporal bones flare and move anterior. In extension, the angle between the occiput and the sphenoid widens ie. the chin goes away from the occiput. In extension, the head narrows and the vertex or crown comes up toward the doctor.
2. Side bending-The wings of the sphenoid go toward the occiput.
9

3.Torsion- One wing of the sphenoid goes superior and the base goes inferior.
4.Lateral strain-The fronto-sphenoidal area moves right or left. (left or right lateral strain).
5.Vertical strain-The fronto-sphenoidal area comes cephalad ie. the base of the sphenoid will be higher or lower than the occipital base. occiput and the thumbs are together superior to the bregma. They donʼt touch the head at all.
10

6.Spheno-basilar compression-the sphenoid is jammed down onto the occiput.
7.The Vault Hold-The thumbs are on the greater wings of the sphenoid and the middle fingers are on the occipital bone.
8.The Classical Vault Hold-The index finger is on the greater wings of the sphenoid, the pinky is on the occiput and the thumbs are together superior to the bregma. They donʼt touch the head at all.
11

9. On the extension phase you can feel the thumbs on the greater wings traveling anterior and slightly cephalad.The fingers monitoring the movement of the occipital base are moving cephalad. On flexion the thumbs are traveling caudad. The patientʼs head will broaden between your hands on flexion If itʼs easier in flexion, let it go
into flexion. Then allow it to go into extension and hold it into extension or vice versa.
10. Side bending to the right--Check for motion tableward and ceilingward. Ask how easy can one greater wing go down to the occiput? Bring one wing towards the table and bring it back to center. Then test the other side. Bring it down and back to center. Induce into the position of ease, on the side that moves easier The landmarks on one side eg. right,
travel apart and the landmarks on the other side eg. left, come together.
12

11. Testing for torsion-In torsion to the left, the left wing of the sphenoid comes high or cephalad while the right wing has gone caudad. One greater wing goes higher, easier. Stabilize the occiput and move the sphenoid up on one side then back down to center. Move the other side up and then back down to center. Compare which side is easier. Then bring the easier side up and hold it there. Then after the release return the sphenoid to itʼs center.12. In order to test for lateral strain, Place your left hand under the occiput stabilizing it so it doesnʼt move and place the right thumb on the left great wing of the sphenoid and right 4th finger on the right great wing of the sphenoid. Feel for right to left motion. Correct the easier direction first, bring it back to center and then correct the
harder direction. Take it into the position of ease. Encourage it to go into the direction it wants to go to. It moves like the carriage of a typewriter. If restricted left, itʼs called a right lateral strain. Next, determine under which phase of the breath the restriction is increased. Ask the patient to inhale and hold their breath in and then move the sphenoid across in the direction of greatest restriction. In this example to the left. Ask the patient to breathe normally. Then ask the patient to exhale and hold it out and again move the sphenoid across in the more restricted direction. In this example to the left. Note in which phase of breath the movement to the left was most restricted. If the movement to the left was most restricted on exhalation, move the sphenoid to the right (direction of ease) on exhalation (phase of breath which caused the most restriction). Move to the right on exhalation as many times as necessary until you get a release.
13

13. Vertical Strain-Use the same position as #12. Check the caudad to cephalad motion. First take the sphenoid and frontal area caudad (towards the chin), then cephalad (towards the bregma). Check to see which is of greater ease. Then ask the patient to inhale and hold, exhale and hold and check for which is more restricted. If the restriction is towards the superior movement, itʼs
called an inferior vertical strain. You may see a bulging in the frontal bone. 14.Spheno-basilar Compression-The sphenoid is jammed against the occiput, not allowing for flexion & extension. Place your thumbs on the greater wings of the sphenoid bilaterally, with the 4th and 5th phalanges monitoring the occiput. First bring thumbs tableward, taking the sphenoid all the way down to the occiput. Hold it down. If the sphenoid moves around, itʼs
unwinding. Go with this movement. Wait to hold it down until both sides have landed. After the release coax it up with your hand and your intention. Then bring the sphenoid towards the ceiling. Feel for an ease of the sphenoid moving ceilingward. At the end check for better range of motion.
15. Parietals: Flexion and extension can be severely restricted in this phase, especially the flexion phase. If thatʼs so, the patient is often depressed. Start off by exaggerating the compression, taking it toward the flexion phase, if there is any flexion left. Then exaggerating that, push the sphenoids bilaterally with equal pressure, back into the occipital base. Then lean your body forward, putting increased medial pressure with the thumbs. Then lift both greater wings of the sphenoid upward or anterior. Bring my hands toward each other to release the suture then
14
bring the parietals cephalad, towards me. Wait for the relaxation and then allow it to come down again.
III. Sutural Corrections
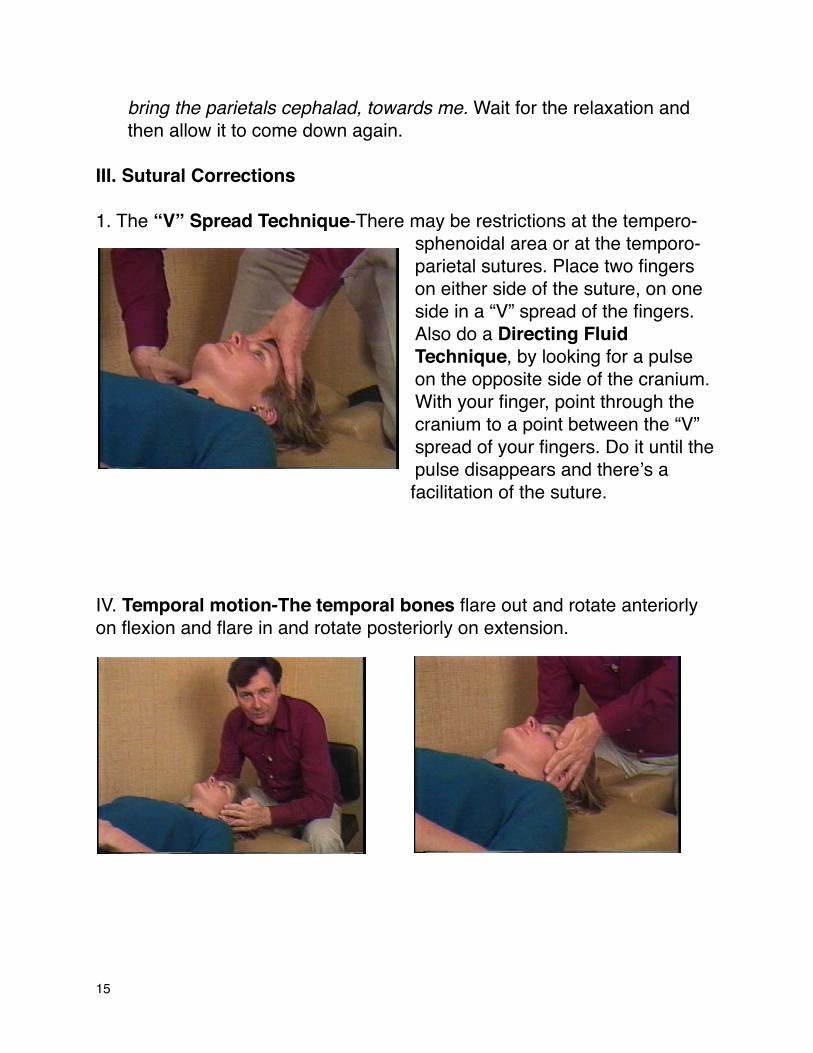
1. The “V” Spread Technique-There may be restrictions at the tempero-sphenoidal area or at the temporo-parietal sutures. Place two fingers on either side of the suture, on one side in a “V” spread of the fingers. Also do a Directing Fluid Technique, by looking for a pulse on the opposite side of the cranium. With your finger, point through the cranium to a point between the “V” spread of your fingers. Do it until the pulse disappears and thereʼs a facilitation of the suture.
IV. Temporal motion-The temporal bones flare out and rotate anteriorly on flexion and flare in and rotate posteriorly on extension.
15
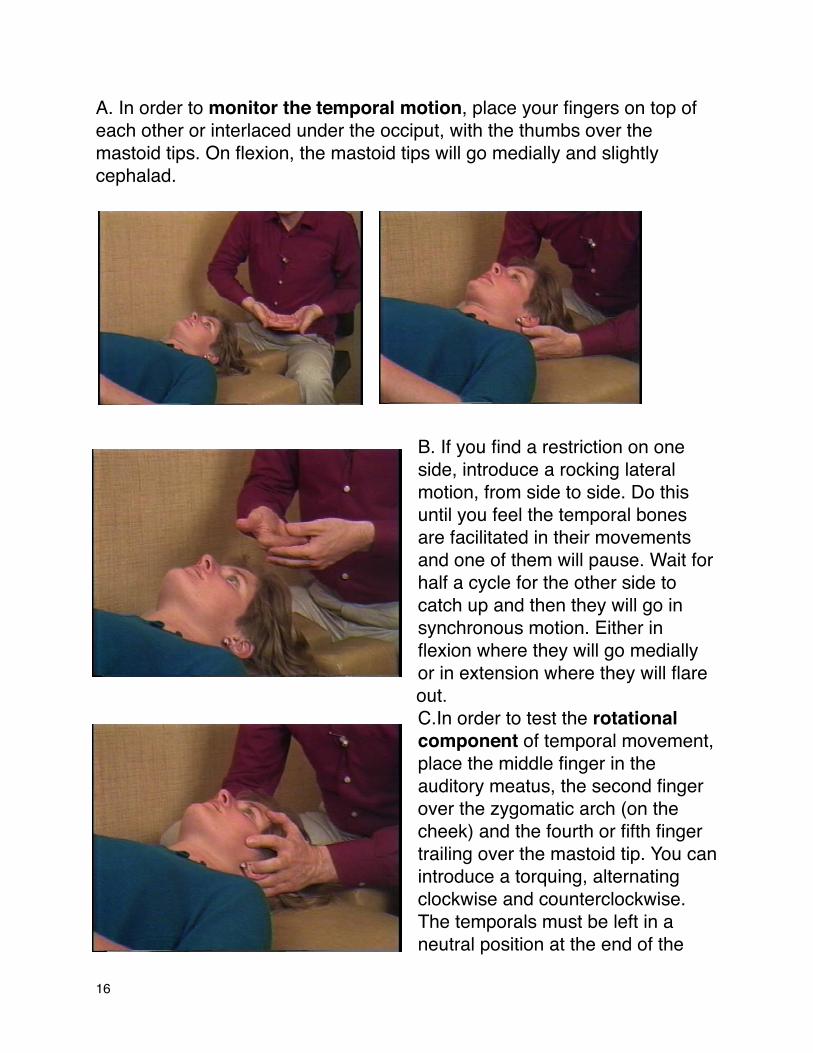
A. In order to monitor the temporal motion, place your fingers on top of each other or interlaced under the occiput, with the thumbs over the mastoid tips. On flexion, the mastoid tips will go medially and slightly cephalad.
B. If you find a restriction on one side, introduce a rocking lateral motion, from side to side. Do this until you feel the temporal bones are facilitated in their movements and one of them will pause. Wait for half a cycle for the other side to catch up and then they will go in synchronous motion. Either in flexion where they will go medially or in extension where they will flare out. C.In order to test the rotational component of temporal movement, place the middle finger in the auditory meatus, the second finger over the zygomatic arch (on the cheek) and the fourth or fifth finger trailing over the mastoid tip. You can introduce a torquing, alternating clockwise and counterclockwise. The temporals must be left in a neutral position at the end of the
16

treatment. Never leave them in the extreme range of movement one way or the other. As the mastoid tips drift medially, you can apply a little more pressure with the fourth and fifth fingers in order to encourage the medial movement of the mastoid tips as the squamae flare out into the flexion phase and the head broadens between your hands.
In the extension phase, the zygomatic arches are coming up and cephalad, the temporals rotate posteriorly, the mastoid tips flare out and the head flattens between your palms, as the vertex comes up towards you. D. Prior to doing the parietal lift, make sure there are no sutural restrictions.
Do the “V” Spread Technique where necessary. V. The Parietal liftA.First release the tempero-parietal suture. Take your first through third phalange and gently apply pressure in a medial direction with the intention of releasing the suture. The sagittal suture is opening laterally. Wait 10-15 seconds then let the cranial pressure normalize. Make a pincer-like (squeezing) movement above the temporo-parietal suture. Compress medially and then pull cephalad (towards you )with the fingers together and the thumbs crossed to monitor the movement. Produce a very gentle cephalad traction. Make sure you are behind the coronal suture. There should be a nice easy lifting movement as if the top of the head is lifting like a lid. The parietals come cephalad and wonʼt be
completed until the parietals flare out.
17

B. Many dyslexic children have flattened temporals and jammed up parietals. There can also be problems with vision especially when there is a blow to the top of the head.
VI. The Frontal Bone
A. Motion-The frontal bone
moves anterior and inferior
and lifts towards its base and then nose dives and broadens in flexion (The outer aspect goes ceilingward, while the center goes tableward). On extension it moves posterior and superior, narrows and contracts back on extension. (The outer aspect goes tableward while the center goes
ceilingward).
B. Frontal adjustment-The frontal lift is done with the thumbs (placed at the outer orbit, at the outer edge of the eyebrows, with the other fingers just resting on the mastoid area without any pressure. The thumbs lift the frontal bone anteriorly and then gently allow it to come cephalad.
18
Flexion

C.An alternative is to place the four fingers on the frontal area with a little bit of lateral traction and then use the fourth fingers to provide a little bit of lift as it broadens and nosedives in the flexion phase. Traction the frontal bone ceilingward and feel for a release in the suture. The frontal bone will then float up. In this way you are encouraging the
frontal area under the balls of your hands (the palmar surface of the knuckles) to allow the frontal area to come caudad. D. With rhinitis or sinusitis, place the fingers on the upper orbit (under the eyebrows) and spread laterally in the flexion phase. An alternative method is to place the third and fourth fingers on both sides of the nasal bones. Place the second fingers on the glabella area. In
the flexion phase, wait for the frontal area to broaden and nosedive and then as it comes back into extension resist the extension movement with the third and fourth fingers, a little bit of traction with the second fingers. This allows the nasal bones to separate and to give great relief with sinusitis and headaches.
19

VII. The Zygoma (upper cheek)-The zygoma rotates around an axis from the angle of the jaw to the glabella. In flexion, the anterior rotation of the temporal bones can be used to encourage the movement to go a little further. With a slight amount of pressure, place your thumb on the outer, inferior orbit, hooking your index finger under the zygoma (cheek) and with your third and fourth fingers adjacent to the index finger, under the zygomatic arch. Support the other cheek with your indifferent hand lying flat on the cheek. Use alternating inferior to superior movements, in the direction of the angle of the jaw towards the glabella, to work the zygoma loose.
VIII. Summary:This, except for the CV4, is covering all the movements in a routine cranial examination and treatment. In practice, you can speed up or apply your attention to areas which you think need more attention. As you are working on the cranium, restrictions elsewhere can become apparent.
20

IX. Intraoral Cranial Work A. Prior to doing intraorals Work on: 1. The thoracic inlet 2. The upper and lower hyoid muscles.I.Treatment order:
1. Nasal Bones 2. Zygoma 3. Maxilla 4. Palatines 5. Vomer 6. Release the tongue 7. Balancing the TMJ 8. Repeat the temporals with an ear pull. II. Intraoral cranial motions
1. Nasal Bones move from the medial suture. Flexion is a flaring out; Extension flaring in.
2. Zygoma-On Flexion there is a flaring out towards the nose. On extension the posterior zygoma goes towards the ear.
3. Maxilla-Flexion, extension, torsion, sheer and decompression. Flexion the sphenoid goes anterior-inferior and the maxilla widens. Extension sphenoid goes posterior-superior and the maxilla narrows.
4. Palatines-Cephalad and then lateral. Back to midline in a medial direction. Caudad.
5. Vomer- flexion extension torsion shear and decompression6. The tongue-Pull medially into underside tongue7. TMJ-Cephalad and caudad. 8. Temporals-Flexion-flare out in external rotation. Extension-internal rotation9. Palatines-Cephalad and then lateral. Back to midline in medial direction.
Caudad.10.Vomer-Flexion, extension, torsion, sheer and decompression.11.The tongue-Pull medially into the underside of the tongue.12.TMJ-Cephalad and caudad. 13.Temporals-Flexion-Flare out in external rotation. Extension-internal rotation
21

III. Step by Step 1. Nasal Bones-Thumbs on frontal bone, index fingers on both nasal bones simultaneously. Feel for both nasal bones being in synch. A DeLorean type of motion is in synch. A windshield wiper type of motion is out of synch. Both bones should have a similar amount of motion ie. symmetry. Gently lift the bones and move them anterior and inferior. Correct the flexion. Go into the direction of ease (do both sides) and then follow them. Your fingers are vertical. 2. Zygoma (lateral lower orbit)-Go into the mouth between the cheek and the teeth as far back as possible, then go slightly cephalad, using the tip of your index finger, in order to feel the zygoma. Move in a 45° angle laterally and slightly cephalad. Place your thumb on the lateral lower orbit on the external part of the zygoma. This is a direct move. Move in slowly. Let the patient feel your finger at their teeth. Pause and then move in more. X. Intraoral Contacts A. Corrections shown with a skull Intraoral Cranial Work
I.Prior to doing intraorals Work on: 1. The thoracic inlet 2. The upper and lower hyoid muscles.
II. Treatment order: 1. The maxillary arch will widen on flexion and narrow on extension. This area is often affected by dental work and blows to the face. 2. Test for symmetry of flexion and extension (widening and narrowing) asymmetry of shearing (lateral) movements and the ability to move in an anterior direction (decompression) and torsion.
22

3. Monitor the movement of the vomer. The contact point is just behind the front teeth.
a. The vomer comes cephalad (superior towards the frontal bone) as the greater wings of the sphenoid go caudad (inferior towards the mouth), on flexion. On extension, the posterior vomer (just in front of the cruciate area) goes superior. You can also test for torsion of the vomer. Stabilize the greater wings of the spheroid with one hand. With a finger cot on the index finger of the other
hand, while contacting the anterior vomer introduce a torsion (clockwise or counterclockwise rotation) to the left or the right. The vomer can also make
the motions of sheer (right and left lateral motion) and decompression (anterior or ceilingward).
4. The next contact is the hamulus, just directly behind the back teeth. a. Contact the pterygoid process of the sphenoid with your index finger, while your other hand stabilizes the greater wings of the sphenoid. Encourage the hamulus to
23

go cephalad, while encouraging the greater wings to go cephalad. b. Another movement weʼre interested in is a torsion of the maxilla through an axis of rotation in the cruciate area, right through
to the bregma, using the second and third fingers with finger cots rotating clockwise or counterclockwise on the center of the hard palate.
5. Then finish with the palatines, which are just behind the cruciate area, in the back of the hard palate. a. Lift the palatines cephalad. b. Once you have a cephalad lift, traction laterally, rotating your index finger clockwise on the right and counterclockwise on the left. Lifting like a tractor. Do the palatines on one side and then on the other side.
B. Corrections shown on a patient Intraoral Corrections Step by Step: 1. Nasal Bones-Thumbs on frontal bone, index fingers on both nasal bones simultaneously. Feel for both nasal bones being in synch. A DeLorean type of motion is in synch. A windshield wiper type of motion is out of synch. Both bones should have a similar amount of motion ie. symmetry. Gently lift the bones and move them anterior and inferior.
24

Correct the flexion. Go into the direction of ease (do both sides) and then follow them. Your fingers are vertical. 2.Zygoma (lateral lower orbit)-Go into the mouth between the cheek and
the teeth as far back as possible, then go slightly cephalad, using the tip of your index finger, in order to feel the zygoma. Move in a 45° angle laterally and slightly cephalad. Place your thumb on the lateral lower orbit on the external part of the zygoma. This is a direct move. Move in slowly. Let the patient feel your finger at their teeth. Pause and then move in more.
3. Maxilla-First stabilize the sphenoid area with your left middle finger on one side and the thumb on the other side. Ask the patient to open their mouth, drop your fingers back as far as you comfortably can along the inside of the the biting surfaces of the teeth, with the palmar surfaces of the second and third fingers (with finger cots on) pointing cephalad.
a. Test the maxilla for flexion and extension.The maxillary arch will widen on flexion and the sphenoid goes anterior-inferior. On extension there is a narrowing of the arch and the sphenoid goes posterior-superior. On checking for flexion and extension donʼt stabilize the sphenoid. Stabilize it only when you treat. With all the other non- physiological movements, stabilize both when checking and treating. If you donʼt feel any widening (flexion) or narrowing (extension) of the maxilla, start with torsion. Note restrictions on the left and the right and if restriction happens while in flexion or extension. b. Correction-If there was eg. restriction on the right during flexion, place your index finger along the maxillary arch on the
25

right. Bring your finger slightly medial and as it comes into flexion encourage that side of the arch to widen towards the patientʼs right. In this case you can use direct technique, holding with a steady pressure laterally on the upper teeth, through several cycles, in order to achieve correction. c. Another method is to apply your fingers and thumbs over the outer
aspect to the teeth as you come into extension, while stabilizing the sphenoid. Exaggerate the extension movement by holding your fingers together and resisting the (widening) flexion movement. Do this through several cycles of flexion and extension until a release occurs. Then the restricted side will broaden into a greater movement in the flexion phase and the maneuver will be complete. You can traction the spheroids to exaggerate the extension movement while resisting the flexion. Then re-evaluate the movement (with both fingers inside the maxillary arch). Allow the patient to rest her bottom teeth against your fingers for comfort.
26

d. You may hook the fingers around the back teeth to traction in an anterior direction. You can anticipate a nice sliding movement forward or anterior. Alternatively, you can come around the top teeth (with the index finger in on the maxillary arch) and encourage the whole maxillary arch to come anterior. Use a little bit of traction behind the top teeth, while contacting with the thumb on the outside of the upper lip.
e.Torsion-Introduce a torsion movement towards the right, resisting it with a grip on the greater wings of the sphenoid around an axis from the cruciate area of the palate to the bregma. You can relaease the torsion by indirect methods incorporating the breath. f.Maxillary Sheer (a right to left lateral motion towards the ear)- When you suspect that
the maxilla is sheared to the left or the right in relation to the sphenoid. (Place your second and third fingers on the inside of the maxillary arch while stabilizing the sphenoid). In this case, you take the whole maxillary arch toward the left. Then change directions and bring the maxillary arch across to the right. If there is a
27

restriction, take it into the direction of ease and use the phase of the breath to obtain a release. g. Decompression-take the maxilla toward the ceiling (anterior). With decompression, just go into treating. Bring it ceilingward.
4. The Palatines-Do the Palatines last because usually the other maneuvers intra-orally will decrease pressure from rhinitis and sinusitis or other allied conditions will be relieved. If not, come onto the palatines with your index finger, trace the teeth back as far as possible and then go medial. a little bit further back than the posterior vomer and to one side of the midline. Place your index finger on
the palatine bone and slide onto the soft palate. Stabilize the sphenoids with your indifferent hand. Introduce a little bit of very gentle cephalad pressure, pushing straight up towards the crown of the head. Feel for upward motion. Use only very slight pressure as if touching an eye. When you feel it the palatine lift cephalad, turn your finger and introduce a little bit of lateral pressure as it slides laterally.. Be careful not to activate the gag reflex. Do one side and then the other the order is unimportant. Do each side up to three times.
5. The Vomer-Vomer-Indications: Deviated septum, falling when sucking on the thumb, sexual trauma and cleft palate. Contact the dead center of the hard palate. Check each motion and go into ease, bring it back and do the other direction. A. Vomer motions: 1. Flexion-the vomer moves inferior towards the chin.
28

2. Extension-the vomer moves superior towards the sphenoid. 3. Torsion-right and left rotation towards the ear. 4. Sheer-right and left lateral motion towards the ear. 5. Decompression-move inferior sucking it down, usually touching the vomer. Stabilize the sphenoid with everything but checking flexion and extension. Stabilize the wings of the sphenoid and place your index finger behind the front (top) teeth with your right hand. During extension, the anterior vomer comes down caudad and during flexion the anterior vomer goes cephalad and the wings of the sphenoid nosedive caudad. Those two landmarks come together on flexion. After a release, ease your finger off to re-evaluate the movement. Next, slide your index finger down onto the palate in front of the cruciate area in order to exaggerate sphenobasilar extension. The posterior vomer goes cephalad in extension. Usually torsional activity starts just after the beginning of the excursion of movement. You will feel a torsion one way or the other, in a torsional pattern. Usually thereʼs more torsional activity in the anterior vomer. Use a lift or right biased movement in the phase holding against the barrier and wait for the release. Angle up towards the left or the right. 6. Release the tongue-Pull medially into the underside of the tongue.
7. TMJ Correction-Hook your third through fifth fingers under the mandible under and around the angle of the jaw, on both sides, with fingers pointing caudad. The thumbs are either off or resting on the frontal bone without exerting any pressure. Press gently superior up towards the TMJ until thereʼs no more give in the joint. Go with any sideward motion but continue to go
cephalad. Emphasize either the right or left side, with either caudad or cephalad traction, whichever goes in the direction of ease. Wait for a softening of the tissues until there is a release. Once there is a softening, change the position of your fingers to come superior to the angle of the jaw. The third to fifth fingers go onto the upper mandible, lateral to the crease in the mouth and medial to the angle of the jaw. Press down towards the feet with a slightly anterior motion towards the lips. Push
29

caudad repositioning the mandible under the maxilla. Push deeply enough so you are touching bone (the mandible) and not just moving skin. Later change your finger grip back to under the angle of the jaw. The temporal bone assessment isnʼt complete without doing the jaw. This is a very effective, relaxing maneuver. 8. Repeat temporals with ear pull. Pull laterally back and down, towards
the table at a 45° angle. h.Pterygoids- Contact the pterygoids on the hamulus. Come just behind the posterior molars and a little bit immediately with your index finger and stabilizing the sphenoids with your indifferent hand.
Use direct, upward, cephalad and slightly lateral pressure on the pterygoids. augment cephalad pressure on the greater wings of the sphenoid. The greater wings of the sphenoid go cephalad at the same time as the pterygoid process. Just hold it for a few seconds until you feel the greater wing of the sphenoid go cephalad.
30

XI. CV4- Compression of the fourth ventricle. Settle the occiput between your thenar eminences well inside the occipitomastoid and lamdoidal
sutures, place one hand on top of the other and touch the tips of the thumbs together, forming an upside down “v”. An alternative is to place the tips of the middle fingers together, the fourth fingers parallel and the pinkies crossed. Follow the cranium into its extension (narrowing) phase and resist, becoming immobile with the thumbs (or middle fingers). Then hold it and prevent it from
expanding or going into its flexion phase until you feel the whole movement completely stop. Hold it until the pulsing stops.
Feel the flexion phase coming up. The occiput will swell between your hands, broadening into flexion. There will be a pause and you then follow it into itsʼ extension phase. Your thenar eminences will move closer together. When itʼs reached the end of the excursion of movement, you are up against the barrier. Resist it broadening into flexion
once again. Follow it through several cycles and each time resist expansion until the craniosacral rhythm becomes disorganized and stops completely. As you resist the flexion phase you can feel the patientʼs breathing getting a little shallower. There will be a feeling of deep relaxation in the patient and their breathing cycle will start up again. Sometimes there will be an involuntary deep sigh. There may be a fine perspiration on the patients forehead. The breathing may pause from several seconds up to a half a minute. Then the breathing will continue upon more relaxed phase. This compresses the fourth
31

ventricle and forces the CSF forward in the head to the other parts of the cranium. It facilitates the movement at the sutures of all other parts of the cranium. It produces a deep physiological rest and is safe to do. You can do up to 10 or 12 still points as you wish. This is an excellent shotgun technique. It helps to increase
fluid flow all over the body. Thereʼs quite a deep feeling of relaxation introduced. This technique will
relax the diaphragm, it can reduce a fever by 10-20 degrees Fahrenheit, within half an hour. It can also reduce blood pressure by at least 10 points. It all feels very relaxing and is perfectly safe. The only contraindications of CV4 are any evidence of tumor or pathology that would increase intracranial pressure or any embolism. That completes the series of moves for the cranium.
XII. ConclusionItʼs all a very rewarding form of therapy, especially with infants, where the response is extremely quick. With infants you need to be very quick. Sometimes in the beginning, you can only do 30 seconds or a minute of treatment. Because their skulls are more pliable, you can get quicker results. However, it is very beneficial in a wide range of patients and situations, from physical tension to more serious pathology.
32

XIII. Addendum:A. Sinus treatment:1. Thoracic Inlet2. AO release3. Frontal bone-Bring the frontal directly up towards the ceiling. Donʼt go
down. The motion is anterior & inferior and posterior & superior in an arc.
4. Nasal bones-Place your thumbs on the frontal bone, index fingers on the upper part of both nasal bones simultaneously. Feel for both nasal bones being in synch. A DeLorean type of motion is in synch. A windshield wiper type of motion is out of synch. Both bones should have a similar amount of motion ie. symmetry. Gently lift the bones and move them anterior and inferior. Correct the flexion. Go into the direction of ease (do both sides) and then follow them. Your fingers are vertical.
5. Ear or temporal release-Pull laterally and back down towards the table at a 45° angle. XIV. Prior to doing Intraoral Cranial Work
I. Prior to doing intraorals Work on: 1. The thoracic inlet 2. The upper and lower hyoid muscles.XV. Intraoral Treatment Order:1. Nasal Bones2. Zygoma3. Maxilla4. Palatines5. Vomer 6. Release the tongue7. Balancing the TMJ8. Repeat temporals with ear pull. Pull laterally back and down, towards
the table at a 45° angle. 9. XVI. Intraoral cranial motions1. Nasal Bones move from the medial suture. Flexion is a flaring out;
Extension flaring in. 2. Zygoma-On Flexion there is a flaring out towards the nose. On
extension the posterior zygoma goes towards the ear.3. Maxilla-Flexion, extension, torsion, sheer and decompression. Flexion
the sphenoid goes anterior-inferior and the maxilla widens. Extension the sphenoid goes posterior-superior and the maxilla narrows.
33

4. Palatines-Cephalad and then lateral. Back to midline in medial direction. Caudad.
5. Vomer- flexion extension torsion shear and decompression6. The tongue-Pull medially into underside tongue7. TMJ-Cephalad and caudad. 8. Temporals- Flexion- flare out in external rotation. Extension-internal rotationXVII. Intraoral Corrections Step by Step: 1. Nasal Bones-Thumbs on frontal bone, index fingers on both nasal bones simultaneously. Feel for both nasal bones being in synch. A DeLorean type of motion is in synch. A windshield wiper type of motion is out of synch. Both bones should have a similar amount of motion ie. symmetry. Gently lift the bones and move them anterior and inferior. Correct the flexion. Go into the direction of ease (do both sides) and then follow them. Your fingers are vertical. 2.Zygoma (lateral lower orbit)-Go into the mouth between the cheek and
the teeth as far back as possible, then go slightly cephalad, using the tip of your index finger, in order to feel the zygoma. Move in a 45° angle laterally and slightly cephalad. Place your thumb on the lateral lower orbit on the external part of the zygoma. This is a direct move. Move in slowly. Let the patient feel your finger at their teeth. Pause and then move in more.
3.Maxilla-Go in with the second and third phalanges back as far as you comfortably can, on the biting surfaces of the teeth. Stabilize the sphenoid with your left middle finger on one side and the thumb on the other side. A. Maxillary motions: 1. Flexion-the sphenoid goes anterior-inferior and the maxilla widens 2. Extension-the sphenoid goes posterior-superior and the maxilla narrows. On checking for flexion and extension you donʼt stabilize the sphenoid. Stabilize it only when you treat. With all the other non physiological movements, stabilize both when checking and treating. If you donʼt feel any widening (flexion) or narrowing (extension) of the maxilla, start with torsion. Go into the direction of ease. 3. Torsion is a vertical rotation down towards the right ear and down towards the left ear. 4. Sheer is a right and left lateral motion towards the ear.
34
5. Decompression-take the maxilla toward the ceiling (anterior). With decompression, just go into treating. Bring it ceilingward.
4.Palatines-Use only very slight pressure as if touching an eye. Trace the teeth back as far as possible and then go medial. Do one side and then the other the order doesnʼt matter. Push straight up towards the crown of the head (or bregma). Do each side up to three times. Place your index finger on the palatine bone and feel for upward motion. Slide onto the soft palate.
5.Vomer-Indications: Deviated septum, falling when sucking on the thumb, sexual trauma and cleft palate. Contact the dead center of the hard palate. Check each motion and go into ease, bring it back and do the other direction. A. Vomer motions: 1. Flexion-the vomer moves inferior towards the chin. 2. Extension-the vomer moves superior towards the sphenoid. 3. Torsion-right and left rotation towards the ear. 4. Sheer-right and left lateral motion towards the ear. 5. Decompression-move inferior sucking it down, usually touching the vomer. Stabilize the sphenoid with everything but checking flexion and extension.
6.Release the tongue-Pull medially into the underside of the tongue.7.TMJ-Place the third through fifth phalanges under the mandible. Press
gently superior up towards the TMJ until thereʼs no more give in the joint. Go with any sideward motion but continue to go cephalad. The third to fifth phalanges go onto the upper mandible, lateral to the crease in the mouth and medial to the angle of the jaw. Press down towards the feet and a slightly anterior motion towards the lips. Push deeply enough so you are touching bone (the mandible) and not just moving skin. caudad repositioning the mandible under the maxilla.
8.Repeat temporals with ear pull. Pull laterally and back down towards the table at a 45° angle. Cranial notes:
Classic Vault Hold # 2-Thumbs on sphenoids middle fingers on the occiput, just past the temporal bone. Feel for the qualities of the cranial rhythm: 1. Flexion-extension 2. Amplitude-is it strong or week and wispy?
35
3. The quality-ideal smooth and flowing or is it bumpy and jagged, like water or molasses?
4. Rate-normal, too fast or too slow? All within flexion-extension. Feel for the direction the bones are moving in.
First Vault Hold-second to fifth phalanges all along the temporal bones just above the ear. Cross thumbs just posterior to the bregma. This checks medial-lateral motion of the temporals and parietals. Feel for symmetry and torsion. Out of sync=dizzy, nauseous, vertigo, visual problems, learning disabilities, pasty skin. If out of balance, the temporals may suck you hands in and the skin is really taut. If no expansion or flaring of the temporal bone do a temporal release (rotational component). If the temporal bones are out of sync, place middle fingers in the mastoids. Move medial-lateral and hold in the direction of ease first then in the harder direction. They should move in arcs not like windshield wipers.Parietals-Flexion they move laterally away from sagittal suture (like a DeLorean) On extension they come back together medially. Dysfunction-One moves medial and the other lateral. Hold one side into extension until the other side meets it. 2nd Vault Hold-Left hand under the occiput horizontal. Thumb on one greater wing and middle finger on the other. Feel for how the occiput and sphenoid are moving. We are checking the sphenoid and occiput for the bones being in sync and all the qualities of the cranial rhythm. 1. Is the sphenoid moving?2. Is it moving in sync with the occiput?3. Membrane tension between the falx and the tentaurium.4. Binding binding up at the cranial base. Intra Orals Maxilla-check for flexion-extension.1. Flexion-sphenoid goes anterior-inferior and the maxilla widens.
On extension, the maxilla narrows and the sphenoid goes posterior and superior.
2. Torsion-turn to the right and turn to the left.3. Sheer-Right to left lateral motion.4. Decompression-Maxilla comes up toward the ceiling. Place your fingertips on the back of the teeth, on the biting surface. I. Sphenobasilar
36

A. Flexion-extension- 1. If it easier in flexion, let it go into flexion, then hold it in flexion. 2. Then allow it to go into extension and hold it in extension. 3. Vault hold-thumb on sphenoid and 4th & 5th finger on the occiput just medial to the mastoid. B. Sphenobasilar decompression: 1. The sphenoid and occiput are smashed together, which results in very little motion. 2. Take the sphenoid all the way down to the occiput (towards the table). Hold it down. If the sphenoid moves around, itʼs unwinding. Go with this movement. Wait to hold it down until both sides have landed. 3. After the release coax it up with my hand and my intention. 4. At the end check for better range of motion. 5. You can have a flexion lesion when it goes easier into flexion and harder into extension.II. Non-physiologic movements:1. Torsion-One greater wing goes higher, easier. Stabilize the occiput and
move the sphenoid up on one side then back down to center. Move the other side up and then back down to center. Compare which side is easier. Then bring the easier side up and hold it there. Then after the release return the sphenoid to itʼs center.
2. Side Bending-Check for motion tableward and ceilingward. Ask how easy can the left greater wing go down to the occiput? Then bring it back to center
3. Lateral Strain-Place my hand under the occiput stabilizing it so it doesnʼt move and the thumb and 4th finger on the sphenoid. Check right to left motion. Correct the easier direction first and the harder direction second.
4. Vertical Strain-Place my hand under the occiput, stabilizing it so it doesnʼt move and the thumb and 4th finger on the sphenoid. Check in the caudad (towards the chin) and cephalad (towards the bregma).
5. After a big release to a still point. . I. The 3 Vault Holds A. Classic Vault Hold # 2-Thumbs on sphenoids middle fingers on the occiput, just past the temporal bone. B. Feel for the qualities of the cranial rhythm:
1. Flexion-extension
37

2. Amplitude-is it strong or week and wispy? 3. The quality-ideal smooth and flowing or is it bumpy and jagged, like
water or molasses?4. Rate-normal, too fast or too slow? All within flexion-extension. Feel for
the direction the bones are moving in. B. First Vault Hold-second to fifth phalanges all along the temporal bones just above the ear. Cross thumbs just posterior to the bregma. This checks medial-lateral motion of the temporals and parietals. Feel for symmetry and torsion. Out of sync=dizzy, nauseous, vertigo, visual problems, learning disabilities, pasty skin. If out of balance, the temporals may suck you hands in and the skin is really taut. If no expansion or flaring of the temporal bone do a temporal release (rotational component). If the temporal bones are out of sync, place middle fingers in the mastoids. Move medial-lateral and hold in the direction of ease first then in the harder direction. They should move in arcs not like windshield wipers.C. Parietals-Flexion they move laterally away from sagittal suture (like a DeLorean) On extension they come back together medially. Dysfunction-One moves medial and the other lateral. Hold one side into extension until the other side meets it. D. 2nd Vault Hold-Left hand under the occiput horizontal. Thumb on one greater wing and middle finger on the other. Feel for how the occiput and sphenoid are moving. We are checking the sphenoid and occiput for the bones being in sync and all the qualities of the cranial rhythm. 1. Is the sphenoid moving?2. Is it moving in sync with the occiput?3. Membrane tension between the falx and the tentaurium.4. Binding binding up at the cranial base. II. Intra Orals A. Maxilla-check for flexion-extension.1. Flexion-sphenoid goes anterior-inferior and the maxilla widens.
On extension, the maxilla narrows and the sphenoid goes posterior and superior.
2. Torsion-turn to the right and turn to the left.3. Sheer-Right to left lateral motion.4. Decompression-Maxilla comes up toward the ceiling. Place your fingertips on the back of the teeth, on the biting surface.
38

Latest notes: 1. Do all these first-Thoracic inlet, parietal, sphenobasilar, sphenoid,
occiput, mastoid wobble, and ear pull.2. Feel whole head and check for decreased rom3. Check each bone and then check for lack of motion
Cranial Treatment for Specific Conditions: Hypertension:
- Thoracic inlet release which you could focus your intention on releasing tension around the arteries. The thoracic cardiac nerves also branch off the left vagus nerve at the level of the clavicle so you could also place intention at those nerves as well sense they help to regulate cardiac rhythm.- Do the Cranial Base Release to remove tension and any restriction on the vagus which will help parasympathetic activity.- CV4- There may be other underlying causes for the hypertension which you will have to find in the moment.
39