creating a job change eform - university of alberta
TRANSCRIPT

UNIVERSITY OF ALBERTA
PeopleSoft HCM
Creating a Job Change eForm
Prepared by: HR Operations
Created on 5/29/2017 4:08:00 PM
Copyright © 2017 University of Alberta All rights reserved. The information contained in this manual is proprietary and confidential to the University of Alberta. No part of this manual may be reproduced or transmitted in any form or by any means, electronic or mechanical, including photocopying, recording, or by any information storage and retrieval system, without express written permission from the University of Alberta. Every effort has been made to make this manual as complete and as accurate as possible. The University of Alberta shall accept neither liability nor responsibility to any person or entity with respect to any loss or damages in connection with or arising from the information contained in this manual. The names of software products referred to in this manual are claimed as trademarks or registered trademarks of their respective companies.

Page 1
Table of Contents
Taking Other Job Action ........................................................................................... 2 eForms UAT
Page 2
king Other Job Action
Creating a Job Change eForm
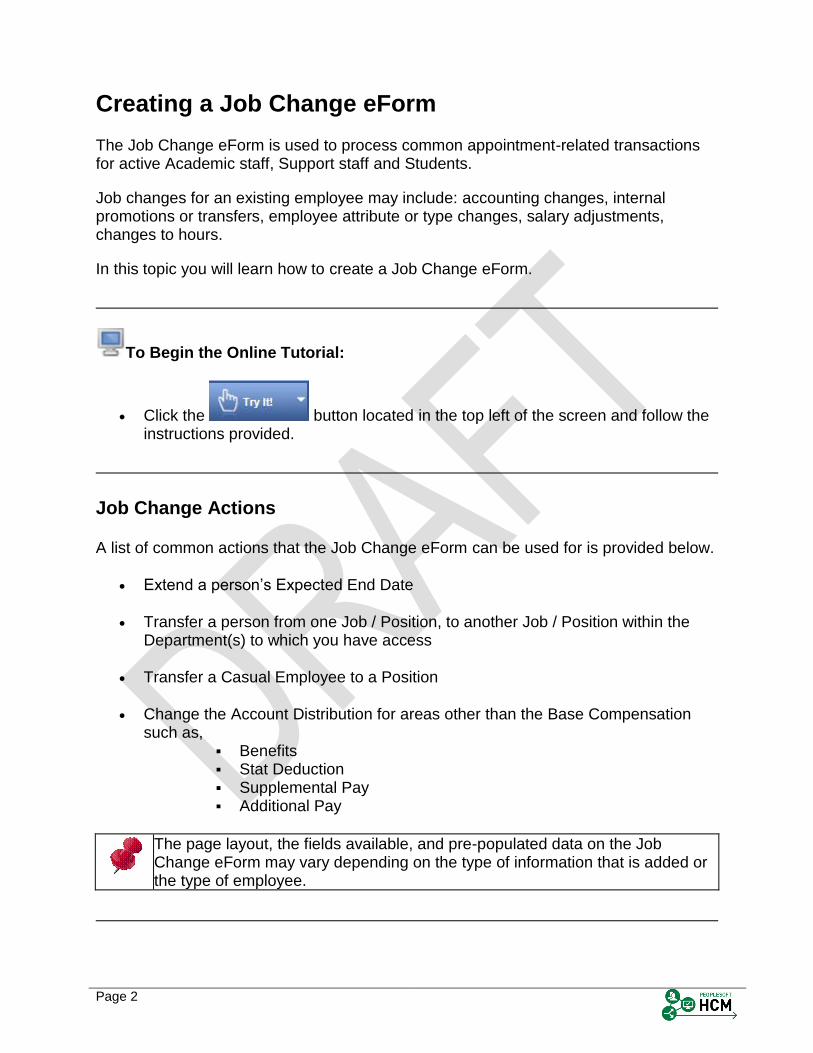
The Job Change eForm is used to process common appointment-related transactions for active Academic staff, Support staff and Students.
Job changes for an existing employee may include: accounting changes, internal promotions or transfers, employee attribute or type changes, salary adjustments, changes to hours.
In this topic you will learn how to create a Job Change eForm.
To Begin the Online Tutorial:
Click the button located in the top left of the screen and follow the instructions provided.
Job Change Actions
A list of common actions that the Job Change eForm can be used for is provided below.
Extend a person’s Expected End Date
Transfer a person from one Job / Position, to another Job / Position within the Department(s) to which you have access
Transfer a Casual Employee to a Position
Change the Account Distribution for areas other than the Base Compensation such as,
Benefits Stat Deduction Supplemental Pay Additional Pay
The page layout, the fields available, and pre-populated data on the Job Change eForm may vary depending on the type of information that is added or the type of employee.
Page 3
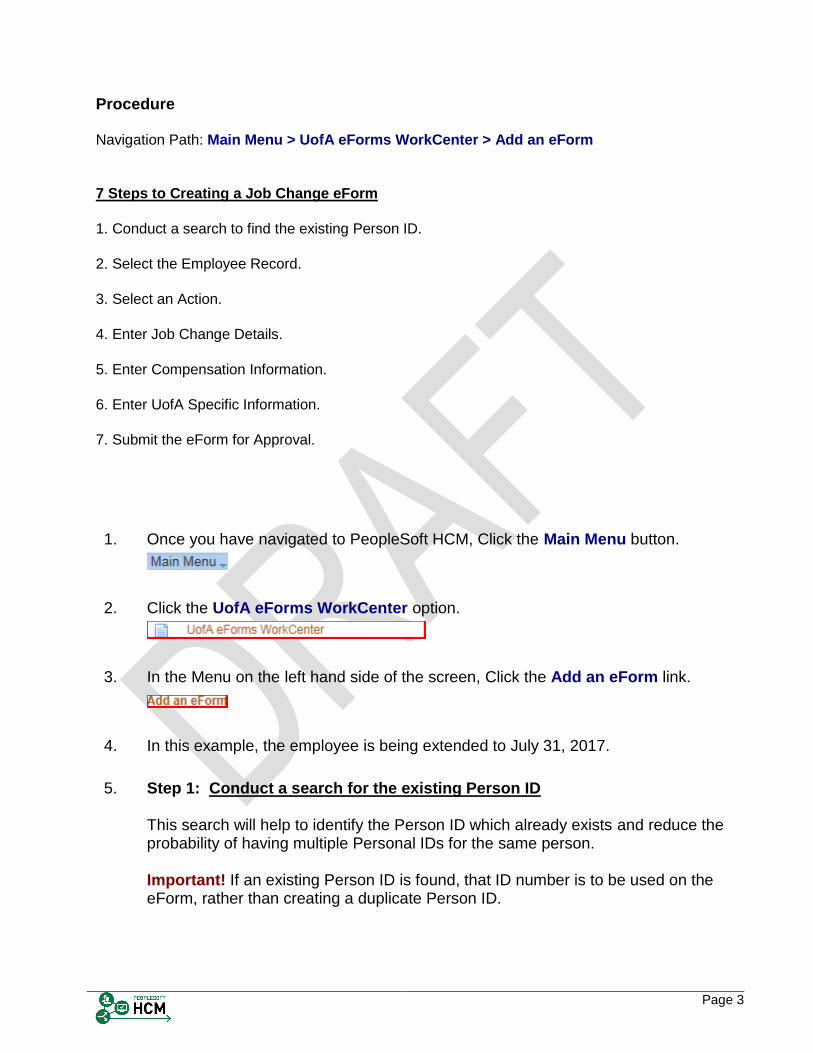
Procedure Navigation Path: Main Menu > UofA eForms WorkCenter > Add an eForm 7 Steps to Creating a Job Change eForm 1. Conduct a search to find the existing Person ID. 2. Select the Employee Record. 3. Select an Action. 4. Enter Job Change Details. 5. Enter Compensation Information. 6. Enter UofA Specific Information. 7. Submit the eForm for Approval.
Step Action
1. Once you have navigated to PeopleSoft HCM, Click the Main Menu button.
2. Click the UofA eForms WorkCenter option.
3. In the Menu on the left hand side of the screen, Click the Add an eForm link.
4. In this example, the employee is being extended to July 31, 2017.
5. Step 1: Conduct a search for the existing Person ID This search will help to identify the Person ID which already exists and reduce the probability of having multiple Personal IDs for the same person. Important! If an existing Person ID is found, that ID number is to be used on the eForm, rather than creating a duplicate Person ID.
Page 4
Step Action
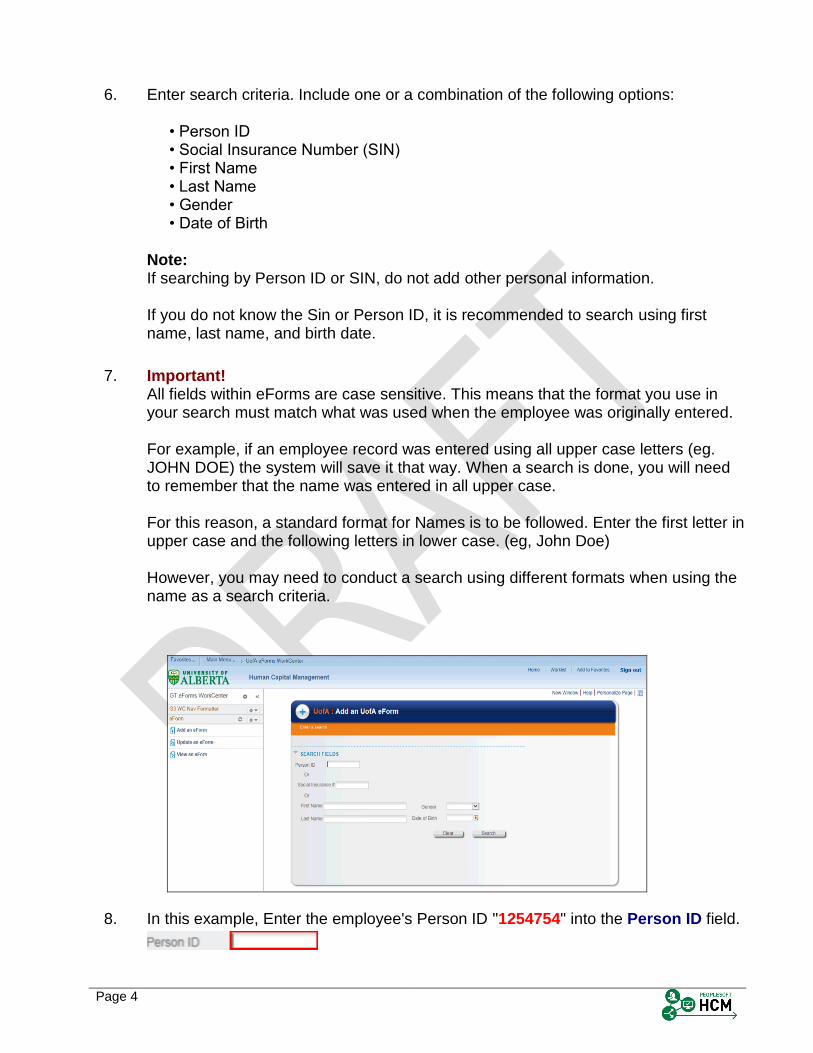
6. Enter search criteria. Include one or a combination of the following options: • Person ID • Social Insurance Number (SIN) • First Name • Last Name • Gender • Date of Birth Note: If searching by Person ID or SIN, do not add other personal information. If you do not know the Sin or Person ID, it is recommended to search using first name, last name, and birth date.
7. Important! All fields within eForms are case sensitive. This means that the format you use in your search must match what was used when the employee was originally entered. For example, if an employee record was entered using all upper case letters (eg. JOHN DOE) the system will save it that way. When a search is done, you will need to remember that the name was entered in all upper case. For this reason, a standard format for Names is to be followed. Enter the first letter in upper case and the following letters in lower case. (eg, John Doe) However, you may need to conduct a search using different formats when using the name as a search criteria.
Step Action
8. In this example, Enter the employee's Person ID "1254754" into the Person ID field.
Page 5
Step Action
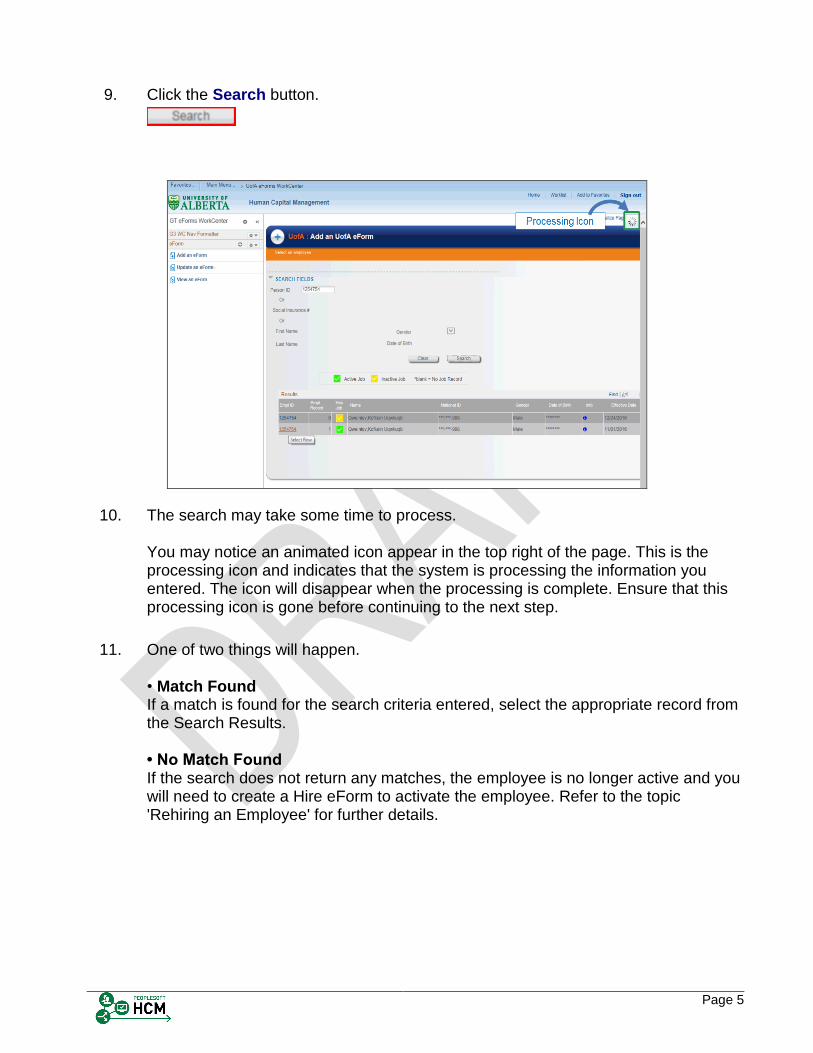
9. Click the Search button.
Step Action
10. The search may take some time to process. You may notice an animated icon appear in the top right of the page. This is the processing icon and indicates that the system is processing the information you entered. The icon will disappear when the processing is complete. Ensure that this processing icon is gone before continuing to the next step.
11. One of two things will happen. • Match Found If a match is found for the search criteria entered, select the appropriate record from the Search Results. • No Match Found If the search does not return any matches, the employee is no longer active and you will need to create a Hire eForm to activate the employee. Refer to the topic 'Rehiring an Employee' for further details.
Page 6
Step Action
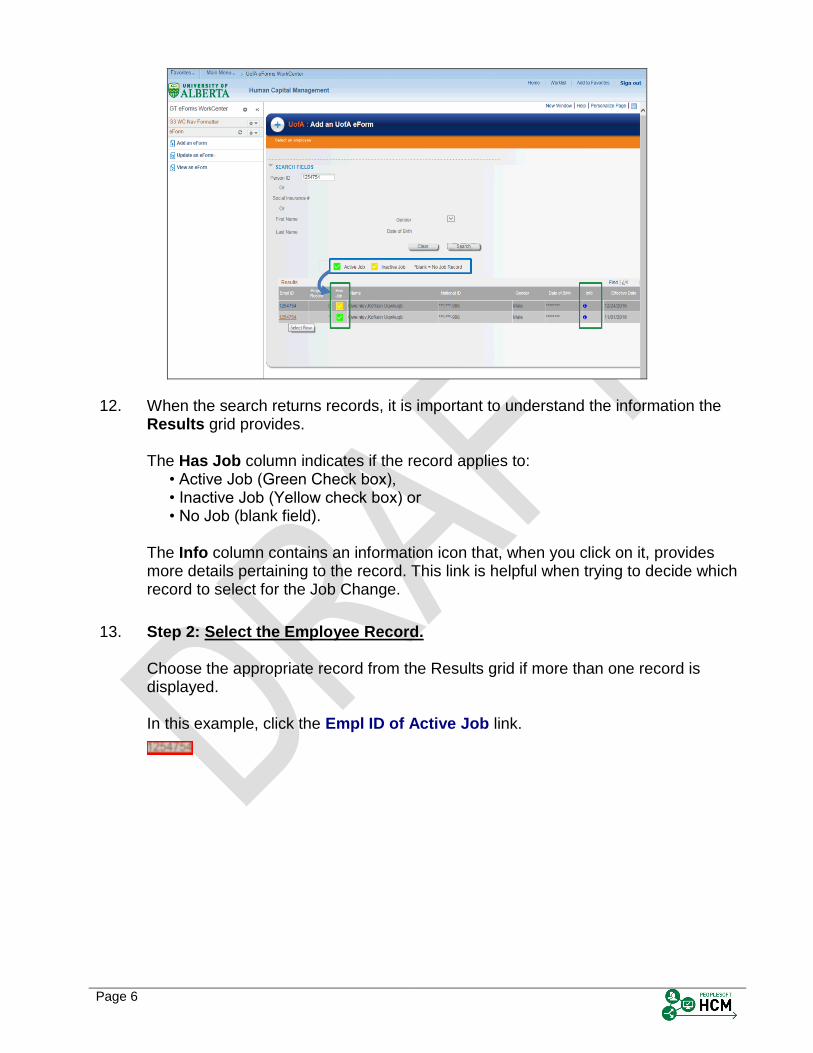
12. When the search returns records, it is important to understand the information the Results grid provides. The Has Job column indicates if the record applies to: • Active Job (Green Check box), • Inactive Job (Yellow check box) or • No Job (blank field). The Info column contains an information icon that, when you click on it, provides more details pertaining to the record. This link is helpful when trying to decide which record to select for the Job Change.
13. Step 2: Select the Employee Record. Choose the appropriate record from the Results grid if more than one record is displayed. In this example, click the Empl ID of Active Job link.
Page 7
Step Action
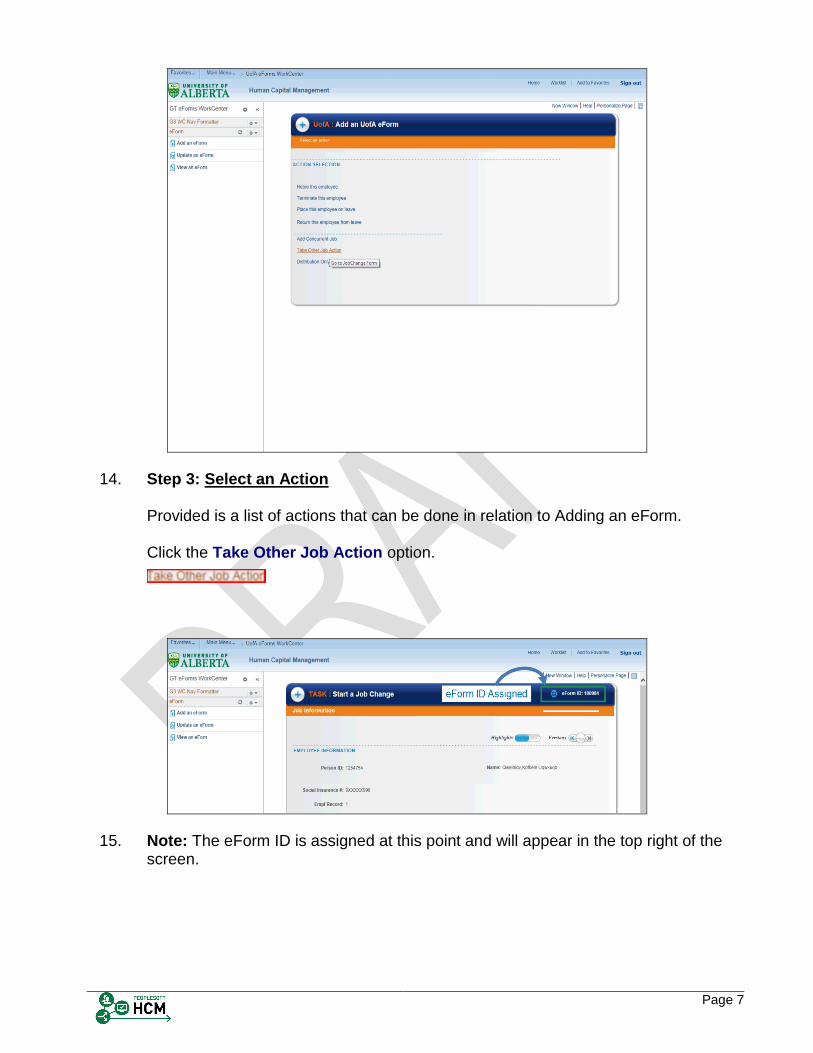
14. Step 3: Select an Action Provided is a list of actions that can be done in relation to Adding an eForm. Click the Take Other Job Action option.
Step Action
15. Note: The eForm ID is assigned at this point and will appear in the top right of the screen.
Page 8
Step Action
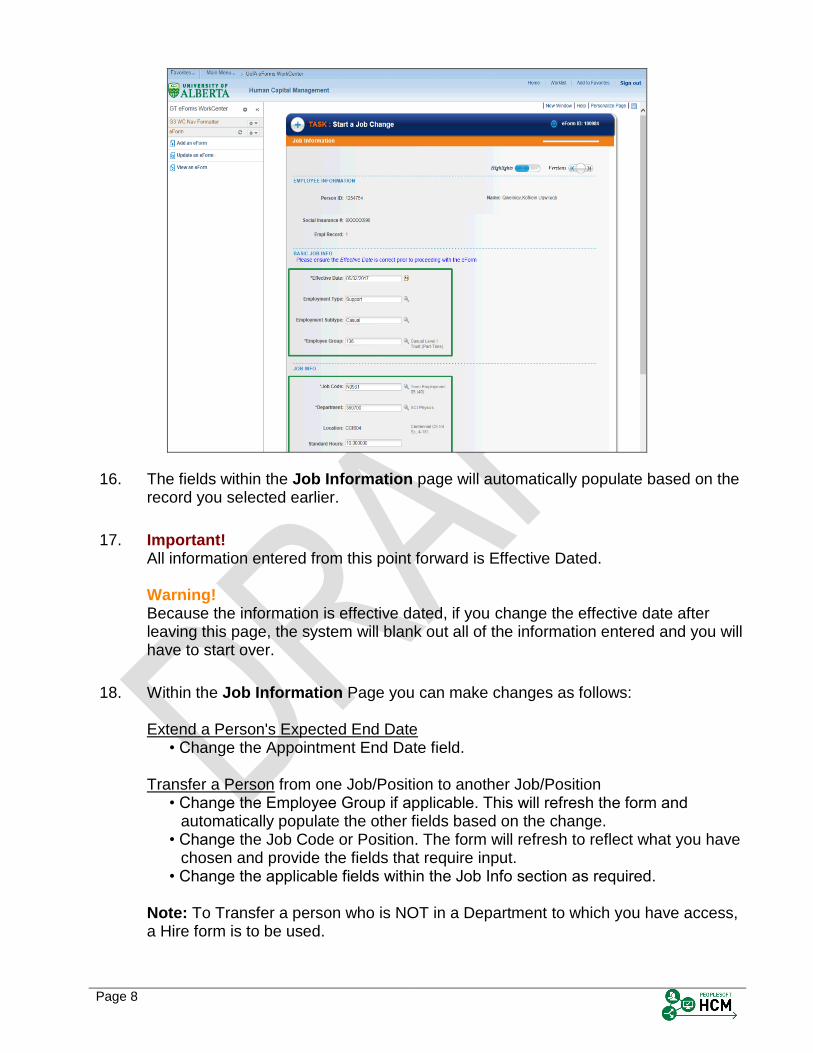
16. The fields within the Job Information page will automatically populate based on the record you selected earlier.
17. Important! All information entered from this point forward is Effective Dated. Warning! Because the information is effective dated, if you change the effective date after leaving this page, the system will blank out all of the information entered and you will have to start over.
18. Within the Job Information Page you can make changes as follows: Extend a Person's Expected End Date • Change the Appointment End Date field. Transfer a Person from one Job/Position to another Job/Position • Change the Employee Group if applicable. This will refresh the form and
automatically populate the other fields based on the change. • Change the Job Code or Position. The form will refresh to reflect what you have
chosen and provide the fields that require input. • Change the applicable fields within the Job Info section as required. Note: To Transfer a person who is NOT in a Department to which you have access, a Hire form is to be used.
Page 9
Step Action
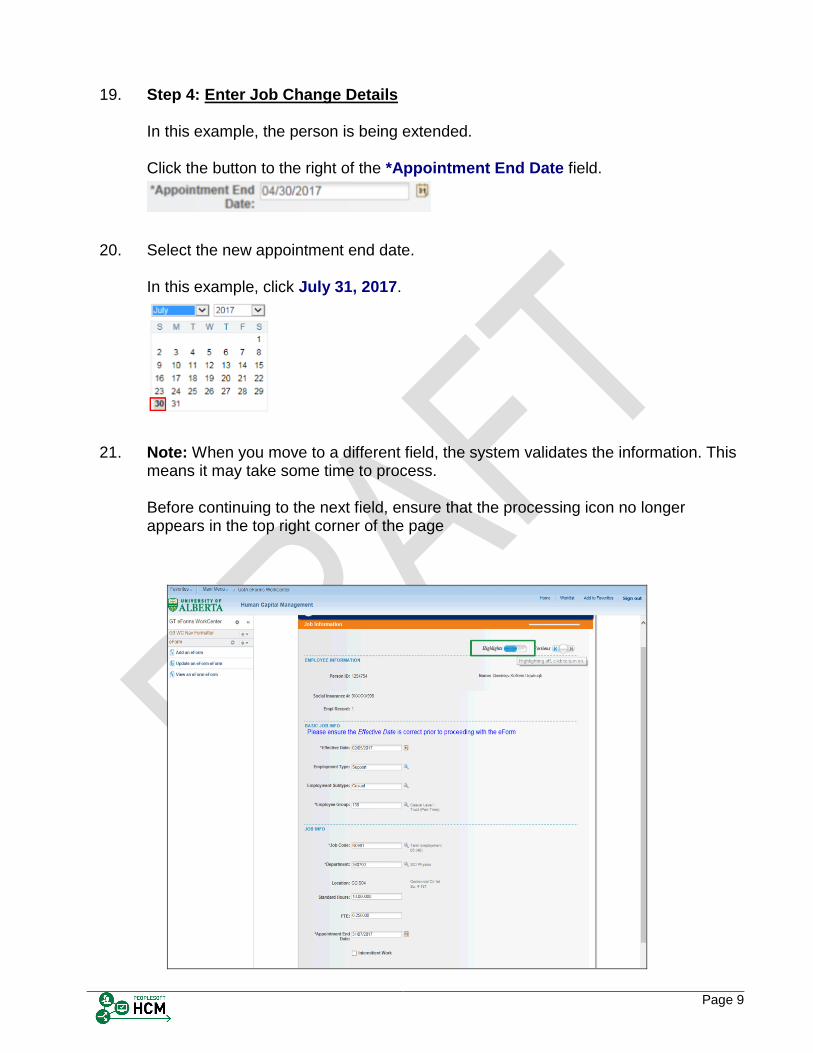
19. Step 4: Enter Job Change Details In this example, the person is being extended. Click the button to the right of the *Appointment End Date field.
20. Select the new appointment end date. In this example, click July 31, 2017.
21. Note: When you move to a different field, the system validates the information. This means it may take some time to process. Before continuing to the next field, ensure that the processing icon no longer appears in the top right corner of the page
Page 10
Step Action
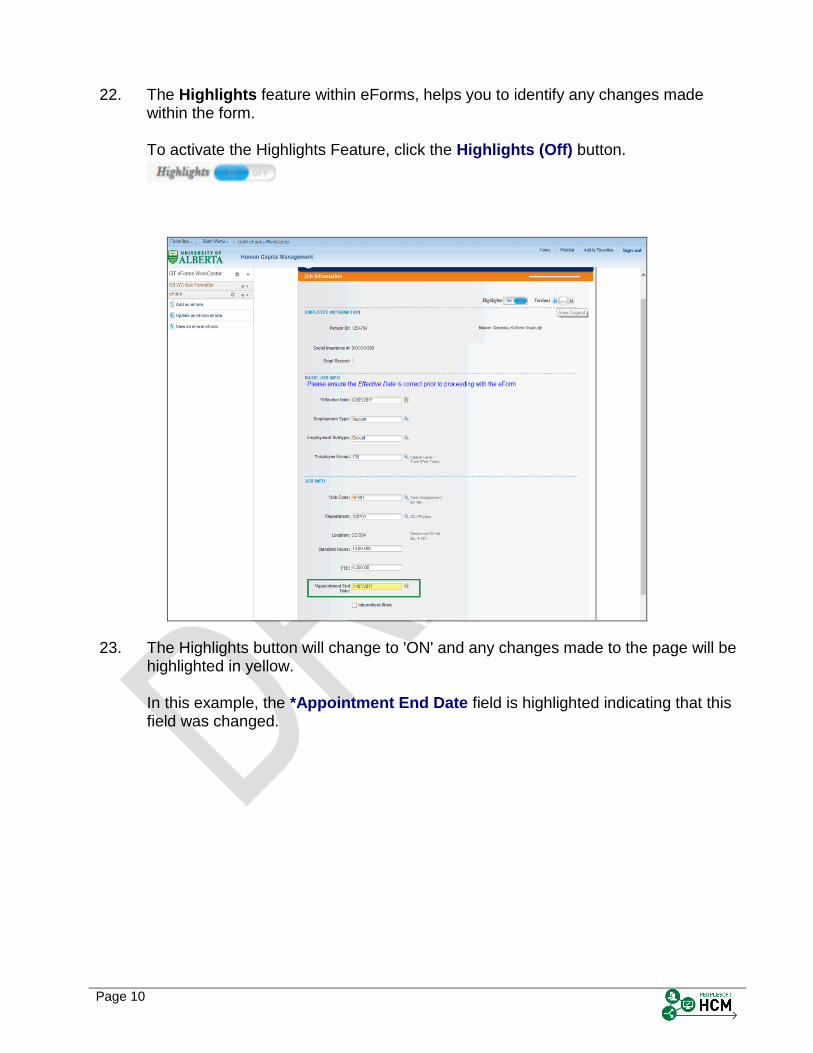
22. The Highlights feature within eForms, helps you to identify any changes made within the form. To activate the Highlights Feature, click the Highlights (Off) button.
Step Action
23. The Highlights button will change to 'ON' and any changes made to the page will be highlighted in yellow. In this example, the *Appointment End Date field is highlighted indicating that this field was changed.
Page 11
Step Action
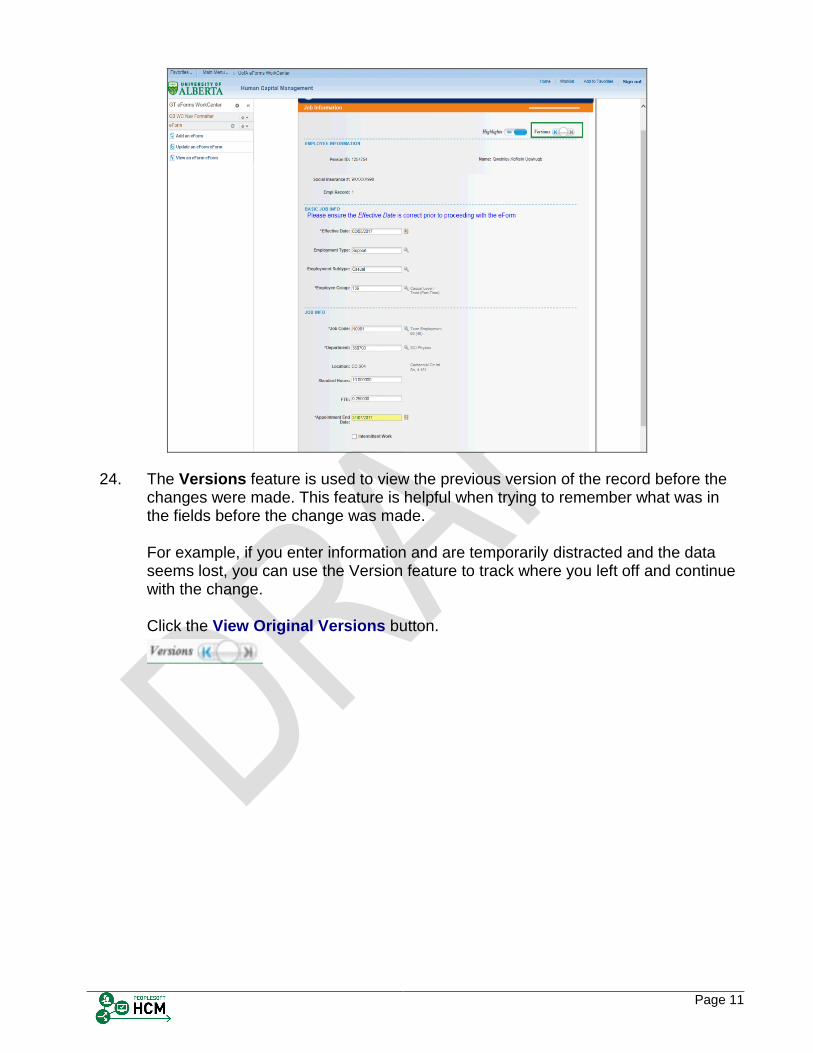
24. The Versions feature is used to view the previous version of the record before the changes were made. This feature is helpful when trying to remember what was in the fields before the change was made. For example, if you enter information and are temporarily distracted and the data seems lost, you can use the Version feature to track where you left off and continue with the change. Click the View Original Versions button.
Page 12
Step Action
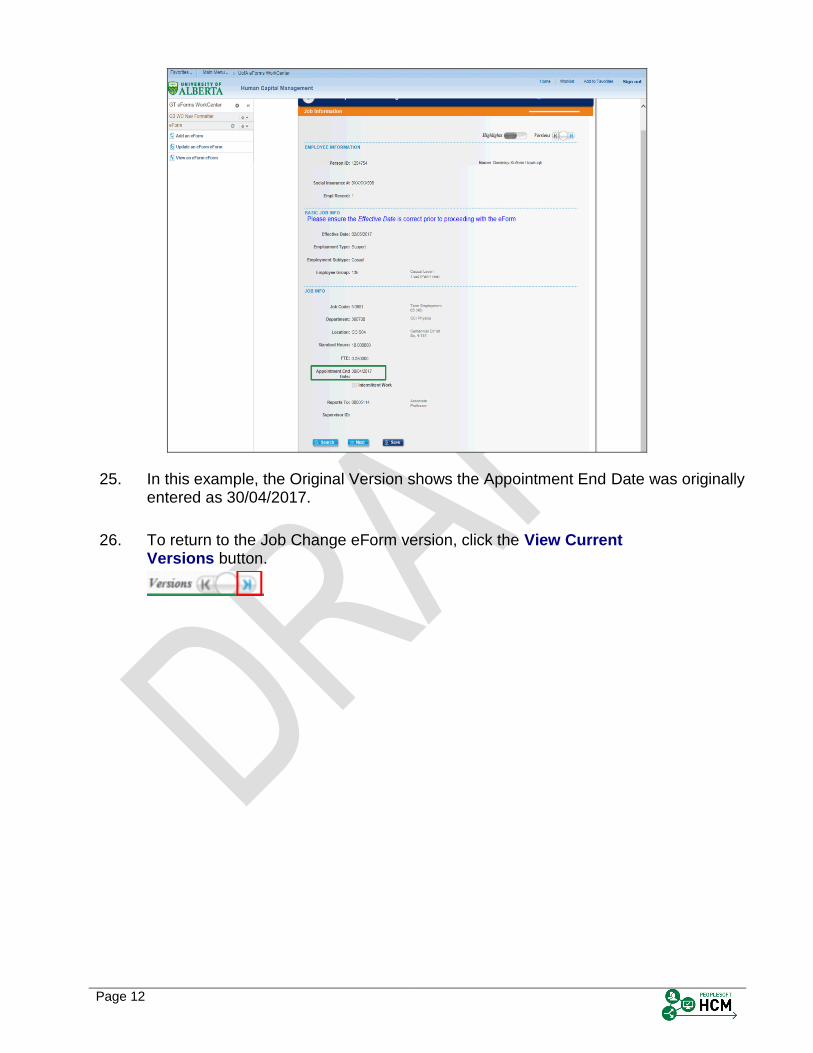
25. In this example, the Original Version shows the Appointment End Date was originally entered as 30/04/2017.
26. To return to the Job Change eForm version, click the View Current Versions button.
Page 13
Step Action
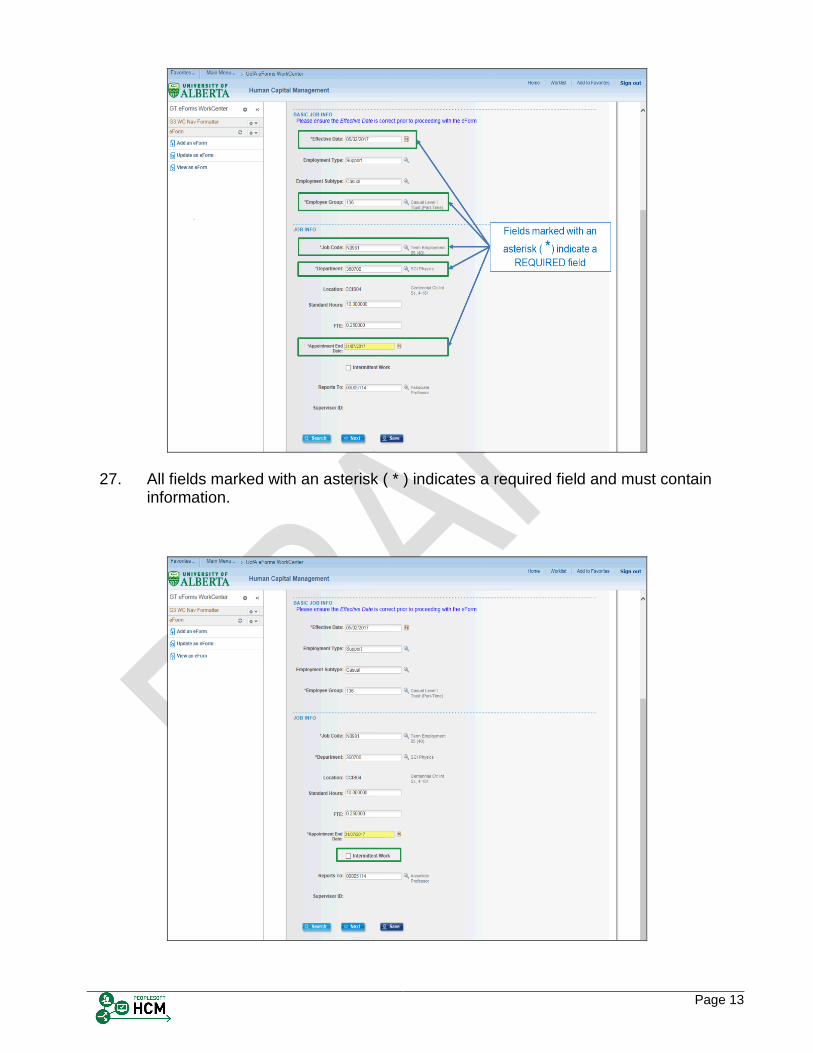
27. All fields marked with an asterisk ( * ) indicates a required field and must contain information.
Page 14
Step Action
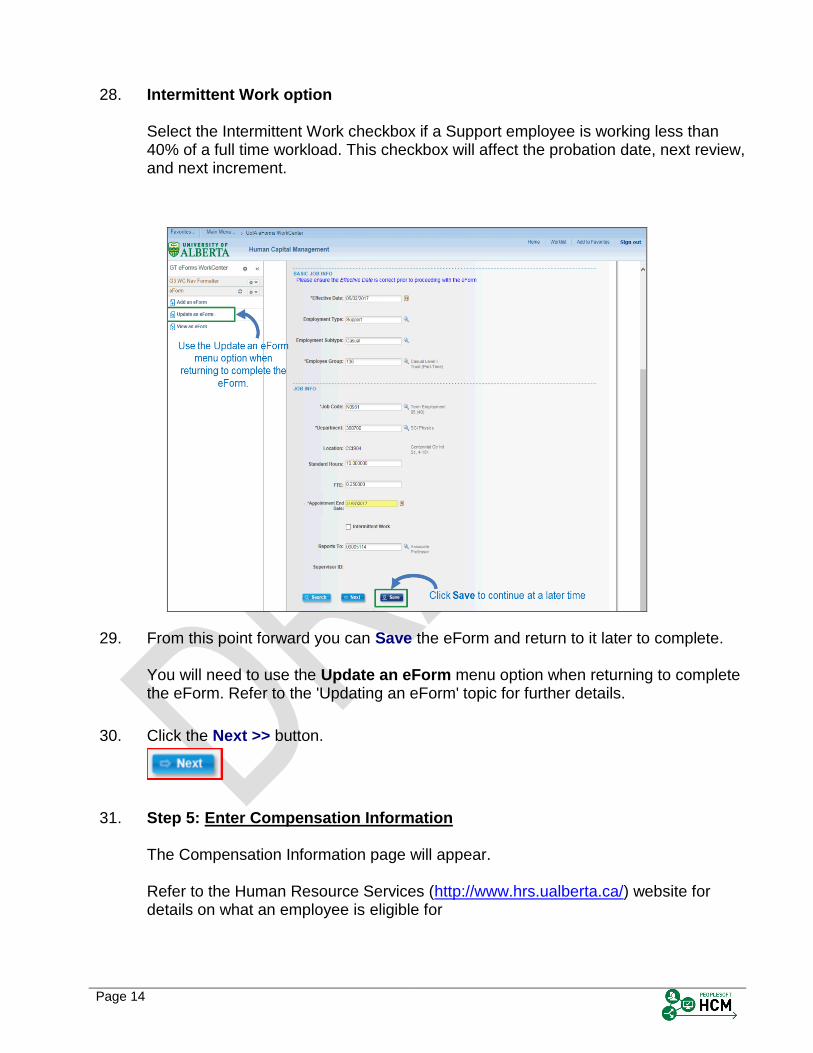
28. Intermittent Work option Select the Intermittent Work checkbox if a Support employee is working less than 40% of a full time workload. This checkbox will affect the probation date, next review, and next increment.
Step Action
29. From this point forward you can Save the eForm and return to it later to complete. You will need to use the Update an eForm menu option when returning to complete the eForm. Refer to the 'Updating an eForm' topic for further details.
30. Click the Next >> button.
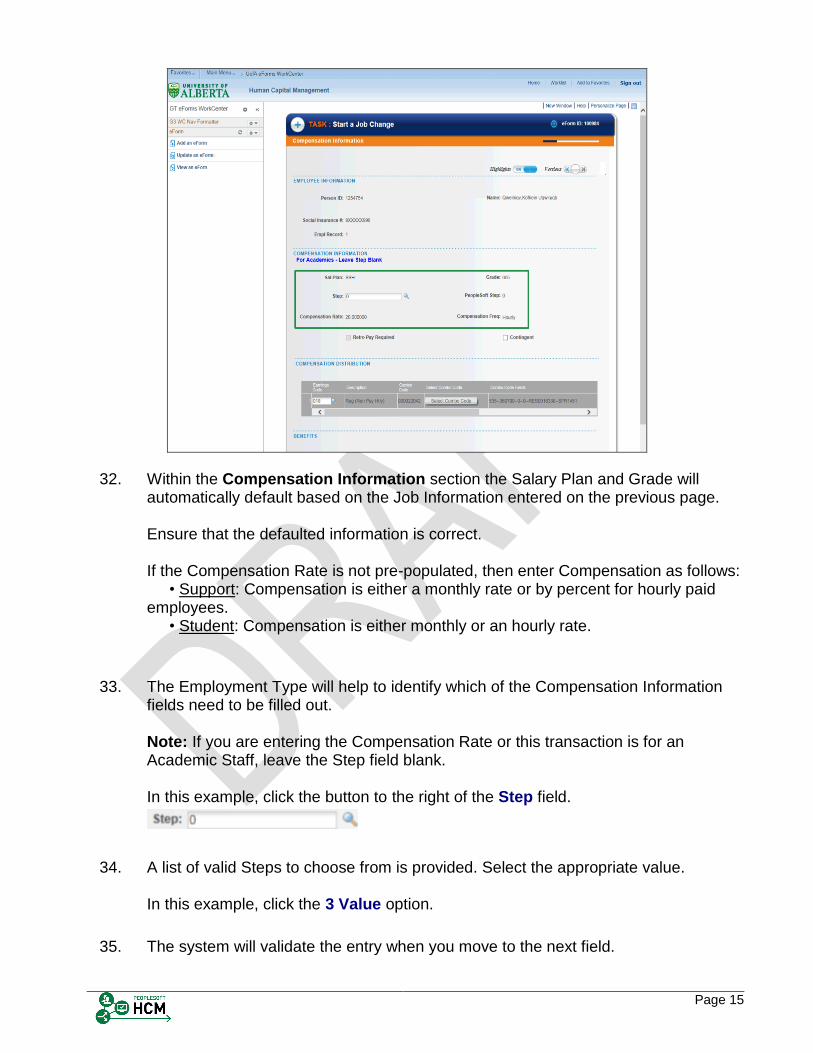
31. Step 5: Enter Compensation Information The Compensation Information page will appear. Refer to the Human Resource Services (http://www.hrs.ualberta.ca/) website for details on what an employee is eligible for
Page 15
Step Action
32. Within the Compensation Information section the Salary Plan and Grade will automatically default based on the Job Information entered on the previous page. Ensure that the defaulted information is correct. If the Compensation Rate is not pre-populated, then enter Compensation as follows: • Support: Compensation is either a monthly rate or by percent for hourly paid employees. • Student: Compensation is either monthly or an hourly rate.
33. The Employment Type will help to identify which of the Compensation Information fields need to be filled out. Note: If you are entering the Compensation Rate or this transaction is for an Academic Staff, leave the Step field blank. In this example, click the button to the right of the Step field.
34. A list of valid Steps to choose from is provided. Select the appropriate value. In this example, click the 3 Value option.
35. The system will validate the entry when you move to the next field.
Page 16
Step Action
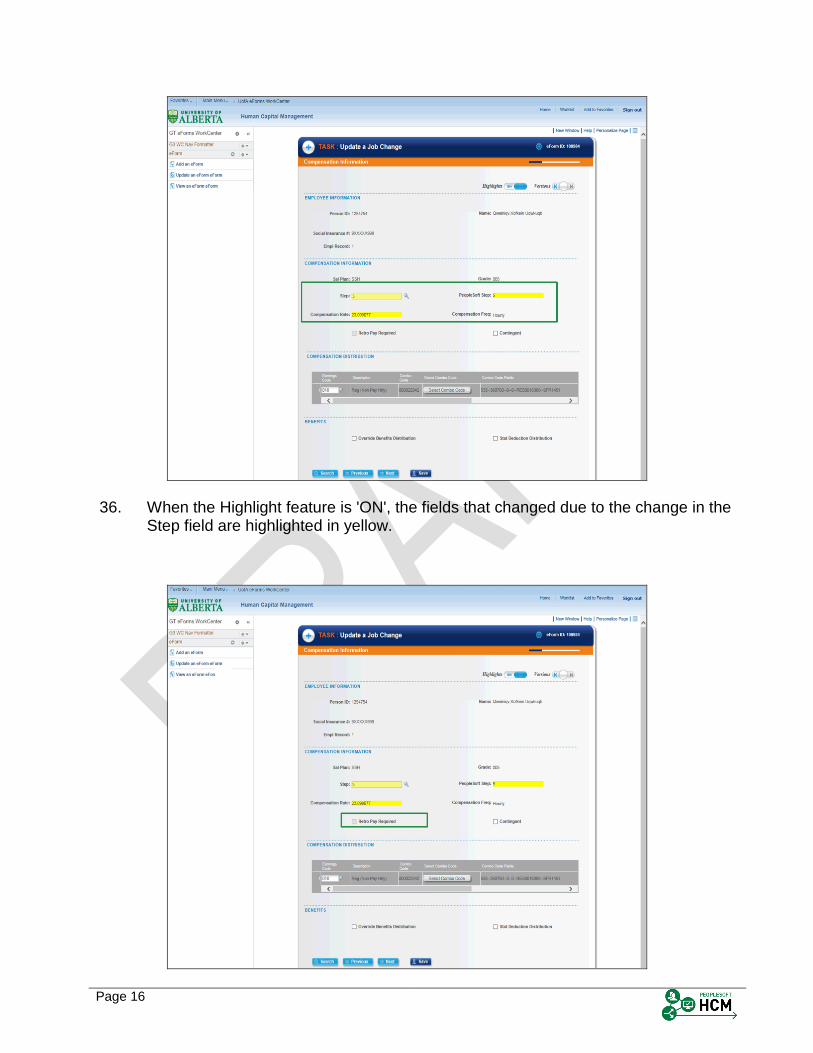
36. When the Highlight feature is 'ON', the fields that changed due to the change in the Step field are highlighted in yellow.
Page 17
Step Action
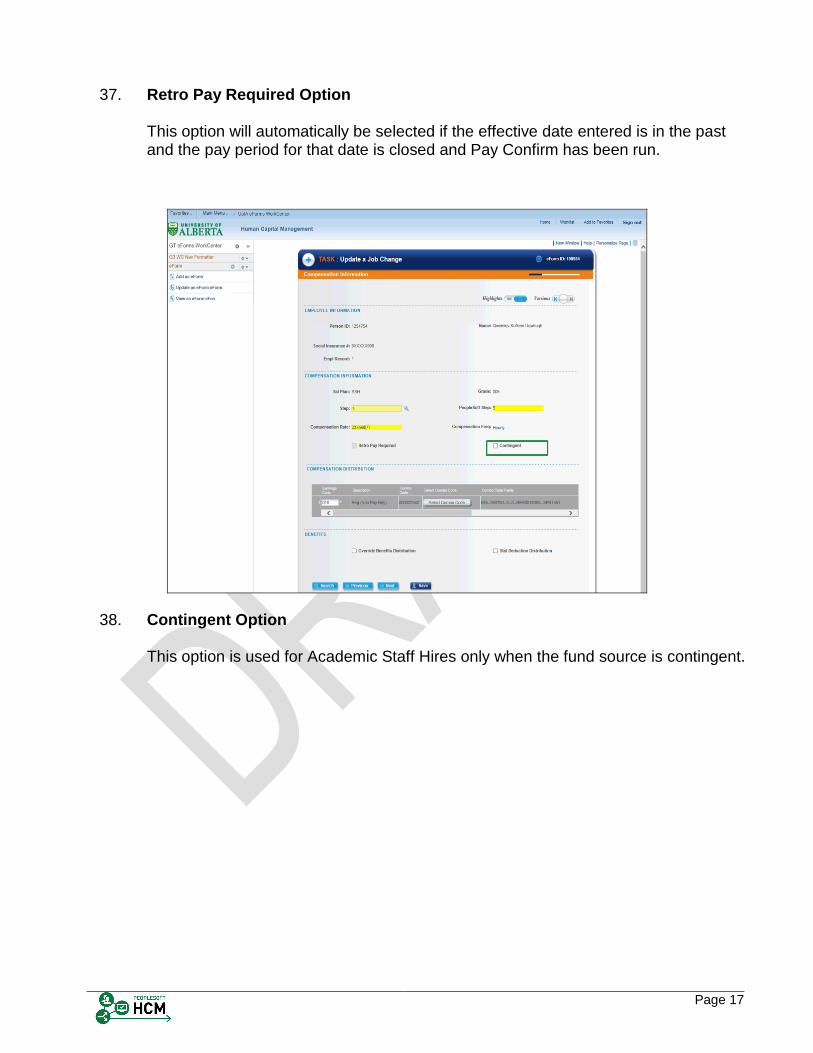
37. Retro Pay Required Option This option will automatically be selected if the effective date entered is in the past and the pay period for that date is closed and Pay Confirm has been run.
Step Action
38. Contingent Option This option is used for Academic Staff Hires only when the fund source is contingent.
Page 18
Step Action
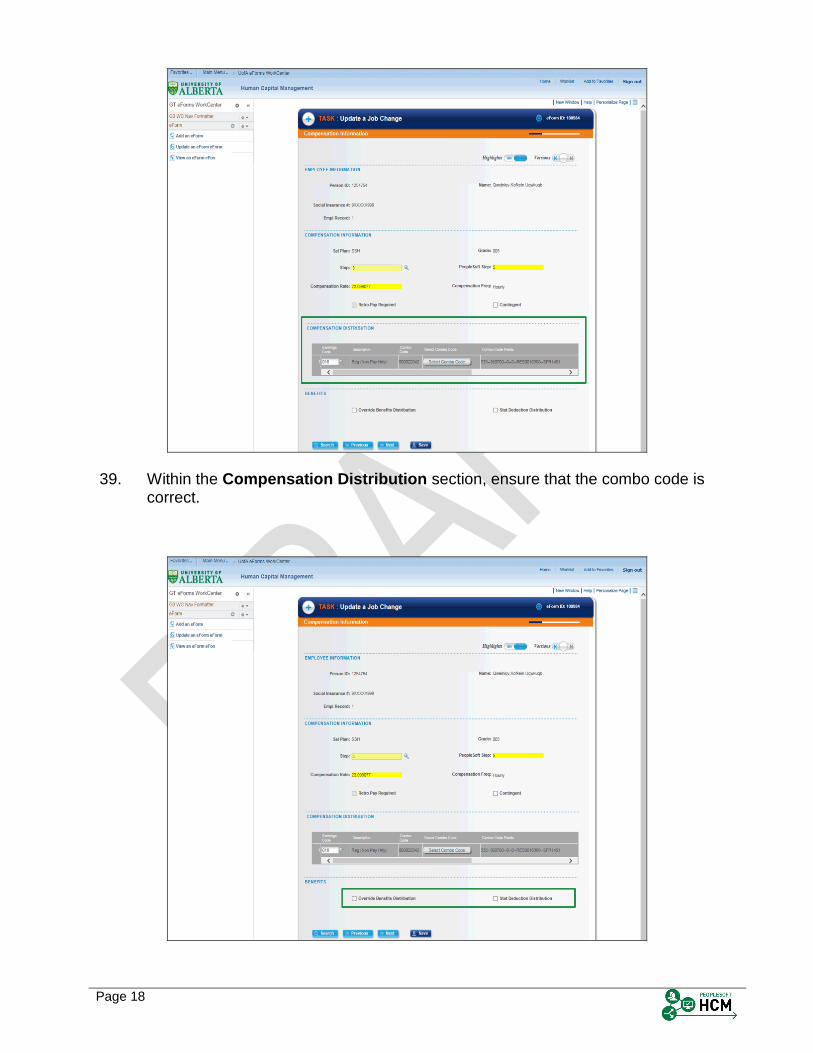
39. Within the Compensation Distribution section, ensure that the combo code is correct.
Page 19
Step Action
40. Override Benefits/Stat Deduction Distribution checkbox is used when benefits and / or statutory deductions are not paid from the default combo code. Selecting either of the check boxes will open the associated grid for you to enter a different distribution combo code. Note: Stat Deduction Distribution refers to the Statutory Taxes that are deducted for the employee.
41. Click the Next >> button.
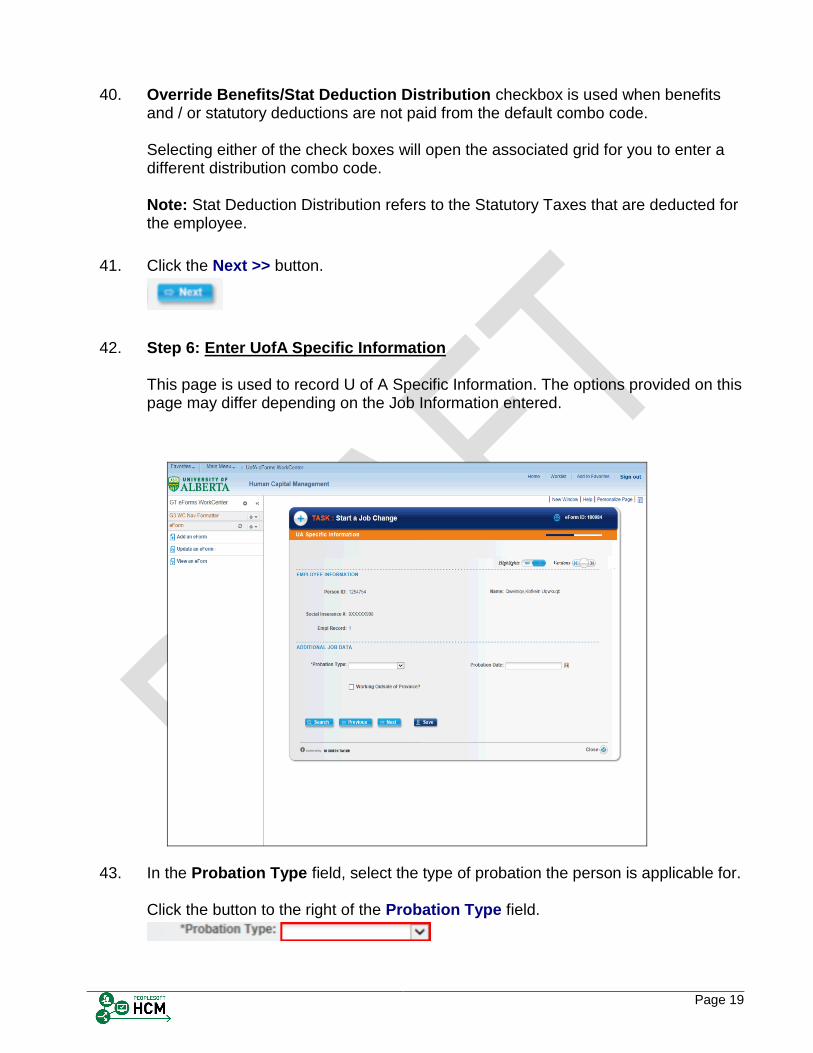
42. Step 6: Enter UofA Specific Information This page is used to record U of A Specific Information. The options provided on this page may differ depending on the Job Information entered.
Step Action
43. In the Probation Type field, select the type of probation the person is applicable for. Click the button to the right of the Probation Type field.
Page 20
Step Action
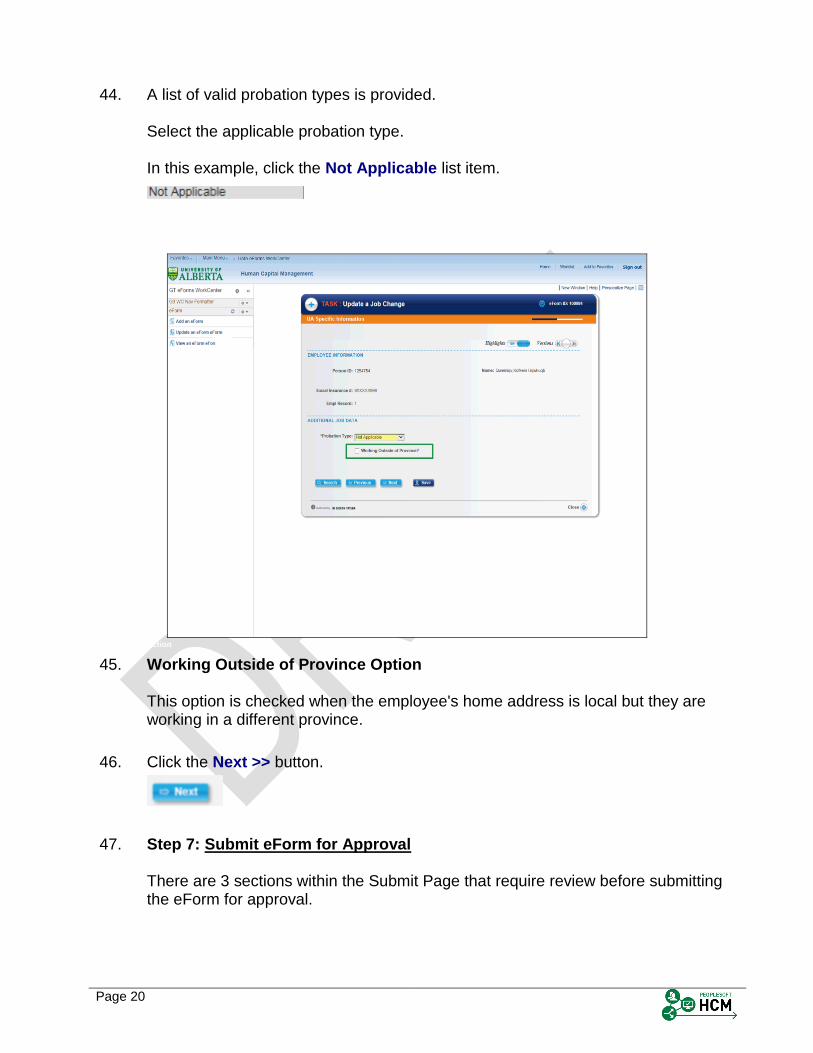
44. A list of valid probation types is provided. Select the applicable probation type. In this example, click the Not Applicable list item.
Step Action
45. Working Outside of Province Option This option is checked when the employee's home address is local but they are working in a different province.
46. Click the Next >> button.
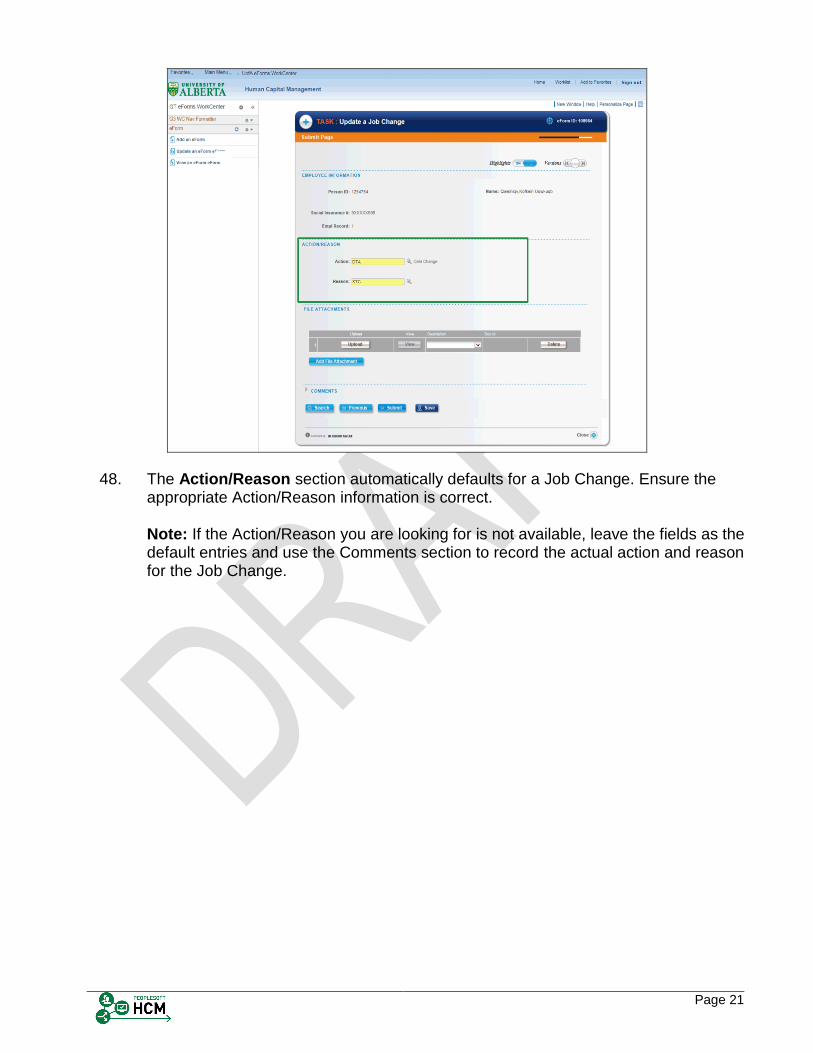
47. Step 7: Submit eForm for Approval There are 3 sections within the Submit Page that require review before submitting the eForm for approval.
Page 21
Step Action
48. The Action/Reason section automatically defaults for a Job Change. Ensure the appropriate Action/Reason information is correct. Note: If the Action/Reason you are looking for is not available, leave the fields as the default entries and use the Comments section to record the actual action and reason for the Job Change.
Page 22
Step Action
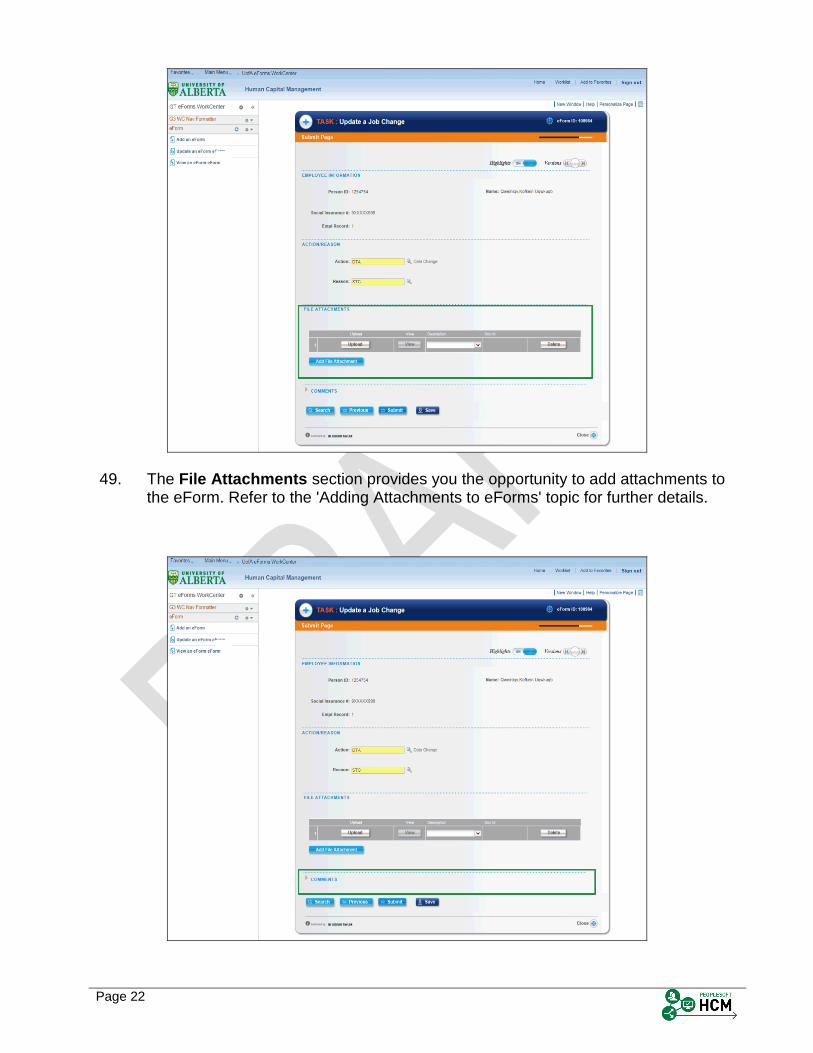
49. The File Attachments section provides you the opportunity to add attachments to the eForm. Refer to the 'Adding Attachments to eForms' topic for further details.
Page 23
Step Action
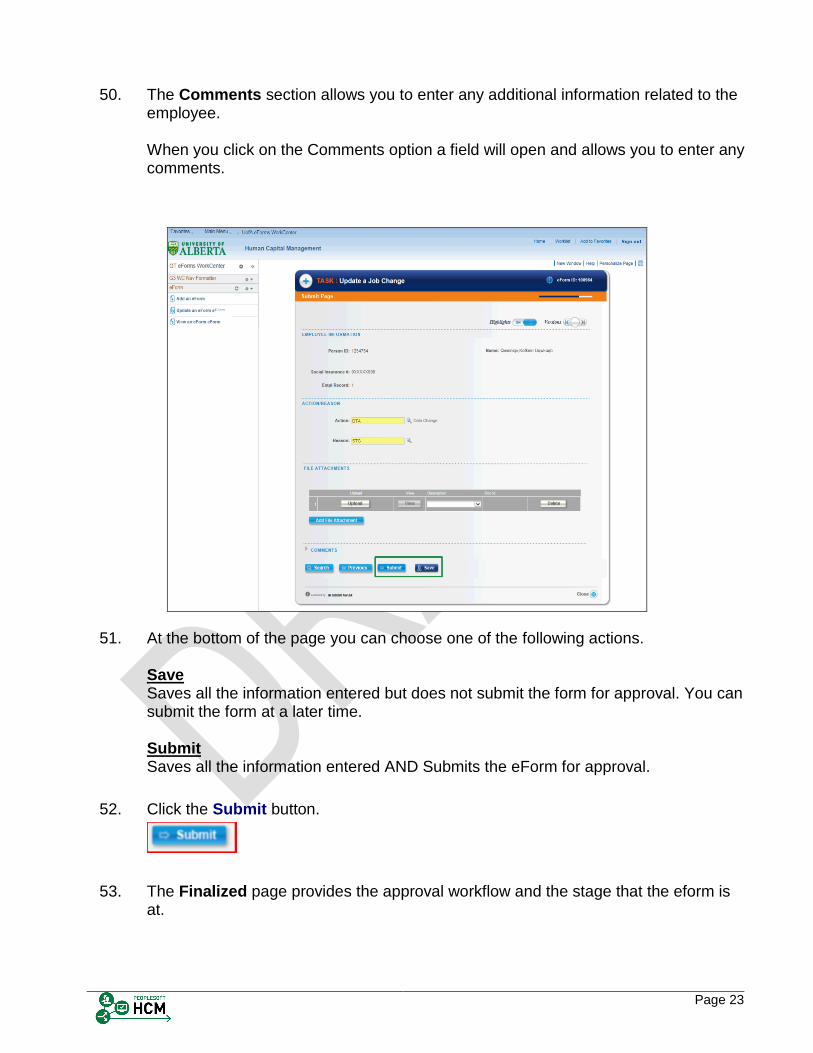
50. The Comments section allows you to enter any additional information related to the employee. When you click on the Comments option a field will open and allows you to enter any comments.
Step Action
51. At the bottom of the page you can choose one of the following actions. Save Saves all the information entered but does not submit the form for approval. You can submit the form at a later time. Submit Saves all the information entered AND Submits the eForm for approval.
52. Click the Submit button.
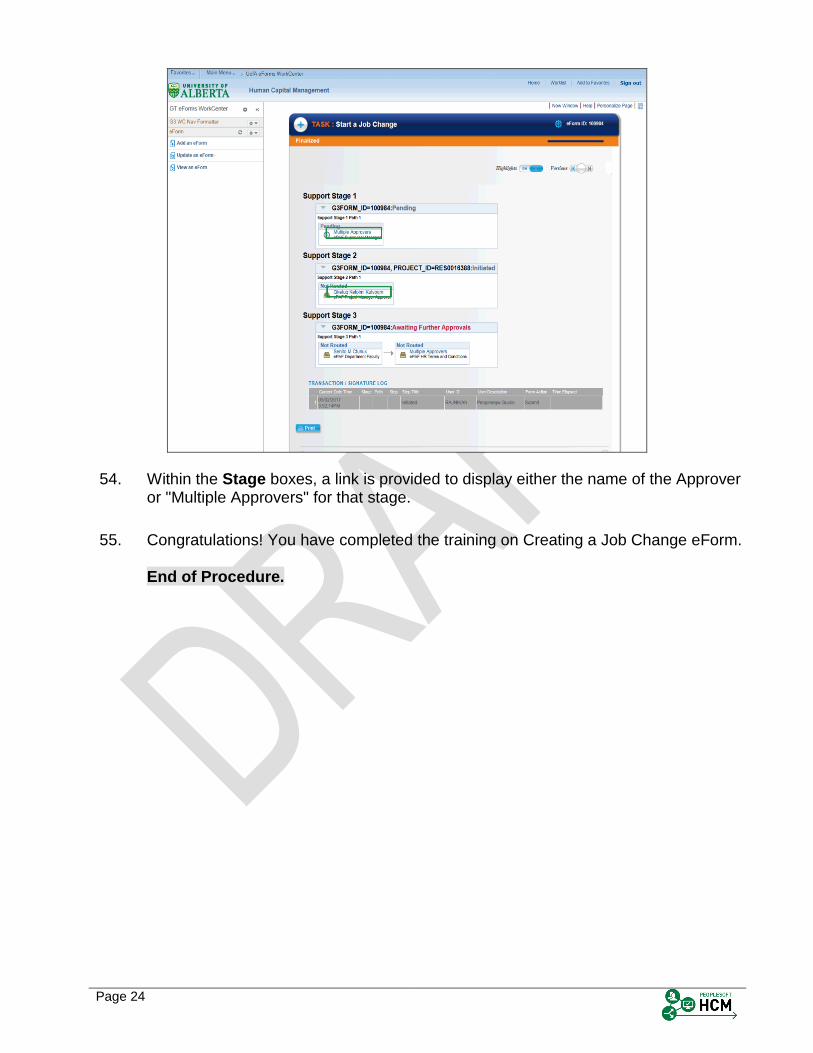
53. The Finalized page provides the approval workflow and the stage that the eform is at.
Page 24
Step Action
54. Within the Stage boxes, a link is provided to display either the name of the Approver or "Multiple Approvers" for that stage.
55. Congratulations! You have completed the training on Creating a Job Change eForm. End of Procedure.