critical application steps with two-part epoxies
TRANSCRIPT

Critical Application Steps with Two-Part Epoxies
Jeff BertscheCanusa-CPS
1

• Product Overview
• Storage
• Safety
• Surface Preparation
• Mixing
• Application
• Quality Control
• Epoxies and HDD Applications
Agenda
2

High Build Epoxies
• 185° to 205° Operating Temperature
• 100% Solids (no solvents)
• 2 component system (3 parts base / 1 part cure)
• Used for girth weld protection, valves & fittings and repair
• Supplied in Brush Grade Kits (liters or pounds), Spray Grade Material and Cartridge Guns (repairs)
• Various cure rates available
Product Overview
3

• Product should be stored at temperatures between 40°F and 105°F
• Do not store epoxy in direct sunlight on ROW
• DO NOT ALLOW to FREEZE
• Shelf life of 2-3 years when stored as specified
• Must ALWAYS check shelf life dates prior to application
Storage
4

READ MSDS sheet
Applicators should wear a mask with the proper cartridge (NIOSH Approved) to protect against the amine (cure side) vapors in high preheat and spray applications
Safety
5
Small percentage of the population are allergic to the amine vapors and other materials in 2PE. (rash)
Wear splash proof chemical safety glasses and rubber gloves during installation
Spilled cure or material remaining in cure containers can be neutralized by mixing with base material

Keys to a Successful Epoxy Installation:
• Proper Surface Preparation – Critical
• Understanding the role of Temperatures - Critical
• Material Temperature• Surface Temperature• Ambient Temperature
6

Primary objective of surface preparation is to provide maximum coating adhesion
Proper Surface Preparation will:
1. Remove any loose/rust material from the surface
2. Increase the surface area
3. Impart an anchor pattern
Surface Preparation
7

• Remove moisture before sandblasting.
• Flash Rust – when blasted surface has been exposed to water or vapor (rain, dew point, high humidity)
• To avoid flash rusting do not reheat the surface after blasting. (<105˚F)
• Examples of heat sources are infra-red heaters, induction coils or propane torches.
Surface Preparation -Moisture Removal
8

• Uniform heating across width & around circumference of joint
• Controlled & repeatable heating process
• Penetrating heat for lasting effect• Imparts no surface residues
• Quicker heating times
• Extensive track record on thousands of projects
Induction Coil Preheat
9

Propane Torch Preheat
10No weed burners

April 9, 2014
April 9, 2014
Surface Preparation

April 9, 2014
April 9, 2014
Air Compressor Blotter Test
• ASTM D 4285
• White, absorbent paper placed on a hard surface
• Run for 1 minute – look for moisture / oil
• Done once per shift

April 9, 2014
April 9, 2014
Surface Preparation
• Most 2PE require an abrasive blast surface to Near-White Metal (SSPC-SP10, NACE 2, Sa 2 ½) or better.
• Blast profile should be 2.5 - 5 mils
Testex Tape w/ micrometerNear-White Surface Prep

April 9, 2014
April 9, 2014
NACE 2 / SSPC SP10
2.5 - 5 mil anchor profile
No visible contaminants, mil
scale, rust, oxides, coating, etc.
Random staining limited to no
more than 5% of each unit area
(3” x 3”)
Random staining may consist of
light shadows slight streaks,
minor discolorations.
Surface Preparation

April 9, 2014
April 9, 2014
A number of products will
result in a 2.5 - 5 mil sharp
angular anchor profile:
G-25 Steel Grit
16 Grit Aluminum Oxide
Black Beauty 1240
EnviroGrit – recycled glass
PLAY SAND IS NOT
ACCEPTABLE!
Contains contaminants & silica
Silicosis = “No Bueno”
Certified Grit
Sieve tested, no oil or
hydrocarbon contamination
Surface Preparation

April 9, 2014
April 9, 2014
Surface Preparation
“Little Bully” Blaster

April 9, 2014
April 9, 2014
Surface Preparation
Power tool cleaning with wire brush
(SSPC SP3) NOT ACCEPTABLE
Use of MBX Metal Blaster is
acceptable, imparts 2.5 – 3 mil profile

April 9, 2014
April 9, 2014
Surface Preparation Comparison
Power wire brush (SP3) vs. Near white metal surface prep (SP10)
• Significant decrease in adhesion, impact resistance, CD values and rust creepage.
• Reference: “Evaluation of various power tooling methods for surface treatment of protective coatings.” - Corrosion 2005,
NACE International.

April 9, 2014
April 9, 2014
Surface Preparation
• Mainline coating must be cleaned and abraded.
• Knock shine off existing coating
• Don’t blast through existing coating.

April 9, 2014
April 9, 2014
Surface Preparation – Ambient Conditions
• Substrate Temperature 50° – 200°F
• Substrate Temperature 5°F above the Dew Point
• Relative Humidity <85%

April 9, 2014
April 9, 2014
Mixing Two Part Epoxies
• Most two part epoxies are supplied in two separate containers:
Large Container – Base
Small Container - Cure
• Containers will be color coded to prevent mixing different kit sizes

April 9, 2014
April 9, 2014
Mixing Two Part Epoxies
• Empty all cure from container to ensure proper 3:1 ratio is achieved.
• The use of a paint stick or rubber spatula can help you to remove all cure contents
Neutralize cure container by mixing in
base material

April 9, 2014
April 9, 2014
Mixing Two Part Epoxies
Mixing Choices:
– Hand
– Mechanical Mixer (Drill)
– Pneumatic Dispenser
– Plural Component Spray
– Plural Component Dispenser

April 9, 2014
April 9, 2014
Mixing Two Part Epoxies
By Hand• Use a clean, sturdy stirring stick• Make sure to mix material on the sides and bottom• Approximate Mixing Time: 4 minutes

April 9, 2014
April 9, 2014
Mixing Two Part Epoxies
Mechanical Mixer• Use a clean mixer
• Ensure that the mixer is neither too large or too small.
– Too large and it will whip in a lot of air into the epoxy
– too small and it may take too long to mix or it may not mix the epoxy fully
• Watch the speed of the drill, if you have too high of a speed it will cause a vortex to form in the epoxy which will beat air into the epoxy. The use of a variable speed drill is essential.
• Sides and bottom
• Metal mixing paddles
• Approximate Mixing Time: 1 minute

April 9, 2014
April 9, 2014
Mixing Two Part Epoxies
• Be sure to mix all of the materials together. Ensure that you reach the bottom corners of the pail and to scrape the material off the wall of the container.
• Most 2PE have a white base and dark cure. A properly mixed batch will result in a homogeneous color with no streaks
• Neutralize the cure containers
• Larger kits = more volume = less pot life

April 9, 2014
April 9, 2014
Mixing Two Part Epoxies
• Do not mix epoxy on top of the pipe. Straight cure is corrosive and any spilled material will need to be properly removed from the pipe.
Do Not Allow “Road-Side” Chemistry!
• Cure heavy - will react too quickly and become brittle once it has kicked over
• Cure light - may never react fully and will not provide proper corrosion protection

April 9, 2014
April 9, 2014
Epoxy Application: Pneumatic Spray
• 1.0 liter cartridges
• 90 second application
• Automated Mixing
• Zero waste in pails
• Material preheat is critical

April 9, 2014
April 9, 2014
Epoxy Application: Plural Component Spray
Hardener Base
3:1 Ratio
Pump
Heater ** & filter
Flush
Pump
Spray Gun
Other items (not identified) include hoses, filters, pressure regulators and gauges
Typical Plural Component
Spray Equipment
Mix Manifold
** Minimum two 2.5kW heaters on Base-side and one 2.5kW on Hardener-side

April 9, 2014
April 9, 2014
Epoxy Application: Plural Component Spray

April 9, 2014
April 9, 2014
Mixing Two Part EpoxiesDispensing Equipment
• Pneumatic dispenser provides the following key benefits:
– Precise volumes dispensed per joint
– Eliminates hand mixing time / errors
– Eliminates component container waste
April 9, 2014
April 9, 2014
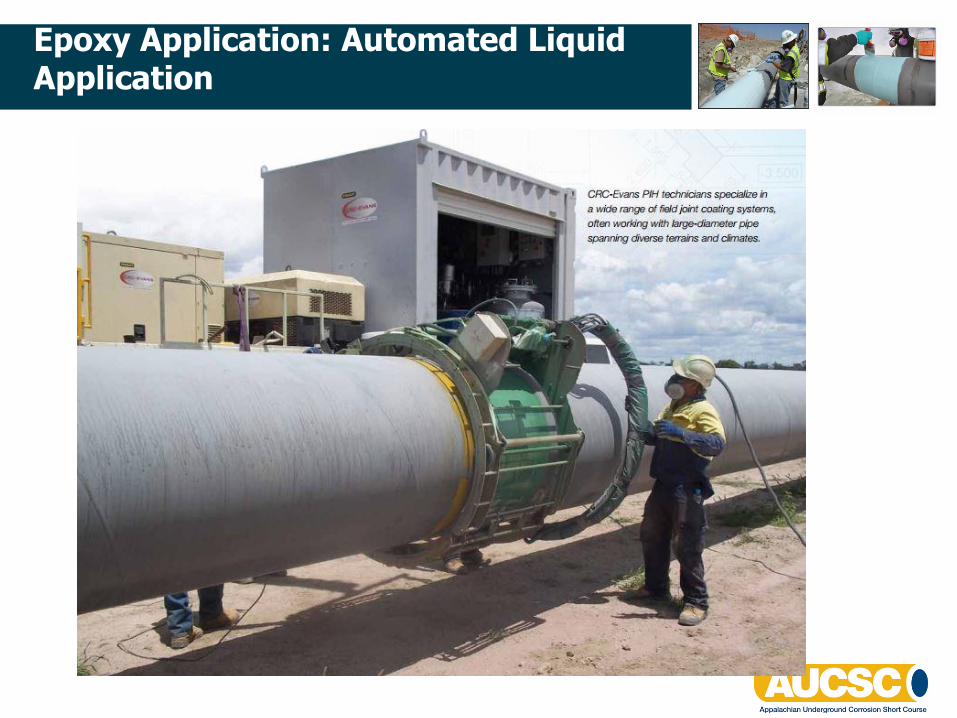
Epoxy Application: Automated Liquid Application

April 9, 2014
April 9, 2014
Semi-Automated Epoxy Application
33

April 9, 2014
April 9, 2014
Epoxy Application: Automated Liquid Application
Pre-heat – Induction Coil and Generator
Surface Prep – Automated Grit Blast
Application – Automated Epoxy Application

April 9, 2014
April 9, 2014
How fast does the epoxy set up???

April 9, 2014
April 9, 2014
Temperature and Epoxy Application
Numerous liquid coating systems on the market: standard cure, fast cure, cold weather cure, moisture tolerant, etc.
Must be aware of all temperatures and the relationship to cure times:
– Material Temperature
– Pipe Temperature
– Ambient Temperature

April 9, 2014
April 9, 2014
Temperature Effects On Application
Material Temperatures(determines pot life)
• Warm / Hot Material– Can dramatically reduce the pot life
– 5˚to10˚F increase in material temp = 50% decrease in pot life
• Cool / Cold Material– Will be difficult to mix
– Difficult to obtain a proper blend
– Will be thicker and harder to spread
• Larger kits = more volume = shorter pot life

April 9, 2014
April 9, 2014
Temperature Effects On Application
Pipe Temperatures(determines cure time)• Surface temperature is too hot:
– Epoxy may become runny and difficult to build thickness
– Epoxy sets up too quickly leading to streaks, clumps, icicles
• Pipe surface temperature is too cool:
– Epoxy may not wet out fully into the steel and could affect adhesion
– Epoxy may be hard to spread out leading to an extra thick coating that is out of spec and wasted material

April 9, 2014
April 9, 2014
Temperature Effects On Application
• Do not stage epoxy on top of the pipe that has been sitting in the sun. Heat from the pipe transfers to the material containers which accelerates the cure.

April 9, 2014
April 9, 2014
Temperature Effects On Application
Ambient Temperatures(affects material & surface temps)
• Warm / Hot Weather
– Speed up pot life and cure times
• Cool / Cold Weather
– At 50°F most epoxies cure very slow
– Recoat project example: Cold ambient / warm material temp / 55F pipe temp

April 9, 2014
April 9, 2014
Epoxy Application
Thixotropy - time dependent shear thinning property
Materials that are thick or viscous under static conditions will flow (become thin, less viscous) over time when shaken, agitated, sheared or otherwise stressed (time dependent viscosity).
Epoxies – allows the installer to build thickness over the welds, prevents drips, runs and icicles at the bottom of the pipe

April 9, 2014
April 9, 2014
Temperature Effects On Application
Cold ambient temperatures do not limit epoxy applications.

April 9, 2014
April 9, 2014
Increased substrate temperatures = faster cures
Should this be done??

April 9, 2014
April 9, 2014
Surface Prep - Temperature
Pipe Temperatures
• Faster cures can be achieved by pre-heating the steel pipe surface.
– If you are pre-heating with a propane torch, preheat should be done before grit blasting
– If you plan on heating after the blast, ensure that the steel is over 40°C (105°F) or you will get flash rust.
• Each manufacturer will have a target pre-heat temperatures.
• Excessive preheat (off-gassing of solvents) which can lead to pinholes in coating

April 9, 2014
April 9, 2014
Pipe, material and ambient temperatures are always changing on
the ROW and you need to make adjustments!

April 9, 2014
April 9, 2014
Other Application Issues
• Hydrostatic testing to verify pipe integrity
– If you exceed 100% or more of the specified minimum yield strength (SMYS), you can exceed the flexibility of the coating resulting in cracks.
– Check tensile and elongation of the two part epoxy.
• Flexibility on bore applications
• Be aware of coatings thickness – to thick can result in cracking

April 9, 2014
April 9, 2014
QUALITY CONTROL
April 9, 2014
April 9, 2014
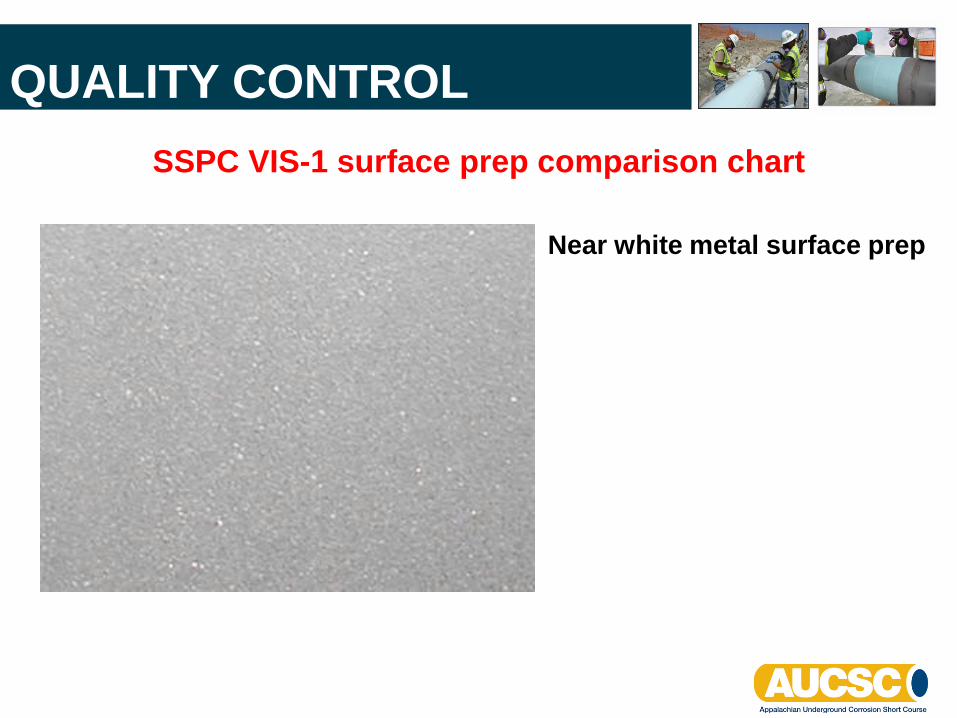
QUALITY CONTROL
SSPC VIS-1 surface prep comparison chart
Near white metal surface prep

April 9, 2014
April 9, 2014
QUALITY CONTROLPosiTector DPM (Dew Point Meter)
•Ambient Temperature
•Surface Temperature
•Dew Point > 3˚ C (5˚ F) above
the dew point.
Sling Hygrometer

April 9, 2014
April 9, 2014
QC – Surface PrepMeasuring Surface Profile – Testex Tape
(multiple locations!)

April 9, 2014
April 9, 2014
QC – Surface PrepElcometer – Measure & Record Blast Profile
2.5 – 5 mils
Usually every 25th weld
3 readings in random quadrants
Any changes to the equipment, operator or media

April 9, 2014
April 9, 2014
QUALITY CONTROLMeasuring Wet Film Thickness

April 9, 2014
April 9, 2014
QUALITY CONTROLPosiTector – Measuring DFT

April 9, 2014
April 9, 2014
QUALITY CONTROL
Durometer – Measuring Shore D Hardness
• Tests the epoxy for % of cure
• Can be used to determine if the coating is hard enough for backfill (>70 Shore D)
• Needle sticks out 100 mils @ 0 Shore D
• At 100 Shore D, needle sticks out 0 mils
• Can cause jeeps if the coating is too thin to measure.
• Make sure that coating is thicker than expected penetration (>60 mils, “button” @ 12 o’clock over existing ML coating)
• “Button” temperature (50°F – 77°F)
• Shore D = 70-80
• 20 mil coating is not cured
• Needle penetrates coating, hits steel = Shore D of 80

April 9, 2014
April 9, 2014
Quality Control
Adhesion
Testing
DeFelsko
PosiTest
Typical Values
2,000 – 3,000
PSI
Lengthy Test –
24 hours for
dolly glue to
cure

April 9, 2014
April 9, 2014
Quality Control
Adhesion Tester
Dollies &
Cutting Tool

April 9, 2014
April 9, 2014
Quality Control
Holiday Detection (3)
SP0 490
FBE ML coatings
125V/mil
NACE SP 0188
< 20 mils wet sponge
21-40 mils = 3K
41-55 mils = 4K
56-80 mils = 6K
NACE RP 0274V = K√T
Where:
K = 1250
T = coating thickness in
mils
Higher Voltages
SP 0188 @ 30 mils = 3K / RP 0274 @ 30 mils = 7K Volts Watch ML coating

April 9, 2014
April 9, 2014
Installers need to take ownership of the application
Coating Logs

April 9, 2014
April 9, 2014
Cold Weather Question
59
April 9, 2014
April 9, 2014
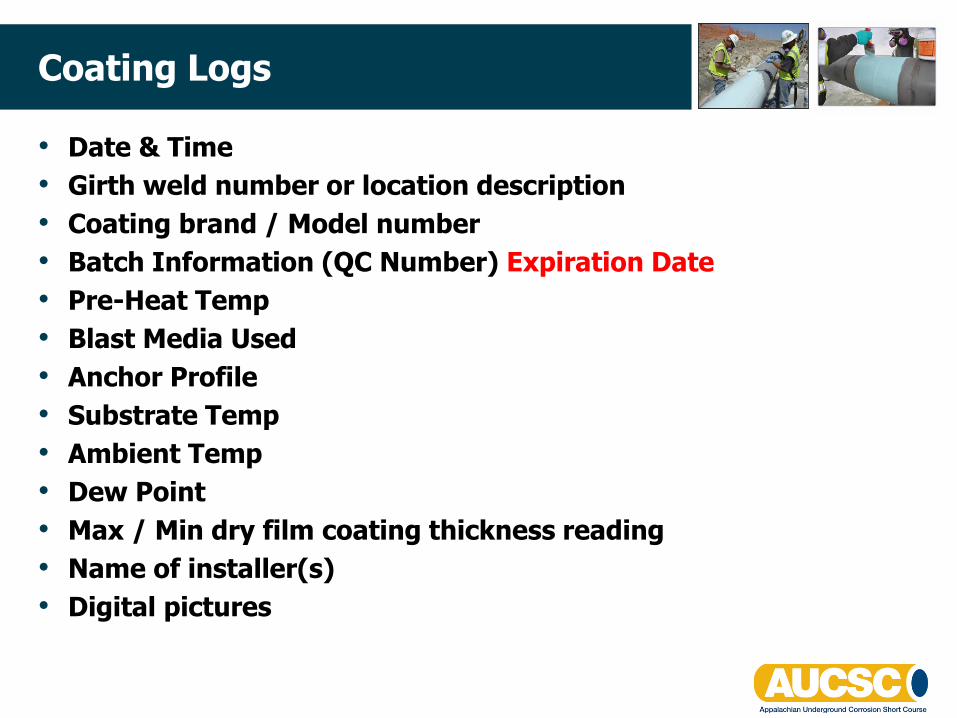
Coating Logs
• Date & Time
• Girth weld number or location description
• Coating brand / Model number
• Batch Information (QC Number) Expiration Date
• Pre-Heat Temp
• Blast Media Used
• Anchor Profile
• Substrate Temp
• Ambient Temp
• Dew Point
• Max / Min dry film coating thickness reading
• Name of installer(s)
• Digital pictures

April 9, 2014
April 9, 2014
Applicator / Inspector Training
Coatings are only as good as the installation.
– Install Guides
– Install Videos
– On-site tech support
– Applicator Certification
• Applicators must have the knowledge, skills and ability to apply the product

April 9, 2014
April 9, 2014
Epoxy FJC / HDD Installations
62
AAnnttii--
ccoorrrroossiioonn
ccooaattiinngg BBaarree
sstteeeell
AAnnttii--aabbrraassiioonn
ccooaattiinngg
RReeaammeerr
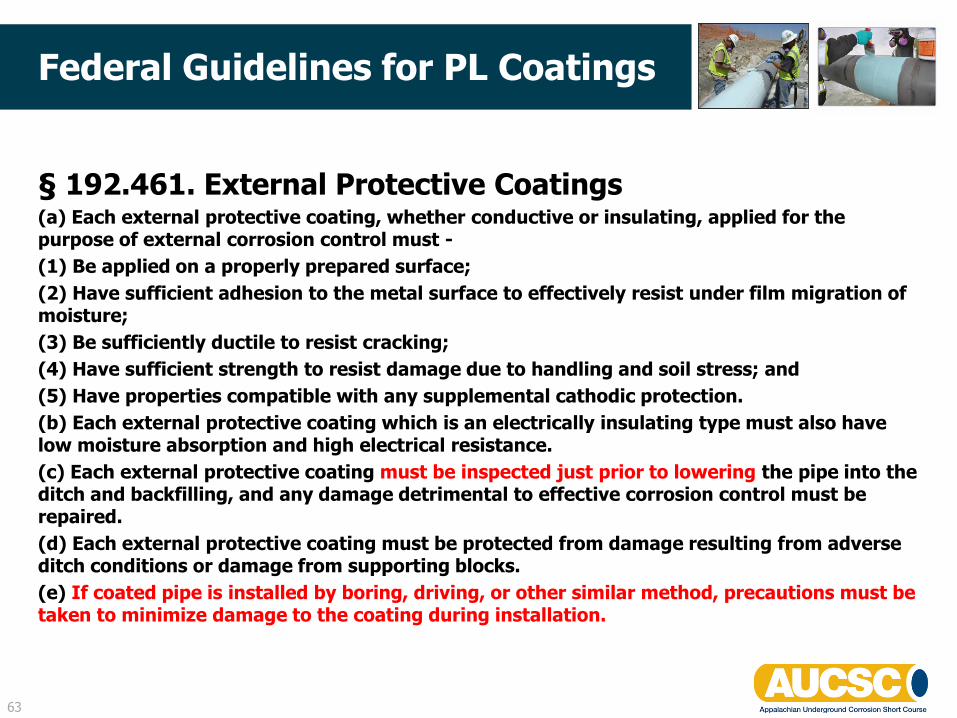
§ 192.461. External Protective Coatings(a) Each external protective coating, whether conductive or insulating, applied for the purpose of external corrosion control must -
(1) Be applied on a properly prepared surface;
(2) Have sufficient adhesion to the metal surface to effectively resist under film migration of moisture;
(3) Be sufficiently ductile to resist cracking;
(4) Have sufficient strength to resist damage due to handling and soil stress; and
(5) Have properties compatible with any supplemental cathodic protection.
(b) Each external protective coating which is an electrically insulating type must also have low moisture absorption and high electrical resistance.
(c) Each external protective coating must be inspected just prior to lowering the pipe into the ditch and backfilling, and any damage detrimental to effective corrosion control must be repaired.
(d) Each external protective coating must be protected from damage resulting from adverse ditch conditions or damage from supporting blocks.
(e) If coated pipe is installed by boring, driving, or other similar method, precautions must be taken to minimize damage to the coating during installation.
Federal Guidelines for PL Coatings
63

Typical Field Joint Coatings for HDD Applications
64

• Adhesion
• Abrasion
• Gouge
• Impact
• Hardness
• CP Compatibility
HDD Coating Tests
65
Gouge Test Results

Typical Results for HDD Applications (Field Joint)
66

• Raised girth weld experiences maximum abrasion, gouge and impact forces
• Performance data is not pulled from the girth weld location.
• Difficult to build consistent epoxy thickness over the girth weld
• Impossible to pull a wet film thickness over the girth weld
• Difficult to read a dry film thickness on the girth weld
• Trying to increase epoxy thickness (60+ mils) over the girth weld results in cracking.
The corrosion coating at the location that will see the most abuse (girth weld) is based on a visual guess.
FJC have always been the weak link with HDD applications. Why?
67

April 9, 2014
April 9, 2014
Weld bead protection is critical for a successful HDD project
68

Tri-directional, fiberglass cloth, pre-impregnated with a moisture cured PU resin
Excellent abrasion, impact and gouge resistance
Activated by fresh or salt water
Fast cure times (~ 30 minutes)
Non-hazardous
Extremely easy field installation
Application over various corrosion coatings.
Non-shielding
Used for girth welds or as a ML ARO
Field Applied Composite ARO
69
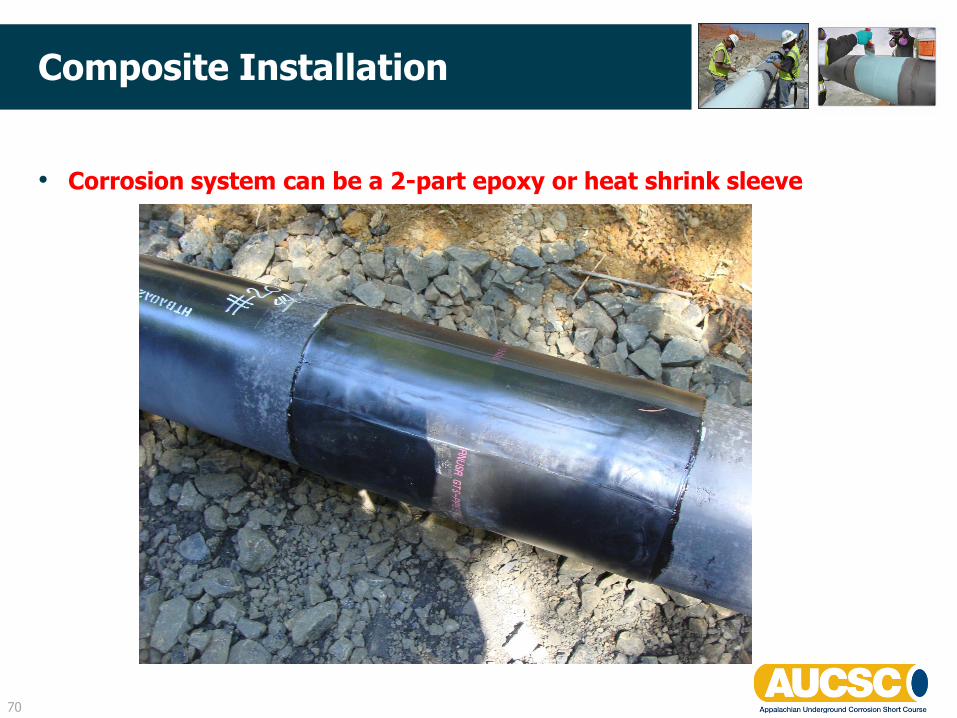
• Corrosion system can be a 2-part epoxy or heat shrink sleeve
Composite Installation
70

Activating the PU resin as material is being applied
Composite Installation
71

Thickness dependent on HDD conditions
Composite Installation
72

Compression film is used to compress all of the layers
Composite ARO Installation
73

Composite ARO Installation
74
Perforation tool used to puncture the compression film which allows the CO2 gas and water to escape

Composite ARO Installation
75
Cure times are approximately 30 minutes

Fracture Toughness
76
Composites
20-60X Greater
Epoxies

Results after HDD Application
77

Results after HDD Application
78
30” OD Pipe – shale conditions, damage to ML ARO

Results after HDD Application
79
1,400’ of 30”
If you are using a plant applied ARO for an HDD, you should consider a field applied ARO for the area that will experience the most damage.
“Precautions Must Be Taken”

April 9, 2014
April 9, 2014
+1 203-240-1267
Jeff Bertsche