cryogenic engineering prof. m. d. atrey department of...
TRANSCRIPT
Cryogenic Engineering Prof. M. D. Atrey
Department of Mechanical Engineering Indian Institute of Technology, Bombay
Module No. # 01 Lecture No. # 02
Properties of Cryogenic Fluids
So, welcome to the second lecture of cryogenic engineering in the NPTEL program. In
lecture one, I gave you brief outline of the syllabus that I am going to cover in this
subject on Cryogenic Engineering, at the same time I gave you brief review of different
applications of cryogenics in various field, we talked about space, mechanical
engineering, medicine, super conducting devices etcetera. Having done that, what is most
important is how to get lower and lower temperatures, what are different cryogens, what
are their properties and this is what we are going to see in this lecture.
(Refer Slide Time: 01:05)
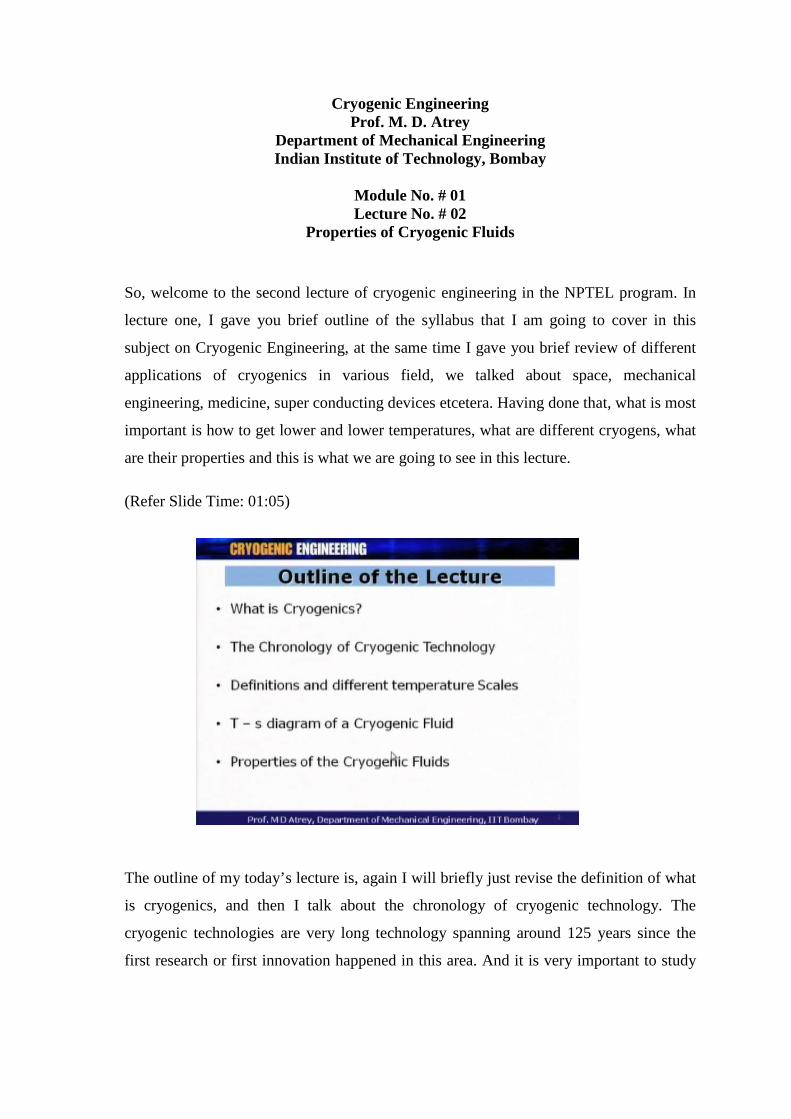
The outline of my today’s lecture is, again I will briefly just revise the definition of what
is cryogenics, and then I talk about the chronology of cryogenic technology. The
cryogenic technologies are very long technology spanning around 125 years since the
first research or first innovation happened in this area. And it is very important to study
how the development or evaluation in cryogenic technology happened over last 125 to 30
years.
After that, I will cover in brief, the definitions and different temperature scales that are
normally used in cryogenic engineering. Then, one of the most important diagram is
what is called as temperature entropy diagram for any fluid wherein, you can really get
all the properties of different cryogens and if you have a critical look at this diagram, lot
of things are getting clear from this diagram regarding those cryogens and the
temperatures associated with those cryogens. So, it is a very important diagram and
normally all the mechanical engineers would deal with T s diagram. So, therefore, I
would like to introduce you to this diagram and understand what exactly T s diagram is
and finally, today I will touch a few cryogens, what are the properties of those Cryogenic
Fluids and in the next lecture also I would continue with this Cryogenic Fluids.
(Refer Slide Time: 02:19)
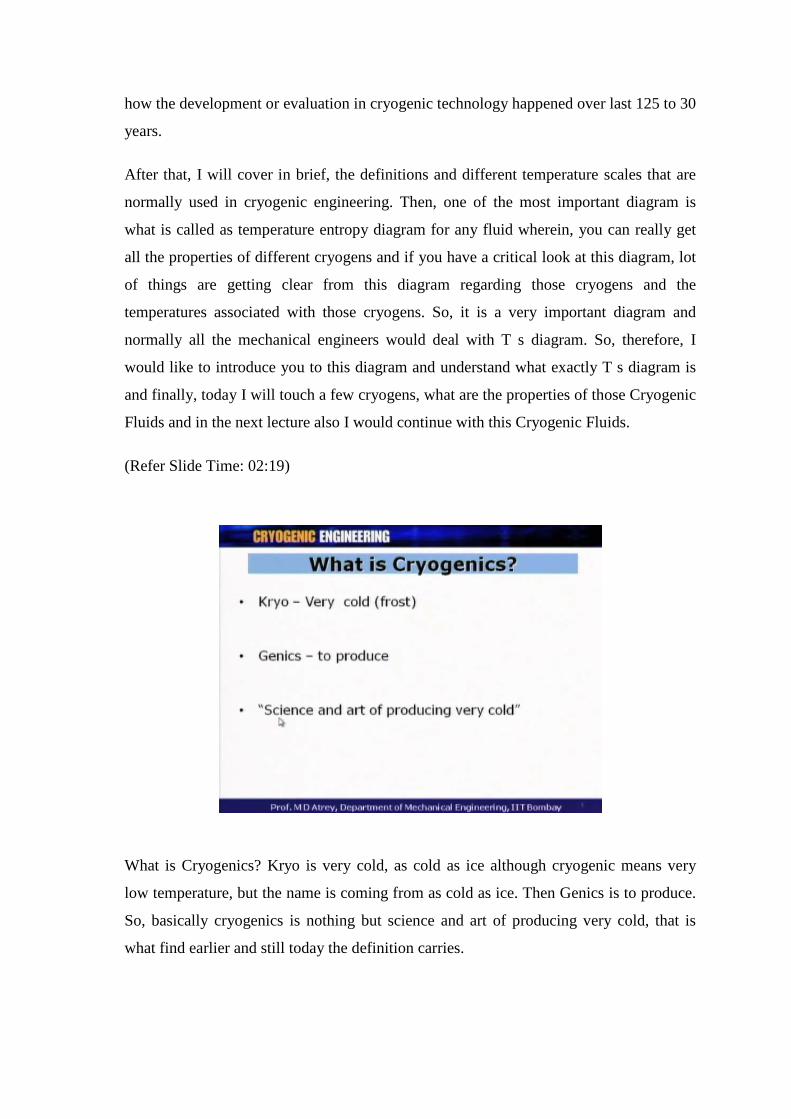
What is Cryogenics? Kryo is very cold, as cold as ice although cryogenic means very
low temperature, but the name is coming from as cold as ice. Then Genics is to produce.
So, basically cryogenics is nothing but science and art of producing very cold, that is
what find earlier and still today the definition carries.
(Refer Slide Time: 02:40)
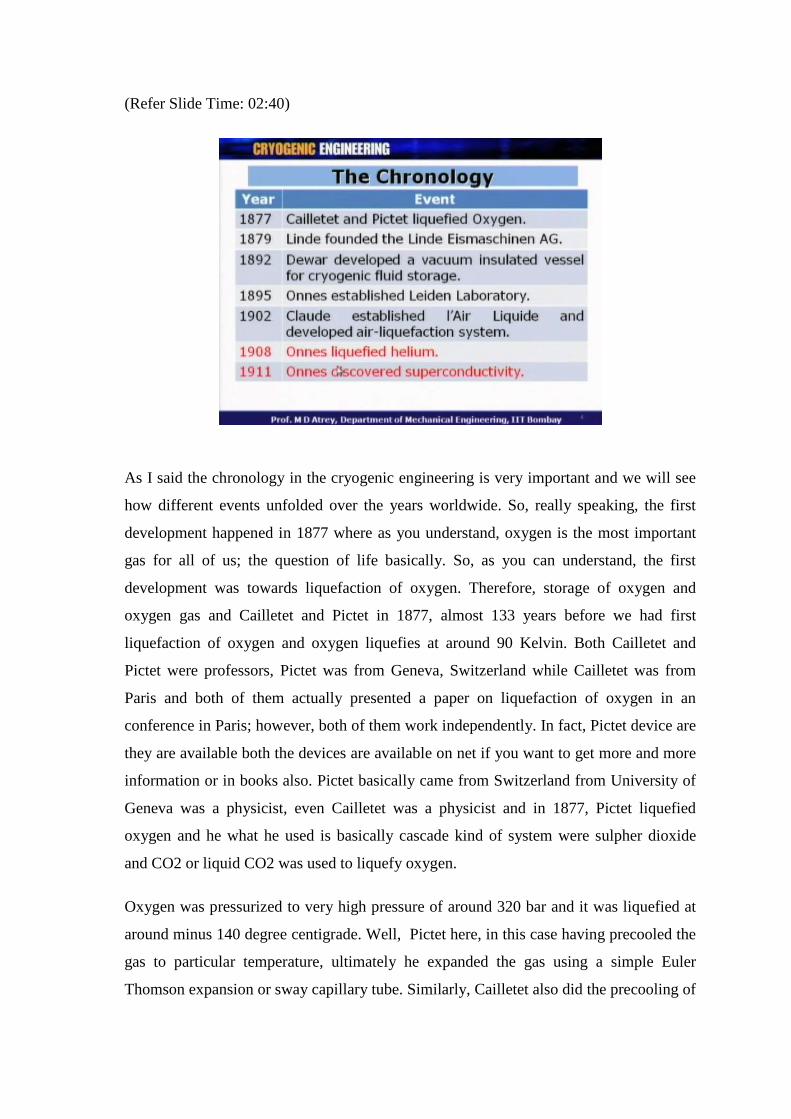
As I said the chronology in the cryogenic engineering is very important and we will see
how different events unfolded over the years worldwide. So, really speaking, the first
development happened in 1877 where as you understand, oxygen is the most important
gas for all of us; the question of life basically. So, as you can understand, the first
development was towards liquefaction of oxygen. Therefore, storage of oxygen and
oxygen gas and Cailletet and Pictet in 1877, almost 133 years before we had first
liquefaction of oxygen and oxygen liquefies at around 90 Kelvin. Both Cailletet and
Pictet were professors, Pictet was from Geneva, Switzerland while Cailletet was from
Paris and both of them actually presented a paper on liquefaction of oxygen in an
conference in Paris; however, both of them work independently. In fact, Pictet device are
they are available both the devices are available on net if you want to get more and more
information or in books also. Pictet basically came from Switzerland from University of
Geneva was a physicist, even Cailletet was a physicist and in 1877, Pictet liquefied
oxygen and he what he used is basically cascade kind of system were sulpher dioxide
and CO2 or liquid CO2 was used to liquefy oxygen.
Oxygen was pressurized to very high pressure of around 320 bar and it was liquefied at
around minus 140 degree centigrade. Well, Pictet here, in this case having precooled the
gas to particular temperature, ultimately he expanded the gas using a simple Euler
Thomson expansion or sway capillary tube. Similarly, Cailletet also did the precooling of
oxygen gas; however, he did it at 200 bar and he used ethylene for precooling up to
minus 100 degree centigrade around and then again expanded the gas using Euler
Thomson expansion device. So, basically they followed a kind of similar technique;
however, they were precooling refrigerants very different, but the funniest part was both
of them did the independent study and presented in the same year at the same
conference. Now in those days in 1877; however, they did not know how to store liquid
oxygen. They got a mist, they got some fog, they got some condensate, but they did not
know how to store that. So, that time that knowledge was not there it came later on.
The next development happened just two years after that were Linde found Linde
Elsmaschinen AG. This is a private company which Linde found and Linde is a big name
in cryogenics. In fact, this company which came into existent in 1879, it became Linde
AG in 1965 and most of the companies are under this umbrella of Linde now. It is a very
big name in cryogenics. It is in India also and here for the first time, there are modern
domestic refrigerator was kind of shown by Linde. The next development happened in
1892. As I said, in those years in 1877, the facility of storing liquid cryogen was not
there. And Dewar, device is named after the scientist is called Dewar. He developed a
vacuum insulated vessel for cryogenic fluid storage. So, here for the first time, he
understood the importance of a double walled flask with vacuum in between and he
showed in principle how one can store liquid nitrogen, liquid oxygen for a long time
which otherwise is to get evaporated immediately and this is a very important
development for cryogenic engineers and the vessel in which we store liquid cryogen is
also called as nitrogen dewar or helium dewar named after this particular scientist.
The next important development happened by a very big scientist called Kamerlingh
Onnes from Leiden laboratory in Netherlands in 1895. Kamerlingh Onnes is a very big
name again and he was the physicist. He was a professor at Leiden University in
Netherlands and here he found cryogenic laboratory at this place and he invited lot of
people all over the world to work at this laboratory. Next, in 1902, Claude for the first
time, he found a next company called l’Air Liquide in France where commercial air
liquefies were made available. So, first we had Linde and then we had Claude. As two
commercial companies came into existence in Europe, this company came into existence
in France and they had commercial air liquefies available worldwide. So, it is a
beginning of real commercial Cryogenic Engineering.
Onnes, Kamerlingh Onnes after founding this Leidin Laboratory, cryogenics laboratory
at Leidin in 1908, he liquefied helium. See, all this development if you could see was
towards lowering and lowering of temperatures. Here we had 90 Kelvin. I forgot to
mention here, in 1898 Dewar for the first time liquefied nitrogen; that means, you could
77 Kelvin here. If you come down below, in 1908, Onnes liquefied helium; that means,
he could reach the temperature of 4.2 Kelvin. This is the most important thing that
happened. Now that is a very typical connection to India in this particular case that the
helium gas which Onnes utilized for liquefaction, it had some Indian connection he had
used monocyte sand from India and when he heated this monocyte sand, he got helium
gas. So, he used this particular gas to liquefy and then he got liquid helium in 1908. So,
can imagine in the year 2008, we completed 100 years for helium liquefaction and we all
celebrated that as a centenary year of liquid helium. In India, we had a big conference in
Indian Institute of Science, which celebrated the centenary year of liquid helium.
Having liquefied helium, the next action is to utilize this liquid helium so that one could
find different properties of metals and in 1911, Kamerlingh Onnes discovered
superconductivity phenomenon. As you understand, as you go on lowering the
temperature of a metal and the metal become more and more conductive, the resistance
become almost equal to 0 and it shows in principle, the phenomena called
superconductivity. So, once you get lower and lower temperature, Kamerlingh Onnes in
the year 1911 showed that mercury becomes superconducting at 4.2 Kelvin and this was
a very big phenomenon which was discovered then and for this phenomenon, he got
noble prize in the year 1930. Onnes got around 60 cc of helium in this experiment at this
point. I just wanted to mention this point over here.
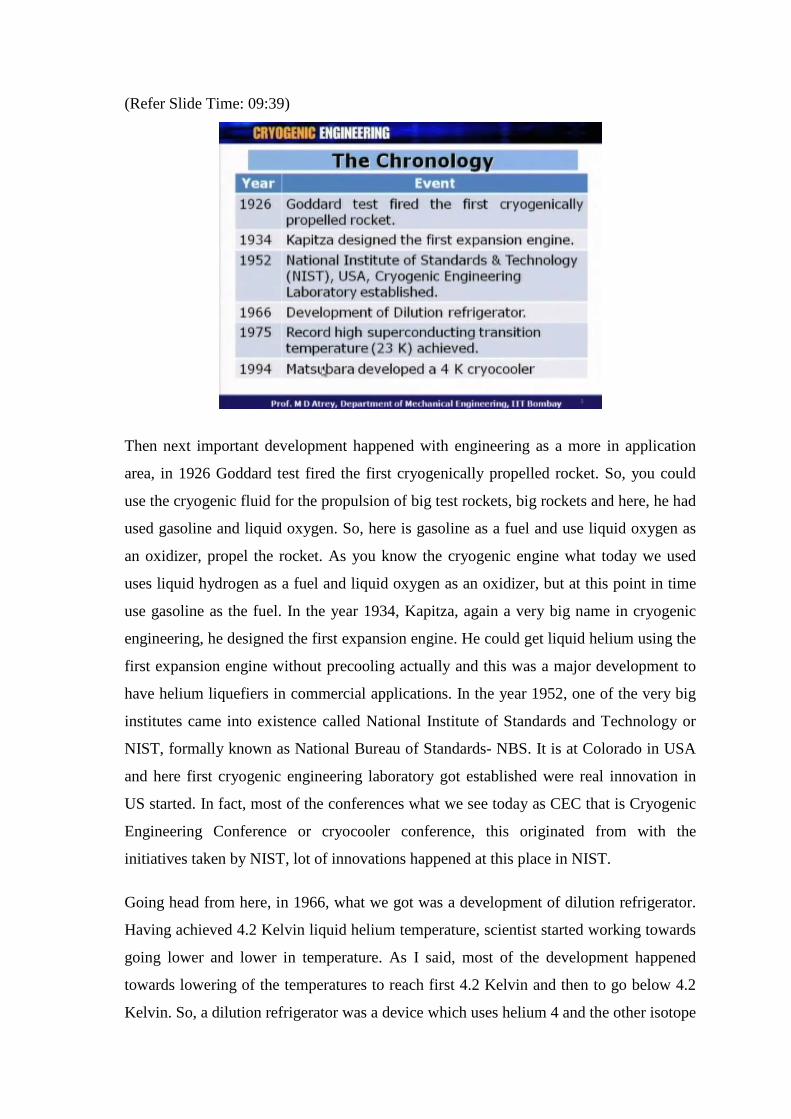
(Refer Slide Time: 09:39)
Then next important development happened with engineering as a more in application
area, in 1926 Goddard test fired the first cryogenically propelled rocket. So, you could
use the cryogenic fluid for the propulsion of big test rockets, big rockets and here, he had
used gasoline and liquid oxygen. So, here is gasoline as a fuel and use liquid oxygen as
an oxidizer, propel the rocket. As you know the cryogenic engine what today we used
uses liquid hydrogen as a fuel and liquid oxygen as an oxidizer, but at this point in time
use gasoline as the fuel. In the year 1934, Kapitza, again a very big name in cryogenic
engineering, he designed the first expansion engine. He could get liquid helium using the
first expansion engine without precooling actually and this was a major development to
have helium liquefiers in commercial applications. In the year 1952, one of the very big
institutes came into existence called National Institute of Standards and Technology or
NIST, formally known as National Bureau of Standards- NBS. It is at Colorado in USA
and here first cryogenic engineering laboratory got established were real innovation in
US started. In fact, most of the conferences what we see today as CEC that is Cryogenic
Engineering Conference or cryocooler conference, this originated from with the
initiatives taken by NIST, lot of innovations happened at this place in NIST.
Going head from here, in 1966, what we got was a development of dilution refrigerator.
Having achieved 4.2 Kelvin liquid helium temperature, scientist started working towards
going lower and lower in temperature. As I said, most of the development happened
towards lowering of the temperatures to reach first 4.2 Kelvin and then to go below 4.2
Kelvin. So, a dilution refrigerator was a device which uses helium 4 and the other isotope
of helium, that is helium 3, in combination together will study about this also later on
and one could reach down lower in temperature below 1 Kelvin and this was a concept
which is a very important concept going below 1 Kelvin. A dilution refrigerator came
into existence and lot of research below 1 Kelvin, one could really go for the device was
available then and the properties of material could be studied below 1 Kelvin.
Superconductivity research was very much high in those days. What you know actually
is you got a low tc material for which the low temperature required for superconductivity
and then the high tc that is the temperatures were the high tc is obtained; that means,
temperature above liquid helium temperature and here first time one could go up to 23
Kelvin where superconductivity could be established in material. This is a very important
concept because it is very costly to reach 4.2 Kelvin in order to utilize helium at 4.2
Kelvin, but attempts were always there to use liquid nitrogen at 77 Kelvin. So, scientist
always craved to invent new and new materials which will show superconductivity at
higher and higher temperature. So, this was the first time in 1975 that they could show
superconductivity at a high temperature of around 23 Kelvin. And then in 1994,
cryocooler development took a big turn where Professor Matsubara from Newborn
University, Japan developed a 4K cryocooler working on a the pulse tube technology and
called pulse tube cryocooler. Here the pulse tube cryocooler or Gifford Mc Mahon
cryocooler or Sterling cryocoolers were already there and they are as you know close
cycle cryocoolers.
So, attempts were always going on. The research was always going on in order to avoid
use of liquid nitrogen or liquid helium which require continuous replenishment because
they get evaporated over a period of time. So, the research was always going on in order
to generate this lower temperature in a close cycle manner so that different cryogens like
liquid helium, liquid nitrogen or liquid oxygen etcetera will not be required to be used
and here the for the first time, he could show pulse tube cryocooler reaching 4K
temperature in a close cycle manner. Now you can imagine, I have got a device which
can produce 4K temperature in a continuous manner in a close cycle fashion whether gas
is getting compress and expanded and fluorescence temperature of 4 Kelvin continuously
and I do not have to really worry about any cryogen replenishment at all and that was a
major breakthrough and then lot of research initiated in the area of this pulse tube
cryocooler to reach lower and lower temperature and now one can reach even 1.5 Kelvin
or 1.2 Kelvin using again helium 3 or helium 4 as a gas and one can really reach lower
and lower temperature below 4 Kelvin also this was a major breakthrough.
As you could see from this that lot of events happened from almost seven through to
almost year 2000 and after that, where things change from oxygen liquefaction and it
came down to helium liquefaction and a temperature went below that of liquid helium.
This is a major development major developments happened over the years and now from
here, once a chronology is complete, I will introduce again what is cryogenics.
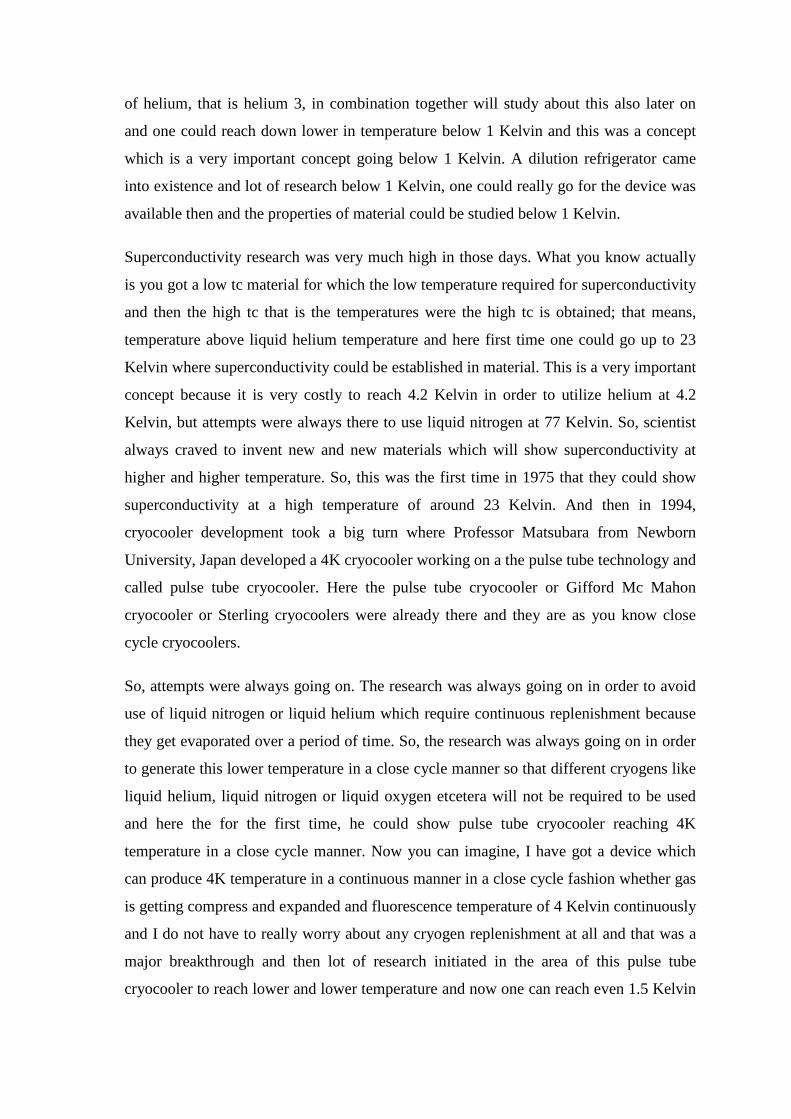
(Refer Slide Time: 15:00)
As I told in the earlier lecture, cryogenics is the science and technology associated with
generation of low temperature below 123 Kelvin and I told you earlier in my last lecture
that I will talk more about why this 123 Kelvin. What is the logic behind this. Let us see
this. So, this 123 Kelvin is a dividing line between cryogenics and refrigeration. You can
see all this under the title of Cryogenics. I have got different gases who have got their
boiling points below 123 Kelvin and on the right side of these dividing line, I have got a
process called refrigeration where all these gasses, all the refrigerants have that boiling
points above 123 Kelvin. So, here I call Cryogenics below 123 kelvin, sometime this
could be 120 Kelvin, some people define below 92 Kelvin also. So, one can have various
definition of cryogenic range or cryogenic temperature. So, below 123 Kelvin, what I
call is Cryogenics and above 123 Kelvin below the room temperature, what I call is

refrigeration. So, this line as I said, could be as broad as from 90 to 125 Kelvin
depending on the definition given by various researchers. Now what was the logic of
having this division at 123 Kelvin. As you can see, all this gases were earlier called as
permanent gases. It was thought that these gases could never be liquefied. They tried to
liquefy those gases at room temperature by pressurizing these gases.
One can get all these gases on the right side. They can get converted to liquid if you
pressurize this gases; however, if we talk about this gases, even if you pressurize them at
room temperature to a very high pressure, when I say high pressure it could be of the
order of 300 to 400 bar. It could be very high pressure, but in this case this gases will not
get liquefied. So, you have to use some different techniques to go below the room
temperature and then liquefy these gases. These were classified as permanent gases
thinking that these gases can never be liquefied and therefore, this dividing line came
into existence of around 120 Kelvin and on the left side of it what we call as cryogenic
engineering, on the right side of this what we call is a refrigeration. Again I said that the
exact value of this could be varying depending on the reference and the person or the
scientist to whom you are talking about.
(Refer Slide Time: 17:31)
Now, in Cryogenics, we talk about different scales. We got different scales available for
temperature measurements. We have got a Kelvin scale, we got a Celsius scale, we got
Rankine scale and we got a Fahrenheit scale. So, in principle, I can give you temperature
in Kelvin or in degree Celsius or in degree Rankine or in degree Fahrenheit, but if you
could see here, when I talk about Celsius, I have got 0 degree centigrade and I got minus
273 degree centigrade which equivalent to the 0 Kelvin here. At the same time, in
Fahrenheit scale I have got minus 459.67 as 0 Kelvin; that means, a temperature when I
talking about below 123 Kelvin, I have to every time refer to minus something degree
Celsius or minus something degree Fahrenheit which normally is avoidable. If I want to
say 77 Kelvin, 77 Kelvin is very simple for me to say or to remember, instead of saying
minus 196 degree centigrade. If I want to avoid that thing, I would always prefer to talk
in Kelvin or I would always prefer to talk in Rankine because Rankine scale also is
always positive scale 0 and positive scale Kelvin also is a 0 and 0 and positive scale.
So, the most preferred scales therefore, in cryogenics are Kelvin and Rankine. So, if you
see various books, you can always see that the temperatures are normally given in Kelvin
or in Rankine and not normally in Celsius and in Fahrenheit; however, one can always
have any temperature scales. It is not must that one should use always Kelvin or
Rankine. It is completely left to the convenience of a person and what he appreciates a
temperature scale as. So, if I were to use Kelvin and Rankine or Celsius and Fahrenheit
scale, if I talk about increment; that means, if I say I incremented the temperature by 1
Kelvin, it will amount to 1 degree centigrade here or it will amount to 1.8 degree
Rankine or it will amount to 1.8 degree Fahrenheit. So, you can understand from here
that if I increase the temperature from 50 Kelvin to 52 Kelvin, it will mean that I also
increase the temperature in Celsius by 2 degree centigrade; however, it means in Rankine
that I increase the 2 Kelvin; that means, 3.6 degree Rankine and there is increase of 3.6
degree Fahrenheit in the Fahrenheit scale. Normally I will refer only in Kelvin in my
further discussion. In cryogenics, I will always refer temperatures in Kelvin range.
(Refer Slide Time: 20:06)
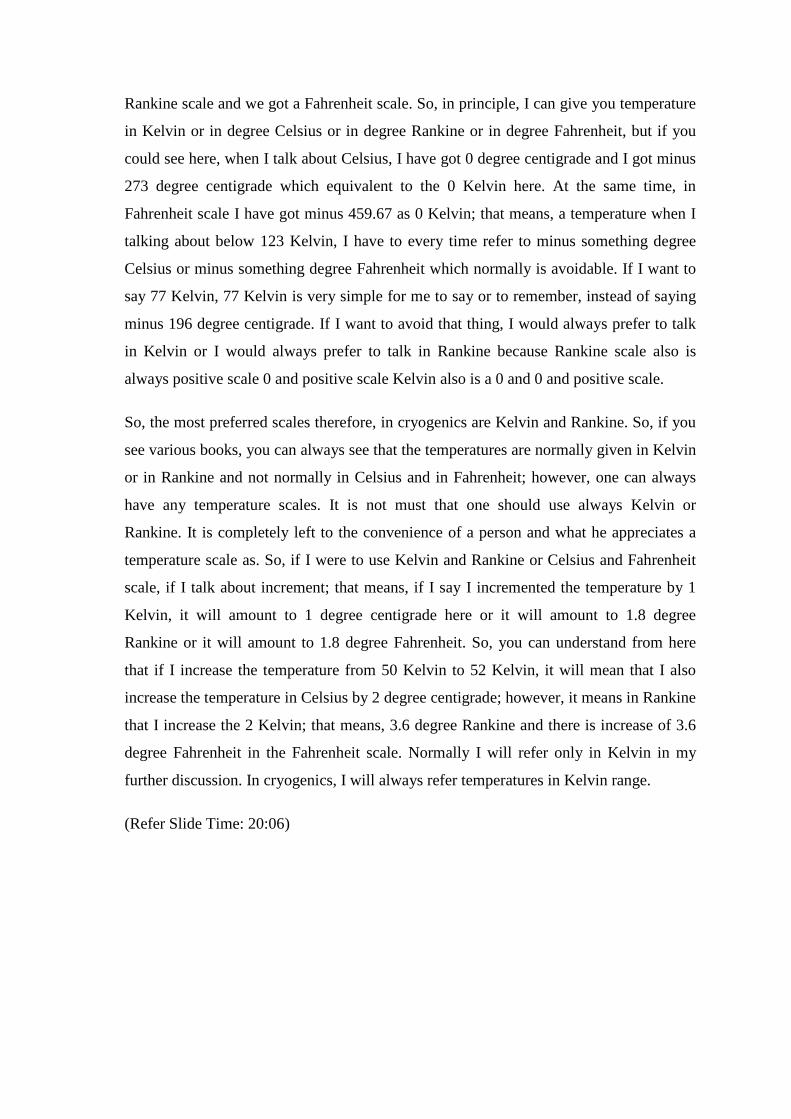
So, the Kelvin temperature range is normally whatever degree centigrade plus 273
degree centigrade. What is important to note here is, it is only Kelvin, it is not degree
Kelvin while all other temperature scales are degree centigrade, degree Rankine and
degree Fahrenheit, but while referring to Kelvin, I will say 20 Kelvin and not 20 degree
Kelvin. This is a mistake lot of people do and therefore, I would like to point out that it is
only Kelvin and not degree Kelvin. In cryogenics normally in India, I will always refer a
room temperature normally has 300kelvin, assuming that its 27 degree centigrade room
temperature, I will call 300 Kelvin as my room temperature. This will be this will be
studied more in the problems or while discussion, I will always call the room
temperature is 1 atmosphere and 300 Kelvin just to give an idea about different
temperatures, the different cryogens which are broadly used are liquid nitrogen, liquid
hydrogen and liquid helium and their boiling points are 77.36 Kelvin, 20.39 Kelvin and
4.2 Kelvin. Just to give a cost comparison of this cryogens, the liquid nitrogen generally
produce across let us say in India, cost only 25 rupees per litre if you buy let us say in
lump of let us say 100 litres, while if I go and buy liquid helium in the market, it will
cost more than 1000 rupees per litre, if again bought in 100 or 500 litres at one time. This
comparison gives you an idea what are the costs associated with liquid nitrogen which
becomes liquid at 77 Kelvin and cost associated with liquid helium which will liquefies
at 4.2 Kelvin.
Do not forget that helium is a rare gas. It is not generally available and nitrogen is
available all over. So, air which 79 percent nitrogen and 20 percent oxygen and

therefore, nitrogen available everywhere and therefore, the cost of nitrogen is not so
much as compared to the cost of liquid helium.
(Refer Slide Time: 22:21)
Now the fluids or the cryogenic fluids normally are referred as cryogens which are the
fluid with normal boiling point less than 123K, 123 Kelvin which we have seen earlier.
Now there are different cryogens. We have got a methane which has got the volume
point of 111 Kelvin and a triple point; that means, if you go on still reducing the
temperature over the particular liquid, it will become solid at 90.69 Kelvin. Similarly
oxygen boiling point of 90.19 and it has get a triple point; that means, it will get
solidified at 54 Kelvin. Argon at 87 Kelvin and 83 Kelvin. Note that there is only 4
Kelvin difference between the liquefaction or the boiling point and the solidification
point. Air, which is a mixture of so many gases has a boiling point of 78.6. Note that the
78.6 is very close to 77.36 which is a boiling point of nitrogen and its triple point is
59.75 Kelvin.
(Refer Slide Time: 23:17)
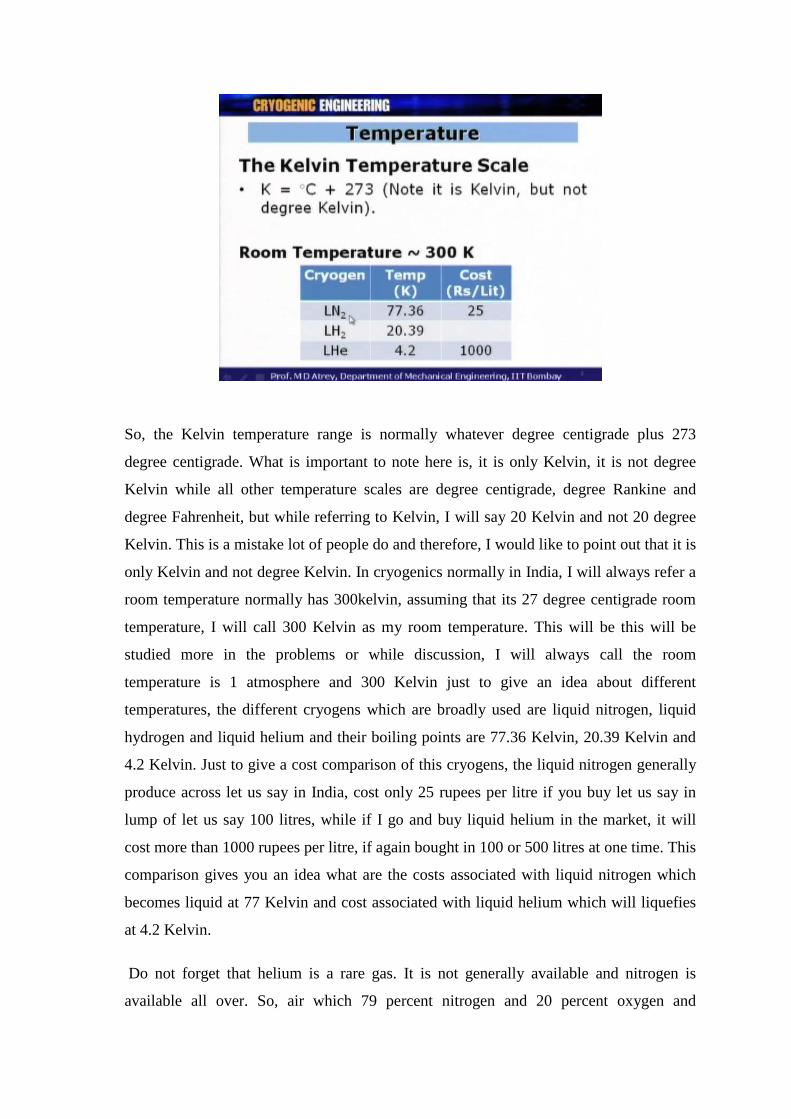
Similarly, nitrogen 77.36 with a triple point or a solidification point at 63.15 and
hydrogen has a boiling point as 20.39 Kelvin with a triple point of 13.96 Kelvin.
It may be noted all this triple points are below atmospheric pressures. So, it will not get
solidified at room temperature, but if you go and removing the pressure or decreasing the
pressure over this gases, over this liquids, then it will reach this solidification point.
While you can see here, the boiling point of helium 4 is 4.2 Kelvin and its isotope helium
3 is 3.19 Kelvin and they will never get solidified or there is no triple point. Not that they
will not get solidified, but there is no triple point for this particular liquids or gases.
(Refer Slide Time: 24:06)
Now, one of the most important thing is the temperature entropy diagram of a cryogen.
In mechanical engineering as I introduced initially, most of the cryogens properties are
given in T s diagram or temperature entropy diagram. In future, whenever we solve some
problem related to liquefaction or refrigeration, what I do first is draw the cycle in a T s
diagram. So, here on this T s diagram, I understand for a given cryogen, what will
happen if I compress this cryogen? What will happen if I expand this cryogen? What will
happen if I want to liquefy this cryogen and all this can be understood on a T s diagram
or a temperature entropy diagram.
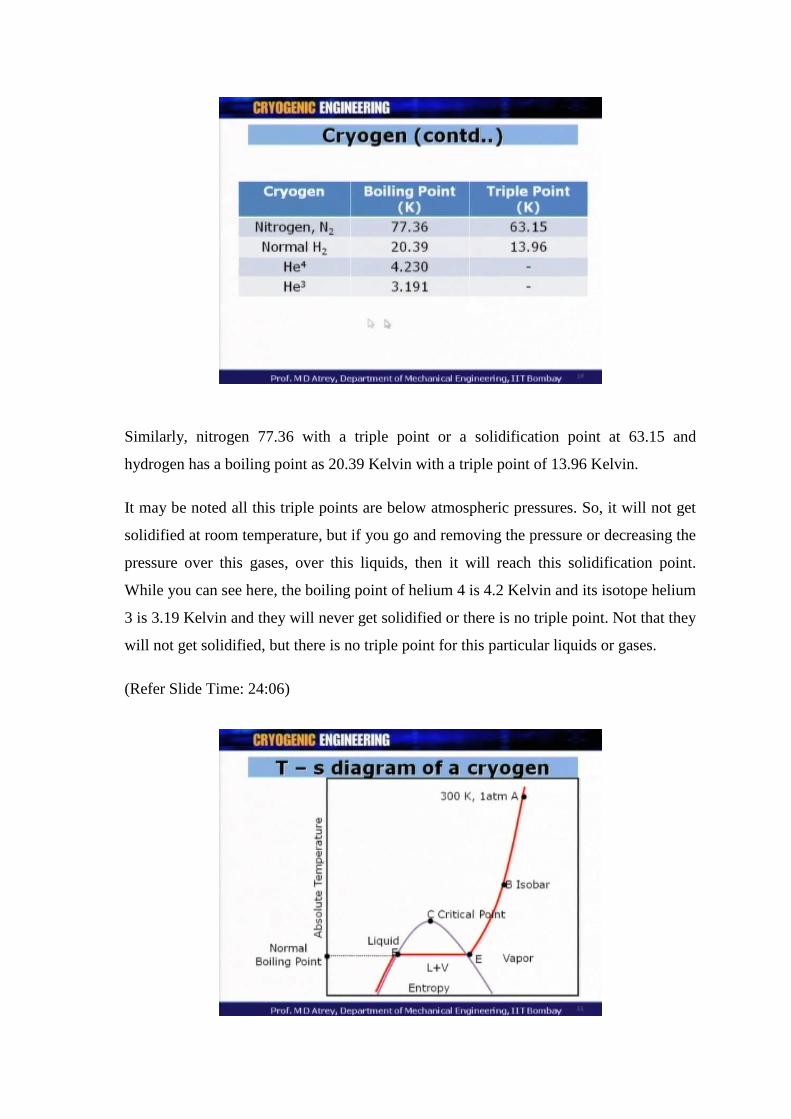
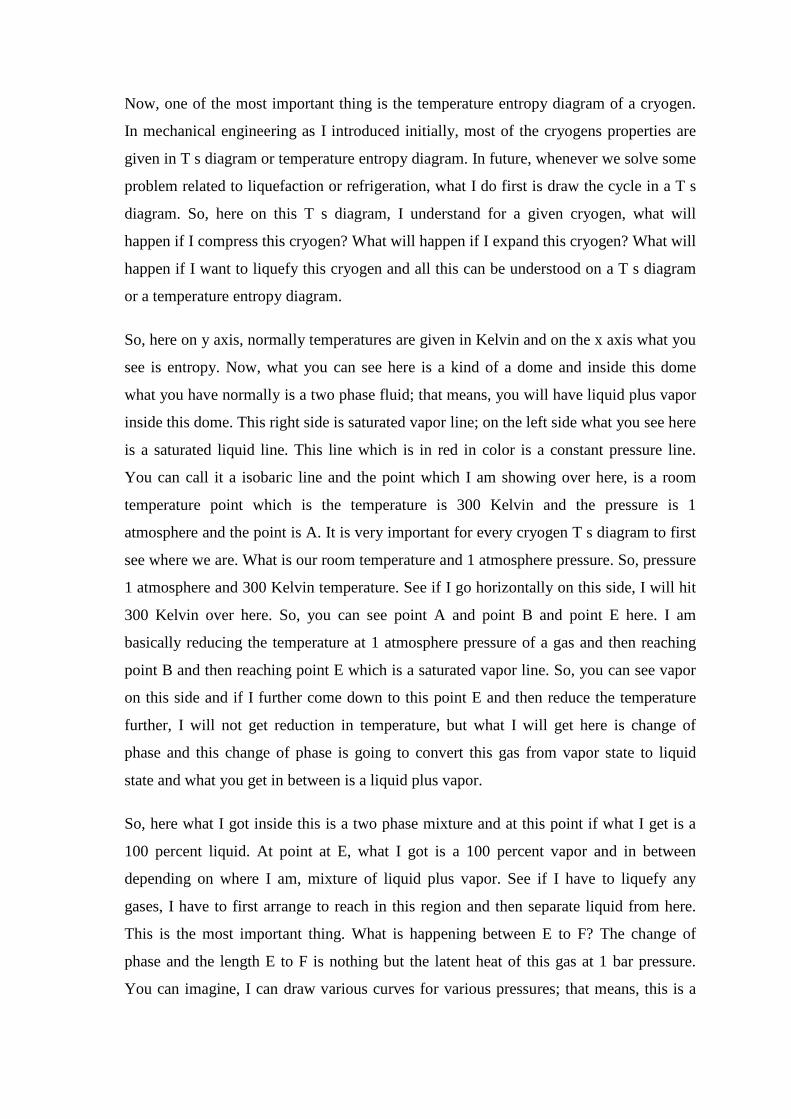
So, here on y axis, normally temperatures are given in Kelvin and on the x axis what you
see is entropy. Now, what you can see here is a kind of a dome and inside this dome
what you have normally is a two phase fluid; that means, you will have liquid plus vapor
inside this dome. This right side is saturated vapor line; on the left side what you see here
is a saturated liquid line. This line which is in red in color is a constant pressure line.
You can call it a isobaric line and the point which I am showing over here, is a room
temperature point which is the temperature is 300 Kelvin and the pressure is 1
atmosphere and the point is A. It is very important for every cryogen T s diagram to first
see where we are. What is our room temperature and 1 atmosphere pressure. So, pressure
1 atmosphere and 300 Kelvin temperature. See if I go horizontally on this side, I will hit
300 Kelvin over here. So, you can see point A and point B and point E here. I am
basically reducing the temperature at 1 atmosphere pressure of a gas and then reaching
point B and then reaching point E which is a saturated vapor line. So, you can see vapor
on this side and if I further come down to this point E and then reduce the temperature
further, I will not get reduction in temperature, but what I will get here is change of
phase and this change of phase is going to convert this gas from vapor state to liquid
state and what you get in between is a liquid plus vapor.
So, here what I got inside this is a two phase mixture and at this point if what I get is a
100 percent liquid. At point at E, what I got is a 100 percent vapor and in between
depending on where I am, mixture of liquid plus vapor. See if I have to liquefy any
gases, I have to first arrange to reach in this region and then separate liquid from here.
This is the most important thing. What is happening between E to F? The change of
phase and the length E to F is nothing but the latent heat of this gas at 1 bar pressure.
You can imagine, I can draw various curves for various pressures; that means, this is a
line for 1 atmosphere, I will have a line for 5 atmosphere, I will have a line for 10
atmosphere like this and all the horizontal lines here will represent the latent heat
associated with those pressures and if I go further reducing the temperature, what I will
get is A sub cooled liquid and temperature will stop dropping down will go on dropping
down further. So, what you call this point of E and F, the line join E and F if I continue
on temperature axis, it is nothing but the normal boiling point.
See, if I talk about liquid helium or if I talk about helium gas, this point will be 4.2
Kelvin. If I talk about nitrogen, this point will be 77.36 Kelvin. What is this point? This
is a critical point. A critical point has got liquid and vapor. There is no phase
differentiation between this two. You can see that if I go on increasing the pressure my
latent heat start reducing. The latent is becoming less and less as I increase the pressure
and at this particular point, there is no latent heat. That is one cannot differentiate
between liquid and the vapor at this particular point and it is called as critical point. The
temperatures and pressures associated with these are called critical temperature and
critical pressure. It is a very significant to understand what the critical temperatures of
any gas. What does it mean? It means that above the critical temperature, what I have got
here is a gas. Below the critical temperature what I can have is a two phase liquid plus
vapor I can get only when my temperature is below the critical temperature and similarly
with pressure lines, if I am coming down over here, if I am above the critical pressure, I
will never come in the two phase dome. I will bypass this two phase dome and I will
drop on this side. While if my pressure is below the critical pressure, then I will
definitely reach inside the dome and therefore, if I tell you any state of a gas in terms of
temperature and pressure, I can immediately know what are corresponding critical
pressures and temperature of this gas and therefore, I will know whether it is in gaseous
stage or it can be in two phase region also.
So, if I want to liquefy the gas, if I want to liquefy the gas, the pressure what I should
have is going to be less than critical pressure so that I can be in this dome and is a very
important thing that one should have temperature of a gas less than critical temperature,
less than critical pressure, then only one can fall in A two phase dome, then only one can
gets liquid plus vapor or liquid can be separated from this liquid plus vapor then.
(Refer Slide Time: 29:51)
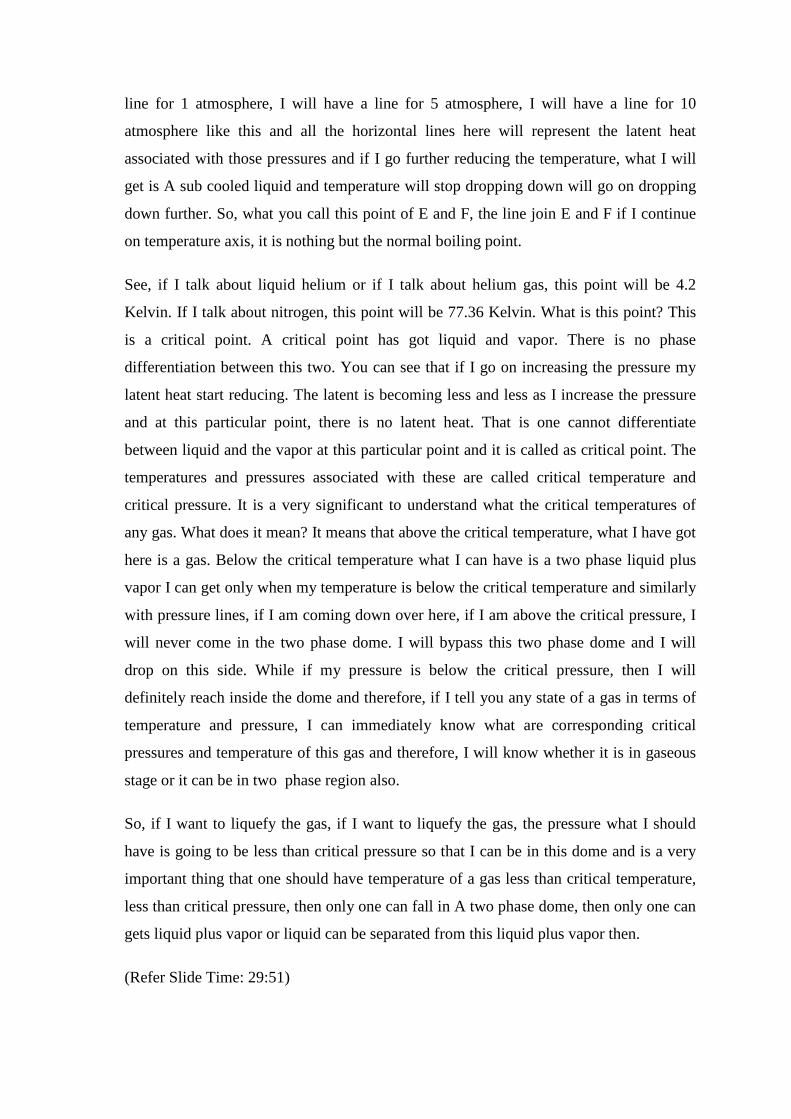
Now, I will show actual properties of the some of the cryogens and then we will see the
T s diagram of some of the cryogens. So, here you can see that, I have got liquid helium;
I have got liquid hydrogen, nitrogen, liquid air and liquid oxygen and some properties for
comparison. So, if I compare their normal boiling point which you know now, it is 4.2,
20 Kelvin, let us say, 77 Kelvin, 78 Kelvin and 90 Kelvin. This are the boiling points in
increasing order from liquid helium to liquid oxygen. The critical pressures are also in
the order of their boiling points. So, you can say 0.229 Mpa which means 2.29 bar or 1.3
Mpa, 3.39 Mpa, 3.92 Mpa and 5.08 Mpa.
So, very close following the normal boiling points, the critical pressures are also
increasing with their boiling points. If you see density, the density of liquid helium is
124.8, for practical purpose we say 125 kg per meter cube. Then liquid hydrogen density
is 70 kg per meter cube and if you see nitrogen, it is very high 800; 807 kg per meter
cube, liquid air is 874 and liquid oxygen is 1141. So, densities are very high as you go on
this side. Latent heat is a very important parameter, in order to see how much cooling
effect one gates with the change of the phase. So, if I get liquid helium at 4.2 Kelvin, the
latent heat is a very small 20.9; that means, it will get immediately evaporated, while it is
not through with liquid hydrogen which has got a very high latent heat. Similarly for
liquid nitrogen, it is around 200 kilo joule per Kg, 205 for liquid air and 213 for liquid
oxygen. So, you can see relative values of the latent heat for these cryogens.
(Refer Slide Time: 31:47)
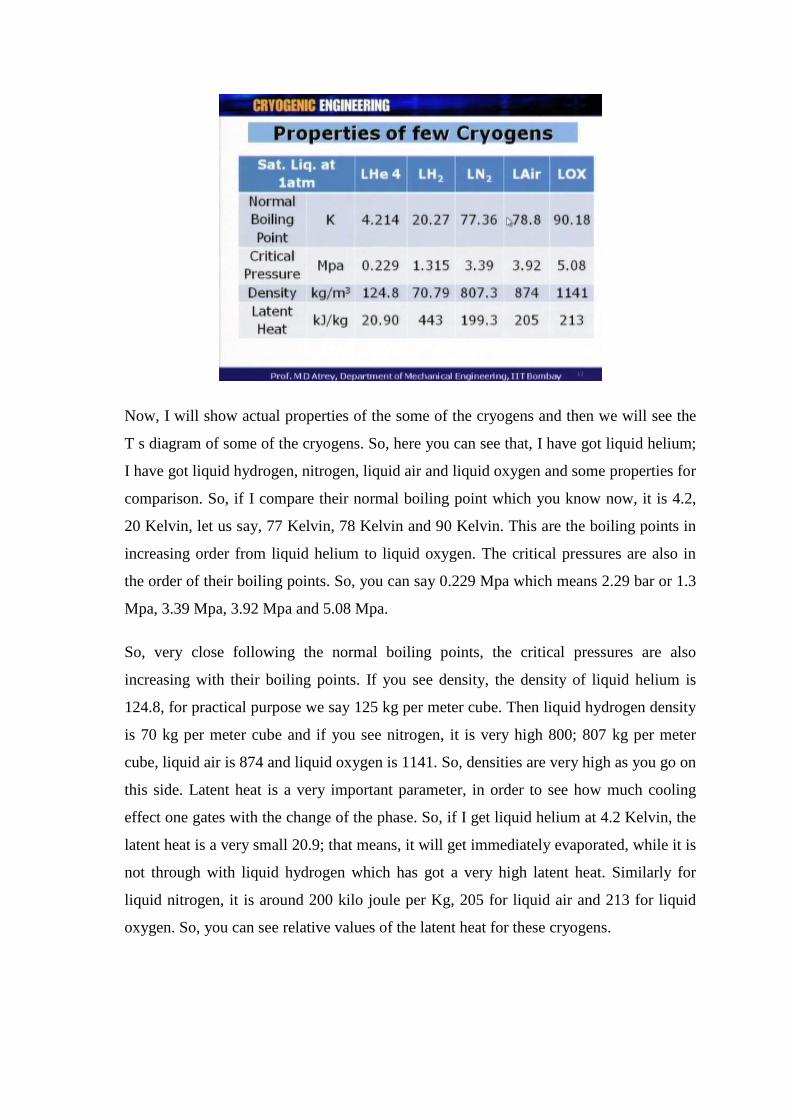
Now here, I am showing a T s diagram for helium. You can see how actually it looks and
on this chart, we have shown different curves which give pressures, temperatures,
entropy, density, enthalpy lines etcetera. So, here I just pointed to you a 1 bar isobaric
line and here if you come down, I am not sure whether you can see, but what you have is
a 4.2 Kelvin and this is 1 atmosphere and 4.2 Kelvin which is nothing but the boiling
point of helium. So, here you can see that if I come down this way, I will reach 4.2
Kelvin at this point and this is the dome here, inside which I am having liquid plus
vapor; a two phase mixture of helium while above this point which is a critical point
here, at this point is a critical point and the critical point is 2.29 atmosphere, that is the
critical pressure and the critical temperature is 5.2 Kelvin. That means, if the temperature
of the gas is above 5.2 Kelvin, I am somewhere above this line. If I draw a horizontal
line here, the gas is above 5.2 Kelvin. Similarly, if my pressure is above 2.29
atmospheres, then I can never be inside the dome. That is the meaning of critical points
pressure and temperature for helium gas.
So, here what you can also see are these lines which is nothing but isenthalpic line or the
enthalpy line. See if I draw any state for example, this state I will know enthalpy at that
point. I will know temperature at that point. I will know density at that point. I will know
entropy at that point and therefore, all the thermodynamic activities which I do for
example, compression and expansion, I can plot all those actions on a T s diagram of a
particular cryogen. These are the constant pressure line 1 and the 2 and the 3 and at
critical point, what you see 2.29 and this line is of 3 atmosphere. So, this point, close to
this point, the line of 2.29 atmosphere would go. So, any action, if I got a isothermal
compression; that means, I will go this way. I am going to compress the gas from 1
atmosphere to higher pressure while temperature is maintained constant. Similarly if I
got a isentropic expansion, then I will go vertically down where the entropy remains
constant. So, one can have a isenthalpic expansion, isentropic expansion, isothermal
compression; all these action can be shown over here. As you can see, these are
isenthalpic line and if got a isenthalpic expansion from high pressure to low pressure, I
would travel across this lines and this is what it helps to bill a cryogenic system of
different compressions and expansion in order to get liquefaction of gases or
refrigeration. This is the most important part and we will deal with such diagrams; hence
in the next lecture when we deal with liquefaction and a refrigeration of different gases.
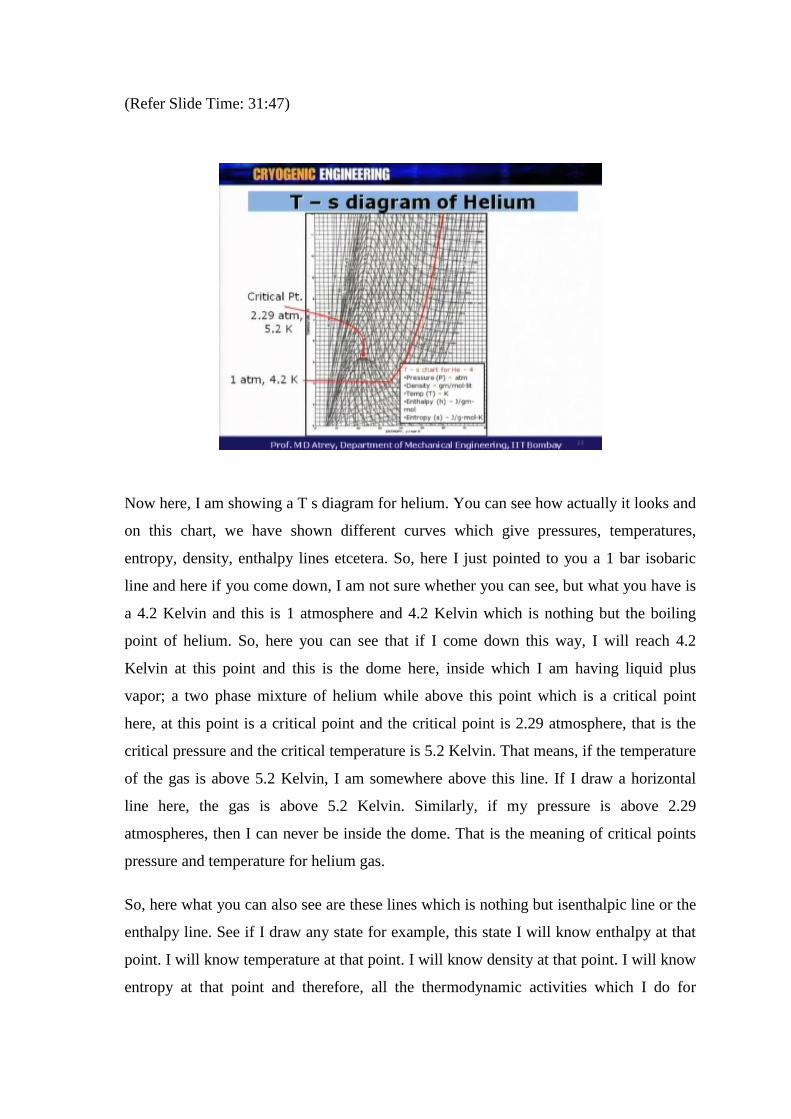
Similarly, I am showing you one more diagram for nitrogen where you can see a isobaric
line from this place at 1 bar and corresponding to that what you have got is a 1
atmospheric pressure which is this line and what you see is a 77.36 Kelvin temperature.
(Refer Slide Time: 35:00)
Corresponding length in this dome, this is the dome and this length is nothing but
representing the latent heat part associated with this gas at 1 atmosphere pressure. Again
you can see isenthalpic line and density line, entropy line etcetera. This point which is
the apex point of this dome denotes the critical point and the critical parameters here are
39.9 atmosphere and 126 Kelvin. 126 Kelvin is a critical temperature for nitrogen and
33.9 atmosphere is the critical pressure for nitrogen here in this case. So, as I said, the T
s diagram forms very important reading for this cryogens and it is very important to
understand and follow this diagrams critically. So, having seen the T s diagram or the
temperature entropy diagram for various cryogens and its importance, now I will talk
about cryogenic fluids and their properties some characteristics and some distinct uses.
(Refer Slide Time: 36:01)
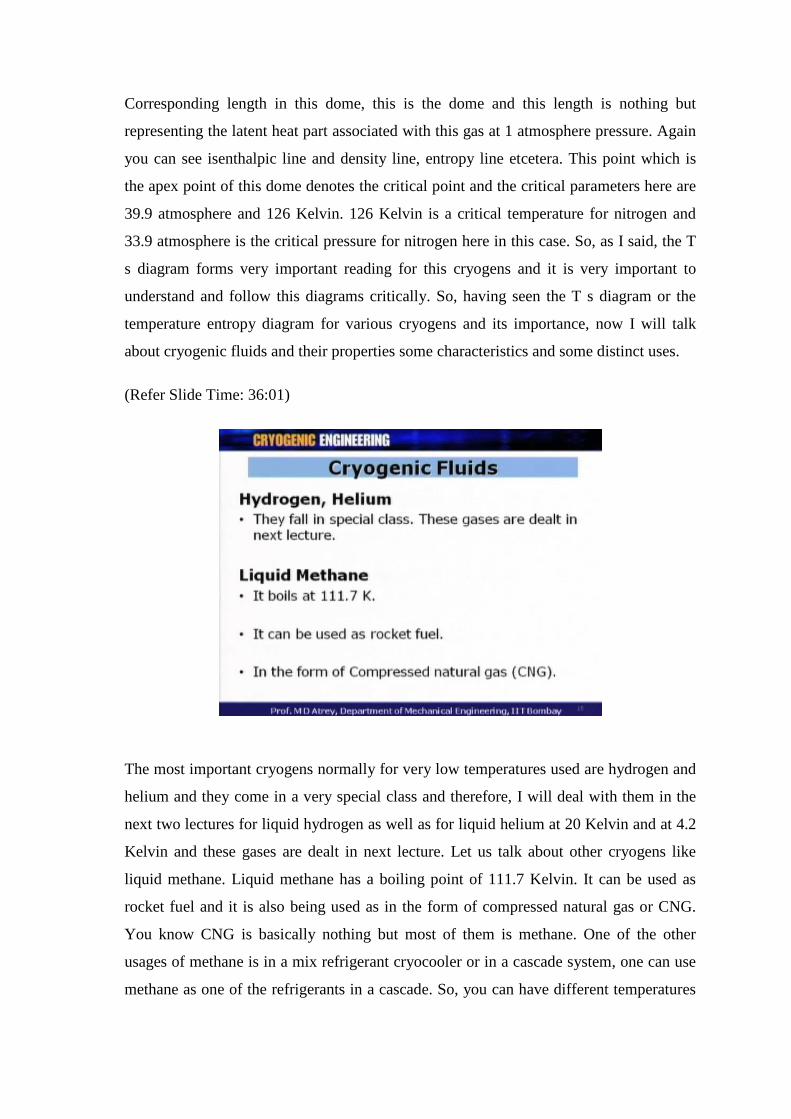
The most important cryogens normally for very low temperatures used are hydrogen and
helium and they come in a very special class and therefore, I will deal with them in the
next two lectures for liquid hydrogen as well as for liquid helium at 20 Kelvin and at 4.2
Kelvin and these gases are dealt in next lecture. Let us talk about other cryogens like
liquid methane. Liquid methane has a boiling point of 111.7 Kelvin. It can be used as
rocket fuel and it is also being used as in the form of compressed natural gas or CNG.
You know CNG is basically nothing but most of them is methane. One of the other
usages of methane is in a mix refrigerant cryocooler or in a cascade system, one can use
methane as one of the refrigerants in a cascade. So, you can have different temperatures
or you can have different circuits where in methane could be one of the refrigerants
which can give you temperature between 110 to 120 Kelvin and then you can use
different refrigerants with respect to temperatures associated with them. So, these are
liquid methane which is normally not very much used as such in cryogenic activities,
which normally is now below 80 Kelvin as such, but it definitely forms one of the
important constituents in cryogens.
(Refer Slide Time: 37:20)
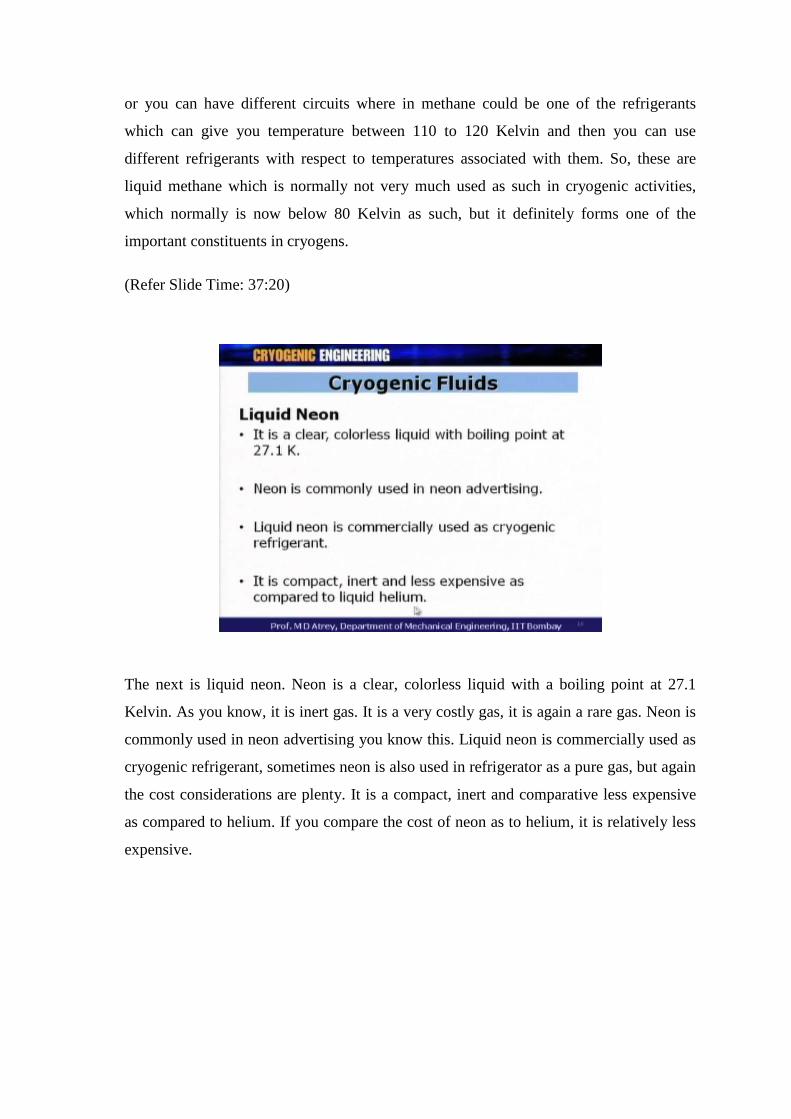
The next is liquid neon. Neon is a clear, colorless liquid with a boiling point at 27.1
Kelvin. As you know, it is inert gas. It is a very costly gas, it is again a rare gas. Neon is
commonly used in neon advertising you know this. Liquid neon is commercially used as
cryogenic refrigerant, sometimes neon is also used in refrigerator as a pure gas, but again
the cost considerations are plenty. It is a compact, inert and comparative less expensive
as compared to helium. If you compare the cost of neon as to helium, it is relatively less
expensive.
(Refer Slide Time: 38:01)
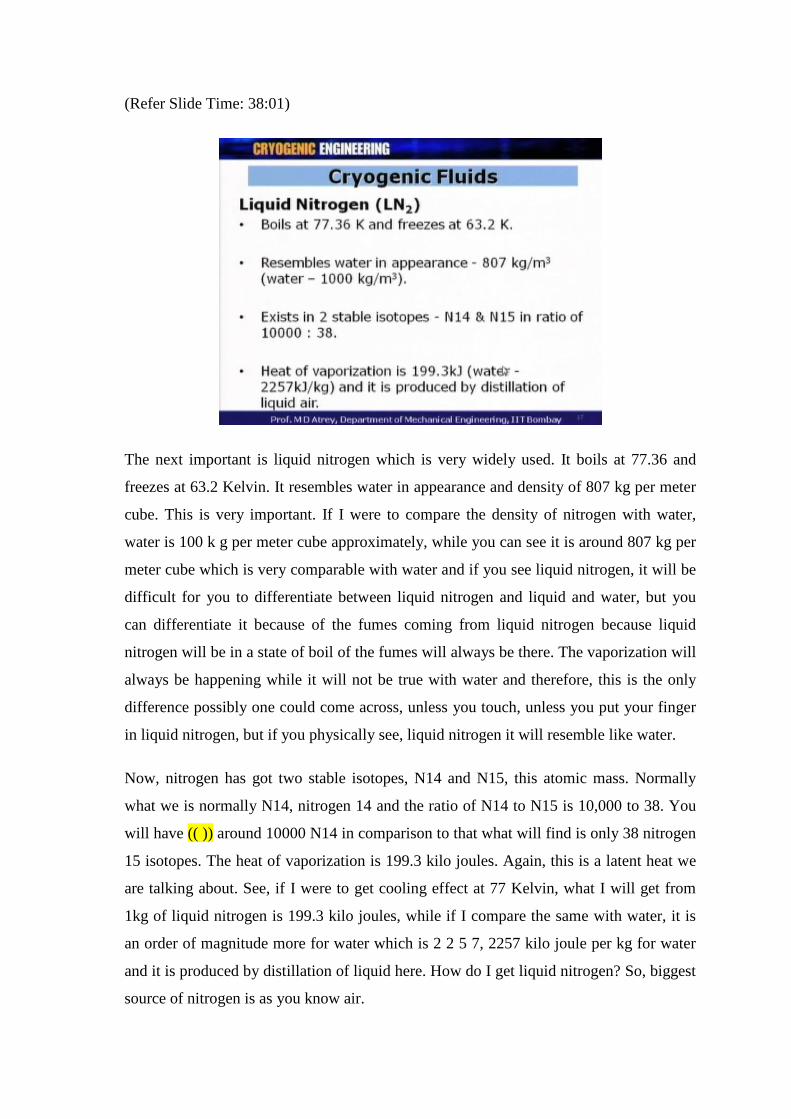
The next important is liquid nitrogen which is very widely used. It boils at 77.36 and
freezes at 63.2 Kelvin. It resembles water in appearance and density of 807 kg per meter
cube. This is very important. If I were to compare the density of nitrogen with water,
water is 100 k g per meter cube approximately, while you can see it is around 807 kg per
meter cube which is very comparable with water and if you see liquid nitrogen, it will be
difficult for you to differentiate between liquid nitrogen and liquid and water, but you
can differentiate it because of the fumes coming from liquid nitrogen because liquid
nitrogen will be in a state of boil of the fumes will always be there. The vaporization will
always be happening while it will not be true with water and therefore, this is the only
difference possibly one could come across, unless you touch, unless you put your finger
in liquid nitrogen, but if you physically see, liquid nitrogen it will resemble like water.
Now, nitrogen has got two stable isotopes, N14 and N15, this atomic mass. Normally
what we is normally N14, nitrogen 14 and the ratio of N14 to N15 is 10,000 to 38. You
will have (( )) around 10000 N14 in comparison to that what will find is only 38 nitrogen
15 isotopes. The heat of vaporization is 199.3 kilo joules. Again, this is a latent heat we
are talking about. See, if I were to get cooling effect at 77 Kelvin, what I will get from
1kg of liquid nitrogen is 199.3 kilo joules, while if I compare the same with water, it is
an order of magnitude more for water which is 2 2 5 7, 2257 kilo joule per kg for water
and it is produced by distillation of liquid here. How do I get liquid nitrogen? So, biggest
source of nitrogen is as you know air.
Air we can assume to be composed of nitrogen and oxygen and from air, if I liquefy air,
then I can separate liquid nitrogen and liquid oxygen. From there, I get nitrogen as a gas,
oxygen as a gas. So, one has to do then fractional distillation of liquid air in order to get
liquid nitrogen.
(Refer Slide Time: 40:22)
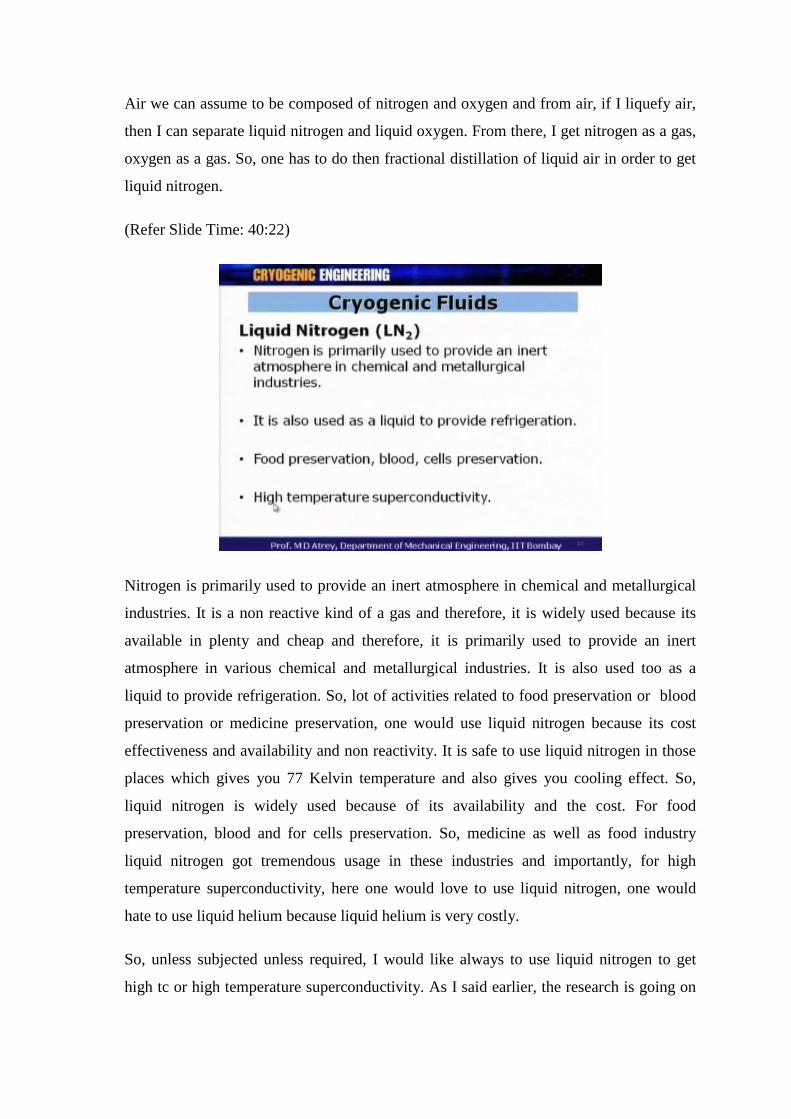
Nitrogen is primarily used to provide an inert atmosphere in chemical and metallurgical
industries. It is a non reactive kind of a gas and therefore, it is widely used because its
available in plenty and cheap and therefore, it is primarily used to provide an inert
atmosphere in various chemical and metallurgical industries. It is also used too as a
liquid to provide refrigeration. So, lot of activities related to food preservation or blood
preservation or medicine preservation, one would use liquid nitrogen because its cost
effectiveness and availability and non reactivity. It is safe to use liquid nitrogen in those
places which gives you 77 Kelvin temperature and also gives you cooling effect. So,
liquid nitrogen is widely used because of its availability and the cost. For food
preservation, blood and for cells preservation. So, medicine as well as food industry
liquid nitrogen got tremendous usage in these industries and importantly, for high
temperature superconductivity, here one would love to use liquid nitrogen, one would
hate to use liquid helium because liquid helium is very costly.
So, unless subjected unless required, I would like always to use liquid nitrogen to get
high tc or high temperature superconductivity. As I said earlier, the research is going on
in order to increase the temperature of various materials so that they can become
superconducting at higher and higher temperatures. At moment, I have got certain
materials with requisite property and they showed they show superconductivity at liquid
helium temperatures only. While if I were to use some materials at very high temperature
of around liquid nitrogen temperature, then I have to sacrifice some important properties.
That is a big problem right now so; however, I would always prefer to use liquid nitrogen
as a temperature to then superconductivity. So, research is always going on in order that I
should get some materials with required properties to show superconductivity at liquid
nitrogen temperatures. Lot of work is being going on in this area.
(Refer Slide Time: 42:33)
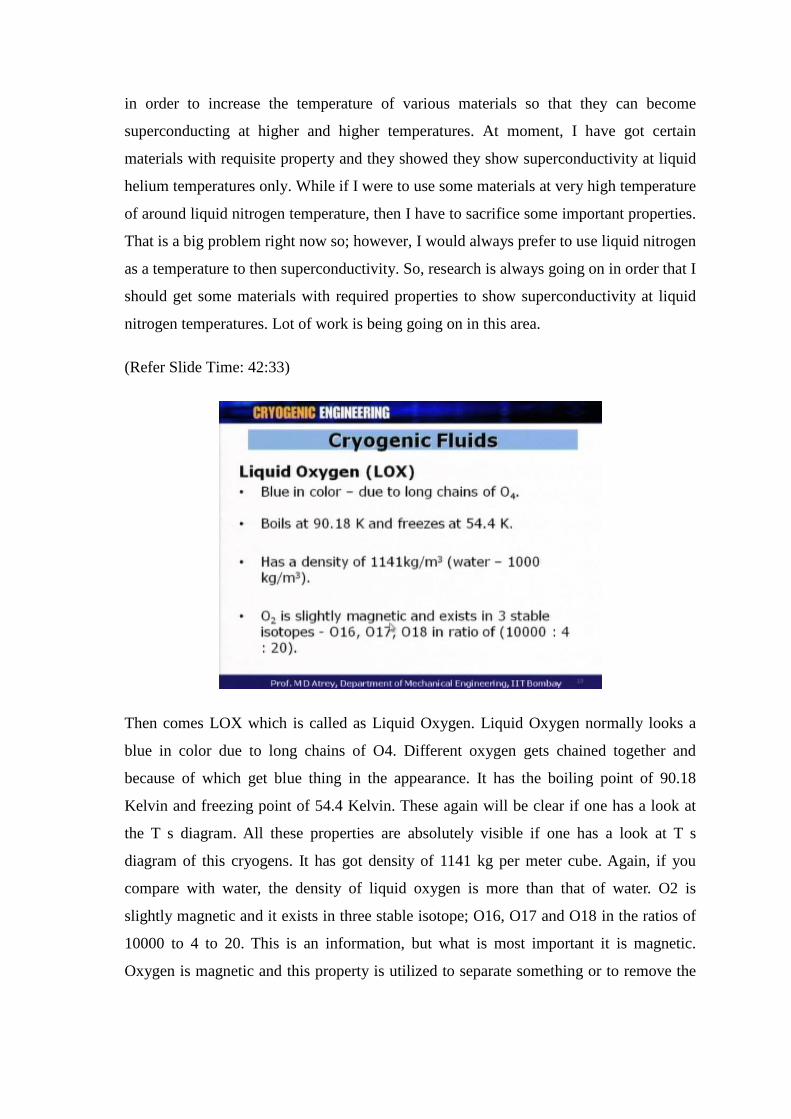
Then comes LOX which is called as Liquid Oxygen. Liquid Oxygen normally looks a
blue in color due to long chains of O4. Different oxygen gets chained together and
because of which get blue thing in the appearance. It has the boiling point of 90.18
Kelvin and freezing point of 54.4 Kelvin. These again will be clear if one has a look at
the T s diagram. All these properties are absolutely visible if one has a look at T s
diagram of this cryogens. It has got density of 1141 kg per meter cube. Again, if you
compare with water, the density of liquid oxygen is more than that of water. O2 is
slightly magnetic and it exists in three stable isotope; O16, O17 and O18 in the ratios of
10000 to 4 to 20. This is an information, but what is most important it is magnetic.
Oxygen is magnetic and this property is utilized to separate something or to remove the
magnetic materials from some area. So, this is a very typical characteristic of liquid
oxygen or oxygen gas.
(Refer Slide Time: 43:43)
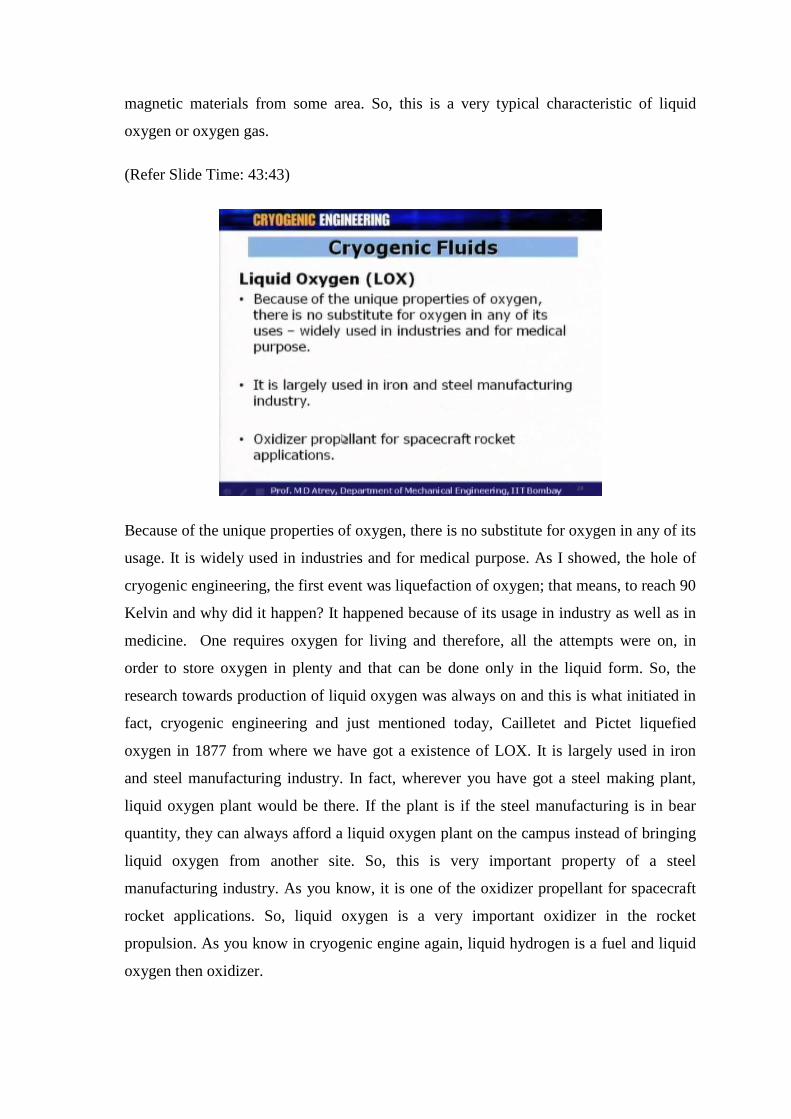
Because of the unique properties of oxygen, there is no substitute for oxygen in any of its
usage. It is widely used in industries and for medical purpose. As I showed, the hole of
cryogenic engineering, the first event was liquefaction of oxygen; that means, to reach 90
Kelvin and why did it happen? It happened because of its usage in industry as well as in
medicine. One requires oxygen for living and therefore, all the attempts were on, in
order to store oxygen in plenty and that can be done only in the liquid form. So, the
research towards production of liquid oxygen was always on and this is what initiated in
fact, cryogenic engineering and just mentioned today, Cailletet and Pictet liquefied
oxygen in 1877 from where we have got a existence of LOX. It is largely used in iron
and steel manufacturing industry. In fact, wherever you have got a steel making plant,
liquid oxygen plant would be there. If the plant is if the steel manufacturing is in bear
quantity, they can always afford a liquid oxygen plant on the campus instead of bringing
liquid oxygen from another site. So, this is very important property of a steel
manufacturing industry. As you know, it is one of the oxidizer propellant for spacecraft
rocket applications. So, liquid oxygen is a very important oxidizer in the rocket
propulsion. As you know in cryogenic engine again, liquid hydrogen is a fuel and liquid
oxygen then oxidizer.
(Refer Slide Time: 45:14)
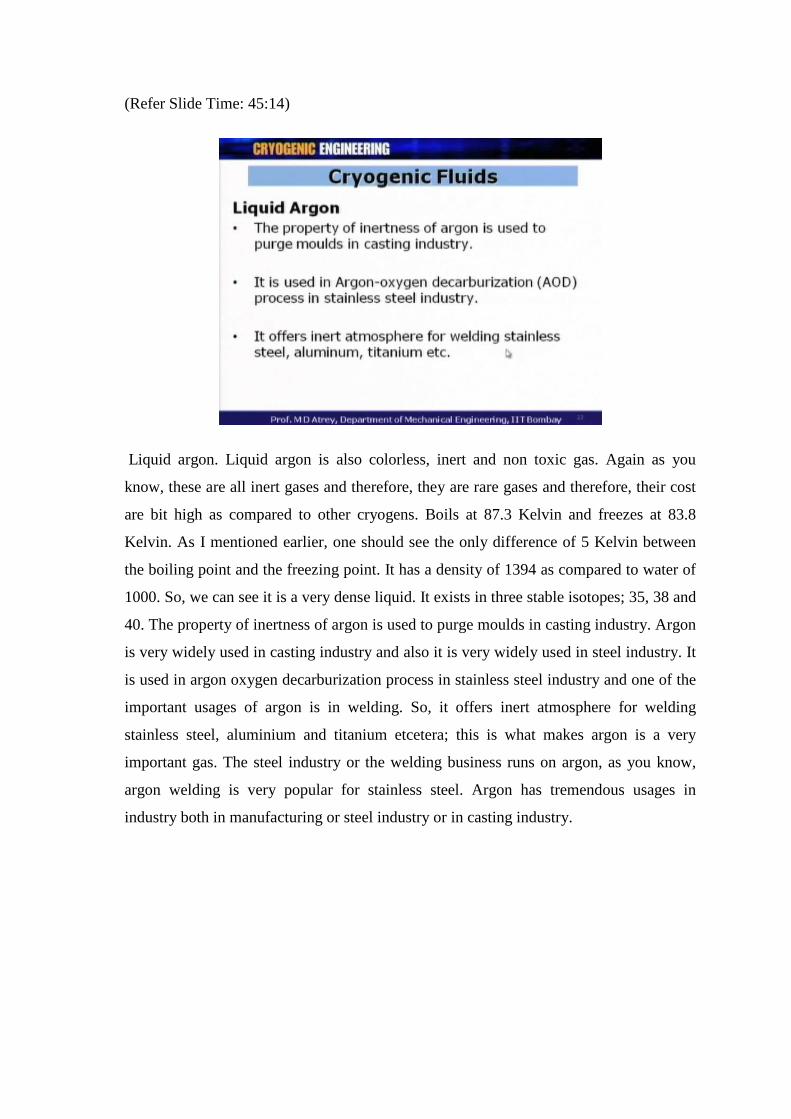
Liquid argon. Liquid argon is also colorless, inert and non toxic gas. Again as you
know, these are all inert gases and therefore, they are rare gases and therefore, their cost
are bit high as compared to other cryogens. Boils at 87.3 Kelvin and freezes at 83.8
Kelvin. As I mentioned earlier, one should see the only difference of 5 Kelvin between
the boiling point and the freezing point. It has a density of 1394 as compared to water of
1000. So, we can see it is a very dense liquid. It exists in three stable isotopes; 35, 38 and
40. The property of inertness of argon is used to purge moulds in casting industry. Argon
is very widely used in casting industry and also it is very widely used in steel industry. It
is used in argon oxygen decarburization process in stainless steel industry and one of the
important usages of argon is in welding. So, it offers inert atmosphere for welding
stainless steel, aluminium and titanium etcetera; this is what makes argon is a very
important gas. The steel industry or the welding business runs on argon, as you know,
argon welding is very popular for stainless steel. Argon has tremendous usages in
industry both in manufacturing or steel industry or in casting industry.
(Refer Slide Time: 46:33)
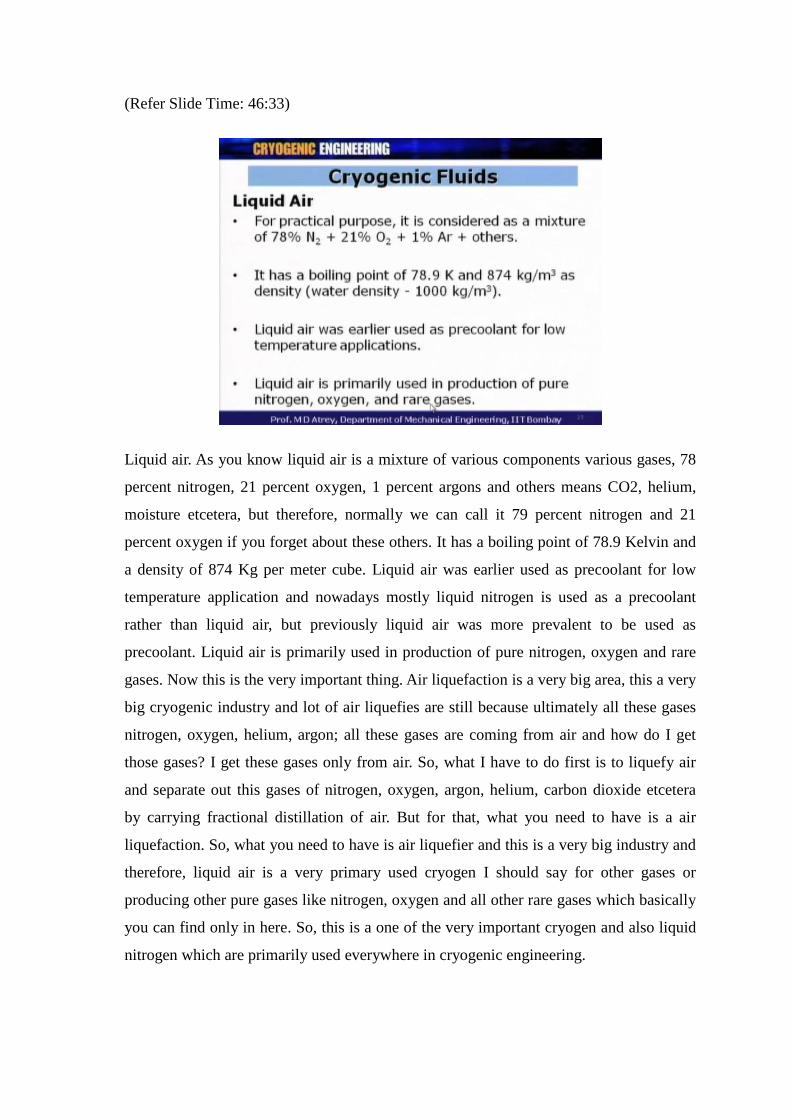
Liquid air. As you know liquid air is a mixture of various components various gases, 78
percent nitrogen, 21 percent oxygen, 1 percent argons and others means CO2, helium,
moisture etcetera, but therefore, normally we can call it 79 percent nitrogen and 21
percent oxygen if you forget about these others. It has a boiling point of 78.9 Kelvin and
a density of 874 Kg per meter cube. Liquid air was earlier used as precoolant for low
temperature application and nowadays mostly liquid nitrogen is used as a precoolant
rather than liquid air, but previously liquid air was more prevalent to be used as
precoolant. Liquid air is primarily used in production of pure nitrogen, oxygen and rare
gases. Now this is the very important thing. Air liquefaction is a very big area, this a very
big cryogenic industry and lot of air liquefies are still because ultimately all these gases
nitrogen, oxygen, helium, argon; all these gases are coming from air and how do I get
those gases? I get these gases only from air. So, what I have to do first is to liquefy air
and separate out this gases of nitrogen, oxygen, argon, helium, carbon dioxide etcetera
by carrying fractional distillation of air. But for that, what you need to have is a air
liquefaction. So, what you need to have is air liquefier and this is a very big industry and
therefore, liquid air is a very primary used cryogen I should say for other gases or
producing other pure gases like nitrogen, oxygen and all other rare gases which basically
you can find only in here. So, this is a one of the very important cryogen and also liquid
nitrogen which are primarily used everywhere in cryogenic engineering.
(Refer Slide Time: 48:32)
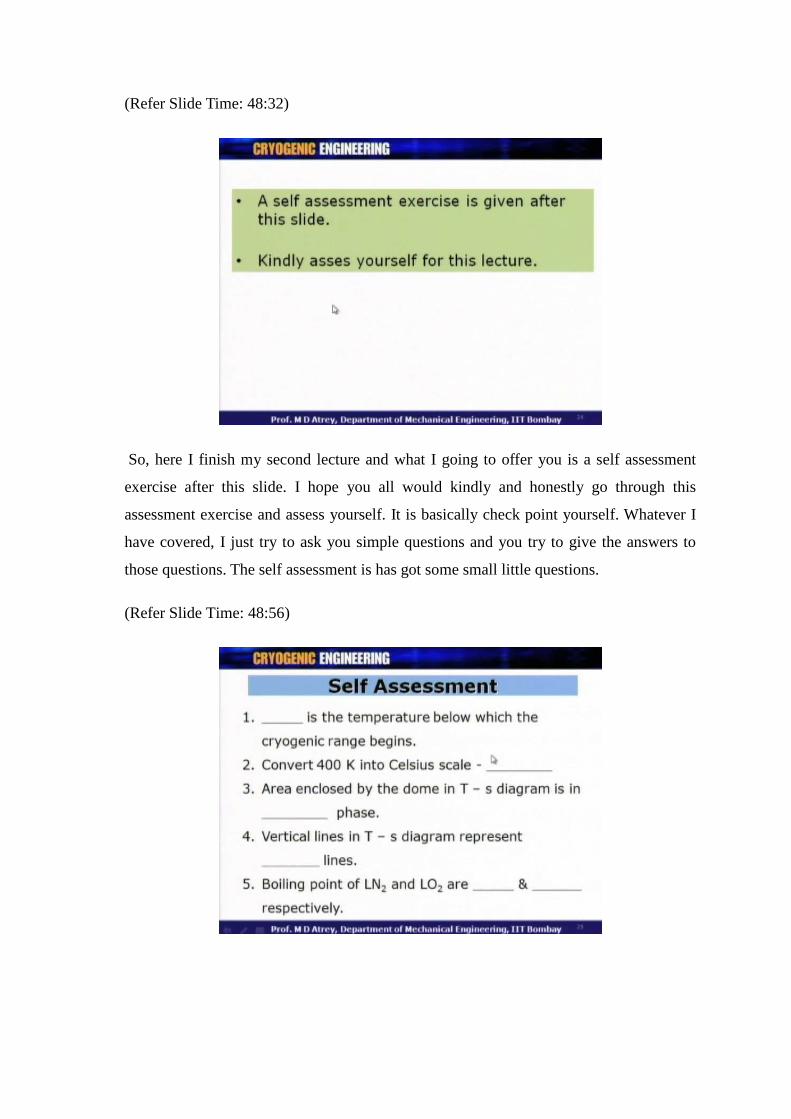
So, here I finish my second lecture and what I going to offer you is a self assessment
exercise after this slide. I hope you all would kindly and honestly go through this
assessment exercise and assess yourself. It is basically check point yourself. Whatever I
have covered, I just try to ask you simple questions and you try to give the answers to
those questions. The self assessment is has got some small little questions.
(Refer Slide Time: 48:56)

(Refer Slide Time: 48:59)
There is a blank given in every, there are around 8 questions. You please try to give
answers and we feel that if you have understood what we have presented till now, it
should not be a problem for you to answer this simple question. It is a self assessment for
you.
(Refer Slide Time: 49:13)

The answers are also given at the end of this, last slide gives the answers for this. So, it is
a kind of check for your assessment.
Thank you very much.