demo on how to create web adi &upload data
TRANSCRIPT

Demo on How to create WEB ADI
&
Upload Data into Custom / Seeded Table
1. Create Table
CREATE TABLE xxxx_web_adi_demo_t
(
record_date DATE DEFAULT SYSDATE ,
full_name VARCHAR2 (250),
eng_marks NUMBER
);
2. Create a wrapper to upload data in the table
CREATE OR REPLACE PROCEDURE APPS.xxxx_upload_web_adi_demo_p (
p_full_name VARCHAR2,
p_eng_marks NUMBER
)
AS
BEGIN
INSERT INTO xxxx_web_adi_demo_t (full_name, eng_marks)
VALUES (p_full_name, p_eng_marks);
COMMIT;
EXCEPTION
WHEN OTHERS
THEN
NULL;
END;
/

3. Enable Macro in Excel
a. Navigation: Excel Option Trust Center Settings Macro Settings
b. Enable all macros (not Recommended; potentially dangerous code can run)
c. Enable all Developer Macro Settings
4. Pre-requisites for using WEB ADI
a. Set Profile option to YES
b. Profile Name: BNE Allow No Security Rule
5. HR Integrator Setup
a. Navigation: Desktop Integrator Manager Integrators Search for Integrator Name “HR Integrator Setup”
Note: If you don’t find Manager Integrator in the Menu, Add the function to the responsibility as show below

How to create a Document in Desktop Integrator
Navigation: Desktop Integrator Search for “HR Integrator Setup” Preview
1. Select Viewer Excel 2007 Next
2. Select Content None Next
3. Review Page

4. Click on Create Document Download the Template after creating the document
5. Click on the Excel It will show “Document is being Created”

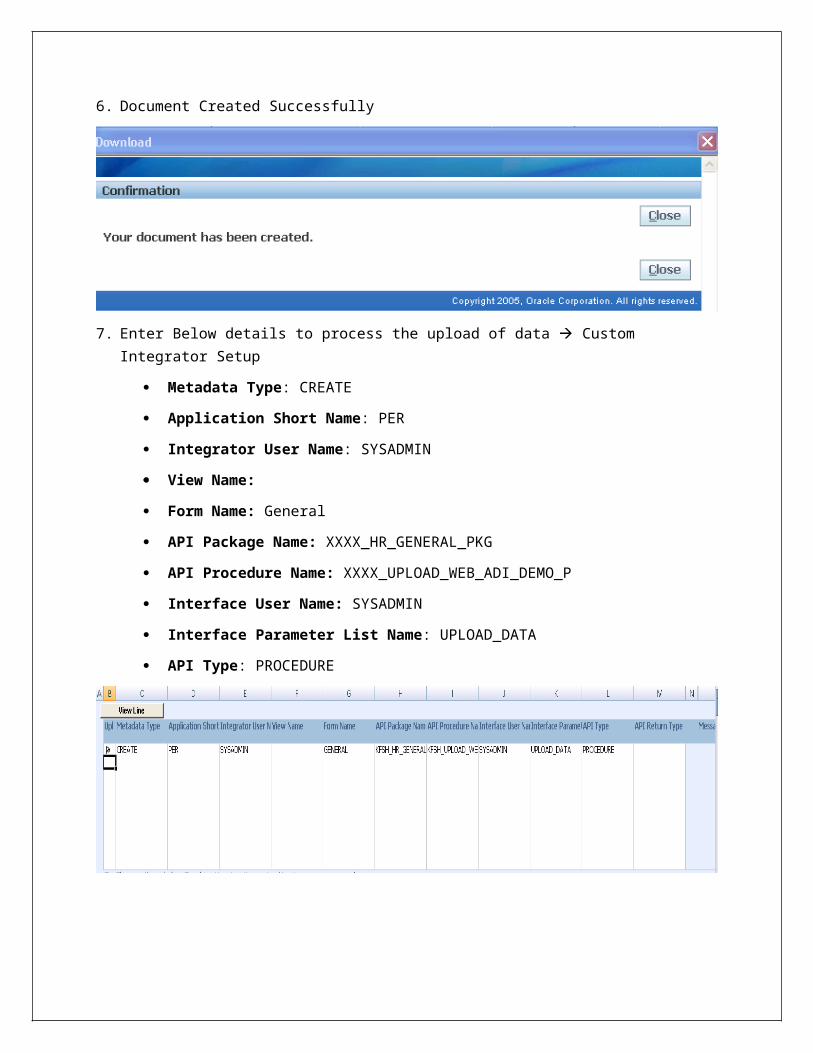
6. Document Created Successfully
7. Enter Below details to process the upload of data Custom Integrator Setup
Metadata Type: CREATE
Application Short Name: PER
Integrator User Name: SYSADMIN
View Name:
Form Name: General
API Package Name: XXXX_HR_GENERAL_PKG
API Procedure Name: XXXX_UPLOAD_WEB_ADI_DEMO_P
Interface User Name: SYSADMIN
Interface Parameter List Name: UPLOAD_DATA
API Type: PROCEDURE

8. Go to Add-Ins Oracle Upload
9. Validate before Upload
10. Upload Process Status

How to create a Layout in Desktop Integrator
Navigation: Desktop Integrator Define Layout
1. Create New Layout
Note: Interface User Name / Integrator User Name would be name of the Integrator, in our case SYSADMIN is the name of our custom Integrator
2. Layout Name Next
3. Required and Optional Fields in Layout
The layout is divided into two important sections-
Required fields, where all mandatory parameters need to be aligned as per the requirement.
Instruct parameters can be used to provide some tips to users who are using this WEBADI for uploading data
Optional fields are non mandatory fields, we need to select the ones which needs to be available in our custom integrator

4. Layout Feature
Data Entry Rows – Using this property we can define the default number of rows which the ADI will create when initialized, in 11i we user had to insert the new row in case of access data
Read Only – Using this feature we can define that which of the columns in our integrator will be available as read only
Width – Using this option we can define the width of each of the columns which will be available under the custom ADI
Move Up/Down – we can re-arrange the order of display of column in our integrator
5. Custom Layout Created

Custom WEBADI is Available in Create Document
Navigation: Desktop Integrator Integrator Name: SYSADMIN
1. Choose Custom Integrator created
2. Select Viewer
3. Select Content
4. Document Review Custom Layout

5. Save Template to Upload data
6. New Template has been created

7. Template
8. Enter Data Add Ins Oracle Upload

9. Validate Before uploading Data

10. Data Uploaded Successfully

11. Data has been Uploaded successfully in the table