developing analogue subtitute for the …bds007.yolasite.com/resources/2-developing analogue...
TRANSCRIPT

DEVELOPING ANALOGUE SUBTITUTE FOR THE MAXILLARY DENTURE BEARING AREA
Dr Muhammad Rizwan Memon FCPS
Assistant Professor

Mucous membrane Residual Ridge Incisive papilla Rugae area Mid palatine raphe Hard palate Soft palate Tuberosity Zygomatic process Torus palatinus

Serves as cushion between the denture base and supporting bone
Composed of mucosa and submucosa Submucosa is formed by connective tissue that varies in
thickness, contain glandular, fat or muscle cells Mucosa is formed by stratified squamous epithelium,
kertatinized Mucosa covering hard palate, crest of residual ridges is
classified as masticatory mucosa In healthy mouth submucosa is firmly attached to
periosteum of underling bone, if it is loosely attached , inflamed or edematus will be displacable and
will affect the stability and support of denture and if thin will be easily traumatized

Hard Palate:
Two maxillary and one palatine bone provide support to the maxillary denture base
At medial palatal suture mucosa is extremely thin, that may need to be relieved to avoid trauma from denture base
Posterolateral part of hard palate provide primary support ]primary stress beaing area}, in area of rugae palate is an angle and is thinly covered by soft tissues provides secondary support

Residual ridges continuously resorbed throughout life after extraction of teeth
Bone is subject to resorption which limits its potential for support, so counted as secondary stress bearing area
At peripheral area mucosa is loosely attached, unable to withstand masticatorty forces, however it contributes to border seal

Incisive foramen:
Located beneath the incisive papilla
Location of incisive papilla gives indication about amount of ridge resorption
Denture base should be relieved at incisive papilla as nerves and blood vessels passes through the foramen

Maxillary Tuberosity:
After extraction of mandibular teeth maxillary teeth overerupt causing hanging of tuberosity
These enlargements often are fibrous or bony
Difficult to develop proper occlusal plane therefore need surgical removal
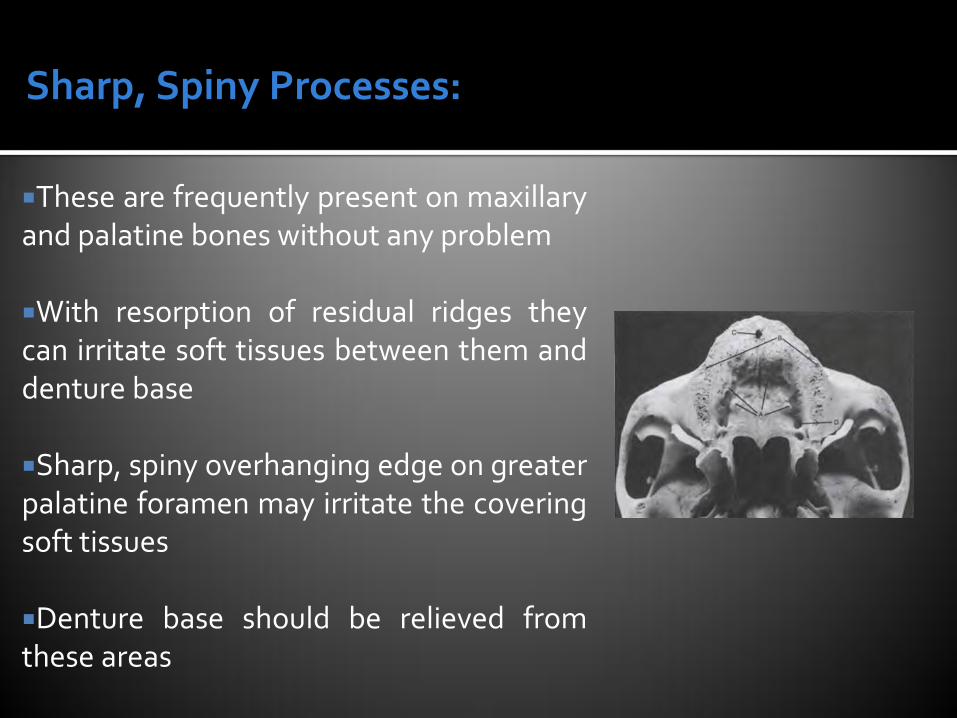
Sharp, Spiny Processes:
These are frequently present on maxillary and palatine bones without any problem
With resorption of residual ridges they can irritate soft tissues between them and denture base
Sharp, spiny overhanging edge on greater palatine foramen may irritate the covering soft tissues
Denture base should be relieved from these areas

Torus Palatinus:
Found in 20% of population
Should be relieved from denture base to avoid trauma of thin covering mucosa

Labial frenum Buccal frenum Labial vestibule
• From buccal frenum to buccal frenum
Buccal vestibule From buccal frenum to hamular
notch
Hamular notch Fovea palatinae vibrating lines
From hamular notch hamular notch

Labial notch in the labial frenum must be wide and deep enough
Labial vestibular mucosa is classified as lining mucosa.
Lips, cheeks, alveololingual sulcus, soft palat, ventral surface of tongue and unattached gingiva on slopes of ridges are also covered with lining mucosa
Lining mucosa is not keratinized and freely movable
Tone of Orbicularis Oris muscle depends upon the support derived from the position of teeth and thickness of labial flange
Orbicularis oris pulls buccal frenum forward and buccinator backward so it requires more clearance than labial frenum

Buccal vestibule:
Size and shape of distal end of the buccal flange must be adjusted to ramus, coronoid process of mandible and masseter muscle
Width of buccal vesibule is reduced by opening and moving of mandible on opposite side and on heavy closing pressure masseter muscle contracts and reduce width of buccal vestibule
Due to resorption of ridge, root of Zygoma located opposite the 1st molar region become more noticeable, requiring relief of denture to avoid soreness of thinly covering mucosa
Hamular notches forms distal limit of buccal vestibule, contains thick submucosal layer that can be easily displaced helping in achieving posterior palatal seal

Imaginary line present on soft palate and marks the beginning of motion when patient says “Ah” extend from one hamular notch to other
Distal end of denture extend at least to the vibrating line
During wide opening of mouth pterygomandibular raphe is pulled forward, if denture base extend too far in to hamular notch, mucous membrane covering raphe will be traumatized
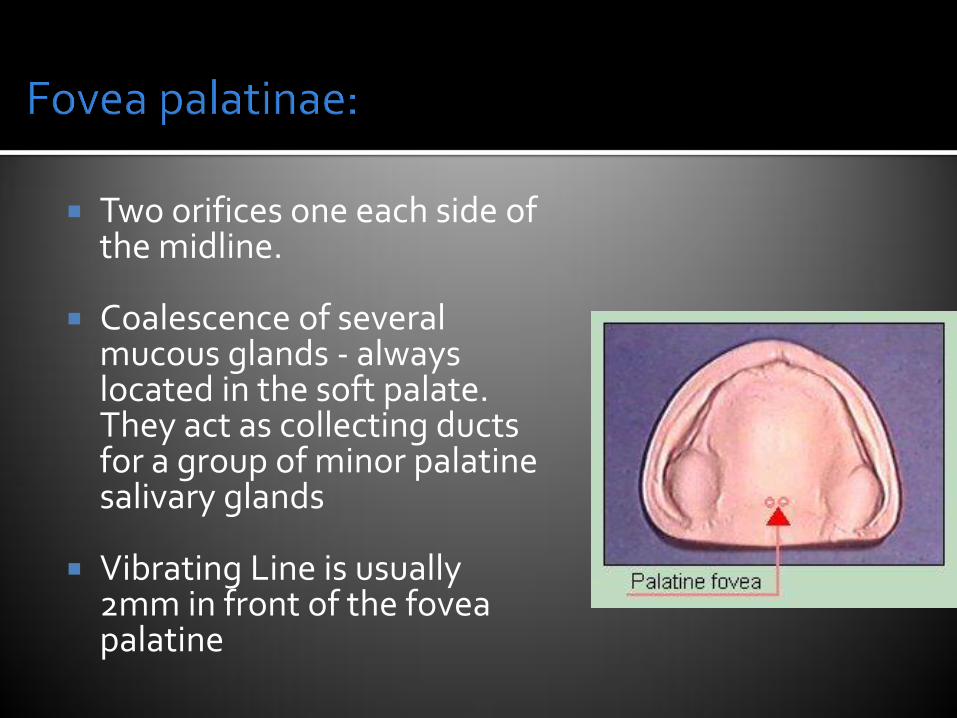
Two orifices one each side of the midline.
Coalescence of several mucous glands - always located in the soft palate. They act as collecting ducts for a group of minor palatine salivary glands
Vibrating Line is usually 2mm in front of the fovea palatine

1. Examination & conditioning of pt: 2. Selection of impression material 3. Selection of impression tray 4. Seating of pt: 5. Making the preliminary impression 6. Constructing the primary cast 7. Fabrication of primary tray 8. Border molding 9. Diagnostic impression 10. Final impression

Oral tissues must be healthy before recording impressions
Patients leave their denture out of mouth for at least 24 hours before recording impression to resolve inflammation
If patients object, then dentures must be relined with tissue conditioner

Impressions that record the tissues with minimum displacement are described as Mucostatic
Impressions that record the tissues with displacement are described as Mucodisplacing
Choice of selecting material is based on oral conditions, skill of operator and concept of functions of tissues surrounding the denture

Preliminary impression materials (select material that have relatively high viscosity to compensate for deficiencies of tray)
▪ Silicone putty (flow beyond the tray to compensate for under extension of tray, because of its elastic nature record undercuts easily but can not be added to if any part is deficient)
▪ Irreversible hydrocolloid (records details accurately but poured cast immediately to avoid dimensional changes)
▪ Impression compound ( flow beyond the tray to compensate for under extension of tray, non elastic does not record undercuts easily but can be added to if any part is deficient)
▪ The material of choice is high viscosity alginate

BASED ON METHOD OF FABRICATION:
Stock trays Custom made trays Individualized trays BASED ON PRESENCE OR ABSENCE
OF HOLES: Plane or non perforated trays Perforated trays Based on material: Plastic trays Metal trays Based on dental status use to make
trays: Trays for dentate or partially dentate pt: Trays for edentulous pt:

Objective is to obtain slightly over extended impression around the borders
Tray should be moistened with water before trying it in mouth so as to reduce the friction with lips and oral mucosa
Sides of properly fitted tray should avoid direct contact with the buccal and labial surfaces of teeth by approximately ¼ inch/5mm
Maxillary tray should extend to include the hamular notches
For alginate impression, under extension of tray is modified with boxing wax
Tray Selection

Chair position for maxillary impression:
Seat the pt: in an upright position Pt: Jaw should be at or below the operator elbow level Operator stand behind the pt: Grape the pt: head around the left hand & retract the lip.
Right hand is used to insert & seat the tray in pt: mouth.
Instructions
Sit quietly and relax
Breath through nose
Not to swallow during impression making

Primary Impression Making (Alginate)

In Old denture wearer, we relined their
old denture with tissue conditioner and
use it as primary impression

1mm thick baseplate wax is placed on cast within outlined border except poster palatal seal area
Tissue stoppers should be placed
Wax spacer will not be used if metallic oxide impression paste is used
Custom tray should be 2 to 3 mm thick with stepped handle

DEFINITION:
“The shaping of the border areas of an impression tray by functional or manual manipulation of the tissues adjacent to the borders to duplicate the contour & size of the vestibule” (GPT 2005)
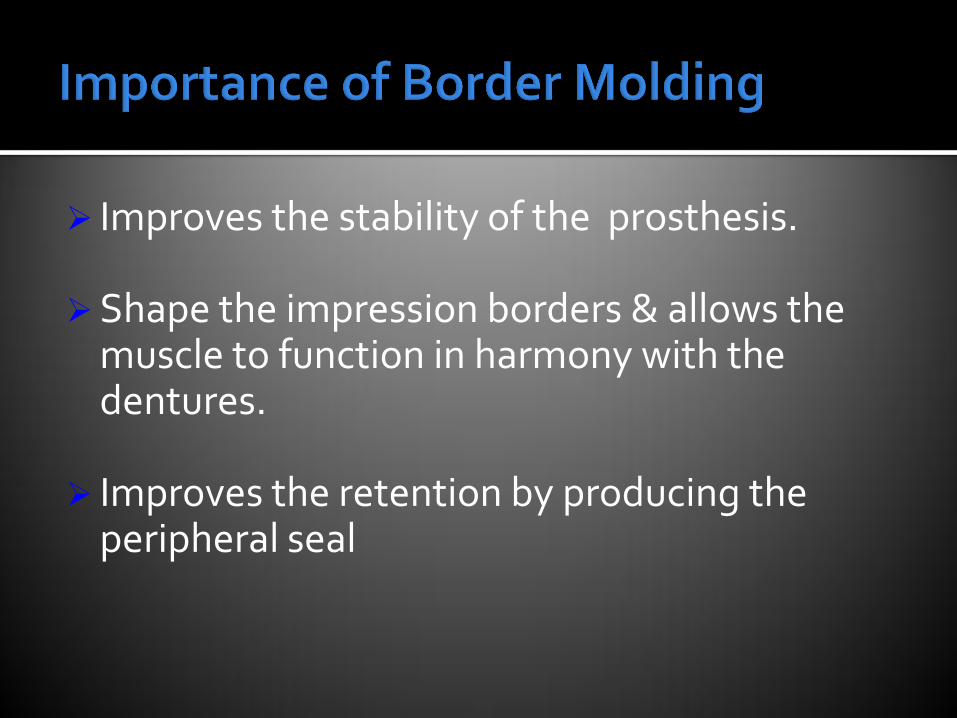
Improves the stability of the prosthesis. Shape the impression borders & allows the
muscle to function in harmony with the dentures.
Improves the retention by producing the
peripheral seal

1. Modeling compound sticks 2. Auto-polymerizing acrylic resins 3. Tissue conditioners 4. Polyether impression paste 5. Impression waxes

Flanges of custom tray should be reduced 2mm short of reflections to create space for border molding material

If overextended trim it and if underextended, the length is
corrected by addition of Modeling compound

Two ways; 1. In one step (Reduce no of insertion of tray and
chances of errors created in one step affect another contour)
2. Segment by segment
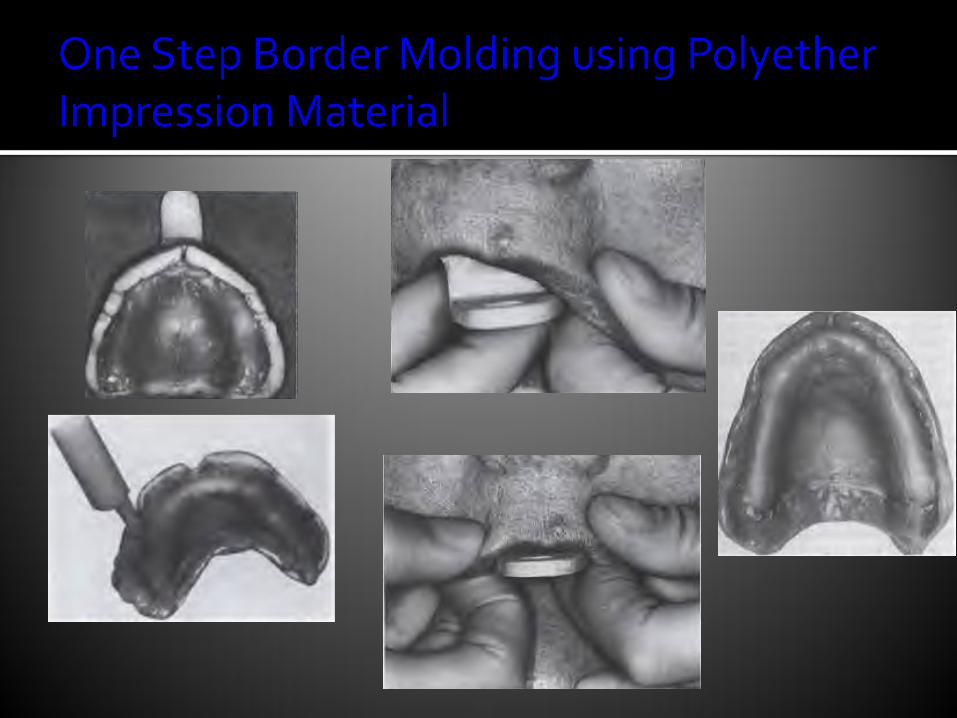

No hard & fast rule May follow Uni or Bilateral approach Can built anterior &/ or posterior portion first The maxillary impressions are made in six
segments


Objectives:
To confirm the correct recording of the periphery
Apply petroleum jelly Mix and apply ZoE paste on the borders and
perform all the movements as for initial periphery record
Look for over and under extensions


0.5 mm of border molding material is removed to create space for final impression material
Spacer wax if present is removed from inside the tray
Atleast 3 escape holes should be placed inside tray to provide relief for impression material to not displace tissues

Final impression materials:
Plaster of paris (not user friendly)
Metallic oxide paste (Rigid on setting, used only when no any bony undercuts, used in close fitting tray, not used in patients with dry mouth)
Poly ether and Silicone impression materials (used in spaced custom tray when bony undercuts are present)
Alginate (used in spaced custom tray when bony undercuts are present in low viscosity)

Mix the material in proper ratio on the glass slab and paint a thin layer on whole surface of tray including the periphery
Seat first anterior then posterior After one minute border mold (first anterior then
posterior) Remove after 3-4 minutes Inspect the Impression


The procedure for preserving functional depth and width of sulcus is called Beading and Boxing
Strip of beading wax is attached 2 to 3 mm below the border all around
A thin sheet about 10 to 15 mm of hight is then attached outside the beading strip
Hard plaster is then poured in boxed impression and allowed to set
