development of a fuzzing tool for the 6lowpan protocol
TRANSCRIPT

HAL Id: hal-00645948https://hal.inria.fr/hal-00645948
Submitted on 29 Nov 2011
HAL is a multi-disciplinary open accessarchive for the deposit and dissemination of sci-entific research documents, whether they are pub-lished or not. The documents may come fromteaching and research institutions in France orabroad, or from public or private research centers.
L’archive ouverte pluridisciplinaire HAL, estdestinée au dépôt et à la diffusion de documentsscientifiques de niveau recherche, publiés ou non,émanant des établissements d’enseignement et derecherche français ou étrangers, des laboratoirespublics ou privés.
Development of a fuzzing tool for the 6LoWPANprotocol
César Bernardini, Abdelkader Lahmadi, Olivier Festor
To cite this version:César Bernardini, Abdelkader Lahmadi, Olivier Festor. Development of a fuzzing tool for the 6LoW-PAN protocol. [Technical Report] RR-7817, 2011, pp.50. �hal-00645948�

appor t t e ch n i qu e
ISS
N02
49-0
803
ISR
NIN
RIA
/RT-
-781
7--F
R+E
NG
Networks and Telecommunications
INSTITUT NATIONAL DE RECHERCHE EN INFORMATIQUE ET EN AUTOMATIQUE
Development of a fuzzing tool for the 6LoWPANprotocol
César Bernardini — Abdelkader Lahmadi — Olivier Festor
N° 7817
September 2011


Centre de recherche INRIA Nancy – Grand EstLORIA, Technopôle de Nancy-Brabois, Campus scientifique,
615, rue du Jardin Botanique, BP 101, 54602 Villers-Lès-NancyTéléphone : +33 3 83 59 30 00 — Télécopie : +33 3 83 27 83 19
Development of a fuzzing tool for the 6LoWPAN protocol∗
César Bernardini , Abdelkader Lahmadi , Olivier Festor
Theme : Networks and TelecommunicationsÉquipe-Projet Madynes
Rapport technique n° 7817 — September 2011 — 47 pages
Abstract: In this report we detail the development of a fuzzing tool for the 6LoWPAN protocol which is proposedby the IETF as an adaptation layer of IPv6 for Low power and lossy networks. Our tool is build upon the Scapy’s[2]packets manipulation library. The tool provides different mutation algorithms to be applied on 6LowPAN messages.These messages are defined by interaction scenarios described in an XML format.
Key-words: 6LoWPAN, Fuzzing, IPv6, Scapy, XML, protocol, Internet of Things, Security
∗ This work was partially funded by the french ANR project VAMPIRE and the FP7 FIWARE project.

Développement d’un outil de fuzzing pour le protocole 6LowPANRésumé : Dans ce rapport, nous présentons les détails de développement d’un outil de fuzzing pour le protocole6LowPAN. Ce protocole est proposé par l’IETF comme une couche d’adaptation du protocole IPv6 pour les réseauxde faible énergie et à forte pertes (Low power and Lossy Networks). Notre outil est basé sur la bibliothèque SCAPYdédiée à la manipulation des paquets. Il fournit différents algorithmes et fonctions de mutation des champs de messages6LowPAN. Ces messages sont définis par des scénarios d’interaction décrits en langage XML.
Mots-clés : 6LowPAN, fuzzing, Scapy, Contiki

Internship report 3
Contents
1 Introduction 51.1 Background . . . . . . . . . . . . . . . . . . . . . . . . . . . . . . . . . . . . . . . . . . . . . . . . 5
1.1.1 Fuzzing . . . . . . . . . . . . . . . . . . . . . . . . . . . . . . . . . . . . . . . . . . . . . . 51.1.2 6LoWPAN . . . . . . . . . . . . . . . . . . . . . . . . . . . . . . . . . . . . . . . . . . . . 61.1.3 Sensor Networks . . . . . . . . . . . . . . . . . . . . . . . . . . . . . . . . . . . . . . . . . 61.1.4 Contiki . . . . . . . . . . . . . . . . . . . . . . . . . . . . . . . . . . . . . . . . . . . . . . 6
1.2 The Problem . . . . . . . . . . . . . . . . . . . . . . . . . . . . . . . . . . . . . . . . . . . . . . . . 7
2 The 6LoWPAN Scapy Module 92.1 Installing the module . . . . . . . . . . . . . . . . . . . . . . . . . . . . . . . . . . . . . . . . . . . 92.2 Packet construction: 6LoWPAN & 802.15.4 . . . . . . . . . . . . . . . . . . . . . . . . . . . . . . . 9
2.2.1 The IEEE 802.15.4 module . . . . . . . . . . . . . . . . . . . . . . . . . . . . . . . . . . . . 92.2.2 Dissecting . . . . . . . . . . . . . . . . . . . . . . . . . . . . . . . . . . . . . . . . . . . . . 102.2.3 Assembling / Building . . . . . . . . . . . . . . . . . . . . . . . . . . . . . . . . . . . . . . 10
2.3 The 6LoWPAN Module . . . . . . . . . . . . . . . . . . . . . . . . . . . . . . . . . . . . . . . . . . 112.3.1 Module Structure . . . . . . . . . . . . . . . . . . . . . . . . . . . . . . . . . . . . . . . . . 122.3.2 Handling 6LoWPAN packets . . . . . . . . . . . . . . . . . . . . . . . . . . . . . . . . . . . 12
3 Injecting Packets into a Real 6LoWPAN Network 153.1 Requirements & Installation . . . . . . . . . . . . . . . . . . . . . . . . . . . . . . . . . . . . . . . 153.2 Our Customized Firmware . . . . . . . . . . . . . . . . . . . . . . . . . . . . . . . . . . . . . . . . 15
3.2.1 How to use it . . . . . . . . . . . . . . . . . . . . . . . . . . . . . . . . . . . . . . . . . . . 163.2.2 Contiki Code Modification . . . . . . . . . . . . . . . . . . . . . . . . . . . . . . . . . . . . 173.2.3 Debugging Options . . . . . . . . . . . . . . . . . . . . . . . . . . . . . . . . . . . . . . . . 18
3.3 Injection Tools . . . . . . . . . . . . . . . . . . . . . . . . . . . . . . . . . . . . . . . . . . . . . . 193.3.1 Send a real IPv6 packet . . . . . . . . . . . . . . . . . . . . . . . . . . . . . . . . . . . . . . 193.3.2 Send a customized 6lowpan packet . . . . . . . . . . . . . . . . . . . . . . . . . . . . . . . 20
4 Fuzzing Scenarios Specification 214.1 The Fuzzer . . . . . . . . . . . . . . . . . . . . . . . . . . . . . . . . . . . . . . . . . . . . . . . . 214.2 Approaches to specify interactions between devices . . . . . . . . . . . . . . . . . . . . . . . . . . 224.3 Scenarios’ Specification . . . . . . . . . . . . . . . . . . . . . . . . . . . . . . . . . . . . . . . . . . 22
4.3.1 Messages . . . . . . . . . . . . . . . . . . . . . . . . . . . . . . . . . . . . . . . . . . . . . 234.3.2 Scenarios . . . . . . . . . . . . . . . . . . . . . . . . . . . . . . . . . . . . . . . . . . . . . 234.3.3 XML Scenario’s Format . . . . . . . . . . . . . . . . . . . . . . . . . . . . . . . . . . . . . 24
RT n° 7817

4 Bernardini & Lahmadi & Festor
5 Fuzzer Internals 275.1 Fuzzer Architecture . . . . . . . . . . . . . . . . . . . . . . . . . . . . . . . . . . . . . . . . . . . . 275.2 Mutation Algorithms . . . . . . . . . . . . . . . . . . . . . . . . . . . . . . . . . . . . . . . . . . . 27
5.2.1 Corrupting Bits: Random Bit Fuzzer . . . . . . . . . . . . . . . . . . . . . . . . . . . . . . . 285.2.2 Corrupting Fields: Random Fields Fuzzer . . . . . . . . . . . . . . . . . . . . . . . . . . . . 29
5.3 Personalized Fuzzing Algorithms . . . . . . . . . . . . . . . . . . . . . . . . . . . . . . . . . . . . . 295.3.1 Fuzzing Algorithm Interface . . . . . . . . . . . . . . . . . . . . . . . . . . . . . . . . . . . 30
6 Conclusions & future work 336.1 Conclusions . . . . . . . . . . . . . . . . . . . . . . . . . . . . . . . . . . . . . . . . . . . . . . . . 336.2 Future Work . . . . . . . . . . . . . . . . . . . . . . . . . . . . . . . . . . . . . . . . . . . . . . . . 33
A Messages Building Tool 35
B Stateless and Stateful Scenarios 37B.1 Stateless Scenarios . . . . . . . . . . . . . . . . . . . . . . . . . . . . . . . . . . . . . . . . . . . . 37
B.1.1 Basic 6LoWPAN . . . . . . . . . . . . . . . . . . . . . . . . . . . . . . . . . . . . . . . . . 37B.1.2 Ping Scenario . . . . . . . . . . . . . . . . . . . . . . . . . . . . . . . . . . . . . . . . . . . 38B.1.3 Basic Fragmentation . . . . . . . . . . . . . . . . . . . . . . . . . . . . . . . . . . . . . . . 38B.1.4 TCP Message over 6LoWPAN . . . . . . . . . . . . . . . . . . . . . . . . . . . . . . . . . . 39
B.2 Stateful Scenarios . . . . . . . . . . . . . . . . . . . . . . . . . . . . . . . . . . . . . . . . . . . . . 40B.2.1 Set a new Prefix Address . . . . . . . . . . . . . . . . . . . . . . . . . . . . . . . . . . . . . 40
C How to import Real Messages to Our Fuzzing Tool 41C.1 Importing messages from Wireshark . . . . . . . . . . . . . . . . . . . . . . . . . . . . . . . . . . . 41C.2 Creating and executing a simple scenario . . . . . . . . . . . . . . . . . . . . . . . . . . . . . . . . . 41
D How-To Install the Fuzzer 45D.1 Flashing, Configuring the AVR Razor USB Stick . . . . . . . . . . . . . . . . . . . . . . . . . . . . 45D.2 Install the Fuzzer . . . . . . . . . . . . . . . . . . . . . . . . . . . . . . . . . . . . . . . . . . . . . 45D.3 Install the Graphical Interface . . . . . . . . . . . . . . . . . . . . . . . . . . . . . . . . . . . . . . 46
INRIA

Internship report 5
Chapter 1
Introduction
The Internet of Things is coming! Day after day, new devices appear to help us in any kind of daily activity providinginformation, automatizing certain tasks and some other ideas that we can’t yet imagine. Moreover, most of thesedevices are tiny, powered by a minimal battery and they have constrained resources.
These devices have begun to take an important place in our life, and sometimes they take control over importantand/or private information like handling the car temperature, environmental music, access control to our garage, ourpictures in all the frames inside the house, etc. It’s because of this that security on these applications it’s an importantmatter that should be the developers’ main concern.
In this report, a brute force testing utility is proposed to help developers to enforce security in their applications.Even though, the focus has been placed on testing different 6LoWPAN[10] protocol implementations.
This chapter is organized as follows. Section 1.1 describes all the information that should be understood to com-pletly understand the whole problem and all the variants proposed: what is fuzzing? What are sensor networks, the6LoWPAN protocol itself and last but not least important, the Operative System where all the tests has been deployed:Contiki OS. Finally, in the Section 1.2 the problem itself is described and which are the potential solutions.
1.1 Background
For a better understanding of the purposed problem and their solutions, some previous knowledge is required. Thosetopics are referred to a security analysis technique called fuzzing, the embedded devices itself, the networks that couldbe created with those devices and the protocol for communication among them which is the 6LoWPAN protocol.
1.1.1 Fuzzing
Fuzzing[11, 12] is a software testing technique, that involves providing valid, invalid, unexpected or random infor-mation as inputs of an application. Then, the program itself will react to these inputs reporting exceptions, crashes,failing in the normal behavior or keeping the normal flow. The technique goal is to take advantage of the low-costcomputation power to find out unexpected scenarios that lead to situations that escape from the normal flow scenarioand produce an unexpected behavior.
In our current case, the target application is the protocol itself or maybe the application that resides in a remotedevice; so, in this case, we will be sending messages through the network to test the target devices’ correct behavior,if it do.
RT n° 7817

6 Bernardini & Lahmadi & Festor
1.1.2 6LoWPAN6LoWPAN[5, 6] is an acronym of IPv6 over Low power Wireless Personal Area Networks, also it’s the name of aworking group in the IETF.
The 6LoWPAN group has defined an encapsulation and header compression mechanism that defines a set ofcompression/decompression rules taking advantage of the most common messages sent through a typical wirelesssensor network, and exploiting some features of the underlaying layer, IEEE 802.15.4, and the upper layer, IPv6. Evenmore, all the information that should be repeated is avoided allowing the protocol to send really short messages and inthis way, helping the devices to save energy.
The protocol also has defined some special rules to fragmentate IPv6 long messages. Being able in this way, tosend the minimal length IPv6 message.
1.1.3 Sensor NetworksThe fuzz target are Sensor-based devices, these devices communicate themself in a wireless network which will becalled Wireless Sensor Network (WSN), and it will be the main focus of all the research and development.
All the interacting devices are called nodes, and some special node-types appear called 6LoWPAN Router and6LoWPAN Border Router. The 6LoWPAN Router perform activities to mantain/inform to all the nodes about theexistance of new nodes or a existing one disappearance, it interacts inside a 6LoWPAN network. 6LoWPAN BorderRouter keep the same task than the 6LoWPAN Router, but it also incorporates some features to communicate the6LoWPAN network to other networks (IPv6, IPv4).
The 6LoWPAN Node Discovery RFC says: "6LoWPAN Border Routers sit at the boundary of the 6LoWPANand the rest of the network while 6LoWPAN Routers are inside the LoWPAN. 6LoWPAN Routers are assumed to berunning a routing protocol."
1.1.4 ContikiContiki[3] is an operative system designed with a clear objetive: high portability for a wide set of wireless andembedded systems; and moreover, it has support for multitasking, IPv4, IPv6 and our fuzzing goal: the 6LoWPANprotocol.
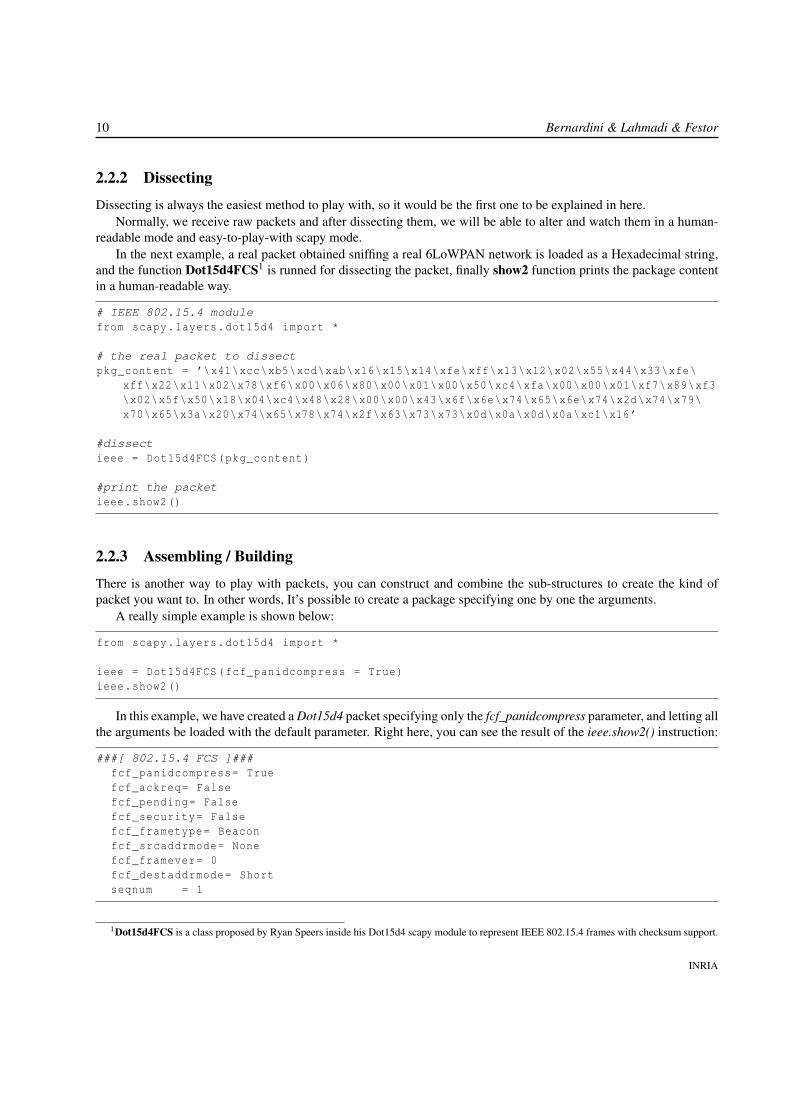
As we’ve recently said, it has a 6LoWPAN implementation based on the IETF draft HC06[4].All my tests have been led over the AVR Platform. The main actors in this report are the usb stick and the AVR
Raven Board both of them can be seen in the Figure 1.1.
Figure 1.1: The devices will be playing with: the AT AVR RZ RAVEN kit.
The USB will interact as a bridge, and it will transmit 6LoWPAN packets through IEEE 802.15.4 to the otherdevice, the one which we want to crash.
INRIA

Internship report 7
1.2 The ProblemThe problem addressed in this work is the construction of a simple, extensible tool to fuzz the 6LoWPAN protocol. Thetools should be developed taking advantage of previous built libraries in the Python[9] language and as well beingable to test applications or other protocols using the same tool, or in the worst case modifying as little as possible.
Currently, there is no IEEE 802.15.4 driver for linux, so we need to develop an embedded driver to inject messagesthrough an IEEE 802.15.4 network.
Also, there is not an easy way to handle 6LoWPAN messages; thus our aim is to create a new layer on the Scapypython library to handle in an easy way all the messages.
Thus, being able to inject messages in a real 6LoWPAN network, the goal is to be able to recreate regular 6LoWPANinteractions defining a graphical interface and a simple syntax language.
Finally, we can start thinking in fuzzing: creating different personalized algorithms that could take advantage ofdevices’ responses to maximize smartness in the test situations and fuzzing the protocol implementation as deep aspossible.
RT n° 7817

8 Bernardini & Lahmadi & Festor
INRIA

Internship report 9
Chapter 2
The 6LoWPAN Scapy Module
This chapter deals with the creation of a new Scapy[2] module to support assembly/disassembly/fuzzing of the proto-col 6LoWPAN.
As 6LoWPAN defines a set of compression rules based on context information sometimes it requires his underneathlayer: IEEE 802.15.4[7]. There is an alpha stage module in Scapy for IEEE 802.15.4; it will be used.
2.1 Installing the module
As the module is in development stage, it can be found in Scapy Community Repository. Scapy repository usesMercurial[8] for version control.
To install the environment in Ubuntu:
# install mercurialsudo apt-get install mercurial# get the repositoryhg clone http://hg.secdev.org/scapy -com/# install itcd scapy -comsudo python setup.py install
2.2 Packet construction: 6LoWPAN & 802.15.4
Once the whole working environment is installed, it’s now possible to play with 6LoWPAN packets. First of all,a little reference on the construction of IEEE 802.15.4 packets. Later on, another brief reference but this time for6LoWPAN packets explaining how to assemble, dissect and fuzz them.
2.2.1 The IEEE 802.15.4 module
The IEEE 802.15.4 module structure has been fully developed by Ryan Speers, and I’ve made a few modifications onit. It will be named Dot15d4 from now and so on.
RT n° 7817
10 Bernardini & Lahmadi & Festor
2.2.2 Dissecting
Dissecting is always the easiest method to play with, so it would be the first one to be explained in here.Normally, we receive raw packets and after dissecting them, we will be able to alter and watch them in a human-
readable mode and easy-to-play-with scapy mode.In the next example, a real packet obtained sniffing a real 6LoWPAN network is loaded as a Hexadecimal string,
and the function Dot15d4FCS1 is runned for dissecting the packet, finally show2 function prints the package contentin a human-readable way.
# IEEE 802.15.4 modulefrom scapy.layers.dot15d4 import *
# the real packet to dissectpkg_content = ’\x41\xcc\xb5\xcd\xab\x16\x15\x14\xfe\xff\x13\x12\x02\x55\x44\x33\xfe\
xff\x22\x11\x02\x78\xf6\x00\x06\x80\x00\x01\x00\x50\xc4\xfa\x00\x00\x01\xf7\x89\xf3\x02\x5f\x50\x18\x04\xc4\x48\x28\x00\x00\x43\x6f\x6e\x74\x65\x6e\x74\x2d\x74\x79\x70\x65\x3a\x20\x74\x65\x78\x74\x2f\x63\x73\x73\x0d\x0a\x0d\x0a\xc1\x16’
#dissectieee = Dot15d4FCS(pkg_content)
#print the packetieee.show2()
2.2.3 Assembling / Building
There is another way to play with packets, you can construct and combine the sub-structures to create the kind ofpacket you want to. In other words, It’s possible to create a package specifying one by one the arguments.
A really simple example is shown below:
from scapy.layers.dot15d4 import *
ieee = Dot15d4FCS(fcf_panidcompress = True)ieee.show2()
In this example, we have created a Dot15d4 packet specifying only the fcf_panidcompress parameter, and letting allthe arguments be loaded with the default parameter. Right here, you can see the result of the ieee.show2() instruction:
###[ 802.15.4 FCS ]###fcf_panidcompress= Truefcf_ackreq= Falsefcf_pending= Falsefcf_security= Falsefcf_frametype= Beaconfcf_srcaddrmode= Nonefcf_framever= 0fcf_destaddrmode= Shortseqnum = 1
1Dot15d4FCS is a class proposed by Ryan Speers inside his Dot15d4 scapy module to represent IEEE 802.15.4 frames with checksum support.
INRIA
Internship report 11
Sometimes, your requirements are more complicated: you need a more complex packet than only a Dot15d4header. Scapy allows you to combine the packets with the overloaded operation “/”. Right here, you can see anexample:
>>> ieee = Dot15d4(fcf_panidcompress = True)/Dot15d4Data()>>> ieee.show2()###[ 802.15.4 FCS ]###
fcf_panidcompress= Truefcf_ackreq= Falsefcf_pending= Falsefcf_security= Falsefcf_frametype= Datafcf_srcaddrmode= Nonefcf_framever= 0fcf_destaddrmode= Shortseqnum = 1
###[ 802.15.4 Data ]###dest_panid= 0xffffdest_addr = 0xffff
In the previous example, you have saw a Dot15d4 header which contained IEEE 802.15.4 data.
Fuzzing
Right now, we have seen different examples on assembling and disassembling packets, but maybe your interest couldbe on fuzzing.
For Example, take the last example for constructing a packet, I’ll fuzz the IEEE 802.15.4 data section using thefuzz function provided by the scapy library.
>>> from scapy.packet import fuzz>>> ieee = Dot15d4FCS(fcf_panidcompress = True)/fuzz(Dot15d4Data())>>> ieee.show2()###[ 802.15.4 ]###
fcf_panidcompress= Truefcf_ackreq= Falsefcf_pending= Falsefcf_security= Falsefcf_frametype= Datafcf_srcaddrmode= Nonefcf_framever= 0fcf_destaddrmode= Shortseqnum = 1
###[ 802.15.4 Data ]###dest_panid= 0xc779dest_addr = 0x3fb9
Everytime you run the example, you will get different values for the fileds dest_panid and dest_addr.
2.3 The 6LoWPAN ModuleThis module has been fully implemented by César Bernardini (me, the one who’s writing!). Right now, is also in analpha stage and it’s highly binded to Dot15d4 module.
RT n° 7817

12 Bernardini & Lahmadi & Festor
2.3.1 Module Structure
Several classes has been developed to create the whole structure for the 6LoWPAN packets.All the classes are inherited from the scapy Packet module except some special class (SixLoWPANAddrField )
which represents 6LoWPAN addresses.In 6LoWPAN, there are several types of packets: Mesh, Broadcast, IPHC, Uncompressed IPv6 packets and Frag-
mentations packets. 6LoWPAN splits long packets in several succesive packets: this is when the fragmentation packetsappears, there are two different classes for representing them depending on their position. when the packet is the firstpart of a big packet it follows LoWPANFragmentationFirst class and the successor follows LoWPANFragmentation-Subsequent implementation.
These different classes varies in their arguments according to the 6LoWPAN standard and drafts.As 6LoWPAN protocol has a particular encoding system, there are several fields that has a variable length depend-
ing on other parameters. Because of this, you can find out in the source code different functions which returns thefield’s length value. For example: source_addr_mode, destiny_addr_mode, pad_trafficclass, etc...
2.3.2 Handling 6LoWPAN packets
It allows you to do the same than the other module: assembly, dissasembly and fuzz. It works in the same way thanthe others one. Anyway, it’s always useful to have some examples.
Dissecting
>>> from scapy.layers.sixlowpan import *>>> lowpan_frag_second = "\xe3\x42\x00\x23\x10\x3a\x2f\x2f\x77\x77\x77\x2e\x77\x33\x2e
\x6f\x72\x67\x2f\x54\x52\x2f\x68\x74\x6d\x6c\x34\x2f\x6c\x6f\x6f\x73\x65\x2e\x64\x74\x64\x22\x3e\x0a\x3c\x68\x74\x6d\x6c\x3e\x3c\x68\x65\x61\x64\x3e\x3c\x74\x69\x74\x6c\x65\x3e\x57\x65\x6c\x63\x6f\x6d\x65\x20\x74\x6f\x20\x74\x68\x65\x20\x43\x6f\x6e\x74\x69\x6b\x69\x2d\x64\x65\x6d\x6f\x20\x73\x65\x72\x76\x65\x72\x21\x3c\x2f\x74\x69\x74\x6c\x65"
>>> lowpan_frag_sec_packet = SixLoWPAN(lowpan_frag_second)>>> lowpan_frag_sec_packet.show2()###[ SixLoWPAN(Packet) ]######[ 6LoWPAN Subsequent Fragmentation Packet ]###
__datagramSize= 834__datagramTag= 0x23__datagramOffset= 16
###[ Raw ]###load = ’://www.w3.org/TR/html4/loose.dtd">\n<html ><head ><title >Welcome to
the Contiki -demo server!</title ’
Note: not all the 6LoWPAN packets can be dissected in this way because of the need of a context identification:sometimes, it will fail when they need information from underlayers.
Assembling
You can assemble packets in the same way than we made with IEEE 802.15.4 packets. Take a look at 6LoWPANStructure in the Section 2.3.
INRIA

Internship report 13
Fuzzing
This document is focused on fuzzing. In this subsection, it is explained the steps that has to be taken for fuzzing real6LoWPAN packets.
Scapy offers a special function, fuzz, that alter all the fields that have not received a default value putting a randomvalue instead of the original one.
In the next example, we took a 6LoWPAN First Part Fragmentation Packet and then we applied the fuzz function.Then, we printed the packet as a string and after that we could see that the unset values has not changed (only reservedin the first example, reserved and datagramTag in the second).
>>> from scapy.packet import fuzz>>> from scapy.layers.sixlowpan import *
# first example>>> p = LoWPANFragmentationFirst(__datagramSize=12, __datagramTag=0)>>> str(p)’\xc0\x0c\x00\x00’>>> str(fuzz(p))’\xa8\x0c\x00\x00’>>> str(fuzz(p))’\x90\x0c\x00\x00’
# second example>>> p = LoWPANFragmentationFirst(__datagramSize =12)>>> str(fuzz(p))’\x18\x0c\xb70 ’>>> str(fuzz(p))’p\x0c\x9d\xde’
Fuzzing a real 6LoWPAN packet with scapy fuzz function, can destroy the packet and make it unreadable or notcompliant.
The Scapy 6LoWPAN module doesn’t support fragmentation and ressambling messages, it should be done manu-ally.
RT n° 7817

14 Bernardini & Lahmadi & Festor
INRIA
Internship report 15
Chapter 3
Injecting Packets into a Real 6LoWPANNetwork
So far, the Scapy module can generate or modify real or fake 6LoWPAN packets but it is still needed a way to injectthese packages into real network to be received by real devices. For this reason, it is expected to modify the Contiki’ssources to generate a new firmware for the AVR Razor USB Stick to be able to retransmit the packets which have beengenerated by our module. From now on the AVR Razor USB stick with a firmware installed will be called jackdawn.
3.1 Requirements & InstallationOur working environment is still Linux, and as usual, it is necessary to install several packages to be able to play with.
It’s compulsory to install avr libc and the compiler (gcc for avr). The install example command in Ubuntu linux is:
sudo apt-get install avrdude gcc-avr avr-libc
Then, we have to load some modules in our system:
# modprobe ipv6# modprobe usbnet# modprobe cdc_ether# modprobe cdc_acm# modprobe rndis_wlan
3.2 Our Customized FirmwareContiki incorporates a clear and basic example, to create a simple bridge between an Ethernet Network (802.3) andaWireless 802.15.4 Network; this can be found in the examples/ravenusbstick folder into the Contiki’s source code1.
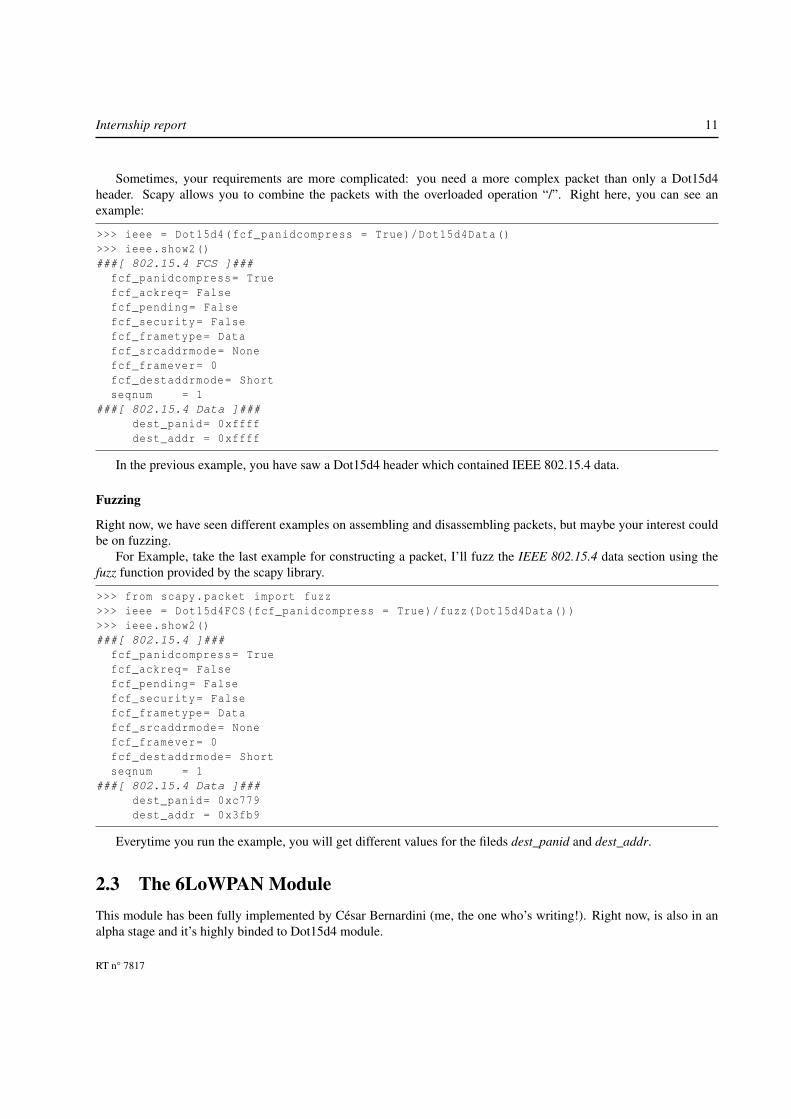
In the Figure 3.1, we can see the basic jackdawn workflow: it receives a IPv6 packet over Ethernet, and followingsome rules, it compresses the IPv6 information into a 6LoWPAN packet to be sent over IEEE 802.15.4.
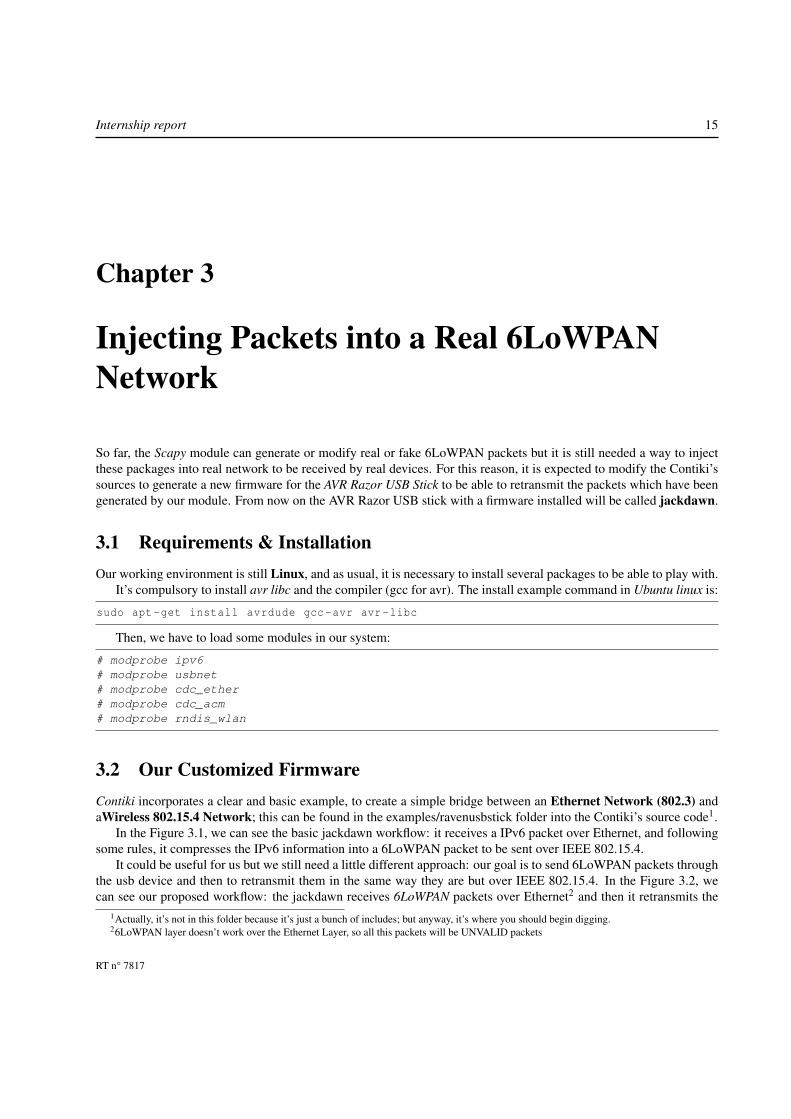
It could be useful for us but we still need a little different approach: our goal is to send 6LoWPAN packets throughthe usb device and then to retransmit them in the same way they are but over IEEE 802.15.4. In the Figure 3.2, wecan see our proposed workflow: the jackdawn receives 6LoWPAN packets over Ethernet2 and then it retransmits the
1Actually, it’s not in this folder because it’s just a bunch of includes; but anyway, it’s where you should begin digging.26LoWPAN layer doesn’t work over the Ethernet Layer, so all this packets will be UNVALID packets
RT n° 7817
16 Bernardini & Lahmadi & Festor
Figure 3.1: ravenusbstick basic workflow: transform IPv6 packets into 6LoWPAN packets.
packet as it has arrived, 6LoWPAN, but over a different interface: IEEE 802.15.4 (this time should be a valid packet,if we want to receive some answer).
Figure 3.2: our ravenusbstick workflow: retransmit 6LoWPAN packets through IEEE 802.15.4.
In this way, the main object is to modify Contiki source code to be able to send 6LoWPAN packets over thewireless interface. furthermore, we want to be able to send IPv6 messages that will be used to control and configurethe IPv6/6LoWPAN network (icmp, router advertisement, etc...). In other words, we will have two kind of ethernetpackets:
1. IPv6 classic packets: in this case the ethernet packet should have a special type: 0x86dd, the IPv6 packet willbe contained in the payload. The jackdawn will transform it into a 6LoWPAN message and it will transmit it.
2. 6LoWPAN retransmission: the ethernet packet should have a special type: 0x6666 (this type has been definedby the author and it can be changed). The packet payload is the 6LoWPAN packet to be retransmitted.
Whatsoever, there are some other assumptions to make. When we transmit a 6LoWPAN packet, the 802.15.4packet should contain source and destination addresses. They will be inferred from the ethernet source and destinationadresses respectively, but as we know the Ethernet sources has 48 bits and for IEEE 802.15.4 we need 64 bits addresses:a translation is defined in Contiki’s Source Code and we have to respect it: It’s pretty straightforward, it just insert a0xfffe in the middle of the 802.3 address to convert it into a 802.15.4 address and it removes it (the fffe in the midle),to make the inverse process.
This approach has an important limitation, it can’t take advantage of all the compression rules; because sometimesthere are some compression rules that are based on the IEEE 802.15.4 information, and we don’t have control overthem.
3.2.1 How to use itThe default example for usb raven stick convert the stick into a packet’s retransmiter: it receives ipv6 packets in theusb ethernet interface and then it modifies them, and it send them compressed as 6lowpan’s packets, but this time, overthe interface 802.15.4 that the stick carry on inside.
INRIA

Internship report 17
The aim in this part of the project was to modify the original firmware to be able to send special ethernet packetsthat would contain our 6lowpan packets that will be transmitted directly through the 802.15.4 interface.
More deeply into the problem, the ethernet packets has a source, destination and a type field. When this type fieldis valued on 0x6666, after the firmware modification, the jackdawn will determine that the stream of bytes containedinto the ethernet packet should be transmitted without further processing. Source and destination addresses in the802.15.4 packet are determined by the ethernet MAC addresses, as it was explained in the previous subsection.
In the next example, we can see two messages: the first one it’s a IPv6 message that will be transformed into a valid6LoWPAN message, when it gets into the ethernet interface (the jackdawn); the other one specifies the type 0x6666, itmeans that "OUR 6LOWPANPACKET" string3 will be retransmitted through the 802.15.4 interface.
message_ipv6 = Ether(src="02:11:12:13:14:15:16", dst="02:11:22:33:44:55")/IPv6()
message_to_retransmit = Ether(src="02:11:12:13:14:15:16",dst="02:11:22:33:44:55",type=0x6666
) / "OUR 6LOWPANPACKET"
3.2.2 Contiki Code ModificationAs we were talking about in this whole section, a change has been made to the Contiki’s sources to be able to retransmitour packets through the wireless interface.
The jackdawn, has a special file sicslow_ethernet.c that make the whole translation between 6LoWPAN and theethernet layers. It has two special functions mac_EthernetToLowpan and mac_LowpanToEthernet, these functions hasthe special work of making all the translation process.
In our special case, we will modify the mac_EthernetToLowpan function; so, it will check the type of the ethernetheader and then it will decide what to do with the packet. Actually, in the current implementation the jackdawn ignoresall the packages with a different type than IPv6 in the ethernet header. The next code has been added in this function:
if (((struct uip_eth_hdr *) ethHeader)->type == UIP_HTONS(0x6666)) {//Addressed to us: make 802.15.4 address from IPv6 AddressdestAddr.addr[0] = ((struct uip_eth_hdr *) ethHeader)->dest.addr[0];destAddr.addr[1] = ((struct uip_eth_hdr *) ethHeader)->dest.addr[1];destAddr.addr[2] = ((struct uip_eth_hdr *) ethHeader)->dest.addr[2];destAddr.addr[3] = 0xFF;destAddr.addr[4] = 0xFE;destAddr.addr[5] = ((struct uip_eth_hdr *) ethHeader)->dest.addr[3];destAddr.addr[6] = ((struct uip_eth_hdr *) ethHeader)->dest.addr[4];destAddr.addr[7] = ((struct uip_eth_hdr *) ethHeader)->dest.addr[5];
destAddrPtr = &destAddr;my_tcpip_output(destAddrPtr);
#if !RF230BBusb_eth_stat.txbad++;
#endifuip_len = 0;return;
}
3The String "OUR 6LOWPANPACKET" represents that any bunch of bytes could be sent over the Ethernet Layer with the type 0x6666 andthey will be transmitted through the air. A valid/unvalid 6LoWPAN packet could be represented as a Python string.
RT n° 7817
18 Bernardini & Lahmadi & Festor
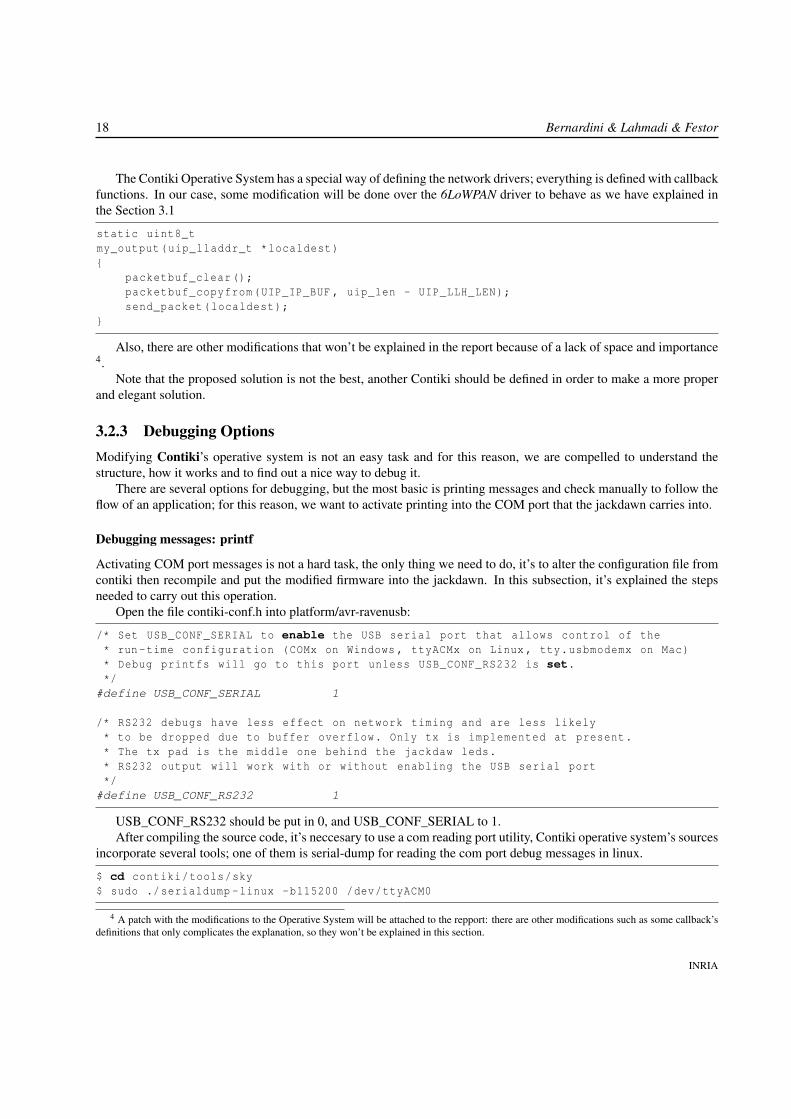
The Contiki Operative System has a special way of defining the network drivers; everything is defined with callbackfunctions. In our case, some modification will be done over the 6LoWPAN driver to behave as we have explained inthe Section 3.1
static uint8_tmy_output(uip_lladdr_t *localdest){
packetbuf_clear();packetbuf_copyfrom(UIP_IP_BUF , uip_len - UIP_LLH_LEN);send_packet(localdest);
}
Also, there are other modifications that won’t be explained in the report because of a lack of space and importance4.
Note that the proposed solution is not the best, another Contiki should be defined in order to make a more properand elegant solution.
3.2.3 Debugging OptionsModifying Contiki’s operative system is not an easy task and for this reason, we are compelled to understand thestructure, how it works and to find out a nice way to debug it.
There are several options for debugging, but the most basic is printing messages and check manually to follow theflow of an application; for this reason, we want to activate printing into the COM port that the jackdawn carries into.
Debugging messages: printf
Activating COM port messages is not a hard task, the only thing we need to do, it’s to alter the configuration file fromcontiki then recompile and put the modified firmware into the jackdawn. In this subsection, it’s explained the stepsneeded to carry out this operation.
Open the file contiki-conf.h into platform/avr-ravenusb:
/* Set USB_CONF_SERIAL to enable the USB serial port that allows control of the* run-time configuration (COMx on Windows , ttyACMx on Linux , tty.usbmodemx on Mac)* Debug printfs will go to this port unless USB_CONF_RS232 is set.*/
#define USB_CONF_SERIAL 1
/* RS232 debugs have less effect on network timing and are less likely* to be dropped due to buffer overflow. Only tx is implemented at present.* The tx pad is the middle one behind the jackdaw leds.* RS232 output will work with or without enabling the USB serial port*/
#define USB_CONF_RS232 1
USB_CONF_RS232 should be put in 0, and USB_CONF_SERIAL to 1.After compiling the source code, it’s neccesary to use a com reading port utility, Contiki operative system’s sources
incorporate several tools; one of them is serial-dump for reading the com port debug messages in linux.
$ cd contiki/tools/sky$ sudo ./serialdump -linux -b115200 /dev/ttyACM0
4 A patch with the modifications to the Operative System will be attached to the repport: there are other modifications such as some callback’sdefinitions that only complicates the explanation, so they won’t be explained in this section.
INRIA

Internship report 19
Note: most of the times you have to execute the serialdump as root user, because a regular user dont have readpermissions into the /dev/ttyACMX.
Debugging packets: Sniffing
After sending our own packets, there should be someway to debug real packets: the way they are sent, the answersthey get and anything else that It’s not in my mind right now.
With this purpose in mind, we need an extra raven usb stick (at90usb1287), compiled with default raven usb stickexample configured to run as a sniffer and allowed it to receive raw packets.
After, we can open wireshark and start sniffing in the usb device interface of the sniffer usb stick.
3.3 Injection Tools
After modifying the Operative System, we were focused on the development of some tools that take advantage of ourmodifications. For this reason, some tools has been proposed and they will be the basis for the future development.
These tools should be able to open the ethernet interface and send real ipv6 packets and retransmit our 6lowpanpackets over our special previously defined ethernet packets.
It’s time to take advange of all the Scapy’s power, so they have been developed in Python with Scapy 2.2.1 fromthe development branch.
3.3.1 Send a real IPv6 packet
An utility has been created to send packages through the usb interface. this utility developed in Python allows you tosend real ipv6 packets and wait for the response.
# emitter.pyimport scapyfrom scapy import *from scapy.sendrecv import sendp , srpfrom scapy.config import conf# route6 import is mandatory for using ipv6from scapy.route6 import *
#layersfrom scapy.layers.inet6 import IPv6 , ICMPv6EchoRequestfrom scapy.layers.inet import TCPfrom scapy.layers.l2 import Ether
# THE PACKET YOU WANT TO SEND: Please IPv6p = IPv6(dst="aaaa::11:22ff:fe33:4455", src="aaaa::ff:fe00:1")/TCP()/"GET / HTTP/1.0\r
\n\r\n"
#send a packet and wait for the answersrp(
Ether(src="02:11:12:13:14:15:16", dst="02:11:22:33:44:55")/p,iface="usb0"
)
RT n° 7817

20 Bernardini & Lahmadi & Festor
Note: the usb0 interface is hardcoded, you have to be sure that you retransmitter jackdawn will be connected tothe usb0 interface or alter this value. Note2: sometimes the tool has to be runned as root user because it need to writeover the usb interface.
3.3.2 Send a customized 6lowpan packetThe recently explained tool can be modified to send special messages that will be retransmitted by our special modifiedcontiki version.
The only thing we have to do is to send an Ethernet package with a special type (0x6666), then we send the packagethrough the Ethernet interface to the jackdawn and it will re transmit it through the air.
A simple example:
# Could be constructed with scapy or just a stringp = "any valid or invalid 6LoWPAN packet"sendp(
Ether(src="02:11:12:13:14:15:16", dst="02:11:22:33:44:55", type=0x6666)/p,iface="usb0"
)
A super naive brute force injection tool can be created with Scapy:
# Could be constructed with scapy or just a stringp = "any valid or invalid 6LoWPAN packet"while 1:
try:sendp(
Ether(src="02:11:12:13:14:15:16", dst="02:11:22:33:44:55", type=0x6666)/fuzz(p),
iface="usb0",loop = 1
)except: #this exception is reached everytime, we try to fuzz with a reserved or
unimplemented part of 6lowpan.pass
This special tool is naive and stateless, and it lacks of any kind of intelligence. It doesn’t either know the 6lowpandevice status, so it’s pretty useless; anyway, it’s important because of the simplicity, easiness to modify and to make afirst proof of concept.
INRIA

Internship report 21
Chapter 4
Fuzzing Scenarios Specification
A new layer for Scapy has been created, the Contiki Operative System has been patched to behave as we want to, abunch of tools has been developed to send the messages we want to the 6LoWPAN networks; it means that we havesetup the whole base to start thinking about possible strategies to fuzz.
In this Chapter, the aim is to replicate interactions between devices. In the section 4.1, we discuss about thepossibility of taking a working fuzzer or just take the features offered by Scapy. Following, after the taken decision wetalk about different approachs for reproducing interactions; Finally, we define the scenario concept and a new XMLlanguage to represent interactions among devices.
4.1 The Fuzzer
First of all, it’s better to begin with how other fuzzer works in real life, which are their features and why it could helpus to test any environment.
Sulley[11] is a fuzzer development and fuzz testing framework, it has as a goal the simplification of data represen-tation, session handling, data tranmision and target monitoring.
Data representation in Sulley consists in the generation of individual requests and to represent them as blocks;Session Handling links the built requests together to form a session, it combines the monitoring agents and thus itbegins with the fuzzing process itself.
Also, it incorporates a special module specially developed to keep control of several virtual machines.Sulley has several nice and complete features, but in our particular case is not a good idea to take advantage of it,
because we have to reimplement the data representation step. And that’s not all, we also want to take advantage of themost important feature of scapy: easiness to manipulate network packets. In Sulley, the representation is really simplebut we don’t have fully support already implemented for IPv4, IPv6, TCP, ICMP; so, if we want to take advantage ofall it’s features, we have to implement new blocks for each one of the IPv6, TCP, ICMP, UDP packets which it’s nota possibility for a matter of time.
According to some authors[12, 11], Sulley offers a extensible, complete, easy to mantain architechture to developour fuzzing work. In this report, we took a complete overview into the sulley fuzzing approach and it was clear thatthe system was easy to extend and mantain; but there is not a strong community around the project, and some of thefeatures after the development of the scapy layer are useless or they require an extra effort, moreover there are someparts of the new scapy layer that has to be re-implemented into the block sulley model.
Scapy offers a whole architechture to handle packets from different kinds including full support for IPv6, TCP,UDP, ICMP, Ethernet and beta support for IEEE 802.15.4 and after the contribution from this report support for6LoWPAN. Sulley does not provide support for anyone of these protocols, so for example if we want to build several
RT n° 7817

22 Bernardini & Lahmadi & Festor
packets composed of 6LoWPAN, IPv6 and ICMP we have to develop the full support for this protocols or at least theparts we need form the procools and there could be problems in the correlation between these layers (compressionparameters). This drawback is reason enough to stop thinking about playing with Sulley, in our case.
Sulley incorporates a special feature to set up callbacks in the middle of a fuzzed packets sequence, so if we wouldpick to play with Sulley we could avoid the introduction of a state machine. Anyway, it seems to be the same than theAutomata but without the theorical name.
Sulley and Scapy are fully developed in Python which means that both are easy to read, and modify.In a brief, we can say that Scapy offers all the features that we need to, and it’s gonna be the picked choice.So, The current main objetive in our fuzzing project is to be able to create different fuzzing scenarios with special
configuration to test 6LoWPAN devices and the protocol itself implementation; and set the basis for testing otherprotocols or applications.
4.2 Approaches to specify interactions between devicesThe approach that has been taken in the fuzzer development has set up some guidelines for the construction of thespecification tool; these approaches differs between them in the coding style. The expert approach provides the basisfor coding the interaction in the Python Language. The other one offers a simple XML language to represent everymessage in the interaction process.
The expert guidelines involved are the following:
1. Draw an Automata Manually
2. Code the Automata in Python
The first step involves the manual development of a State Machine to represent the behavior we want to reproduce.Finally, it’s required to code the State Machine in Python. In this case, Scapy offers a class named Automaton, that
provides all the features we need: states, transitions and debugging functions.Also, a different and less complex guideline is offered:
1. Create an XML file describing the device interactions.
The only one step involves the development of a simple interaction in a XML format described in the Section ??.
4.3 Scenarios’ SpecificationIn the whole document, we have discussed about fuzzing in the smartest way possible taking into account the status ofour devices; but there is still a huge lack, all the fuzzing selection has been randomly, there are not special algorithmsto apply the best matching-criterion: to select the best combination of packets which will most probably generate acrash into the target device.
In a brief, our goal is to replicate interactions between devices to apply fuzzing algorithms in specific places inthe communication process, in a near future; thus, we will be able to find several flaws hidden deeply in the deviceimplementation.
We have discussed about Protocols, now we will have a new term to handle with: Scenario. An Scenario is apacket’s ordered sequence that specify clearly which message should be sent and what are the expected responses.
A message is a target protocol’s packet with a certain predefined name and parameters set to be fuzzed, if it isdesired.
Messages and Scenarios should be constructed exploiting our graphical interface (GUI), or following a strict syntaxthat will be detailed below.
INRIA

Internship report 23
4.3.1 MessagesA message is a binary sequence that should be sent through some network interface to test certain behavior (modify aparameter, wait for a specific answer, etc...) in a device.
In our approach, the messages are usually generated with scapy code but they could be created with any binarysequence. As we have explained in a previous section, Scapy offers a 6LoWPAN layer, developed by us, that could beuseful to create all the messages we need to.
The messages will be contained in a Python file that could be created manually or exploiting the graphical interfacethat we will describe in the Appendix A. Every message should have a name representable in a Python string. Forexample: message1, 1, 124124, "asdk3125325kl><?" are valid possibilities.
A basic message looks like:
ping_msg = IPv6(dst="aaaa::11:22ff:fe33:4455", src="aaaa::1")/ICMPv6EchoRequest()packet = LoWPAN_IPHC(tf=0x0, _hopLimit=64)/ping_msgmessages[’message ping ’] = packet
In this case, we ’ve built a Message called message ping. It has some special fields set and the unset parametersare filled by scapy with default values.
These built messages are grouped in a python file that will look like:
# headers for the packetsfrom scapy.layers.inet6 import IPv6 , ICMPv6EchoRequestfrom scapy.layers.sixlowpan import LoWPAN_IPHC
# Python dictionary that will store all the messagesmessages = {}
### BEGIN MESSAGES DEFINITION
ping_msg = IPv6(dst="aaaa::11:22ff:fe33:4455", src="aaaa::1")/ICMPv6EchoRequest()packet = LoWPAN_IPHC(tf=0x0, _hopLimit=64)/ping_msgmessages[’message ping ’] = packet
We have shown a typical case of packet construction, but there are other scapy features that we could take advantageof them in the packet building process. One of these feature is fuzzing specific fields. We will set the sam field in themessage ping as a random field:
ping_msg = IPv6(dst="aaaa::11:22ff:fe33:4455", src="aaaa::1")/ICMPv6EchoRequest()packet = LoWPAN_IPHC(tf=0x0, _hopLimit=64)/ping_msgpacket.setfieldval(’sam’, packet.getfield_and_val(’sam ’)[0].randval())messages[’message ping ’] = packet
Maybe, an interested reader could ask himself if it’s possible to play this approach with a different protocol, theanswer is clearly yes, and that’s the main benefit of the approach chosen.
Regularly, you could find messages coded in hexadecimal format in the messages file. Often, this is done to beable to write special characters that are not available in the encoding provided by the Python language.
4.3.2 ScenariosA scenario is an ordered messages sequence specifying what should be done with this packets: sent or wait for ananswer through a given interface (i.e. usb0, eth1, wlan15).
RT n° 7817

24 Bernardini & Lahmadi & Festor
The Scenario itself reproduces a communication between devices, specifying the sent messages and the moreimportant properties of the expected reponses (but you could define all the properties).
Also, the scenario’s language allow us to test some properties, to make basic packet manipulation on-the-fly to beable to interact in unknown situations (or context depending situations).
A potential scenario could represent a ping interaction betwen two devices, testing that the value sent in the datafield of the ICMP message is the same in the send and received message. As well as we could modify the destinyaddress on-the-fly to make a more re-usable scenario.
4.3.3 XML Scenario’s Format
A simple XML format has been created to describe interactions based on the 6LoWPAN Protocol behavior. The wholeformat is based into the SIPp XML Format[1].
The XML Structure is really simple: we define a scenario, and this scenario will contain a ordered packets sequenceto be send or to expect to be received.
We have defined 3 different tags for the structure: scenario, recv and recv for the scenario itself, message sendingand message receiving respectively; every tag should have their own attributes and subtags that can be shown below.
Scenario Tag
The scenario tag defines the general properties, main parameters and it contains the packet’s sequence.
• Attributes
– name: scenario’s name
– ignore_router_advertisement: in the 6LoWPAN protocol, usually we could receive Router Advertisementmessage in unexpected ocassions and this could create some problems in your scenario specification.Setting this attribute to true will avoid the possibility of receiving this messages and thus confuse yourscenario.
• Subtags
– sendv: packet to be sent
– recv: packet expected to be received.
In the example placed below, we can see an incomplete scenario called scenario123; it has 5 packets: 3 sendmessages and 2 packets expected to be received. The send and recv tags will be explained below.
<?xml version="1.0" encoding="utf -8"?><scenario name="scenario123">
<send ...></send ><send ...></send ><recv ...></recv ><send ...></send ><recv ...></recv >
</scenario >
Inside scenario, we could find out a message sequence: send and recv tags specifying a message to be sent or aexpecting message to be received respectively.
INRIA

Internship report 25
Send Tag
The send tag specifies a message that should be sent, the message could be based on a previously created messagewith Scapy or our Graphical Interface or it could be created on-the-fly with some hexadecimal code.
The XML Format also offers a feature to decide what type of packet should be sent a 6LoWPAN, IPv6 or IEEE802.15.41, this could be useful to test all the features that the 6LoWPAN protocol provides us.
Moreover, the send tag could contain some subtags to modify the field on-the-fly, providing a value previouslycalculated or certain value that we have set from the command line.
• Attributes
– name: every message must have a name, this name would help us to make special algorithms for specialscenarios. It means we will be able to fuzz with certain criterion the third message in a scenario that hasseven messages and maybe the fifth message with another algorithm, for example.
– message*: previously we have talked about messages, this attribute set which message we want to sendtaking it from the message’s file. It’s not compulsory to send a fixed message we could be alter it on-the-flysetting some subtags.
– packet_type: The message sent could be of different types: 6lowpan, ipv6 or 802.15.4 (the last one, hasnot yet been implemented).
– payload*: this attribute contains a message encoded in hexadecimal format. This message ’ll be builton-the-fly putting the encoded message after decoding over the Ethernet Layer as we have discussed in theprevious chapter depending on the packet type. It works in the same way than the message attribute, but itdoesn’t need the messages file.
• Subtags
– field: We can take a message and impose some changes on-the-fly like setting a parameter with a specificvalue. Some Attributes should be exploited to modify the exact parameter:
* layer: layer where the field we want to modify is placed.
* name: field’s name to be modified.
* value: the value we wish to put into the field.
* type: value’s type (string or int)
.(*) The message and payload are mutually exclusive, one of them should appear in a scenario to be a valid one.In the next example, we can see a simple message sent with a different source address modified on the fly to
bbbb::1. The ping_message must be defined as a regular message as it has been explained in the Section 4.3.
...<send name="1" message="ping_message">
<field name="src" layer="IPv6" value="bbbb::1" type="string" /><\send >...
The layer and field’s name MUST be the same that the Scapy layer provided one.
1IEEE 802.15.4 message sending it’s not available right now
RT n° 7817
26 Bernardini & Lahmadi & Festor
Recv Tag
The recv tag specifies a message that we are waiting for. Actually, this is not completely true: we don’t specify thecomplete expected message, we just expect to receive a message and then we check some propierties of the receivedpacket (like the specific field’s value) and/or we can make some calculations over some received fields. All thoseoperations are defined with test and calc subtags.
• Attributes:
– timeout: specify the timeout for receiving the expected message.
• Subtags
– test:
* layer: layer where the field we want to modify is placed.
* name: field’s name to be modified.
* value: value to be set
* type: value’s type (string or int)
* compare: operation to test if the real value is the way we are expecting.
– calc: sometimes we have to modify some value, to send it in another message, or to check something. Thiscould be done, thanks to this practical field. The options are below:
* assign_to: variable’s name, where the value should be stored.
* field: field’s name to be read.
* layer: layer in which one the field could be found.
* code: operation to apply to the value. %d or %s should keep the value in the original way.
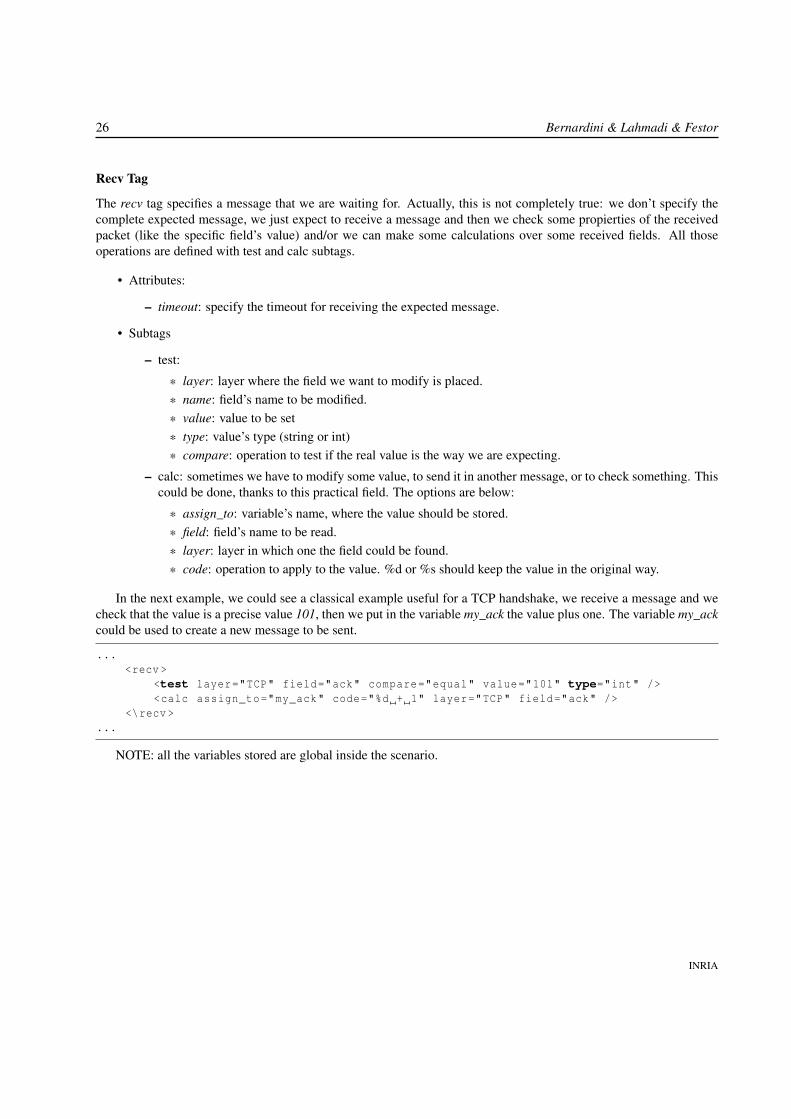
In the next example, we could see a classical example useful for a TCP handshake, we receive a message and wecheck that the value is a precise value 101, then we put in the variable my_ack the value plus one. The variable my_ackcould be used to create a new message to be sent.
...<recv >
<test layer="TCP" field="ack" compare="equal" value="101" type="int" /><calc assign_to="my_ack" code="%d + 1" layer="TCP" field="ack" />
<\recv >...
NOTE: all the variables stored are global inside the scenario.
INRIA

Internship report 27
Chapter 5
Fuzzer Internals
So far, we have built several scenarios that specifies typical interactions between 6LoWPAN devices: copying it fromreal life traces or just following the protocol documentation; a different tool has been developed to execute all thesescenarios, applying fuzzing algorithms over the messages to be send and then executing another scenario just to testthe device state: alive or dead. In the case, the device is dead it means that a security flaw has been found.
The tool is called Executor and can be found as executor.py. A simple executing example:
$ sudo python executor.py -s xmlscenarios/ping.xml -t 3 -n 1000 -e 123 -c xmlscenarios/ping_ipv6.xml -r 3 -x 0.05 -a "cccc::11:22ff:fe33:4455" -a "cccc::1" -frandom_fields_fuzzer --src "02:12:13:14:15:16" --dst "02:11:22:33:44:55"
The previous example, execute 1000 tests over the scenario ping.xml, retrying 3 times every scenario and thenrunning the scenario ipv6_ping to check the device status. The parameter -x 0.05 specifies the corruption ratio forevery sent message and the last one, is -n parameter which specifies how many tests will be runned. The src and dstarguments set the origin and target MAC address.
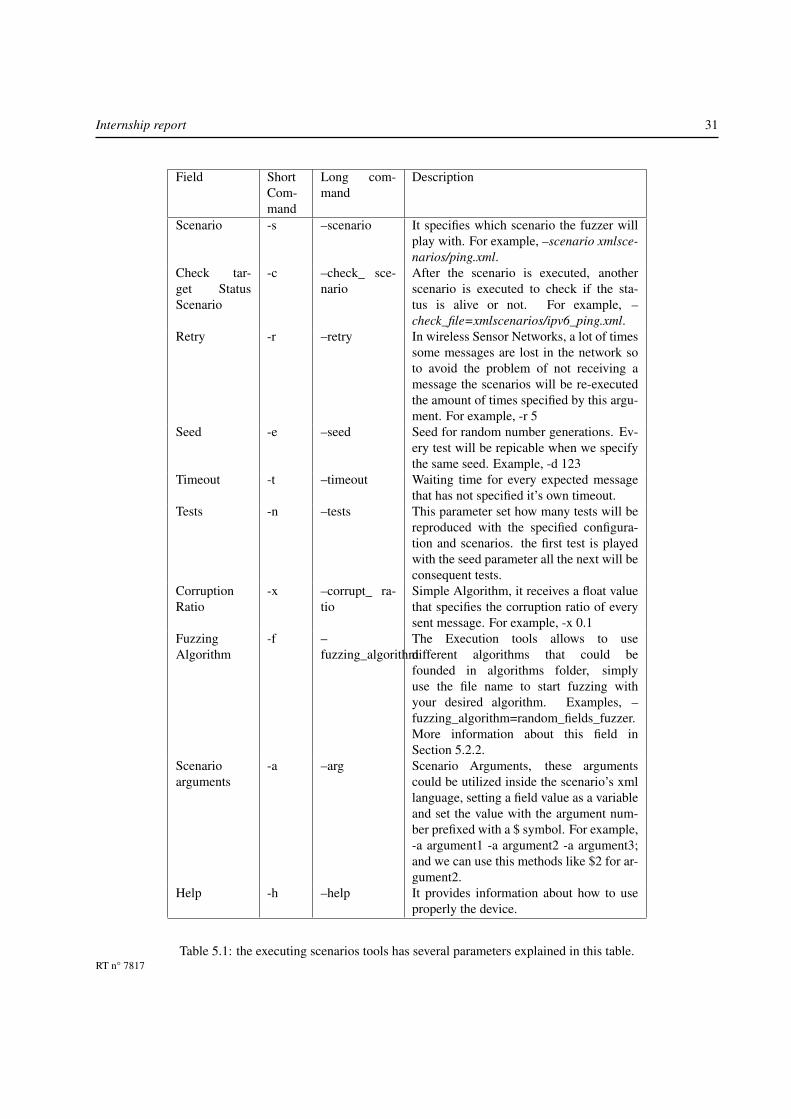
In the Table 5, there is a detailed explanation for every parameter that can be exploited in the execution tool.
5.1 Fuzzer ArchitectureThe developed tool has a special architecture that should be explained to understand correctly the behavior of theFuzzer and in this way, to be able to exploit it at maximum.
The Executor is based on three modules: Sniffer, FilterQueue and the most important the Executor. The Snifferopens the usb interface where our jackdawn is connected and start receiving all the information that cross throughthe interface (every and each send, receive message); the FilterQueue is the shared communication variable, it’s aregular synchronized queue with two main functions: a basic put, and a special get that filters the received messages;finally, the Executor module is the more complex one, it contains all the Parser’s scenarios functions and the scenario’sexecution for both fuzzing the device and then checking its status.
The architecture is depicted in the Figure 5.1.
5.2 Mutation AlgorithmsThere are two kinds of Fuzzing: smart and dumb. The smart approach takes advantage of the knowledge of theprotocol and select certain parameters to apply the best criterion for corrupting the messages; the dump approach justput random values in the places specified.
RT n° 7817

28 Bernardini & Lahmadi & Festor
Figure 5.1: The Executor command line architecture.
The Fuzzer smartness or dumbness is determined by the algorithm played in the fuzzer. In this section, severalalgorithms will be explained and the way to play with them into the execution tool.
5.2.1 Corrupting Bits: Random Bit FuzzerThe first algorithm is the simplest one, it takes a pre-built message and applies corruption to some random bits; thecorruption ratio is determined in the command line. If the protocol has a checksum control, this method is uselessbecause altering some bits after checksum calculation will make the check invalid and the message will be rejected.
The algorithm is really simple, it applies the xor operation to some random values picked depending randomlyin the interval: messages starting bit to some max value (n parameter) or the message ending bit. We can see thealgorithm itself in the next bunch of code:
# This code belongs to utils.py file inside the scapy library.def corrupt_bits(s, p=0.01, n=None):
"""Flip a given percentage or number of bits from a string"""s = array.array("B",str(s))l = len(s)*8if n is None:
n = max(1,int(l*p))for i in random.sample(xrange(l), n):
s[i/8] ^= 1 << (i%8)return s.tostring()
Launching a simple test playing this algorithm is really simple, there is a parameter called corruption ratio. Itshould contain a valid float value between 0.0 and 1.0.
There is a simple example that execute 4000 tests over the ping scenario, corrupting the 10% of the message, wecan replay it in the following way:
$ sudo python executor.py -s xmlscenarios/ping.xml -t 3 -n 4000 -e 800
INRIA

Internship report 29
-c xmlscenarios/ping_ipv6.xml -r 2 -x 0.1 -a "cccc::11:22ff:fe33:4455" -a "cccc::1" -avalor3 -f random_bit_fuzzer --src "02:12:13:14:15:16" --dst "02:11:22:33:44:55"
5.2.2 Corrupting Fields: Random Fields FuzzerThe previous algorithm is really simple, and easy to avoid: even when it’s a powerful way to test protocol/application-s/devices. It’s because of this that a new algorithm is proposed: Random Fields Fuzzer. This algorithm take all thefields from the contained 6LoWPAN headers, pick some of them and insert random values into these fields.
Suppose that we want to send a 6LoWPAN that has header compression. In this case, the message includes theLoWPAN_IPHC scapy layer that has 23 fields. Selecting a corruption ratio of 0.5, the fuzzing algorithm will putrandom values in 12 fields.
The algorithm itself is exposed in the following code snippet:
from scapy.layers.sixlowpan import LoWPAN_IPHC , LoWPANFragmentationFirst ,LoWPANFragmentationSubsequent
def extract_fields(m, layer):try:
return m[layer].fields_descexcept:
return []
layers_to_fuzz = [LoWPAN_IPHC , LoWPANFragmentationFirst , LoWPANFragmentationSubsequent]
fields = []for l in layers_to_fuzz:
fields += extract_fields(scapy_message , l)
if fields != []:k = int(metadata[’corrupt_ratio ’] * len(fields))for f in random.sample(fields , k):
scapy_message.setfieldval(f.name , scapy_message.getfield_and_val(f.name)[0].randval())
return str(scapy_message)
The extract_fields function gets all the fields that a layer contains. A list of layers is proposed to be fuzzed: LoW-PAN_IPHC, LoWPANFragmentationFirst, & LoWPANFragmentationSubsequent. Then, all the fields are extractedwith extract_fields functions and finally, some ratio of fields are fuzzed with the random value provided by the Scapy’sRandVal function.
5.3 Personalized Fuzzing AlgorithmsExecutor tools allows the execution of user-defined algorithms, this allows that our tool would be flexible enough tofuzz any protocol, and ultra-personalized fuzzing criterion.
The Personalized Fuzzing function is a regular function with any desired name, but it should respect some con-straints: the filename should be the same than the function name, it has to respect an interface (to be explained below),the function must be deterministic, it must be developed in Python, and finally the file containing the python scriptshould be stored into the algorithms folder.
RT n° 7817
30 Bernardini & Lahmadi & Festor
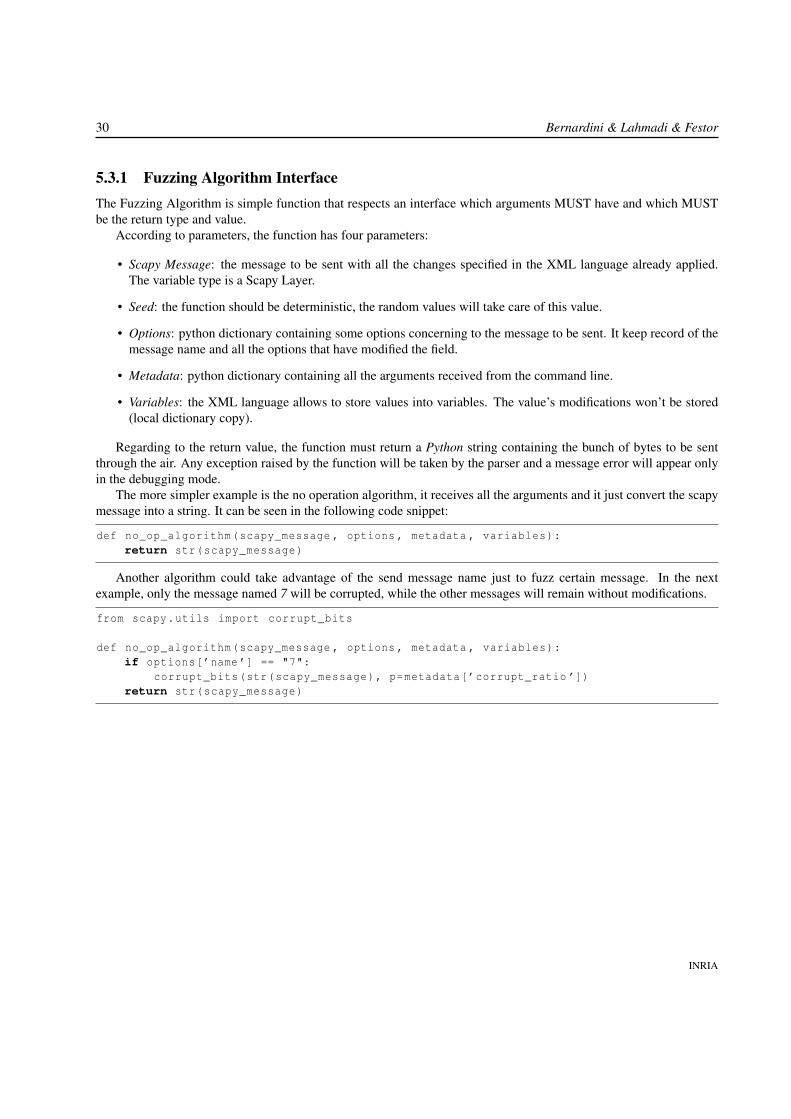
5.3.1 Fuzzing Algorithm InterfaceThe Fuzzing Algorithm is simple function that respects an interface which arguments MUST have and which MUSTbe the return type and value.
According to parameters, the function has four parameters:
• Scapy Message: the message to be sent with all the changes specified in the XML language already applied.The variable type is a Scapy Layer.
• Seed: the function should be deterministic, the random values will take care of this value.
• Options: python dictionary containing some options concerning to the message to be sent. It keep record of themessage name and all the options that have modified the field.
• Metadata: python dictionary containing all the arguments received from the command line.
• Variables: the XML language allows to store values into variables. The value’s modifications won’t be stored(local dictionary copy).
Regarding to the return value, the function must return a Python string containing the bunch of bytes to be sentthrough the air. Any exception raised by the function will be taken by the parser and a message error will appear onlyin the debugging mode.
The more simpler example is the no operation algorithm, it receives all the arguments and it just convert the scapymessage into a string. It can be seen in the following code snippet:
def no_op_algorithm(scapy_message , options , metadata , variables):return str(scapy_message)
Another algorithm could take advantage of the send message name just to fuzz certain message. In the nextexample, only the message named 7 will be corrupted, while the other messages will remain without modifications.
from scapy.utils import corrupt_bits
def no_op_algorithm(scapy_message , options , metadata , variables):if options[’name ’] == "7":
corrupt_bits(str(scapy_message), p=metadata[’corrupt_ratio ’])return str(scapy_message)
INRIA
Internship report 31
Field ShortCom-mand
Long com-mand
Description
Scenario -s –scenario It specifies which scenario the fuzzer willplay with. For example, –scenario xmlsce-narios/ping.xml.
Check tar-get StatusScenario
-c –check_ sce-nario
After the scenario is executed, anotherscenario is executed to check if the sta-tus is alive or not. For example, –check_file=xmlscenarios/ipv6_ping.xml.
Retry -r –retry In wireless Sensor Networks, a lot of timessome messages are lost in the network soto avoid the problem of not receiving amessage the scenarios will be re-executedthe amount of times specified by this argu-ment. For example, -r 5
Seed -e –seed Seed for random number generations. Ev-ery test will be repicable when we specifythe same seed. Example, -d 123
Timeout -t –timeout Waiting time for every expected messagethat has not specified it’s own timeout.
Tests -n –tests This parameter set how many tests will bereproduced with the specified configura-tion and scenarios. the first test is playedwith the seed parameter all the next will beconsequent tests.
CorruptionRatio
-x –corrupt_ ra-tio
Simple Algorithm, it receives a float valuethat specifies the corruption ratio of everysent message. For example, -x 0.1
FuzzingAlgorithm
-f –fuzzing_algorithm
The Execution tools allows to usedifferent algorithms that could befounded in algorithms folder, simplyuse the file name to start fuzzing withyour desired algorithm. Examples, –fuzzing_algorithm=random_fields_fuzzer.More information about this field inSection 5.2.2.
Scenarioarguments
-a –arg Scenario Arguments, these argumentscould be utilized inside the scenario’s xmllanguage, setting a field value as a variableand set the value with the argument num-ber prefixed with a $ symbol. For example,-a argument1 -a argument2 -a argument3;and we can use this methods like $2 for ar-gument2.
Help -h –help It provides information about how to useproperly the device.
Table 5.1: the executing scenarios tools has several parameters explained in this table.RT n° 7817

32 Bernardini & Lahmadi & Festor
INRIA

Internship report 33
Chapter 6
Conclusions & future work
In the Fuzzer development process many contributions have been made to accomplish our goal and as well someconclusions could be taken, even though, there was some work that could be finished and some ideas that couldn’t beimplemented yet. In this chapter, the conclusions are described in the Section 6.1 and the Future Work to accomplishin the near future in the Section 6.2.
6.1 ConclusionsAt the earlier stage of this work, a Scapy layer was developed to handle in an easy way the 6LoWPAN packets. In themean time, a patch was developed for the Dot15d4 Scapy Layer (IEEE 802.15.4) to has all the features desired for our6LoWPAN Scapy Layer. But that’s not all, a graphical interface was built to facilitate the 6LoWPAN message creation.
In a later etage, a patch for the Contiki Operative System was created to allow the injection of personalized mes-sages into a 6LoWPAN network.
Following this step, a a new XML language was defined to replicate device interactions; defining special tagsto combine easiness-to-read and all the features that we could need; as well, some common interactinos has beendeveloped to take as an example for the new scenario’s building or just for testing basic behavior.
The next step has involved the fuzzer itself development, it’s composed of the creation of personalized algorithmsfor applying custimizable fuzzing criterion and features for replicate the previously built scenarios.
All the contributions have been made possible that currently it’s possible to test any 6LoWPAN device or applica-tion; moreover, the process to fuzz a new protocol has been highly simplified.
Finally, some basic experiments have been developed to test a Contiki’s 6LoWPAN implementation with the basicsscenarios and a bug was found after 2000 tests. This is a clear aknowledgment that fuzzing process works.
6.2 Future WorkThe time is not unlimited and sometimes there are some ideas that couldn’t be exploited. In this repport, this situationhas happened and there some ideas or limitations that need a wider and extensive work.
The Contiki’s personalized firmware allows to insert 6LoWPAN messagees into a 6LoWPAN network but we don’thave control over the whole possibilities of the protocol; because some compression rules depends on the underlayerIEEE 802.15.4. A Contiki driver should be modified to inject 802.15.4 messges into a 802.15.4 network to be able toexploit all the 6LoWPAN features.
More experiments must be developed in order to find more bugs or flaws in the Contiki OS; other Operative Systemwith 6LoWPAN implementations shall be fuzzed.
RT n° 7817

34 Bernardini & Lahmadi & Festor
Currently, on the fuzzer crashed the Contiki device, it stops working because there is not a way to reinitialize thedevice by software.
Two Algorithms has just been developed; other more complex algorithms should be proposed to simplify thefuzzing process.
Finally and may be the more important is to try to exploit the bugs founded and check if it’s possible to change thedevice behavior.
INRIA

Internship report 35
Appendix A
Messages Building Tool
A special tool has been created to make easier the scenario’s construction step (building.py). This utility allows you tocreate special packets taking as payload any hexadecimal string you want to (maybe a correct one like a IPv6 messageor a fake one with any crafted bits you want to), selecting if you desire compression or not and which parametersvalues should every field have, whether this is a fragmentated message and the parameters to fuzz in his header. Thisutility automatizes the generation of Python code previously explained for the messages’ generation. In other words,it will help you in the development of new messages not in the development of new scenarios files.
The interface appeareance can be seen into the Fig C.2. As we can see in the screenshot there are 3 columns withdifferent purposes. The first one, contains a Checkbox that enable/disable the IP Header Compression feature and alist with all the fields from header compression with a special field to set any value we want to set into the field. Thenext column details if the packet is a fragmentation message or not and also it shows fields and their potential value.The last column contains the message payload, the name for the new message and two button: the first one to generatethe message without fragmentation; the other one to try to fragmentate the generated message.
When the option Generate Fragmentated Messages is picked, the messages name is determined according to thevalue filled into the Scenario Name, appending a number depending on which part of the message it is.
GUI Limitations
The message building tool allows to simplify the creation of new 6LoWPAN messages; but as any GUI it is not asflexible as the code generated could be. So, our utility has some limitations which are important to be known to avoidany possible problems.
The first limitation is that our GUI does not check if there are other messages with the same name; so, if a previousmessage exists when the new code with the same name is generated it will be appended after the other one and whenwe execute the python code, Python will consider the last message definition.
Some other limitations could be reached but they could be avoided or solved playing with Python code.
RT n° 7817

36 Bernardini & Lahmadi & Festor
Figure A.1: Appeareance of 6lowpan Packet’s Construction Graphical Interface.
INRIA

Internship report 37
Appendix B
Stateless and Stateful Scenarios
Building scenarios is not an easy task, it requires a well-and-deep-knowledge of the target protocol. As we havealready discuss, our fuzzing target is the 6LoWPAN protocol, in this protocol some of the messages depend of thecurrent state of the device and other messages can be replied without caring about the previously sent messages.
This is when two different concepts are born: stateless and stateful scenarios. The stateless scenarios are scenariosthat can be launched in any state, a fixed configuration is set and all the messages are sent under this configuration, itmeans we”ll be testing just some compression/decompression rules. Stateful scenarios requires a proper configurationand their behavior is different depending on the previously sent messages.
Most of the 6LoWPAN messages are stateless, after setting the prefix address on a device, if we just send 6LoW-PAN messages we can send all the messages in any order and they will work. But when we are playing with NodeDiscovery messages, we should care about the order sequence in our messages: if we change the source address andthen we send a message to the older address it won’t ever be received but in the inverse order, the message will bereceived without any problem.
The Stateless section contains tutorials about how to create basic messages with a previously set configuration;The Stateful section contains different tutorials that create different scenarios where we care about the order and wecan test more complex situations.
B.1 Stateless ScenariosIn this section, we will create a really basic scenario for sending a ping message and waiting for a valid response; Theother scenario building will deal about the development of different messages with different configuration parameters:the object to fuzz here is just to test the decompression rules implemented in the different devices.
B.1.1 Basic 6LoWPANThis basic example intends to show how a basic message should be created with this architecture and how the fieldscan be changed on-the-fly at the scenario’s definition.
First, a basic message should be created (we have already discuss about the way to proper add new messagespreviously):
messages[’basic_6lowpan ’] = LoWPAN_IPHC()/IPv6()
The message added is just a 6LoWPAN packet that applies compression over an empty IPv6 message.Now, we should create the scenario itself: in this case, some values should be modified on-the-fly:
RT n° 7817

38 Bernardini & Lahmadi & Festor
<?xml version="1.0" encoding="utf -8"?><scenario name="basic_6lowpan">
<send name="1" message="basic_6lowpan"><field name="tf" layer="LoWPAN_IPHC" value="1" type="int" /><field name="dac" layer="LoWPAN_IPHC" value="1" type="int" />
</send ></scenario >
In the previous example, two values ’ve been changed on the fly: tf & dac fields.
B.1.2 Ping ScenarioThe ping message is a typical control packet sent through the nodes to determine latency, liveness and more properties.It’s also a basic packet that could be useful to explain how the system works and of-course, we could take advantageof its simplicity.
For sending a basic ping message, we have to create a basic ping message into our messages file. This messagesare the basic request and reply. In the following example, we can see basic_ping_echo and basic_ping_reply:
from scapy.layers.inet6 import IPv6 , ICMPv6EchoRequest , ICMPv6EchoReply
messages[’basic_ping_echo ’] = LoWPAN_IPHC(tf=0x03, cid=True , sac=True , sam=0x2, m=False , _nhField=0x3a)/IPv6(dst="aaaa::11:22ff:fe33:4455", src="aaaa::1", hlim=128)/ICMPv6EchoRequest(id=0x1540 , seq=0x01, data="hola , hola , hola")
Then we should create a new scenario to represent the interaction between these messages. In the following bunchof code, you could see the basic interaction the first echo request is sent with some specific id, sequence & data thenwe receive an answer and this answer should have the same values for this fields as ICMP specification explains.
<?xml version="1.0" encoding="utf -8"?><scenario name="basic_ping">
<send name="1" message="basic_ping_echo"><field name="id" layer="ICMPv6EchoRequest" value="90" type="int" /><field name="seq" layer="ICMPv6EchoRequest" value="152" type="int" /><field name="data" layer="ICMPv6EchoRequest" value="hola , hola , hola" type="
string" /></send ><recv >
<!-- Check if some value is the specified --><test layer="ICMPv6EchoReply" field="id" compare="equal" value="90" type="int"
/><test layer="ICMPv6EchoReply" field="seq" compare="equal" value="152" type="
int" /><test layer="ICMPv6EchoReply" field="data" compare="equal" value="hola , hola ,
hola" type="string" /></recv >
</scenario >
B.1.3 Basic FragmentationPreviously, we have talked about the 6LoWPAN Fragmentation capabilities. In this subsection, we will create a basicTCP message with the acknowledge bit enabled; so, when it’s finally sent a simple reponse is received.
INRIA

Internship report 39
We have to create the following Scapy messages in the message’s file:
messages[’frag1 ’] = LoWPANFragmentationFirst(datagramSize=160, datagramTag=0x30)/("\x7a\xe7\x00\x06\x00\x01\x03\xe8\x07\xd0\x00\x00\x00\x00\x00\x00\x00\x00\x50\x10\x20\x00\x0a\x0b\x00\x00" + ("\x41"*28))
messages[’frag2 ’] = LoWPANFragmentationSubsequent(datagramSize=160, datagramTag=0x30,datagramOffset =88/8)/("\x41"*72)
And the scenario will send the two messages and after it will check if the destination port is the same that we havespecified and the ack value is 1.
<?xml version="1.0" encoding="utf -8"?><scenario name="basic_frag" ignore_router_advertisement="true">
<send name="1" message="frag1" packet_type="6lowpan"></send ><send name="2" message="frag2" packet_type="6lowpan"></send ><recv >
<!-- Check if some value is the specified --><test layer="TCP" field="dport" compare="equal" value="1000" type="int" /><test layer="TCP" field="ack" compare="equal" value="1" type="int" />
</recv ></scenario >
B.1.4 TCP Message over 6LoWPANFor the purpose of fuzzing strictly the 6LoWPAN protocol, sending complicated TCP messages it’s not useful. But inthis way, we can prove that the purpose is extensible to fuzz other protocols.
In this case, the example shows how to make a typical handshake needed for establish any tcp transmission flow.The messages that we need to set up:
from scapy.layers.inet import TCPmessages[’basic_tcp ’] = IPv6()/TCP()
The handshake scenario:
<?xml version="1.0" encoding="utf -8"?><scenario name="TCP_handshake">
<send name="1" message="basic_tcp"><field name="sport" layer="TCP" value="1050" type="int" /><field name="dport" layer="TCP" value="80" type="int" /><field name="flags" layer="TCP" value="S" type="string" /><field name="seq" layer="TCP" value="100" type="int" />
</send ><recv >
<!-- Check if some value is the specified --><test layer="TCP" field="ack" compare="equal" value="101" type="int" /><test layer="TCP" field="flags" compare="equal" value="SA" type="string" /><calc assign_to="my_ack" code="%d + 1" layer="TCP" field="ack" />
</recv ><send name="2" message="basic_tcp">
<field name="sport" layer="TCP" value="1050" type="int" /><field name="dport" layer="TCP" value="80" type="int" />
RT n° 7817

40 Bernardini & Lahmadi & Festor
<field name="flags" layer="TCP" value="PA" type="string" /><field name="ack" layer="TCP" value="101" type="int" /> <!-- Seq number + 1
--><field name="seq" layer="TCP" value_from="my_ack" type="int"/>
</send ></scenario >
B.2 Stateful ScenariosPreviously, we have been dealing with different scenarios where we didn’t care about the state of the device we haveassumed that it has a certain configuration and this is never changed.
Right now, we will change the approach taking advantage of the device configuration and the potential mistakesthat could occur when the settings are modified.
B.2.1 Set a new Prefix AddressIn the first example, we deal with the more basic configuration setting which is adding a new prefix address. In thiscase a control message should be sent to the device.
First of all, a new message should be added to the mesdsages file.
messages[’prefix_addr ’] = LoWPAN_IPHC()/IPv6("\x60\x00\x00\x00\x00\x40\x3a\xff\xfe\x80\x00\x00\x00\x00\x00\x00\x00\x12\x13\xff\xfe\x14\x15\x16\xff\x02\x00\x00\x00\x00\x00\x00\x00\x00\x00\x00\x00\x00\x00\x01\x86\x00\x32\x09\x80\x00\x00\xc8\x00\x05\x7e\x40\x00\x00\x00\x00\x03\x04\x40\xc0\xff\xff\xff\xff\xff\xff\xff\xff\x00\x00\x00\x00\xaa\xaa\x00\x00\x00\x00\x00\x00\x00\x00\x00\x00\x00\x00\x00\x00\x05\x01\x00\x00\x00\x00\x05\x00\x01\x01\x02\x12\x13\x14\x15\x16")
After we create our own scenario, in this case the basic workflow is an original configuration is set into the device,then we alter this configuration changing the address prefix several times and finally, setting the original address. Whenthe scenario has been finished, the address should be the original if it’s not there is a problem or the last message hasnot arrived to the device.
<?xml version="1.0" encoding="utf -8"?><scenario name="prefix_set_addr">
<send name="1" message="prefix_addr"><field name="prefix" layer="ICMPv6NDOptPrefixInfo" value="bbbb::" type="string
" /></send ><send name="2" message="prefix_addr">
<field name="prefix" layer="ICMPv6NDOptPrefixInfo" value="aaaa::" type="string" />
</send ></scenario >
INRIA

Internship report 41
Appendix C
How to import Real Messages to OurFuzzing Tool
In this appendix, we provide a tutorial to explain how to import real messages from wireshark to our graphical interfacein a simple process.
Besides than the whole fuzzing platform, you need a cutting-edge wireshark version (local tests have been devel-oped running the 1.5.2-SVN-36643 version). This tutorial suppose that the end-user knows how to deal with wireshark,and understand how to capture real traffic or open pcap files.
C.1 Importing messages from WiresharkOpen the wireshark application and load your PCAP file with the traffic you want to replicate.
Select the message you want to, and right-click over the Internet Protocol Version 6 item; a new menu will appear,there you have to select Copy / Bytes / Hex Stream
Then, open our building graphical interface...
# Change location to the folder where our fuzzing tools are placed into.$ cd fuzzer$ python building.py
In our graphical interface, you can select all the option you want for your 6LoWPAN packet. In the payload field,right click and paste the hex stream extracted from wireshark.
Finally, select a nice name (ping_msg should work) for your message and click into the Generate button. At thismoment, the graphical interface should look like we can see in the Figure C.2. Now, your message could be finded inthe messages file and this means that you could use it in a xml scenario.
Note: in wireshark you have to repeat the process and select the protocols inside the IPv6 layer (in the Figure C.1you should repeat the process with the Internet Control Message Protocol v6 item.
C.2 Creating and executing a simple scenarioNow, the basic message resides into our message’s file. We are able to play with it in any scenario. In this section, thegoal is to create a basic scenario to send the message over the network.
The scenario will look like:
RT n° 7817

42 Bernardini & Lahmadi & Festor
Figure C.1: Extracting a packet from Wireshark.
<?xml version="1.0" encoding="utf -8"?><scenario name="tutorial">
<send name="1" message="ping_msg" packet_type="6lowpan"></send >
The scenario is really simple, we can see the scenario’s name tutorial, and inside the scenario, a simple messageto be send ping_msg. This message is the one, we have created in the previous section.
Now, there is only a missing step: to execute the scenario. To do this, we have to run the utility executor.py:
$ python executor.py -s xmlscenarios/tutorial.xml -t 3 -n 1 -e 1020 -c xmlscenarios/ping_ipv6.xml -r 1 -x 0.0 -f random_fields_fuzzer --src "02:12:13:14:15:16" --dst "02:11:22:33:44:55"
INRIA
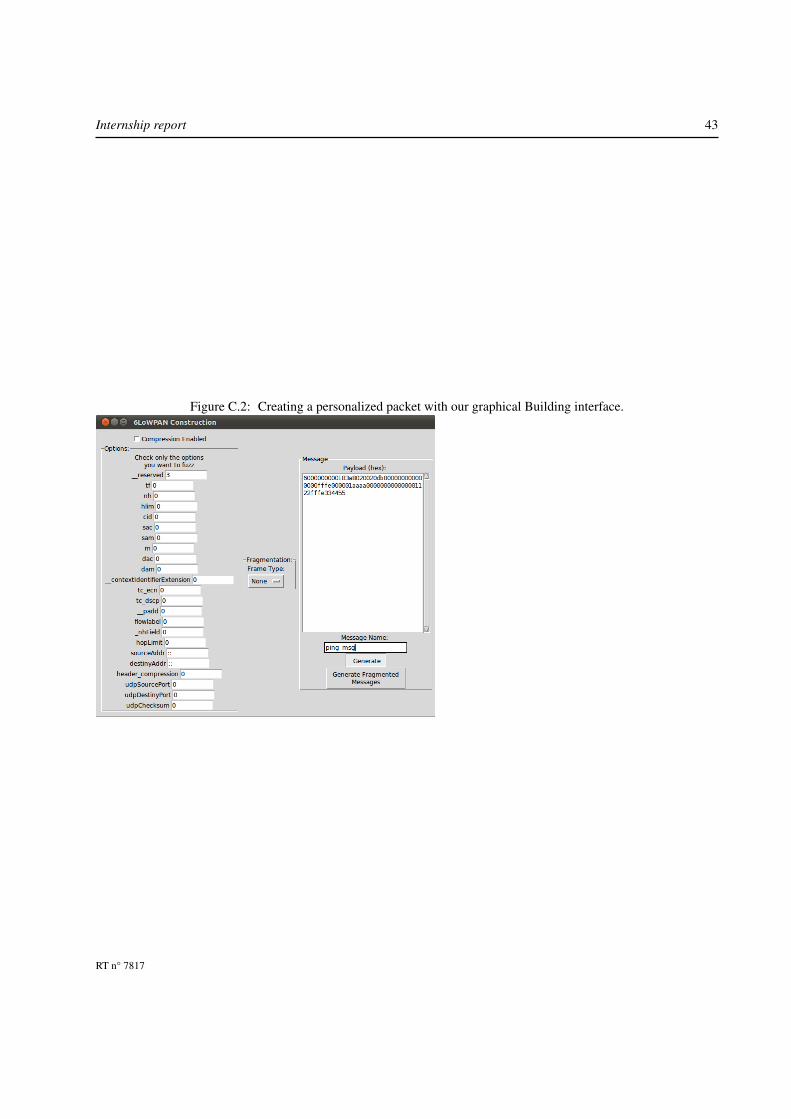
Internship report 43
Figure C.2: Creating a personalized packet with our graphical Building interface.
RT n° 7817

44 Bernardini & Lahmadi & Festor
INRIA

Internship report 45
Appendix D
How-To Install the Fuzzer
To play with any utility there is a annoying procedure to follow; in this case as our effort was put in taking advantageof community’s work there is a lot of configuration to make but the aim is to try to simplify it as much as possible.The procedure is divided into three sections: the Section D.1 explains how to install the personalized firmware intothe device; the next Section D.2 explains how to install the fuzzer and previosly how to install all the dependencies;finally, it’s explained the installation guide for the graphical interface in the Section D.3.
D.1 Flashing, Configuring the AVR Razor USB StickThe Contiki Operative System offers a bunch of tutorials that can be found in their distribution package. The targettutorial is called "Running Contiki with uIPv6 and SICSLowpan support on ATMEN RAVEN Hardware" and itcan be found in the doc folder of the Contiki’s distribution package.
This tutorial explains in a colorful step-by-step guide how to flash the firmware on all the AVR devices. In ourcase, you must follow the guide but utilizing the firmware provided in the fuzzer/firmware folder in our distributionpackage.
D.2 Install the FuzzerThe Fuzzer itself is distributed as an gz compressed file, but before decompressing it; it’s required to install somedependencies.
The environment played into this tutorial is Ubuntu 11.04.The first dependency is the Python 2.6 script language:
$ sudo apt-get install python
In the following stage, the Scapy layer should be installed. As the module is in development stage, it can be foundin Scapy Community Repository. Scapy repository uses Mercurial[8] for version control.
# install mercurialsudo apt-get install mercurial# get the repositoryhg clone http://hg.secdev.org/scapy -com/# install itcd scapy -comsudo python setup.py install
RT n° 7817

46 Bernardini & Lahmadi & Festor
After installing the module, there are some dependencies that must be installed.
Install python -pypcap
After this, you have to decompress the tar.gz file and place yourself into the fuzzer folder and simply execute thescenario or run the test you desire:
sudo python executor.py -s xmlscenarios/ping.xml -t 3 -n 10 -e 1 -c xmlscenarios/ping_ipv6.xml -r 2 -x 0.1 -a "cccc::11:22ff:fe33:4455" -a "cccc::1" -frandom_fields_fuzzer --src "02:12:13:14:15:16" --dst "02:11:22:33:44:55"
D.3 Install the Graphical InterfaceThere is a simple command to execute in a Ubuntu Environment:
sudo apt-get install python -tk
After that, you only have to place yourself in the fuzzer folder and execute the following command:
$ python building.py
INRIA

Internship report 47
Bibliography
[1] Sipp.
[2] P. BIONDI. Network packet manipulation with scapy, 2005.
[3] Adam Dunkels, Björn Grönvall, and Thiemo Voigt. Contiki - a lightweight and flexible operating system for tinynetworked sensors. In Proceedings of the First IEEE Workshop on Embedded Networked Sensors (Emnets-I),Tampa, Florida, USA, November 2004.
[4] IETF Group. Compression format for ipv6 datagrams in 6lowpan networks, 2010.
[5] IETF Working Group. Rfc4944: Transmission of ipv6 packets over ieee 802.15.4 networks.
[6] IETF Working Group. Compression format for ipv6 datagrams in low power and lossy networks (6lowpan),2011.
[7] The IEEE 802.15 Working Groups. Wireless medium access control (mac) and physical layer (phy) specificationsfor low-rate wireless personal area networks (lr-wpans), 2006.
[8] M. Mackall and S. Consulting. Towards a better scm: Revlog and mercurial. In Linux Symposium, page 83.Citeseer.
[9] M. Pilgrim. Dive Into Python. Createspace, 2009.
[10] Zach Shelby and Carsten Bormann. 6LoWPAN: The Wireless Embedded Internet. Wiley Publishing, 2010.
[11] Michael Sutton, Adam Greene, and Pedram Amini. Fuzzing: Brute Force Vulnerability Discovery. Addison-Wesley Professional, 2007.
[12] A. Takanen, J. DeMott, and C. Miller. Fuzzing for software security testing and quality assurance. Artech Houseinformation security and privacy series. Artech House, 2008.
RT n° 7817

Centre de recherche INRIA Nancy – Grand EstLORIA, Technopôle de Nancy-Brabois - Campus scientifique
615, rue du Jardin Botanique - BP 101 - 54602 Villers-lès-Nancy Cedex (France)
Centre de recherche INRIA Bordeaux – Sud Ouest : Domaine Universitaire - 351, cours de la Libération - 33405 Talence CedexCentre de recherche INRIA Grenoble – Rhône-Alpes : 655, avenue de l’Europe - 38334 Montbonnot Saint-Ismier
Centre de recherche INRIA Lille – Nord Europe : Parc Scientifique de la Haute Borne - 40, avenue Halley - 59650 Villeneuve d’AscqCentre de recherche INRIA Paris – Rocquencourt : Domaine de Voluceau - Rocquencourt - BP 105 - 78153 Le Chesnay CedexCentre de recherche INRIA Rennes – Bretagne Atlantique : IRISA, Campus universitaire de Beaulieu - 35042 Rennes Cedex
Centre de recherche INRIA Saclay – Île-de-France : Parc Orsay Université - ZAC des Vignes : 4, rue Jacques Monod - 91893 Orsay CedexCentre de recherche INRIA Sophia Antipolis – Méditerranée : 2004, route des Lucioles - BP 93 - 06902 Sophia Antipolis Cedex
ÉditeurINRIA - Domaine de Voluceau - Rocquencourt, BP 105 - 78153 Le Chesnay Cedex (France)
http://www.inria.frISSN 0249-0803