dji phantom 2 vision plus gimbal yaw arm replacement · dji phantom 2 vision plus gimbal yaw arm...
TRANSCRIPT
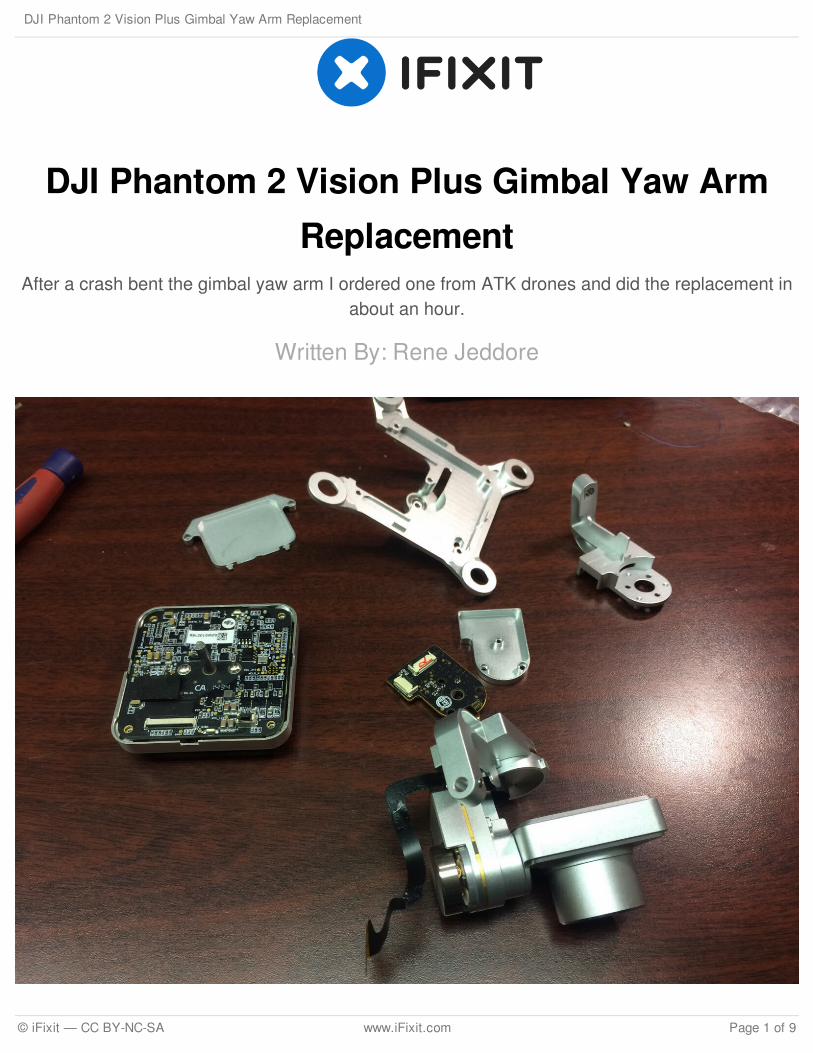
DJI Phantom 2 Vision Plus Gimbal Yaw ArmReplacement
After a crash bent the gimbal yaw arm I ordered one from ATK drones and did the replacement inabout an hour.
Written By: Rene Jeddore
DJI Phantom 2 Vision Plus Gimbal Yaw Arm Replacement
© iFixit — CC BY-NC-SA www.iFixit.com Page 1 of 9
INTRODUCTION
This guide will go through the steps I took to remove the gimbal and camera and then dismantle it toreplace the gimbal yaw arm.
The process looked to be difficult but once I got into it it proved to be relatively easy.
TOOLS:Phillips #0 Screwdriver (1)
Hex/ Allen wrench (1)
PARTS:Gimbal Yaw Arm from ATK Drones (1)
DJI Phantom 2 Vision Plus Gimbal Yaw Arm Replacement
© iFixit — CC BY-NC-SA www.iFixit.com Page 2 of 9
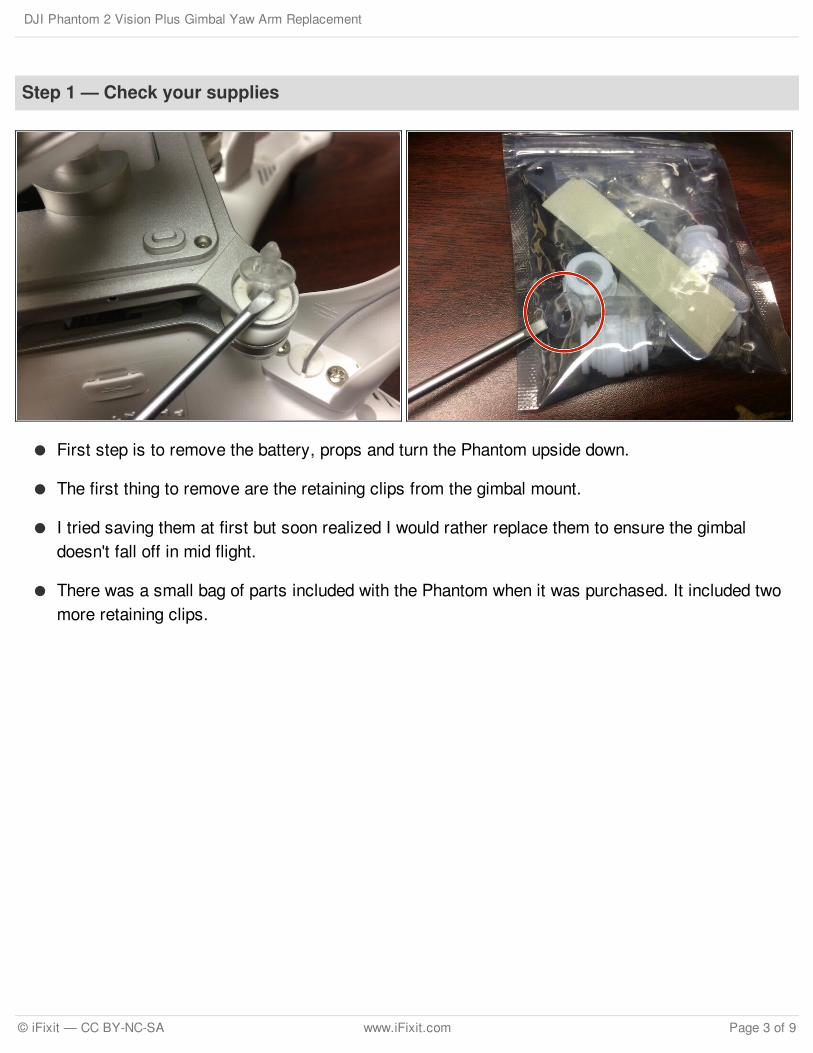
Step 1 — Check your supplies
First step is to remove the battery, props and turn the Phantom upside down.
The first thing to remove are the retaining clips from the gimbal mount.
I tried saving them at first but soon realized I would rather replace them to ensure the gimbaldoesn't fall off in mid flight.
There was a small bag of parts included with the Phantom when it was purchased. It included twomore retaining clips.
DJI Phantom 2 Vision Plus Gimbal Yaw Arm Replacement
© iFixit — CC BY-NC-SA www.iFixit.com Page 3 of 9
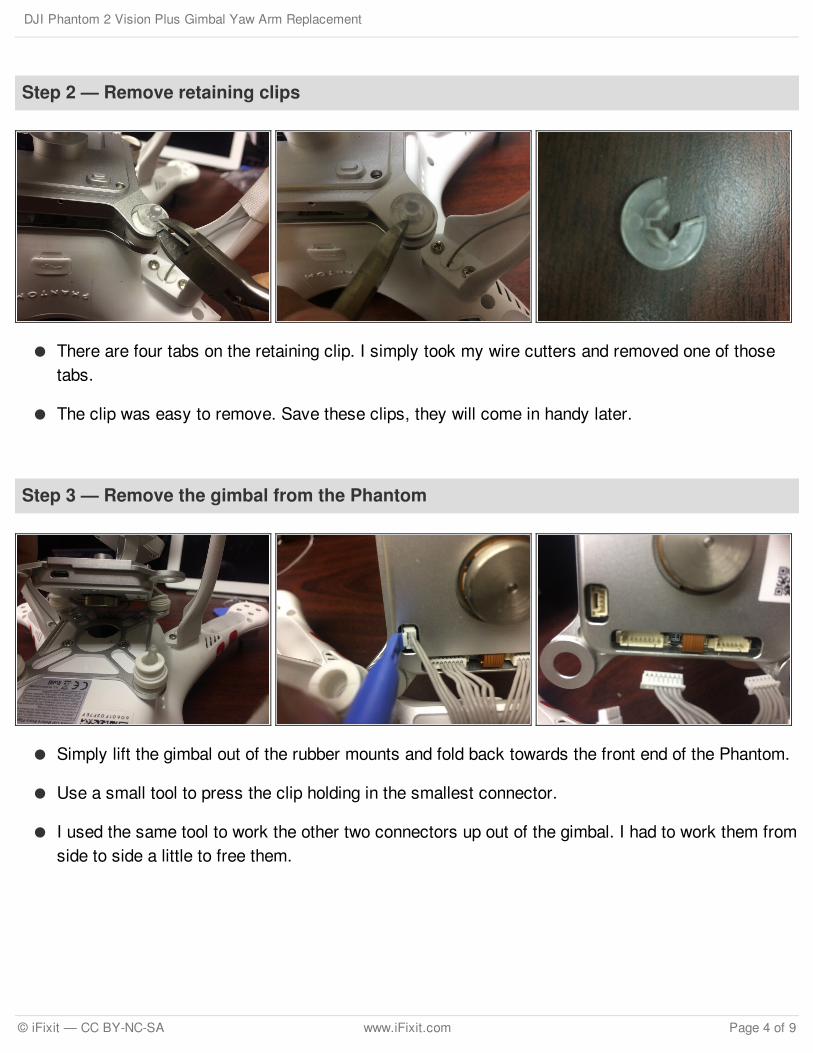
Step 2 — Remove retaining clips
There are four tabs on the retaining clip. I simply took my wire cutters and removed one of thosetabs.
The clip was easy to remove. Save these clips, they will come in handy later.
Step 3 — Remove the gimbal from the Phantom
Simply lift the gimbal out of the rubber mounts and fold back towards the front end of the Phantom.
Use a small tool to press the clip holding in the smallest connector.
I used the same tool to work the other two connectors up out of the gimbal. I had to work them fromside to side a little to free them.
DJI Phantom 2 Vision Plus Gimbal Yaw Arm Replacement
© iFixit — CC BY-NC-SA www.iFixit.com Page 4 of 9
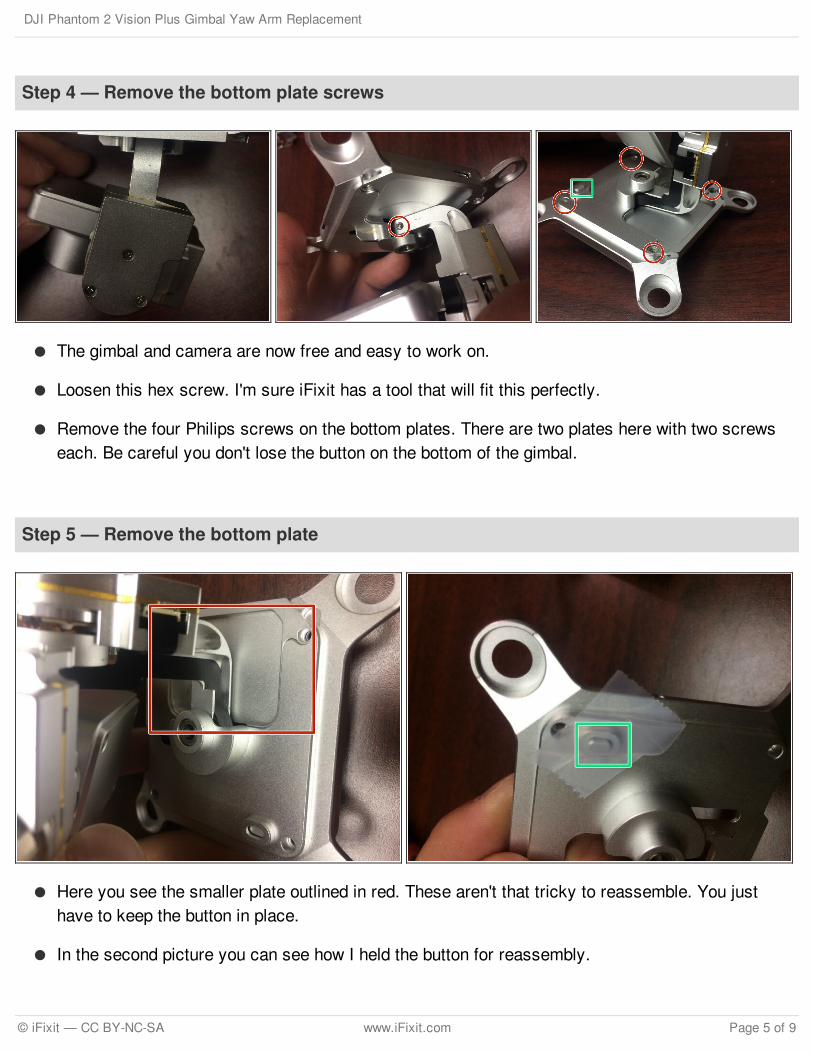
Step 4 — Remove the bottom plate screws
The gimbal and camera are now free and easy to work on.
Loosen this hex screw. I'm sure iFixit has a tool that will fit this perfectly.
Remove the four Philips screws on the bottom plates. There are two plates here with two screwseach. Be careful you don't lose the button on the bottom of the gimbal.
Step 5 — Remove the bottom plate
Here you see the smaller plate outlined in red. These aren't that tricky to reassemble. You justhave to keep the button in place.
In the second picture you can see how I held the button for reassembly.
DJI Phantom 2 Vision Plus Gimbal Yaw Arm Replacement
© iFixit — CC BY-NC-SA www.iFixit.com Page 5 of 9
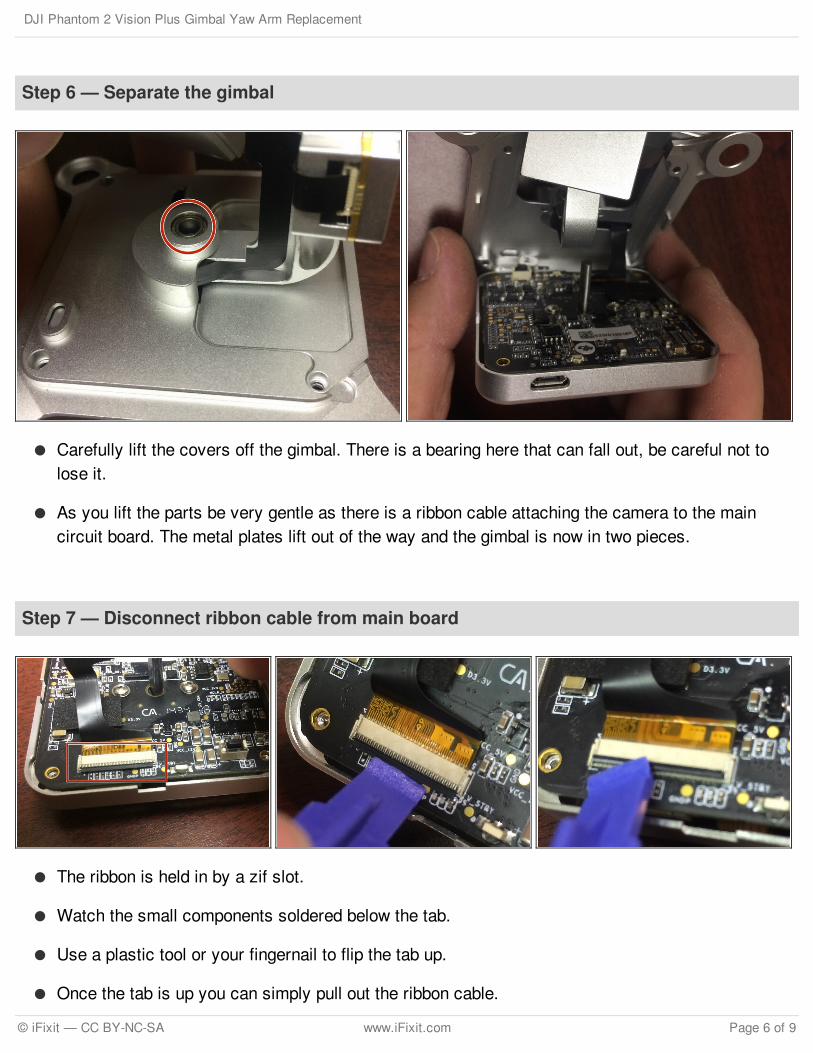
Step 6 — Separate the gimbal
Carefully lift the covers off the gimbal. There is a bearing here that can fall out, be careful not tolose it.
As you lift the parts be very gentle as there is a ribbon cable attaching the camera to the maincircuit board. The metal plates lift out of the way and the gimbal is now in two pieces.
Step 7 — Disconnect ribbon cable from main board
The ribbon is held in by a zif slot.
Watch the small components soldered below the tab.
Use a plastic tool or your fingernail to flip the tab up.
Once the tab is up you can simply pull out the ribbon cable.
DJI Phantom 2 Vision Plus Gimbal Yaw Arm Replacement
© iFixit — CC BY-NC-SA www.iFixit.com Page 6 of 9
Step 8 — Rear cover and circuit board
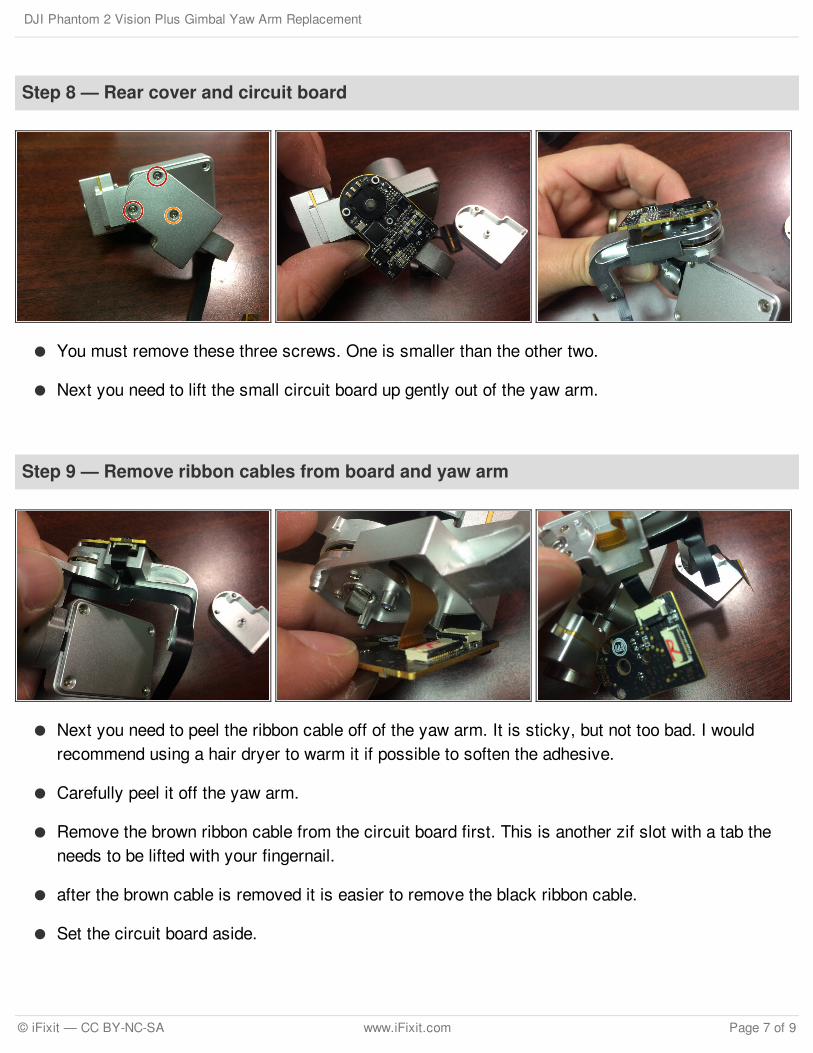
You must remove these three screws. One is smaller than the other two.
Next you need to lift the small circuit board up gently out of the yaw arm.
Step 9 — Remove ribbon cables from board and yaw arm
Next you need to peel the ribbon cable off of the yaw arm. It is sticky, but not too bad. I wouldrecommend using a hair dryer to warm it if possible to soften the adhesive.
Carefully peel it off the yaw arm.
Remove the brown ribbon cable from the circuit board first. This is another zif slot with a tab theneeds to be lifted with your fingernail.
after the brown cable is removed it is easier to remove the black ribbon cable.
Set the circuit board aside.
DJI Phantom 2 Vision Plus Gimbal Yaw Arm Replacement
© iFixit — CC BY-NC-SA www.iFixit.com Page 7 of 9
Step 10 — Remove yaw arm!
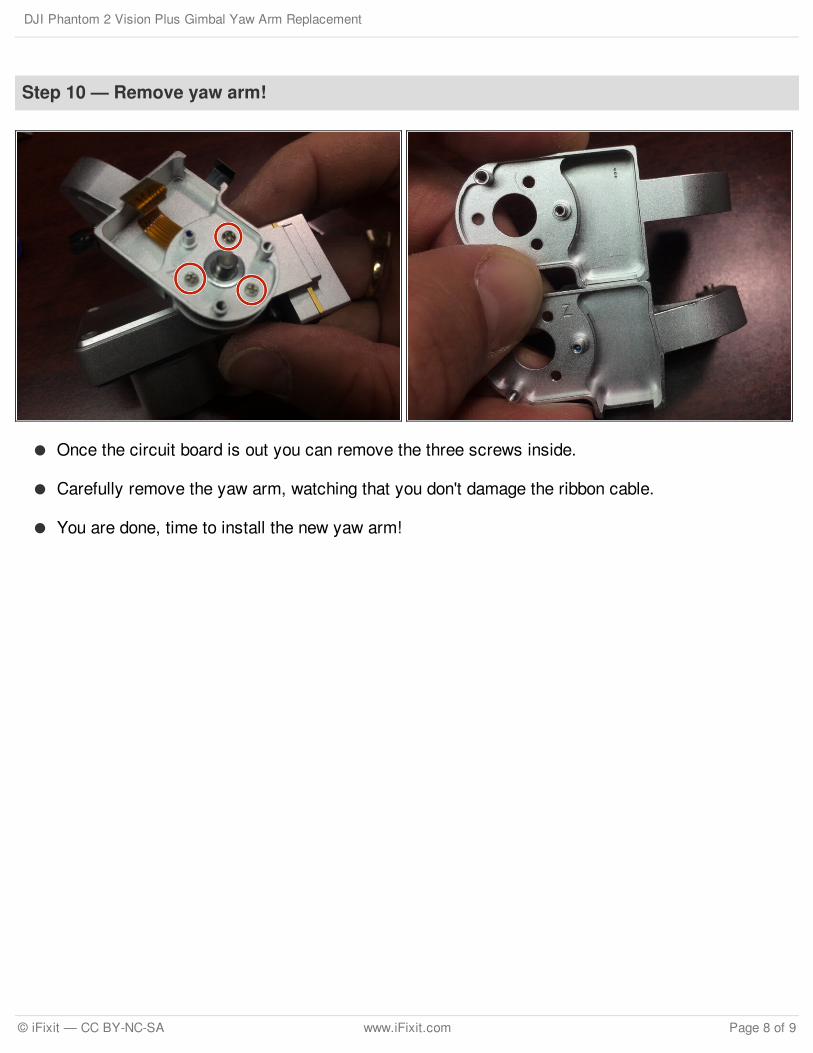
Once the circuit board is out you can remove the three screws inside.
Carefully remove the yaw arm, watching that you don't damage the ribbon cable.
You are done, time to install the new yaw arm!
DJI Phantom 2 Vision Plus Gimbal Yaw Arm Replacement
© iFixit — CC BY-NC-SA www.iFixit.com Page 8 of 9
To reassemble your device, follow these instructions in reverse order.
This document was last generated on 2017-06-21 08:21:22 AM.
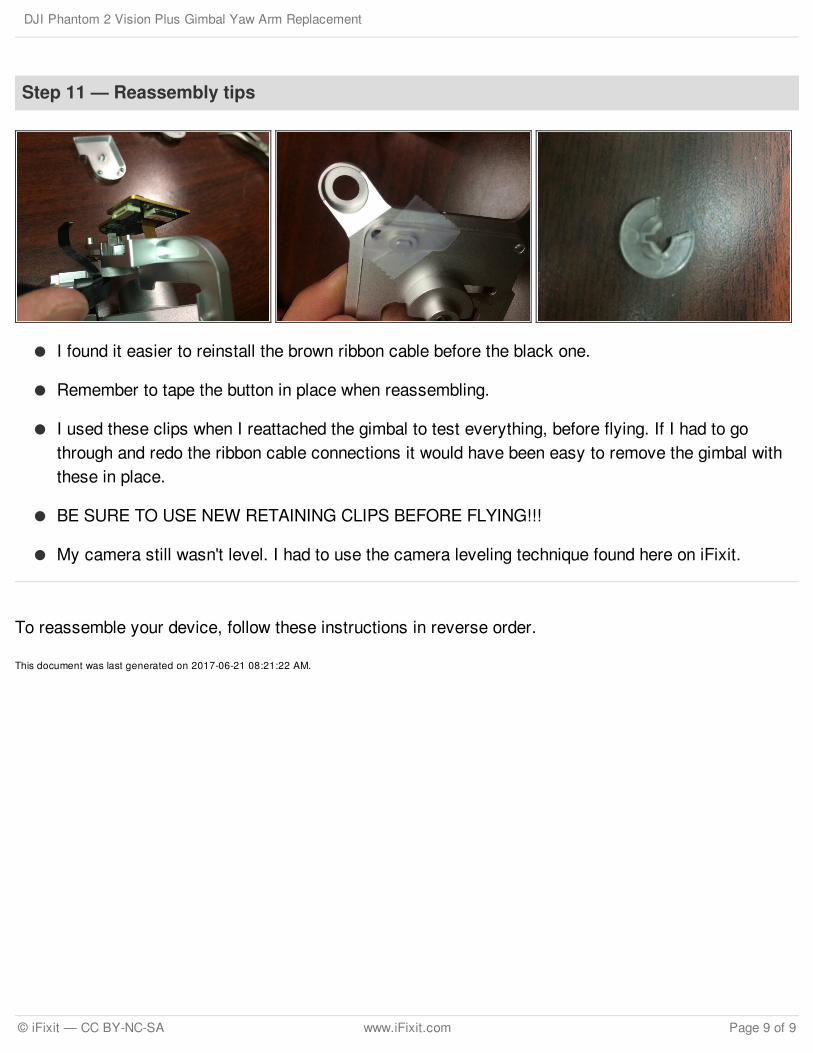
Step 11 — Reassembly tips
I found it easier to reinstall the brown ribbon cable before the black one.
Remember to tape the button in place when reassembling.
I used these clips when I reattached the gimbal to test everything, before flying. If I had to gothrough and redo the ribbon cable connections it would have been easy to remove the gimbal withthese in place.
BE SURE TO USE NEW RETAINING CLIPS BEFORE FLYING!!!
My camera still wasn't level. I had to use the camera leveling technique found here on iFixit.
DJI Phantom 2 Vision Plus Gimbal Yaw Arm Replacement
© iFixit — CC BY-NC-SA www.iFixit.com Page 9 of 9