
DESIGN, TEST AND INTERFACE OF CMOS AND BICMOS
OPTO-ELECTRONIC TRANSCEIVERS
by
Amitava Bhaduri
A thesis submitted to the Faculty of the University of Delaware in partial fulfill-ment of the requirements for the degree of Master of Electrical Engineering
Summer 2002
c�
2002 Amitava BhaduriAll Rights Reserved

Report Documentation Page Form ApprovedOMB No. 0704-0188
Public reporting burden for the collection of information is estimated to average 1 hour per response, including the time for reviewing instructions, searching existing data sources, gathering andmaintaining the data needed, and completing and reviewing the collection of information. Send comments regarding this burden estimate or any other aspect of this collection of information,including suggestions for reducing this burden, to Washington Headquarters Services, Directorate for Information Operations and Reports, 1215 Jefferson Davis Highway, Suite 1204, ArlingtonVA 22202-4302. Respondents should be aware that notwithstanding any other provision of law, no person shall be subject to a penalty for failing to comply with a collection of information if itdoes not display a currently valid OMB control number.
1. REPORT DATE 2002 2. REPORT TYPE
3. DATES COVERED 00-00-2002 to 00-00-2002
4. TITLE AND SUBTITLE Design, Test and Interface of CMOS and BICMOS Opto-Electronic Transceivers
5a. CONTRACT NUMBER
5b. GRANT NUMBER
5c. PROGRAM ELEMENT NUMBER
6. AUTHOR(S) 5d. PROJECT NUMBER
5e. TASK NUMBER
5f. WORK UNIT NUMBER
7. PERFORMING ORGANIZATION NAME(S) AND ADDRESS(ES) University of Delaware,Department of Electrical and ComputerEngineering ,Newark,DE,19716
8. PERFORMING ORGANIZATIONREPORT NUMBER
9. SPONSORING/MONITORING AGENCY NAME(S) AND ADDRESS(ES) 10. SPONSOR/MONITOR’S ACRONYM(S)
11. SPONSOR/MONITOR’S REPORT NUMBER(S)
12. DISTRIBUTION/AVAILABILITY STATEMENT Approved for public release; distribution unlimited
13. SUPPLEMENTARY NOTES
14. ABSTRACT see report
15. SUBJECT TERMS
16. SECURITY CLASSIFICATION OF: 17. LIMITATION OF ABSTRACT Same as
Report (SAR)
18. NUMBEROF PAGES
120
19a. NAME OFRESPONSIBLE PERSON
a. REPORT unclassified
b. ABSTRACT unclassified
c. THIS PAGE unclassified
Standard Form 298 (Rev. 8-98) Prescribed by ANSI Std Z39-18

DESIGN, TEST AND INTERFACE OF CMOS AND BICMOS
OPTO-ELECTRONIC TRANSCEIVERS
by
Amitava Bhaduri
Approved:Fouad Kiamilev, Ph.D.Professor in charge of thesis on behalf of the Advisory Committee
Approved:Gonzalo R. Arce, Ph.D.Chair of the Department of Electrical and Computer Engineering
Approved:Eric W. Kaler, Ph.D.Dean of the College of Engineering
Approved:Conrado M. Gempesaw II, Ph.D.Vice Provost for Academic Programs and Planning

ACKNOWLEDGMENTS
I had a wonderful time during my research activity. There were many incidents
that I would like to forget and many more that I would want to cherish all my life. Results
did not come very easily. There were many unsuccessful attempts made that resulted in
sleepless nights, missed classes and sheer disappointment, but they also opened the door
for me. New thoughts kept coming, new ideas flurried by and I found the key to unlock
the many tangles of my work.
During this endeavor, there were several people whose contributions helped me
reach this stage. First and foremost, I would like to thank my advisor Dr. Fouad Kiamilev,
who among all odds found time to explain things to me and clear my doubts.
I would like to thank my parents and my sister, whose love, encouragement and
unconditional support cannot be expressed in few words. They were always there when I
needed them the most.
I would like to thank all my colleagues, with whom I talked, discussed and solved
a number of problems. Jeremy Ekman, Ping Gui and my friend Felipe Cabarcas deserve
special thanks for their extensive help and support.
My fiancee, Anuradha, helped me a lot in motivating me throughout this entire
endeavor. Thanking her for all her support and encouragement will be too less to ac-
knowledge her latent presence.
Lastly, I would like to thank the support of DARPA, CFDRC and University of
Pittsburgh for contributing both financially and for providing access to their toolsuite for
my research.
iii

TABLE OF CONTENTS
LIST OF FIGURES ��������������������������������������������������������������� viiiLIST OF TABLES ����������������������������������������������������������������� xiiiABSTRACT ������������������������������������������������������������������������� xiv
Chapter
1 INTRODUCTION ������������������������������������������������������������� 1
1.1 Analog Design - CMOS and BiCMOS ������������������������������������� 11.2 VCSEL Technology ������������������������������������������������������� 21.3 Efficient Transceiver Design ����������������������������������������������� 21.4 Importance of Testing ����������������������������������������������������� 41.5 Future Generation CAD Analysis ����������������������������������������� 41.6 Extension of the Research ������������������������������������������������� 5
2 ANALOG LAYOUT DESIGN CONSIDERATIONS ������������������������� 6
2.1 A Simple Resistor ��������������������������������������������������������� 62.2 Resistor Correction ������������������������������������������������������� 72.3 Resistor Layout Considerations ������������������������������������������� 82.4 Resistor Design Nuances ��������������������������������������������������� 92.5 Transistor Design ��������������������������������������������������������� 92.6 Different Transistor Structures ��������������������������������������������� 10
2.6.1 Multiple Sections ������������������������������������������������� 102.6.2 Interlacing Structures ��������������������������������������������� 12
3 AN OPTO-ELECTRONIC DESIGN SYSTEM ������������������������������� 14
3.1 An Overview ��������������������������������������������������������������� 143.2 General Description ������������������������������������������������������� 15
iv

3.3 Classification of the Model ������������������������������������������������� 17
3.3.1 Opto-electronic Elements ����������������������������������������� 183.3.2 Optical Elements ������������������������������������������������� 193.3.3 Electrical Elements ����������������������������������������������� 20
4 SCHEMATIC ENTRIES OF THE TRANSCEIVERS ����������������������� 21
4.1 VCSEL Driver ������������������������������������������������������������� 21
4.1.1 Reference Voltages ����������������������������������������������� 224.1.2 CMOS Step-up Driver ��������������������������������������������� 244.1.3 Bias and Modulation Elements ����������������������������������� 24
4.2 Opto-electronic Receiver ��������������������������������������������������� 27
4.2.1 Pre-amplifier Stage ����������������������������������������������� 284.2.2 Post-amplifier Stage ����������������������������������������������� 314.2.3 ToCMOS Stage ��������������������������������������������������� 32
4.3 LVDS Driver ��������������������������������������������������������������� 33
4.3.1 CMOS Buffer Stage ����������������������������������������������� 344.3.2 CML Buffer Stage ������������������������������������������������� 354.3.3 LVDS Output Stage ����������������������������������������������� 36
4.4 LVDS Receiver ����������������������������������������������������������� 37
4.4.1 LVDS Receiver Block ��������������������������������������������� 394.4.2 ESD Circuit ������������������������������������������������������� 40
5 LAYOUT DESIGN AND VARIOUS ISSUES ��������������������������������� 42
5.1 Layout Elements and Construction ����������������������������������������� 42
5.1.1 Poly-resistor Layout ����������������������������������������������� 435.1.2 Capacitor Layout ������������������������������������������������� 455.1.3 Interleaved Layout ������������������������������������������������� 48
5.2 VCSEL Driver ������������������������������������������������������������� 515.3 Optical Receiver ����������������������������������������������������������� 53
v

5.4 LVDS Driver ��������������������������������������������������������������� 535.5 LVDS Receiver ����������������������������������������������������������� 575.6 Power Rail Design ��������������������������������������������������������� 59
6 TEST AND MEASUREMENT ����������������������������������������������� 61
6.1 Bare Die Testing ����������������������������������������������������������� 61
6.1.1 Resistor Characterization ����������������������������������������� 636.1.2 Transistor Characterization ��������������������������������������� 636.1.3 Post-amplifier Characterization ����������������������������������� 63
6.2 Packaged Die Testing ����������������������������������������������������� 66
6.2.1 LVDS Receiver to VCSEL Driver Test ��������������������������� 686.2.2 LVDS Driver to LVDS Receiver Test ����������������������������� 69
6.3 Test Equipments ����������������������������������������������������������� 70
6.3.1 Probe Station ����������������������������������������������������� 726.3.2 Logic Analyzer ��������������������������������������������������� 74
7 RAPID PROTOTYPING CAD TOOL SUITE ������������������������������� 76
7.1 Chatoyant Design Environment ������������������������������������������� 767.2 System Level Modeling ��������������������������������������������������� 777.3 Modeling and Simulation ������������������������������������������������� 787.4 SiGe Driver ��������������������������������������������������������������� 797.5 SiGe Receiver ������������������������������������������������������������� 847.6 The Design Objective ����������������������������������������������������� 90
8 DESIGN INTERFACE WITH MICROMESH CAD TOOL ����������������� 93
8.1 CFDRC-Micromesh Design Tool ����������������������������������������� 948.2 Transformation of Design ������������������������������������������������� 958.3 StreamLayer Class Creation ����������������������������������������������� 968.4 Software Interface Development ������������������������������������������� 97
9 FUTURE WORK ��������������������������������������������������������������� 102
9.1 Merging of CAD tools ����������������������������������������������������� 103
vi

BIBLIOGRAPHY ����������������������������������������������������������������� 105
vii

LIST OF FIGURES
1.1 VCSEL structure ������������������������������������������������������� 3
1.2 VCSEL beam profile ��������������������������������������������������� 3
2.1 Layout of a simple strip resistor ����������������������������������������� 7
2.2 Layout of a serpentine resistor ������������������������������������������� 8
2.3 Sample dogbone resistor ������������������������������������������������� 9
2.4 Connected dummy reistor ����������������������������������������������� 10
2.5 Folded transistor ��������������������������������������������������������� 11
2.6 Transistor with 3 sections ����������������������������������������������� 12
2.7 NAND gate interleaved structure ��������������������������������������� 13
3.1 Cross sectional view of free space optical interconnect ����������������� 15
3.2 SPA-to-SPA cluster mapping ������������������������������������������� 16
3.3 SiGe SPA dimension ����������������������������������������������������� 17
4.1 VCSEL driver stage ����������������������������������������������������� 21
4.2 VCSEL driver schematic ����������������������������������������������� 22
4.3 Reference voltage (REF) ����������������������������������������������� 23
4.4 CMOS Step-up driver ��������������������������������������������������� 24
4.5 VCSEL driver simulation ����������������������������������������������� 26
viii

4.6 Opto-electronic receiver strategy ��������������������������������������� 27
4.7 Opto-electronic receiver connectivity ����������������������������������� 28
4.8 Opto-electronic receiver pre-amplifier circuit ��������������������������� 30
4.9 Opto-electronic receiver post-amplifier circuit ��������������������������� 31
4.10 Opto-electronic receiver ToCMOS circuit ������������������������������� 32
4.11 Opto-electronic receiver simulation ������������������������������������� 33
4.12 LVDS driver elements ��������������������������������������������������� 34
4.13 LVDS CMOS buffer stage ����������������������������������������������� 34
4.14 LVDS CML buffer stage ������������������������������������������������� 37
4.15 LVDS driver output stage ����������������������������������������������� 38
4.16 LVDS driver simulations ����������������������������������������������� 38
4.17 LVDS receiver elements ������������������������������������������������� 39
4.18 LVDS receiver circuit ��������������������������������������������������� 39
4.19 LVDS receiver simulation ����������������������������������������������� 40
4.20 ESD block diagram ����������������������������������������������������� 41
4.21 ESD circuit diagram ����������������������������������������������������� 41
5.1 Technology setup ������������������������������������������������������� 43
5.2 Poly-resistor layer derivation ������������������������������������������� 44
5.3 Poly-resistor of 20K ����������������������������������������������������� 45
5.4 Capacitor layer derivation ����������������������������������������������� 46
5.5 A 200fF capacitor layout ����������������������������������������������� 47
ix

5.6 A 1pF capacitor made from five 200fF capacitors ����������������������� 48
5.7 Replicator cell for CMOS step-up driver ������������������������������� 49
5.8 Inverter stage with sixteen fingers made from replicator cell of fourfingers ������������������������������������������������������������������� 50
5.9 CMOS step-up driver layout ��������������������������������������������� 51
5.10 VCSEL driver layout ��������������������������������������������������� 52
5.11 VCSEL driver simulations ����������������������������������������������� 52
5.12 Post amplifier stage ����������������������������������������������������� 54
5.13 Optical receiver layout ��������������������������������������������������� 54
5.14 Optical receiver simulation ��������������������������������������������� 55
5.15 LVDS driver layout ����������������������������������������������������� 55
5.16 LVDS driver simulations ����������������������������������������������� 56
5.17 LVDS receiver layout ��������������������������������������������������� 58
5.18 LVDS receiver simulations ��������������������������������������������� 58
5.19 ESD circuit ������������������������������������������������������������� 59
6.1 A hypothetical system made out of the test circuits ��������������������� 62
6.2���
vs � ��� graph of a NMOS transistor ����������������������������������� 65
6.3 Post-amp operation in common mode ����������������������������������� 66
6.4 Post-amp operation in differential mode ��������������������������������� 67
6.5 LVDS receiver to VCSEL driver modulation characterization ����������� 69
6.6 LVDS driver to LVDS receiver at a frequency of 5MHz ����������������� 70
x

6.7 LVDS driver to LVDS receiver at a frequency of 500KHz ������������� 71
6.8 LVDS driver to LVDS receiver DC test ��������������������������������� 71
6.9 Probe Station ����������������������������������������������������������� 73
6.10 Probe Pads as seen on the computer screen ����������������������������� 74
6.11 Tektronix Logic Analyzer 700 Series ����������������������������������� 75
7.1 Opto-electronic elements modeled in Chatoyant ������������������������� 77
7.2 Chatoyant “stars” used to model the FAST-NET system ����������������� 78
7.3 Chatoyant simulation of the FAST-NET system ������������������������� 79
7.4 SiGe Bipolar VCSEL driver ��������������������������������������������� 80
7.5 SiGe Bipolar input circuit for the transmitter ��������������������������� 81
7.6 SiGe Bipolar limiter circuit for the transmitter ��������������������������� 81
7.7 AC simulation of SiGe driver circuit ������������������������������������� 82
7.8 Gain element used for DC input signal(for differential levels) ����������� 83
7.9 Transient simulation of SiGe driver circuit ����������������������������� 83
7.10 DC signal applied through the Gain Element ��������������������������� 84
7.11 DC simulation of SiGe driver circuit ������������������������������������� 85
7.12 Pre-amplifier schematic of SiGe receiver circuit ������������������������� 86
7.13 AC simulation of SiGe receiver circuit ��������������������������������� 87
7.14 Buffer stage of SiGe receiver circuit ������������������������������������� 88
7.15 Post-amplifier (bipolar) stage of SiGe receiver circuit ������������������� 88
7.16 Differential DC input signal ��������������������������������������������� 89
xi

7.17 DC simulation of the receiver circuit ����������������������������������� 91
7.18 Limiter circuit of the receiver stage ������������������������������������� 92
7.19 Transient simulation of the receiver stage ������������������������������� 92
8.1 3D-model of metallic interconnects in Micromesh[9] ������������������� 94
8.2 Electro-magnetic simulation of six striplines in Micromesh[9] ��������� 95
8.3 Design transfer process from Cadence to Micromesh ������������������� 98
8.4 Terminal information generation ����������������������������������������� 99
8.5 Terminal information file ����������������������������������������������� 101
8.6 VCSEL driver in Micromesh ������������������������������������������� 101
xii

LIST OF TABLES
3.1 Design data ������������������������������������������������������������� 18
3.2 SPA dimension data ����������������������������������������������������� 18
3.3 Cluster dimension data ������������������������������������������������� 19
3.4 Compound lens design data ��������������������������������������������� 19
3.5 Electrical design data ��������������������������������������������������� 20
6.1 Resistance measurement ������������������������������������������������� 62
6.2���
vs � ��� data for a NMOS transistor ����������������������������������� 64
6.3 Post-amp common mode data ������������������������������������������� 67
6.4 Post-amp differential mode data ����������������������������������������� 68
6.5 LVDS receiver to VCSEL driver modulation data ����������������������� 68
xiii

ABSTRACT
Analog and mixed signal design has always been very interesting and when it
comes to the design of high-speed CMOS and SiGe BiCMOS optical transceivers it be-
comes even more challenging. Special care has to be taken while doing the layout of such
a circuit that operates at a frequency of 1 Gbps or higher.
The focus of our first work was to layout an optical driver and receiver stage ca-
pable of high integration and driving VCSEL arrays that emit laser at a wavelength of
850 nm. Emphasis was given on analog CMOS design techniques because an increasing
portion of today’s integrated circuit functionality is being performed in the digital domain
by VLSI circuits implemented in a CMOS technology. Achieving high integration re-
quires both the analog signal processing and the associated analog-to-digital interface to
be built with the same technology as the digital circuits. The work was extended to pro-
vide a test-bench to the CFDRC-Micromesh tool that provides the capability of doing 3D
electro-magnetic analysis of both analog circuits and interconnects. As the tool is capable
of reading layout in the Cadence Virtuoso format, these big transceiver designs were first
made Cadence compatible and then interfaced with the Micromesh tool using Cadence
Skill procedures. During the process of interfacing the main idea was to preserve the
terminal information that will provide Micromesh with the right interfaces for the signal
flow.
The second part of our work dealt with the testing and measurement of the test
circuits that were designed so far. It included testing both flavors, bare die and packaged
IC. This work will provide a first hand information on the proper functionality of the
design done earlier. The theoretical and the practical results came under direct comparison
xiv

and strict scrutiny. Most of the results obtained match with the behavior as expected
though a few warps interrupted the cadence and enunciated the practical limitations of
the design.
0.18-micron SiGe BiCMOS technology performs at higher speeds and lower power
than standard CMOS. It is less expensive than gallium arsenide (GaAs) alternatives, mak-
ing it an ideal technology for optical networking. The third part of our research dealt
with standalone simulation of analog SiGe BiCMOS optical transceiver. SiGe process
combines CMOS and bipolar technologies in a new generation of communications appli-
cations. The state-of-the-art IBM-7HP models were used for both the active and passive
devices. With the right transistor sizing and the proper parasitics, this standalone design
will provide the right kind of prototyping environment. This can be used and referred to
as a check in the later design stage. The netlists conform to the low voltage differential
mode of design and operates at a frequency of about 1Gbps. The Chatoyant tool, from the
University of Pittsburgh in their effort to design a prototyping environment for high speed
optical communication system using VCSELs and photodetectors will use the results of
these simulations as a test-bench to their simulated results. This will eventually reduce
the turnaround time of the total integrated system design.
The research in its entirety encompasses the nuances of high-speed mixed signal
design, an approach towards interfacing with a future generation CAD tool and providing
a first hand simulation to enhance some future design checks in rapid prototyping.
xv

Chapter 1
INTRODUCTION
1.1 Analog Design - CMOS and BiCMOS
Naturally occurring signals are analog, at least at a macroscopic level. It is diffi-
cult to completely shift to the digital domain as analog circuits have proved fundamentally
necessary in many of today’s complex, high performance systems. A system that requires
high signal handling capability requires good analog design as the control and driver cir-
cuitry. There is a trade-off between analog and digital design implementations. Sampling
the signal and discretizing it into digital signals may improve the time to market and cost
of production of critical designs, but it may lead to imperfections in the signal retaining
and handling capability. Signal integrity might be lost. Recent system-on-chip designs
show the coexistence of analog and digital circuitry on the same chip.
This coexistence has been possible due to the implementation of CMOS design
techniques in analog chips. The CMOS technology provides for low power dissipation
and smaller chip size, an improvement over the bipolar or GaAs counterparts. The BiC-
MOS technology implements the best of both the bipolar and CMOS technologies. The
speed of bipolar circuits are mixed with the low power CMOS circuits. This eliminates
the problem of dynamic dissipation 1 and the problem with CMOS logic families driving
high capacitive loads.
�
where the repetitive charge and discharge of internal parasitic capacitances within thegates gives rise to a frequency-dependent power dissipation.
1

Opto-electronic circuit elements requires some special treatment to bring the right
precision in the transmit and receive signals. The layout of those circuits has to be care-
fully designed in CMOS and BiCMOS disciplines. More discussions on the design of
such circuits will be made in Chapter 2.
1.2 VCSEL Technology
Conventional lasers are known as “edge emitters” as their laser light comes out
from the edges. Also, their laser cavities run horizontally along their length. A Vertical
Cavity Surface Emitting Laser(VCSEL - pronounced “vixel”), however, gives out laser
light from its surface and has a laser cavity that is vertical; hence the name. As seen from
Figure 1.1, mirrors are located on the top and bottom and light resonates vertically in the
laser chip. The VCSEL emit much more circular beam of light than edge emitters (Figure
1.2) and hence the beam divergence is less.
There are some advantages in using VCSEL in optical communication. They can
be coupled with the optical fibers easily. It involves a single process growth phase, which
is simpler and as a result wafer stage testing can be done. It needs less power to function
and can operate at a high speed (10 Gbps). Though less optical power is generated,
because of the many advantages stated earlier, VCSEL arrays find an important place in
today’s world of parallel optics. Another important advantage in using VCSEL is that it
requires simple driver circuitry for direct modulation. More of this technology will be
explored in Chapter 3.
1.3 Efficient Transceiver Design
Proper design of driver and receiver circuits are essential, to use the various fea-
tures offered by the VCSELs in parallel optical fiber communication. The things that have
to be kept in mind are the current and power required to drive the VCSEL arrays to emit
light having wavelength between 850nm and 980nm.
2

Figure 1.1: VCSEL structure
Figure 1.2: VCSEL beam profile
3

After doing research about the various design techniques, CMOS design proved
to be the best, with respect to the ease of design, fabrication methods offered by MOSIS,
consumption of power, time to market, and use of less “real-estate” on board [1].
Using the selective oxidation process, VCSELs can be made to operate with sub-
milliampere threshold current. They can be driven very easily with Si-based CMOS chips.
Both the schematic and the layout design of the electrical and optical driver and
receiver circuits will be discussed in more detail in Chapter 4 and Chapter 5.
1.4 Importance of Testing
Testing forms an important part in any design. It integrates the whole design cycle
into one. Without the right kind of testing it becomes hard to infer the proper functionality
of the design. The driver and receiver circuits that were designed for the VCSEL arrays
and Photodetectors, were tested for proper functionality and other design issues related
to fabrication and design environment. Many other test circuits were also tested and the
comparison made between theoretical and practical results.
Most of the results confirm the theory with a few occasional warps. Those results
establishes the practical limitations of the chip design. Chapter 6 will cover more on the
intricacies of testing, test equipment, procedures and test results.
1.5 Future Generation CAD Analysis
As microelectronics technology continues to advance, the associated electrical in-
terconnection technology is not likely to keep pace, due to many parasitic effects ap-
pearing in metallic interconnections. Hence, the optical interconnections and photonic-
electronic chips seem to be the most viable technology for future multi-GHz mixed-signal
electronics.
The optical driver and receiver circuits designed in this research served as a good
test-bench to analyze the various qualities offered by two different CAD tools.
4

The first CAD tool developed by University of Pittsburgh provides the capability
of reducing the design cycle time considerably. This tool-suite helps in modeling and pro-
totyping an entire design system within days, as opposed to months in case of fabricating
the same. This tool will be studied in Chapter 7.
The second CAD tool developed by CFDRC promises an efficient way of extract-
ing the parasitics of both the chip and the interconnects, where high-frequency electro-
magnetic effects will not allow SPICE-type models anymore. More on this tool and port-
ing designs into the system will be discussed in Chapter 8.
The stand-alone driver and receiver designs for SiGe BiCMOS technology, will
help to crosscheck the functionality of the prototyping tool. There are two parts to this.
One is a paradigm shift from the existing CMOS circuits to the more advanced BiCMOS
circuits, and the second is the cross-validation of the practical design data, with the stand-
alone simulation results. Chapter 7 will focus more on this topic.
1.6 Extension of the Research
The thesis ends with a pointer to the future, where more efficient design techniques
coupled with proper CAD tools, will make the System-on-Chip designs more efficient
and accurate. There will be a scope of cross-verification using two different CAD tools,
which will eventually reduce the percentage of error in system design thereby increasing
the efficiency of the design phase. Thus, before sending a chip for fabrication, appropriate
analysis about the performance and behavior of the chip can be done more accurately and
at a much lower cost.
We will see how two CAD tools will eventually integrate in Chapter 9 and how
the entire research fits into the integrated structure.
5

Chapter 2
ANALOG LAYOUT DESIGN CONSIDERATIONS
The complexity of an integrated circuit is revealed under high magnification. The
innumerable number of wires covering its surface, and the patterns of doped silicon be-
neath it, follow a set of blueprints called a layout.
Design automation to construct layouts for analog and mixed-signal integrated
circuits had been made, but more work has to be done in this field. Every polygon size,
shape and placement are guided by the principles of device electronics, semiconductor
fabrication and circuit theory. The following sections will explain the intricacies of layout
of a few circuit elements and in the later chapters we will see how the theory is maintained
in practice.
2.1 A Simple Resistor
Figure 2.1 shows the layout of a resistor of a simple rectangle of resistance mate-
rial with contacts at either end. Almost all of the current exits the contact along its inner
edge, facing the main body of the resistor. The drawn length of the resistor� �
therefore
equals the distance measured from the inner edge of one contact to the inner edge of the
other. Similarly, the width of the strip of resistance material is called its drawn width� �. The drawn length and width can be used to determine the approximate value of the
resistor using equation (2.1)
����� ��� � �� �� (2.1)
6

Figure 2.1: Layout of a simple strip resistor
and, � � � � � � � (2.2)
where, � is the resistivity and ’t’ is the thickness of the resistor. However, many other con-
siderations become important during actual resistor calculation due to the several limiting
factors a layout suffers during fabrication.
2.2 Resistor Correction
The most significant correction to the resistor equation are those associated with
width rather than length, because most resistors are much narrower than they are long.
Outdiffusion and non-uniform current flow near the contact points affect the value of the
resistance. When outdiffusion dominates, the resistor equation is rewritten as in Equation
2.3. [5]. ����� ��� � �� ��� ���� (2.3)
where,��
is the width bias, due to outdiffusion. The resistance equation modifies to
Equation 2.4 due to non-uniform current flow near the contacts [5].� � � � �� ��������� � � ���� ��� � ����� ����� �� � ��� (2.4)
where,� �! � �"� ���$#&%' � ��� �� � ��($#
. This equation is not that important, because
usually the resistors are made fairly long, and the corrective factor comes within �*) of
the original value [5], though Equation 2.3 should be considered carefully.
7

B
A
Figure 2.2: Layout of a serpentine resistor
In summary, the width bias is usually important, and the effects of nonuniform
current are usually not. Thus, the resistor design should be long enough to avoid the
nonuniform effect.
2.3 Resistor Layout Considerations
Large resistors are laid out in two styles, serpentine (Figure 2.2) or dogbone (Fig-
ure 2.2). The serpentine form is preferred to dogbone style, because it leads to greater
packing density and good resistor matching at the extreme ends of the resistor layout. In
the serpentine form of the layout, the current does not flow uniformly around the rectan-
gular bends. It has been found that each turn introduces������ squares of resistance [5].
The value of the resistor of Figure 2.2 will be:
8

Figure 2.3: Sample dogbone resistor
����� ��� ��� ���� � � � � � � (2.5)
where, W is the width of the poly resistor strip. The error caused by this non-uniform
current flow is negligible and can be overlooked in resistor designs.
2.4 Resistor Design Nuances
Two things are important in designing poly resistors. First, the poly strips, in either
the serpentine form or the strip form should be closely packed to minimize the spacing
for the etchant entry, and thereby reduce sidewall erosion. Second, the resistor should
be matched with strips of dummy resistors at the extreme ends to ensure uniform etching.
The dummy polysilicon strips should be grounded to discharge the static electrical charge,
that might develop in the oxide isolating them. The spacing between the dummies and the
resistor strips should also match to give a good impedance matching. Figure 2.4 shows
an example of a resistor with dummy strips at the end [5].
2.5 Transistor Design
CMOS transistor design becomes difficult when the aspect ratio (W/L) of the tran-
sistor goes up. It becomes difficult to fit a large transistor in a small area of the chip.
Various techniques have been devised to draw such kind of layouts. The most strategic
of which is to fold the transistor, in order to fit a wide transistor in the smallest chip
9

Connected Dummies
Figure 2.4: Connected dummy reistor
space possible. Figure 2.5 explains the concept of folding and the amount of area saved
is calculated below.
� � � � ���� � � �� � ��� � � ���� � � � )
where,� � is the total width and
���is the space improvement factor.
2.6 Different Transistor Structures
The different design techniques that are generally used in the design of CMOS
transistors and complex logic gates will be discussed in the following subsections. The
theory explains the use of a few clever approaches towards such kind of design. Some of
these techniques will be used in Chapter 5.
2.6.1 Multiple Sections
When the width of the transistor is large then it becomes unmanageable to do the
layout in a small space, and it becomes even more difficult when the transistors abutting
10

W
L
Figure 2.5: Folded transistor
it are of different sizes. The design is then broken down into multiple sections with a
much more manageable aspect ratio. The multiple sections will comprise of parallel poly
strips with active space in between. This also reduces the parasitic junction capacitances
considerably, as the poly regions share the active zones between them. The specification
of such a design is given by� � % �"#
, where N specifies the number of sections. It
becomes easy to infer from Figure 2.6 that even number of fingers always contain odd
number of source/drain sections [5].
Though in this kind of design the source capacitance increases, the drain capaci-
tance decreases, as a number of drain sections are shared by the poly fingers. It is known
that the drain capacitance is more critical to CMOS design and minimizing its value usu-
ally improves the circuit performance.
11

S D SD
Figure 2.6: Transistor with 3 sections
2.6.2 Interlacing Structures
When it comes to the design of CMOS logic gates with multiple fingers the same
approach of folding the poly strips are used in order to accommodate wide transistors
along with the technique of interleaving. Interleaving technique helps to fit a complex
symmetric CMOS design in a very small space and also improves the impedance matching
of the circuitry. As the main objective lies in the fact to share the drain regions between
different poly fingers, the drain capacitance also decreases, thereby improving the device
performance. Figure 2.7 explains the interleaving architecture of a NAND gate. The drain
regions are shared between poly sections.
12

Figure 2.7: NAND gate interleaved structure
13

Chapter 3
AN OPTO-ELECTRONIC DESIGN SYSTEM
This chapter will focus on an integrated system that is based on VCSELs and Pho-
todetectors. The design model named FAST-NET system was actually conceptualized as
a smart-pixel-based optical interconnection prototype [3]. Based on this model, the design
parameters were collected from various vendors and research foundations and a practical
real-time switching system was built. This discussion follows from the introductory note
on VCSEL technology in Chapter 1. It will give a good picture on how an integrated
system with VCSEL and Photodetector arrays is built. The system also had the potential
to function as a high-speed switching device capable of handling data at multi-gigabit per
second.
3.1 An Overview
The FAST-NET model (Figure 3.1) had been designed to identify issues in order
to achieve � � � Gb/s per channel data rates over free space optical links associated with
large-area smart-pixel-arrays (SPAs). The design provided high throughput data switch-
ing capability that used a reflective optical system to globally interconnect a multi-chip
array of smart pixel devices (SPAs).
The three dimensional optical system linked each chip directly to every other with
a dedicated bi-directional data path. Smart-pixel devices were packaged on a common
multi-chip module (MCM) with inter-chip registration accuracies of � � � ����� . The
smart-pixel arrays (SPAs) consisted of clusters of oxide confined Vertical-Cavity Surface-
Emitting Lasers (VCSELs) and Photodetectors (PDs) that were solder bump-bonded to
14

Figure 3.1: Cross sectional view of free space optical interconnect
Silicon (Si) integrated circuits. The Opto-electronic elements were arranged within each
cluster in a checkered pattern with � � � ��� pitch. The global optical interconnection mod-
ule consisted of a mirror and lens array that were precisely aligned to achieve the required
inter-chip parallel connections between the four SPAs.
3.2 General Description
The SPA was designed to be implemented in a one-to-four SPA configuration
where every SPA had nine optical channels directly linking it to every other SPA in the
system, including itself. The illustration in Figure 3.2 explains this. Each SPA was pre-
cisely placed with respect to one another on a multi chip module (MCM) with optical
elements placed above the MCM to allow for connections of the free space optical paths.
There were four clusters per SPA (for every SPA in a four-SPA system) with nine
Opto-electronic (OE) channels per cluster. Five of the channels were independent of each
other and externally controlled, while the other four channels (comprising the crossbar
switch) required control signals brought in through a serial port on the ASIC. Figure 3.2
shows the optical communication between the four SPAs. It is based on the principle
15

Figure 3.2: SPA-to-SPA cluster mapping
where SPA-”x”/Cluster-”y” communicates with SPA-”y”/Cluster-”x”.
Though the maximum expected data rate was 8 Gb/s/channel, but during the de-
sign of this ASIC, some design issues could be addressed, which would easily allow for� � � Gb/s/channel operation.
CMOS signals for the driver and receiver circuits of this model required single-
ended 1.8V full swing voltage levels. All other signals required differential 1.5V to 1.8V
Current Mode Logic levels (CML). CML inputs were terminated with � � � �resistors on
chip. CML outputs were AC coupled, followed by � � �termination to Ground (or supply
plane of choice).
The transceivers were fabricated using IBM SiGe BiCMOS-7HP process and the
maximum power consumption of the system was limited to 7 Watts.
16

Figure 3.3: SiGe SPA dimension
3.3 Classification of the Model
The FAST-NET system had been broadly classified into three main parts, Opto-
electronic elements, Optical elements and Electrical elements. Each of these elements
had a crucial part to play in the overall system, to make the system work as a unified
whole. The elements were also related to each other in terms of functionality, where one
part either required the output of one stage or drove the input of the other stage.
17

Table 3.1: Design data
Length��
� � �
Breadth��
� � �
Material�������
Table 3.2: SPA dimension data
Length�� � � � �
Breadth���� � � �
Pitch (SPA-SPA) � � � ��� �
3.3.1 Opto-electronic Elements
The Opto-electronics part consisted of the SPAs that were solder bump-bonded to
the Si Application Specific Integrated Circuit (ASIC) on the Multi-chip module. There
were four SPAs in this particular FAST-NET system arranged in a � � �SPA configu-
ration matrix on the MCM. Each SPA was comprised of four clusters of VCSELs and
Photodetectors. The clusters in the SPA were arranged in a���
matrix. Each cluster was
composed of nine GaAs VCSELs (the transmitters) and nine GaAs MSM Photodetectors
(PDs), thereby forming nine Opto-electronic channels per cluster. They were arranged in
a checkered fashion as in Figure 3.3
The multi chip module (MCM) held four SPAs in a one-to-four SPA configuration.
The VCSELs and Photodetectors were usually made of GaAs, but compound complex
substances of varying proportions could have been also used. Design parameters for the
ASIC die that housed one SPA are listed in Table 3.1.
Each SPA had four clusters (of VCSELs and Photodetectors) arranged in a���
matrix. The dimensions as inferred from Figure 3.3 are given in Table 3.2.
Each cluster was comprised of nine VCSELs and 9 Photodetectors arranged in a
checkered fashion to form nine Opto-electronic channels per cluster The dimensions for
each cluster as inferred from the Figure 3.3 are given below in Table 3.3.
18
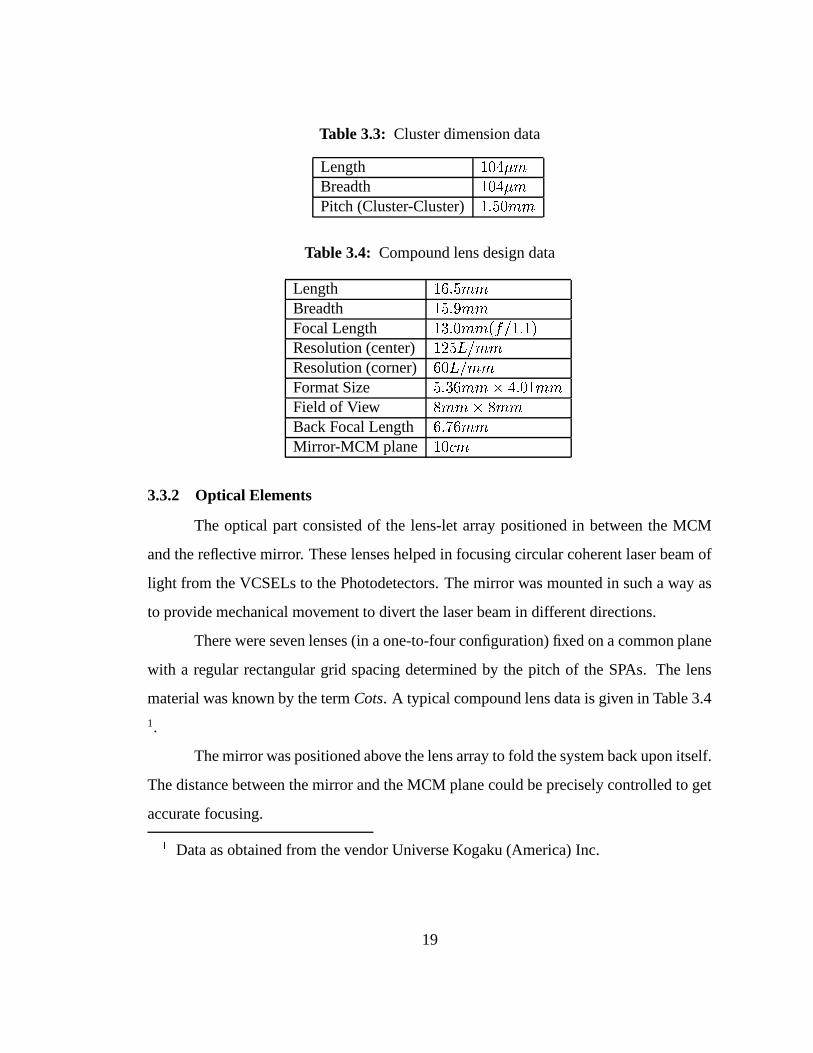
Table 3.3: Cluster dimension data
Length � � � ���Breadth � � � ���Pitch (Cluster-Cluster) � � � � � �
Table 3.4: Compound lens design data
Length � � � � � �
Breadth � � � ��� �
Focal Length � � � ��� � �� % � � � #Resolution (center) � � � �"% � �
Resolution (corner) � � �"% � �
Format Size � � � � � ����
� � � �
Field of View � � ���� � �
Back Focal Length � ����� � �
Mirror-MCM plane � �� �3.3.2 Optical Elements
The optical part consisted of the lens-let array positioned in between the MCM
and the reflective mirror. These lenses helped in focusing circular coherent laser beam of
light from the VCSELs to the Photodetectors. The mirror was mounted in such a way as
to provide mechanical movement to divert the laser beam in different directions.
There were seven lenses (in a one-to-four configuration) fixed on a common plane
with a regular rectangular grid spacing determined by the pitch of the SPAs. The lens
material was known by the term Cots. A typical compound lens data is given in Table 3.4
1.
The mirror was positioned above the lens array to fold the system back upon itself.
The distance between the mirror and the MCM plane could be precisely controlled to get
accurate focusing.
�
Data as obtained from the vendor Universe Kogaku (America) Inc.
19

Table 3.5: Electrical design data
Logic Family CMOS/BipolarSubstrate SiGeMax. current � ��� �Operating Voltage
��
� �
3.3.3 Electrical Elements
The Electrical part was comprised mainly of driver and receiver circuitry in CMOS
logic on SiGe substrate. This part made the Multi-chip module (MCM). The solder-
bumps were left on the top plane so that the SPAs could be bump-bonded to the MCM.
The technology used for fabrication was IBM SiGe BiCMOS-7HP process.
The design data of interest for these elements mainly comprised of those for the
driver and receiver circuits. The CMOS logic family was used in the design of these
transmitter and receiver circuits, though BiCMOS technology could have been used to
give better speed and performance. The design parameters of interest are given in Table
3.5.
20

Chapter 4
SCHEMATIC ENTRIES OF THE TRANSCEIVERS
This chapter will focus on the design of four circuits that can be integrated to form
a system by itself. The four circuits are VCSEL driver, Optical receiver, LVDS driver
and LVDS receiver. The discussion will be limited to the design of the schematics of
the individual circuits, some mathematical analysis that is useful for the operation of the
circuits and simulation results.
These circuits can be broadly classified into two groups; namely, Opto-electronic
circuits comprising of VCSEL driver and Optical receiver and Electrical circuits com-
prising of LVDS driver and receiver circuits. Individual circuits will be discussed to the
extent limited by the research. The simulation results will be later matched with the re-
sults obtained from the simulation of layouts in Chapter 5
4.1 VCSEL Driver
Digital Input On−chip WireVCSEL
Driver Cell Cmos Buffer
VDD33 PAD
GND33 PAD
TXREF PADREF PAD
Figure 4.1: VCSEL driver stage
21

Figure 4.2: VCSEL driver schematic
The purpose and the function of having a VCSEL driver circuit can be explained
from Figure 4.1. For brevity, only one stage is depicted here. This stage can be repeated
according to the size of the array. A���
array of VCSEL driver can be arranged in a two
dimensional arrangement of VCSEL arrays. The geometrical and the electrical properties
of the driver stages should be compatible with the CMOS driver arrays. The driver array
could then be “flip-chip” bonded to the VCSEL array. Each of the sixteen channels of the
chip can be individually addressable.
Figure 4.2 shows the schematic of the VCSEL driver stage. Analysis of separate
blocks will be given in the subsequent sections.
4.1.1 Reference Voltages
There are two reference voltages that are used in the driver circuit. TXREF is kept
at a DC level of 1.8 volts, while the REF voltage is modulated with the help of CMOS
circuitry to be at a nominal 0.9 volts. These two voltages helps the circuit to operate
22

Figure 4.3: Reference voltage (REF)
properly. The mathematical basis for the generation of 0.9 volts will be discussed in this
section. As seen from the Figure 4.3, M1 and M2 forms a diode connected circuit. From
the figure it is clear that M1 operates in the saturation region and act as a constant current
source of 1mA. Now, � � �� ���������� � �� � � � � � ��� #
which gives, � � �� � � � � � �� ��� ���
where, N = number of fingers. Also,
��� � �� ��������� � � ��� � � � ��� # �Substituting, � ��� = 0.37 V (obtained from TSMC
��
� � ��� model parameters),���������
= � ��� � % � � , ��� � � � � and� % � � ����� � !" � #%$ , we get
� � � � ��
� � �
23

Figure 4.4: CMOS Step-up driver
Thus, it can be seen that the mathematical analysis matches with the design re-
quirement.
4.1.2 CMOS Step-up Driver
Figure 4.4 shows a simple CMOS step up driver that helps in producing a digital
output from the analog input (vin). The output voltage obtained swings between 0 and
2.5 volt. This buffer does not allow the circuit to switch at each stage corresponding to
the different levels of the analog voltage and as a result the output changes only when
the analog input falls below a certain voltage level or rises above a certain voltage level.
The buffer helps in stepping up the levels in case of small signal input, and a full voltage
swing is obtained at the output.
4.1.3 Bias and Modulation Elements
The left-hand side of Figure 4.2 represents a four-bit resolution bias circuit and the
right-hand side of Figure 4.2 represents a four-bit resolution modulation circuit. These
circuit elements control the amount of current passing through the VCSEL model [6].
24

A 3.3 volts power supply is connected across the VCSEL p-side and the dummy output
(vd2) to ensure differential operation.
The four-bit bias circuit ensures a minimum current flow through the VCSEL. The
maximum allowed current to flow through the bias circuit is 3 mA. This happens when all
the elements are at an “ON” state. The current flowing through the individual branches is
substantiated by the following mathematical explanation.
� � ��� � � � � �
� � ��� � � � � � � � � � # � � ���� � � � � ��� �� � ��� � ��� �� ��� � (4.1)
����� � % � � # � � � �
�
� � �
��� � � � % � � # � � � ��
� � �
��� # � � % � � # � � � �� � � �
��� � � � % � � # � � � � � � � �where,
� � ��� � represents total current,� � ��� � represents total number of fingers ,
��� ��� � is the
number of fingers in each branch and���
is the current through each branch.
The four-bit modulation circuit also behaves in a similar manner as that of bias
circuit. One important thing to note in this circuit is that the number of fingers in each
branch is twice the number of fingers in each branch of the bias circuit. Thus,
� � � � ��� � ��� ��� � � � � �� � � � � ��� �
�� � � � ��
� � ��� � � ��� # � �
�� � � � � � �
� � � � � � � � � � � � # � � �
� � � � �� � �� � � � � �� � �
(4.2)� � �
� � % � � #� � � �
�
� � �
25

Figure 4.5: VCSEL driver simulation
� � � � � % � � #� � � �
� � � �
� � # � � % � � # � � � � ��� � �� � � � � � % � � # � � � ��
� � �
where,� � �
and� � ��� � represents the number of fingers in the modulation and the bias
branch,�� � �
is the total modulation current,� � �
is the total number of fingers in the
modulation circuit and� � represents the current through each of the modulation branches.
The differential circuit comprises of thick oxide NMOS transistors (Figure 4.2).
One arm of the circuit is connected to the VCSEL model [6] while the other arm is con-
nected to the dummy cell (vd2). The current steering is done by the modulation elements
corresponding to the gate voltage on transistor M82 as shown in Figure 4.2. The four-
bit resolution provided by the modulation circuit can be increased in order to get more
modulated light intensity from the VCSEL. The driver power is calculated as shown be-
low. Maximum power is obtained when the modulation and the bias elements are fully
26

Current input CMOS buffer Postamp &ToCMOS
Enable input
VDD PAD
GND PAD
PAD1
Figure 4.6: Opto-electronic receiver strategy
functional.
����� ��� ���� � � ��� � � �� � � #
���
� ����� ��� �� � # � �
���� �
���
� � # � �� � � �� � � � �
The simulation results are shown in Figure 4.5. It is clear from the figure that there
is a slight current even when the input voltage at the gate M82 goes low. This is due to the
four-bit bias elements connected at node n1. The graph on the top in Figure 4.5 depicts
the current at node v(vd), while the graph at the bottom depicts the input voltage at gate
of the transistor M82. The frequency of operation is,
� � ����� ��� ��� � �� � � � # � � ��� � � % � � � �4.2 Opto-electronic Receiver
The function of the opto-electronic receiver can be understood from Figure 4.6.
The main purpose of the receiver stage is to amplify the photo-electric current generated
by the Photo-detector elements in the optical switch of the FAST-NET system discussed
in Chapter 3. The data signal in the form of current can then be directed to the elec-
trical LVDS driver circuit that will be discussed in the following section. The entire
optical receiver circuit comprises of three blocks; namely, the Pre-amplifier stage, the
Post-amplifier stage and the ToCMOS stage. The following subsections will highlight
the functionality of each of these stages. The connectivity of the opto-electronic receiver
stage is shown in Figure 4.7.
27

Figure 4.7: Opto-electronic receiver connectivity
4.2.1 Pre-amplifier Stage
There are two pre-amplifier stages in the circuit(Figure 4.7). The current gen-
erated from the Photo-detectors vary between��� �
to � ��� � . For the top pre-amplifier
circuit the current is maintained at a constant value of� � � � (
� ����� ) while for the lower
pre-amplifier the current varies from� � �
to � ��� � (�������
). Figure 4.8 explains the ar-
rangement of the pre-amplifier circuit. From the figure it is clear that the transistors M3,
M4 and M5 operates in the saturation region and provides the path for the current (� � � �
or�������
). The mathematical analysis given below explains the voltage obtained at the
output of the two pre-amplifier stages. The receiver simulation in Figure 4.11 confirms
the analysis below. � � �� #� ��� � � � � � � # � � � � �� � � # � � � � �� # � �� ��� � � � � � � # � �
�
� � ��
� � � �This implies that the effective resistance can be controlled by the voltage applied at the
gates of M3, M4 and M5; namely, “gmax”, “gmed” and “gmin” respectively. For sim-
plicity only “gmax” is kept at 2.5 V, while the other two gate voltages “gmed” and “gmin”
28

are kept at 0 V.
For the pre-amplifier in the Figure 4.8
� � # � ���� ����� � �� � � � � � ��� #� � # � � � � � � �(4.3)
where,��� ����� � � ��� � % � � , N = 1, W/L = 1 and ( � � � � � ��� ) = (2.5 - 0.37) V. For the
pre-amplifier at the top of Figure 4.7:
� � ��� � � � � � � � � ��� #� � # � � � ��� � � � # #
Putting the value of Equation 4.3,
� � # � � � � � � � � � � � � # � �� � � �
For the pre-amplifier at the bottom of Figure 4.7.
When����� � � � � � � :
� � # � ��������� � � # #Putting the value of equation 4.3,
� � # � � ��� � � � � � � � � # � ��
� � �
When����� � � ��� �
:
� � # � � �Therefore, it can be concluded that “vin” in Figure 4.8 is fixed at 0.16 V for the
top pre-amplifier while “vin” for the bottom pre-amplifier varies from 0 V to 0.32 V. Thus
we see from Figure 4.11 that the output of the top pre-amplifier (v0p) is almost at the
middle (1 V) of the voltage swing of the bottom pre-amplifier. The voltage for the bottom
pre-amplifier (v0m) varies from 0.9 V to 1.2 V. The voltage does not swing between 0 V
and 2.5 V mainly because of the load capacitance the post-amplifier eventually drives.
29

Figure 4.8: Opto-electronic receiver pre-amplifier circuit
30

Figure 4.9: Opto-electronic receiver post-amplifier circuit
4.2.2 Post-amplifier Stage
There are three post-amplifier stages in the opto-electronic receiver circuit (Figure
4.7). The basic operation of the circuit is based on the operation of a differential circuit.
The differential part of the post-amplifier stage is made of two PMOS transistors M3 and
M4 (as shown in the Figure 4.9). The voltage at “vim” swings between 0.9 V and 1.2
V, while the voltage at “vip” is at 1 V. The voltage at “vip” on the first stage of the post-
amplifier acts as the common-mode voltage. When � � � � � (bias voltage), then the
PMOS transistors M1 and M2 will conduct and the current will be steered between M3
and M4. Thus the voltage obtained at “vop” and “vom” attain voltage swings of opposite
phases because of the differential operation. The two more post-amplifier stages helps in
attaining a full voltage swing of opposite phases at “vop” and “vom”. The voltage swings
between 0 V and 2.5 V.
31

Figure 4.10: Opto-electronic receiver ToCMOS circuit
4.2.3 ToCMOS Stage
This stage is the final one in the opto-electronic receiver. The operation is similar
to that of the post-amplifier stage. Figure 4.10 illustrates the differential elements and the
associated circuit elements. The function of the ToCMOS stage can be summarized in the
following sequence of events.
1) When “vim” goes low “vip” goes high. M3 starts conducting while M4 does
not. Current starts flowing through M3 and M6. M5 then starts conducting as the gate
voltage is high. M8 also starts conducting while M7 does not. Finally the output (“vout”)
reaches 2.5 V.
2) When “vim” goes high “vip” goes low. M3 switches off and the voltage at the
node “n0” goes low. This in turn switches on M2 and switches off M5. Under this con-
dition as M4 is open, the node “n1” goes high. M8 then switches off while M7 switches
on. The output (“vout”) eventually reaches 0 V.
The simulation results of the opto-electronic receiver stage is shown in Figure
4.11. The graph shows that there is full voltage swing at the output (0 V to 2.5 V). The
32

Figure 4.11: Opto-electronic receiver simulation
receiver circuitry helps in amplifying the small current obtained from the Photo-detectors
into a large voltage that can be used in the electrical driver stage. The power consumed
by the receiver stage is given by the mathematical formula,
��� � ��� � �� �� � � � # � � � � � #
where, N is the number of stages of Opto-electronic circuitry used in the FAST-NET
system described in chapter 3.
4.3 LVDS Driver
The behavior of the LVDS driver circuit can be understood from Figure 4.12. This
driver stage is comprised of a CMOS buffer stage, a CML (current-mode logic) buffer
stage and a LVDS output stage. The CMOS stage takes the digital input and buffers it
up so that it can drive large capacitive loads at the output. The following discussion will
explain the functionality of each stage.
33

Digital input CMOS bufferOn−chip wire CML buffer &
LVDS driver
Enable input
VDD PAD
GND PAD
LVDSREF PAD
Figure 4.12: LVDS driver elements
Figure 4.13: LVDS CMOS buffer stage
4.3.1 CMOS Buffer Stage
The CMOS buffer stage helps in buffering up the input signal so that it can drive
more capacitive loads. It also improves the rise and fall times of the circuit, and with
proper design the rise and fall times can be made equal. Figure 4.13 shows the circuitry of
the buffer stage. The mathematical explanation given below substantiates the arguments
made above. � � �� � " � � % � # (4.4)
For M91 and M93 (PMOS transistors)� � � � � ���
� �# � � �
34

������� � � ��� � % � ��
�� �� � � #
For M90 and M92 (NMOS transistors)� � � � � � ���
� �# � �
��������� � � ��� � % � �� � � �� � � #where, W/L is the ratio of width to length of the transistors,
� ���is the oxide capacitance,
���is the electron mobility and
�� is the hole mobility of the device. Thus, it is seen that
the PMOS part and the NMOS part are designed in such a way so that they have almost
equal resistances. Hence, it can be concluded that the output rise and fall times are equal,
as both the parts drive equal capacitances.
Effectively the resistance of the MOS devices are small. Time constant ( � ) of the
circuit is given by,
�� � � � � � � � � � #
where,� ��� � is the effective resistance of the device due to either PMOS or the NMOS
transistor and� � � � is the effective capacitance.
Hence, � becomes small when� ��� � decreases while
� � � � remains constant for a
design. This improves the rise and fall times of the buffer stage and a full voltage swing
between 0 V and 2.5 V can be obtained at the output (vip). The voltage at “vim” is exactly
the same as that of “vip” except being in the opposite phase.
4.3.2 CML Buffer Stage
The operation of the CML buffer stage can be well understood from Figure 4.14.
There are two pairs of differential amplifiers. The NMOS transistors M0 and M16 func-
tions in the saturation region and acts as constant current sources. Similarly the NMOS
transistors M3 and M15 acts as constant current sources for the next pair. The current
35

flowing through the two pairs are different as the ratio of (W/L) is different for the pairs.
Thus,��� � � � � #
where, N is the number of fingers, W/L is the ratio of width to length of the transistor.
Therefore,
� �� � ��� � � � � � �
��
� � � � � � � ���
� ���� � � �
��� ��� �
It is also seen that
� � � � � � � � � � � � � �� � � �� � � �
where���
� is the current carried in the first differential stage and� � � is the current carried in
the second differential pair. The mathematics shown above proves that the current carried
in the second differential pair is two-and-a-half times more than the current carried in the
first differential pair. This will help in obtaining a full voltage swing at “v2m” and “v2p”
in opposite phases. The current is steered from one arm to the other depending upon the
gate voltage “vim” or “vip”.
4.3.3 LVDS Output Stage
The main principle of operation of this circuit is quite similar to the operation of
CML buffer stage discussed in the previous subsection. Figure 4.15 shows the operation
of this stage. The differential pair helps in steering the current from one branch to the
other. M14 and M17 operates in saturation and acts as constant current sources. M11
and M13 acts in the deep triode region and acts as resistors. It can be inferred from the
statements that the voltage swings obtained at “vom” and “vop” are fully differential and
of opposite phases. As the number of fingers in both the arms for M11 and M13 are large
36

Figure 4.14: LVDS CML buffer stage
the current passing through the two arms will be large as the effective resistance falls (see
Equation 4.4). The “off-chip” load is taken as � � � �with 1pF capacitor. The simulation
of this circuit is shown in Figure 4.16. The voltage swings between 0 V and 2.5 V at the
input (“vin”) and a fully differential signal is obtained at the output of the LVDS driver
stage. The power dissipated in this circuit is given by
���� ��� � �� � ��� � � � � ��� � #
where, N is the number of stages of the driver circuit used in the FAST-NET system
described in chapter 3.
4.4 LVDS Receiver
The parts of the LVDS receiver circuitry and their connectivity are shown in Figure
4.17. This circuit is not that complicated as compared to LVDS driver. The main function
of the receiver is to take the analog signal in the differential form and communicate it
to the VCSEL driver discussed in section 4.2. For simplicity only one stage is shown,
but the number of stages can be increased according to the number of the VCSEL driver
stages it needs to drive. For the FAST-NET system discussed in Chapter 3, four stages
will be required to drive four VCSEL driver circuits. There are two main components in
37

Figure 4.15: LVDS driver output stage
Figure 4.16: LVDS driver simulations
38

Diff. Input LVDS receiver
Un−bufferedCMOS Output
GND PAD
VDD PAD
Figure 4.17: LVDS receiver elements
Figure 4.18: LVDS receiver circuit
the design of the LVDS receiver circuit; namely, the LVDS receiver block and the ESD
protection circuit. These circuits will be discussed in the following subsections.
4.4.1 LVDS Receiver Block
The LVDS receiver circuit is shown in Figure 4.18. It can be seen from the figure
that M1 and M2 form a differential pair. The gates of M3 (PMOS) and M0 (NMOS) are
connected. Thus, when one gate conducts the other does not. This eventually helps in
controlling the current flowing into node “n1”. As the input voltage at the gate M1 and
M2 are differential and of opposite swings, as seen from Figure 4.19, the voltage swings
between 1.0 V and 1.3 V at “vim” and “vip”. The sequence of events can be described in
the following steps.
39

Figure 4.19: LVDS receiver simulation
1) When “vim” rises and “vip” falls, M3 and M4 starts switching off while M0
starts switching on. The charge at node “n1” finds a path through M2 and M0 and gets
discharged. As a result, the output “vout” after the inverter stage gradually increases.
2) When “vim” falls and “vip” rises, M1 starts conducting while M2 starts to
switch off. M3 and M4 starts switching on while M0 turns off. The current will flow from
VDD to node “n1” and as a result “vout” after the inverter stage gradually decreases.
The interesting point to note for this circuit is that there are no bias controls, as the
circuit is “self-biasing”.
4.4.2 ESD Circuit
The ESD block diagram and the circuit are shown in Figure 4.20 and Figure 4.21
respectively. The main purpose of having such a circuit is to protect the gate oxide from
getting damaged due to unnecessary static discharge at the gate input of the circuit (“vim”
and “vip”).
40

Figure 4.20: ESD block diagram
Figure 4.21: ESD circuit diagram
41

Chapter 5
LAYOUT DESIGN AND VARIOUS ISSUES
The layout design was one of the most important work in this research. The theory
that was discussed in Chapter 2 was put into effect while doing the layouts of VCSEL
driver, Opto-electronic receiver, LVDS driver and LVDS receiver. All the design elements
were drawn by hand using the Tanner layout design suite, of which the layouts were done
using the Layout Editor called “LEdit”, the simulations were done using “TSpice” and the
waveforms were viewed using “WEdit”. The designs were full custom and no standard
cells were used.
The layouts were done using TSMC��
� � ��� technology. The technology file
and the extractor and model files were all provided by the vendor, based on which the
layer selections were done and the design parameters were chosen. Each of the circuits
will be dealt with in the following sections and a comparison will be made with some
of the concepts introduced in Chapter 2. Before the layout of any circuit was done the
technology file was properly set, as seen from Figure 5.1
5.1 Layout Elements and Construction
In this section some important layout elements will be discussed, which will be
referred to later in the other circuits. The functionality and the schematics of the circuits
have been discussed in detail in Chapter 4. Here, in this chapter the main focus will be
on the construction of effective polygons to make the device elements properly etched
on Silicon substrate. The analog design issues that might come up can be referred to in
Chapter 2.
42

Figure 5.1: Technology setup
5.1.1 Poly-resistor Layout
Layout of two poly resistors were needed for the VCSEL driver circuit. Both
had to have a resistance of��� � �
. Layout of the resistor is shown in Figure 5.3. The
important thing in the design of poly resistor was to make parallel poly strips of equal
length drawn side by side, so that during fabrication the etching from the extreme sides
happen uniformly and does not affect the value of the resistance much. Each strip drawn
has a resistance of���� � �
. Eight such strips were drawn in a serpentine fashion to make
the layout effective in terms of area used and analog layout intricacies. It can be seen
from Chapter 2, that this practical design obeys the theory to a large extent.
As the poly layers provided by the vendor did not have the resistivity parameter,
a customized layer was created with suitable resistance value. Figure 5.2 shows how the
layers were derived for the resistors used in the design. Two layers that were combined in
a boolean fashion to form a new layer called “Npluspolyresistor”, were Poly1 (PO1) and
43

Figure 5.2: Poly-resistor layer derivation
Poly-resist (RPO). The following mathematical calculation shows how the value of each
strip was calculated. � � � � � ����� � � � � � �� � � � � � ��� � � � �� � � � � �� � � � � � � � � � � #� � � ��� �
� � ���� � �
Thus, the total resistance was,� � � �� � � �
��� # � ��� � �
44

Figure 5.3: Poly-resistor of 20K
where, W and L were the width and length of the poly section, S was the number of
squares and� �
was the resistance of the poly resistor. Note that from Figure 5.2, the
value of resistivity was obtained as � � � � % � � � � �. An important thing to note in this
design was that, the dummy resistors were not used. As the design of the resistors were
not that critical for these circuits, the dummy resistors were not be used in any of the
circuit designs.
5.1.2 Capacitor Layout
The capacitors were derived from the layers, Poly1 (PO1), N-well (NW) and Var-
actorId. Figure 5.4 shows how the capacitor was derived from the layers mentioned
above. From the technology parameters the capacitance unit value was found out to be
45

Figure 5.4: Capacitor layer derivation
46

Figure 5.5: A 200fF capacitor layout
� � � � ��% ��� � . When doing the mathematical calculations only the area capacitance was
considered while the fringe capacitance was neglected due to its small value. Figure 5.5
shows the layout of a capacitor. The value of the capacitance was calculated as given
below.
� � � � � � ��� � �� � � �� � � % ��� �� � � � � � � � � � �� � #� � � ��� � � �
47

Figure 5.6: A 1pF capacitor made from five 200fF capacitors
The capacitor was formed due to the parallel-plate effect of polysilicon and the
n-doped silicon substrate. This form of capacitor was used to enhance the speed of the
design as the layout of a MiM capacitor was both time consuming and difficult. Another
interesting thing to note in this design was the use of outer ring contacts in the p-doped
region. This helped to have both the n-doped and the immediate p-doped region at the
same potential and thus, minimized the fringing effect. This type of layout was needed
to minimize the fringing effects as far as possible, as it was not considered even in the
mathematical calculation.
The right hand arm of the outer ring did not have any contact as shown in Figure
5.5. This helped in replicating the same structure to form capacitors of higher value.
Figure 5.6 shows how a 1 picoFarad capacitor could be made from five 200fF capacitors
connected in parallel. This 1pF capacitor was made by replicating the capacitors shown
in Figure 5.5 five times to form a � � � array.
5.1.3 Interleaved Layout
To explain the concept of interleaving the main focus will be on VCSEL driver.
The entire VCSEL driver design was broken down into small elements like, the DAC
48

Figure 5.7: Replicator cell for CMOS step-up driver
design, the MOD design, the near-VCSEL circuit design and the CMOS step-up driver
design. Each of these small designs were then constructed from even smaller replicator
cells. Once the replicator cells were laid out, they were combined to form an array struc-
ture which completed the layout of those small elements mentioned above. One such
replicator cell is shown in Figure 5.7.
The schematic design discussed in Chapter 4, goes hand in hand with the layout
design as the design parameters were obtained from the schematics of the circuits. The
schematic of the CMOS step-up driver is shown in Figure 4.4. From the figure it is clear
that there were three stages of inverter forming the buffer. Each of the stage differed from
the other in the number of fingers associated with the design. Thus,
� � � � � � � � � � � � � � �where, N1, N2 and N3 were the number of fingers in each of the stages of the CMOS
step-up driver.
49

Figure 5.8: Inverter stage with sixteen fingers made from replicator cell of four fingers
A replicator cell was made (Figure 5.7) such that it can be combined to form
layouts with multiple fingers, in an array replication, to minimize the burden of hand-
crafting each of the stages. This helped in improving the design time. Figure 5.7 is the
replicator cell for the inverter stage with sixteen fingers. Figure 5.8 shows how these
replicator cells (Figure 5.7) were combined to form an array of an inverter stage with
sixteen fingers.
There were a few more important things to note from this layout. The extreme
ends of the fingers were dummy transistors. This was done in order to make the etching
of the poly layer on the active layer isotropic and in order to match the other poly sections
to the extreme poly sections. The multi-finger layout conforms to the concept of drawing a
wide transistor by “folding” technique. It can also be seen from Figure 5.8 that the drain
regions are shared between the poly transistor sections. Thus, in this way the effective
capacitance also decreased.
The theory enunciated in Chapter 2 was thus put into effect in these layouts, with
added customizations to suit the need of the design criteria. The entire CMOS step-up
50

Figure 5.9: CMOS step-up driver layout
driver is shown in Figure 5.9.
Having discussed the intricacies of the layout design, the results of each of the
circuits will be presented in the following sections. Each circuit was divided into a number
of elements and then by proper floor-planning the entire design was laid.
5.2 VCSEL Driver
This circuit was broken down into the following elements, Bias element, DAC
modulation element, near VCSEL element and the CMOS step-up driver element. The
layout of the CMOS step-up driver element had already been discussed before. The bias
and the modulation elements were drawn similarly. First a replicator cell was created for
each of these circuits and then they were laid out in an array configuration, repeating the
replicator as many times as needed depending upon the number of fingers required in each
of the design. The entire design of the VCSEL driver circuit is shown in Figure 5.10. The
simulation of this circuit is shown in Figure 5.11.
51

Figure 5.10: VCSEL driver layout
Figure 5.11: VCSEL driver simulations
52

Each of the design elements were then properly placed to minimize the white
space in the floorplan. As seen from Figure 5.10 it becomes clear that that the floorplan
efficiency was high as the area of unused space in the design was very less. This effec-
tive floorplan made the design compact and consumed less silicon, thereby reducing the
design cost. The simulation result matched with the simulation result obtained from the
schematic design in Chapter 4.
5.3 Optical Receiver
The optical receiver circuit can be broken down into following sub-circuits, pre-
amplifier stage, post-amplifier stage and the ToCMOS stage. The circuit design and the
simulation is shown in Figure 5.13 and Figure 5.14 respectively.
The construction of the post-amplifier stage is given below as an example. From
the schematic of the post-amplifier stage given in Chapter 4 it can be seen that the follow-
ing elements were needed for the construction: two resistors of � � �each, two PMOS
transistor with four fingers each, two NMOS transistors with four fingers each, a resis-
tor of � � �and a capacitor of � � � � � . The individual elements were first laid out using
the concepts discussed earlier in this chapter and then finally all these elements were put
together as shown in Figure 5.12.
The simulation results shown in Figure 5.14 matches with the simulation result
obtained in Chapter 4 for the Optical receiver. This shows that the design criteria are met
as per the requirement.
5.4 LVDS Driver
The layout of the LVDS driver circuit and the simulation are shown in Figure 5.15
and Figure 5.16 respectively. The LVDS driver circuit was composed of a simple CMOS
buffer stage, a fully differential CML buffer stage and a LVDS output stage.
The design of the LVDS output stage was critical as it involved a huge layout. Each
of the differential arms (Figure 5.15) consisted of eighty finger PMOS transistor and fifty
53

Figure 5.12: Post amplifier stage
Figure 5.13: Optical receiver layout
54
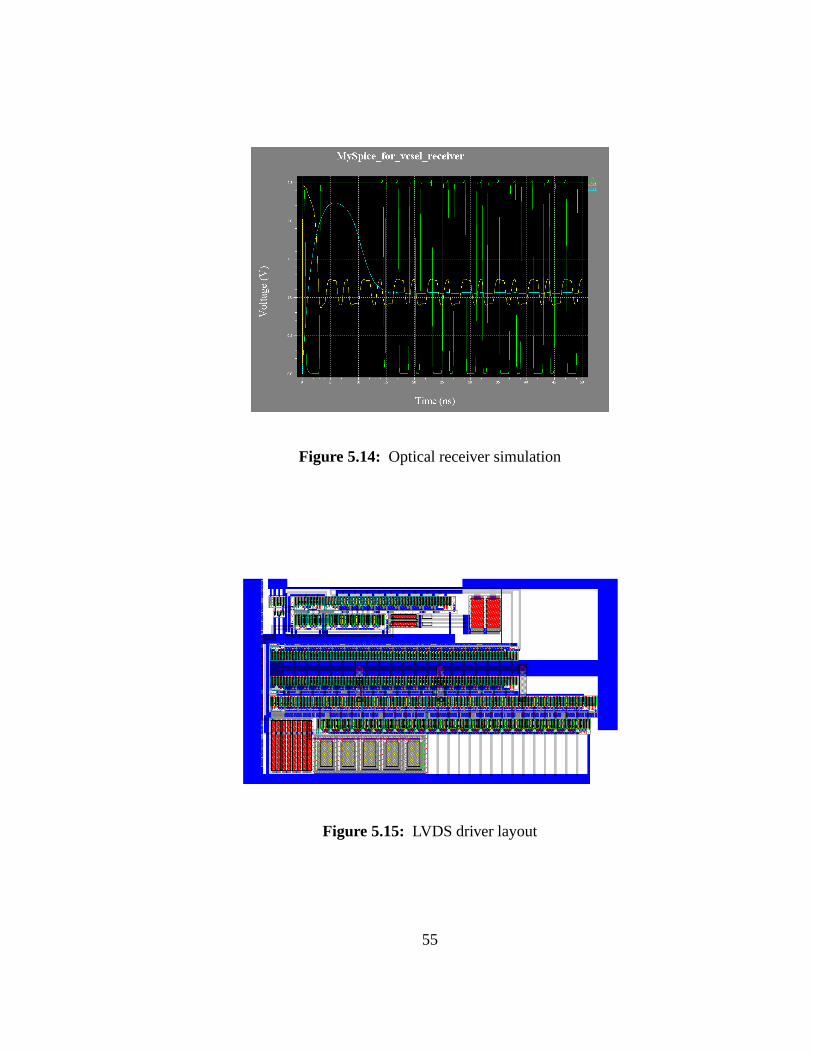
Figure 5.14: Optical receiver simulation
Figure 5.15: LVDS driver layout
55

Figure 5.16: LVDS driver simulations
56

finger NMOS transistor. The layout of the circuit was done by interleaving the PMOS
and the NMOS transistors. The middle section of Figure 5.15 depicts the output stage.
The design was flanked by four dummy transistors, two in the PMOS region connected to
VDD while two were in the NMOS region connected to ground.
These dummy transistors helped in proper matching of the other poly sections by
not allowing anisotropic etching during fabrication and as they were connected to the
power supply appropriate for the regions, they prevented accumulation of static charge
of any kind. Unless the layout would have been made in this way, mismatch would have
occurred and the device performance would have gone down.
The simulation of the LVDS driver circuit is shown in Figure 5.16. The result
matches with the simulation obtained from its schematic, as shown in Figure 4.16. The
output at the nodes “vop” and “vom” were fully differential with voltage swings between
1.2 V and 1.5 V.
5.5 LVDS Receiver
The LVDS receiver circuit was comprised of the LVDS receiver stage and the ESD
protection circuit. Figure 5.17 shows the whole LVDS receiver circuit while Figure 5.18
shows the simulations.
The receiver stage took the analog differential signals and converted them into
digital signals that were later used by the VCSEL driver circuit. The receiver stage was
laid out from small circuit replicators of both the PMOS and the NMOS stages with proper
matching. The critical design was that of the ESD circuit.
The ESD circuit layout was done based on Figure 5.19. The importance of the
circuit lied in the fact that it prevents any high static voltage to get discharged through
the gate of the LVDS receiver stage. As the LVDS receiver stage would communicate to
the outside world the presence of such a circuit is essential in the design of this receiver
stage.
57

Figure 5.17: LVDS receiver layout
Figure 5.18: LVDS receiver simulations
58

Figure 5.19: ESD circuit
5.6 Power Rail Design
One of the most important requirement in the layout design was the proper design-
ing of the power rails, both supply (VDD) and the ground (GND) rails. From the design
document it was found that a metal line of thickness � � � was able to handle a current of
1 mA. Thus, the various layouts had metals lines of varying width. This depended on how
much current each of the lines carried. For a particular circuit the power and the ground
lines were made of equal width, so that if the current needed to flow to the ground, then
the ground rail would be able to handle that much current as the power rail did.
Proper interleaving structure also helped in minimizing the thickness of each of
the metal lines entering the source in case of PMOS transistors and drain in case of NMOS
transistors. The following mathematical analysis helps in substantiating the argument. In
case of the LVDS driver output stage (only the PMOS part), two PMOS transistors each
having eighty fingers were interleaved.
� � � � ��� � �
� � � � � � # � � � �59

� � � � � � �� � � � �� � � � � � � � # � � ��� ������ � � � ���
� � � � ��
� � ���
where,� �
is the total current, N is the total number of fingers interleaved,� �
is the
number of source elements in the interleaved structure,� �
is the total width of the metal
line required and�
��
is the width of metal line required for each of� �
.
Thus, it can be seen that the thickness of the metal lines at each of the source entry
points was about��
� � ��� . Hence, instead of laying out a huge metal line a narrow metal
line would suffice the purpose if proper interleaving could be done. This was more like
distributing the load across many regions.
Another important consideration in the design of power rails was electro-migration
[2]. Electro-migration is a phenomenon, when the ions of the metal cross grain bound-
aries under the influence of an electric field. This results in dislocation of metallic atoms
from the crystal structure and an eventual breakdown in the continuity of the metal lines.
By making the width of the metal lines adequate, the effect of electro-migration can be
prevented.
60

Chapter 6
TEST AND MEASUREMENT
Test and measurement forms an integral part of the entire design process. The test
circuits that have been discussed (refer to Chapter 4 and Chapter 5) so far, VCSEL driver,
Optical receiver, LVDS driver and LVDS receiver were fabricated on Silicon substrate
using the TSMC��
� � ��� technology. These circuits were repeated on the chip a number
of times with different circuit connections or in stand-alone form. Testing provided a way
to determine the correct performance of these circuits. A number of tests were done and
the results pertaining to the hypothetical circuit shown in Figure 6.1 will be presented in
the following sections. Two forms of dies were fabricated through MOSIS1, the bare die
and the packaged IC.
6.1 Bare Die Testing
The bare die form of integrated circuit did not have a bond-wire leading to a bond-
pad, instead the input and output of the circuits terminated in solder bumps. These dies
were tested using the probe station under a very powerful microscope. The bare die tests
will be presented in the next section. These tests helped in characterizing a few basic
elements in the test circuits.�
MOSIS is a low-cost prototyping and small volume production servicefor VLSI circuit development (as in http://www.mosis.org)
61

Table 6.1: Resistance measurement
Measured resistance Compensated resistanceMeasurement (Ohms) (Ohms)Test leads 7.8 not applicable20Kohm resistor 20700 20692.21 Kohm resistor 1050 1042.2100 Ohm resistor 116.19 108.39
MIRROR
Optical receiver
LVDS receiver LVDS driver
VCSEL driver
Figure 6.1: A hypothetical system made out of the test circuits
62

6.1.1 Resistor Characterization
Table 6.1 shows the design and the measured value of the resistances used in
the circuit. From the table it can be seen that a��� � �
resistance actually measured������ � � � � �
, which was close to the required value. The value of the other resistors
closely followed this behavior and it can be inferred from this result that the layout of the
resistor had been done properly.
6.1.2 Transistor Characterization
Figure 6.2 shows the� �
vs � ��� graph of a twenty finger NMOS transistor operated
at a drain to source voltage ( � ��� ) that varied from 0.1 V to 2.5 V for each of the gate
voltages that ranged between 0.4 V and 0.9 V. It can be seen from the graph that at low
� ��� the transistor operated in the triode region and acted as a linear resistor, while at higher
� ��� the transistor operated in the saturation region. The current in the saturation region
was not constant (though theoretically it should have been) but increased with � ���. This
phenomenon was the result of second order effects in transistor operation. The channel
length of the transistor shortened at higher � � � and resulted in more current. Thus, in the
linear region,
� ��� � � � � � � � ��� #and in the saturation region,
� ��� � � � � � � � ��� #where, � ��� � �
�
� � � is the threshold voltage obtained from the technology model file
from TSMC. The test data recorded for this measurement is given in Table 6.2
6.1.3 Post-amplifier Characterization
The post-amplifier stage was used in the Optical receiver circuit. Figure 6.3 and
Figure 6.4 shows the DC characterization of the post-amp cell used in the Optical receiver
circuit. The data for those measurements are given in Table 6.3 and Table 6.4. Both
63

Table 6.2:���
vs � ��� data for a NMOS transistor
� � � � ��
� � ��� � � �� � � � � � � �
� � �� ��� (V)
����� � � # � ��� (V)� ��� � � # � ��� (V)
����� � � #0.1 6.1 0.1 49.4 0.1 181.80.3 7.2 0.3 61.8 0.3 285.00.5 8.0 0.5 68.1 0.5 313.10.7 8.7 0.7 73.8 0.7 335.71.3 10.9 1.3 89.7 1.3 395.01.9 13.2 1.9 105.6 1.9 450.02.5 16.0 2.5 123.6 2.5 507.0
��� � � ��
� � � � � � ���� � ��� � � �
��� �� � � (V)
� ��� � � # � ��� (V)����� � � # � ��� (V)
� � � � � #0.1 376.7 0.1 515.0 0.1 600.00.3 727.0 0.3 1286.0 0.3 1664.00.5 810.0 0.5 1608.0 0.5 2427.00.7 865.0 0.7 1728.0 0.7 2783.01.3 994.0 1.3 1959.0 1.3 3170.01.9 1107.0 1.9 2147.0 1.9 3437.02.5 1221.0 2.5 2323.0 2.5 3676.0
64

Figure 6.2:� �
vs � ��� graph of a NMOS transistor
65

Figure 6.3: Post-amp operation in common mode
common mode and differential mode of operation are depicted in the figures and the
tables. The result matches with the schematic and layout data presented in Chapter 4 and
Chapter 5.
6.2 Packaged Die Testing
The packaged form of the integrated circuit terminated in pins in a PGA (Pin Grid
Array) form. The packaging helped the chips to communicate to the outside world. The
pin grid array (PGA) has pins all over its bottom surface and can accommodate about two
hundred and fifty six pins. Testing packaged dies were easier compared to the bare dies.
This test ensured that when the solder-bumps of bare dies were wire-bonded to the pins
of the package, the inductance of the wire did not deteriorate the performance of the chip.
Mathematically,
� � ��� � � � �� � �66

Figure 6.4: Post-amp operation in differential mode
Table 6.3: Post-amp common mode data
� � � � � � � � � � � � � � � � � � � � �Vim, Vip (V) Vom (V) Vom (V) Vom (V)0.3 1.031 0.828 0.6340.9 0.949 0.722 0.5941.5 0.529 0.483 0.4221.9 0.092 0.089 0.0852.1 0.004 0.004 0.0042.3 0.000 0.000 0.000
67

Table 6.4: Post-amp differential mode data
� � � � ���� � ��� � � �
� � � � � � � ��
� �Vim (V) Vop (V) Vom (V) Vop (V) Vom (V) Vop (V) Vom (V)
0.2 0.580 1.269 0.399 1.419 0.232 1.5460.4 0.739 1.105 0.469 1.345 0.270 1.5050.6 1.071 0.768 0.697 1.105 0.372 1392.00.8 1.356 0.454 1.053 0.727 0.654 1.0811.0 1.534 0.253 1.376 0.375 1.013 0.6971.1 1.602 0.156 1.496 0.259 1.184 0.482
Table 6.5: LVDS receiver to VCSEL driver modulation data
vim = 1.0 V, vip = 1.3 VModulation Bias “0000” Bias “1000” Bias “1111”
(binary) (mA) (mA) (mA)
0000 0.00 1.91 3.310010 0.80 2.63 4.080100 1.55 3.34 4.760110 2.28 4.01 5.381000 2.91 4.47 5.471010 3.54 5.04 6.211100 4.15 5.60 6.991111 5.02 6.38 7.46
where, � � is the voltage drop across the bond wire, L is the inductance of the wire and
di/dt is the rate of change of current.
The tests that pertain to Figure 6.1 will be given in the following sub-sections.
Many other tests including those mentioned in section 6.1 were performed, but they are
not listed over here to avoid repetition of the same result.
6.2.1 LVDS Receiver to VCSEL Driver Test
This test was done to find the speed at which the VCSEL driver was able to oper-
ate. Figure 6.1 gives a reference to where this test will come to use. Figure 6.5 and Table
6.5 shows the modulation characterization of the LVDS receiver circuit.
68

Figure 6.5: LVDS receiver to VCSEL driver modulation characterization
From Figure 6.5 it becomes clear how the four-bit modulation resolution con-
trolled the amount of current that flowed through the VCSEL driver circuit. When the
modulation circuit (Figure 4.2) opened up, all the resistors acted in parallel and the effec-
tive resistance decreased. Thus, as seen from Table 6.5 when Modulation is “1111” and
Bias is “1111” the current drawn is 7.46 mA, whereas, when Modulation is “0010” and
Bias is “1111” the current drawn is 4.08 mA.
6.2.2 LVDS Driver to LVDS Receiver Test
The main objective of this test was to check the functionality of the data connec-
tivity between LVDS driver circuit and the LVDS receiver circuit, as shown in Figure
6.1. A DC test and a speed test were also performed to find the frequency with which
these two circuits were able to operate without any loss of data. Figure 6.7 and Figure 6.6
shows the frequency of operation of these circuits. From the figures it can be seen how
69

Figure 6.6: LVDS driver to LVDS receiver at a frequency of 5MHz
the signal degraded at higher frequency. In the DC test the frequency of the signal was
made very low (50Hz) and the performance of the circuit is shown in Figure 6.8.
In Figure 6.6, Figure 6.7 and Figure 6.8 C1 and C2 represent the output terminals
of the LVDS receiver circuit (differential signals) while C3 and C4 represent the output
terminals of the LVDS driver circuit.
6.3 Test Equipments
The packaged and the bare die testing was done using high-precision test equip-
ments. The following instruments were used for the testing. Though all the equipments
were essential for the testing, only the last two equipments will be covered in this section
to post a brief idea on the quality and the precision of the equipments used.
70

Figure 6.7: LVDS driver to LVDS receiver at a frequency of 500KHz
Figure 6.8: LVDS driver to LVDS receiver DC test
71

1. Keithley 2400 Series Source Meter.2. Fluke Multimeter.3. Tektronix PS2521G Programmable Power Supply
with GPIB interface.4. Tektronix TDS694C Four Channel Digital
Real-Time Oscilloscope (3GHz, 10GS/s).5. Arbitrary Waveform Generator (AWG610)
operating at 2.6GS/s.6. High Magnification Probe Station and7. Tektronix Logic Analyzer (TLA 700 Series).
6.3.1 Probe Station
The Probe Station was mainly used to test the bare dies. As the bare dies did not
have any wire bonding to the pins, it would have been actually very difficult to study
the various characteristics without the right kind of equipment. The probe station helped
in doing this. The probe station that was used had eight fine-tipped, highly conducting
probes. The tip diameter of these probes were � � � ��� . These fine tips helped in touch-
ing the bare die pads with the right accuracy. The microscope mounted on top of the
probes helped in magnifying the image of the bare die by � � � . Figure 6.9 of the test
equipment shows the various components of the probe station.
The � � � image of the die pads were then fed through a CCD camera that was
coupled to the microscope. This resulted in another magnification of � � � and the image
was finally fed to the computer screen through a frame-grabber software. The image of
the bare die pads were displayed on the computer screen as in Figure 6.9. A more clearer
image is shown in Figure 6.10. The special software used for frame-grabbing is a product
from Integral Technologies, Inc. and is called Flashpoint 3D (version 2.0). The movement
of the probes were controlled by X, Y and Z probe-manipulators that had three degrees of
freedom. These manipulators helped in positioning the probes on the right pad with great
accuracy.
72

Figure 6.9: Probe Station
73

Figure 6.10: Probe Pads as seen on the computer screen
6.3.2 Logic Analyzer
The Logic Analyzer was used to determine the signal characteristics of the pack-
aged dies and to generate waveform patterns that were fed to the device under test (DUT).The
device made by Tektronix had an internal display style. The TLA700 series Logic Ana-
lyzer combined high-performance logic analyzer module and a pattern generator module.
It had various combinations of channel width and memory depth. Figure 6.11 shows the
TLA used for testing.
An acquisition technology called MagniVu [7] enabled by this device provided
500 picosecond timing resolution on all channels and required no additional probing. As
seen from Figure 6.11 a square waveform was generated to test the LVDS Receiver to
VCSEL Driver operation (refer to Subsection 6.2.1). The modulation and the bias bit
patterns (for example “1111” and “1010”) were generated using the pattern generator
module and fed to the packaged die under test. This method helped in simplifying the
bit-pattern generation and also made the work quite easy to monitor and control. The
pattern alteration was possible with right precision and minimum error.
74

Figure 6.11: Tektronix Logic Analyzer 700 Series
75

Chapter 7
RAPID PROTOTYPING CAD TOOL SUITE
This effort in the research lead to the system level modeling of the Opto-electronic
elements discussed in Chapter 3, Chapter 4 and Chapter 5. So far, only the design of the
integrated circuits like drivers and receivers have been discussed. The schematic de-
sign and the layout of the circuits were done without the prior information about how
they would integrate with the optical elements, like the lenses and the mirrors that would
provide the optical flow of the design as shown in Figure 6.1. The VCSELs and the
Photo-detector arrays that would be “flip-chip” bonded to the VCSEL driver and the
Opto-electronic receiver could not be designed using any of the tools in hand and only a
hypothetical model of the VCSEL could be provided in the schematic stage of the design
(Figure 4.2 in Chapter 4).
The design of the free-space optical communication system that had been dis-
cussed in Chapter 3, could not be completed until a prototype environment of the entire
design could be created using some system level modeling tool. This would help in de-
signing the entire system before the elements were sent for fabrication, and as a result the
cost of the design and the design cycle time would get reduced.
7.1 Chatoyant Design Environment
Chatoyant is a tool for the simulation and the analysis of heterogeneous free-space
Opto-electronic architectures [4]. Both the digital and analog electronic integrated circuits
along with optical models could be modeled with mechanical tolerancing at the system
76

Figure 7.1: Opto-electronic elements modeled in Chatoyant
level. To design the complex system like FAST-NET, the Chatoyant tool could be of
great use, as it would provide a design framework and a simulation environment based on
system level models of Opto-electronic components. Figure 7.1 shows an Opto-electronic
system that could be modeled in Chatoyant. This model is very similar to the FAST-NET
system that had been described in Chapter 3.
7.2 System Level Modeling
In this type of modeling each module was built on the system level parameters
and behavioral level data. The signals in the opto-electronic systems were based on elec-
tronic waveforms, mechanical movements and modulated carriers (like a beam of light).
The entire prototyping of the system was based on a time-domain analysis of the signal
propagation through the system.
Figure 7.2 shows a simple FAST-NET opto-electronic system modeled in cha-
toyant. The system simulation is based on the Ptolemy environment developed at the
University of California at Berkeley [4]. In Chatoyant a component model is written as
a programming object called a star. These stars are written in C++ and defined the be-
havior of a component at a specific level of abstraction chosen by the user. Each star
communicate with the other stars using a specific set of signals between them by a proper
scheduling discipline used during simulation computations. A number of built-in stars
77

Figure 7.2: Chatoyant “stars” used to model the FAST-NET system
helped in the graphic display of the result and the entire design system was modeled by
graphically interconnecting icons that represented particular modeled devices. The simu-
lation of the system shown in Figure 7.2 is depicted in Figure 7.3. The blue spots in Figure
7.3 represents the switching mechanism of the Photo-detectors at a particular instant of
time.
7.3 Modeling and Simulation
The prototyping of the entire system could be broken down at various level of
abstraction.
1) Physical Level
2) Component Level
3) System Behavior and
4) System performance and Validation.
The main focus of the research was on the component level of abstraction, where
circuit-level high-speed transmitter and receiver circuit netlists were developed using Ca-
dence spectre. The standalone netlist development used IBM-7HP SiGe device models
78

Figure 7.3: Chatoyant simulation of the FAST-NET system
and the waveform was viewed in AWD (Arbitrary Waveform Display).
7.4 SiGe Driver
The SiGe driver was composed of three main circuit components, the driver, the
limiter and the input buffer. Figure 7.4 shows the SiGe driver circuitry that was used to
drive the VCSELs. In the earlier chapters the main focus was on CMOS driver circuits,
but to have enough precision and control of the analog design, SiGe BiCMOS technology
was finally chosen for these Opto-electronic driver circuits. The main reason for this was
the speed at which these drivers were required to operate and the capacitive load that they
eventually drive.
The netlist of this driver circuit was created in Cadence spectre and was written as
a sub-circuit. The simulation of the system was carried out only after connecting all the
other sub-circuits related to the transceiver stage. The form of such a sub-circuit is given
79

Figure 7.4: SiGe Bipolar VCSEL driver
below as an example.
subckt DRIVER-vsource (vbias curout vim1 vip1 vmod)R2 (vbias net30) resistor r=50.01R3 (vbias curout) resistor r=50.01BJ4 (net30 vip1 net32 gnd) vbjtBJ5 (curout vim1 net32 gnd) vbjtM3 (net32 vmod gnd gnd) nfet l=220n w=9.2u nf=65 m=1
ends DRIVER-vsource
Figure 7.5 and Figure 7.18 shows two other circuits that coupled with the driver circuit in
Figure 7.4 to make the SiGe transmitter module.
The netlists for the limiter and the input circuits were created in the same manner
as demonstrated for the driver circuitry. The netlists ensured the proper connectivity of
the transmitter circuit and they were also used to simulate the circuit, obtain the waveform
and determine the speed of operation of the circuit.
80

Figure 7.5: SiGe Bipolar input circuit for the transmitter
Figure 7.6: SiGe Bipolar limiter circuit for the transmitter
81

Figure 7.7: AC simulation of SiGe driver circuit
Figure 7.7 shows the AC simulation of the circuit. From the figure it can be seen
that the device was capable of operating at a frequency of about 1Gbps. Considering
all the parasitics involved in the design the speed obtained was satisfactory for the pro-
totyping environment. The parasitic components and parameters were taken from the
IBM-7HP-SiGe model file, which had the device parameters that would be used during
fabrication.
Figure 7.9 shows the transient simulation of the circuit. It can be noted from this
simulation that the signal level reached the full voltage level for a piecewise-linear input
signal. This would help to conclude the fact that the signal did not degenerate with time.
Figure 7.10 shows the application of input signal for DC analysis of the circuit.
The signal was applied using the “gain element” modeling in Cadence spectre. The netlist
for such a gain element is given below. The typical gain element modeled as shown in
Figure 7.8. ensured perfect differential DC levels at the input of the driver circuit.
Vcmip (cmip 0) vsource type=dc dc=2.4Vnegin (negin 0) vsource type=dc dc=2.0Eicmp (padp 0 in 0) vcvs gain=1
82

Eicmpgain = 1
Eicmngain = −1
padp
gndin
padn
cmip
2.4V2.0V
negin
gnd
Figure 7.8: Gain element used for DC input signal(for differential levels)
Figure 7.9: Transient simulation of SiGe driver circuit
83

Figure 7.10: DC signal applied through the Gain Element
Eicmn (padn cmip in negin) vcvs gain=-1
The results of the DC simulation is shown in Figure 7.11. It can be noted from
the figure that when there was a voltage drop at the resistor on the right hand differential
arm of Figure 7.4 a current in the range of 9.8 mA shows up at the VCSEL model. This
current will be able to emit LASER at about 850 nm wavelength.
An ASCII file having “nutascii” format was also generated, which contained the
information of the value of the current at different time instants. This data has been
generated using the pseudo-random bit sequence (PRBS) at the input of the driver cir-
cuit. The numerous values of the current and the time stamp would help in generating
an eye-diagram of the transmitter. Depending upon the eye-opening, the quality and the
consistency of the current generated could be inferred.
7.5 SiGe Receiver
SiGe receiver circuit was comprised of the same circuit elements as the CMOS
optical receiver module discussed in section 4.2. The main elements in this circuit were
84

Figure 7.11: DC simulation of SiGe driver circuit
pre-amplifier circuit, buffer stage, post-amplifier circuit and the limiter circuit. The main
function of the receiver stage was to amplify the photo-electric current that it received
from the Photo-detectors. The Photo-detectors generated a very small current in the order
of � 1mA. This current was then passed through the various amplifier stages to finally
generate a voltage in the range of few Volts.
The pre-amplifier circuit is shown in Figure 7.12. The� � � �
resistor connected
between node “n3” and “curin” creates enough voltage drop to switch on the NFET “Q1”
� � ��� #
� � ��
� �
where, V is the voltage drop, I is the current generated by the photo-detector and assumed
to be 1 mA and R is the resistance. The NFET “M1” operated in the saturation region and
acted as a constant current source. R1 and R2 on the two arms formed a voltage divider
circuit, and the voltage drop across the� � � �
resistor was approximately calculated as,
��� � � � � �� � � � � � � � ( (85

Figure 7.12: Pre-amplifier schematic of SiGe receiver circuit
� � � � � � ���� � � � � � � � � � ���� � ��� � �
where, the resistances of the NFETs have been neglected to simplify the calculation and
� � � is the voltage drop across the resistance R2.
The sub-circuit netlist of the pre-amplifier stage was created in Cadence spectre
as given below. This was only a part of the entire receiver stage and the AC simulation
shown in Figure 7.13 could be obtained only after connecting all the other remaining
sub-circuits of the receiver stage.
subckt PREAMP (curin vave vout)R1PR (vcc n2) resistor r=700R2PR (vcc vout) resistor r=500Q1PR (n2 curin gnd gnd) vbjt1Q3PR (vout n2 n3 gnd) vbjt2
86

Figure 7.13: AC simulation of SiGe receiver circuit
RFPR (curin n3) resistor r=400CfPR (curin n3) capacitor c=30fFIDC1PR (n3 gnd) isource type=dc dc=0.5e-03
ends PREAMP
The small-signal AC simulation is shown in Figure 7.13. From the frequency response of
Figure 7.13 it is clear that the SiGe receiver circuit was capable of operating at a frequency
of a few hundreds of GHz.
The buffer stage followed the pre-amplifier stage to increase the voltage level of
the signal produced by the pre-amp circuit. This was done in order to drive the huge
capacitive loads of the post-amplifier stage. Figure 7.14 and Figure 7.15 shows the
schematic of the Bipolar buffer and post-amplifier stages. It is important to note that
both the circuits acted as differential amplifiers that made the output voltage swing about
a common-mode voltage.
The spectre netlist of the post-amplifier stage is given below.
subckt POSTAMP (vb1 vim vip vom vop)R1PO (vcc v2p) resistor r=350
87

Figure 7.14: Buffer stage of SiGe receiver circuit
Figure 7.15: Post-amplifier (bipolar) stage of SiGe receiver circuit
88

Figure 7.16: Differential DC input signal
R2PO (vcc v2m) resistor r=350Q1PO (v2p vim v1 gnd) vbjt3Q2PO (v2m vip v1 gnd) vbjt3Q3PO (vcc v2p vop gnd) vbjt3Q4PO (vcc v2m vom gnd) vbjt3M1PO (v1 vb1 gnd gnd) nfet l=0.3u w=2.4u m=4M2PO (vop vb1 gnd gnd) nfet l=0.3u w=2.4u m=2M3PO (vom vb1 gnd gnd) nfet l=0.3u w=2.4u m=2C1PO (vop gnd) capacitor c=2fFC2PO (vom gnd) capacitor c=2fFC3PO (v2m gnd) capacitor c=2fFC4PO (v2p gnd) capacitor c=2fF
ends POSTAMP
For the DC simulation, the DC signal applied at the input was made differential,
by using the same gain element as in Figure 7.8. The introduction of the gain element
controlled the DC signal at every instant of time, by making the voltage level at the two
inputs rise and fall simultaneously. This is illustrated in Figure 7.16. The result of the
DC simulation is shown in Figure 7.17. From the simulation result it can be seen that the
voltage at the output reached around 1.80 V, which was sufficient to trigger the NFETs in
89

the limiter stage.
The limiter stage was connected at the end of the receiver circuit. This stage had
two differential circuits connected back to back and boosted the signal level considerably.
The low-pass filters attached at the extreme differential stage in Figure 7.18 helped in
filtering the stray noise that might have generated during operation. The spectre netlist of
the limiter stage is given below.
subckt LIMITER (vb1 vim vip vom vop)R1LI (vcc v2p) resistor r=200R2LI (vcc v2m) resistor r=200Q1LI (v2p vim v1 gnd) vbjt3Q2LI (v2m vip v1 gnd) vbjt3Q3LI (vcc v2p vop gnd) vbjt3Q4LI (vcc v2m vom gnd) vbjt3M1LI (v1 vb1 gnd gnd) nfet l=0.3u w=2.4u m=4M2LI (vop vb1 gnd gnd) nfet l=0.3u w=2.4u m=2M3LI (vom vb1 gnd gnd) nfet l=0.3u w=2.4u m=2C1LI (vop gnd) capacitor c=2fFC2LI (vom gnd) capacitor c=2fFC3LI (v2m gnd) capacitor c=2fFC4LI (v2p gnd) capacitor c=2fF
ends LIMITER
The standalone simulation of the transient response is shown in Figure 7.19. From the fig-
ure it is clear that the voltage level at the output reached around 1.80 V that was sufficient
to trigger the subsequent electrical circuits carrying the signal.
7.6 The Design Objective
The main aim to undergo these standalone simulations was to verify the modeling
tool, Chatoyant. The “stars” that would have the same parametric signal information
and device parasitics would be electrically connected to generate a simulation. The main
objective of this was to match the behavior of these transceiver circuits generated from
real netlists with the ones generated using software (C++).
90

Figure 7.17: DC simulation of the receiver circuit
The “stars” for each circuit stage was fed with the same design parameters as that
of IBM-7HP models and then fed into a spice engine to generate the simulation for each
stage. The simulation results would then be verified against the data generated from these
real netlist simulations. If these two level of verification converge to a common point then
the prototyping tool would emerge as a success. The prototyping of the Opto-electronic
driver and receiver circuits would then become easy in the future as the “stars” for these
circuits could be referenced directly from the design library and put into effect, to design
an entire Opto-electronic system.
91

Figure 7.18: Limiter circuit of the receiver stage
Figure 7.19: Transient simulation of the receiver stage
92

Chapter 8
DESIGN INTERFACE WITH MICROMESH CAD TOOL
The simulation and the design that had been discussed so far were based on pla-
nar analysis. The circuits of each of the opto-electronic elements were laid out in two
dimensions and the simulations that had been carried out were developed on simple cir-
cuit theory based on Kirchoff’s Law. The real world circuit analysis could be much more
complicated than this. Two metal lines running parallel to each other have other electrical
parasitics that must be considered to simulate the circuit in detail. Spice like simulation
analyzes only the device characteristics and neglects the parasitic effect of interconnects.
As the number of devices in a circuit increase, the metal lines run from one end of the cir-
cuit to the other to electrically connect all these devices. Integrated circuits with millions
of transistors in them can perform well if the metallic interconnects used in the connectiv-
ity of the devices are designed and routed well. There might be instances where crosstalk
between two metal lines introduce so much capacitive effect that it degrades either the
signal quality or the circuit speed and performance. Designing circuit elements using the
differential approach solves this problem to a large extent, as the noise introduced swings
in opposite phase around the common-mode level and mutually cancels off, keeping the
signal good. This approach though useful in the designing of components, (as a matter
of fact all circuits discussed and designed so far were based on this approach) cannot be
extended to the metallic interconnects. A different approach seemed imminent to analyze
these interconnects.
93

Figure 8.1: 3D-model of metallic interconnects in Micromesh[9]
8.1 CFDRC-Micromesh Design Tool
CFDRC-Micromesh is a CAD tool that helps in doing a three dimensional analy-
sis of VLSI circuits. When interconnects in a circuit become one of the dominant factors
limiting the performance, it is important to model the wires so that digital pulses with
nanosecond rise and fall times could be modeled accurately. Spice type solvers does not
help much by solving lumped-circuit models and transmission line characteristic, as it
fails to model the crosstalk, noise, radiation effects and three dimensional glitches in vias
and pins over a wide frequency range. Figure 8.1 shows the metallic interconnects on a
chip, as viewed in Micromesh [9]. Micromesh does a three dimensional analysis of the en-
tire design and also does an Electro-magnetic analysis of the metallic interconnects based
on either the Finite-Difference Time-Domain (FDTD) or Finite-Surface Time-Domain
94

Figure 8.2: Electro-magnetic simulation of six striplines in Micromesh[9]
(FSTD) methods. [9, 8]. This tool enables three dimensional viewing of complex micro-
structures from layout designs, using CIF and GDS11 files as input or directly from Ca-
dence Virtuoso Editor. A typical three dimensional analysis of six striplines is shown in
Figure 8.2 [9].
8.2 Transformation of Design
The Micromesh tool can transcribe chip designs in its own graphic environment
by interpreting the designs in CIF and GDS11 format. The main objective of this part of
the research was to prepare the control software of the tool so that it would be able to get
all the input and output interfaces of the circuits designed so far. The circuits that were
95

transcribed included VCSEL driver (Figure 5.10), Optical receiver (Figure 5.13), LVDS
driver (Figure 5.15) and LVDS receiver (Figure 5.17).
The layout of the circuits mentioned above were done using Tanner Layout Editor
software. Micromesh is unable to read files in the tanner format, but has the capability
of directly interpreting the layout from Cadence Virtuoso Editor through a software in-
terface. The modification of the interfacing software between CFDRC Micromesh and
Cadence Virtuoso environment was needed so that the layout designs in Virtuoso could
be directly exported to the Micromesh graphic tool with the proper interface information.
The layouts of the design in Tanner Layout Editor were first converted to the
GDS11 form by exporting. These GDS11 files were then read back into the Cadence
Virtuoso Editor by streaming in the files. The technology file that does the layer mapping
was obtained from the vendor (TSMC) and had the information like, layer and device
parameters, layer map, layer definitions, technology display maps, electrical rules and via
and pin maps. When the designs were imported to the Cadence environment these maps
were referred to translate the layer information in GDS11. All these informations were
written using object classes in the technology mapping file.
8.3 StreamLayer Class Creation
After importing the design in Cadence Virtuoso an initial test was made to see
whether the designs could be exported or streamed out into GDS11 format once again
preserving the layer information. This test was essential before actually delving into
the interface software modification, because the interface software would do the same
streaming operation in order to transport the design into CFDRC Micromesh tool. In order
to do the perfect layer conversion, the streamLayer() class was written in the technology
file (sometimes called the layer map file).
Stream translation rules, control file conversion to the Cadence GDS11 Stream
format. These rules must be set in the technology file to perform the conversion. The
96

streamlayers subclass of the Layer Rules class specified the stream layers of the design.
The streamLayers() class was modified as shown below.
;( layer streamNumber dataType translate );( ----- ----------- -------- --------- )( sub 1 0 t )( nwell 2 0 t )( active 3 0 t )( poly1 13 0 t )( nplus 8 0 t )( pplus 7 0 t )
The Layer name was obtained from the layer-purpose pair for the layers to trans-
late. The stream number assigned a number between 0 - 255 to the layer. This number
was also in accordance with the stream numbers given in the layerPurpose class(). The
stream data type was any number between 0 and 127, but was kept at zero, which was the
default value. The last field, specified whether to translate (t) the layer or not.
This technique was used for all the layers listed in layer-purpose pairs given in
the User-defined layer section of the techLayers class. This procedure helped to have a
coherence in the “stream-in” and “stream-out” operation of the Cadence Virtuoso Layout
Editor. As a test, the GDS11 file size obtained by exporting the design from the Tanner
Layout Editor was compared to the size of the GDS11 file obtained by the stream-out
operation from the Cadence Virtuoso Editor. They were found out to be the same.
8.4 Software Interface Development
This was the most important effort in this area of the research. The main idea of
this work was to export the layout design from the Cadence Virtuoso Editor to the CFDRC
Micromesh environment. Figure 8.3 explains the concept of the flow behind the transfer
of the design elements.
The software interface was created by composing various SKILL procedures.
SKILL is a high-level, interactive programming language which provides an extension
97

��������������������������������������������������������
��������������������������������������������������������
CadenceVirtousoLayoutDesign
Add CFDmenu
Capturedesign area
Call pipofunction
Generateterminal info
CFDRCMicromeshGUI
SOFTWARE SKILL INTERFACE
Figure 8.3: Design transfer process from Cadence to Micromesh
to the Cadence Design Framework environment. It is a LISP like language with C IO
structures that enhances the functionality of the Cadence design tools.
Figure 8.3 shows the main function calls of the SKILL software program. The
main modification that was done on the existing software was the creation of a procedure
that took care of the terminal information generation denoted by the hatch-marked box in
the Figure 8.3.
The importance of this work came out of the limitation of GDS11 transformation.
When a layout was exported or streamed-out into the GDS11 form, the terminal infor-
mation of the circuit elements were lost. The transformation preserved the information
about the polygons and all other geometrical elements pertaining to the layers in the lay-
out, but failed to preserve the terminal information. The input and output ports related to
the signal entry and exit points in the circuit were drawn and named in the Layout Editor
(ports like “VDD”, “GND”, “VIN”, “VOUT”). When these informations were lost during
the streaming out operation, the Micromesh tool remained clue-less about the interfaces
of the circuit after it read the GDS11 file and imported the design.
98

Figure 8.4: Terminal information generation
The algorithm to generate such a procedure is given below:
procedure( terminalinfo()my_terminals = listToVector(cell->terminals)p1=outfile("my_terminals.info")
loop [0 to length(my_terminals)-1]terminal_layer=car(my_terminals[i]˜>pins˜>fig˜>layer)lx=xCoord(caar(my_terminals[i]˜>pins˜>fig˜>bBox))ly=yCoord(caar(my_terminals[i]˜>pins˜>fig˜>bBox))ux=xCoord(cadar(my_terminals[i]˜>pins˜>fig˜>bBox))uy=yCoord(cadar(my_terminals[i]˜>pins˜>fig˜>bBox))
Print(p1)Print(my_terminals[i])Print(my_terminals[i]->name)Print(terminal_layer)Print(lx ly ux uy)Closefile(p1))
All design elements in Cadence Virtuoso could be accessed using the SKILL pro-
gramming language. The design elements were created as database objects. The “� � ”
99

operator helped in hopping from one database object to the other. In the above procedure,
the terminal objects were stored in the variable called “my terminals”. The bounding box
for that database object was then found out by traversing through other nested database
objects like “pins” and “fig”. The x-coordinate and the y-coordinate of the lower-left
hand corner and the upper-right hand corner was then retrieved from the “bBox” database
object.
This procedure generated the terminal information for each of the layouts, VCSEL
driver, Optical receiver, LVDS driver and LVDS receiver. Figure 8.4 shows how the
terminal information generated for the “GND” terminal matches with the co-ordinates
of the bounding box. A blow-up of the file generated is shown in Figure 8.5. It can be
observed from Figure 8.5 that the information generated for the “GND” port correlates
with the “x” and “y” coordinates shown in Figure 8.4.
This terminal information generation will help in locating the coordinates of the
input, output and other signal interfaces after the design gets exported to the CFDRC
Micromesh environment. If the Micromesh tool maintains the correct grid dimensions
as that of the Cadence Virtuoso Editor, then locating the ports in the design will be as
easy as reading the already generated information from the file and placing the ports at
the right coordinates. The entire design can then be analyzed using three dimensional
electro-magnetic simulation and various electrical parasitics can be extracted, which is
not possible using Spice. Figure 8.6 shows the layout of VCSEL driver after transcribing
to Micromesh.
100

Figure 8.5: Terminal information file
Figure 8.6: VCSEL driver in Micromesh
101

Chapter 9
FUTURE WORK
The research done so far can be extended to do a full end-to-end simulation of
the Opto-electrical system that had been discussed in Chapter 3. The “FAST-NET” sys-
tem described in that chapter can be modified to the “10G System”. The main difference
between these two systems lies in the data transmission and reception rates of the signal
propagation. “The 10G System” will provide a benchmark in the future work by estab-
lishing a valid solution to the end-to-end simulation of the system prototype. The entire
effort will then be directed to the following major area of work.
1) To develop the VCSEL and the Photodetector models.
2) To model the physical optics for free-space communication.
3) To model the electrical and optical circuits that house the VCSEL and Photode-
tector models.
4) Compare the results obtained from this prototype model to the actual individ-
ual circuit simulation results, like bit-error-rate (BER), crosstalk, electrical and optical
parasitics and interconnect electro-magnetic analysis.
Some of these efforts were already made on the first level, like the work related
to the design of electrical and optical transmitter and receiver circuits. An elaborate dis-
cussion on these areas have already been discussed in Chapter 4, Chapter 5, Chapter 7
and Chapter 8. The other areas need more development and further work, like obtaining
the accurate VCSEL and Photodetector models that operate at either 850nm or 980nm
wavelength.
102

9.1 Merging of CAD tools
The end-to-end simulation of the Opto-electronic system is possible if the two
CAD design tools, Chatoyant (discussed in Chapter 7) and CFDRC-Micromesh (dis-
cussed in Chapter 8) merge, to form a unified concept of rapid prototyping. Each of
these tools has their own unique capabilities to model the system, but they also lack a few
capabilities that the other tool provides. Building more on each of the tool’s strength and
taking the results from the other tool, the task of en-to-end simulation can be achieved.
CFDRC-Micromesh is capable of doing a three-dimensional electro-magnetic anal-
ysis of the driver and the receiver circuits of the Opto-electronic system. From this
electro-magnetic simulation, some hard to find device and interconnect parasitics, like
crosstalk, radiative effects and noise can be extracted easily. The only missing elements
that cannot be modeled in Micromesh are the Optical elements like, VCSELs and Pho-
todetectors.
Chatoyant design tool can model all the optical elements like VCSELs and Pho-
todetectors with ease, by applying the Gaussian beam concept and near-field and far-field
effects. For the electrical elements, like the electrical and optical drivers and receivers,
it has to bank on the simulation results and some known device parameters. Chatoyant
is unable to predict the interconnect and more complicated device parasitics. In order to
model such a fast system where the data signal speed reaches 10Gbps, correct parasitic
extraction becomes mandatory to accurately predict the system behavior.
It becomes clear that each of these tools has their own strengths and weaknesses. If
the results of each is made transparent to the other then the Opto-electronic system can be
modeled in both environments, with results on end-to-end simulation. As an example, the
Micromesh environment can generate the S-parameter models of the driver and receiver
circuitry while the Chatoyant tool can generate the Gaussian beam models of the physical
optics involved in the system. The results can then be shared between both the systems,
and two results of the end-to-end simulation of the system design can materialize. The
103

results obtained may be different, as both the tools use different approaches in modeling
the Opto-electronic system, but the data can be compared and validated. In this way a
more accurate system model prototype can be generated, which will eventually reduce
the design cycle time of an entire Opto-electronic system.
104

BIBLIOGRAPHY
[1] J. S. Bergey. Cmos laser driver, current mode dac’s and test circuits. Master’s thesis,University of Delaware, Spring 2001.
[2] A. Christou. Electromigration & Electronic Devise Degradation. John Wiley & Sons,Inc., New York, 1994.
[3] Michael W. Haney et al. Description and evaluation of the fast-net smart pixel-basedoptical interconnection prototype. Proceedings of the IEEE, 88(6):819–828, June2000.
[4] S.P. Levitan et al. Chatoyant: a computer-aided-design tool for free-space optoelec-tronic systems. APPLIED OPTICS, 37(26), September 1998.
[5] Alan Hastings. The Art of Analog Layout. Prentice Hall, New Jersey 07458, 2001.
[6] F. Kiamilev and A. Krishnamoorthy. A high-speed 32-channel cmos vcsel driver withbuilt-in self-test and clock generation circuitry. IEEE Journal of Quantum Electron-ics, pages 287–295, March/April 1999.
[7] Tektronix, Inc., 14200 SW Karl Braun Drive, Beaverton, OR 97077. Tektronix LogicAnalyzer Family Version 4.1 Software.
[8] R. Tramel, M. Torowski, A. Przekwas, J. Schultz, and R. Frey. Modeling of elec-tromagnetic fields in high speed electronic interconnects using a least squares fd-tdalgorithm. CFD Research Corporation.
[9] M. Turowski, R. Tramel, and A. Przekwas. High-fidelity 3d electromagnetic analysisof interconnects and printed-circuit-boards. In MIXDES 2001, Zakopane, Poland,June 2001.
105


