
USER MANUAL
Syntax Highlighter
for Magento2
For latest information, please visit the website.
Syntax Highlighter 2.0.4

INSTALLATION
Installation via Magento Marketplace
For more details about installing custom modules see
http://docs.magento.com/marketplace/user_guide/quick-
tour/install-extension.html
Manual Installation (Installation from a Zip file)
Unpack the extension into Your Magento 2 Directory /app/code
folder. See the screenshot below as an example.
Open up command prompt Navigate to Magento 2 root
directory and run the following commands:
sudo –uwww-data bin/magento setup:upgrade
sudo –uwww-data bin/magento cache:clean
For more details about installing custom modules check
http://devdocs.magento.com/guides/v2.0
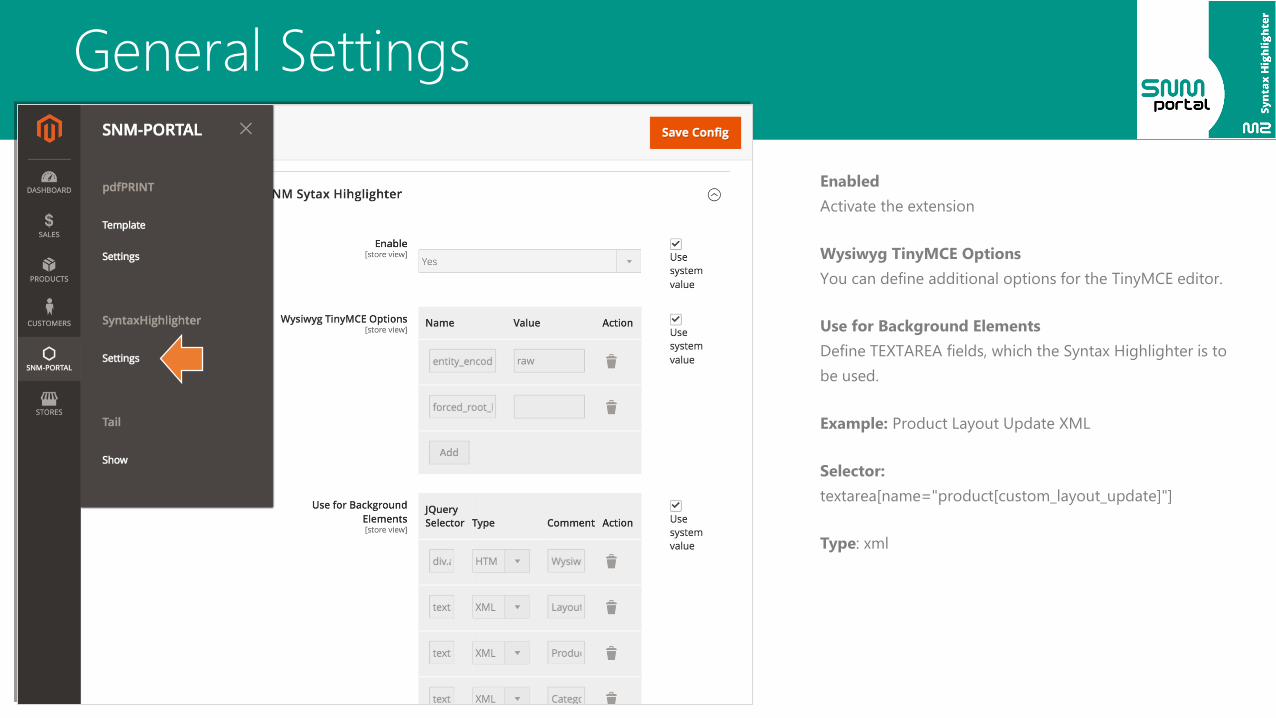
General Settings
Enabled
Activate the extension
Wysiwyg TinyMCE Options
You can define additional options for the TinyMCE editor.
Use for Background Elements
Define TEXTAREA fields, which the Syntax Highlighter is to
be used.
Example: Product Layout Update XML
Selector:
textarea[name="product[custom_layout_update]"]
Type: xml
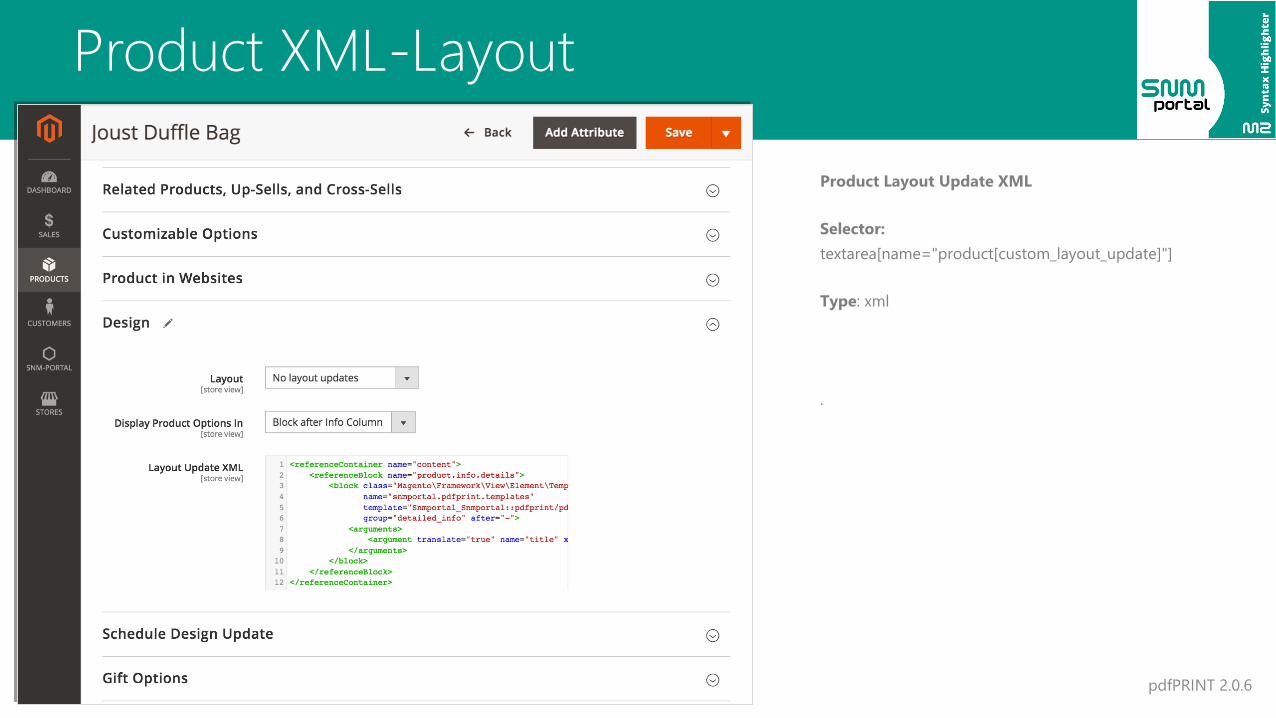
Product XML-Layout
pdfPRINT 2.0.6
Product Layout Update XML
Selector:
textarea[name="product[custom_layout_update]"]
Type: xml
.

CMS Block
pdfPRINT 2.0.6
Wysiwig Editor
Selector:
div.admin__control-wysiwig > textarea
Type: Magento (HTML+ Markup Tags)
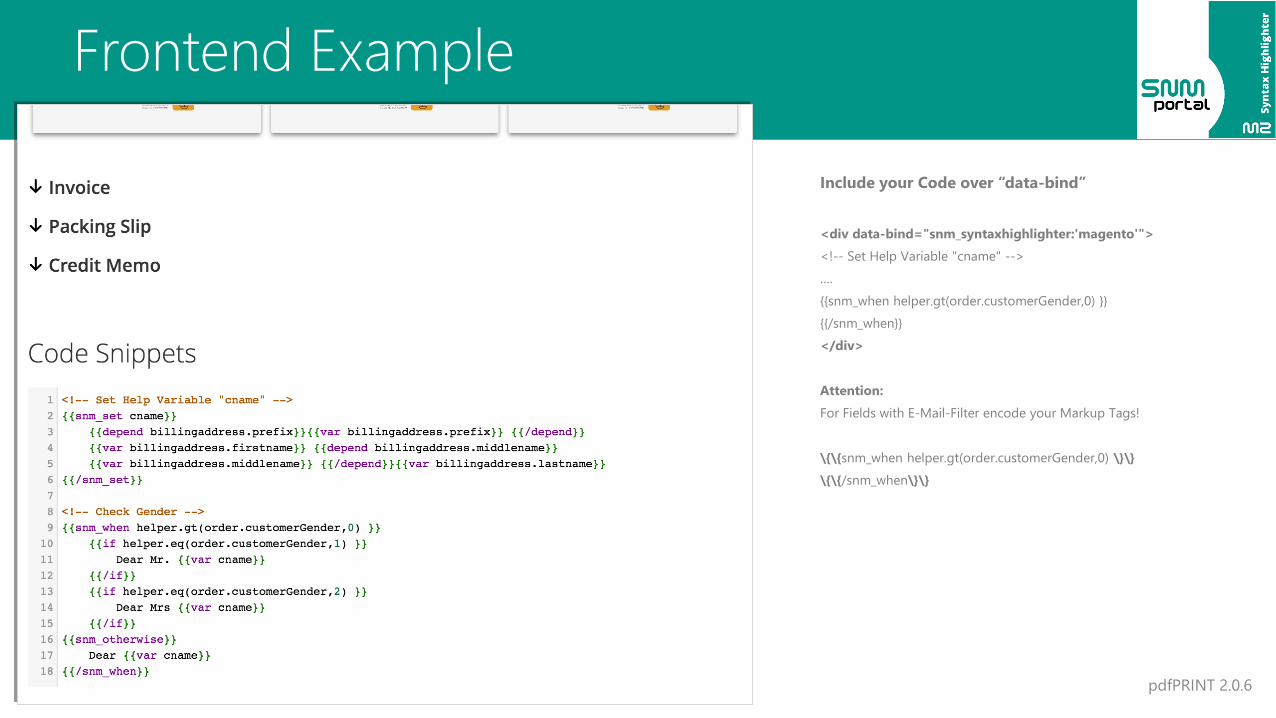
Frontend Example
pdfPRINT 2.0.6
Include your Code over “data-bind”
<div data-bind="snm_syntaxhighlighter:'magento'">
<!-- Set Help Variable "cname" -->
….
{{snm_when helper.gt(order.customerGender,0) }}
{{/snm_when}}
</div>
Attention:
For Fields with E-Mail-Filter encode your Markup Tags!
\{\{snm_when helper.gt(order.customerGender,0) \}\}
\{\{/snm_when\}\}

Thank you!
Should you have any questions or feature
suggestions, please contact us at:
Contact page : contact
Email: [email protected]
Website: snm-portal.com
Extension: Syntax Highlighter
SNM-Portal Team
pdfPRINT 2.0.6


