education program grades 9-12 · • classroom experiment to derive students’ predicted terminal...
TRANSCRIPT
Every iFLY Field Trip includes:
• Interactive STEM presentation, delivered by iFLY STEM Educator
• Physics demonstration in the wind tunnel
• Classroom experiment to derive students’ predicted terminal velocity and
compare with actual measured wind tunnel speeds
• Flying instruction & safety training
• Flying time, with one-on-one supervision from a highly-trained and certified
instructor
• Pre and post-field trip activities to conduct in your classroom
• Photos and videos for the students to keep
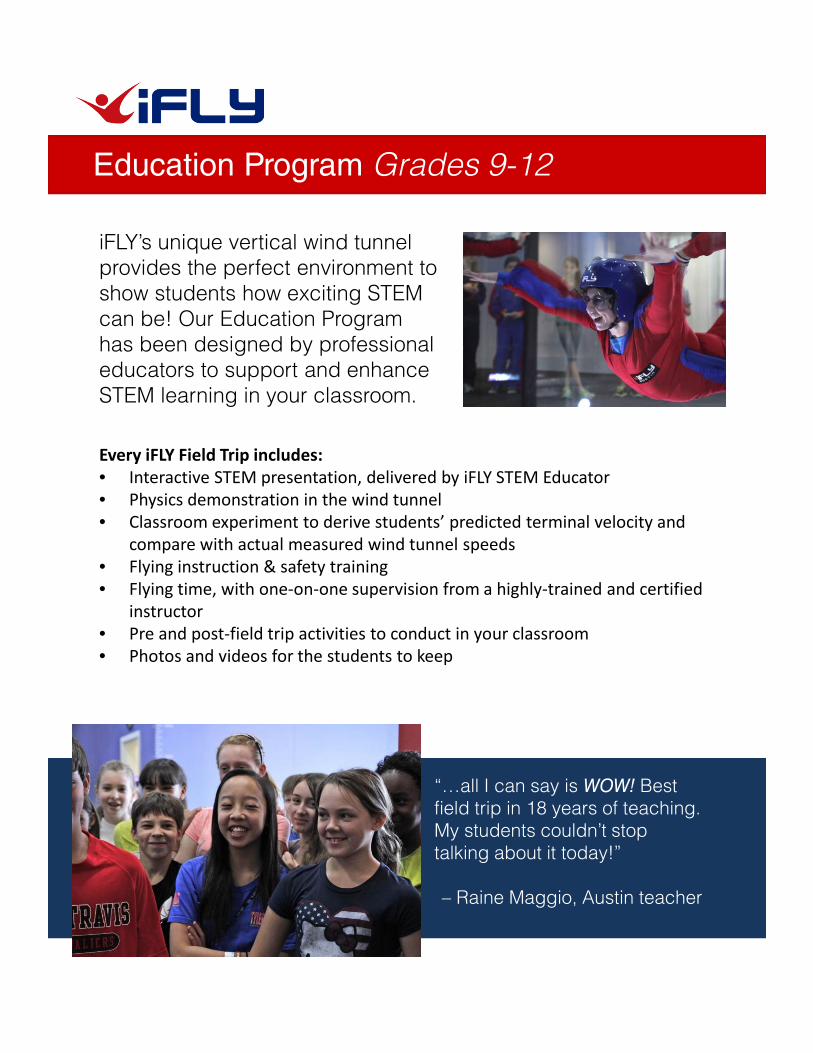
iFLY’s unique vertical wind tunnel
provides the perfect environment to
show students how exciting STEM
can be! Our Education Program
has been designed by professional
educators to support and enhance
STEM learning in your classroom.
Education Program Grades 9-12
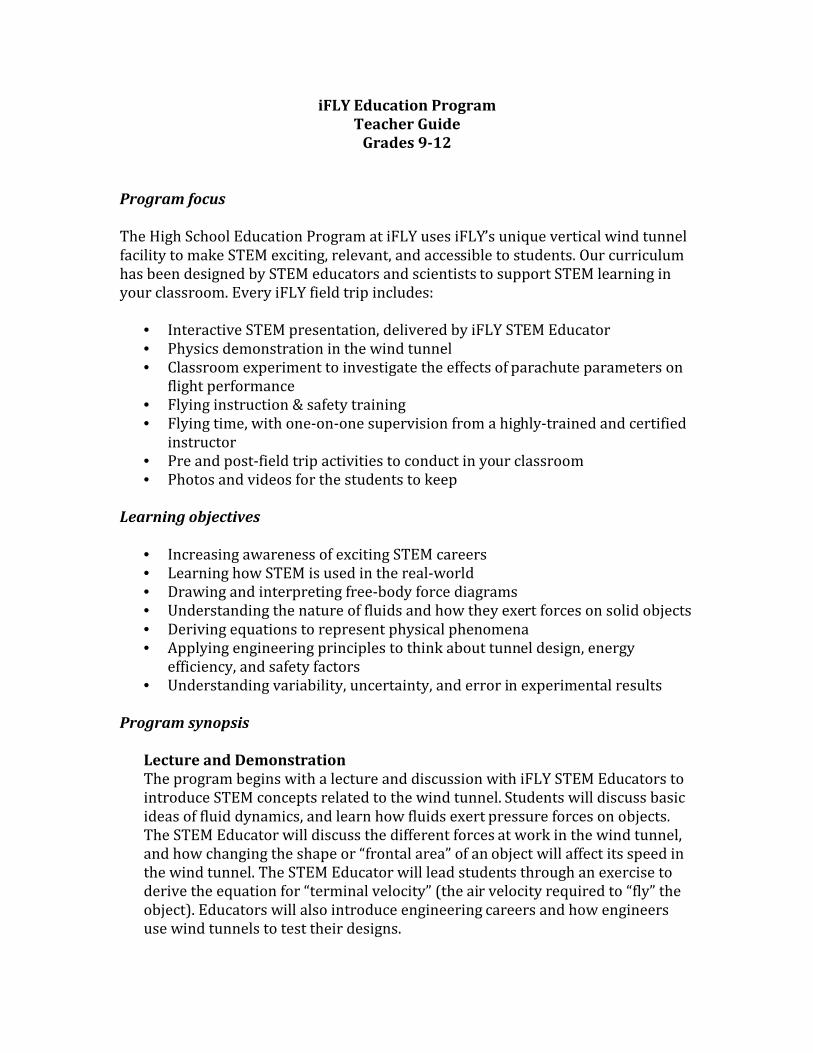
“…all I can say is WOW! Best
field trip in 18 years of teaching.
My students couldn’t stop
talking about it today!”
– Raine Maggio, Austin teacher

Our Learning Objectives include:
• Increasing awareness of exciting STEM careers
• Learning how STEM is used in the real-world
• Drawing and interpreting free-body force diagrams
• Understanding the nature of fluids and how they exert forces on
solid objects
• Deriving equations to represent physical phenomena
• Applying engineering principles to think about tunnel design,
energy efficiency, and safety factors
• Understanding variability, uncertainty, and error in experimental
results
All iFLY field trips support the following TEKS:
Math: Algebra I: 1, 2D, 5, 9B; Algebra II: 1; Geometry: 8A
Science: IPC: 2B-E, 3A, 3E, 4A, 4C, 4D, 5A; Physics: 2E, 2H-L, 3A, 3E, 3F,
4A, 4B, 4D, 4E, 4F
Education Program Grades 9-12
iFLY field trips make
STEM relevant,
interesting and
accessible for your
students.
iFLY Education Program
Teacher Guide
Grades 9-12
Program focus
The High School Education Program at iFLY uses iFLY’s unique vertical wind tunnel
facility to make STEM exciting, relevant, and accessible to students. Our curriculum
has been designed by STEM educators and scientists to support STEM learning in
your classroom. Every iFLY field trip includes:
• Interactive STEM presentation, delivered by iFLY STEM Educator
• Physics demonstration in the wind tunnel
• Classroom experiment to investigate the effects of parachute parameters on
flight performance
• Flying instruction & safety training
• Flying time, with one-on-one supervision from a highly-trained and certified
instructor
• Pre and post-field trip activities to conduct in your classroom
• Photos and videos for the students to keep
Learning objectives
• Increasing awareness of exciting STEM careers
• Learning how STEM is used in the real-world
• Drawing and interpreting free-body force diagrams
• Understanding the nature of fluids and how they exert forces on solid objects
• Deriving equations to represent physical phenomena
• Applying engineering principles to think about tunnel design, energy
efficiency, and safety factors
• Understanding variability, uncertainty, and error in experimental results
Program synopsis
Lecture and Demonstration
The program begins with a lecture and discussion with iFLY STEM Educators to
introduce STEM concepts related to the wind tunnel. Students will discuss basic
ideas of fluid dynamics, and learn how fluids exert pressure forces on objects.
The STEM Educator will discuss the different forces at work in the wind tunnel,
and how changing the shape or “frontal area” of an object will affect its speed in
the wind tunnel. The STEM Educator will lead students through an exercise to
derive the equation for “terminal velocity” (the air velocity required to “fly” the
object). Educators will also introduce engineering careers and how engineers
use wind tunnels to test their designs.
The wind tunnel demonstration segment uses various objects such as inflatable
balls to show how the terminal velocity depends on an object’s size, shape, and
weight.
Classroom Experiment
Students move into a classroom and break into 2’s and 3’s to conduct an
experiment. The goal is for each student to predict his/her own terminal velocity
in the wind tunnel. In other words, how fast must the air in the wind tunnel
move to make each student “float”? The students will use algebraic reasoning to
solve the air drag equation for “v”. The groups will then use measuring tapes and
scales to determine their weight and frontal area.
During their flights, an instructor will be recording their actual terminal
velocities. Afterwards, the students will compare their actual velocities to their
predicted values. The Educator will lead them through a discussion of error and
the class will brainstorm possible reasons for the error. If time is running short,
the classroom teacher will be given all the materials necessary to conduct this
discussion back at school.
Flight Experience
All students are given flight instruction by a certified flight instructor, including
an individual flight experience in the iFLY tunnel.
Grade level appropriateness
Our curriculum has been specifically designed to support the following
standards:
TEKS:
Math: Algebra I: 1, 2D, 5, 9B; Algebra II: 1; Geometry: 8A
Science: IPC: 2B-E, 3A, 3E, 4A, 4C, 4D, 5A; Physics: 2E, 2H-L, 3A, 3E, 3F, 4A, 4B,
4D, 4E, 4F
Common Core Mathematics: HSA.CED.A.1; HSA.CED.A.2; HSA.CED.A.4;
HSA.REI.A.1; HSA.REI.B.3
NGSS: HS-PS2-1; HS-PS2-2; HS-ETS1-2
Making the most of your field trip
1. Deliver the “Pre Field Trip” pdf slides to your students (This is also available
in .pptx format. Contact us and we can email you this file). This presentation
will show students what to expect when they arrive at the wind tunnel. It will
also introduce some of the vocabulary and STEM concepts we will cover in
the field trip. At the end of the slides, you will find a page containing a “script”

that you can read word-for-word to your students. No preparation
necessary!
2. If you have questions before, during, or after your field trip, please do not
hesitate to contact iFLY staff. We are happy to answer any questions that will
make your students’ better!
3. Arrive on time. Students’ flight times are prescheduled and cannot be
rearranged. Arriving promptly will ensure that your students do not miss any
portions of their education experience.
4. During the classroom activity, the STEM Educator may ask for your
assistance to help students with certain portions of their investigation. Please
encourage parents and other field trip chaperones to jump in and lend a
hand!
5. Please help us improve and strengthen our program by completing the
Teacher Survey. We value your feedback!
6. You will receive materials and suggested activities to complete back in the
classroom. Having a follow-up discussion or activity with your students after
the field trip will help support the concepts they learned during their visit.

iFLY Education Program
High School Standards Alignment
Field Trip Activity Standard Interactive Presentation:
• Students analyze the graphs of displacement, velocity, and acceleration vs. time and use these to describe a skydiver during freefall
• Students use the pitot-static tubes in the wind tunnel to observe and record the velocities of different objects in the wind tunnel.
• Use a free body diagram of a skydiver to sum the forces acting on his/her body • Discuss that when forces are balanced (net force = 0), acceleration is zero, and a skydiver achieves
“terminal velocity” • Discuss the differences between objects falling through air vs. a vacuum. Conclude that in a vacuum, mass
has no effect on acceleration or velocity. • Recognize that a flyer has both mass and velocity and that a flyer’s kinetic energy increases as a square of
the flyer’s velocity • Discuss the difference in frames of reference between the wind tunnel and skydiving, i.e, in the wind tunnel
the flyer is still and the air is moving, while in free flight the air is still and the skydiver is moving • The STEM Educator leads the class in the derivation of the equation for terminal velocity using the balance
of forces equation (sum of forces = ma) • Students identify the independent variables involved in terminal velocity, and determine whether they are
inversely or directly proportional to velocity • Identify when the gravitational force or the force of air drag is dominant. Discuss the effect this has on a
skydiver’s velocity and acceleration. • Discuss that when forces are balanced (net force = 0), acceleration is zero, and a skydiver achieves
“terminal velocity”. • Discuss the differences between objects falling through air vs. a vacuum. Conclude that in a vacuum, mass
has no effect on acceleration or velocity. • Educator leads a discussion about engineering careers, the engineering process as applied to the design of
iFLY tunnels, and other applications of wind tunnels in STEM
Science TEKS: IPC 3E IPC: 4A,C,D IPC: 5A Physics 3E Physics 4A,B,D,E,F Math TEKS: AlgebraI: 1A Next Generation Science Standards: HS-PS2-1
LAB ACTIVITY
• Students break into small groups and brainstorm ways to measure the variables required for solving the lab activity
Science TEKS: IPC 2B-E IPC 3A Physics 2E,H- L Physics 3A,F

iFLY Education Program High School Standards Alignment
2
• Students use the derived equation to calculate their own personal terminal velocity in the wind tunnel, which they compare to actual values
• Students measure their own mass and surface area using scales and tape measures. They use this to calculate their terminal velocity in the tunnel. All calculations are made using SI units.
• Students compare predicted terminal velocity to their actual velocity in the wind tunnel and calculate percent error. They then discuss possible reasons for error and ways to redesign the experiment to be more accurate.
• Students use the equation for terminal velocity to conclude what would happen if certain variables were increased or decreased. For example, “How would a very large object with a small mass behave in the wind tunnel?”
• Apply the equation for terminal velocity to such hypothetical scenarios such as “What would you expect for a skydiver falling through molasses instead of air?” or “What factors complicated the design of the descent and landing for the NASA Mars Rover expeditions?”
Physics 4B Math TEKS: AlgebraI: 1B-E, 9B Geometry: 8A Next Generation Science Standards: HS-PS2-1 HS-ETS1-2 Common Core Mathematics: HSA.CED.A.1,2,4 HSA.REI.A.1 HSA.REI.B.3
Post-field trip classroom activity
• Students can use their own data to create a class graph of terminal velocity. • Students can use their class graph to create a “recommendation” to iFLY engineers for which value of drag
coefficient should be used to model teenage flyers in the wind tunnel
Science TEKS: Physics 2J, K Math TEKS: AlgebraI: 2D. 5 AlgebraII: 1

iFLY pre-Field Trip
Introduction

So, you’re coming to
iFLY…
What should you
expect during your
field trip?

You’ll learn about the science
and engineering involved in our
wind tunnel.

You’ll make measurements and do calculations to see if you can predict how fast the wind has to blow for you to “fly” in the tunnel.

Our certified flight instructors will lead
you through flight and safety training.

Everyone will get to fly in the
tunnel with one-on-one
supervision from an
instructor.

Here are a few things to think
about before your field trip:

What are the
differences
between solids
and fluids?
What are some
examples of each?
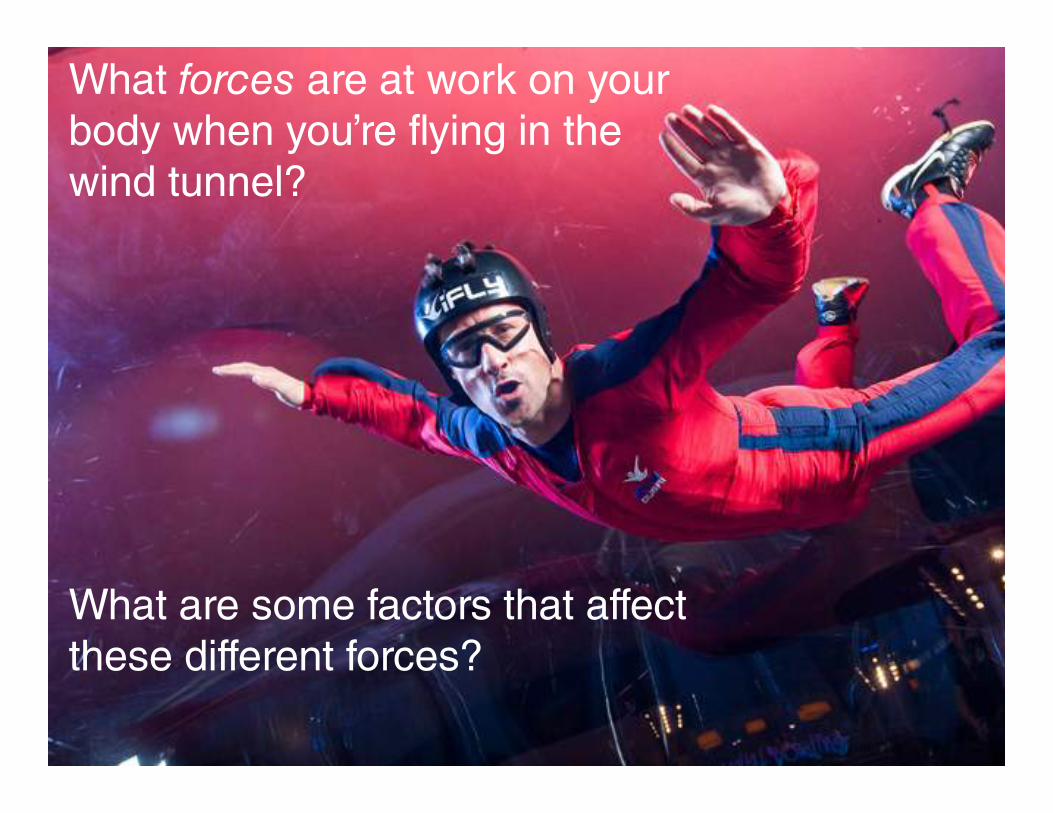
What forces are at work on your
body when you’re flying in the
wind tunnel?
What are some factors that affect
these different forces?

What is “terminal velocity”?
What does it mean for a skydiver?
What does it mean for an iFLY-er?

You’ll learn about the term frontal area. This is the part of an object’s surface area that the wind “sees”.
Changing your frontal area in the wind tunnel will change how you fly.

This flyer is presenting a large
frontal area to the wind.
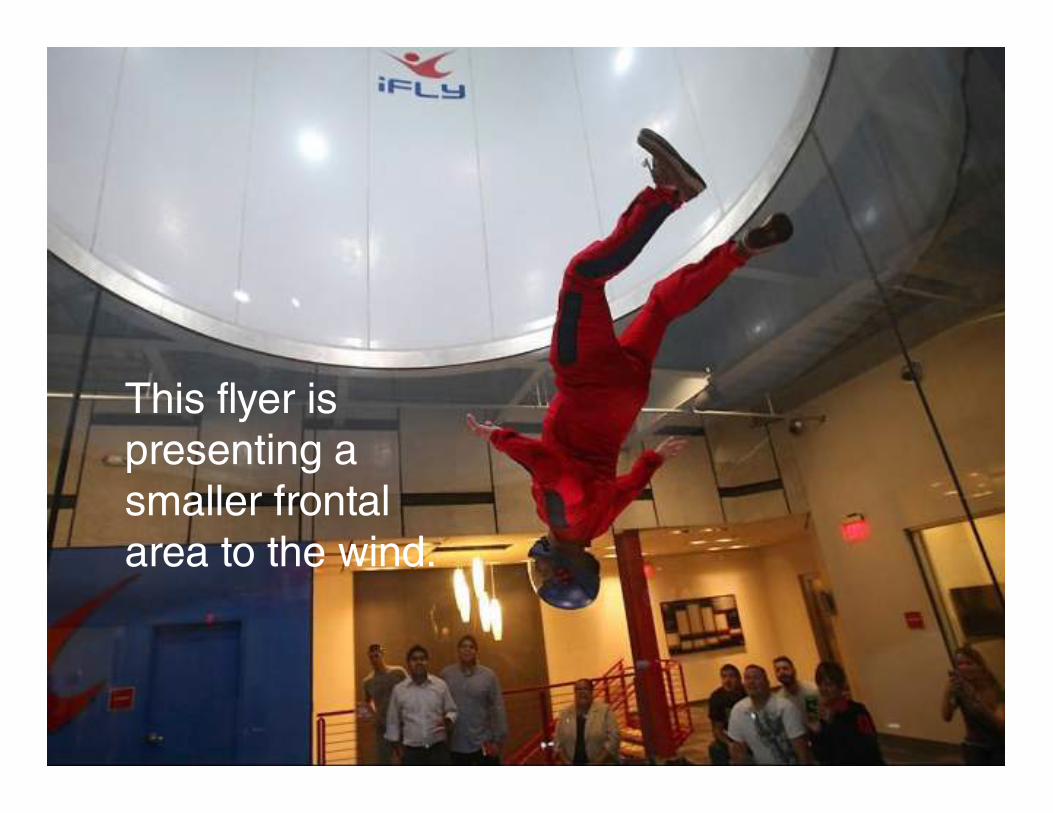
This flyer is
presenting a
smaller frontal
area to the wind.

How is it different from the
surface area of the entire
basketball?
How would you find the frontal
area of the basketball?

Now, think about what
questions you have
for us!

See you soon!

iFLY Pre-Field Trip Presentation script for teachers
1. Title Slide
2. Are you excited to visit iFLY? First, let’s go over what to expect during your field trip.
3. You’ll start off by sitting in front of our state-of-the-art wind tunnel. One of iFLY’s science educators will give a brief introduction to the
science and engineering concepts involved in the wind tunnel. They’ll do a demonstration of how some everyday objects behave in the
tunnel. Then a flight instructor will show you how they use fluid dynamics to do their expert moves. Prepare to see some cool tricks!
4. Our class will head to our “lab” to do an activity. Every student will fly at a different velocity, or speed, in the wind tunnel. Your challenge
is to predict what your own velocity will be. To do this, you’ll measure your body and do some calculations. Then it’s off to the wind
tunnel to see if you got it right!
5. Highly-trained flight instructors will lead you through a flight and safety training. You’ll learn all the basics that will allow you to have a
safe and enjoyable flight. Next, it’s time to gear up and get ready to fly.
6. Every student will have the chance to fly in the wind tunnel! Your flight instructor will stay right there with you to make sure you’re safe
and having the best flight possible. You’ll be experiencing all the physics for yourself!
7. Here are a few STEM concepts to think about before you come…
8. Read students the questions on this slide. The answers are given here: Solids have a definite shape and volume. When you apply a force
to a solid, it may change its volume, but usually only by a small amount. Examples of solids in this photo: the glass, the table, the ice
cubes. Fluids don’t have a definite shape….they take on whatever shape they are contained in. When you apply a force on a fluid it flows
around the solid. Fluids may be liquid or gaseous. Examples of fluids in this photo: the air, the soda, the gas bubbles trapped in the soda.
9. Read students the questions on this slide. The answers are given here: The two main forces we are concerned with in the wind tunnel are
GRAVITY and AIR DRAG. Gravity is the force pulling you down to earth. Drag is the force the moving air exerts on your body. Your size,
shape, and the way you hold your body will affect your drag force.
10. For a skydiver, terminal velocity is the speed at which the falling diver is no longer accelerating. They are still falling, but they are no
longer falling faster and faster. The drag force and gravitational force are balanced. For a flyer in the wind tunnel, the terminal velocity is
how fast the air has to move in order to get you off the ground and “float” in the air. When you are “hovering” in the tunnel, we refer to
that as your terminal velocity.
11. In the demonstration portion of the field trip, you’ll be learning about frontal area. This is different from the surface area.
12. A flyer can increase their frontal area by spreading out their bodies.
13. Leave this trick to the experts! This flight instructor has decreased his frontal area by pointing his body straight down.
14. Here’s a quick activity to make sure you understand the difference between frontal area and total surface area. The frontal area of the
basketball is (pi*r^2), where r is the radius of the basketball (This is also the area of a circle with radius, r). The surface area of the entire
basketball is (4*pi*r^2).
15. What questions do you have about your upcoming field trip? What are you curious about? What do you wonder? Jot these down and
the iFLY educators will do their best to answer them when you come!