efficient surface repairs for aluminium wheels. · efficient surface repairs. 4 1. preface 2....
TRANSCRIPT
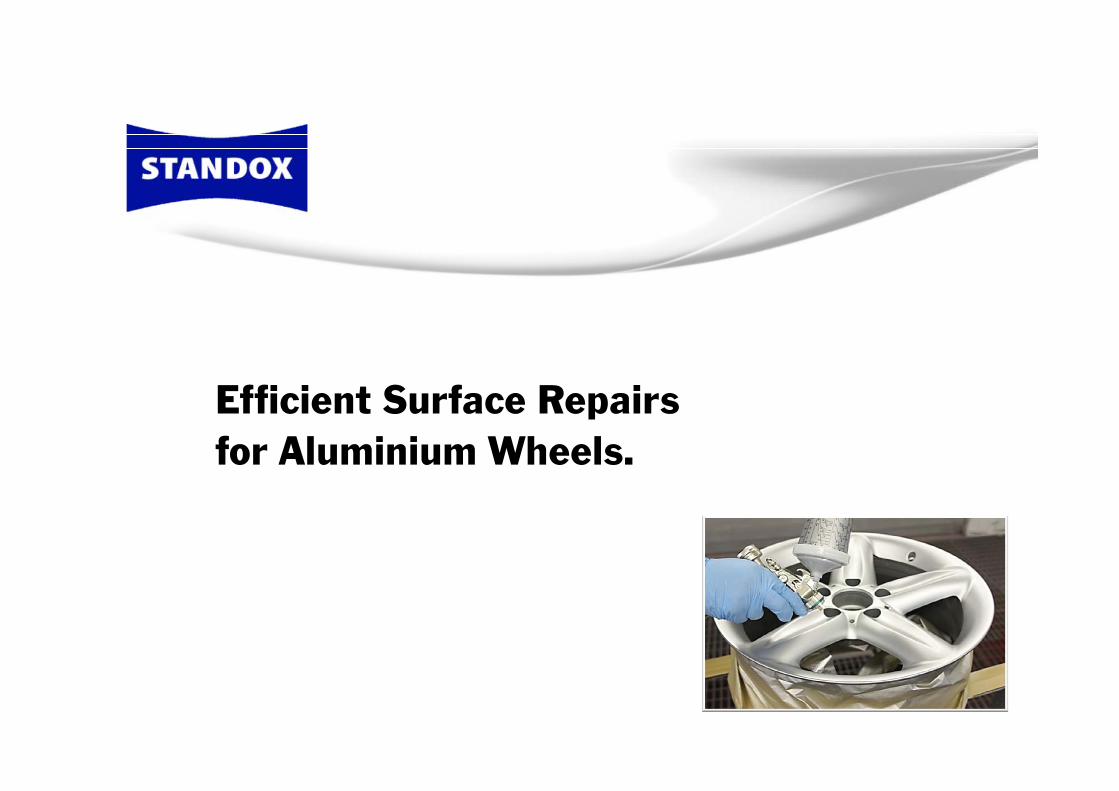
Efficient Surface Repairsfor Aluminium Wheels.

2
3
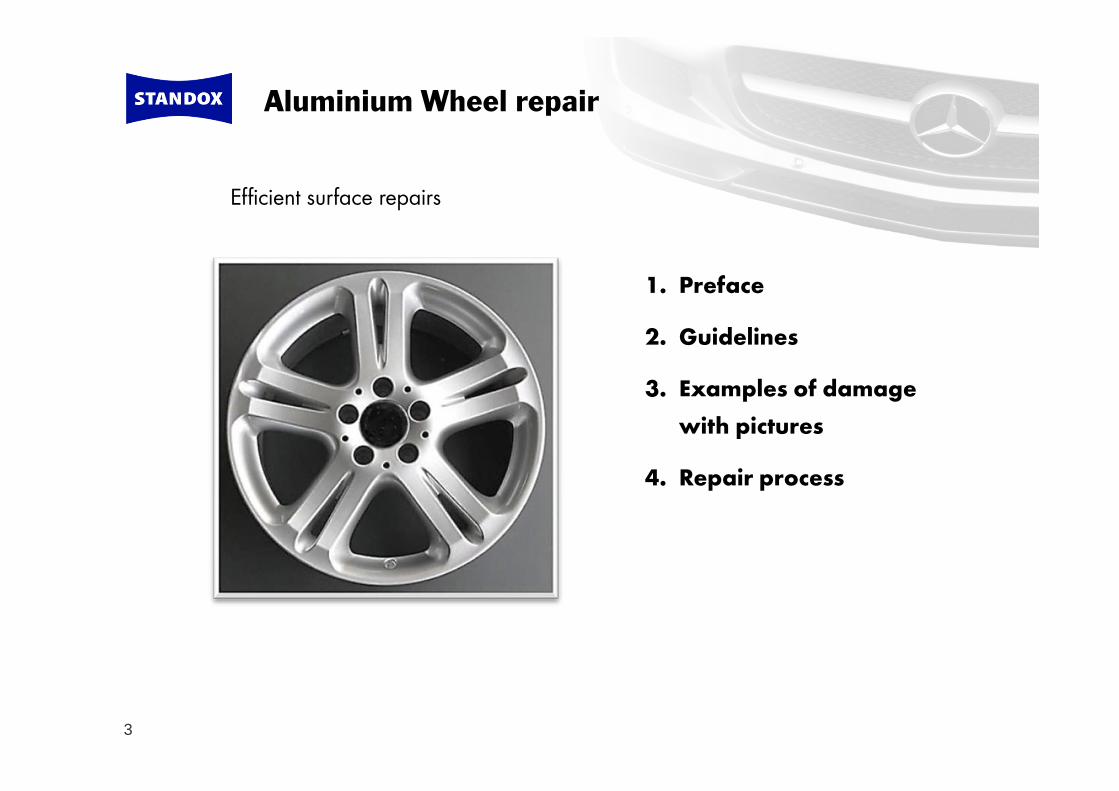
Aluminium Wheel repair
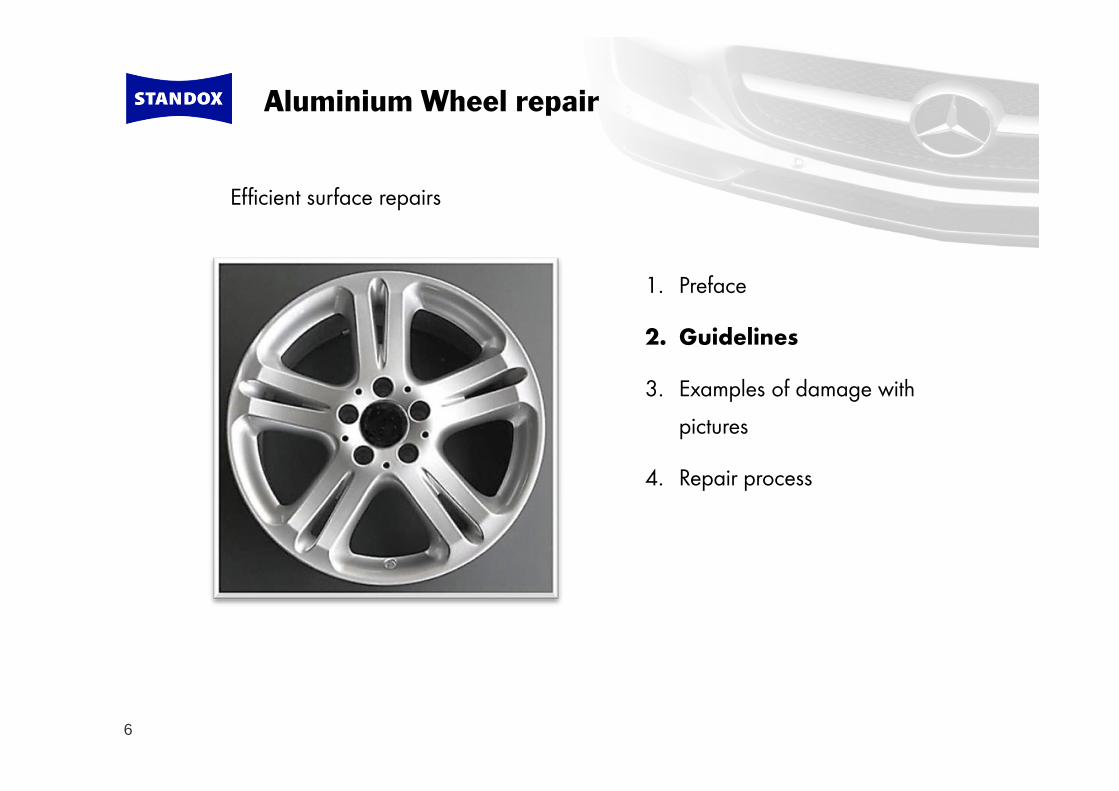
1. Preface
2. Guidelines
3. Examples of damage with pictures
4. Repair process
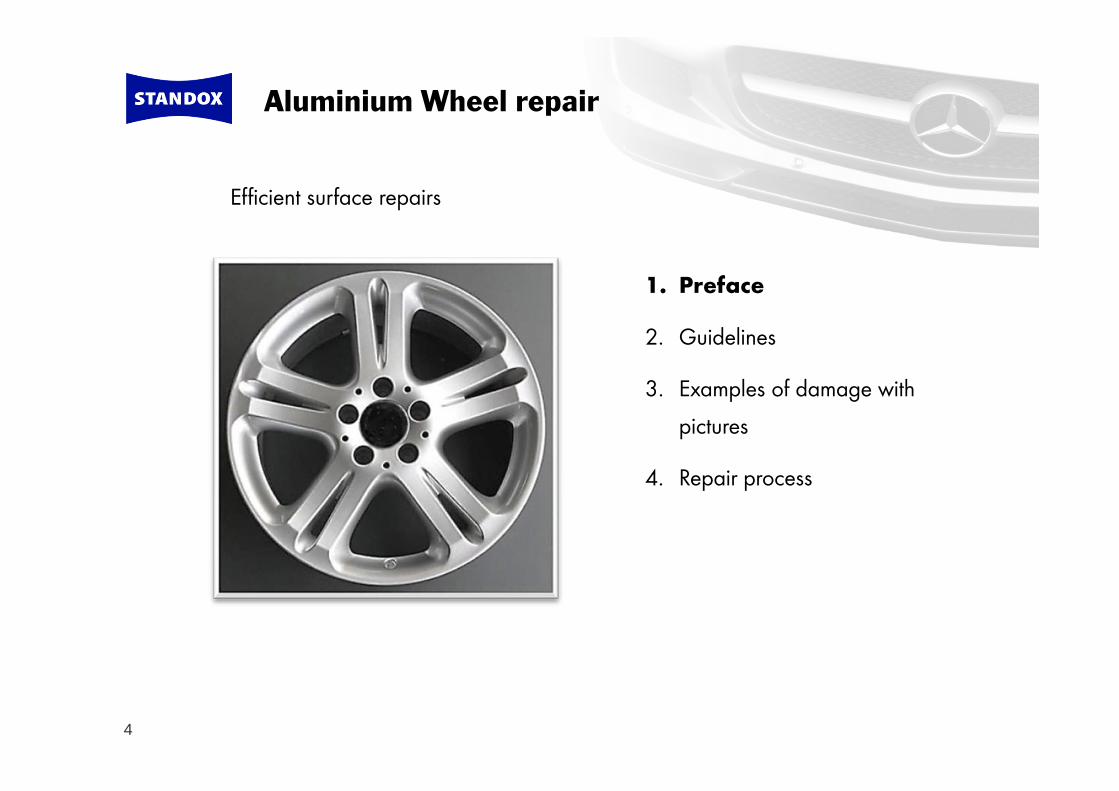
Efficient surface repairs
4
1. Preface
2. Guidelines
3. Examples of damage with pictures
4. Repair process
Efficient surface repairs
Aluminium Wheel repair
5
1. Preface
• Wheels are highy stressed vehicle components of high safety relevance. For Safety reasons, leading car makers have until now not approved any refinish processes for wheels. And this principle has also applied so far to Aluminium Alloy wheels.
• Modern metal stopper and paint materials and the latest repair processes now make it possible to repair their surface of Aluminium Alloy wheels, albeit within bounds.
• This guide describes what is currently technically possible. To what extend a repair makes economic sense depends on many factors, however.
• This guide merely contains recommendations and cannot serve as a basis for warranty claims against Standox GmbH.
6
1. Preface
2. Guidelines
3. Examples of damage with pictures
4. Repair process
Efficient surface repairs
Aluminium Wheel repair

7
2. Guidelines
• ISO 14400, point 5: After removal, wheels, studs and nuts shall be checked closely to ensure that they are in good condition: namely that any fracture, crack, deformation, corrosion, heavy wear or other kind of non-conformity are not present. Moreover, no technical modification on the wheel shall be made. Repair by means of welding or by the addition of material on wheels or wheel centres having breakage, fissures, cracks or high wears, shall not be made, as they can introduce additional stresses in the critical areas.
• EUWA (Association of European Wheel Manufactures): Repair of a damaged wheel or disc by heating, welding or addition or removal of material is absolutely forbidden.
8
2. Guidelines
• ETRTO – (The European Tyre and Rim Technical Organisation)
Damaged or deformed wheels or wheels with cracked or deformed bolt holes must not be repaired or put into service.
• What does „cosmetic repair“ mean?
The term „cosmetic repair“ always refers to the expert technical restoration of the wheel in terms of visible defects by polishing, local sanding, smoothing of nicks/notches, and possibly by applying surfacer, primer and paint.
• Such repairs relate to superficial, visible blemishes that, in the event of furter use of the untreated wheels, would result in neither technical nor legal restrictions (e.g. during on MOT inspection under Art. 29 StVZO (German vehicle roadworthiness regulations)).
9
2. Guidelines
• Source:
Final position paper on cosmetic wheel repairs of the Vehicle Engineering Commitee, special committee on wheels and tyres at the German Federal Ministry of Transport, building and urban development (BMVBS).
The restrictions on repair and preparation issued by the wheel manufacturer remain unaffected by these guidelines.
A repair may only be carried out with the tested and prescribed paint materials.
The approval of a repair must ultimately be granted by the skilled refinisher and cannot be forcibly obtained from an expert under third-party liability claims.
10
2. Guidelines.
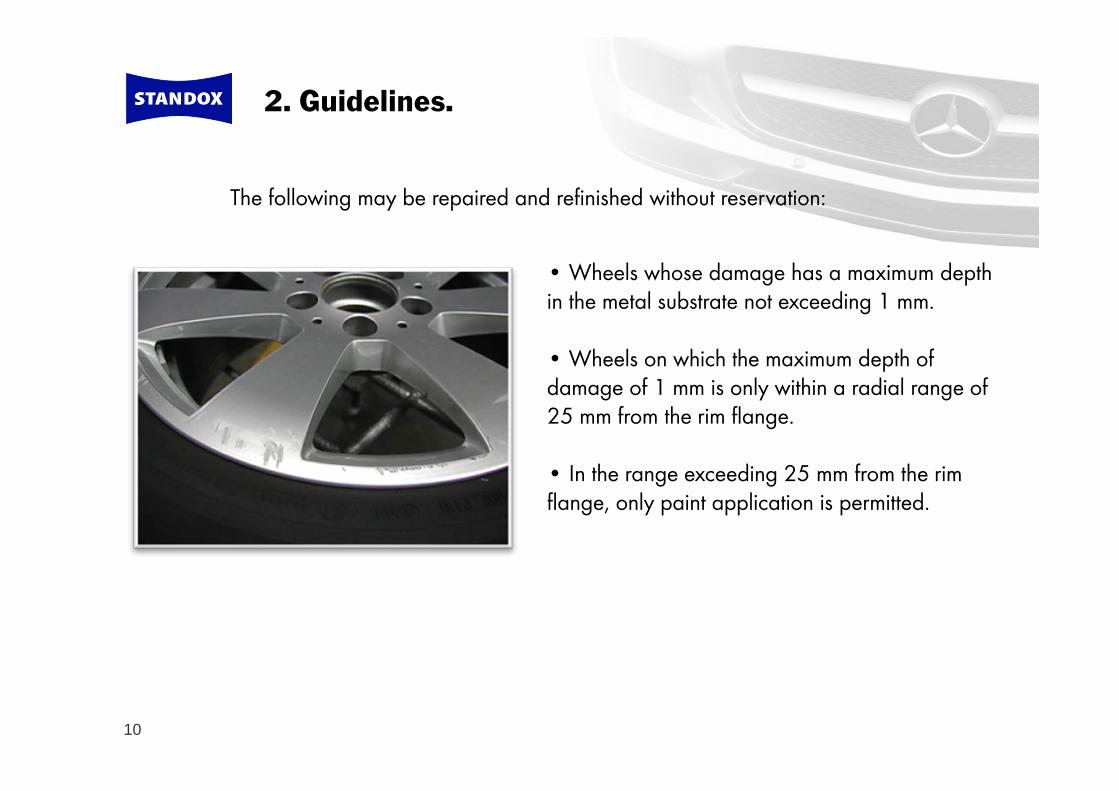
The following may be repaired and refinished without reservation:
• Wheels whose damage has a maximum depth in the metal substrate not exceeding 1 mm.
• Wheels on which the maximum depth of damage of 1 mm is only within a radial range of 25 mm from the rim flange.
• In the range exceeding 25 mm from the rim flange, only paint application is permitted.
11
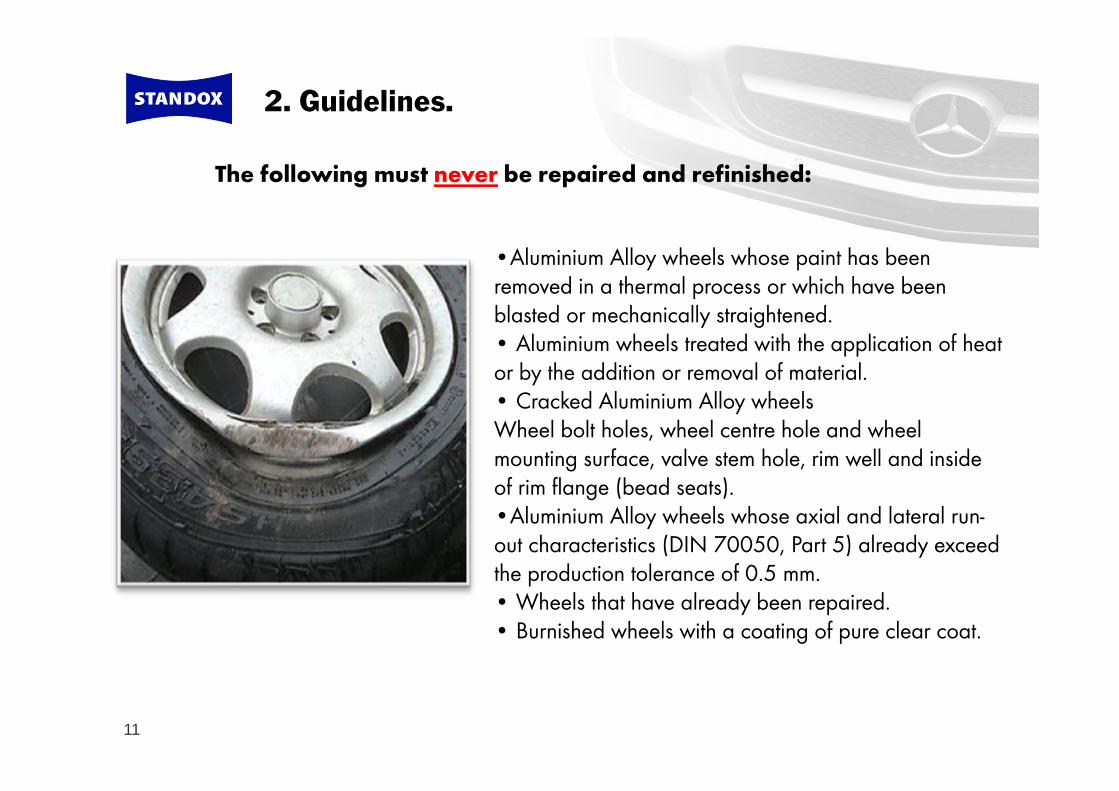
2. Guidelines.
The following must never be repaired and refinished:
•Aluminium Alloy wheels whose paint has been removed in a thermal process or which have been blasted or mechanically straightened.• Aluminium wheels treated with the application of heat or by the addition or removal of material.• Cracked Aluminium Alloy wheelsWheel bolt holes, wheel centre hole and wheel mounting surface, valve stem hole, rim well and inside of rim flange (bead seats).•Aluminium Alloy wheels whose axial and lateral run-out characteristics (DIN 70050, Part 5) already exceed the production tolerance of 0.5 mm.• Wheels that have already been repaired.• Burnished wheels with a coating of pure clear coat.
12
2. Guidelines.
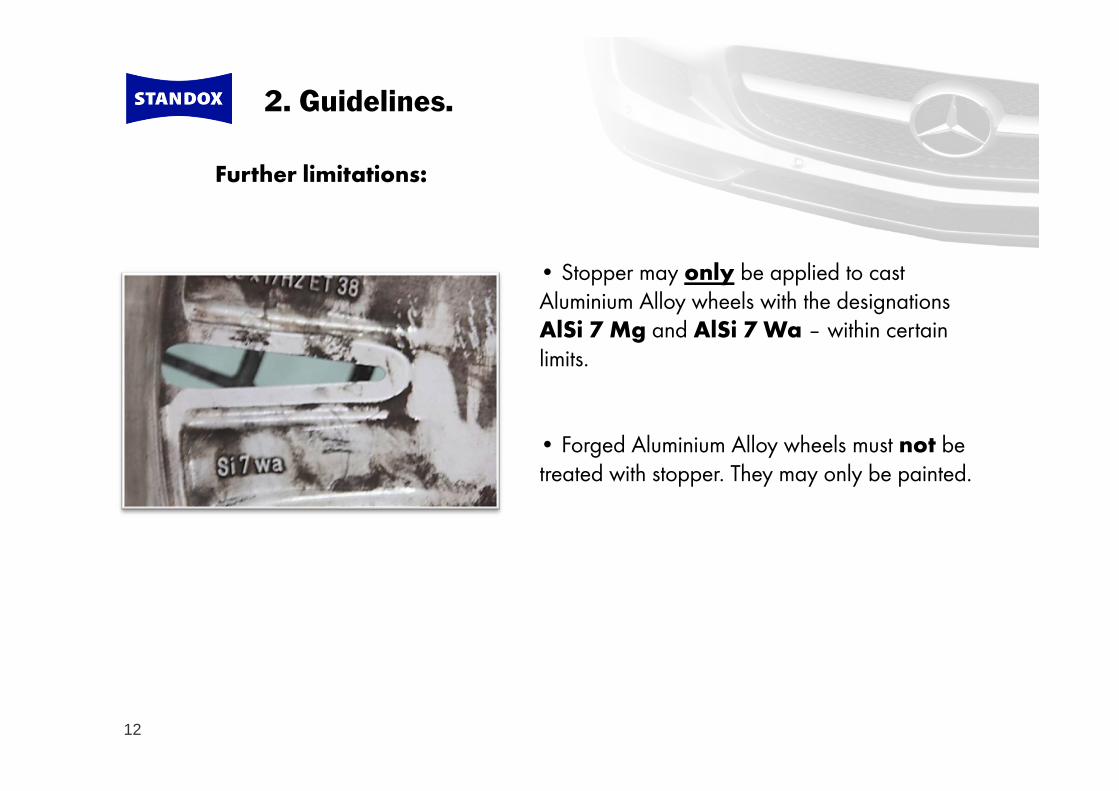
Further limitations:
• Stopper may only be applied to cast Aluminium Alloy wheels with the designations AlSi 7 Mg and AlSi 7 Wa – within certain limits.
• Forged Aluminium Alloy wheels must not be treated with stopper. They may only be painted.
13
2. Guidelines.
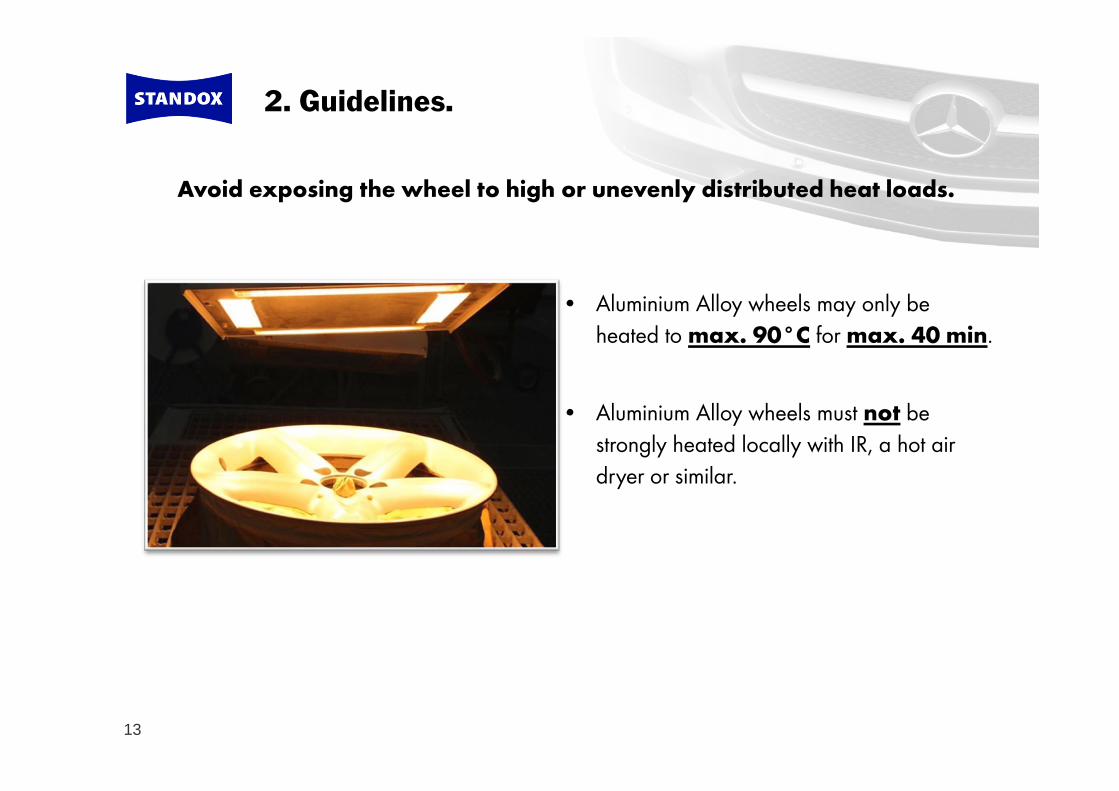
• Aluminium Alloy wheels may only be heated to max. 90°C for max. 40 min.
• Aluminium Alloy wheels must not be strongly heated locally with IR, a hot air dryer or similar.
Avoid exposing the wheel to high or unevenly distributed heat loads.
14
2. Guidelines.
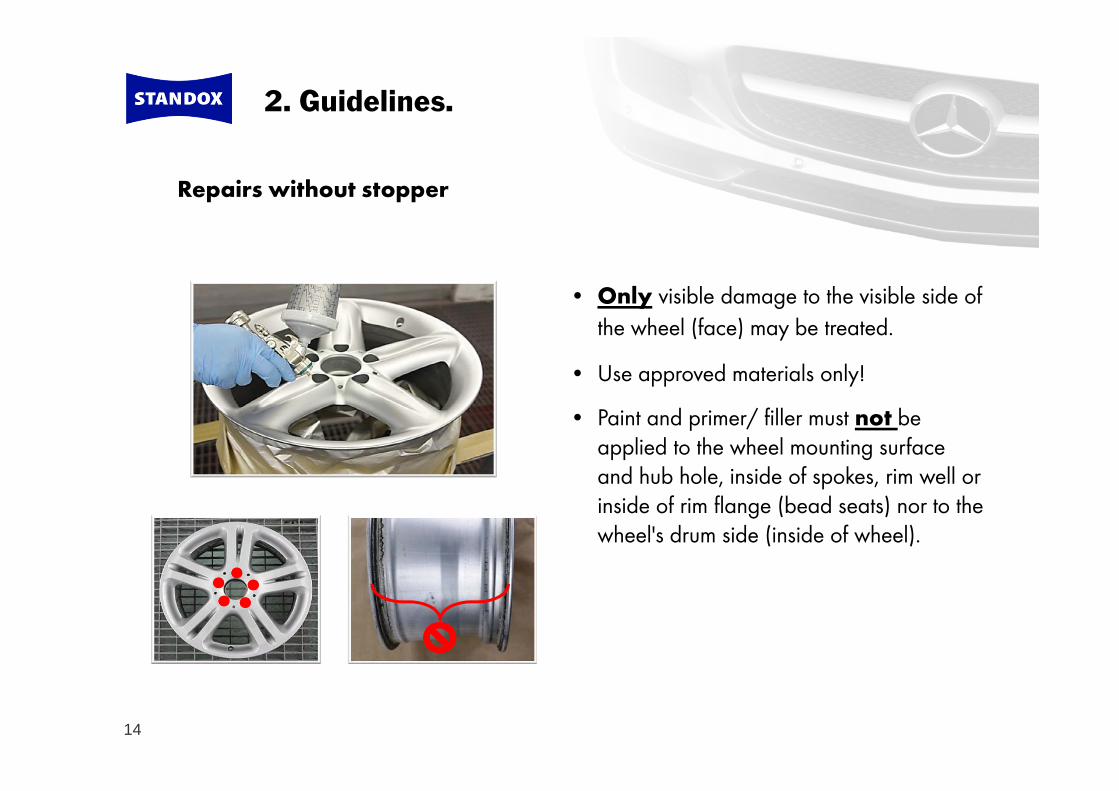
Repairs without stopper
• Only visible damage to the visible side of the wheel (face) may be treated.
• Use approved materials only!
• Paint and primer/ filler must not be applied to the wheel mounting surface and hub hole, inside of spokes, rim well or inside of rim flange (bead seats) nor to the wheel's drum side (inside of wheel).

15
2. Guidelines.
Repairs with stopper
•Stopper may only be applied to the wheel face, up to max. 25 mm measured from the rim flange.
•Material addition must not exceed 1 mm thickness! In the metal substrate, the max. depth of damage must not exceed 1 mm!
•Use approved stopper materials only!

16
Aluminium Alloy wheels.
1. Preface
2. Guidelines
3. Examples of damage with pictures
4. Repair process
Efficient surface repairs

17
3. Examples of damage with pictures.
Damaged paint on wheel face= repair possible
TipMicro Repair is also suitable for straightforward paint repairs on the rim flange and edge.
18
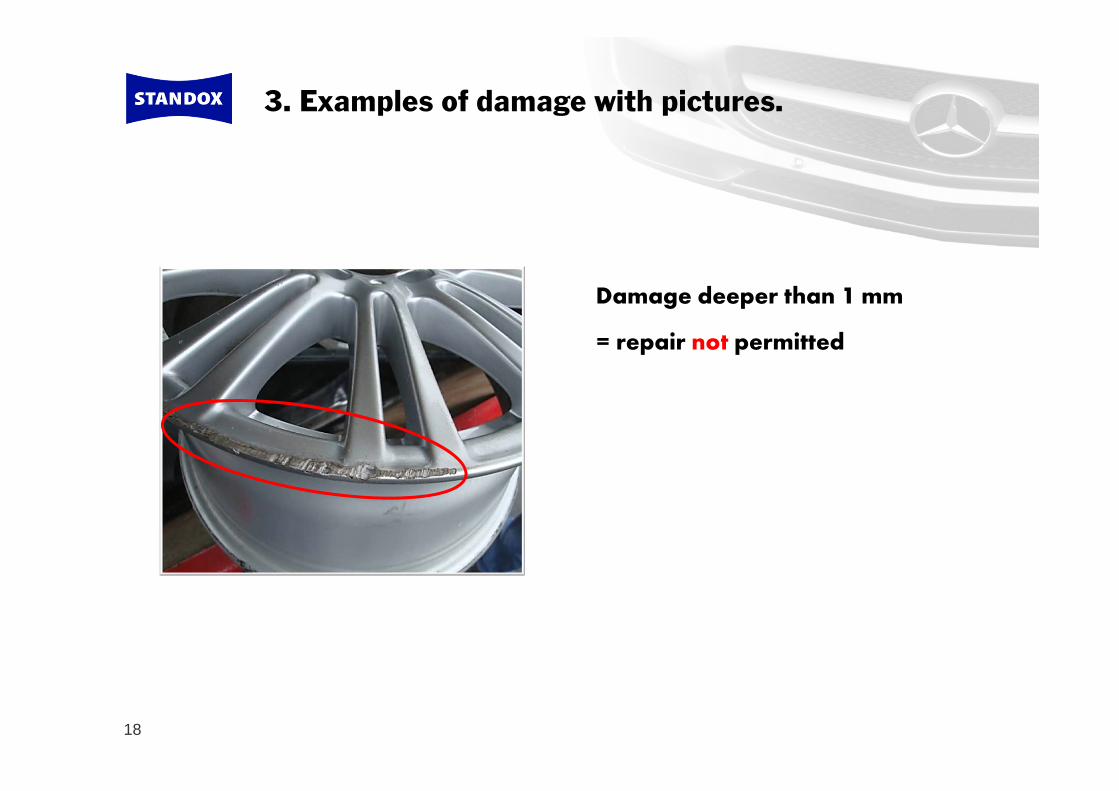
3. Examples of damage with pictures.
Damage deeper than 1 mm
= repair not permitted
19
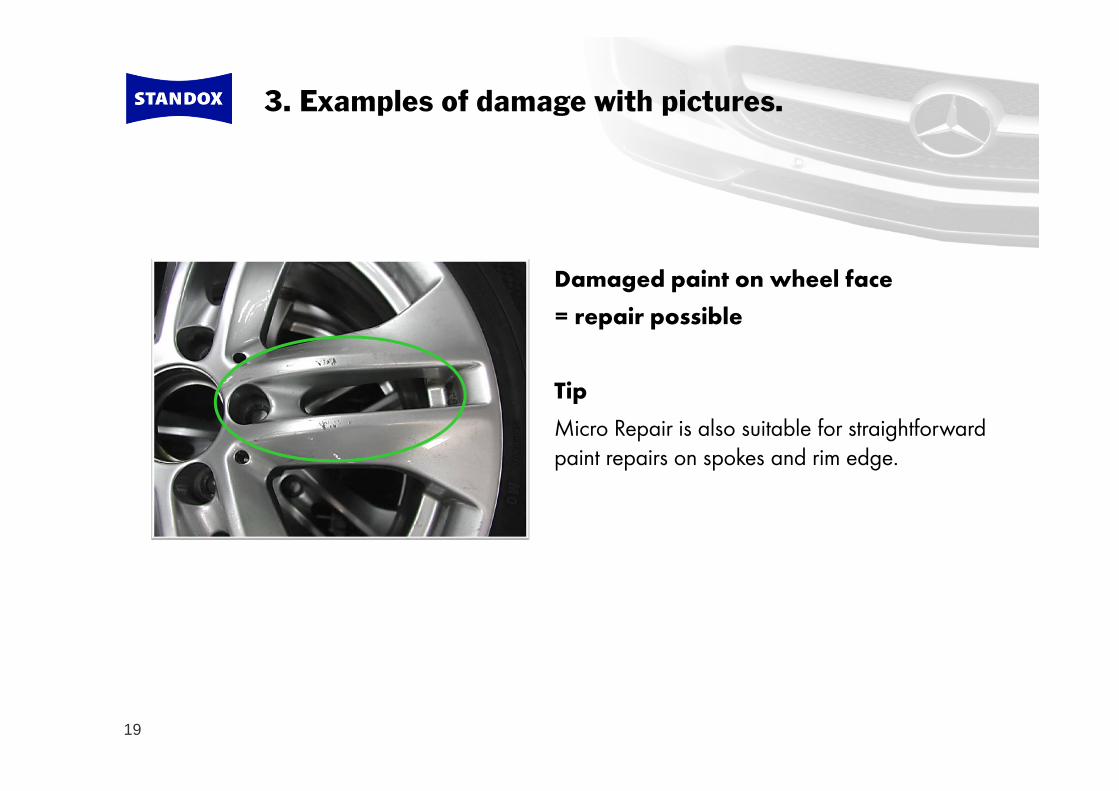
3. Examples of damage with pictures.
Damaged paint on wheel face= repair possible
TipMicro Repair is also suitable for straightforward paint repairs on spokes and rim edge.
20
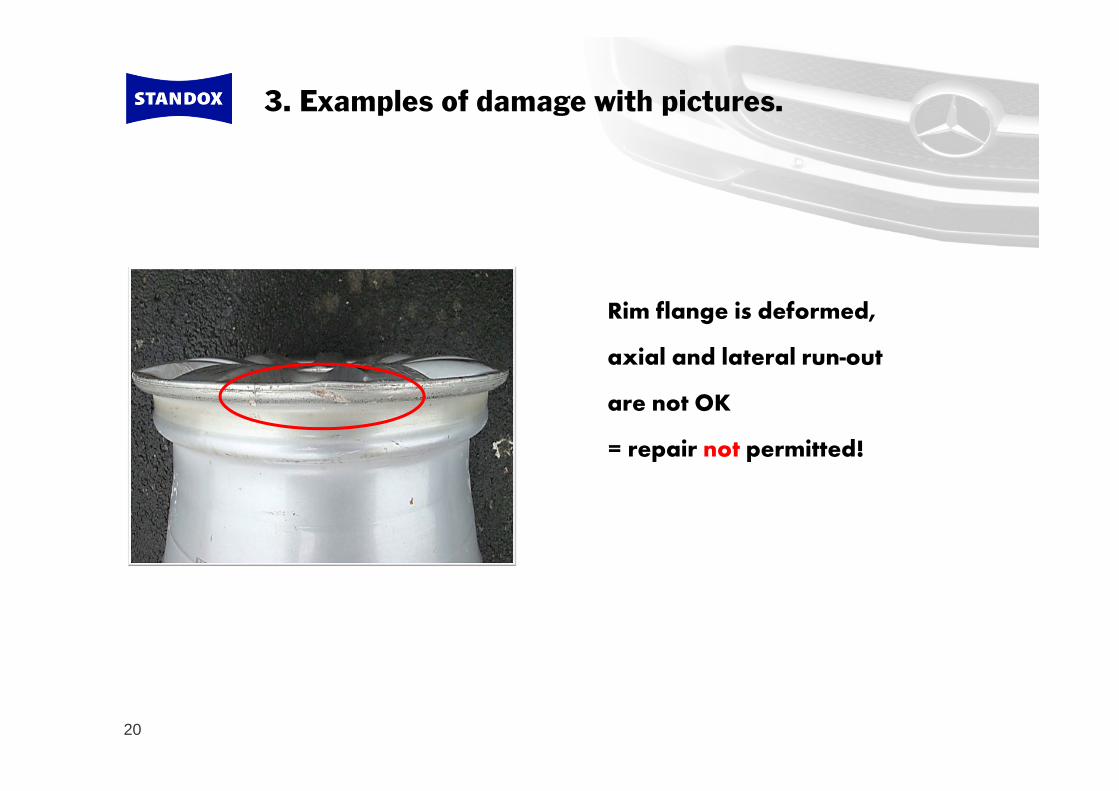
3. Examples of damage with pictures.
Rim flange is deformed,
axial and lateral run-out
are not OK
= repair not permitted!
21
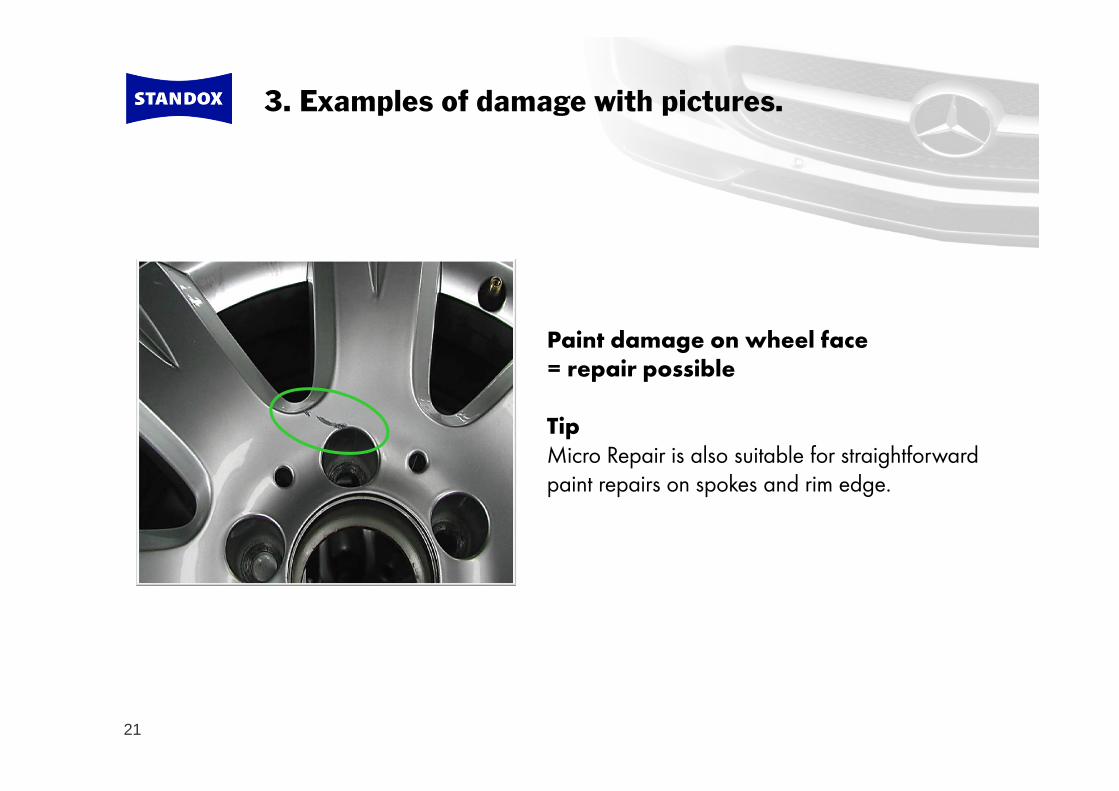
3. Examples of damage with pictures.
Paint damage on wheel face= repair possible
TipMicro Repair is also suitable for straightforward paint repairs on spokes and rim edge.
22
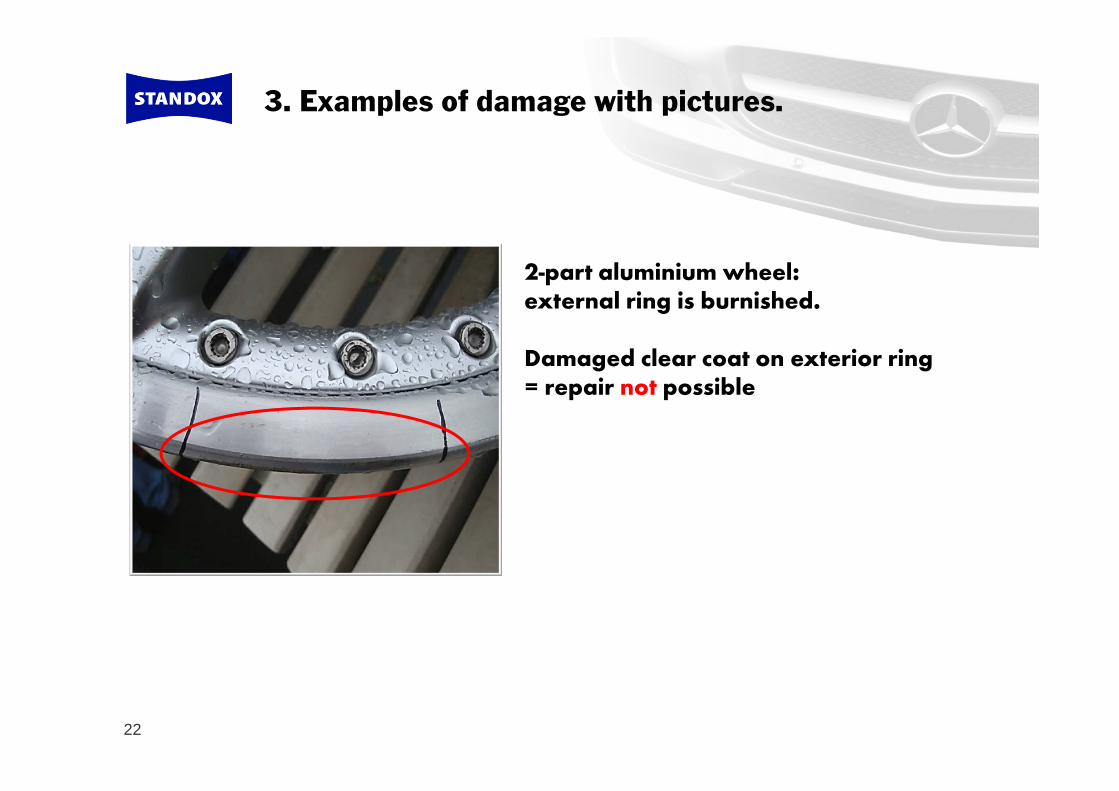
3. Examples of damage with pictures.
2-part aluminium wheel: external ring is burnished.
Damaged clear coat on exterior ring= repair not possible
23
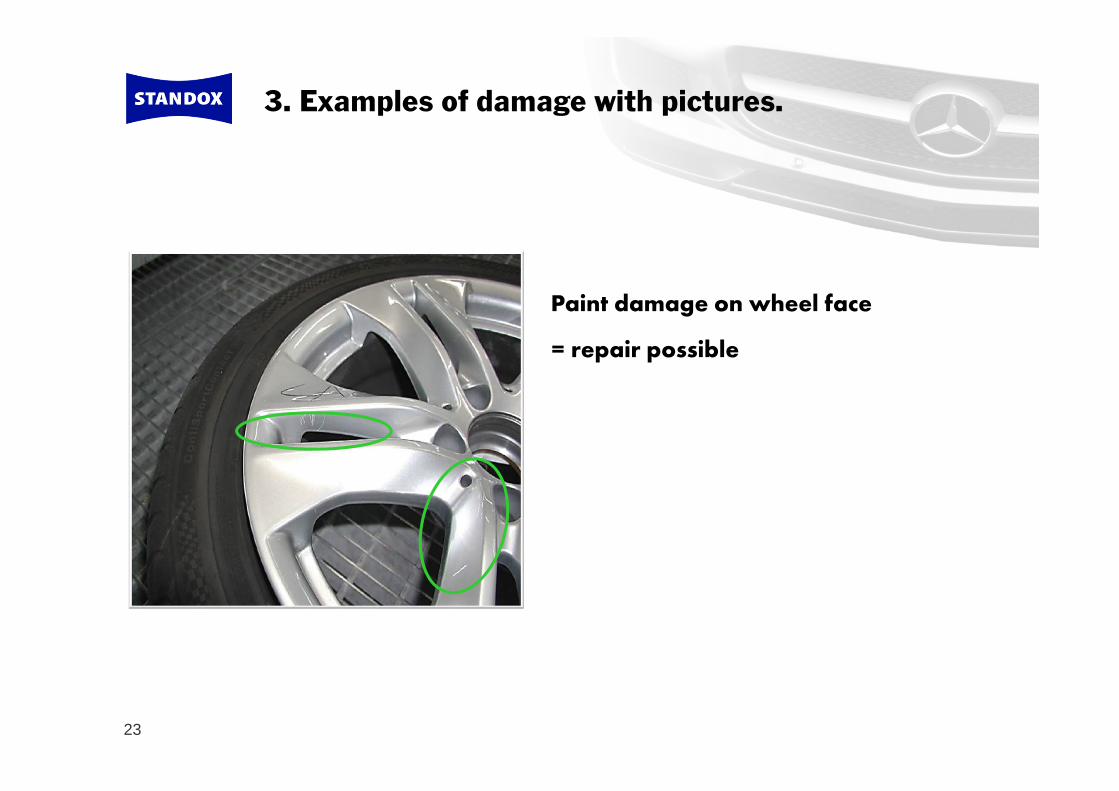
3. Examples of damage with pictures.
Paint damage on wheel face
= repair possible
24
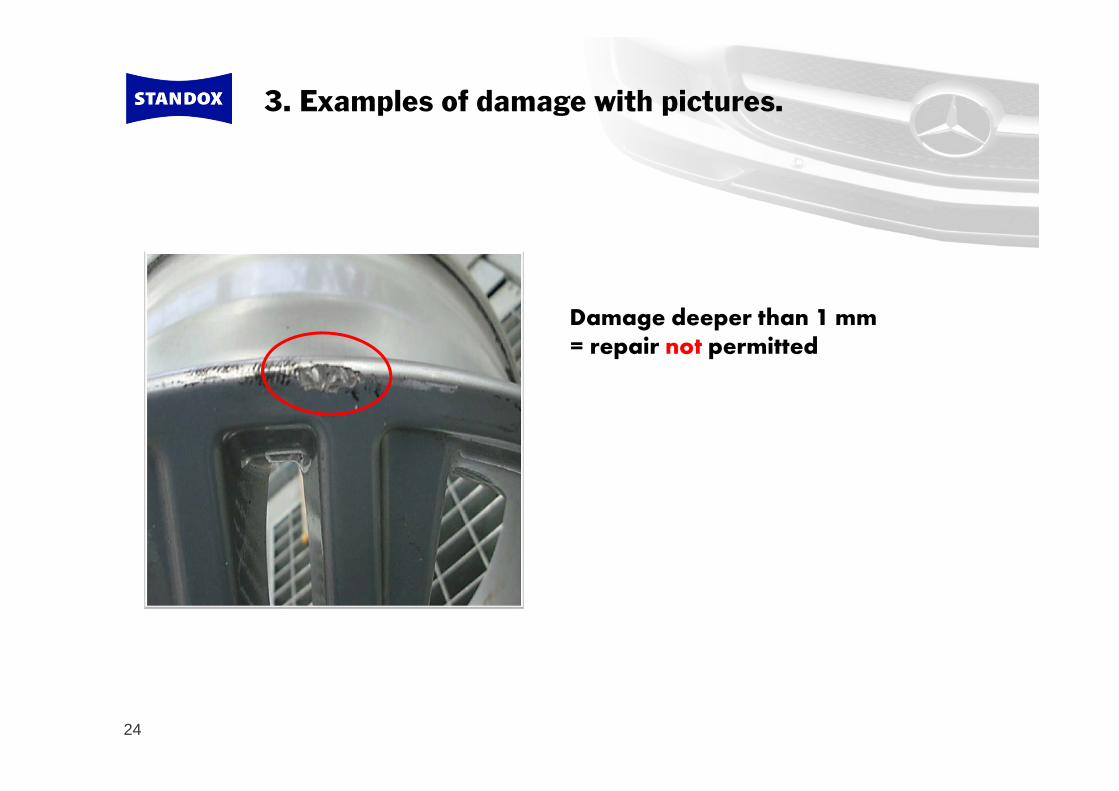
3. Examples of damage with pictures.
Damage deeper than 1 mm= repair not permitted
25
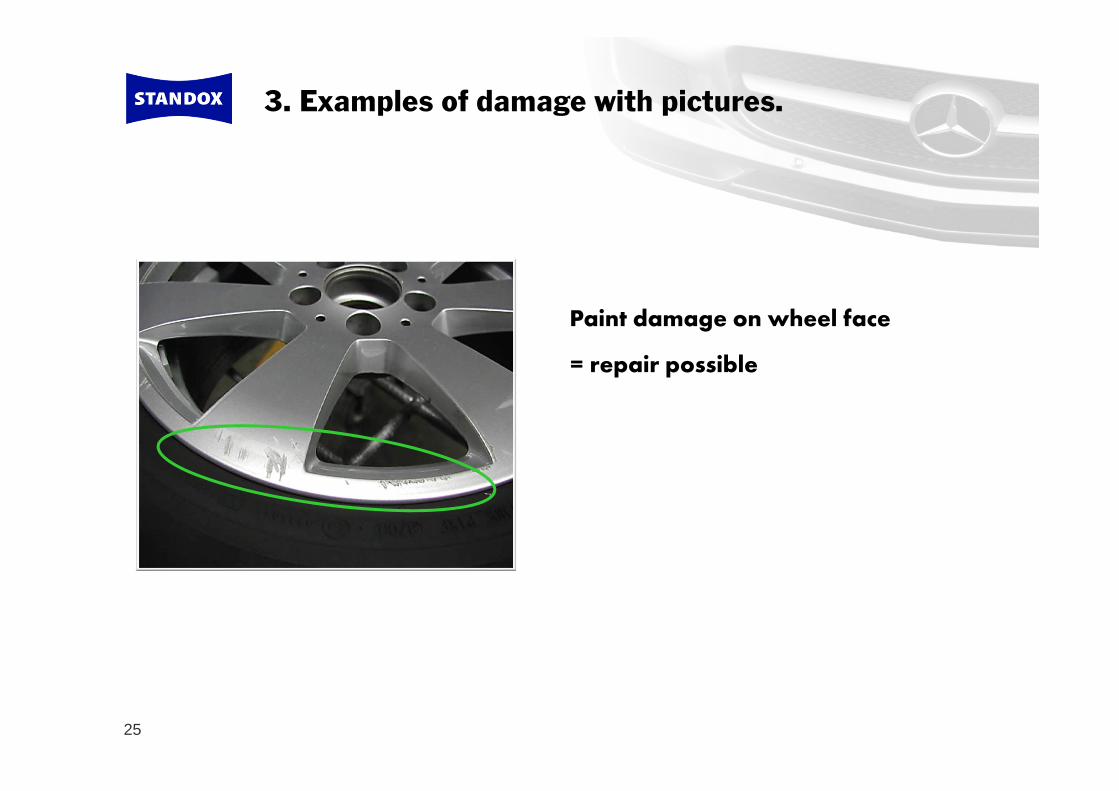
Paint damage on wheel face
= repair possible
3. Examples of damage with pictures.
26
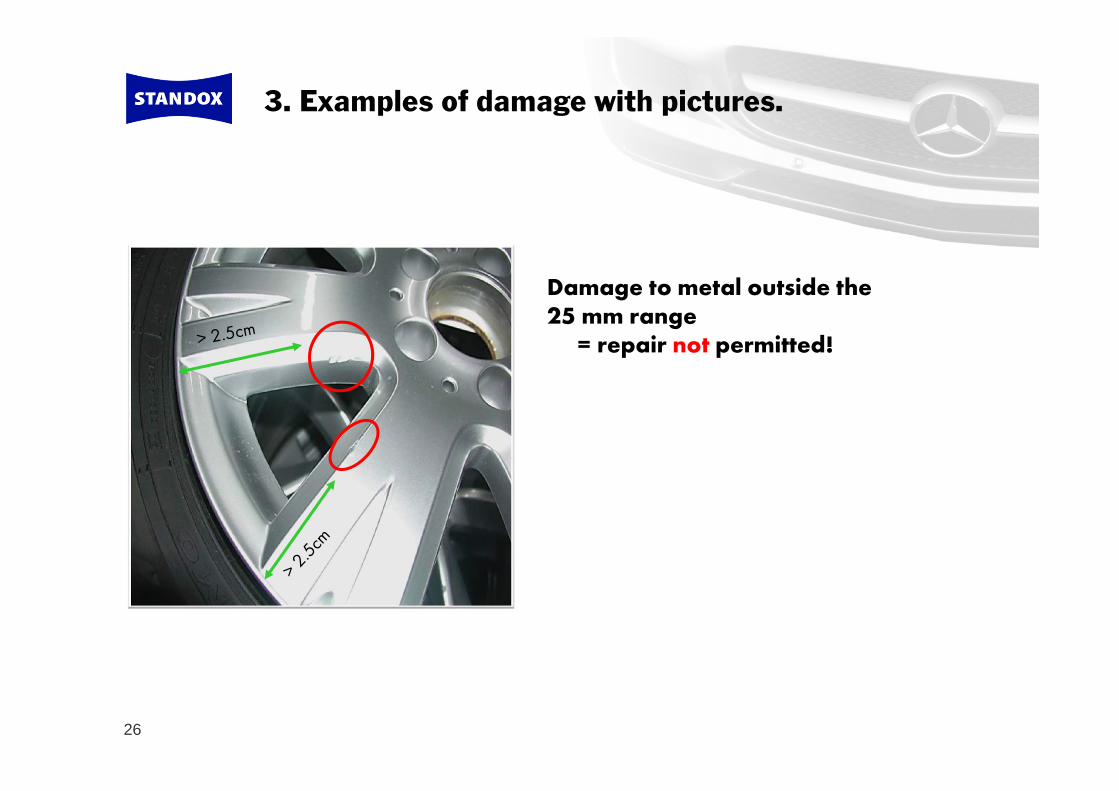
Damage to metal outside the25 mm range
= repair not permitted!
3. Examples of damage with pictures.
27
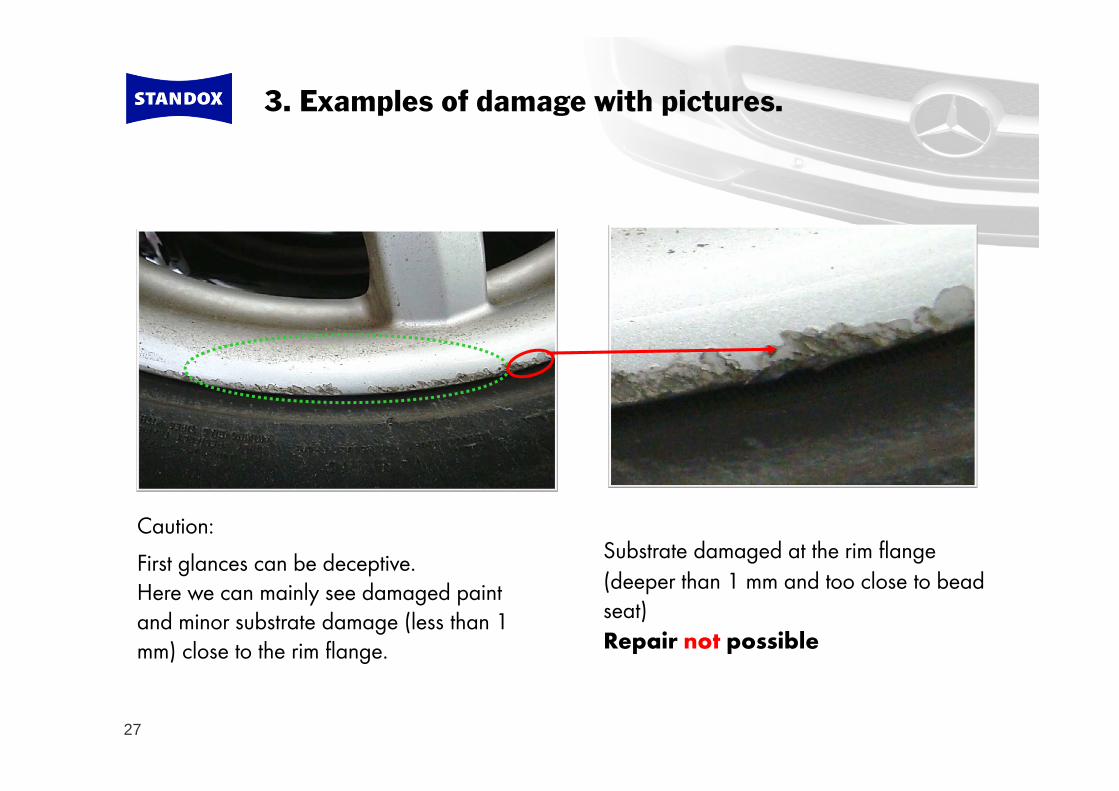
Caution: First glances can be deceptive. Here we can mainly see damaged paint and minor substrate damage (less than 1 mm) close to the rim flange.
Substrate damaged at the rim flange(deeper than 1 mm and too close to bead seat)Repair not possible
3. Examples of damage with pictures.

28
Aluminium Alloy wheels.
1. Preface
2. Guidelines
3. Examples of damage with pictures
4. Repair process
Efficient surface repairs
29
4. Repair process.
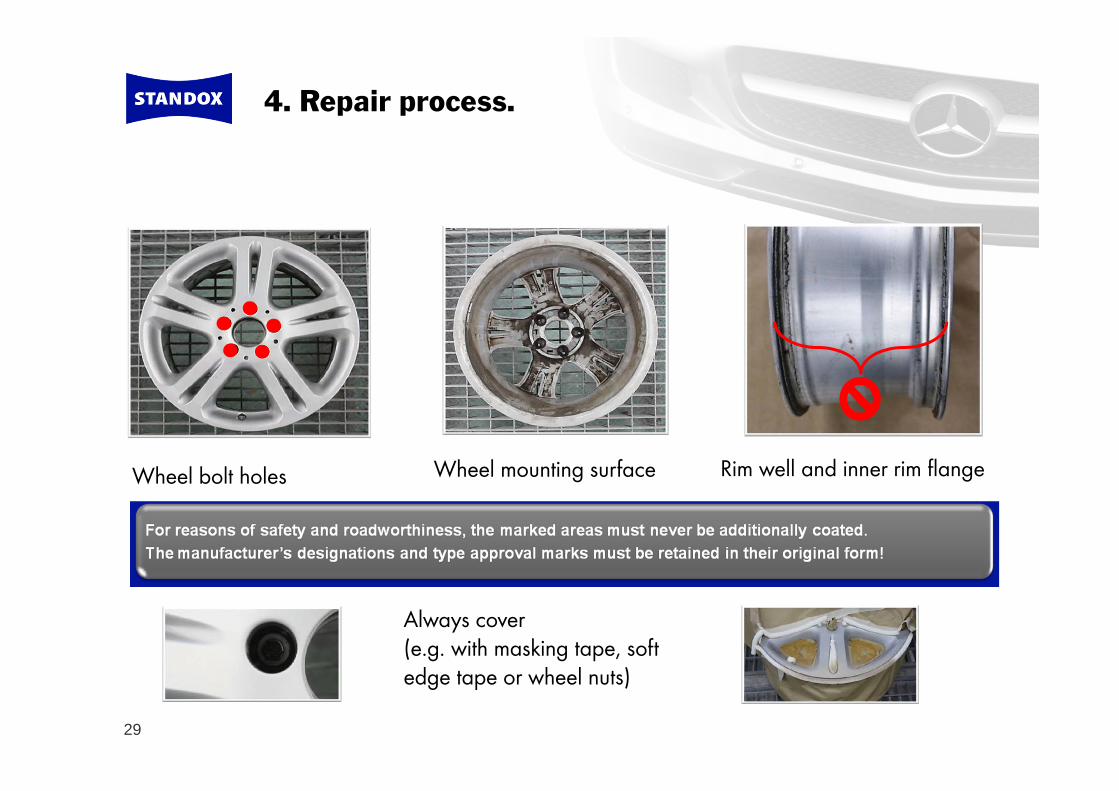
Wheel bolt holes Wheel mounting surface Rim well and inner rim flange
Always cover (e.g. with masking tape, soft edge tape or wheel nuts)
30
4. Repair process.
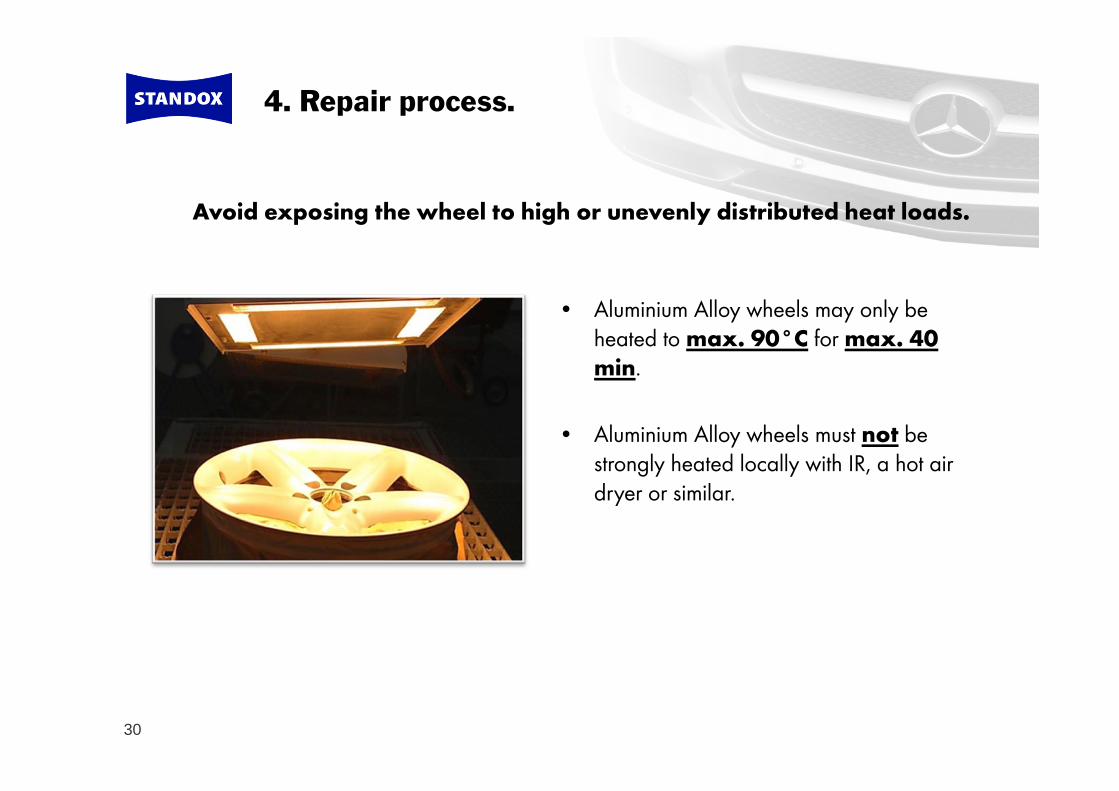
Avoid exposing the wheel to high or unevenly distributed heat loads.
• Aluminium Alloy wheels may only be heated to max. 90°C for max. 40 min.
• Aluminium Alloy wheels must not be strongly heated locally with IR, a hot air dryer or similar.
31
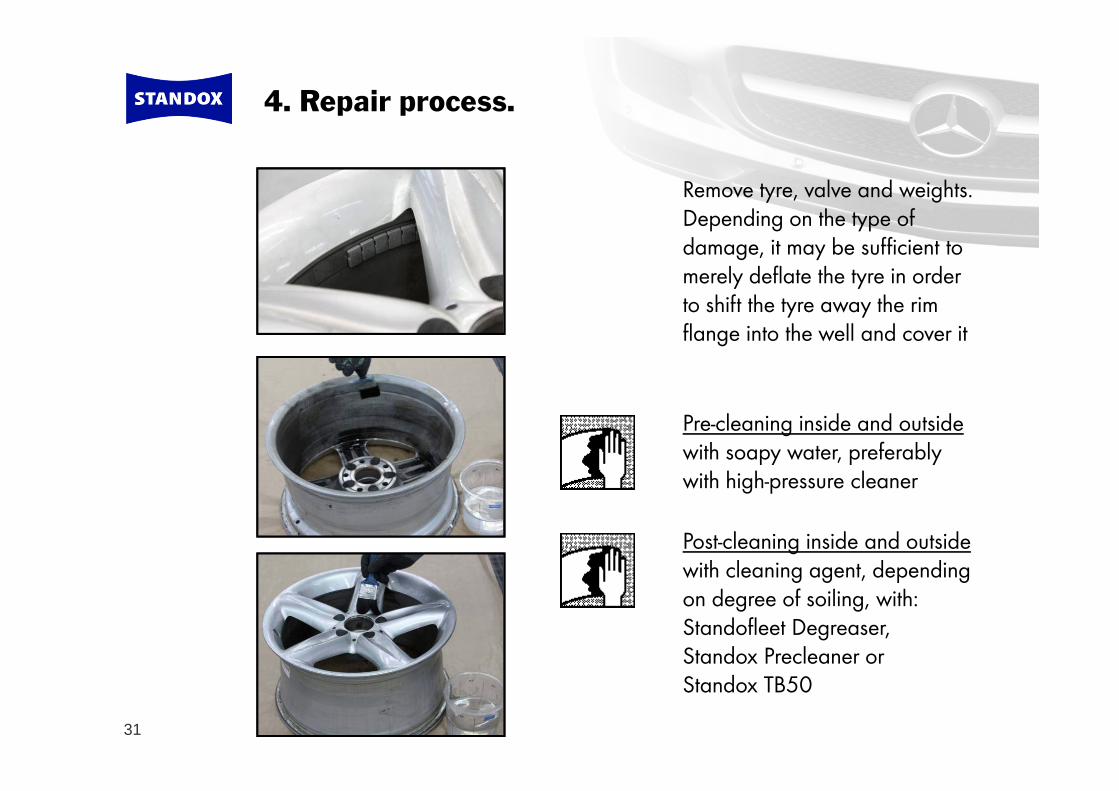
Pre-cleaning inside and outsidewith soapy water, preferably with high-pressure cleaner
Post-cleaning inside and outsidewith cleaning agent, depending on degree of soiling, with: Standofleet Degreaser, Standox Precleaner orStandox TB50
Remove tyre, valve and weights. Depending on the type of damage, it may be sufficient to merely deflate the tyre in order to shift the tyre away the rim flange into the well and cover it
4. Repair process.
32
4. Repair process.
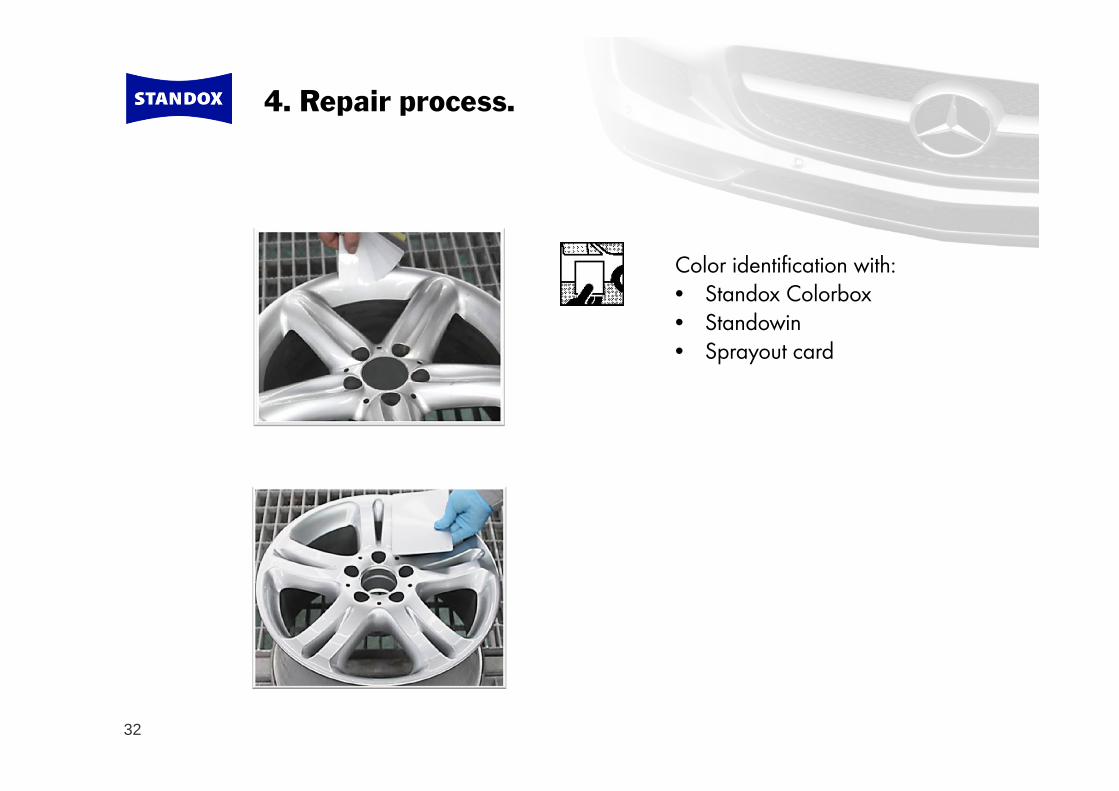
Color identification with:• Standox Colorbox• Standowin• Sprayout card
33
4. Repair process.
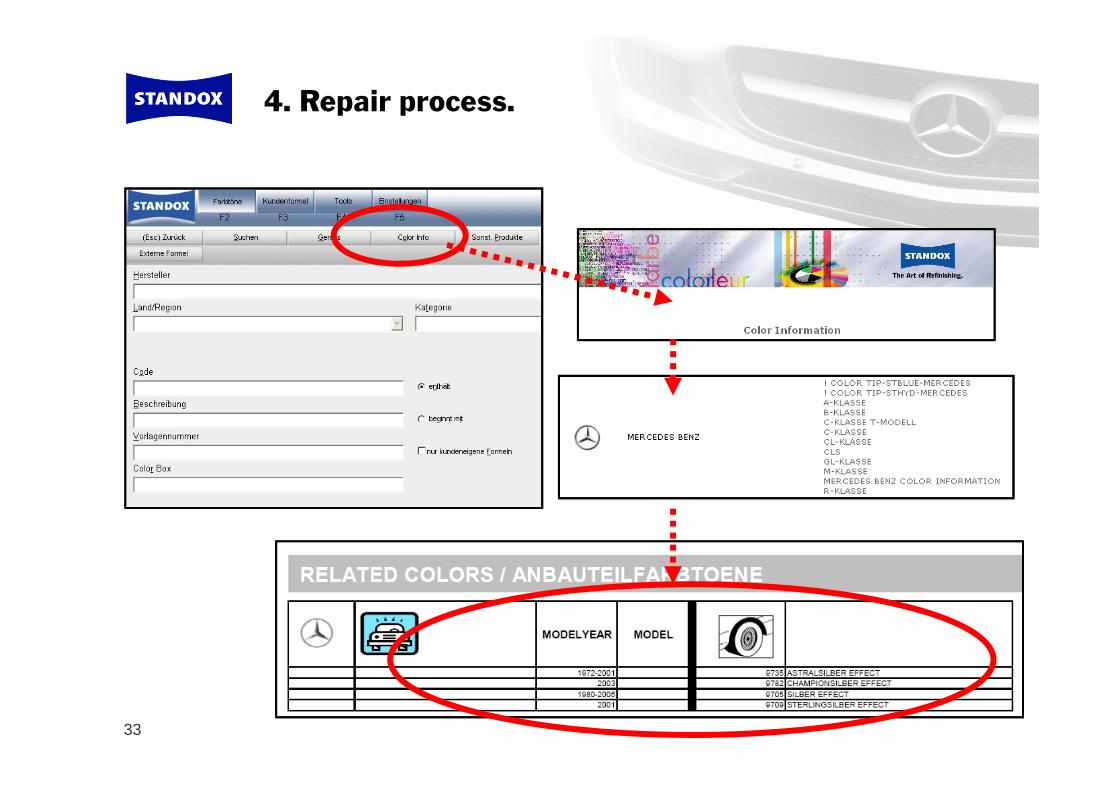
Wheel colors
34
4. Repair process.
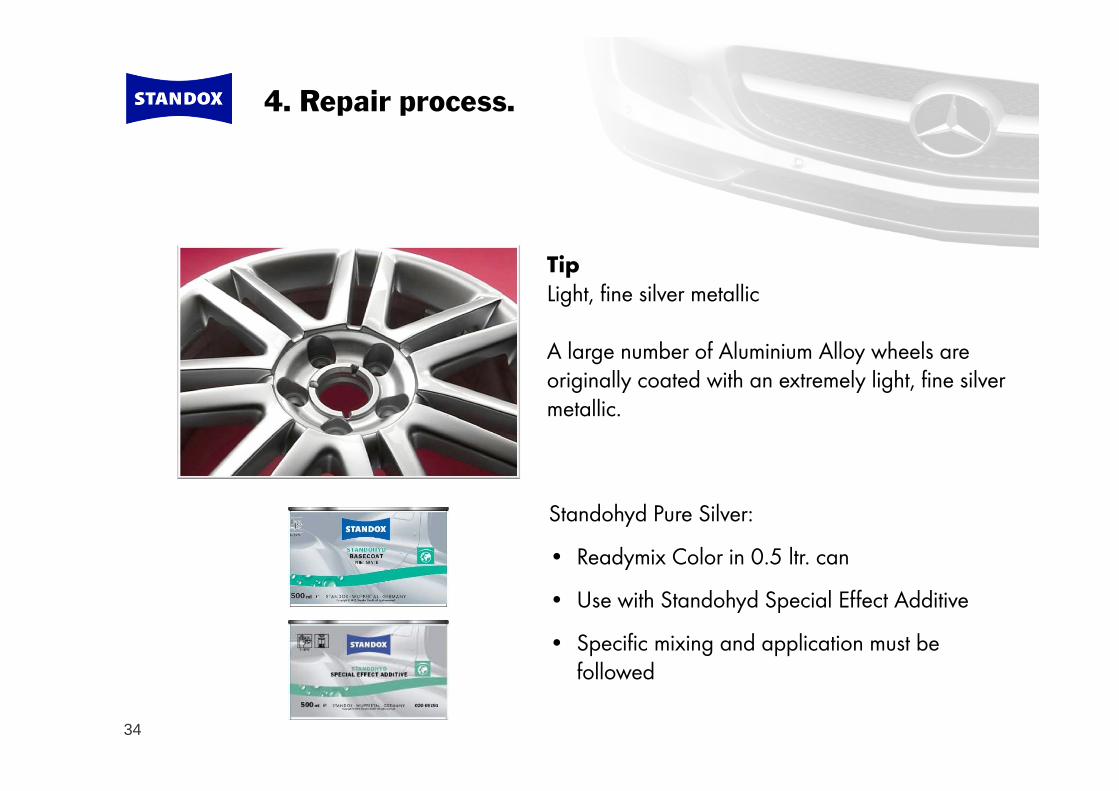
TipLight, fine silver metallic
A large number of Aluminium Alloy wheels are originally coated with an extremely light, fine silver metallic.
Standohyd Pure Silver:
• Readymix Color in 0.5 ltr. can
• Use with Standohyd Special Effect Additive
• Specific mixing and application must be followed
35
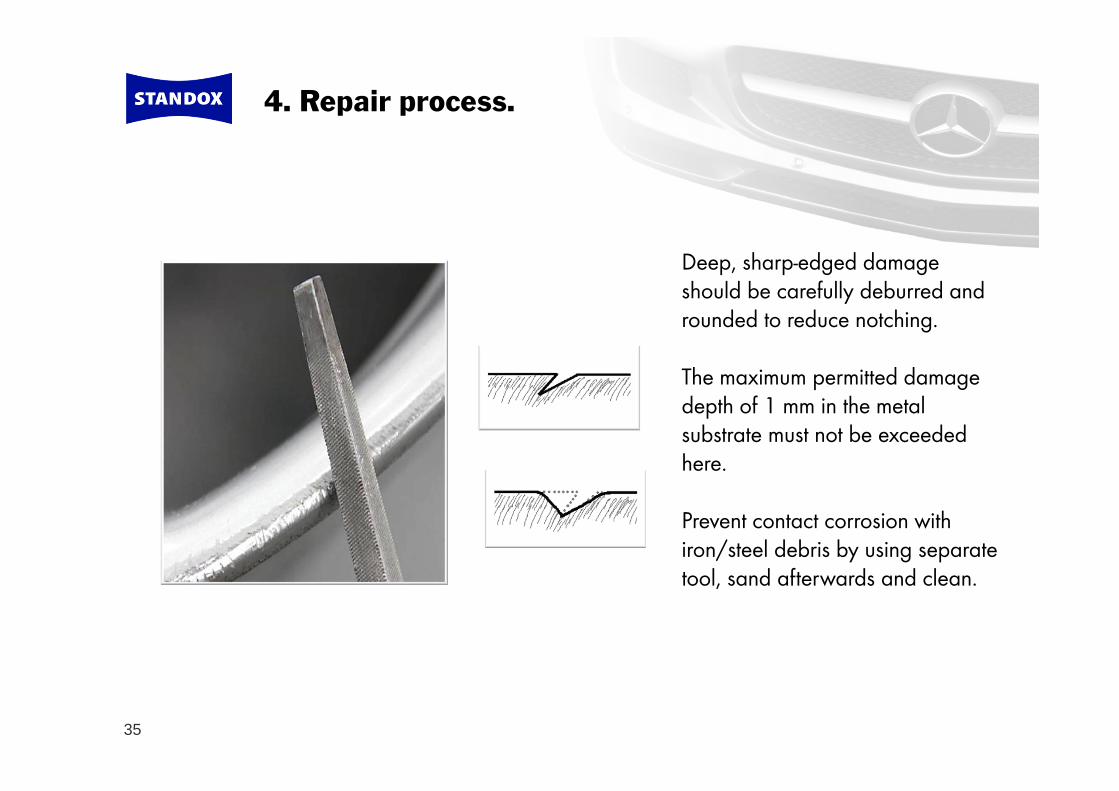
4. Repair process.
Deep, sharp-edged damage should be carefully deburred and rounded to reduce notching.
The maximum permitted damage depth of 1 mm in the metal substrate must not be exceeded here.
Prevent contact corrosion with iron/steel debris by using separate tool, sand afterwards and clean.
36
4. Repair process.
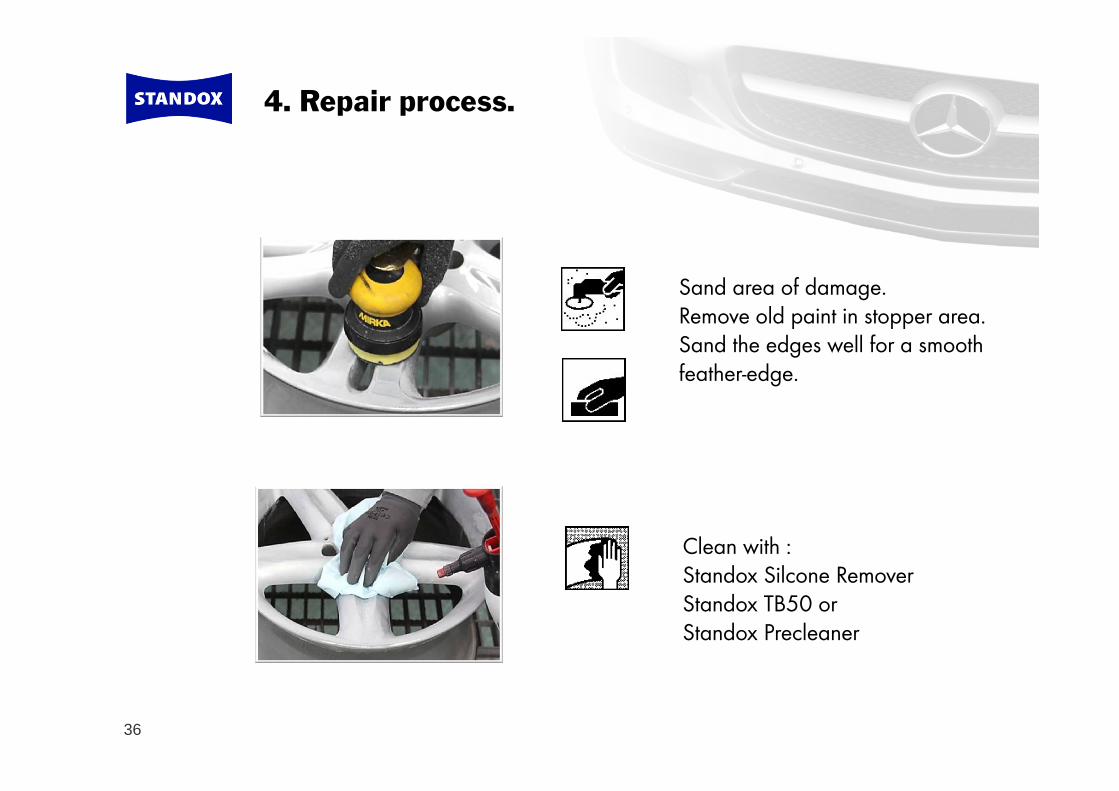
Sand area of damage. Remove old paint in stopper area.Sand the edges well for a smooth feather-edge.
Clean with :Standox Silcone RemoverStandox TB50 orStandox Precleaner
37
4. Repair process.
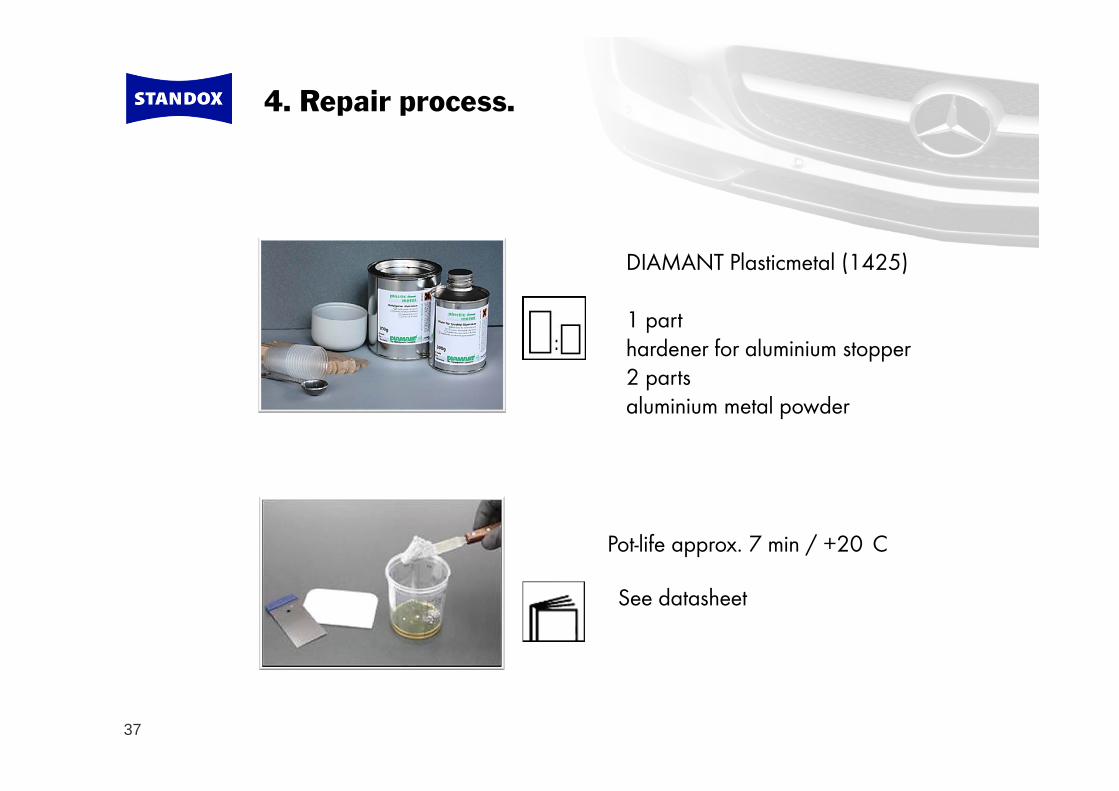
See datasheet
Pot-life approx. 7 min / +20 C
DIAMANT Plasticmetal (1425)
1 part hardener for aluminium stopper2 parts aluminium metal powder
38
4. Repair process.
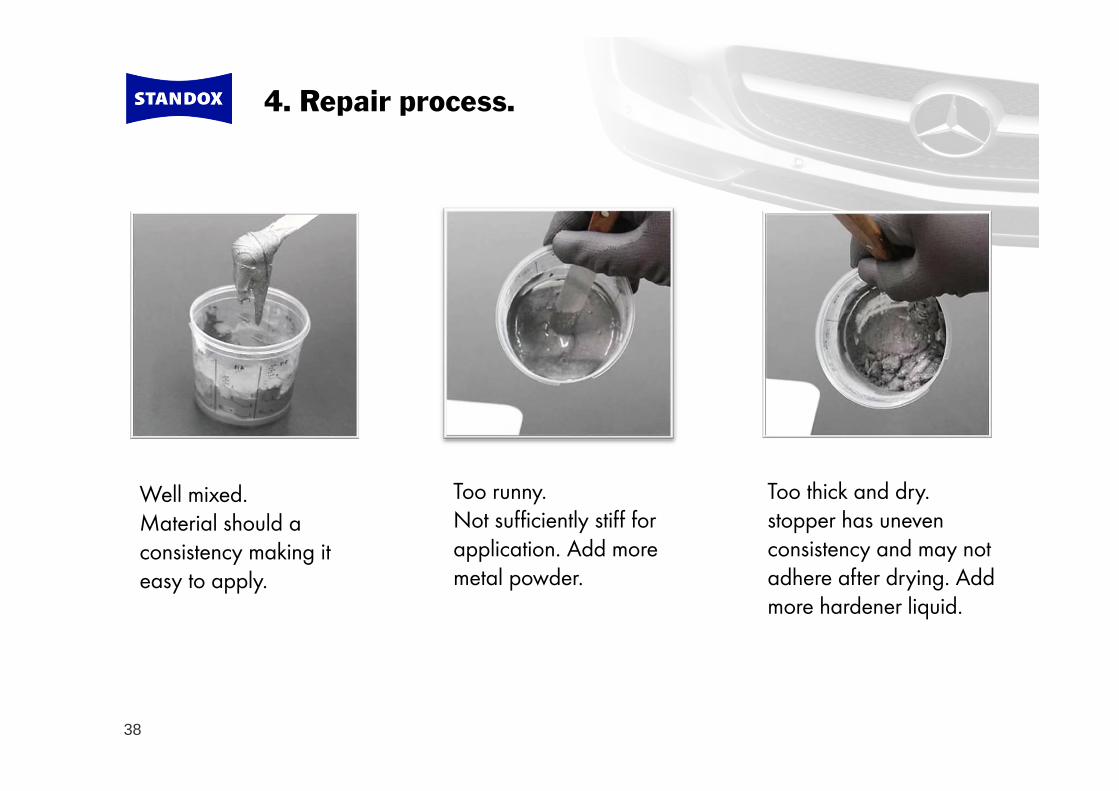
Well mixed.Material should a consistency making it easy to apply.
Too runny.Not sufficiently stiff for application. Add more metal powder.
Too thick and dry.stopper has uneven consistency and may not adhere after drying. Add more hardener liquid.
39
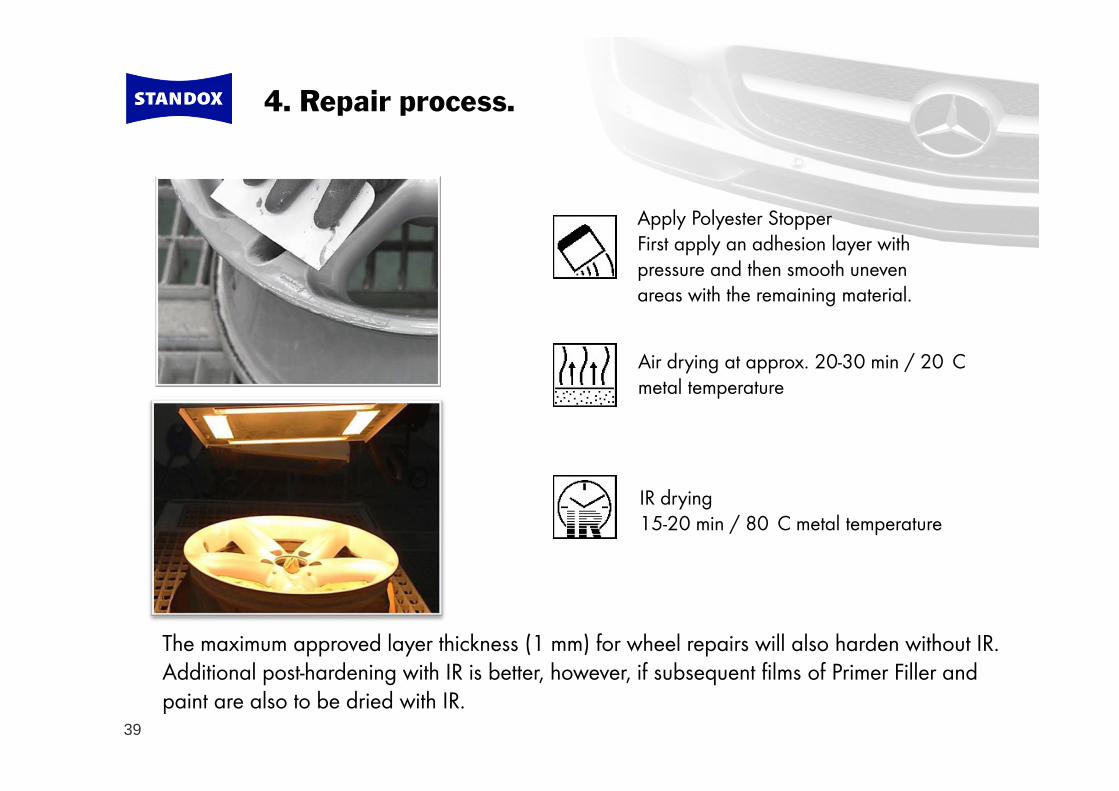
4. Repair process.
Apply Polyester StopperFirst apply an adhesion layer with pressure and then smooth uneven areas with the remaining material.
Air drying at approx. 20-30 min / 20 C metal temperature
IR drying15-20 min / 80 C metal temperature
The maximum approved layer thickness (1 mm) for wheel repairs will also harden without IR. Additional post-hardening with IR is better, however, if subsequent films of Primer Filler and paint are also to be dried with IR.
40
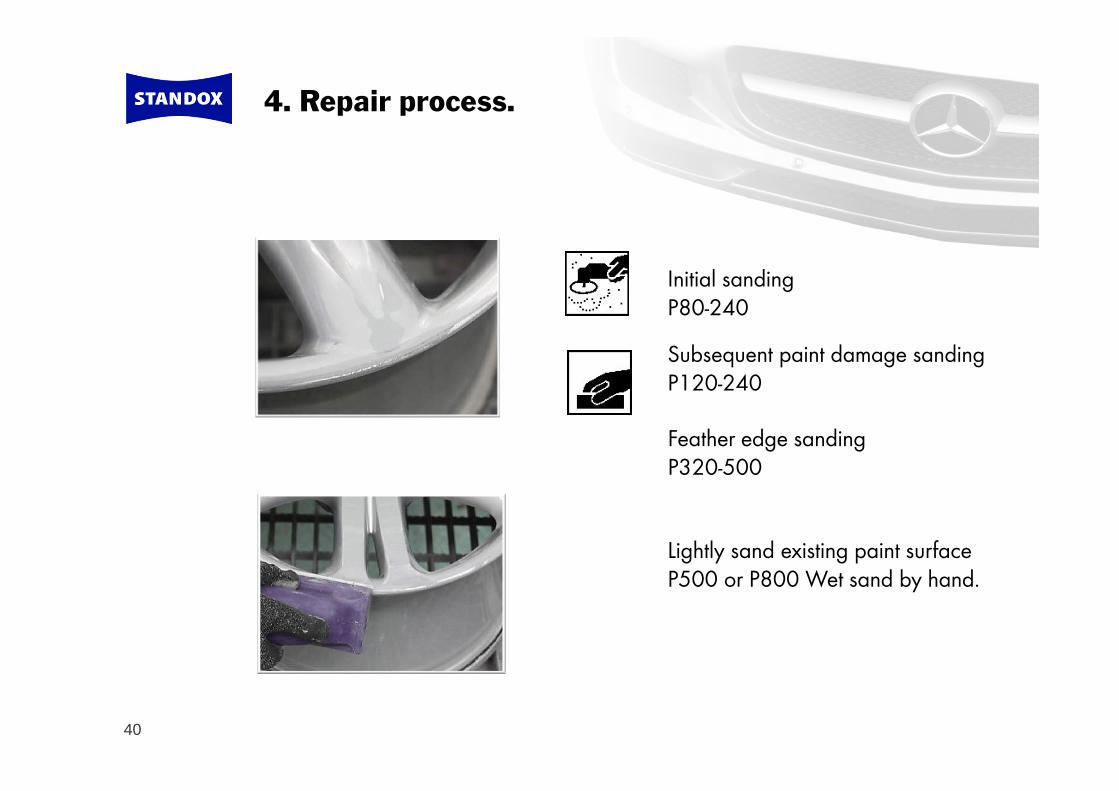
4. Repair process.
Initial sandingP80-240
Subsequent paint damage sandingP120-240
Feather edge sandingP320-500
Lightly sand existing paint surfaceP500 or P800 Wet sand by hand.
41
4. Repair process.
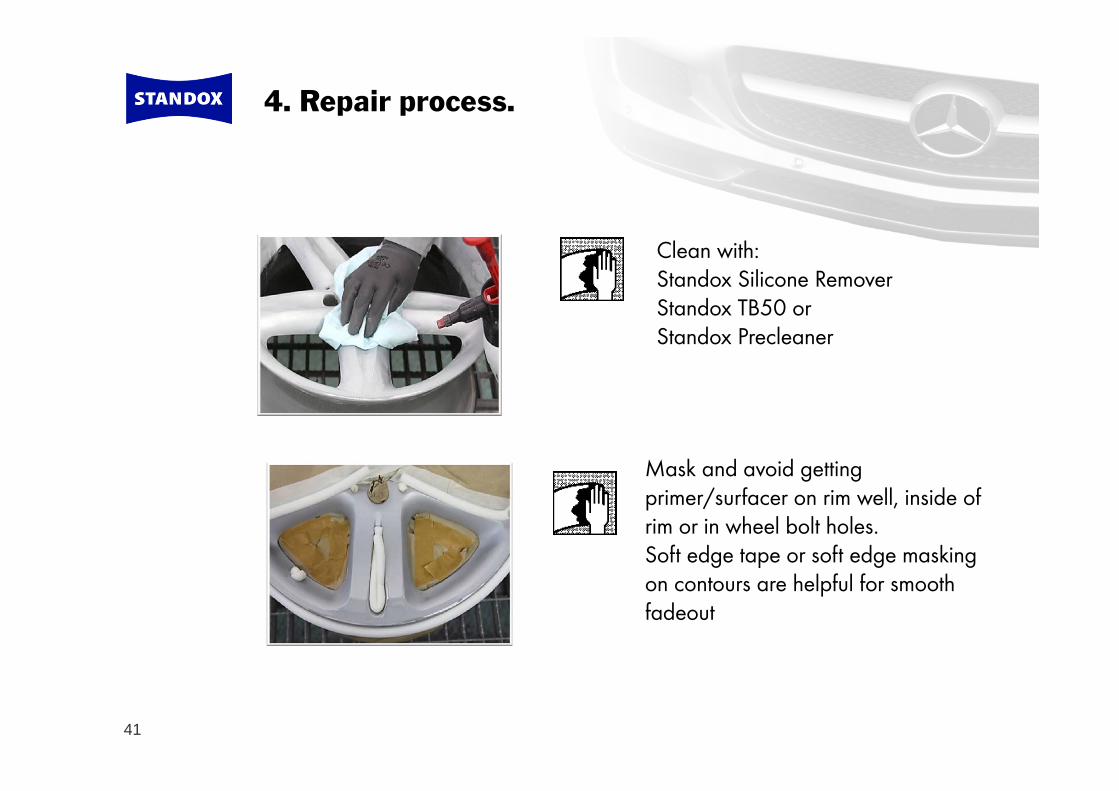
Clean with:Standox Silicone RemoverStandox TB50 orStandox Precleaner
Mask and avoid getting primer/surfacer on rim well, inside of rim or in wheel bolt holes.Soft edge tape or soft edge masking on contours are helpful for smooth fadeout
42
4. Repair process.
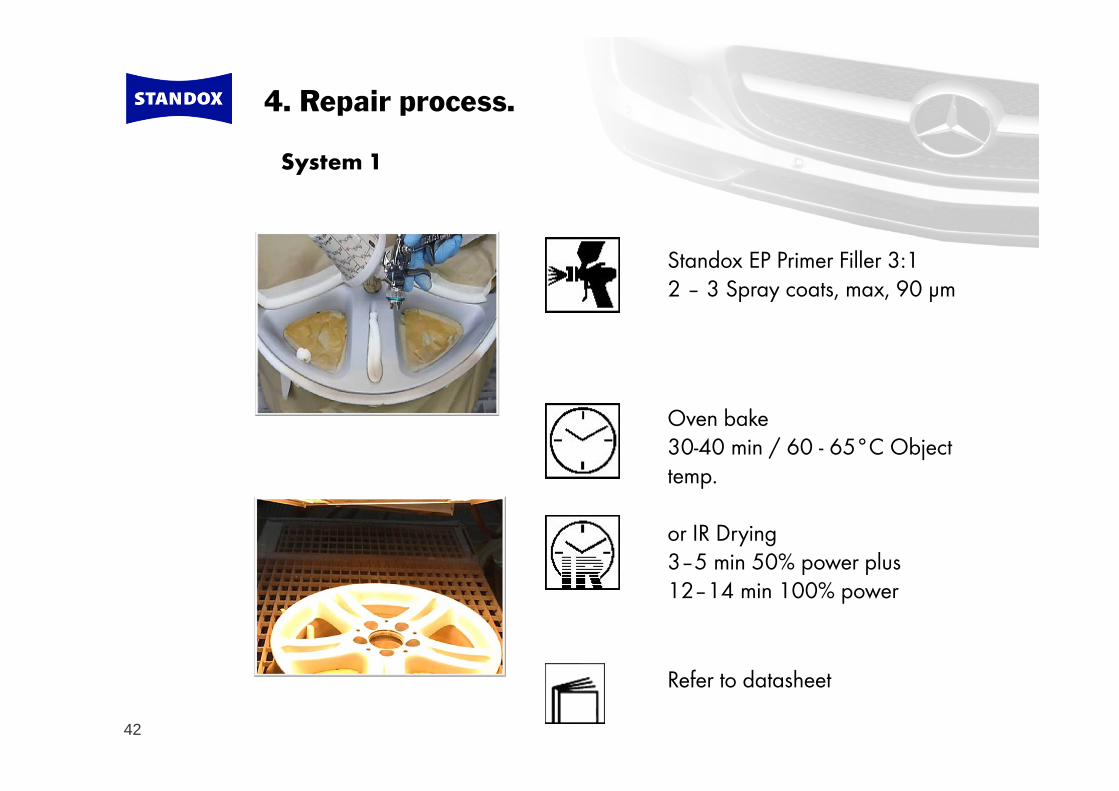
Refer to datasheet
System 1
Standox EP Primer Filler 3:12 – 3 Spray coats, max, 90 μm
Oven bake30-40 min / 60 - 65°C Object temp.
or IR Drying3–5 min 50% power plus12–14 min 100% power

43
4. Repair process.
Standox SprayMax EP Primer Filller 2 – 3 Spray coats, max. 70 μm
Optional process 1.
Refer to datasheet
Oven bake45-50 min / 60 - 65°C Object temp.
or IR Drying3 min 50% power plus12 min 100% power
44
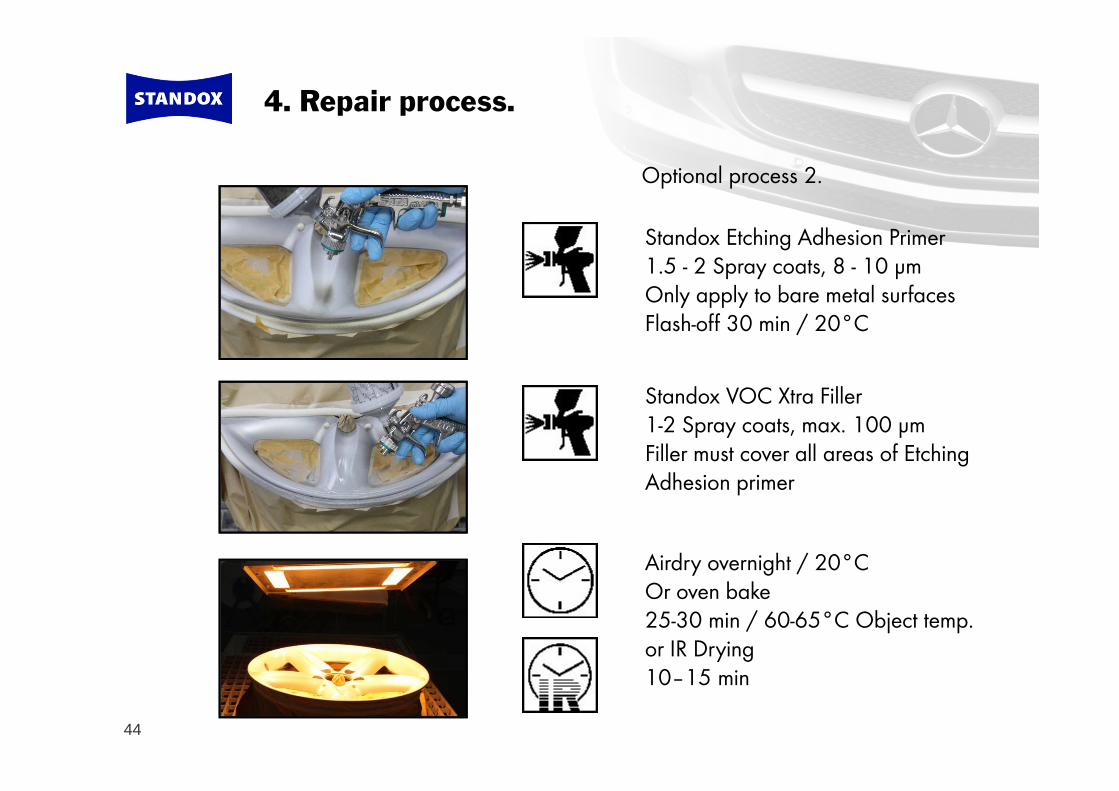
4. Repair process.
Standox Etching Adhesion Primer 1.5 - 2 Spray coats, 8 - 10 μmOnly apply to bare metal surfacesFlash-off 30 min / 20°C
Standox VOC Xtra Filler1-2 Spray coats, max. 100 μmFiller must cover all areas of Etching Adhesion primer
Airdry overnight / 20°COr oven bake 25-30 min / 60-65°C Object temp.or IR Drying10–15 min
Optional process 2.
45
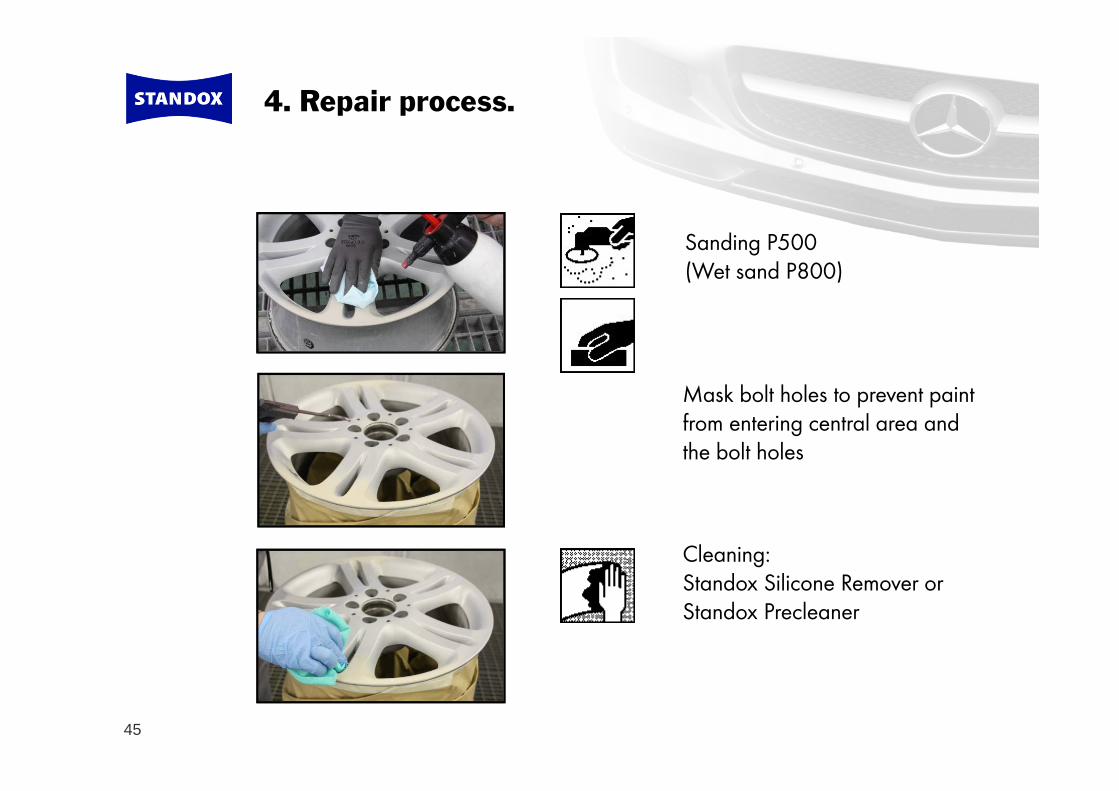
4. Repair process.
Mask bolt holes to prevent paint from entering central area and the bolt holes
Cleaning:Standox Silicone Remover orStandox Precleaner
Sanding P500(Wet sand P800)
46
4. Repair process.
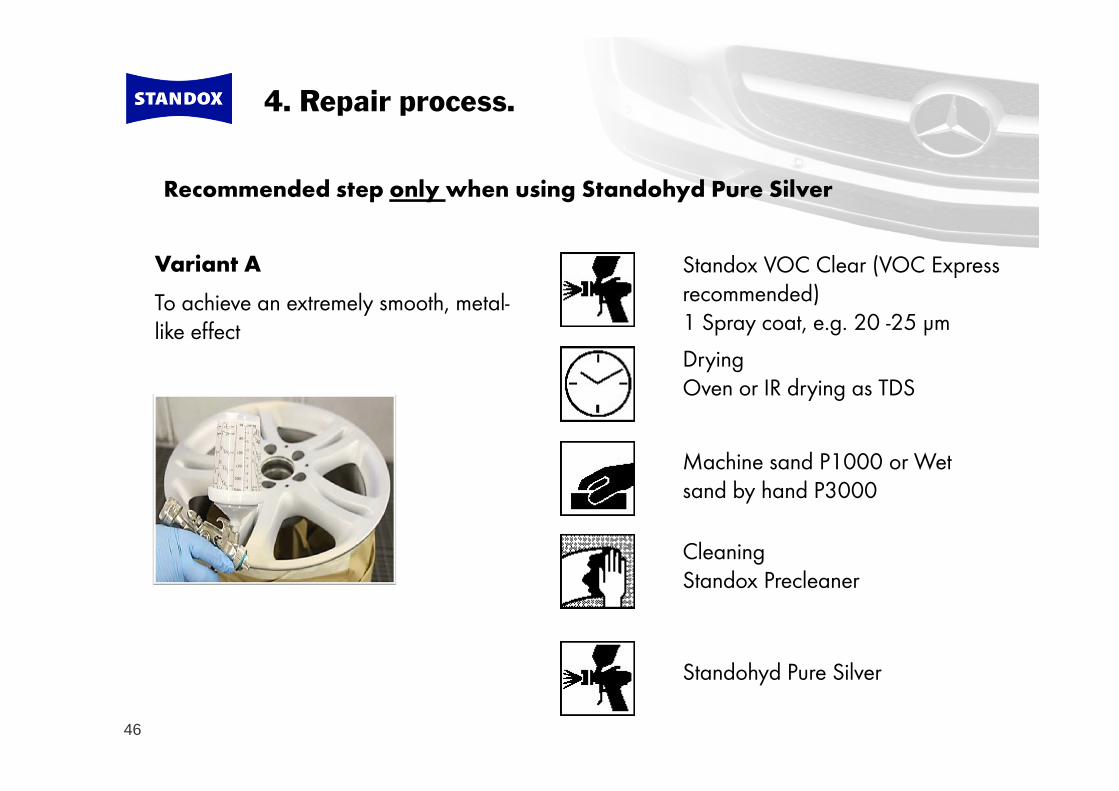
Recommended step only when using Standohyd Pure Silver
Variant ATo achieve an extremely smooth, metal-like effect
Standox VOC Clear (VOC Express recommended)1 Spray coat, e.g. 20 -25 μmDryingOven or IR drying as TDS
Machine sand P1000 or Wet sand by hand P3000
CleaningStandox Precleaner
Standohyd Pure Silver
47
4. Repair process.
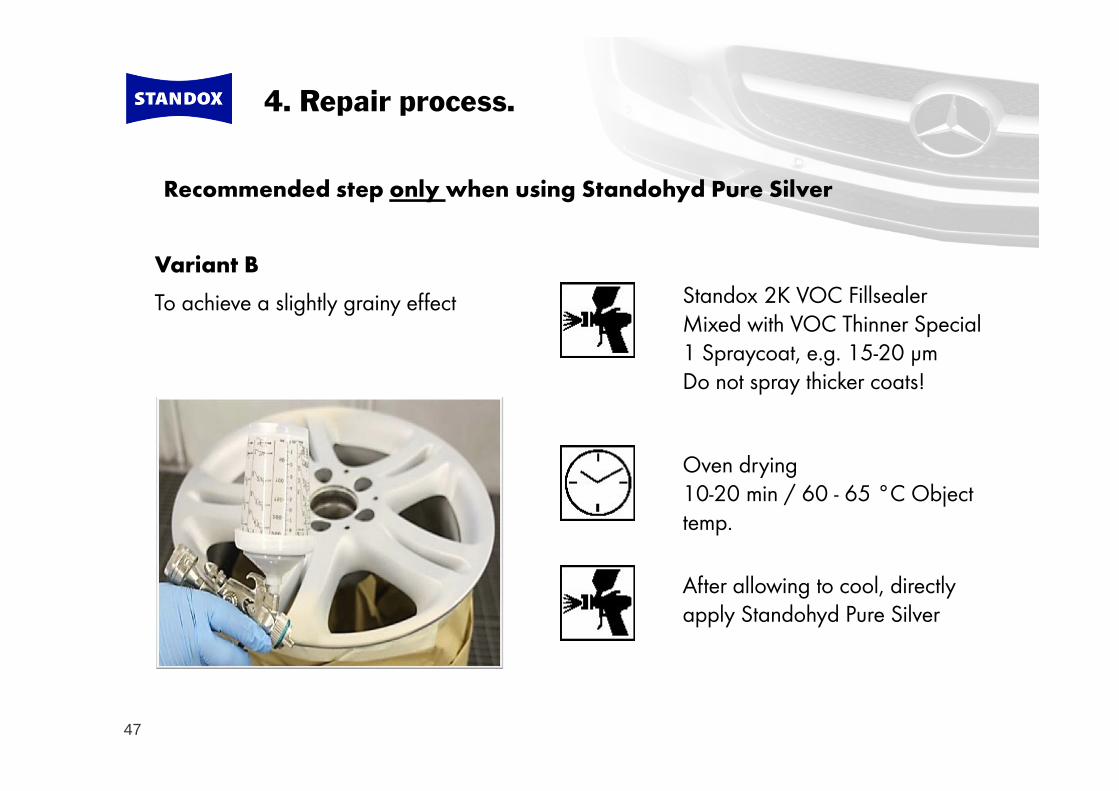
Variant BTo achieve a slightly grainy effect Standox 2K VOC Fillsealer
Mixed with VOC Thinner Special 1 Spraycoat, e.g. 15-20 μmDo not spray thicker coats!
Oven drying10-20 min / 60 - 65 °C Object temp.
After allowing to cool, directly apply Standohyd Pure Silver
Recommended step only when using Standohyd Pure Silver
48
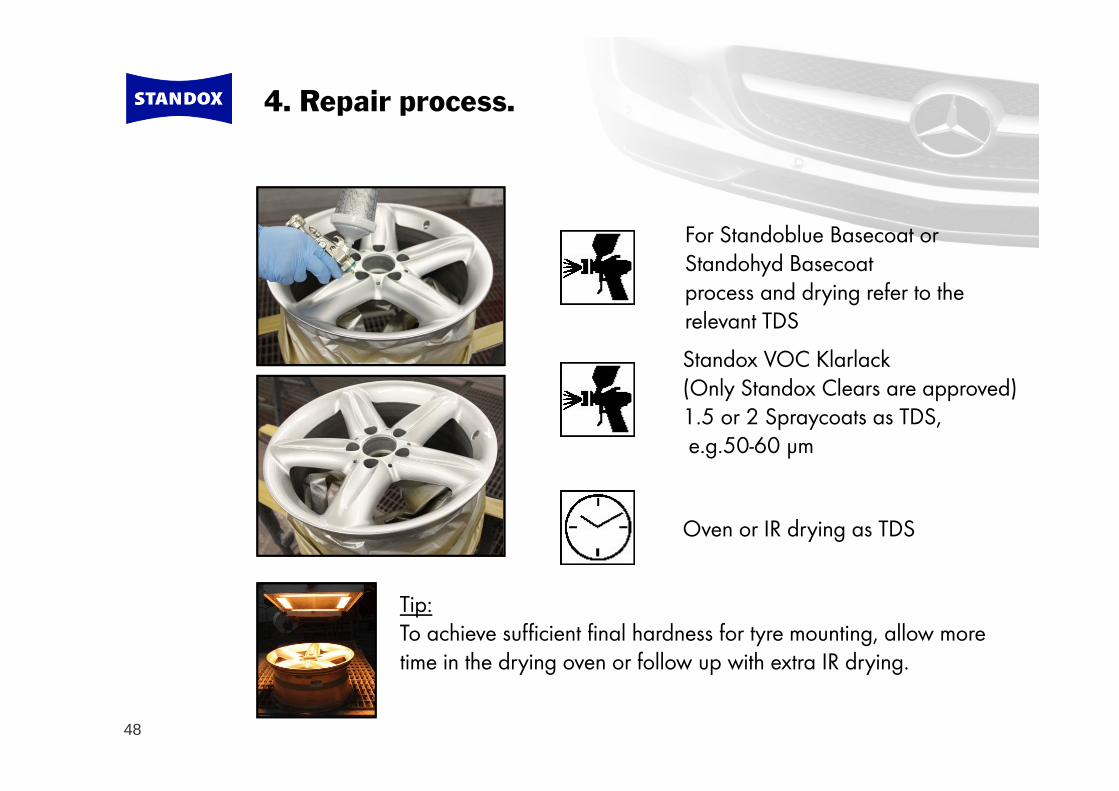
4. Repair process.
For Standoblue Basecoat orStandohyd Basecoatprocess and drying refer to the relevant TDS
Tip:To achieve sufficient final hardness for tyre mounting, allow more time in the drying oven or follow up with extra IR drying.
Standox VOC Klarlack (Only Standox Clears are approved)1.5 or 2 Spraycoats as TDS,e.g.50-60 μm
Oven or IR drying as TDS
49
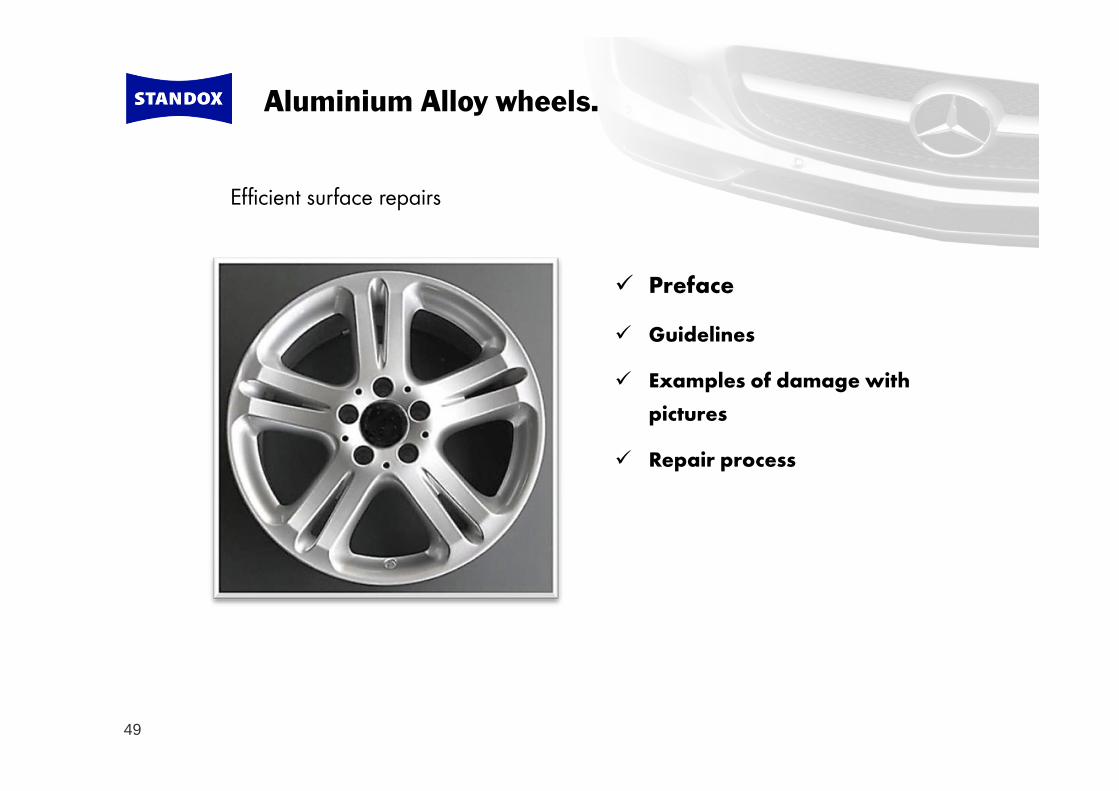
Aluminium Alloy wheels.
Efficient surface repairs
Preface
Guidelines
Examples of damage with pictures
Repair process
July 2010
The Art of Refinishing.