exploring the basics of windows xp. objectives start windows xp and tour the desktop explore the...
Post on 21-Dec-2015
214 views
TRANSCRIPT

Exploring the Basicsof Windows XP

Objectives
• Start Windows XP and tour the desktop• Explore the Start menu• Run software programs, switch between them, and
close them• Manipulate windows• Identify and use the controls in menus, toolbars,
and dialog boxes

Objectives
• Navigate your computer with Windows Explorer and My Computer
• Change the view of the items in your computer
• Get help when you need it
• Shut down Windows

Starting Windows XP
• Windows XP– Starts when computer is turned on– Elements of the desktop
• Icon• Pointer• Desktop• Date/Time control• Taskbar• Start button• Notification area

Starting Windows XP
Figure 1-1 shows the Windows XP desktop

Starting Windows XP
• Windows XP desktop uses a graphical user interface
• Graphical user interface (GUI)– Displays icons to represent items stored on
the computer• Icons: Pictures of familiar objects

The Windows XP Desktop
• Desktop– Area that appears on the screen when
Windows XP starts– A workspace for projects and tools– Uses default settings when the computer is
first started• Default settings: settings preset by the operating
system
– Appearance can be changed by the user

Using a Pointing Device
• A pointing device– Helps the user interact with objects on the
computer screen– Comes in many shapes and sizes
• Mouse– Most common pointing device
Pointing
• Pointing device– Used to move the mouse pointer over objects
on the desktop
• Pointing– Positioning the pointer over a specific part of
the screen

Pointing
• ScreenTips– Appear when the mouse pointer is positioned over certain objects– Display the purpose or function of the object– Figure 1-3 shows a ScreenTip

Clicking
• Clicking– Pressing a mouse button and immediately releasing
it
• Menu– A list of options which can be used to perform tasks
– Submenus
• Start menu– Appears when the Start button is clicked
– Provides access to programs, documents, etc.
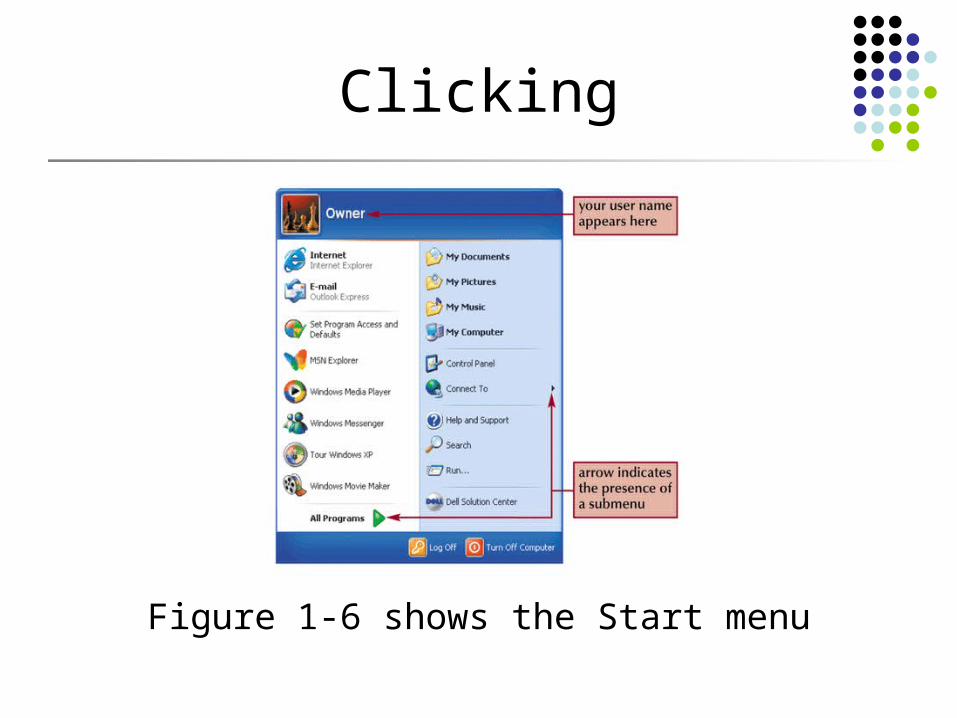
Clicking
Figure 1-6 shows the Start menu

Selecting
• Selecting a menu command– Two possible ways of selecting objects in
Windows XP• Pointing to an object• Pointing to and then clicking an object
– A selected object is highlighted

Selecting

Viewing the contents of the Recycle Bin
• Click the desktop, and then point to the Recycle Bin icon. After a few moments, a ScreenTip appears that describes the Recycle Bin
• Click the left mouse button twice quickly to double-click the Recycle Bin icon. The Recycle Bin opens

Viewing the contents of the Recycle Bin

Right-Clicking
• Right-clicking– Clicking an object with the right button of the
mouse– Selects an object and opens its shortcut menu
• Shortcut menu: a list of options directly related to the object

Right-Clicking
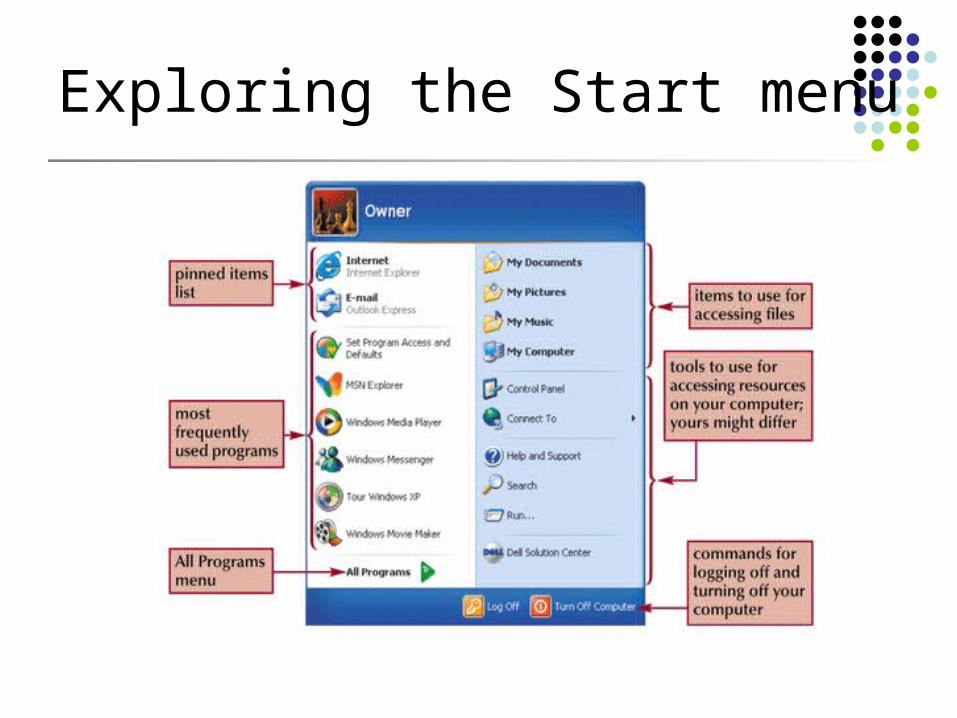
Exploring the Start menu

Starting and Closing a Program
• Starting a program– A program must be started before it can be
used– To start a program
• Click the Start button• Locate and click the program’s name in the
submenus
• An open or running program– A program which has been started

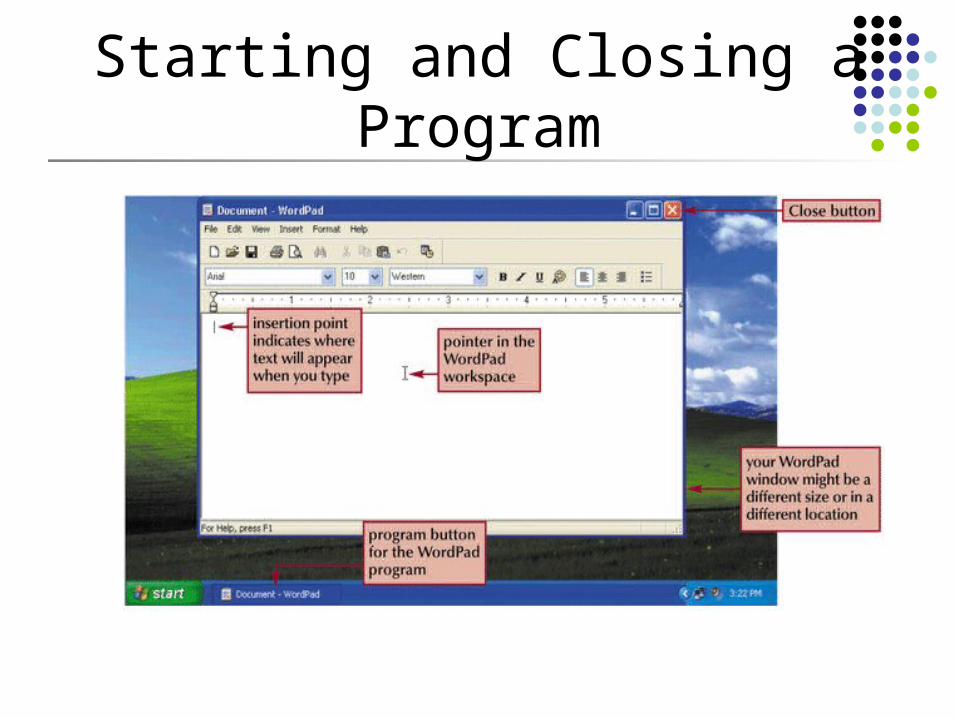
Starting and Closing a Program

Starting and Closing a Program
• Program button– Appears on the taskbar for each open
program– Click to switch between open programs
• Close button– Located in the upper-right corner of the
program window– Click to close the program
Starting and Closing a Program

Running Multiple Programs
• Multitasking– Ability to run multiple programs on Windows
XP at the same time– Allows the user to work on more than one
project at a time– The active program is the one you are
currently using

Switching Between Programs
• Program buttons– Located on the taskbar– Offer the easiest way to switch between
programs

Closing Inactive Programs from the Taskbar
• Options for closing a program– Use the Close button on the title bar of the program
window– Use the shortcut menu associated with the program
button on the taskbar

Anatomy of a Window
• A window– A rectangular area of the screen that may
contain• A program• Text• Graphics• Data

Anatomy of a Window
• Controls– Located in a window– Graphical or textual objects used for
• Manipulating the window• Using the program
– Examples• Menu bar• Sizing buttons• Status bar• Title bar• Toolbar• Workspace
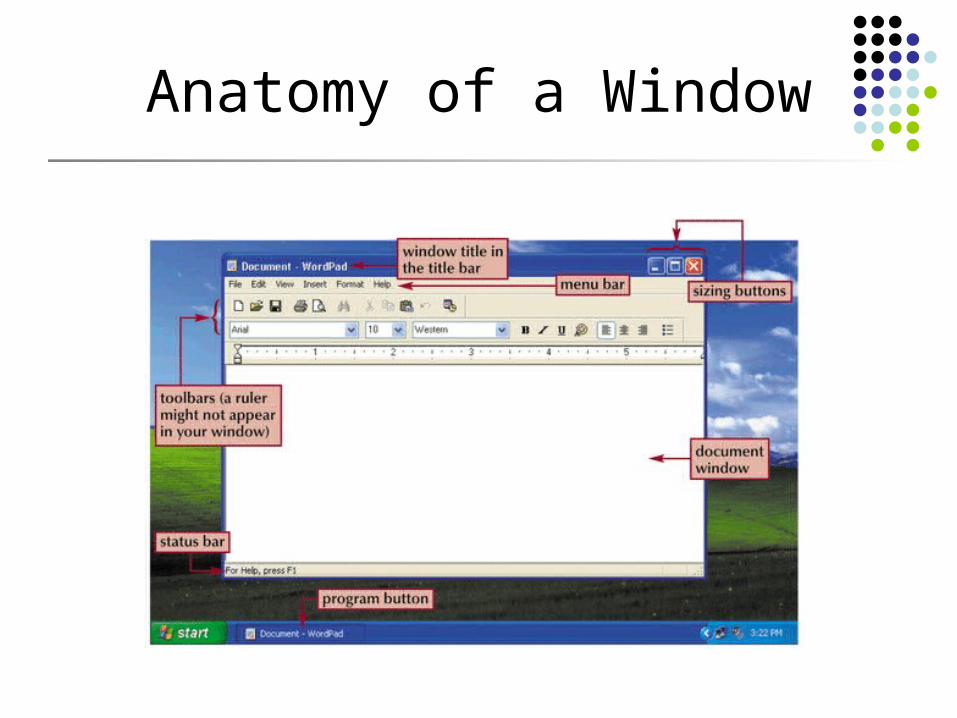
Anatomy of a Window

Manipulating a Window

Moving a Window
• To drag an object– Click an object and then hold down the mouse
button while moving the mouse
• To move a window– Drag the window by its title bar

Changing the Size of a Window
• Options for changing a window’s size– Sizing handle
• Located at the lower-right corner of the window
– Window borders• Can be dragged left, right, up, or down

Changing the Size of a Window

Using Program Menus
• Menus– Organize a program’s features and available
functions
• Menu bar– Typically located at the top of the program
window– Shows the names of the menus

Selecting Options from a Menu
• Menu items or commands– Choices for a menu– Appear when a menu name is clicked– Possible actions when clicked
• Immediately carry out an action• Show submenus• Ask the user for more information about the
desired action

Selecting Options from a Menu

Selecting Options from a Menu

Using Toolbars
• Toolbars in the program window– Provide one-click access to frequently used
commands– Have buttons grouped and organized by tasks
• To perform a command– Select a toolbar button by clicking it

Using List Boxes and Scroll Bars
• List box– Displays a list of available choices– Usually includes
• Array buttons• A scroll bar• A scroll box

Using List Boxes and Scroll Bars

Using Dialog Box Controls
• Dialog box– Opens when a menu command or item
followed by an ellipsis is selected– Allows the user to provide more information
about how a program should carry out a task– Groups different kinds of information in panes
• Panes: bordered rectangular areas

Using Dialog Box Controls

Exploring Your Computer

Changing the View
• Change the view by selecting an option from the View menu on the menu bar

Using Help
• Windows XP Help– Provides on-screen information about programs– Available by
• Clicking the Start button and selecting Help and Support from the Start menu
• Windows Help and Support Center window– Provides access to
• Help files stored on the computer• Help information stored on Microsoft’s Web site

Using Help

Using Help
• Windows XP Help and Support window– Organizes information into pages
• Home page• Index page• Favorites page• History page• Support page• Options page
– Search box• Used to search for keywords contained in Help pages

Shutting Down Windows XP
• Turn Off Computer option– Located on the Start
menu– Turns off the computer
• Log Off option– Located on the Start
menu– Logs off Windows XP
but leaves the computer on