fitness cycle owner’s manual -...
TRANSCRIPT

Fitness CycleOwner’s Manual
“It All Starts With a Vision”
FC2

1Congratulations
Congratulations on choosing a Vision Fitness Cycle. You’ve taken an important step in developing andsustaining an exercise program! Your Vision Fitness Cycle is a tremendously effective tool for achievingyour personal fitness goals. Regular use of your Vision Fitness Cycle can improve the quality of your lifein so many ways.
Here are just a few of the health benefits of aerobic exercise:
• Weight Loss • A Healthier Heart• Improved Muscle Tone• Increased Daily Energy Levels• Reduced Stress• Help In Countering Anxiety and Depression• An Improved Self Image
The key to reaping these benefits is to develop the exercise habit. Your new Vision Fitness Cycle willhelp you eliminate the obstacles that prevent you from getting in your exercise time. Snow and rain anddarkness won't interfere with your workout when you have your Vision Fitness Cycle in the comfort ofyour home.
This manual provides you with basic information on starting an exercise program. A more completeknowledge of your new fitness cycle will assist you in realizing your goal of a healthy lifestyle.
Some kinds of service to your Vision Fitness Cycle should only be performed by your Vision Fitnessdealer. Please contact your authorized Vision Fitness dealer should service be required. If a question orproblem arises which cannot be handled by your Vision Fitness dealer, please contact us:
Vision FitnessP.O. Box 280621-D East Lake St.Lake Mills, WI 53551Ph: 1-920-648-4090Fax: 1-920-648-3373www.visionfitness.com

2 About Home Exercise
ABOUT HOME EXERCISEYour Vision Fitness Cycle is the ideal choice to help you maintain year round fitness. You can use
your Vision Fitness Cycle as the core of your exercise program, or as a supplement to other fitnessactivities. Many people will ride their bikes, hike, or swim in the more pleasant months, only to lose theirimproved fitness with the arrival of inclement weather. By placing a Vision Fitness Cycle in the conven-ience of your home, you can keep your exercise program going despite bad weather, early nightfalls, oran ever increasingly busy schedule.
Below are some of the advantages of having a Vision Fitness Cycle in your home:
• Exercise is not weather dependent.• Saves you time by eliminating the drive time you would have to and from a health club.• You can exercise before or after work when it might be dark.• You can do multiple activities such as reading, watching TV, or listening to your favorite music.• It’s easier to control exercise intensity.• It’s a safe and comfortable environment.• You can stay in shape while spending time with your children and family.• You can avoid pollen during peak allergy times.
CAUTION: BEFORE BEGINNING ANYEXERCISE PROGRAM, ALWAYSCONSULT YOUR PHYSICIAN. IF YOUEXPERIENCE CHEST PAINS, NAU-SEA, DIZZINESS OR SHORTNESS OFBREATH, STOP EXERCISING ANDCONSULT YOUR PHYSICIANBEFORE CONTINUING.

3
PART 1 FEATURES & BENEFITSSemi-Recumbents . . . . .page 4-5Upright Cycles . . . . . . . . . . . .6-7Dual Action Cycles . . . . . . . . .8-9
Synchronized Arm & Leg . .10Pedal Cadence . . . . . . . . .10Upper Body Toning . . . . . .11Upper Body Only Exercise .11
PART 2 GETTING STARTEDSafety Tips. . . . . . . . . . .page 12Cleaning. . . . . . . . . . . . . . . . . .13Assembly . . . . . . . . . . . . . . . .13Moving Your Vision Fitness Cycle .13Leveling the Feet. . . . . . . . . . .13Adjusting the Seat
Recumbent ModelsSeat Position . . . . . . . . .14Seat Cushion Position . ..14
Upright ModelsSeat height . . . . . . . . . .15Seat tilt . . . . . . . . . . . . .15
Power Supply (R2200, E3200 Only)15
PART 3 - CONSOLESA. PROGRAMMABLE CONSOLES (Models R2200, E3200)Selecting Miles or Kilometerspage 16Turn Power On . . . . . . . . . . . .16Choosing the Program . . . . . . .16Choosing the Workout Level . .17Choosing the Time . . . . . . . . .17Count Down Mode . . . . . . . . . .17Count Up Mode . . . . . . . . . . . .17Entering Weight (Optional) . . . .18Start Program. . . . . . . . . . . . . .18Finish Program . . . . . . . . . . . .18
SPECIAL PROGRAMMABLE CONSOLE FEATURESManual Start . . . . . . . . . .page 19Easy Start . . . . . . . . . . . . . . . .19Changing Course Difficulty . . .19Pause . . . . . . . . . . . . . . . . . . . . .19Reset . . . . . . . . . . . . . . . . . . .19Auto Reset . . . . . . . . . . . . . . .19Ten Feedback Functions . . . . .20Scan On/Off . . . . . . . . . . . . . .20
PROGRAM DETAILSMountain . . . . . . . . . . . .page 21Intervals . . . . . . . . . . . . . . . . .21Rolling. . . . . . . . . . . . . . . . . . .22Weight Loss . . . . . . . . . . . . . .22Race . . . . . . . . . . . . . . . . . . .23Manual . . . . . . . . . . . . . . . . . .24
B. HEART RATE CONTROLCONSOLES(Models R2200 HRC, E3200 HRC)Moistening Transmitter Contactspage 25 Placing Strap Around Chest . . .25Heart Rate Feedback . . . . . . .25Determining Target Heart Rate 26Choose Heart Rate Control Program26Choose Target Heart Rate . . . .26Maintain High Pedaling RPMs .26
C. INDEXED CONSOLES (Models R2100, E3100, E4100)Installing Batteries . . . . .page 27Setting Miles or Kilometers . . .27Turning Screen Display On . . .27Choosing the Time and Starting27
Count Down Mode . . . . . . .27Count Up Mode . . . . . . . . . .27
Selecting Screen . . . . . . . . . . .28Changing Resistance . . . . . . .28Finishing Your Workout. . . . . . .28
SPECIAL INDEXEDCONSOLE FEATURESPause . . . . . . . . . . . . . . .page 28Reset Console . . . . . . . . . . . . .28Auto-off . . . . . . . . . . . . . . . . . .28Position Sensor Check . . . . . .28Six Feedback Functions. . . . . .29
D. MANUAL CONSOLES (Models R2000, E3000)pages 30-31
PART 4 DEVELOPING AFITNESS PROGRAM FOR YOUStretch First. . . . . . . . . . .page 32Warm Up and Cool Down . . . .32Exercise Guidelines . . . . . . . . .33
How Often? . . . . . . . . . . . . .33How Long?. . . . . . . . . . . . . .33How Hard? . . . . . . . . . . . . .33
Target Heart Rate. . . . . . . . . . .34Perceived Exertion Level . . . . .34A Note on Workload or Watts .34Achieving Your Fitness Goals. .34Weekly Log Sheets . . . . . . .36-37Annual Log Sheet . . . . . . ..38-39
PART 5Common Product Questionspage 40-41Further Reading . . . . . . . . . . .42Warranty . . . . . . . . . . . . . . . . 43
TABLE OF CONTENTS

4 PART 1 Vision Fitness Semi-Recumbents
Enclosed Casing
Two Piece Seat
Semi-RecumbentPositioning
Front WheelsFoot Levelers
Magnetic Resistance

5PART 1Features and Benefits
SEMI-RECUMBENT FEATURES & BENEFITS
Semi-Recumbent Positioning• Easy on and off.• Uses gluteus, hamstring, and quadriceps muscles.
COMFORT ARC™ Two Piece Seat• Lumbar support for lower back comfort.• Bottom seat cushion uses cutaway design for free rotation of legs.• Fore and aft bottom seat cushion positions.
Magnetic Resistance• No wearing contact parts.• Reliable and durable.• Smooth feel.• Noise free.
Belt Drive• Near silent pedaling.• Long Lasting
Enclosed Casing• Improves safety.• Further noise dampening.• Protects internal mechanics from dust and corrosive sweat.
Foot Levelers• For a solid ride on uneven floors.
Front Wheels• Makes it easy to move your Fitness Cycle around your home.

6 PART 1 Vision Fitness Uprights
Enclosed Casing
Front Wheels
Foot Levelers
Magnetic Resistance
Ergonomic Handlebar Design
Wide Padded Saddle

7PART 1Features and Benefits
UPRIGHT FEATURES & BENEFITS
Classic Cycling Positioning• Ideal for training for outdoor cycling.
COMFORT ARC™ Upright Seat• Wide rear anatomic padding for maximum comfort.• Nose cutaway to reduce pressure on soft tissue area.
Ergonomic Handlebar Design• Numerous comfortable hand positions. • Upright or drop positioning.
Magnetic Resistance• No wearing contact parts.• Reliable and durable.• Smooth feel.• Noise free.
Belt Drive• Near silent pedaling.• Long Lasting
Enclosed Casing• Improves safety.• Further noise dampening.• Protects internal mechanics from dust and corrosive sweat.
Foot Leveler• For a solid ride on uneven floors.
Front Wheels• Makes it easy to move your Fitness Cycle around your home.

8 PART 1 Vision Fitness Dual Action
Enclosed Casing
Dual Action Handlebar Design
Wide Padded Saddle
Front WheelsFoot Levelers
Magnetic Resistance

9PART 1Features and Benefits
DUAL ACTION FEATURES & BENEFITS
Dual Action Handlebar Design• Synchronized arm and leg action.• Total body muscle toning.• Superior cardiovascular workout.
COMFORT ARC™ Upright Seat• Wide rear anatomic padding for maximum comfort.• Nose cutaway to reduce pressure on soft tissue area.
Magnetic Resistance• No wearing contact parts.• Reliable and durable.• Smooth feel.• Much quieter than air resistance bikes.
Wide Range of Resistance Levels• Allows for proper warm up and cool down.
Belt & Chain Drive• The combination of a belt and chain drive reduces noise.
Enclosed Casing• Improves safety.• Further noise dampening.• Protects internal mechanics from dust and corrosive sweat.
Foot Levelers• For a solid ride on uneven floors.
Front Wheels• Makes it easy to move your Fitness Cycle around your home.

10 PART 1 Total Body Workout
TOTAL BODY WORKOUT ON DUAL ACTION BIKE
By combining upper and lower body exercise in one machine, you get totalbody benefits from every workout. Because you're spreading the workloadover all your major muscle groups, you can workout at higher intensitieswithout fatiguing any one particular muscle. And by keeping all your mus-cles working aerobically (oxygen burning), your body will burn fat cells upto 25% more efficiently compared to other types of exercise.
Synchronized Arm and Leg ConnectionThe pedals and arms on your Vision Dual Action Fitness Cycle are linkedtogether to reproduce a natural walking motion. When walking or running,your arm motion serves as your body's natural counterbalance, and thesynchronized action of the Vision Dual Action Cycle duplicates this benefit.With a fixed synchronized arm and leg action, you are assured of optimalbody positioning at all times.
Pedal CadenceThe Vision Dual Action Fitness Cycle with variable magnetic resistance
allows you to select the level of resistance and pedal cadence (Revolutions Per Minute or RPM’s) ofyour choice. You can increase your workload (Watts) either by increasing the resistance level or bypedaling at a faster cadence. However, your Dual Action Cycle will feel more natural if you pedal at awalking cadence of between 40 and 70 RPM’s instead of a usual cycling cadence of 80 RPM’s orgreater. Because your arms are in motion as well as your legs on a Dual Action Bike, a faster thanwalking cadence may feel awkward or unnatural.
Synchronized arm and legaction provides a superioraerobic exercise.

11PART 1Total Body Workout
Upper Body ToningThe total body workout of a dual action bike also helps tone yourarm, shoulder, chest, and back muscles at the same time youenjoy the benefits of a superior aerobic exercise. You can focusthe toning benefit on either your triceps (outer arm) and shouldermuscles or your biceps and chest muscles simply by changingyour grip on the handlebar. With your palm facing down on thegrip, the toning benefit will be focused on the triceps and shoulders. With your palm facing up on the grip, the toning bene-fit will be concentrated on the biceps and chest muscles. Youmight want to try changing your hand positions throughout yourworkout for variety and even body toning.
Upper Body Only ExerciseBy placing your feet together on the black plastic top cap, you canisolate your workout on the upper body muscles. For a little vari-ety, mix a few minutes of isolated upper body exercise into yourtotal body workout. Sometimes it may be necessary to get thearms started in motion by pushing one of the pedals gently withyour foot.
A Note on Gripping the ArmsWhen using your Vision Dual Action Cycle, do not grip the armstightly. Holding the grip tightly may elevate your blood pressure.Keep a loose, cupping hold as you push and pull the arms.
Palms Up Position Focuses ToningBenefits on Biceps and Chest.
Palms Down Position Focuses ToningBenefits on Triceps and Shoulders
Upper Body Only Exercise

12 PART 2 Getting Started
PART 2 - GETTING STARTED
IMPORTANT SAFETY INSTRUCTIONSSAVE THESE INSTRUCTIONS
When using an electrical product, basic precautions should always be followed, including the following: Read all instructions before using this Vision Fitness Cycle. (Note: Not all models use external power).
WARNING! - To reduce the risk of burns, fire, electrical shock, or injury to persons:
1. Use this exercise bike for its intended use as described in this manual. Do not use attachments not recommended by the manufacturer.
2. Never operate this Vision Fitness Cycle if it has a damaged cord or plug, it is not working properly, if it has been damaged, or immersed in water. Return the fitness cycle to a dealer for examination and repair.
3. Keep the cord away from heated surfaces.4. Never drop or insert any object into any opening.5. Do not use outdoors.6. To disconnect, turn the switch to the off position, then remove plug from outlet.7. Only use the power supply provided with your Vision Fitness bike.8. Never place the power cord under carpeting or place any object on top of the power cord.9. Do not remove the fitness cycle side covers. Service should be performed only by an authorized
Vision Fitness dealer.10. Unplug your Vision Fitness Cycle before moving it.
CHILDREN• Keep children off your Vision Fitness cycle at all times. • When the Vision Fitness cycle is in use, young children and pets should be kept at least 10 feet away.
OTHER SAFETY TIPS• CAUTION!: If you experience chest pains, nausea, dizziness or shortness of breath, stop exercising
immediately and consult your physician before continuing.• Do not use your Vision Fitness Cycle in or near puddled water, where there is moisture on the floor, or
near a swimming pool.• Do not turn pedals by hand.• Do not wear clothing that might catch on any part of the Fitness Cycle.• Make sure seat and handlebars are secure before each use.• Read this manual before operating this Fitness Cycle.

13PART 2Getting Started
CLEANING• Clean with soap and water cleaners only.• Never use solvents on plastic parts.
ASSEMBLYIf you have elected to assemble this product yourself, for your safety please
read and follow each of the steps in the enclosed assembly instructions. It isrecommended, when possible, that assembly be performed by an authorizedVision Fitness dealer. If you have any questions regarding any part or functionof your Fitness Cycle, contact your dealer.
MOVING YOUR VISION FITNESS CYCLEYour Vision Fitness Cycle has a pair of transport wheels built into the front
legs. It is easy to move your Vision Fitness Cycle by rolling it on the front trans-port wheels.
PLACEMENT IN YOUR HOMEIt is important that you place your Vision Fitness Cycle in a comfortable and
inviting room. Your Vision Fitness Cycle is designed to use minimal floor spaceand go nicely in your family room, den, or bedroom. Many people will placetheir Fitness Cycles facing the TV or a picture window. If at all possible, avoidputting your Vision Fitness Cycle in an unfinished basement. To make exercisea desirable daily activity for you, the Fitness Cycle should be in an attractivesetting.
Occasionally after long term use you will find a fine black dust below yourVision Fitness Cycle. This is normal wear from the drive belt and DOES NOTmean there is anything wrong with your Fitness Cycle. This dust can be easilyremoved with a vacuum cleaner. If you wish to prevent this dust from getting onyour floor or carpet, place a rubber or vinyl mat beneath your Fitness Cycle.
LEVELING THE FEETIf your Vision Fitness Cycle wobbles when you have placed it where you
intend to use it, raise or lower one or both of the adjustable levelers located onthe bottom of the rear leg support. Once you have leveled the Fitness Cycle,lock the levelers in place by tightening the winged lock nuts against the rear legsupport.
How to move yourVision Fitness Cycle
Leveler with Locknut

ADJUSTING THE SEAT
SEMI-RECUMBENT MODELS
SEAT POSITION The seat is at the proper position if your knee is slightly bent when the
pedal is in the furthest position. To reposition the seat, lift the quickrelease seat lever and slide the seat forward or back. (Loosen the knob onthe model R2000). It is best to adjust the seat position while you are seated with your feet on the pedals. Lock the seat into position by press-ing the quick release lever down. If the quick release lever does not holdthe seat tight, tighten the black knob on the underside of the seat rail. Theseat rail is numbered for your convenience.
For full use of your leg muscles, center the ball of your foot on thepedal and use the toe strap to pull back and up on the pedal.
BOTTOM SEAT CUSHION FORE & AFT ADJUSTMENTThe bottom seat cushion can be attached to the frame in either a fore or
aft position. A larger person may want to use the fore position to providemore saddle support. To change the bottom seat cushion position, removethe four bolts that hold the seat cushion to the frame and use the alternatemounting holes.
14 PART 2 Setting Up Your Fitness Cycle
Quick Release Seat Adjust
Proper Leg Position

15PART 2Setting Up Your Fitness Cycle
UPRIGHT MODELS
SEAT HEIGHTIt is important for your comfort that the seat height be set properly. The seat is
at the proper height if your knee is slightly bent when the pedal is in the lowestposition.
For your convenience, the holes on your seat post are numbered. To raise orlower the seat, first turn the inside knob counterclockwise 2 complete turns toloosen the locking feature. Then pull the outside knob out and raise or lower theseat post. When you have positioned the seat post to the correct height, let theseat pin rest in the nearest hole. Relock the seat pin by turning the inside knobclockwise until tight. Make sure the pin is fully engaged before sitting on the seat.
SEAT TILTThe angle of the seat is also important for your
comfort. It is usually best to have the seat positioned horizontally. The seat anglecan be checked by placing a straight edge, such as a ruler, across the top of theseat. If you experience discomfort with this position, loosen the seat fixing bolt andangle the saddle nose down slightly. Retighten the seat fixing bolt before trying thenew seat position. Make sure the seat nut is tight before using.
POWER SUPPLY (MODELS R2200 & E3200 ONLY)
Your Vision Fitness Cycle uses a wall mount external power supply. Only use thepower supply supplied with the bike. If you misplace this power supply, pleasecontact your authorized Vision Fitness dealer for an original replacement.
Use of the wrong power supply may cause damage to your Fitness Cycle.
Seat Pin Knob

PART 3 - CONSOLES
A. QUICK-SET™ PROGRAMMABLE CONSOLE(Models R2200, E3200)
Your Vision Fitness computer console offers 48 different programs. Theseprograms are designed to make each exercise session enjoyable while youmake progress toward your personal fitness goal.
SELECTING MILES OR KILOMETERS The programmable console comes preset for use in miles. To change to
kilometers, remove the console from the console mast and switch the posi-tion of the switch as shown on the diagram on the back of the console. Allspeed and distance feedback functions will then be in kilometers, weight willbe in kilograms.
TURN POWER ONThe On/Off switch for your fitness cycle is located next to the power supply cord plug in. Flip this
switch to the ‘ON’ position. You will hear a beep and the console will light up. You are ready to use yourconsole.
CHOOSING THE PROGRAMThe course profile screen will now show the Mountain Program. The flashing column of program lights
indicates that a Program is ready to be entered. By pressing either the UP or the DOWN arrow, you canmove between the 6 different Program options. The course profiles will change as you view differentPrograms. The chart below provides you with the preset times and specific fitness benefits of each pro-gram.
Program Preset Time Fitness Benefits*Mountain 24 minutes General conditioningIntervals 24 minutes Improve strength, speed,and enduranceRolling 32 minutes Weight maintenanceWeight Loss 48 minutes Weight LossRace 24 minutes Improve cycling performanceManual Not preset Customized workouts
* All the programs can provide an aerobic and cardiovascular benefit in addition to the specific benefitslisted.
When the program you choose to use is displayed on the screen, press the ENTER button. The lightnext to the program name will stop flashing and remain lit. Now you are ready to choose your workoutlevel.
16 PART 3 Programmable Console
Vision Console Computer

17PART 3Programmable Console
CHOOSING THE WORKOUT LEVELThe function light next to PROGRAM LEVEL will now begin to flash. The flashing number showing in
the number screen indicates the current Program Level. Each Program has 8 different Levels to choosefrom, except for the Race Program which has 17 levels. You vary the Program Level by pressing eitherthe UP or the DOWN arrow. The higher the number, the more difficult the Program will be. As youchange the Program Level, the profile screen lights will move up or down to show the relative difficultyof the course.
When the Level you choose to use is displayed, press the ENTER button.Reminder: When you are beginning an exercise program, it is better to start at a low level of intensity
and gradually work up to higher levels. You might want to start with a Program Level of 1 or 2.
CHOOSING THE TIMEThe function light next to TIME will now begin flashing. The flashing number showing in the number
screen indicates the workout time. There are two ways to use the timer: Count Down Mode or Count UpMode.
Count Down ModeIn count down mode, the timer starts with a set number of minutes and moves to zero. Count down
times of between 5 minutes and 99 minutes can be selected. You vary the time by pressing either theUP or the DOWN arrows. The preset workout time for each Program has been chosen to match theProgram’s primary fitness goal. However, you may want to customize the workout time to fit your pres-ent fitness level, or to fit your personal fitness goals. When the time you choose to use is showing in thenumber screen, press the ENTER button.
Count Up ModeIn count up mode, the timer starts with zero and goes up. You select count up mode by setting the
time to ’00:00’ and pressing the ENTER button. In count up mode each program segment will last 1minute. When the program is finished, there will be a single beep and the program will immediatelybegin start over. Because their are 16 segments on the profile screen, each program cycle will take 16minutes. Program time and other function data will accumulate until START•STOP is pressed and theprogram is changed. The Race Program does not operate in Count Up Mode.

18 PART 3 Programmable Console
ENTERING WEIGHT (Optional)The function light next to WEIGHT will now begin flashing. The flashing number showing in number
screen is weight in pounds. By entering your weight, the calorie feedback calculations will be moreaccurate. You vary the weight input by pressing either the UP or the DOWN arrow.
When your correct weight is showing in the numeric LED screen, press the ENTER button to reviewyour selections or the START•STOP button to begin the program. You may choose to skip the weightstep by pressing START•STOP immediately after pressing ENTER following your time selection. If youskip this step, the Vision Fitness console will calculate feedback for a 150 pound person.
START YOUR FITNESS CYCLE PROGRAMYou are now ready to start exercising. After you press the START•STOP button to begin the Program,the light next to ‘ON’ will light up and the first column of lights on the profile screen will begin flashing.As time elapses, the flashing column of lights will shift to the right indicating your position on the courseprofile. The chart below shows each segment time for the preset program times:
PROGRAM PRESET TIME PRESET SEGMENT TIMEMOUNTAIN 24 Minutes 1.5 MinutesINTERVALS 24 Minutes 1.5 MinutesMOUNTAIN 32 Minutes 2 MinutesWEIGHT LOSS 48 Minutes 3 MinuteRACE 24 Minutes 1.5 MinuteMANUAL Not preset Not preset
If you have entered a time goal other than the preset time, each segment will be 1/16th of the timegoal selected.
If you have programmed the timer to count up, each segment will be one minute long.
FINISH YOUR FITNESS CYCLE PROGRAMWhen your program is completed, record your time and mileage in your personal exercise log book.You can begin a new program by repeating the above instructions.
Turn the power switch off when you are done with your workout.

19PART 3Programmable Console
SPECIAL CONSOLE FEATURES(Models R2200, E3200)
Manual StartIf you wish to skip all programming steps, simply press START•STOP while all six program lights are
flashing. The console will go to Manual Program, Level 3 and begin in count up mode. To change lev-els, press the UP or DOWN arrow.
Easy StartEach Program has a ‘default’ Program Level. If a Program Level is not entered, then the Program will
operate on Program Level 3. If you choose to use the default Program Level of 3, the preset programtimes and the preset weight of 150 lbs, you can press the START•STOP button immediately after choos-ing the Program and the Program will begin.
OR, if you choose to use the preset program time and the preset weight of 150 lbs, but want to cus-tomize only the Program Level, you can press the START•STOP button immediately after choosing theLevel and the Program will begin with your selected Level.
Change Course DifficultyOnce the Program has begun, you can vary the level of each segment by using the UP or DOWN
arrow. This feature allows you to adjust select sections of a course to meet your present fitness level. If you wish to vary the Level of the entire Program, you must stop the Program you are in and start
over.
PauseYou may stop a Program after it has begun by pressing the START•STOP button once. To resume the
Program, press the START•STOP button again.
ResetAfter a Program has begun, you may quit the Program by pressing and holding the START•STOP but-
ton for 2 seconds. The column of red program lights will flash and the console profile screen will showthe Mountain Program.
Auto-ResetIf your Vision Fitness Cycle is not used for 5 minutes, it will automatically reset itself. (Auto-reset will
not work when timer is operating in count up mode.)
20 PART 3 Programmable Console
TEN FEEDBACK FUNCTIONSOnce a program has begun, you may use the SELECT button to view the data of your choice
on the number screen. The light next to the function name indicates which data is currently displayed.The following functions can be viewed:
DISPLAY DATA USE THIS FUNCTION TO:LOAD (Watts) Evaluate your fitness progress over time.SPEED Compare your performance to simulated outdoor cycling speed.AVERAGE SPEED Set personal average speed goals for a specific program at a
specific level. A faster average speed is an indication of improved physical conditioning.
RPM Improve cycling technique while reducing leg muscle fatigue by pedaling at between 80 and 100 RPM’s.
DISTANCE Set personal goals for covering greater amounts of distance for each program. You can log mileage as a motivational tool.
CALORIES View your total calorie expenditure.CALORIES PER HOUR View the rate you are currently burning calories.PROGRAM LEVEL View the current program level selected.TIME View the time remaining if the count down mode is used, or
view the elapsed time if the count up time mode is used.WEIGHT Used to calculate more accurate calorie expenditure.
SCAN ON•OFFWhen the SCAN button is pressed, the red LED next to ‘SCAN’ will light up
indicating Scan is on. When Scan is on, the number display will cycle between each data function(except weight) showing a new data display every four seconds.
To turn Scan off, press the SCAN button again. The Scan light will no longer be on.

21PART 3Programmable Console
PROGRAM DETAILS
MOUNTAIN PROGRAMPreset Time: 24 MinutesPrimary Fitness Goal: General conditioningCourse Description: The Mountain Program simulates a gradualclimb up a mountain grade with a quicker descent for the cool downphase. It is a good general conditioning program that strengthensyour leg muscles and improves your cardiovascular system.
INTERVALS PROGRAMPreset Time: 24 MinutesPrimary Fitness Goal: Improve strength, speed and enduranceCourse Description: The Intervals Program is one of the mostchallenging workouts. The alternating high and low intensity loadwill improve your power, speed, and endurance while keeping yourmetabolism high for the entire workout.

22 PART 3 Program Details
ROLLING PROGRAMPreset Time: 32 MinutesPrimary Fitness Goal: Weight MaintenanceCourse Description: The Rolling Program simulates rolling terrain withslow and gradual changes. This is a lower intensity cardiovascularworkout that is ideal for weight maintenance.
WEIGHT LOSS PROGRAM Preset Time: 48 MinutesPrimary Fitness Goal: Weight LossCourse Description: With regular use, the Weight Loss Program is apowerful tool for weight loss. The combination of low load intensity overa longer period of time has been found to be the most effective forweight control. The course profile changes are just enough to keep yourworkouts interesting.

23PART 3Program Details
RACE PROGRAMPreset Time: 24 MinutesPrimary Fitness Goal: Improve Cycling PerformanceCourse Description: The Race Program is one of the most exciting and challenging programs onyour Vision Fitness Cycle. It’s a great motivating program for competitive individuals. With the RaceProgram, you compete with the computer pacer across the length of the profile screen. The pacermoves across the screen at a rate that puts it at the finish line in exactly the time entered. Prior tobeginning the Race Program, the profile screen will read ‘PACE’. This refers to the computer pacespeed showing in the number screen.
LEVELS: In the race program, there are 17 different levels of difficulty (17 different pace levels).The figure shown in the number screen when the program level light flashes is the pace speed ofthe computer competitor in miles per hour. The computer pace can be set from 12.00 MPH to28.00 MPH in increments of 1 mile per hour.
After a Race Program has begun, you use the UP and DOWN arrows as you would shift gearson a bike. Your goal in this Program is to beat the pacer to the finish line by covering an equal dis-tance at a faster pace.
The solid light in the upper row of lights shows the computer pacer position. Your position on thescreen is indicated by the flashing light on the lower row of lights. If you trail the pacer you shouldeither ‘shift’ to a higher gear or spin at a faster RPM to regain ground lost to the pacer.
If you beat the pacer to the finish line, the profile screen will flash ‘WIN!’ and the Program will beover. Note that if you beat the pacer, the entire time goal will not have elapsed. If the pacer beatsyou to the finish, the full entire goal will have elapsed.

24 PART 3 Program Details
MANUAL PROGRAMPreset Time: NonePrimary Fitness Goal: Customized WorkoutsCourse Description: The Manual Program allows you to choose yourown load levels any time during the program, or simply to maintain aconstant load level throughout your workout. When the UP or DOWNarrows are pressed during the manual program operation, the load levelof the entire program changes.
25PART 3Heart Rate Control Console
HEART RATE CONTROL CONSOLE(Models R2200HRC, E3200HRC)
Before proceeding, refer to instructions for programmable consoles on page 16. Console operation forthe Heart Rate console is the same as for Programmable consoles except that the ‘Heart Rate Control’program replaces the ‘Mountain’ program. The heart rate console on your Vision Fitness exercise bikeincludes both heart rate feedback and a heart rate control program. Using heart rate control to monitoryour workout allows you to achieve the optimal workout. This console is manufactured with an internalwireless telemetric receiver that will receive heart rate signals sent to it by a transmitter that is wornaround your chest. This wireless technology is accurate, continuous, and convenient. You should be positionedon the exercise bike seat for the system to operate.
MOISTENING TRANSMITTER ELECTRODESOn the back side of your transmitter are two rubber strips several inches long. These rubber strips arethe electrodes that will pick up the signals of your heart beat. It is very important to moisten these stripswith several drops of water prior to placing the belt against your chest. this moisture will allow the sig-nals to be conducted to the transmitting hardware. If you ever use the bike and the display is not show-ing a heart rate value, remoisten the electrodes.
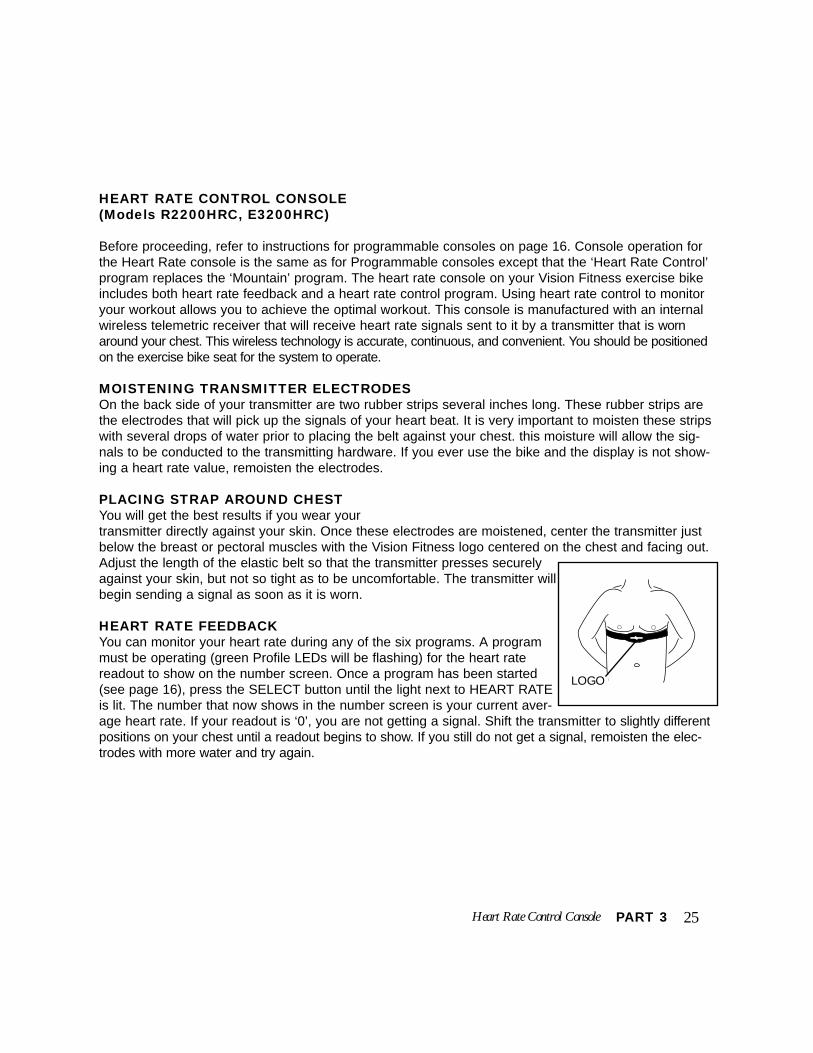
PLACING STRAP AROUND CHESTYou will get the best results if you wear your transmitter directly against your skin. Once these electrodes are moistened, center the transmitter justbelow the breast or pectoral muscles with the Vision Fitness logo centered on the chest and facing out.Adjust the length of the elastic belt so that the transmitter presses securelyagainst your skin, but not so tight as to be uncomfortable. The transmitter willbegin sending a signal as soon as it is worn.
HEART RATE FEEDBACKYou can monitor your heart rate during any of the six programs. A programmust be operating (green Profile LEDs will be flashing) for the heart ratereadout to show on the number screen. Once a program has been started(see page 16), press the SELECT button until the light next to HEART RATEis lit. The number that now shows in the number screen is your current aver-age heart rate. If your readout is ‘0’, you are not getting a signal. Shift the transmitter to slightly differentpositions on your chest until a readout begins to show. If you still do not get a signal, remoisten the elec-trodes with more water and try again.
LOGO

26 PART 3 Heart Rate Control Console
HEART RATE CONTROL This console has an easy to operate heart rate control program that operates using the same sequenceof steps as the other programs. The heart rate control program will take you through a warm-up phase,and gradually increase the resistance levels automatically until your actual heart rate is equal to yourinputted target level (plus or minus five beats). During the last two segments of your workout, the resist-ance will be reduced gradually to allow your body a slow cool down period.
DETERMINING TARGET HEART RATETarget heart rate is the number of beats per minute you determine to be ideal for achieving your person-al fitness goals. If you have been sedentary, or have a history of heart disease always consult yourphysician to determine the target heart rate. Otherwise, please read pages 33 and 34 for further infor-mation to help you decide on the target rate best for you.
CHOOSE HEART RATE CONTROL PROGRAMAfter turning on the power to your exercise bike, use either the UP or DOWN arrow to choose theHEART RATE CONTROL program. Press ENTER.
CHOOSE TARGET HEART RATEThe function light next to PROGRAM LEVEL will be flashing and ‘H 80’ will show in the number screen.You can choose a target heart rate from 80 to 170 in 5 beat increments by pressing the UP or DOWNarrow. Once your selected target level is showing in the number screen, press ENTER. The steps forentering TIME and WEIGHT are the same as all the other programs. After inputting your choices, pressSTART.
MAINTAIN HIGH PEDALING RPM’sWhen using the Heart Rate Control program, you may find that the resistance levels rise higher thanwhat your legs are accustomed to pedaling against. To avoid this, and reduce the stress on your joints,it is highly recommended that you pedal at a ‘cyclists’ cadence range of 80 to 100 RPM’s. If you do notpedal at higher RPM’s (80-100), you may find it impossible to achieve heart rate target level, sinceworkload is determined by the combination of resistance and RPM’s.

INDEXED CONSOLE(Models R2100, E4100, E3100)
Your easy to use Vision Fitness Indexed compute console provides the informationyou need to monitor your progress toward your personal fitness goals.
INSTALLING BATTERIESYour Vision Indexed console uses two size AA batteries. These batteries are locat-ed in a snap open battery compartment in the back of the console. If your FitnessCycle batteries have not already been installed by your dealer, please install themnow.
SETTING CONSOLE FOR CORRECT MODELWhen the batteries are first installed, ‘ E4100 ML' will be blinking in the SPEED -DISTANCE window. Use this setting for the model E4100 if you wish to view speedand distance in miles. If you have the model R2100 or E3100, press any button to change the display until theconsole displays: ‘R2100 ML’.If you wish to view the speed and distance in kilometers, press any button untileither ‘E4100KM’ shows for the model E4100, or ‘R2100KM’ shows for the model R2100 or E3100. After youhave selected the correct model and mile or kilometer setting, wait 30 seconds for the console display to stopblinking. After 30 seconds the console will beep, and ‘0:00’ will begin flashing in the time window. The selectionyou have made will remain in the console program until the batteries are removed. If you wish to change theselection, remove the batteries and reinstall them. You can now select the model again.
TURNING SCREEN DISPLAY ONTo turn the screen display on, either press any console button or turn the pedals one complete revolu-tion. When the display first comes one, the console will beep and '0:00' will be flashing in the TIME win-dow.
Choosing Time and StartingThere are two ways to use the timer: Count Down Mode or Count Up Mode.
Count Down ModeUse the UP or DOWN arrows to enter your workout time. Times of between 1 and 99 minutes can be selected.When the time you choose is showing in the TIME window, press the START•STOP button. The timer will begincounting down to zero. When the workout time is completed, the console will beep 3 times and the screen will flash3 times.
Count Up ModeTo use the timer in count up mode, simply press START•STOP when '0:00' is flashing on the screen. Thetimer will count up till 99 minutes. When 99 minutes are reached, the console will beep 3 times and thescreen will flash 3 times.
27PART 3Indexed Console
Vision Indexed Console

28 PART 3 Manual Console
SELECTING SCREENUse the SELECT SCREEN button to choose the feedback display in the lower console windows. Youcan choose to view SPEED and RPM or DISTANCE and CALORIES. The top two windows, TIME andWATTS, will not change.
CHANGING RESISTANCEThere are two ways to increase your workload. You can pedal faster, or your can turn the tension knoblocated in the center of your console. There are 8 preset positions numbered from 1 to 8. Level 1 isthe position of lowest resistance or easiest, level 8 the position of highest resistance or hardest. Duringthe warm up and cool down phase of your workout, use a lower setting such as level 1 or 2 to graduallywarm up and cool down.
FINISHING YOUR WORKOUTWhen your workout is completed, record your time and mileage in your personal exercise log book (seelog record forms in the back of this manual).
SPECIAL CONSOLE FEATURESPauseYou can stop the timer at any time by pressing the START•STOP button once. To start the timer again,press START•STOP again. The timer can pause for up to 10 minutes. After 10 minutes, the consolewill turn off.
Reset ConsoleYou can stop and reset the console data to zeroes by pressing and holding the START•STOP key for 2seconds. When '0:00' is flashing in the TIME window, the console has been reset.
Auto-offTo extend battery life, the console will turn itself off if there is no RPM input for 10 minutes.
Position Sensor CheckYour Vision Indexed Fitness Cycle can provide accurate work load readouts because the computerknows what position the magnet is in through a sensor located at the base of the tension knob. Tocheck this sensor, remove and reinstall the batteries. While the 'E4100 ML' icon is flashing, a numberfrom 1 to 8 will show in the WORKLOAD window. This number indicates the position of the tensionknob. Turn the tension from 1 through 8 and check that the number in the WORKLOAD window matches thenumber on the tension knob. If it does not, contact your Vision Fitness dealer.
Be sure to select the correct computer model setting (described above) after completing this check.

29PART 3Manual Console
6 FEEDBACK FUNCTIONS
DISPLAY DATA USE THIS FUNCTION TO:
TIME View the time remaining if the count down mode is used, or view the elapsed time if the count up mode is used.
LOAD (Watts) Evaluate your fitness progress over time.
SPEED Compare your performance to simulated outdoor cycling speed.
DISTANCE Set personal goals for covering greater amounts of distance. You can log your distance as a motivational tool.
RPM Improve cycling technique by maintaining consistent pedal RPM’s. On the Dual Action Cycles, an RPM of 40 to 70 is recommended.
CALORIES View your calorie expenditure.

30 PART 3 Heart Rate Control Console
MANUAL CONSOLE(Models R2000, E3000)
Your easy to use Vision Fitness Manual computer console provides the informa-tion you need to monitor your progress toward your personal fitness goals.
INSTALLING BATTERIESYour Vision Fitness Manual console uses two size AA batteries. These batteries
are located in a snap open battery compartment in the back of the console. If yourFitness Cycle batteries have not already been installed by your dealer, please installthem now.
TURNING SCREEN DISPLAY ONTo turn the screen display on, either press any console button or turn the pedals one complete revolu-
tion. When the display first comes on, ‘0:00’ will be flashing in the TIME window.
TURNING SCREEN DISPLAY OFFThe screen display will go off automatically after 5 minutes of non use.
CHOOSING TIME AND STARTINGThere are two ways to use the timer: Count Down Mode or Count Up Mode.
Count Down ModePress the SET TIME button to enter your workout time. When the time you choose is showing in the
TIME window, start pedaling. The timer will begin counting down to zero. When the workout time iscompleted, the console will beep and the screen will flash.
Count Up ModeTo use the timer in count up mode, simply start pedaling when ‘0:00’ is flashing on the screen.
Vision Manual Console

31PART 3Heart Rate Control Console
CHANGING RESISTANCEThere are two ways to increase your workload. You can pedal faster, or you can turn the tension knob
which is located below the console. During the warm up and cool down phase of your workout, use a lower setting to gradually warm up
and cool down your muscles.
PARTIAL RESETTo reset time only, touch the HOLD TO RESET button. Time will return to ‘0:00’ and not delete the
values in the other windows.
FULL RESETTo reset all the console values, press and hold the HOLD TO RESET button. Time will return to ‘0:00’
then all the other values will be deleted.
5 FEEDBACK FUNCTIONS
DISPLAY DATA USE THIS FUNCTION TO:
TIME View the time remaining if the count down mode is used, or view the elapsed time if the count up mode is used.
SPEED Compare your performance to simulated outdoor cycling speed.
DISTANCE Set personal goals for covering greater amounts of distance. You can log your distance as a motivational tool.
RPM Improve cycling technique by maintaining consistent pedal RPM’s.
CALORIES View your total calorie expenditure.

32 PART 4 Developing a Fitness Program
PART 4DEVELOPING A FITNESS PROGRAM
Stretch FirstBefore using your Vision Fitness Cycle, it is best to
spend a few minutes doing a few gentle stretching exercises. Stretching prior toexercise will improve flexibility and reduce chances of exercise related injury. Easeinto each of these stretches with a slow gentle motion.
Wall PushStand 1 1/2 feet from a wall and lean forward pushing against the wall with your
palms. Keep your heels flat and hold this position for a count of 10. Do not bounce.
Standing Quadriceps StretchUsing the saddle of your Fitness Cycle to provide balance, grab your left ankle
with your left hand and hold your foot against the back of your thigh for a count of10. Repeat with your right foot and hand.
Seated Toe TouchSit on the floor with your legs together and straight out in front of you. Do not lock
your knees. Extend your fingers towards your toes and hold for a count of 10. Donot bounce.
THE IMPORTANCE OF THE WARM UP AND COOL DOWN
Warm UpThe first 2 to 5 minutes of a work out should be devoted to warming up. The warm
up will limber your muscles and prepare them for more strenuous exercise. Warmup on your Vision Fitness Cycle by pedaling with low resistance.
Cool DownNever stop exercising suddenly! A cool down period allows your heart to readjust
to the decreased demand. Use a low resistance setting during the cool down togradually lower your heart rate. After the cool down, repeat the stretching exercisesdescribed at the beginning of this chapter to loosen and relax your muscles.
Wall Push
Standing quadriceps stretch
Seated toe touch stretch

33PART 4Developing a Fitness Program
EXERCISE GUIDELINESAlways consult your physician before beginning an exercise program.
How Often?The American Heart Association recommends that you exercise at least 3 to 4 days per week to maintain car-
diovascular fitness. If you have other goals such as weight or fat loss, you will achieve your goal faster with morefrequent exercise. Whether it’s 3 days or 6 days, remember that your ultimate goal should be to make exercise alifetime habit.
Many people are successful staying with a fitness program if they set aside a specific time of day to exercise. Itdoesn’t matter whether it’s in the morning before your shower, during lunch hour or while watching the eveningnews. What’s more important is that it’s a time that allows you to keep a schedule, and a time when you won’t beinterrupted. If you are to be successful with your fitness program, you have to make it a priority in your life. Sodecide on a time, pull out your day planner and pencil in your exercise times for the next month!
How Long?For aerobic exercise benefits, it’s recommended that you exercise from between 24 and 32 minutes per ses-
sion. But start slowly and gradually increase your exercise times. If you’ve been sedentary during the past year, itmay be a good idea to keep your exercise times to as little as five minutes initially. Your body will need time toadjust to the new activity.
If your goal is weight loss, a longer exercise session at lower intensities has been found to be most effective. Aworkout time of 48 minutes or more is recommended for best weight loss results.
How Hard?How hard you workout is also determined by your goals. If you use your Vision Fitness Cycle to prepare for rac-
ing, you will probably work out at a higher intensity than if your goal is general fitness. Regardless of your longterm goals, always begin an exercise program at low intensity. Aerobic exercise does not have to be painful to bebeneficial! There are two ways to measure your exercise intensity. The first is by monitoring your heart rate, andthe second is by evaluating your perceived exertion level (this is simpler than it sounds!).
To monitor your heart rate you can use a pulse monitor or take your pulse with your fingers. Pulse monitors area convenient tool for monitoring heart rate, but make sure you use an accurate one. An inaccurate pulse monitoris of little value. You can measure your pulse with your fingers by placing your first two fingers lightly over theblood vessel (carotid artery) on your neck located next to your Adam’s apple. Count your pulse for ten secondsand multiply by six. This figure is your heart rate in beats per minute. Compare this number to the Target HeartRate Zone for your age group.

34 PART 4 Developing a Fitness Program
Target Heart Rate ZoneThe most common method for calculating your target heart rate is to first find your maximum heart
rate. The standard formula for this is:
220—Your Age = Maximum heart rate.
You do not want to workout at your maximum heart rate, you want to workout in your Target HeartRate Zone. Your Target Heart Rate Zone is a percentage of your maximum heart rate. The AmericanHeart Association recommends working out at a Target Heart Rate Zone of between 60% and 75% ofyour maximum heart rate. If you are just beginning an exercise program, exercise near or below thelower limit of your Target Zone.
Lower Limit of Target Zone = Maximum heart rate X .6Upper Limit of Target Zone = Maximum heart rate X .75
You may find the chart below helpful for a quick reference.Age Target Zone 60%-75%20 120-15025 117-14630 114-14235 111-13840 108-13545 105-13150 102-12755 99-12360 96-12065 93-11670 90-113
Perceived Exertion LevelThe second and simpler way to gauge your exercise intensity is to evaluate your perceived exertion
level. If while exercising you are too winded to maintain a conversation without gasping, you are workingout too hard. A good rule of thumb is to work to the point of exhilaration, not exhaustion. If you cannotcatch your breath, it’s time to slow down. Always be aware of other warning signs to overexertion.
A Note On 'Workload' Or 'Watts'The Vision Fitness Programmable and Indexed consoles have a workload readout. Workload is meas-
ured on your Vision Fitness Cycle in watts. You can use the workload readout to help you gauge your cur-rent workout intensity and make adjustments as needed.

ACHIEVING YOUR FITNESS GOALSAn important step in developing a long term fitness program is to determine your goals. Is your primary goal
for exercising on your Vision Fitness Cycle to lose weight? Improve muscle tone? Burn stress? Prepare forthe spring racing schedule? Knowing what your goals are will help you develop a more successful exercise program. Below is a list of some common exercise goals:
• Weight Loss• Weight Maintenance• Improve Body Shape and Tone• Strengthen Leg Muscles• Increased Energy Level• Improved Sleep Patterns• Improved Cycling/Cross Sports Performance• Improved Cardiovascular Endurance• Stress Reduction
If possible try to define your personal goal in precise, measurable terms, and then put your goal in writing.The more specific you can be, the easier it will be to track your progress. If your goals are long term, dividethem up into monthly, then weekly segments. Longer term goals can lose some of the immediate motivatingbenefits. Short term goals are easier to achieve. Your Vision Fitness Cycle console provides you with severalreadouts that can be used to record your progress. You can track Distance, Calories or Time. Time is themost important and useful of these functions.
Sample Goals:Goal setting is a popular motivational technique. It’s important to set goals and reward yourself when initiat-
ing a new exercise program because you’re attempting to break current patterns and form a new habit.Whether you use this technique or another, make fitness a priority in your life. You can achieve the ultimatereward to yourself - you can establish the exercise habit! Some sample goals may be:
• To strengthen my heart by exercising 24 minutes three days a week. (Goal Measurement: Exercise Time =72 minutes a week.)
• To improve my body’s ability to burn fat by exercising at a low intensity for 48 minutes per day, 5 days aweek. (Goal Measurement: Exercise Time = 240 minutes per week.)
• To burn off work related stress by exercising for 20 minutes a day on work days. (Goal Measurement:Exercise Time = 100 minutes per week.)
Keeping an Exercise DairyPhotocopy the weekly and annual log sheets on the following pages to make your personal exercise log
book. As time goes by you’ll be able to look back with pride at the work you’ve done. As your fitnessimproves, you can look back and see how far you’ve come.
35PART 4Developing a Fitness Program

36 PART 4 Weekly Log Sheets

37PART 4Weekly Log Sheets

38 PART 4 Monthly Log Sheets

39PART 4Monthly Log Sheets

40 PART 5 Common Product Questions
COMMON PRODUCT QUESTIONS
Are the sounds my bike makes normal?Our bikes are some of the quietest available becausethey use belt drives and friction free magnetic resist-ance. We use the highest grade bearings and belts tominimize noise. However, because the resistance sys-tem itself is so quiet, you will occasionally hear someslight mechanical noises. Unlike older, louder technolo-gies, there are no fans, friction belts, or alternator nois-es to mask these sounds on our bikes. These mechani-cal noises, which may or may not be intermittent, arenormal and are caused by the transfer of significantamounts of energy to a rapidly spinning flywheel. Allbearings, belts and other rotating parts will generatesome noise which will transmit through the casing andframe. It is also normal for these sounds to changeslightly during a workout and over time because of ther-mal expansion of the parts. Remember, while you workout you’re sometimes exerting the equivalent mechani-cal energy of a washing machine or dryer!
Why is the bike I had delivered louder thanthe one at the store?All fitness products seem quieter in a large store show-room because there is generally more backgroundnoise than in your home. Also, there will be less rever-beration on a carpeted concrete floor than on a woodoverlay floor. And finally, if a fitness product is placedclose to a wall, there will be more reflected noise.Sometimes a heavy rubber mat will help reduce rever-beration through the floor.
When should I be worried about a noise?As long as the sounds your bike makes are no louderthan a normal conversational tone of voice, it is consid-ered normal noise. If your bike is louder than this, youmay want to call your service technician. Sometimes aninitial diagnosis can be made over the phone.

41PART 5Common Product Questions
What kind of routine maintenance isrequired?We use sealed bearings throughout our bike so lubrica-tion is not needed. The most important maintenancestep is to simply wipe your perspiration off the bike aftereach use.
Will the magnets wear out over time?No, we use permanent magnets that will retain their brak-ing force indefinitely in this application. One of the bigadvantages of a magnetic brake is its long life sincethere is no physical contact between the flywheel and themagnet surface.
How long will the drive belt last?The computer modeling we had done indicated virtually thousands of maintenance free hours. Belts are now commonly used in far more demanding applicationssuch as motorcycle drives.
What does the watts readout mean?Watts are a standard unit of work that allow you tomonitor your progress from week to week and year toyear. The higher the watts, the stronger you’ve become.

42 PART 5 Further Reading on Fitness
FURTHER READING ON FITNESS
ACSM Fitness BookAmerican College of Sport MedicineLeisure Press
Exercise and Your HeartPamphlet by the American Heart AssociationSee your local American Heart Association Office
The New Fit or FatCovert BaileyHoughton Mifflin Company
Fit or Fat for the 90’s A 60 Minute VideoCovert BaileyPacific Arts
The Aerobics Program for Total Well BeingKenneth H. Cooper, MDBantam Books

WARRANTIES FOR MODELS R2000, R2100, R2200HRC, E3000, E3100, E3200HRC, E4100
LIMITED HOME USE WARRANTY
VISION FITNESS extends the following exclusive, limited warranty, which shall apply only to the use of the devicein the home, for residential, non-commercial purposes only. Any other use of the device shall void this warranty.
VISION FITNESS hereby extends the following limited warranties for the following components of the device, forthe time period indicated:
FRAME - LIFETIME VISION FITNESS warrants the Frame against defects in workmanship and materials for the life of the product, solong as it remains in the possession of the original owner.
ECB-PLUSTM BRAKE - LIFETIME VISION FITNESS warrants the ECB-PLUSTM Magnetic Brake against defects in workmanship and materials forthe life of the product, so long as it remains in the possession of the original owner. Only the Brake and Magnetassembly, and no other ancillary components or parts, are covered by this lifetime warranty.
ELECTRONICS & PARTS - TWO YEARS VISION FITNESS warrants the Electronic components and all original Parts (other than the ECB-PLUSTM
Magnetic Brake) against defects in workmanship and materials for a period of two years from the date of originalpurchase, so long as the device remains in the possession of the original owner.
LABOR - ONE YEARVISION FITNESS shall cover the Labor cost for the repair of the device for a period of one year from the date oforiginal purchase, so long as the device remains in the possession of the original owner.
LIMITED LIGHT COMMERCIAL WARRANTY - UP TO 3 HOURS OF USE PER DAY
LIGHT COMMERCIAL USES DEFINEDVISION FITNESS warrants models R2100, R2200HRC, E3100, E3200HRC, and E4100 for use in light commer-cial facilities including: Hotels, Resorts, Police & Fire Stations, Apartment Complexes, Corporate Fitness Centers,Hospitals, Rehabilitation and Sports Medicine Clinics, where average use is up to three hours per day. Not war-ranted for private health club, YMCA's or schools.
FRAME, ECB-PLUSTM BRAKE, ELECTRONICS & PARTS - ONE YEAR VISION FITNESS warrants the Frame, ECB-PLUSTM Magnetic Brake, Electronic components and all originalParts against defects in workmanship and materials for a period of one year from the date of original purchase,so long as the device remains in the possession of the original owner.
LABOR - ONE YEARVISION FITNESS shall cover the Labor cost for the repair of the device for a period of one year from the date oforiginal purchase, so long as the device remains in the possession of the original owner.
43PART 5Warranty

EXCLUSIVE REMEDYThe exclusive remedy for any of the above warranties shall be repair or replacement of defective Parts, or the supply of Labor to cureany defect, provided that Labor shall be limited to two years. All Labor shall be supplied by the local Retailer and the product must belocated within that Retailer's service area. Products located outside the Retailer's service area will not be covered by the Labor war-ranty.
EXCLUSIONS AND LIMITATIONSThis warranty applies only to the original owner and is not transferable. This warranty is expressly limited to the repair or replacementof a defective Frame, ECB-PLUSTM Magnetic Brake, Electronic component, or defective Part and is the sole remedy of the warranty.The warranty does not cover normal wear and tear, improper assembly or maintenance, or installation of parts or accessories notoriginally intended or compatible with the Fitness Product as sold. The warranty does not apply to damage or failure due to accident,abuse, corrosion, discoloration of paint or plastic, or neglect.
VISION FITNESS shall not be responsible for incidental or consequential damages. Parts and Electronic components reconditionedto As New Condition by VISION FITNESS or its vendors may sometimes be supplied as warranty replacement parts and constitutefulfillment of warranty terms. Any warranty replacement parts shall be warranted for the remainder of the original warranty term.
VISION FITNESS expressly disclaims all other warranties, express or implied, including but not limited to all warranties of fitness for aparticular purpose or of merchantability. This warranty gives you specific legal rights and your rights may vary from state to state.
WARRANTY REGISTRATIONYour warranty card must be completed and sent to VISION FITNESS before a warranty claim can be processed. You may also regis-ter via our web site at www.visionfitness.com. Inside the enclosed warranty card you will find a customer survey. Your care in com-pleting the survey will be of value to us in serving you in the future. Comments and suggestions are always welcome. We are certainyou will enjoy your new Treadmill. Thank you for selecting a VISION FITNESS product.
WARRANTIES FOR MODELS R2600HRC & E3600HRC
LIMITED HOME USE WARRANTY
VISION FITNESS extends the following exclusive, limited warranty, which shall apply only to the use of the devicein the home, for residential, non-commercial purposes only. Any other use of the device shall void this warranty.
VISION FITNESS hereby extends the following limited warranties for the following components of the device, forthe time period indicated:
FRAME - LIFETIME VISION FITNESS warrants the frame against defects in workmanship and materials for the life of the product, solong as it remains in the possession of the original owner.
ECB-PLUSTM BRAKE - LIFETIME VISION FITNESS warrants the ECB-PLUSTM Magnetic Brake against defects in workmanship and materials forthe life of the product, so long as it remains in the possession of the original owner. Only the Brake and Magnetassembly, and no other ancillary components or parts, are covered by this lifetime warranty.
ELECTRONICS & PARTS - THREE YEARS VISION FITNESS warrants the Electronic components and all original parts (other than the ECB-PLUSTM
Magnetic Brake) against defects in workmanship and materials for a period of three years from the date of origi-nal purchase, so long as the device remains in the possession of the original owner.
LABOR - TWO YEARS VISION FITNESS shall cover the labor cost for the repair of the device for a period of two years from the date oforiginal purchase, so long as the device remains in the possession of the original owner.
LIMITED LIGHT COMMERCIAL WARRANTY - UP TO 5 HOURS OF USE PER DAY
LIGHT COMMERCIAL USES DEFINEDVISION FITNESS warrants models R2600HRC and E3600HRC for use in light commercial facilities including:Hotels, Resorts, Police & Fire Stations, Apartment Complexes, Corporate Fitness Centers, Hospitals,Rehabilitation and Sports Medicine Clinics, where average use is up to five hours per day. Not warranted for pri-vate health club, YMCA's or schools.
FRAME, ECB-PLUSTM BRAKE, ELECTRONICS & PARTS - TWO YEARS VISION FITNESS warrants the Frame, ECB-PLUSTM Magnetic Brake, Electronic components and all originalParts against defects in workmanship and materials for a period of two years from the date of original purchase,so long as the device remains in the possession of the original owner.
LABOR - TWO YEARS VISION FITNESS Shall cover the Labor cost for the repair of the device for a period of two years from the date of original purchase,so long as the device remains in the possession of the original owner.
44PART 5Warranty