fitting instructions #0169lis ford ranger px ii - 06/2015-on
TRANSCRIPT
1
Fitting Instructions #0169LIS
Ford Ranger PX II - 06/2015-on Strut Spacer/Raising Block Lift Kit – Approximate 40-50 mm Lift
Important Notes:
These components must be fitted by qualified persons only, in conjunction with the factory service
manual.
Components have only been tested on and deemed suitable for vehicles with OE suspension. -Supplied kits and instructions are suitable for the vehicles kits were tested on. Fitting requirements may vary across vehicle model range.
Vehicle will require a wheel alignment after components have been fitted.
To improve off-road suspension articulation after fitment of this lifting kit, fit extended travel rear
shock absorbers.
Installation Instructions: Strut Spacers (FSS-006) Use a jack to raise the front of the vehicle and support chassis on vehicle stands or use a hoist to raise
vehicle (recommended);
Before disconnecting any suspension components – take into account the following:
o Disconnect any cables/hoses/sensors that could get overstretched during the installation
procedure. Check for;
Brake hoses
ABS sensor cables
Etc
Remove strut – It will be necessary to do the following to allow re-installation of strut assembly once the
strut spacer has been attached:
o Mark or make note which strut is left or right;
o Undo sway bar links on both sides to allow sway bar to be moved away;
o Remove hub nut and loosen spline on CV shaft;
o Disconnect tie rod end from steering knuckle;
o Remove brake calliper and rotor;
o Disconnect upper control arm from steering knuckle ensuring the CV joint does not fall out;
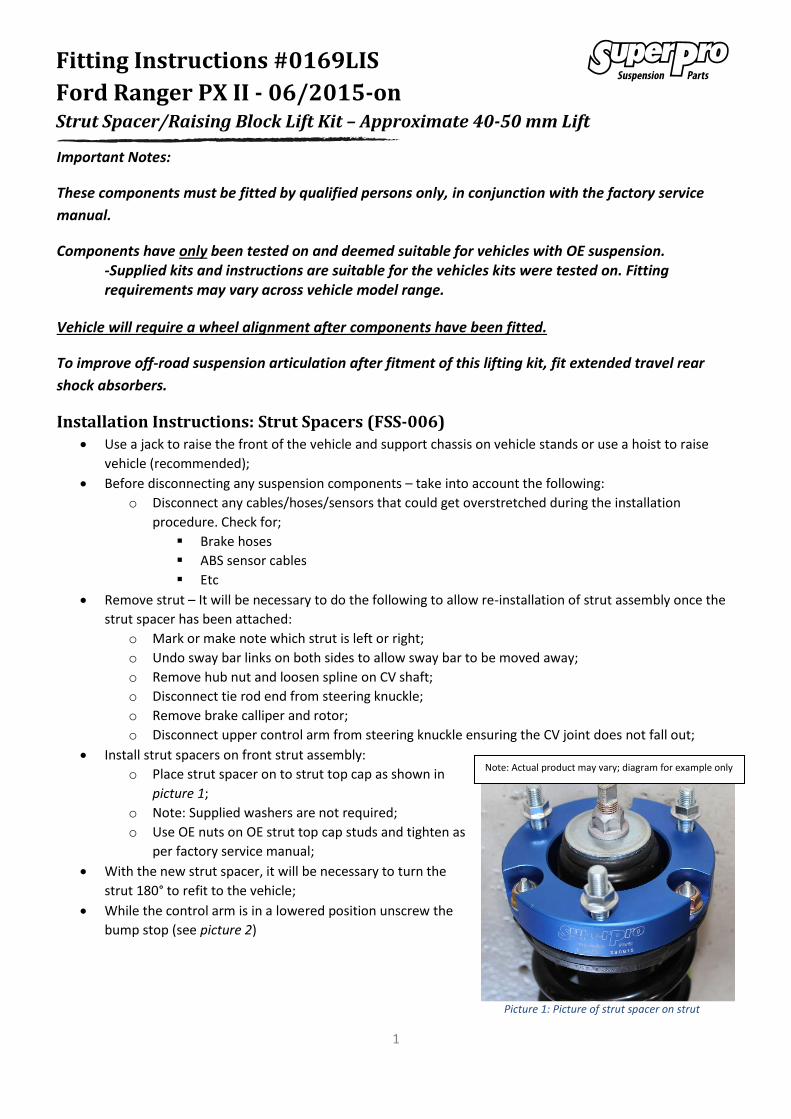
Install strut spacers on front strut assembly:
o Place strut spacer on to strut top cap as shown in
picture 1;
o Note: Supplied washers are not required;
o Use OE nuts on OE strut top cap studs and tighten as
per factory service manual;
With the new strut spacer, it will be necessary to turn the
strut 180° to refit to the vehicle;
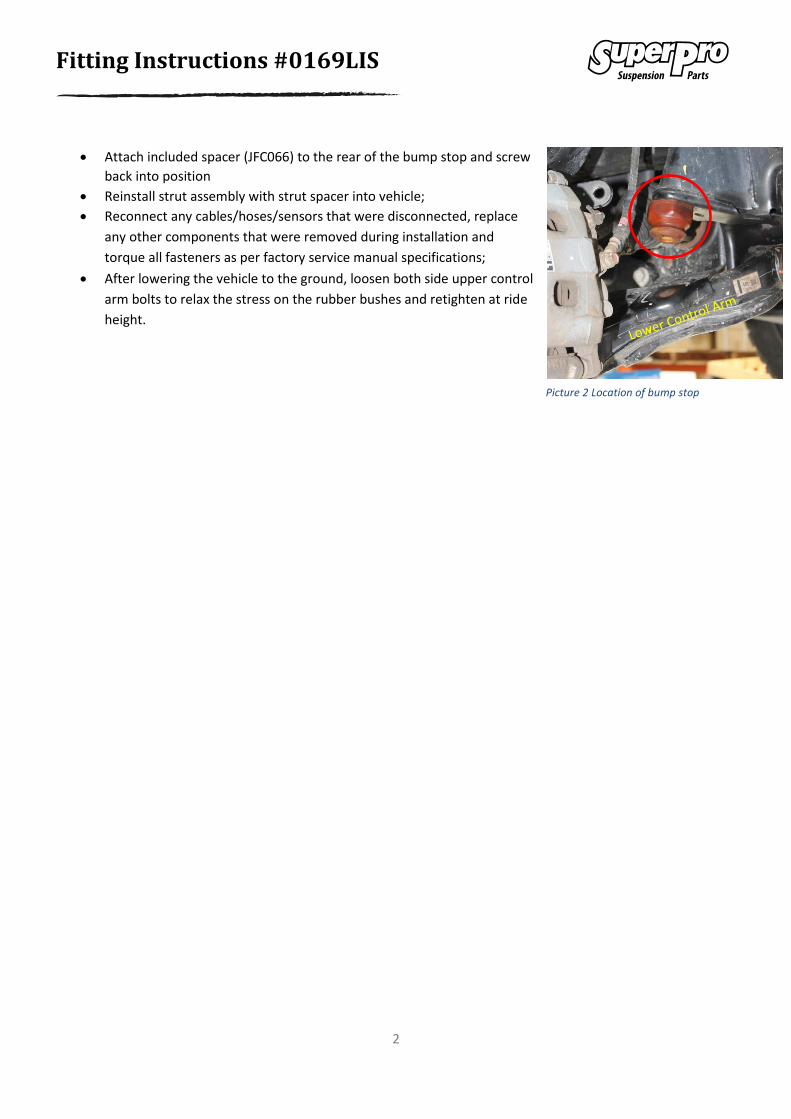
While the control arm is in a lowered position unscrew the
bump stop (see picture 2)
Picture 1: Picture of strut spacer on strut
Note: Actual product may vary; diagram for example only
2
Fitting Instructions #0169LIS
Attach included spacer (JFC066) to the rear of the bump stop and screw
back into position
Reinstall strut assembly with strut spacer into vehicle;
Reconnect any cables/hoses/sensors that were disconnected, replace
any other components that were removed during installation and
torque all fasteners as per factory service manual specifications;
After lowering the vehicle to the ground, loosen both side upper control
arm bolts to relax the stress on the rubber bushes and retighten at ride
height.
Picture 2 Location of bump stop
3
Fitting Instructions #0169LIS
Installation Instructions: Rear Raising Blocks (FSB-006) Use a jack to raise the rear of the vehicle and support chassis on vehicle stands or use a hoist to raise
vehicle (recommended);
Before disconnecting any suspension components – take into account the following:
o Disconnect any cables/hoses/sensors that could get overstretched when the axle housing is
lowered – check leaf spring and both front and rear of axle housing for;
Brake hoses
ABS sensor cables
Handbrake cables
Diff breathers
Diff locker cables/hoses/sensors
Etc
Note: A leaf spring on either side of the vehicle must be attached to the axle housing at all times. Raising blocks
must be installed one side at a time.
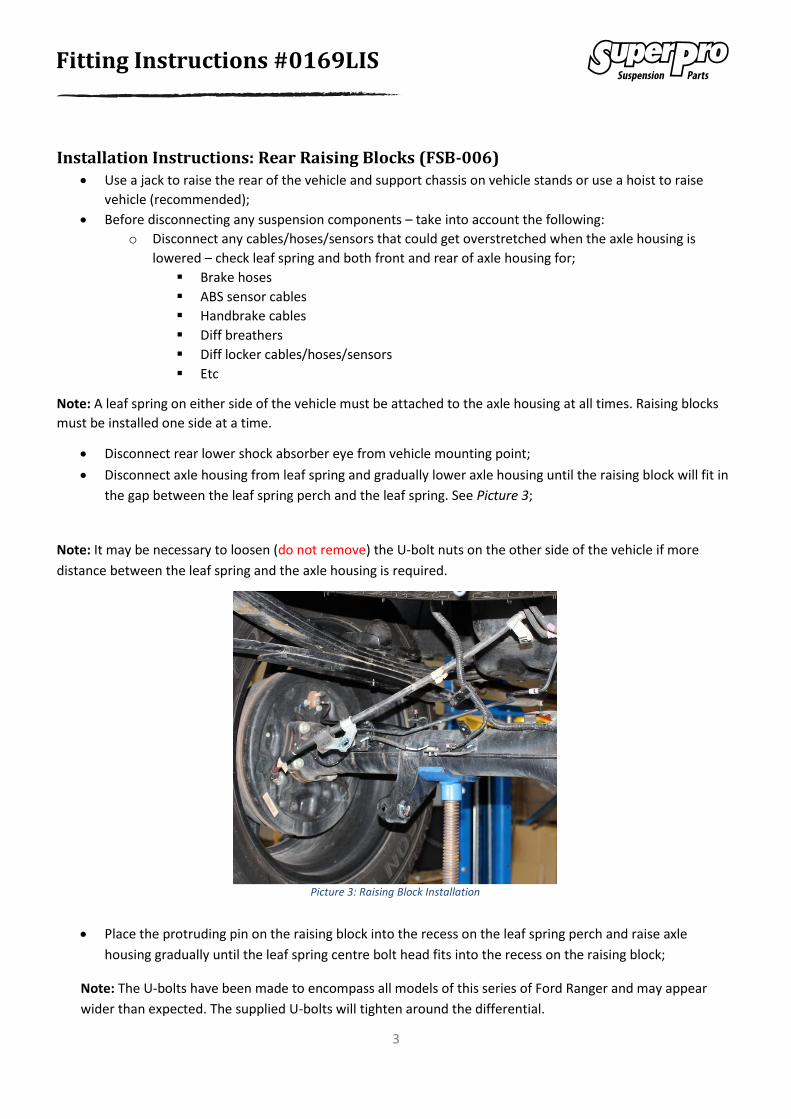
Disconnect rear lower shock absorber eye from vehicle mounting point;
Disconnect axle housing from leaf spring and gradually lower axle housing until the raising block will fit in
the gap between the leaf spring perch and the leaf spring. See Picture 3;
Note: It may be necessary to loosen (do not remove) the U-bolt nuts on the other side of the vehicle if more
distance between the leaf spring and the axle housing is required.
Place the protruding pin on the raising block into the recess on the leaf spring perch and raise axle
housing gradually until the leaf spring centre bolt head fits into the recess on the raising block;
Note: The U-bolts have been made to encompass all models of this series of Ford Ranger and may appear
wider than expected. The supplied U-bolts will tighten around the differential.
Picture 3: Raising Block Installation
4
Fitting Instructions #0169LIS
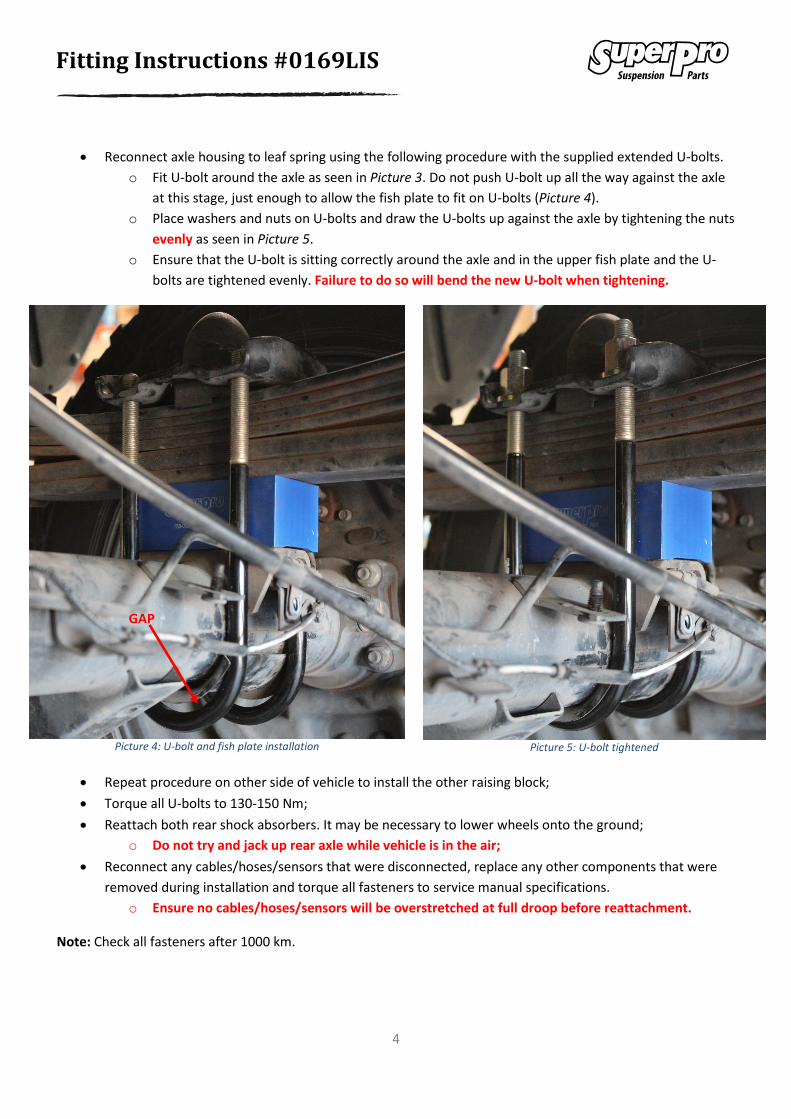
Reconnect axle housing to leaf spring using the following procedure with the supplied extended U-bolts.
o Fit U-bolt around the axle as seen in Picture 3. Do not push U-bolt up all the way against the axle
at this stage, just enough to allow the fish plate to fit on U-bolts (Picture 4).
o Place washers and nuts on U-bolts and draw the U-bolts up against the axle by tightening the nuts
evenly as seen in Picture 5.
o Ensure that the U-bolt is sitting correctly around the axle and in the upper fish plate and the U-
bolts are tightened evenly. Failure to do so will bend the new U-bolt when tightening.
Picture 4: U-bolt and fish plate installation
Picture 5: U-bolt tightened
Repeat procedure on other side of vehicle to install the other raising block;
Torque all U-bolts to 130-150 Nm;
Reattach both rear shock absorbers. It may be necessary to lower wheels onto the ground;
o Do not try and jack up rear axle while vehicle is in the air;
Reconnect any cables/hoses/sensors that were disconnected, replace any other components that were
removed during installation and torque all fasteners to service manual specifications.
o Ensure no cables/hoses/sensors will be overstretched at full droop before reattachment.
Note: Check all fasteners after 1000 km.
GAP