hadoop single node cluster preparation - … first thing we will do is setup a “group” for...
TRANSCRIPT

Hadoop Single Node Cluster Preparation
Case Study by Arunava Chakraborty
Lab Case Study by Arunava Chakraborty

Table of ContentsOverview............................................................................................................................................................31. Download VM Tool and Virtual Appliances..................................................................................................4
Virtualbox:.....................................................................................................................................................4Linux virtual appliance:................................................................................................................................4
2. Install Virtual Machine...................................................................................................................................5Install the Virtualbox Hypervisor:.................................................................................................................5Install and configure the base Linux VM:.....................................................................................................6
3. Download Java, Hadoop and FileZilla.........................................................................................................15Download Java............................................................................................................................................15Download Hadoop.......................................................................................................................................15Download and install SFTP client FileZilla................................................................................................16
4. Install Java and Hadoop...............................................................................................................................17Install Java...................................................................................................................................................17Install Hadoop.............................................................................................................................................17
5. Configure Hadoop as a single node instance...............................................................................................20Hadoop Configuration.................................................................................................................................20File: core-site.xml........................................................................................................................................20File: mapred-site.xml..................................................................................................................................21File: hdfs-site.xml........................................................................................................................................21
6. Graphical Admin Console : webmin............................................................................................................257. Other VM Operation....................................................................................................................................26
Root Shell in VM........................................................................................................................................26Shutdown.....................................................................................................................................................28
8. References....................................................................................................................................................29
Lab Case Study by Arunava Chakraborty

Overview
I was searching commands for easy to build Hadoop lab in local machine and found some command reference. Hence thought of presenting the same as a hands on lab.
In this test project we will do the following:
• Setup a hypervisor to run a linux virtual machine to host lab machine• Build a linux appliance to build Hadoop lab• Install and configure Java• Install and configure a single node Hadoop instance
First up, here are some basic requirements to build our test bed:
• A personal computer or server of some form.• A reasonably powerful x86 hardware (a recent Intel or AMD processor an Intelbased
Windows PC, Intelbased Mac or Intelbased Linux machine with at least 2 GB of RAM and 2GB of Hard Drive space free.
Note: We are going to be run a full virtual computer on top of base operating system in computer, so we need to consider the performance impact, i.e. it could potentially slow our PC down a little while we are running the Hadoop VM under VirtualBox.
Lab Case Study by Arunava Chakraborty

1. Download VM Tool and Virtual Appliances
First download the following two key components:
Virtualbox:
Download Virtualbox from:
https://www.virtualbox.org/wiki/Downloads
Linux virtual appliance:
This is a tiny Linux system “appliance” virtual machine we’ll use to install and run Hadoop on.
We will be importing this self configuring Linux appliance with Virtualbox to build the linux virtualmachine (VM) we need to start from.
Download base linux virtual machine OVF (from TurnKey Linux):
http://mirror.turnkeylinux.org/turnkeylinux/images/ovf/
Look for turnkeycode 64 bit zip and save the file to a folder where you will setup your Hadoop testbed
• turnkeycore13.0wheezyi386ovf.zip
Note: this will expand to a folder called: turnkeycore13.0wheezyi386
Lab Case Study by Arunava Chakraborty

2. Install Virtual Machine
Install the Virtualbox Hypervisor:
The installation of Virtualbox is very simple, just locate the installer you downloaded, open it (i.e. double click on it), and follow the prompts.
Under Windows simply double click the download and it will lead you from there.
Under Linux and Mac OS X, you need to open the downloaded disk image or TAR file, and run the installer from within.
Follow the prompts, defaults will do what we need, you do not need to change anything during theinstall.
Simply doubleclick the base installer, follow the prompts and accept all the defaults, and in a few minutes you will have a full working version of Virtualbox installed and ready to run and import your Linux appliance.
Lab Case Study by Arunava Chakraborty

Install and configure the base Linux VM:
The set of the Linux virtual machine is a little more detailed but the key steps are pretty straightforward.
From the main "File" menu select "Import Appliance"
• A new window will open titled "Appliance to import"• Click on "Open appliance" button• Navigate to the "turnkeycore13.0wheezyi386" folder• Select the file "turnkeycore13.0wheezyi386.ovf" and click "Open"• Click "Continue/Next"• Click "Import"
We now need to change a few settings
• Right click on "vm" and select "Settings"• Rename the VM from "vm" to Hadoop"• Click on the "system" icon• Change the "Base memory" from 256 MB to 1024 MB ( 1 GB )• In the "Boot order" window unselect "Floppy" and "CD" (leave Hard Disk checked)• Click on "OK" to save settings
Lab Case Study by Arunava Chakraborty

Now you can start up your Hadoop VM.
Double click on the "Hadoop" VM listed as "Powered Off" to start it
Note: you can also single click on the Hadoop VM icon and the click START button
• The Hadoop VM will start up and autoboot. Boot with first option in GRUB menu by pressing ENTER
Lab Case Study by Arunava Chakraborty
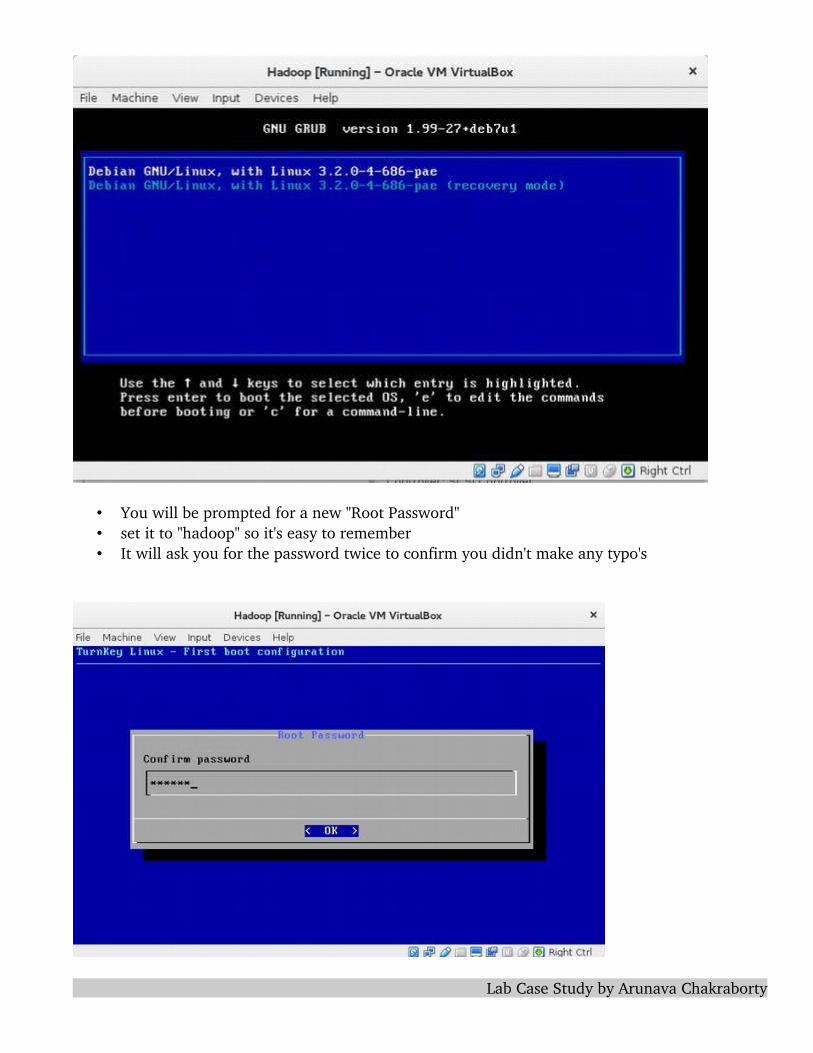
• You will be prompted for a new "Root Password"• set it to "hadoop" so it's easy to remember• It will ask you for the password twice to confirm you didn't make any typo's
Lab Case Study by Arunava Chakraborty
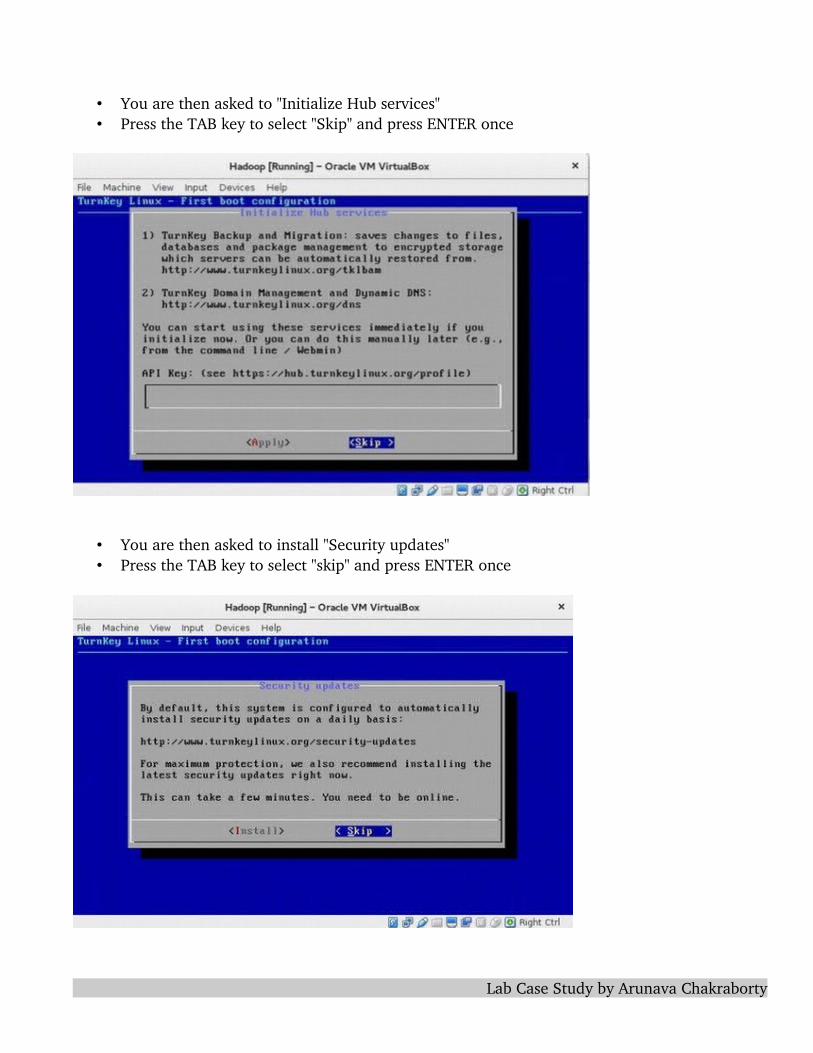
• You are then asked to "Initialize Hub services"• Press the TAB key to select "Skip" and press ENTER once
• You are then asked to install "Security updates"• Press the TAB key to select "skip" and press ENTER once
Lab Case Study by Arunava Chakraborty

• Your VM will then boot up and be running• You will have a window displaying URL's you can use to connect to your new VM
Note: this is only your "base" linux OS, we have not installed Hadoop yet. IP address will vary if different wireless is connected.
Congratulations, you’ve successfully installed Virtualbox and imported and configured your Linux appliance.
To confirm you can now connect to your Hadoop virtual machone via a web browser from base operating system, make a note of the IP address displayed on the final screen when your Linux VM finishes booting (it will show up in the URL’s on the final screen), and use a web browser to connect that ip address on port 12320 to the built in web shell, i.e if the IP address was 192.168.2.15 then connect to using firefox browser. You might need to addd new http address in security exception list in Firefox or IE browser as a trusted connection.
http:// 192.168.2.15 :12320
You will be presented with what looks like a terminal console. You can now login using the root user account and password, i.e.: root and hadoop
If this was successful you will now be logged in as the root user with a “#” prompt and you will seea screen similar to the following, and you will be at a prompt that looks like this:
Lab Case Study by Arunava Chakraborty

Note: that once you are logged in as root, you are in fact the super user, so tread gently as you have the power to break the system)!!
The first thing we will do is setup a “group” for Hadoop with the following command:
root@core ~# addgroup hadoop
Now we need to add a user for Hadoop with the following command line. Use password as hadoop
root@core ~# adduser ingroup hadoop hduser
Lab Case Study by Arunava Chakraborty

Now add our Hadoop user “hduser” to the sudo group ( so it can run commands as root ):
root@core ~# adduser hduser sudo
Now we are going to generate Secure Shell “keys”:
root@core ~# sshkeygen t rsa P ""
Lab Case Study by Arunava Chakraborty

Now add our new public key to the known keys file:
root@core ~# cat ~/.ssh/id_rsa.pub >> ~/.ssh/authorized_keys
Lab Case Study by Arunava Chakraborty

Now let’s confirm that our new SSH keys work and we can login with out entering a password.
The step is also needed to save your local machine’s host key fingerprint to the hduser user’s known_hosts file.
root@core ~# ssh localhost
What we’ve done now is connect to our own system using an SSH public key stored so we don’t need to type in our account password – this allows Hadoop to run commands on the system without needing to know or enter the password.
Now exit from the login to your own server with this simple command line:
root@core ~# exit
You are now ready to proceed to download and install the Oracle Java development kit (JDK) version 7, and the core distribution of Hadoop we’ll be using version 1.2.1.
Lab Case Study by Arunava Chakraborty

3. Download Java, Hadoop and FileZilla
Download Java
Search for jdk 7 for linux in Google and go to below url
http://www.oracle.com/technetwork/java/javase/downloads/jdk7downloads1880260.html
As we are installing the Java JDK on a Debian based Linux distribution, we will download a 32bit linux version. Accept license agreement and download jdk7u79linuxi586.tar.gz
Download Hadoop
Go to below url and download hadoop1.2.1.tar.gz
https://www.apache.org/dist/hadoop/core/hadoop1.2.1/
Lab Case Study by Arunava Chakraborty

Download and install SFTP client FileZilla
http://sourceforge.net/projects/filezilla/files/FileZilla_Client/3.13.1/
Transfer downloaded software in /root folder
Lab Case Study by Arunava Chakraborty
4. Install Java and Hadoop
Install Java
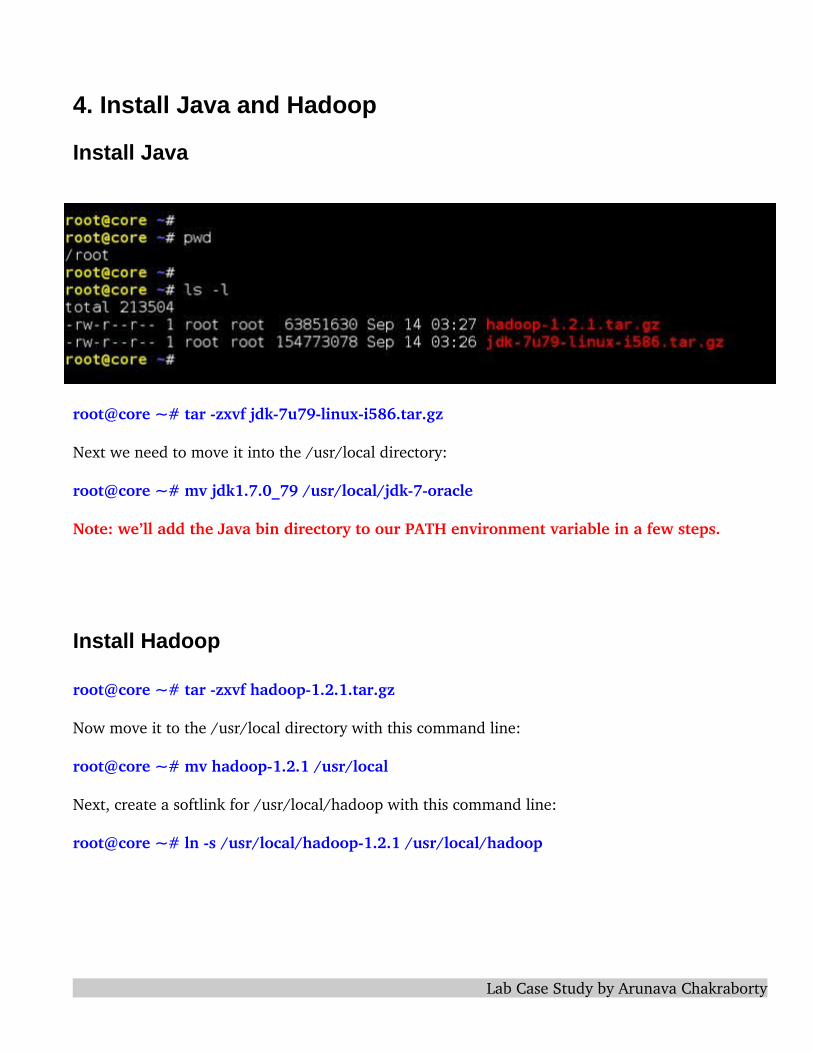
root@core ~# tar zxvf jdk7u79linuxi586.tar.gz
Next we need to move it into the /usr/local directory:
root@core ~# mv jdk1.7.0_79 /usr/local/jdk7oracle
Note: we’ll add the Java bin directory to our PATH environment variable in a few steps.
Install Hadoop
root@core ~# tar zxvf hadoop1.2.1.tar.gz
Now move it to the /usr/local directory with this command line:
root@core ~# mv hadoop1.2.1 /usr/local
Next, create a softlink for /usr/local/hadoop with this command line:
root@core ~# ln s /usr/local/hadoop1.2.1 /usr/local/hadoop
Lab Case Study by Arunava Chakraborty

Now we need to setup a couple of environment variables and update our command path.
To do this we need to edit our .bashrc ( dot bash rc ) file in the root users /home directory and addthe following lines (cut and paste them to save typing them in):
export HADOOP_HOME=/usr/local/hadoopexport JAVA_HOME=/usr/local/jdk7oracleexport PATH=$PATH:$JAVA_HOME/binexport PATH=$PATH:/usr/local/hadoop/bin
If you’re familiar with Linux use your editor of choice. I’m a VI user myself, but if you’re new to Linux you may way to use the nano editor. VI users will know their way around adding these lines to the .bashrc file. If you use the nano editor, add these extra lines just below the existing PATH setting so it looks like this:
Existing PATH setting:
PATH=/usr/local/sbin:/usr/local/bin:/usr/sbin:/usr/bin:/sbin:/bin
Add these lines below it:
export HADOOP_HOME=/usr/local/hadoopexport JAVA_HOME=/usr/local/jdk7oracleexport PATH=$PATH:$JAVA_HOME/binexport PATH=$PATH:/usr/local/hadoop/bin
To put these changes into effect in our current shell we need to respawn a new shell with the following command:
root@core ~# exec bash
Lab Case Study by Arunava Chakraborty
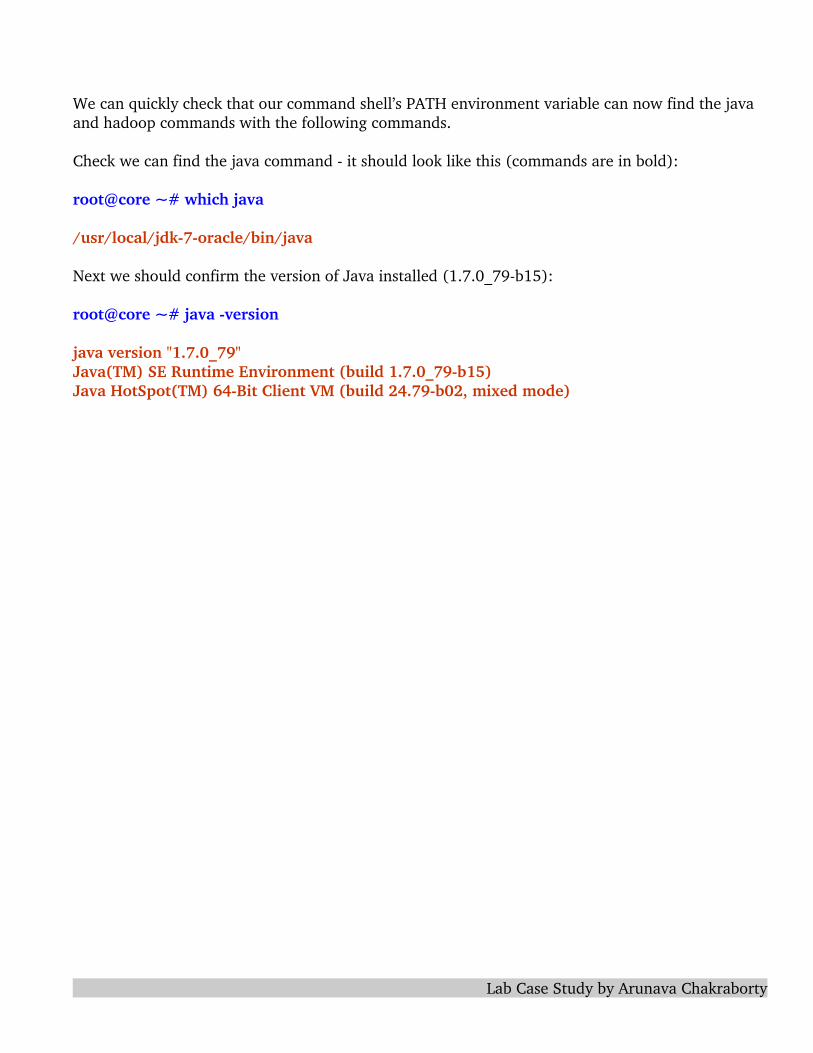
We can quickly check that our command shell’s PATH environment variable can now find the java and hadoop commands with the following commands.
Check we can find the java command it should look like this (commands are in bold):
root@core ~# which java
/usr/local/jdk7oracle/bin/java
Next we should confirm the version of Java installed (1.7.0_79b15):
root@core ~# java version
java version "1.7.0_79"Java(TM) SE Runtime Environment (build 1.7.0_79b15)Java HotSpot(TM) 64Bit Client VM (build 24.79b02, mixed mode)
Lab Case Study by Arunava Chakraborty

5. Configure Hadoop as a single node instance
Hadoop Configuration
You're almost there! Next we need to make a directory for Hadoop to use for storage, which we’ll include in the configuration in the next few steps, change the directory permissions and ownership / group:
root@core hadoop/conf# mkdir p /usr/local/hadoop/tmp
root@core hadoop/conf# chmod 750 /usr/local/hadoop/tmp
root@core hadoop/conf# chown R hduser.hadoop /usr/local/hadoop/tmp
Now we need to make a couple changes to the Hadoop configuration and set it up as a single node instance.
First change into the Hadoop conf directory using this command line:
root@core ~# cd /usr/local/hadoop/conf
Now we need to make the following changes to the respective files. Use your preferred editor to add / edit the files listed below to include the following lines. You can cut and paste to save havingto type it all in manually:
File: core-site.xml
<!--?xml version="1.0"?-->
<!--?xml-stylesheet type="text/xsl" href="configuration.xsl"?-->
<! Put sitespecific property overrides in this file. > <configuration> hadoop.tmp.dir /usr/local/hadoop/tmp fs.default.name hdfs://localhost:9000 </configuration>
Lab Case Study by Arunava Chakraborty
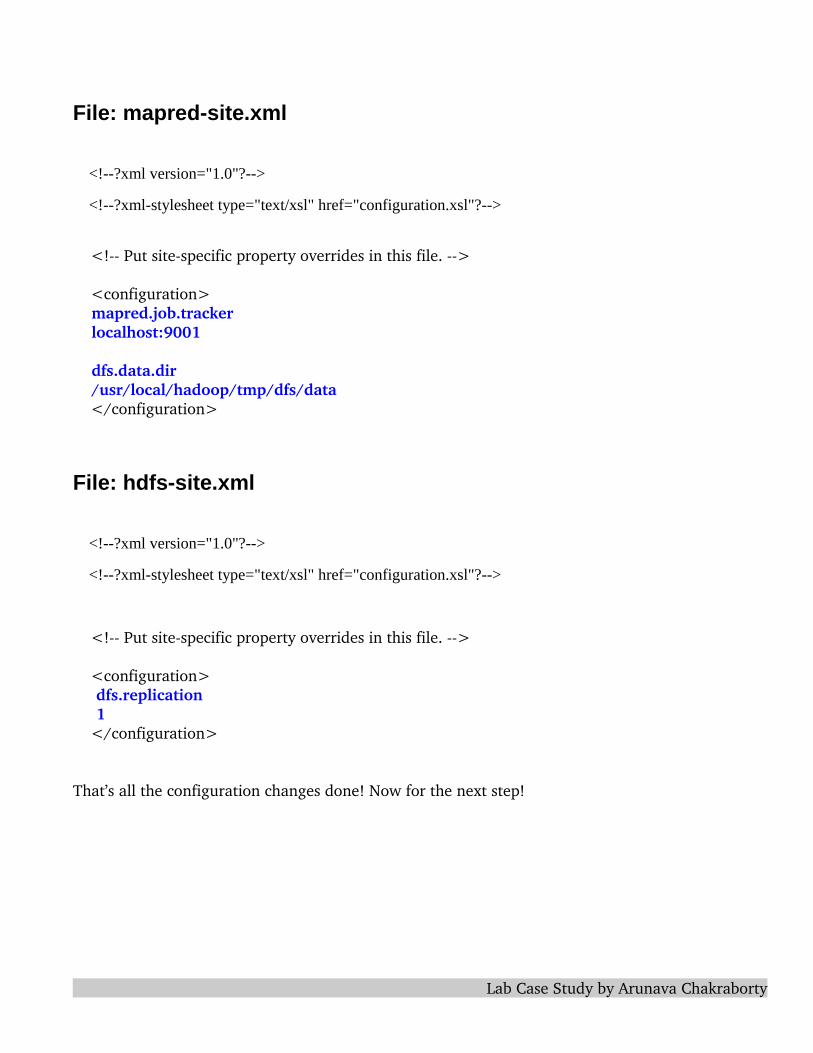
File: mapred-site.xml
<!--?xml version="1.0"?-->
<!--?xml-stylesheet type="text/xsl" href="configuration.xsl"?-->
<! Put sitespecific property overrides in this file. > <configuration> mapred.job.tracker localhost:9001 dfs.data.dir /usr/local/hadoop/tmp/dfs/data </configuration>
File: hdfs-site.xml
<!--?xml version="1.0"?-->
<!--?xml-stylesheet type="text/xsl" href="configuration.xsl"?-->
<! Put sitespecific property overrides in this file. > <configuration> dfs.replication 1 </configuration>
That’s all the configuration changes done! Now for the next step!
Lab Case Study by Arunava Chakraborty
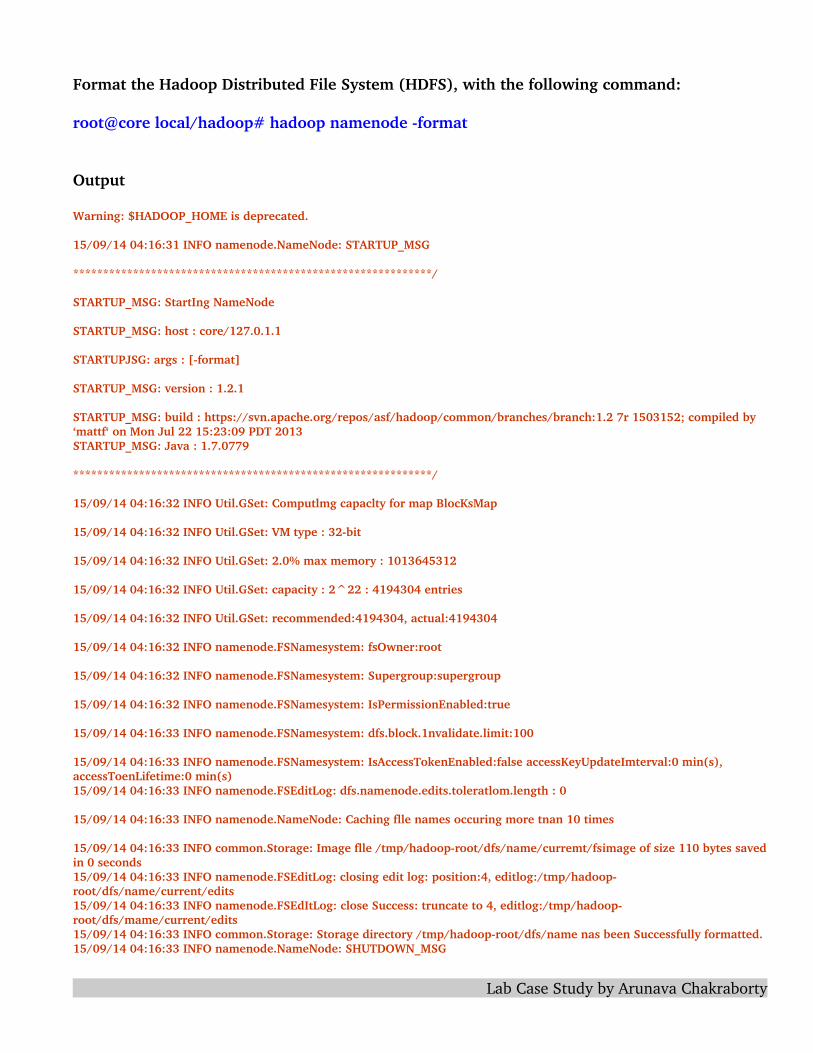
Format the Hadoop Distributed File System (HDFS), with the following command:
root@core local/hadoop# hadoop namenode format
Output
Warning: $HADOOP_HOME is deprecated.
15/09/14 04:16:31 INFO namenode.NameNode: STARTUP_MSG
************************************************************/
STARTUP_MSG: StartIng NameNode
STARTUP_MSG: host : core/127.0.1.1
STARTUPJSG: args : [format]
STARTUP_MSG: version : 1.2.1
STARTUP_MSG: build : https://svn.apache.org/repos/asf/hadoop/common/branches/branch:1.2 7r 1503152; compiled by ‘mattf‘ on Mon Jul 22 15:23:09 PDT 2013STARTUP_MSG: Java : 1.7.0779
************************************************************/
15/09/14 04:16:32 INFO Util.GSet: Computlmg capaclty for map BlocKsMap
15/09/14 04:16:32 INFO Util.GSet: VM type : 32bit
15/09/14 04:16:32 INFO Util.GSet: 2.0% max memory : 1013645312
15/09/14 04:16:32 INFO Util.GSet: capacity : 2^22 : 4194304 entries
15/09/14 04:16:32 INFO Util.GSet: recommended:4194304, actual:4194304
15/09/14 04:16:32 INFO namenode.FSNamesystem: fsOwner:root
15/09/14 04:16:32 INFO namenode.FSNamesystem: Supergroup:supergroup
15/09/14 04:16:32 INFO namenode.FSNamesystem: IsPermissionEnabled:true
15/09/14 04:16:33 INFO namenode.FSNamesystem: dfs.block.1nvalidate.limit:100
15/09/14 04:16:33 INFO namenode.FSNamesystem: IsAccessTokenEnabled:false accessKeyUpdateImterval:0 min(s), accessToenLifetime:0 min(s)15/09/14 04:16:33 INFO namenode.FSEditLog: dfs.namenode.edits.toleratlom.length : 0
15/09/14 04:16:33 INFO namenode.NameNode: Caching flle names occuring more tnan 10 times
15/09/14 04:16:33 INFO common.Storage: Image flle /tmp/hadooproot/dfs/name/curremt/fsimage of size 110 bytes savedin 0 seconds15/09/14 04:16:33 INFO namenode.FSEditLog: closing edit log: position:4, editlog:/tmp/hadooproot/dfs/name/current/edits15/09/14 04:16:33 INFO namenode.FSEdItLog: close Success: truncate to 4, editlog:/tmp/hadooproot/dfs/mame/current/edits15/09/14 04:16:33 INFO common.Storage: Storage directory /tmp/hadooproot/dfs/name nas been Successfully formatted.15/09/14 04:16:33 INFO namenode.NameNode: SHUTDOWN_MSG
Lab Case Study by Arunava Chakraborty
************************************************************/
SHUTDOWN_MSG: Shuttlmg down NameNode at core/127.0.1.1
************************************************************/
rootecore hadoop/conf#
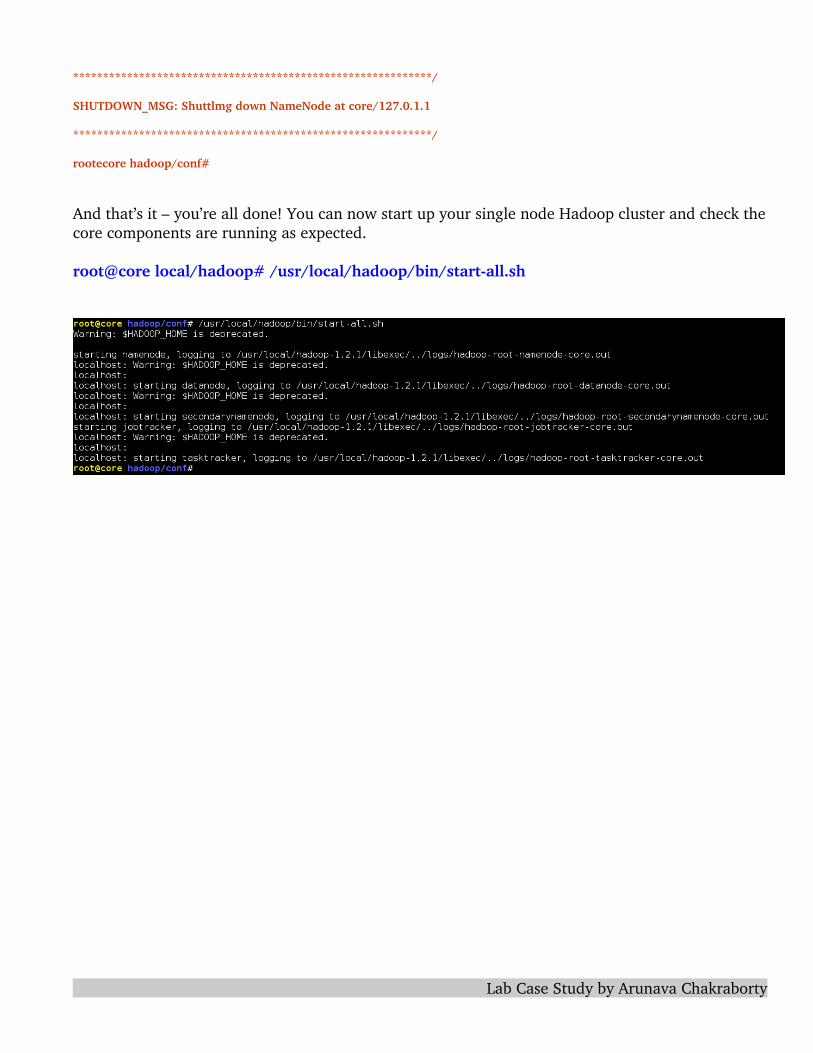
And that’s it – you’re all done! You can now start up your single node Hadoop cluster and check thecore components are running as expected.
root@core local/hadoop# /usr/local/hadoop/bin/startall.sh
Lab Case Study by Arunava Chakraborty

Lab Case Study by Arunava Chakraborty

6. Graphical Admin Console : webmin
webmin can be accessed from port 12321 using https://192.168.2.15:12321/
You must know what you are doing
Lab Case Study by Arunava Chakraborty

7. Other VM Operation
Use TAB and ENTER. If clicked in VM, use host key (Right CTRL in VirtualBox) to get the mouse back in host operating system.
Root Shell in VM
Lab Case Study by Arunava Chakraborty

Reboot from here
Lab Case Study by Arunava Chakraborty

Shutdown
Lab Case Study by Arunava Chakraborty

8. References
A very good video tutorial available in youtube for practicing Hadoop build using CentOS Linux 6.2and Cloudera Hadoop installer CDH4 in rackspace public cloud.
https://www.youtube.com/watch?v=_mGIAOIgD6I
But this will incur cost in $ as shown below. But test server can be deleted after practice and credit card will be charged only for hours of usage.
Hands on, as shown in video, can be done installing same software in local machine using VM. But this will require Cloudera signup for package download and Linux install expertise with power user level.
Lab Case Study by Arunava Chakraborty
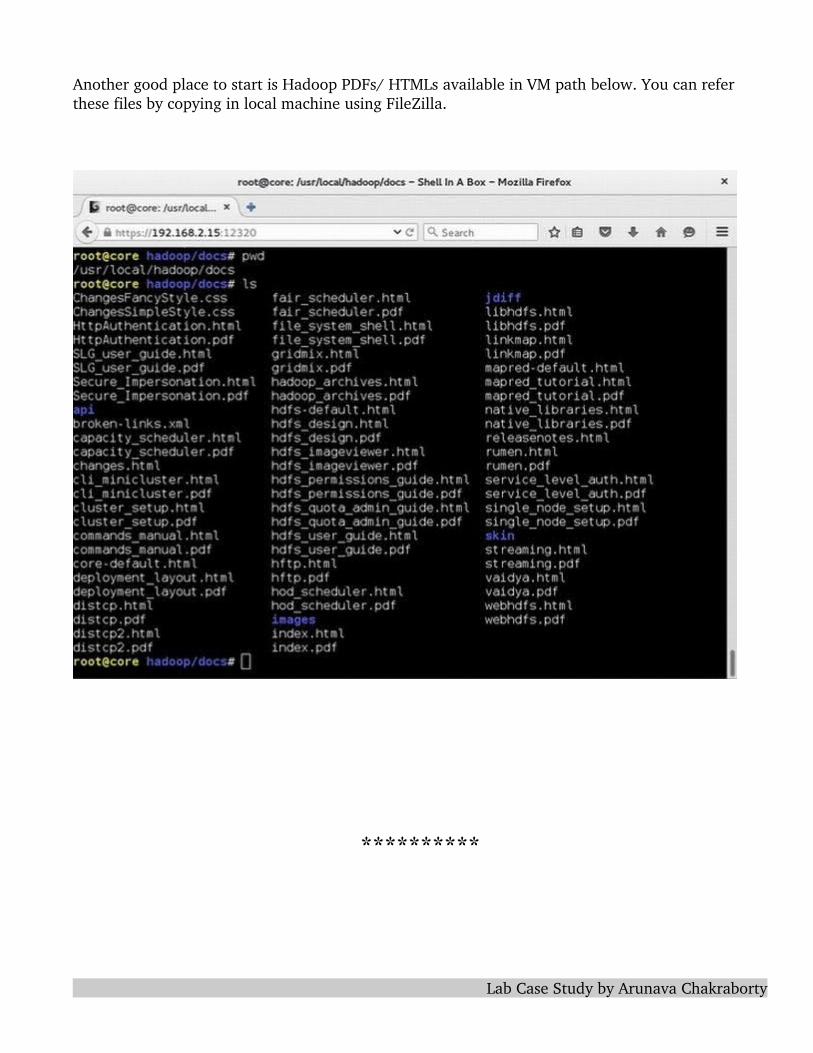
Another good place to start is Hadoop PDFs/ HTMLs available in VM path below. You can refer these files by copying in local machine using FileZilla.
**********
Lab Case Study by Arunava Chakraborty