how to register for water quality permitting portal ... contents 1. create secureaccess washington...
TRANSCRIPT

How to Register for Water Quality Permitting Portal (WQWebPortal)
Updated February 2018


i
Contents
1. Create SecureAccess Washington (SAW) Account .................................................................................... 1 Steps for New SAW account ................................................................................................................................1
2. Add the Water Quality Permitting Portal (WQWebPortal) Application to Your Services ........................ 6 3. Setting Up Your WQWebDMR ................................................................................................................... 9
A. Setting Up Your WQWebDMR – Coordinator Role ......................................................................................9 B. Create an electronic signature account ..................................................................................................... 10 C. Activate Electronic Signature Account ....................................................................................................... 15 D. Assigning Additional Users onto Your Approved Permits ........................................................................ 18
To request ADA accommodation including materials in a format for the visually impaired, call Ecology at 360-407-6600 or visit https://ecology.wa.gov/accessibility. People with impaired hearing may call Washington Relay Service at 711. People with speech disability may call TTY at 877-833-6341.
1
1. Create SecureAccess Washington (SAW) Account In order to access the Water Quality Permitting Portal (WQWebPortal) you need to have a SecureAccess Washington (SAW) account:
o If you are registering for a new SAW account, please follow the registration instructions below. o If you have an existing SAW account, go straight to “Add a New Service” section.
NOTE: Accounts are set up by individuals, not by company. Each person needs to have their own SAW account and, if signing electronically, their own signature account. Your SAW account can be used to access many different web applications offered by the Department of Ecology and by other state agencies (Example: Department of Labor and Industries).
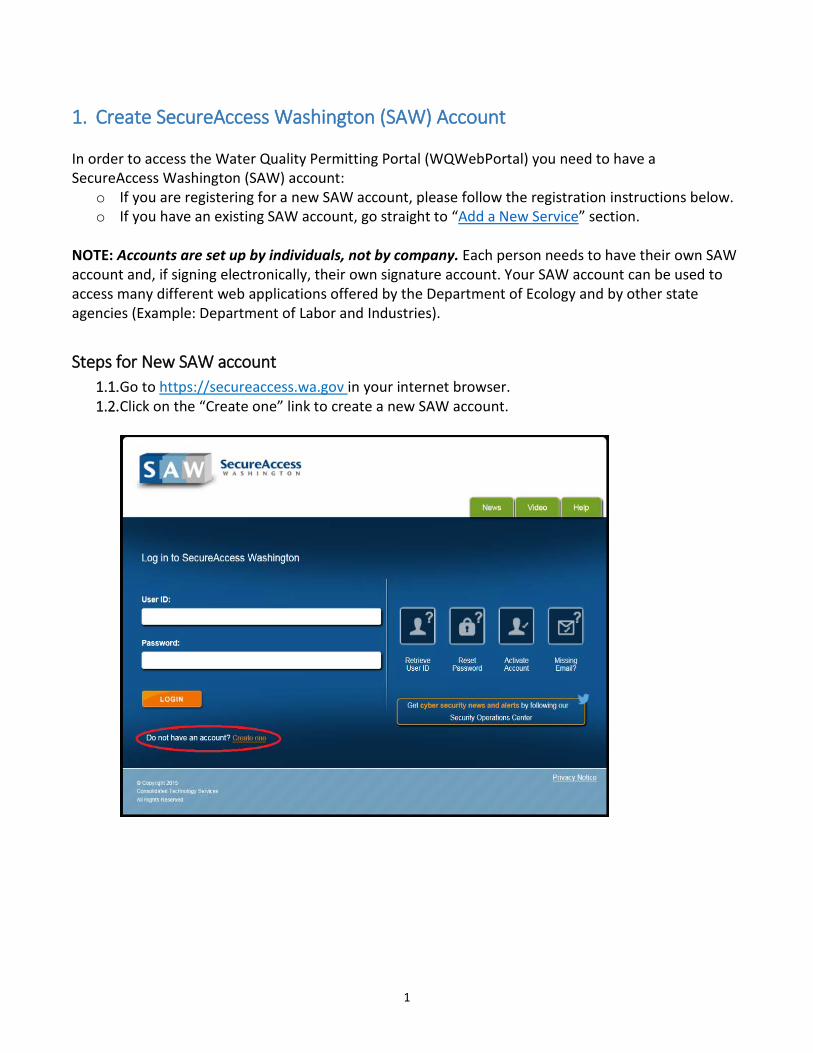
Steps for New SAW account 1.1. Go to https://secureaccess.wa.gov in your internet browser. 1.2. Click on the “Create one” link to create a new SAW account.
2
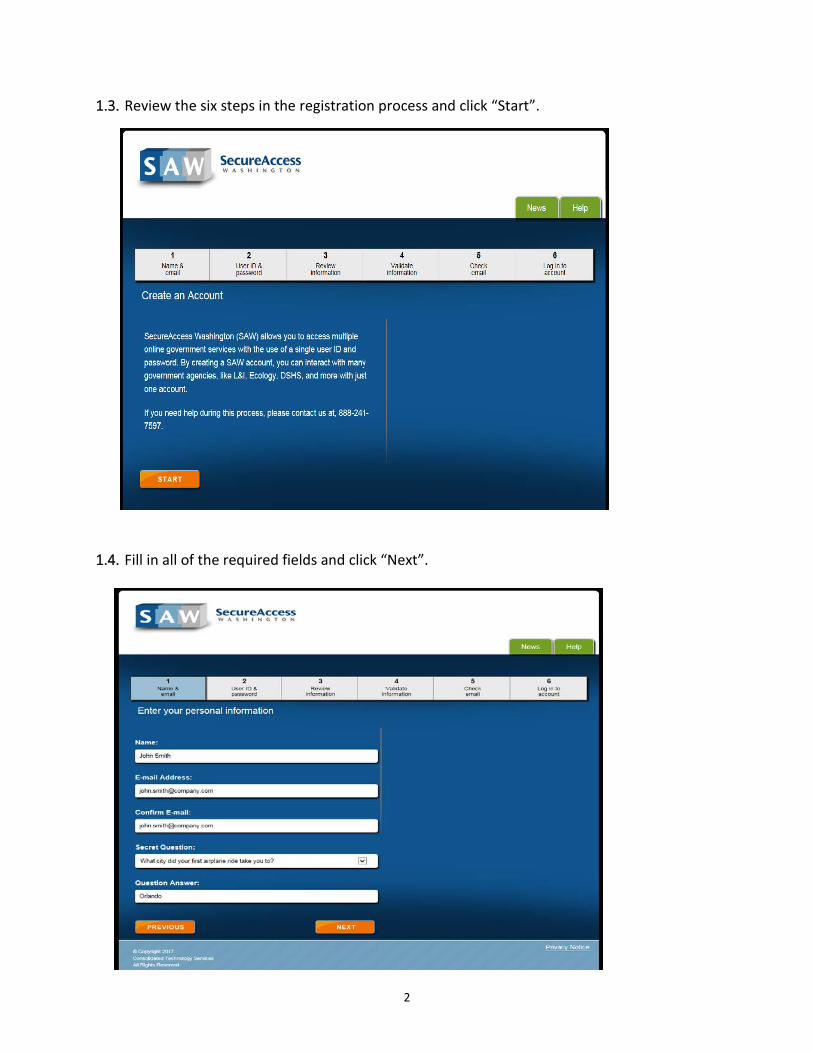
1.3. Review the six steps in the registration process and click “Start”.
1.4. Fill in all of the required fields and click “Next”.
3
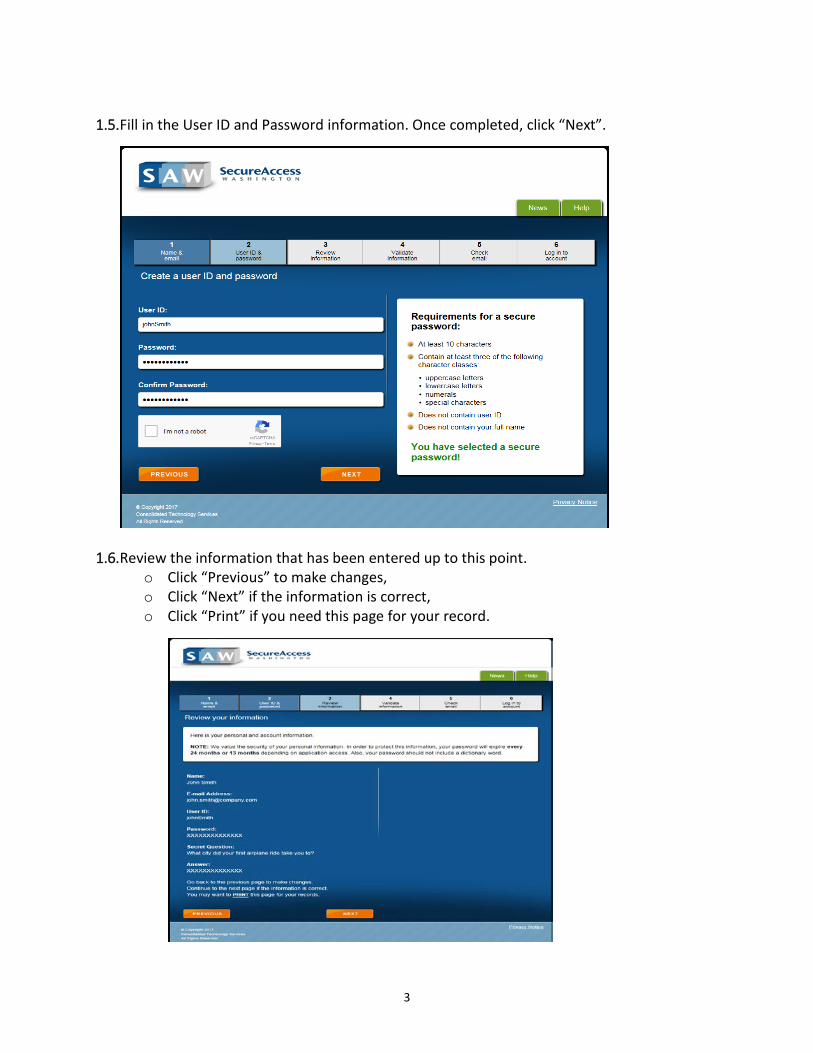
1.5. Fill in the User ID and Password information. Once completed, click “Next”.
1.6. Review the information that has been entered up to this point. o Click “Previous” to make changes, o Click “Next” if the information is correct, o Click “Print” if you need this page for your record.

4
1.7. Log into your e-mail provider and find the message from [email protected] with subject line “SecureAccess Washington: Welcome to SecureAccess Washington.” Open the e-mail message and click on the “To activate your new account” link. You must log on using the link in the e-mail message to activate your account.
Email Example Message:

5
1.8. Use your new User ID and Password to log back into SAW. When you click on the “Login” button, your account will be activated.
o Your SAW account can be used to access many different web applications offered by the Department of Ecology and by other Washington State agencies.
o For additional assistance, please check out the SecureAccess Washington (SAW) customer support web site at: http://support.secureaccess.wa.gov/.
6
2. Add the Water Quality Permitting Portal (WQWebPortal) Application to Your Services
Now that you have a SecureAccess Washington (SAW) account, you will need to add WQWebPortal to your list of “My Services.” WQWebPortal is Washington State Department of Ecology's Water Quality Permitting Portal and allows you a single sign-on for all your electronic Water Quality permit actions.
Use the following instructions to add this service to your list:
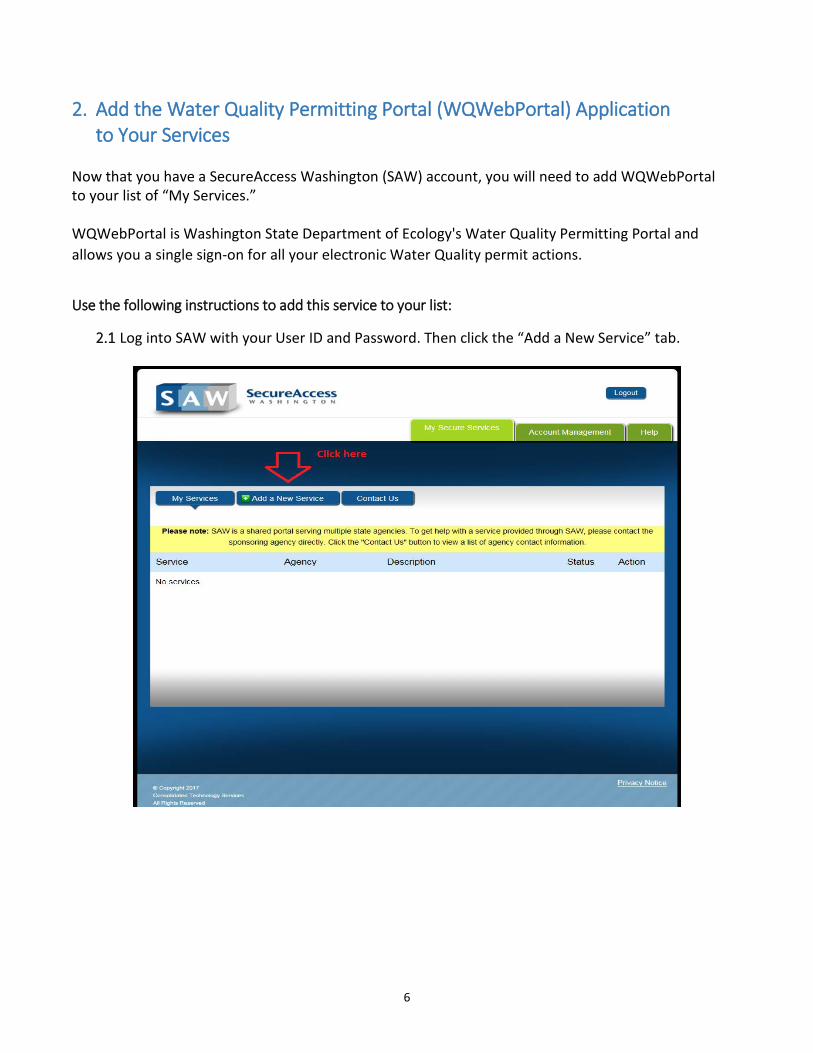
2.1 Log into SAW with your User ID and Password. Then click the “Add a New Service” tab.

7
2.2 Click the “Department of Ecology” link on the right hand side of the screen.
2.3 Scroll towards the bottom of the list until you find the service called “Water Quality Permitting Portal (WQWebPortal).” Click the “Apply” button on the right hand side of the page to add WQWebPortal to your list of services.

8
2.4 Once you have added the service, click on the “My Services” tab.
2.5 To get into the WQWebPortal application, click the “Water Quality Permitting Portal (WQWebPortal)” link.
9
NOTE: Now that you are registered with SAW and have access to the WQWebPortal service, you may now use the following shortcut link to direct you straight into the WQWebPortal application https://secureaccess.wa.gov/ecy/wqwebportal.
3. Setting Up Your WQWebDMR NOTE: Accounts are set up by individuals, not by company. Each person needs to have their own SAW account, and if signing electronically, his or her own signature account. The SAW account is linked to private, personal information. There are four different roles to choose from:
o Facility Coordinator: This role will allow a person to enter data and sign electronically. You are in charge of inviting other users to your permits, once you have been approved.
o Facility Signer: This role will allow a person to enter data and sign electronically. o Facility Preparer: This role will allow a person to enter data only. This Role will not be able to
sign electronically. o Facility Administrator: This role will allow a person to enter data and like the Coordinator role
can invite other users to your permits, once you have been approved. This Role will not be able to sign electronically.
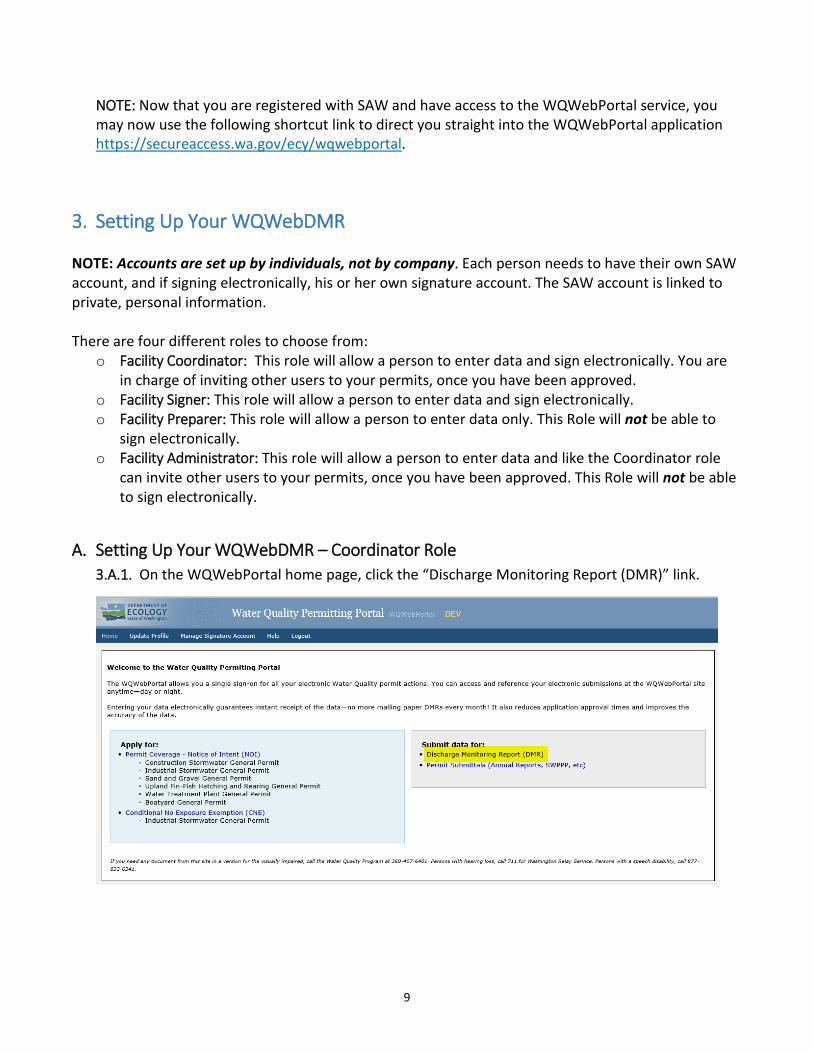
A. Setting Up Your WQWebDMR – Coordinator Role 3.A.1. On the WQWebPortal home page, click the “Discharge Monitoring Report (DMR)” link.

10
3.A.2. You are now in the registration stage of WQWebDMR. Select the radio button for the Facility Coordinator Role, then click the “Continue” button.
3.A.3. In order to electronically sign, you must create an electronic signature account. This account is different from the SAW account that you created earlier. This account is just for signing electronically with Ecology and is only used within the WQWebPortal application for the Role of Signer and Coordinators.
B. Create an electronic signature account
3.B.1. To create an electronic signature account, you will need to complete the following steps: (See screen shot on next page)
o First, select a user name and password. (The box will pre-populate with your SAW User name, if not already used by someone else or you can select a new one.
o Select a password that meets the password criteria (Must have at least one capital letter, one lower case letter, one number and one special character).
o Click on the “Submit New User” button.

11
3.B.2. Next, you will select five security questions. Once you have selected and answered all five questions, click “Continue” within the blue box.
NOTE: Keep a record of the question and your answers. Each time you sign electronically, you will need to answer correctly one of your five security questions that randomly display.

12
3.B.3. The final step in creating your signature account is to enter your company name and primary phone number.
o The display name and email address text boxes contain the text you used to create your SAW account. You may leave this as is, or you may change it. If you change your email address, you must put an active email address in its place.
o The electronic signature account will use this email address to notify you when your account has signed a document.
o Click “Submit User Profile Information” to complete the electronic signature account profile.
13
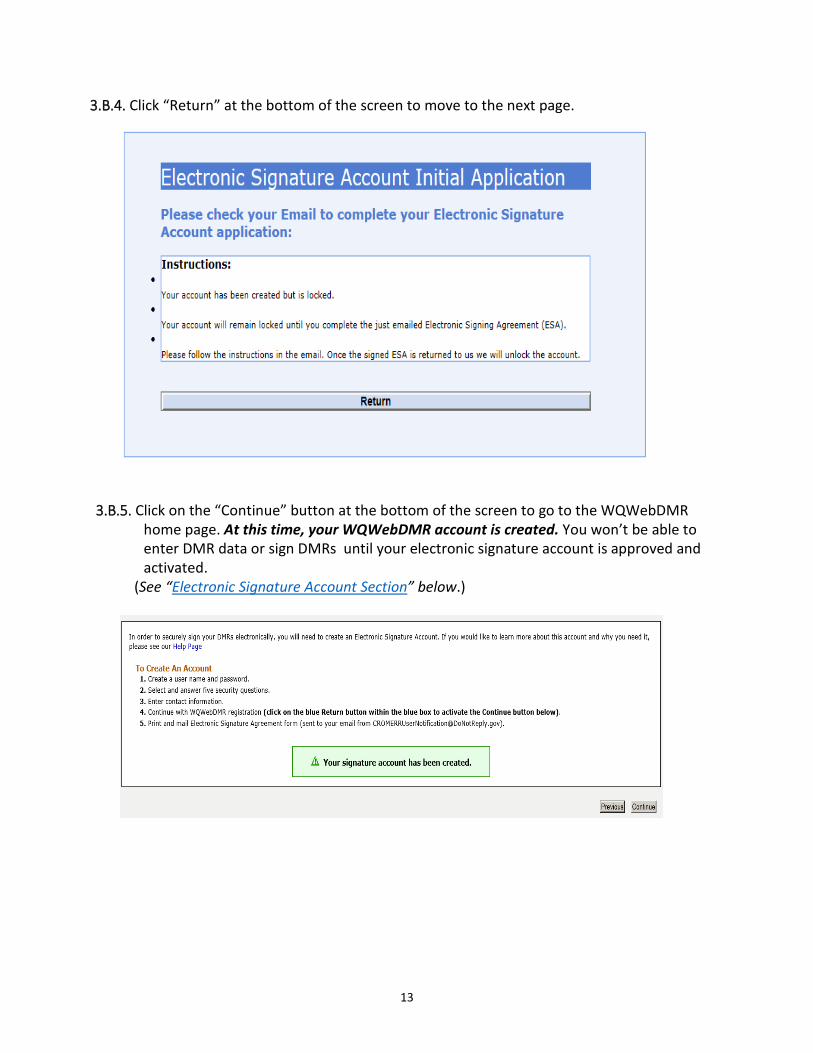
3.B.4. Click “Return” at the bottom of the screen to move to the next page.
3.B.5. Click on the “Continue” button at the bottom of the screen to go to the WQWebDMR home page. At this time, your WQWebDMR account is created. You won’t be able to enter DMR data or sign DMRs until your electronic signature account is approved and activated.
(See “Electronic Signature Account Section” below.)

14
3.B.6. To add a permit to your account, enter Permit Number and click “search”
3.B.7. Under Action, click “Select” to add this permit to your account. You will need to complete an Electronic Signature Agreement Form (ESAF) for each permit you are requesting access to and mail the ESAF to the appropriate Ecology office for approval.
3.B.8. If you would like to assign a person to this role, click “Assign Users” under the action column (See “Assigning Additional Users onto your approved Permits” section below). If you wish to continue without assigning a person, click the “Continue” button.
15
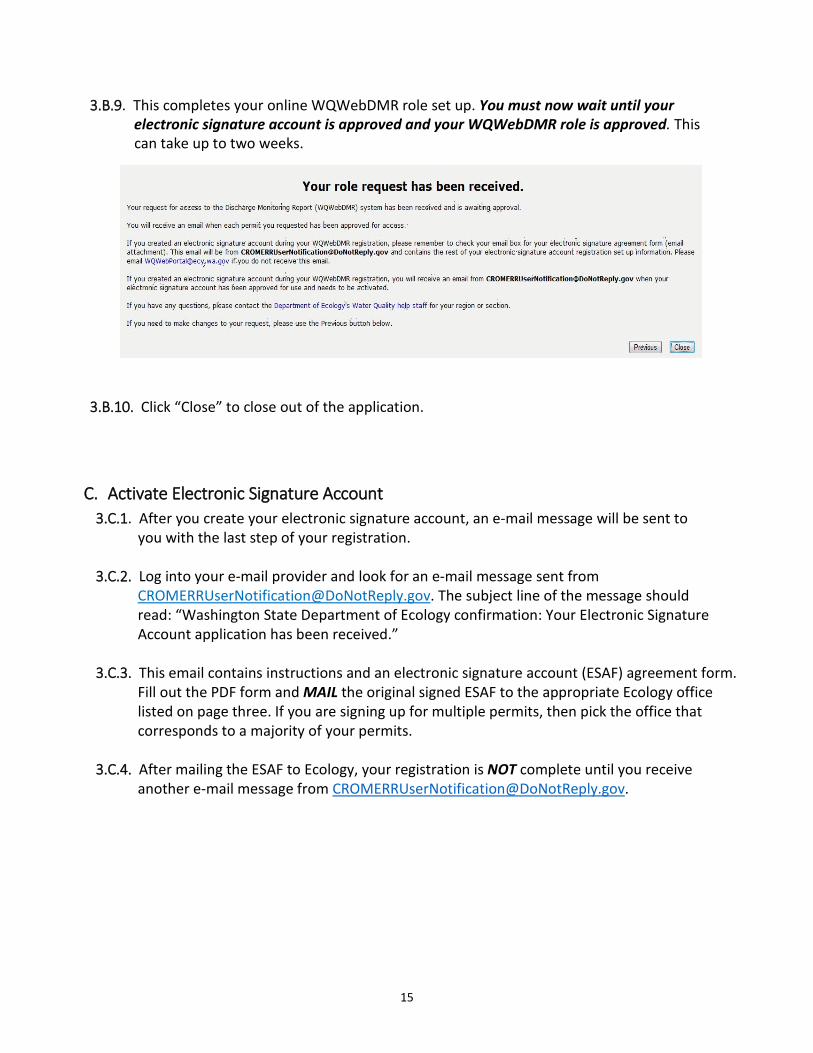
3.B.9. This completes your online WQWebDMR role set up. You must now wait until your electronic signature account is approved and your WQWebDMR role is approved. This can take up to two weeks.
3.B.10. Click “Close” to close out of the application.
C. Activate Electronic Signature Account 3.C.1. After you create your electronic signature account, an e-mail message will be sent to you with the last step of your registration. 3.C.2. Log into your e-mail provider and look for an e-mail message sent from [email protected]. The subject line of the message should
read: “Washington State Department of Ecology confirmation: Your Electronic Signature Account application has been received.”
3.C.3. This email contains instructions and an electronic signature account (ESAF) agreement form. Fill out the PDF form and MAIL the original signed ESAF to the appropriate Ecology office listed on page three. If you are signing up for multiple permits, then pick the office that corresponds to a majority of your permits. 3.C.4. After mailing the ESAF to Ecology, your registration is NOT complete until you receive another e-mail message from [email protected].

16
Here is an example e-mail message:
3.C.5. When you receive a second e-mail message (at a later date) from [email protected], click on the link provided in the e-mail message. This link will direct you to the SAW log in page; type in your SAW user ID and password and click “Login.”
Here is an example e-mail message:

17
3.C.6. Log into your SAW account. You will be directed to the electronic signature account activation page where your electronic signature account will be verified and activated. You are now certified to sign DMRs and grant other user access to your DMRs.
3.C.7. Click on the “Log into WQWebPortal” button to go to the WQWebPortal home page.
Here is an example of the Verification Screen:

18
3.C.8. Click on the “Discharge Monitoring Reports (DMR)” to get to WQWebDMR.
WQWebPortal Home page:
D. Assigning Additional Users onto Your Approved Permits NOTE: Only the Coordinator and Administrator Roles have this option, once approved. 3.D.1. WQWebDMR Home page – click “Assign Users” Tab

19
3.D.2. Enter the first and last name of the user and their email address, then select the Role. Click “ADD”.
NOTE: The system will send an email letting them know they have been assigned as a User to the permit and the role they have been assigned. The assigned user will then need to create their own accounts, if they do not already have one. If assigned as Signer or Coordinator, you will need to complete the Electronic Signature Agreement Form (ESAF) requesting access to the permit before receiving access. Registering for WQWebDMR – Signer Role There is a one-time setup process to complete before you gain access to specific permits.
a. Follow the same 12 steps as in the “WQWebDMR Coordinator Role” section above when creating an electronic signature; selecting the button for the Facility Signer Role.
b. When you receive an e-mail message from [email protected] with a subject line of
“You Have Been Granted Access to WA Dept. of Ecology's WQWebDMR Application,” you can start your setup process. The e-mail message has basic instructions to get you started.
Here is an example e-mail message:
20
c. First, if you do not have a SecureAccess Washington (SAW) account you need to create one. Go to the “Create a SecureAccess Washington (SAW) Account” section of this document for instructions on how to create a SAW account.
d. Then you need to add the WQWebPortal to your list of services. Go to the “Add the
WQWebPortal Application to Your Services” section of this document for instructions on how to get this service.
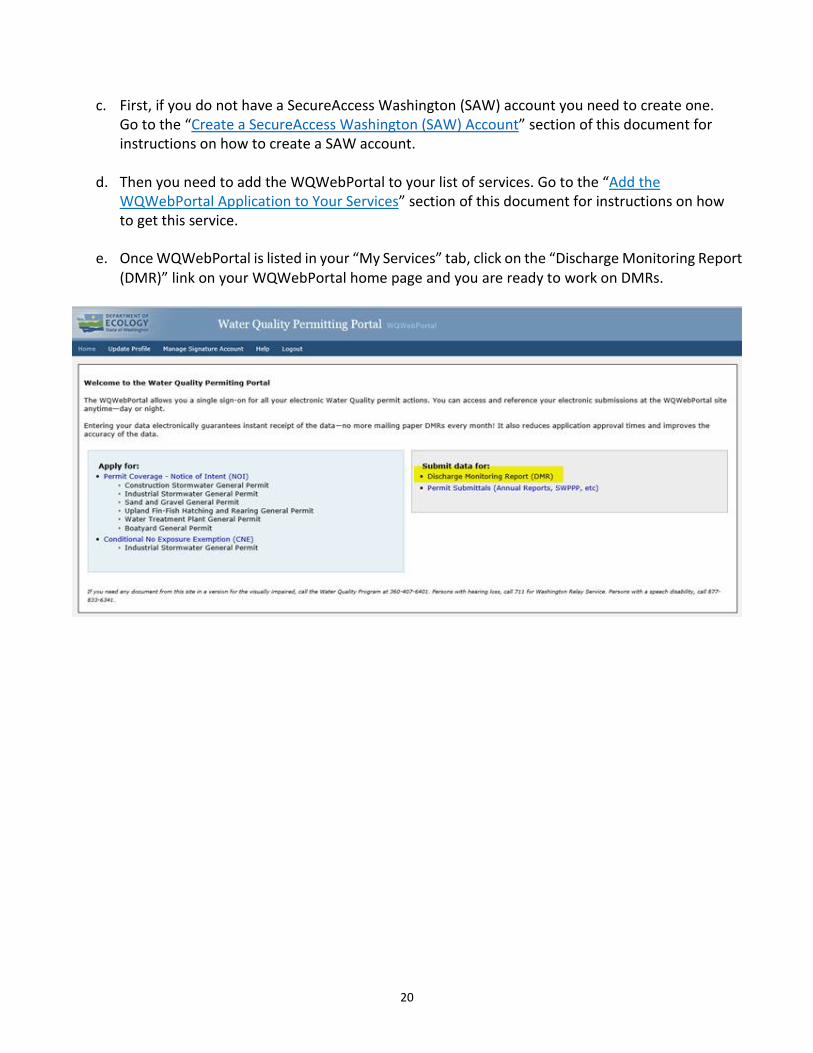
e. Once WQWebPortal is listed in your “My Services” tab, click on the “Discharge Monitoring Report
(DMR)” link on your WQWebPortal home page and you are ready to work on DMRs.