hp storageworks command view sdm for disk systems …h10032. · 3 revision history july 2002...
TRANSCRIPT
Installation and
User Guide
HP StorageWorksCommand View SDM
for Disk SystemsVersion 1.08.01
Edition August 2004
Part Number: T1086-96020

Notice
© Copyright 2003-2004 Hewlett-Packard Devel-opment Company, L.P., all rights reserved.Hewlett-Packard Company makes no warranty of any kind with regard to this material, including, but not limited to, the implied warranties of mer-chantability and fitness for a particular purpose. Hewlett-Packard shall not be liable for errors con-tained herein or for incidental or consequential damages in connection with the furnishing, perfor-mance, or use of this material.This document contains proprietary information, which is protected by copyright. No part of this document may be photocopied, reproduced, or translated into another language without the prior written consent of Hewlett-Packard. The information contained in this document is subject to change without notice.
Format Conventions
WARNING Identifies a hazard that can cause personal injury
Caution Identifies a hazard that can cause hardware or software damage
Note Identifies significant concepts or operating instructions
this font - used for all text to be typed verbatim: all commands, path names, file names, and directory names also, text displayed on the screen
<this font> - used for variables used in commands
this font - used for GUI menu options and screen controls
Trademark InformationRed Hat is a registered trademark of Red Hat Co.C.A. UniCenter TNG is a registered trademark of Computer Associates International, Inc. Microsoft, Windows Server 2003, and Windows 2000 are registered trademarks of Microsoft Cor-poration HP, HP-UX are a registered trademarks of Hewlett-Packard Company. CommandView, Secure Man-ager, Business Copy, Auto Path are trademarks of Hewlett-Packard CompanyAdobe and Acrobat are trademarks of Adobe Sys-tems Inc.Java and Java Virtual Machine are trademarks of Sun Microsystems Inc.NetWare is a trademark of Novell, Inc. AIX is a registered trademark of International Business Machines, Inc.
2

Revision HistoryJuly 2002
November 2002
January 2003
Septermer 2003
Change Page
Added firmware download issues. 93
Added -b and -v options to JBODdsp -i command. 95
Change Page
Clarified use of multiple device IDs when downloading firmware. Also added -d option to JBODdld command
92
Added -ST option to JBODmgr command. 99
Change Page
Removed Enterprise Intergrations as a stand-alone product. It is now shipped with Command View SDM.
9
Change Page
Updated GUI figure with License tab. 84
Added license chapter 107
Added licApp, licUtil, and secadim commands 113, 103
Added informatio on HP StorageWorks SMI-S VA 77
3

July 2004
August 2004
Change Page
Updated to Free permenent license for Command View 10
Updated OS Support various
Updated HP OpenView Storage Area Manager info
Updated SMI-S information
Change Page
Updated Figure 1 33
Updated HP-UX minimum requirements and patch location details 36
Updated SLP binaries location on CD and web 72
Added addcliuser command 101
Updated secadmin command 103
Added HP-UX 11.00 to OS Support various
4

contents
1 Product Description 9Command View SDM Software 10
The Software Components 10Event Reporting Software 11
HP StorageWorks SMI-S VA (Storage Management Initiative Specification) 13
Introduction 13SMI-S VA Features 13Supported Operating Systems 14Installing SMI-S VA 14Verifying SMI-S VA Installation 14Starting and Stopping SMI-S VA 15Uninstalling SMI-S VA 15Configuring SMI-S VA 16VAProvider.params 16UserAccountsManager.bat 17SLP DAEMON Installer 20SLP Binaries Location on the Web and CD 20Managing Passwords for VA LUN Security/ LUN Masking Access 22Configuring Alert Indications 23Troubleshooting 23
HP Modular Storage Software Products 25Operating System Support (Native) 27
Non-Native Supported Operating Systems 27Sources of Support Information 28
Technical Support 29
5

2 Installing Command View SDM 31Upgrading to a Newer Version of Command View SDM 31
Command View Installation Configurations 32Installing Command View SDM on HP-UX 36
Minimum System Requirements for HP-UX 36Installation Steps 38Removing Command View SDM from HP-UX 40HP-UX System Support Software 41
Installing Command View SDM on Windows 42Minimum System Requirements for Windows 42Installation Steps 45Setting Up the Launcher on a Remote Client 46Removing Command View Software from Windows 48
Installing Command View SDM on Linux Red Hat 49Minimum System Requirements for Linux Red Hat 49Installation Steps 50Removing Command View SDM from Linux 52
Saving Disk System Configuration Information 54Configuring Command View SDM 55
Setting up Remote Client Access 55Configuring the Command View SDM Web Server 56Enabling EMS Monitoring 57
Verifying the Installation 59Starting/Stopping HostAgent and OpenDIAL 60Details About the Command View SDM Installation Process 61
Command View Architecture 61The Installation Process 63File Directory Structure 63
HP StorageWorks SMI-S VA (Storage Management Initiative Specification) 65
Introduction 65SMI-S VA Features 65Supported Operating Systems 66Installing SMI-S VA 66Verifying SMI-S VA Installation 66Starting and Stopping SMI-S VA 67
6 Contents

Uninstalling SMI-S VA 67Configuring SMI-S VA 68VAProvider.params 68UserAccountsManager.bat 69SLP DAEMON Installer 72SLP Binaries Location on the Web and CD 72Managing Passwords for VA LUN Security/ LUN Masking Access 74Configuring Alert Indications 75Troubleshooting 75
77
3 Graphical User Interface 79The GUI Components 79
Running the Command View GUI 80Running the Launcher from the Windows Icon 80Running the Launcher Using a Command Line 81Running the Management GUI Directly from a Command Line 81Running the Launcher from a Web Browser 81Running the Management GUI Directly from a Web Browser 83
Using the Command View SDM GUI 84Locating Information 85Managing the DS 2300 in Split Bus Mode 85
4 Command Line User Interface 87Entering Commands 88
Command Syntax Conventions 88Command View SDM man pages 88Quick Help 89
Using Identification Variables 90Disk System Identification <device-id> 90FRU Location 90
Command View Disk System Commands 91JBODdld 92JBODdsp 95JBODfmt 97JBODlog 98
Contents 7

JBODmgr 99addcliuser 101secadmin 103
5 Command View User Interface 105Starting the Command View SDM CVUI 106CVUI Menu Map 107
6 Solving Problems 109
8 Contents

1
Product DescriptionHP Command View SDM software is designed to provide storage management for the HP StorageWorks Disk System. This software, included on the HP Command View SDM CD-ROM, provides simple, yet sophisticated device management tools for the disk system.
Some of the features and benefits offered by Command View SDM include:
■ Lets you manage an unlimited number of HP Disk Systems from a graphical user interface (GUI), command line user interface (CLUI), or web browser.
■ The GUI uses Java technology to create a common application for all supported operating systems
■ Easily spans your storage system as it grows from entry level to midrange and enterprise-wide.
■ Goes from out-of-the-box to up-and-running faster than any other device management solution.
■ CVSDM 1.08.01 comes with the FREE Permanent License
■ Provides unlimited web-browser support.
Product Description 9

Command View SDM SoftwareThe Command View SDM product includes the following items:
— HP StorageWorks Command View Disk System Installation and User’s Guide
— Software Installation CD-ROM — CVSDM 1.08.01 comes with the FREE Permanent License
The Software ComponentsThe Command View SDM CD-ROM contains all the software required to manage the HP Disk System products. The software components include:
■ Installers - provided for Windows (2000/2003), HP-UX, and Linux Red Hat.
■ Command View Utilities - the underlying code, these utilities are invoked by the user interfaces to perform all management tasks.
■ Three User Interfaces
— Graphical User Interface (GUI) - a Java-based interface that simplifies management. Most management tasks can be done using the GUI.
— Command Line User Interface (CLUI) - a full suite of commands that provide access to the full capability of the management utilities.
— Command View User Interface (CVUI) - adds a menu-based text interface front end to the command lines. This interface provides access to full command line functionality without requiring you to memorize all the commands and options.
■ HostAgent & OpenDIAL Services (or daemons) - these services control the operation of the Command View SDM software. OpenDial is responsible for discovering what disk systems are visible to the host, and HostAgent manages the server components of the software.
If Command View is installed on a Windows host that is running HP OpenView Storage Area Manager, the HostAgent and OpenDial services are not used. The HP OpenView Storage Management Server service is used to integrate the Command View software with OpenView.
■ README file - contains updated support and installation information
■ Book files - electronic copies of the product documentation are included for your convenience.
10 Product Description

Product Description
Event Reporting SoftwareInternal events in the disk system, such as module failures which may result in degraded operations, are monitored by Command View. These events include disk, power supply, fan, and port failures, as well as voltage and temperature conditions which are out of the normal operating range.
The disk system’s internal event reporting software retrieves event information from the disk system and communicates these as warnings to the user. Command View event software broadcasts these events to platform dependent targets. For example, using SNMP applications with an SNMP agent to trap the events. Command View also stores these events to system log files.
Note Command View SDM does not support the SNMP set feature. Device information cannot be configured from a remote host.
Event targets include:
■ Windows
— Event Viewer— HP OpenView (SNMP) — HP Top Tools (SNMP) — CA Unicenter TNG (SNMP) — BMC Patrol (SNMP)— Tivoli (SNMP)— HP EMS — Instant Support Enterprise Edition
■ Linux
— Syslog — HP EMS — Instant Support Enterprise Edition
■ HP-UX
— Syslog— HP EMS — HP OpenView (SNMP) — HP Top Tools (SNMP) — CA Unicenter TNG (SNMP) — BMC Patrol (SNMP)
Product Description 11

— Tivoli (SNMP)— Instant Support Enterprise Edition
Events are categorized as Information, Minor Warning, Major Warning, Serious, and Critical. These events also provide descriptions useful for troubleshooting. A current list of events is available from the HP web site:
http://docs.hp.com/hpux/content/hardware/ems/RemoteMonitor.htm
12 Product Description

Product Description
HP StorageWorks SMI-S VA (Storage Management Initiative Specification)
IntroductionHP StorageWorks SMI-S VA provides the Web-Based Enterprise Management (WBEM) interface for the management of HP StorageWorks VA arrays. SMI-S VA uses the Storage Management Initiative Specification (SMI-S), which is a new standard developed by the Storage Networking Industry Association (SNIA).
SMI-S VA is a component of Command View SDM and resides on the management host in the SAN. It runs as a service daemon. To start and stop SMI-S VA, see “Starting and Stopping SMI-S VA” later in this chapter.
This document section contains procedures for configuring and installing SMI-S VA for HP StorageWorks Command View SDM.
SMI-S VA Features Following are the features provided by SMI-S VA:
■ Profile
— Array— Subprofiles
■ Access point■ Backend ports■ Cluster■ Copy services■ LUN creation■ LUN masking and mapping■ Software
■ Profile
— Server
■ Indications - Event Capabilities
— Process indications
Product Description 13

— Lifecyle indications
■ Other features
— Service Location Protocol (SLP) discovery— Java Authentication and Authorization Service (JAAS)
Supported Operating SystemsSMI-S VA v1.08.01 is supported on all the operating systems that support Command View SDM 1.08.01. See “Operating System Support” for more information.
Installing SMI-S VAHP StorageWorks SMI-S VA is automatically installed when the HP StorageWorks Command View SDM software is installed.
Prerequisites
Ensure that the SLP daemon is running on the management host. See “SLP DAEMON Installer” later in this chapter.
Verifying SMI-S VA InstallationTo verify the SMI-S VA installation, complete the following steps:
Windows■ Verify that hp StorageWorks SMI-S CIMOM service is displayed.
■ Verify that the VAProvider.jar file is present in the following directory:
C:\Program Files\Hewlett-Packard\sanmgr\SMI-S\VAProvider\classes\VAProvider.jar.
HP-UX ■ Verify that the following SMI-S VA components are displayed within
CMDVIEWSDM in the SD Remove interface:
— SMI-S_VA — cimom
14 Product Description

Product Description
Linux■ Execute the rpm -qa |grep SMI-S command on the destination machine
to view the following SMI-S VA packages:
— SMI-S_CIMOM-1.00.00— SMI-S_VA-1.08.00-1
Starting and Stopping SMI-S VA
Windows
The display name of the service is hp StorageWorks SMI-S CIMOM (Service Name hpSMISCIMOM). The service is automatically installed and started after installation.
To start or stop the service:
Control Panel > Administrative Tools > Services (for Windows 2000 and Server 2003)
Control Panel > Services (for Windows NT)
HP-UX and Linux
The name of the SMI-S VA daemon is hpSMISCIMOM. The daemon can be started by running the script SMIS_trigger located in the /opt/SMI-S/cimom/ directory with the start option. The SMIS_trigger also supports restarting of the service.
$./SMIS_trigger start
The daemon can be stopped by running the script SMIS_trigger with the stop option.
$./SMIS_trigger stop
Uninstalling SMI-S VAHP StorageWorks SMI-S VA is automatically uninstalled when the HP StorageWorks Command View SDM software is uninstalled.
Product Description 15

Configuring SMI-S VAThe set of configuration files you need to modify are:
■ cim.properties: CIMOM related parameters for enabling SSL, JAAS, and so on.
■ VAProvider.params: The provider configuration parameters.
■ Passwords: The user names and passwords for the authentication of the clients connecting to the CIMOM server.
■ JAAS.policy: Used for configuring an access control list.
Configuration parameters appear in the sections below. After changing any of the configuration parameters, be sure to restart the hpSMISCIMOM service.Table 1 cim.properties
VAProvider.params For Windows:
Location: <DriveLetter:\>Program Files\Hewlett-Packard\SMI-S\cimom\VAProvider.params
For HP-UX and Linux:
Location: /opt/SMI-S/cimom/VAProvider.params
Field PurposeEnableBasicAuthorization("true" or "false")
Set this to "true" to indicate that you want the basic level of authentication and authorization.
EnableCompleteAuthorization ("true" or "false")
Set this to "true" to indicate that you want complete authentication and authorization. Each command needs to be authorized before it can be executed. If EnableCompleteAuthorization is set to "true," then the value of EnableBasicAuthorization is ignored.
EnableSSL ("true" or "false")
Set this to "true" to enable SSL
16 Product Description

Product Description
The values of the editable parameters described in Table 2 should be configured before managing VA arrays using HP StorageWorks SMI-S VA. A restart of the VA provider service (hpSMISCIMOM) is required after modifying these Configuration parameters.Table 2 Default Parameters
UserAccountsManager.bat User accounts are organized into groups, and a set of permissions are assigned to each group using JAAS. To manage the user accounts, use the script file (UserAccountsManager.bat) located in the home directory. This is the directory where the CIM Object Manager is installed. Typically, it is in C:\Program Files\Hewlett-Packard\SMI-S\cimom. To find the list of switch options supported, run this script file with the -h option.
To list the available groups and users, execute this command:
Field Purpose ModifiableProvider Class VA Provider class Name No
Host IP address of the management host to contact for the array data. (default value for the host parameter is 127.0.0.1, which is the localhost).
Yes
Event Periodicity Specifies the periodicity of the event capturing. Yes
Debug By default it is false. If true it writes log information into file. (Passive Management data such as details of CIM instance creation and deletion).The log file is DefaultDebug.log.Location on Windows:<Drive Letter:\>Program Files\Hewlett-Packard\SMI-S\cimom.Location on HP-UX and Linux:/opt/SMI-S/cimom.
Yes
NameSpace Currently only the root/va namespace is supported.
No
Methodlog If “On”, method logging is enabled. If it is set to “Off” method logging is disabled. This parameter is not present in the file by default.<Installation Directory>\HPVAMethodLog.log (Active management data status of method providers by displaying Name of method invoked, Time it was invoked, Status in terms of Success or Failure along with description).
No
Product Description 17

$ UserAccountsManager -LG
Note There is no other input parameter other than -LG to list the available groups and users. Currently the available groups are Administrator and User. There are no commands to add or remove the groups. User accounts in the Administrator group have complete control of all operations. User accounts in the User group can only execute read-only operations.
To add a user, execute this command:
$ UserAccountsManager -AU -G <Group> -U <UserName> -P <Password>where:
-G is the group name for the user.
-U is the user name.
-P is password for the user.
Example:
$ UserAccountsManager -AU -G Administrator -U Tom -P Vanilla2
Note The parameter Group is one of the groups listed by the -LG option. A user name can exist in only one group.
To change the user password, execute this command:
$ UserAccountsManager -CP -U <UserName> -O <OldPassword> -N <NewPassword>
where:
-U is the user name.
-O is the old password of the user.
-N is the new password for the user.
Example:
$ UserAccountsManager -CP -U Tom -O Vanilla2 -N Chocolate3
To remove a user, execute this command:
$ UserAccountsManager -DU -U <UserName>
18 Product Description

Product Description
where:
-U is the user name.
Example:
$ UserAccountsManager -DU -U Tom
For help, execute this command:
$ UserAccountsManager -h
where:
-h is help.
Product Description 19

SLP DAEMON InstallerThe SMI-S server supports Service Location Protocol Daemon (SLP) discovery and it is mandatory to have the "slpd" (SLP daemon) running on management host. The SLPD binaries are located on the web and the Command View SDM CD.
SLP Binaries Location on the Web and CD
HP-UX
HP-UX Binaries Location on the Web
http://www.software.hp.com/cgi-bin/swdepot_parser.cgi/cgi displayProductInfo.pl?productNumber=HPUXSLP
HP-UX 11.00 Binaries Location on the CD
The HP-UX 11.00 slpd binaries are located on web and Command View CD as follows:
CD:
/CD Root/
|SMI-S/
|slpd/
|hpux/
|slpd-11.00.depot
HP-UX 11.11 Binaries Location on the CD
The HP-UX 11.11 slpd binaries are located on web and Command View CD as follows:
CD:/CD Root/
|SMI-S/
|slpd/
|hpux/
20 Product Description

Product Description
|slpd-11.11.depot
HP-UX 11.23 Binaries Location on the CD
For HP-UX 11.23 slpd is bundled along with the Operating System.
Linux
Linux Red Hat Binaries Location on the Web
http://openslp.org/download.html (openslp-1.0.11-1.i386.rpm)
Red Hat Linux Binaries
Location on the CD
The Linux slpd binaries are located on the web and the Command View SDM CD as follows:
CD:
/CD Root/
|SMI-S/
|slpd/
|linux/
|slpd.rpm
Windows
Windows Binaries Location on the CD
The Windows slpd binaries are located on the Command View CD as follows:/CD Root/slpd/windows/setup.exe
Product Description 21

Managing Passwords for VA LUN Security/ LUN Masking AccessThe VA provides the capability to password-protect access to the LUN security management interface. The password is entered when the system is being configured and is maintained within the array.
When SMI-S interface is initially used to access a password-protected LUN security table on the array the user must enter the password using the "VA_LunMasking_PasswdUtility" described below. The password is stored in encrypted form on the management host (the system- where hpSMISCIMOM service/daemon is running) and subsequently used to establish all SMI-S management sessions. If the password is changed, it must be changed in the array. The new password must be re-entered using the VA_LunMasking_PasswdUtility.
Location of the utility:
HP-UX/ Linux
/opt/SMI-S/cimom/VA_LunMasking_PasswdUtility.sh
Windows
<DriveLetter:\>Program Files\Hewlett-Packard\SMI-S\cimom\VA_LunMasking_PasswdUtility.bat
The LunMasking password utility supports the following options:
1 Add - adds a new password for the array.
2 Delete - deletes a password for the array.
3 Modify - modifies a password for the array.
4 List - lists all the passwords in decrypted form along with array WWN's in the following format:Array WWN : Passwd----------- ----- ------50060B00000921AB: guestpassword
5 Exit - exit the license utility.
Enter the number of the desired option to perform the operation. SMI-S VA interface allows the user to view & modify LunSecurity/LunMasking data for all the arrays that has a password entry on the management station. You can do add
22 Product Description

Product Description
and modify operation and modification does not require restarting the hpSMISCIMOM service/daemon.
Configuring Alert IndicationsContact HP support to configure alert indications for SMI-S VA.
TroubleshootingThis section explains the commonly-occurring problems that you may face with SMI-S VA
Table 3 Troubleshooting
Problem SolutionThe server did not respond to the CIM requests and the CIM Clients receive "CIM_ERR_FAILED" exception.
Determine if the hpSMISCIMOM Service/daemon is running. If not, start the service.Determine if the TCP/IP Protocol stack is properly installed on the host. To check, ping localhost. If the ping fails, reinstall the TCP/IP Stack. Determine if TCP port 5988 is used by another process. If used, then server binds it self to the next free port, so client should try connecting to the next port number (e.g 5989).
The CIM calls are raising NullPointerException.
Check the available disk space on the drive where CIMOM server is installed. If it is full, clean up the disk to make more free space available. If the disk is not full, this indicates that the problem is with the CIM call. Determine if the parameters are valid.
The CIM query did not return any instances even when the host pointed by the parameter Host in the VAproviders.hpcfg configuration file had virtual arrays connected to it.
Determine if the HP OpenView SAM Hostagent service is running on the host machine to which the arrays are connected. If the service is not running, start the HP OpenView SAM Hostagent service and then restart the hpSMISCIMOM service.
Product Description 23

SMI-S VA Service failed to start Check the service registration.Check the event log details.
SMI-S VA is not able to populate data. Check to see if the directory C:\ProgramFiles\Hewlett-Packard\SMI-S\cimom\persitence\classes\root\VA is empty. If thedirectory is empty, load the mofs byinvoking the batch file LoadMofs.bat in <sanmgr>\SMI-S\VAProvider. Run the LoadMofs in the CIMOM directory e.g C:\...\cimom> <sanmgr>\SMI-S\VAProvider\LoadMofs.bat
SMI-S VA failed to fetch data. Check if the HP OpenView SAM Hostagent service is running in the windows services window.HP OpenView SAM Hostagent needs to be running. If its not running, select the service and start it.
Table 3 Troubleshooting
Problem Solution
24 Product Description

Product Description
HP Modular Storage Software ProductsA full line of complementary software products are available to expand the capability of the CommandView SDM software. These optional products are listed in the following table. For the most up-to-date information about Modular Storage Software products, visit the HP web site.
Table 4 CommandView SDM Modular Storage Software Products
SOFTWARE PRODUCTS
CommandView SDMEnables array configuration and management. Provides the foundation for value-added software products. Also includes Enterprise Integrations, which integrates CommandView SDM into network management applications BMC Patrol, HP Openview NNM for HP-UX/Windows/Solaris, HP Openview VPO for HP-UX, and CA-Unicenter TNG.
— Software Package (T1086A)
Business Copy VA Enables online data replication or LUN copying within the array for testing and backup, and requires the same physical space to be available in the array as the LUN(s) being copied.
— Software Package and 50 GB LTU* (T1007A)— 500 Gbyte Upgrade (T1008A)— 1 Tbyte Upgrade (T1009A)
Secure Manager VAEnables LUNs to be locked into a secure shared environment.
— Software Package and 50 GB LTU* (T1003A)— 500 Gbyte Upgrade (T1004A)— 1 Tbyte Upgrade (T1005A)— 5Tbytee Upgrade (T1006A)
Auto Path VA for Windows 2000 Enables I/O path fail-over in MSCS Windows 2000 environments with the benefit of I/O load balancing in both failed and non-failed states.
— Software Package and 1 Host LTU* (T1011A)— 1 Host Upgrade LTU (T1012A)— 5 Host Upgrade LTU (T1013A)
Product Description 25

Auto Path VA for HP-UXEnables I/O path fail-over in HP-UX environments with the benefit of I/O load balancing in both failed and non-failed states.
— Software Package and 1 Host LTU* (T1060A)— 1 Host Upgrade LTU (T1061A)— 5 Host Upgrade LTU (T1062A)
Auto Path VA for LinuxEnables I/O path fail-over in Linux environments with the benefit of I/O load balancing in both failed and non-failed states.
— Software Package and 1 Host LTU* (T1044A)— 1 Host Upgrade LTU (T1045A)— 5 Host Upgrade LTU (T1046A)
* - License to Use
26 Product Description

Product Description
Operating System Support (Native)The HP Command View software is supported on the following operating systems. Because hosts running these operating systems can both access and manage the disk system using Command View SDM, these are referred to as “native” operating systems.
■ HP-UX*
■ Windows 2000**
■ Windows Server***
■ Red Hat Linux Advanced Server****
*Command View SDM 1.08.01 provides support for HP-UX 11.00, 11.11, 11.23 (IA-64)
in a non-HP OpenView environment. Command View SDM 1.08.01 does not support HP-UX 11.20)
**Command View SDM 1.08.01 provides support for Windows 2000 Server SP4 (32 bit) and Windows 2000 AS SP4 (32 bit).
***Command View SDM 1.08.01 will now support Window Server 2003(32-bit).
****Command View 1.08.01 will support Red Hat Linux version is RHEL AS 3.0 with Kernel version 2.4.21-9EL
Installation instructions for each operating system are included in Chapter 2.
Non-Native Supported Operating SystemsIn addition to the native operating system listed above, the HP Surestore Disk System is also supported on the “non-native” operating systems listed below. Hosts running these operating systems can access data on the disk system; however, Command View SDM is not supported on them. Consequently, disk management must be done from a host running one of the supported operating systems listed above.
■ Sun Solaris
■ IBM AIX
■ Novell NetWare
■ MPE/iX (VA 7100 only)
Product Description 27

■ Tru64
■ OpenVMS
■ HP-UX 10.20
Note Command View SDM 1.08.01 provides UX 11.23 (IA-64) in a non-HP OpenView environment. Additionally, Command View SDM 1.08.01 does not support HP-UX 11.20)
Sources of Support InformationThe README file included on the Command View installation CD contains important support information you should read before installing and using the software. In addition, it is recommended that you visit the technical support web site identified in "Technical Support on page 29".
28 Product Description

Product Description
Technical SupportTechnical support is provided for this product through an HP Support Contract, purchased at the time you purchased this product. For details regarding support information, refer to that contract.
For a list of the most current support phone numbers, access the following HP web site:
www.hp.com/support/cvsdm
Product Description 29

30 Product Description

2
Installing Command View SDMThis chapter includes procedures for installing Command View SDM on each supported operating system. The installation process differs for each operating system. Once the software is installed, operation of Command View SDM is identical on all platforms.
The Command View SDM software can be installed on both local hosts for direct management of the disk system, or on a client for remote management. Remote clients must be assigned permission to manage the disk system from a Command View SDM host connected to the disk system.
If you would like some general information on the software installation process before you begin, see "Details About the Command View SDM Installation Process on page 61".
Note Can I install Command View SDM on more than one host?Command View SDM comes with a FREE license. If you want to install the software on additional hosts, you may.
Upgrading to a Newer Version of Command View SDMWhen upgrading to a newer version of Command View SDM, always remove the previous version before installing the new software. This will ensure that the software installation will complete successfully and that Command View SDM will operate correctly.
You should also save the Command View SDM configuration files. This will allow you to easily restore the same configuration on the new software. See "Saving Disk System Configuration Information on page 54".
Installing Command View SDM 31

Command View Installation ConfigurationsThe installation of Command View SDM is influenced by a number of factors: the type of hosts connected to the disk system, other network management tools in use, and your management strategy.
There are three typical management configurations:
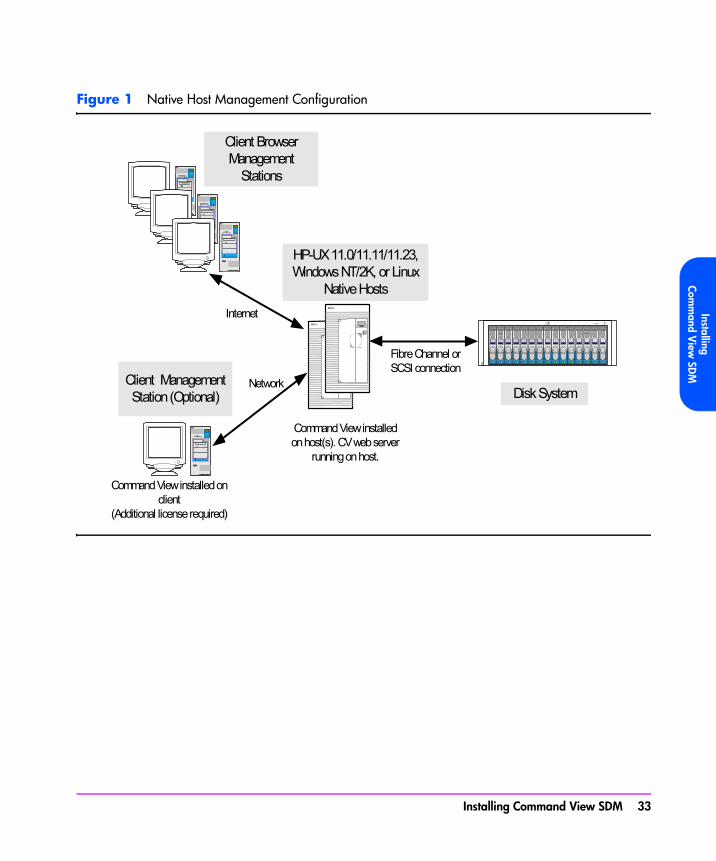
■ Native host - shown in Figure 1, this configuration is typically used when a host accessing the disk system supports Command View SDM. Because disk management can be done from this host, the need for a separate management station is eliminated.
■ Non-native - shown in Figure 2, this configuration is typically used when the hosts accessing the disk system do not support Command View SDM. In this environment, Command View SDM is installed on a separate management station.
■ HP OpenView Storage Area Manager - shown in Figure 3, this configuration integrates Command View SDM into the SAM management architecture. The software is installed on the SAM management station, allowing the disk system to be managed from the same point as other storage resources.
32 Installing Command View SDM
Installing Com
mand
View
SDM
Figure 1 Native Host Management Configuration
Fibre Channel orSCSI connection
Fibre Channel orSCSI connection
Disk System
HP-UX 11.0/11.11/11.23,Windows NT/2K, or Linux
Native Hosts
Command View installedon host(s). CV web server
running on host.
Internet
Client BrowserManagement
Stations
1 2 3 4 5 6 7 9 10 11 12 13 14 15
NetworkClient ManagementStation (Optional)
Command View installed onclient
(Additional license required)
Installing Command View SDM 33

Figure 2 Non- Native Host Management Configuration
34 Installing Command View SDM

Installing Com
mand
View
SDM
Figure 3 HP OpenView Storage Area Manager Management Configuration
Installing Command View SDM 35
Installing Command View SDM on HP-UXThe following procedure describes the steps involved in installing the Command View SDM software on an HP-UX host or client.
Minimum System Requirements for HP-UXBefore installing the Command View SDM software, verify that the host meets the following minimum requirements.
Locating HP-UX PatchesCV SDM 1.08.01 delivers version 1.4.1.03 of the Java Runtime Environment. Java Version 1.4.1.03 and later for PA-RISC requires patch PHCO_29109 for HP-UX 11.11.
■ PHCO_29959: Pthread enhancements and fixes for 11.0 platform.
■ Patch PHCO_29960 for Pthread enhancement and fixes.
■ Please download and install the necessary patches from the following URL for the specific HP-UX/JRE version.
Host ■ HP-UX 11.00/11.11/11.23 (plus the Support Plus Hardware Enablement Bundle, version September 2001 or later)
■ RAM: 1 GB
■ Screen Resolution: 800 x 600 (for the GUI)(Recommended 1024 X 768)
■ Video Support: 64K colors or better
■ Disk Space: 60 Mbyte in the /var directory (for logs)
■ Directory Space for installation:
— /opt (230Mbyte 11.00/11.11) (350Mbyte 11.23)
— /var (less than 1Mbyte for 11.00/11.11) (1.3 Mbyte for 11.23)
— /etc, /usr, / (less than 1Mbyte for 11.00/11.11/11.23)
36 Installing Command View SDM

Installing Com
mand
View
SDM
http://www.hp.com/products1/unix/java/patches/index.html
Refer to the HP web site for the latest patch bundle information.
http://www.hp.com/products1/unix/java/
Support Plus Hardware/Critical Patch Bundle information can be found on the HP-UX Support Plus CD-ROM, or on the following web page:
http://www.software.hp.com/SUPPORT_PLUS/hwe.html
Selecting a Host IP Address on Systems with Multiple IP Addresses
During installations where multiple IP addresses exist on a host (i.e. multiple LAN cards in a single host), only one of the IP address will be entered into the /etc/opt/sanmgr/hostagent/config/commIpAddr.txt file. If this is not the correct address, the hostagent will not communicate with the array.
After installation, check the contents of the /etc/opt/sanmgr/hostagent/config/commIpAddr.txt file. If the correct IP address is not shown, manually enter the correct IP address.
Please restart the host agent service, if ‘commIpAddr.txt’ file is manually modified.
Changing Thread CountThe Command View SDM server components run within the context of a single instance of the Java Virtual Machine. In HP-UX this is a single process. Within the Command View server instance of the JVM, multiple threads of execution are running virtually concurrently. By default, a single process is limited to 64 threads. If the process attempts to spawn more threads, an Out of Memory error may be reported.
To avoid this situation, the thread count should be increased by setting the following kernel parameters:
max_thread_proc set to at least 256nkthread set to twice the value of max_thread_proc
To determine the current values of these parameters run:#kmtune | grep -e max_thread_proc -e nkthread
After these settings have been changed, rebuild and reboot into the new kernel.
Installing Command View SDM 37

Note Changing the thread count settings is only necessary if you observe Out of Memory errors when running Command View.
Installation Tips— For the latest information on installing and upgrading the software,
refer to the README file on the Command View SDM Installation CD. The README is located in the corresponding operating system directory.
— When upgrading to a newer version of Command View SDM, always remove the previous version before installing the new software.
— Make sure EMS hardware monitoring is installed and operating on the host before installing Command View SDM. This will ensure that the disk system is automatically added to the EMS configuration and disk system events will be detected and reported.
Installation Steps
1 Log onto the system as root or superuser.
2 If upgrading to a newer version of Command View SDM, save any configuration files and remove the old software. See the following section.
3 Insert the Command View SDM software CD into the CD-ROM drive.
4 Identify the device file for the CD-ROM:ioscan -funC disk
eg: disk 2 8/16/5.2.0 sdisk CLAIMED DEVICE TOSHIBA CD-ROM XM-5701TA
/dev/dsk/c2t2d0 /dev/rdsk/c2t2d0
5 Create a mount point directory. For example:mkdir /cdrom
Use a directory that does not exist
6 Execute ps -ef |grep pfs command, to confirm if the following processes are runningroot 2588 2587 0 15:31:18 pts/tb 0:00 pfsd.rpc
root 2586 2585 0 15:31:00 pts/tb 0:00 pfs_mountd.rpc
root 2587 2579 0 15:31:18 pts/tb 0:00 /usr/sbin/pfsd
38 Installing Command View SDM

Installing Com
mand
View
SDM
root 2585 2579 0 15:31:00 pts/tb 0:00 /usr/sbin/pfs_mountd
root 2592 2579 2 15:31:30 pts/tb 0:00 grep pfs
7 If the above processes are not running, execute the following commands,/usr/sbin/pfs_mountd &
/usr/sbin/pfsd &
8 Mount the CD device file using the device file and directory from the preceding steps.
For example: pfs_mount -t rrip -o xlat=unix /dev/dsk/c2t2d0 /cdrom
9 Run swinstall using the appropriate command:
HP-UX 11.00swinstall -s /cdrom/CommandViewSDM/hpux/cvsdm_11_00_v108.depot
HP-UX 11.11swinstall -s /cdrom/CommandViewSDM/hpux/cvsdm_11_11_v108.depot
HP-UX 11.23swinstall -s /cdrom/CommandViewSDM/hpux/cvsdm_11_23_v108.depot
Check the appropriate /cdrom/CommandViewSDM/hpux directory for the complete version name of the depot file.
10 Highlight CMDVIEWSDM from the list, then Mark it for installation from the Action menu. All required Command View components will be marked for installation.
11 Start the installation by selecting Install from the Action menu. Complete the information requested on the swinstall screens.
Note The installation process may determine that components required by Command View SDM are aleady installed. In this case, an error message may be displayed, but it can be ignored.
12 Once the software installation is complete, log out, then log back in to reset the path.
13 If you saved the configuration files from any earlier Command View SDM installation, use them to restore the prior configuration. Before restoring the
Installing Command View SDM 39

older files, you may want to compare them with newly installed files (some of the old files may be the same).
Note Note For installations with multiple IP addresses, see Selecting a Host IP Address on Systems with Multiple IP Addressesî earlier in this chapter.
Controlling Access to Command View SDM Executable FilesUpon installation, the Command View SDM executable file permissions are set to all users. To restrict execution of the Command View SDM executable to root-level users only, execute the following commands as root:
chmod 500 /opt/sanmgr/commandview/server/sbin/*
chmod 500 /opt/sanmgr/commandview/client/sbin/*
chmod 600 /opt/sanmgr/commandview/server/logs/*.log
chmod 600 /opt/sanmgr/commandview/client/logs/*.txt
What’s Next?■ If the software was installed on a host, refer to "Configuring
Command View SDM on page 55" for additional configuration information.
■ If the software was installed on a client, see "Setting up Remote Client Access on page 55" for information on assigning client access rights.
Note Two Command View daemons are installed on the client that are only required on the host. They may be shut down on a client. To shut these daemons down, refer to "Starting/Stopping HostAgent and OpenDIAL on page 60".
Removing Command View SDM from HP-UXThis procedure describes removing the Command View SDM software. The existing Command View SDM software should be removed before installing a new version of the software. The removal process does not automatically delete the log files. If you want to delete the log files, you will have to do so manually.
40 Installing Command View SDM
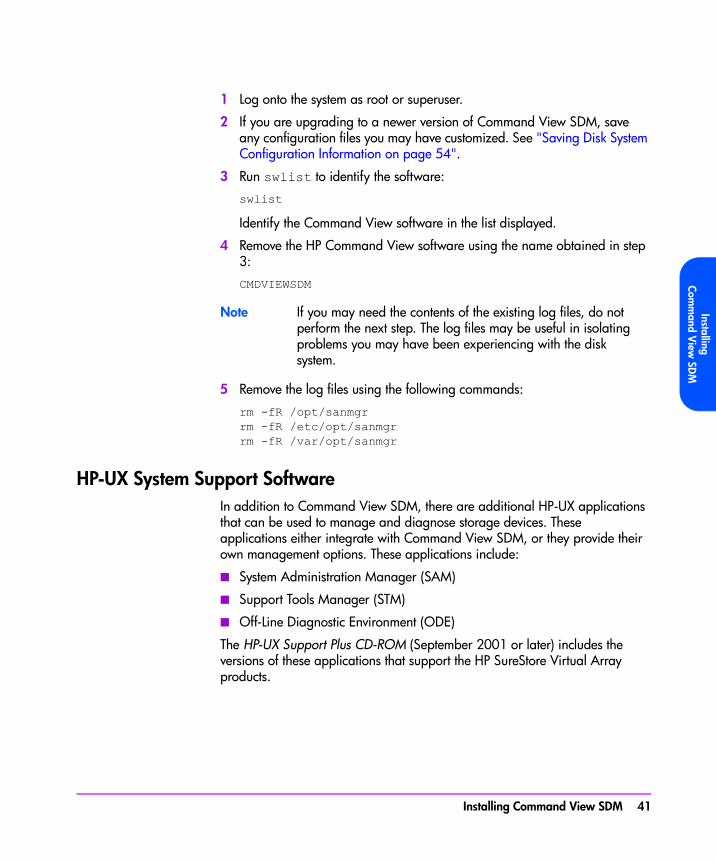
Installing Com
mand
View
SDM
1 Log onto the system as root or superuser.
2 If you are upgrading to a newer version of Command View SDM, save any configuration files you may have customized. See "Saving Disk System Configuration Information on page 54".
3 Run swlist to identify the software:swlist
Identify the Command View software in the list displayed.
4 Remove the HP Command View software using the name obtained in step 3:CMDVIEWSDM
Note If you may need the contents of the existing log files, do not perform the next step. The log files may be useful in isolating problems you may have been experiencing with the disk system.
5 Remove the log files using the following commands:rm -fR /opt/sanmgrrm -fR /etc/opt/sanmgrrm -fR /var/opt/sanmgr
HP-UX System Support Software In addition to Command View SDM, there are additional HP-UX applications that can be used to manage and diagnose storage devices. These applications either integrate with Command View SDM, or they provide their own management options. These applications include:
■ System Administration Manager (SAM)
■ Support Tools Manager (STM)
■ Off-Line Diagnostic Environment (ODE)
The HP-UX Support Plus CD-ROM (September 2001 or later) includes the versions of these applications that support the HP SureStore Virtual Array products.
Installing Command View SDM 41

Installing Command View SDM on Windows The following procedure describes the steps involved in installing the Command View SDM software on a Windows 2000/2003 host or client.
Minimum System Requirements for WindowsBefore installing the Command View SDM software, verify that the host meets the following minimum requirements.
Selecting a Host IP Address on Systems with Multiple IP Addresses
During installations where multiple IP addresses exist on a host (i.e. multiple LAN cards in a single host), only one of the IP address will be entered into the <INSTALLDIR>\hostagent\config\commlpAddr.txt file. If this is not the correct address, the hostagent will not communicate with the array.
After installation, check the contents of the <INSTALLDIR>\hostagent\config\commlpAddr.txt file. If the correct IP address is not shown, manually enter the correct IP address.
Host ■ Administrator privileges (Required)■ Windows 2000 SP4 (32Bit), Windows 2000 AS SP4 (32Bit)
and Windows 2003 server Enterprise Edition (32Bit)■ 500 MHz processor speed or better■ 1 GB RAM■ Screen resolution 800 x 600 (for GUI use)
(Recommended resolution: 1024 X 768)■ Video support: 64K colors or better■ Disk space:
60 Mbytes of permanent space for the application30 Mbytes of temporary space in the Windows Temp directory (typically C:/Temp) used during installation
42 Installing Command View SDM

Installing Com
mand
View
SDM
Installation Tips— For the latest software updates, refer to the README file on the
Command View SDM CD. The README is located in the corresponding operating system directory.
— When upgrading to a newer version of Command View SDM, always remove the old software and save any configuration files.
INSTALLATION STEPS FOR CVSDM ON A STAND-ALONE SYSTEM
1. Ensure that previous versions of CVSDM is uninstalled and all other applications are closed before the installation
2. Insert the Command View SDM CD into the CD-ROM drive on the host.
3. If upgrading to a newer version of Command View SDM, save any configuration files and remove the old software.
Note While un-installation of the previous version, clicking on the pop-up message can save configuration files.
4. From the Start menu, select Run.
5. Enter the letter of your CD-ROM drive, followed by
CommandViewSDM\win\setup.exe. For example, if your CD-ROM drive is “E”, enter:
E:\CommandViewSDM\win\setup.exe
6. Follow the instructions to complete the installation.
7. If you saved the configuration files from any earlier Command View SDM installation, use them to restore the prior configuration. Before restoring the older files, you may want to compare them with newly installed files.
Once the installation is complete, an icon for the Command View SDM Launcher is placed on the desktop.
Note For installations with multiple IP addresses, see “Selecting a Host IP Address on Systems with Multiple IP Addresses” earlier in this chapter.
Installing Command View SDM 43

Note You have to manually uninstall the previous version of Command View if it exists through Add/Remove Programs, as Command View SDM installer will not automatically remove the previous version.
HP OpenView Storage Area Manager IntegrationThe Command View SDM software integrates into HP OpenView Storage Area Manager (SAM) running on a Windows management station. The process of installing the software on OpenView SAM is the same as on a standard WIndows environment, however you should be aware of the following operational differences when installing on an OpenView SAM management station:
■ The Command View software is only installed on the OpenView SAM management station.
■ When installing Command View SDM on an OpenView SAM management station, make sure that SAM is installed before installing Command View SDM.
■ The OpenView SAM Host Agent must be installed on servers connected to the disk systems that will be managed.
■ When upgrading OpenView SAM, Command View SDM must be uninstalled before performing the upgrade, and then reinstalled when the upgrade is complete.
■ The file used to control client access on OpenView SAM is authorizedClients.dat located in the following directory \sanmgr\managementserver\config\.
■ The Command View HostAgent and OpenDIAL services are not used on an OpenView SAM management station. Instead, the OpenView Storage Management Server service is used for the Command View SDM software.
■ OpenView SAM is supported on the following versions of Command View:
— OVSAM 2.1 is supported with Command View 1.03/1.04— OVSAM 2.2 is supported with Command View 1.05 and 1.06— OVSAM 3.0 is supported with Command View 1.06— OVSAM 3.1 is Supported with Command View 1.07— OVSAM 3.1/3.2 is Supported with Command View 1.08
44 Installing Command View SDM

Installing Com
mand
View
SDM
Installation Steps1 Make sure that SAM is installed and that the SAM Host Agent has been
installed on the hosts connected to the array. See "Installing the SAM HostAgent on OpenView SAM" below.
2 Insert the Command View SDM CD into the CD-ROM drive on the host.
3 If upgrading to a newer version of Command View SDM, save any configuration files and remove the old software. See the following section.
4 From the Start menu, select Run.
5 Enter the letter of your CD-ROM drive, followed by CommandViewSDM\win\setup.exe. For example, if your CD-ROM drive is “E”, enter:E:\CommandViewSDM\win\setup.exe
6 Follow the instructions to complete the installation.
7 If you saved the configuration files from any earlier Command View SDM installation, use them to restore the prior configuration. Before restoring the older files, you may want to compare them with newly installed files (some of the old files may be the same).
Note For installations with multiple IP addresses, see “Selecting a Host IP Address on Systems with Multiple IP Addresses” earlier in this chapter.
Once the installation is complete, an icon for the Command View SDM Launcher is placed on the desktop.
Note You have to manually uninstall the previous version of Command View if it exists through Add/Remove Programs, as Command View SDM installer will not automatically remove the previous version.
Note After uninstalling Command View SDM, check to see if HP StorageWorks SMI-S VA is still installed. If it is still installed, you need to uninstall HP StorageWorks SMI-S VA.
Installing Command View SDM 45

Installing the SAM HostAgent on OpenView SAMWhen installing the Command View SDM software in a SAM environment, the SAM Host Agent must be installed on hosts connected to the disk systems that will be managed. The SAM Host Agent must be installed and running on a host to allow the SAM management client to detect and manage the disk system .
1 Launch the SAM GUI.
2 Select Tools > Manage Host Agent > Install Host Agent Software
Refer to the SAM on-line help for more information on installing the host agent.
What’s Next?■ If the software was installed on a host, refer to "Configuring
Command View SDM on page 55" for additional configuration information.
■ If the software was installed on a client, continue with "Setting Up the Launcher on a Remote Client on page 46".
Note Two Command View services are installed on the client that are only required for server operation. They may be shut down on the client. To shut these processes down, refer to "Verifying the Installation on page 59".
Setting Up the Launcher on a Remote ClientAfter installing Command View SDM on a client management station, you must identify the host you want the Launcher to connect to. This will be a host running Command View SDM and connected to the disk system you want to manage. The Launcher properties on the client must be modified to identify the desired host.
Note It is not necessary to perform this procedure if Command View SDM has been installed on a client being used for Instant Support Enterprise Edition.
46 Installing Command View SDM

Installing Com
mand
View
SDM
1 Right click on the Command View SDM Launcher icon on the client desk top.
2 Select Properties >> Short Cut
3 In the Target: window, append a space and the host identification to the end of the path displayed. The host can be identified by either its DNS name or IP address. In the following figure, the IP address 10.62.126.238 is added to the target path.
4 Click OK.
Note - To manage a disk system from a remote client, the client must be granted access by the Command View SDM host the Launcher is connecting to. See "Setting up Remote Client Access on page 55" for more information.
- You can create additional Launcher icons connecting to different Command View SDM hosts by right clicking on the Launcher icon and selecting Create Shortcut. This will create a duplicate of the existing icon, which you can then modify to connect to a different host.
Add the IP address or the DNS name of the Command View host
Installing Command View SDM 47

Removing Command View Software from WindowsThis procedure describes removing the Command View software. The existing Command View SDM software should be removed before installing a new version of the software. The removal process does not automatically delete the log files. If you want to delete the log files, you will have to do so manually.
To remove the software:
1 If you are upgrading to a newer version of Command View SDM, save any configuration files you may have customized. See "Saving Disk System Configuration Information on page 54".
2 Select Start >> Settings >> Control Panel >> Add/Remove Programs
3 Select hp command view from the list of applications, and then click Add/Remove....
Follow the screens to remove Command View.
Note If there has been a problem with the software or the disk system, the logs should be retained and used to reference for troubleshooting. If you are certain you will not need to access the logs, they can be removed.
4 To remove the logs files, delete the following folder:\sanmgr\commandview\server\logs
5 Reboot the system when the software has been removed.
48 Installing Command View SDM

Installing Com
mand
View
SDM
Installing Command View SDM on Linux Red HatThe following procedure describes the steps involved in installing the Command View SDM software on a Linux Red Hat.
Minimum System Requirements for Linux Red HatBefore installing the Command View SDM software, verify that the host meets the following minimum requirements.
Where to Get the Latest Linux InformationFor the most current supported Linux Kernel version and required patches for Command View SDM, refer to the web documents, “Kernel Configuration” and “Linux Tips”. These documents and all the latest information can be found in the Using Your Product section of the following HP support web site:
http://www.hp.com/support/cvsdm
Selecting a Host IP Address on Systems with Multiple IP Addresses
During installations where multiple IP addresses exist on a host (i.e. multiple LAN cards in a single host), only one of the IP address will be entered into the / etc/opt/sanmgr/hostagent/config/commIpAddr.txt file. If this is not the correct address, the hostagent will not communicate with the array.
Host ■ RHEL AS 3.0 with Kernel version 2.4.21-9EL (plus patches, see web site mentioned below)
■ Intel Pentium PIII/IV 500 MHz processor speed or better
■ RAM: 1 GB
■ Video Resolution: 800x600 (for GUI)(Recommended 1024 X 768)
■ Video Support: 64K colors or better
■ Disk Space: 60 Mbyte
Installing Command View SDM 49

After installation, check the contents of the /etc/opt/sanmgr/hostagent/config/ commIpAddr.txt file. If the correct IP address is not shown, manually enter the correct IP address.
Installation Tips.— For the latest software updates, refer to the README file on the
HP StorageWorks Command View SDM CD. The README is located in the corresponding operating system directory.
— When upgrading to a newer version of Command View SDM, always remove the previous version before installing the new software.
— Before installing Command View SDM, verify that the timezone system environmental variable, TZ, is properly set. If the TZ variable is not properly set before installation, the system logs may have inconsistent date stamps. If this should occur, set the TZ variable, then stop and restart HostAgent.
— You have to manually uninstall the previous version of Command View if it exists through Add/Remove Programs, as Command View SDM installer will not automatically remove the previous version.
Installation StepsInstallation procedures for Command View SDM on Linux Red Hat consists of
a set of shell scripts and rpm files that customize and install the necessary
software. Prior to installing the software, the Linux Kernel must be updated
using the Kernel Configuration document available on the support web site.
1. Log on as root or superuser.
2. If upgrading to a newer version of Command View SDM, remove the old software and save any configuration files. See the following section.
3. Create a directory for the software. For example:
mkdir /tmp/cmdview
4. Insert the Command View SDM software CD into the CD-ROM drive.
5. If necessary mount the CD device file. For example:
mount /dev/cdrom /mnt/cdrom
50 Installing Command View SDM
Installing Com
mand
View
SDM
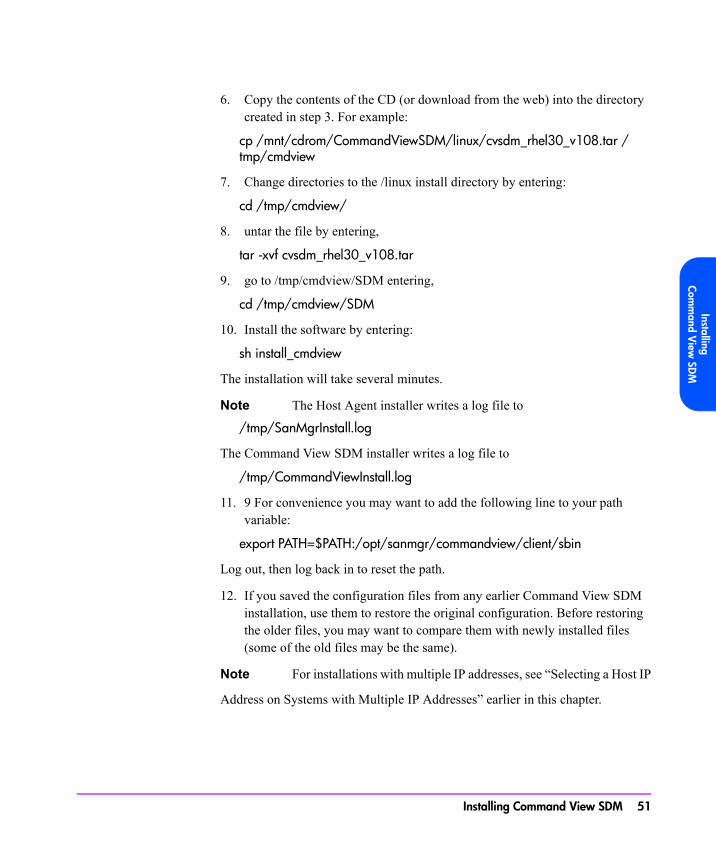
6. Copy the contents of the CD (or download from the web) into the directory created in step 3. For example:
cp /mnt/cdrom/CommandViewSDM/linux/cvsdm_rhel30_v108.tar /tmp/cmdview
7. Change directories to the /linux install directory by entering:
cd /tmp/cmdview/
8. untar the file by entering,
tar -xvf cvsdm_rhel30_v108.tar
9. go to /tmp/cmdview/SDM entering,
cd /tmp/cmdview/SDM
10. Install the software by entering:
sh install_cmdview
The installation will take several minutes.
Note The Host Agent installer writes a log file to
/tmp/SanMgrInstall.log
The Command View SDM installer writes a log file to
/tmp/CommandViewInstall.log
11. 9 For convenience you may want to add the following line to your path variable:
export PATH=$PATH:/opt/sanmgr/commandview/client/sbin
Log out, then log back in to reset the path.
12. If you saved the configuration files from any earlier Command View SDM installation, use them to restore the original configuration. Before restoring the older files, you may want to compare them with newly installed files (some of the old files may be the same).
Note For installations with multiple IP addresses, see “Selecting a Host IP
Address on Systems with Multiple IP Addresses” earlier in this chapter.
Installing Command View SDM 51

Note After installation, check the contents of /opt/sanmgr/hostagent/ config/commIPAddr.txt file. If the correct IP address is not shown, manually enter the correct IP address and stop and start the HostAgent.
Controlling Access to Command View SDM Executable Files
Upon installation, the Command View SDM executable file permissions are set to all users. To restrict execution of the Command View SDM executable to root-level users only, execute the following commands as root:
chmod 500 /opt/sanmgr/commandview/server/sbin/*
chmod 500 /opt/sanmgr/commandview/client/sbin/*
chmod 600 /opt/sanmgr/commandview/server/logs/*.log
chmod 600 /opt/sanmgr/commandview/client/logs/*.txt
What’s Next?■ If the software was installed on a host, refer to "Configuring
Command View SDM on page 55" for additional configuration information.
■ If the software was installed on a client, see "Setting up Remote Client Access on page 55" for information on assigning client access rights.
Note Two Command View daemons are installed on the client that are only required on the host. They may be shut down on a client. To shut these daemons down, refer to "Starting/Stopping HostAgent and OpenDIAL on page 60".
Removing Command View SDM from LinuxThis procedure describes removing the HP Command View software. The existing Command View SDM software should be removed before installing a new version of the software. The removal process does not automatically delete the log files. If you want to delete the log files, you will have to do so manually.
Note The 1.07 version of the Linux installer will not correctly remove earlier versions of the Command View software. Previously installed versions on Linux should be uninstalled using the
52 Installing Command View SDM

Installing Com
mand
View
SDM
uninstaller for that version of command view. If the 1.07 uninstaller is used, the following steps may be taken to ensure all unnecessary files are removed:
rm -fR /opt/sanmgr/hostagentrm -fR /var/opt/sanmgr/hostagentrm -fR /etc/opt/sanmgr/hostagent
1 If you are upgrading to a newer version of Command View SDM, save any configuration files you may have customized. See "Saving Disk System Configuration Information on page 54".
2 Remove the HP Command View software: uninstall_cmdview
Note If there has been a problem with the software or the disk system, the logs should be retained and used to reference for troubleshooting. If you are certain you will not need to access the logs, they can be removed.
3 To remove the logs, enter the following three commands:rm -fR /opt/sanmgrrm -fR /etc/opt/sanmgrrm -fR /var/opt/sanmgr
If you are re-installing HP Command View software, perform the installation procedures described under "Installing Command View SDM on Linux Red Hat on page 49".
Installing Command View SDM 53

Saving Disk System Configuration InformationSeveral configuration files are used to customize the operation of Command View SDM. Because these files allow you to easily replicate or restore the configuration of your disk system, it is recommended that you maintain copies of these files. This is particularly important if you plan to upgrade to a newer version of Command View SDM. After the new software has been installed, these files can be copied into the newly installed files to recreate the desired operating configuration.
Note To prevent the configuration files from being deleted when you remove the existing Command View SDM software to upgrade to a newer version, make sure the copies are in a location outside the HP Command View installation path.
There are three configuration files that should be saved:
HP-UX and Linux
/opt/sanmgr/commandview/server/config/PanConfigParams.txt/opt/sanmgr/commandview/server/config/ContactInfo.txt/opt/sanmgr/hostagent/config/access.dat
Windows
\sanmgr\commandview\server\config\PanConfigParams.txt\sanmgr\commandview\server\config\ContactInfo.txt\sanmgr\hostagent\config\access.dat
Windows - HP OpenView Storage Area Manager
\sanmgr\commandview\server\config\PanConfigParams.txt\sanmgr\commandview\server\config\ContactInfo.txt\sanmgr\managementserver\config\authorizedClients.dat
In addition, if you have downloaded any firmware update files stored within the Command View installation path, and would like to save them, copy them to a temporary directory and restore after installation.
54 Installing Command View SDM
Installing Com
mand
View
SDM
Configuring Command View SDMOnce installed, it may be necessary to configure the operation of Command View SDM. Configuration is required to perform the following tasks:
■ Setting up remote client access
■ Configuring the Command View SDM web browser
■ Enabling EMS if necessary (HP-UX only)
Setting up Remote Client AccessWhen using a remote client to manage disk systems, the client must be granted access rights by the Command View SDM host connected to the disk system. This includes both clients running Command View SDM, and web browser clients. Access rights are managed using a special access file which is maintained on the Command View SDM host. This file contains the IP addresses of clients that are allowed to manage any disk system connected to the host.
The following files are used to control client access:
■ access.dat - standard installation
■ authorizedClients.dat - HP OpenView Storage Area Manager (SAM) installation
Note By default the configuration file contains a value of “127.0.0.1”. This localhost entry is required for Command View host operation and must remain in the file.
1 On the Command View SDM host connected to the disk system, open the configuration file in a text editor. The file is located in the following directory:HP-UX and Linux: /opt/sanmgr/hostagent/config/ Windows: \sanmgr\hostagent\config\ HP OpenView SAM: \sanmgr\managementserver\config\
2 Add the IP address for each client requiring access to the disk systems connected to the host. Single client IP addresses can be added, or a range of IP addresses can be added using the wild card “*”. For example; 10.62.128.* grants access to any client on subnet 128. The use of
Installing Command View SDM 55

wildcards is recommended when connecting from clients configured for dynamic host configuration protocol (DHCP).
3 Save the configuration file.
Removing a Client Use the above procedure to remove a host you no longer want to have access. When removing clients it is necessary to stop and restart the HostAgent to implement the change. See "Starting/Stopping HostAgent and OpenDIAL on page 60".
Configuring the Command View SDM Web ServerThe Command View software includes its own web server, which is installed along with the other software components. By default, the web server is enabled on port 4096. If you need to disable the web server or change its port, you can do so using the following procedures.
Disabling the Web ServerBy default, the Command View SDM web server is enabled to provide remote management capability. If remote access via the web is a security concern, the web server can be disabled.
1 On the Command View SDM host, open the web server configuration file, PanConfigParams.txt, in a text editor. The configuration file is located in the following directory:HP-UX or Linux/opt/sanmgr/commandview/server/config/
Windows<drive>:\Program Files\Hewlett-Packard\sanmgr\command-view\server\config\
2 Disable the web server by modifying the web server entry as follows:WEBSERVER_ENABLED=false
Should you need to re-enable the web server, set the value to “true”.
Changing the Web Server PortBy default, the Command View SDM web server listens for http requests on port 4096. If this port is not available on your system, you can specify a
56 Installing Command View SDM
Installing Com
mand
View
SDM
different port. The port is specified in the following parameter in the configuration file PanConfigParams.txt:
WEBSERVER_PORT=4096
Change the value to an available port number.
Restarting the HostAgent ServiceAfter making changes to the configuration PanConfigParams.txt file, you must stop and restart the HostAgent service on the server. For information on performing this operation, refer to "Starting/Stopping HostAgent and OpenDIAL on page 60".
Note HP OpenView SAM ImplementationOn HP OpenView SAM you must stop and restart the HP OpenView Storage Management Server service, not HostAgent. This is done from the Services dialog accessed from the Control Panel.
Enabling EMS MonitoringIf EMS monitoring is running on the HP-UX host when Command View SDM is installed, the disk system(s) will be automatically configured into event monitoring. In this situation the following steps do not need to be performed.
If EMS monitoring is installed on the host after Command View SDM, it will be necessary to manually enable event monitoring for the disk system. To do so, perform the following steps:
1 On an HP-UX host, perform the following steps. If the host is not running HP-UX, go to step 2.
a Open the following file in a text editor:/var/stm/config/tools/monitor/RemoteMonitor.cfg
b Edit the entry for JBOD to read as follows:JBOD ENABLE
c Save the file.
2 Open the following file in a text editor:/opt/sanmgr/commandview/server/config/PanConfigParams.txt
3 Edit the following entry to read as follows:
Installing Command View SDM 57

EMS_HOST=hostname
hostname is the name of the host running EMS
4 Save the file.
58 Installing Command View SDM

Installing Com
mand
View
SDM
Verifying the InstallationYou can easily verify the success of the Command View SDM software installation using the following steps.
1 From a command line on the host or client on which you have installed the software, enter the following command:JBODdsp -i <hostname>
<hostname> identifies the remote host for which information will be displayed, and is required only when running the command on a client.
2 View the output displayed. It should include an entry similar to the following for each disk system connected to the host. Product: HP-A6255ADevice Type: Enclosure ControllerDevice Path: \\.\scsi3.0.15.0Alias: blueUnique ID:HPA6255AR1AHL1224345Serial Number:R1AHL1224345Device Host: netsvr.boi.hp.com
Note If the anticipated output is not displayed, a problem may have occurred during installation. See "Solving Problems on page 109" for help in isolating and solving the problem.
Installing Command View SDM 59

Starting/Stopping HostAgent and OpenDIALThe HostAgent and OpenDIAL services (or daemons) are installed with Command View SDM. These services are started automatically during installation and any time the host is restarted. Both services must be running on the host for Command View SDM to operate. If these services are not running, they must be started manually. HostAgent and OpenDIAL are not needed on a remote Command View SDM client and can be stopped.
To start or stop HostAgent and OpenDIAL you must login as root or superuser (for HP-UX/Linux) or have Administrator Privileges (for Windows).
HP-UX and Linux■ To stop HostAgent and OpenDIAL, enter the following command:
/opt/sanmgr/hostagent/sbin/HA_Dial_Stop
■ To start HostAgent and OpenDIAL, enter the following command:/opt/sanmgr/hostagent/sbin/HA_Dial_Start
Windows 2000 and Windows 2003 server
Note If Command View SDM is installed on an HP OpenView SAM management station, the HostAgent and OpenDial services are not used. The HP OpenView Storage Management Server service is used to integrate the Command View software with Storage Area Manager. This is the service you must stop/start in this environment.
Although it is possible to start or stop HostAgent and OpenDIAL from the Services dialog, it is recommended that you use the script files described below. This will ensure that the services are stopped and started in the proper order.
■ To stop HostAgent and OpenDIAL, enter the following command:<drive>:\Program Files\Hewlett-Packard\sanmgr\command-view\client\sbin\HA_Dial_Stop
■ To start HostAgent and OpenDIAL, enter the following command:<drive>:\Program Files\Hewlett-Packard\sanmgr\command-view\client\sbin\HA_Dial_Start
60 Installing Command View SDM

Installing Com
mand
View
SDM
Details About the Command View SDM Installation Process
This section describes in more detail the Command View SDM installation process. It is not essential that you read this material to install the software successfully. It is provided for those who have a desire to understand what is going on behind the scenes. It may also help you solve any problems that occur during the installation.
Command View ArchitectureUnderstanding the architecture of the Command View SDM software components should help you understand the installation and interaction of the various components.
The major components is the Command View SDM software are shown in Figure 4. The integration with other components is also shown.
Installing Command View SDM 61

Figure 4 Command View SDM Architecture
GUI
HPOpenView
Storage AreaManager
SAMSTM
EventsService
SCSI Gateway Host Agent
Web Browser
SNMPAgent
Storage Device
HP-UXIntegration
StorageManagement
SystemManagement
Launcher
HP OpenViewNNM
Top ToolsCA
CLUI
Device Object
LoggingService
armdiscover
OpenDIAL
Command ViewComponentArchitecture
CVSDMWeb Server
DeviceDatabase
EMS
LogDatabase
CVUI
NT EventViewer syslog
62 Installing Command View SDM

Installing Com
mand
View
SDM
The Installation ProcessThe following steps identify the main tasks performed during the installation of the software.
1 The installer creates the directory structure on the host and copies the Command View SDM files to the appropriate folders.
2 The OpenDIAL and HostAgent services start, which in turn launch the server components - SCSI Gateway, Logging Service, etc.
3 The armdiscover process is initiated, which causes OpenDIAL to do a discovery of all disk systems connected to the host.
4 The results of the discovery are stored in the device database files used by other components. The contents of the database files are used to populate the Launcher, and are returned in response to an JBODdsp -i command.
5 When all disk systems are discovered, the logging service is enabled and it begins collecting log entries for the discovered disk systems.
6 When the Launcher is run, it retrieves device information from the device data to determine what disk systems are connected. The Launcher then accesses each disk system to determine its status and displays the appropriate icon for each disk system.
File Directory StructureDuring the installation a directory structure is created on the host for the Command View SDM files. The main directory structure is listed below.
HP-UX and Linux Directories
The following directories are created when installing Command View SDM on an HP-UX or Linux host. Files are split between /opt/sanmgr, /etc/opt/sanmgr, and /var/opt/sanmgr
/opt/sanmgr/opt/sanmgr/jre/bin/opt/sanmgr/jre/lib/opt/sanmgr/hostagent/sbin/opt/sanmgr/hostagent/config > /etc/opt/sanmgr/hostagent/config/opt/sanmgr/hostagent/data > /var/opt/sanmgr/hostagent/data/opt/sanmgr/hostagent/log > /var/opt/sanmgr/hostagent/log/opt/sanmgr/commandview/client/config/opt/sanmgr/commandview/client/sbin/opt/sanmgr/commandview/server/config > /etc/opt/sanmgr/commandview/server/
Installing Command View SDM 63

config/opt/sanmgr/commandview/server/data > /var/opt/sanmgr/commandview/server/data/opt/sanmgr/commandview/server/logs > /var/opt/sanmgr/commandview/server/logs
Windows DirectoriesThe following directories are created when installing Command View SDM on a Windows host. Note that some directories differ when installing on an HP OpenView Storage Area Manager host.
\Program Files\Hewlett-Packard\sanmgr\Program Files\Hewlett-Packard\sanmgr\jre\bin\Program Files\Hewlett-Packard\sanmgr\jre\lib\Program Files\Hewlett-Packard\sanmgr\commandview\client\config\Program Files\Hewlett-Packard\sanmgr\commandview\client\sbin\Program Files\Hewlett-Packard\sanmgr\commandview\server\config\Program Files\Hewlett-Packard\sanmgr\commandview\server\data\Program Files\Hewlett-Packard\sanmgr\commandview\server\logs
Standard Install with HostAgent and OpenDIAL \Program Files\Hewlett-Packard\sanmgr\hostagent\sbin\Program Files\Hewlett-Packard\sanmgr\hostagent\config\Program Files\Hewlett-Packard\sanmgr\hostagent\data\Program Files\Hewlett-Packard\sanmgr\hostagent\log
Install with HP OpenView Storage Area Manager (SAM)\Program Files\Hewlett-Packard\sanmgr\managementserver\sbin\Program Files\Hewlett-Packard\sanmgr\managementserver\config\Program Files\Hewlett-Packard\sanmgr\managementserver\data\Program Files\Hewlett-Packard\sanmgr\managementserver\logs
64 Installing Command View SDM

Installing Com
mand
View
SDM
HP StorageWorks SMI-S VA (Storage Management Initiative Specification)
IntroductionHP StorageWorks SMI-S VA provides the Web-Based Enterprise Management (WBEM) interface for the management of HP StorageWorks VA arrays. SMI-S VA uses the Storage Management Initiative Specification (SMI-S), which is a new standard developed by the Storage Networking Industry Association (SNIA).
SMI-S VA is a component of Command View SDM and resides on the management host in the SAN. It runs as a service daemon. To start and stop SMI-S VA, see “Starting and Stopping SMI-S VA” later in this chapter.
This document section contains procedures for configuring and installing SMI-S VA for HP StorageWorks Command View SDM.
SMI-S VA Features Following are the features provided by SMI-S VA:
■ Profile
— Array— Subprofiles
■ Access point■ Backend ports■ Cluster■ Copy services■ LUN creation■ LUN masking and mapping■ Software
■ Profile
— Server
■ Indications - Event Capabilities
— Process indications
Installing Command View SDM 65

— Lifecyle indications
■ Other features
— Service Location Protocol (SLP) discovery— Java Authentication and Authorization Service (JAAS)
Supported Operating SystemsSMI-S VA v1.08.01 is supported on all the operating systems that support Command View SDM 1.08.01. See “Operating System Support” for more information.
Installing SMI-S VAHP StorageWorks SMI-S VA is automatically installed when the HP StorageWorks Command View SDM software is installed.
Prerequisites
Ensure that the SLP daemon is running on the management host. See “SLP DAEMON Installer” later in this chapter.
Verifying SMI-S VA InstallationTo verify the SMI-S VA installation, complete the following steps:
Windows■ Verify that hp StorageWorks SMI-S CIMOM service is displayed.
■ Verify that the VAProvider.jar file is present in the following directory:
C:\Program Files\Hewlett-Packard\sanmgr\SMI-S\VAProvider\classes\VAProvider.jar.
HP-UX ■ Verify that the following SMI-S VA components are displayed within
CMDVIEWSDM in the SD Remove interface:
— SMI-S_VA — cimom
66 Installing Command View SDM

Installing Com
mand
View
SDM
Linux■ Execute the rpm -qa |grep SMI-S command on the destination machine
to view the following SMI-S VA packages:
— SMI-S_CIMOM-1.00.00— SMI-S_VA-1.08.00-1
Starting and Stopping SMI-S VA
Windows
The display name of the service is hp StorageWorks SMI-S CIMOM (Service Name hpSMISCIMOM). The service is automatically installed and started after installation.
To start or stop the service:
Control Panel > Administrative Tools > Services (for Windows 2000 and Server 2003)
Control Panel > Services (for Windows NT)
HP-UX and Linux
The name of the SMI-S VA daemon is hpSMISCIMOM. The daemon can be started by running the script SMIS_trigger located in the /opt/SMI-S/cimom/ directory with the start option. The SMIS_trigger also supports restarting of the service.
$./SMIS_trigger start
The daemon can be stopped by running the script SMIS_trigger with the stop option.
$./SMIS_trigger stop
Uninstalling SMI-S VAHP StorageWorks SMI-S VA is automatically uninstalled when the HP StorageWorks Command View SDM software is uninstalled.
Installing Command View SDM 67

Configuring SMI-S VAThe set of configuration files you need to modify are:
■ cim.properties: CIMOM related parameters for enabling SSL, JAAS, and so on.
■ VAProvider.params: The provider configuration parameters.
■ Passwords: The user names and passwords for the authentication of the clients connecting to the CIMOM server.
■ JAAS.policy: Used for configuring an access control list.
Configuration parameters appear in the sections below. After changing any of the configuration parameters, be sure to restart the hpSMISCIMOM service.Table 5 cim.properties
VAProvider.params For Windows:
Location: <DriveLetter:\>Program Files\Hewlett-Packard\SMI-S\cimom\VAProvider.params
For HP-UX and Linux:
Location: /opt/SMI-S/cimom/VAProvider.params
Field PurposeEnableBasicAuthorization("true" or "false")
Set this to "true" to indicate that you want the basic level of authentication and authorization.
EnableCompleteAuthorization ("true" or "false")
Set this to "true" to indicate that you want complete authentication and authorization. Each command needs to be authorized before it can be executed. If EnableCompleteAuthorization is set to "true," then the value of EnableBasicAuthorization is ignored.
EnableSSL ("true" or "false")
Set this to "true" to enable SSL
68 Installing Command View SDM

Installing Com
mand
View
SDM
The values of the editable parameters described in Table 6 should be configured before managing VA arrays using HP StorageWorks SMI-S VA. A restart of the VA provider service (hpSMISCIMOM) is required after modifying these Configuration parameters.Table 6 Default Parameters
UserAccountsManager.bat User accounts are organized into groups, and a set of permissions are assigned to each group using JAAS. To manage the user accounts, use the script file (UserAccountsManager.bat) located in the home directory. This is the directory where the CIM Object Manager is installed. Typically, it is in C:\Program Files\Hewlett-Packard\SMI-S\cimom. To find the list of switch options supported, run this script file with the -h option.
To list the available groups and users, execute this command:
Field Purpose ModifiableProvider Class VA Provider class Name No
Host IP address of the management host to contact for the array data. (default value for the host parameter is 127.0.0.1, which is the localhost).
Yes
Event Periodicity Specifies the periodicity of the event capturing. Yes
Debug By default it is false. If true it writes log information into file. (Passive Management data such as details of CIM instance creation and deletion).The log file is DefaultDebug.log.Location on Windows:<Drive Letter:\>Program Files\Hewlett-Packard\SMI-S\cimom.Location on HP-UX and Linux:/opt/SMI-S/cimom.
Yes
NameSpace Currently only the root/va namespace is supported.
No
Methodlog If “On”, method logging is enabled. If it is set to “Off” method logging is disabled. This parameter is not present in the file by default.<Installation Directory>\HPVAMethodLog.log (Active management data status of method providers by displaying Name of method invoked, Time it was invoked, Status in terms of Success or Failure along with description).
No
Installing Command View SDM 69
$ UserAccountsManager -LG
Note There is no other input parameter other than -LG to list the available groups and users. Currently the available groups are Administrator and User. There are no commands to add or remove the groups. User accounts in the Administrator group have complete control of all operations. User accounts in the User group can only execute read-only operations.
To add a user, execute this command:
$ UserAccountsManager -AU -G <Group> -U <UserName> -P <Password>where:
-G is the group name for the user.
-U is the user name.
-P is password for the user.
Example:
$ UserAccountsManager -AU -G Administrator -U Tom -P Vanilla2
Note The parameter Group is one of the groups listed by the -LG option. A user name can exist in only one group.
To change the user password, execute this command:
$ UserAccountsManager -CP -U <UserName> -O <OldPassword> -N <NewPassword>
where:
-U is the user name.
-O is the old password of the user.
-N is the new password for the user.
Example:
$ UserAccountsManager -CP -U Tom -O Vanilla2 -N Chocolate3
To remove a user, execute this command:
$ UserAccountsManager -DU -U <UserName>
70 Installing Command View SDM
Installing Com
mand
View
SDM
where:
-U is the user name.
Example:
$ UserAccountsManager -DU -U Tom
For help, execute this command:
$ UserAccountsManager -h
where:
-h is help.
Installing Command View SDM 71

SLP DAEMON InstallerThe SMI-S server supports Service Location Protocol Daemon (SLP) discovery and it is mandatory to have the "slpd" (SLP daemon) running on management host. The SLPD binaries are located on the web and the Command View SDM CD.
SLP Binaries Location on the Web and CD
HP-UX
HP-UX Binaries Location on the Web
http://www.software.hp.com/cgi-bin/swdepot_parser.cgi/cgi displayProductInfo.pl?productNumber=HPUXSLP
HP-UX 11.00 Binaries Location on the CD
The HP-UX 11.00 slpd binaries are located on web and Command View CD as follows:
CD:
/CD Root/
|SMI-S/
|slpd/
|hpux/
|slpd-11.00.depot
HP-UX 11.11 Binaries Location on the CD
The HP-UX 11.11 slpd binaries are located on web and Command View CD as follows:
CD:/CD Root/
|SMI-S/
|slpd/
|hpux/
72 Installing Command View SDM

Installing Com
mand
View
SDM
|slpd-11.11.depot
HP-UX 11.23 Binaries Location on the CD
For HP-UX 11.23 slpd is bundled along with the Operating System.
Linux
Linux Red Hat Binaries Location on the Web
http://openslp.org/download.html (openslp-1.0.11-1.i386.rpm)
Red Hat Linux Binaries
Location on the CD
The Linux slpd binaries are located on the web and the Command View SDM CD as follows:
CD:
/CD Root/
|SMI-S/
|slpd/
|linux/
|slpd.rpm
Windows
Windows Binaries Location on the CD
The Windows slpd binaries are located on the Command View CD as follows:/CD Root/slpd/windows/setup.exe
Installing Command View SDM 73

Managing Passwords for VA LUN Security/ LUN Masking AccessThe VA provides the capability to password-protect access to the LUN security management interface. The password is entered when the system is being configured and is maintained within the array.
When SMI-S interface is initially used to access a password-protected LUN security table on the array the user must enter the password using the "VA_LunMasking_PasswdUtility" described below. The password is stored in encrypted form on the management host (the system- where hpSMISCIMOM service/daemon is running) and subsequently used to establish all SMI-S management sessions. If the password is changed, it must be changed in the array. The new password must be re-entered using the VA_LunMasking_PasswdUtility.
Location of the utility:
HP-UX/ Linux
/opt/SMI-S/cimom/VA_LunMasking_PasswdUtility.sh
Windows
<DriveLetter:\>Program Files\Hewlett-Packard\SMI-S\cimom\VA_LunMasking_PasswdUtility.bat
The LunMasking password utility supports the following options:
1 Add - adds a new password for the array.
2 Delete - deletes a password for the array.
3 Modify - modifies a password for the array.
4 List - lists all the passwords in decrypted form along with array WWN's in the following format:Array WWN : Passwd----------- ----- ------50060B00000921AB: guestpassword
5 Exit - exit the license utility.
Enter the number of the desired option to perform the operation. SMI-S VA interface allows the user to view & modify LunSecurity/LunMasking data for all the arrays that has a password entry on the management station. You can do add
74 Installing Command View SDM

Installing Com
mand
View
SDM
and modify operation and modification does not require restarting the hpSMISCIMOM service/daemon.
Configuring Alert IndicationsContact HP support to configure alert indications for SMI-S VA.
TroubleshootingThis section explains the commonly-occurring problems that you may face with SMI-S VA
Table 7 Troubleshooting
Problem SolutionThe server did not respond to the CIM requests and the CIM Clients receive "CIM_ERR_FAILED" exception.
Determine if the hpSMISCIMOM Service/daemon is running. If not, start the service.Determine if the TCP/IP Protocol stack is properly installed on the host. To check, ping localhost. If the ping fails, reinstall the TCP/IP Stack. Determine if TCP port 5988 is used by another process. If used, then server binds it self to the next free port, so client should try connecting to the next port number (e.g 5989).
The CIM calls are raising NullPointerException.
Check the available disk space on the drive where CIMOM server is installed. If it is full, clean up the disk to make more free space available. If the disk is not full, this indicates that the problem is with the CIM call. Determine if the parameters are valid.
The CIM query did not return any instances even when the host pointed by the parameter Host in the VAproviders.hpcfg configuration file had virtual arrays connected to it.
Determine if the HP OpenView SAM Hostagent service is running on the host machine to which the arrays are connected. If the service is not running, start the HP OpenView SAM Hostagent service and then restart the hpSMISCIMOM service.
Installing Command View SDM 75

SMI-S VA Service failed to start Check the service registration.Check the event log details.
SMI-S VA is not able to populate data. Check to see if the directory C:\ProgramFiles\Hewlett-Packard\SMI-S\cimom\persitence\classes\root\VA is empty. If thedirectory is empty, load the mofs byinvoking the batch file LoadMofs.bat in <sanmgr>\SMI-S\VAProvider. Run the LoadMofs in the CIMOM directory e.g C:\...\cimom> <sanmgr>\SMI-S\VAProvider\LoadMofs.bat
SMI-S VA failed to fetch data. Check if the HP OpenView SAM Hostagent service is running in the windows services window.HP OpenView SAM Hostagent needs to be running. If its not running, select the service and start it.
Table 7 Troubleshooting
Problem Solution
76 Installing Command View SDM
Installing Com
mand
View
SDM
Installing Command View SDM 77

78 Installing Command View SDM

3
Graphical User InterfaceThe Command View SDM Graphical User Interface (GUI) provides a convenient and familiar interface for managing the disk system. Using the GUI you can perform most of the tasks involved in the normal day-to-day operation and management of the disk system. For tasks not available in the GUI, the CLUI should be used.
This chapter describes how to start the GUI and use it to perform common management tasks.
The GUI ComponentsThe GUI comprises two components:
■ Launcher - displays all the disk systems connected to the host. The Launcher builds the display based on information stored in device database files on the host. The Launcher accesses each disk system to determine its status, which is also displayed. Double clicking on a disk system icon runs the management GUI for that disk system.
■ Management GUI - the interface from which you perform direct management of a specific disk system. Multiple instances of the GUI can be running on the host, allowing you to manage multiple disk systems simultaneously.
Graphical User Interface 79

Running the Command View GUIThere are several methods for running the Command View SDM GUI, each of which is described here.
Note Accessing the disk system from a remote client requires the proper access! Regardless of the method you use to start the GUI, a remote client will need the proper access rights to manage a disk system. See "Setting up Remote Client Access on page 55" for more information.
Watch Your Case!On an HP-UX system, case is important. The Launcher and cmdviewDS must be entered with an upper case L and DS, respectively. For example:
http://<hostname>:4096/Launcher.htmlhttp://<hostname>:4096/cmdviewDS.html?<hostname>:<device-id>
Running the Launcher from the Windows IconDuring installation on a Windows host, a Command View Launcher icon is placed on the desktop. You can start the GUI from this icon.
1 Double click the Launcher icon.
The Command View Launcher window opens displaying an icon for each disk system connected to the host. The icon indicates the current disk system status.
2 Double click on a disk system icon to run the management GUI for the disk system. You can now begin managing the disk system.
80 Graphical User Interface

Graphical U
ser Interface
Running the Launcher Using a Command LineOn HP-UX and Linux systems, the Launcher is run from the command line.
1 Start the Launcher by entering:launcher <<From the local host
launcher <hostname> <<From a remote client
<hostname> is the name of the host to which the disk system is connected
Note If the host cannot find the Launcher, add the path to the command as follows:
HP-UX or Linux/opt/sanmgr/commandview/client/sbin/launcher <hostname>
Windows<drive>:\Program Files\Hewlett-Packard\sanmgr\command-view\client\sbin\launcher <hostname>
2 To start the management GUI, double click on any disk system icon displayed in the Launcher window.
Running the Management GUI Directly from a Command LineIf you choose, you can bypass the Launcher and run the management GUI for a specific disk system. You must know the ID of the disk system you want to manage to use this technique. To run the GUI directly from a command line, enter the following command:
cmdviewDS <device-id> <<From the local host
cmdviewDS <hostname:><device-id> <<From a remote client
<hostname> is the name of the host to which the disk system is connected.
<device-id> is the disk system’s alias, serial number, device file, or world wide name.
Running the Launcher from a Web BrowserThe Command View Launcher and management GUI can be run from a web browser. This provides a convenient method of managing a disk system from
Graphical User Interface 81

a remote client that does not have the Command View SDM software installed.
Note Earlier versions of Command View SDM (1.0 and 1.01) required the installation of a certificate on the browser client for security. Later versions of Command View SDM (1.02 and later) no longer require the installation of the certificate. The applets are now authenticated with built-in certificates.
1 Open a browser on the client.
2 Type the following URL into the address field in the browser:http://<hostname>:4096/Launcher.html
<hostname> is the name of the Command View SDM host to which the disk system is connected.
Note The Sun Java 1.4.1.03 plug-in is required to run Command View SDM. For Windows and Linux, the Sun Java 2 plugin-in 1.4.2 is required. If this component is not installed, you will be prompted to install it at this point. Follow the instructions to install the Java plug-in, and then continue with the next step.
On an HP-UX host you will need to go to the following web site to get the necessary Java plug-in components:
http://www.hp.com/products1/unix/java
3 If the Java Plug-in Security Warning is displayed, select Grant Always to avoid having the warning displayed again. If you select Grant This Session, the message is displayed for each signed jar file that is initially loaded in this session.
4 When the Launcher window is displayed, double-click a disk system icon to start the management GUI.
82 Graphical User Interface

Graphical U
ser Interface
Running the Management GUI Directly from a Web BrowserIf you know the ID of the specific disk system you want to manage, you can run the management GUI directly from the browser.
1 Open a browser on the client.
2 Type the following URL into the address field in the browser:http://<hostname>:4096/cmdviewDS.html?<hostname>:<device-id>
<hostname> is the DNS name or IP address of the host to which the disk system is connected.
<device-id> is the disk system’s alias, serial number, device file, or world wide name.
Graphical User Interface 83
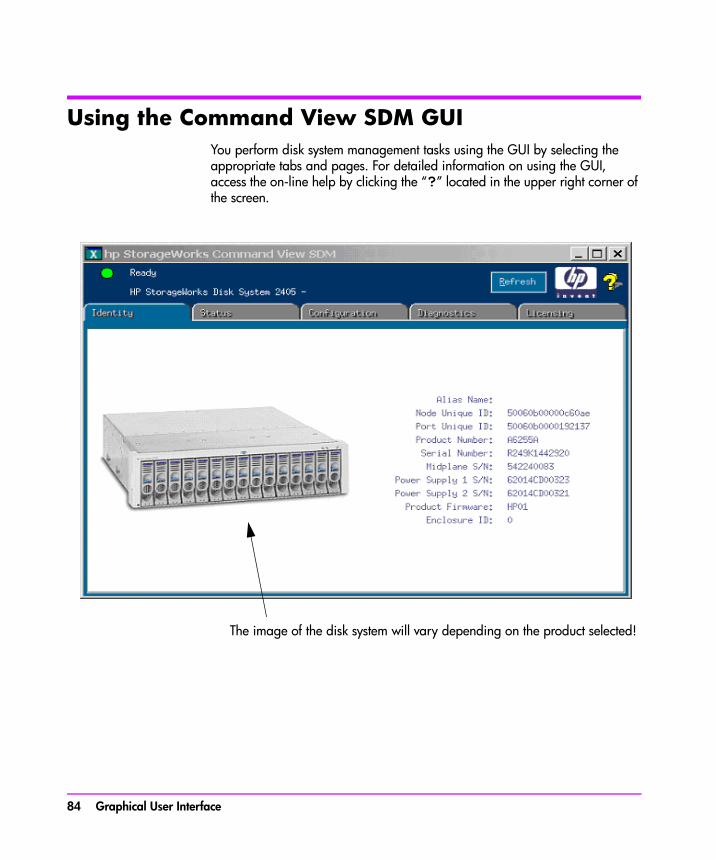
Using the Command View SDM GUIYou perform disk system management tasks using the GUI by selecting the appropriate tabs and pages. For detailed information on using the GUI, access the on-line help by clicking the “?” located in the upper right corner of the screen.
The image of the disk system will vary depending on the product selected!
84 Graphical User Interface

Graphical U
ser Interface
Locating InformationThe GUI interface uses a set of tabs to organize the tasks and information presented. The following table should assist you in determining which tab to use to perform a task.
Managing the DS 2300 in Split Bus Mode In split bus mode, only a subset of the installed disks are available from each Disk System 2300 BCC (bus controller card). Only the disk slots that are accessible from a BCC can be managed through that BCC. In the GUI interface only the disks that are accessible from the BCC will appear, even though there may physically be more disks inserted in the enclosure. The inaccessible slots will be displayed as uninstalled.
Similarly, any operation performed on an inaccessible slot (blinking the LED for example) will be ignored.
Table 8 GUI Navigation Overview
Tab Task/Information
Identity Displays general information about the disk system.
Status Status information is organized into three categories:
— Device Status - general disk system status— Component Status - complete status information for each hardware
component in the disk system. Select the appropriate enclosure icon to display its status.
Configuration Allows you to define an alias name assigned to the disk system.
Diagnostic Identifies the current state of each disk within the disk system. The Identify feature allows you to flash the LEDs on the selected disk(s).
Licensing Displays information about licenses for the JBOD.
Graphical User Interface 85

86 Graphical User Interface

4
Command Line User InterfaceThe HP Command View SDM Command Line User Interface (CLUI) is a set of commands and associated utilities that provide user management for the disk system. Each utility performs a different management task, such as configuring, reporting status information, or reading disk logs. These utilities include:
— JBODdld - download firmware to the disk system— JBODdsp - display disk system status and configurations— JBODfmt - format individual disks in the disk system— JBODlog - read log entries from individual disks in the disk system— JBODmgr - manages the disk system configuration parameters— licAdmin* - view licenses— licUtil* - manage licenses— addcliuser - configure users to use the CVSDM CLI— secadmin - configure users to use the CVSDM GUI
*These commands are discussed in "Array License Commands on page 112"
Each command contains optional parameters that modify the operation of the command. These commands and their options are described in this chapter. The operation of the commands is identical for all operating systems: Windows, HP-UX, and Linux Red Hat.
Note If you are unfamiliar with the operation of the disk system, you should use the graphical user interface for performing disk system management operations, described in "Graphical User Interface on page 79".
Command Line User Interface 87

Entering CommandsWhen a utility command is entered from a command line prompt (followed by a <return>), the command utility is performed. For example, to display the status of the disks and other field replaceable units in a disk system with the alias of “myDevice”, enter the disk system display command, JBODdsp, with the options shown:
JBODdsp -e myDevice <return>
Note Performing a <return> for command execution is assumed in the remainder of this document and is not shown.
Command Syntax ConventionsThe following symbols are used in the command descriptions and examples in this chapter.
Command View SDM man pagesOnline man pages are included for each Command View SDM command. Each man page includes detailed information about the command and its usage.
To display the man page for any Command View SDM command, type:man <command_name>
Substitute one of the Command View SDM utility names for command_name. For example, to access the JBODdsp man page, type:
man JBODdsp
Table 9 Syntax Conventions
Symbol Meaning
< > Indicates a variable that must be entered by the user.
| Only one of the listed parameters can be used (exclusive OR).
[ ] Values enclosed in these braces are optional.
{ } Values enclosed in these braces are required.
88 Command Line User Interface

Comm
and Line User Interface
Quick HelpA quick listing of the syntax and available options for a command can be displayed by using the “?” option with the command. For example, for quick information about the JBODmgr command, type:
JBODmgr -?
Command Line User Interface 89
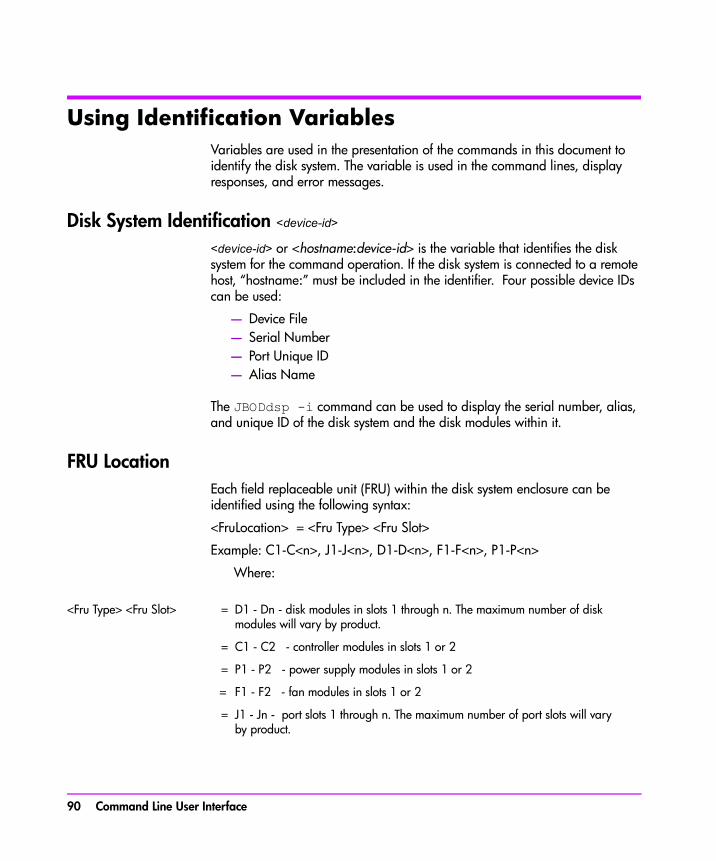
Using Identification VariablesVariables are used in the presentation of the commands in this document to identify the disk system. The variable is used in the command lines, display responses, and error messages.
Disk System Identification <device-id><device-id> or <hostname:device-id> is the variable that identifies the disk system for the command operation. If the disk system is connected to a remote host, “hostname:” must be included in the identifier. Four possible device IDs can be used:
— Device File— Serial Number— Port Unique ID— Alias Name
The JBODdsp -i command can be used to display the serial number, alias, and unique ID of the disk system and the disk modules within it.
FRU LocationEach field replaceable unit (FRU) within the disk system enclosure can be identified using the following syntax:
<FruLocation> = <Fru Type> <Fru Slot>
Example: C1-C<n>, J1-J<n>, D1-D<n>, F1-F<n>, P1-P<n>
Where:
<Fru Type> <Fru Slot> = D1 - Dn - disk modules in slots 1 through n. The maximum number of disk modules will vary by product.
= C1 - C2 - controller modules in slots 1 or 2
= P1 - P2 - power supply modules in slots 1 or 2
= F1 - F2 - fan modules in slots 1 or 2
= J1 - Jn - port slots 1 through n. The maximum number of port slots will vary by product.
90 Command Line User Interface

Comm
and Line User Interface
Command View Disk System CommandsThis section describes each Command View SDM command, its use, and its options. Examples are included showing the typical use of the command.
Command Line User Interface 91
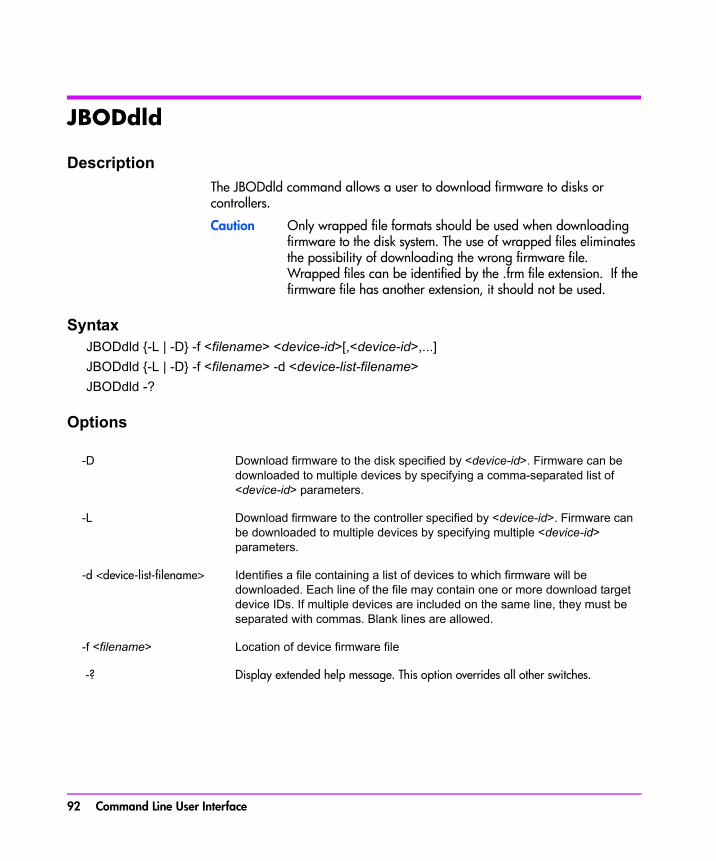
JBODdld
DescriptionThe JBODdld command allows a user to download firmware to disks or controllers.
Caution Only wrapped file formats should be used when downloading firmware to the disk system. The use of wrapped files eliminates the possibility of downloading the wrong firmware file. Wrapped files can be identified by the .frm file extension. If the firmware file has another extension, it should not be used.
SyntaxJBODdld {-L | -D} -f <filename> <device-id>[,<device-id>,...]JBODdld {-L | -D} -f <filename> -d <device-list-filename>JBODdld -?
Options
-D Download firmware to the disk specified by <device-id>. Firmware can be downloaded to multiple devices by specifying a comma-separated list of <device-id> parameters.
-L Download firmware to the controller specified by <device-id>. Firmware can be downloaded to multiple devices by specifying multiple <device-id> parameters.
-d <device-list-filename> Identifies a file containing a list of devices to which firmware will be downloaded. Each line of the file may contain one or more download target device IDs. If multiple devices are included on the same line, they must be separated with commas. Blank lines are allowed.
-f <filename> Location of device firmware file
-? Display extended help message. This option overrides all other switches.
92 Command Line User Interface
Comm
and Line User Interface
About Firmware FilesThe following information applies when downloading firmware files.
■ The command looks for firmware files in the specified path. If the current working directory is the ..\commandview\client\sbin directory, the path need not be specified.
■ Wrapped files (.frm) contain header information that allow the download utilities to verify that the firmware file matches the hardware component. Only wrapped files should be used when downloading firmware.
Disk System Firmware Download Issues
Unsafe Removal of Device on Windows 2000
After performing a firmware update on either disks or disk systems connected to a Windows 2000 host, you will likely see an "Unsafe Removal of Device" pop-up warning, some time after the device completes its reset. To clear this condition, click OK on the pop-up warning, then run "armdiscover" at a command prompt.
Disk System 2300 Firmware Update
After downloading firmware to a DS 2300 enclosure services controller, the firmware revision may not immediately be updated to the new version. This is because it can take several minutes for the controller to send the firmware image to its peer controller. When the transfer is complete, the controller will reset itself and the new firmware revision will reported.
DS 2405 Warning Status During Firmware Mismatch State
During a DS 2405 firmware update, the controllers will report a Warning status due to the mismatch of firmware revisions between them. The firmware image is NOT automatically copied to the other DS 2405 controller, so the warning status will persist until you complete the firmware update on the second controller.
ExamplesDownload firmware file A5236A.HP09.frm to an enclosure controller with alias FC10-2A.
JBODdld -L -f A5236A.HP09.frm FC10-2A
Command Line User Interface 93

Download firmware file ST39102FC.HP03.frm to disks with serial numbers 3CD1JM4K and 3CD1L9CX.
JBODdld -D -f ST39102FC.HP03.frm 3CD1JM4K,3CD1L9CX
Download firmware file ST318406LC.HP05.frm to the disks listed in device list file diskupgrade.
JBODdld -D -f ST318406LC.HP05.frm -d diskupgrade
94 Command Line User Interface
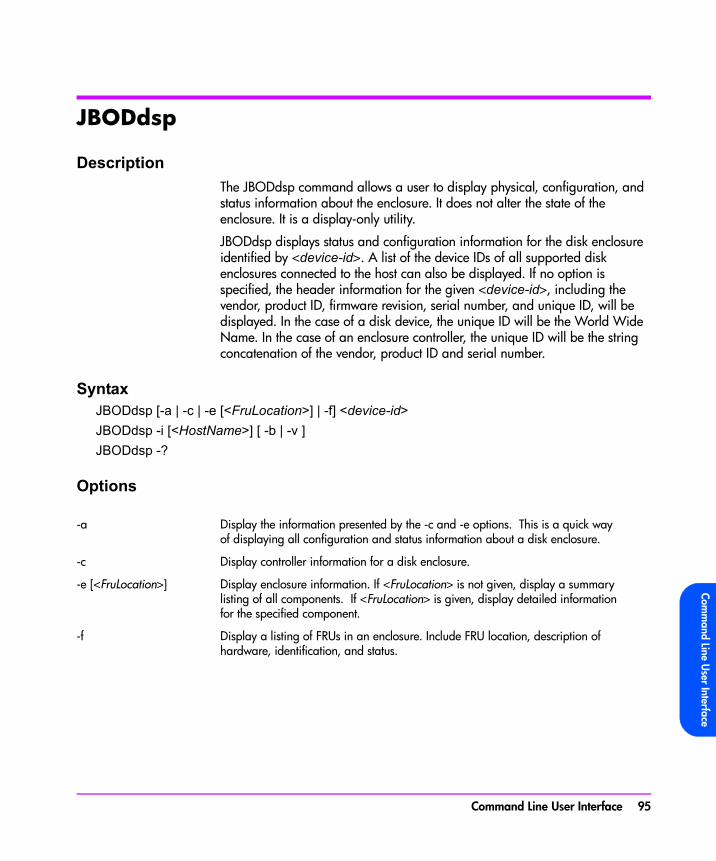
Comm
and Line User Interface
JBODdsp
DescriptionThe JBODdsp command allows a user to display physical, configuration, and status information about the enclosure. It does not alter the state of the enclosure. It is a display-only utility.
JBODdsp displays status and configuration information for the disk enclosure identified by <device-id>. A list of the device IDs of all supported disk enclosures connected to the host can also be displayed. If no option is specified, the header information for the given <device-id>, including the vendor, product ID, firmware revision, serial number, and unique ID, will be displayed. In the case of a disk device, the unique ID will be the World Wide Name. In the case of an enclosure controller, the unique ID will be the string concatenation of the vendor, product ID and serial number.
SyntaxJBODdsp [-a | -c | -e [<FruLocation>] | -f] <device-id>JBODdsp -i [<HostName>] [ -b | -v ]JBODdsp -?
Options
-a Display the information presented by the -c and -e options. This is a quick way of displaying all configuration and status information about a disk enclosure.
-c Display controller information for a disk enclosure.
-e [<FruLocation>] Display enclosure information. If <FruLocation> is not given, display a summary listing of all components. If <FruLocation> is given, display detailed information for the specified component.
-f Display a listing of FRUs in an enclosure. Include FRU location, description of hardware, identification, and status.
Command Line User Interface 95

ExamplesDisplay general information about an enclosure controller identified by /dev/rscsi/c4t10d0.
JBODdsp /dev/rscsi/c4t10d0
Display general information about a disk device with unique ID 2000002037e19e10.
JBODdsp 2000002037e19e10
Display all status and configuration information for an enclosure controller with alias Enclosure-1A.
JBODdsp -a Enclosure-1A
Display enclosure controller information for a disk enclosure controller with device descriptor \\.\scsi2.0.2.0.
JBODdsp -c \\.\scsi2.0.2.0
Display status of power supply 1 in a disk enclosure with alias Enclosure-1B.JBODdsp -e P1 Enclosure-1B
Display location, description, and status of FRUs in a disk enclosure identified by device file /dev/rscsi/c4t10d0.
JBODdsp -f /dev/rscsi/c4t10d0
Display device identification for all disk enclosures and all disk mechanisms connected to the host identified by HostName.
JBODdsp -i HostName
-i [<HostName>] [ -b | -v ] Display the serial number, alias, world wide name, device file name and unique name of all disk systems connected to the host. <HostName> denotes the remote host for which information will be displayed. If no value is specified, local host will be assumed.If the -b option is included, an abbreviated list is displayed. If the -v option is included, a detailed list of devices, including all known preferred management paths to each device, is displayed.
-? Display extended usage message. This option overrides all others.
96 Command Line User Interface
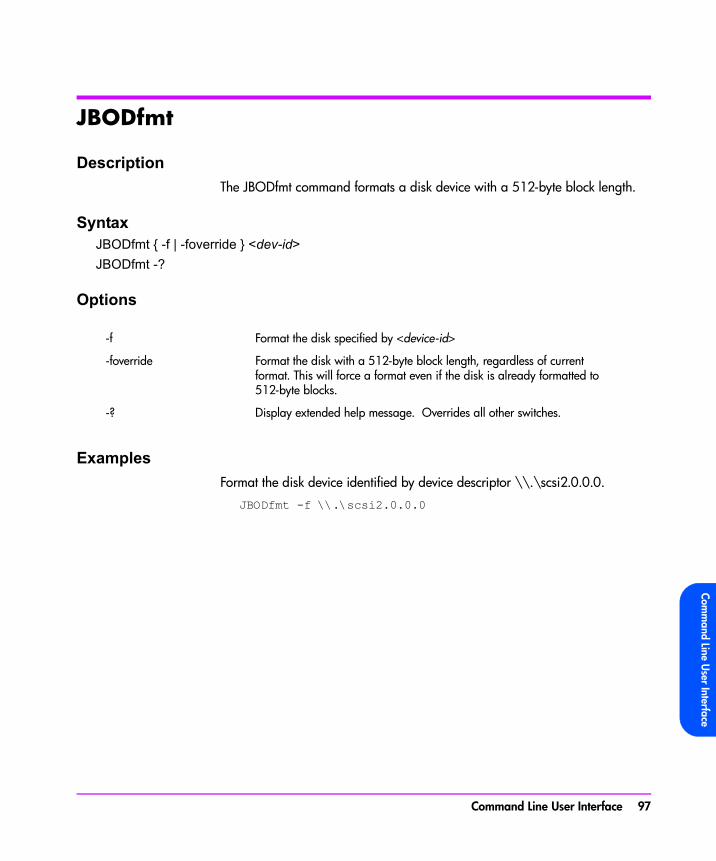
Comm
and Line User Interface
JBODfmt
DescriptionThe JBODfmt command formats a disk device with a 512-byte block length.
SyntaxJBODfmt { -f | -foverride } <dev-id>JBODfmt -?
Options
ExamplesFormat the disk device identified by device descriptor \\.\scsi2.0.0.0.
JBODfmt -f \\.\scsi2.0.0.0
-f Format the disk specified by <device-id>
-foverride Format the disk with a 512-byte block length, regardless of current format. This will force a format even if the disk is already formatted to 512-byte blocks.
-? Display extended help message. Overrides all other switches.
Command Line User Interface 97

JBODlog
DescriptionJBODlog provides access to the disk logs stored in the disk mechanism identified by <device-id>. These logs contain information useful for diagnosing and troubleshooting the disk. If no options are specified, all known formatted pages, as well as the defect list, will be displayed.
SyntaxJBODlog [-p <pagenumber> | -d | -C] <device-id>JBODlog -?
Options
ExamplesDisplay formatted log pages and the defect list for the disk mechanism identified by \\.\scsi2.0.2.0.
JBODlog \\.\scsi2.0.2.0
Display raw contents of Log Page 2 from the disk mechanism identified by/dev/dsk/c4t2d0.
JBODlog -p 2 /dev/dsk/c4t2d0
Display the defect list for the disk mechanism with unique ID 200000203722aa90.
JBODlog -d 200000203722aa90
Clear the logs on the disk device with serial number L3N662500000.JBODlog -C L3N662500000
-p <pagenumber> Display the contents of the log for the disk identified by <device-id>. The -p option returns the log information identified by <pagenumber>.
-d Display the defect list for the disk identified by <device-id>.
-C Clear the cumulative device logs on the selected device
-? Display extended help message. Overrides all other switches.
98 Command Line User Interface

Comm
and Line User Interface
JBODmgr
DescriptionThe JBODmgr command allows a user to configure the enclosure characteristics. JBODmgr manages the operating environment of the disk enclosure by providing access to the settings used to control operation. Disk self-tests can also be initiated using this command.
SyntaxJBODmgr {-d <FruLocation> {on|off} | -D <alias> | -ST {d|e|s|x}} <device-id>JBODmgr -?
Options
ExamplesTurn on the LED associated with disk D3 in a disk enclosure with alias Enclosure-1A.
JBODmgr -d D3 on Enclosure-1A
-d <FruLocation> {on|off} Identify the <FruLocation> by blinking the associated LED.
-D <alias> Change the enclosure's alias name (limited to 256 bytes).
-ST {d|e|s|x} Run a disk self-test. The test type and corresponding method of viewing the results are defined by the accompanying parameter:d - Default disk self-test. Any error will be shown at the command prompt. If no error message is displayed, the test was successful.e - Extended background mode test. Results are stored in Disk Log Page 0x10, which can be retrieved using the JBODlog command.s - Short background mode test. Results are stored in Disk Log Page 0x10, which can be retrieved using the JBODlog command.x - Cancel any background test in progress. Only the short or extended tests may be cancelled. Results are stored in Disk Log Page 0x10, which can be retrieved using the JBODlog command.
-? Display extended help message. Overrides all other switches.
Command Line User Interface 99

Set the alias name of the disk enclosure identified by unique ID HPA5236AUSSA05001707 to FC10-1.
JBODmgr -D FC10-1 HPA5236AUSSA05001707
Run the default self-test on the disk identified by device ID 2000002037efc243.
JBODmgr -ST d 2000002037efc243
100 Command Line User Interface

Comm
and Line User Interface
addcliuser
DescriptionThe addcliuser command configures the user to use CVSDM CLI commands.
Syntax<CMD-SCRIPT> -user <user> -pass <pwd> [-localuser | [user1 host1 ...]]
OptionsLog in to the cmd prompt with the following user name and password:
# addcliuser -user admin -pass nimda
The addcliuser command has the following options:
a Add a user
d Delete a user
l List existing users
x Exit addcliuser
Command Line User Interface 101

ExamplesTo add a new user, enter a at the prompt and provide the details as noted below.
Enter command: a
User name: root
Host name (use full path): host1.india.hp.com
Select group(a|u): a
To delete a user, enter d at the prompt and provide the details as noted below.
Enter command: d
User name: root
Host name (use full path): host1
102 Command Line User Interface

Comm
and Line User Interface
secadmin
DescriptionThe secadmin command configures the user to use the CVSDM GUI.
Note New Administrator accounts can be created using this secadmin script and existing Admin/Administrator accounts can be deleted using the deluser option. The new Administrator accounts can be then used to administer security for both GUI and CLI using the secadmin and addcliuser scripts.
Syntaxsecadmin
OptionsLog in to the secadmin prompt using the user name and password created previously or using "admin/nimda". Always log in as a user with Administrator privileges to create users or assign the group privileges to the users. Any new Administrator accounts created using the secadmin script can also be used.
To log in as an administrator that has super-user privileges, enter the following command:logon admin nimda
The secadmin command supports the following options.
? Displays this help message.
logon <acct> <pass> Log in as a user.
logoff Log off.
users Displays a list of users.
groups Displays a list of groups.
Command Line User Interface 103

ExamplesCreate a new user:adduser archie arc
Assign group (administrator/user) privileges to the new user:grpadd Administrators harry
grpadd Users potter
Note Accounts with "user" privileges cannot create or assign new users.
Note Accounts with "user" privileges can be locked out of operation by "Administrator" accounts. Once an account is locked, that user cannot use secadmin or the CVSDM GUI.
user <acct> Displays user details.
adduser <acct> <pass> [desc] Adds a user (description is optional).
deluser <acct> Deletes a user.
grpadd <group> <acct> Adds a user to a group.
grpdel <group> <acct> Deletes a user from a group.
lock <acct> Lock an account.
unlock <acct> Unlock an account.
quit Quit
104 Command Line User Interface

5
Command View User InterfaceThe Command View User Interface (CVUI) adds a simple, text menu-based interface as a front end to the Command View SDM commands.
Some of the benefits the CVUI offers include:
■ Full functionality - the CVUI provides the same complete management capability and functionality as the Command Line User Interface (CLUI).
■ Ease of use - the menu structure relieves you of the need to memorize command syntax. This is useful if you use the command infrequently.
■ Easy remote access - the CVUI is particularly useful when using telnet to connect to a remote Command View SDM host.
Command View User Interface 105

Starting the Command View SDM CVUIThe Command View User Interface is started from a command line. To start the interface, enter the appropriate command:
cvui << From a local host
cvui -h <hostname> << From a remote client
When the command line is entered, the CVUI will display the first screen. This screen lists miscellaneous server information plus a list of disk systems attached to the host, as shown below.
__________________________________________________________________ CVUI version 1.01.0011
Storage Device Selection
Choice Device Id Alias Device Type============================================================================= 1 20000020370fef68 HP JBOD Disk 2 20000020370fe7ec HP JBOD Disk 3 HPA5236AUSSA08016022 FC10-JBOD-1 HP JBOD Controller 4 HPA5236AUSSA05001707 FC10-JBOD-2 HP JBOD Controller 5 Refresh
(1-5=Choice, a=App menu, h=Help, x=eXit)>__________________________________________________________________
To perform an operation, identify the number or letter of the item you want, then enter that number or letter at the command line. This will advance you to the next screen where additional selections will be presented. The available selections for each screen are listed in the row at the bottom of the screen.
Several levels of menus are required to execute a command. Continue entering the number of the operation until the action is performed. A menu showing the various menu selections is provided on the following page (some additional levels are not shown). For additional help on the operation of this interface, select “h” from any CVUI screen.
106 Command View User Interface
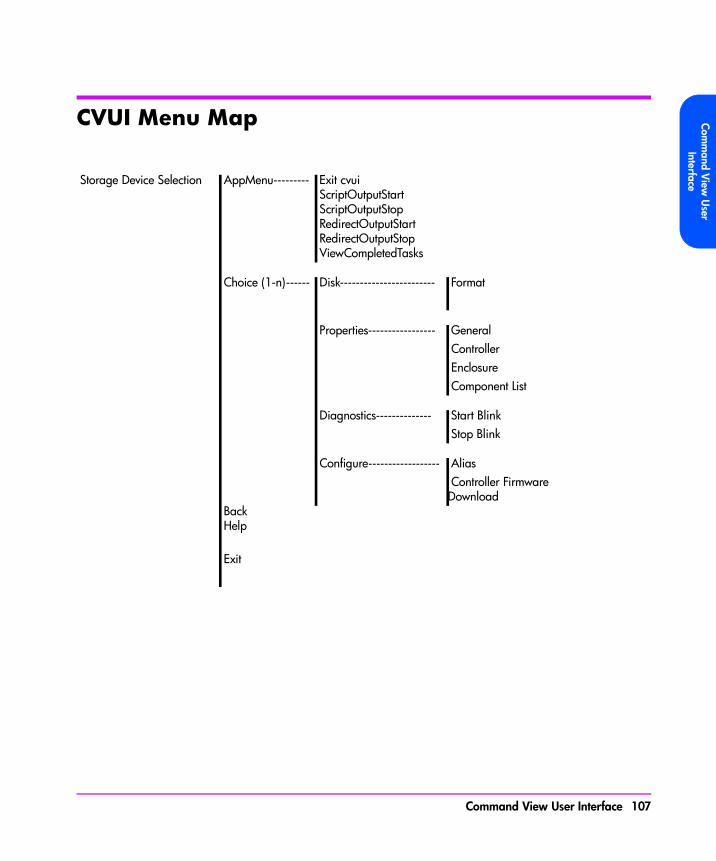
Comm
and View
User
Interface
CVUI Menu Map
Storage Device Selection AppMenu--------- Exit cvui ScriptOutputStart ScriptOutputStop RedirectOutputStart RedirectOutputStop ViewCompletedTasks
Choice (1-n)------ Disk------------------------ Format
Properties----------------- General Controller Enclosure Component List
Diagnostics-------------- Start Blink Stop Blink
Configure------------------ Alias Controller Firmware Download
Back Help
Exit
Command View User Interface 107

108 Command View User Interface
6
Solving ProblemsThis chapter identifies problems you may encounter when installing and using Command View SDM. It takes you through the steps typically required to solve each problem. If the problem you are experiencing is not include here, the following resources may provide a solution.
■ HP support contact
■ HP support web site
■ HP storage forums
PROBLEM I get a 401 error when trying to manage the disk system from a browser.
SOLUTION This indicates that the correct access permissions have not been set on the Command View host. Access permissions are managed using a configuration file on the Command View host. To allow a remote client to manage the disk system, the IP address of the remote client must be added to the file.
The following files are used to control client access:
■ access.dat - HP-UX, Linux, and Windows (standard installation)
■ authorizedClients.dat - HP OpenView Storage Area Manager (SAM) installation
To set up remote client access:
1 On the Command View SDM host, open the configuration file in an ascii text editor. The file is located in the following directory:
/opt/sanmgr/hostagent/config/ << HP-UX and Linux\Program Files\Hewlett-Packard\sanmgr\hostagent\config\ << Windows\Program Files\Hewlett-Packard\sanmgr\managementserver\config\<< HP OpenView SAM
2 Add the IP address for each client requiring access to the disk systems connected to the host. Or remove the IP address for any clients you no longer want to have access.
Solving Problems 109

Single client IP addresses can be added, or a range of IP addresses can be added using the wild card “*”. For example; 10.62.128.* grants access to any client on subnet 128. The use of wildcards is recommended when connecting from clients configured for dynamic host configuration protocol (DHCP).
3 Save the configuration file.
4 Verify that the client browser now has access by entering the following URL:http://<hostname-or-ipaddress>:4096
The following message should be returned by the host:(c) Copyright 2000-2002 - Hewlett-Packard Company
hp StorageWorks Command View web server
PROBLEM After installing Command View, the disk systems I expected to see in the Launcher do not appear.
When I run the JBODdsp -i command, the disk systems I expected to see in the output do not appear.
SOLUTION During the software installation process, the armdiscover command is launched to locate all disk systems connected to the host. This information is then used to populate the Launcher screen. If there is a functional disk system connected to the host that does not appear in the Launcher screen, it may be necessary to repeat the discovery process.
To rediscover the disk systems:
1 Check the disk system hardware and make sure it is operating properly, and that the disk system is connected to the host, switch, or hub.
2 Manually stop the HostAgent and OpenDIAL services. See "Starting/Stopping HostAgent and OpenDIAL" on page 60.
3 Delete all files in the ../sanmgr/hostagent/pdb folder. This causes OpenDIAL to rebuild the database files with the disk storage devices that are discovered.
4 Manually restart the HostAgent and OpenDIAL services.
5 Execute the armdiscover command to initiate the discovery process.
6 Check the Launcher to ensure the disk system is now displayed. You can also execute the JBODdsp -i command to display the disk systems that were discovered.
110 Solving Problems

Solving Problems
If this does not solve the problem, contact support for assistance.
PROBLEM Command View is not working properly. I have exhausted all other possible solutions without success.
SOLUTION Remove and reinstall the Command View SDM software. Before doing so make sure the host meets all necessary requirements.
PROBLEM I get “Out of Memory” errors on my HP-UX host
SOLUTION This is typically caused by the kernel thread count being set to low. See "Changing Thread Count" on page 37 for information on correcting this problem.
Solving Problems 111

112 Solving Problems

index
Aaccess.dat file 55AIX 27authorized clients
access.dat file 55
BBMC Patrol 11
CCA Unicenter 11CA Unicenter TNG
prerequisites 14, 66changing thread count 37client
access configuration 46, 55HostAgent operation 60Windows 46
commandconventions 88
command syntax 88Command View
installing on HP OpenView Storage Area Manager 42
installing on HP-UX 36installing on Linux 49installing on Windows 42removing from HP-UX 40removing from Linux 52removing from Windows 48
utilities 10command view user interface seeCVUIconfiguration
client access 55client access for Windows 46general 55
configuringthe web server 56
CVUIstarting
Ddaemons
HostAgent 60OpenDIAL 60
disk systemfirmware download issues 93
EEMS
enabling 57enabling EMS 57event viewer 11
Ffiles, special
access.dat 55authorized clients 55
firmware download issues 93
113

GGUI
starting from thecommand line 81command line launcher 81web browser 81
using 84
HHostAgent
client operation 60hostagent
installing on OpenView SAM 46
HP EMS 11HP OpenView SAM
authorized clients 55HP-UX
installing Command View 36minimum system requirements
36patches 36software support 41
Iinstallation
overview 31installing Command View
on HP-UX 36on Linux 49on Windows 42
IP addressesmultiple
HP-UX 37Linux 49Windows 42
LLicensing 85Linux
installing Command View 49minimum system requirements
49
Mminimum system requirements
HP-UX 36Linux 49Windows 42
modular storage software products25
MPE/iX 27
NNetWare 27non-native operating systems 27
OOpenDIAL
client operation 60OpenView 11OpenView SAM
installation tips 44installing HostAgent 46
OpenVMS 27operating systems
non-native 27other products 25Out of Memory error 37
Ppatches, HP-UX 36prerequisites
CA Unicenter TNG 14, 66problem solving 109
114 Index

Rreinstalling Command View
HP-UX 40Linux 52Windows 48
removing Command ViewHP-UX 40Linux 52Windows 48
Sservices
HostAgent 60OpenDIAL 60
Solaris 27solving problems 109support
HP-UX software 41supported operating systems
HP-UX 27Linux Red Hat 27Windows 2000 27Windows NT 4.0 27
Tthread count, changing 37Tivoli 11TopTools 11Tru64 27
Uuninstall
See removinguninstall See removingutilities, Command View 10
Wweb server, configuration 56Windows
installing Command View 42minimum system requirements
42
Index 115

116 Index

Index 117

118 Index